Inspiring Ideas for Modern Home

The best battery packs for power recliners provide reliable, cordless power that enhances both the functionality and placement flexibility of your recliner—without the need to stay plugged into a wall outlet. Power recliners have become increasingly popular for their ability to deliver instant, motorized comfort at the push of a button, making them ideal not just for relaxation but also for individuals with limited mobility or post-injury recovery needs. However, relying solely on a fixed outlet can restrict room layout and portability. That’s where a high-quality battery pack comes in—ensuring uninterrupted use during power outages and allowing placement anywhere in the room. In this guide, we review the 8 best battery packs for power recliners, evaluating performance, battery life, compatibility, safety features, and ease of installation—along with a buyer’s guide to help you choose the right model for your recliner setup.

Best Battery Packs for Power Recliners

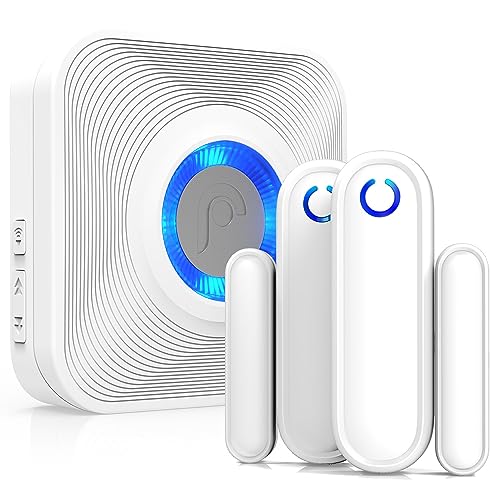
1. The Blue Cactus Company Universal Battery Pack - Best for General Compatibility

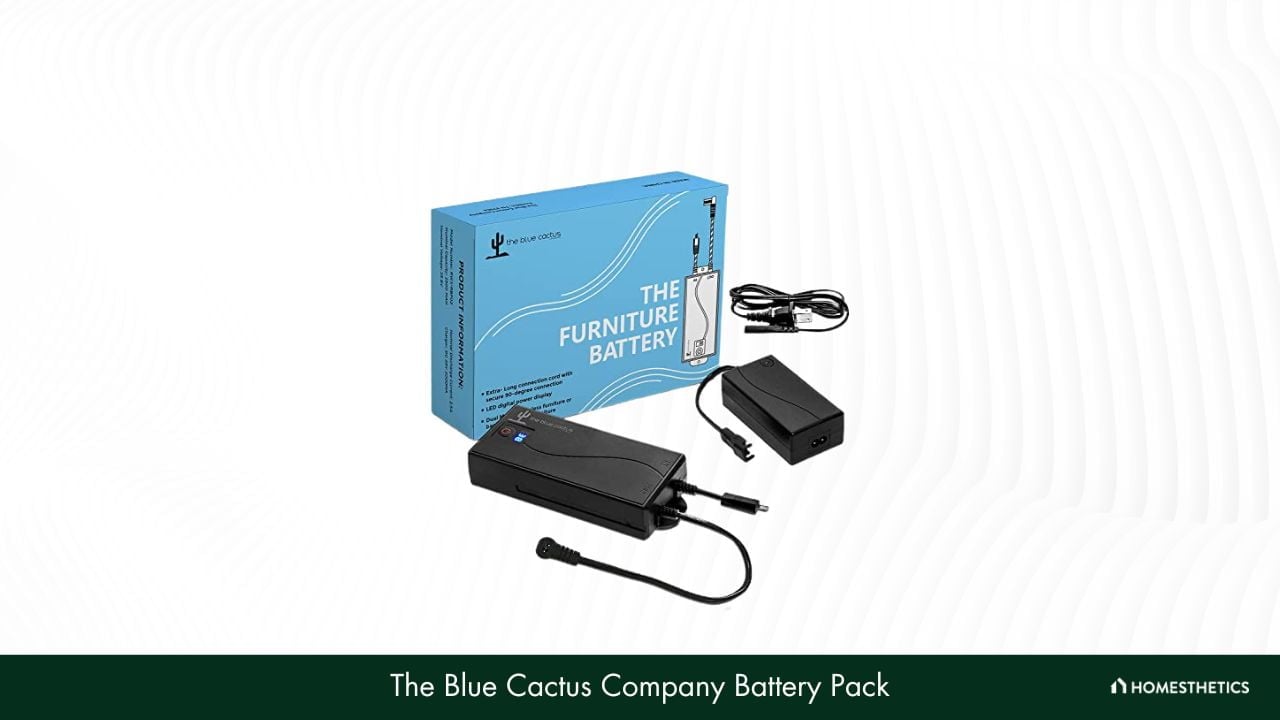
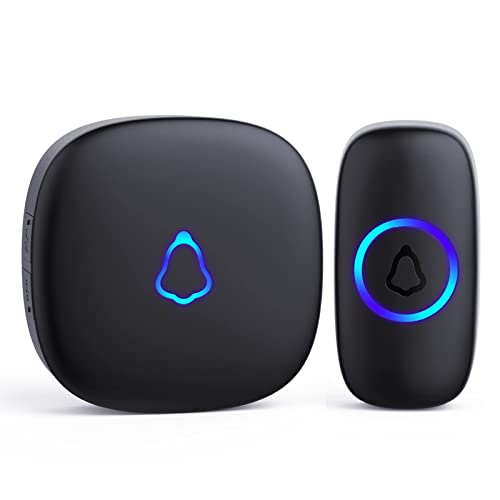
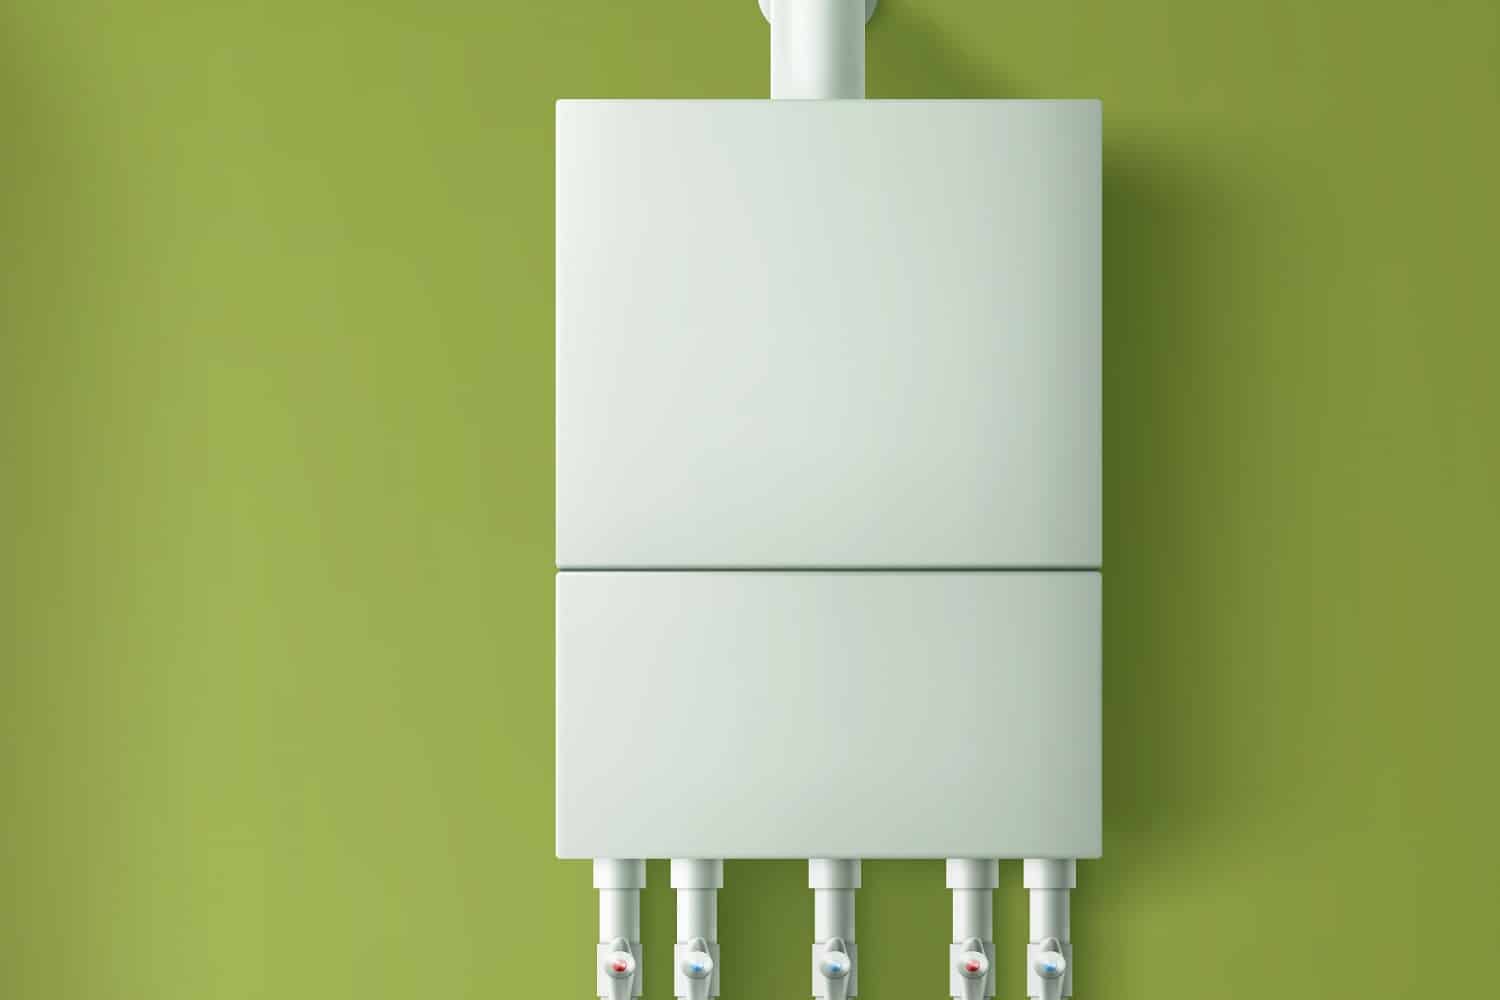
Let’s start with the Universal Battery Pack from the Thin Blue Cactus Company. It is a 2500 mAh rechargeable battery pack compatible with a wide range of reclining furniture, which makes it one of the best options currently available on the market.

Never been able to arrange your furniture as you like? Now you can — with this battery pack, you can rid yourself of the problem of tangled cords. It eliminates the problem of cable management, preventing accidents while keeping your recliner fully charged for use. 

Not only is this product from the Thin Blue Cactus Company highly convenient to use, but it is also compatible with most recliners. The two-pin connector ensures that the battery pack works with a wide range of reclining furniture of different makes and models. 

Additionally, the installation process is straightforward and does not require much effort. Another nifty addition is the LED display on top of the recliner battery pack, which will help you know exactly how much battery is left. This accurate tracking technology will keep you informed about when it needs to be recharged.

And the best part? The product comes with a one-year hassle-free replacement warranty, providing a worry-free experience.

We didn’t come across any significant downsides to this excellent battery pack during our testing process. However, to keep the pack hidden in your power reclining furniture, you must purchase a two-pin splitter since it comes with very short cords. Nevertheless, performance-wise this is a highly recommended product. 

Dimensions: 6" x 3" x 1.5" | Weight: 2.59 lbs | Battery Type: Lithium Ion | Battery Capacity: 2500 mAh | Wireless: Yes | Connection Type: Two-pin | Charging Time: 8 Hours | Battery Life: N/A

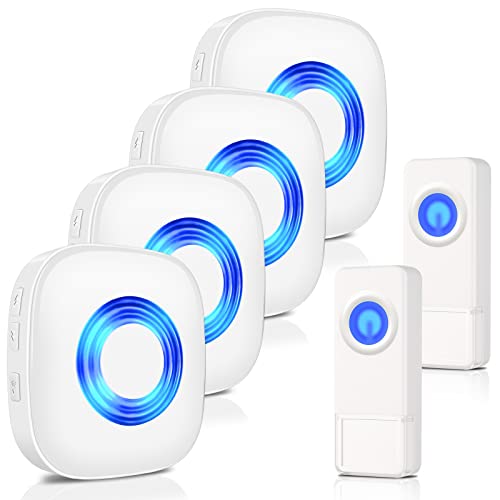
2. Limoss Battery Pack - Best for Arrangement Flexibility

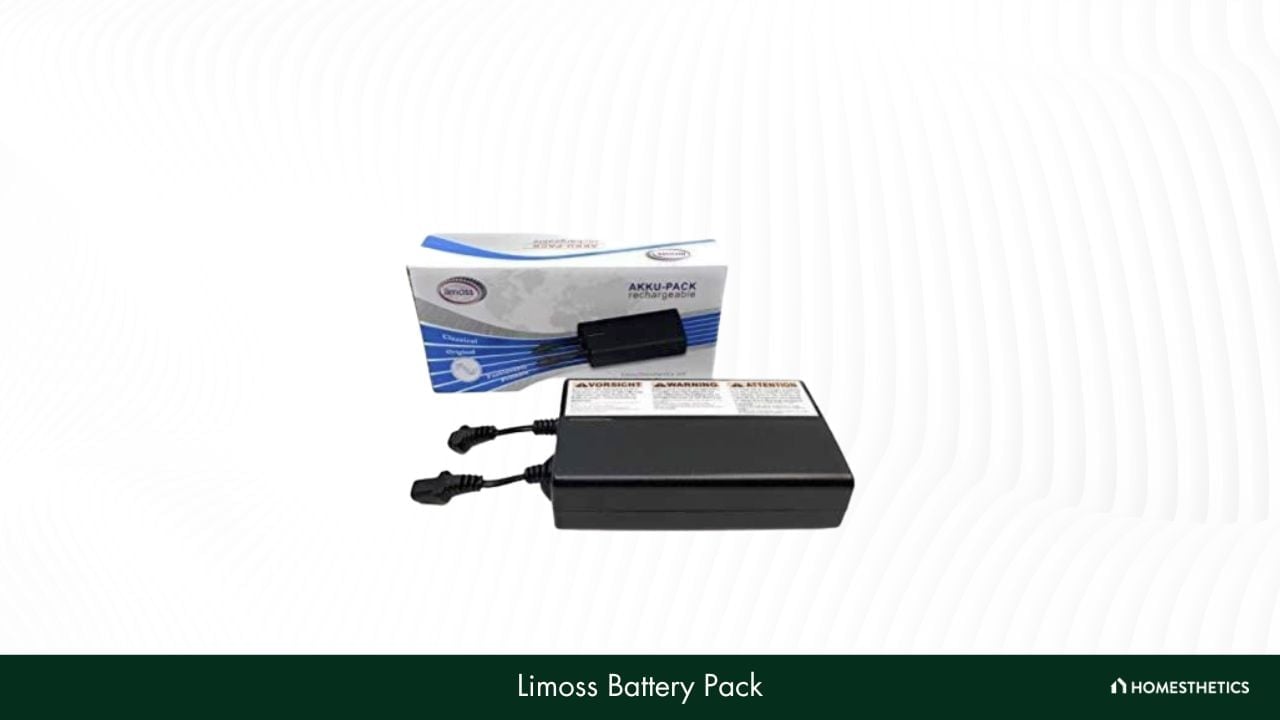
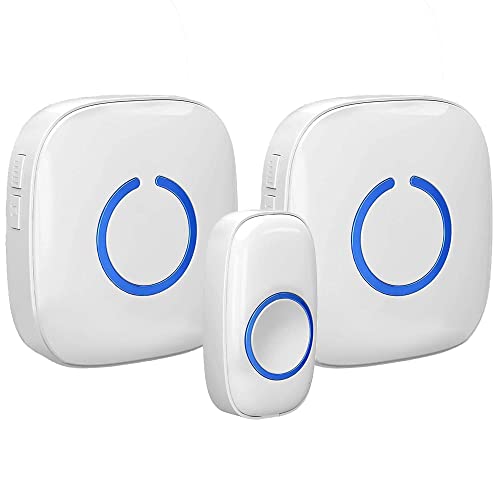
Next up on the list is a battery pack from Limoss, one of the leading power supply systems and components manufacturers. The Limoss battery pack is a universal battery pack that is compatible with several types of reclining furniture while delivering exceptional performance.

The Limoss battery pack has a two-prong connection that makes it compatible with reclining furniture from most major brands. That said, it will work well with different types of reclining furniture, including sofas, lift chairs, love seats, and more. 

Not only that, but it is also one of the best solutions to get rid of untidy wires and cords on your power recliner. Being a wireless battery pack, you won’t have to worry about tripping on wires, and you can arrange reclining furniture however you like. 

We also liked that the battery kit comes with all the accessories that you might need. These include the 85-inch extension cable and the safety lockout pin, which can help extend the battery life of the product while making the battery pack easy to use.

Furthermore, you can charge the battery pack while using the recliner, an additional feature that is quite impressive for the price.

The Limoss battery pack is one of the best products in the segment that we came across. However, we would’ve liked it even more if the manufacturer had included some instructions or diagrams explaining how to install it. Despite that, the installation process is quite simple, even for newcomers.

Dimensions: 8.9" x 7.36" x 3.7" | Weight: 0.98 lbs | Battery Type: Lithium Ion | Battery Capacity: N/A | Wireless: Yes | Connection Type: Two-prong | Charging Time: N/A | Battery Life: N/A

3. Lavolta Battery Pack - Best for Rapid Charging

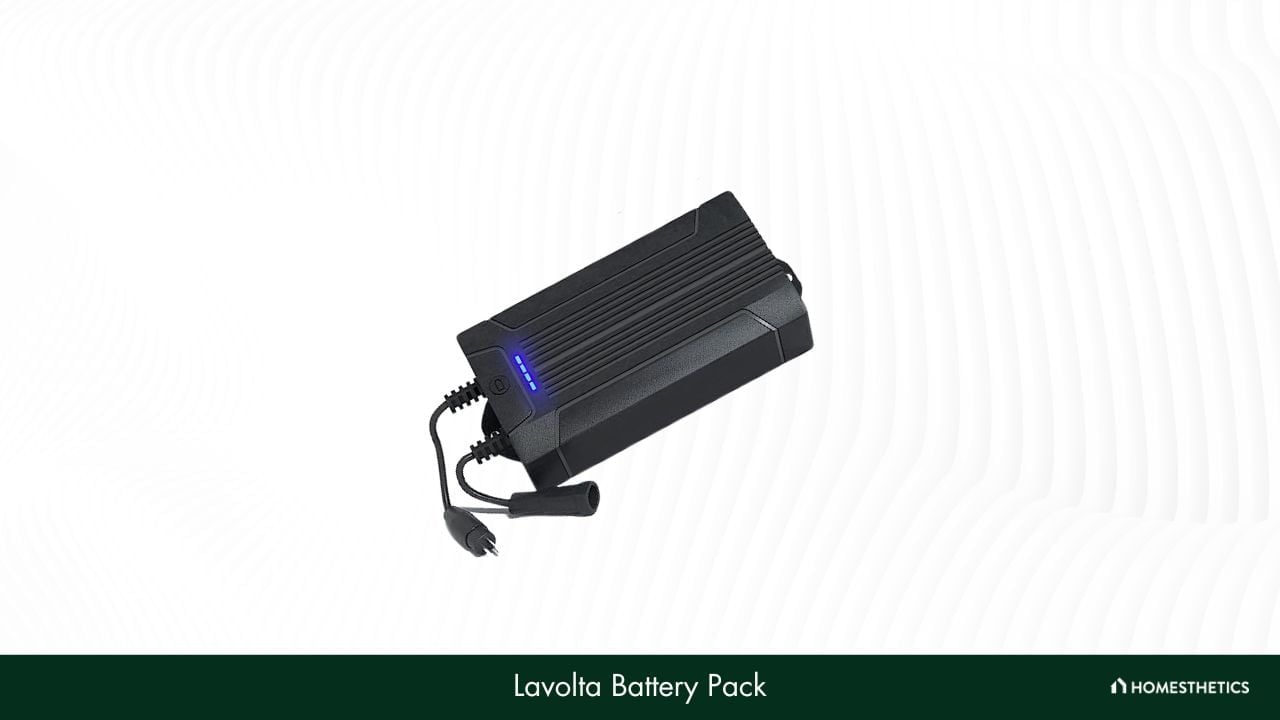
For those unaware, Lavolta is one of the biggest names in the power supply industry. It manufactures a wide range of products, including power adapters, batteries, power banks, and more. This 2500 mAh battery pack is an excellent universal wireless recliner power supply that lets you use your recliners anywhere you want. 

Like a few other products on our list, this one is also a universal battery pack, making it compatible with a wide range of power recliners. All you need is reclining furniture with a two-pin connection for the Lavolta battery pack to work. 

Another thing that we found impressive is that it allows you to place your recliner anywhere you want. It is possible because this battery pack design eliminates wires that are potential hazards and requires you to place the recliner close to power sockets.

What is more, the hundred-charge cycle feature allows the Lavolta battery pack to retain its battery for several weeks before it needs to be recharged. Also, charging the battery pack takes only around six hours, so you can plug it in when leaving for work, and it will be ready for use when you return.

The Lavolta battery pack is one of the products compatible with most models and makes of reclining furniture. However, it is not suitable for recliners with touch-sensitive buttons, USB ports, or LED lights that function on an open-close switch. Check your recliner for compatibility before going for this product.

Dimensions: 6.25" x 3.25" x 1.75" | Weight: 1.26 lbs | Battery Type: Lithium Ion | Battery Capacity: 2200 mAh | Wireless: Yes | Connection Type: Two-pin | Charging Time: About 6 Hours | Battery Life: 4 Weeks

4. Fooao Battery Pack

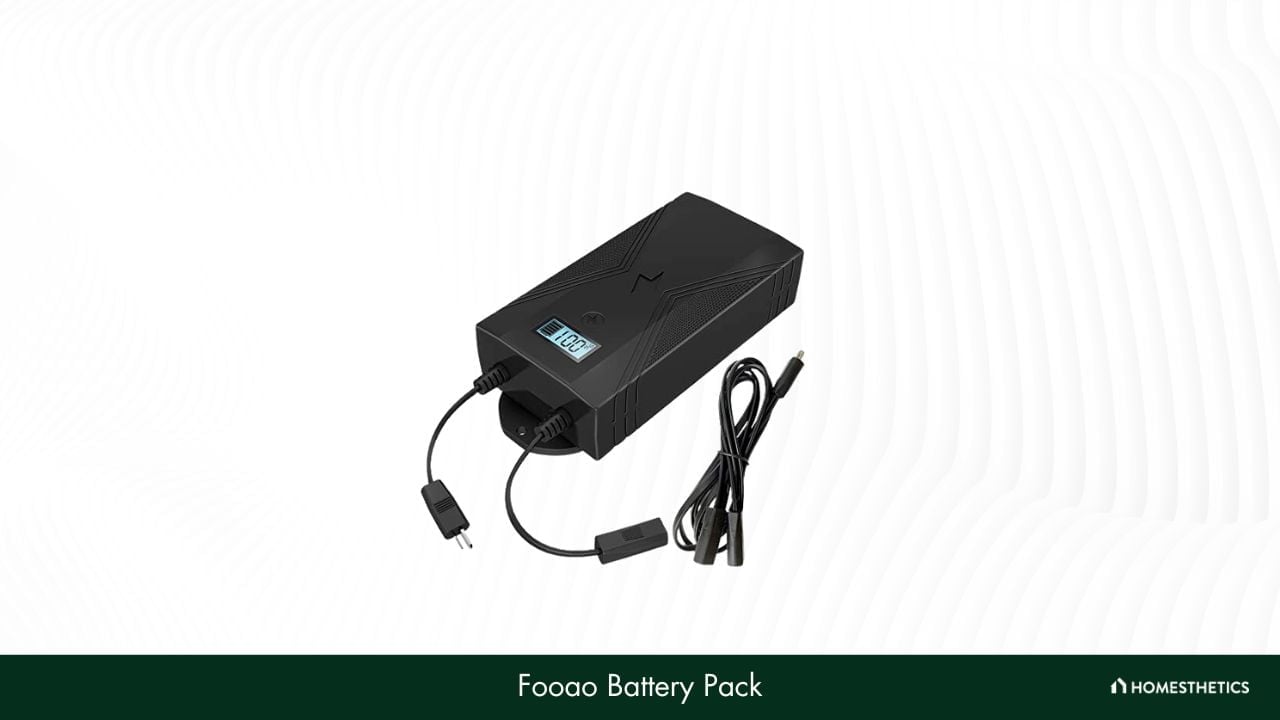
Moving on, we bring you the Fooao Battery Pack, which will keep your power recliner up and running in no time with its quick charging solution. This battery pack is also one of the safest and easiest-to-use options on the market while ensuring a great experience. 

First of all, we liked the impressive build quality of this battery pack. It is one of the most durable options on the market and is guaranteed to last you a long time. Moreover, the battery pack is compatible with most types of power reclining furniture that work with a two-pin connection. So, it should work well with your furniture, no matter the manufacturer.

The Fooao battery pack also has an impressive range of certifications, including UL, FCC, CE, and ROHS. These certifications ensure that it is one of the safest-to-use products currently available for purchase and can be used almost anywhere without worry.

You will be pleased to know that this battery pack comes with all the required accessories, a 30-day refund option, and a 365-day replacement warranty. Indeed, don’t shy away from applying for a refund or replacement from the manufacturer if any issues arise.

We would’ve liked the product even more if the manufacturer had made it easier to know when the battery pack is completely charged. That said, there is a risk of overcharging as it does not come with any notification light or audible alert. 

Dimensions: N/A | Weight: 1.38 lbs | Battery Type: Lithium Ion | Battery Capacity: 2500 mAh | Wireless: Yes | Connection Type: Two-pin | Charging Time: About 6 Hours | Battery Life: A Few Weeks

5. Freemotion Rechargeable Battery Pack

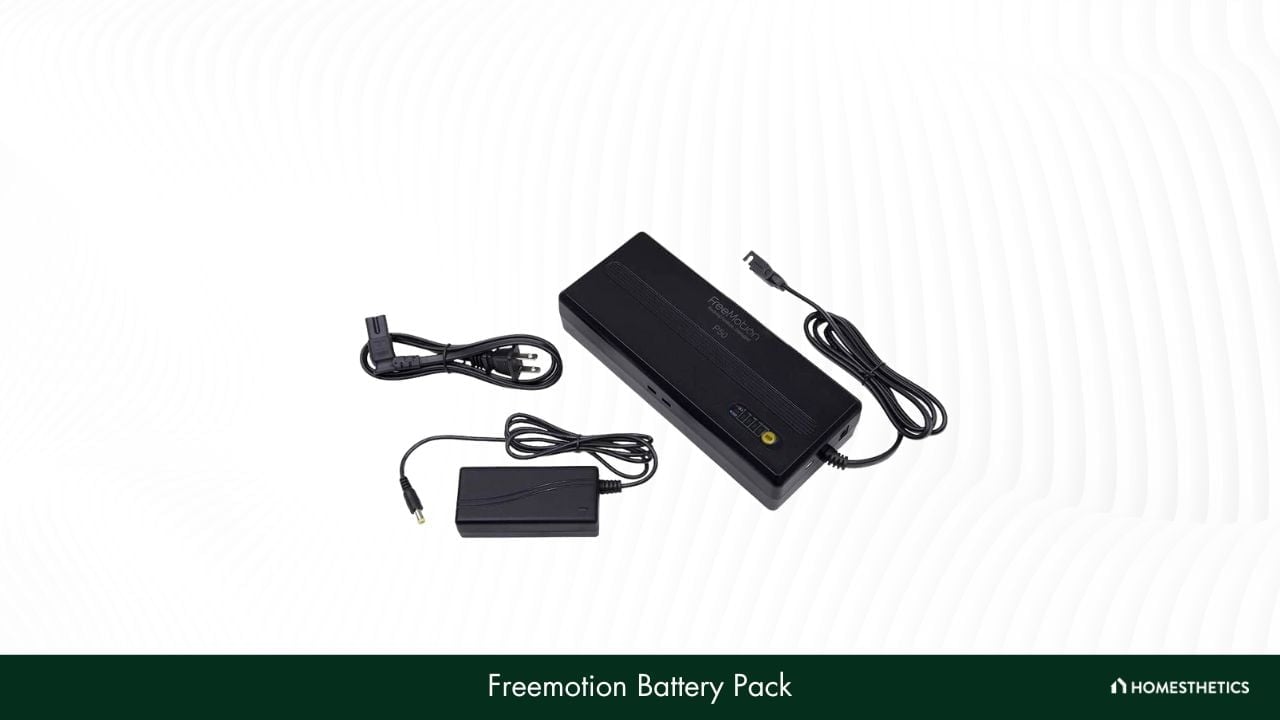
Freemotion is another big name known for its high-quality cordless battery packs, especially for power recliners. It comes with a massive 5000 mAh battery capacity that can power your recliner for an extended period. It is also one of the safest options since it comes with UL MH60644 recognition.

Freemotion brings to you one of the most powerful battery packs for power recliners that comes with a 5000 mAh capacity. While most other manufacturers offer 2200 to 2500 mAh capacity products, this one offers double the capacity,y enabling it to stay charged for longer.

On that note, this battery pack can easily power up to four modular pieces and nine motors. Furthermore, it offers up to 900 single-motor cycles on a full charge, making it one of the longest-lasting products in the segment. Indeed, you can easily go for more extended periods before recharging the pack again.

What impressed us the most was Freemotion’s unique technology and proprietary software, which allows you to charge the battery pack safely even while using the recliner. The manufacturer has put a lot of effort into ensuring that this product is safe. In fact, this battery pack has undergone independent testing.

The only downside to this otherwise excellent product that we noticed is that it requires power recliners to have a smart on-off switch to work. So, it is best to check whether your recliner works on a smart on-off switch before you decide to purchase this product.

Dimensions: 3.7" x 9.5" x 2" | Weight: 3.25 lbs | Battery Type: Lithium Ion | Battery Capacity: 5000 mAh | Wireless: Yes | Connection Type: Standard Two-prong, Flat-round | Charging Time: 6 to 7 Hours | Battery Life: N/A

6. TomSheir Battery Pack for Reclining Furniture

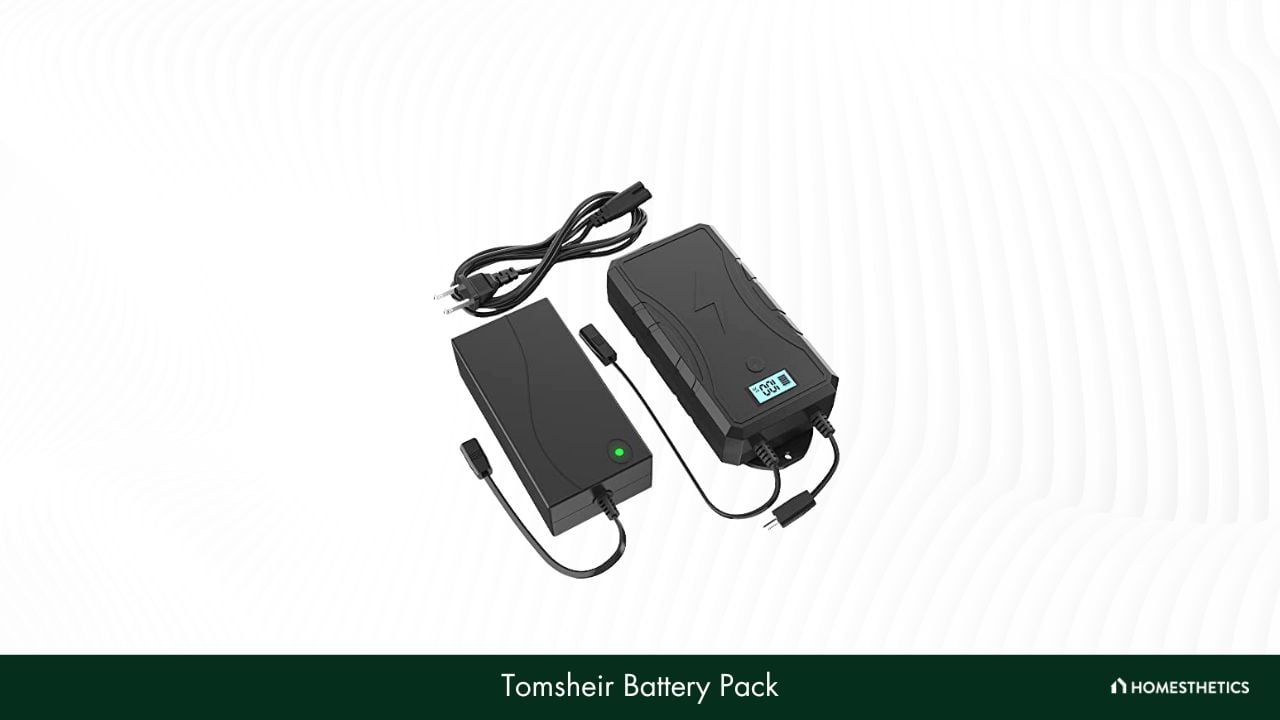
This 2500 mAh battery pack from Tomsheir, a leading American brand, has been created to provide the best experience at a great price. It comes with several certifications, including UL, FCC, CE, and ROHS for ensuring a higher level of safety without compromising on performance.

If you are looking for a battery pack that is easy to install and compatible with a wide range of products, this is a perfect choice. It comes with a two-pin connection that makes it suitable for use with all power recliners that come with such a connection. 

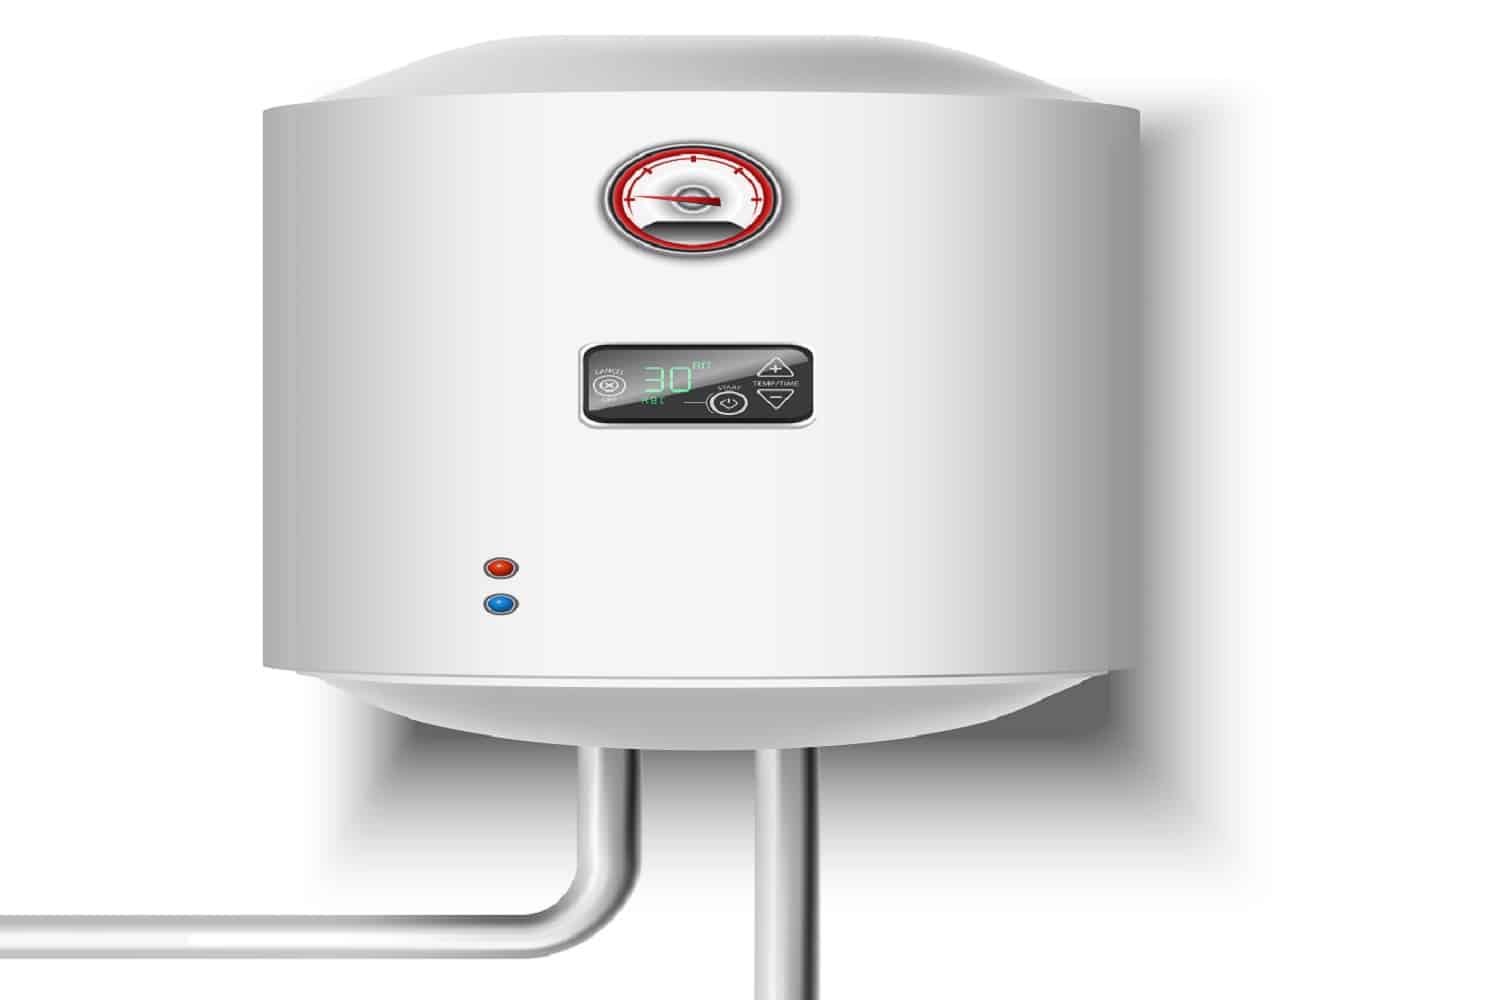
What is more, it also comes with a clear display that shows the percentage of charge remaining. This helpful feature makes it easy to know when to plug the device in for recharging. Also, with the help of this impressive product, you can place the recliner at any preferred spot without needing to run cords across the floor.

Other than that, this battery pack for reclining furniture also holds enough charge to power over a hundred cycles of your sofa or recliner, with each charge lasting about a month. With this excellent product, you don’t need to worry about charging your recliner frequently. 

While there is no doubt that the performance of this product is one of the best, the Tomsher battery pack is one of the costlier options on the market. It may not be the best option if you have a modest budget. However, it offers excellent performance for the price.

Dimensions: N/A | Weight: 1.53 lbs | Battery Type: N/A | Battery Capacity: 2500 mAh | Wireless: Yes | Connection Type: Two-pin | Charging Time: About 6 Hours | Battery Life: A Few Weeks

7. Enouvation ENBATT-E6

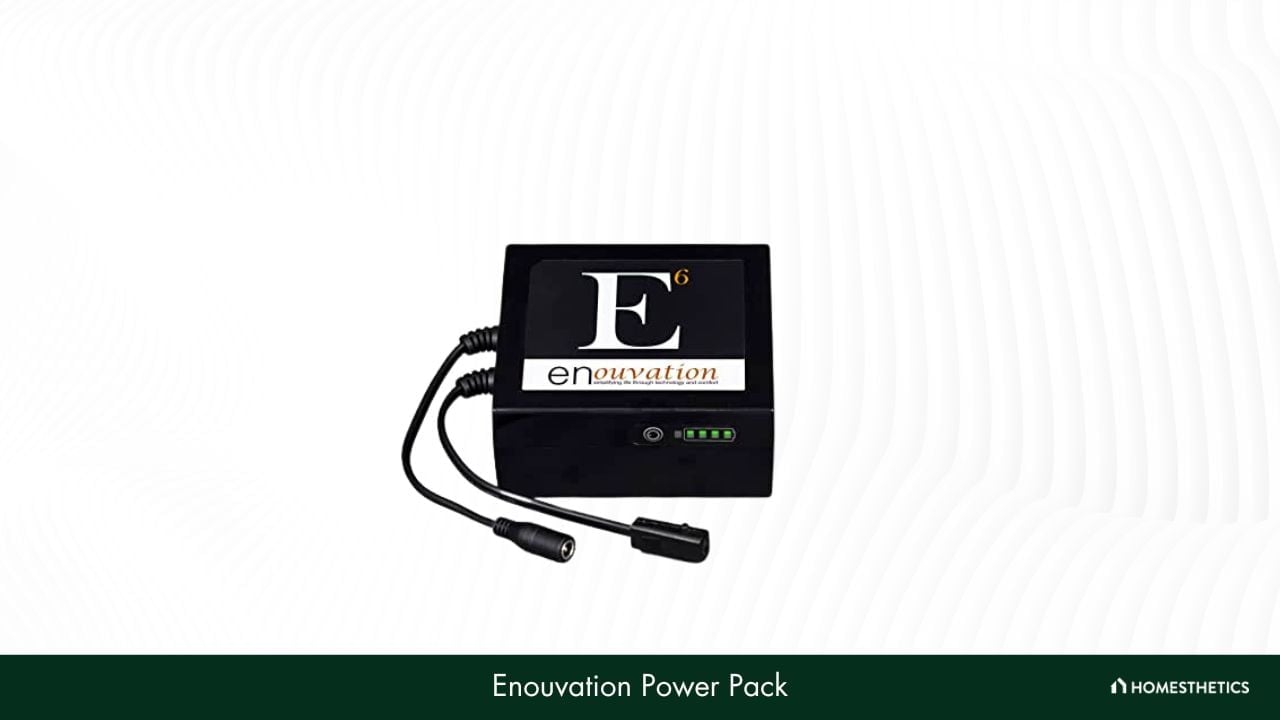
As we near the end of this list, it is time to introduce the Enouvation ENBATT-E6. Enouvation is one of the top brands that offer a range of power supply products and accessories, and the ENBATT-E6 is a prime example of how good their products are. 

The first thing that sets the Enouvation ENBATT-E6 apart from the competition is its compact form factor. Due to its smaller size, it can easily be concealed in any type of power recliner. Also, it makes this battery pack one of the most portable options you can find on the market. 

However, don’t let the compact size fool you. Despite the lightweight build, the ENBATT-E6 is one of the most powerful battery packs we have come across. It can charge your recliner very quickly, making it ready for use as and when required.

Speaking of the charging performance, this product from Enouvation is also highly efficient, helping you save power and bringing down your power bill. Plus, the easy-to-read LED power indicator lets you know how much power is left before it needs recharging.

Along with the LED power indicator, this battery pack includes an audible, interactive low-power alert.

The Enouvation ENBATT-E6 offers everything you need from a battery pack in one compact package. However, the instructions required for setting up and installing this product are too complicated for the layman to understand. Fortunately, you can look up instructions from other buyers online to help you out. 

Dimensions: 5" x 5" x 2" | Weight: 2 lbs | Battery Type: Lithium Ion | Battery Capacity: 6000 mAh | Wireless: Yes | Connection Type: Universal/Select Adapters | Charging Time: N/A | Battery Life: More Than 1 Month

8. Staigo Battery for Power Recliner

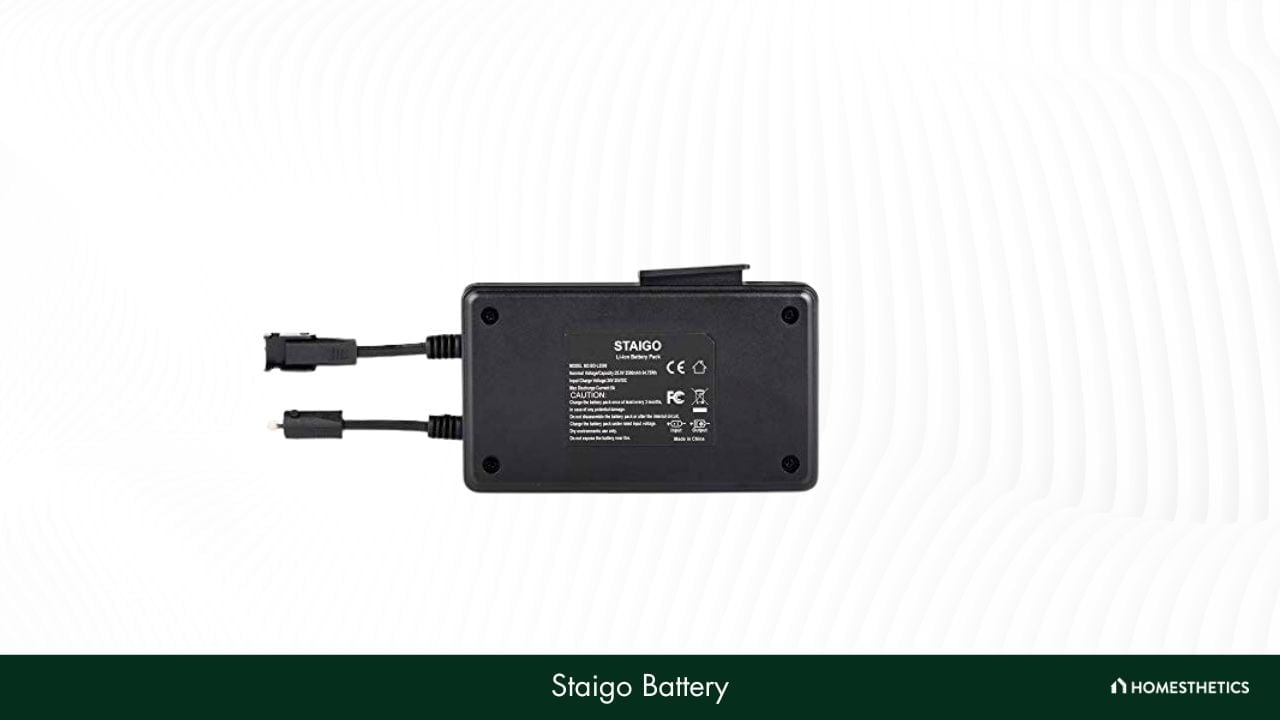
The final product on our list comes from the house of Staigo, an American manufacturer that specializes in the production of power supply products. This product is a rechargeable lithium-ion recliner battery pack with a short charging time but delivers long-lasting performance for the perfect experience.

Since this product comes with several innovative features, let us start with the most useful. Most battery packs that you can find on the market require at least six hours of charging time. The Staigo recliner battery pack, on the other hand, requires only three to get fully recharged. It helps you save time and makes your recliner ready for use faster.

Another impressive feature is the high-temperature protection built into the battery. It prevents the battery from getting too hot while charging, thereby ensuring complete safety for all. Similarly, it also comes with overcharge protection that prevents the battery pack from getting damaged. 

The Staigo battery lasts for a month once it is fully charged, so you won’t need to charge it frequently. If the voltage is not enough for the battery to get charged, it also has a low voltage alarm that will let you know. 

The Staigo battery pack for reclining furniture has several exciting features and delivers excellent performance. However, it is only compatible with a limited list of recliner brands. When going for this product, you will need to consider several factors, such as the output and the connector type, to ensure it is compatible.

Dimensions: 6.1" x 3.54" x 1.77" | Weight: 1.06 lbs | Battery Type: Lithium Polymer | Battery Capacity: 2500 mAh | Wireless: Yes | Connection Type: Two-pin | Charging Time: About 3 Hours | Battery Life: About 1 Month

Best Battery Packs Comparison Table

Product Dimensions Weight Battery Type Battery Capacity Wireless Connection Type Charging Time Battery Life
The Blue Cactus Company Battery Pack 6" x 3" x 1.5" 2.59 lbs Lithium Ion 2500 mAh Yes Two-pin 8 Hours N/A
Limoss Battery Pack 8.9" x 7.36" x 3.7" 0.98 lbs Lithium Ion N/A Yes Two-prong N/A N/A
Lavolta Battery Pack 6.25" x 3.25" x 1.75" 1.26 lbs Lithium Ion 2200 mAh Yes Two-pin About 6 Hours 4 Weeks
Fooao Battery Pack N/A 1.38 lbs Lithium Ion 2500 mAh Yes Two-pin About 6 Hours A Few Weeks
Freemotion  Battery Pack 3.7" x 9.5" x 2" 3.25 lbs Lithium Ion 5000 mAh Yes Standard Two-prong, Flat-round 6 to 7 Hours N/A
Tomsheir Battery Pack  N/A 1.53 lbs N/A 2500 mAh Yes Two-pin About 6 Hours A Few Weeks
Enouvation ENBATT-E6 5" x 5" x 2" 2 lbs Lithium Ion 6000 mAh Yes Universal/Select Adapters N/A More Than 1 Month
Staigo Battery 6.1" x 3.54" x 1.77" 1.06 lbs Lithium Polymer 2500 mAh Yes Two-pin About 3 Hours About 1 Month

Battery Pack for Power Recliners Buying Guide

By now, we’re sure you have an idea about the best battery packs that you can get for your power recliner. However, simply knowing about the best available products is not enough to help you find the right product. 

You need to consider several factors before making a final decision. Keeping these factors in mind while selecting a product can help find the product that meets your needs in the best possible manner. To know more about these factors, continue reading on.

1. Battery Capacity

The battery capacity is the first thing you need to consider when looking for the best battery pack for your power recliner. Manufacturers offer several battery packs with varying capacities, ranging from 1000 mAh to 3000 mAh. 

The battery capacity determines how long a charge will last, with higher capacity batteries generally lasting for a longer time. Roughly, a 5000 mAh capacity will last for up to 900 cycles, which translates into a month, with moderate use. 

The battery capacity also affects the charging time, with a larger capacity battery pack requiring more time for charging. 

2. Battery Size and Design

Since power recliners from different brands vary in size and design, so do their compatible battery packs. If you intend to keep your battery pack for reclining furniture in the open, size is not a major influencing factor. In such cases, the battery pack can be kept in any safe place without affecting the performance.

On the other hand, compact battery packs can be easily installed and concealed within the power recliner. Here, the size plays an essential role if you plan to keep it in your power recliner. That is why it is vital to measure the recliner and the battery pack you intend to purchase before deciding. 

3. Wired vs. Wireless

Battery packs can either be wired or wireless. Wired battery packs come with certain limitations, such as the requirement of keeping your recliner near a power socket. They are also potential hazards as people can easily trip over them. Additionally, if you have pets, they can nibble on the wire and damage it quickly.

Wireless battery packs, while generally being costlier, offer several advantages. They allow you to place your power recliner anywhere you like and help reduce the mess that wires cause. Additionally, they are safer as they prevent accidents and also cannot be damaged easily.

4. Charging Type and Method

Certain manufacturers include the charger with the battery pack in the package, while other battery packs need to be charged with the power supply of your recliner. Both charging types are easy to use and work well enough. 

Besides the type of charging, you should also consider whether the battery pack can be charged while using the recliner. Some battery packs can be used while using the recliner, while others cannot. In such cases, getting one that offers this capability is generally a more convenient option.

Can one battery pack be used for different models of power recliners?

Many power recliner battery packs are designed with universal functionality, meaning they can be used with various recliner brands and models. Nonetheless, it's essential to ensure the compatibility of plug types and voltage requirements.

Can a battery pack for a power recliner be used while charging?

While some battery packs allow for use while charging, most manufacturers usually recommend against this to preserve the battery's lifespan and avoid any potential safety risks.

How long does a fully charged power recliner battery pack last?

On a full charge, most power recliner battery packs offer up to several weeks of recliner use, with around 100 to 300 cycles of chair operation. However, the exact duration can vary based on the recliner's make, model, and usage frequency.

Can I leave my power recliner battery pack plugged in all the time?

It's generally not advisable to leave the battery pack plugged in constantly since it could lead to overcharging, thus reducing the battery's overall lifespan.

What is the typical lifespan of a power recliner battery pack?

Typically, a power recliner battery pack can last anywhere from six months to two years, depending on usage and proper maintenance. Batteries should be charged only when drained completely to extend their lifespan.

The best walk-behind string trimmers are designed to cut through dense grass, stubborn weeds, and overgrown brush where standard lawnmowers fall short. These powerful machines combine the maneuverability of a push mower with the cutting strength of a commercial-grade trimmer, making them ideal for uneven terrain, fence lines, and hard-to-reach areas. Whether you're a homeowner maintaining a large yard or a professional landscaper dealing with invasive growth, choosing the right walk-behind string trimmer can dramatically improve efficiency and reduce physical strain. In this guide, we review 8 top-rated models based on engine performance, deck width, cutting precision, and durability—so you can select the best tool to achieve a cleaner, well-manicured landscape with less effort.

Best Walk-Behind String Trimmer 

String trimmer and protective face mask on grass

1. Southland SWFT15022 Field Trimmer

One of our top recommendations is this field trimmer from Southland Outdoor Power Equipment. If you are on the lookout for something that’s affordable, easy to start, durable, and easy to store, this is the one for you. Long story short, this Southland field trimmer is a heavy-duty machine that can meet your trimming needs with ease.

Why Did We Like It?

The first thing that stood out to us was how easy it is to start this machine. You don't have to join the gym and buff up only to operate it. It has a manual recoil system that cranks the machine up on the first go.

Once you get it going, nothing can come in its way. The 150cc engine makes this trimmer heavy-duty and rugged. You can expect it to cut whatever comes in its way, even those pesky wooden stalks.

And that’s not all; it's 2a 2-inch cutting swath that ensures you can get rid of anything in not only open ground, but also harder to reach places.

You may think a trimmer like this must be hard to store, but that is far from the truth. This heavy-duty machine is relatively easy to store and doesn't take up too much space, thanks to the foldable handle.

What Could've Been Better?

While having a trimmer that can pretty much chomp down on anything is great, it comes with some downfalls. A common complaint with this machine was its inability to cut on uneven terrain and slopes since it tends to topple over.


Pros

  • Convenient to store
  • Foam cushion on handles to avoid any damage to your hands
  • Cranks up on the first pull
  • Easy to assemble


Cons

  • Difficult to maneuver on uneven or sloping terrain


2. Southland SWSTM4317 2-Cycle Wheeled String Trimmer

If you are looking for a compact, easy-to-use machine that caters to basic trimming needs, this is the one for you. Not everyone has acres and acres of land lying around with overgrown grass and weeds. Sometimes, you need a small machine for all those little details. You can count on this one to help maintain the garden.

No products found.

Why Did We Like It?

One of the top reasons this trimmer is on the list is to highlight its rotating trimmer. It can rotate 20 to 30 degrees, and that is ideal for when you want to cut around boundaries or edges.

Another great feature is that it is lightweight, which means you don't have to depend on hand-held trimmers for your basic trimming needs. You can use this one instead because it has a 0.155-inch string, which is broader and more durable than hand-held machines.

In addition to all these excellent features, storing the trimmer will not be a hassle either. Although the handle doesn't fold, the compact design of the machine allows it to fit anywhere.

What Could've Been Better?

As previously mentioned, the machine is smaller in size and not as powerful as some bigger weed trimmers. So, it is not ideal to use this if you have a larger space or thicker overgrown patches.


Pros

  • Affordable
  • Easy to handle
  • Compact design
  • Perfect for cutting along edges and boundaries


Cons

  • Not made for thick weeds or tall grass


3. EARTHQUAKE 28463 M205 Trimmer

Now we have the EARTHQUAKE trimmer, which is deadly. The 150cc engine on this machine will ensure it eliminates everything in its way with ease. It is perfect for residential properties as it doesn't make as much noise as its competitors. So, you can count on this one to keep your property looking fresh.

Earthquake 28463 M205 Trimmer with 150cc 4-Cycle Viper...
  • POWERFUL - Powered by a strong, yet quiet, 150cc 4-Cycle...
  • DURABLE - Our one-piece steel deck provides strength and...

Why Did We Like It?

Finding the perfect string trimmer while living in a heavily populated locality can be difficult. The EARTHQUAKE trimmer is ideal for people who wish to keep a clean property without disturbing the neighbors.

Sometimes the noise isn't a concern, but assembly is; this string trimmer solves that problem, too. It comes pre-assembled, so all you have to do is open it, fill it up with oil, fire it up, and watch it demolish everything that's keeping your garden from looking its best!

Now, coming to the design aspect of this trimmer. It has a low trimming deck that allows you to trim in harder to reach spots like under fences. Plus, the wheels are wide enough, making it easier to handle and smoothly go over rough terrain.

Overall, it is a fantastic product to use for your residential property, has excellent value for money, and the five-year warranty is a definite bonus!

What Could've Been Better?

Having a garden as part of your residence doesn't mean it can be full of tall grass. That is where this product is lacking. It is not as useful if you intend to use it or want to cut tall grass.


Pros

  • Already assembled and ready to use
  • Low-trimming deck
  • Makes less noise
  • It comes with a five-year warranty


Cons

  • Not meant for tall grass or commercial use


4. TAZZ 35258 Walk-Behind String Mower/Trimmer

The Tazz String Mower/Trimmer has most of the standard features as its competitors and then some! If you are looking for an affordable alternative to the EARTHQUAKE trimmer with some additional features, this is the one for you. This 150cc engine machine is powerful enough to keep the weeds off your property.

TAZZ One-Piece Steel Deck, 22” Cutting Swath, Never Kill,...
  • FAST AND FRIENDLY: Perfect for mowing and trimming around...
  • POWERFUL VERSATILITY: Our 150cc engine has plenty of power...

Why Did We Like It?

To put it simply, it has more to offer than it shows. The engine is powerful, and the 22-inch cutting swath can cover a large area in a short time.

Additionally, it has a never-kill engine. That means the engine will keep running even when the cutter is not engaged.

This trimmer is ideal for people who want a machine that doesn't interrupt them while clearing out the property. Constantly switching it on and off can cause malfunctions, and this reduces that risk.

Another feature worth pointing out is that the trimmer can cut through thick bushes and patches of land with heavy growth. It always starts on the first pull and can get to work within 5 minutes of unpacking.

What Could've Been Better?

While trying to figure out the downside to this machine, we found that it can be challenging to maneuver. Although the wheels allow it to go over rough terrain, it may not be easy to handle since it is a heavyweight machine.


Pros

  • Never-kill engine saves time
  • It starts on the first pull
  • Can cut through heavy growth
  • Affordable


Cons

  • Heavyweight machine


5. Husqvarna HU675HWT High Wheel Trimmer

Made by American manufacturers Briggs and Stratton, the Husqvarna trimmer is known for its quality. If you are looking for a lightweight and easy-to-use trimmer for heavy-duty trimming, then your search ends here. This string trimmer will chomp down weeds, stalks, and tall grass effortlessly and without having you break into a sweat.

Why Did We Like It?

The most crucial feature that caught our eye was that it was easy to use and spoken of in high regard by senior citizens. It is lightweight, easy to maneuver, and walk behind, making it quite popular among people who do not want to strain themselves physically.

Another noteworthy feature is that you can adjust the cutter based on your needs. This trimmer has a cutting range of 1.6 - 3 inches.

Moreover, it does not matter how big or small you are; the machine has adjustable handles so that you can adjust it to a comfortable height.

Much like some of the previously reviewed trimmers, this one too has a never-kill engine, minimizing interruption while you trim.

Overall, this is one of the most user-friendly machines that people of all ages can use.

What Could've Been Better?

It was challenging to find a flaw in this trimmer, but it's worth keeping in mind that the quality of the plastic carrier provided might not be up to your expectations. So, it is best to take note of some brands for a replacement in case the carrier snaps.


Pros

  • It is quite lightweight
  • Easy to walk behind
  • Minimize interrupting with a never-kill engine
  • Adjustable cutter


Cons

  • Flimsy and breakable plastic carrier for string


6. Southland SOWST4317 Wheeled String Trimmer

Another great lightweight, affordable, and easy-to-maneuver string trimmer is this one. It has a smaller engine than some of the others we have reviewed in this list but can give them a run for their money. If you are testing the waters with string trimmers, this is the one for you.

Why Did We Like It?

The most significant feature for us was the design of the product. It has a slim structure, making it easy for anyone, beginner or otherwise, to use this product. The stature of the machine allows it to reach under fences, railings, and other harder-to-reach spots.

However, a smaller-framed machine does not mean it doesn't have any power. It can cut through thick weeds and grass as efficiently as any other trimmer on this list.

It is also noteworthy that this small walk-behind machine ensures that you are not left feeling drained after a hard day's work (which would be the case with a regular weed whacker).

Another significant aspect is that it takes very little time to assemble, allowing you to put it to work as soon as you like.

What Could've Been Better?

One of the downsides to this machine that we came across was regarding the user manual. We noticed that a lot of people would have wanted the instructions to be better. It is also important to remember that the smaller engine might not allow heavy-duty work for a long time.


Pros

  • It is easy to assemble
  • Easy to start
  • Great value for money
  • Small yet powerful for light work
  • Slim design allows easy storage


Cons

  • The instruction manual needs to improve
  • Not meant for long hours of heavy-duty work


7. Dirty Hand Tools 101085 Walk-Behind String Trimmer

Now on the list is a wheeled trimmer that offers some great features for an affordable price. This powerful and sleek-looking machine is excellent for effortlessly trimming tall grass, weeds, and bushes. The machine is also quieter than most of its competitors, allowing you to carry out your work without any disturbance!

Why Did We Like It?

This one is like a gift that keeps on giving. One of the first unique features we would like to mention is that the DHT string trimmer has a never-kill engine, making it easier to clear any objects in the machine's path.

The next great point is the adjustable cutting height feature of this trimmer. Unlike some that only have 3 cutting options, this one goes up to 5, ranging from 1.5 inches to 3.5 inches.

Another fantastic feature is the string thickness it can hold. Most of the machines on this list can support a string thickness of up to 0.155 (or less). But, this one can go up to 0.17, which is very advantageous in case you need a thick string to cut thicker growth.

What Could've Been Better?

A common complaint with this trimmer was that it was not made to cut around obstacles. You might face some trouble turning the head of the machine, but if you need to clear a massive area without swerving it around too much, it will be fine.


Pros

  • 5 different cutting heights
  • Can hold thicker strings
  • Secure design for holding a thick string
  • Never-kill engine


Cons

  • Not made to go around obstacles


8. SuperHandy Walk-Behind String Trimmer

Finally, on our list is the SuperHandy Trimmer. This handy and powerful tool is an excellent addition to your garden tools and will help you cut off pesky growths like tall grass, weeds, and shrubs like a hot knife through butter. Powered by the 149cc engine it carries, this machine can solve all your gardening problems with its 21-inch cutting swath.

SuperHandy String Trimmer Walk Behind 21" Inch Line Cutting...
  • PROFESSIONAL SPECIFICATIONS - This Walk Behind String...
  • EFFICIENT DESIGN - Our one-piece, seamless deck offset frame...

Why Did We Like It?

The first great thing that this machine has is all-terrain wheels. The wheels are made to suit rough and uneven ground, so you will not be breaking your back while using this.

Moreover, if you are looking for a string trimmer that can cut along flower beds, fountains, and fences, this is the one for you. This machine is made in a way that gives you precise cuts without you putting in too much effort.

SuperHandy focuses on its customers' safety and comfort, which is why it cuts without vibrating too much and is also easy to use. It is also easy to store because of the foldable handles, ensuring it takes up less space in your storage area.

What Could've Been Better?

Unlike most of its competitors, the SuperHandy trimmer does not have oil included in the package, which is a common concern among people who buy this trimmer. Moreover, there have also been a few issues regarding it starting on the first pull.


Pros

  • Easy to maneuver on all terrains
  • Great for tall weeds and grass
  • Compact design allowing easy storage
  • It can be used on massive plots of land


Cons

  • Has trouble starting on the first pull


Walk-Behind String Trimmer Buyer's Guide

Now, it does not matter if you are new to this or have a fair amount of experience; buying a product that makes your space look better can be a bit daunting.

It can be a little more nerve-racking than usual when you are trying to buy something online. There are no physical machines to look at or a person to clear your doubts continually. Don't let your apprehension about online products come in the way of you buying the best product.

After reading our comprehensive guide that reviews 9 of the top string trimmers from 2020, we understand if you are still feeling a little confused.

To put you at ease and give you a clearer idea, read on below to know what to look out for while buying a string trimmer.

  1. Coverage

The first and probably most important thing to look for is the cutting swath of the trimmer. If you are looking for a machine that can cover a lot of area within short periods, then a 22-inch cutting swath is ideal. If you don't have a lot to cover, invest in something smaller like a 17-inch cutting swath.

  1. Usage

Maintaining a patch of land can be hard, especially if you are away from time to time. If you want a trimmer to cut out thick and tall growths from time to time, then a heavy-duty machine is the one for you. However, if you wish to occasionally cut weeds and need the machine for some light trimming, it is better to opt for a lightweight trimmer.

  1. Storage

Buying a commercial-type trimmer is excellent as it will assist you in carrying out all gardening duties, but in the absence of proper storage space, it will come in the way of your daily life. It is essential to remember how much space you have or can make for your trimmer.

However, almost all string trimmers have handles that can fold, causing them to take up less space.

  1. Comfort

It is no secret that you would opt for a string trimmer over a weed whacker because a weed whacker can be physically strenuous. However, it is advisable to look out for a machine that has an ergonomic design. The walk-behind string trimmer should ideally not put any strain on your back and should be easy to push around.

The handle itself should have padding to minimize the effect of the vibration the machine causes. The padding will prevent any damage to your hands and arms.

Man cutting grass Walk-Behind String Trimmer Buyer's Guide in the back yard

Whether you have a large plot of land or just a small residential garden, maintaining it can be strenuous. But what makes it essential is the fact that a well-maintained lawn and surroundings enhance the overall look and value of any property.

On that note, we will be signing off. But before we leave, let us remind you that if you have a residential lawn that needs to be managed, the EARTHQUAKE trimmer is ideal. For bigger plots of land and commercial use, the Husqvarna trimmer and the TAZZ trimmer are great choices.

And with that, we bid adieu to you. Until next time!

This feature is part of the "Things to Draw" Collection of drawings realized by Homesthetics Magazine in partnership with Designaissance Studio. The contents of the tutorial are copyright protected as it is the collection itself; if you are interested on sharing the drawings on your website or magazine please contact the magazine. Feel free to print or share the page for educative purposes as this is the definitory purpose of our mission with this collection.

It has been determined that drawing in the early stages of childhood can provide insightful knowledge into the crucial cognitive, physical, and emotional development of a child. The actual act of drawing is chosen by all young kids as a creative expressive manner of externalization and engaging the developing intellect and the entire body in general. If you ever opt to simply observe a little one drawing you can notice how his concentration is expressed with his entire body, the activity being extremely engaging and appealing to young and adults alike. With this idea in mind, Homesthetics in partnership with Designaissance has started the Cool Things To Draw Collection, a creative method of immersing into the colorful world of basic illustrations able to inspire and offer guidance in creative representations of the imaginative. Cast a glance and stay tuned for more creative, fun, and playful drawing guides!

1. Learn How to Draw a Deer- Deer Step-by-Step Tutorial

We felt it was only natural to start with a beloved childhood character: Bambi. Animals represent a great mediator between the natural environment and your little one, able to form relationships, and bonds and induce a sense of responsibility in the process of taking care of one another. They are also a good start for the representation phase your kid goes through in creative development when shapes become more realistic and tend to slip towards depicting the natural environment rather than the fairyland of fantasy. Start with basic shapes, followed by the setting of axes that will determine the essential anatomical parts of the deer, and end with adding a colorful natural scenery that will place the animal in the proper context. Use bright colors and be imaginative when it comes to vegetation.

Learn How to Draw a Deer - Cartoon Scene Step by Step Tutorial

2. Learn How to Doodle - Cartoon Scene Step-by-Step Tutorial

Doodling is a fun activity most of us undertake in hours of boredom. Nonetheless, the creative act is one of imagination, allowing to merging of different shapes, colors, and characters into unlikely scenes. You can start by expressing a simple fun character evolved from a basic primitive form like a circle and keep adding more and more elements to the painting. You can try and combine the characters in a fun fantastic imagery where color and details create a complex work of art. Teach your little one the importance of detail in art and life in general and admire and praise creativity and imagination. You can never go wrong with doodling.

Learn How to Doodle - Cartoon Scene Step by Step Tutorial

3. Learn How to Draw a Butterfly on a Flower - Butterfly Step-by-Step Tutorial

Butterflies and flowers are essential primal elements attempted to be depicted by kids in representations of the natural landscape. The delicacy and complex colorization of a butterfly might seem like a difficult job for a toddler but the idea is not of exact replication of the existent but rather the understanding of the shape, form, the abstraction of the idea of a butterfly. Flowers come easier to represent. Try and teach the rules of symmetry and proportions to such small elements that are perfect in their creation.

Learn How to Draw a Butterfly on a Flower - Cartoon Scene Step by Step Tutorial

4. Learn How to Draw a Sunflower and a Snail - Cartoon Scene Step-by-Step Tutorial

It is impressive how simple forms can be translated into complex natural elements that compose the surrounding world. No matter the scale, the natural replicates the same structure on and on, forming complex and intricate relations that generate the wonderful beauty of the natural. Below the miniature world of a snail has been cartooned to depict a fun perception of this small environment.

Learn How to Draw a Sunflower and a Snail- Cartoon Scene Step by Step Tutorial

5. Learn How to Draw an Owl- Easy Drawing Step-by-Step Animals

Owls are delicate majestic creatures frowned upon due to their preference for living in the cold night yet their perfect symmetry and beauty cannot be denied. Two circles intertwined start the base form of this drawing that transforms into a cute funny owl by adding more and more curved lines to form the impressive eyes and the feathers. Place it in a green environment and don't hesitate to add other fun characters to the scene. Color is an essential part of the end design and using vibrant rich colors will spark the interest of your little ones.

Learn How to Draw an Owl- Cartoon Scene Step by Step Tutorial

6. Learn How to Draw a Zebra - Easy Drawing Step-by-Step for Kids

Zebras are curious animals, representing the perfect duality between dark and light, night and day, white and black. The representation of such a character might be the right motif for teaching your kid the mentioned duality of life whilst keeping things casual and fun. The colorful environment surrounding and placing the zebra in its context will contrast beautifully with the main character. The below drawing depicts the zebra in a posture expressing human behavior as a creative parallel of understanding and comprehending the animal by comparison.

Learn How to Draw a Zebra - Cartoon Scene Step by Step Tutorial (2)

7. Learn How to Draw an Octopus - Cartoon Scene Step-by-Step Tutorial

You can immerse yourself and your kid in the unexplored mysterious underworld, filled with colorful interesting characters. A colorful octopus has been depicted in a lively environment associated with a better understanding of the miniature world of a fish tank in the vast immensity of an ocean and as a parallel to the importance of freedom for animals and their protection in their natural habitat. Reflect the vast world in a variety of tones and contrasts that will inspire and allow creativity to run free.

01 Learn How to Draw an Octopus - Cartoon Step by Step Tutorial

8. Learn How to Draw a Mouse - Mouse in Cat Clothing Step-by-Step Tutorial

The classical chase of cat and mouse of the beloved cartoon Tom and Jerry will remain a fond memory for most of us. We have tried to capture their complex and fun play in a single character that plays a double role, being placed in a homey mundane environment. The creation can be understood on a multitude of levels and explained to your kid depending on his age and understanding capacity. For the young toddler, the cartoon will represent a fun method of expressing his beloved characters in a colorful creation.

Learn How to Draw a Mouse - Cartoon Scene Step by Step Tutorial

9. Learn How to Draw a Seahorse - Cartoon Seahorse Step-by-Step Tutorial

Another cute creative character from the sea world has been brought to life in this marine-themed drawing. You can once again start from the basic circle and work your way around it to form and add complex colorful details to the creation. You could even merge the octopus with the below-featured creation if you feel adventurous enough to form a complex vast marine environment. Use the two characters to explain the concepts of friendship, closeness, and difference by determining your little one to add personality to each individual.

Learn How to Draw a Seahorse - Cartoon Scene Step by Step Tutorial

10. Learn How to Draw a Mushroom - Easy Drawing Step by Step for Beginners

We end our cartoon scenes with another natural environment captured in its various, complex essence, a miniature scale depicting the natural course of life at a different level. The intricate world of mushrooms and their internal logic of functioning and developing in the forest, along with the vital role they have to play in the environment will represent a wonderful lesson for your children. Dive into the natural world and you will capture their interest and attention whilst stimulating their creativity and imagination.

Learn How to Draw a Mushroom - Cartoon Scene Step by Step Tutorial

How Drawing Positively Influences a Child's Development

Further on we will go deeper into the intricate and complex roles drawing plays in a child's development.

Scribbling

The act of scribbling becomes a focus of attention for toddlers around 18 months, helping in muscle coordination, wrist and finger movement, coordination, and general physical development. The child will exercise his cognitive abilities and will interact socially, learning the meanings of shapes and marks. In time, his technique will improve, and the rhythm will take over and engage his entire being in the act of drawing. Full control of wrist movement will be achieved later on the evolution ladder but by scribbling, the toddler will learn how to grow from grasping a pen with his entire fist to holding it the proper healthy way. You must be aware of the fact that the end product of scribbling is important for the toddler as well as the process itself. Colors and lines spark their interest and later on, the shapes they have created will become their own signature. Later on, the act of scribbling represents autonomy, they have the ability to choose their own colors, lines, shapes, crayons, and paper, learning essential steps in the process of making rational decisions based on preferences and becoming independent.

Creating shapes

Between two and three a child has developed enough to create shapes, primitive circles, squares, and triangles, and by the age of three, the child puts together several shapes to form what Kellogg termed aggregates. These aggregates represent the first step in the reaching of realistic drawings which will usually be a primitive person, a tadpole formed out of a circle, and two lines that form the legs. The details may be placed or not on the circle, arms might not be used unless necessary. This should not be understood as a lack of understanding of the human body and its existence but rather as a conceptual interpretation of a persona, a personal manifest of apprehension, and a method of conveying a human being as a whole. Around age nine body proportions appear in the interpretation of human shapes, completing the concept begun as a toddler.

Conceptual drawing

The association is a technique used in language skills and arts alike. We tend to conceptualize items and ideas in order to better understand and comprehend their meaning and role in life, as well as associate them with certain memories and ideas. Around age three or four young children tend to create generic symbols for representing repeating elements in their drawings: trees, birds, the sun, the house, and people, beginning to show signs of realistic representation of the world as they perceive it. More often than not the impossibility of the world expressed such as representing both the inside and outside in the same picture is the key to challenging their mind and imagination and stimulating creativity.

Realistic depictions

Concrete operational thought manifests after the age of eight when kids tend to represent the world in a more realistic manner, leaving imagination and creativity behind. Perspective and proportions appear in the equation and the skill demonstrated at depicting them will encourage the little one to pursue arts in the future rather than giving up in an early stage. Confidence is key in creative development so the act of encouraging children, and offering them positive feedback along with guided technical drawing instruction in middle school years is essential for those who exude passion and intuition for creative arts.

How to encourage and promote drawing

As we have seen, drawing plays a vital role in the early years of development so let's decide on a few methods of encouraging and promoting drawing as art.

  1. Choosing and offering proper materials to young kids represents the first step
  1. Become the role model and influence your kids into drawing, present it as a fun creative activity
  2. Never allow an effort to go unnoticed. Applaud intent, colors, lines, and most of all, creativity
  1. Allow your kid to depict the story he is trying to convey
  2. Coloring books can exercise control but in the early stages creativity and an open free mind are far more important
  3. Offer high-quality examples later on
  1. Associate music with drawing- it stimulates the mind
  2. Always offer freedom of choice- in heme, color, pagination, and everything involved in the creative process

In conclusion, the simple act of drawing or scribbling at an early age will promote physical and cognitive development whilst encouraging social interaction, creativity, autonomy, and confidence. Admiration and early encouragement will help in forming a future great artist. Creativity and skill should be praised and understood as a wonderful asset and an incredible method of releasing stress, expressing emotions, and being free.

Related Articles

111 Best, Fun, and Cool Things to Draw

8 Best Cartooning Books For Artists Today

Electric hand planers are essential tools for woodworkers who need precision and speed when smoothing rough lumber, leveling doors, or tapering edges. Unlike manual planers, these motorized devices use fast-spinning blades to shave off fine layers of wood quickly, making them ideal for both professional carpenters and home workshop users.

In our hands-on evaluation, models like the WEN 6530 hand planer stood out for their powerful 6-amp motor and 34,000 cuts per minute, making it a reliable choice for most DIY users. The PORTER-CABLE PC60THP impressed with its dual-side dust extraction and ergonomic grip for fatigue-free use, while the Makita XPK01Z , with its cordless operation and 18V LXT battery system, delivered pro-level performance and unmatched portability.

According to tool expert and industrial designer Chris Marshall, “An electric hand planer can remove stock faster than a belt sander and with much better precision, making it an indispensable tool for finish carpentry and cabinetry.”

Discover the best electric hand planers for woodworking at home:

  • WEN 6530 electric hand planer: The WEN hand planer, with a 3-1⁄4-inch cutting width and adjustable depth settings, is a versatile choice for woodworking projects. Its ergonomic handle ensures comfort during extended use, while the included dust collection bag maintains a clean workspace. Backed by WEN's warranty, it combines precision and reliability.
  • PORTER-CABLE hand planer: The PORTER-CABLE hand planer, powered by a 6-amp motor, excels in hardwood with ten positive depth stages for accuracy. Despite some noise, its dual-side dust extraction system, ergonomic design, and robust construction make it a versatile and durable choice, ensuring a clean and efficient woodworking experience.
  • Makita XPK01Z cordless planer: The Makita planer, with an 18V motor, offers cordless convenience and portability for various woodworking projects. Despite limited battery life, its aluminum foundation ensures planing accuracy, making it suitable for smoothing door edges or crafting stick-free surfaces.
  • JELLAS electric planer: The JELLAS planer stands out with high-speed steel cutting blades, a powerful motor, and a dual dust-out system for flawless woodworking. Its ergonomic design provides maximum control and comfort, and the all-mirror-grade aluminum construction ensures durability. JELLAS backs this tool with a generous warranty for peace of mind.
  • SKIL electric corded planer: The SKIL electric corded planer, with a 6.5-amp motor, delivers precision and efficiency in woodworking. Its dual-chip exhaust and dust bag guarantee efficient dust collection, maintaining a tidy workspace. With easy-to-use depth adjustment and cutting width, this planer offers complete control over projects, making it an excellent value-for-money option.
  • TOPSHAK electric hand planer: The TOPSHAK electric hand planer is a game-changer with a 10A/120V/1200W motor and adjustable cutting width. The dual-sided dust outlet and powerful motor cater to both rough lumber and hardwood projects. Despite its noisy operation, it remains budget-friendly, ideal for woodworking.
  • AOBEN cordless electric hand planer: The AOBEN cordless electric hand planer is a cordless convenience with high-speed performance and adjustable planing depth. Powered by a 7A motor, it operates at 18,000 RPM, making it ideal for fast stock removal. While it has limited battery life, its affordability and included features make it a valuable choice for woodworking projects.

1. WEN electric hand planer - Best precision hand planer

Step into the world of woodworking perfection with the WEN 6530 electric hand planer, a true marvel of craftsmanship and innovation. Crafted to transcend the boundaries of ordinary hand planers, this remarkable tool guarantees an extraordinary experience that will leave you spellbound.

The WEN 6530 boasts a cutting width of 3-1⁄4 inches, ensuring you can easily tackle any woodworking project. Its cutting-depth adjustments offer unparalleled flexibility, allowing you to achieve the perfect shaving thickness for your desired outcome. Whether you’re working on rough lumber or seeking to chamfer those door edges, this planer has got you covered.

But that’s not all. Drawing from experience, the WEN 6530 cares for your comfort as much as it does for your craftsmanship. The ergonomically designed handle, paired with a parallel fence bracket, ensures that your strokes are parallel to the edge of the wood and allows extended use without fatigue. The dust collection bag, which comes along with this product, ensures a clean and safe working environment.

And here’s the best part: WEN stands behind its product with a generous warranty, providing peace of mind and confidence in your investment. You can trust in the quality and reliability of the WEN 6530, knowing that it is backed by a brand renowned for excellence in the realm of power tools.

Power and Motor: 6A/120V | Blade Size and Quality: 3.25" cutting width, two HSS reversible blades | Depth of Cut: .125" | Speed: 17,000 RPM | Ergonomics and Grip: Lightweight, ergonomic handle and parallel fence bracket | Dust Collection: Dust bag, reversible dust chute | Safety Features: Safety lock, kickstand

2. PORTER-CABLE hand planer - Best power tool for versatile woodworking

Crafted with utmost precision and powered by a robust 6-ampere electric motor, this hand planer unleashes a symphony of revolutions per minute. It effortlessly glides through hardwood like a maestro conducting an orchestra. Its high-speed steel cutting blade rotates with finesse, producing delicate wood shavings that rival the strokes of an artist’s brush.

Its unwavering dedication to human factors and ergonomics sets the PORTER-CABLE hand planer apart from its counterparts. The ten positive stages of the overmold depth knob allow for precise depth adjustments, enabling you to sculpt your workpiece with unrivaled accuracy.

The versatility of this power tool is another feather in its cap. Whether you’re working on door edges, countertop chamfering, or tacking rough lumber, the PORTER-CABLE hand planer effortlessly handles it all. Based on our first-hand experience, the three chamfering grooves allow for quick and efficient edge chamfering.

Moreover, this PORTER-CABLE hand planer understands the importance of cleanliness in the workshop. Its dual-sided dust extraction system, equipped with a dust bag, ensures that every stroke yields not only a masterpiece but also a pristine environment. No sawdust will dare interrupt the rhythm of your craftsmanship.

In terms of durability, this hand planer sets the bar high. Its robust construction, fortified by the sturdy aluminum shoes, guarantees longevity despite challenging projects. Backed by a generous warranty, the PORTER-CABLE hand planer stands as a testament to its manufacturer’s confidence in the lasting performance of the tool.

Power and Motor: 6A/120V | Blade Size and Quality: N/A | Depth of Cut: .078" | Speed: 16,500 RPM | Ergonomics and Grip: N/A | Dust Collection: Dust bag, dual side dust extraction | Safety Features: N/A

3. Makita cordless planer - Best for efficient wood shaping and smoothing

The Makita XPK01Z is an ideal tool for all your woodworking projects.

This cordless model has a brushless DC electric motor that delivers a maximum cut of 3-¼ inches and 14,000 revolutions per minute, making it perfect for fast stock removal. The cutting depth can be easily adjusted with the front knob. It has an aluminum foundation that has been precisely milled for planing accuracy. It can also be used to smooth door edges or stick-free surfaces.

The Makita XPK01Z is lightweight and easy to handle, especially during prolonged use. This electric hand planer has a spring-loaded stand that protects the blade and workpiece when the tool is not in use.

Our analysis of this product revealed that this planer is versatile and can be used for various woodworking projects. It’s excellent for rough lumber, construction lumber, or thinner and softer woods. The double-edge carbide blades ensure longer blade life, and the powerful brake and electric motor make it easy to stop the blade quickly for added safety.

The Makita XPK01Z has a warranty and is built to last, making it an excellent investment for your woodworking projects.

Power and Motor: 18V | Blade Size and Quality: Planes up to 3.25" wide, 2-blade cutterhead and double-edge carbide blades | Depth of Cut: .078" | Speed: 14,000 RPM | Ergonomics and Grip: Lightweight, ergonomically-centered balanced design, rubberized soft grip | Dust Collection: N/A | Safety Features: Powerful brake to stop the blade quickly, spring-loaded stand

4. JELLAS electric hand planer - Best tool with reversible HSS cutting blades

Craftsmanship meets innovation in the remarkable electric planer by JELLAS. A true game-changer in the realm of woodworking, this power tool unveils a world of possibilities for both professional woodworkers and DIY enthusiasts. 

At the heart of this woodworking marvel is its high-speed steel (HSS) cutting blades, meticulously engineered to deliver a flawless cutting experience. With a powerful electric motor, the planer effortlessly glides through hardwood, leaving a smooth surface behind. The 16,500 revolutions per minute (RPM) ensure fast stock removal, making it ideal for various woodworking projects. 

What sets the JELLAS electric planer apart from the rest is its dual dust-out system, designed to keep your workspace clean and free of debris. Equipped with a dust collection bag, multi-directional dust chute, and a sawdust ejector, the planer efficiently collects wood shavings and sawdust, preventing them from littering your work area. This thoughtful feature not only saves you valuable time but also protects your health by minimizing the inhalation of harmful particles. 

The ergonomic auxiliary push dual-handle design of the JELLAS electric planer ensures maximum control and comfort during operation. Whether working on rough lumber or fine carpentry, this planer effortlessly adapts to your needs, making it the go-to tool for a wide range of woodworking tasks. 

With JELLAS, durability is a given. The electric planer boasts all-mirror-grade aluminum construction, ensuring longevity and reliability. This sturdy build, coupled with the inclusion of a reversible blade, means you can tackle any woodworking project with confidence and ease. 

And rest assured, JELLAS stands behind the quality of their product with a generous warranty, giving you peace of mind and the assurance that your investment is protected. 

Power and Motor: 7.5A/120V | Blade Size and Quality: 3.25" cutting width, HSS reversible blades | Depth of Cut: .125" | Speed: 16,500 RPM | Ergonomics and Grip: Auxiliary push handle, ergonomic soft grip | Dust Collection: Dual side dust extraction bag, multi-directional dust chute, sawdust ejector | Safety Features: Safety switch, protective kickstand

5. SKIL electric corded planer - Best value for money hand planer

Crafted with utmost precision, this electric hand planer surpasses all expectations.

First and foremost, let’s talk about power. Equipped with a robust 6.5-ampere electric motor, the SKIL planer is an unstoppable force in the realm of carpentry. It effortlessly glides through hardwood and construction lumber with every stroke, ensuring fast stock removal and unparalleled precision. The powerful electric motor ensures maximum power and efficiency, leaving other planers in the dust.

When it comes to dust extraction, this planer takes the crown. The dual-chip exhaust, combined with a dust bag, guarantees a clean and tidy workspace. No longer will you be bothered by the pesky wood shavings that once invaded your personal space. Instead, you’ll revel in the tranquility of a dust-free environment, enabling you to focus solely on your craftsmanship.

Plus, the easy-to-use depth adjustment and cutting width give you complete control over your woodworking project, ensuring a smooth surface and the perfect cutting depth every time.

As an ideal tool for both professional woodworkers and enthusiastic hobbyists, the SKIL planer provides an extraordinary combination of precision, power, and convenience. Whether you’re tackling rough lumber or refining delicate pieces, this planer effortlessly rises to the occasion. With its impressive features, meticulous craftsmanship, and a warranty that guarantees peace of mind, the SKIL planer is an investment worth every penny.

Power and Motor: ‎6.5A | Blade Size and Quality: 3.25" planing width | Depth of Cut: .078" | Speed: 16,000 RPM | Ergonomics and Grip: N/A | Dust Collection: Dust bag, dual chip exhaust | Safety Features: Lock-off switch

6. TOPSHAK electric hand planer - Best electric planer with efficient dust extraction system

The TOPSHAK TS-EP3 electric hand planer is a true game-changer in the world of woodworking. It is perfect for both rough lumber and construction lumber, as well as hardwood and softer woods. This powerful tool boasts a 16,500 RPM electric motor, making it ideal for any woodworking project. 

Moving on, it features a precision-machined bottom made of mirror aluminum, which ensures the flatness of the cut. Additionally, this electric hand planer has a front knob that makes depth adjustments quick and easy. The cutter head has three v-shaped chamfering grooves that can create edge chamfering and rabbet cuts. 

One of the most impressive features of this electric hand planer is the dual-side dust outlet with dust chutes mounted on the sides and the dust collection bag. These planer features are designed to collect dust and shavings as you work, leaving you with a very smooth surface and minimizing cleanup time. The dust collector also makes it easier to work with thicker doors or sticking doors and allows you to collect dust from door edges or countertops. 

As such, the TOPSHAK TS-EP3 is ideal for professional woodworkers and DIY enthusiasts. This corded electric hand planer is also budget-friendly and perfect for those needing a reliable tool for their woodworking projects. 

Power and Motor: 10A/120V/1200W | Blade Size and Quality: 4.4” planing width | Depth of Cut: .062" | Speed: 16,500 RPM | Ergonomics and Grip: Ergonomic handle | Dust Collection: Dust bag, side-mounted dust chutes, can be connected to a vacuum cleaner | Safety Features: Lock/lock-off switch

7. AOBEN cordless electric hand planer - Best cordless electric hand planer

The AOBEN cordless electric hand planer is an impressive addition to any woodworking enthusiast’s arsenal. With a powerful electric motor and a lithium-ion battery, this cordless electric hand planer is perfect for those who want a smooth surface finish on their woodworking projects.

This hand planer boasts a high no-load speed of 18,000 revolutions per minute, making it the ideal tool for fast stock removal. It also features a planing width of 3-¼ inches and a maximum cut depth of ⅗ inch, making it suitable for construction lumber, rough lumber, hardwood, and softer woods.

This electric hand planer also includes a dual-sided dust outlet with a dust collection bag to collect dust. It prevents the dust from spreading all over your workspace. The stand also doubles as a kickstand, making it easier to put the planer down without damaging the blade or workpiece. Additionally, it has reversible cutting blades that can easily be replaced when they become dull.

The price is one of the most notable differences between the AOBEN cordless electric hand planer and other planers. It’s affordable, making it an ideal option for both professional woodworkers and DIY enthusiasts on a budget. Moreover, it comes with a carrying case and a warranty, giving you peace of mind knowing that you’re getting a quality product.

Power and Motor: 7A | Blade Size and Quality: 3.25" planing width | Depth of Cut: .078" | Speed: 18,000 RPM | Ergonomics and Grip: Ergonomic handle | Dust Collection: Dust bag, dust outlet, can be connected to a vacuum cleaner | Safety Features: Lock-on button

Which electric hand planer is right for your home woodworking needs?

Explore the key features of these electric hand planers to help you make an informed choice for your home woodworking projects. From power and blade quality to ergonomics and safety features, this table provides a handy comparison for your needs.

Electric Hand Planers Power and Motor Blade Size and Quality Depth of Cut Speed Ergonomics and Grip Dust Collection Safety Features
WEN Electric Hand Planer 6A/120V 3.25" cutting width, two HSS reversible blades .125" 17,000 RPM Lightweight, ergonomic handle and parallel fence bracket Dust bag, reversible dust chute Safety lock, kickstand
PORTER-CABLE Hand Planer 6A/120V N/A .078" 16,500 RPM N/A Dust bag, dual side dust extraction N/A
Makita Cordless Planer 18V Planes up to 3.25" wide, 2-blade cutterhead, and double-edge carbide blades .078" 14,000 RPM Lightweight, ergonomically-centered, balanced design, rubberized soft grip N/A Powerful brake to stop the blade quickly, spring-loaded stand
JELLAS Electric Hand Planer 7.5A/120V 3.25" cutting width, HSS reversible blades .125" 16,500 RPM Auxiliary push handle, ergonomic soft grip Dual side dust extraction bag, multi-directional dust chute, sawdust ejector Safety switch, protective kickstand
SKIL Electric Corded Planer 6.5A 3.25" planing width .078" 16,000 RPM N/A Dust bag, dual chip exhaust Lock-off switch
TOPSHAK Electric Hand Planer 10A/120V/1200W 4.4” planing width .062" 16,500 RPM Ergonomic handle Dust bag, side-mounted dust chutes, can be connected to a vacuum cleaner Lock/lock-off switch
AOBEN Cordless Electric Hand Planer 7A 3.25" planing width .078" 18,000 RPM Ergonomic handle Dust bag, dust outlet, can be connected to a vacuum cleaner Lock-on button

Buyer’s guide for electric hand planers

When buying an electric hand planer, several key features must be considered. 

1. Power

Electric hand planers are compact yet powerful tools that offer exceptional performance and versatility. With their robust motors, they deliver an impressive amount of power. While buying one, look for a powerful motor, preferably a brushless DC electric motor, that can handle various woodworking projects and provide smooth cutting action. 

2. Cutting depth

The cutting depth of electric hand planers refers to the maximum cutting depth at which the tool can remove material from the workpiece. It determines the amount of material that can be planed off in a single pass, affecting the efficiency and versatility of the tool. 

Electric hand planers typically offer adjustable cutting depths, allowing users to customize the thickness of shavings. Consider the maximum depth a planer can cut in a single pass while buying. 

3. Cutting width

The cutting width of an electric hand planer refers to the width of the material that the planer can remove in a single pass. Typically, electric hand planers have cutting widths ranging from two to four inches, although some models may offer wider options. 

The cutting width determines the speed and efficiency of material removal. Choosing the appropriate cutting width ensures that your electric hand planer matches your project requirements. 

4. Speed

Electric hand planers are versatile tools that excel in removing excess material and smoothing surfaces. Equipped with powerful motors, they can swiftly and efficiently shave off layers of wood or other materials. Check the revolutions per minute (RPM) or no-load speed of the planer to ensure efficient and fast cutting. 

5. Blades

The durability and sharpness of the blades of electric hand planers are vital for achieving smooth finishes and reducing tear-out. Look for reversible blades made of durable materials like high-speed steel or tungsten carbide, which provide longer-lasting sharpness and smoother cuts. 

6. Dust collection

Electric hand planers often come equipped with a dust collection feature, enhancing their functionality and user experience. It also contributes to a healthier work environment by reducing airborne dust and minimizing the risk of respiratory issues. 

Look for electric hand planers with a dust collection bag or dust extraction port, as they’re essential for keeping your work area clean and free of sawdust and wood shavings. 

7. Ergonomics

Electric hand planers are designed with ergonomics in mind to ensure user comfort and efficiency. Consider the design and comfort features such as a comfortable grip, placement of controls and switches, ergonomic handle, and vibration reduction for extended use without fatigue. 

9. Depth adjustments

The depth adjustment feature in electric hand planers allows users to precisely control the amount of material being removed from the workpiece. This feature is typically operated by a depth control knob or lever, enabling you to make fine or coarse adjustments depending on your requirements. While buying, ensure the planer offers easy and precise depth adjustments, allowing you to achieve the desired cutting depth for different woodworking projects. 

10. Fence or guide

Fences or guides of electric hand planers enhance precision and control during woodworking tasks. By aligning the material against the fence or guide, woodworkers can achieve smooth, even surfaces and maintain the desired shape. Look for a planer with a parallel fence or guide to help maintain a consistent cutting width and ensure accurate edge chamfering. 

11. Corded vs cordless

Corded models of electric hand planers provide a consistent and uninterrupted power supply, making them ideal for longer projects and heavy-duty tasks. On the other hand, cordless electric hand planers offer unmatched portability and flexibility. Before buying, decide whether you prefer the convenience of a cordless model or the continuous power supply of a corded electric hand planer. 

12. Brand and warranty

A strong brand with a comprehensive warranty ensures a satisfying experience with your electric hand planer. While buying one, choose a reputable brand known for its quality power tools, such as Jellas, Makita, Skil, Wen, DeWalt, Bosch, or Porter-Cable. Also, check for a warranty that covers any potential defects or malfunctions. 

Remember, the best electric hand planer for you depends on your specific needs, budget, and woodworking projects. Consider these features to make an informed decision and find a planer that suits your requirements. 

What are the advantages of using an electric hand planer for woodworking projects?

A few advantages of using an electric hand planer for woodworking projects are fast stock removal, precise depth adjustments, and the ability to create a very smooth surface. It is a powerful tool that can handle various types of wood, making it ideal for both professional woodworkers and DIY enthusiasts.

How does a cordless electric hand planer differ from a corded model?

A cordless electric hand planer differs from a corded model mainly in its power source. While a corded model requires a power cord, a cordless planer operates on a rechargeable electric battery. Cordless planers offer more mobility and freedom of movement but may have slightly less power and shorter battery life compared to corded ones.

Is a dust bag or a dust collection port better for collecting sawdust from an electric hand planer?

A dust collection port is generally better than a dust bag for collecting sawdust from an electric hand planer as it is more effective, especially when paired with a dust collector. That being said, a dust bag is more convenient for small jobs or when working in tight spaces.

Can corded electric hand planers be used as jointers, stationary planers, molding planers, or benchtop planers?

No, electric hand planers, corded or cordless, cannot be used as jointers, stationary planers, molding planers, or benchtop planers. It is designed for portable and handheld use, making it unsuitable for tasks requiring the precision offered by these tools. Each serves a specific purpose and should be used accordingly. 

After careful consideration, the verdict is clear. The WEN electric hand planer shines as the all-around performer with its powerful motor and versatile 3-¼ inch blade. For smaller projects, the PORTER-CABLE hand planer, with its 6-ampere motor and 5/64-inch cut depth, is the ideal choice. If mobility is your priority, the Makita cordless planer takes the spotlight, offering cordless freedom.

Whether you're a DIY enthusiast or a professional, there's a planer to suit your needs and lead you to woodworking success. If you found this article helpful, explore our guides on stationary planers and benchtop planers for more woodworking insights.

The best vacuum cleaners for mattresses are engineered to extract dust mites, dead skin cells, and allergens that accumulate deep within bedding surfaces—improving indoor air quality and supporting healthier sleep. Since we spend nearly one-third of our lives on mattresses, neglecting their cleanliness can lead to chronic exposure to respiratory irritants, especially for allergy sufferers. Unlike standard vacuums, mattress vacuums often include features like HEPA filtration, UV-C sterilization, and high-frequency vibration to dislodge and eliminate microscopic debris embedded in dense fabrics. Whether you're a pet owner, a parent, or simply prioritizing hygiene, this guide reviews the top 5 mattress vacuum cleaners that deliver the performance, convenience, and sanitation needed to keep your sleep environment truly clean.

Listed below are the 5 best vacuum cleaners for mattresses from our list:

  • Dyson V7 Vacuum. Dyson V7 is a handheld vacuum featuring a robust digital motor, delivering 30 minutes of powerful fade-free suction. Dyson V7 stands out with its 2-tier radial cyclone assembly and HEPA filtration, capturing even the smallest dust particles efficiently. This vacuum is also compatible with dusting brushes for versatile use on various surfaces, from mattresses to keyboards or tapestries.
  • Raycop Mattress Vacuum. Raycop Lite Vacuum excels in removing allergens and dust from mattresses with its scientifically calibrated UV light and vibrating pads. It's built-in HEPA filters secure the tiniest of particles, providing a clean sleeping environment. However, it is a non-cordless machine, which might restrict movement during cleaning tasks.
  • Housmile Mattress Vacuum Cleaner. The Housmile Mattress Vacuum Cleaner brings advanced cleaning features, such as an upgraded UV light, an activated carbon filter, and a HEPA filtration system. It's designed with a lightweight body for long-duration cleaning comfort and a dust collector for efficient debris capture. Despite these perks, its effectiveness decreases with pet hair.
  • Dascooni Mattress & Bed Vacuum Cleaner. The Dascooni Vacuum Cleaner offers innovative cleaning features like high-frequency vibration, cyclone suction, and UV lamp technology. This vacuum cleaner's unique attributes include a pulsating pad system for loosening deeply embedded dust and a 300-w motor for rapid cleanup. However, its operation can be slightly noisy.
  • Flyingqin Handheld Vacuum Cleaner. The Flyingqin Handheld Vacuum Cleaner is a versatile cleaning solution, due to its user-friendly, portable design and impressive cleaning performance. Its cordless feature adds convenience, but the cleaner tends to be quite noisy during operation.

Here is the list of the 5 best vacuum cleaners for mattresses that you can use to quickly and effectively clean your mattress of dirt, debris, and allergens.

1. Dyson V7 Vacuum - Best for Versatile Cleaning

  • Features a powerful digital motor
  • Up to 30 minutes of fade-free suction
  • Can be used beyond mattresses

We are starting our list with the Dyson V7, which is undoubtedly one of the best handheld vacuum cleaners for mattresses. This ergonomically designed vacuum features a robust digital motor that offers 30 minutes of powerful,l fade-free suction. But it’s not the power of the suction that makes Dyson stand apart.  

It’s the 2-tier radial cyclone arrangement and holistic HEPA filtration that gives the Dyson V7 an edge over many compact vacuum cleaners available in the market right now. There are 15 cyclones circularly arranged in two layers to ensure maximum airflow with optimal capturing of fine dust particles.

To reinforce the mechanism of the 2-tier cyclone assembly, Dyson has fitted a post-motor HEPA filter that can capture particles as small as 0.3 microns. The state-of-the-art HEPA filter is the reason why the Dyson V7 handheld vacuum cleaner can round up all the dust mites invisibly lurking on your mattress. To keep this vacuuming and filtration in isolation, the entire machine body is completely sealed. Rest assured, the air leaving the vacuum is free of any contaminants and may be cleaner than the room atmosphere you are breathing in.   

To make its handheld vacuum product more versatile, Dyson has also made it compatible to work with a dusting brush. So, besides the mattress, you can use a Dyson V7 handheld vacuum to clean other small and tricky plan surfaces. Whether it’s the difficult task of getting rid of the dust from in between the keys of a keyboard or dusting a tapestry, you can take on these challenging cleaning tasks with a Dyson V7 vacuum cleaner fitted with a dusting brush.

Additionally, the ergonomic handle and light body also ensure that you can conveniently use it without repeatedly changing hands.

Dimensions: 12.45" x 5.17" x 8.11" | Weight: 3.77 lbs | Type: Handheld | Power Source: Battery-Powered | Voltage: | Wattage: 21.6V | Filter Type: N/A | Controller Type: Cloth | Hand Control

2. Raycop Mattress Vacuum - Best for Allergen Removal

  • Features a calibrated UV sanitizer
  • Features an additional pulsating pad
  • Comes with HEPA filters that trap the tiniest of particles

Raycop Lite Vacuum for Mattress is one of the most technologically sound products among the handheld vacuum cleaners available in the market right now. It is also fitted with a UV lamp to exterminate dust mites, bed bugs, and other microorganisms then and there. However, the difference is the UV wavelength in the Raycop Mattress Vacuum Cleaner is calibrated and tested with lab-grade SOPs to authenticate its bug and bacteria-killing capability.

The results show that even the tiniest of microorganisms like E-coli and Staphylococcus, can’t survive under the UV action of a Raycop vacuum cleaner. From bacteria to dust mites, all troubling organisms perish within a few seconds of exposure.

Sometimes, dust and with it dust mites are baked in the fine threads of the mattress cover or upholstery. Even the high-pressure suction often misses out on this strongly embedded dust and accompanying organisms. Raycop has gotten around this shortcoming in its Lite handheld vacuum cleaner, which is fitted with pulsating pads. These pads vibrate at the frequency of 4,600-5,000 hertz while the suction is on to loosen and stir all those strongly-latched dust particles.

As a result, you get three times better removal of allergens and dust in comparison to other vacuums with the same suction power.  Like any premium quality vacuum cleaner for mattresses, the Raycop Handheld Vacuum is also fitted with HEPA filters that trap the tiniest of particles, including pet dander, pollen, and even smoke particles.

The weight of these handheld vacuum cleaners can be slightly on the heavy side. However, you won’t feel this extra weight on your hand because the Raycop Handheld Filter works like an iron i.e., you press and move it against the mattress/upholstery surfaces.

Dimensions: 11" x 14" x 6" | Weight: 4 lbs | Type: Handheld | Power Source: Corded Electric | Voltage: 120V (AC) | Wattage: 330W | Filter Type: Cartridge | Controller Type: Push Button

3. Housmile Mattress Vacuum Cleaner - Best for Quiet Operation

  • UV light technology kills up to 99.97% of bacteria
  • State-of-the-art HEPA filter
  • Quiet motor system

The Housmile Mattress Vacuum Cleaner sets new standards in mattress and bedding surface cleaning, ensuring that you enjoy a comfortable and hygienic sleeping environment. With advanced features such as an upgraded UV light, a HEPA filtration system, and an activated carbon filter, this vacuum cleaner delivers a superior cleaning performance.

The Housmile Mattress Vacuum Cleaner has several features that set it apart from competitors.

First and foremost, its lightweight construction ensures that you can clean for extended durations without experiencing discomfort. This is crucial, as mattress vacuuming can be a lengthy task, and a cumbersome vacuum can strain your arms or cause fatigue.

Featuring a generously sized dust collector, the vacuum cleaner is particularly advantageous for those suffering from allergies, as it minimizes post-vacuuming allergens in the sleeping environment and reduces the frequency of having to empty the dust container.

Ease of use is another area where this vacuum cleaner excels, offering a power switch for quick startup, as well as an indicator light and rotating brush switch for effortless control. Its intuitive design means you can efficiently clean your mattress with minimal setup time.

An essential feature of the vacuum cleaner is its rotating brush, which guarantees a comprehensive cleaning without causing damage to your mattress and bedding materials. The brilliant dual-brush system combines a hard brush for dust removal with a soft brush for preserving fabric quality, making it suitable for delicate surfaces.

In addition, the Housmile Mattress Vacuum Cleaner harnesses UV light technology, delivering an extra layer of protection against harmful germs and bacteria. The UV light generates intense beams that effectively exterminate up to 99.97% of bacteria on your mattress. Furthermore, the UV tube ensures the maintenance of a high operating temperature (149F) for optimal pollutant removal.

Featuring a cutting-edge HEPA filter, the vacuum cleaner meets both US MERV19 and EU H14 standards, capturing an impressive 99.99% of dust particles as minute as 0.1 microns. This extraordinary filtration performance promotes a clean, healthy sleep environment, significantly reducing the risk of allergy or respiratory issues.

Lastly, the Housmile Mattress Vacuum Cleaner incorporates a quiet motor system, allowing you to clean in a peaceful and tranquil ambiance.

While the Housmile Mattress Vacuum Cleaner has many impressive features, there are a couple of aspects that could be improved. The sensitivity of the vacuum cleaner's buttons has been reported to cause minor inconveniences during operation. Also, some users have found the vacuum cleaner to be less effective in removing pet hair as compared to other debris and allergens.

Dimensions: 14" x 11" x 7" | Weight: 4.5 lbs | Type: Handheld | Power Source: Battery-Powered | Voltage: 120V | Wattage: 350W | Filter Type: Cartridge | Controller Type: Push Button

4. Dascooni Mattress & Bed Vacuum Cleaner

  • High-frequency vibration allows for the effective dislodging of dirt and dust
  • Sterilizes mattresses with its 253.7nm purple light UV lamp
  • Powered by a 300-watt motor

Introducing the Dascooni Mattress & Bed Vacuum Cleaner, a top-of-the-line product designed to ensure a pristine and healthy sleeping environment. This vacuum cleaner stands out with its pulsating pad system, high-frequency vibration, cyclone suction, and UV lamp technology, making it a formidable tool for removing dust, allergens, and bacteria from your mattress and bed linens.

The Dascooni Mattress & Bed Vacuum Cleaner comes with several innovative features to make mattress cleaning highly efficient and hassle-free. The high-frequency vibration (which operates at 12,800 times/min) works wonders in agitating and dislodging embedded dirt and dust, allowing the powerful 12kPa cyclone suction to easily remove them. This ensures a thorough cleaning process without any residues.

In addition to its cleaning power, the 253.7nm purple light UV lamp takes it a step further by sterilizing mattresses and eliminating bacteria, thus promoting a healthier sleep environment. The pulsation pad aids in this process by lifting dust to the surface for a smoother cleaning experience. Moreover, the high-filtration HEPA system captures minute particles, dander, hair, and larger debris, contributing to a pollution-free atmosphere around your bed.

The Dascooni vacuum cleaner is powered by a 300-watt motor, which enables a swift cleaning process. Its spacious 600ml washable dust box accommodates an ample amount of dust and debris before requiring emptying, providing users with a clean and refreshed mattress to sleep on.

Despite its remarkable performance and array of impressive features, the Dascooni Mattress & Bed Vacuum Cleaner has a minor shortcoming — the motor tends to be slightly noisy. However, given the numerous advantages that this luxury vacuum cleaner offers, this small drawback can be disregarded.

Dimensions: 8" x 7" x 6" | Weight: 3.69 lbs | Type: Handheld | Power Source: Corded Electric | Voltage: 110V | Wattage: 300W | Filter Type: Disk | Controller Type: Push Button

5. Flyingqin Handheld Vacuum Cleaner

  • User-friendly design
  • With a suction power of up to 100.12 picometers
  • Portable and easy to store

Introducing the Flyingqin Handheld Vacuum Cleaner, a versatile and portable cleaning solution designed to cater to a range of surfaces, including mattresses and beddings. This vacuum cleaner, with its user-friendly operation and unique features, simplifies the cleaning experience while maintaining a comfortable home environment.

One of the standout aspects of the Flyingqin Handheld Vacuum Cleaner is its user-friendly design. The cordless nature of the device combined with its ergonomically curved handle allows for easy maneuverability and control during operation. This functionality enables you to effortlessly reach tight spaces and awkward corners. Furthermore, the vacuum cleaner includes a translucent dust box and side exhaust vents, allowing for efficient monitoring of dirt collection and overall maintenance.

Another remarkable feature of the Flyingqin Handheld Vacuum Cleaner is its impressive performance. With a suction power of up to 100.12 picometers, the vacuum cleaner effectively eliminates dirt, dust, and debris from a variety of surfaces, ensuring a clean and refreshed living space.

The portability of the Flyingqin Handheld Vacuum Cleaner is yet another positive aspect. The device weighs a mere 3.69 pounds and measures 11 inches x 15 inches x 7 inches, making it the perfect size for easy storage and transportation. Its cordless design further enhances its usability across various areas of your home without the hindrance of a power outlet.

Based on user feedback, it's worth noting that the Flyingqin Handheld Vacuum Cleaner can be relatively noisy when in use. While this may not be particularly bothersome to some users, it's essential to be aware of it if you require a more tranquil cleaning experience or have sensitive hearing.

Dimensions: 11" x 15" x 7" | Weight: 3.69 lbs | Type: Handheld | Power Source: Corded Electric | Voltage: 110V | Wattage: 330W | Filter Type: N/A | Controller Type: Push Button

What is the Best Vacuum Cleaner for Mattresses?

This section presents a detailed comparison of vacuum cleaners specifically designed for mattresses. The table below provides an insightful evaluation of critical attributes including Dimensions, Weight, Type, Power Source, Voltage, Wattage, Filter Type, and Controller Type.

Product Dimensions Weight Type Power Source Voltage Wattage Filter Type Controller Type
Dyson V7 12.45" x 5.17" x 8.11" 3.77 lbs Handheld Battery-Powered 21.6V N/A Cloth Hand Control
Raycop Vacuum Cleaner 11" x 14" x 6" 4 lbs Handheld Corded Electric 120V (AC) 330W Cartridge Push Button
Housmile Vacuum Cleaner 14" x 11" x 7" 4.5 lbs Handheld Battery-Powered 120V 350W Cartridge Push Button
Dascooni Vacuum Cleaner 8" x 7" x 6" 3.69 lbs Handheld Corded Electric 110V 300W Disk Push Button
Flyingqin Vacuum Cleaner 11" x 15" x 7" 3.69 lbs Handheld Corded Electric 110V 330W N/A Push Button

Buying Guide for the Best Mattress Vacuum Cleaner 

But before we delve into this discussion, it is important to shed some light on the reasons why homeowners should invest in a quality vacuum cleaner for mattresses.

These are the three major reasons why you should have a vacuum cleaner for mattresses in your home.

1. Get Your Mattress and Bedroom Dust-free

Like regular vacuum cleaners are used on the floors to get rid of dirt and dust, mattress vacuum cleaners are used to remove fine particles of dust that trap in the lining of the mattress over a long period of time. You might be thinking that you can do this by using the regular vacuum cleaner without ‘wasting’ money on a separate vacuum cleaner.

You are right in thinking along these lines, but here’s the thing: a regular floor vacuum cleaner can’t get all the dust out of the mattress because its suction pump is not designed to remove the finest dust particles. On the other hand, vacuum cleaners designed for mattresses are fitted with a mechanism that can agitate and suck all the fine dust particles and even microorganisms that are responsible for allergies.

If anyone in your home suffers from asthma, and even an apparently clean interior doesn’t help in easing their condition, then you need to look at the condition of the mattress they are sleeping on. There is a strong chance that the invisible dust from the mattresses is responsible for aggravating their condition.

2. Get Rid of Dust Mites and Bed Bugs

As mentioned earlier, mattresses are one of the most overlooked fixtures in the house. This is the reason why they often become a breeding ground for insects, particularly bed bugs and dust mites; this is due to the same invisible dust that causes dust allergies and aggravation.

According to some rough estimates, an unvacuumed mattress is the host of over 2 million dust mites along with all their feces and shedding.  Though dust mites don’t bite, their excretions and shedding are the reason to cause allergic reactions.

On the other hand, we all know how much trouble bed bugs can cause. Their silent stings are potent enough to mess up your nighttime sleep routine. The dark and warmth of mattresses prove to be the best haven for bed bugs.  Mattress vacuum cleaners can’t help in taking out the bed bug problem from the roots, but they can be of great assistance to your fumigation efforts.

3. Get Rid of Bad Odors

Do you get frustrated by a persistent musty odor lingering in your bedroom even when there are no apparent signs that point to the source of that smell? This usually happens when bacteria and other allergens give rise to the mold in the mattress lining. If you devise a routine to vacuum your mattress once in a while, then you can prevent these strange odors from permeating your room.

Although we have reviewed the best vacuum cleaners for mattresses that are available right now, one must still have a general idea of buying the right option for his/her mattress vacuuming needs. These are the five elements that you should factor in while looking for a vacuum, particularly for mattresses, bedding, and upholstery.

    • Filters

Filters ensure that a vacuum cleaner can keep the smallest irritants trapped. In other words, filters are responsible for the clean air emission from the vacuum. For that matter, a good vacuum cleaner should always be fitted with a filter that can capture all the microscopic mites, dander, and other similar elements.

HEPA is now the go-to filtration system for mattress vacuum cleaners. They can capture 97-99% of those organisms that go on to cause allergies. However, there is a downside to the use of HEPA filters. They are disposable and need to be replaced after a year or two.

If you don’t approve of this ongoing replacement work, then vacuums with washable filters are also available on the market (we have also reviewed some). These filters are expensive, but their reusability extends their service life to an extent where their higher costs are worth it.

    • UV Light Sanitization

If you have noticed, the UV sanitization system is a recurrent feature in many modern vacuum cleaners. It is a chemical-free way to exterminate mites and bugs. In many vacuums, they are coupled with heat treatment to get rid of larvae and eggs as well.

In households with people having sensitive respiratory systems, a mattress vacuum cleaner with UV sanitization will be useful.  And even if that’s not the case, prefer UV vacuum cleaners over non-UV ones because of their more holistic cleaning activity.

    • Suction Power

In conventional large vacuum cleaners, the power of suction is all that matters. However, handheld vacuums for mattresses have a layered and multifaceted cleaning mechanism. Besides UV sanitization, the vibration pads and dual inlet suction also factor in a lot in determining the efficiency of a mattress vacuum cleaner.

For that matter, a mattress vacuum cleaner, even with low suction power but other features, can work better on mattresses than the regular high suction models. In short, suction is an important characteristic of a mattress vacuum cleaner, but not as decisive as it is in regular large vacuum machines.

    • Extensions

Hoses and nozzle attachments at the vacuum inlet ensure a diversified cleaning activity. Handheld vacuum cleaners often don’t come with a set of attachments because they are particularly designed for mattresses and quilts.  However, there are some (we have also reviewed one) where you can get this cleaning versatility.

So, it is simple. If you want to use your vacuum not just on mattresses, then go for a model that comes with a package of hoses and nozzles.

    • Cordless or Wired

It is another important characteristic to factor in while buying a mattress vacuum cleaner. Cordless ones are easier to use, but you have to put up with their lower suction power and shorter vacuuming span. Similarly, if you are going for a wired one, then it will give you more powerful suction and an extended vacuuming cycle, but at the cost of convenience, that's a trade-off you will have to take, even with the best mattress vacuum cleaners.

So, while choosing between cordless and wired vacuum cleaners, make a trade-off that suits your particular cleaning settings and budget.

Do mattress vacuum cleaners also work on pillows, upholstery, and other soft furnishings?

Yes, most mattress vacuum cleaners can also be used on pillows, upholstery, sofas, and other soft furnishings due to their lightweight and versatile design.

Are cordless vacuum cleaners for mattresses effective?

Yes, cordless vacuum cleaners can effectively clean mattresses. However, be aware of the battery life, suction power, and charging time, as these factors vary among models.

How important is the UV sanitization system in a mattress vacuum cleaner?

UV sanitization systems are essential for killing bacteria, viruses, and mites, providing thorough sterilization. Opting for a vacuum with this feature ensures a cleaner and safer sleeping environment.

How often should I use a vacuum cleaner on my mattress?

For optimal cleanliness and hygiene, vacuum your mattress every 1 to 3 months. People with allergies or asthma might need to clean their mattresses more frequently.

Can vacuum cleaners for mattresses handle pet hair?

Yes, many mattress vacuum cleaners can effectively remove pet hair with strong suction power and specialized attachments.

How do I maintain my mattress vacuum cleaner?

Regularly empty and clean the dust bin, replace or clean filters as needed, and check the vacuum for any blockages or debris. For models with UV sanitization systems or other features, consult the user manual for maintenance guidelines.

Ultrasonic dog repellers are compact, humane devices designed to deter aggressive or unwanted canine behavior using high-frequency sound waves—inaudible to humans but unpleasant for dogs. Whether you're seeking protection during walks, looking to prevent stray dog confrontations, or training a persistent pet, these tools offer a non-contact, non-lethal way to create boundaries without causing harm. Ideal for joggers, delivery workers, outdoor enthusiasts, and homeowners, the best ultrasonic dog repellers combine range, ease of use, and reliability in a single portable unit. In this guide, we review the 7 top-rated ultrasonic dog deterrents available today, comparing their effectiveness, battery life, range, and safety features to help you make a confident and informed choice.

Listed below are the 5 best ultrasonic dog repellents from our list:

  • Dog Dazer II Ultrasonic Dog Deterrent: Particularly effective for big dogs, it uses ultrasonic technology to keep dogs at a distance, with its easy-to-use design and low battery indicator serving as key advantages.
  • PetUlove Handheld Ultrasonic Dog Repeller: More than just a dog repeller, this device scares away other animals too and comes packed with dog training aid functionality, making it a robust choice for pet owners demanding diverse functionality.
  • FIRST ALERT Bark Genie Handheld Bark Control Device: A cost-effective solution to control dogs, its compact design and actual 15-feet range offer excellent user-friendly attributes.
  • PetSafe Ultrasonic Remote Dog Trainer: Combining rewarding good behavior and deterring bad ones, this product stands out for its dual functionality, demonstrating effectiveness even at a range of 25 feet.
  • Frienda LED Ultrasonic Dog Repeller: A budget-friendly choice available in the color yellow, this repeller stands out for its dual dog deterrent and flashlight functionalities, although its effectiveness may vary across breeds.

Here's the list of the 7 best ultrasonic dog repellents, ensuring your safety and peace of mind when dealing with dogs, even the less friendly ones.

1. Dog Dazer II Ultrasonic Dog Deterrent - Best for Big Dogs

At the top of our list comes a very moderately priced product with a high number of positive reviews. The Dog Dazer II is an excellent handheld device that uses modern ultrasonic tech to keep dogs at bay even if they’re 20 feet away! And the best part is that this model has been designed to be especially useful for deterring big dogs rather than small ones. Read more to find out about our experience.

Well, being dog owners, we often find ourselves in the company of other pet parents in the neighborhood or at the dog park. While most dogs are well-behaved, there are always some we’d like to keep our distance from. Our first tryst with this model happened right beside our house when the neighbor's German Shepherd gave us a gnarly look. A press of 1-2 seconds is all it took to get him away.

We don’t approve of any form of cruelty towards animals (or humans), so this ultrasonic “gun” works wonders to scare off mutts. All you have to do is point the machine at the dog and press the button for a couple of seconds. The LED lights up to indicate the machine is working, and you barely hear any noise coming out of it. 

The build quality is simple and effective-- just what you need from a device of this sort, andit  can be a solid companion no matter where you go. There’s also a low battery indicator to let you know when it’s ready for charging.

The only problem we encountered while using this model was related to the machine not working on the first attempt. On a couple of occasions when we were testing the machine (thankfully), the LED didn’t light up and we had to press it 2-3 times before it did. This can be a big deal if not taken care of early on.

Material: Plastic | Dimensions: 4.5 x 2.25 x 1.25 inches | Weight: 0.35 pounds | Range: Up to 20 feet

2. PetUlove Handheld Ultrasonic Dog Repeller - Best for Multi-Animal Repellent

Now, this one is more than just a dog repeller! Coming with 3-channel ultrasonic sensors, you can use this machine to scare away dogs, cats, wolves, and even snakes! Well, we didn’t try on wolves and snakes, but if the company says it’s true, we believe it. Besides, if your K9 companion has the problem of barking too much, this model by PetUlove should help.

First of all, this repellent costs less than the previous model we reviewed, but it also has a lower number of reviews on the internet. But despite it being a newer entry, it comes with loads of additional features that will appeal to everyone. Its Dog Training Aid functionality is especially useful for correcting wrong behavior such as barking, digging, or fighting.

Now, our Corgi puppy is very mild, but even he gets into a frenzy sometimes after seeing a squirrel or a stray cat in the backyard. We used this ultrasonic repellent to make him go away and calm down. Using it is easy; you press the button as usual, and the machine does the rest. The 1000mA rechargeable battery is also known to last a long time.

After-sales support is what we think deserves a special mention because so few companies do it right. In addition to 24/7 customer support, you have the option to return or replace the product if it turns out to be faulty. And the best part of using this ultrasonic repellent? It won’t cause any harm to your animals.

I must say, we were completely in love with this model till we figured out that we had to charge the batteries in time for it to work with 100% efficiency. Also, the 25-foot claim is a little exaggerated so we would recommend you use it between 5-15 feet, as usual. Do not, under any circumstances, use it to annoy your pet.

Material: ABS | Dimensions: 5.87 x 3.11 x 1.42 inches | Weight: 0.29 pounds | Range: Up to 25 feet

3. FIRST ALERT Bark Genie Handheld Bark Control Device - Best Budget Option

Want a slightly cheaper solution to your dog-controlling woes? You won’t be disappointed after using the Bark Genie from First Alert. Although lacking in some advanced features as compared to the first two products, this device does well to keep its promise-- to deter dogs and keep them from barking excessively. Should you try it out? Let’s see.

Well, first of all, the price is an attractive factor that we must take into account. This product costs less than the first two alternatives and has almost the same features. As far as effectiveness is concerned, the manufacturer promises it to work up to 15 feet away. We roughly tested that claim and found it to be true. No exaggeration is involved!

You can carry and use it anywhere, thanks to its extremely portable design that kind of resembles a flashlight. To get the dog’s attention, all you have to do is point toward him and press the button. Like others, this machine will also emit ultrasonic sounds that only your mutt can hear and will discourage them from barking or engaging in other unwanted activities.

We used the ultrasonic sound on our dog a couple of times, and it worked so well that later on we only had to reach for the machine for the dog to stop. Not saying you have to terrorize your pet pals; just let them know who’s the boss!

A persistent problem in this product category we kept on noticing was that the ultrasonic sound doesn’t work on all dogs. This device also didn’t work on every breed-- some just looked at us and continued barking, and some stopped only momentarily. We’d say this machine is best used alongside proper behavioral training, your puppy might be lacking.

Material: Plastic | Dimensions: 4 x 2.5 x 7 inches | Weight: 0.18 pounds | Range: Up to 15 feet

4. PetSafe Ultrasonic Remote Dog Trainer

Want to reward good behavior in your canine companion in addition to discouraging the bad ones? Then this model from PetSafe is what you need to get started. With over 700 positive ratings at the time of writing this review, we can vouch that people around the US loved it as much as we did. What does it do differently? Well, you’re in for a treat.

Despite costing more than other models reviewed in this guide, we believe this product is worth it for the good behavior tone alone. Unlike other devices that only work to deter dogs, this one comes with a relaxing sound that rewards your puppy for being a good boy. So, go ahead and use it twice as much and see what that leads to.

The bad behavior ultrasonic sound is also strong enough to deter dogs from a range of up to 30ft. This is by far the boldest claim the product makes, and we tested it out to see if it's true. Well, we wish it were, but according to our observation, the best max range is 25 feet. Beyond that, the results get a bit iffy, if you know what we mean.

This item might cost more, but it also comes with a 9V alkaline battery included. You can buy this unit with your eyes closed because PetSafe is a brand recognized worldwide for its extensive range of pet products. However, as responsible pet parents, we must remember to use devices such as this one sparsely, or else the dogs might get traumatized or familiar with the experience.

As great as this model might be, some buyers have returned it due to the ultrasound not working for their breeds. While we have tested on a couple of breeds, we cannot guarantee it will work on yours for sure, especially if it's a super exotic one. We suggest you read through the comments and then decide. Or take a chance anyway because you have nothing to lose.

Material: N/A | Dimensions: 6 x 2.5 x 7.75 inches | Weight: 0.33 pounds | Range: Up to 30 feet

5. Frienda LED Ultrasonic Dog Repeller

Now that you’ve read about our top 5 picks, let us present you with another product that can be a great addition. This Dog Repeller by Frienda is a pocket-friendly option for those who aren’t looking for the bells and whistles of models that cost $30 and above. What features does it offer to entice buyers? Let’s find out.

There are many reasons to like this product, with price being just one of them. We love the fact that you can buy this in the color yellow, which is a nice option to have because very few manufacturers are offering colors apart from the standard black. As far as user-friendliness is concerned, this product is as easy to use as others. All you gotta do is press the button.

Starting up for the first time, just open the battery cover and insert one 9V battery. If you want to use this as a flashlight too in some occasions, that’s okay too. Moreover, this device comes with a very portable shape and size, so feel free to carry it anywhere you go. We tried this at a local park one da,y and it showed results up to 20 feet, as promised.

What kind of results can you expect? Well, the company says you can prevent dogs from indulging in unwanted activities such as barking, growling, chewing furniture, being hyperactive, etc. However, Frienda also states that the ultrasonic sound this produces may not be enough for large and aggressive breeds. So, take those into account before buying.

One repeller for all dogs is a great concept indeed, but rarely does it work as expected. The one thing we wish were better is customer support. We tried reaching out through their official phone number and were always greeted by...crickets. Email, however, worked well, and we got an answer to our question.

Material: N/A | Dimensions: 4.92 x 1.77 x 1.02 inches | Weight: 0.14 pounds | Range: Up to 20 feet

6. Modus Ultrasonic Bark Control Device

At this point, it’s getting hard to differentiate between different products because these are all so well-made! This is another impressive product you must try if excessive barking is plaguing you.

Like every unit on our list, this one also produces ultrasonic frequencies at a range that’s safe for dogs-- big or small. At 25KHz, the sound is either not passive or too loud, so you can rest assured knowing it will grab any dog’s attention. The range isn’t bad either because 16.4 ft is close to or a little more than average. So, you can use this to train your dog inside or out. 

The shape is very portable, and using it is as easy as it can be. There’s an LED light to indicate the unit is switched on and emitting sound. If you don’t switch it off, the model goes into hibernation mode. To switch it off, all you gotta do is hold the power button for 10 seconds. 

The Modus Ultrasonic Bark Control Device is excellent in every way except one-- customer support. We wish that were a little better because it was quite a challenge to get in touch with them.

Material: Plastic | Dimensions: 3.7 x 1.6 x 1.2 inches | Weight: 0.18 pounds | Range: Up to 16.4 feet

7. PetSafe Indoor Bark Control Unit

As the guide gets longer and reviews get shorter, we bring you another product that doesn’t need much “talking about.” We were decently impressed with the performance of this indoor unit and think it’s worth a chance.

One advantage you have with this ultrasonic repeller is that you can use it both hand-held and freestanding. In addition, you also have the choice to set it to “Auto” or “Manual” mode; Auto mode activates the ultrasonic sound whenever your dog barks, while Manual is for correcting bad behavior at your discretion.  

It operates using a 9V battery, and it takes up to 5-6 months to get depleted--that’s impressive. Oh, this machine’s effective range is up to 25 feet, which is pretty standard. This product is not perfect, but if you plan to use it exclusively indoors, we recommend trying it out.

The only con of this unit we found is that it doesn’t have any effect on some dogs. One moment, a dog will quickly quiet down after hearing the sound, and the next, he’ll go on barking as usual. 

Material: N/A | Dimensions: 9 x 8 x 3 inches | Weight: 0.4 pounds | Range: Up to 25 feet

What is the Best Ultrasonic Dog Repellent?

Following is a comparison table, meticulously conceived to underline the key qualities of the foremost ultrasonic dog repellents. The table scrutinizes and contrasts critical features such as the material, dimensions, weight, and effective range of each product.

Product Material Dimensions Weight Range
Dog Dazer II Ultrasonic Dog Deterrent Plastic 4.5 x 2.25 x 1.25 inches 0.35 pounds Up to 20 feet
PetUlove Handheld Ultrasonic Dog Repeller ABS 5.87 x 3.11 x 1.42 inches 0.29 pounds Up to 25 feet
FIRST ALERT Bark Genie Handheld Bark Control Device Plastic 4 x 2.5 x 7 inches 0.18 pounds Up to 15 feet
PetSafe Ultrasonic Remote Dog Trainer N/A 6 x 2.5 x 7.75 inches 0.33 pounds Up to 30 feet
Frienda LED Ultrasonic Dog Repeller N/A 4.92 x 1.77 x 1.02 inches 0.14 pounds Up to 20 feet
Modus Ultrasonic Bark Control Device Plastic 3.7 x 1.6 x 1.2 inches 0.18 pounds Up to 16.4 feet
PetSafe Indoor Bark Control Unit N/A 9 x 8 x 3 inches 0.4 pounds Up to 25 feet

Buying Guide for the Best Ultrasonic Dog Repellent 

Unless you’ve owned a dog repeller before, you’re probably not very familiar with how these things work or why you might even want one in the first place. Don’t worry; in this section, we’ll explain everything you need to know about these great devices. First, let’s start with why people use ultrasonic dog repellents. 

You can use dog repellents to either scare dogs away as intended or discourage negative behavior like excessive barking, chewing furniture, growling, etc. Sure, you might be fine with a small puppy or a non-aggressive breed getting on your nerves once in a while, but what will you do when an aggressive breed such as a pitbull or rottweiler growls at you?

If things take a turn for the worse, you won’t even have time to realize you’re being stalked and risk being attacked soon. Even if you’re a “dog person” who can’t get enough of them, there’s no guarantee you’ll be able to handle an attack like that. Or if you’re generally afraid of dogs, then having a repellent would do wonders in your life.

How to buy the best ultrasonic dog repeller

We know there are many different products available from many different brands, so choosing the right fit for your needs may be difficult. Things might get especially tricky if you’re a first-time buyer and you believe paying a higher price equates to better quality. Let us tell you, that’s not the case! You can definitely get a reliable repellent under $20 if you know where to look and what to look for.

  1. Types of repellents

  • Handheld repellents: These are the most popular types of repellents because they cost less and allow you to carry them anywhere. Most of these models use either AA batteries or a 9-V battery, depending on their specifications. The products we’ve reviewed here are mostly handheld models, and there’s very little that could go wrong if you buy one of them.
  • Stationary repellers: as the name implies, these are ultrasonic dog repellers you use at a fixed place-- usually outside of the home. Stationary repellers use a PIR (Passive Infrared) sensor to detect movement in the vicinity and get triggered when the animal bypasses the set limit. These devices work well to keep away cats, rats, squirrels, possums, and other types of rodents.
  1. What animals does it repel

This might come off as a surprise, but ultrasonic repellers can scare away more than just dogs. Since they come with a variety of frequency settings, you can effectively keep away many kinds of critters. For animals like dogs, foxes, and mice, 13.5-19.5 KHz does the trick, while raccoons, skunks, and badgers can be kept away by using 19.5-24.5 KHz. 

If you have a lawn or a garden that you want to protect from these critters, then having a stationary repeller is a must! We were apprehensive about buying one at first but then put one stationary repeller in the backyard. The difference was astonishing! We would always be bothered by raccoons and bats, but they were nowhere to be found after installing the machine.

  1. Effective range

The last thing you’d want is for your repeller to fail just because you’re a little farther away than you think. That’s why it’s crucial to get a device that sticks to its promises of working up to a certain distance. Most mid-range repellers work best within 5-20 ft, but there are higher-priced variants that are effective for up to 50 ft. So, choose wisely and know your device well.

  1. If it doubles as a flashlight

Another great feature of these repellents is that you can use them as a flashlight when needed. We don’t exactly know what led the manufacturers to include these features, but it’s a welcome modification indeed. Though this feature does not work as a selling point, we believe you can put it to use at night, when animals tend to sneak up around the house.

  1. Battery type

As we mentioned before, the type of battery your ultrasonic repeller uses also plays a role in its effectiveness. Right now, most models are either powered by AA or rechargeable batteries. Although you could find solar-powered units, too, if you’re interested.

Why use ultrasonic dog repellents and not other methods?

Well, if our goal is to scare dogs away, then the best way to do so is by using ultrasonic sound. The sound emitted by these machines is safe for you and the dogs, and in no way does it cause any physical or mental trauma. You should NEVER take the path of throwing rocks, beating with sticks, or using other inhumane methods to scare or discipline your dog.

These repellents work effectively because they emit a high-frequency sound that comes off as extremely irritating to a dog. So irritating that most dog breeds will run away if they hear it. We also like the fact that these models are available in such portable shapes and sizes that anyone can carry them anywhere. Just point in their direction and press a button!

Ultrasonic repellers also work over long ranges of up to 20-25 ft, so you don’t have to take any chances. A lot of domesticated dogs are aggressive and attack due to a lack of proper training or care given by their owners, yet somehow they believe their pooch can do no wrong! In such cases, you should use ultrasonic repellers. The dog will run away, scared, and the owners won’t suspect a thing.

On what breeds can you use the repellent?

Honestly, the jury is still out on this one. We have no concrete evidence that supports any claims. Some say these machines work best on large dog breeds, but others say it has no effect on breeds other than smaller ones. There is no general consensus we can rely upon. However, we encourage you to try it out on both big and small dogs. Chances are you’ll be lucky on both counts, like we were.

For best results, we recommend you use this machine to train your dog first and scare away other dogs (if needed), second. There’s no list of breeds that you should avoid trying the repellent on; just make sure you’re not using it excessively or scaring away dogs for fun.

Why do people use ultrasonic dog repellents?

People use ultrasonic dog repellents to scare away aggressive dogs or to discourage negative behavior in their own dogs, such as excessive barking or chewing furniture. These devices emit high-frequency sounds that are irritating to dogs, causing them to run away or stop unwanted behavior.

Why use ultrasonic dog repellents and not other methods?

Ultrasonic dog repellents are preferred over other methods because they are safe for both humans and dogs, causing no physical or mental trauma. Inhumane methods like throwing rocks or beating with sticks should never be used. Ultrasonic repellents emit a sound that is highly irritating to dogs but does not harm them.

On what breeds can you use the repellent?

There is no definitive answer regarding which dog breeds ultrasonic repellents work best on. Some claim that these devices are more effective on larger dog breeds, while others suggest they work equally well on both large and small breeds. It is recommended to try the repellent on different breeds to see the results.

Can ultrasonic dog repellents double as flashlights?

Yes, some ultrasonic dog repellents come with a built-in flashlight feature. While this feature may not be a primary selling point, it can be useful for illuminating the surroundings at night when animals are more likely to approach the house.

Based on our extensive research and analysis of various ultrasonic dog repellents, three standout products have emerged as top recommendations.

The Dog Dazer II Ultrasonic Dog Deterrent is an excellent handheld device, specifically designed for deterring big dogs and offering a user-friendly experience. The PetUlove Handheld Ultrasonic Dog Repeller provides not only effective dog deterrence but also additional features for training and behavior correction.

Lastly, the FIRST ALERT Bark Genie Handheld Bark Control Device offers a more affordable option without compromising on effectiveness, making it a suitable choice for budget-conscious dog owners.

Choosing the best ultrasonic dog repeller for your needs is not rocket science! Sometimes, you just gotta take that leap of faith and make a purchase. But if you read our guide completely, you know that being informed is always better than taking a blind chance. So, go ahead and order yours now and see how it performs.

Wish you many peaceful and scare-free dog days!

French door refrigerators—with their dual upper doors and spacious bottom freezers—are some of the most popular choices for modern kitchens, combining elegant design with functional storage. Known for their wide shelves, flexible compartments, and energy-efficient features, these refrigerators are ideal for families, entertainers, and serious home cooks alike. However, with so many models offering smart connectivity, humidity control, dual ice makers, and flexible temperature zones, choosing the right one can be overwhelming. In this guide, we’ve reviewed the best French door refrigerators on the market today, highlighting top performers across design, capacity, cooling technology, and energy savings—along with a buyer’s guide to help you select the perfect fit for your kitchen space and lifestyle.

Best French Door Refrigerators

Here's the list of the 8 best french door refrigerators on the market today, perfect for adding both style and functionality to your kitchen.

1. LG LFXS26973S - Best Overall

LG fridges are some of the best, especially when it comes to these types. It wasn't surprising then that this 26 Cu. Ft. is one of the best French doors on this list.

It features a huge storage space, providing a decent number of shelves, crisper drawers, and door bins for your food. The freezer capacity also lets you have more meat inside.

Both the fridge and its freezer drawer are made with a fingerprint-resistant stainless steel finish, making them easy to maintain.

The external water and ice dispenser gives you easy access to these resources. This can encourage you to hit that eight-glasses-a-day goal.

It's also equipped with smart technology, allowing you to take control of everything from your mobile device.

It makes adjusting temperatures so much easier and even notifies you when you leave your door open for too long.

This is the best French door refrigerator for most kitchen spaces, especially if you want to upgrade your kitchen appliances.

Dimensions: 36 D x 70 W x 35 H inches | Total Capacity: 26 Cu. Ft | Installation Depth: Standard | Dispensers: Ice maker and water dispenser | Available Finishes: Stainless steel | Energy Star Certified: Yes

2. Bosch B36CL81ENG - Best Value for Money

This 20.5 Cu. Ft. French door refrigerator from Bosch is one of the most expensive on this list.

However, If you're the type who loves to organize, prefers smart technology, and want a special drawer specifically for your wine bottles, then this fridge is worth it.

This refrigerator is known for its reliable and adjustable glass shelves and dividers, helping you make the most of your storage space. You can get the freezer door open with ease as it pulls out like a drawer.

Its interior comes with efficient cooling and humidity control, helping retain freshness. It reduces odor which also helps maintain the cold air inside.

You don't need a separate wine refrigerator with this model, as it can hold up to 17 wine bottles, making it great for keeping your drinks cool. It's also great for stocking up during a party.

You can pair this refrigerator to your phone and other mobile devices, making it easier to control and monitor settings. Adjust your refrigerator temperature and interior LED lighting easily with a single tap.

When it comes to splurging for the best French door refrigerators, this Bosch fridge is the most functional one you can get.

Dimensions: 29 D x 35.63 W x 72 H inches | Total Capacity: 20.5 Cu. Ft | Installation Depth: Counter-depth | Dispensers: Ice maker and water dispenser | Available Finishes: Stainless steel | Energy Star Certified: Yes

3. LG ‎LFCS22520S - Best Budget Option

LG LFCS22520S 22 Cu. ft. French Door Refrigerator in...
  • Spacious 22 cu. ft. French Door Design This fridge...
  • Smart Cooling System with Multi‑Air Flow LG’s Smart...

If you're looking for an affordable yet high-end French door refrigerator, this 22 Cu. Ft. LG fridge is one of the best choices. Despite being cheap, it has most of the functions of the other refrigerators on this list.

Even though it has a lower capacity, it has multiple organization options, from its two crisper drawers to its Glide N' Serve and spill-proof glass shelves.

It also has a smart cooling system that keeps the temperature consistent in both the fridge and the freezer compartments.

While it's not a smart refrigerator, it does an excellent job of providing reliable food storage for your household.

It also has contoured doors and hidden hinges for a more sleek look. Unfortunately, you'd still have to clean it occasionally since it's not fingerprint-resistant.

When it comes to the best French door refrigerators, it doesn't always have to be the most expensive. Despite being the cheapest, this fridge is one of the best in the market.

Dimensions: 71 D x 38 W x 32 H inches | Total Capacity: 22 Cu. Ft | Installation Depth: Standard | Dispensers: Internal ice maker | Available Finishes: Stainless steel | Energy Star Certified: Yes

4. Bosch 800 Series B36CL80SNS

When it comes to more aesthetic choices, people usually choose a counter-depth refrigerator—this 20.5 Cu. Ft. from the Bosch 800 series is one of the best and most well-known when it comes to that.

This French-door refrigerator has many ways to organize the inside, helping you quickly find the food you need when you need them. It also comes with a separate crisp drawer for your produce.

It has a smart design for its central chiller unit, letting the fridge defrost as necessary.

Instead of having its dispensers on the refrigerator door, they're internal, so it doesn't have to disrupt the refrigerator's smooth stainless steel finish.

When it comes to the best counter-depth French refrigerator, this model from Bosch is one of the top recommendations.

Dimensions: 31.13 D x 35.63 W x 72 H inches | Total Capacity: 20.5 Cu. Ft | Installation Depth: Counter-depth | Dispensers: Ice maker and water dispenser | Available Finishes: Stainless steel | Energy Star Certified: Yes

5. Galanz GLR16FS2K16

Galanz 3-Door French Door Refrigerator with Bottom Freezer &...
  • HUMIDITY CONTROL - Includes 2 half width removeable crisper...
  • EASY TO CLEAN - 3 full width glass shelves that slide out...

If you're living in a small space, this 16 Cu. Ft. refrigerator might be ideal for you. Given its width, it also comes with a lower capacity, which is best for those living in apartments or small households.

It has a great way of organizing food through its shelves and racks. It also has an ice maker that can produce up to 3 lbs. of ice daily.

Thanks to its technology, this refrigerator is also known for being quiet and energy-saving. Keep things cool efficiently and quietly without contributing to global warming.

It has a stainless steel finish for a sleek look, maintaining aesthetics despite its small size.

Besides its capacity, its dim interior light may be a downside for people, especially those who can't see well.

This model proves that not all French door refrigerators have to be massive.

Dimensions: 28.4 D x 31.1 W x 70 H inches | Total Capacity: 16 Cu. Ft | Installation Depth: Standard | Dispensers: Ice maker | Available Finishes: Stainless steel | Energy Star Certified: Yes

6. Samsung RF27T5501SR

Samsung RF27T5501SR 27 cu. ft. 3-Door French Door...
  • 36 Inch Smart French Door Refrigerator
  • 26.5 Cubic Feet Capacity

There are several smart refrigerators on this list—however, this 27 Cu. Ft. Family Hub refrigerator from Samsung is one of the smartest ones up to date.

This refrigerator from Samsung comes with spill-proof shelves and crisper drawers that help maintain your food and keep them ready for consumption.

It also has a high freezer capacity to help you keep frozen food in top shape, especially for big households.

It has a through-the-door dispenser, making accessing your ice and water easy.

The most notable part of this refrigerator are its intelligent functions. The right door can help you access the internet for recipes, music, and other things to make food prep much more manageable.

If you're a tech-savvy family looking for a refrigerator that can double as a kitchen assistant, this French-door refrigerator is the best choice.

Dimensions: 37.5 D x 72 W x 37.5 H inches | Total Capacity: 27 Cu. Ft | Installation Depth: Standard | Dispensers: External ice maker and water dispenser | Available Finishes: Stainless steel, black stainless steel | Energy Star Certified: Yes

7. GE Profile PVD28BYNFS

GE Profile PVD28BYNFS 36" 4-Door French Door Refrigerator...
  • Large 27.9 Cu. Ft. Capacity – Spacious interior with...
  • External Water & Ice Dispenser – Provides cold filtered...

Whether you're a member of a large household or tend to shop in bulk, this 27.9 Cu. Ft. refrigerator from GE Appliances is an excellent addition to your kitchen.

It's designed with a smudge-proof stainless steel finish, making it easy to maintain and clean, especially in a household with kids running about.

The interior has plenty of shelves, door bins, and soft-close crisper drawers to keep everything organized and fresh. Its freezer capacity also lets you stock many portions of meat and other frozen goods.

It also features a door-in-door feature, making it easier to access snacks and beverages without opening the whole door. Not only does it add to your refrigerator's Cu. Ft., but it also makes the most of your space.

It even has a through-the-door dispenser, making accessing your water and ice easier without opening anything.

When it comes to large capacities, this French-door refrigerator is one you can count on.

Dimensions: 35.63 D x 36.75 W x 69.88 H inches | Total Capacity: 27.9 Cu. Ft | Installation Depth: Standard | Dispensers: Through-the-door ice dispenser and water dispenser | Available Finishes: Stainless steel | Energy Star Certified: Yes

Best French Door Refrigerators Comparison Table

French Door Refrigerators Dimensions Total Capacity Installation Depth Dispensers Available Finishes Energy Star Certified
LG LFXS26973S 36 D x 70 W x 35 H inches 26 Cu. Ft. Standard depth Ice maker and water Stainless steel Yes
Bosch B36CL81ENG 29 D x 35.63 W x 72 H inches 20.5 Cu. Ft. Counter depth Ice maker and water Stainless steel Yes
LG ‎LFCS22520S 71 D x 38 W x 32 H inches 22 Cu. Ft. Standard depth Internal ice maker Stainless steel Yes
Bosch 800 Series B36CL80SNS 31.13 D x 35.63 W x 72 H inches 20.5 Cu. Ft. Counter depth Ice maker and water Stainless steel Yes
Galanz GLR16FS2K16 28.4 D x 31.1 W x 70 H inches 16 Cu. Ft. Standard depth Ice maker Stainless steel Yes
Samsung RF27T5501SR 37.5 D x 72 W x 37.5 H inches 27 Cu. Ft. Standard depth External ice maker and water Stainless steel, black stainless steel Yes
GE Profile PVD28BYNFS 35.63 D x 36.75 W x 69.88 H inches 27.9 Cu. Ft. Standard depth Through-the-door ice dispenser and water Stainless steel Yes

What is a French Door Fridge?

A French-door refrigerator is best known for its configuration. The top half would always have side-by-side doors for the refrigerator compartment. These take up the majority of the container space.

At the bottom is usually the freezer. Most French door refrigerators feature a freezer drawer rather than a door.

Depending on the design, these refrigerators can have up to 3 drawers at the bottom. Not all of them have to be a freezer drawer.

These separate drawers can be a variation of fridge and freezer compartments, able to hold different kinds of products depending on the temperature settings.

Its configurations and combinations are flexible and almost endless, making them the dream refrigerator for many people.

They're also best known for combining style and sleekness with efficiency in keeping food fresh and providing ample storage space. It can match almost any kitchen appliance, giving you a more aesthetic kitchen.

What are the Benefits of French Door Refrigerators?

The main advantage of a French door fridge is its premium features, especially when compared to a top freezer or side-by-side models.

These standard features include custom-temperature flex drawers and a through-the-door dispenser. Depending on the manufacturer or model, they also tend to have smart features.

It's a great pick if you're looking for a large-capacity refrigerator. They tend to have wider shelves and drawers specifically for produce.

You can also find features like gallon door bins, dividers on the fridge door, and you can even add caddies to keep your refrigerator organized.

They also tend to mesh well aesthetically, matching and blending in with most kitchen interiors. That makes them easier to integrate into your kitchen design.

If you're looking for these features and don't mind spending a little extra on your refrigerator, this type is for you. Just make sure you know which features are helpful for your household.

When is the Best Time to Buy French Door Refrigerators?

Buying a new refrigerator usually depends on the lifespan of your previous one. The general timeframe for replacement is 9 to 13 years after purchase.

The lifespan can depend on how you maintain your refrigerator. Other factors, such as environment and usage, can also affect its lifespan.

If you're ready to buy a new refrigerator, see if you have the space for this type. French door models tend to need to take a lot of them.

It's also important to consider your budget when deciding if it's time to buy this kind of refrigerator.

Lastly, see if there's a need for an upgrade. A French-door refrigerator isn't the cheapest type, and there are many things to consider before investing in one.

How I test French Door Refrigerators

Besides being some of the best in rankings, I had to test these refrigerators to give an honest and reliable review.

I've listed and observed factors, which will be discussed later on, which I have tested to see if these refrigerators are genuinely the best and which households they can work with.

One of the most notable factors I looked into was capacity. Despite their size, some can have a lower Cu. Ft., which can affect how a household uses them, especially since they're expected to hold a lot of food.

Reviews by professionals and other consumers also helped me cross-reference my findings to identify discrepancies.

These reviews can be subjective, and consumers can have various experiences based on how they received the product and how it ran in their household.

Doing a lot of research on the appliance and putting in the effort and patience to test out each one gave a more objective result that helped me understand the pros and cons of each model.

Factors to Consider When Choosing a French Door Refrigerator

French door refrigerators tend to have many features which can be overwhelming to review. You might be bombarded with many details about your potential fridge when you're looking to purchase one.

That said, you can zero in on some factors when choosing your refrigerator.

These are the important things to consider when choosing a French-door refrigerator.

Material

The best French door refrigerators are built with the best materials, both with their exterior and interior.

When looking through French door fridges, it's best to consider what they're made of. See if they're made of durable materials or come with spill-proof shelves and sturdy drawers.

It's also vital to verify that any additional features are working well. Repairs and exchanges can be a hassle once you've had the refrigerator for a while.

Its exterior can have different finishes, depending on the model and brand. You can consider the following finishes for your French door refrigerator:

  • White
  • Black
  • Stainless steel
  • Matte black stainless steel
  • Black stainless steel Slate

While these are classic finishes, some brands may have more unique colors to fit their brand and motif.

Aesthetics

As mentioned, refrigerators can come in different colors, depending on the manufacturer and model.

It's important to check the refrigerator's aesthetic and ensure it matches the rest of your appliances. Once you've added the appliance, it should give your kitchen a more cohesive finish.

Note which color would coordinate with your countertops and cabinets as well.

Many would prefer a built-in finish, making the refrigerator look purpose-built to fit your interior space.

However, by getting a counter-depth refrigerator, you might have to sacrifice storage space for the sake of aesthetics.

Size and Capacity

The size and capacity of your French door refrigerator affect how it will work for you. They tend to have the largest capacity compared to the other refrigerators.

The capacity of an average French door refrigerator falls between 21 and 30 Cu. ft. The freezer space has a total Cu. ft. measurement that tends to be lower than the refrigerator space.

Consider the capacity of the freezer bin and refrigerator and how it can affect the overall size of your appliance. A counter-depth refrigerator may look hefty, but it will have lower Cu. Ft. because of its depth.

Measure all the dimensions of the space where you plan to put the refrigerator. Ensure an allowance between the appliance and the other walls and appliances.

Allowances will also make the refrigerator look like it belongs in your kitchen rather than just being wedged into a specific space.

If you think that the size and capacity of a French door design are too much for your household, you can try out a top freezer type instead. The best top freezer refrigerators tend to have more limited space for smaller households.

Energy Rating

The Energy Star Certification of a refrigerator informs the consumers if the appliance is energy-efficient. Experts try and test these because it affects the fridge's performance.

These are tested to see if they can meet high standards to help households reduce their environmental footprint.

Having an energy-efficient appliance helps you save on your electric bills. Sometimes, even if you end up with an expensive refrigerator, it can pay back dividends in the long run.

Energy Star Certified models don't have to be expensive. There are plenty of affordable models that can help you have a better impact on the environment while keeping fresh and frozen foods for your household.

Configuration

The configuration of your French door refrigerator can affect how it works in your household. You'll have to consider the versatility and usability of your interior compartments.

Even with their door, refrigerator space can still be used through door bins and can racks for additional storage. The double doors are a great way to make the most of the appliance.

Some refrigerators can also feature a door-in-door design, while others don't.

Some even allow you to lower your frozen food storage temperature, creating additional fridge space if you just had a big party.

Features

French door fridges tend to come with different features, which usually affect their price.

On top of its luxurious look, it's nice to have features that add function to your refrigerator beyond just keeping your food fresh longer.

Here are some common additional features your French door refrigerator can have.

Ice and Water Dispenser

An ice maker and water dispenser aren't usually a top priority for some people. However, it's a great feat to have, especially if you're looking to get that eight glasses of water goal going.

Some may prefer an internal ice maker and water dispenser to maintain a sleek appearance. However, opening the door to access these can be a hassle for some people.

Most tend to prefer through-the-door ice makers and water dispensers. It gives them quicker access to the ice and water dispenser without having to open their refrigerator doors.

This feature may depend on personal preference and how it can improve your household.

Water Filters

A water dispenser on a fridge usually comes with a filter to help you get fresh and clean water.

These water filters must be changed regularly to ensure you only get the best water.

Door-in-Door Design

A door-in-door refrigerator design is a great way to quickly access your food and beverages without opening your refrigerator.

This feature keeps the cool air in, helping you save energy and electricity.

Fingerprint-Resistant Finish

A fingerprint-resistant finish for a refrigerator is one way to keep your appliance sleek and aesthetically pleasing.

Most stainless steel refrigerators come with this finish, making it easier to maintain, especially for large families with children who love to play around.

Programmable Controls

Most French door refrigerators have smart technology that helps them retain temperatures and defrost the freezers as needed.

With programmable controls, you can easily adjust your refrigerator with a tap on your smartphone.

Smart Technology

Smart refrigerators, or connected refrigerators, are known for their advanced features. These features allow your refrigerator to connect to your portable devices or home assistant.

It can have sensors that help you list down what you need to buy and advanced settings that can affect temperatures inside. It can even go as far as providing entertainment in the kitchen.

Some are designed to help you see what's inside your fridge with a tap on the refrigerator door. You can find what you need without letting the cold air out.

This technology is usually seen as a luxury since it can raise the price of your refrigerator. They are best for tech-savvy households that need this technology daily.

Cost

It's no secret that French door refrigerators are some of the most expensive ones in the market. On average, buying this type of refrigerator can cost about $2,000 to $3,000.

A more high-end French door refrigerator cost can even reach up to $5,000, depending on the brand and design specs.

Additional features can also contribute to the cost of the refrigerator, especially with smart features.

It's best to have a set budget and only get the features you'll use daily when you're shopping for one.

French Door Refrigerator FAQs

  • You may have more questions about French door refrigerators.

    I’ve answered the most common questions to help you with your research.

  • What Size Refrigerator Do I Need for a Family of Four?

    A family of four with average shopping habits usually needs a 19 to 22 Cu. Ft. refrigerator.

    This capacity is usually found in other types of refrigerators. However, plenty of French door models can accommodate this range perfectly, especially those with a counter-depth design.

  • What Are the Disadvantages of a French Door Fridge?

    The most significant disadvantage of a French door refrigerator is its size. They tend to take up a lot of space, which isn’t ideal for tiny houses and apartments.

    Depending on the configuration, some can have a lower Cu. ft. measurement when it comes to freezer capacity, especially the more narrow ones.

    Since one of the defining characteristics of a French door refrigerator is how its freezer is placed, the bottom drawers tend to be useless for people who do more take-out than home cooking.

    These disadvantages are also important to consider if you want to upgrade to a French refrigerator.

  • My Top Picks

    Now that you know more about French door refrigerators, you might already be considering your next purchase.

    With the many refrigerators on this list, you need a starting point to help you decide when purchasing.

    Here's a quick recap of my top 3 picks for French door refrigerators which you can look into for your home.

    Best Budget Option - LG ‎LFCS22520S

    LG LFCS22520S 22 Cu. ft. French Door Refrigerator in...
    • Spacious 22 cu. ft. French Door Design This fridge...
    • Smart Cooling System with Multi‑Air Flow LG’s Smart...

    This 22 Cu. Ft. refrigerator from LG is proof that you don't need to spend a lot to get the best French refrigerator.

    It's able to keep your food fresh for an affordable price.

    Best Value for Money - Bosch B36CL81ENG

    If you don't mind splurging a bit, getting the most advanced French-door refrigerator on the market should definitely be considered. This 20.5 Cu. Ft. refrigerator from Bosch is one of the best.

    It may be expensive, but its functions and features make it worth the price.

    Best Overall - LG LFXS26973S

    When it comes to the best of the best French door refrigerators, this 26 Cu. Ft. model from LG is the overall favorite of many families.

    Its many features and storage options help keep your food fresh longer.

    Conclusion

    Having a French-door refrigerator can be considered a luxury. If you're interested in purchasing one, it's best to know which would best fit your lifestyle.

    This refrigerator is an excellent addition to most kitchens, especially with how much space it can provide without ruining your space's aesthetic.

    The best concrete crack fillers are designed to seal structural and surface-level cracks caused by wear, weather exposure, settlement, or heavy loads, restoring durability and preventing further damage. Concrete naturally expands and contracts over time, and if left untreated, even minor cracks can lead to water infiltration, rebar corrosion, or slab displacement. In fact, early crack repair can extend a surface’s life by up to 60%, especially in driveways, patios, and foundations. Fortunately, with today’s advanced formulations, you can now seal concrete cracks quickly and effectively, even without prior repair experience. As one materials engineer notes, “Modern sealants offer high bonding strength with low shrinkage, making them ideal for both horizontal and vertical surfaces.” Whether you're dealing with hairline fractures or deeper gaps, knowing how to repair cracks in concrete is just as important as choosing the right product. To simplify the selection process, we tested and compared a range of leading options in real-world conditions, evaluating them for flexibility, adhesion, ease of use, and durability. In this guide to the 11 best concrete crack fillers, we provide a detailed breakdown of each product’s pros and cons, helping you choose the most effective solution for your surface type and repair needs.

    Listed below are the 5 best concrete crack fillers from our list:

    • DAP Liquid Cement Crack Filler: Distinguishes itself with a speedy cure time, ease of use, and the ability to seamlessly blend with surrounding concrete, although its open shelf-life is short.
    • Red Devil Concrete Patch Filler: This provides an ideal solution for paintable surfaces and an easier cleaning process, but it may need multiple applications for wider cracks.
    • Sashco Concrete Filler: Noted for its versatility, it works great on both horizontal and vertical surfaces with strong temperature resistance, although it takes longer to set.
    • Bluestar Flexible Concrete Filler: This DIY-friendly filler stands out with high resistance to temperature changes and is an effective solution for high-traffic areas; however, the quantity might seem less considering the price.
    • DAP Concrete Patch Interior and Exterior Filler: Specialises in filling wide and deep cracks with a durable finish, but it may not blend well with the surrounding concrete material.

    So whether you're a homeowner looking to spruce up your driveway or a contractor in need of a reliable product for your next job, here's the list of the 11 best concrete crack fillers to help you get started.

    1. DAP Liquid Cement Crack Filler - Best Quick Cure Time

    The DAP 37584 Liquid Cement Crack Filler is one of the highest-rated products in its category. This crack filler is an easy-to-use product that helps permanently seal cracks in concrete and is suitable for both indoor and outdoor usage. Based on our firsthand experience, we used this in our garage and outside too, in an area where the car brings salt and chemical compounds throughout winter, a rather harsh environment.

    The DAP 37584 is an excellent product that is simple enough to use even for first-time users. It is a ready-made filler that comes in a bottle, so you don't need to mix or blend anything. This makes the crack filler very easy to use and helps save both time and effort. 

    One of the most significant advantages of this concrete crack filler over others is that it works very quickly, and doesn’t take a long time to set or cure the concrete. Your concrete floor will be as good as new within 30 to 45 minutes, or at the max, under an hour,r according to literature, while in our tests, it dried in 33 minutes.

    You can use the DAP 37854 on both interior and exterior surfaces, and it self-levels to match the gray of your concrete. It even helps to blend the repaired section with the surrounding areas of the surface it’s used on. 

    The quick-acting feature of this product is one of its most significant advantages. However, this also results in the solution drying up quickly once the filler bottle is opened. This means that you won't be able to store the product for long periods after opening it. The best way is to use the cement filler entirely after opening the bottle. 

    Size: 1 quart | Drying Time: 24 hours | Coverage: Up to 1/4 inch | Color: Gray
    1. Red Devil Concrete Patch Filler - Best for Paintable Surfaces

    For those who don't know, Red Devil is one of the biggest names in the American sealant industry. It specializes in the manufacture of high-quality caulks, sealants, adhesives, etc. The 0644 is one of the best products from the company for sealing up small cracks, gaps, and large patches in concrete. 

    Through our trial and error, we discovered that if you are looking for a “set it and forget it” crack-filling experience, the Red Devil 0644 is the most obvious choice. The premixed filler formula is suitable for cracks as well as patches and makes repairs easy and quick, seamlessly, as our tests showed. 

    One of the most significant advantages of this crack filler is that it is paintable, a great feature for indoor surfaces. You can use it to repair areas and then easily paint over them. We used this in our garage. The formula of the sealant does not react with the paint and remains stable; this is a feature that many products on the market do not offer. 

    Most concrete fillers make it highly difficult to clean the surface. However, with this concrete crack repair, cleaning the surface where you apply this product is also a straightforward process; just use soap and water. This makes the product ideal for use even in areas that tend to get dirty quickly.

    While this concrete patch filler is ideal for filling cracks and patches, larger patches require you to use the product several times as a one-time application does not provide accurate results. However, you get a superb finish after multiple applications on wide concrete cracks.

    Size: 1 quart | Drying Time: 24-48 hours | Coverage: Up to 3/8 inch | Color: Gray
    1. Sashco Concrete Filler - Best for Versatility

    Next up is a product from Sashco, a leading brand offering a wide range of home solutions. The Sashco 16210 is a highly effective product for dealing with cracks in concrete surfaces. This concrete repair product comes with a complete repair kit that makes the process of application process simple for all users.

    We have found the Sashco 16210 to be an excellent product for a wide variety of applications. It is perfect for use on sidewalks, garages, driveways, patios, and more. Again, we used it in front of the garage with great results. Besides being a multipurpose product, this crack repair sealant also offers long-lasting durability, preventing cracks from developing again, the manufacturer says.

    The Sashco sealant is a highly versatile product perfectly suitable for use on horizontal and vertical cement surfaces. Therefore, you can also use it for repairing cracks in chimneys, pillars, etc., besides the regular flat surfaces such as roads and sidewalks.

    This water-based sealant has high flexibility and is pretty resistant to strong temperature changes. You can use this crack filler on surfaces that are exposed to extreme temperatures without worrying about cracks, as the formula remains stable under excessive heat as well as cold.

    In comparison to other products on this list, this concrete crack sealant takes time to set. This might become an issue if you use it in areas that receive regular traffic. However, once the filler sets, the area is entirely indistinguishable from non-damaged regions and provides a solid, sturdy surface.

    Size: 14.8 ounces | Drying Time: 24-48 hours | Coverage: Up to 1 inch | Color: Gray
    1. Bluestar Flexible Concrete Filler - Best for High-Traffic Areas

    One of the highest-rated concrete crack-filling products online, the Bluestar Flexible Concrete Filler is an excellent product. It helps seal up cracks and crevices effectively, ensuring a smooth surface and preventing further damage to it. And you can easily apply it yourself, making it perfect for DIY uses.

    Most products available on the market for filling cracks in concrete are available in a single shade of gray. However, this crack filler is available in two different shades. This makes it easier to select the shade that matches the concrete surface where you need to apply the sealant, if you are happy enough to match your cement or concrete at home, you won't need to paint over anymore, after trialing this at home, in both shades, we failed to match the old concrete but both shades came close though.

    What’s more, the filler comes in a bottle with a nozzle that makes the application a simple and easy process. This makes it ideal for those who prefer the DIY route, as applying the filler just requires using the nozzle to pour the contents into any crack in your cement.

    Another added advantage is that the product is resistant to extreme temperature changes. You can use it on surfaces that receive intense heat or cold, and the sealant will not get damaged. 

    This sealant is an excellent product that fills up cracks in concrete very effectively. The only drawback it suffers from is getting a minimal amount of adhesive for the price. Most competing brands offer a higher quantity at similar price points.

    Size: 16 ounces | Drying Time: 24 hours | Coverage: Up to 1 inch | Color: Gray
    1. DAP Concrete Patch Interior and Exterior Filler - Best for Wide and Deep Cracks

    DAP offers some excellent products for repairing and fixing cracks in concrete. The DAP 31084 Concrete Patch Interior and Exterior is another superb product that helps you permanently seal up cracks in concrete without much effort or expense.

    We were impressed by the effectiveness with which this cement filler works after trying out this concrete filler. It perfectly fills up holes and cracks in concrete without leaving any gaps for air or moisture to enter. This ensures you get a watertight seal that holds the surface and prevents further deterioration.

    The concrete gap filler arrives in a well-packaged box that protects it from damage or exposure. Also,  the ready-made formula simply requires application on the surface, and you can easily store the crack filler to apply later as well.

    This sealant works like a charm to fill any cracks and gaps in the concrete. The crack sealer expands to fill up the cavities and dries up to offer a hard surface suitable for traffic. It even has a perfect consistency and sticks readily to all concrete surfaces, providing fast results. 

    The DAP 31084 is an excellent product, but you should keep in mind that the sealant does not blend very well with the surrounding areas. As a result, it is easy to make out the repaired area from the rest of the concrete surface.

    Size: 1 quart | Drying Time: 24 hours | Coverage: Up to 1/4 inch | Color: Gray
    1. RadonSeal Concrete Foundation Crack Repair Kit

    Among concrete crack sealants, the RadonSeal Concrete Foundation Crack Repair Kit is a must-recommend product. This concrete crack filler is one of the most effective products and utilizes innovative technology combined with scientific principles to get the job done.

    For people who don't want to spend a considerable amount on getting a contractor to fix cracks in their cement, the RadonSeal Concrete Foundation Crack Repair Kit is a good contender as the kit includes all the tools and accessories you require to fix cracks in concrete and apply the filler.

    Unlike most other products on the market, the manufacturer also provides a complete set of instructions for using the product, which is beneficial, especially for first-time users who require guidance on using the product to fix cracks and crevices properly.

    What makes this crack filler even more impressive is that it offers unmatched protection against moisture. Areas that tend to develop leaks due to condensation get completely fixed and dry up over time with this concrete filler.

    Compared to similar products, it is costly, which might put some people off from trying it out. First-time users can consider spending on a more affordable alternative, but this product is still cost-effective when compared to the cost of hiring a contractor, our research indicates.

    Size: n/a | Drying Time: 24-48 hours | Coverage: Up to 1/16 inch | Color: Gray
    1. PC Cement Crack Filler Products

    PC Products is a brand that has been offering quality home repair solutions for over 55 years, and the 72561 PC-Concrete is a perfect example of how good their products are. It not only helps repair cracks in concrete but also provides anchoring and support.

    The PC Products 72561 is a multifunctional crack repair product that is sure to exceed your expectations, thanks to its dual epoxy adhesive paste not only helps repair cracks in concrete but is also perfect for anchoring threading rods, bolts, and more into concrete.

    The concrete crack filler offers the added benefit of being applicable to dry and wet surfaces, making it ideal for damp environments. Additionally, it does well when used on vertical surfaces or cracks, making it suitable for walls, chimneys, etc.

    One of the features that sets it apart from most sealants is that the filler does not leave behind a mess; just leave it to set after filling in the required cracks, and the filler won't leave behind any residue. You can easily use it without worrying about cleaning up afterward.

    While this product provides excellent results without a doubt, it requires some effort for proper application. Getting the sealant out of the tube requires the right tools, and applying it to concrete surfaces requires some prior knowledge and expertise.

    Size: Varies | Drying Time: 24-48 hours | Coverage: Varies | Color: Gray or white
    1. Rust-Oleum Epoxy Shield Concrete Patch and Repair Kit

    Rust-Oleum 301012 is an exceptional product for sealing and repairing cracks in concrete. It is a two-part industrial-strength epoxy that bonds with the concrete permanently. This makes it one of the best choices for a highly effective and permanent solution to fill concrete cracks.

    Based on our firsthand experience, the Rust-Oleum 301012 turned out to be one of the most effective products on the market. It not only repairs cracks in concrete but also creates a surface that is harder than regular concrete. This concrete filler provides durability and prevents further damage.

    Apart from this, the crack filler is easy to use. You simply need to mix both epoxy parts in the quantity desired and apply them to the cracks in the concrete. The sealant will quickly adhere to the surface and fill the gaps, even entering hard-to-reach crevices. 

    As it sets fast, you do not need to worry about not using the surface for an extended period. Additionally, the repaired surface will look better than one with vinyl concrete patch compounds.

    Like most products on this list, this sealant can withstand a reasonable variation in temperature. However, in extreme heat or frost, cracks tend to develop over time on the concrete. As such, should apply this product in areas that are not susceptible to extreme temperatures.

    Size: 24 ounces | Drying Time: 4-6 hours (foot traffic after 24 hours) | Coverage: Up to 1/2 inch | Color: Gray
    1. Damtite Concrete Crack Filler

    The Damtite 04072 comes from one of the leading manufacturers of repair and restoration products. It is the ideal solution for repairing cracks in concrete surfaces such as driveways, sidewalks, etc., while also providing a permanent waterproof finish.

    You will be very impressed by the quality of the Damtite 04072 Concrete Super Patch Repair. It comes as a 6 lb powder and a 1-pint bonding liquid that you need to mix for applying to the concrete. The liquid and powder blend to create a solid and durable surface.

    The waterproof mortar is suitable for patching, repairing, or resurfacing. It works well on concrete, masonry, stucco, and brick, and sticks to glass, steel, aluminum, and wood, enabling you to use it for several different purposes.

    We also liked the fact that it sets fast and looks great after setting. The fast-curing property allows it to be used on concrete surfaces that receive heavy traffic, and the repaired concrete surface will become usable within a day once you leave it to set.

    While this product works well and quickly, you may face some inconvenience if you store the filler and try to use it later. It has a short shelf life and becomes unusable within a short period after being opened. So, you need to use it quickly before that happens.

    Size: 1 gallon | Drying Time: 24 hours | Coverage: Up to 1/4 inch | Color: Gray
    1. Dalton Enterprises Crack Repair

    If you are looking for an effective concrete crack filler, you must check out the Dalton Enterprises 36099. It is a contractor-grade thermo-plastic waterproof rubber that is ideal for concrete or asphalt cracks and works well to seal up cracks in concrete without requiring too much effort.

    We maintain a constant effort to find products that are easy to use even for first-time users. To that end, we have mentioned several products that either come ready-made or are simple to mix. The Dalton Enterprises 36099 is one of the most accessible products despite falling into neither of the above categories.

    The application process requires melting the product using a propane torch and pouring it into the necessary cracks. It fills up these cracks to create a watertight seal, leaving behind a solid surface. You can undertake the application process on your own without requiring extra help.

    While similar products tend to damage the surface if over-applied, this sealant has no such drawbacks. You can apply it again on the same spot to improve the smoothness or finish of the surface; multiple applications do not reduce its quality or finish.

    The Dalton Enterprises 36099 is overall an excellent product that fills up cracks in concrete very effectively. However, it does not leave behind a professional-looking surface and is only suitable for areas that do not require a clean look.  

    Size: n/a | Drying Time: 24-48 hours | Coverage: Up to 1/4 inch | Color: Gray
    1. GetSet2Save Hairline Crack Sealer

    This list would be incomplete without mentioning the GetSet2Save Hairline Crack Sealer. As the name suggests, this product specifically helps fix hairline cracks and leaks without requiring a lot of effort. It is suitable for use on several surfaces, including sidewalks, stairs, floors, walls, etc.

    This crack filler is a super-thin formula that works by capillary action to reach the source of the crack. You just need to apply the sealant at the point of damage, and it will seal up hairline cracks perfectly. It’s also resistant to sunlight and provides long-lasting results on large concrete cracks.

    One of the best qualities of this product is that it can enter even the tiniest crevices, where other sealants may not reach. It is what makes it suitable for such cracks that are barely visible to the naked eye.

    Besides concrete, you can also use it on other surfaces, including porcelain, window sills, asphalt, etc. No other product offers results that are close to what you get from this sealant when it comes to fixing hairline cracks.

    This product works like a charm for small cracks and crevices, sealing them up permanently. Where it fails to work are areas that have larger cracks or gaps. The thin formula is unsuitable for large patches or cracks and tends to seep through them.

    Size: 1 quart | Drying Time: 24 hours | Coverage: Up to 1/2 inch | Color: Gray

    What is the Best Concrete Crack Filler?

    This section provides a clear comparison of leading concrete crack fillers. The table below outlines key specifications for each product, including size, drying time, coverage, and color.

    Product Size Drying Time Coverage Color
    DAP Liquid Cement Crack Filler 1 quart 24 hours Up to 1/4 inch Gray
    Red Devil Concrete Patch Filler 1 quart 24-48 hours Up to 3/8 inch Gray
    Sashco Concrete Filler 14.8 ounces 24-48 hours Up to 1 inch Gray
    Bluestar Flexible Concrete Filler 16 ounces 24 hours Up to 1 inch Gray
    DAP Concrete Patch Interior and Exterior Filler 1 quart 24 hours Up to 1/4 inch Gray
    RadonSeal Concrete Foundation Crack Repair Kit n/a 24-48 hours Up to 1/16 inch Gray
    PC Cement Crack Filler Products Varies 24-48 hours Varies Gray or white
    Rust-Oleum Epoxy Shield Concrete Patch and Repair Kit 24 ounces 4-6 hours (foot traffic after 24 hours) Up to 1/2 inch Gray
    Damtite Concrete Crack Filler 1 gallon 24 hours Up to 1/4 inch Gray
    Dalton Enterprises Crack Repair n/a 24-48 hours Up to 1/4 inch Gray
    GetSet2Save Hairline Crack Sealer 4 ounces 24-48 hours Up to 1/16 inch Clear

    Buying Guide for the Best Concrete Crack Filler

    Our list of the best concrete crack fillers is meant to help you find the right product that meets your requirements. 

    However, selecting the product that is perfect for you from among several choices is a challenging task. Several factors need to be considered in this regard, such as durability, effectiveness, price, etc.

    Hence, we’ve compiled this comprehensive buyer's guide to help simplify selecting the ideal concrete crack filler. It covers all the crucial aspects that should be taken into account while making a purchase. 

    Read on to learn more about crack repair products.

    1. Crack Filler Ease of Use

    The foremost factor to consider while selecting a concrete crack filler is how easy it is to use. For most cracks that develop in your home, an ideal product should not require too much effort or assistance from other parties. It should involve a simple process to apply the filler, and you should be able to apply it on your own. 

    This factor is relevant if you want to perform the repair work without needing to hire a contractor for the same. If expert assistance is an option, then simply select the most effective sealant available.

    1. Sealant Durability

    Another prominent factor that needs to be considered is how long the product lasts. In general, most crack fillers last several years, and some even last a lifetime. While selecting a crack filler, you should check the reviews to find out whether the product requires frequent reapplication or not. 

    Durability is also affected by the location and use of the surface. For instance, surfaces such as driveways witness more heavy traffic than sidewalks and need to be more durable. 

    1. Crack Filler Versatility

    Several manufacturers offer products that are suitable for a variety of surfaces and materials. Depending on your requirements, you can choose a multipurpose product that works well on a single surface, like concrete. 

    Multipurpose sealants can also be used on wood, asphalt, porcelain, glass, marble, etc. Generally, it is better to select a multipurpose sealant as it allows a wider scope of applications. 

    1. Time Required for Repair and Curing

    Different concrete fillers require different amounts of time to set correctly. It is better to select products that are set fast for areas that frequently see heavy traffic. On the other hand, relatively traffic-free areas do well with products that have a longer curing time.

    The amount of time that the product takes to cure also affects the amount of time available for manipulating and adjusting the surface. A longer curing time provides a longer period for adjustment and vice versa. 

    1. Sealant Temperature and Weather Resistance

    You need to consider the effect of the weather and temperature on the surface that requires fixing. Several concrete crack fillers are highly resistant to strong changes in temperature and are also waterproof. These are suitable for areas that are exposed to such elements. 

    On the other hand, you can easily use crack fillers that are not waterproof or weather-resistant in areas that are not exposed. Since these areas are sheltered from heat, moisture, frost, etc., the sealant will provide excellent results.

    Can sand be used to fill concrete cracks?

    While it is possible to use sand or emulsified sand as fillers for the lower depths of concrete cracks, it is often not the best choice. Sand tends to wash out easily, lacks durability, and does not adhere well to the concrete. Additionally, sand alone cannot effectively address the root cause of the damage, which is often due to water seeping into the cracks, freezing, and expanding the rupture. Consequently, using sand on the upper layers of cracks is not advisable as it could result in joint failure.

    How can I repair crumbling cracks on the sides of a cement driveway?

    The edges of driveways are particularly susceptible to damage due to heavy vehicular traffic. To repair these cracks, start by thoroughly cleaning the cracks and then applying a suitable concrete crack filler. In some cases, you might need to use two products together, such as quick-setting cement along with an acrylic fortifier, to effectively mend the damage.

    What is the process to apply concrete crack filler in deep cracks?

    To effectively fill deep concrete cracks that are approximately 1/2 inch deep and about 1/8 inch wide, caulking may be sufficient. For even deeper cracks, merely using high-quality caulk won't be adequate. Instead, line the deep cracks with a foam backer rod, using a putty knife to push the backer into the crack until it sits at least 1/4 inch below the crack's surface. Once this is done, proceed by applying caulk on top to prevent the filler from sinking once it dries.

    When should I be concerned about cracks in concrete?

    Concrete floors are prone to cracking. However, if the cracks change configuration and become vertical, it's a good indication to start showing concern. As a rule, a handful of cracks in concrete are not unusual, nor are they indicative of significant structural damage, as they can be caused by factors such as climatic conditions or the rate of evaporation during the drying process.

    What are the different types of structural and non-structural foundation cracks in concrete?

    Structural foundation cracks in concrete typically result from poor soil bearing, overloading, or substandard construction sites. Examples of such cracks include stair-stepping cracks, vertical cracks that are wider at either the top or bottom, and cracks on foundation beams and slabs. Meanwhile, non-structural foundation cracks occur due to climatic influences, moisture, hydrostatic pressure, and aging. They do not compromise the structural integrity of your property and commonly manifest as narrow, vertical, or diagonal cracks, as well as cracks on plaster.


    The best mini freezers offer compact, efficient cold storage for homes, dorms, RVs, offices, and small apartments, making them an excellent choice when space is limited but freezer capacity is still essential. Whether you're preserving frozen meals, breast milk, leftovers, or ice for travel, mini freezers provide the convenience of standard freezers in a smaller footprint. Their portability and energy-efficient performance make them ideal for tight spaces, backup storage, or supplemental freezing during camping trips and events. From upright units to chest-style designs, modern mini freezers come in a variety of sizes, capacities, and features, including reversible doors, adjustable thermostats, and fast-cooling systems. In this guide, we’ve reviewed the 7 best mini freezers across different categories—evaluating their energy efficiency, internal storage layout, noise levels, and ease of use—to help you find the perfect model that fits your lifestyle and space constraints.

    Best Mini Freezers 

    As I've mentioned, there's a wide selection of mini freezers on the market today, and choosing one can be difficult to begin with.

    To help you with this, I've already done the hard part, and below is the list of the best mini freezers to store your frozen essentials.

    1. Best Overall: Midea WHS-109FW1 Upright Freezer, 3.0 Cubic Feet

    Midea WHS-109FW1 Upright Freezer, 3.0 Cubic Feet Mini...
    • [Large Capacity] With a capacity of 3.0 cubic feet, Midea...
    • [Adjustable Temperature Control & Fast Cooling Design]...

    If you're hunting for the best portable freezers on the market, the Midea WHS-109FW1 Upright Freezer ranks as the best mini freezer on my list.

    This mini fridge packs a punch despite its size; the wire shelves at the back are great for a few frozen essentials, and the reversible freezer door hinge allows you to open this small freezer either left or right.

    Its temperature control is great too! It will have a consistent temperature and cold storage, and you'll be surprised by the extra space it can hold!

    In addition, it is also energy-star certified, which cuts down the cost significantly, as most models with these certifications use up less energy in the long run.

    This small freezer is a great addition for owners with small spaces and students living in dorm rooms. It is the perfect mini fridge to store your frozen foods.

    Type: Upright | Capacity: 3.0 Cubic Feet | Temperature Range: Not specified | Frost Type: Manual Defrost

    2. Best Value: Whynter 2.1 Cu. Ft. Cuf-210SS Stainless Steel Upright Freezer with Lock

    The Whynter 2.1 Cubic Feet Stainless Steel Upright Freezer is small enough to fit on any countertop or convenient location at home. It has a capacity of 2.1 Cubic Feet, more than enough to store bigger and bulkier items.

    In addition, this mini freezer has many convenient features, such as having an energy-star rating, an adjustable thermostat, removable shelves, and many more.

    What I liked the most about this product is its recessed handle, which adds to the mini freezer's convenience.

    This freezer might be the best option for users who want an extra fridge. It also comes with a cylinder lock with two keys which allows you to have peace of mind knowing your kids can't access this mini fridge.

    From the outside, it looks pretty sleek and compact. The only drawback I found is it needs to be manually defrosted as frost builds up more quickly than I imagined.

    Type: Upright | Capacity: 2.1 Cubic Feet | Temperature Range: -10° - 2 Fahrenheit | Frost Type: Manual Defrost

    3. Best Countertop: Whynter CUF-110B Energy Star 1.1 Cubic Feet Upright

    Whynter Upright Small Freezer Mini Freezer with Lock for...
    • Small Upright Freezer: Ideal for any small space where cold...
    • Flexible Food Storage: This small stand-up freezer features...

    The Whynter CUF-11oB is one of the smallest mini freezers I have ever come across in my life. However, don't let this mini fridge fool you!

    This mini freezer features a reversible door that allows you to customize the direction depending on the layout of your house. It operates at a respectable 42-decibel level, which is good enough.

    Also, it has one removable wire shelf to organize frozen foods. This product is by far the best mini freezer with 1.1 Cubic Feet of storage space, and it doesn't feel like it.

    It has enough refrigerator space while keeping the footprint to a minimum, which is ideal for students living in a dorm room. The removable shelf allows you to organize essentials easily.

    This mini freezer passed with flying colors based on my tests and criteria.

    Type: Upright | Capacity: 1.1 Cubic Feet | Temperature Range: -2 to 10 degrees Fahrenheit | Frost Type: Manual

    4. Best Portable: AstroAI Portable Freezer 12 Volt Car Refrigerator

    AstroAI 12 Volt Car Refrigerator, 12V Portable Freezer...
    • HIGH CAPACITY: Our heavy-duty 12 volt refrigerator boasts an...
    • FAST COOLING: With its powerful compressor, the car...

    If you're looking for a portable freezer for your outdoor activities, the AstroAI Portable Freezer 12 Volt Car Refrigerator is the first choice when it comes to this.

    While I don't recommend this mini freezer as your staple freezer, this can serve as a mini freezer during outdoor getaways.

    What's more impressive is that you can hook it up to your car battery, and this car refrigerator can provide plenty of freezer space in the wilderness.

    It has the perfect storage space to keep your frozen food from spoiling in the jungle while keeping your drinks cold.

    This mini fridge can be powered in three ways, an electrical outlet, a 12- or 24-volt car cigarette lighter, or a 12-volt accumulator battery.

    Type: Portable freezers | Capacity: 15 liters | Temperature Range: -4 and 68 Fahrenheit | Frost Type: Manual defrost

    5. Best With Refrigerator: Frigidaire Mini Fridge with Built-In Freezer

    Any homeowner looking for a mini freezer attached to a refrigerator should consider the Frigidaire Mini Fridge with Built-In Freezer. It has a total storage space capacity of 3.1 cubic feet, which is more than enough.

    As I've mentioned, this mini freezer comes with refrigerator features. The refrigerator part features a pull-out drawer and two shelves to organize perishable items easily.

    The freezer option keeps food frozen for long periods.

    Another feature I was impressed about is that the freezer and fridge have a mechanical temperature control individually, which allows you to set different temperatures for both compartments.

    Type: Upright | Capacity: .9 (freezer) 3.1 (refrigerator) cubic feet | Temperature Range: -8 degrees Fahrenheit | Frost Type: Manual defrost

    6. Best Compact: Danby Designer

    The Danby Design Compact Freezer has one of the best mini freezer interior designs one could find on the market today. Despite its small capacity, the insides have adjustable shelves that make storing items a breeze.

    While the exterior leaves something to be desired, the internal design will truly amaze you. This freezer has adjustable temperature controls and features a beverage dispensing mechanism.

    Ice buildup is a common problem that most freezer owners tend to experience. However, that's not the case with this freezer. It has an automatic defrosting feature that prevents ice build-up on the freezer door.

    Furthermore, this freezer is energy-star compliant, which helps cut down electricity costs in the long run. This mini freezer is the best freezer for beverage lovers.

    Type: Chest Freezer | Capacity: 3.8 Cubic Feet | Temperature Range: 0 to 110 Fahrenheit | Frost Type: Automatic

    7. Best Under Counter: hOmeLabs Under Counter Mini Refrigerator with Small Freezer

    This freezer features an aesthetically pleasing design that will make your head turn the moment you see it.

    What I'm impressed with the most is that despite its size, it feels a little roomy inside. Three different temperature settings allow you to turn it to minimum, medium, or max.

    Its sleek black interior adds elegance to any part of the house. The interior light is bright enough to make your goodies visible even in the dark.

    Type: Upright | Capacity: 2.4 Cubic Feet | Temperature Range: Not specified | Frost Type: Mechanical

    Quick Comparison Of Top Mini Freezers

    Top Mini Freezers Type Capacity Temperature Range Frost Type
    Midea Upright Freezer Upright 3.0 Cubic Feet Not specified Manual Defrost
    Whynter Stainless Steel Upright Freezer Upright 2.1 Cubic Feet -10° - 2 Fahrenheit Manual Defrost
    Whynter Energy Star Upright 1.1 Cubic Feet -2 to 10 degrees Fahrenheit Manual Defrost
    AstroAI Portable Freezer Portable freezers 15 liters -4 and 68 Fahrenheit Manual defrost
    Frigidaire Mini Fridge Upright .9 (freezer) & 3.1 (refrigerator) cubic feet -8 degrees Fahrenheit Manual defrost
    Danby Designer Chest Freezer 3.8 Cubic Feet 0 to 110 Fahrenheit Automatic
    hOmeLabs Under Counter Mini Refrigerator Upright 2.4 Cubic Feet Not specified Mechanical

    What Should You Look For in a Mini Freezer?

    Before anything else, you need to keep things in mind to have the right mini freezer for you. Here are some features you must look for when buying a mini freezer.

    Size and Capacity

    A mini freezer isn't intended solely to work as a traditional refrigerator. They are small enough to be placed in compact spaces.

    And because they are called "freezers," they are best used for keeping foods frozen. How much space will depend on what is its intended purpose?

    The size you should get depends on how much food you will place inside. If you have a big family, then I wouldn't recommend a freezer of this size. Chest freezers are the best choice.

    Going back to size and capacity, if you only store a few essentials and have a small space, you can rely on a mini freezer to keep your food, fruits, and veggies frozen.

    However, if you have a big family and a large space, you can look up chest or upright freezers, as their primary purpose is to store bulkier items and valuables.

    If you feel that you want bigger storage, you might want to look for upright freezers for the job.

    Manual vs Automatic Defrosting

    Regardless of freezer type, a freezer needs defrosting to avoid ice buildup. For comparison, a manual defrosting freezer is harder to maintain as it requires removing all your essentials while melting the ice away.

    On the other hand, automatic defrost removes this tedious process and doesn't experience ice build-ups, but is significantly priced higher than its counterparts.

    If you have the money, I recommend an automatic defrosting freezer as it's easy to maintain and doesn't require you to do the aforementioned tedious process.

    Garage-Ready Design

    If you plan to put your freezer in your garage, I must warn you that only a few freezers operate under extreme temperatures.

    Not all freezers can do well with fluctuating temperatures on the opposite side of the spectrum.

    But if you plan to store your freezer in the garage, look for a freezer that says "Garage-ready." This type of freezer is specially made for these kinds of scenarios.

    You might want to check the best refrigerators with garage-ready features!

    Standout Features

    You want a mini freezer, in the first place, because of its features and how they will benefit you once you purchase one!

    It is important to know what features you want in a mini freezer so that this expensive investment will provide you with returns and benefits!

    Additional standout features can help you choose the right freezer for you. Here are some features you'd wanna look out for before buying your option:

    Defrost Drain

    While these are known only as bells and whistles, having a defrost drain can make your life easier if you have a manually defrosting freezer.

    Having an exit point when the water has accumulated due to condensation is a great way to keep your freezer running. More often than not, freezers with automatic defrosting features have this feature.

    You might want to store your frozen goods as airtight as possible to avoid freezer burn.

    Indicator Light

    An indicator light bulb tells the owner the freezer is functioning and plugged in.

    While this is not customary, it can clarify whether your freezer works properly. Fortunately enough, almost all freezers have this feature.

    Reversible Door

    A freezer with a reversible door and adjustable legs makes the entire experience more convenient. A chest freezer doesn't have this feature because its hinged lid is on top.

    Most upright freezers have this feature and create the flexibility of having your door swing to the left or right. This feature is not a must, but if it comes with it, you'll be happy to have it.

    Glass Shelves

    Many glass shelves in your freezer can help you organize and categorize all your stored food. A removable shelf can also work wonders if you plan to store bigger, bulkier items.

    Mini Freezer FAQs

  • You might find the answers below if you have additional questions regarding mini freezers.

  • What Is the Smallest Freezer You Can Buy Right Now?

    As you’ve seen on my list, mini freezers come in various shapes, sizes, and features.

    In addition, you can’t compare mini freezers to portable freezers. The smallest freezer you can buy should not exceed below .8 cubic feet; anything below that, and you will store small items.

  • Do Mini Freezers Consume a Lot of Electricity?

    A mini freezer uses less electricity than your traditional refrigerators. They are smaller and can only store food based on their limited capacity.

    Fortunately, most mini freezers today are energy certified, which means they use less energy while storing your frozen items at an optimal level without spoiling.

    I highly recommend you opt for products with energy-star certifications to ensure you will cut down on electricity costs in the long haul.

    If you want to save electricity with some of your other appliances like your electric kettles, you can check out which electric kettle is best for you!

  • Are Frost-Free Freezers Better Than Mini Freezers?

    This is a matter of personal preference. If you’re after convenience, you would want a frost-free freezer as you don’t have to defrost your freezer manually.

    But a mini freezer will be enough to keep your items frozen if you don’t have the budget.

  • Are Mini Freezers Quiet?

    It depends on the product. To give you a good idea, read the manufacturer’s manual and check the decibel level in which the freezer operates.

    Most operate around 40 decibels, which is quiet enough to sleep soundly. In most cases, energy-efficient models have a quieter operation than others that aren’t energy-certified.

  • What Size Mini Freezer Should I Get?

    Again, this is a matter of personal preference and intended use. Consider the number of items and food you will store inside and where your freezer is placed.

    In addition, you have to decide whether it would serve as a supplemental freezer or your sole freezer at home.

  • Summary of Top Picks

    Here's a quick summary of my top picks.

    Best Countertop: Whynter CUF-110B Energy Star 1.1 Cubic Feet Upright

    The Whynter mini freezer is the best option for you if you are looking for a mini freezer that goes well as a countertop!

    It has a great balance of storage and capacity. Great for storing frozen items and has the convenience that most freezers can't offer.

    Best Value: Whynter 2.1 Cu. Ft. Cuf-210SS Stainless Steel Upright Freezer

    The Whynter Freezer is the best value as it hits the sweet spot of functionality, performance, and storage. Not a lot of products can rival this one within the price point.

    Best Overall: Midea Upright Freezer

    There's no question that the Midea WHS-109FW1 Upright Freezer is a top pick. It has a large storage capacity, low operating noise, and removable shelves that can make your life easier when storing frozen goods.

    Conclusion

    Getting the right freezer for the intended purpose can be overwhelming due to the number of reputable brands and products in the market.

    However, this list should give you plenty of options, and they are great in their way.

    Before you head out and purchase, always read some of the things you need to consider before buying one. If you are looking for a decent chest freezer, check out the best chest freezers available!

    Related Articles

    13 Safest Electric Kettles without Plastic

    11 Best Portable Pizza Oven

    5 Best 24-Inch Gas Range

    Vitamix 5200 vs Vitamix 5300

    7 Best Spice Grinder

    11 Best Small Crock Pot

    13 Best Electric Kettles

    13 Best Small & Compact Microwave

    5 Best Lunch Boxes and Coolers for Construction Workers

    7 Best Hand Crank Ice Cream Makers

    9 Best Soaps and Cleaners for Construction Workers

    13 Best Cappuccino Makers

    NutriBullet vs. Vitamix

    11 Best Broiler Pan

    13 Best Molcajete

    11 Best Zoodle Maker

    8 Best Apple Peeler

    The best asphalt crack fillers are formulated to seal pavement damage, stop moisture intrusion, and extend the life of your driveway by preventing minor cracks from expanding into larger structural issues. Even the smallest surface fissure can grow rapidly due to seasonal freeze-thaw cycles, traffic, and UV exposure. In fact, crack filling is known to extend pavement life by 6 to 20 years, making it one of the most cost-effective asphalt maintenance practices available. Homeowners increasingly prefer these affordable, easy-to-use products over costly contractor repairs. As one asphalt maintenance expert puts it, “Addressing cracks early is the single most effective way to prevent potholes and preserve surface integrity.” With multiple formulas on the market—from rubberized cold-pour fillers to fast-drying liquid sealants—selecting the right one can be overwhelming, especially for new users. That’s why we’ve reviewed the 10 best asphalt crack fillers, evaluating performance across drying time, flexibility, weather resistance, and application ease. And for those repairing concrete instead of asphalt, be sure to check out our guide to the best concrete crack filler for the right solution.

    Listed below are the best asphalt crack fillers:

    • Red Devil Acrylic Asphalt Crack Filler: The Red Devil asphalt crack filler adheres to damp surfaces and creates a tight seal over cracks, providing superior performance compared to Henry. Its smaller quantity may not be sufficient for larger cracks.
    • Henry Driveway Elastomeric Emulsion Crack Filler: This crack filler by Henry is excellent for filling wide cracks and can withstand high temperatures. The application can be messy compared to more controlled options like the Red Devil.
    • Bluestar Flexible Asphalt Crack Filler: Bluestar asphalt crack filler excels in its ability to withstand extreme temperatures. It's made to fill larger cracks up to an inch. Its higher price may be a deterrent when compared to more budget-friendly options.
    • Aquaphalt Permanent Asphalt Repair: The Aquaphalt crack filler scores high on the environmental front because it's free of harmful chemicals. It dries well even in freezing temperatures, which makes it more durable than Bluestar. The application might be less beginner-friendly.
    • EWT Asphalt Crack Sealer Hot-filler Tape: An asphalt filler that stands out for its unique tape adhesive form, excellent for sealing wider cracks. Unlike the Aquaphalt, it can't be set in wet conditions, limiting its use to sunny days only.

    1. Red Devil Acrylic Asphalt Crack Filler - Best for Easy Application

    This polymer-based crack filler is especially recommended for those who lack prior experience working on asphalt surfaces. The Red Devil Acrylic Asphalt Crack Filler is a favorite for many people due to its easy application, so let's check out its other features. 

    If you're looking for an easy-to-apply asphalt driveway crack filler, look no more as the Red Devil acrylic filler will deliver optimum performance, thanks to its polymer and rubber formula. It comes in a caulking tube, so all you need to do is install it in a caulking gun, snip the tip, and apply the filler into the cracks. 

    What's best is that this filler can adhere to damp surfaces and you won't need to worry about cleaning the driveway. The polymer-based formula also makes it quite flexible, as the filler can withstand the regular contraction and expansion of asphalt without cracking or splitting. 

    Plus, it forms an extra tight seal over cracks, ensuring that no moisture can seep inside to prevent further damage to the asphalt.

    No doubt, this Red Devil crack filler is one of the best asphalt crack fillers that are currently available. However, we felt that the brand could have included a bit more filler for the price, which would have helped fill larger cracks. 

    Color: Black | Quantity: 1 Tube | Resistance: Resists Water, Weather, Cracking

    2. Henry Driveway Elastomeric Emulsion Crack Filler - Best for Large Cracks

    Want to fill all the cracks on your driveway in one go? If yes, check out this driveway elastomeric emulsion from Henry that comes in a gallon jug. This affordable filler can be used to fill minor and deep cracks on your asphalt driveway without much hassle or help from a professional. 

    The Henry driveway elastomeric emulsion crack filler is an elastomer-modified asphalt-based formula that's blended with rubber polymer for high flexibility. Thus, the filler is able to withstand extreme pressure and temperature changes without cracking or peeling, making it suitable for use in high-traffic areas. 

    Added to it are adhesion-promoting polymers for forming a stretchable and flexible seal after drying to resist weathering for a long time. We also like that this filler can be directly poured from the bottle, so you won't need to worry about any additional prep work. 

    It's able to fix cracks up to half inches wide, just make sure to fill wide cracks with sand before pouring the filler for a tighter seal. 

    Overall, this is a really good product for filling cracks on an asphalt driveway but the application can be a bit messy. The product tends to seep out of the cracks if you lose control and apply too much filler. 

    Color: Black | Quantity: 1 Bottle | Resistance: Resists Water & Weather, Withstands High Temperatures

    3. Bluestar Flexible Asphalt Crack Filler - Best for Extreme Temperatures

    Is your cracked driveway or pavement exposed to extreme temperatures? If yes, you will definitely like the Bluestar Flexible Asphalt Crack Filler that can withstand hot and cold temperatures. Plus, the asphalt finish makes the filler seamlessly blend with the surface you're looking to repair. 

    One of the problems faced by homeowners is that most asphalt crack fillers are meant for cracks up to half inches wide. There's no need to worry, as Bluestar has formulated this product to fill cracks of up to an inch. During application, the filler may feel a bit thin but be assured that the product gets thick on drying to prevent further damage. 

    We really like how easy it is to apply this filler, thanks to the narrow nozzle, which lets you fill cracks of all widths. You'll need no extra tools for application, and with no rain for 24 hours, the filler will dry within a day.

    This filler can also be applied in layers, which is excellent for fixing large cracks without worrying about peeling or cracking. 

    To be honest, there’s nothing to complain about this asphalt crack filler as it's an excellent product. However, we found it to be a bit expensive compared to other options, which isn’t a major issue per se. You will just need to buy a couple of bottles extra to fill wider and deeper cracks, so plan your expenses accordingly. 

    Color: Black | Quantity: 1 Bottle | Resistance: Withstands Hot & Cold Temperatures

    4. Aquaphalt Permanent Asphalt Repair - Best for Eco-friendly Use

    Aquaphalt is an innovative crack filler that's preferred by both residential and commercial users. Unlike other products, it can be used with just water, and you can fill the cracks or potholes almost immediately. This one-time fix is said to last longer than petroleum-based cold patches available on the market. 

    What impressed us the most was that this asphalt filler can be used for filling potholes, driveways, and roads. And you can use it anytime, irrespective of the weather conditions. Unlike other asphalt-based products, this product manages to dry without any trouble, even in below-freezing temperatures. 

    We especially appreciate the environment-friendly formula that is free from harmful chemicals and VOCs. You can safely work with it without needing to worry about inhaling toxic fumes. 

    Furthermore, the brand provides detailed instructions on fixing damaged roads or driveways to make the application process hassle-free. You only need to use water to activate this patching material and tamp it into place. This makes the process economical compared to other options without needing any special tools or additives for application. 

    The Aquaphalt permanent asphalt crack filler is definitely a user-friendly product, but we won't recommend it to absolute beginners. You will need to have some experience in fixing similar surfaces to properly apply the filler and achieve a smooth finish. 

    Color: Black | Quantity: 1 Bucket | Resistance: Withstands Freezing Temperatures

    5. EWT Asphalt Crack Sealer Hot-filler Tape - Best for Wide Cracks

    The EWT asphalt filler tape is a unique product that is much more pliable than the usual rope fillers available on the market. With a width of two inches, this tape is suitable for fixing wide cracks to prevent further damage to your asphalt or concrete driveway, so let's check it out!

    Most people complain about the mess created by liquid asphalt crack fillers. So, EWT has introduced these self-adhering asphalt crack repair tapes as an alternative for providing an easy and mess-free driveway repair experience. 

    All you need to do is take off its backing, lay the tape on the crack, and heat it with a large heat gun. This will melt the filler and help create a permanent bond with the asphalt. 

    Moreover, the rubberized formulation of this tape ensures that it forms a tight waterproof seal to protect the underlying layers of asphalt from moisture damage. And it doesn't crack or peel on coming in contact with other sealants, so you can safely seal coat your driveway. 

    As you might have figured out, these asphalt crack-filling strips need to be set in place using a propane gun. That means you will need to wait for a sunny day to seal your driveway cracks with this product but it can resist water once it’s set.

    Color: Black | Quantity: 1 Roll | Resistance: Waterproof

    6. EcoClean Asphalt Patch & Pothole Filler

    Do you have problems sealing cracks as you live in a cold area? Don't worry, as this asphalt patch from EcoClean has got you covered. The product is formulated to work at temperatures above 15°F, and you won't need to bother much even if it's freezing outside. 

    If your driveway gets a lot of traffic, you need a strong filler to fix the cracks and withstand the constant pressure. The resilient ingredients like screened aggregate, tar, and asphalt binders present in this patch come with the promise of not wearing out for years. And on application, the product sets within an hour, making it suitable for fixing road cracks without any difficulty. 

    Another thing that we really liked about this all-in-one filler is its versatility since apart from asphalt, you can use it for stone, concrete, and brick surfaces. Moreover, you can reuse it several times from the tub, as the substance remains pliable for a long time even after it's opened. 

    You won’t need any primer or mixer for application, and it can also be applied in wet weather conditions.

    Note that this petroleum-based asphalt patch isn't free from VOCs and other chemicals, and you need to be careful while handling the substance. Remember not to get too close to the cracks while the filler is drying, as it might still be emitting toxic fumes. 

    Color: Black | Quantity: 1 Bucket | Resistance: Traffic-resistant

    7. Henry ‎Driveway Asphalt Filler

    Are you looking for a product that can fix tiny or hairline cracks in your driveway? This E-Z Stir solution from Henry can help fix and improve the health of your driveway within hours. It also easily adheres to driveways with different grades of roughness without much trouble. 

    Tired of crack sealers that need special preparation? That won't be a problem with this product as it comes in a stir-and-apply formula. You just need to stir the solution inside the pail and spread it over the desired area. 

    We also like that this product can be used both as a filler and a sealer for asphalt driveways or pavements. Henry has even reinforced it with four times more rubber polymers compared to other brands to provide enhanced durability. And when used as a sealant, it can significantly improve the traction of your driveway while keeping it crack-free for a long time. 

    Moreover, the five-gallon pail can cover an area of 250-500 square feet, which is close to the average driveway size of most US homes. 

    This asphalt crack sealer only works on cracks with a width of up to 1/8 inches, so we won't recommend it for repairing driveways with wider or deeper cracks. But you can use this product as a sealant after filling the cracks to prolong the lifespan of your driveway.  

    Color: Black | Quantity: 1 Bucket | Resistance: N/A

    8. Latex-Ite Asphalt & Concrete Crack Filler

    Want a contractor-quality crack filler at an affordable price? Look no more, as Latex-Ite has made this possible with its PLI-STIX Asphalt And Concrete Crack Filler. This product is perfect for filling cracks of up to half inches wide, and you can melt it into place within seconds using a propane gun. 

    First of all, let's talk about the composition of this asphalt crack filler. Latex-Ite has formulated this crack-filling rope with contractor-grade thermoplastic rubber, which makes it extremely durable, particularly in areas that experience frequent weather fluctuations. And unlike other fillers available on the market, this is meant to be a permanent solution for repairing your driveway. 

    We also like the self-leveling quality of this filler, and you won't require any special equipment to smoothen it out for an even look. Plus, on melting, this product forms a watertight seal to prevent any moisture from getting into the cracks, which may cause damage to the underlying layers of asphalt. 

    You will find that it doesn't react with other sealants, and you can use it to fill small cracks before seal coating a driveway. 

    This asphalt crack filler requires you to have access to a propane gun but you must be extra careful during application to avoid accidents. We also found that the PLI-STIX works best when melted with a high-heat outdoor torch for which you will need practice to get the best results. 

    Color: Black | Quantity: 2 Packs | Resistance: Resists Water, Weather

    9. Jetcoat Premium Driveway Sealer

    This sealant from JetCoat comes with a long-lasting polymer rubber-based formulation that guarantees five-year protection. You can use this product to seal your entire driveway or fill in individual cracks. Even for its premium product, JetCoat has kept the price affordable to let you have a crack-free asphalt driveway. 

    One of the troubles faced when using the most commonly available crack fillers is their low durability. To solve this issue, JetCoat has reinforced this sealant with five times more polymer which helps it to last a long time. It's even fortified with sand to provide much-needed slip resistance. 

    What's more, this product can be used to solve multiple driveway-related problems, like filling cracks, holes, gaps, and openings of various sizes. This is made possible by the uniform consistency of this sealer which isn't too thick or thin. Plus, the application is pretty easy as all you need to do is stir it in the pail, pour it, and spread it evenly using a rubber squeegee. 

    But remember to apply a second coat over the first one for added strength and smoothness. 

    Like many other asphalt fillers available on the market, this product contains VOCs, even though their quantity is pretty low at 50 grams per gallon, as stated by the brand. Still, if you want a product that's free from any toxic substances, it's best to look for other options. 

    Color: Black | Quantity: 1 Tube | Resistance: Traffic-resistant, Withstands Low & High Temperatures

    10. Crack-Stix Blacktop Crack Filler

    Many homeowners swear by this filler material for driveway asphalt crack repair. This crack filler rope from Crack-Stix has made fixing cracks easier without creating a mess, thanks to its thermoplastic technology. We have seen that it creates a permanent bond, so you can safely use the driveway for years to come. 

    One of the reasons we liked this product was due to the easy application and you can conveniently place this 125-foot long, ½-inch wide rope into the cracks. The filler melts evenly at 200°F without cracking or creating a mess on your driveway, which is much better than the finish achieved with liquid asphalt fillers. 

    Another feature to note is the thermoplastic technology that lets it form a permanent bond with the asphalt. Crack-Stix has added elastomeric compounds and modified polymers in this filler to make it super resilient to all kinds of pressure. And this durable sealant is flexible which helps it adjust while the driveway contracts and expands to prevent cracking, even when the surface is exposed to low temperatures.  

    If you live in a cold region, be aware that this asphalt filler rope may become stiff and less pliable during winter. But, there's no need to worry, as it will work just fine in maintaining a strong seal when properly melted with a propane gun. 

    Color: Black | Quantity: 1 Bucket | Resistance: N/A

    What is the Best Asphalt Crack Filler?

    If you're searching for the best asphalt crack filler, listed below is a table detailing color, quantity per package in units, and resistance capabilities.

    Product Color Quantity Resistance
    Red Devil Acrylic Asphalt Crack Filler Black 1 Tube Resists Water, Weather, Cracking
    Henry Driveway Crack Filler Black 1 Bottle Resists Water & Weather, Withstands High Temperatures
    Bluestar Flexible Asphalt Crack Filler Black 1 Bottle Withstands Hot & Cold Temperatures
    Aquaphalt Permanent Asphalt Repair Black 1 Bucket Withstands Freezing Temperatures
    EWT Asphalt Crack Sealer Hot-Filler Tape Black 1 Roll Waterproof
    EcoClean Asphalt Patch & Pothole Filler Black 1 Bucket Traffic-resistant
    Henry ‎Driveway Asphalt Filler Black 1 Bucket N/A
    Latex-Ite Asphalt & Concrete Crack Filler Black 2 Packs Resists Water, Weather
    Jetcoat Premium Driveway Sealer Black 1 Tube Traffic-resistant, Withstands Low & High Temperatures
    Crack-Stix Blacktop Crack Filler Black 1 Bucket N/A

    Buying Guide for the Best Asphalt Crack Filler

    To be honest, the sheer number of options available on the market can make it challenging to find the best asphalt crack filler. That's why we have highlighted some essential points to help you find the right product for your needs. Check them while getting an asphalt driveway crack repair product, and you won't be disappointed. 

    Types of Asphalt Crack Fillers

    One of the first things to check is the formula or type of asphalt crack filler that you’re buying. The most popular options right now are the epoxy and acrylic crack fillers, as they provide UV protection and stain resistance from oil or gas while lasting a long time. 

    Other options include the coal tar-based crack fillers that are usually used as a sealer for the driveway. Due to affordable pricing, this asphalt driveway crack filler used to be the primary choice for many. But as it's known to emit volatile organic compounds (VOCs) that can harm your body, the use of such fillers has decreased. 

    Another common option available on the market is asphalt-based crack fillers which are much safer for the environment. However, note that these fillers are susceptible to UV damage and staining over time. 

    Crack Size

    How much asphalt filler you need depends on the size of the driveway asphalt crack, while in some cases, you may need to fill multiple cracks at a time. Based on the formulation of a crack filler, it might be able to tackle everything from hairline cracks to deeper cracks. Typically, most formulas work for cracks ranging in size from quarter-inch to half-inch. 

    Crack Sealing Ease of Application

    A key reason most people opt for asphalt crack fillers is the ease of application. That's why you need to know more about how a product is supposed to be used before making the purchase. 

    Other features to check in a filler should be the drying time and weather conditions in which it can be applied. The average time taken by most fillers to fully cure is around 24-48 hours. Make sure not to walk or drive on the repaired surface before it's dry, or you may end up peeling the filler. 

    Read up on how to repair cracks in concrete and asphalt before working on your driveway or pavement for the best results. 

    Do asphalt crack fillers work?

    Yes, asphalt crack fillers do work and are commonly used in road repair, driveway maintenance, and other asphalt-related restoration. They create a flexible and durable seal over cracks which helps prevent water seepage, further damage caused by freeze-thaw cycles, and the growth of vegetation.

    Keep in mind that the effectiveness of crack fillers largely depends on the correct application and the quality of the product used.

    What are asphalt filler ropes?

    Asphalt filler ropes, also known as pliable fillers or fibrated fillers, are a type of crack filler used for repairing asphalt surfaces. They are ropes made of a flexible and heat-resistant material that is packed into the crack before being heated, usually with a torch, causing the filler to melt and seal the crack. This type of filler is typically used for wider cracks or joints in asphalt surfaces.

    What is the difference between sealants and fillers?

    The primary difference between sealants and fillers lies in their use and material properties. Sealants are usually more flexible and are used to prevent elements like water or air from passing through material surfaces, often including a range of materials such as concrete, wood, or metal.

    On the other hand, fillers are more rigid and are employed to fill gaps or cracks in surfaces, restoring structural integrity or aesthetics. Their effective application depends on the specific requirements of the task.

    We hope our suggestions will help you find the best asphalt crack filler that fixes cracks quickly and keeps any surface in good condition. 

    Among our recommendations, we will suggest the Red Devil Acrylic Asphalt Crack Filler to those looking for a product with excellent flexibility that resists damage during temperature fluctuations. On the other hand, the Henry Driveway Elastomeric Emulsion Crack Filler is excellent for someone who needs to fix several driveway cracks at once. 

    Remember to read the instructions carefully before application and you should have a smooth driveway or pavement in no time. Until next time, goodbye, and take care! 

    The best fertilizers for trees are nutrient-rich formulations designed to enhance root development, increase foliage density, and support long-term health in both ornamental and fruit-bearing trees. While many established trees can survive on natural soil nutrients, younger trees, stressed specimens, or those planted in nutrient-poor environments often need supplemental feeding to thrive. Fertilizers improve soil structure and deliver essential macronutrients like nitrogen (N), phosphorus (P), and potassium (K)—critical for root strength, shoot growth, and overall vitality. However, with so many formulas available—granular, liquid, organic, synthetic—it can be difficult to determine which fertilizer is right for your tree species, soil condition, and seasonal needs. That’s why we’ve reviewed the 11 best fertilizers for trees, assessing each for nutrient composition, application ease, and long-term effectiveness. Whether you’re feeding shade trees, evergreens, or flowering species, this guide will help you make a confident and informed choice.

    Best Fertilizers For Trees

    Landscape design. Beautiful background. Nature park Outdoors. Top Fertilizers For Trees

    Here is the list of the 11 best fertilizers for trees that you can use to keep your trees healthy and strong.

    1. Miracle-Gro 3002410 Shake N Feed - Best for All-Season Nourishment

    Miracle-Gro Shake 'N Feed Flowering Trees and Shrubs Plant...
    • Miracle-Gro Shake 'N Feed Flowering Trees & Shrubs Plant...
    • This plant food contains natural ingredients (kelp,...

    Miracle-Gro is a brand we trust when it comes to gardening and landscaping the ins and outs of homes. That’s why we’ve decided to introduce you to the Miracle-Gro 3002410 Shake N Feed. The trees and shrubs plant food formulated with vital nutrients and natural ingredients supports their development and growth. 

    Why Did We Like It?

    There are many reasons to like this tree and shrub food from Miracle-Gro. After all, it’s formulated with earthworm castings, kelp, feather meal, and bone meal to feed microbes in the soil. As a result, the microbes break down organic matter into nutrients to support root strength and development, thereby increasing water efficiency. 

    The best part about Shake N Feed is that it can be used on all flowering trees, shrubs, and acid-loving plants, both in containers and on the ground. Its vital nutrients and natural ingredients work in harmony to maintain deep, lush green foliage and colorful blooms throughout the season.

    Your plants get off to a good start as it provides continuous-release feeding for up to 3 months. Consequently, they obtain nourishment all year round without you having to do much. 

    What Could’ve Been Better?

    We didn’t come across any significant downside to using Shake N Feed from Miracle-Gro. However, it’s important to note that being an all-purpose concentrated fertilizer, it should be used as directed. We ended up burning the leaves of a spider plant by using more than the required quantity.


    Pros

    • All-season nourishment
    • Contains micronutrients and natural ingredients
    • Can be used on all plants and trees
    • Maintains lush green foliage


    Cons

    • Excessive use may burn plant leaves


    Dimensions: 4.25" x 13.5" x 7" | Weight: 7.92lbs | Item Form: Granules | NPK Ratio: 18-6-12

    2. Osmocote Smart-Release Plant Food Plus - Best All-in-One Solution

    Osmocote Smart-Release Plant Food Plus Outdoor and Indoor,...
    • Osmocote Smart-Release Plant Food Plus Indoor & Outdoor is...
    • This plant food feeds plants for up to 6 months with...

    Next up on the list, we have the best all-in-one solution for serious gardeners. The Osmocote Smart-Release Plant Food Plus is formulated and fortified with 11 essential nutrients to feed indoor and outdoor potted plants in all growing conditions. But does it meet expectations? Let’s find out.

    Why Did We Like It?

    Rest assured, this nutritious plant food can be applied with confidence to potted plants, whether indoors or outdoors. It contains 11 essential nutrients to work on virtually all plant varieties in different growing conditions.

    All you have to do is sprinkle a scoopful of the food per 2 gallons or 4 square feet and mix it into 1-3 inches of soil. The granules, coated with semi-permeable resin, allow water to penetrate in order to dissolve the encapsulated nutrients. In turn, the nutrients are released into the soil with changes in temperature, feeding plants and trees for up to 6 full months.

    Without a doubt, the Smart-Release Plant Food Plus is one of Osmocote’s best formulas. But if you ask us, its highlight is the no-burn pledge offered by the brand when used as directed.

    What Could’ve Been Better?

    The fertilizer works effectively; there’s no question about that. However, once the nutrients are released, the empty shells remain in the soil, resembling small plastic balls. This can be detrimental to the environment in the long run, something which none of us wants.


    Pros

    • No-burn pledge when used as directed
    • Highly nutritious
    • Easy to use
    • Works on all plant varieties


    Cons

    • Leaves microplastic empty shells


    Dimensions: 4.2" x 7" x 13.5" | Weight: 8.1lbs | Item Form: Granules | NPK Ratio: 15-9-12

    3. Miracle-Gro Water Soluble Plant Food - Best Instant-Result Fertilizer

    Miracle-Gro Water Soluble All Purpose Plant Food -...
    • FEEDS ALL PLANTS: Miracle-Gro Water Soluble All Purpose...
    • PROMOTES GROWTH: Use this all-purpose plant food outdoors...

    We now bring you yet another all-purpose plant food from Miracle-Gro that works instantly to ensure the best results. The water-soluble fertilizer provides all the required nutrition houseplants, shrubs, and trees need to blossom and grow without you worrying about it burning leaves and flowers.

    Why Did We Like It?

    The water-soluble plant food is safe to use on flowers, vegetable patches, trees, shrubs, and houseplants. It’s guaranteed not to burn their leaves when applied as directed after every 1 or 2 weeks when plants are actively growing.

    Instead, it starts working instantly, adding vital nutrients to the soil for them to flourish throughout the season. We were able to see results within less than a month of use, which is remarkable indeed.

    Coming to the method of application, we can assure you that this fertilizer is easy to use. Being water-soluble in nature, it can be applied with the help of a garden feeder. Simply fill the jar with the plant food, attach it to a hose, turn on the water, and begin spraying after choosing the desired spray pattern.

    You may also consider using a watering can to soak the base of your plants with the solution.

    What Could’ve Been Better?

    The only downside to buying this water-soluble plant food from Miracle-Gro is its packet size. Seeing its price, we expected the quantity of the product to be a bit more. You might have to spend more money buying bigger or multiple boxes of this all-purpose fertilizer.


    Pros

    • Safe for all tree types
    • Easy to use
    • Works instantly for effective results
    • Full of essential nutrients


    Cons

    • Not cost-effective


    Dimensions: 4.3" x 4.3" x 7.5" | Weight: 3lbs | Item Form: Granules | NPK Ratio: N/A

    4. BioAdvanced 701700B Tree & Shrub Protect & Feed - Best for Insect Protection

    BioAdvanced 12 Month Tree and Shrub Protect and Feed II,...
    • UP TO 12 MONTH PROTECTION: With one application, BioAdvanced...
    • PEST KILLER: BioAdvanced 12 Month Tree and Shrub Protect and...

    BioAdvanced is a brand offering the lawn and gardening products you need to maintain the beauty of your garden. And with the dual-action formula of the Tree & Shrub Protect & Feed, you get the ultimate peace of mind while it revitalizes your trees and shrubs and kills unwanted insects.

    Why Did We Like It?

    What makes this fertilizer stand out from the rest is its dual-action formula. BioAdvanced’s cutting-edge technology helps release nutrients slowly into the soil to improve the health of your plants and trees.

    But that’s not all; this fertilizer acts as an insect and pest killer, killing unwanted insects, including Japanese beetles, leafminers, caterpillars, adelgids, and more. With just one application, it kills these insects and prevents new infestations for up to a year.

    That said, Protect & Feed can be applied to all types of flowers, including roses and flowering shrubs, with ease. There’s no need to spray or mix the granules; simply measure the required amount and sprinkle it around the tree’s base.

    Furthermore, the product gets directly absorbed by the internal root system, so you need not worry about it being washed away by irrigation or rain.

    What Could’ve Been Better?

    Protect & Feed is not just a fertilizer, but it’s also an insect killer that kills pests and prevents infestation. So, avoid applying it on or around vegetable patches and fruit-bearing plants. The chemicals may reach the fruits and vegetables, making them inedible and unsafe for consumption.


    Pros

    • Prevents infestations for up to a year
    • Easy to apply
    • Systematic rainproof protection
    • Kills adult Japanese beetles


    Cons

    • Not suitable for vegetable patches and fruit-bearing plants


    Dimensions: 7.3" x 3.7" x 11.3" | Weight: 4lbs | Item Form: Granules | NPK Ratio: 2-1-1

    5. Ross 14636 Root Feeder Refills - Best Root Feeding System

    We’ll now introduce you to the Ross Root pre-measured refills, a high-nitrogen formula for deciduous trees and shrubs. When installed in the brand’s deep feeding system, it ensures uniform fertilization below the soil’s surface while you simultaneously water the area.

    Why Did We Like It?

    The best part about the Ross 14636 Root Feeder Refills is that it’s an easy-to-use formula that requires no mixing or measuring. Since they come in the form of pre-measured refills, you can rest assured of quick, easy, and mess-free fertilizing.

    You have to use them in your Ross Root Feeder to get the perfect balance of nutrients directly into the plant’s roots. Once they’re inserted in the ground, make sure to water the area for the fertilizer to dissolve and release the essential micronutrients and minerals.

    This will help in maintaining and improving the overall health of your trees and shrubs all year long. Your garden will look beautiful and luscious throughout the different seasons, which is something every gardener desires.

    What Could’ve Been Better?

    Considering the number of sticks you have to use, which is usually 2 for every small tree and 3 to 4 for large trees, the average cost of fertilizing the garden with these refills is significantly high. Other than this, we found it difficult to water the area using the feeder because of its low water flow.


    Pros

    • Easy, quick, and mess-free fertilizing
    • For seasonal use
    • Requires no mixing or measuring
    • High-nitrogen formula
    • Even fertilization at the roots


    Cons

    • Feeder ensures low water flow
    • Not cost-effective


    Dimensions: 8" x 3" x 8" | Weight: 1lb | Item Form: Granules | NPK Ratio: 25-10-10

    6. Dr. Earth 708P Fruit Tree Fertilizer

    Dr. Earth Natural Wonder Organic Fruit Tree Fertilizer - 4lb...
    • Natural and Organic Hand Crafted Blend
    • Formulated to feed all fruit trees, berries, grapes, nut...

    Serving the organic community for over 29 years, Dr. Earth has set industry standards yet again with the 708P Fruit Tree Fertilizer. The 100% organic and natural product made using the best ingredients and innovative technology stimulates root development and consistent plant growth while addressing safety concerns for all gardeners.

    Why Did We Like It?

    Fertilizers containing chemicals can’t be used on trees and plants bearing fruits and vegetables. But with Dr. Earth 708P, you need not worry since it’s made using 100% organic and natural ingredients. It doesn’t consist of GMOs, chicken manure, or sewage sludge, giving you complete peace of mind during use.

    Instead, the fertilizer, which comes in a poly-bag, contains probiotics, seven strains of beneficial soil microbes, along with ecto and endo-mycorrhizae. These ingredients work together to provide optimum levels of essential nutrients to the tree by releasing them quickly, thereby stimulating root development and plant growth.

    It eliminates the need for chemical fertilizers when used as directed, enhancing plant performance, nutrient availability, and drought tolerance. As a result, you get more nutritious fruits with no growth spikes.

    What Could’ve Been Better?

    The fertilizer works well to promote consistent plant growth, but it’s important to note that it may attract unwanted insects and worms when used excessively. This may cause damage to your tree and fruits, so make sure you use it as directed.


    Pros

    • 100% organic and safe
    • Increases plant performance
    • Releases nutrients quickly
    • Enhances drought tolerance
    • Stimulates healthy root growth


    Cons

    • May attract unwanted insects and worms


    Dimensions: 2.5" x 7.3" x 10" | Weight: 4lbs | Item Form: Powder | NPK Ratio: 5-5-2

    7. Jobe’s Trees & Shrubs Fertilizer Spikes

    Jobe’s Slow Release Tree and Shrub Fertilizer Spikes, Easy...
    • Package contains 15 tree and shrub fertilizer spikes and are...
    • Formulated with a 16-4-4 NPK to ensure a continuous supply...

    The Jobe’s Evergreen Fertilizer Spikes come pre-measured to ensure a slow but continuous supply of the right amount of nutrients below the surface of your trees. In turn, they keep your trees and shrubs healthy all season by nourishing and promoting the active growth of their roots.

    Why Did We Like It?

    Rest assured, these slow-release fertilizer spikes will help keep your yard spectacular-looking throughout the year. All you have to do is place them along the tree’s drip line during early spring or late fall and water well before application.

    Since they come pre-measured, there’s no need for complicated mixing and measuring. Using two to three spikes for one to two inches of trunk diameter will provide the right amount of nutrients to promote overall plant growth.

    They release vital nutrients continuously to support the actively growing roots below the surface without causing wasteful runoff. You don’t even have to bother about any smell, creating a mess, or a hazard. What’s more, these spikes are suitable for nourishing the roots of all deciduous trees and shrubs, including oak, maple, birch, elm, poplar, and redbud.

    What Could’ve Been Better?

    After a few weeks of inserting Jobe’s Fertilizer Spikes in the ground, we noticed that the surrounding grass started turning brown. This was a bit of a letdown, but you won’t be facing this issue, provided the spikes are used as directed.


    Pros

    • Pre-measured spikes for ease of use
    • Slow-release formula feeds all season
    • No wasteful runoff, smell, mess, or hazard
    • For all deciduous trees and shrubs


    Cons

    • Turns grass brown


    Dimensions: 6.5" x 9.5" x 2.5" | Weight: 3lbs | Item Form: Spikes | NPK Ratio: 16-14-4

    8. Jobe’s 02010 Tree & Shrub Fertilizer Spikes

    Jobe’s Slow Release Tree and Shrub Fertilizer Spikes, Easy...
    • Package contains 5 tree and shrub fertilizer spikes and are...
    • Formulated with a 15-3-3 NPK to ensure a continuous supply...

    We’ll now move on to yet another tree and shrub fertilizer from Jobe’s, a company offering a variety of eco-friendly, organic gardening products to meet all your lawn and garden requirements. The slow-release formula, available in a bag of 5 spikes, lasts throughout the season to promote the active growth of plant roots.

    Why Did We Like It?

    This is another fertilizer from Jobe’s that comes in the form of pre-measured spikes to nourish all types of deciduous trees and shrubs at the roots. It’s easy to use; all you have to do is follow the instructions included with the pack and insert it around the drip line during early spring, mid-summer, or late fall when the roots grow actively.

    The slow-release formula ensures a continuous supply of nutrients below the surface to feed the trees throughout the season. Consequently, you’ll notice visible results all year round, which, in turn, helps keep your lawn or garden luscious and beautiful at all times.

    There’s no doubt that these spikes promote the healthy growth of trees and shrubs. But that’s not all; they are safe for the environment, and you need not worry about wasteful runoff or any smell. The fertilizer does its job by working effectively without creating a mess or any hazard.

    What Could’ve Been Better?

    Truth be told, we don’t really have any significant complaints related to the application or effectiveness of this fertilizer. However, we find it important to highlight the fact the pack includes considerably smaller spikes. They also tend to break easily, so you’ll have to be careful while handling them.


    Pros

    • Easy to use
    • Nourishes trees at the roots
    • The package comes with instructions
    • No hazards, wasteful runoff, or smell
    • Feeds all season


    Cons

    • Spikes are smaller in size
    • Tend to break


    Dimensions: 1" x 5" x 7" | Weight: 1lb | Item Form: Spikes | NPK Ratio: 15-3-3

    9. VPG Inc BAC421 Tree & Shrub Food

    VPG Inc BAC421 20Lb Tree & Shrub Food, 1
    • Eliminating the need to dig holes
    • Feed trees and shrubs twice a year

    Fertilome, a leading manufacturer of weed killers, insecticides, fungicides, and other garden and lawn care products, comes forth with the VPG Inc BAC421. It’s a plant food scientifically formulated to feed all types of trees and shrubs up to twice a year without any hassle.

    Why Did We Like It?

    The VPG Inc BAC421 is scientifically formulated to give your trees and shrubs the nourishment they deserve. When applied around the tree drip line, it moves directly to the feeder roots with the help of its penetrating action. This, in turn, eliminates the need for digging holes in the area for feeding.

    Fertilome’s premium fertilizer is available in a 20-pound bag, which can feed up to 10 4-inch diameter trees, making it a cost-effective option. But that’s not all; you’ll be pleased to know that the plant food is pretty diverse in application, being an all-purpose fertilizer. It can be used for all types of trees, including evergreens, palms, citrus, tropical, fruit and nut, shade, and flowering trees.

    We were also quite impressed with its effectiveness and performance. It starts working instantly to release the vital micronutrients into the ground for them to promote growth from the roots.

    What Could’ve Been Better?

    You won’t be facing any significant problems while using this premium fertilizer, provided you’re careful during application. If not, the granules might mix with underground water resources, leading to contamination. Also, it’s best to keep VPG Inc BAC421 out of the reach of children.


    Pros

    • Cost-effective
    • No need to dig holes for feeding
    • Can feed up to twice a year
    • All-purpose fertilizer
    • Deep penetrating action for effective results


    Cons

    • May contaminate underground water
    • Not safe for use around children


    Dimensions: 3" x 21" x 14" | Weight: 20lbs | Item Form: Granules | NPK Ratio: 19-810

    10. Down To Earth All Natural Tree & Shrub Fertilizer

    Down To Earth All Natural Fertilizers Tree & Shrub Mix...
    • Tree & Shrub 4-2-4 is formulated for transplanting bare root...
    • Blended-in Root Growth Enhancer will promote extensive root...

    Down To Earth, a company that began in Eugene, Oregon, in 1977, takes pride in its complete line of natural and organic fertilizers like this one. The all-natural tree and shrub fertilizer work together with the microorganisms, organic matter, and fungi of the soil to feed plants and stimulate growth.

    Why Did We Like It?

    This organic fertilizer from Down To Earth is fortified with 11 species of endo and ectomycorrhizal fungi that help encourage extensive root development. As a result, it protects the tree or shrub from a variety of stresses, including drought, transplant shock, and other environmental extremes that can negatively impact its growth potential.

    That’s not all; it mixes into the planting hole for new transplants to maximize root contact, ensuring rapid establishment and survival. This is all thanks to the inclusion of beneficial microbes and their active ingredients, including rock phosphate, soybean meal, feather meal, and basalt.

    We also found that the 4-2-4 is extremely easy to use. All you have to do is follow the provided application rates and directly apply it to the plant roots or mix it with the soil.

    What Could’ve Been Better?

    When we first ordered the Down To Earth Fertilizer, we received a box that had already crossed its expiration date. If you come across a similar situation, it’s best to get the product replaced, as this might compromise the fertilizer’s effectiveness and reduce the health of your surrounding trees and shrubs.


    Pros

    • Maximizes root contact
    • Contains essential microbes
    • Protects trees and shrubs from stress
    • Easy to use


    Cons

    • Expired fertilizer lacked effectiveness


    Dimensions: 10.94" x 8.19" x 3.66" | Weight: 5lbs | Item Form: N/A | NPK Ratio: 4-2-4

    11. Scotts Evergreen, Flowering Tree & Shrub

    No products found.

    Our list would be incomplete without the inclusion of this evergreen, flowering tree and shrub fertilizer from Scotts, a global leader in the lawn care industry. Formulated with all the right ingredients, this continuous-release plant food promotes growth at the roots to ensure lush green foliage.

    Why Did We Like It?

    Scotts has managed to introduce us to an exceptional fertilizer that encourages the vigorous root growth of a wide range of trees and shrubs. The continuous-release formula, when directly applied to the soil, feeds acid-loving plants, including evergreens, camellias, hydrangeas, azaleas, rhododendrons, and magnolias, for up to 2 months.

    It adds the essential nutrients to help plant growth in all aspects, thereby ensuring lush foliage throughout the season. All you have to do is apply the fertilizer at the beginning of the growing season to notice desirable results all year long.

    Apart from being easy to apply, this plant food is safe to use; it won’t burn the leaves of your trees and shrubs, provided it’s used as directed. You’ll also be pleased to know that it’s available in different pack sizes to choose from. The 2-pack variant comes at a comparatively reasonable price, but you can also opt for the 3-pack option at a discounted price.

    What Could’ve Been Better?

    The only disappointing factor of using this plant food to promote tree and shrub growth is that it causes the yellowing of leaves to a certain extent. This is probably due to the absence of iron, which is a major component of fertilizers.


    Pros

    • Perfect for acid-loving plants and trees
    • Safe to use
    • Easy to apply
    • Encourages vigorous root growth


    Cons

    • Causes yellowing of leaves


    Dimensions: 9.5" x 5.5" x 4" | Weight: 3lbs | Item Form: Granules | NPK Ratio: 11-7-7

    Best Tree Fertilizer Comparison Table

    Product Dimensions Weight Item Form NPK Ratio
    Miracle-Gro 3002410 4.25" x 13.5" x 7" 7.92lbs Granules 18-6-12
    Osmocote Plant Food Plus 4.2" x 7" x 13.5" 8.1lbs Granules 15-9-12
    Miracle-Gro Plant Food 4.3" x 4.3" x 7.5" 3lbs Granules N/A
    BioAdvanced 701700B 7.3" x 3.7" x 11.3" 4lbs Granules 2-1-1
    Ross 14636 8" x 3" x 8" 1lb Granules 25-10-10
    Dr. Earth 708P 2.5" x 7.3" x 10" 4lbs Powder 5-5-2
    Jobe’s Trees & Shrubs Fertilizer 6.5" x 9.5" x 2.5" 3lbs Spikes 16-14-4
    Jobe’s 02010 1" x 5" x 7" 1lb Spikes 15-3-3
    VPG Inc BAC421 3" x 21" x 14" 20lbs Granules 19-810
    Down To Earth Fertilizer 10.94" x 8.19" x 3.66" 5lbs N/A 4-2-4
    Scotts Fertilizer 9.5" x 5.5" x 4" 3lbs Granules 11-7-7

    Beautiful flowers and trees landscape in the botanical garden in beauty summer evening. Horizontal orientation

    Buying Guide For The Best Tree Fertilizer

    As you’re already aware, selecting a fertilizer that’s capable of fulfilling all your lawn and garden requirements is easier said than done. There is a wide range of options to choose from, making it all the more time-consuming and hectic.

    Now, we’ve tried simplifying your task by reviewing a handpicked list of excellent options. So, were you able to shortlist the best products, if not make a purchase? Well, it’s not just you; most buyers find it challenging to pick a fertilizer, even from a narrowed-down list.

    Understanding your plight, we’ve carefully created this buyer’s guide, explaining a few crucial points that need to be considered while buying fertilizers for trees. Read on.

    1. Fertilizing Frequency & Feeding Time

    How often you decide to fertilize your trees and shrubs will depend on their age and season. Based on these factors, choose a pack that offers sufficient plant food to last you through the season. After all, you wouldn’t want to keep spending money on buying expensive fertilizers all year long, right?

    Other than this, it’s crucial to check the product’s feeding time. Most fertilizers feed for up to two months, while others can feed up to 6 months.

    Depending on its feeding time, it’s generally a good idea to apply the fertilizer during early spring and late fall. Fertilizing during these seasons helps strengthen plants for the growing and dormant periods.

    1. Insect Repellant

    Insects and worms tend to latch onto trees and shrubs, obstructing their overall growth. To prevent this, it’s best to opt for dual-action plant foods that also act as insect repellants. These products not only help in enhancing plant health and promoting growth, but they also kill insects and prevent infestations.

    1. Safe To Use

    Remember, the fertilizer or plant food you buy should be not only easy to apply but also safe for your trees and shrubs. You can always consider organic options made using 100% natural ingredients. Being free from GMOs and harmful chemicals, they are safe for the environment and your surroundings.

    You’ll be able to use these fertilizers on vegetable patches and fruit-bearing trees as well. And when used as directed, rest assured, they won’t be burning the plant leaves and flowers. Instead, you’ll get lush green foliage that will make your garden look as beautiful as ever.

    1. Formulated With Essential Minerals and Nutrients

    When buying fertilizer for trees, make sure it’s formulated and fortified with all the essential minerals and nutrients required for growth. It should be able to slowly yet continuously add the vital micronutrients below the soil’s surface to encourage vigorous root growth during the active growing stages.

    Fertilizers for Trees FAQs

  • How do I determine which fertilizer is best for my tree?

    To select the right fertilizer, start by determining the nutrient requirements of your specific tree species. You can then choose a fertilizer with an appropriate nutrient ratio that meets these requirements.

  • Do newly planted trees require fertilization?

    Newly planted trees may benefit from a light application of balanced fertilizer to support root development and growth. Always check with a specialist if you’re unsure about fertilizing a newly planted tree.

  • How do I apply granular fertilizers?

    Granular fertilizers should be evenly applied on the soil surface around the tree’s root zone or drip line. Be careful not to let granules come into contact with the tree’s trunk to prevent burn or damage.

  • Can I overfertilize my tree?

    Yes, overfertilization can lead to nutrient imbalances, which may harm your tree by causing excess growth, susceptibility to diseases and pests, or even root burn. Follow the recommended application rates and methods.

  • Close up Farmer Hand watering young baby plants (tamarind tree). Best Fertilizer for Trees Verdict

    Conclusion

    Every gardener dreams of having a beautiful garden with healthy and luscious trees and shrubs. And fulfilling this dream isn’t that difficult, provided you have the right fertilizer to add the essential nutrients. 

    On that note, we’ll now progress to the end of this review-based guide on the best fertilizers for trees. But before signing off, let’s take a quick look at our favorites. 

    Miracle-Gro 3002410 Shake N Feed tops our list as it nourishes trees at the roots. Osmocote Smart-Release Plant Food Plus is the best option for potted indoor and outdoor plants, while Miracle-Gro Water Soluble Plant Food works instantly to ensure praiseworthy results. 

    Here’s hoping this guide helps you find the ideal fertilizer to strengthen your trees and promote growth. But don’t be discouraged if it takes some time for it to work. 

    We’ll now take your leave with that bit of advice. Till next time! 

    Related Articles

    13 Best Fertilizers for Blueberries

    13 Best Organic Lawn Fertilizers

    13 Best Fertilizers for Hibiscus

    13 Best Fertilizers for Roses

    11 Best Fertilizers for Lilacs

    9 Best Fertilizers for Hydrangeas

    9 Best Fertilizers for Petunias

    11 Best Fertilizers for Citrus Trees

    11 Best Lawn Fertilizer Options

    13 Best Fertilizers for St Augustine Grass

    13 Best Fertilizers for Palm Trees

    8 Best Dump Carts for Lawn Tractors & ATVs

    Trick-or-treating isn’t the only fun part of Halloween!

    On October 31, tap into the creativity of your kids with some scary, fun, and easy Halloween paintings. Halloween costumes, DIY decorations, and pumpkin carvings are a few things families usually do in this spooky season. However, nothing beats gathering together and making some crazy yet beautiful acrylic paintings. But, be sure not to start with any complicated paintings, as they might bore the kids, and they might leave in the middle. Hence, we are sharing some lovely yet simple acrylic Halloween painting ideas for beginners and kids. We have even shared the step-by-step painting process for your convenience. Although acrylic paints are excellent for Halloween paintings, they're not suitable for body art. So, if you want to dress up like a vampire for a Halloween party and try on acrylic paints on your face, it'll be a big problem. Most of the high-quality body paints do not contain acrylic paint in them. Acrylic causes irritations to the skin and washing off acrylic is not an easy job. So, putting acrylic paint on your face is a big no-no.

    But, enough of that! Let’s dive in with acrylic Halloween paintings!

    Acrylic Halloween Paintings Ideas For Beginners

    1. Halloween Treats

    Materials Required

    • Acrylic paint
    • 11 x 14 canvas
    • Chalk
    • #8 and #4 art brushes

    Colors

    • Titanium white
    • Mars black
    • Cadmium yellow light hue
    • Cadmium orange hue
    • Yellow oxide
    • Brilliant yellow green
    • Dioxazine purple
    • Deep green permanent
    • Burnt umber
    • Deep violet

    How To Paint

    This fall art is suitable, especially for beginners and kids, making it ideal as culinary decor for Halloween gatherings. To make it, start with painting the 11 x 14 Canvas entirely black. Then, take the chalk and draw the outlines of the key characters of the painting: Frankenstein popsicle, bat ice cream, and orange pumpkin ice cream.

    Draw the outline for an ordinary popsicle, add two “Frankenstein” screws and bumpy lines on the top or anywhere you like. Then, take out your #8 brush and start painting your popsicle.

    You can color them with anything you like, but we prefer the outline to be painted with brilliant yellow-green and a semi-thick layer of permanent green at the bottom. Use yellow oxide for the stick and a stash of titanium white on the side.

    It’s time to take out your #4 brush to paint a dripping shape using a deep violet color on the popsicle head. And, use titanium white for the screws.

    It's time to start drawing the middle bat ice cream. Use a #8 brush and yellow oxide color to paint the cone, and mix a tad bit of titanium white on the edges. Then, paint the ice cream brilliant purple with a mixture of titanium oxide. Use cadmium orange hue and titanium white to paint the next ice cream cone. Draw another layer of it once dry, and then use a mixture of colors like green, orange, or any other to the bottom.

    Finish the art by drawing faces on the ice cream to make it Halloween-themed.

    2. Sugar Skull Painting

    Materials Required

    • Acrylic paint
    • 11 x 14 canvas
    • Chalk
    • #8 and #4 round paint brushes

    Colors

    • Titanium white 
    • Mars black 
    • Primary yellow
    • Pyrrole red
    • Medium magenta
    • Turquoise blue
    • Green hue permanent

    How To Paint

    Start with blackening the 11 x 14 canvas background, then outline a skull using chalk and fill it with titanium white. Use a #8 brush for black paint, and paint its teeth, eyes, nose, and jaws.

    Now it’s time to start decorating the skull with designs, dots, flowers, and other decorations. Though it’s entirely up to you how you want to decorate the skull, we are sharing how we like it to be.

    Start with making half-circular shapes around the eyes using #4 brushes and medium magenta color. Then, draw a flower on the head using a primary yellow color, and primary blue for painting a mandala pattern on the cheekbones. You can keep on adding whimsical designs to it, like a rose on the head, a flowering branch on its jaws, and a small red heart on the nose, creating a vibrant piece for the entryway setup.

    3. Pumpkin Topiary

    Materials Required

    • Acrylics
    • 11 x 14 canvas
    • Chalk
    • #4 and #8 art brush
    • Water 

    Colors

    • Red 
    • Orange
    • Light blue
    • Brown
    • White
    • Black 

    How To Paint

    Start with drawing a squiggly line 2 inches apart from the edges using a #8 brush, black paint to make a frame, and fill it using green color. Add some big violet dots to give it a quirky look.

    Once done, run a few splashes of blue, a tiny bit of black, and titanium white in the background. You can add any color of your choice. Then, draw three pumpkins on top of each using chalk, with the smallest at the top and the largest at the bottom. And, make bump lines on each of them.

    Next, use reddish-orange paint to color the edges and orange to fill the inside. Now, draw different Jack O’Llantern faces on each pumpkin using your chalk. Finally, draw the facial expressions using your brush and black color, and consider placing the pumpkin topiary at your entryway setup for added Halloween flair.

    Acrylic Halloween Painting Frequently Asked Questions?

    What acrylic color brand should we go for?

    Well, it depends entirely on your budget. First, go for basic ones to see if you can use them well and draw quality paintings. And, once you feel confident about it, spend extra money to get yourself some artist-quality paints.

    Can we mix different paint brands?

    Yes, you can mix paints of different brands, irrespective of their quality. But, remain cautious while mixing different types of paints, like oil paints and acrylic paints, for the same painting. You can add oil paints to a dried acrylic color but not vice versa.

    Where should we paint?

    You can paint acrylic color on card, paper, wood, or canvas without applying a primer layer first.

    Acrylic Halloween Painting Final Words

    Acrylic Halloween Painting Final Words

    That concludes our painting suggestions!

    We hope your kid will be able to make beautiful Halloween-themed paintings using these ideas.  And, if they enjoy themselves when drawing them, they might end up being an artist in the future. Keep these beautiful pieces hanging on your wall for everyone to admire.

    Acrylic paints are the ones they should start with, but only if they are aged above three years. These artworks are intended for fun, so you don’t want to give your kids something harmful to them.

    You can search on YouTube, Etsy, and other sites for more Halloween paintings like a haunted house, a cat and the moon, and so on. Visit these site links for simple and free art tutorials.

    With that, we’ll wrap up the guide. See you soon and goodbye!

    Kids look forward to the trick-or-treat season because it means candies, chocolates, and loads of surprises!

    Sometimes, to make their experience one-of-a-kind, you will need to go the extra mile, which means drawing for decors or thinking of drawing activities to make them as happy as they can be. To help you out, we have this post you can refer to every time for easy Halloween drawings for you and your little ones. Read through!

    Drawing of haloween nature background with orange pumpkin in painting on paper style. 45 Easy Halloween Drawing Ideas.

    Get your little boos in the booze with Halloween-themed parties as you recreate these Halloween drawing ideas for your decorations and activities. These festive lounge setup ideas or decorations add extra charm and make each area ready for the spooky season.

    1. Pumpkin Jack O'lantern

    Pumpkin Jack O'lantern

    Via: ineedfabric

    If your state doesn't allow a real jack o'lantern to stay at your doorstep, a Halloween drawing like this can surely save the spirit of treat or trick in your household and complete your Halloween porch setup. A pumpkin jack o'lantern is easy to draw. All you have to do is guide your kids in doing C-like shapes, combine them, and draw the facial expressions they like using circles and triangles.

    2. Cute Bat

    Cute Bat

    Via: Maestra Anita

    A cute bat is a good addition if your family makes banners for your doors, balconies, and indoor designsTo make the bat as adorable as it can be, incorporate big eyes, a round face, pinkish ears, and a perky smile!

    3. Black Cat

    Black Cat

    Via: Mary

    A black cat is one of the drawing ideas you shouldn't miss in a list of Halloween pieces, as it can make your Halloween merchandise, cookies, or stickers a little more engaging. The specifics of drawing black cats are not complicated. You just need to highlight the contrast between the yellow eyes and the black cat's skin to make it look creepy and charming simultaneously.

    4. Spooky Ghost

    Spooky Ghost

    Via: Artipijar

    As you and your kids fill your creativity tanks, don't forget to put some smiles on your spooky ghosts' faces, too. Yet, the tiny little bats at the back make this ghost drawing a blast, which serves as additional details that emphasize the charming (and spooky) ghost.

    5. Witch's Hat

    Witch's Hat

    Via: Varsha Kadam

    Are you looking for Halloween drawing ideas to add to your table decorations? Look no further because a witch's hat is an excellent element to incorporate, especially when colored purpleIt can be an efficient activity to keep your preschoolers entertained and help them work with their hand and drawing abilities.

    6. Witch's Broom

    Witch's Broom

    Via: DJV

    Since you already have the witch hat, why not go all out and make some witch's broom, too, to complete the drawing idea? A witch broom is simple to draw. However, it would be best if you still make it a standout by creating contrasts in brown, yellow, and purple colors. You can even add hints of the web at the back for a scarier feel.

    7. Skull

    Skull

    Via: ARTIST UNKNOWN

    When you say Halloween drawing, skulls always make it to the top of the list as it symbolizes the dead. So, it is a no-brainer to draw this, which is also very straightforward to make. All you have to draw are semi-circles, circles, little m shapes, and an inverted heart.

    8. Mummy

    Mummy

    Via: Osanna Chil

    You can make the mummy return by incorporating it through your Halloween drawings. Don’t overthink because you can cover your dead head drawing with horizontal paper towels from head to neck to make this drawing come to life. Moreover, you don’t need colors as a pencil can do the job mainly with simple sketches and shades.

    9. Owl

    Owl

    Via: Mahafarid Kazemi

    Ready your Halloween drawing arsenal as you create this big-eyed (but super adorable) creature — the owl! To create an owl, the majority of shapes you need to perfect are circles and triangles. Also, make sure to add tree branch details to make them more realistic.

    10. Candy Corn

    Candy Corn

    Via: LunimeGames

    Level up your creativity by sprinkling fun into your spooky drawing ideas by adding colorful candy corn or maizeThe eyes, lips, and rosy cheeks are crucial elements to make your candy corn appealing. But colors play a much bigger task as these will catch the attention of passersby from afar when you decide to make your candy corn human-sized.

    11. Candy Apple

    Candy Apple

    Via: CollectionByAnnTheGran

    Draw your candy corn a buddy by making candy apples. Aside from the pure bloody red color, you can always change it to dominant green and make the red an accent tone. Also, the brown shades are essential regardless of your apples’ base colors to distinguish the stick that pierces through each apple.

    12. Vampire

    Vampire

    Via: Aomam.ss

    A vampire figure in your Halloween-inspired greeting cards is a must-have. But don’t forget to elevate your drawing game. Draw wavy hair, red cheeks, cool fangs, and a bat in black color to make your Halloween drawing exciting, creative, and a definite showstopper.

    13. Spider

    Spider

    Via: DJ Inkers & Laura Strickland

    When spiders smile in your drawing, toddlers, and preschoolers will surely giggle with utmost joy. Nevertheless, this simple design can be drawn in your children’s costumes, Halloween baskets, and even as an ornament for their hats.

    14. Spider Web

    Spider Web

    Via: Leyla Rose

    With a spider comes the web, which is why you must not forget about this uncomplicated but significant element — the spider’s webTo draw the web, primarily intersect several straight lines, and connect them by drawing little curves in between.

    15. Clown

    Clown

    Via: Vex the Abyss

    Clowns have gained popularity in Halloween celebrations because several movies depict the clown as a spooky part of the community. So, fill in your Halloween drawings by creating a clown embedded with an extensive smile, big teeth, and scary eyes.

    16. Cauldron

    Cauldron

    Via: Hanu Rajput

    Mix and match your witch potions through this minimalist cauldron with a big boo sign and bubbles on top. Yet to make it a superb addition to your drawing, ensure that bubbles are present in the background. Moreover, colors are welcome here. But a black lining is more than enough.

    17. Witch

    Witch

    Via: Dawn

    Now that you know how to draw a witch hat and a witch broom, the only thing left to draw is the witch. An essential part of drawing a witch is her hair. With this, always ensure that your little witch drawing ideas have long hair.

    18. Tombstone

    Tombstone

    Via: Michael McGimpsey

    Make your Halloween cakes and pastries look fun when you draw as a topper the iconic tombstone. This drawing is among the simple Halloween drawing ideas because line precision and coloring are not, in any way, vital in the course of drawing the best tombstone.

    19. Zombie Hand

    Zombie Hand

    Via: Hanna Lee Tidd

    Your kids' Halloween doodles will never be complete when the zombie hand reaches for whoever and whichever it likes is missing. So what do you need to do? Of course, draw soil where the hand can break in, draw parallel vertical lines from the ground to the desired length, and create the finger elements for the reaching effect.

    20. Zombie

    Zombie

    Via: Light Lenser

    A zombie a day keeps the brains away, but it also makes your Halloween doodles more cute, fun, and enjoyable. If you're wondering what makes this zombie drawing a befitting inspiration for Halloween ideas, just look at its eye-catching color play in green, red, and blue shades.

    21. Candies

    Candies

    Via: hellothegandesign

    Treats turn a boring Halloween party into a festive and unforgettable one, even if these are just paper drawings. Yet, you can always turn these simple Halloween doodles into necklaces for your children's costumes by cutting out the drawing and tying everything together with yarn.

    22. Haunted House

    Haunted House

    Via: Lori Whitlock

    If you're wondering what's an interesting drawing to paste on your walls or doors, then a haunted house is the answer. To make the haunted house as creepy as it can be, make sure to only use black pens in outlining and filling in the drawing.

    23. Potion and Witchcraft

    Potion and Witchcraft

    Via: RAStudio

    The creepiness never ends when you draw a potion and witchcraft-inspired drawing idea, similar to the drawing above. Moreover, this piece of drawing can complete your witch hat, broom, witch, and tombstone doodles.

    24. Frankenstein’s Monster

    Frankenstein’s Monster

    Via: Fahrizky

    Frankenstein is an indispensable character in every Halloween or other scary event because of its monstrous look. Yet, you can make your drawing distinct by adding cute puppy eyes and a U-shaped smile on your Frankenstein.

    25. Moon

    Moon

    Via: aroberts20

    A scary, scary night is complete when the moon shines bright in patches and stitches that add a dozen more creeps into your bones. Out of all the easy Halloween drawings in this list, a doodle of the moon has got to be one of the easiest because you only need a big fat C, some squares, and lines!

    26. Skeleton

    Skeleton

    Via: Nalleli Figueroa

    Aside from the skulls, you and your kiddos can also try creating a full-body skeleton for your Halloween crafts and decors. To make the skeleton stand out, don't forget to raise one hand to the sky, just like dancing to Michael Jackson's Beat It.

    27. Old Tree

    Old Tree

    Via: Roshanda

    A growling old tree doodle can give a nice touch to your Halloween preparations which your family will surely love. To make it, you only need a pencil for outlining and a black pen marker to complete the rest of the doodle.

    28. Howling Wolf

    Howling Wolf

    Via: Artist Unknown

    Awoo your Halloween preparation worries away by drawing a howling wolf under the night stars, with trees and rocks as added elements. You can draw it with a pencil and let your toddlers do the rest of the coloring for a meaningful evening activity.

    29. Shadow

    Shadow

    Via: deimonnus

    Mirror, mirror on the wall, who's that silhouette trailing us all? Of course, that black figure is the shadow! A shadow is quick to do for your Halloween prep, as you and your little ones only need to scribble and sketch using a pencil, and you're done.

    30. Cute Child in Costume

    Cute Child in Costume

    Via: Jenni Keddie

    For your Halloween drawing, a cute kid in a costume can be a fantastic inclusion, especially when you put some witch hat and broom on.It would also help when you color your kid witches' drawing with green to boost the Halloween vibe.

    31. Melting Candle

    Melting Candle

    Via: Artist Unknown

    Melting candles elevate the Halloween spirit, but making the base a skull-like feature is more fun. What you need to do for this one is to make a skull and put a candle on top; make sure there are drip factors to make it more believable. Watercolors are fantastic for this one, too!

    32. Spooky Eyeball

    Spooky Eyeball

    Via: Violin Events

    A spooky eyeball to get your family and friends off-guard and terror-stricken once they enter your houses. It's a much better design for your doors or when you like some sneaky surprises at the front of your mirrors.

    33. Scary Coffin

    Scary Coffin

    Via: Gloria Medeiros

    A scary coffin is a nice feature to decorate in your table corner with your cute mummy and melting candle. Nevertheless, you don't need any tutorial in making a scary coffin because its design is direct and can be mimicked by anyone instantly.

    34. Magic Spell Book

    Magic Spell Book

    Via: Nikury

    It's a given that when you have a magic spell book, you can cast your spells, like expecto patronum, wingardium leviosa, arresto momentum, expelliarmus, avada kedavra, and more, wherever and whenever you like. This is why you need to draw it along with a cute mummy, a haunted house, a ghost doodle, a cat, and pumpkins for a full-circle Halloween experience.

    35. Scarecrows

    Scarecrows

    Via: Rauno

    Instead of stacking hays and doing actual physical work to create a scarecrow, why not draw, cut it out, and paste it wherever you like? After all, a scarecrow drawing can be quickly executed because you don't need to draw a particular face, as the body will suffice.

    36. Crow

    Crow

    Via: Jeffrey Garfield

    Who would've thought that crows could be charming, too? Well, believe it or not, you can make your drawing of an adorable crow with big dreamy eyes. To make the drawing more mesmerizing and total eye candy, draw the crow on top of your jack-o'lantern.

    37. Vampire Fangs

    Vampire Fangs

    Via: Margot Blanford

    If you do not want the full-face vampire, you can draw just the vampire fangs for some Halloween madness. Aside from purple, you can also mix and match other colors in your drawing depending on the theme of your Halloween celebration.

    38. Mexican Skull with Patterns

    Mexican Skull with Patterns

    Via: SouthPrints

    If you are a Mexican who celebrates Dias de La Muertos, it is a given that you need to make a skull with flower patterns all over it. To do it best, you can use a brush and a watercolor to achieve a beautiful drawing of flowers and other details.

    39. Halloween Trident

    Halloween Trident

    Via: Jazzyx3

    A drawing in a spooky season seems off without a Halloween trident as details. Don't worry because you and your child can easily do it, even with closed eyes. When doing this, imagine you are drawing a fork, and that's it; you can have a Halloween trident.

    40. Scary Castle

    Scary Castle

    Via: ssstocker

    Different from the spooky house in this post, a scary castle is a much bigger idea to draw and much creepier. Remember that the only colors that can make a castle scary are orange, yellow, red, and black, even with different shades.

    41. Spooky Gate

    Spooky Gate

    Via: Sarah Bailey

    Your castle will be incomplete when it does not have a scary gate doodle with creepy pumpkins on top. Aside from that, you can draw with this idea an owl, moon, mummy, animals like a bat and a cat.

    42. Little Girl in Pumpkin Costume

    Little Girl in Pumpkin Costume

    Via: Ivette Gonzáles

    A cuddly baby inside a pumpkin costume is everything, primarily when it's dominated by orange and highlighted by black colors. Yet, what will make it a better idea on paper is when you add a witches' hat and some lollies.

    43. Halloween Drink

    Halloween Drink

    Via: Artist Unknown

    Cheers to the Halloween season as you draw a sneaky little spider drink in your drawing idea. Aside from a spider, a cat is fun to draw with a drink, too. Moreover, hats and stripes are the best pairs for some green drinks, similar to the drawing tutorial above.

    44. Little Boy in Black Cat Costume

    Little Boy in Black Cat Costume

    Via: Aomam.ss

    Can you remember the black cat from earlier? Well, you can surely incorporate it with a boy figure while holding his orange-colored bucket. What made this drawing fascinating the most was the addition of cat ears and rosy red cheeks!

    45. Grim Reaper

    Grim Reaper

    Via: Varsha Kadam

    Last but not least from this list is the to draw your idea of a grim reaper, for this the best reference will always be The Grim Adventures of Billy & Mandy's Grim ReaperFor this, you must draw an axe (or a trident if you prefer), a skull, and a skeleton. Also, don't leave out the hood and the dress.

    Art Materials to Prepare

    To draw all these fun drawing ideas from this tutorial, you need to prepare these art materials:

    • Pencils: These are used to outline your drawing before coloring and to help with sketching.
    • Coloring materials: These can be watercolors, paint, crayons, and others that help you draw your desired pieces on whichever canvas you choose.
    • Canvas: This is where you will input your drawings, whether it be art paper, sketchbook, cloth, or sack.
    • Erasers: These are used to erase and change the details of your piece that you do not like.

    Halloween Drawing Ideas Wrap Up

    Halloween Drawing Ideas Wrap-Up

    Since all the easy Halloween drawing ideas have been laid out in this article, you can surely give your children a worthwhile Halloween experience when you incorporate each drawing into your decors and preps.

    So, what are you waiting for? Get that Halloween drawing to come to life!

    For years, steel casement windows, recognized by their gridded mullions and outward swing like a door, had fallen out of favor due to their tendency to leak and their fragile hinges, which could be damaged by strong winds. Many older buildings replaced these with more modern single-pane aluminum or double-hung windows. But recently, steel casements have made a notable comeback, especially in newer developments across West Chelsea and the West Village, as a nod to prewar architectural styles.

    Much of this revival can be attributed to architect and developer Cary Tamarkin. Often referred to as “the window guy,” Tamarkin has featured steel casement windows in many of his New York City projects, including 140 Perry Street, 495 West Street, 397 West 12th Street, and most recently, 456 West 19th Street, a 22-unit, 11-story duplex building, where five apartments are still for sale, starting at $2.2 million.

    Crosby Street Hotel Interior Featuring Blue Accent Wall and Steel Casement Windows © Crosby
    Crosby Street Hotel Interior Featuring Blue Accent Wall and Steel Casement Windows © Crosby

    Explaining his choice to use the more expensive steel casement windows, Tamarkin described it as a "commitment to a classic Modernism rooted in authenticity." Many of his projects are in areas rich in warehouse architecture, and Tamarkin designs his buildings to complement their surroundings. He favors steel over aluminum because the former has slimmer mullions and a textured, weathered look. “I don’t like fat-mullioned windows,” he said. The windows are carefully crafted, with small glass panes installed individually. “Either you don’t get it, or you can’t live without it,” he added, emphasizing the subtle craftsmanship that appeals to discerning buyers.

    Crosby Street Hotel Interior Full of Pattern and Light Thanks to Steel Casement Windows © Crosby
    Crosby Street Hotel Interior Full of Pattern and Light Thanks to Steel Casement Windows © Crosby

    One such buyer is Jaime Roth, who had been searching for an apartment in the West Village before purchasing a three-bedroom unit at 456 West 19th Street, drawn in by the windows. “The windows were really the reason why I bought that apartment,” she said. “I like that it’s new construction, but it feels kind of old. That’s what the windows do.”

    Crosby Street Hotel Interior with Accent Stripes and Patterns and Steel Casement Windows © Crosby
    Crosby Street Hotel Interior with Accent Stripes and Patterns and Steel Casement Windows © Crosby

    Casement windows also feature prominently in other high-end developments, such as 200 11th Avenue, where a penthouse is listed for $17.5 million. Sara Lopergolo, a partner at Selldorf Architects, who designed the building, noted the appeal of casement windows: “It breaks down the scale of a window opening. It frames views.” She added that the windows resonate with buyers because they evoke a sense of old-world charm, especially in New York City.

    Richard Kusyk, owner of Bright Window Specialists, which installs Hope’s Windows, a prominent manufacturer of steel casements based in Jamestown, N.Y., attributed part of the resurgence to advancements in window technology. Older steel windows were often single-pane with putty-glazed exteriors and no weather stripping, designed for industrial warehouses where air leaks didn’t matter. “Hope’s has developed ways to make those windows accommodate insulating glass, triple weather stripping, and superior finishes that will last a lifetime. They never did any of that in the old days,” Kusyk explained.

    In some cases, casement windows have been integrated into renovations. In the 1980s, Pierre LeVec and Pierre Moulin, founders of Pierre Deux, a company specializing in French country furnishings, installed French casement windows at 367-369 Bleecker Street. French casements, which have no center mullion and swing open for an uninterrupted view, became a key selling point when the building was converted to a condominium by Beck Street Capital in 2004. Apartments sold for up to $3 million and went quickly. Kevin D. Comer, senior managing director at Beck Street Capital, emphasized that these windows were a major selling feature for every unit. Comer, a former resident of the building, appreciated the French casements for their airflow, saying, “With French casement windows, the entire window is available for airflow. Just the breeze is incredible.”

    The Bowery Hotel Lobby Sitting Area with Steel Casement Windows © CMG
    The Bowery Hotel Lobby Sitting Area with Steel Casement Windows © CMG

    For those unable to purchase such high-end properties, vintage steel casement windows can still be experienced at hotels like the Bowery Hotel or Crosby Street Hotel. At the Bowery, rooms start at around $425 per night, while rates at the Crosby begin at $495. Sean MacPherson, co-owner of the Bowery Hotel, pointed out the charm of “real mullioned windows,” noting their coziness and appeal.

    However, only some are fans. Leonard Steinberg, managing director of Prudential Douglas Elliman and sales director for 200 11th Avenue, mentioned that while some people love the warehouse aesthetic of casement windows, others find it a "no-no."

    The Bowery Hotel Facade Featuring Steel Casement Windows © CMG
    The Bowery Hotel Facade Featuring Steel Casement Windows © CMG

    Though steel casement windows are known for their durability and character, modern architects are increasingly turning to aluminium joiner systems for their sleek design and superior energy efficiency, but modern window frame types, such as wood and composite, are also widely used in modern window construction. Wood offers a timeless aesthetic and excellent insulation, while composites combine the strength of materials like fiberglass and resin, providing durability and low maintenance. Each material offers distinct advantages, allowing architects to choose the best option depending on the building’s style, budget, and performance requirements.


    Flexi Hose Expandable Garden Hose is the most durable hose that will work well in cold weather, while Pocket Hose Expandable Garden Hose is the best lightweight alternative. You can also go for Kettoya Expandable Garden Hose, having repairable components. 

    Expandable hoses are the perfect combination of convenience and functionality, so they are emerging as a popular alternative to traditional hoses. 

    A good expandable garden hose should be lightweight, flexible, and have sturdy brass fittings. However, with most expandable hoses claiming to be the best ones on the market today, choosing your ideal option can take time and effort. 

    In this blog post, we will explore the top 7 expandable garden hoses worth your money. 

    Listed below are the best expandable hoses for gardeners:

    • Flexi Hose Expandable: The Flexi Hose Expandable Garden Hose is identified for its durability and weather resistance. Exceptional for heavy-duty use with solid brass fittings and an 8-pattern nozzle. Costs are higher than its rivals.
    • Pocket Hose Turbo Shot: The Pocket Hose Turbo Shot is valued for its lightweight structure and range of length options. Distinct with lead-free and machined aluminum connectors ensuring safety. User may face difficulty in controlling water pressure.
    • KETTOYA 100FT: The Kettoya is noted for its repairable 3/4-inch brass fittings, granting high durability. Expands up to 100 feet, ideal for large areas. Lacks a spray nozzle.
    • X-Hose Pro: The X-Hose Pro Expandable Garden Hose stands out for its lightweight yet sturdy design. Withstands high water pressure of 34 Bar. This high pressure necessitates user adaptation.
    • Dia Burst Proof: The Dia Burst Proof Expandable Garden Water Hose is known for its easy assembly process making it beginner-friendly. Matches the competition in durability. Requires careful storage when not in use.

    1. Flexi hose expandable garden hose - Best expandable hose with outer elastic fabric

    If you are looking for durable yet reliable expandable garden hoses, we recommend trying out Flexi Hose Expandable Garden Hose. It expands automatically to about thrice its original length when you turn on the water and then goes back to its compact size when not in use. 

    One of the standout features of this expandable garden hose is its durable design. It consists of ¾ inch solid brass fittings that ensure all the connections are secure and leakage-free. This expandable hose also comes with a guarantee of withstanding 2,000 uses, and we found it to be perfect for heavy-duty use. 

    This Flexi Hose model can handle up to 174 Pounds per Square Inch (PSI) or 12 bar of water pressure. It also works efficiently in temperatures ranging from 41 degrees to 114 degrees Fahrenheit. All these features combine to make this expandable hose capable of watering each plant, tree, and the entire soil of your garden even during the coldest months of the year. 

    The product boasts a 3750D outer fabric made of elastic along with four layers of latex. As a result, this hose by Flexi Hose stays safe against sharp corners, punctures, and thorns. 

    It also comes with an 8-pattern rotating hose spray nozzle so that you can choose from a variety of watering options according to your preferences. The nozzle of this expandable Flexi Hose is made of ABS plastic and comes with a slip-resistant and ergonomic natural rubber handle. 

    But the only drawback of this product is its slightly higher price. 

    Material: Latex | Product Dimensions: 8.9 x 8.82 x 3.94 inches | Weight: 2.77 lb. | Maximum Pressure: 12 Bar

    2. Pocket hose turbo shot expandable garden hose - Best with lead-free connectors

    If you are looking for a hassle-free watering process, we recommend the Pocket Hose Turbo Shot Expandable Garden Hose. Unlike a traditional rubber hose that is difficult to maneuver due to its heavy weight, this alternative garden hose tool can be moved around the area to be watered effortlessly. 

    One feature that brings this hose to the list of the best expandable garden hose options is safety. We found the lead-free connectors of this product to be quite impressive, as they made the water from this hose safe for consumption. 

    This can be especially useful for garden enthusiasts who supply water to their pets using their hoses. The machined-aluminum connectors of this expandable hose also prevent water contamination. 

    We found this expandable garden hose to be long-lasting. It features an exclusive outer-casting of Bullet Shell, which prevents any form of wear or tear on the product. The design of this expandable hose is as impressive from the inside, with kink-proof inner tubing for an uninterrupted flow of water. 

    Another great feature of this product is the decent number of variants that it is available in. For instance, this Pocket Hose Silver Bullet expandable garden hose is available in four sizes - 25, 50, 75, and 100 feet. 

    The nozzle of this garden hose is removable as well, which makes it a versatile option on the market. However, we found it a bit difficult to control the water pressure coming out of this hose. 

    Material: Aluminum | Product Dimensions: 7.2 x 6.55 x 5.9 inches | Weight: 1.63 lb. | Maximum Pressure: 12 Bar

    3. Kettoya 100FT expandable garden hose - Best repairable expandable hose

    The Kettoya 100 feet Expandable Garden Hose is one of the best expandable hoses on the market. It is convenient to use, durable, and overall a decent investment, thanks to its good hose material. 

    One of the best aspects of this expandable garden hose is it’s easy to repair. It boasts repairable 3/4-inch solid brass fittings, making the hose much more practical than those with fragile plastic fittings. Since you do not need to replace components or buy a new hose whenever an issue shows up, this Kettoya expandable garden hose is a value-for-money investment. 

    Another great feature of this expandable garden hose is its multi-layer integrated assembly. This design ensures that there is minimum internal wear and tear incidents due to horizontal expansion. 

    We consider this product one of the best expandable garden hoses because as soon as the water pressure in it touches 5 Bar, it can expand up to 100ft. As a result, we could easily reach the farthest corners of our garden, which made watering much easier. 

    This product also has a ten-function nozzle and a thumb control feature suitable for washing your house, car, floor, pet, and so on. Further, using this expandable hose with an irrigation sprinkler system along with a shut-off valve on its spray would make the watering process quite easy. However, this garden hose lacks a sprayer nozzle. 

    Material: Brass | Product Dimensions: 12 x 4 x 4 inches | Weight: 2.7 lb. | Maximum Pressure: 12 Bar

    4. X-hose pro expandable garden hose - Best with dac-5 fiber webbing

    X-Hose Pro Expandable Garden Hose by Big Boss boasts a lightweight construction yet works well for heavy-duty use. It is constructed using micro-weave fiber, which is one of the reasons why it weighs about half what a regular garden hose does. You can move this lightweight hose around easily without much hassle. 

    One of the standout features of this expandable garden hose is that it can easily stand heavy-duty use. It is made up of DAC-5 fiber webbing from commercial grade, which is why it is highly durable. This garden hose is also quite durable against any wear and tear, leaks, and punctures. 

    We could even drag it across tough surfaces without causing intense damage to the body of this expandable hose. Hence, it might be a good investment for people who want to invest money on a hose just once and then relax as they use it for years. 

    It can also stand strong against extreme weather fluctuations, including instances like storms and fire breakouts. This garden hose comes with solid brass fittings that are decently crush-resistant and a stabilizer so the product does not break under intense pressure. 

    Another good thing about this expandable hose is that it can attach to almost any nozzle. The product has plastic collars that are ABS high-resistant, allowing you to attach nozzles easily. 

    With a burst strength of 34 bar, this expandable hose allows you to work with intense water pressure from your tap without worrying about the pipe bursting. However, you may need some time to get accustomed to working with such high water pressure, as it is needed to keep the hose expanded. 

    Material: Brass and Latex | Product Dimensions: 12 x 4 x 4 inches | Weight: 2.7 lb. | Maximum Pressure: 34 Bar

    5. Dia burst proof expandable garden water hose - Best with thick latex-core

    If you are a beginner looking for an expandable garden hose, we recommend you try the Burst-Proof Expandable Garden Water Hose by Hydrotech. It comes with high-quality components that make it easy for anyone to assemble the hose for application. 

    For instance, we found the connectors of this expandable hose to be quite impressive. The spigot-end connector of this hose is made up of molded plastic, which is quite durable in nature. It secures decently well to the outdoor fixture, and the independent twisting capability of this component makes it very easy to connect to the Hydrotech water hose. 

    This garden hose expands up to 100 feet when filled with water, and its construction is durable enough to stand strong against ruptures and snags. It can also stand strong water pressure for a decent period and remain leak-free as you water your desired regions. 

    The build of this expandable garden hose is also worth noting. This Hydrotech product consists of a thick latex core and reinforced exterior made of nylon, which explains the decent durability of the garden hose. Overall, this garden hose is quite ergonomic and can be used by anyone. However, it would help if you stored it when the hose is not in use, which may be inconvenient for some people. 

    Material: Latex and Nylon | Product Dimensions: 9.45 x 5.35 x 10.87 inches | Weight: 5.4 lb. | Maximum Pressure: 17 Bar

    6. Hosetop expandable garden hose - Best with highest burst rating

    The expandable garden hose by Hostetop is a flexible water hose that comes with a ten-function nozzle. It is made up of high-quality materials, which is why the product is impressively durable and works well even for heavy-duty purposes. A balanced combination of materials like polyester and latex gives this hose enough resilience to withstand regular usability. 

    This 3750D garden hose is manufactured to easily resist issues like leaks and punctures. One of the best standout features of this product is its exceptionally high burst rating, which is about 41 bar. This means you can utilize a strong stream of water without damaging your hose. 

    It also incorporates components like ¾ inch brass connectors, which are suitable for heavy-duty use. As a result, this product lasts longer than most traditional garden hoses on the market today. It also works well in different ranges of temperatures, from 41 degrees Fahrenheit to 113 degrees Fahrenheit. 

    The variants of this product are available in four sizes - 25, 50, 75, and 100 feet. However, users can extend them up to 125, 150, or even 200 feet according to their needs and preferences. While we found the hose to be satisfactory, the nozzle was a bit cheaper in quality than we expected.

    Material: Brass, Latex, and Rubber | Product Dimensions: 11.8 x 11.8 x 2.9 inches | Weight: 4.28 lb. | Maximum Pressure: 41 Bar

    7. Expandable garden hose flexible water hose - Best with tangle-free design

    The Flexible Water Hose by WeGuard is one of the best expandable garden hoses that do not require arranging a huge storage space. Despite its 100 ft. expandable size, it comes in a package that allows users to store it conveniently. 

    This package includes one garden hose, a water hose nozzle, a custom drawstring bag, a few spare sealing rings, and a hose hanger for easy storage. The space-storage design of this product makes it an ideal gift and suitable for a wide variety of applications, such as watering your lawn, cleaning floors, etc. 

    It is also one of the best expandable garden hoses in terms of durability. Made of high-quality components such as a polyester fabric cover and four layers of latex core, the hose prevents common wear and tear issues. Further, the ¾-inch connectors made of heavy-duty brass prevent problems like cracks, rust, corrosion, and leakages. 

    We found this product to be one of the best expandable garden hoses in terms of its design as well. While most traditional garden hoses get tangled easily, the expandable alternatives like that by WeGuard don't. This hose remains tangle-free and kink-proof, thus boosting one's productivity. 

    The nozzle of this hose offers users a total of ten different kinds of spray patterns. These include full, cone, angle, shower, center, vertical, and several other patterns. We also recommend this product for people who want a soaker hose, as this product has a nozzle for this function as well. The only issue is that, at 6 pounds, it is much heavier than other hoses on this list. 

    Material: Polyester and Latex | Product Dimensions: 6 x 6 x 14 inches | Weight: 6 lb. | Maximum Pressure: 12 Bar

    What are the best expandable hoses for gardeners?

    Product Material Product Dimensions Weight Maximum Pressure
    Flexi hose expandable garden hose Latex 8.9 x 8.82 x 3.94 inches 2.77 lb. 12 Bar
    Pocket hose turbo shot expandable garden hose Aluminum 7.2 x 6.55 x 5.9 inches 1.63 lb. 12 Bar
    Kettoya 100FT expandable garden hose Brass 12 x 4 x 4 inches 2.7 lb. 12 Bar
    X-hose pro expandable garden hose Brass and Latex 12 x 4 x 4 inches 2.7 lb. 34 Bar
    Dia burst proof expandable garden water hose Latex and Nylon 9.45 x 5.35 x 10.87 inches 5.4 lb. 17 Bar
    Hosetop expandable garden hose Brass, Latex, and Rubber 11.8 x 11.8 x 2.9 inches 4.28 lb. 41 Bar
    Expandable garden hose flexible water hose Polyester and Latex 6 x 6 x 14 inches 6 lb. 12 Bar

    Expandable Hoses Buyer's Guide

    1. Dimensions

    It is crucial to research about the dimensions of the expandable garden hoses that you check out to ensure that they will serve your needs best. You can begin by considering what length you want your best expandable garden hose to be. To do so, think about the area that you wish to cover with water using the hose and then narrow it down to the ideal length that would fit the goal. 

    Similarly, you should consider the diameter of the hose as well. While a larger diameter will increase the water flow from the expandable hoses, it will also increase its weight by a pound or too. Most expandable hoses come with a diameter of either ¾ inch or ½ inch, and your choice should depend on the area you wish to wash or water using the product. 

    2. Material

    Another crucial factor to look out for while browsing for expandable hoses is the material that they are made up of. The material of the body of a hose directly affects its durability, which is why you can easily conclude how long your best expandable garden hose choice would last. 

    It would be best if you stick to hoses that are made of multiple layers of latex, such as the ones by Flexi Hose. You can also look out for materials like polyester and nylon in the exterior of expandable hoses. 

    3. Connectors

    The quality of connectors on both ends of expandable hoses should be good. Otherwise, their functionality can be hampered. It would help if you considered using metal or solid brass connectors because they are way more durable than plastic alternatives. 

    Further, you should also check whether or not the connectors have rubber washers or gaskets. They help provide a tight sealing to every best expandable garden hose, preventing the water pressure from causing leakage. 

    4. Maneuverability

    Gardeners who want to work with a flexible rubber hose should consider options with decent maneuverability. For instance, consider going for the best expandable garden hose that is lightweight and does not tangle easily. 

    It would help if you also looked for kink-proof options to ensure that your top expandable garden hoses move effortlessly around you as you water or wash certain regions. They are way better than conventional garden hoses, which often come in bulky sizes and are not as compact. 

    5. Nozzle Options

    Expandable hoses offer several nozzle options to choose from. As you browse your expandable water hose options, consider looking for the ones that offer different spray settings. Such hoses with a good-quality spray nozzle can help you be much more productive. 

    For instance, tasks like controlling the water pressure and adjusting the nozzle for better water flow become easy when you work with various nozzle options. Flexi Hose models and other expandable garden hoses come with 8 to 10 spray patterns, and you can choose your ideal nozzle from the same. 

    6. Price

    Finally, it would help if you always considered the price of expandable hoses before purchasing them. Considering the hoses we tested, the ones that featured a double-layer core, kink-free outer shell, ability to resist cold temperature, etc., were a bit pricier than a conventional hose. 

    However, it is worth noting that you can find several affordable expandable hoses that provide a satisfactory user experience too. It would be best to list all the features you necessarily require in your expandable hose. Then, you can search for one that fits your needs in your budget in the best way. 

    Can you connect multiple expandable hoses?

    Several expandable hoses allow users to connect them to other hoses for an extended reach. Good-quality options will not compromise on aspects like water pressure, even in an extended hose. 

    However, checking if your expandable hose is compatible to be connected with other hoses first is important. You can contact your expandable hose manufacturing company for further information or switch to other expandable hoses that offer this feature. 

    Are expandable hoses safe for drinking water?

    Yes, several expandable hoses are safe for drinking water. However, quality hoses don't always guarantee a safe water supply, so you should first check whether your hose is safe for such a supply. 

    To do so, ensure that you only go for hoses that come with a lead-free body. This way, there will be no cross-contamination of your water supply with harmful elements. Additionally, it would help to flush the full length of your hose to ensure that your expandable hose is clean and suitable for drinking water supply. 

    How to prevent kinking and tangling in expandable hoses?

    While expandable hoses are less prone to kinking and tangling, constant neglect can cause your collapsible hose to tangle up. Hence, ensure that you carry out all the necessary handling and storage measures to keep your expandable hoses tangle-free. 

    For instance, try to avoid twists and bends as much as possible while you use your hose. Drain and coil it properly in a hose reel before you store it to maintain a kink-free hose. 

    Of all the expandable hoses we tested, the Flexi Hose Expandable Garden Hose is the best. It is durable and efficient and can be left outside no matter how cold it is outside. 

    The Pocket Hose Expandable Garden Hose is a close second and ideal for people looking for a lightweight hose to maneuver around easily. Meanwhile, the Kettoya 100 Feet Expandable Garden Hose is the third most desirable option for its strong and repairable components. 

    Ensure you look for features like a double-layer latex core, good-quality hose materials, and protection from direct sunlight exposure, in your expandable hoses. Moreover, you can check out various expandable hose types and go for one that can withstand high water pressure if you want to use your hose to perform heavy-duty tasks effortlessly. 

    Homeowners may often get worried about the enormity of the task, which needs to be done on a periodical basis. But keeping your garden clean or mowing a massive piece of land has been made easier with a zero-turn mower. Not only does this equipment make the activity easy, but it also leaves behind perfectly trimmed land, which is bound to create a lasting impression on your guests. 

    However, the availability of so many great options on the market can confuse anyone. To make the selection job easier for you, we have researched, tested, and reviewed the six best zero-turn mowers that will be best suited for your 5 acres of land. 

    Without taking much time, let’s get going! 

    Listed below are the 5 best zero-turn mowers from our list:

    • Husqvarna MZ61 61 in. With a powerful 24-HP Kawasaki engine and a large 61-inch deck, the Husqvarna MZ61 delivers a speedy mowing process suitable for large areas. Its powerful engine, combined with 12-preset settings and Hydro-Gear ZT3100 Hydrostatic Transmission, enables effective mowing over any surface. Despite being impressive, its extensive build makes it challenging to move around when not in use.
    • Ariens IKON XD 52 inch 23 HP. The Ariens IKON XD offers professional-grade grass cutting at a lower price, featuring a 52-inch cutting deck, a Kohler 23HP engine, and remarkable traction. Its user-centric features like reduced vibrations, comfortable seat, and automatic parking brake add convenience. Nonetheless, parts except for the oil filter are not serviceable by the company, and attachments are purchased separately.
    • Jungle Jim Zero Turn Trimmer Rack ZT-TR. The Jungle Jim Zero Turn Trimmer Rack offers seamless movement and a powerful motor, which helps in efficiently completing mowing jobs. It is easy to operate thanks to its adjustable settings, and it is easy to move due to being lightweight. Note that this lawn mower does not come with an engine.
    • Husqvarna Z254F Zero-Turn Lawn Mower. Showcasing a powerful 26 horsepower engine and a speed of up to 6.5 miles per hour, the Husqvarna Z254F is well-suited for mowing three to five acres of land quickly. Notable features include its air induction technology and reinforced steel deck, providing optimal precision and durability. Although incredibly feature-rich, it may not fit everyone's budget.
    • EGO POWER+ZT4204L Cordless Z6 Zero Turn Riding Mower. EGO's POWER+ZT4204L mower stands out for its eco-friendly and easy operation, offering a cordless mowing experience. Its battery life may limit mowing larger areas, requiring recharging after clearing a 2-acre land, which increases the overall mowing time.

    1. Husqvarna MZ61 61 in.

    The Husqvarna Group has always been at the forefront of innovation since 1989 and their B07D1SVBVG perfectly shows off its manufacturing prowess. This zero-turn mower is perfectly fit for large areas, and tackling 5 acres will be a peanut of a job. 

    This model delivers a speedy mowing process, thanks to its large 61-inch deck size connected to a powerful 24-HP engine by Kawasaki. Its powerful engine is more capable than any walk-behind or push mower and helps reach a speed of up to 8 mph. The 12-preset settings of the cutting deck also help cut the longer grass on your land with utmost precision.   

    Plus, its commercial-grade performance can cover 5 acres of land in less than 1 hour if you can work your way with these machines. It also provides excellent access to areas that require maintenance and cleaning. Other than that, you can mulch, discharge, or bag the grass clippings efficiently and seamlessly.

    Our team discovered through using this product that completing the cutting job faster has become possible with the powerful blades and Hydro-Gear ZT3100 Hydrostatic Transmission that delivers effortless mowing over any surface. Additionally, its low operation cost and reliability add to an excellent experience, which you might not find with any other option.  

    All in all, this particular model will be an appropriate choice for mowing your 5-acre land. However, it might be challenging to move around when not in use due to its extensive build. You might need to turn it on every time you intend to move it around, which might be troublesome for some. 

    Cutting Width: 61" | Engine Power: 24 HP | Power Source: Gasoline | Speed: N/A | Cutting Height: N/A | Deck Material: Fabricated | Warranty: 4 Years

    2. Ariens IKON XD 52 inch 23 HP

    If you are looking for a cut quality similar to Husqvarna but do not wish to spend a fortune on a mower, then the Ariens B087ZSJLHX may fit the bill. Its seamless movement and the powerful motor will ensure that you can complete your mowing job in less than an hour.

    This model has a 52-inch cutting deck size that combines a Kohler 23HP FR 7000 V-Twin OHV engine and a Hydrostatic EZT transmission. This combination makes the mowing process easy as well as super-efficient. 

    Although it will not be as quick as the Husqvarna one due to its reduced deck size and a top speed of 7 mph, it makes up for it by offering excellent traction, fine-quality cuts, and a dependable build. Other than that, it is the most lightweight option on the market, and an automatic parking brake ensures it stays in its place when not in use. 

    Additionally, user-centric features like reduced vibrations and a comfortable seat with armrests make it a practical option that delivers commercial-grade grass clippings without burning a hole in your pocket.  

    Through our trial and error, we discovered that if there is one thing we did not like about the product, it's that the parts other than the oil filter are not serviceable by the company. These can be quite difficult for a user to clean and maintain. Additionally, you will need to purchase the attachments separately according to your use.   

    Cutting Width: 52" | Engine Power: 23 HP | Power Source: Gasoline | Speed: 7 MPH | Cutting Height: 1.5" - 4.5" | Deck Material: 12-gauge Steel | Warranty: 3 years

    3. Jungle Jim Zero Turn Trimmer Rack ZT-TR 

    If you are ready to dish out some extra dollars for a large cutting deck, powerful engine, and a heavy-duty zero-turn mower, the Jungle Jim B07CJZQPQZ can be a suitable choice. Its powerful engine and easy-to-use accessories allow you to do your mowing job without breaking a sweat. Continue reading to get detailed insight about the product. 

    Jungle Jim has continually developed easy-to-use and pocket-friendly equipment and tools for professionals in the lawn care industry. The lawn maintenance products of the company come with easy access, secure storage, and high mobility. 

    This unit is heavy-duty and can easily cut through stubborn grass. Also, the trimmer is within your reach when you are using it. A quick clamp attached to the mower ensures that the trimmer stays in place and doesn’t spin unconventionally. It also includes 2-inch U-bolts, which are compatible with any roll bars. 

    The availability of a range of adjustable settings makes the lawnmower easy to operate. Plus, its professional design enhances its efficiency and quickly completes the mowing process. Last but not least, the brand backs this model with a solid 2-year warranty.   

    After trying it in various situations, it is a suitable machine for mowing your 5-acre area, and after rigorous testing, we have not found many setbacks in its features and functionality. However, this zero-turn lawn mower does not come with an engine, and the mowing process can be a bit tiring. 

    Cutting Width: N/A | Engine Power: N/A | Power Source: N/A | Speed: N/A | Cutting Height: N/A | Deck Material: N/A | Warranty: N/A

    4. Husqvarna Z254F Zero-Turn Lawn Mower

    Looking for a powerful and versatile lawn mower? The Husqvarna Z254F Zero-Turn Lawn Mower is a top choice for homeowners who want excellent performance and durability. With a 26-horsepower engine and a speed of up to 6.5 miles per hour, you can efficiently mow three to five acres of land.

    The standout feature of this mower is its air induction technology, which ensures a precise cut every time. By drawing in air from the top and bottom of the deck, the grass is lifted for optimal cutting. The reinforced steel deck is built to last, even under heavy use.

    Whether you prefer to discharge, mulch, or bag your grass clippings, this mower provides flexibility. The added convenience of a cupholder and storage space makes the mowing experience more enjoyable. Parking the mower is effortless, thanks to the easy maneuverability provided by the steering levers.

    While the Husqvarna Z254F Zero-Turn Lawn Mower offers impressive features, it may not be the most budget-friendly option for some buyers.

    Cutting Width: 54" | Engine Power: 26 HP | Power Source: Gasoline | Speed: 6.5 MPH | Cutting Height: 1.5" - 4" | Deck Material: Fabricated | Warranty: 3 years

    5. EGO POWER+ZT4204L Cordless Z6 Zero Turn Riding Mower

    And lastly, this next Zero Turn Mower is a game-changer for those looking to break free from gas and fuel consumption. Powered by electricity and equipped with excellent battery backup, this mower offers a hassle-free mowing experience. While it may not be suitable for extensive properties, it excels as the best cordless riding mower for up to 5 acres.

    What makes this electric riding mower stand out is its eco-friendly operation and ease of use. The elimination of oil, gas, and fuel maintenance adds convenience and quickens the mowing process. Additionally, its comfortable design provides an added value to the user experience.

    While the EGO POWER+ZT4204L performs well in terms of mowing, it does have limitations. The battery life may be a concern, as it requires recharging after mowing a 2-acre land, extending the overall mowing time for larger areas.

    This limitation can be mitigated by using more batteries, but keep in mind that the mower only comes with 4 batteries. Additionally, for larger properties exceeding 10 acres, the EGO POWER+ZT4204L may not be the most efficient choice.

    Cutting Width: 42" | Engine Power: 22 HP | Power Source: Electric | Speed: 8 MPH | Cutting Height: 1.5" - 4.5" | Deck Material: 10-gauge Steel | Warranty: 5 years

    What is the Best Zero Turn Mower for 5-acre Lands?

    The table below provides a direct comparison of the top-rated Zero Turn Mowers suitable for 5-acre properties. Key specifications, including Cutting Width, Engine Power, Power Source, Speed, Cutting Height, Deck Material, and Warranty, are evaluated. These attributes are vital in determining the most effective mower for maintaining expansive lands.

    Product Cutting Width Engine Power Power Source Speed Cutting Height Deck Material Warranty
    Husqvarna MZ61 61 in. 61" 24 HP Gasoline N/A N/A Fabricated 4 Years
    Ariens IKON XD 52 inch 23 HP 52" 23 HP Gasoline 7 MPH 1.5" - 4.5" 12-gauge Steel 3 years
    Jungle Jim Zero Turn Trimmer Rack ZT-TR N/A N/A N/A N/A N/A N/A N/A
    Husqvarna Z254F Zero-Turn Lawn Mower 54" 26 HP Gasoline 6.5 MPH 1.5" - 4" Fabricated 3 years
    EGO POWER+ZT4204L Cordless Z6 Zero Turn Riding Mower 42" 22 HP Electric 8 MPH 1.5" - 4.5" 10-gauge Steel 5 years

    Best Zero Turn Mower For 5 Acres Buying Guide 

    Now that you have gone through our comprehensive list of the best zero-turn mowers available on the market, it’s time you make a buying decision. You can’t just select a high-power and durable mower from the market. However, several factors are at play when we talk about having an ideal zero-turn mower for 5 acres of land. 

    So here we are with a detailed discussion about these factors and features you might consider before making your final purchase. Let’s look into them. 

    1. Design And Size

    A zero-turn mower provides the rider with better maneuverability and control over such large machinery. Compared to a traditional mower, it features a zero-turn design that allows you a 0-degree tight turning radius for a pristine cut. 

    The weight of these machines is bound to be heavy, which cannot be avoided anyway. You might need to start the mower to move it from one place to another. However, if you are looking for one to use on your household lawn, some lightweight options are available for the market. 

    1. Engine Power

    The engine power of your lawn mower dictates how quickly you are going to finish the job, how fast it is moving, and the power output provided by it. Most of the best-selling mowers have used engines of large brands like Kohler, Kawasaki, and Briggs Stratton, which are responsible for powering the machines. 

    As you saw in our list of best mowers, Kohler and other brands feature anywhere from 17 to 27 HP engines. Our experts would recommend a Kawasaki twin-cylinder engine,  Kohler V-Twin series, or Briggs Stratton recoil start engine that provides Horsepower in the range mentioned earlier. You can easily and quickly mow your 5 acres of land using the provided engine power. 

    The tank capacity and right motor size determine the type of work you do, but we say power should be a primary concern for acres and hectares of land. 

    1. Deck Size

    The deck is another crucial feature that influences the amount of mowing time. We tested and reviewed a variety of zero-turn mower options with varying deck sizes in order to determine the best sizes for various work types.

    Deck sizes can vary from 42 inches to 61 inches, varying from model to model. For instance, some Husqvarna mowers feature a small 42-inch cutting deck and are suitable for people who want to work in their yards. Due to the smaller deck size, it would take time to mow tall grass, but you will get targeted accuracy. 

    On the other hand, the Husqvarna MZ61 mower features a large 61-deck cutting deck that completes your job in less than an hour. Being the unit with the largest deck size, it is suitable for large properties. 

    Also, you get product options with 2 or 3 blades. The greater the number of blades, the greater the precision you will get in cutting. We think the selection of blades depends on the type of terrain, the lay of the land, and the grass you have. However, it is preferable to have a 3-blade mower over 2 for a cleaner cut. 

    1. Cutting Size

    Apart from how much and how fast the machine can cut, it offers several customization options that allow you to maintain the grass level you wish for. You can look for a mower with an adjustable height to choose how close to the cut you want. 

    Many zero-turn mower models are integrated with incremental height adjustments. If the height level allowed by the mower is 4 and above, it means the minimum cut will be 4mm. So, if you want to give your lawn a unique look every time, this feature will significantly be helpful for the purpose. 

    1. Transmission

    The transmission, also known as the zero-turn mowers’ drive system, dictates its mobility and maintenance. Three transmission categories are available in mowers, including automatic, manual, and hydrostatic. Hydrostatic ones will be most suitable in any respect. 

    When combined with the zero-turn function, the hydrostatic transmission provides greater comfort and a faster response time to users while mowing.

    1. Fuel Capacity

    Fuel capacity is not to be confused with engine capacity, as the former depicts how much fuel your machine can hold and is measured in cc. The greater the fuel capacity the more will be the runtime of your mower. For mowing a 5-acre land with long grass, you not only need a powerful engine and large cutting capacity, but we also recommend a mower with a large fuel volume. 

    1. Safety Features

    Despite you sitting comfortably atop the mower at an adequate distance with blades and grass, your machine must have ample safety features. For instance, an exclusive bumper roller system fosters turf protection. 

    A rollover protection system or ROPS makes sure that rides remain safely seated in case the zero-turn mower flips or tips. Many machines feature steering wheels, and most riders tend to prefer them to overlap bars. However, lap bars provide you with superior control over the movement and speed of your lawn mower. 

    Many mowers can attain a speed up to 8.5mph, so it’s handy to have some sort of brake or emergency stop for reacting in a sudden situation. Also, it is preferred to have a gradual but easy start so that you won’t get off guard quickly. 

    Additionally, high-back padded seats are preferred as the mowing process can be time-consuming, and uncomfortable seats result in back problems. Armrests are always a good idea for stability, along with the presence of vibration dampeners. 

    What is a zero-turn mower and how does it differ from other types of mowers?

    A Zero-turn mower is a type of lawn mower that maximizes efficiency due to its zero turning radius, obtained via independent control of each drive wheel by wheel motors. This distinguishing feature allows for unparalleled maneuverability, marking it as an ideal choice for expansive landscapes such as 5-acre lands.

    Are zero-turn mowers suitable for 5-acre properties?

    Absolutely, zero-turn mowers are a perfect match for 5-acre properties. With their superior maneuverability and speed, they are excellent for covering large open spaces, ensuring efficient and accurate mowing, making them an attractive option for land of this size.

    What cutting width should I look for in a zero-turn mower for a 5-acre land?

    In the case of a 5-acre land, a zero-turn mower with a cutting width of 50 inches or more is ideal. This increased cutting deck width allows a greater area to be covered in a shorter time period, thereby reducing the total time dedicated to mowing.

    Can I use a zero-turn mower on hilly terrain within a 5-acre property?

    Yes, it is possible to use a zero-turn mower on moderately sloping terrains within a 5-acre property. Nonetheless, while many zero-turn mowers are designed to handle slight inclines, it is crucial to consult the manufacturer's specifications for the maximum allowable slope or incline for operation to guarantee safety and efficiency.

    How long does it typically take to mow a 5-acre property with a zero-turn mower?

    The Zero G garden hose has been widely appreciated by most customers. But is that enough for you to buy the product?

    Of course not! It is important to determine whether it will be the right option for you. And for that, you will need to know about all of its different features. Being a recent product with superior technology, it has many advanced features that need a proper discussion.

    As for the negatives, well yes, it does have some, like every other product out there. But those flaws are not dealbreakers; in fact, the host of advantages it offers more than makes up for them. And we’re saying this after using the product extensively.

    So, based on our experience, here is a Zero G garden hose review containing all the important information for you. Go on and give it a read.

    Zero G Garden Hose Review

    Garden Water Hose with Watering Head. Watering Garden Plants Concept Photo.

    zero-G 4001-100 Garden Hose, 5/8" x 100', Gray
    • 50% lighter weight compared to commercial vinyl hose.The...
    • Jobsite tough - abrasion, leak & puncture resistant with...

    Why Buy This Product?

    If you didn’t know it till now, Teknor Apex, the brand that offers this product, is known for its varied range of durable and convenient products. And the Zero G garden hose completely lives up to that reputation. It is one of the most efficient options you will find on the market today.

    Here are all the praiseworthy aspects of this product that we observed.

    1. Much More Lightweight

    Watering plants in your garden is a regular task that becomes tiring if you have a heavy hose that needs to be carried or wheeled around. It may even seem to take a longer time. However, with this garden hose at home, you don’t need to bother about any of these problems.

    Its weight is half that of other products, thanks to the innovative materials and technology used. You can also be relieved of the backache which arises due to carrying hoses over long distances. Uncurling and maneuvering the Zero G garden hose is as easy as it can be. That ensured, the length is also ideal for watering small gardens as well as large fields.

    Also, the product is a complete exception to other lightweight hoses that tend to burst easily. This is also something that we can readily vouch for.

    1. Easy Storage

    Another convenient feature of this garden hose is that you can swirl it up and store it easily without any worries. Not only does the inner core of Tru-Flex allow it to stay kink free, but also lets you wind it into any small space. As such, you don’t need to search around the house for an adequately large area to store it.

    In fact, you can keep it wound up even when it is cold outside. Thus, when winter comes, storing it in a box or reeling it onto a outdoor spindle or reel is not at all a problem. It can withstand temperatures as low as 35 degrees. So, you also don’t have to face problems of storage space or any tripping hazard.

    1. Durability

    Many people believe that a hose that is lightweight isn’t sturdy enough. Honestly, this statement does hold true in most cases, but not for this product.

    This garden hose is light but tough enough to withstand a pressure of more than 600 PSI, which signifies a good deal of durability. In fact, a water pressure surpassing 600 PSI is way too much for the majority of garden hoses. Most models can’t bear a pressure of more than 250 PSI.

    Apart from this, a High Density G-Force jacket also covers the product entirely. As such, this garden hose becomes as long-lasting and durable as any commercial-grade hose. The jacket even protects the hose from developing tears or cracks while pulling it across rough ground or gravel.

    1. Kink-Free Design

    Getting kinks and tangles while using long, ordinary hoses is a major concern of all customers. That’s because it’s an issue that can potentially lead to a lot of problems. Any kink in a hose might increase the water pressure in the middle, leading to leakage or even bursts. However, with this Zero G hose, you can be rest assured that you won’t face such problems.

    It is the special design of this product that does not let it kink easily and lets you conduct your chore without having to undo any knots. Even when you pull the hose out from a water source, its rigid and tough structure prevents it from kinking and curling up. Also, the Zero G hose does not bend easily when you unravel it to pull it across the garden.

    1. Lead-Free and Drinking Water Safe

    As far as garden hoses are concerned, you might have never thought that the possibility of contamination exists. But in reality, it does. A hose and any fittings used may leach dangerous chemicals into the water. Among such substances are BPA, which is a kind of plastic, and lead. These are as harmful to humans as they are to animals. So being specifically drinking water safe is a criterion that’s very much important.

    Having metal fixings that are completely lead free, this hose is drinking water approved. The high opinions of several customers in this regard are a testimony to the fact. So filling up a bowl of the water for your pet or even a glass for yourself on a sunny day would not be worrisome anymore.

    1. Thickness

    An essential requirement for ensuring the ideal water flow through a hose is the right thickness. As for this Zero G garden hose, we can very well say it scores quite high in this parameter also. With its ⅝ diameter, you can be assured of getting quite a huge amount of water with great pressure.

    Thanks to this great feature, your field and gardens can be filled up in a very short duration. And despite the high pressure and volume of water flowing through the product, it stays perfectly strong. What does the trick is the high-quality latex material used to make the Zero G hose.

    1. Crush-Proof Fixtures

    Another common defect observed in ordinary hoses is the cheaper plastic or metal fittings that degrade with time. These are also not sturdy enough to be used for different purposes. In case you use the hose in areas such as at a building site or to wash our car, many people might tread on it.

    In comparison to other available hoses, the Zero G provides much greater resistance to being crushed or broken. This is owing to its commercial-grade and newly designed crush-proof fittings. If ever driven over or stepped on, they keep the integrity and shape of the product up to 900 pounds. Also, their ergonomic design makes them easy to screw on and off or to fit on the outside tap, pressure washer or sprinkler.

    What Could’ve Been Better?

    Though this product is among the best options that you will ever find, it does have a few faults which don’t make much difference. Firstly, sometimes there might be problems in dispensing the water through some sprayers. For this, you need to be sure that the hose-end fits properly with the spray-bottle cap. Also, do make sure that you are using a good quality spray-bottle as the ordinary ones may lead to leakages in the hose.

    Also, too much rough handling of the hose might lead to leakages from some areas. Handling them with proper care and in the right way keeps such hazards away. Also, you should not apply much force when pulling it out from the water source. That might lead to leakages at the ends, which are more critical.


    Pros

    • 50 percent lighter than other hoses
    • Can withstand a pressure of 600 psi+
    • Great resistance to punctures and leakages
    • Fixtures are crush-proof
    • Easy and convenient storage


    Cons

    • Problems in using with sprayers
    • Rough handling might lead to leakage


    [easyazon_image align="center" height="500" identifier="B01GHSBKOS" locale="US" src="https://m.media-amazon.com/images/I/41dy-RYlfVL._SL500_.jpg" tag="homesthetics0a-20" width="500"]

    Garden Hose Guide For You

    Whether it is working in your garden or a rural field, a suitable hose is mandatory for keeping your plants or crop production healthy. But this fact is often taken lightly or even ignored by many people. And the result? They tend to go for the best-looking or the cheapest products, which start faltering within days or weeks of the purchase.

    So while buying a garden hose, make sure you don’t judge a product by such external features as those won’t ultimately matter. Purchasing an efficient product such as the Zero G garden hose would make a lot of difference in the long run. Hence, to help you further before you move on to purchase a hose, we list some factors which you must consider:

    1. Length

    This is a very important aspect that people often cannot interpret properly. An average length hose may not be ideal for using in gardens or fields of all sizes and would mean extra hard work. A length of about 100 ft, as with the Zero G hose is perfect in this regard.

    1. Flexibility

    While you water your plants or crops, ensuring that it travels to all corners of the garden or field is essential. A flexible hose such as this one can travel to the entire corners, making your gardening or crop production truly ‘fruitful’.

    1. No Retractions or Expansions

    Cheap quality materials used in ordinary hoses might expand or retract due to temperature fluctuations. This leads to problems of fitting into the water sources. As such, it is ideal to go for a hose with a high-quality material that is not affected by weather changes. As for the Zero G hose, it is the superior quality latex material that rules out such possibilities.

    1. Strength

    This is another important factor when it comes to selecting a garden hose. In fact, it is key to ensuring that the hose doesn’t burst easily. It can be determined by the limit of water pressure that the hose can withstand. This feature is mentioned in the product information and should always be checked.

    Generally, a burst pressure of more than 350 psi is ideal. By getting the Zero G garden hose, you are more than secured in this regard, since it can even bear a pressure of greater than 600 psi.

    What About The Price?

    Well, you might be wondering why we have not yet discussed the price of the product. Let us tell you that we’ve kept it for the last since it is the most amazing trait of this garden hose. Despite offering such impressive features, this hose has quite an affordable price. Hence it ranks high in terms of cost-effectiveness as well.

    Among the multitude of products available nowadays, you will spot many that do not possess such advanced qualities yet charge much more. If you go for such garden hoses, it would mean you have to be cautious about the health of your hose beside the health of your plants. In comparison, choosing this Zero G hose would be a much more wise decision. You would get both a suitable price as well as advanced features.

    Side view of male gardener watering pot plants from hose. Caucasian bearded man wearing blue shirt, glasses and apron, growing flowers in greenhouse. Commercial gardening activity and summer concept. Zero G Garden Hose Verdict

    Zero G Garden Hose Verdict

    With this, we come to the end of our review, and we hope it has been helpful for you.

    The Zero G garden hose is an all-rounder in our opinion, as it performs equally well in various aspects. Being lightweight and able to withstand high levels of pressure, it delivers a seamless performance. Also, you can water the plants at a constant pace and in an uninterrupted manner.

    On the other hand, the tough material gives it the durability and longevity that anybody would desire. Tears and kinks will be things of the past once you get hold of this one. And the best bit is that this all comes at a very affordable price!

    So, go ahead and try this garden hose. Let us know about your experience in the comments section below.

    Till next time!

    Related Articles

    10 Best Automatic Garden Hose Reels

    13 Best Expandable Hoses

    13 Best Soaker Hose

    Learn How to Bury a Garden Hose for Easy Watering Transport

    10 Best Hose Clamps

    13 Best Soaker Hose

    Want to fulfill your dream of having a garden with perfectly leveled grass and uniform bushes?

    You must have already come across the Worx GT 3.0 during your online research on gardening tools. But, are you absolutely sure that it would be the right one to go for?

    Well, to answer that question, a lot of facets of the product must be considered, including its faults. But we are confident that you will be impressed with the great features it offers. We can say that because we’ve used it extensively for a couple of months.


    In this article, we bring to you a review of this multi-tool based on our experience, which will help you form a better idea about the product.

    So, without any further ado, let’s get started.

    WORX GT 3.0 Trimmer Edger Review

    WORX WG163 GT 3.0 20V PowerShare 12" Cordless String Trimmer...
    • [KIT INCLUDES] WORX Power Share Grass Trimmer and Hedge...
    • [TRIMMER & EDGER 2-in-1] Easily converts from a string...

    In case you didn’t know, Worx is one of the most popular brands when it comes to garden and lawn equipment. The brand had initially come up with Worx GT2.0, an award-winning grass trimmer and edger with exceptional versatility, precision, and power.

    This Worx GT3.0 is its successor, with a number of improved features and enhancements that make it the best solution for your gardening needs. So, let’s take a look at all the benefits and features that the product offers.

    1. Easy Multi-use Tool

    With this tool, we got a grass edger, a trimmer, and a mini-mower. It is a unique system that incorporates the functionalities of all these three tools. Here, we briefly talk about each of these three modes of functioning:

    • Trimming

    We loved how the multi-use tool converted between the three modes without using any additional tools. Trimming is the first mode that operates by adjusting the position of the handle. For initiating a trimming action, we just stood in front of the bush that we wanted to polish up and worked our way along. One thing you have to make sure is that the device stays in the right position.

    • Edging

    For going to the edging mode from trimming, we just had to adjust the angle of the handle pivoting at the base. We held it steady and continued to edge along the perimeter of the garden and other obstacles in between.

    Furthermore, it was very easy to use this mode. In fact, with our previous edgers, it was not at all a smooth process. So, it is safe to say that this product has really been a blessing in disguise!

    • Mowing

    Mowing your lawn with those regular weed eaters can be a tough task. But thanks to its 90 degrees rotating head, it becomes quite easy to reach spots where the regular ones won’t. Some of these spots include those under the ground-level deck or under low-hanging trees.

    It has sturdy wheels attached so that you can adjust the handle pivot once more and move it in the same way as a mower. Meanwhile, you can be sure that the wheels guide and keep the cut line steady.

    1. Handle Design and Adjustability

    When it comes to gardening equipment, having an efficient design is of prime importance. If the design makes it difficult to handle, you wouldn’t be able to work with it in the right way.

    But in the case of this product, even the design has been crafted with much effort from the makers. It has a two-hand gripping system, which you can also hold using one hand depending on the application. For better comfort, there is extra cushioning on the grips which are also slip-proof.

    What impressed us the most was the handle, which could be adjusted to any height that we desired. This edger, mini-mower, and trimmer system feature seven lock height modifications. Besides, you can also move the auxiliary handle to multiple positions. As a result, it becomes equally convenient for tall as well as short users.

    Furthermore, its cordless trimming mode is super easy to handle. You can forget about the hazard of using heavy, gas-powered trimmers or the tripping problem with the electric variants.

    1. Powerful Battery System

    Ultimately, what you want from a gardening tool is the right performance that makes your garden just how you want it. For achieving this, you need a powerful battery system, which most trimmers and edgers lack.

    But the Worx GT3.0 is a complete exception to this trend, as it features a battery capacity twice that of its predecessor. Its cutting system functions with the latest Max-Lithium batteries of high density. Hence, you wouldn’t have any problems even after using it regularly for a full season.

    Besides, these Li-ion batteries can be recharged. We could trim a medium-sized garden twice by one charge of the product, which was far better compared to our previous trimmers. Needless to say, we were overjoyed.

    Note that the batteries come uncharged when you purchase the tool. However, after the first charge which takes a maximum of 12 hours, the batteries only need about 3 hours of recharging.

    1. Cutting System

    This is something that many of you might not be aware of, but it plays a vital role in making a weed cutter or trimmer truly successful. A trimmer must have a quality cutting system for ensuring that your cuts are as precise as they can be.

    You will find different kinds of trimmers adorning difficult cutting systems. While some are average in performance and suited for light to moderate work, others are meant for heavy-duty work such as cutting woody plants.

    This multi-tool from Worx has a string-cutting system, which is suitable for moderate yard work. The system works on the principle of centrifugal force to deliver seamless trimming. It consists of a string that spins fast enough and is held by a rotating spool by centrifugal force. A faster rotational speed would make the string stiffer.

    Added to this, the Worx GT3 features a standard round trimmer line which cuts the grass more than other vegetation. This line has a diameter of around 0.065 inches, which is suitable enough for light to moderate trimming.

    1. Cordless Ability

    Using electric trimmers or edgers involves the use of extension cords and that’s where all the hassles lie. You must have a cord that is long enough for the trimmer or edger to reach the grass lawn. Also, while moving them around the extension cord may get pulled out now and then.

    But with this all-in-one tool, you are relieved of all these hassles as it is completely cordless. You can take it with you wherever you need it, without worrying about any extension cords. As a result, spots that you earlier ignored can be worked on easily.

    1. Lightweight

    Moving about in your garden with a heavy tool can be tiring. This is the case with most of the ordinary trimmers and edgers available. But not with the GT3.0, as it weighs less than 6 lbs. You can therefore comfortably move it from place to place. Even lifting it high for trimming some of the hedges won’t be a problem.

    [easyazon_image align="center" height="500" identifier="B07Z8PB3PQ" locale="US" src="https://m.media-amazon.com/images/I/41vjppewqnL._SL500_.jpg" tag="homesthetics0a-20" width="500"]

    What Could’ve Been Better?

    Although the product is undoubtedly among the best gardening equipment available, it has some minor faults. However, this doesn't make much difference in its efficiency.

    Firstly, the diameter of the round trimmer line sometimes makes it difficult to cut the tougher bushes or grass. Hence its capability is limited to moderate trimming. Also, while attempting to cut the tougher weeds, the trimmer line becomes prone to snap. But this problem is rectified to some extent with its reinforced nylon material which offers extra strength and resistance.

    Apart from this, draining out the battery of this tool when the charge is finished may lead to problems in its functioning. Usually, the battery automatically shuts off when the charge reaches a certain point.

    But if you try to squeeze out that remaining charge as well, it might kill the life of the battery. So be careful to take it off the tool and recharge it. You can also purchase some spare batteries. They come at an affordable price.


    Pros

    • Multi-use tool with three modes
    • The handle can be adjusted to any height
    • The convenient design makes it easy to handle
    • Rechargeable lithium battery
    • Light weight makes it easy to carry around


    Cons

    • Round trimmer line not suitable for tough grass
    • Draining out the battery may affect its functioning


    Young man work with string trimmer cutting the grass in the garden. Worx GT3 Buyer's Guide

    Worx GT3 Buyer's Guide

    Choosing quality tools for gardening purposes is important if you really want your garden to be in the right shape. Trimming, edging, and mowing are some of the key practices that help to maintain the health of your lawn or garden weeds.

    Hence, it is important to have a clear idea about what your needs and preferences are. Here are a few points that you should consider:

    1. Reaching The Hard Areas

    It is you who knows best about your garden and not anyone else. Your yard might have a lot of small and hard-to-reach places, and obtrusions like fences or decks. In such cases, ordinary edgers or trimmers won’t be too useful and you need to go for an option like the Worx GT3.0. Note that even a large mower may not provide you with close-range cuts along rocks and stairs.

    1. Bushes Or Hedges That Grow Fast

    All plants don’t have the same rate of growth. As such, some of your bushes or hedges may grow faster than others. To maintain uniformity in the garden, such bushes need frequent trimming. If you have several such bushes in your garden, it is best to go for a tool like the Worx. On the other hand, if you have a basic lawn that needs little polishing, this might not be the right tool.

    1. Durability

    Purchasing a gardening tool can well be regarded as a long-term investment. Naturally, durability is a must quality. Ordinary edgers or trimmers might be made of cheap material that might not be as long-lasting as you want them to be. Hence it is essential to check the material from which the equipment is made. In the case of Worx GT3.0, high-quality materials provide the tool with the durability you desire.

    Using The Worx GT3.0

    After you bring the multi-tool home, some simple steps have to be followed to make it ready for use and to store it afterward. This product comes pre-assembled and just requires a few installations using a screwdriver and some screw pins. Here’s is a brief list of the steps involved: 

    1. Charging

    Begin by charging the battery using the charging system provided. Note that the battery must be fully charged before making it ready for use.

    1. Assembling the Product

    Before you use the product for the first time, attach the safety guard on the trimmer. To do this, unscrew the pin on the bottom portion of the guard and gently place it onto the rear side of the trimmer. Keep pushing the guard carefully until you hear it snap into place. Then fasten the guard with the screw pin.

    1. Placing the Wheel

    This would vary depending on how you wish to use the three-in-one system. For using the edger mode, you need to attach the wheels to the side of the trimmer. Slide the wheels over the metal plate on that side.

    For using the mini-mower feature, the wheels must be fastened to the back of the safety guard. Do this by sliding the wheels vertically on the metal plate below the safety guard till they lock perfectly.

    1. Storage

    This product is very adjustable. Hence you can store it just anywhere you want to. You can keep it hanging on your garden shed wall or any other small space. All you need to do is adjust the tool to its smallest size.

    All That’s Included In The Box

    After you purchase the product, here are the things you’ll get in the box:

    • The Worx GT 2.0 multi-use tool
    • One miniature shaft which adjusts between the modes
    • One or two 20v or 32v MAX Lithium-ion battery
    • One standard three-five hour charger or one rapid charger
    • Three spools
    • Instruction manual
    • Warranty

    Price, Warranty, And Availability

    Most of the time, many of you might think that going for a high-quality product will be cost-intensive. Honestly saying, it does hold true for several cases, but not all! And surprisingly, the Worx GT3.0 falls among those few products. It is quite fairly priced in comparison to other edgers and trimmers of similar caliber.

    As for its availability, it can be readily found in your local supply store or can be purchased online. If you go for the latter option, ordering it from the Worx website or an authoritative site like Amazon would be better. An added advantage of buying from the Worx website is that they allow you to pay the amount in three installments.

    This product also comes along with a two-year warranty that is extendable up to three years. If any malfunctions occur or you are not satisfied, there is a 30-day money-back guarantee as well.

    A municipal worker in an lawn mower mows fresh, green grass on the lawn near a residential building. WORX GT3.0 Verdict

    WORX GT3.0 Verdict

    With this, we come to the end of the review and we hope you have found it helpful.

    The Worx GT3.0 multi-use tool is something you should seriously think about if you need multiple tools to maintain your garden. It will help you consolidate your trimming, mowing, and edging needs into a single tool.

    Added to this, its advanced features and compact design help you achieve the best possible results while saving room in your garden shed. And the best part is that all these benefits come at an affordable price!

    So, go ahead and try out this three-in-one tool. Let us know about your experience in the comments section. We’ll be glad to know about it.

    Till next time, Adios!

    Related Articles

    The 5 Best Lawn Mowers for St Augustine Grass

    5 Best Gas Hedge Trimmers

    3 Best Polymeric Sand

    5 Best Paver Sealers for a Wet Look of Epic Proportions

    8 Best Dump Carts for Lawn Tractors & ATVs

    4 Best Walk Behind Brush Cutter

    3 Best Yard Hydrant

    5 Best Stick Edger

    7 Best Shoes for Cutting Grass Comfortably

    9 Best Small Hedge Trimmer

    9 Best Small Hedge Trimmer

    7 Best 21-inch Mulching Blade

    13 Best Trimmer Lines

    6 Best Corded Electric String Trimmer

    Frustrated with all the holes, cracks, and scratches on your wood furniture? Then it's about time you got yourself a quality wood filler. 

    These products have gained significant popularity among DIYers over the years because they can handle pretty much all sorts of repairs, from hiding blemishes to filling holes on wooden surfaces. Not to mention, they leave an excellent finish and are easy to use. 

    Hence, going for such a product would certainly make sense if you are not planning on replacing your wood furniture anytime soon. However, since the market is flooded with a ton of options, choosing the right product can be pretty complicated and time-consuming. 

    That's why we have compiled a list of the top 9 wood fillers currently available on the market to make your search easier. Plus, we have included a buyer's guide towards the end of the article to make things a notch more interesting. 

    So, without further ado, let's jump right in! 

    Best Wood Fillers

    putty of wooden crevices, window door restoration with the Best Wood Filler

    1. Elmer's

    For over 65 years, Elmer's has been committed to delivering quality adhesive solutions that turn ideas into reality. And the E855 Carpenter's Wood Filler is a noteworthy example of what the brand can offer. From filling gouges to hardwood floors to filling nail holes in molding strips, this product can make every task effortless. 

    Elmer's E855 Carpenter's Wood Filler, 3.25-Ounce Tube, White
    • Paintable and sandable
    • Sands easily to a smooth finish

    Why Did We Like It?

    As a wood filler from a brand that has been in the industry for decades, we are pleased to say that it exceeded our expectations in most aspects. It is paintable for starters, which means it allows you to apply a fresh coat of paint on the wooden surface that you've repaired. 

    Apart from that, the product sands smoothly and leaves an even finish, something that all users will love. It offers a drying time between 12 and 24 hours, which may not be the fastest on the market, but it allows you to make any last-minute changes if required. So, a longer drying time is not that bad after all. 

    Additionally, it is durable; not only can it fill voids with ease, but it can also resist cracking and shrinking due to daily wear and temperature changes. Lastly, it features an economical price tag, ensuring that it is the go-to choice for those on a limited budget. 

    What Could've Been Better?

    Even after having tested it for a significant period, we could not find any downsides to this product. But having said that, we have to admit that it tends to get a bit dry in the tube with time, which might make it just a bit difficult to be pushed out. 


    Pros

    • Easily sandable and paintable
    • Sports an economical price tag
    • Leaves a smooth finish
    • Can resist shrinking and cracking


    Cons

    • Gets dry in the tube with time


    2. Goodfilla Water-Based Wood & Grain Filler

    Next up, we have an outstanding product from the house of Goodfilla. This Water-Based Wood & Grain Filler from the brand can help you fill large holes with a trowel, including hard floors. It is equipped with all the necessary features to provide the desired results. 

    Goodfilla Red Oak, 1 Quart (3.7lbs) Wood and Grain Filler,...
    • ⚒️ HIGH QUALITY & MONEY SAVING: Save time and money with...
    • ⚒️ DESIGNED FOR PROFESSIONAL WOODWORKERS: This is the...

    Why Did We Like It?

    To begin with, this wood filler offers top-notch adhesion, which ensures it doesn't crack or shrink with time. This saves both your money and time. Even though it's designed for professional woodworkers, any novice can use this water-based wood filler to fill holes on damaged wood because of its easy application. 

    A major problem with wood fillers is that they tend to get harder with time, which makes it difficult for the users to push them out of the tube. Thankfully, this product is water-based and offers a very long shelf life, so users no longer have to worry about hardened wood fillers. 

    Finally, it is backed by a 365-day warranty; therefore, if you don't get satisfactory results with this product, the brand will refund your money without asking any questions. 

    What Could've Been Better?

    Again, we couldn't find many flaws with this product except for the strong odor, which made it a bit difficult for us to test it for this guide. Also, it took a few days for the odor to go away, which was a little annoying. But other than that, it worked perfectly.   


    Pros

    • Backed by a 365-day warranty
    • Safe to use
    • Has an unlimited shelf life
    • Offers top-notch adhesion


    Cons

    • Offensive odor


    3. West System

    West System is widely known for its assortment of highly functional epoxy wood fillers that help users fix their wood flaws without a hassle. And the CECOMINOD050909 Low Density Filler from the brand offers the same efficiency. So, let us learn a bit more about this product in the next few sections. 

    West System 407-5 Low Density Filler 4 oz
    • 407 Low-Density is a blended microballoon-based fairing...
    • Add 407 to a mixture of epoxy resin/hardener to create a...

    Why Did We Like It?

    First and foremost, it's easy to sand and carve once it has cured, which enables users to paint their wood surface after repairing it. Understandably, this helps users apply a new look to their rotted wood without breaking a sweat. 

    Like any other West System product, it is high quality and can easily stand the test of time despite weather changes and daily wear and tear, which is great. Additionally, it sports a reasonable price tag, making this epoxy glue wood filler an instant hit among DIYers and novices. 

    What's more, the product offers the "Peanut Butter Consistency," which ensures it can cling to vertical surfaces such as stands. Overall, it is one of the best wood fillers on the market that comes extremely handy for bonding uneven surfaces, fairing, fileting, and gap filling. 

    What Could've Been Better?

    We couldn't find any considerable drawbacks with this product during our usage. But one thing that you should keep in mind is that being a low-density fairing filler, it may not be ideal for general bonding hardware with epoxy.


    Pros

    • Sports a reasonable price tag
    • Can easily cling to vertical surfaces
    • Highly efficient
    • Easy to sand


    Cons

    • Not ideal for general bonding hardware with epoxy


    4. West System 404-45

    Since West System is such a dependable brand for versatile wood fillers, we thought of adding one more product from it to our list. Allow us to introduce you to the  404-45 High-Density Filler from the brand, which is a great option if you are looking for an epoxy thickening additive. 

    WEST System® 404 High-Density Epoxy Filler | Strong...
    • High-density epoxy thickening additive for strength – Made...
    • Excellent for hardware and stud bonding – Even small...

    Why Did We Like It?

    Anyone who knows a thing or two about wood fillers would agree that the key highlight of this product is its formulation. It is mixed with epoxy for top-notch compressive strength. Thus, it makes the product ideal for hardware bonding and other applications that require a tough interface between dissimilar materials. 

    Believe it or not, even a small amount of this wood filler can help minimize cracks in the epoxy. All you need to do is mix it into liquid epoxy to make a moderately loose slurry, which will stay in a hole on a horizontal surface. 

    Apart from that, it is the go-to choice for boat repair. Needless to say, it can withstand the harshest of marine elements and will last a long time. Overall, it is one of the best-selling epoxy fillers on the market that any DIY or boat enthusiast can hope to get their hands on. 

    What Could've Been Better?

    Without a doubt, this product is one of the best epoxy fillers on the market. But the thing is, since it's a high-density adhesive filler, it may not be the perfect choice if you are looking for a product that can be used for fairing epoxy surfaces. 


    Pros

    • Ideal for boat repair and building
    • Can withstand the toughest of marine conditions
    • Offers top-notch compressive strength
    • Comes at an affordable price


    Cons

    • Not recommended for fairing epoxy surfaces


    5. Timbermate Water-Based Wood Filler

    Founded in Australia in 1992, Timbermate is a brand that specializes in the manufacture of unique filling products. On that note, we bring to you the Water-Based Wood Filler from the brand, which can be used for regular wood maintenance work. Now, there's a lot more to it, so keep reading. 

    Timbermate Wood Filler, Water Based, 8-Oz Alder
    • Easy preparation
    • Timbermate is versatile and may be used for all interior...

    Why Did We Like It?

    We were pretty impressed with what it had to bring to the table. Firstly, this stainable wood filler is highly versatile, which means it can be used to repair wood voids on various interior surfaces. So, be it your furniture or the guitar, you can apply it to real wood without thinking twice. 

    Beyond that, it takes only a few minutes to dry, unlike many other ordinary tube fillers that take as long as an entire day. Thus, it allows you to go about your daily life without wasting much time covering wood flaws. 

    Plus, if you have any excess filler on the surface, you can scoop it up and place it back in the bucket, which is great. Since it falls under the category of water-based wood fillers, it is non-toxic and safe to use, which, in our opinion, is an added advantage. 

    Lastly, it comes in a pack of 2, ensuring you have enough material to complete your project. 

    What Could've Been Better?

    If you are looking for water-based wood fillers that can be used on heavy-duty outdoor projects, then it might not be the right choice for you. This is because it is ideal for interior use only; as such, it may not be as durable to withstand harsh weather elements. 


    Pros

    • Has a quick drying time
    • Can be applied on various rough surfaces
    • Safe to use
    • Easy to prepare


    Cons

    • Can’t be used outdoors


    6. 3M

    We are halfway through this list, and it's time to talk about a bondo wood filler from 3M, a popular US-based brand dedicated to manufacturing products that improve people's lives. Now, as far as the 01131 Platinum Plus is concerned, it is no exception as its super malleable and consistent substance spreads easily for quick applications. 

    3M Platinum Plus Filler 01131, Lightweight, Stain Free, Tack...
    • EXCELLENT GRIP: Contains an adhesive promoter that...
    • MULTI-SURFACE VERSATILITY: Recommended for use with...

    Why Did We Like It?

    A common issue with most wood fillers is that they shrink and crack after a certain time because of numerous factors, including temperature changes and daily wear. But this one offers a durable adhesion that can last for a long time on rough edges of various surfaces. 

    Additionally, it features an advanced formula, making it the go-to choice for using aluminum and galvanized steel. Besides applying it on wood fiber, you can use it on other metallic surfaces with ease. Sounds good? Well, keep reading. 

    Different wood fillers have different curing times, but we can all agree that a shorter curing time doesn't make users wait too long to apply a fresh coat. Thankfully, this product has a shorter curing time, which lets you sand and apply a new coat of paint in as little as 20 minutes. 

    So, if you have too many projects to deal with, you might want to consider this one. 

    What Could've Been Better?

    The packaging material used by the brand was not good. Since the can wasn’t durable, it was slightly dented in the transit, making it difficult for us to get the lids off. That said, this issue doesn't compromise the performance of the product, and we'd recommend going for it nonetheless. 


    Pros

    • Stainable wood filler
    • Has a short curing time
    • Ideal for galvanized steel and aluminum
    • Features super malleable and consistent substance


    Cons

    • Poor brand packaging


    7. Woodwise Wood Patch

    Next, this Wood Patch from Woodwise can take stains like hardwood. Its higher solid content makes it the perfect choice to fill large holes on different wood species. Thus, it makes it an ideal choice for professional woodworkers and DIYers looking for a reliable wood filler. 

    Woodwise Wood Patch "Ebony" Quart Wood Filler
    • Pre-mixed ready-to-use
    • Takes stain like hardwood

    Why Did We Like It?

    We liked pretty much everything this product has on offer, but what truly caught our attention was its easy application; it comes pre-mixed and ready to use. So, applying this product won't be a hassle for experienced DIYers and professionals. 

    Plus, this wood patch has a higher solid content, making it a perfect option for filling large cracks and spots. Hence, no matter how big the rot is on the surface, the product will make it sand-ready in a jiffy. Not to mention, it is easy to clean up as well. 

    What's more, it cures to an aesthetically pleasing gloss finish on the surface, which is good. But especially pleasing is its budget-friendly price tag, making this product the go-to option for many DIYers who are starting new. 

    Overall, from our experience with this product, we can assure you that it is an option that you wouldn't want to miss out on. 

    What Could've Been Better?

    We weren't able to find any significant flaws with this product. But if given a choice to nit-pick, we'd say that even though it's easy to use, the filler itself can be a bit messy to apply, so first-timers may require some time to get used to it. 


    Pros

    • Can fill large holes
    • Easy to apply
    • Cures to an aesthetically pleasing gloss finish
    • Sports a budget-friendly price tag


    Cons

    • Wood filler is a bit messy


    8. Timbermate

    We won't be wasting any time introducing you to Timbermate as we've already included a quality product from this brand previously. As for the CECOMINOD049315 Hardwood filler from the brand, it is just as good as the other picks. So, let's dig a little deeper. 

    Timbermate American Cherry/Brush Box Hardwood Wood Filler...
    • Easy preparation
    • Timbermate is versatile and may be used for all interior...

    Why Did We Like It?

    First things first, this wood filler dries pretty fast, which lets users sand the wood and apply a new coat of paint or stain in a matter of minutes. So, if you are a professional, who has a deadline to be met, this product could be your best bet. 

    We also liked that it features non-toxic solvents that don't cause harm to the wood, unlike ordinary fillers that tend to take a toll on the integrity of the wooden surface. What's more, it cures to a durable filler, which doesn't shrink or crack with daily use. Rest assured, this product is dependable, strong, and reliable and can accept all finishes. 

    If it dries out in the container, there's absolutely nothing to worry about, just add some water, and it'll be brand new. Thus, it ensures that there's no wastage. Overall, we think it's safe to say that this wood filler can easily meet your highest professional standards. 

    What Could've Been Better?

    No doubt, the product dries quickly and is easy to use. But the color of filler when it cures is not what we had expected. The label says "American Cherry," but it turns into a lighter color than cherry when it dries. So, that's something you need to keep in mind if you decide to go with this product. 


    Pros

    • Dries quickly
    • Can take almost any finish or stain
    • Strong and reliable
    • Doesn’t contain any harsh solvents


    Cons

    • Dries into a different color


    9. DAP

    Our next pick is from the brand DAP, a leading supplier and manufacturer of wood fillers, adhesives, sealants, and caulks. The 00585 Latex Wood Filler from the brand contains real wood fibers, making it a great choice for those who want a filler that feels and looks like real wood. 

    Why Did We Like It?

    Perhaps, the most advantageous feature of this product is that it contains real wood fibers. This not only makes it feel and look like real wood once it dries but is also durable enough for indoor and outdoor use. Besides, once it hardens, it becomes three times stronger than the wood itself, something you wouldn't see with other wood fillers in a similar price bracket. 

    Furthermore, it can be painted, varnished, stained, planed, screwed, drilled, or cut, so you can rest assured this product can be used professionally. Now, as far as the drying time is concerned, you will be pleased to know that it dries quite faster, allowing you to sand and paint it right after. 

    Another that we particularly liked about this product is the fact it is crack and shrink resistant. Long story short, the DAP 00585 is for those looking for a heavy-duty and professional-grade latex wood filler at an economical price. 

    What Could've Been Better?

    We were pretty impressed with the results delivered by the product for the most part. But keep in mind that If you have a larger project to deal with, a single tube of this product may not suffice. In fact, you might have to buy many of them to get the job done. 


    Pros

    • Contains actual wood fibers
    • Durable enough for indoor and outdoor use
    • Available at an affordable price
    • Dries faster


    Cons

    • Doesn’t have sufficient quantity for large projects


    Wood Filler Buying Guide

    Hopefully, you have gone through the list of the top 9 wood fillers on the market by now. So, were you able to make a choice? Well, it's not all that simple. To buy the best wood filler, there are some important factors to keep in mind apart from the specifications. 

    That's why we have written this buyer's guide, explaining all those important factors in detail, so make sure you read it carefully till the end.

    1. Packaging

    One of the most important factors to consider when purchasing a wood filler is the packaging of the product. More often than not, they come in the sticks, squeeze tubes, and tubs. Those that come in tubes are either two-part fillers that must be mixed before application or no-mix, which can be applied on the surface with a putty knife.

    As far as tube fillers are concerned, you only need to squeeze out the required amount of the filler to fill voids and pores. On the other hand, you just need to rip off a small chunk and apply it by hand with stick fillers. 

    Tubs tend to hold a good amount of the product and hence are considered to provide good value for money. Also, they are the go-to choice for larger and heavy-duty projects, while stick fillers provide the least value for money and are mostly used to repair cracks and scratches.    

    2. Color

    Most wood fillers available on the market come in wood-inspired shades or white. If you plan to stain or paint the cured filler, make sure you choose a product stainable or paintable, either in white or in a lighter color. However, if you don't intend on applying a coat of stain or paint on the repaired area, then going for a shade that matches the original wood color would make sense.

    3. Consistency

    Consistency is another crucial factor that needs to be considered to get the best results. Fillers can have a thin or thick consistency. Usually, thicker wood fillers are used to fill voids, while thinner wood fillers are mainly used to fill open-grain wood pores. 

    You must choose the right consistency for your project. This is because thinner usually lacks the body to sufficiently fill voids, and thicker fillers feature large particles that don't easily fit into pores. 

    That said, keep in mind that some thicker fillers can be converted into thinner fillers by adding water.      

    4. Task

    Wood fillers are used for a range of tasks. While some are used to fill pores in open-grain wood, others are used for filling voids such as gouges, holes, or divots in all wood species. However, versatile wood fillers can fill both pores and voids with ease.    

    5. Application Environment

    Usually, most fillers on the market are for "interior/exterior" use or 'interior-only." This indicates how well the wood filler will hold up in the mentioned environment during and post-application. 

    A. Interior-only Fillers

    These types of fillers can be safely applied to wooden pieces in your home, such as furniture like tables, chairs, etc. If you apply the same filler outdoors or to furniture that'll stay outdoors, such as a patio table, the filler will likely shrink or crack. 

    B. Interior/Exterior Fillers

    You can apply this type of wood filler to wood pieces that will live both indoors and outdoors since they can tolerate the harsh weather elements without shrinking or cracking.    

        furniture restoration, the master closes the hole in the wooden surface with wax pencils close-up. Wood Filler Verdict

    Wood Filler Verdict

    With that, we have almost come to the end of our review-based guide. And we hope that it helps you buy the right wood filler based on your requirements. But still, if you have trouble zoning in on a single product, we strongly suggest going through our top picks from the list.   

    The Elmer's is the best overall, in our opinion, the reason being it leaves a smooth finish and can resist shrinking and cracking. Closely following the Elmer wood filler is the Goodfilla Water-Based Wood & Grain Filler, which is a great choice if you are looking for a product backed by a warranty and safe to use.

    However, if you want a quality wood filler that can easily cling to vertical surfaces, we strongly recommend checking out the West System.

    Do let us know in the comment section if you have any further doubts or queries. Till then, goodbye!  

    Related Articles

    Wood Filler vs Wood Putty

    5 Best Epoxy Wood Filler

    5 Best Epoxy Resin for Tumblers

    5 Best Wood Hardener

    7 Best Glue for Glass to Wood

    9 Best Exterior Wood Stains

    9 Best Glue for Metal to Wood

    9 Best Primer for Bare Wood

    9 Best Varnishes for Wood

    11 Best Epoxy Resin For Crafts

    Food Safe Epoxy Guide 101

    11 Best Concrete Crack Filler

    Sanding Epoxy Resin Guide 101

    The Difference Between Epoxy & Super Glue

    11 Best Bar Top Epoxy

    Waterproof Epoxy 101

    What is Resin and How It’s Used

    Epoxy Paint For Wood 101

    10 Best Epoxy for Plastic

    Epoxy Garage Floor 101

    Surfaces Resin Won’t Stick to

    Heat Resistant Epoxy 101

    Epoxy Cement Guide 101

    How To Stabilize Wood

    How To Mix Epoxy 101

    How to Remove Wood Glue

    How To Harden Sticky Resin

    How To Fix Epoxy Mistakes

    Water leaks are a major thing in American homes, and if not fixed right away, they can cause water damage and massive disruption. 

    Thankfully, we have automatic water shut-off valves in this tech-driven day and age. These amazing devices inform you of water leaks and shut off the mainline to prevent water damage or flooding. What’s more, you can install it on the existing water intake pipe without spending a hefty amount on installing new pipes.   

    If the fear of water damage keeps you up at night, you should definitely purchase such a product. However, the problem is, since there are numerous factors and options to consider, you can’t just expect to settle on the right product based on luck.

    In this article, we have reviewed the top 10 options on the market and provided a buyer’s guide to help you make an informed purchase. Now, without further ado, let’s get started.   

    Listed below are the top 5 recommendations for the Best Wireless Water Shut Off Valves:

    • Owfeel WIFI & Bluetooth Smart Water Valve: Owfeel WIFI & Bluetooth Smart Water Valve offers affordability, easy installation, remote control via smartphone and voice commands, and compatibility with Google Home and Amazon Alexa. It needs slight modifications for mounting.
    • LeakSmart 8881300: LeakSmart 8881300 ensures swift leak detection, operates during power outages, and provides easy installation without pipe cutting. It comes with a relatively high price tag.
    • Owfeel WIFI Smart Valve: Owfeel WIFI Smart Valve stands out with its reasonable price, remote control via smartphone and voice commands, and timing control feature. Its installation process may pose a challenge due to unclear instructions.
    • Moen: Moen conducts daily tests for an efficient water supply, offers 24/7 leak protection, and allows water consumption tracking via the Moen app with a 1-year limited warranty. It comes with a difficult installation process and an additional subscription fee for basic functionality reporting.
    • Aubric Smart Valve: Aubric Smart Valve combines economy, durability with an IP65 waterproof ABS material housing shell, easy installation, and hands-free voice control with Google Assistant and Amazon Alexa. The downside is the absence of warranty information is notable.

    1. Owfeel WIFI & Bluetooth Smart Water Valve - Best for Smart Budget

    One of our top recommendations is the Owfeel WIFI & Bluetooth Smart Water Valve, which can be connected to WiFi to control the closing and opening of the water valve.  It can be used for various other applications; hence it is an option you wouldn’t want to miss out on.  

    For starters, this automatic water shutoff valve is easy to install. Rest assured, you can put it together without any professional help in just a matter of minutes. Furthermore, it is equipped with a power indicator and a power button on the top, making the installation process even more convenient.

    This wireless water shutoff valve can be controlled remotely, so when you are on a trip or away from home, you can control the valve with the smartphone. On top of that, it is compatible with Google Home and Amazon Alexa, enabling you to control the functions of the unit through your voice, which is great. 

    But what’s even more pleasing is the affordable price tag, which ensures it delivers good value for money.     

    To be honest, there’s not much that can be found faulty with such an exceptional device. However, it requires some modifications to make the mounting bracket fit right. So, that’s something you might want to keep in mind if you decide to go with this model.   

    Weight: 1.57 lbs | Dimensions: ‎7.48 x 4.02 x 3.66" | Compatible Pipe Size: N/A | Smart Home Integration: Amazon Alexa, Google Home | Connectivity: Wi-Fi | Special Feature: Voice Control

    2. LeakSmart 8881300 - Best for Advanced Leak Protection

    For over 85 years, LeakSmart has been protecting American homes through its quality and technologically advanced products. Hence, it should come as no surprise that the 8881300 Automatic Water Shut-Off Valve from the brand is among our noteworthy recommendations. Let us learn more about this product in the next few sections. 

    Anyone who has used a LeakSmart product before can vouch for the quality of the products the brand offers. And naturally, this model of wireless water valve is no exception. 

    It shuts off the water supply automatically whenever it detects a leak within 5 seconds, so you don’t have to worry about water damage in your house with this product. And since it operates off a smart home protocol, it features a battery to keep functioning even when there is a power outage, which is no less than a bonus. 

    Apart from that, this automatic water shut-off valve is easy to install. You are not required to cut any pipes as it works perfectly with the ball or gate valves. Thus, it means that you don’t have to hire a professional plumber and spend a hefty amount to get this wireless shut-off valve to work. 

    Overall, it is one of the best smart home devices that any homeowner can hope to get their hands on.   

    Without a doubt, this product is an excellent addition to a smart home system, especially because of its easy installation and 24/7 protection. But that said, it sports a pretty expensive price tag, which is why it may not be ideal for those on a low budget. 

    Weight: 5.44 lbs | Dimensions: ‎10.7 x 9.8 x 6.7" | Compatible Pipe Size: N/A | Smart Home Integration: LeakSmart Hub | Connectivity: Wi-Fi | Special Feature: LeakSmart Sensors

    3. Owfeel WIFI Smart Valve - Best for Cost-Effective Smart Home Integration

    Since Owfeel products are so nifty, we thought adding yet another efficient wireless water shut-off valve from the brand to this list would make sense. Meet the Owfeel WIFI Smart Valve that allows you to open or shut down the valve automatically with a smartphone so that you can enjoy a carefree vacation.     

    Thanks to the remote control feature, this product gives you complete control over the closing and opening of the water valve even when you are not at home. Just connect it to the WiFi using the “Smart Life” app, and you are good to go.

    Additionally, it is compatible with two of the most famous voice command apps Google Assistant and Amazon Alexa. So, if you feel too lazy to use the app, you can just speak the commands directly, and it will make sure that they get executed immediately without any issues. 

    Furthermore, it features timing control, enabling you to set when the valve controller shuts or opens as per your requirements. Now, that’s something you don’t see with the other ordinary wireless shut-off valves on the market. 

    Last but not least, it is priced reasonably well, which makes it an instant hit among those who don’t want to invest a big amount in smart home systems.     

    A few customers have complained that the installation was not hassle-free. Indeed, the instructions that came along were a bit unclear and not of any help, so you might need to hire a professional to install this product. We tried doing it ourselves, but it took a while to get it right. 

    Weight: 1.34 lbs | Dimensions: 11.93 x 5.12 x 3.5" | Compatible Pipe Size: 0.8-1.7", 0.8-1.18" | Smart Home Integration: Amazon Alexa, Google Home | Connectivity: Wi-Fi | Special Feature: Voice Control

    4. Moen - Best for Water Consumption Tracking

    Our next pick is from the house of Moen, a well-known brand dedicated to designing and delivering innovative and reliable products that last a lifetime. As far as the 900-001 Smart Water Shut-Off Valve is concerned, it is an ideal example of what the brand can bring to the table.   

    First, this smart water valve runs daily tests to ensure the water supply line is running efficiently. 

    It continuously checks for potential vulnerabilities and leaks in the pipes and automatically turns off your home’s water supply in case there are issues, thereby offering 24/7 leak protection. So, rest assured that you won’t have to deal with the catastrophic effects of water damage as long as this product is installed in your house.

    Plus, it is compatible with the Moen app, which lets you set water consumption goals, turn your water valve on and off remotely, and track water usage. Thus, it helps you save money and water for your home, which is truly amazing. 

    Lastly, it is backed by a 1-year limited warranty. So, you don’t have to worry about manufacturing defects within the first year of purchase; the brand has got you covered!     

    We were pretty disappointed to find out that it doesn’t come with the basic functionality reporting unless a hefty subscription fee is paid. Also, this product is a bit difficult to put together, so you will have to call a professional plumber to get it to work. 

    Weight: 4.75 lbs | Dimensions: 5.75 x 2.6 x 5.9" | Compatible Pipe Size: 3/4" | Smart Home Integration: Amazon Alexa, Google Home | Connectivity: Wi-Fi | Special Feature: Microleak Technology

    5. Aubric Smart Valve - Best for Outdoor Use

    Next up, we have a product from Aubric, a relatively new entrant to the market. Like most other products on our list, this one, too, is easy to install and is an excellent add-on to the existing levered ball valve. And the best part? It is priced economically, so it can be a great option if you want to save a few bucks.   

    The durable build quality of the product is what caught our attention from the get-go. The entire wireless water shut-off valve is covered by a top-quality ABS material housing shell, which is durable and IP65 waterproof. So, you don’t have to worry about rain ruining the longevity of the product. 

    Additionally, the application is super easy to use. All you need to do is add this wireless valve controller to your existing ball valves to control the water supply from anywhere with a touch on the smartphone. 

    When paired with Google Assistant or Amazon Alexa, the smart water shut-off valve offers you hands-free voice control over your home. This means you can control the functions of the device the way you want without having to move an inch, which is truly remarkable.  

    This product from Aubric is undoubtedly one of the best smart valves out there, but we didn’t find any information related to the warranty offered by the manufacturers. So, you might have to make additional expenses to repair or replace this product if it breaks down the road. 

    Weight: 1.17 lbs | Dimensions: ‎2.76 x 2.76 x 2.95" | Compatible Pipe Size: 1/2", 3/4", 1", 1 1/4", 1 1/2" | Smart Home Integration: Amazon Alexa, Google Home | Connectivity: Wi-Fi | Special Feature: Voice Control

    6. E-SDS

    The ESDSWLD02 Water Leak Detector will automatically shut off the main water supply to the appliances to prevent your house from flooding when you are away. Naturally, this makes the product the perfect choice for vacation homes. So, let’s take a closer look at what it has to offer.   

    The best part about this unit is that it sounds a loud alarm whenever it detects a leak and sends a signal to shut off the main water supply. Thus, it ensures that your house doesn’t get flooded.

    Moving on, you can install this exceptional product on a water heater or on the power outlet of a washing machine and see the amazing performance for yourself. Rest assured that you won’t be disappointed. 

    The device allows you to manually shut off the water when you are away on vacation, thanks to the vacation mode. We were also pleased to find out the manufacturer didn’t skimp on the warranty. 

    In fact, this water leak detector is backed by a 2-year warranty, so you can get in touch with the manufacturer if you have any issues or concerns with this product.     

    While it features a top-notch leak detection system, it has a couple of drawbacks. For starters, even though it supports battery life, it doesn’t come with any batteries out of the box, so be prepared to make additional expenses. Other than that, we found the 6-meter cable to be a little short.    

    Weight: 1.3 lbs | Dimensions: ‎6.06 x 5.67 x 4.29" | Compatible Pipe Size: 3/4" | Smart Home Integration: N/A | Connectivity: N/A | Special Feature: Water Leak Sensor

    7. Ufairy

    Now that we are almost near the end of the list, here’s another product from Ufairy that you should consider. Tested by experts to meet the highest quality and performance standards, the GR-W-105 Smart Water Valve from the brand can shut off the water supply when it detects leaks. 

    The single biggest advantage of this product is that it uses stainless steel double hose clamps, which ensures it makes the product 20 times more durable than its predecessor. So, longevity should be the least of your concerns if you decide to go with this smart water valve.    

    Additionally, this product works with a quarter-turn ball valve, even those found on radiant heat systems and water heaters. Thus, it makes the product stand out from most of the options on the list, which is great.  

    We also liked that it can be used remotely using the “Smart Life” app without hidden costs. So, no matter where you are, you have complete control over the functioning of this product. And you no longer have to worry about a burst pipe and other unforeseen water leaks while at work or on vacation.      

    Unfortunately, this smart water valve is not backed by a warranty, which is undoubtedly disappointing. So, if it faces any problems down the line, you’ll have to spend a few bucks from your pocket to repair it. Other than that, it is a top-notch option available at a reasonable price. 

    Weight: 1.61 lbs | Dimensions: ‎11.97 x 6.1 x 2.91" | Compatible Pipe Size: 1/2", 3/4", 1", 1 1/4", 1 1/2" | Smart Home Integration: Alexa, Google Home | Connectivity: Wi-Fi | Special Feature: N/A

    8. Orbit

    Orbit is a popular brand known for manufacturing products that help save water and money and make life easier. On that note, allow us to introduce the 21004 Wireless Faucet Timer, one of the most notable of the brand. This product features a built-in flow meter and allows you to track your daily water usage conveniently.   

    The WaterSense technology automatically adjusts the watering based on the conditions of the site, ensuring the product delivers the right amount of water to your plants. Hence, you don’t have to worry about water wastage anymore. 

    On top of that, the built-in flow meter gives you a rough idea of how much water you will use to water the plants. Thus, it makes it the ideal choice for gardening and hydroponic applications.

    If you are worried about the installation, you will be pleased to know that it is pretty straightforward. All you need to do is download the app, create an account, and then set up the timer at the hose faucet. Plus, the brand offers a 2-year warranty, which we truly appreciate.

    Overall, we found this product quite efficient, so you can most certainly keep it under consideration.   

    Sadly, this product doesn’t feature a battery backup, which can be an issue when you are not within the Bluetooth range or when the WiFi is down. That said, if you can look past this minor problem, you will find an otherwise outstanding product that offers unmatched performance.  

    Weight: 1.03 lbs | Dimensions: ‎2.9 x 6.44 x 8.7" | Compatible Pipe Size: N/A | Smart Home Integration: Alexa | Connectivity: Wi-Fi / Bluetooth | Special Feature: WeatherSense Technology

    9. Guardian

    Now, let’s talk about the Guardian Leak Prevention System. You can install this valve controller in just minutes over the existing quarter-turn ball valve without using any additional tools and not worry about water damage ever again. In addition, it sports highly functional leak detectors that offer a long detection range.    

    Firstly, we found the leak detectors of this product to be truly promising, making the product applicable in a range of places, including toilets, water heaters, sump pumps, etc. Not to mention, they can be placed up to 1000 feet away from the valve controller without any hassle, which we must say is quite unique. 

    Regarding the build quality, the product is constructed from high-quality materials from top to bottom, and hence couldn’t be more durable and long-lasting. Moving on, it features an optional battery backup, meaning it can work without the internet or electricity to protect your home.    

    Whether you are worried about a burst pipe, a broken washing machine, or an overflowing pump, we think it’s safe to say the product has your back.  

    The only gripe we have against this product is that it is not compatible with any other smart home hubs, apart from its own app. This can be an issue for those people who want to track their smart devices through a single application.  

    Weight: 6 lbs | Dimensions: 13.54 x 10.47 x 6.42" | Compatible Pipe Size: 1/2-1" | Smart Home Integration: N/A | Connectivity: Wi-Fi | Special Feature: N/A

    10. MyGuard MGWLD

    Honestly, this list would have remained incomplete had we not included the MGWLD Water Leak Detector from MyGuard. This product could be a notch above most of the options we have mentioned on this list regarding usability and performance. Want to know more, then keep reading. 

    If you want to protect your business or home from water damage and save money, then this product could be your best. For one, it is easy to install; simply attach it to the existing plumbing, keep the water sensor on the floor, and you are done. Oh! And don’t forget to download the app, which is free, to control it remotely.

    Additionally, it comes with all the necessary accessories, including the floor sensor, pipes, and power adapter, thereby saving you from the hassle of purchasing any important item separately.    

    Besides sending notifications on your phone when the water leak is detected, the product continuously rings a loud alarm of 85 decibels before shutting off the main valve. Not to mention the quick response time, which reduces the chances of water wastage and water damage in your home.  

    Some disgruntled customers have complained that this product tends to trigger a false alarm. They have further mentioned that the system won’t reset after triggering the alarm, which could be frustrating. Now, all the units from this brand may not have this issue, but still, we thought it was worth letting you know.  

    Weight: 3.75 lbs | Dimensions: ‎2.75 x 14.55 x 9.35" | Compatible Pipe Size: N/A | Smart Home Integration: N/A | Connectivity: Wi-Fi | Special Feature: Audible Alarm

    What Are the Best Wireless Water Shut-off Valves?

    Wireless Water Shut-Off Valves are essential for remote water flow control, providing convenience in the efficient management of water systems.  This table clearly shows the weight (in pounds), dimensions (in inches), pipe compatibility (in inches), smart home integration, connectivity and special features of different wireless water shut-off valves.

    Product Weight Dimensions Compatible Pipe Size Smart Home Integration Connectivity Special Feature
    Owfeel WIFI & Bluetooth Smart Water Valve 1.57 lbs ‎7.48 x 4.02 x 3.66" N/A Amazon Alexa, Google Home Wi-Fi Voice Control
    LeakSmart 8881300 5.44 lbs ‎10.7 x 9.8 x 6.7" N/A LeakSmart Hub Wi-Fi LeakSmart Sensors
    Owfeel WIFI Smart Valve 1.34 lbs 11.93 x 5.12 x 3.5" 0.8-1.7", 0.8-1.18" Amazon Alexa, Google Home Wi-Fi Voice Control
    Moen 4.75 lbs 5.75 x 2.6 x 5.9" 3/4" Amazon Alexa, Google Home Wi-Fi Microleak Technology
    Aubric Smart Valve 1.17 lbs ‎2.76 x 2.76 x 2.95" 1/2", 3/4", 1", 1 1/4", 1 1/2" Amazon Alexa, Google Home Wi-Fi Voice Control
    E-SDS 1.3 lbs ‎6.06 x 5.67 x 4.29" 3/4" N/A N/A Water Leak Sensor
    Ufairy 1.61 lbs ‎11.97 x 6.1 x 2.91" 1/2", 3/4", 1", 1 1/4", 1 1/2" Alexa, Google Home Wi-Fi N/A
    Orbit 1.03 lbs 2.9 x 6.44 x 8.7" N/A Alexa Wi-Fi / Bluetooth WeatherSense Technology
    Guardian 6 lbs 13.54 x 10.47 x 6.42" 1/2-1" N/A Wi-Fi N/A
    MyGuard MGWLD 3.75 lbs 2.75 x 14.55 x 9.35" N/A N/A Wi-Fi Audible Alarm

    Wireless Water Shut-off Valves Buying Guide

    Believe it or not, knowing just the top 10 recommendations and a few pros and cons is just not enough information to buy the best wireless shut-off valves. You need to keep in mind a few factors apart from the specifications in buying the right product based on your needs.

    Don’t worry; we have explained all of these factors here in detail, so kindly read this section very carefully.

    1. Feedback Time

    Perhaps the most important reason people buy wireless water shut-off valves is that it automatically detects leaks. This provides top-notch protection from potential flooding, water damage, and other water leakage problems in the house by alerting you when the device detects a leak. 

    However, the feedback time should be fast enough to ensure no water wastage and that the damage is kept to the bare minimum. So, before buying, make sure you check the response time of the product. More often than not, it is mentioned in the specifications or the product description section.   

    2. Connectivity

    Connectivity is another important factor you must consider. A quality product can offer multiple connectivity options such as WiFi and Bluetooth, allowing you to remotely control the product and manage its functionality from your smartphone. 

    Therefore, you must ensure your product supports wireless connectivity before buying.  

    3. Installation

    While some units are made for the entire smart home, others are specifically designed for a particular outlet. 

    We strongly believe that it’s more beneficial to go with a product made for the entire smart home because, with it, you get better control of all the outlets. This, in turn, allows you to take the necessary precautions before you leave for a vacation. 

    Also, before buying it, make sure that it is compatible with your water valve; otherwise, it’d be a waste.

    Apart from that, if you prefer installing the product by yourself instead of having a professional do it, then it’s best to go with a model that’s easy to install. Thankfully, most units in this day and age are easy to install and don’t require additional pipes or tools.   

    4. Accessories

    When choosing a quality wireless shut-off valve model, it always makes sense to go with a complete kit. This saves you from the hassle of making a quick trip to your local hardware store to buy the additional equipment needed for the setup.

    5. Additional Features

    Many devices available on the market sport additional features such as a water timer, consumption indicator, temperature, and water pressure monitor to enhance the versatility and efficacy of the product. 

    As far as the water consumption indicator is concerned, it sends you a notification when the water usage is higher than usual. Thus, it helps you detect early signs of burst pipes or other types of leakage and get them fixed immediately. 

    Moving on, temperature monitors come in handy for people living in freezing temperatures, as they can keep track of how cold the water is and prevent burst pipes. So, if you want to defect any anomaly in your water supply, we strongly recommend going with a product that sports these types of additional features.      

    6. Build Quality

    Build quality is also a crucial factor that should be considered. After all, the more durable the build quality, the better the chances that it will last a long time. Always go with a valve that is made of sturdy materials such as stainless steel, bronze, or brass, as it will ensure that the product will last for years.   

    How does a wireless water shut-off valve work?

    Equipped with wireless communication technology like Wi-Fi or Z-Wave, these valves can be controlled via a mobile app or smart home hub. In the event of leaks or emergencies, the valve automatically shuts off the water supply, preventing potential water damage.

    What are the benefits of using a wireless water shut-off valve?

    The primary benefits include remote control and monitoring of water usage, protection against leaks and water damage, and the ability to shut off water quickly during emergencies. Some models integrate with smart home systems for enhanced automation.

    Are wireless water shut-off valves compatible with smart home ecosystems?

    Indeed, many wireless water shut-off valves are designed to integrate seamlessly with popular smart home platforms like Google Home, Amazon Alexa, and Apple HomeKit. This enables users to incorporate water shut-off control into their existing smart home setups.

    How difficult is it to install a wireless water shut-off valve?

    Installation difficulty varies among models, but many are designed for easy installation without professional help. They come with step-by-step instructions, and some even offer video tutorials. If uncertain, consulting a professional plumber is recommended.

    Can I receive alerts on my smartphone for water leaks with these valves?

    Certainly, most wireless water shut-off valves provide real-time alerts for potential leaks. Users receive notifications on their smartphones, allowing immediate action to prevent water damage.

    Are there different types of wireless water shut-off valves available?

    Yes, various types exist, including motorized ball valves and motorized gate valves. The choice depends on specific plumbing system requirements and user-preferred features.

    Can I control multiple water shut-off valves in different areas of my home?

    Many wireless water shut-off valves support the control of multiple valves within the same system. This enables users to manage water flow in different areas of their homes independently through a single app or smart home interface.

    What maintenance is required for wireless water shut-off valves?

    Regular testing and inspection are recommended to ensure proper valve function. Additionally, users should replace batteries (if applicable) according to the manufacturer's guidelines and perform any maintenance tasks outlined in the product manual.

    We have finally reached the end of our review-based guide, and we hope that you have enjoyed the long yet exciting ride. But hold on, we will not let you leave before we mention our top picks from the list. 

    In our opinion, the Owfeel WIFI & Bluetooth Smart Water Valve is the best overall because it’s easy to install and sports an affordable price tag. Additionally, the LeakSmart 8881300 can be a great choice for those looking for a product that detects leaks in an instant and works with voice command software.

    However, if you want a product that gives you complete remote control, we strongly recommend going with the Owfeel WIFI Smart Valve. That’s all for today. Do let us know in the comment section below if you agree with our top picks.

    Till then, sayonara! 

    At 115 dB sound level, the AVANTEK Mini Wireless Doorbell is neither too loud nor too soft, so it’s ideal for homes with hearing-impaired members. Doorbells from SECRUI, SadoTech, and Ring Video are also dependable options for hard-of-hearing individuals. 

    Installing the best wireless doorbells can make a world of difference for people with profound hearing loss. 

    As against standard doorbells, a wireless doorbell is a customizable alert system that combines extra-loud chimes with flashing lights. Thus, people with hearing aids won’t miss a delivery or a visitor again. 

    That said, we’ve rounded the ten best wireless doorbells that are worth considering. So, without further ado, let’s dive in! 

    10 Best Wireless Doorbells For Hard Of Hearing

    1. AVANTEK Mini Wireless Doorbell

    AVANTEK Wireless Door Bell, Mini CB-11 Waterproof Doorbell...
    • SIMPLE SETUP: Just plug the mini receiver into a socket and...
    • 300 M/1000 FT ULTRA LONG WIRELESS RANGE: 1 plug-in receiver...

    The AVANTEK Mini Wireless Doorbell features a 29mm stereo speaker to deliver crisp and rich sound. This unit boasts 52 melodies and comes with buttons to go back and forth when choosing a tune. Moreover, this unit is sturdy and can withstand harsh weather conditions. 

    Why Did We Like It?

    Lightweight, compact and elegant, the AVANTEK Mini Wireless Doorbell arrives with everything you need to set it up– anchors, screws, a piece of double-sided bonded tape, and a key. All you need to do is connect the receiver to a socket and mount the transmitter to a wall, and your doorbell is ready to use. 

    Powered by a long-lasting CR2032 lithium battery, this doorbell system comes with two transmitters, which are designed to cover an impressive range of 1,000 feet. On top of that, its 29mm speaker produces clear sound and has a flashing LED light, so people with impaired hearing will hear the doorbell whenever someone rings it. 

    Aside from a handful of chirpy tunes and a classic “ding-dong” sound, this doorbell comes with 50 different chimes. With just the click of a button, you can choose your favorite tune and adjust the volume up to 115 dB. 

    Despite its small size, this unit is designed to take a beating, and its IP55 ratings testify to the same.

    What Could’ve Been Better?

    The only caveat is that it doesn’t come with a rechargeable battery, so you’ll have to take the pain of changing it every time it drains. Other than this minor flaw, this unit makes for a perfect option for homes with people who have difficulty hearing doorbell rings. 

    2. SECRUI Wireless Doorbell

    SECRUI Wireless Doorbell, Easy installation, Waterproof,...
    • [Work Out of Box] This wireless doorbells for home has been...
    • [Long Range] This high-frequency electronic technology...

    Sleek, stylish, and energy-saving, this wireless doorbell by SECRUI allows users to change from 58 different chimes from a harsh buzzing sound to a long chiming ring. This easy-to-install doorbell has a strong signal strength and comes with a sensing range of up to 1,000 ft. 

    Why Did We Like It?

    Tired of searching for visual alert doorbells with industrial aesthetics that score well on longevity? Well, the SECRUI Wireless Doorbell might fit the bill because of its sleek silhouette, multiple customization features, and IP55 rating. 

    Adopting the FM signal scheme, this remote control doorbell boasts strong anti-interference features and connects up to 1,000 ft in open areas. So, people with a hearing aid can hear the doorbell no matter whichever corner they are in. 

    What’s more, it comes with a colorful LED flashing light, so it’s a must-have for homes with seniors who cannot hear sounds. The unit contains 58 short ringtones, which you can change according to your mood with the button on its body. 

    The white color certainly oozes elegance, but what’s impressive is that its body is crafted of high-quality ABS material. Thus, it works excellently in harsh weather conditions– be it rain, snow, or sandstorm. 

    What Could’ve Been Better?

    Owing to its functionality, this extra loud doorbell is a worthy addition to large homes with hard-of-hearing individuals. One minor flaw of this unit is that it doesn’t come with a “next” or “previous” button, so you’ll have to cycle through all the tones to return to the one you like. 

    3. SadoTech Wireless Doorbell Kit

    SadoTech Wireless Doorbells for Home, Apartments,...
    • WIRELESS DOORBELL KIT: Includes everything you need for DIY...
    • EASY TO SETUP: Our portable doorbell easily pairs and...

    Ideal for townhomes, condo apartments, and warehouses, the SadoTech Wireless Doorbell Kit is a versatile kit that comes equipped with LED lights that add to user-friendliness. Though it has an operating range of up to 1,000 ft, you can extend the coverage by adding multiple doorbells and receivers. 

    Why Did We Like It?

    Businesses that are generous enough to hire deaf people must install the SadoTech Wireless Doorbell Kit in their workplace. This doorbell kit contains two plug-in chime receivers, a doorbell ringer, a battery, and fittings needed for setup. 

    What’s more, you get to choose your favorite door chime from more than 50 melodies, which can be adjusted to four different volume levels. Another noteworthy aspect of this portable doorbell is that you can set the two chime units with distinct ringtones. 

    Thanks to the built-in memory, the unit remembers every setting from volume level to selected tones after a power outage. 

    Equipped with the highest-quality microchips, this flashing light doorbell has an operating range of 1,000 ft. And since it comes with two plug-in chime receivers, you can install them in any corner you want.

    What Could’ve Been Better?

    Available in multiple color options, the SadoTech Wireless Doorbell Kit blends well with all kinds of exteriors. Though weatherproof, the doorbell doesn’t come with an IP rating like the previous models. So, it may not be suitable for places prone to torrential rainstorms.

    4. Ring Video Doorbell 4

    Ring Video Doorbell 4 – Previous Generation
    • 1080p HD video doorbell with improved video previews and...
    • All-new Color Pre-Roll Video Previews of all motion events...

    Have a completely deaf person at your home who refuses to put on a hearing aid? Then this Ring Video Doorbell 4 is a worthy investment because its high-definition video camera sends notifications whenever someone’s at the door. Compatible with Amazon Alexa, this video doorbell allows two-way communication, so you can speak to visitors without opening the door. 

    Why Did We Like It? 

    Confused between Arlo wired vs wireless doorbell for your home? We’ve got a perfect alternative– the Ring Video Doorbell 4 is an investment you wouldn’t regret. With improved video previews, motion sensors, and night vision, this video doorbell secures your property. So, you won’t have to worry about the safety of your loved ones. 

    Boasting a maximum resolution of 1080p, this system records video in high-definition and captures every little detail, offering head-to-toe visibility. On top of that, its motion sensors detect lurkers and send alerts to your smartphone, doubling as a security camera. 

    As the system comes equipped with speakers and microphones, it allows for two-way communication. So, whether the hearing-impaired individual is mowing the lawn or relaxing in their bedroom, they can answer the door through their smartphone. 

    What Could’ve Been Better?

    Aside from video quality, the motion detection sensor helps people with severe hearing loss to answer the door quickly through their smartphone or Alexa. However, the battery life is very short, and you’ll have to subscribe to the Ring Protection Plan to save and share videos. 

    5. NOVETE Wireless Doorbell Kit 

    Wireless Doorbell Kit, NOVETE Door Bell Operating at Over...
    • 【Expandable Doorbell System】Expand your existing...
    • 【Ultra-Long Wireless Range】Boasts a remote connection of...

    Jam-packed with 52 melodious chimes and five adjustable volume ranges, the NOVETE Wireless Doorbell Kit can connect up to 1,300 ft in open environments. What makes it ideal for people with severe or moderate hearing loss is that it comes with an LED indicator. Rest assured, hearing-impaired individuals won’t miss the doorbell the next time it rings. 

    Standout Features

    • 1,300 ft connection range
    • IP55 dustproof and waterproof rating

    Why Did We Like It?

    Operating on a replaceable 230mAh CR2032 lithium battery, NOVETE boasts a strong signal penetration that can range up to 1,300ft. For this reason, this is a popular pick among large homes, warehouses, factories, and industrial establishment owners. 

    Folks who aren’t fond of the classic doorbell sound will be pleased to know that this doorbell comes with 52 different chimes. Thus, you can browse through them and set the one you find most pleasant. 

    The speakers of this doorbell produce around 115 dB, but you can adjust it through five levels to suit the needs of your hearing-impaired family members.  

    Aside from functionality, this unit wins brownie points for its sturdy body made of ABS material. Interestingly, the push-button is robust and waterproof, so it can tolerate harsh weather. To top it off, it is rated IP55, which means it is resistant to water and dust. 

    Lastly, we appreciate the addition of an LED indicator that makes it easy for people with severe hearing impairment to answer the doorbell. 

    What Could’ve Been Better?

    Hassle-free setup, weather-resistant, and decent sound output– this wireless doorbell is perfect for everyone on a budget. However, you’ll need to spend a few bucks on batteries because this unit consumes a lot of power, so you’ll have to change them frequently. 

    6. Honeywell Home Portable Wireless Doorbell

    Honeywell Home RDWL917AX2000/E Doorbell Portable Wireless...
    • Downloadable MP3
    • Adjustable volume, sleep mode and mute to adapt use for time...

    Another reliable option for people who are hard of hearing is this portable wireless doorbell from Honeywell Home. It has a wireless range of 450 ft, and the volume can be adjusted to the preference of members using hearing aids. Additionally, the push-button features weather-resistant plastic, so its durability is top-notch. 

    Standout Features

    • Runs on C-alkaline batteries
    • Weather-resistant plastic

    Why Did We Like It?

    While there are plenty of things to like about this wireless doorbell, the first thing to appeal to us is its portability. Bedroom, lounge, yard, or basement– you can carry the receiver of this wireless doorbell wherever you go. Its portability makes it a perfect option for elderly members with moderate hearing loss. 

    And in case your family member doesn’t like wearing a hearing aid because of discomfort, let us tell you that it’s equipped with a halo light, offering seven color options. So, the light will flash whenever someone rings the doorbell, and hearing-impaired individuals will be alerted. 

    Available in six styles, this wireless doorbell features only 11 pre-installed tunes. However, you can download your favorite ones using the USB that comes with the package. 

    If your hard-of-hearing family member naps with their hearing aid in their ears, you can set the doorbell on “sleep” mode or mute it. 

    What Could’ve Been Better?

    Though compact and portable, this wireless doorbell has an operating range of only 450ft, so it won’t be the right pick for large spaces. However, you can extend the range by connecting a second doorbell to the chain, but you’ll have to fork out extra cash. 

    7. Coolqiya Wireless Doorbell

    Wireless Doorbell, Coolqiya Door Bell Chimes Kit with 3...
    • 🔔【IT'S DURABLE AND SAFETY FOR PEOPLE】: Transmitter...
    • 🔔【SUPER LONG DISTANCE TRANSMISSION】: Made of...

    Still haven’t found the right wireless doorbell for your hearing-impaired wife? Then this Coolqiya Wireless Doorbell would make an excellent addition to your abode, thanks to the operational range of 1,000 ft. The transmitter isn’t only waterproof, but it is also RoHS, CE, and FCC-certified. 

    Why Did We Like It?

    This wireless doorbell from Coolqiya earns a solid score when it comes to aesthetics, but it wins brownie points for its outstanding performance. This small device operates at a range of up to 1,000 ft, which makes it ideal for bungalows, farmhouses, and assisted living facilities. 

    It produces about 110 dB of maximum volume, which might be loud for people with normal hearing but not ear-splitting. As the volume is adjustable, you can set it to the highest range when leaving for work. So, your hearing-impaired family members can answer the door in your absence. 

    Other than that, you’ll find a blue LED indicator that flashes whenever someone presses the doorbell, which makes it perfect for people with profound hearing loss. 

    Setting up this wireless doorbell unit is easy– mount the transmitter outside your main door, pair it with receivers and plug them into an electrical outlet. What’s more, you can use the transmitter to leave messages for your visitors and vice versa. 

    Also, the brand goes the extra mile to satisfy its customers by backing its doorbell with an 18-year warranty. 

    What Could’ve Been Better?

    If you’re looking for a wireless doorbell for a large space, this one by Coolqiya will fit the bill. However, the double-sided tape that comes with the unit doesn’t work well in colder regions, so we suggest using rubber-based adhesive for mounting the transmitter. 

    Fosmon WaveLink Wireless Door Chime with 500 Feet Range, 58...
    • [MONITOR THE AREAS MOST IMPORTANT TO YOU WITH WAVELINK...
    • [58 UNIQUE CHIMES] 58 unique ringtones and chimes allow your...

    Running on a 1.5V AA alkaline battery, the Fosmon WaveLink Wireless Doorbell is a multi-functional unit that serves both as a doorbell and a home security system. With five adjustable volumes and 58 pleasant ringtones, you can customize this unit to suit your preferences. 

    Why Did We Like It?

    For homes with multiple windows and doors, the Fosmon WaveLink Wireless Doorbell will be the best option because the receiver can be paired with multiple transmitters. Thanks to the magnetic door and window sensor, the doorbell notifies you whenever a window or door is opened. 

    Additionally, you can choose your favorite tune from among 58 unique chimes, including lullabies and long melodies. Whenever someone presses the push-button of the doorbell, it rings your set chime at 110 dB, which of course, can be adjusted as per your preference. 

    Besides, this doorbell creates a visual alert, thanks to the LED indicator on the receivers. Thus, anyone with profound hearing loss will know whenever someone’s at the door due to the visual cues triggered by the doorbell ringing. 

    Furthermore, it can withstand temperatures between 5°F and 140°F, so you can install the bell outdoors without worries. This wireless doorbell comes with clear instructions, so setting it up won’t be much of a challenge. 

    What Could’ve Been Better?

    Despite boasting a huge selection of more than 50 melodies, this wireless doorbell may not be suitable for a commercial or industrial establishment. That’s because it hardly features any classic or professional melody; instead, they are packed with lullabies. So, if you’re looking for a wireless doorbell to make your commercial space deaf-friendly, this won’t be the right pick. 

    9. PHYSEN Wireless Doorbell

    Wireless Doorbell with 2 Buttons 4 Receivers, PHYSEN...
    • Long Wireless Range Doorbell System: Our wireless doorbells...
    • Waterproof Doorbell Buttons & Easy to Install: Crafted from...

    This 110 dB wireless doorbell is ideal for various establishments that wish to make their space deaf-friendly– offices, retail stores, villas, and homes. Thanks to the LED indicator, people with profound hearing loss won’t have trouble answering the doorbell. 

    Why Did We Like It?

    Covering an extensive range of over 1,300ft, the PHYSEN Wireless Doorbell produces chimes at 110 dB, which is loud enough to notify deaf people that someone’s knocking at the door. 

    All four receivers in the package feature an LED indicator that lights up whenever someone presses the push button of the doorbell. As such, the flashing light grabs the attention of people who are hard of hearing but don’t wear hearing aids. 

    Besides five adjustable volume levels, this unit offers 58 chimes, so you get to choose a plethora of options to choose the ringtone. 

    Crafted of ABC material, the body of the transmitter is weatherproof and waterproof, and it can survive extreme temperatures. The push button is IP55-rated, so it’s tested against water and dust– no matter the weather outside, you can rest assured that your doorbell will resist everything. 

    That’s not all; the model is equipped with a 23A, 12V battery that lasts for two to three years. Hence, you won’t have to go through the hassles of changing it every few months. 

    What Could’ve Been Better?

    While setting it up, we found out that all receivers ring the same chime, no matter how much you try to set different ones. So, it doesn’t live up to its claims of allowing users to customize transmitter tones for different doors of their homes. 

    10. Anpress Wireless Doorbell

    Anpress 7 Color Lights Flash + Music Doorbell, Doorbell, The...
    • 【Music Doorbell with Colorful Light】Appearance elegant...
    • 【3 Working Modes】1, Only flash; 2, Only ring; 3, Both...

    With a wireless range of up to 164ft and seven colorful flashing lights, the Anpress Wireless Doorbell is a dependable option for small spaces with hearing-impaired individuals. This easy-to-operate unit comprises 16 melodies, which can be adjusted to five different volumes. 

    Why Did We Like It?

    Despite its affordable price tag, this wireless doorbell from Anpress packs a powerful punch. This quick and easy-to-install doorbell is equipped with an LED indicator that lights up whenever anyone rings the bell. So, deaf people will instantly understand that someone’s at the door. 

    Certainly, you can customize the doorbell by setting your favorite tune out of the 16 melodies that come with the unit. Like other doorbells, it allows you to set different tunes for different doors, so you won’t have trouble identifying which door is ringing. 

    Not just that, but you can also adjust the volume level to the liking of your family members who wear a hearing aid. 

    It offers three working modes– only ring, only flash, or both ring and flash, which adds to its user-friendliness. Lastly, we like the minimalist white body of this doorbell that blends well with every exterior. 

    What Could’ve Been Better?

    Unlike other wireless doorbells, this doesn’t come with screws or anchors for mounting; instead, you’ll have to use adhesive patches to install it outside your front door. On top of that, the body isn’t as durable as other options on the list, so it may not survive harsh weather conditions. But for the price paid, it offers excellent value for money. 

    Wireless Doorbells For Hard Of Hearing Buying Guide

    Out of so many wireless doorbells for UPVC doors, choosing the right one for hard-of-hearing people is challenging. That is why we’ve shortlisted a few important factors that you must keep in mind while shopping for wireless doorbells. So, let’s check them out. 

    1. Range

    The wireless range between the receiver and the doorbell differs from model to model, which is why it’s the first thing you need to consider when buying a wireless doorbell. For large homes, you must go for systems that boast an operating field of up to 1,000 ft, while anything between 164 ft to 500 ft will be ideal for small spaces. 

    2. Power Source

    Most doorbells run on non-rechargeable batteries, whereas some feature rechargeable ones. Non-rechargeable batteries can last up to two to three years, depending on the size of your home. Conversely, rechargeable batteries consume more power, so you’ll have to recharge the doorbell system much more often. 

    When compared, wireless doorbells with disposable batteries are cost-effective in the long run, so you must opt for them. 

    3. Additional Features

    When shortlisting wireless doorbells for your property, pay attention to the extra features that come with the system. Like, a doorbell with an LED indicator will be more helpful for hearing-impaired individuals than one without it. 

    Also, check whether the volume levels are adjustable or not because a system producing extra loud sounds can damage the ears of people with hearing aids. Other features to look for in a wireless doorbell are motion sensors, high-definition video capture, security sensors, and two-way communication. 

    Top Wireless Doorbells For Hard Of Hearing Verdict

    Leading a normal life for hard-of-hearing individuals is challenging– but very few people understand that. 

    One way you can make your hearing-impaired relatives’ life easy is by installing a wireless doorbell. Thus, they can live independently without worrying about missing an important visitor or parcel. 

    Before we sign off, here’s a quick rundown of our favorites from the list. The AVANTEK Mini Wireless Doorbell is our favorite because it’s easy to install and boasts an ultra-long wireless range. 

    But if you’re looking for a more deaf-friendly device, you can’t go wrong with the SadoTech Wireless Doorbell Kit. That’s because the unit has LED lights that flash whenever someone rings the bell. 

    That’s all for today. See you later! 

    A lawn mower is an essential piece of equipment that you need to keep your lawn in tip-top shape.

    Buying one, however, is a complicated matter. There are a large number of lawn mower makers out there, and everyone claims to be the best. So, how do you know who makes the best lawn mower engine?

    To solve that problem for you, today we’re going to address that very question. We’ll take a look at all the factors that make a lawn mower engine tick, and then see who is the best manufacturer of the same.

    Who Makes The Best Lawn Mower Engine

    Lawn mower cutting green grass in backyard on a sunny day. Garden cleaning services.

    A Matter of Efficiency

    The efficacy of a lawn mower depends on a wide range of factors. You have to take careful stock of its fuel efficiency, engine power, and the availability of replacement parts. Keeping all of the above in mind, it’s evident that Honda makes the best lawn mower engines today.

    Utterly durable and long-lasting, Honda lawn mower engines offer extreme power and reliability at reasonable costs. The results that you get from Honda Engines are unmatched as compared to the other players in the market.

    The Secret Behind Honda Engines

    Honda is a company that’s known for building high-quality power tools. Honda engines make up the core of many major lawn mower brands such as Husqvarna and Troy-Bilt. What’s more, they are also found in a large number of riding mowers.

    But what makes them so in-demand? The secret lies in the impeccable craftsmanship of the Honda engineers. Honda engines are specifically created to provide long term operational efficiency, and operate under any condition.

    Most of them come with advanced features such as auto-choke and cold start, which makes them easy to operate. Plus, they offer the ability to mow through the toughest of garden growth, thus making the task effortless.

    Why Honda Is The Best

    Apart from the above features, Honda lawn mower engines also have a reputation of being among the most fuel-efficient in the market. They glean the greatest power from the least amount of fuel and are also low on emissions that damage the environment.

    What’s more, due to their widespread use and popularity, spare parts for Honda engines are easy to come by. This means in case you do need to get a Honda engine repaired, you won’t have to settle for counterfeit parts from shady suppliers.

    A man starts a lawnmower motor in the store.

    Final Thoughts

    Low on cost and high on performance, it’s no wonder Honda is the leading manufacturer of lawn mower engines today. Not only do they deliver unmatched power, but they are also efficient and cost-effective.

    So, the next time you need to get a lawn mower, look for a Honda under the hood. With one of their engines powering your mower, you’ll get past the unwanted yard growth in no time. After all, if it has a Honda engine, then it spells reliability in any situation!

    Related Articles

    How to Sharpen Reel Mower Blades?

    The 5 Best Lawn Mowers for St Augustine Grass Right Now

    6 Best Electric Start Self-Propelled Lawn Mowers of 2022

    5 Best Gas Hedge Trimmers  Reviewed

    4 Best Walk Behind Brush Cutters | Buyer’s Guide

    3 Best Yard Hydrant | Buyer’s Guide and Reviews

    5 Best Stick Edger | Buyer’s Guide

    13 Best Trimmer Lines | Multi-Sided, Round, Square, Twisted & Serrated

    Troy Bilt TB230 Review

    13 Best Lawn Tractor Batteries

    Zero Turn Vs Riding Mower, Differences & Best Solution for 2022

    13 Best Loppers in 2022 | Buyer’s Guide

    13 Best Chipper Shredders

    13 Best Lawn Aerators

    How to Clean the Lawn Mower Carburetor Without Removing It?

    10 Best Lawn Dethatchers

    6 Best Zero Turn Mowers for 5 Acres

    Isn’t a lush green turf just a sight to behold in rains and sunshine alike? Not only do these look and feel absolutely amazing, but these also contribute to the natural process of earth’s restoration by doing their bit at the “grass-root level.”

    An elaborate St. Augustine grass lawn could undeniably give you one of the most beautiful turfs. It is very popular in Florida and the Gulf states for its ethereal bluish-green dense beauty!

    But as turf breeders would know, growing a St. Augustine could be a daunting task, especially from grass seed.

    And, if you’re on the lookout for substantial information on how to get the process of growing St. Augustine just right, then you, my friend, have stumbled upon just the ideal comprehensive read for the purpose!

    Simply read on to know more on this subject!

    Good St. Augustine Grass Seeds & How to Grow Them

    Growing a St. Augustine’s lawn using sods

    The St. Augustine’s grass lawn has a considerable tolerance to humidity and heat. The bluish-green blades develop quickly to form plush, dense turfs, and it’s adjustability to significantly saline soils, make it a perfect choice for coastal yards.

    One of the easiest ways to get the process of growing a St. Augustine’s lawn done is to plant the plugs from the established turf.

    The plugs are the rooted sod pieces, and when you plant them, they grow up to gradually fill in the spaces between them, giving you a full, luxuriant lawn.

    Even though you can also buy St. Augustine’s sod, it will be a bit expensive than most other grass sods.

    Planting a St. Augustine’s lawn from seeds

    It can be considerably difficult to grow a St. Augustine’s lawn from seeds as it’s infamously bad at proliferating this way.

    This is one of the primary reasons why we don’t get its seeds for sale that easily in the stores.

    This is also why the St. Augustine’s sod farmers usually leave strips of the turf behind for a new St. Augustine’s to grow from instead of completely harvesting the previously.

    However, some farmers who do breed and grow St. Augustine grasses for seed during their development and breeding cycles, do so by using “quantities of seed which is often selected and blended,” and planted in these exact quantities to procure a few other new

    kinds of grass for different selections.

    How to plant a St. Augustine’s lawn?

    1. Estimate your lawn area

    Measure the dimensions of your lawn and the kind of areas that you want to plant. Purchase as much sod as you would require to fill in that area. Getting a tray of around 18 plugs will be sufficient to cover an area of approximately 32 sq.ft.

    1. Prepare the area for planting

    Remove all old sods and weeds using a sod cutter, if you’re planning to regrow an existing lawn. Apply a “non-selective herbicide” for about 2 weeks before you plant, to kill all weeds and ensure no residual is left behind to harm the new saplings.

    1. Apply fertilizer 

    Do treat the soil using a natural or organic fertilizer and use a biological restorative agent to nourish it back to health. Since St. Augustine’s requires considerably fertile soil to grow, it’s not a good idea to skip this step. This will also help the sod fill in faster.

    1. Water the area

    Make sure to thoroughly water the ground before planting, as it makes the soil more pliable and accommodating to the roots of the plug, providing immediate moisture to them. However, do remember that the water should soak in thoroughly and not stagnate on the surface.

    1. Dig in

    Start by digging the holes in a diagonal planting pattern, so that each group creates a diamond. Space these holes 12 inches apart from each other ( the holes across the center of each diamond should be 15 inches apart). Dig each hole a bit larger, but of the same depth as the plug’s root ball.

    1. Plant the plugs

    Push the plug firmly into the hole ensuring that it’s level with the surrounding ground. If you think that the holes are a bit deep, use a little fertile soil to fill in the extra space.

    1. Continue watering

    Water the plugs daily until you see them firmly rooted and gradually spreading. It usually takes about 7-14 days for the roots to settle. After this, water every week unless there’s sufficient rainfall to do away with manual watering.

    1. Screen for critters and diseases

    A newly planted and gradually establishing St. Augustine’s lawn can fall prey to pests bugs and plant diseases, which can affect both its roots and turf. If you notice mildew or any brown spot beginning to manifest, do contact your local extension agency for treatment options.

    Where and when to plant the St. Augustine seeds?

    Where and when to plant the St. Augustine seeds?

    The St. Augustine grass grows and proliferates best in warm springs and summers when temperatures are normally between 80-100 degrees Fahrenheit. It develops full colors at approximately 10 degrees lower than the temperature which discolors and fades Bermuda grass.

    It can tolerate some shaded places during hotter summers but can develop thin and spindly turf in densely shaded regions.

    The grass can be grown in most soil types as long as it has proper drainage facilities and is fertile. The pH range for growing the St. Augustine grass should preferably fall between 5.0 to 7.5, but at higher levels than that, it could develop a chlorotic appearance.

    St. Augustine's has a tolerance for a salinity level of up to 6 mhos, unlike Bermuda grass which has only slight tolerance for high salinity.

    If you’re planting the plugs or sods in the full sun, make sure to give it a minimum of 90 days “before your region’s first estimated fall frost” for the grass to develop. Since this grass develops rather quickly, it won’t be necessary to go over frequent checks and estimations.

    Maintaining the lawn

    When the new lawn begins to fill in, and the blades reach a “mowable” height, cut them with the mower. Make sure that the mower is set at 3-4 inches. Once the leaves start to turn bluish-green, water them regularly and add any organic lawn food every 6-8 weeks to feed the grass until they have filled in.

    How to Grow Augustine's Grass Conclusion

    So, this was all about how to grow a beautiful, flourishing St. Augustine’s grass lawn and maintain it thereafter.

    Hope you got an insight into the subject.

    Thanks for reading. Till next time!

    Related Articles

    The 5 Best Lawn Mowers for St Augustine Grass Right Now

    5 Best Gas Hedge Trimmers 

    4 Best Walk Behind Brush Cutter 

    3 Best Yard Hydrant  

    5 Best Stick Edger 

    13 Best Trimmer Lines | Multi-Sided, Round, Square, Twisted & Serrated

    7 Best Shoes for Cutting Grass Comfortably | Buyer’s Guide

    13 Best Fertilizer Spreaders

    13 Best Expandable Hoses 

    11 Best Pine Straw Rakes

    11 Best Mosquito Fogger Insecticide

    9 Best Fertilizers for Petunias Right Now

    9 Best Fertilizers for Hydrangeas

    11 Best Fertilizers for Lilacs

    How to Install Landscape Fabric for Weed Control

    How to Grow Cilantro Indoors Easily

    13 Best Fertilizers for St Augustine Grass Reviewed

    13 Best Fertilizers for Palm Trees

    13 Best Weed Torch

    How Long After Grass Starts Growing Can You Mow It?

    Does Grass Seed Go Bad | Expiration Dates Explained

    There’s no dearth of different tankless water heaters in the market. But that’s where the problem lies!

    Choosing a model from a wide range of options, which ensures the endless flow of hot water to your home, may seem simple but isn’t. This is because hot water demands differ from one household to another.

    That said, we understand that selecting a model that best meets your requirements can be a daunting and time-consuming task. Several factors need to be considered before the installation process - size being the most crucial.

    We’ve carefully created this comprehensive guide to help you find a suitable tankless water heater. Through this article, we’ll be addressing a critical question - “what size tankless water heater do I need?” Furthermore, you can go through our FAQs and examples provided in each section to gain all the relevant information on the topic.

    So, without further ado, let’s get going!

    Guide To The Ideal Size Of A Tankless Water Heater


    When you want to choose a water heater for your home, it’s important to consider its size before going ahead with your purchase. Ideally, traditional water heaters can be selected based on the size of your family, but determining the size of a tankless model isn’t that simple.

    Factors such as GPM or flow rate, and types of fixtures come into play while selecting a unit that supplies the required amount of hot water to your home. That being said...

    In this section, we’ll be taking you through an in-depth guide to help you find the tankless water heater that’s perfect for your home. We’ve explained a few crucial points and calculations that need to be considered during the selection process. So, let’s dive right in, shall we?

    1. The Size Of Your House

    With tankless water heaters varying in sizes, choosing a model that meets your requirements should be a priority. Although almost all modern units can easily steam the entire water supply of your home irrespective of its size, opting for a smaller model can be inefficient if you own a big house with more than one bathroom.

    It may only allow you to heat water flowing into specific bathrooms in your home. This is why it’s crucial to consider the size of your house and determine the output required to fill all your spa and shower rooms.

    1. Calculating The Water Flow or GPM

    Unlike regular water heaters, tankless models steam water as it runs into your home. In other words, the flow rate offered by your water heater helps in determining the water output of your taps.

    This is why you need to consider the GPM of the appliance to make sure it allows you to run more than one tap or shower simultaneously with the same flow rate. There’s a simple calculation that can help you determine the maximum required GPM for the tankless water heater.

    All you need to do is add up the flow rates of each water fixture in your home that supports the flow of hot water. You can refer to user manuals to find the specific values of the individual fixtures or simply search their model numbers online.

    Don’t have the original paperwork or model number? Well, there’s no need to worry; you can use generic GPM numbers depending on the water fixture type. Estimate charts are readily available on the internet for you to find the required information. However, you can also consider the following list of flow rates:

    (a) Bathroom faucet: 0.5 GPM - 1.0 GPM

    (b) Dishwasher:1.5 GPM - 2.5 GPM

    (c) Showerhead: 1.5 GPM - 2.0 GPM

    (d) Laundry washer: 2.5 GPM - 3.5 GPM

    (e) Kitchen faucet: 2.0 GPM - 6.0 GPM

    Now, we come to the basic formula to help calculate the GPM for your water heater:

    Required GPM = Sum of all the flow rates for individual hot water fixtures which run simultaneously

    Consider the following example for a better understanding - suppose two showers with the usual water flow rate of 1.8 gallons per minute each run at the same time. You can calculate the required tankless water heater GPM by adding the rate of both fixtures, i.e.

    Required tankless water heater GPM = 1.8 GPM (shower 1) + 1.8 GPM (shower 2) = 3.6 GPM

    1. Determining The Required Temperature Rise

    Now that you’re done calculating the required flow rate, it’s time you determined the amount of heat your heater needs to generate to sufficiently warm water.

    For this, you’ll need to calculate the temperature rise; rather, the amount of heat needed to increase the temperature of groundwater to the desired level. It’s therefore important to know the temperature of water flowing into your home, and that of the water you wish to obtain from your faucets or shower fixtures.

    Finding your region’s groundwater temperature is easy provided you use a ground temperature map, offering temperature listings over broader areas or specific values for smaller areas. Once you know the groundwater temperature, simply follow the given formula to determine the required temperature rise.

    Required temperature rise = desired water temperature - groundwater temperature

    For example, let’s assume the preferred hot water temperature is 105 degrees F, while your home’s incoming groundwater temperature is 45 degrees F. So, the required temperature rise will be 60 degrees F.

    To sum up, if your shower flows at a rate of 1.8 gallons per minute, your heater must be able to heat 1.8 gallons of water by 60-degree F every minute to deliver the desired hot water temperature.

    1. Knowing The Power Source

    Next up, you’ll need to consider the power source for your tankless water heater to determine the required size. Ideally, gas water heaters are less expensive and more powerful than their electric counterparts as they can easily heat 5 gallons of water up to 70 degrees F in a minute.

    On the other hand, electric tankless heaters are more affordable and simple to install. They can only heat 2 gallons of water up to 70 degrees F within the same duration. Hence, they’re more suited for homes with higher incoming groundwater temperatures and smaller heating requirements.

    Before going ahead with your purchase, consider the availability of the power source. Does your home have the power access for a gas or an electric water heater? Once you’re convinced with the price and power source of the unit, you may check out the features offered by the model.

    1. The Size Of Your Household

    Without a doubt, this is one of the most crucial factors to take note of before buying a tankless water heater for your home. It should be able to handle the hot water usage of individual faucets without compromising their flow rate.

    The frequency and total volume of hot water consumption are dependent on the number of members in your family. It’s quite obvious that a family with four members will use more hot water than a couple living in a condo, even though they might not use heated water at all times.

    However, you must also consider scenarios in which the water usage may peak, like when guests are over, or when you’re planning a wedding. And choose the size accordingly to avoid running out of water on such occasions.

    This is why it’s important to add up the flow rate of each fixture. It will enable you to determine the maximum GPM required for the tankless water heater, depending on the simultaneous activities of the different users and members of the family.

    Let’s take a look at a few examples to help you understand the concept better.

    (a) What Size Tankless Water Heater Will A Couple Need?

    A couple living in a condo will obviously have a single bathroom and no on-site dishwasher or laundry. Hence, the hot water requirements and usage would be substantially lower than larger families with four to five members.

    Suppose after adding up the flow rates of their individual water fixtures; the maximum required water heater flow rate is just 5 GPM. To raise the temperature from the average 68 degrees F to the desired 110 degrees F, the couple will need a water heater capable of heating 5 gallons of water by 42 degrees F per minute.

    (b) What Size Tankless Water Heater Will A Family Of Four Need?

    A family of four will have to consider how many people at their average-sized home might run hot water at the same time. Let’s assume the family might have to run a dishwasher (2 GPM), kitchen faucet (3 GPM), and up to two showers (1.5 GPM each) simultaneously.

    Considering all the appliances run efficiently, the maximum required water heater flow rate would be 8 GPM. And if they’re living in Hawaii, for all that matters, they might need a heater capable of raising the average groundwater temperature of 77 degrees F to 120 degrees F.

    In other words, the family of four will require a tankless water heater capable of heating 8 gallons of water by 43 degrees F in a minute.

    (c) What Size Tankless Water Heater Will A Family Of Five Need?

    A family of five can always opt for a gas tankless water heater as it’s not only cost-effective, but it’s also powerful enough to fulfill their hot water requirements.

    That said, consider five of them living in a home with the same appliances as our previous example. To this list, we’ll add an extra bathroom with an additional 1.5 GPM bathroom faucet. It’s quite obvious that they would be running two showers at the same time, along with a dishwasher and washing machine.

    Adding the individual flow rates of each fixture, the maximum required water heater flow rate reaches 9.5 GPM approximately. Now, assuming their home is located in Oklahoma, we’ll take the average groundwater temperature as 57 degrees F.

    With the family preferring their hot water output to be 120 degrees F, they’ll need a water heater capable of heating 9.5 gallons of water by 63 degrees F per minute.

    1. Can a tankless water heater fill your tub?

    A smaller tankless water heater will take longer to fill a large tub, so if you want to get it done within no time, opt for a unit with a substantially higher flow rate.

    1. Can a tankless water heater be too big for a family?

    There’s nothing as too big when it comes to tankless water heaters. Opting for a unit with a capacity smaller than what’s required will not provide sufficient hot water to meet your requirements. You’ll eventually run out of hot water.

    On the other hand, you may consider going for a water heater with a larger capacity than required, provided you don’t mind overpaying. This is why proper sizing is crucial before making a purchase.

    Final Words

    Tankless water heaters are designed to save more space compared to traditional geysers. That’s not all; an efficient model can help readily supply hot water to your household without compromising the water flow rates of your individual faucets and fixtures.

    However, to ensure this, you’ll need to choose a water heater size depending on your household size and overall water usage. Simply follow the two primary steps - firstly, calculate the maximum required flow rate of the unit. And secondly, find the temperature rise based on the desired output and incoming groundwater temperature.

    Once you’ve determined your requirement, all that’s left to do is select a suitable power source. With this, we now come to the end of our informative and comprehensive guide.

    Here’s hoping you were able to gain the required insight on the topic. On that note, we’ll take your leave.

    Till next time!

    Related Articles

    13 Most Energy-Efficient Space Heaters For 2022

    5 Best Above-Ground Pool Pads | Buyer’s Guide and Reviews

    5 Best Epoxy Pool Paint | Buyer’s Guide and Reviews

    10 Best Pool Cover Pumps | Buyer’s Guide and Reviews

    Learn How to Install a Spa Cover Lifter

    Dolphin M400 with Caddy Review & Buyer’s Guide

    Top Tier APEC vs. iSpring RCC7 | Water Filtration Systems Compared

    11 Best Pool Handrails + Buying Guide

    13 Best Salt Water Chlorinators

    5 Best Auto Chlorinators for Pool  

    Ceramic VS Infrared Space Heaters | What’s the Difference?

    13 Best Wireless Water Shut-Off Valves

    In the world of digital painting and concept artwork, there are a lot of techniques and methods that can speed up your workflow while simultaneously providing you with outstanding results.

    In practice, these tricks and techniques differentiate the medium from the traditional pen and paper counterpart.

    Today, in this guide we are going to discuss a similar unique method that makes digital painting more productive and convenient, and it is called Photobashing.

    So, let’s dive deeper into the subject and find out what you can do with it!

    Featured Image via artstation.com

    What is Photobashing & How to Use It


    What is Photobashing & How to Use It

    Image via davidkirkconceptart.wordpress.com 

    What is Photobashing?

    Photobashing is a unique technique in which you can use real images and 3D assets as a framework to create original artworks.

    In short, an artist can use real assets and pictures that match with their concept and place them around in a canvas and use that as a base of their finished product.

    Of course, this technique sounds a bit like cheating, similar to using butter paper for tracing, but this technique actually takes a good understanding of lighting and how you can realistically merge assets into a piece of work.

    Creators usually use this technique to increase their workflow and make their artworks get a more realistic look.

    More importantly, it can help them get and add many details that usually get neglected while working from scratch.

    But we’ll discuss the feasibility of Photobashing and the particular use-case that fits Photobashing the best in the next section.

    Why and When Do You Use Photobashing?

    We have already discussed why most artists use Photobashing in their workflow. But we also need to understand when we should use it to avoid wasting our time trying to use this technique when it’s actually not necessary.

    One of the most popular examples where artists like to use Photobashing is in concept artworks. For example, if you want to create a dystopian or alternate-universe picture of a real-life landscape, you’d prefer to use real scenery for reference.

    Another great example is if you have to work with character design. Let’s say that you want to create a character and depending upon his/her attributes you want them to pose or look a certain way in the concept art.

    In that case, you can simply use a stock model photo that looks similar to the way you have imagined and begin your work from there.

    All and all, there are many ways you can use Photobashing to enhance your work but the ideal situation is where you can use most of the elements in the original picture or you can get the skeletal framework from somewhere else.

    Photo Courtesy of Adam Wong

    Wait, Isn’t It Photoshopping Rather Than Photobashing?

    To be honest, there’s a grey thin line between the two techniques. In Photoshop, the artist usually alters the original image to a point where there’s no resemblance to the original picture.

    But in Photobashing, you enhance the original image rather than change it beyond recognition.

    As you might have already guessed it, this creates a grey area where one can’t decide upon the legitimacy of the artwork created through Photobashing.

    And unfortunately, this is an ongoing debate in the community. Many established institutes and communities don’t even admit artworks that have a hint of Photobashing.

    Many artists like to use software like Blender to create their own 3D assets and work on it after that to work around this argument.

    But overall, that’s not for us to discuss. Even though, we personally believe that if it’s original, even if it is worked on other assets, then it’s legitimate.

    What Should I Use to Photobash?

    Some of you might have already guessed it, but the answer to this question is Photoshop. From our experience, there’s no better software to Photobash than Photoshop even though there’s a bit of a hefty fee attached with it.

    The main reason for our choice is the sheer control the software gives you on your artwork. Photobashing needs you to do a lot of lighting and color manipulation to make it look seamless. And the tools that Photoshop provides, are splendid for the job.

    Some of the tools that you should get a good grip of before you start Photobashing are brushes, clone brushes, layer manipulation, blending options and filters.

    There are many more tools and honestly, we believe that no one can truly get done with photoshop in a countable number of sittings.

    If you are not willing to shell up for the expensive price tag of Photoshop, there are other tools that can help you Photobash. The ones that come to our mind are GIMP and Krita.

    Out of the two, we’d like to recommend Krita because it’s a lot easier to learn. It’s less complicated and the community is much more fleshed out to feed your niched puzzles.

    Image via arteneo.com

    The Individual Skills Needed for Photobashing

    There are some skills that you need to master to make sure you can do Photobashing with ease. These individual techniques are quite important in other types of work as well but the lack of them will severely defect your Photobashing skills.

    1. Picking up the right images

    Before you do anything, you need to get savvier with the world of stock images. You need to know of all the paid and free websites that can give you the most ideal images for working on your artworks.

    The usefulness of a reserve is seriously subjective, so, we highly recommend you to talk with your friends and family members who work in the similar genre of digital painting and ask them where they collect their assets.

    Some of our recommendations include Unsplash, Freepik, Pixabay, Pexels and even Pinterest.

    Sites like Unsplash, Pixabay, and Pexels have more photographic images than digital artworks. One of the main reasons we love these sites is because of their free license system and the high-resolution images you can get there.

    But you might have to settle for less than ideal images for your artwork because these sites are designed more for photographers than digital artists.

    Freepik is an awesome website that has loads of free assets, images, and illustrations. Many of our professional designers love to pick up reference items from this website, so, we thought it deserves a spot here.

    And don’t judge us for Pinterest. It has the potential to give you whatever you may dream but you just have to make sure that you can use it - it’s all about the license.

    Full Tutorial @ husso.artstation.com 

    2. Processing the initial image or asset

    Of course, you can’t just put a border on the stock image and use it as your own. You need to process the image ideally to get the things you need.

    This includes separating the individual elements and manipulating it, so that, you can work on it.

    One of the most important tools that most beginners tend to overlook is the famous Pen tool of Photoshop. You need to get good with it!

    Not only it will help you draw custom shapes better but it’s super important for selection, and if it hasn’t hit you already, being good with selection tool is crucial for isolating the elements perfectly.

    Another tool we’d like you to get acquainted with before you start Photobashing is the Blending Options that you have on each layer.

    There are a plethora of actions in that dialog box and you must get handy with almost all of them! The most important of those is the shadow tool.

    Full Details @ therookies.co

    3. Manipulation layers

    The most unique and crucial feature of Photoshop is its extremely fleshed out layer system. The layer system is heaven-sent in photoshop and digital artists who have tried working on other software understand its importance.

    In Photoshop, the layers can be easily manipulated and moved around. You can mess with the layer’s colors, masking properties, blending options, filters, black levels, etc.

    To truly understand the creativity of Photobashing and execute it perfectly, you need to get used to manipulating layers in Photoshop. And yes, that does need you to master the shortcuts as well!

    So, What Should I Do Now?

    To be honest, this article can’t encompass the magnitude of exploration you need to do for Photobashing.

    Apart from mastering the skills we have mentioned above, you’d have to venture on your own to find the right way to do Photobashing.

    But don’t worry because there are loads of free tutorials and videos on YouTube that can teach you Photobashing.


    We’d recommend you to pick up your own project and learn on YouTube how you can do that. That way you can learn in the most natural way and you’ll also learn fast.

    Conclusion

    With that, we are done with this piece.

    We hope you found this article helpful and that it got you started with Photobashing.

    We wish you well and thank you for reading!

    Related Articles

    14 Amazing Free Krita Brushes and Brush Packs for Digital Art

    A storyboard is where the ideas conceived by the artist is given its actual visual form and expression which is then developed into a single action-strip in a comic book or an animated motion-picture or film.

    A storyboard artist is, thus, the creator and director of any animated film, comic book or TV show. The storyboard artist’s job actually goes beyond what we might think is only putting down a particular scene on to the paper or electronic pad, nowadays.

    This is because not only the artist conceives and gives a visual structure to an idea, they are responsible for developing the myriad of emotions that an absolutely fictional, animated character exhibits, forming an unbelievably beautiful relationship with its audience.

    So if you’re interested in visual story-telling and knowing more about what a storyboard artist actually does, keep reading the following extensive guide that bares all about the profession of animation and the genius behind the screen!

    What is a Storyboard Artist & Ultimate Guide for Beginners


    First of all, how should one describe a storyboard and its artist?

    Every sequence or clip in an animated movie that you see is formed by delicately weaving numerous panels together. Visual story-telling for animation finds expression on the artist's table where he creates and composes these snippets of scenes that relay an incident.

    And the very layout on which these panels are created and arranged to form a scene is known as the artist’s “storyboard.”

    In short, this is where the real magic for all animation movies begin!

    Now, apart from just character sketches and situations or actions unfolding, storyboard panels also consist of sequences dealing with numerous reactions, movements, and locomotions, which are developed painstakingly by storyboard artists. These include everything from body language, the movement of limbs, the effects that each tiny movement has, and most importantly, each and every tiny facial expression of each and every character in the story.

    These expressions are what relays the state of mind and thought processes of a character to us. These are what portrays the personal and ulterior motives and intentions of a character onto the screen and makes its virtual, imaginary “existence” believable to us.

    If you think about it, the expressions of an animated character could make or break the illusion of his existence that we love to believe in and form a relationship with.

    And this is where the genius of a storyboard artist lies.

    So, how does a storyboard artist develop a visual sequence from just an idea?

    A storyboard artist is the one who creates a visual story out of just a mere concept and or a script containing the idea, making it “real” for the world to see.

    A storyboard artist is in complete control of how others might perceive a character and the entire project, for that matter. The storyboards serve as a critical reference point for all of the members of production and development, no matter which sub-department they belong to. Hence, the clarity of every storyboard for the entire project is a crucial requirement for all. 

    Thus, it is required for a storyboard artist to be absolutely confident, crisp and precise in all of his depictions of the plot so that it is absolutely clear and comprehensible to every member of the team even if joins midway or is responsible for undertaking just a segment of the story. This decides the vital “energy” of the panels which motivates and drives an entire production house.

    As has been previously mentioned, a storyboard artist is responsible for the clearly depicting literally each and every tiny aspect of every scene and character in the story, including emotions, reactions, and gestures (subtle or otherwise).

    Now, the critical point over here is to develop these actions with minimal or no words (dialogues) at all. The entire plot should be strong enough to not depend on any spoken word as such and should be able to hold its structure without scripted context. This tests the strength and depth of a visual story-sequence and is the ultimate parameter for judging the mettle of an artist or a beginner in the field.

    This is the reason why each storyboard artist is a great visual communicator for every field that deals with virtual reality such as animated movies, TV shows, video games, and a great many forms of story-telling!

    How does a storyboard artist handle visual story-telling?

    The primary job of any storyboard artist is to sketch scenes that explain the story. They seldom require any word or dialogic to convey the story. The process and the methods that the storyboarders employ vary from one artist to the other. Often, it so happens that the rest of the production or development team also influences a storyboarder’s methods and style.

    If there happens to be more than one artist at the storyboard, then one artist can also mimic the style of another. This is to ensure the uniformity of the storyboards to help maintain the clarity of the vision and comprehensibility of the plot.

    Also, in the case of movie projects, a director’s personal style at handling a particular storyboard could influence the way another storyboarder creates scenes. This is a pretty beneficial way to ensure great flexibility in a team that also helps obtain the maximum benefits of an artist's personal style. However, the clarity of a storyboard shouldn't be compromised in any way no matter how many artists are working at a particular storyboard.

    In certain ways, storyboard artists could like sketching a comic-book strip of a movie or video game. This is because, apart from visualizing scenes, an artist at the storyboard will have to describe the movement of the camera.

    Based on your preference, you can realize the scenes on the computer screen or manually. A digital depiction and rendering of the scenes make it easier to exhibit and share. However, for traditionalists at the art, nothing beats the incredible appeal of pen on paper.

    What are the specific things that a storyboard artist has to work upon?

    Even though a significant portion of a storyboarder’s work involves drawing the fundamental structure for the characters and sketching in the details, there definitely remains a fair bit of room for text as well owing to the requirement of technical description. These go in their respective slots in the panels.

    Since the clarity of a storyboard is the essential and utmost requirement of the production procedures, it is understandable that visual representations may at times fall short in conveying a clear message, especially if someone is starting out from the middle of the story or handling a part of it.

    In such circumstances, using text often becomes a necessity to explain the specifics in greater detail, or even for listing the details from a technical standpoint.

    On projects like that of video games, storyboard artists are often responsible for developing on so many other fronts than just visualizing scenes. Sometimes they have to work on various levels within the game or on the constituent elements of character design. They are responsible for developing and maintaining the “visual continuity” of a story.

    According to celebrated game design artist, Lauren Walsh, a storyboard could be essentially termed as a sketch of the finished product, that lets a storyboard artist unleash their creativity without any sort of boundaries, restraints or limitations. 

    This crucial “sketch phase” allows an artist to freely explore several different themes, concepts, environments as well as vital story-telling tools as different means of communicating their ideas to the team. It is way easier and cost-effective to make simple changes to a storyboard before devoting precious time and resources to a concept or an idea that way.

    How does “pitching” a storyboard works for an artist and the rest of the unit?

    Storyboard artists are essentially responsible for “pitching” their art panels and boards to the director of a film or to the creative head of a development team. If you’ve got the knowledge and the talent of how things work in the storyboard department, then, this is how you can make your work have a substantial impact on a unit.

    Once you have taken a concept or a script and woven a rough visual representation from it, your “pitch” is what is going to become the deciding factor for you.

    It is because your “pitch” is the point where you perfect your visual representation, instilling life into it. This is where you provide the director or immediate mentor with an extensive walkthrough your entire story, narrating and describing your panels and boards.

    These could include sound effects (better start polishing those explosion and spaceship sounds right away!). However, it is fundamentally your drawings that will decide the impact, speaking for themselves.

    What you need to at this point is to take the recipient of your pitch into your world and keep them intrigued enough for them to stay there. Remember that like any other “sales-pitch,” here too, it is required for you to focus on selling your visual interpretation. This is why any pacing, sound, or rhythm will hold the power to make a drastic impact on your pitch.

    And if your pitch makes a spectacular impact on the viewer, the script itself could be adjusted to include all those vital parts of your storyboard that has influenced the storyline so much!

    This is because your visual representation of a concept not only serves to entertain, but they inspire other creative minds to create in turn!

    How can one become a storyboard artist?

    So, now, to answer the million-dollar-question of how does one become a storyboard artist, we would like to tell you that there are a number of ways to go about achieving that feat.

    For starters, there are several tools available online that can help you out with your aim. A substantial portion of all of it goes into creating an ideal storyboard, so, it’s better if you tested your knowledge of the field and skills out for before you go ahead with the application procedures. This way, you can know for yourself if you are equipped for the job or not.

    Some of the best storyboard software out there right now include:

    To excel at storyboarding, you require great drawing skills. This is a crucial point of the work. Your storyboards do need to relay the scene clearly to their audience, and this is why you will be required to illustrate the emotions and gestures of your character correctly and prominently on your panels on the board. You will also have to render the setting for the scene as cleanly as you can.

    All in all, you would have to draw pretty much all of the time to create your boards well. If this sounds appealing to you now, then do remember that jobs like these are some of the most viciously competitive ones that you’ll ever come across. 

    There is always going to be someone better than you at the job or more talented, but this doesn’t mean that you can’t reach their levels or go beyond it by perfecting your craft. With real patience and dedication, you could become the next best thing at your work that everybody looks up to. And this case, all you have to do is draw every day, for the majority of the time until you get the perfect circle!

    No wonder people working at Pixar talks about staying up all night drawing and practicing. They mention working “48 hour days!”

    Tips and tricks to practice better!

    One of the most exciting and fun ways to practice drawing and get better at it is to do a “draw every day” challenge. This way, you can capture (and you should), whatever is happening around you and to you during the day or an incredible dream that you might have had last night and create your panels out of these memories and concepts!

    This will build your interest in the task as well as strengthen your skills of visually representing a though.

    Knowing a bit of cinematography will help you immensely with getting the fundamental dimensions of the picture right. This is because you would be required to draw whatever the “camera” sees, and that would be very different from what your own eyes would see. This is why you have to learn the difference between physical and cinematographic perspectives when it comes to defining perspective angles on the storyboard

    Although video games and animated films aren’t filmed with a camera, they still have different perspectives.

    Limitations of concepts such as that of the 180 degrees rule

    The 180 degrees rule ensures that the viewers are absolutely oriented in the scene. Fundamentally, when you set your scene up, you get a straight line running through the middle of it. Now, for every shot in the scene, your camera perspective requires to be on the same side of that line.

    The Warburton Labs offers a pretty helpful comic that correctly and accurately illustrates this concept. You could get the second part of the comic right here. It also discusses several other essential concepts that are closely related to storyboarding specifically.

    To hone your skills, you could take art and theatre courses as well as various courses in photography and cinematography. Every part of this field, no matter which department it is, will contribute substantially to your growth and development as a storyboard artist.

    How to apply for the job and be successful at it?

    The first thing that you should do if you’re looking to bag a storyboard project is to search for internships, while you’re in art school. Try applying in bigger studios and smaller ones alike. As you achieve more and more reps, your chances of getting noticed at bigger studios such as Pixar and of the likes, get higher.

    And if you’re looking for an entry-level job that doesn’t require much of a formal collegiate education, then do work hard and extensively on your portfolio as that needs to be pitch-perfect for these openings. Various workshops and classes can help you learn the technical parts of the art and assist you in honing your skills.

    In all circumstances, you should focus on concentrate on constructing a portfolio that displays your deft skills as an artist as well as visually relay your story to the viewer in the perfect way.

    Remember: draw all the time!

    Now for the most challenging part: learn to prepare yourself for a lot of “no”s. Like any other job in the industry, this too will test your patience, perseverance, and positivity in the most brutal ways.

    But, be assured, that with a strong portfolio and a persistent approach towards cracking the code will definitely get you to your goal eventually, if not fast enough.

    A simple way to make it even more motivational and fun for you is to chalk it down to a “PSP” (not the Sony one, though), formula which stands for “Persistence, Strong Portfolio.” This is bound to get you closer to your destination by the day.

    However, at bigger studios, it’s more than likely that you won’t find entry positions for storyboard artists. So, if you have already had some experience of working at a storyboard, then chances are that you may be hired directly for the spot.

    Whereas smaller studios will often depend on their animators for helping with the storyboards. With smaller projects or indie ones, the pressure could be high, but these would provide you with all the scope to develop substantially on your skills and personal style and help you prepare for applying at bigger studios.

    Skills and Education

    Knowing how a film and animation differ from each other and their basic constituent elements are intrinsic parts of storyboarding.

    You will be expected to have profound knowledge and in-depth understanding of acting, staging. Devote time in learning about cutting, which is the process of splicing scenes together as well as the language of a film.

    Since your primary responsibility would always be that of communicating the story clearly through visuals, developing strong draftsmanship should be your top priority. Strengthen your skills as an artist as studios will always look for well-drawn storyboards with panels that can communicate tiny, tricky, and subtle details such as gestures and expressions with ease and clarity.

    When you're dealing with portraying expressions and emotions, try covering as much as you can on them. Stories consist of a myriad of emotions. If you choose to depict only a singular emotion, for instance, humor in your panels, then a lot of questions about the plot and the characters would be left unanswered for the reviewer of your portfolio.

    Make sure that you include emotionally-charged scenes, thrilling action panels or such that contain multiple emotions.

    Based on requirements, you’d often have to be a collaborator or sub, especially if you’re looking to work in a studio. Working closely with the members of a team will spell bliss for learning the specifications and technicalities of the work.

    However, if it’s specifically a solo or personal project or even for any indie game you want to design, then you need not require to collaborate with others as such if you aren’t really looking to.

    A few potential challenges for a storyboard artist

    One of the things that you would have to learn to accept is that not all ideas that you have would be perfect or enough to impress. Be prepared to take scathing criticisms and absorb all the precious feedback thrown your way. Not all panels you draw will bring in favorable judgments or remarks from your fellow team-mates. 

    But the best part about it is the incredible opportunity it will provide for you to improve your work. As long as you’re ready to turn a brutal criticism into a positive result for your work, things would pan out for you just fine!

    Often it may happen that you’d be asked to rework your scenes over and over and in the process, combine different elements of the iteration until you’re able to create the very thing the team is looking for. You will have to be very flexible that way in order to tackle the struggles of creating perfection on the storyboard.

    There could also be a lot of pressure when it comes to pitching as storyboard pitches could involve executive producers, backers, and several other decision-makers. Pleasing all at the same time could be the most challenging feat to win in this field. However, with a positive attitude and mindset towards it, all will get you where you want to be!

    The Industry Advices!

    One of the most influential figures at Pixar studios itself is that of Ted Mathot, who is the story supervisor and the creator and artist for comic books. He had posted his “story advice” where he talks about creating the ideal portfolio for you to be able to apply at studios like Pixar on Tumblr three years ago. It is available even today.

    He talks about some of the vital things to keep in mind such as the length of your portfolio, which, according to Mathot, should be limited within 15-20 pages worth of boards.

    Avoid cramming these as many panels as you want. Trying to keep everything clear and legible enough: this is of utmost importance. Mathot recommends about 6-9 panels per page.

    Always put up your best works as no one would have the time to go through all that you may have created in the past 15 years.

    Your best works on panels should convince the reviewer or interviewer of your skills, reflecting clearly and precisely whatever it is that you specialize in. This way you’d be showing value for their time.

    And for the subject matter, Mathot is of the view that a little depth and personality could be just the thing that could impress the reviewer. Apart from the conventional character or setting, bringing in scenes from real life (such as coffee shops, airports, etc.) could spell a breath of fresh air, defining a unique character and tell its story.

    In this context, keeping a notebook or journal at hand could indeed be a wise call, so that the next time something interesting happens in your surroundings or you visit a place that inspires a story, you’ll be able to record it. And according to Mathot, this sort of work is exactly what could make a vital difference.

    He clearly states that “communicative single image story-telling” provides very personal insight into the artist’s mind as well as his style.

    So now you know what to do and how to do it all!

    Conclusion

    This was it for our ultimate guide to storyboarding for beginners! We hope we were able to provide you with an insight into what exactly storyboarding is supposed to be and how the industry works.

    And we sincerely hope you liked our effort!

    Take care and keep drawing the smiley!

    See you soon!

    If you need to know more about sheds or you are simply wondering what is a shed, you`ve come to the right place ! Sheds have been used for a very long time globally and having multiple uses; it is a very convenient utility option for people who own gardens, backyard, or even limited spacing. Typically single story, these structures are versatile and easily modified to fit the needs of the individual, they're commonly structures which have a roof and four walls, situated outside the house. A shed could vary from a couple of square meters in size to a dozen depending on how they are utilized, whether it is for gardening purposes or industrial usage, sheds play a major role in storage.

    Sheds Defined, Structure Types, Advantages and Disadvantages

    What are the different types of sheds?

    Sheds, as mentioned above, come in all shapes of sizes as well as dozens of materials. The most common presence in the domestic setup is built in wood yet nowadays vinyl and plastic variants start to gain ground as they are less expensive and a tad easier on maintenance compared to their wooden competitors.

    As sheds grow in sizes complex wooden structures and professional carpenters come into the picture when it comes to wood, alternatively iron and a professional welder could achieve brilliant results too when it comes to medium and large sheds.

    via bhg

    Domestic sheds

    Yes, you could even DIY a shed! Did you know that?

    A very interesting choice indeed, sheds could be available in the DIY form, and by using simple methods, they could be constructed according to our needs. A simple tool like a screwdriver can help you in assembling a shed, whether it is plastic, wood or metal. These sheds are versatile and their uses range from gardening storage to chemicals and equipment storage or home workshops, people often store in them items which otherwise could not be stored inside the house.

    Shed kits could be the horizontal, vertical or corner type with modifications inside the shed to meet your needs! They could be apex, pent or reverse apex roofed. Pent shaped roofs are for places which have heavy downpours or even snow, it is sloping downwards and helps in water run-off. An apex type roof is basically like an inverted V, often common to houses too. The reverse apex roof, on the other hand, has a side door, not a front. This facilitates the door to open in the largest and widest section of the shed rather than the narrowest, aiding in better visibility and room.

    There are salt-box style roofs or gambrel type roofs too, which have lofts attached to them. The prices of these sheds naturally vary, and so do their functions. 

    Source Unknown

    Larger sized sheds

    A little heavier on the pocket, larger sheds are used for domestic purpose too and while their footprint is larger, they have better ventilation and can also be used for purposes other than gardening or typical tool work. Often such sheds can also be transformed into a cozy outdoor office, a photo studio or library, they are often hobby related and they enjoy a better build quality overall.

    People often see these as small retreats, comfort dwellings within reach.

    Sheds which have more specific usage

    From being used in the mall for parking to university, restaurants and other commercial spaces, sheds are a major contribution towards protecting vehicles both two-wheeled and four-wheeled vehicles. We encounter bike sheds and carports everywhere, both type of sheds that protect and safeguard our belongings with a basic design.

    An ever more particular usage would be boat sheds or, structures envisioned for rowing and drying materials.

    Agricultural sheds

    Farmers use a lot of agricultural sheds, again for storage and protection of farm equipment and produce. Depending on the production, these could be from small to large and are largely modifiable according to requirements. This also includes shearing sheds in which cattle are kept.

    Raw Materials

    The most common type of materials which are used to build the framework of a shed depends again on its usage, but most often it is PVC, metal or wood. They could also be vinyl-sided sheds, everything depends on the owner and their requirements.

    via pinterest

    Metal Sheds

    Metal rooftop, framework, and galvanized aluminum sheets are used to build sheds. They tend to rust with time, and their durability is weaker than wooden sheds when maintenance is overlooked, they also tend to dent faster. Metal sheds have the advantage of being strong and termite resistant. For this reason, corrugated metal sheds are preferred as they are stronger than their counterparts. Financing into an anchoring kit for a metal shed makes sense as they could be susceptible to weather-related damages.

    via familyhandyman.com

    Plastic Sheds

    Plastic and PVC sheds are also quite popular and are the least expensive type. Also, they are easier to maintain than the metal ones. Plastic sheds are very lightweight in comparison to metal or wood and are also UV protective, rot-proof, and termite free. They could be modified with extensions like plugs, boards, shelves, skylights, etc. 

    Wooden Sheds

    The classiest of them all, wooden sheds are classics and therefore, more expensive. The maintenance of wooden sheds is higher than vinyl or plastic, but they are excellent when it comes to durability. It would be recommendable to research well before investing in wooden sheds as proper varnish and good quality wood last for a very long time. Cedar wood is pretty much water-resistant. There are typically two ways by which wood could be treated, dip or pressure treatment. Pressure-treated sheds last longer and don't need additional preservatives, whereas dip-treated ones will again throw you into the maintenance game every few years.

    via nzhouseandgarden.co.nz

    Vinyl and Asbestos Sheds

    Vinyl, as well as asbestos sheds, are also popular and good alternatives to plastic or wood, even though the major framework would probably still be wooden or metal. They are stronger than metal or plastic sheds and are also easy on the pocket.  There are many color options that could suit your aesthetic appeal.

    All these types of sheds are available in kit form and could be DIY too.

    Organizing your shed

    One should do all in his power to organize a shed clutter-free in an attempt to maximize its storage. A simple trick would be to utilize the vertical wall space to build new shelves and cabinets, one could also use rods to suspend organizers and possibly mount oddly shaped items that he does not use often under the pitched roof. It is highly recommended to reuse and recycle, anything can be of use in your shed, plastic bottles split in half can rapidly become nail organizers for example, creativity is key!

    At all times, keep in mind that a clutter-free shed is a happy shed, seek solutions that help you keep the space clean in the long run and everything will be far easier, maintenance included.

    The advantages and disadvantages of sheds

    Whether someone owns a big area in their garden or backyard, or whether it is tiny and cluttered- a shed could solve a lot of your organizational problems. They sure are affordable and come in a varied range of prices for everyone out there. Sheds could also be innovated into dainty personal spaces which could be used in various ways apart from storage.

    Sticking to the basic idea of having a shed, as a storage unit, there are certain pros and cons to them, and it would be advisable to discuss a few.

    via findinghomefarms.com

    Advantages 

    Storage

    The most important advantage and usage of a shed is obviously storage. They act as huge storage spaces and occupy very little space overall. Whether it is for domestic purposes, or for commercial needs, sheds are extremely important storage units. This makes your backyard clutter free, giving you more space inside and outside the house.

    Organization

    Sheds account for very good organization spaces, and since it can store a lot of objects and materials under one roof, it is easy to organize them according to our needs. This makes work much easier and of course faster.

    Budget-friendly

    Since sheds come in various sizes as well as quality and type, they are quietly affordable. Sometimes investing in huge-scale storage could be difficult for some people, under such circumstances, making the perfect use of limited space, sheds make a great choice. For commercial purposes, like train goods, or parking, sheds help in keeping things organized in one area in a friendly.

    Protection and safety

    Sheds actually could be installed with very good protective measures. This ensures that the goods/vehicles/valuables are kept safe and away from burglars. Vehicle sheds require more attention, and so do private homes. Sheds could be installed and modified with specialized locking devices which make sure that there is no unnecessary theft.

    Easy Peasy

    One could express his creative side by redesigning his shed through paint, coloring it towards happiness. Shed kits are usually DIY, and this means that anyone could follow a set of simple instructions and assemble their shed with very basic tools present in the house.

    Anything You Want

    Depending on the need and location of the shed, any raw material, starting from wood to metal and vinyl to asbestos can be used, one can choose from many options in the market. They could make their shed colorful and at the same time productive.

    Maintenance

    A very important factor to consider when buying a shed is what type of material is used. Certain materials like PVC, plastic, and certain metals are very easy to maintain and thus save a lot of hassle as well as maintenance costs. Find out what suits your requirements the best and invest in the most suitable shed for yourself.

    Durable

    One of the important factors to consider is the longevity and durability of the product we invest in. Depending on the material, sheds come with a manufacturing warrant. Plastic sheds are durable and so is steel. The classics, wooden sheds are a tad more expensive and a little bit high maintenance yet their expression sends an entirely different message.

    Temperature control

    Plastic sheds and wooden sheds are usually quiet temperatures friendly. Even in extreme climates, there is a moderate temperature that could be maintained inside these sheds, and this makes them more user-friendly. Also, one should consider hazard protocols. Wooden sheds have more susceptibility to catching fire than metal, and thus it should be kept in mind. Everything depends on the owner, the location, and the type of storage they want to make.

    via poppytalk.com

    Disadvantage of sheds 

    Hectic Maintenance

    Some of the problems which are faced when having any shed are maintenance related, especially if the quality is sub-par. Wood is usually prone to catch fungus, termites, foul smells as well as various pests. Unless it is a superior manufactured shed which a have all precautionary measurements like varnish paint, wooden sheds could be hard to maintain. Metal sheds are prone to get dented, even though they don't get damaged otherwise. Paint too tends to chip off and peel easily and thus requires additional investment.


    via statesmanjournal.com

    Expensive

    Even though, otherwise budget-friendly, wooden sheds could be quite expensive. They tend to be the most durable too, but it depends from person to person on what quality of wood they would invest into. It is always advisable to spend a few bucks extra to get the best deal quality-wise.

    Immobile

    Except for certain kinds of sheds, most of them are immobile and cannot be moved easily. These sheds thus have to be lodged in one area permanently.  This is the most applicable for wooden sheds as they are heavy and bulky and almost impossible to move.

    via bhg.com

    Too many pests 

    Again, if not maintained well, sheds could be a hub of unwanted pests, bugs, and eventually diseases. This is especially if they are unused for a very long period. So ensure that when there is a routine cleaning of your home, the shed to is a part of it.

    Noise

    Sheds are nowhere near as soundproofed as garages, their low mass especially on plastic and thin wooden sheds is not sufficient to break down sounds, their main objective being storage. If you are planning to use power tools in the shed occasionally for woodworking or any other hobby that might generate noise do research soundproofing costs and options that will help you maintain the peace in the household.

    Conclusion

    Sheds are a smart choice and their popularity is a testament to their greatness, simply ensure that you pick something that fits your needs and requirements and prepare yourself for an awesome experience with your next structure!

    Related Articles

    Backyard Landscaping Design Ideas-Charming Cottages and Sheds

    10 Best Shed Locks Right Now Reviewed

    9 Best Shed Alarm Systems for Enhanced Security

    8 Best Carport Kits  

    10 Best Pergola Kits for an Awesome Summer

    Unfortunately, this product is discontinued on most e-commerce websites. Try this newer model WEN 34034 6-Amp Wood Lathe

    The WEN 3420 Lathe is one of the most affordable options out there, but is it the right choice for you?

    Well, we hope that you get the answer to your question after going through our comprehensive review. The unit is equipped with some great features for its price, making it a viable investment option for sure.

    Having said that, it is also essential to consider its flaws in order to get a balanced idea. Yes, we wouldn’t say that this lathe from WEN is perfect. To be honest, no product is. But that doesn’t mean it shouldn’t be considered. So, through our guide, we bring you an unbiased review of the WEN 3420.

    We decided to test out the unit for you, so we are quite positive about our findings. But the ultimate decision is in your hands.

    So, without wasting any more time, let’s dive in. 

    WEN 3420 Lathe Review

    Industry lathe machine work. WEN 3420 Lathe Review

    For those who don’t know, WEN is a leading brand that deals with the manufacture of top-grade and affordable power tools. And the WEN 3420 Lathe is one of the many exceptional innovations from the brand. So, how about we discuss some of its incredible features?

    1. Variable Speed Control

    You will be pleased to know that the WEN 3420 Lathe features a speed control knob and a 2 amp slow start motor. In other words, it provides its users with complete control while working on various woodworking projects.

    We were able to adjust its speed from 750 to 3200 rotations per minute by simply turning the knob in the right direction. You can increase the speed by turning it clockwise, and decrease it by turning it anticlockwise. Yes, it’s that simple! However, make sure to keep the pace at the lowest setting when you start the motor.

    1. Capacity and Size

    We loved the compact design of this lathe which comes with a surface area of 8 inches by 12 inches. This makes it ideal for most benchtops with a lack of sufficient space. Not only this but it can also be moved from one workstation to another.

    It is always recommended to choose a lathe based on your workspace. That being said, we found the capacity and size of the WEN 3420 suitable for most workpieces. Furthermore, it includes a 5-inch faceplate, making it the best option for cups, turning bowls, and other non-spindle workpieces.

    1. Easy Operation

    As mentioned earlier, the unit comes with a variable speed control knob that allows you to adjust its speed settings easily. But that’s not all! Now, if you are a beginner, you might not know that a lathe requires a tool rest for flexibility and ease of movement. And this particular model comes with tool rests in two different sizes.

    Having said that, we were amazed at the level of comfort the tool rest of this lathe offered. It enabled us to move it left to right and back to front with ease. In fact, you will also find a lock lever near the tool rest. This will aid you to keep it securely in the right position.

    Furthermore, it comes with an on/off switch that makes it convenient to start or stop the motor as and when required. WEN has simplified the operation system of this unit so that every beginner can find it easy to use. And this is why it is a preferred choice for most first-timers.

    1. Safety

    When it comes to power tools and electrical appliances, safety should be your utmost priority. This is why it was essential for us to check out the safety features of the WEN 3420, and to be honest, we were quite impressed with our findings.

    Now, you already know that the unit comes with an on/off switch for its easy operation. But that’s not all! It features a safety switch lock, which prevents the motor from accidentally restarting. You can start it once the key is put back in place.

    The circuit breaker button is another exceptional safety feature of this lathe. It automatically switches off the unit in case of voltage fluctuations and overload. This, in turn, minimizes the cause of damage, keeping it safe and secure.

    In such situations, allow the lathe to cool down for a while. You can then press the circuit reset button, and switch the motor on again. But remember to keep the speed low at the beginning to ensure safety. That being said, you don’t have to worry much since it comes with a slow-start motor, which starts gradually in order to maximize safety and minimize damage.

    Apart from this, it is critical to follow the safety rules while using WEN 3420. For this reason, we would suggest you go through the instruction manual and thoroughly follow the safety guidelines. After all, safety depends on precautions!

    1. Accessories

    As we said, the WEN 3420 is one of the most affordable options available in the market today. And truth be told, seeing its price, we didn’t really expect it to come with so many great features. But what amazed us the most was the fact that it comes with a complete kit of accessories, which makes its operation even more convenient and comfortable.

    We have already mentioned that it includes two tool rests and a 5-inch faceplate. So, by now, you must also know their functions. Apart from these two types of accessories, the tool comes with a tailstock, a knockout rod, a headstock spur center, and more.

    The tailstock helped us set up the spindle at the desired position to get a tighter grip on the workpieces. On the other hand, you can use the knockout rod to remove the center cup when required. Not just that, but it also enables you to drill holes in the center of any of your workpieces.

    1. Durability

    When we invest in a product, we expect it to last us for a few years, if not a lifetime. On that note, you will be pleased to know that the WEN 3420 Lathe will surely ensure long-lasting performance. This is because of its sturdy solid cast-iron construction, which also makes it a handy power tool.

    Furthermore, it is backed by a 2-year warranty from WEN. So, you can go ahead and buy this unit without worrying about its longevity. It is a reliable investment that will prove to be beneficial even in the long run.

    What Could’ve Been Better?

    There is no scope of the doubt when it comes to the functionality and performance of this safe lathe from WEN. However, we did come across a few drawbacks related to the model, but these aren’t deal-breakers.

    Firstly, being a compact unit designed ideally for beginners, the WEN 3420 is suitable for smaller projects and DIY crafts. Why? Well, this is because of its low-powered slow start motor. Now, even though it minimizes damage and ensures safety, it lacks the power to tackle larger projects.

    And secondly, we found the unit easy to operate, but it was quite noisy. The high level of sound produced by the motor may disturb you and your surroundings. Also, this might compromise your overall working experience.

    That being said, despite its minor drawbacks, we would definitely recommend this lathe to first-timers who want to work on smaller projects.


    Pros

    • On/off switch with safety lock
    • Slow start motor
    • Available at an affordable price
    • Includes a variety of accessories
    • Comes with a 2-year warranty


    Cons

    • Noisy operation
    • Not suitable for larger projects


    Young carpenter processing wooden plank on special woodworking machine WEN 3420 Verdict

    WEN 3420 Verdict

    In our opinion, WEN 3420 is a must-have for every beginner despite its flaws. And there is really no harm in trying it out because it is a reliable investment option that’s not even too expensive.

    The model is equipped with safety features, preventing unwanted accidents and damage. In fact, it is also durable and sturdy. So, you can lay your trust in it to ensure accurate and precise results for years to come. To sum up, if you need to tackle a small woodworking project, this should be your go-to option.

    With this, we come to the end of our comprehensive review. And we hope by now you have made a decision.

    On that note, we take your leave. Till next time!

    Related Articles

    11 Best Wood Chisels to Enjoy

    How To Cut Wood Without A Saw Using Different Wood Cutting Tools

    Grizzly Lathe Review [Clear Winner?]

    For many folks, enjoying the summer means having a barbecue in the backyard with friends and family. Most gas grills that are available today don’t cater to small families or homes that don’t have the free space to include a large gas grill.

    That shouldn’t be an excuse to not have a barbecue at home. This is where the Weber Spirit E-330 comes in. This is a gas grill that features just about every function you would expect to find in a grill but in a compact unit. The small size of the Spirit E-330 offers users with a compact grill that’s easy to move around and store away when not in use. So, let’s take a closer look at what the Weber Spirit #-330 has to offer.

    Weber Spirit E-330 Review

    Weber 46810001 Spirit E-330 LP Gas Grill, Black, 115cm
    • Equipped with upgraded features and the perfect size for...
    • Sear station creates an intense heat zone to quickly add...

    Sure, there are many gas grills to choose from nowadays, but few offer the functionality and compatibility of the Weber Spirit E-330. This is exactly what you would expect from a company that’s been delivering superior grills for as long as Weber. The company doesn’t disappoint with the Spirit E-330 which is part of its smaller designs. 

    With the Spirit E-330, Weber makes its entry into the compact gas grill market in style. The new Spirit E-330 offers customers with all the bells and whistles one would look for in a gas grill in a compact size unit. The Weber Spirit E-330 offers a full stainless-steel body with 3 burners that provide an ample amount of heat to cook delicious foods outdoors. It is also reasonably priced which makes it possible for everybody to enjoy outdoor cooking in style with the Spirit E-330. 

    Specifications

    • Three burger grill: 32,000 BTUs
    • Side burner: 12,000 BTUs
    • Rear searing burner: 7,500 BTUs

    [easyazon_image align="center" height="500" identifier="B016M5A2SQ" locale="US" src="https://m.media-amazon.com/images/I/51osGQdiLTL._SL500_.jpg" tag="homesthetics0a-20" width="500"]

    The Design

    For many folks, purchasing a large gas grill is out of the question due to a lack of space. Keeping that in mind, the Spirit E-330 offers a viable and affordable alternative. With the Weber Spirit E-330, you get to cook delicious food outdoors in style.

    One of the main features of the Spirit E-330 is its compact design. This makes it easy to cook on and move around in the backyard. The compact design also takes the hassle out of storage, which is a challenge with larger gas grills. For a compact grill, the Spirit delivers a decent amount of cooking space to prepare foods, but not enough for cooking for large families. Other features that make the Weber Spirit E-330 standout are the multi-colored controls that add to the grill’s appearance. They are also easy to use and provide complete control over the grill. With just three large heavy-duty control knobs for the grill, there’s no need to guess the function of each. 

    The stainless steel grill area is protected by a heavy-gage metal lid that protects the cooking area. It features a large handle for easy grip and a large thermostat to gauge the temperature of the grill. Below the cooking area is a surprisingly large storage space where you can keep grilling tools and accessories along with the gas tank. If you’re looking to move around the grill then that shouldn’t be a problem with the sturdy caster wheels that can take the unit on any surface. 

    [easyazon_image align="center" height="500" identifier="B016M5A2SQ" locale="US" src="https://m.media-amazon.com/images/I/513VjwepVJL._SL500_.jpg" tag="homesthetics0a-20" width="500"]

    The Features

    The following are some of the features in the Weber Spirit E-330. 

    Stainless Steel Build

    You expect to get a certain level of quality when purchasing a product such as a grill from Weber, one of the masters of gas grills. With the Spirit E-330, you are not going to be disappointed with the quality of the design and the materials that have been used in manufacturing the E-330. The Spirit E-330 offers a durable grilling unit that’s reasonably priced and will last for years to come. 

    Large Cooking Area

    One of the standout features of the Weber Spirit E-330 is its large 424-square inch cooking space that is surprisingly large, considering its compact design. This allows hassle-free cooking of a decent amount of food with ease. While you won’t be having a party with the Spirit E-330, the grill offers just enough cooking space to cater to a small crowd of family or friends, which is exactly what it promises. 

    Impressive Power

    The output of the Spirit E-330 is just as impressive and makes cooking a breeze. The three burger grills can deliver up to 32,000 BTUs of cooking power, and if that’s not enough, you also get a side burner that produces up to 12,000 BTUs and is a nifty addition for preparing sauces or other foods. There’s also a rear searing burner that has a total output of 7,500 BTUs and can be used for both warming and cooking. 

    Easy to Clean

    The Weber Spirit E-330 doesn’t just take the hassle out of storage but also offers a grill that’s extremely easy to clean and maintain. The porcelain-enameled cooking grates can be cleaned with ease along with the rest of the grill. Since the whole unit has been constructed using stainless steel, it is able to maintain its appearance for longer. 

    Flavorized Bars

    While with a gas grill this small you would expect the bare minimum, Weber has gone out of its way to make sure you do not feel that there’s anything missing with the Spirit E-330. The grill includes flavorized bars that bring the flavor out of every food you cook. 

    Other Features

    Some of the other features that the Spirit E-330 offers include lots of space for storage and a temperature gauge built into the grill cover. It also includes heavy-duty control knobs for the three grills and the side burner. You also get an easy to use electronic ignition system to power the grill whenever needed. The addition of two heavy-duty caster wheels makes it easy to move around the grill or keep it in storage when not in use. 

    Warranty

    Weber has always been confident about their products, and they are holding on to the tradition with the Spirit E-330. The company offers a solid 10-year warranty on the cook box and the burners. You will also get a 5-year warranty on the cooking grates and flavorizer bars along with a 2-year warranty for all the other parts of the gas grill. Not bad for a portable outdoor grill. 


    Pros

    • Sleek and heavy-duty design 
    • Many additional features 
    • Comes along with a powerful side burner and rear searing burner 
    • Excellent warranties >


    Cons

    • The low grade of stainless steel 
    • Only three burners 


    [easyazon_image align="center" height="500" identifier="B016M5A2SQ" locale="US" src="https://m.media-amazon.com/images/I/41JJBl7YdDL._SL500_.jpg" tag="homesthetics0a-20" width="500"]

    Conclusion For Weber Spirit E-330

    The amount of functions that the Spirit E-330 offers along with its portable size makes it a sure winner in the small size gas grill niche. This outdoor grill is the ideal size for enjoying cooking outdoors even with limited space.

    Related Articles

    Traeger Renegade Pro Review – Traeger Pellet Grills

    Blackstone 28” Griddle Review – One of the Best Flat Top Grill Today

    5 Best Small Traeger Grill For Backyard & RV BBQs

    Saber R50SC1417 Gas Grill Review Under the Microscope

    Weber Spirit E-330 Review – Handpicked Gas Grills

    Napoleon Prestige Pro 500 Under Review

    Nexgrill vs. Weber | Budget Grills Product Comparison

    Broil King vs. Weber Grills | Two of the Best Compared

    13 Best Grills For Apartment Balcony at Tasty Prices

    Weber Spirit vs. Spirit II

    Rec Tec vs. Traeger

    The second product Weber Q2200 is a discontinued product, no longer available on the market instead  the updated version Weber Q3200. Although, Weber Q1200 is available on the market. 

    For many folks who take their family barbecues seriously, buying a grill is a pretty big deal, and rightly so. The good news is we’re living in the golden age of outdoor grills. What this means is that when it comes to options, we are spoilt for choice. One of the leading players in outdoor grills for many years now is Weber. 

    The manufacturer has been responsible for delivering many high-quality grills and is constantly improving its game in terms of both style and functionality. Since Weber has been responsible for rolling out many premium grills through the years, here we are going to focus on two grills, in particular, the Q1200 and the Q2200. So, if you’ve been stuck with the decision of which grill to choose, this is going to be your guide. So, let’s get started. 

    Weber Q1200 vs Weber Q2200

    Weber Q1200 Liquid Propane Portable Gas Grill, Titanium –...
    • The Titanium Weber Q1200 Travel Grill features...
    • 8,500 BTU Burner: Provides robust level of heat output,...

    The Weber Q1200 and Q2200 are two world-class outdoor grills that are known for their superior build quality and many functions. Both these outdoor grills have been well-built using heavy-duty materials. They are also both powerful enough to deliver an excellent cooking experience. These also are without a doubt, two of the best barbecue grills that have been built by Weber, and they are certainly two of the most popular. Both these grills feature a slide on drip pan for collecting oil and grease while cooking. 

    Since both the Weber Q1200 and the Weber Q2200 fall under the portable or tabletop section of outdoor grills, they both offer great value for money with their portability and sturdy design. With so many similarities, it can be difficult to choose between the two, but upon taking a closer look you will find that there are quite a few differences between these two top-shelf grills. 

    Specifications

    • Single burner | [Q1200] 8,500 BTUs, [Q2200] 12,000 BTUs
    • Electronic Ignition | [Q1200] yes, [Q2200] yes
    • Porcelain-enameled cast-iron grates | [Q1200] yes, [Q2200] yes
    • Cooking space | [Q1200] 189 square inches, [Q2200] 280 square inches
    • Folding side tables | [Q1200] yes, [Q2200] yes
    • Dimensions [Q1200] Height: 24.4 inches, Width: 40.9 inches, Depth: 20.5 inches
    • Dimensions [Q2200] Height: 26 inches, Width: 51.4 inches, Depth: 25.1 inches

    [easyazon_image align="center" height="500" identifier="B00FGEHG6Q" locale="US" src="https://m.media-amazon.com/images/I/61mYhDB5-gL._SL500_.jpg" tag="homesthetics0a-20" width="500"]

    The Design

    When it comes to the design and appearance of the Weber Q1200 and Weber Q2200 it gets really difficult to tell them apart. Both these barbecue grills boast of a similar design with a sturdy lid covering the cooking area, and foldable side tables. Both get a thermometer for gauging the temperature while you cook and are available in multiple colors. 

    One of the areas where both the Weber Q1200 and Weber Q2200 are almost identical is in its build quality. You will notice the top-shelf build quality of the Q1200 and Q2200 right off the bat. The stand-out features between the two grills are the porcelain enameled cast iron cooking grates that are sturdy and well built. Maintaining their high-quality standards, you also get a glass-reinforced nylon frame that supports the grill. The slide on the drip pan makes sure all the grease or oil is collected in one place for easy disposal. 

    Right off the bat, it’s clear that the only real differences worth mentioning between the Weber Q1200 and the Weber Q2200 is the difference between the heat output, dimensions and the available cooking area which differ slightly. Both the Q1200 and Q2200 offer the best value for money since you will be getting a barbecue grill that features an ergonomic design while also offering you with power and portability. 

    [easyazon_image align="center" height="246" identifier="B00FGEHG6Q" locale="US" src="https://m.media-amazon.com/images/I/31vDn6H0UiL._SL500_.jpg" tag="homesthetics0a-20" width="500"]

    The Features

    The following are some of the features of the Weber outdoor grill and how these features differ in the Weber Q1200 and Q2200.

    Total Cooking Area

    The Weber Q1200 has a cooking area of 189 square inches while the Weber Q2200 has a cooking area of 280 square inches, which is a difference of a full 91 square inches between the two grills. While this might seem like a big deal to some folks, the good news is that the nature of squaring size means that, at the end of the day, the difference in cooking space isn’t that drastic. 

    To put the size difference of these two grills into perspective, the manufacturer has decided to use hamburgers as a means of measurement. For instance, according to Weber, the Q1200 has a total capacity of eight hamburgers. The Q2200, on the other hand, can cook up to 11 hamburgers at a time. While this isn’t much of a difference, if you plan on inviting many guests to your backyard barbecue it’s best to go with the larger option. 

    Heat Output

    Both the Weber Q1200 and the Weber Q2200 feature a D-burner which helps distribute the heat well throughout the interior of the cooking area. The Q1200 offers a total heat output of 8,500 BTUs while the slightly larger Weber Q2200 can produce up to 12,000 BTUs of heat. It is also important to mention here that the Q2200 has a slightly larger lid. The taller lid has been incorporated into the design of the Q2200 because it provides more options for the users in terms of grilling.

    Performance

    When it comes to performance, both the Weber Q1200 and the Q2200 performs well and can cook delicious foods. Both these grills are quick to start thanks to the electronic ignition system. Both the Q1200 and Q2200 also feature a temperature gauge that’s been integrated into the design of the lid. This makes it easier for the user to know the temperature inside the cooking space. The feature also comes in handy if you are looking for a precision cooking grill. 

    Since the Q2200 comes with a slightly larger lid, it allows you to cook more meat. What the Q1200 fails to deliver in size it more than makes up for in cooking capabilities. For instance, while the larger Q2200 is a more convenient option if you are looking to cook more food within the least amount of time, it still cooks at a high temperature, which can make it difficult to roast meat. On the other hand, the Weber Q1200 cooks perfectly on low heat as well, which makes it a versatile choice. 

    [easyazon_image align="center" height="500" identifier="B00FGEHG6Q" locale="US" src="https://m.media-amazon.com/images/I/51DqGE3ITYL._SL500_.jpg" tag="homesthetics0a-20" width="500"]

    Final Verdict For Weber Q1200 vs Q2200

    While both the Weber Q1200 and the Weber Q2200 have similar features, if you are looking to cook more food then the larger Q2200 is going to be a better option. If you are going to be roasting meat a lot, then it’s best to go with the Q1200. Both grills have plenty to offer users all you have to do is choose one that suits your needs.

    Related Articles

    Blackstone 28” Griddle Review – One of the Best Flat Top Grill Today

    Saber R50SC1417 Gas Grill Review Under the Microscope

    Weber Spirit E-330 Review – Handpicked Gas Grills

    Napoleon Prestige Pro 500 Under Review

    Weber Summit S-470 Gas Grill Under the Microscope

    Traeger Renegade Pro Review – Traeger Pellet Grills

    Watts is a measure of the amount of energy being released. It is created when amps and volts combine. The higher the wattage, the more will be the output and power from an appliance. A watts-to-amps calculator converts watts (electric power) to amps (electric current) in alternating current (AC) and direct current (DC) power systems.

    Watts to Amps Calculator

    Amps to Watts

    Switch

    Results:

    Watts to Amps

    Switch

    Results:

    You can easily convert watts to amps (amperage) by using the electrical power formula, according to which power (watts) is divided by voltage (volts) to get amps. The formula for this is:

    Amps (I)=Watts (P) Voltage (V)

    This formula is applicable only for devices that operate with DC power, whereas for AC current, the power factor is considered. So, the equation goes:

    Amps (I)=Watts (P)Voltage (V) Power Factor (PF)

    Watts To Amps Converter: Some Key Terms Explained

    Watts To Amps Converter: Some Key Terms Explained

    Before you can fully understand why the conversion from watts to amps is important, you must have a brief idea of certain terms associated with this formula. Let me tell you more about them:

    Volts

    Volt or voltage is the measure of force or electric potential. Simply put, it helps measure how much force is required to get the electrical current flowing. In the United States, home appliances work at different voltages. For instance, air conditioning units, clothes dryers, etc., operate at 240 volts, whereas computers, light bulbs, and phone chargers work at an electrical supply of 120 volts.

    Before making a big investment, like buying a new air conditioner, you must check your AC system’s cooling capacity. You can do so using BTU to kW air conditioning calculator or even the kW to BTU calculator.

    Amps

    Amps or ampere is a unit that measures electrical current. It determines the amount of electricity that runs through a circuit. In a circuit breaker, you will often notice the amperage written, and the larger this number, the more electricity can flow through the circuit.

    To calculate amps, you divide watts by volts. So, if you have an 800W electric appliance connected to a circuit of 240V, then it will be drawing 3.33 A.

    Similarly, you can calculate how many amps of current are drawn per watt of power using the amps formula. For example, at 120 volts, you will need 8.33 amps of current to generate 1000 watts of power.  

    Watts

    I’ve already explained what watts are. To recap, it represents the energy produced when volts and amps work together. It is the power that an electric device uses to run. For instance, when you light a bulb or run a vacuum, it consumes a certain power, which is expressed in watts.

    You can calculate watts by multiplying amps with volts. For example, at 120 volts, 1 amp will produce 120 watts, and at 120 volts, 20 amps will produce 2,400 watts. 

    In larger units, the power consumed is mentioned in kilowatts. One kW = 1000 watts. 

    Convert Watts To Amps: All You Need To Know

    When you are converting watts to amps, the first step is to know what is the current type you are dealing with. 

    In DC or direct current, the electric current flows in one direction. This type of current is produced by solar panels and used by devices (such as laptops, cell phones, etc.) that run on the electric battery. When the battery is connected to a circuit, electric charge flows in a single direction from negative charge to positive charge.

    AC or alternating current has current flowing in both directions. Usually, the current changes direction periodically. The AC supply is used extensively in homes and businesses. 

    Tip

    Although the calculation is easy to do manually, I recommend using an online calculator instead. When you use the watts to amps calculator, you will be asked to insert a few values.

    For instance, you will be asked to specify the current type you’re working with - DC, AC (single), or AC (three-phase). Then, you will be asked to insert the amps-watts-volts values. For an AC voltage, you will be given the power factor (usually taken as 1). 

    Watts To Amps Conversion For AC Single Phase

    For DC watts to amps calculation, you have to divide power (expressed in watts) by the power factor times RMS voltage (expressed in volts). So:

    Amps (I)=Watts (P)Voltage (V) Power Factor (PF)

    Watts To Amps Conversion For AC Three Phase

    For three-phase units, you will get the option to choose between the line-to-line voltage and line-to-neutral voltage. The PF is taken as one, and a certain square root is derived.

    You simply have to insert the given values and choose the voltage type, and the results will be calculated for you. 

    Watts To Amps Converter Final Words

    Final Words

    Converting watts to amps may feel simple, but there are a lot of factors you need to consider. It is not simply possible to convert watts directly to amperes or amps to watts. Instead, you must know the resistance (r), voltage, voltage type, and so on. This is why it is best to use a calculator. 

    Calculators designed for electrical systems, such as BTU calculators, also come in handy when trying to determine a home appliance’s cooling capacity or when trying to convert between EER and COP numbers.

    With that, I will take my leave. Goodbye!

    The effects of a beautiful piece have a way of capturing the eyes of an observer.

    And many existing artists love watercolor as a painting medium because of the many benefits they get from using it.

    Firstly, watercolors are easy to use for anyone, be it beginners or experienced artists. Another good thing about watercolors is that they are relatively cheaper if compared to other coloring mediums.

    Now, there are many upcoming artists who are drawn to the art of painting with this medium. But how does one prepare for painting with watercolors? There are a lot of things to consider having and buying.

    If you too are a practicing artist, don’t worry! We have your back. Today, we will give you a list of all the things/supplies that you must have in order to set up your very own watercolor studio.

    Keep in mind that these materials are both necessary and inexpensive, therefore, anybody can get them without having to spend so much.

    With that said, let’s move on to the list! 

    Must-have Watercolor Supplies


    The first thing you’d need is, of course, watercolor paints.

    You probably have seen watercolors come in different packaging - tubes, pan sets or pencils.

    If you are wondering which one to get as a beginner, we would suggest going for pan sets because firstly, they are easy to carry around and they do not consume too much space in the studio or on the shelf.

    Secondly, these paints are organized, hence, preventing the user from creating a lot of mess during the painting process.

    When looking for watercolor pan sets as a beginner, choose one which is student grade as they are much cheaper than those which are artist or professional grade.

    Student-grade watercolors are good for practicing because you don’t have to focus much on the mixing process as you will do with professional or artist grades.

    However, if you feel unsure about buying a whole set of watercolors, you can buy sample sets of any brand which you like. They will cost you much lesser than the actual colors would. Hence, this is a good way to find out if a watercolor painting set is the right one for you.

    There are a lot of sketchbook varieties out there and choosing one can be tricky because each and every one of them seems important.

    However, we would suggest buying one with thick sheets that are about 300 gsm since the colors are water-based and can penetrate through the paper if it is too thin.

    Not only that but if you choose a much lighter or thin paper, there is a high chance your painting will not last as long as you expect because the paper may warp anytime soon.

    The size of the notebook also matters a lot because you don’t want to end up regretting having bought a sketchbook that is too big or too small.

    When picking out the right size, think about how practical it is for you. The practicability of the sketchbook depends on where you work often, how you carry the sketchbook, and so on.

    Finally, we would also recommend finding the right orientation: horizontal or vertical. This again depends on what and how you want to paint. If you choose landscapes, then a horizontal-oriented sketchbook is the right one for you as it provides more space width-wise.

    Painting Periwinkle Flowers
    © Homesthetics - Dylla Setyadji

    Painting by your-confusion

    As we have discussed a little about sheets in a sketchbook and how thick they should be, now we are going to look at something similar; these are watercolor papers.

    Paper is one of the most essential supplies when it comes to watercolor painting. What makes a piece of art great is not only the right paints but the right quality of the paper as well.

    There are papers that are specifically designed for watercolors, and they are known as “watercolor papers”. These are not the same as regular papers we use every day, or like sketching papers.

    These absorb moisture very well and do not allow the paint to bleed through on the other side of the paper. Besides that, these papers also provide enough texture to make your painting look excellent.

    However, just like how normal papers are measured, these watercolor sheets are also rated by their size, weight, and texture.

    And just as choosing sketchbook sheets, we suggest you go with watercolor papers that are about 300 gsm or 140 lb which are cold-pressed. Also, choose papers that are acid-free or pH neutral because they will preserve the quality of your painting and help it age well.

    The importance of pencils is inevitable even if we are doing a watercolor painting.

    Many artists use pencils to create an underdrawing before they start off with the actual painting. The reason they use a pencil for this is because it provides outlines which make the work easier.

    However, a pencil can do so much more than just outline the piece. It can contribute to the overall beauty of the painting by enhancing small details. Moreover, lead pencils blend very well with watercolors.

    Besides lead pencils, you can choose to outline the work with other colored pencils which you see fit. And that’s the best part about it - we get to be creative with this step. 

    Final Touches
    © Homesthetics - Dylla Setyadji

    • Pens

    If you use pens to darken a few areas or just for working with other details, you will notice amazing changes in the painting.

    Although watercolor painting by itself is already magnificent, adding pen effects will take it to a whole different level. But then again, not just any pen will do.

    For watercolor paintings, we recommend going for micron pens. If you can, refrain from using ballpoint pens because they do not have pointy nips.

    If you like to sketch and paint at the same time, using micron pens will surely help make a great piece of painting.

    With micron pens, you can easily slide through the details of the painting without making a mess. These are also much suitable for rough surfaces and cold-pressed papers since you don’t require to put on a lot of pressure on the nip while drawing.

    One more benefit we get from using micron pens in watercolor paintings is that they tend to blend well with the rest of the colors, making them look harmonized. Ballpoint pens, on the other hand, do not produce the same effects. Rather, you can tell that the ink does not belong there.

    We understand if you are a beginner, that you would want to start off with only a couple of brushes first, and that’s a good thing.

    But we must say that you should not be content with only a few brushes you have in hand. The reason we are saying this is because there are a lot of brushes that provide different effects because of their shapes and sizes.

    If you only stick to the few ones you have, there is a lesser chance for your work to improve.

    Even if you plan to buy a few brushes for the beginning of your watercolor journey, make sure that each brush is distantly different from the other so that you can see the different effects that each brush has on the painting.

    If you have gained a certain level of experience, that’s when you start trying out different brushes every now and then.

    However, even if you are on a budget, be sure to get good-quality brushes so that they will serve you for years to come as well.

    Draw The Pine Tree Trunk And Inner Branches
    © Homesthetics - Dylla Setyadji

    Palettes are necessary for mixing any kind of paint.

    Yes, there are DIY alternatives or other surfaces which are good enough for mixing colors - and that is great!

    But there are certain benefits of using palettes. First of all, they are specifically made for the purpose of mixing colors and all good artists prefer using them.

    Secondly, there are varieties of palettes made to suit different paint mixing purposes and have different surfaces.

    If you are an artist who works once in a while, then a paper palette would be a great choice since you can discard them after you’re done. Paper palettes can be used for a maximum of three times continuously before disposing.

    But if painting is your daily hobby, there are so many palettes out there with various features to suit your preferences. For instance, a plastic palette with a thumb hole is great when you’re working for many hours because it is lightweight and comfortable.

    Also, unlike random surfaces, palettes these days are washable, scrapable, or even foldable. These features make them desirable for certain preferences.

    •  Artist Tote Board

    An artist's tote board provides a flat support for when you are painting.

    You can use any board with a smooth surface for this. But we would recommend getting a tote board because it is designed for artists and their work.

    Most boards have clips to hold the paper in place. They also come with a smooth rubber band to ensure your painting does not move or tilt.

    •  Tracing Paper

    You may be wondering why tracing paper is on the list of watercolor supplies.

    If you are a beginner, tracing papers can come in very handy.

    For instance, there is an art that you want to imitate and recreate, but it’s too complicated. What you can do is use tracing paper and trace every outline.

    After that, use the “rub method” of transferring the outline onto the actual watercolor paper and you’re good to go!

    But choosing tracing papers is not a task where you have to take much caution; any kind of tracing paper will do. If you need a tip, we would suggest looking for cheap ones which have enough transparency and won’t easily tear while tracing. 

    •  Drafting or Masking Tape

    Artists will do anything to make sure their paintings remain in good and straight shape while painting so it does not curl up at the touch of water-based paints.

    From choosing the right watercolor paper to using the right amount of paints, they also have found another technique to prevent papers from crippling; and that’s taping the paper down.

    For this technique, you can either use masking/drafting tape or gummed paper.

    Using gummed paper ensures that the paper remains flat on top of a surface. However, gummed papers can get too rigid to remove and at times, require to use of a blade or any sharp object to detach it from the paper.

    We do not recommend using force to tear off the tape from the paper because that will only damage the painting.

    A masking tape, however, is not as strong as gummed paper. It still holds it in place, but will not be as flat as it should be when using gummed paper. That means you still need to straighten it when the painting is dry.

    Nonetheless, the masked tape can be removed easily without harming the condition of the paper.

    •  Spray Bottle

    A hair spray bottle will come in handy during the painting process.

    If you want different effects on the painting, use a water spray bottle. It has become a technique for achieving and trying out different textures.

    It depends on the distance and the amount of water used for spraying, you can work with different kinds of effects.

    • Glass Jar

    A glass jar is where you store all brushes used for painting after you’re done cleaning and drying them.

    It does not necessarily have to be made of glass but we mentioned it because it provides better storage and you can see through the glass whenever you have to choose a preferred brush with a name on it.

    We would recommend using a medium-sized glass jar if you own only a few brushes now.

    But if you have a lot of brushes, make sure to store them in a glass jar which is much bigger so that when you put in a brush, it does not touch the bristles of other brushes and increase the chance of warping or getting damaged too early. There should be enough space in the jar when moving the brushes.

    We also suggest getting three glass jars for your brushes because you can use one for rough cleaning, one for proper cleaning, and the last for storing your brushes.

    Sketch The Teak Tree Trunk And Branches
    © Homesthetics - Dylla Setyadji

    • Masking Fluid

    Liquid latex, which is commonly known as masking fluid, is used to create blank white spots on the painting. These are areas where you don’t want the paint to touch.

    Sometimes, when working with watercolors, it becomes hard to avoid certain areas in which you want to stay white (like painting dozens of stars, for example). And in this case, using masked fluid would be an excellent choice.

    Masking fluids protect the areas by repelling any liquid and then you can peel it off when finished. Those areas will still remain blank as your desired effect..

    Masking fluid can come really handy once you start to get the hang of using it.

    • Watercolor Sponges

    Another one of the best non-traditional techniques is using a sponge for achieving different effects in watercolor painting.

    If you want to paint small textures which will probably take forever using a brush, then a sponge is the best option for this. It is comparably faster to achieve a texture that you like.

    Any type of sponges will work for watercolor painting. However, if you want to explore different textures, we would recommend using a natural sponge.

    A natural sponge comes in different textures and there’s no telling which pattern you’re getting next, hence, it also becomes a great option for achieving a spontaneous painting.

    But if you want to manipulate and have more control over the pattern outcome, you can always cut the sponge and trim it to get the desired texture. If not, there are always sponges available online or at an art store that has a variety of sponges with different textures.

    • Water Jar

    Needless to say, this is an obvious tool needed for watercolor painting. How else are you going to mix watercolor paints without water?

    But the reason it is worth mentioning here is that some of us can be a little careless at times and forget the most necessary materials because they’re too small to notice that they’re missing.

    When you’re painting at home, we see there’s no need to pay attention to small things like these. Even when there’s no water jar kept separately for painting, you can always use a bowl or something else to substitute that.

    But a water jar becomes necessary when you go plein air. Either keep a separate one for this purpose or buy brushes that come along with a barrel that you can use it to store the water.

    Having a jar helps you stay organized as a painter. There is no need to keep looking for a different bowl/container every time you have to paint.

    By practicing keeping a separate water jar, it will become a habit to carry it wherever you go plein air; you will automatically remember to store it along with the other supplies.

    Conclusion

    So these are all the basic supplies you’ll need for your studio. Few of them are available online or at a local art store, while for some, you can use alternatives without having to shed some extra money.

    We hope this article was helpful and we’d like to see you again soon.

    Happy painting!

    Related Articles

    Cold Press vs. Hot Press vs. Rough Watercolor Paper Compared

    Best Watercolor Painting Books Everywhere | Beginner to Expert Grade

    9 Best Water Brushes for Beginners, Professionals & Calligraphy

    11 Best Watercolor Palettes for Beginners & Professionals Everywhere

    13 Best Watercolor Pencils and Water Soluble Art Supplies Today

    15 Best Watercolor Paints| Students & Artist Grades

    Best Watercolor Paper|Top Brands Reviewed + Plein Air

    12 Must-Know Watercolor Tips for Beginners & Pros Everywhere

    Why and How to Use Watercolor Mediums to Enhance Your Painting Game

    Learn How to Use Watercolor on Wood | Professional Tips & Tricks

    13 Best Watercolor Sketchbooks for Creatives Everywhere

    11 Best Watercolor Brushes for Beginners & Professionals Reviewed

    Stretching Watercolor Paper & How To Keep Watercolor Paper From Warping

    Learn How to Paint Watercolor on Canvas Easily & Successfully

    16 Must-Know Painting En Plein Air With Watercolors Tips & Tricks

    Learn The Basic Watercolor Painting Techniques For Beginners - Ideas And Projects

    Expand Your Knowledge With Watercolor Painting Ideas

    19 Incredibly Beautiful Watercolor Painting Ideas

    Watercolors are a simple yet challenging medium to work on. Practicing various painting techniques with watercolors can help you master it. 

    Artists are generally thought of as expressive and emotive - at least when it comes to their canvas. Painting is therapeutic, and even if you don’t consider yourself an expert, experimenting with watercolors can be exhilarating. 

    As it was rightly said by famous painter Bob Ross, “There are no mistakes, only happy accidents.” When it comes to learning a new technique, the best way to do it is by picking up the brush, dipping it in paints, and creating magic on the canvas. 

    Do you paint as a hobby, or are new to the world of watercolors? Well, this guide has been created for anyone who is looking for watercolor painting ideas and inspiration. 

    So without further ado, let’s bring out our paints and get started!  

    1. Forest

    I've always loved the deep tranquility of the forest. With each brushstroke, I've tried to capture that feeling, using a palette of various shades of green.

    2. Types of Trees

    In this painting, I focused on 4 types of trees: pine tree, cypress, aspen, and teak. Each tree species has unique characteristics that I've tried to emphasize in watercolor.

    3. Sunset

    Try to capture the fleeting beauty of a sunset in this piece, with a blend of warm hues that bring the twilight hour to life.

    4. Lotus Flower

    5. Lake

    My goal was to create a sense of calm and tranquility with this depiction of a lake, paying close attention to the play of light on water.

    6. House

    7. Galaxy

    I wanted to capture the vast expanse of a galaxy in this painting, using shades of blues and purples to depict the infinite cosmos.

    8. Sea

    9. Roses

    I've always admired roses, so I dedicated this painting to their velvety texture and vibrant colors.

    10. Pine Forest

    This painting of a pine forest aimed to capture the grandeur of these evergreens and the crisp, invigorating atmosphere they create.

    11. Types of Flowers

    12. Amsterdam 

    In this piece, I tried to encapsulate the charm of Amsterdam with its colorful townhouses and picturesque canals, and of-course tulips.

    13. New York

    14. Berlin

    15. Paris - Le Consulat

    16. Colorful Balloons


    Colorful Balloons watercolor painting

    One of the first watercolor painting ideas to try out is a simplistic, colorful balloon painting. Wet your watercolor paper and use any light color to create a soft background - maybe a sky or splash pattern. Use bright colors to make two inverted egg-shaped balloons and add a string. 

    17. Balancing Zen Stones

    Balancing Zen Stones watercolor paintings

    Try creating balancing stones to tune in to your inner Zen. Begin by outlining, then use gray, white, and shades of black to add delicate details. Don’t forget to add the shadow! You can use this reference image for tips. 

    18. Sea Of Poppies

    Sea Of Poppies

    Create a splotchy watercolor background by dropping paint water on your wet canvas or watercolor paper. Once dry, add beautiful purple poppies using rounded strokes and a long stem. 

    19. Mountain Scenery 

    Mountain Scenery 

    Painting mountains with watercolors is easier than it looks. Use a simple layering technique with light shades to create the mountain background. Check if it is completely dry, then add dark-colored trees.

    20. Abstract Art

    Abstract Art

    Let your imagination run wild! Create abstract designs and shapes using whichever color you wish to express your emotions for the day. Abstract art is one of the most fulfilling ways of letting your paints do the talking for you. 

    21. Dusk 

    Dusk watercolor paintings

    Painting dusk sceneries can be challenging, but there are always online tutorials to help. Opt for darker pastels and create a scenery at dusk for this one. Start with lighter shades and build up to darker ones.

    22. Bird

    Bird

    Outline a bird and fill it in with bright watercolors. Add some branches and fruits to complete your painting. Don’t forget to include a small beak and a white gleam in its eye for the reflection of light. 

    23. Farmhouse 

    Farmhouse watercolor painting

    Paint this beautiful farmhouse, complete with trees, flowers, and the sky. This can take a couple of days to complete, but once it’s done, you can sell it. Trust us, it’s so thrilling to see once it's complete. 

    24. Half Sunflower 

    Half Sunflower 

    Not confident enough to paint a full sunflower? Try painting half! Opt for bright yellow and orange shades and use black for details. Tune in to your inner Van Gogh with this one. 

    25. Lighthouse 

    Lighthouse  watercolor

    While this watercolor painting does require some skill and patience, the end result is stunning. Use a template to create the structure if you need help. Remember to add a background to complete it.

    26. Abstract Trees

    Abstract Trees watercolor

    The background for this painting idea is astounding - create a colorful transition using different shades. Add the silhouette of a tree and branches, and finish off by dropping splotches of colored paint. 

    27. Cup Of Tea

    Cup Of Tea watercolor

    Fancy a cup of tea? Why not paint it using brown and red watercolor shades? Add the teabag in for a unique effect. Creating shadows will give the painting a realistic appeal.

    28. Fall tree

    Fall tree

    Fall trees remind you of the warm sun, pumpkin patches, and shades of orange. Use a wet toothbrush dipped in paint to create the effect of flowers. Try a wet-on-wet technique with watercolors for the orange leaves. 

    29. Flamingo 

    Flamingo  watercolor

    A favorite subject amongst most painters - is the majestic flamingo! Outline first, filling it in slowly with shades of pink, red, and white. Add a splash watercolor effect at the back for a mesmerizing result. 

    30. Rainbow Trees

    Rainbow Trees watercolor

    Ditch the monotone trees and try creating rainbow-colored ones instead! Use all the colors on your watercolor palette and add black for detailing work. Let your creativity run wild with this one. 

    31. Bright Flowers 

    Bright Flowers 

    Paint brightly colored flowers using a wet-on-wet technique for this watercolor painting idea. Remember to add a bright, contrasting background for a special effect. Use different size brushes for the flowers.

    32. Pastel Roses

    Pastel Roses

    Using a dry-on-dry technique for this watercolor painting, paint with undiluted soft shades to create roses. Add a vase and some dark green ferns to complete it. Once done, you can use this as a postcard for loved ones. 

    33. Lavender Trees 

    Lavender Trees 

    Start by creating the curved tree trunk and branches. Add the lavender leaves and flowers using both wet-on-wet and wet-on-dry techniques for added details. Create a bright purple shade by adding some pink to your lavender paint.

    34. Seahorse 

    Seahorse 

    Create an emerald seahorse with this watercolor painting inspiration. Use the wet toothbrush technique to add colored bubbles in the background, giving it an underwater effect. Cover the seahorse with a piece of paper if you don’t want to add the colored splotches to it.

    35. Misty Waters

    Misty Waters painting watercolor

    A soft but mesmerizing watercolor landscape. Use lighter blue shades to create the misty waters, keeping lots of white space for effect. The negative space will enhance the appeal of this watercolor painting.

    36. Hibiscus 

    Hibiscus watercolor

    Created using a ‘wash technique’ with watercolors, this hibiscus is an excellent way to practice your watercolor techniques. Use shades of red and white to create it. Add green stems and black detailing work. 

    37. Sunset Cacti

    Sunset Cacti

    Using beautiful shades of navy, orange, and yellow, create a gradient background for this watercolor painting. Then, use black paint to make the cacti silhouette, and add some details for bushes. 

    38. Simple Flower

    Simple Flower watercolor

    An extremely simple watercolor technique to practice for beginners. Use a wet-on-wet technique to make a watery background effect, picking any colors you wish. Once it is dry, add a minimalistic flower, and you’re done!

    39. Roses

    Roses watercolor

    Roses are some of the most beautiful concepts to paint using watercolor. Since they’re found in a variety of colors, experiment with your watercolor palette and use wet-on-wet techniques to create a bunch of colorful roses. 

    40. Splatter Painting

    Splatter Painting

    Splatter paintings are not only easy but also fun to create. Dip a paintbrush or toothbrush into different watercolor paints and spray them on your canvas. Create shapes and designs as creatively as you can. 

    41. Flying Egret

    Flying Egret

    This beautiful, white bird with an orange beak is challenging yet impressive. Try your hand at painting this in watercolor using soft white and grey shades and blue for the background. Of course, feel free to use a template or reference to create the bird.

    42. Layered Leaves

    Layered Leaves

    Layering watercolors can create stunning textures that look like they’ve been made by expert painters! Try it yourself by layering different watercolors over one another. Remember to let one layer dry before painting the next. 

    43. Lone Boat

    Lone Boat

    Paint a solitary but determined little boat using simple watercolor painting techniques. Try the wet-on-wet technique for creating water ripples and the dry-on-dry technique for the boat. Remember to use line work for detailing. 

    44. Sponge Clouds

    Sponge Clouds

    Love the look of fluffy clouds? Why not try painting them using a sponge? Dip a dry sponge into watercolors and blot it on watercolor paper to create dreamy clouds. Choose any watercolor shade you like for this one. 

    45. Red Radish

    Red Radish watercolor

    Painting vegetables can be fun. Paint this red radish using red and pink and a thin brush to create the roots in beige. Add the green leaves on its crown to finish. You can use a real vegetable in front of you to make this into a still-life painting.

    46. Night Sky

    Night Sky

    Create a night sky watercolor painting using shades of blue and black. Add white stars and black trees to make the painting pop. Try different effects to create the background. 

    47. Bicycle Basket With Flowers 

    Bicycle Basket With Flowers  watercolor paint

    This watercolor painting looks extremely attractive because of its use of bright colors. Paint the bicycle in whichever color you wish and add colorful flowers to complete it. You don’t need to paint the entire cycle if you don’t wish to.

    48. Lavender Fields 

    Lavender Fields 

    Lavender fields look striking, especially against a sunny background. Pick a vivid purple color for the fields and add a bright sun for this one. Add a splash effect to make it pop. 

    49. Rainbow Giraffe 

    Rainbow Giraffe  watercolor

    A colorful, rainbow idea to jazz up a monotone giraffe painting. Add clouds and pouring, colorful rain for effects. Take the help of a reference image to draw the giraffe. 

    50. Dreamcatcher 

    Dreamcatcher 

    Dreamcatchers are meant to catch your deepest, innermost dreams and desires. Make your dreamcatcher come to life by painting it with vibrant watercolors. 

    51. Dandelions

    Dandelions

    Another popular idea for watercolor painters - the dandelion. Paint a couple using unique colors like blue, green or your favorite watercolor shades. Add any background effects you wish to experiment with. 

    52. Happy Orangutan 

    Happy Orangutan 

    Paint a happy baby orangutan using shades of brown, orange, and white. Don’t forget to add a big, dreamy smile! 

    53. Solitary Dandelion 

    Solitary Dandelion  watercolor painting

    How about painting a solitary dandelion for a change? You can see a blue one in this image, but feel free to add any other color to your artwork. 

    54. Fuschia

    Fuschia

    Attempt these magnificent fuschia flowers using a mixture of colors to create the exact shade. Opt for a splash effect for the background. 

    55. Geometric Flower

    Geometric Flower

    The beauty of this watercolor painting lies in its tasteful shading. Try layering techniques to create this shaded effect for your flower. 

    56. Crossing 

    Crossing 

    Paint a busy street with a zebra crossing using advanced watercolor techniques. Take a photograph for reference to get the shading right. 

    57. Doors

    Doors

    Remaking door paintings have been popular for generations. Create your own using watercolors and add bright flowers for effect. 

    58. Flowers 

    Flowers  painted in watercolor

    Yet another idea for watercolor flowers - try painting them in a clear glass pitcher. Add some shaded shadows below for effect. 

    59. Bird Study

    Bird Study painted in watercolor

    This cute, fluffy bird is worth spending a few days painting. Add a spot of white to its beady black eyes to make the pop. 

    60. Church Door

    Church Door

    Instead of traditional doors, how about painting a watercolor church door this time? Add black details with a pen. 

    61. Sparrow 

    Sparrow 

    This watercolor painting features a tiny sparrow on cherry blossom branches. Use your imagination to create a colorful background. 

    62. Colorful Dreamcatcher

    Colorful Dreamcatcher

    Similar to the previous dreamcatcher on our list, this one has a cleaner backdrop but more vivid feathers. 

    63. Skull 

    Skull watercolor rainbow painting

    Begin by drawing a rough skull, then fill it up with black, grey, and white watercolors. Add a drip effect with rainbow colors for the background. 

     64. Autorickshaw

    Autorickshaw

    Found commonly on Southeast Asian roads, the autorickshaw can be an interesting subject to paint. Keep the background minimalistic for this one. 

    65. Purple Flowers

    Purple Flowers

    Purple and pink are lively colors to opt for. Paint watercolor flowers using various shades of these colors and add a green contrast. Use different techniques for this painting, mixing wet on wet and wet on dry methods. 

    66. Simple Vase Flowers

    Simple Vase Flowers

    Sketch a long neck, and thin vase with flowers, and use watercolors to paint them in your creative style. Keep the background simple to make the flowers pop. Add a table or window in the background if you wish to. 

    67. Pink Roses

    Pink Roses

    The best part about this pink rose painting is its colorful background. Let your creative juices flow with this one! Don’t be fussy about the paint, instead, let it flow and create its masterpiece. 

    68. Simple Trees

    Simple Trees

    Paint simple trees by adding splotches of greens and yellow, and some black penwork for detailing. Don’t forget a colorful background! 

    70. Lord Krishna

    Lord Krishna

    A classic Indian God, Krishna, was painted in a minimalistic style. This idea is great for those who want to practice making watercolor figures. Use any reference image for this one, picking a bright, dark blue for the figure. 

    71. Autumn 

    Autumn 

    Embrace autumn with this rich, orange and red tree painting. Scatter some leaves on the floor to make it more realistic. Remember to let the paint dry first, before adding the leaves on the floor. 

    72. Seaside

    Seaside watercolor

    A unique seaside painting complete with long-stemmed plants painted in black silhouette. Add a bright sun and its reflection on the blue water. Use a wet-on-wet technique for the watery effect. 

    73. Lake & Trees

    Lake & Trees watercolor

    Honestly, this one looks like a Bob Ross painting. It does require some skill, but attempting it is so much fun! Watch a tutorial for more guidance, or simply use this reference image as your guide.

    74. Cone Flower

    Cone Flower

    Although it looks minimalistic, it’s quite challenging to make this coneflower. Use a fine-tip black marker to add finer details. Don’t be a perfectionist - let the paints flow freely for this one. 

    75. Hummingbird

    Hummingbird

    Draw a hummingbird and fill it in with bright, green watercolors. Add a long, black beak and a branch for it to perch on! Remember to paint a long, dark beak to complete it. 

    76. Abstract Landscape 

    Natural Landscape 

    Painting abstract landscapes can be a great way to practice different watercolor painting techniques. Try experimenting with wet on wet, dry brush, gradient, and wash techniques when making these paintings. 

    77. Abstract Christmas Tree

    Abstract Christmas Tree

    Christmas trees are always fun to paint, but how about trying an abstract one this time? Create fluid brush strokes with dark and light green and use paint splotches for the background. 

    78. Superman 

    Superman 

    Who doesn’t love Superman, right? Try your hand at this watercolor Superman painting by using red and blue. Keep light brush strokes and diluted watercolors for the effect. Create a drip effect using a wet brush for this one. 

    79. Paint Brushes

    Paint Brushes

    Painting still life can be one of the best ways to practice any art technique. Place your paintbrushes in a glass jar or mug, keep them on a table, and start painting! Inspiration is right in front of you.

    80. Tulips

    Tulips

    Practice painting watercolor flowers by choosing different species as inspiration. This time, paint some watercolor tulips in bright, vibrant colors. Flower paintings are a great way to practice different watercolor techniques.

    81. Flying Hummingbird

    Flying Hummingbird

    If you’ve already painted the sitting hummingbird, you’re probably up for a new challenge. Try painting a flying hummingbird, complete with a beautiful flower and vibrant background. 

    82. Colorful Lighthouse

    Colorful Lighthouse

    Coming back to lighthouses, why not pop in a splash of color for this one? Look at a reference image and draw a lighthouse. Complete it by adding vivid watercolors and a brilliant sky. 

    83. Portrait 

    Portrait 

    Painting portraits is challenging. Opt for this abstract girl portrait with dream-like blue eyes. Choose a fun backdrop to blend it in. You can replace the girl image with a boy if you wish to experiment further. 

    84. Flower Vase

    Flower Vase

    Why are flowers so popular amongst watercolor artists? Maybe because they’re so much fun to paint! How about this brightly colored bunch of flowers in a beautiful, blue vase? Make the flowers brightly colored or monotone, as you wish.

    85. Enchanted Woods 

    Enchanted Woods 

    Once you learn the wet-on-wet watercolor technique, use mystical shades of blue, purple, black, and a pop of pink to create this enchanted woods painting. Complete it by adding a deer silhouette. 

    86. Catching Stars

    Catching Stars

    Create this beautiful concept painting of a little girl on a ladder trying to catch stars. You might need a reference photo which you can find online, but painting it should be super fun! 

    87. Mountains 

    Mountains 

    Instead of scaling the mountains, how about painting them? Use gradients and soft shading to create this mountain landscape painting. Remember to use a layering technique to create the effect of mountains at the back.

    88. Pine Cone

    Pine Cone

    You can take this as a still life painting by actually getting a pine cone, or simply take this reference image to paint it. It’s quite a fun watercolor exercise to try! Keep the background simple so the focus remains on the pine cone.

    89. Blue Jay

    Blue Jay

    Paint this wonderful Blue Jay using your best blue and gray watercolor shades. Remember to draw a pretty branch for your Blue Jay to sit on. Draw the bird first, so you have a reference of how much to paint. 

    90. Waterscape 

    Waterscape 

    A perfect postcard image of two boats on the water. This watercolor painting might require some skill, especially for the water effect, but it’s fun to try out nonetheless. Try using a wet-on-wet technique for the ‘water ripples’ effect. 

    91. Owl 

    Owl  watercolor painting

    Try painting the wise owl using your watercolor shades of brown and oranges. This is a fluffy bird, so make sure you add lots of feathers. Add a few lines of blue on its underside, just to make a shadow effect. 

    92. Poppies

    watercolor painting

    You can never paint enough flowers. This time around, try painting these beautiful yellow poppies as your next watercolor painting inspiration. Intertwine the stems to create a unique effect, and don’t forget to add a background. 

    93. Day & Night

    Day & Night

    This is a brilliant concept of a day and night painting on one single canvas. Paint a day scenery on the top and a nightscape at the bottom. Flip the painting to show off both styles of art. 

    94. Midnight Sky

    Midnight Sky watercolor

    Skies are always super fun to paint. It allows you to use various effects like gradients, splash, textures, etc. Paint this midnight sky by opting for darker shades of blue and purple. Add the silhouette of trees to the finish. 

    95. Rainbow Elephant

    Rainbow Elephant watercolor

    Painting animals with watercolor is an exhilarating project. The elephant especially is fun to paint. This gentle giant has been painted in shades of purple, pink, and navy. It seems like it has stepped into a puddle of rainbow colors, which is a great effect to recreate.

    96. Wish Dandelion

    Wish Dandelion watercolor painting

    Although this is another dandelion watercolor, its gradient background gives it a unique vibe. Keep the center of the dandelion white, while painting the rest of the background in vivid colors of your choice. Add details with markers and write ‘Wish’ in cursive at the top for a special effect. 

    97. Florals

    Florals lavender painting in watercolor

    To end with, we are adding another beautiful floral watercolor painting. Although it looks abstract, a great deal of detailed work has gone into this one. Start with a colorful background using the wet-on-wet technique, and let it dry completely before making the flowers.

    Final Words

    With that, we have come to the end of our massive list of watercolor painting ideas! 

    Learning anything new requires patience and effort. When it comes to watercolors, the challenge is different. Watercolors are notorious for having a mind of their own. Remember one thing about learning this technique - it is best to let the colors flow freely and see where it takes you. 

    The mistake beginners make with watercolors is trying to control its flow. Instead of doing that, just let the colors blend into each other, creating their own mesmerizing textures and patterns. As with anything, it takes some practice to get comfortable with watercolors. So don’t hesitate. Pick up your brushes and start painting. 

    Let the little Picasso in you shine! 

    Related Articles

    45 Best Oil Painting Ideas [Reviewed]

    59 Best Face Painting Ideas

    103 Best Acrylic Painting Ideas

    10 Best Paper for Acrylic Paint in 

    10 Best Canvases for Acrylic Painting | Student & Artist Grade

    8 Best Palettes For Acrylic Paint & How to Choose What You Need

    Learn How To Make An Acrylic Painting Waterproof Right Now

    Acrylic Painting Materials That You Really Need In The Studio

    13 Best Acrylic Paints for Beginners & Professionals Reviewed

    10 Best Acrylic Paint Brushes for Artists & Students Reviewed

    Learn How To Get Dried Acrylic Paint Out Of Brushes Successfully

    Cold Press vs. Hot Press vs. Rough Watercolor Paper Compared

    Best Watercolor Painting Books Everywhere | Beginner to Expert Grade

    9 Best Water Brushes for Beginners, Professionals & Calligraphy

    10 Best Watercolor Palettes for Beginners & Professionals Everywhere

    13 Best Watercolor Pencils and Water Soluble Art Supplies Today

    Best Watercolor Paper |Top Brands Reviewed + Plein Air

    12 Must-Know Watercolor Tips for Beginners & Pros Everywhere

    Why and How to Use Watercolor Mediums to Enhance Your Painting Game

    Learn How to Use Watercolor on Wood | Professional Tips & Tricks

    13 Best Watercolor Sketchbooks for Creatives Everywhere

    11 Best Watercolor Brushes for Beginners & Professionals Reviewed

    15 Must-Have Watercolor Supplies for Beginners & Artists Everywhere

    Stretching Watercolor Paper & How To Keep Watercolor Paper From Warping

    Learn How to Paint Watercolor on Canvas Easily & Successfully

    16 Must-Know Painting En Plein Air With Watercolors Tips & Tricks

    Learn The Basic Watercolor Painting Techniques For Beginners – Ideas And Projects

    Expand Your Knowledge With Watercolor Painting Ideas

    19 Incredibly Beautiful Watercolor Painting Ideas

    13 Best Concrete Paints  

    10 Best Canvases for Oil Painting | Beginner & Artist Grades Reviewed

    8 Best Oil Paint Brushes 

    11 Best Oil Paints for Beginners & Professionals Artists Alike

    Learn What is the Best Surface for Oil Painting Right Now

    How Long It Will Take Oil Paint To Dry  & How to Speed It Up

    Oil Painting for Beginners Basics & How to Use Oil Paints

    Learn How To Dry Oil Paint Faster Overnight

    12 Oil Painting Supplies That Every Oil Painter Needs in the Studio

    5 Things You Should Know Before Painting Oil Paint on Glass

    Learn How to Make Oil Paints Dry Faster

    What Are The Benefits of Oil Painting?

    Watercolors act as an excellent tool for expressing the works of an artist’s creative mind. 

    Some painters who are just starting out choose to explore the scopes of watercolors using their own techniques - a splendid approach that nurtures creativity. 

    On the other hand, some want to learn what has already worked for others. This is also a great way to start because then they will know what and what not to do at a much faster pace. 

    First of all, it is highly essential that one must learn the basics of a subject before they can become a master at it. The same thing applies to watercoloring as well. 

    There are many sources out there that one can go to for guidance. 

    Reading a book is comparatively better because you can easily stop, think, and re-engage whenever you want to. Another reason to read a book is that it strategically describes all the small and minute details that other sources fail to do. 

    And in today’s article, we have picked out the most useful and highly recommended watercolor painting books which one needs to learn.

    Best Watercolor Painting Books

    Painting watercolor landscape pink red color of Wild himalayan cherry roadside in the morning with vintage emotion sky cloud background, Hand painted, beauty nature winter season landmark in Thailand. Best Watercolor Painting Books

    Besides the fact that these books have worked for many artists, they also contain specific techniques and instructions that will introduce the amateur artist to a whole different level of watercoloring, while recommending useful skills to the experienced one. 

    And with that in mind, let’s begin! 

    1. Watercolour For The Absolute Beginner

    With 128 pages and numerous instructions about watercoloring, this book by Matthew Palmer is a must-have for beginners. 

    Inside this book, there are 12 outlines for drawing, 6 fascinating projects as well as hundreds of demonstrations to help a beginner out in producing an exceptional piece of watercolor painting. 

    Experience

    We find this book to be extra helpful for artists who are new to watercoloring and still not sure where to begin, as well as for those who are concerned with outlining or sketching before actually getting into the painting process. 

    Most developing artists find the book to be rather helpful when understanding the complications of watercolor as a painting medium. 

    This book contains everything a beginner needs to know about watercoloring, hence, it has saved us a lot of money which we could have paid for an expensive art class. 

    Moreover, we like that throughout the whole book, there are recommendations for using particular painting materials like certain brushes and paints, which we find really suitable. 

    While the book tells us about simple and elementary color mixing, it does not stress much about how some colors work well together, however. But keeping that aside, this is an incredible, complete beginner’s guide to watercoloring. 


    Pros

    • Provides detailed descriptions about the different techniques and methods of watercoloring
    • It offers recommendations of using particular painting materials that work well for various instances
    • Contains up to 12 outlines and 6 projects


    Cons

    • Includes simple illustrations for color mixing but lacks information about better color balance


    1. If You Are Bored With Watercolor Read This Book

    If You Are Bored With WATERCOLOR Read This Book
    • Lilja, Veronica Ballart (Author)
    • English (Publication Language)

    Here is another book which consists of 128 instructional pages. 

    Judging by its name, this book by Veronica Lilja may appear to be oriented towards those who have reached expert levels and slowly starting to get tired of using watercolors. 

    However, the name is somewhat misleading because the book contains guidelines for beginners to follow as well. 

    Experience

    What we love about this book is that it includes a set of techniques and color-mixing guides which serve both beginners and experts. And apart from that, it offers suggestions to use different types of supplies and papers for watercolors. 

    We also get to explore various topics such as the comparison between warm and cool tones, color wheels, and many other aspects of watercolors. 

    Another good thing about this guide is that it is flexible.

    Unlike other tutorials which require completion of a task before a given time period or that need us to follow certain guides strictly, this book allows us to experiment with watercolors while getting guidance at the same time.


    Pros

    • It contains a number of strategies for beginners to take on, as well as innovative and non-traditional techniques for the experienced artist
    • Allows readers and watercolorists to see the extent to which watercolors can go and experiment with it 


    Cons

    • The title of the book is confusing as it seems to target only seasoned artists


    1. Texture Techniques For Winning Watercolors

    Texture Techniques for Winning Watercolors
    • Hendershot, Ray (Author)
    • English (Publication Language)

    This book is for artists who have had a lot of experience with watercolor paintings and want to try something new. What it includes are state-of-the-art techniques and suggestions to make watercoloring more enticing.

    The author, Ray Henderson, is an esteemed watercolor artist whose artworks reflect his brilliant, ingenious mind. Through his book, you’ll be able to see his unique methods for creating outstanding watercolor art.

    Experience

    First of all, we find this book to be very easy to follow because it breaks down complicated instructions into much simpler ones. 

    For instance, within the book, there are a number of full-sized pictures and right beside them are specific portions of the image which the author keeps aside to explain what type of technique he used for achieving that kind of effect. 

    Secondly, it teaches and provides complete details on how to create amazing textures in watercolor paintings. And since textures are almost always required for producing exceptional paintings, we think this guide is a must-have for both an advanced beginner and a watercolor expert. 

    However, the paperback version does not contain high-quality pictures, and we have to settle for the hardcover version which comes at a slightly higher price. 

    And if you are one of those artists who are really concerned about the quality of a painting, this book will be just what you need. 


    Pros

    • The book provides amazing illustrations when it comes to texture techniques with watercolors
    • It thoroughly explains how to achieve a particular effect most easily 


    Cons

    • The paperback version of this book contains low-quality images, and one has to settle for a higher priced hardcover


    1. Modern Watercolor

    Modern Watercolor: A playful and contemporary exploration of...
    • Van Leuven, Kristin (Author)
    • English (Publication Language)

    Kristin Van Leuven wrote this book which is so much different from the rest of other guides.

    The reason is that there are two parts to it. One section focuses on the essentials of colors and supplies while the other section focuses on exploring resist art (a technique where several layers are used to highlight a design with the use of a medium such as tape) and concentrating on common painting subjects such as flowers, landscapes, animals, etc.

    Experience

    When we struggle with the process of watercoloring, we tend to lose focus on what we need to do for achieving great painting results. And this book really helps when it comes to situations like this.

    The best thing about this book is that the author chose to use a simple language for communication rather than highly technical terms which might be difficult for a beginner to understand.

    The 8-pages techniques which inform us how to achieve the desired effect using multiple methods are quite enlightening. For example, we learn to add the necessary amount of water to mix with the right amount of colors for various painting effects.

    Then, we also learn about the resist technique in 12 pages which provides detailed explanations on how to use them properly.

    Another great thing about this book is that it provides knowledge about the world of watercolor painting as no other book does. Therefore, if you want to go from a complete beginner to a much more experienced artist, then this book is for you.

    The book is only intended solely for beginners because it provides only basic information and is not for artists of the intermediate level. Painters who are already familiar with the basics may not find this book to be helpful although they are still learning how to paint with watercolors.


    Pros

    • Introduces all the ins and outs of watercoloring to the absolute beginner
    • The book contains simple terms which anybody can understand


    Cons

    • The guides provided by this book are only for beginners and not for artists of intermediate level


    1. The Complete Watercolorists Essential Notebook

    This book by Gordon MacKenzie allows the artist to explore endless watercolor scopes and ideas through the use of delightful and easy instructions.

    It leads both beginners and seasoned artists to the world of watercolors using light, casual structures to successfully come up with a great piece of art.

    Experience

    Rather than using guidelines, the book itself takes the reader for a ride through the whole creation process.

    The reason we chose to include this book on this list is that it is entirely different from other guides by letting learners see the step-by-step, non-traditional journey for creating an exceptional piece of painting.

    This process is effective because we feel that we’re in the author’s shoes, scrutinizing each step carefully.

    Even with the informal style of guidance one gets from this book, we are still able to produce remarkable paintings.

    Another great thing about this book is that we get both The Watercolorist’s Essential Notebook and The Watercolorist’s Essential Notebook: Landscapes in one place.

    However, the book’s whole explanation concept is lengthy at times and might not work for everyone, especially those who like to follow single sentence instructions.


    Pros

    • This book delivers a guide for both beginners and experts in an informal way, allowing them to observe each and every step carefully
    • It also includes two North Light watercolor guides that are essential for any creative artist
    • For the price of two different guides, this book is highly affordable


    Cons

    • The book’s concept of explanation might not work for those who choose to follow short and crisp guides


    1. Watercolor Techniques: Painting Light And Color In Landscapes And Cityscapes

    In this 142-page guide, you will be able to see the fantastic life-like artworks on cityscapes and landscapes achieved by using multiple creative steps and techniques.

    This guide leans more towards bettering the advanced artist whose aim is to improve their paintings on both landscapes and cityscapes.

    However, the steps provided by the author are so easy that a learner can also follow if they choose to take on this wonderful journey.

    Experience

    To experienced watercolorists, this book brings new ideas and demonstrations which enhance their present styles of painting by using the author’s approaches.

    We liked that in one way, this book covers all the basics of watercoloring in minute details which beginners would find helpful since every explanation is a byproduct of answering frequently asked questions about watercolor paintings. 

    While at the same time, it helps a seasoned artist to see the extent that watercolors could go to by following the suggested techniques.

    Besides that, we gain a lot of insights into the struggles and successes experienced and shared by the author.

    But because the book clearly focuses only on producing great landscape art, it might not be useful for artists who want to learn the different subject matters of watercolor paintings.


    Pros

    • A large section of the book’s guidance is based on questions raised by artists every now and then, making it more relatable and reliable
    • It includes many instances encountered by the author so that it helps readers, especially beginners, in knowing what to expect


    Cons

    • As good as the book is, the demonstrations are only limited to those of landscape and cityscape paintings


    1. Painting Watercolors [First Steps]

    Painting Watercolors (First Steps)
    • Johnson, Cathy (Author)
    • English (Publication Language)

    This next book by Cathy Johnson is a good option for the absolute beginner.

    Inside this 128-page guide, there are full-sized pictures in each page along with brief and very clear demonstrations about them.

    Besides being quite simple in explanation, the author also uses simple terms and language to convey the methods to her audience so that anybody can easily get the idea.

    Experience

    This guide provides a complete guide to using different tools and materials for painting and proper color mixing that makes the process of learning come easily to a beginner.

    There are times when we think that teaching ourselves the art of watercolor painting is pretty hard to achieve immediately. But that’s not the case with this guide; everything we read is available in a simple form and everything we have to follow is broken down into the easiest manners possible. 

    With a guide as such, we can start painting with watercolors efficiently within a few days.

    Moreover, the paintings we are able to achieve with this guide are remarkable and realistic to the eye of any beholder.

    The ebook version of this guide contains poor-quality images. Therefore, we do not recommend buying it.


    Pros

    • This book offers the determined beginner a number of easy ways to learn how painting with watercolor works
    • The tricks available in this book help deliver realistic and exceptional watercolor artworks


    Cons

    • The ebook version contains images which do not produce good-quality images when zoomed in for a better view


    1. Breaking The Rules of Watercolour

    Breaking the Rules of Watercolour
    • Keep your techniques sharp with this amazing book
    • Hardcover Book

    Shirley Trevana in her book Breaking The Rules of Watercolour adds 10 watercolor paintings followed by revealing her thoughts while creating them.

    With this process, we not only see what’s genuine narration but we get to learn the do’s and don’ts of watercolor artworks using her techniques.

    In this book, you’ll see how the author creates amazing artworks by continuously looking for alternative ways to make the best use of watercolors.

    Experience

    To put it out there first, this book is not a guide for beginners because the kind of illustration which the author used leans more towards those who already have enough knowledge of this medium.

    That being said, the book shows us personal methods which the author used to create these 10 paintings.

    We get to see the way Shirley was able to come up with extraordinary paintings is by using her unique methods. These methods include her own style of creating textures, different perspectives, and most importantly, her way of combining colors to get the best results out of them.

    Moreover, the features of these 10 paintings used in the book are very clear and of high quality so that the reader can observe all the textures carefully.  


    Pros

    • The whole guide is based on using the author’s unique methods of taking watercolors to their highest level
    • All the pictures in the book are enhanced so that the reader can closely watch each attribute and brushstroke


    Cons

    • The demonstrations in this book seem to be intended only for knowledgeable artists, hence, beginners will find it hard to understand the guide


    1. Watercolor 365: Daily Tips, Tricks, and Techniques

    Watercolor 365: Daily Tips, Tricks and Techniques
    • Redhead, Leslie (Author)
    • English (Publication Language)

    Here is a book that will work pretty well for anyone who likes to paint for fun. Anybody who reads this book will find it to be pleasing and entertaining rather than serious and descriptive.

    The book covers almost all the basics about watercoloring, and is therefore great for learners.

    Experience

    We like that this book provides short and crisp guides which are very easy to understand for anybody. With a brief guide, you can jump from one step to another step pretty easily.

    What we like about this book is that it has fun and fascinating guides that make us look forward to what’s in store for us on the next day.

    We find the concept to be constructive because unlike other guides which you read once a while, this one actually helps form a habit for us.

    The guide helps us learn and practice one new step every day, ensuring better and quicker learning. So, if you are determined to learn about watercolor paintings, this book might be the best choice for you.

    However, the problem with the short guides is that they don’t answer or clarify doubts. If you need a better explanation, you won’t be able to find it here.


    Pros

    • The book contains short and crisp ideas that any reader would understand and easily follow
    • The guide’s concept is entertaining, which makes it fun to read


    Cons

    • These steps are meant only for giving ideas/techniques and not to provide extra information or to clarify any doubts


    Autumn floral border background in white with leaf watercolor illustration. Watercolor Painting Books Conclusion

    Watercolor Painting Books Conclusion

    Well, that’s it, folks! Those are the best watercolor painting books that we have chosen specifically for you. We hope you found this article helpful enough and enjoyed reading it!

    Check out our other article on the best watercolor painting books for kids to know more about this topic.

    See you soon. Good luck!

    Related Articles

    Cold Press vs. Hot Press vs. Rough Watercolor Paper

    10 Best Watercolor Palettes for Beginners & Professionals

    13 Best Watercolor Pencils and Water Soluble Art Supplies

    15 Best Watercolor Paints

    Best Watercolor Paper

    12 Must-Know Watercolor Tips for Beginners & Pros

    Why and How to Use Watercolor Mediums to Enhance Your Painting Game

    Learn How to Use Watercolor on Wood

    13 Best Watercolor Sketchbook for Creatives

    11 Best Watercolor Brushes for Beginners & Professionals

    15 Must-Have Watercolor Supplies for Beginners & Artists

    Stretching Watercolor Paper & How To Keep Watercolor Paper From Warping

    Learn How to Paint Watercolor on Canvas Easily & Successfully

    16 Must-Know Painting En Plein Air With Watercolors Tips & Tricks

    Learn The Basic Watercolor Painting Techniques For Beginners

    Expand Your Knowledge With Watercolor Painting

    19 Incredibly Beautiful Watercolor Painting

    83 Best Watercolor Painting

    While painting on paper is fairly common, using watercolor on wood can create interesting effects and a distinct style, making it a great medium. Wood also allows the watercolor to stick better to the surface, and the colors appear brighter, especially when you prepare it well using proper primer and varnish.

    Since watercolor paint is a diverse medium that is robust and easy to apply, it can be used on various flat surfaces, such as watercolor paper, wood, glass, and fabrics. Most artists prefer wood panels since they’re compatible with most paints, and their natural wood grains can add elegance and texture to the work of art.

    However, working with wooden surfaces can also be quite tricky since they are porous in nature. So, you must create a suitable and well-prepared flat surface before you paint watercolor on wood, and this can be done by choosing the right natural grain and applying primer.

    Besides these techniques, you must know other important steps to create a watercolor painting on a wood panel. We will discuss those steps in this guide, so keep reading!

    How To Use Watercolor On Wood: A Step-by-Step Guide


    Materials You Need

    As with any other art medium, achieving the best results to create watercolor paintings on wood highly depends on the materials used. Good quality materials - from wood and varnish to art supplies like brush and paint - all of them play an important role in the process of creating long-lasting art.

    Many artists who work with watercolor paints have started utilizing various eco-friendly surfaces, such as a thick canvas and synthetic, recyclable materials like Yupo papers. However, watercolors on wood remain the most preferable for their unique pattern and smooth surface.

    Here are the materials you will need to get started:

    • High-quality watercolor paint
    • Sandpaper
    • Dust removal kit
    • Primer for prep work
    • Varnish for sealing
    • Paper towel or damp cloth
    • Mask, eye goggles, and gloves for safety
    • Water and paintbrush

    These materials are easily available at craft stores, so you need not worry about their availability.

    Step 1: Know Your Watercolor Paint

    We are all aware of how watercolors work, but we’d like to reiterate a few key points for better understanding. Firstly, different watercolors have different compositions. However, most of them are made using gum arabic, a binding agent that combines with water to activate different colors. Some other brands also use linseed oil as a binding agent for their watercolor paint. 

    So, it’s important to look into the binding agents used and other chemicals included in the paint when you purchase it from the local craft store. You can also avoid the hassle of checking every watercolor product by using trusted brands, such as Daniel Smith or Winsor & Newton. 

    After purchasing the watercolor paints, activate the pigments in a palette to understand how they might appear on different materials. 

    Step 2: Preparing the Wood Surface by Sanding

    Most often, you find a wood panel or piece that has a nice natural grain or texture - that’s why you must sand the wood to prepare it for watercolor. Use fine-grit sandpaper to sand the areas where you will add paint. This will create a smoother finish that will help the pigment pop when activated.

    If you have a large piece of wood or a wide wood panel, you can try sanding a smaller area in the middle. This will alleviate the surface surrounding the middle, giving a framed look. Many artists use this method since it’s quite difficult to frame wood. Attach the sandpaper to a drill for better grip and control, and ensure you sand the wood in a well-ventilated room.

    Step 3: Remove Dust And Wood Shavings

    After the sanding process is over, you’ll find several wood shavings and a significant amount of dust on the wood and the workstation. You must remove this unless you want a different kind of texture that utilizes wood shavings - but be warned, they’re quite tricky to incorporate.

    The best way to remove the fine particles from the surface is by simply blowing the loose debris off. We recommend using a vacuum cleaner with the blower settings and adding a thin nozzle to the opening. Blow the air both with and against the wood grain. This will create a striated intersection on the wood, which will give you a canvas-like appearance.

    Alternatively, you can use a bottle of compressed air, which is often used to remove dust from computer keyboards.

    Step 4: Apply Primer

    When the wood is properly sanded, wipe down the surface with a damp cloth and paper towel to prepare it for primer application. Since watercolor paints contain gum arabic, they may be tacky while applied on a surface with no primer. Moreover, a primer helps the watercolors move fluidly on the surface, making it easier for you to blend and layer them. 

    The best primer for watercoloring on wood is watercolor ground, preferably in an iridescent gold color that compliments the natural finish of the wood. You can use this primer directly from the container and apply them on wood, metal, canvas, etc. At first, apply a light coat with a synthetic flat brush to get a smooth texture, but if you want a rough texture, use a brush with natural bristles instead.

    Moreover, you must remember that the watercolor ground makes the surface more absorbable, so ensure you use little water. When applied in thin layers, the iridescent gold primer will create the perfect canvas for your art.

    Another primer you can use instead of watercolor ground is Gesso, which is affordable and easy to use. Mostly used for acrylic and oil paints, an even layer of super heavy or light Gesso that resolves absorption issues and allows the watercolor to move more freely. The most prominent benefit of Gesso is that it doesn’t yellow over time, but it requires thorough sanding if you decide to use more than one layer.

    Step 5: Painting with Watercolor on Wood

    Painting on wood with watercolor is similar to painting on other surfaces - you can follow your favorite painting technique, preferred texture, and artistic goals. However, we recommend applying the paint with thicker layers compared to when you apply watercolor on canvas or paper. A thicker consistency with less water content will stick better onto the wooden surface and prevent dripping.

    Alternatively, you can apply a great number of very thin layers of watercolor paint. In this case, you need to be extra careful so that the layers aren’t too thin to avoid dripping and are thick enough to have a visual impact.

    Step 6: Finishing and Sealing the Wood

    The final step in creating a watercolor painting on wood is sealing it with a varnish. This step ensures your artwork lasts longer - the varnish protects the wooden surface from humidity, preventing it from rotting or yellowing with age. When it comes to watercolor paintings, we recommend sealing the wood with clear-coat spray before applying varnish, like Krylon. 

    If you want to protect your watercolor painting further, consider applying an epoxy resin layer (artist-grade) to the already sealed surface of the painting. This will provide extra protection to the gum arabic in watercolors, which are vulnerable to moisture.

    You can also protect your painting with glass by making a customized wooden frame, but ensure the glass isn't too thick. Glass can provide robust protection against humidity and prevents warm color from fading due to bright lighting.

    Advanced Techniques

    Wood serves as an excellent medium to experiment with different painting techniques. We’ve already discussed how artists prefer building the painting layer by layer, especially when it comes to wood. This offers better results than simply daubing it on the surface, but it takes quite a lot of time and patience. So here are some other techniques you can employ to achieve your artistic goals:

    1. Blending

    Properly using blending techniques in your watercolor painting can give you the advantage of creating certain interesting textures and shadow effects. To get started, choose a particular color and create a dark and light version using white and black, as required. 

    Start with either the dark or light shade. Then, while the paint is still wet, add the other shade and blend them gently. Make sure the first layer of color starts to pop through the second layer - the two shades shouldn’t totally mix with each other. 

    2. Ombre Effect

    Ombre is a very popular technique among artists, who use it to express a single shade through various iterations by reflecting light from different angles. For example, you can start with a very dark shade of color and progressively lighten it until it’s totally white.

    The easiest way to create the perfect ombre is by “washing” the wood before applying paint. Simply cover the surface with a thin layer of water, and then add a dark pigment at the bottom of the wooden piece. While moving towards the top, keep adding pigment in small amounts and ensure you wash it down to create lighter shades. And although this method can be a bit messy, it creates a scattered yet romantic effect.   

    These two methods aren’t the only ways you can create interesting watercolor paintings on wood. Experiment with different shades, textures, and water content to find a style that suits you best.

    How To Use Watercolor On Wood FAQs

  • What kind of wood can I use for watercolor painting?

    Most wood species can be compatible with watercolor paints, but we recommend using soft wood types. Consider pine or even balsa since they absorb the paints better, making them last longer. Hardwood, such as oak, maple, or rosewood, has a tendency to soak too much watercolor, which prevents them from showing up brighter and lasting longer.

  • Do I need to prepare the wood before painting with watercolor?

    Yes, absolutely. Preparing the wood before applying watercolor paint is important since it ensures you have a fresh, smoother surface to work with. Unwanted texture and ridges can ruin your painting by disintegrating the color and not giving you the pigment you wanted. 

  • What types of watercolor paints should I use for painting on wood?

    Most watercolor types are compatible with wood as a medium. If you properly prep the wood, apply high-quality primer and varnish. And just to be on the safe side, consider purchasing brands that are trustworthy and have been on the market for a long time. 

  • Can I mix watercolor paints with other mediums, such as acrylic or oil paint?

    Yes, you can. Combining watercolor paints with acrylic or oil paints can give you a thicker application, which easily sticks on the wood surface and doesn’t drip.

  • How do I protect the watercolor painting on wood?

    The best way to protect a watercolor painting on wood is by applying a nice coat of varnish on the completed piece of art. You can also frame it with glass to protect it from humidity and dust, helping your art last longer.

  • To Sum It Up 

    Wood can be a good medium for watercolor painting, especially if you want unique patterns and textures that cannot be achieved on paper or canvas. The one disadvantage of using watercolor on wood is the amount of time lost in thoroughly preparing the surface, but the awe-inspiring results are more than enough for compensating it.

    And if you’ve never tried watercolor on wood or considered doing it, you may want to try it out - the whole process is fun and worthwhile. You’ll get better color payoffs, better ombre and layering effects, greater durability, and unique textures, which will help you create memorable art. This experience will also help you understand how watercolor paints respond to different mediums.

    Alternatively, if you want to try something less complicated first, consider using textured clay to get the hang of how textured surfaces like wood really work.

    Related Articles

    Cold Press vs. Hot Press vs. Rough Watercolor Paper

    Best Watercolor Painting Books

    9 Best Water Brushes for Beginners, Professionals & Calligraphy

    10 Best Watercolor Palettes for Beginners & Professionals

    13 Best Watercolor Pencils and Water Soluble Art Supplies

    15 Best Watercolor Paints

    Best Watercolor Paper

    12 Must-Know Watercolor Tips for Beginners & Pros

    Why and How to Use Watercolor Mediums to Enhance Your Painting Game

    13 Best Watercolor Sketchbooks for Creatives

    11 Best Watercolor Brushes for Beginners & Professionals

    15 Must-Have Watercolor Supplies for Beginners & Artists

    Stretching Watercolor Paper & How To Keep Watercolor Paper From Warping

    Learn How to Paint Watercolor on Canvas Easily & Successfully

    16 Must-Know Painting En Plein Air With Watercolors Tips & Tricks

    Learn The Basic Watercolor Painting Techniques For Beginners

    Expand Your Knowledge With Watercolor Painting

    19 Incredibly Beautiful Watercolor Painting

    Watercolor canvases are the most popular art media among professional artists due to their huge margin of error, low absorbency, and high durability. Such qualities allow you to experiment with different art styles and techniques, such as wet-on-wet, gradient, lifting, etc., to create unique watercolor paintings.

    Many watercolor artists prefer to work with watercolor paper since it’s a versatile medium with high mobility and absorbency.

    This traditional art medium is coveted in the painting world due to its durability and the fluidity it allows the watercolor paints to achieve. However, many people are unaware of how well these paints work on watercolor canvas.

    The quality of your artwork will depend on the kind of canvas surface you use since some watercolor paints appear brighter and blend better on certain watercolor canvases. But to start working with watercolor canvas, you need to gain a full understanding of the medium and the process of painting watercolor on it.

    In this article, we will walk you through all the important details and help you gain mastery over yet another medium. Read on!

    Watercolor Paper Vs Canvas: Which One is Better?


    Before we further our discussion of watercolor canvas, let’s take a look at how paper and canvas fare when pitted against each other. We’ll discuss six determining factors: absorbency, versatility, lifting capacity, convenience, durability, and availability.

    1. Absorbency

    Watercolor canvases and papers have almost equal capacity when it comes to absorbing watercolor paints and fixing the painting surface. However, similar to watercolor painting on wood, you have to be extra careful while painting on canvas so as not to disturb the underlying layer. So, there’s going to be a significant learning canvas as you slowly adapt to the techniques and brush strokes that are compatible with normal canvas.

    Moreover, building up each layer by washing and putting a glaze or varnish will be extremely difficult on your first try. But don’t lose hope - after a few tries, you’ll master painting on a canvas board and create amazing watercolor paintings.

    Once you’ve learned how to blend and layer on watercolor canvas, you’ll notice that canvas surfaces accept watercolor paints less readily than paper. This low absorbency is ideal for painting styles like the wet-on-wet technique since it gives the watercolor artist more time to experiment with the pigment.

    2. Versatility 

    Watercolor canvas is much more versatile than watercolor paper - you can easily create watercolor canvas art using acrylic paints, ink, and even pencils. Ideal for mixed media art, watercolor canvas allows sketching outlines of your subject matter and erasing any errors made. And you’ll find that artwork is much easier to display on stretched canvas instead of paper.

    3. Lifting Capacity

    Lifting capacity refers to the degree of ease of removing paint colors from the surface or washing it to start over. And watercolor canvas certainly has this capacity - all you need is some clean water and a paper towel, cloth, or sponge. Gently rub it on the canvas surface and get the paint off the surface. You can either erase and fix the error or completely erase your watercolor art to white to start over.

    It is often possible to lift paint from watercolor papers as well, but it only works on hot and cold-pressed watercolor paper.

    However, this lifting capacity of watercolor canvas products can often be a disadvantage, especially if an artist uses a lot of glazing. This technique is quite difficult on canvas since it requires a lot of patience to move around the watercolor paint without lifting any previous layer. You’ll have to learn how to glaze on canvas through a lot of trial and error, but try to master how to do it quickly without mixing the colors.

    4. Convenience

    You might often need to prepare your watercolor paper before painting, but a standard canvas doesn’t have this problem. After you purchase canvas boards or pads from the art supply store, you can directly start painting on them without any preparation. 

    This is because most watercolor canvases are made from 100% cotton (Gossypium hirsutum) and are acid-free, but only a few watercolor papers have this quality. So, purchasing a traditional canvas will be much more affordable than looking for high-quality, artist-transfer paper.

    5. Durability 

    Unlike watercolor paper, normal canvases don’t warp or wrinkle around the edges that easily - it is much more durable in this sense. Plus, they can resist wear and tear or any breakage that is caused by moisture or abrasion. However, you’ll find paint pooling in certain areas of a poor-quality watercolor canvas.

    6. Availability

    Watercolor canvases are widely available across most art stores, and you’ll find a wide range of sizes as well. The common type used by many artists is the stretched canvas, which allows you to paint on all four sides of the canvas board, giving you more dimensions to work with.

    What To Consider While Choosing A Watercolor Canvas?

    Always go for acid-free watercolor canvases that are made from 100% organic textile, such as cotton or satin. Keeping these two parameters in mind will save you from various difficulties during painting. 

    Firstly, an acid-free cotton canvas won’t react to watercolor paints and can create dissimilar colors, and secondly, they’re environment-friendly and not harmful to your health. But ensure you’re purchasing authentic watercolor canvas boards and not just normal boards covered in Gesso. 

    And since there are various kinds of canvases, including canvas pads, canvas boards, and stretched canvases, many people often get confused when faced with the options. Usually, the difference lies in the size of the canvas, so as long as there’s a label mentioning that it’s compatible with watercolor paints, you’re good to go. 

    There are two ways you can get started with watercolor canvas. Either you can buy a readymade canvas board, or you can prepare one using watercolor ground. However, preparing canvas can be quite challenging on your first try, so we recommend using readymade ones initially. 

    Materials You Will Need

    Let’s look at the materials you will need to create a watercolor painting on canvas and prepare the surface before you begin painting if required.

    • Canvas pad/ board
    • Watercolor ground
    • Watercolor Gesso
    • Watercolor paints 
    • Paintbrush, sketch pens, pencils
    • Paper towel or damp cloth
    • Watercolor Palette
    • Fine-grit sandpaper
    • Varnish
    • Transfer paper (optional)
    • Masking fluid
    • Toothpick or earbuds

    All of these supplies should be of good quality. Doing so is a foolproof way of avoiding various challenges one can face while painting, such as color pooling, high absorption, curling, warping, etc.

    Preparing Canvas For Watercolor

    If you prefer preparing your own watercolor canvas board instead of buying readymade ones, then this basic tutorial is for you. First thing first - you’re going to need watercolor ground, which is a specialized watercolor gesso to help the canvas absorb water-based paints. 

    Absorbent ground is necessary since most canvases aren’t absorbent enough to keep the colors in place. Even if you add a thin layer of normal gesso without applying ground, there are chances of the paint running off.

    Before you prepare the watercolor canvas, you’ll be faced with various watercolor ground choices, but we recommend using the one by Daniel Smith if you’re a beginner. Try using an absorbent ground that is transparent and smooth in texture since it will ease the process of spreading. 

    The aim is to get a flat, smooth surface for painting, so you can also sand the canvas after applying gesso. Here’s a detailed look into the process:

    Step 1

    If your watercolor canvas pads or boards are raw, apply two layers of standard gesso to cure the canvas before applying the absorbent ground. Let it completely dry.

    Step 2

    Apply at least two to six layers of watercolor ground to your pre-stretched canvas, and allow each layer to dry completely before applying the next one. Moreover, if you want a textured surface, start applying the watercolor ground more roughly, starting from the second layer. In this case, you’ll have to apply more layers than you normally would for a smoother surface.

    Step 3

    Let the watercolor ground cure for at least 24 hours before painting watercolor on it. When it’s completely dry, you can start painting watercolor, oil, and acrylic paints on the surface.

    Tip

    If you want a very even and smooth surface to paint on, use a fine-grit sandpaper to sand the canvas when it’s completely dry.

    Applying Watercolor Paint on Canvas 

    Now that you know the basic differences in the effects of watercolor paints on canvas and paper, you’re ready to get started. Keep in mind that there will be a period of experimentation and adjustment, which you’ll use to get ahead of the learning curve. 

    From learning how much paint to use in a single stroke to the glazing process, there’ll be quite a few things you need to get the hang of. So, we recommend utilizing your first watercolor canvas art as a test run.

    Experimenting with different brush strokes, paint dilution, and concentration is the key to unlocking the power of blending, layering, and lifting techniques. You can reuse your watercolor canvas simply by lifting colors to correct any errors - this helps prevent waste and achieve a finished painting. 

    So, as long as there aren’t any layers of sealant or varnish, you can continue to tweak your artwork with different techniques. If you’d rather not lift colors repeatedly, you can cover the error with watercolor grounds and start all over again.

    Step-by-Step Guide:

    There aren’t any specific instructions for creating a watercolor painting on a canvas pad or board since every artist has their own art style. The basic steps are similar across different painting types, whether you’re using acrylic paint, watercolor, or oil paint. But you can always follow some recommended guidelines to make your first attempt successful. Follow these steps:

    Step 1

    Before you use watercolor on canvas, lightly sketch the subject and ancillary drawings on the surface with a pencil. If you’re worried about leaving grease stains on the pre-stretched canvas, consider using transfer paper while sketching. Masking fluid is another agent that helps in safeguarding your canvas and waterproofing the painting. You can also use this fluid if you wish to keep certain areas of the painting uncolored - do it at this step itself.

    Step 2

    Now you can begin painting watercolor on canvas. If you want a more solid base for your painting, use a background wash before getting started. Then proceed to add layers, details of the subject, and glazing. However, be wary while applying the glaze since it can be tricky - experiment with your mixing time and paint-water ratio. 

    And as always, there’s always the option of lifting color and starting over if you haven’t applied a sealant.

    Step 3

    If you’re feeling adventurous, try creating mixed-media art. Watercolor paints are compatible with various other media, such as acrylic and oil-based paints, so take advantage of this ability. You can also incorporate watercolor paints in an acrylic painting and vice versa - take your pick!

    Step 4

    As we’ve mentioned before, any error you make while you use watercolor on canvas can be corrected through color lifting. But there are other techniques as well. Simply use earbuds or a toothpick to scrape some of the paint off the area where you’ve made a mistake. And since watercolor canvas is quite durable, you won’t need to worry about ripping or tearing it.

    Moreover, you can correct a fully dried painting - simply add water to the area using a round brush and scrub the paint off. 

    Step 5

    Ensuring your watercolor canvas art is completely dry is a huge step towards increasing its longevity. Let the painting dry for at least 24 hours - this will also give you enough time to decide whether you want to make any changes before sealing.

    Protecting Your Watercolor Canvas Art

    The high resistance of canvas against humidity and debris is the most common reason why most artists prefer this medium after trying it. So, it doesn’t require glass or a wooden frame to protect it from the elements.   

    If you decide to hang your art on the wall as decoration, ensure you apply a thick layer of UV-resistant spray varnish or sealant. It’s always better to use spray varnish than brush a sealant on the surface since it can smear or lift the paint. 

    Remember that you can’t make any changes to the watercolor painting once you’ve sealed it, so ensure everything is in order. Also, ensure you spray the varnish only when the artwork is completely dry.

    Moreover, you only need about three light layers of sealant to protect your painting, but ensure you let each layer dry for 20 minutes before applying the next. When you’re done sealing the painting, let it cure for a while, preferably for another 24 hours, before handling it. Properly sealing after you use watercolor on canvas makes it water-resistant, ultra-violet rays resistant, smudge-proof, and durable.

    Different Watercolor Techniques

    Learning about the basic techniques of watercolor painting can go a long way in preparing you to create a masterpiece. Of course, trial and error is a compulsory part of the journey, but having some knowledge reduces the chance of errors.

    1. Lifting Technique

    This technique is very useful for correcting areas or creating low-pigmented subjects such as clouds or eyes. It actually “lifts” the pigments from the surface of the watercolor paper or canvas. To do this, first, you cover the entire painting surface with a light coat of water and then paint the area with any color you want. 

    Ensure you use a lighter shade since lifting a darker shade is quite difficult, and we recommend scraping the paint in this case. Then, before your paint dries, use a clean brush or paper towel and firmly press it on the area where you don’t want color. This way, the paper towel or brush will soak the excess paint, leaving behind a colorless or lighter area.

    2. Gradient Technique

    This basic yet effective technique lets the watercolor bloom from a lighter to a darker shade. While creating a color gradient, you should pay close attention to the water-paint ratio to get a beautiful result. It is mostly used to paint sunsets, oceans, or landscape backgrounds.

    After priming the surface with water, start with a dark shade of any color and add a thick layer on the uppermost part of the canvas or paper. While the paper is still wet, quickly keep adding layers and bringing the color to the bottom with clean, horizontal strokes without dipping the brush in an additional color. As you create layers upon layers, the brush consistently loses color, creating the beautiful gradient effect we’re aiming for.

    For sunsets that include different colors, you can re-do the process with another color on top of the completed gradient while the surface is wet.

    3. Wet-on-Dry Technique

    The previous techniques involved the “wet-on-wet” art styles, so we’ll talk about something different here. A wet-on-dry technique denotes using paint on a dry surface - this process helps you make certain details stand out and set properly onto the canvas. 

    First, wet the surface and create a background with one color - apply it evenly and let it completely dry. You can use gradient or lifting techniques to create beautiful backgrounds in keeping with the theme of the main subject. 

    Once the background is completely dry, take a thin or pointed brush and draw your details using darker pigments. 

    Warning

    Don’t add a lot of water to the paint since it can lead to unwanted blending or diffusion.

    4. Wet-on-Wet And Wet-on-Dry Combination

    This combined method is very popular for creating oceans or lakes with ripple-like effects. After covering the paper or canvas with water, you need to use the same technique as when creating a gradient effect. The only difference here is that you need to totally disconnect your brush from the paper occasionally to create negative spaces.

    Next, while the paint is still wet, add darker pigment to create more depth - do this with wavy brushstrokes. However, the darker strokes should reduce in frequency as you reach the top of the canvas or page. This wet-on-wet technique allows the darker pigment to seep into the lighter one, creating a rippling, water-like motion.

    Moving on to the wet-on-dry portion, using a side-to-side motion, apply blue strokes swiftly, but let the color fade as it moves to the top. Ensure you don’t add too much water to the color this time - the strokes should be dark and detailed. 

    Even though this technique is quite elaborate, it can be very effective in creating difficult themes such as water and sunsets.

    Tips For Creating Watercolor Painting On Canvas

    Now that you know all about creating watercolor paintings on canvas, here are some suggestions you can follow to enhance the experience. These tips will make the process a lot easier and enjoyable:

    1. Start Off With Landscapes or Bouquets

    Many artists prefer canvas to watercolor paper since it helps you to experiment more freely by allowing you to correct errors without worrying about starting over. And errors can get particularly daunting when creating a landscape with various minute details, such as trees (including branches, leaves, flowers), sky gradient, water, etc. So, we suggest taking advantage of the margin of error given by canvases and starting off with a serene landscape like a pine forest.

    2. Drying Time

    Wait for at least 24 hours before applying varnish or paint coating to your finished piece. This will prevent the colors from accidentally washing off or blending with the varnish or coating product. Also, read the label of the varnish carefully and follow the directions while working with it. 

    3. Choose The Right Varnish Method

    Always use spray varnish on the canvas for watercolor paints since applying glaze or coating with a brush can lift the colors from the painting you’re trying to safeguard. Moreover, using a spray-on method is more convenient - you’ll be done with just three coats and won’t need to wash your brush or hands repeatedly to take the solution off.

    4. Take Your Time

    It is a common misconception that you must seal the painting immediately after completion. However, you can wait for a few weeks before you decide to apply the varnish. This will give you enough time to decide whether you’re satisfied with the finished product. But ensure you keep it in a dry, cool place away from contact.

    5. Create Your Preferred Texture

    Watercolor ground often creates a chalky, uneven texture that many people might not prefer. If you want a smoother surface, simply sand it down with fine-grit sandpaper. Then, take a cloth (preferably with no lint or lose threads) and remove the excess dust. Now you have a smooth, even canvas for watercolor.

    How To Paint Watercolor On Canvas FAQs

  • Do I need to prime the canvas before painting with watercolors?

    No, a pre-stretched canvas you purchase from the art store is already primed with watercolor gesso or absorbent ground. So, you won’t need to prime a readymade canvas – just start painting as you normally would on watercolor paper. But if you decide to make your own canvas, then preparation is necessary. Refer to the step-by-step guide on preparing a canvas, as this article mentions.

  • What kind of watercolors should I use on canvas? 

    A traditional canvas allows you to use pretty much all kinds of watercolors, including gouache, watercolor in tubes, pans, liquid watercolor, markers, etc. All you need to do is ensure the surface is wet enough for the pigment to show up and blend with others. Moreover, when using watercolor markers, the surface requires sanding since markers don’t thrive on textured canvases. 

    Overall, you need to be careful about the paint-water ratio for most kinds of watercolor products.

  • Can I mix watercolors with other mediums on canvas?

    Watercolor canvas is a great surface for creating mixed-media art. Since the material is quite durable, unlike cold and hot pressed paper, it readily accepts other media like acrylic paint, ink, graphite pencil, etc. Many experts recommend experimenting with different media on canvas to achieve different depths and dimensions.

  • How do I prepare my canvas for watercolor painting?

    If you decide to make your own raw canvas before painting, our step-by-guide on preparing a canvas will be helpful. As such, you need to cure the canvas with at least two layers of standard gesso. Then, you need to apply two to six layers of watercolor ground. 

    Depending on the texture preference, you can either roughly or smoothly apply the absorbent ground from the second layer. Let the canvas cure for 24 hours after this process. Once completely dry, sand the surface for an extra smooth base.

  • What techniques can I use for watercolor painting on canvas?

    You can use all watercolor techniques on canvas – lifting, layering, blending, gradient, ombre, wet-on-wet, wet-on-dry, etc. Just be careful about the paint-water ratio and let the colors dry properly, and you’re good to go. 

  • How do I ensure the watercolors don't bleed on canvas?

    Typically, watercolors don’t bleed on canvas unless you’ve neglected to use the right water-to-paint ratio and drying time. After painting one section, let the area dry completely before you paint the next section – this will prevent the color from bleeding unnecessarily. Moreover, priming the canvas well is another way to ensure it readily accepts the paint. 

  • How do I frame a watercolor painting on canvas?

    You can directly hang the painting or let it rest against a shelf or wall when the artwork is cured and dried. However, if you don’t prefer the raw look of canvas, you can get it framed in a wooden or glass frame based on the preferred aesthetic. If you’re unsure how to fix it in a frame, send it to a photography shop specializing in framing.

  • How do I care for my watercolor painting on canvas?

    The spray varnish that you’ll use after finishing the paint will sufficiently protect it from UV rays, humidity, and dirt. However, you can never be too careful – so you should put the canvas in a dry area that is away from direct sunlight and human traffic. You can also consider framing it in a wooden frame to protect it from rodents and debris. 

  • To Sum It Up 

    Before ready-made canvases were invented, artists had to stick to watercolor papers for their art. And even though the paper did allow brighter hues and mobility, people started demanding permanent structure as the art style evolved. Thus, watercolor canvas gained popularity as the most preferred art medium for watercolor, gouache, and even oil-based paints.

    If you’ve never tried painting on canvases before, we recommend using it since it allows you to experiment with different techniques more freely. And if you do make mistakes, you can always lift the color or scrub the area to get the paint off. You’ll never know the full scope of your artistic abilities, especially when it comes to watercolors, if you don’t try painting on canvas!

    See you next time!

    Related Articles

    15 Best Canvas Printing Services

    Cold Press vs. Hot Press vs. Rough Watercolor Paper

    Best Watercolor Painting Books

    9 Best Water Brushes for Beginners, Professionals & Calligraphy

    10 Best Watercolor Palettes for Beginners & Professionals

    13 Best Watercolor Pencils and Water Soluble Art Supplies

    15 Best Watercolor Paints

    Best Watercolor Paper

    12 Must-Know Watercolor Tips for Beginners & Pros

    Why and How to Use Watercolor Mediums to Enhance Your Painting Game

    Learn How to Use Watercolor on Wood

    13 Best Watercolor Sketchbooks for Creatives

    11 Best Watercolor Brushes for Beginners & Professionals

    15 Must-Have Watercolor Supplies for Beginners & Artists

    Stretching Watercolor Paper & How To Keep Watercolor Paper From Warping

    16 Must-Know Painting En Plein Air With Watercolors Tips & Tricks

    Learn The Basic Watercolor Painting Techniques For Beginners

    Expand Your Knowledge With Watercolor Painting

    19 Incredibly Beautiful Watercolor Painting

    Best Canvas for Acrylic Painting

    The Winsor & Newton Granulation Medium is one of the best high-quality options to add depth to your artwork. The QoR watercolor medium by Golden is a close second and can help you increase the luminosity of your painting. On the other hand, the Holbein Ox Gall Medium is best for working with painting techniques like wet-on-wet.

    Sometimes, a good watercolor medium is all you need to elevate your paintings.

    A medium helps you alter the properties of your wet paint. For instance, you can play with the consistency, texture, and drying time of your paints by mixing them with a suitable medium.

    However, which one should you go for and why? In this article, I will tell you about the top 5 watercolor mediums in detail.

    5 Best Watercolor Mediums

    1. Winsor & Newton Granulation Medium - Best For Adding Depth And Playing With Textures

    Winsor & Newton Watercolor Medium, Granulation Medium, 75ml...
    • Increases the granulation of color, giving a mottled...
    • For maximum effect dilute colour generously with medium...

    The Winsor & Newton Granulation Medium is a must-have for every watercolor enthusiast. It can help you add a decent texture and depth to your paintings. All you need to do is use your best watercolor markers or pencils to sketch your drawing and mix this medium with your choice of watercolor paint or ink. This way, you can easily experiment with a granulated effect!

    The best thing about this medium is that you get to work with various textures. You can achieve anything from subtle changes to bold transitions by adjusting the granulation medium you add to your paint.

    For instance, when I wanted to paint a house using watercolors - I used the granulation medium to create textures that resemble that of bricks or wood. Or, if I wanted to create elements like a leaf, this medium helped me achieve a textured and mottled appearance for the same.

    It is important to note that the Winsor & Newton Granulation Medium is a little runny in texture, which is great if you want to create a soft blended look in your painting surface. However, you can find better options if you are looking to paint precise details in smaller sections. 

    Color: Clear | Finish type: Matte | Form: Liquid |Package: Bottle | Volume: 75 ml or 2.5 oz.

    2. Qor Watercolor Medium- Best For Enhancing Luminosity  

    GOLDEN QoR Watercolor Medium, 2 oz. Jar, Professional...
    • Watercolor Medium is a general purpose medium used to...
    • It also increases the gloss and saturation of colors when...

    If you like adding a transparent, glossy texture to your paintings, the QoR medium by Golden might be the best option. It can be used to create a variety of glazes and textures and is suitable for both beginner and professional watercolor artists. 

    You can adjust the glossiness of your painting by varying the amount of medium you add to your paint. For instance, I used to add a normal amount if I wanted my artwork to shine brightly and fewer drops to achieve a more matte finish. 

    The QoR medium also allows you to enhance the intensity of your watercolor pigments, which is why it is popularly used to work with vibrant colors. I used this medium to add beautiful elements like a flower, tree, or sky to my paintings. It also helped me create a smooth and even dry wash, which helped me further elevate my art piece. 

    This medium has a dropper, making it very easy to use. However, you can also use a brush or spray bottle to apply it as per your convenience.

    The only drawback with this product is that it comes with no instruction manual, which might be a problem for beginners who rely on such manuals to learn product use. Other than that, the QoR medium is definitely worth a try.  

    Color: Clear | Finish type: Gloss | Form: Liquid |Package: Bottle with dropper | Volume: 59 ml or 2 oz.

    3. Holbein Ox Gall Medium - Best For Using Wet-On-Wet Technique 

    Holbein watercolor medium 60ml ox gall
    • Holbein Ox Gall Medium - 60 ml bottle
    • 60 ml

    Made from the extract of cow bladder, the ox gall medium is popular for increasing flow and transparency of watercolor paints. The one sold by Holbein is a great option, especially if you are looking for a medium to prevent blotching on your watercolor paper

    The Holbein ox gall medium allows artists to create smooth and even washes in their artworks while giving them great control over the flow of watercolor paint. All these features make this artist-grade wetting agent an ideal medium for the wet-on-wet watercolor painting technique. 

    Using this medium, I could easily create smooth transitions, gradients, and hues in my watercolor painting. It also prevents the paint from drying out quickly, which helped me paint for long hours without needing to constantly re-wet my painting. 

    However, the Holbein ox gall medium has a strong odor. If you are sensitive to strong smells, there might be better options for you. 

    Color: Clear | Finish type: Matte | Form: Liquid |Package: Bottle | Volume: 60 ml

    4. Sennelier Watercolor Binding Medium - Best For Creating Custom Watercolor Paints

    SENNELIER Watercolor Binding Medium, 200ml Bottle, 6.76 Fl...
    • Contains gum arabic, honey, water and a preservative
    • Thin with water

    The Sennelier watercolor binding medium is easy to use and best for artists who want to avoid sticking to a particular watercolor paint pigment or consistency. It has a smooth and consistent texture and blends decently well with watercolors. 

    This Gum Arabic-based medium enhances the flow and transparency of watercolors, which is why they are popularly used while painting with certain techniques, such as glazing and layering. Apart from that, you can mix this medium with your watercolors to create your custom palette or use it to modify the existing properties of your paints.

    If you like purchasing only high-quality art tools, the Sennelier watercolor binding medium will not disappoint you. It comprises ingredients, such as gum arabic, honey, and water. As a result, the medium works well to help enhance the overall quality of your artwork. 

    This medium comes from a very reputed brand and is a little costlier than other mediums. However, a great quality product seldom comes at a low price. 

    Color: Clear | Finish type: Semi-gloss | Form: Liquid |Package: Bottle | Volume: 200 ml or 6.8 oz.

    5. Winsor & Newton Aquapasto - Best Gel Watercolor Medium

    Winsor & Newton Professional Watercolor Medium, Aquapasto,...
    • A translucent gel medium that reduces flow
    • Thickens watercolors and gouache to give an impasto effect

    Sometimes, all your painting lacks is a little opacity - and that is exactly what the Winsor & Newton Aquapasto watercolor medium provides you with. Its gel-like texture medium allows you to create a sense of depth in your artwork and play with several effects. 

    The consistency of this watercolor medium is quite thick but can be thinned out to achieve your desired texture. It blends with wet paint easily, and there are no hassles even when using the Aquapasto medium with acrylic paint sets. 

    Using this blending medium, I got to work with a huge spectrum of effects. It helped me create everything from smooth and glossy effects to rough textures. Like any good blending medium, it slows the drying time of your painting - thus making it easier to paint for a long time. 

    The Aquapasto is well-known for its thickening abilities while working with watercolors and gouache. Hence, you can also use it to create an impasto gel medium effect in your painting. 

    However, if you prefer using luminous paints in your artwork, you might not love the Winsor & Newton Aquapasto. It makes watercolors appear slightly lighter and less transparent.  

    Color: Transparent | Finish type: Matte | Form: Gel |Package: Tube | Volume: 60 ml

    Quick Comparisons Of Watercolor Mediums

    Watercolor Mediums Color Finish Type Form Package Volume
    Winsor & Newton Granulation Medium Clear Matte Liquid Bottle 75 ml or 2.5 oz.
    Qor Watercolor Medium Clear Gloss Liquid Bottle with dropper 59 ml or 2 oz.
    Holbein Ox Gall Medium Clear Matte Liquid Bottle 60 ml
    Sennelier Watercolor Binding Medium Clear Semi-gloss Liquid Bottle 200 ml or 6.8 oz.
    Winsor & Newton Aquapasto Transparent Matte Gel Tube 60 ml

    Factors To Consider While Buying Watercolor Mediums

    1. Quality

    The quality of mediums you use can make or break your artwork. Hence, only go for high-quality ones made up of ingredients like gum arabic and cellulose. Also, ensure that they are acid-free to prevent accidental damage to your paintings (and to yourself!). 

    2. Type Of Medium

    Depending on the type of your painting, you may require a specific kind of medium. You can choose from various mediums, such as gesso, varnish, and masking fluid while looking for one. Further, it is best to go for gum arabic-based mediums if you want a binding effect in your paintings. 

    3. Compatibility 

    You need to ensure that your art tools are compatible with your choice of medium. For instance, applying a medium that needs water for activation on watercolor sketchbooks that can only hold a small amount of water is not a good idea. Doing so may lead to the paper getting damaged. 

    4. Budget 

    Finally, you should find a medium that suits your budget well. You should carefully assess the functions you need your medium to serve and then decide on a budget that doesn't strain your wallet.

    FAQs Related To Watercolor Mediums

  • What are the different types of watercolor mediums available in the market?

    The different kinds of mediums available on the market are texture medium, granulating medium, permanent masking medium, lifting preparation medium, and so on. You can also go for an iridescent medium or a varnish, depending on the type of your painting. 

  • How do watercolor mediums differ, and which one should I use for my painting?

    The mediums differ in texture, consistency, and their effects on the watercolors you combine them with. You should choose one based on the blending techniques you will use in your artwork and the textural effects you wish to create. 

  • Can I mix different watercolor mediums to achieve a specific effect?

    Yes, you can mix different mediums to achieve a specific effect. However, check their compatibility first to see whether they will work together. You may also experiment with their proportions and apply them to your artwork.

  • How do I store my watercolor mediums properly to ensure their longevity?

    You should store your mediums properly in a cool and dry place to ensure their longevity. It is best to keep them away from direct sunlight exposure and extreme temperatures. Additionally, make sure to wipe the cap of your medium bottle using a paper towel so that it is sealed properly. 

  • How do I apply watercolor mediums to my painting, and how do I know how much to use?

    You can apply mediums to your painting by using tools like a wet brush, sponge, or spray. The amount of medium that you use should depend on several factors such as the kind of finish you want in your illustration and the consistency of paints that you are aiming for. 

  • What are the benefits and drawbacks of using watercolor mediums in my paintings?

    A good medium (binding medium, lifting preparation medium, etc.) can help you increase the vibrancy of your paints and enhance their transparency. You can also use a medium to create a wide range of effects, such as adding gloss or creating an iridescent medium. However, certain watercolor mediums can alter the color of your paint by either lightening or darkening its hue – thus making it difficult to achieve your desired shades. 

  • Conclusion

    It is best to experiment with different mediums to find which one suits you best. Additionally, you should apply them in layers to increase depth and add texture. Following these tips can help you create stunning artwork. You can also go through a tutorial on sites like Skillshare to practice your skill of medium application.

    The Winsor & Newton Granulation Medium is one of the best options. It provides much room for a creative experience, and you can add a lot of depth and texture using this medium.

    However, if you like a glossy finish in your paintings, the QoR watercolor medium won't disappoint you. The Holbein ox gall is the best medium to create wet or dry washes and works well if you like creating smooth transitions.

    And with that, I have reached the end of this blog post. Goodbye!

    Related Articles

    Cold Press vs Hot Press vs Rough Watercolor Paper

    Best Watercolor Painting Books Everywhere

    9 Best Water Brushes for Beginners, Professionals & Calligraphy

    10 Best Watercolor Palettes for Beginners & Professionals

    13 Best Watercolor Pencils and Water Soluble Art Supplies

    15 Best Watercolor Paints

    Best Watercolor Paper

    12 Must-Know Watercolor Tips for Beginners & Pros

    Learn How to Use Watercolor on Wood

    13 Best Watercolor Sketchbook for Creatives

    11 Best Watercolor Brushes for Beginners & Professionals

    15 Must-Have Watercolor Supplies for Beginners & Artists

    Stretching Watercolor Paper & How To Keep Watercolor Paper From Warping

    Learn How to Paint Watercolor on Canvas Easily & Successfully

    16 Must-Know Painting En Plein Air With Watercolors Tips & Tricks

    Learn The Basic Watercolor Painting Techniques For Beginners

    Expand Your Knowledge With Watercolor Painting

    19 Incredibly Beautiful Watercolor Painting

    83 Best Watercolor Painting

    Are you tired of food going stale sitting in your fridge? If so, we might have the perfect solution for you. 

    Even though most of us like the idea of going to the supermarket every other day, it isn't a feasible idea. We usually buy many things in a single go, which quickly develops into a spiral where produce starts going stale. 

    Yes, there's always the option of meal prep, but cooked food starts tasting bland after a while. Hence, many people use zip lock bags to freeze food, but vacuum sealer bags might be a better option. 

    By vacuum sealing your food, you can retain the taste as well as its freshness. And, it works well for cooked and uncooked food items. However, finding the right vacuum sealer bags can be challenging, so we came up with some great suggestions. 

    So, without further ado, let's get started! 

    Best Vacuum Sealer Bag 

    Young woman with best vacuum sealer. Vector illustration , isolated on white background.

    1. FoodSaver 11" x 16' Vacuum Seal Roll 

    Are you tired of meat going tasteless after storing them in zip lock bags? Don't worry, as these bags from FoodSaver will help you retain the taste of all food items for months. FoodSaver is a company making multitudes of vacuum sealer bag options along with a very own sealing system. So, let's check out the features of this product. 

    FoodSaver Custom Fit Vacuum Sealer Rolls, Airtight Food...
    • Customizable Length: Cut the roll to suit your specific...
    • Long-lasting Freshness: Multi-layer, airtight design locks...

    Why Did We Like It? 

    The first thing you will notice about this product would be its quality. The thickness of these plastic vacuum bags makes sure to lock in the freshness of cooked and uncooked foods. On top of that, it can stand temperatures of up to 195° F, making it microwaveable as well as great for sous vide water baths. 

    When using the FoodSaver vacuum sealing system, the plastic bags become completely airtight and watertight. Don't worry about tearing the bags, as the material is meant to resist it. Moreover, it won't get punctured even if it is in contact with sharp objects. 

    One of the common complaints about vacuum sealing bags is the complicated usage process. But, that's not the case with these FoodSaver vacuum bags. You can even customize the length of these plastic bags to fit any food according to your preference. 

    What Could’ve Been Better?

    Overall, this is undoubtedly one of the best vacuum sealer bags we have come across. However, it does come at a high price compared to the other options available on the market. But, the quality of these bags is impeccable and keeps your food considerably fresher. 


    Pros

    • Lets you customize the bags
    • Bags can stand microwaving and boiling
    • Strong plastic material
    • Simple to use


    Cons

    • Expensive


    2. FoodSaver Pre-cut Vacuum Seal Bags 

    When getting the best vacuum sealer bags, FoodSaver is a company you can trust. Alongside the several variants of vacuum sealer bags produced by the company, these pre-cut ones are good for storing individual portions. So, let's look at the specialty of these plastic bags. 

    FoodSaver Precut Vacuum Sealer Bags for Airtight Food...
    • BPA-Free Material: Safe for storing raw and cooked foods,...
    • Long-lasting Freshness: Multi-layer design creates an...

    Why Did We Like It? 

    First of all, let's talk about convenience. These vacuum sealer bags are specifically pre-cut to fit around 1 quart or 946 ml of food. Hence, these are great options for people who live on their own or those who like to meal prep by dividing portions. 

    Furthermore, because of its multi-layer protection and high-quality plastic, these bags can be used for cooking. So, cooking your meat in a sous vide bath wouldn't be a problem with these bags. Similarly, the thickness of this plastic makes it good for storing food in the freezer for a long time, sometimes up to three years. 

    What's more, the plastic used in these vacuum seal bags is BPA-free.  Therefore, you can store food for your kids or pets in these bags without worrying about the harmful effects of plastic. Plus, it locks in the freshness of your food, making them healthier and nutrient-rich. 

    What Could’ve Been Better?

    This isn't really a negative thing about this product, but you must realize that it's only suitable for storing single portions. Because of the 1 quart size, storing big steaks or a large amount of food can be challenging. Moreover, when storing liquid food, try to freeze it beforehand to avoid spills while vacuuming. 


    Pros

    • Convenient to use
    • Perfect for long storage
    • Good for storing soups
    • Sturdy and flexible bags


    Cons

    • Only for small food items


    3. Wevac Vacuum Sealer Bags 

    Are you tired of using vacuum seal bags that cause freezer burn to your fish and meat? Don't worry, as these rolls from Wevac are the perfect solution to the problem. Along with outstanding quality, the company provides a combo of two rolls to let you pack a lot of food at the same time. 

    Wevac Vacuum Sealer Bags 8x50 Rolls 2 pack for Food Saver,...
    • HEAVY DUTY AND PUNCTURE PREVENTION - 2 pack of 8 inch by 50...
    • INCREASE STORAGE TIME FOR NUTRITION AND FLAVOR - 3-6 times...

    Why Did We Like It? 

    As someone looking forward to vacuum sealing your food to increase its shelf life, you will want plastic bags that will retain the freshness and nutrients of each item. These Wevac vacuum sealer bags let you achieve that with ease as it's pretty simple to use, even for a beginner. 

    Apart from that, these are commercial vacuum sealer bag rolls. Hence, the superior quality of the plastic allows you to store the food items for a longer duration. The packets even have specialized grooves to prevent the foods from developing burns from the cold surface of commercial or home-use freezers

    Furthermore, Wevac follows a no-questions-asked return policy. So, if you happen to face any issues with the vacuum sealer bag rolls, don't forget to contact customer care. We found them to be quite prompt at dealing with quality or delivery issues of the products. 

    What Could’ve Been Better?

    One of the things that could have been better for this product is the sealing process. It supports most of the vacuum sealing devices available on the market, but it can take you some time to figure out the right way to get the best seal. A trick is to take the right measurement and seal the bag keeping the rough side facing up.


    Pros

    • Prevents freezer burns
    • Doesn’t tear or puncture easily
    • Keeps food airtight
    • Good for cooked and uncooked food


    Cons

    • Takes time to seal


    4. Simple Houseware 11" x 50 Feet Vacuum Sealer Bags

    Tired of using expensive yet thin vacuum seal bags that don't seem to work? Try this combo from Simple Houseware that makes storing your food affordable and keeps it fresh for a long time without a constant need to check on it. And, the best part is that these rolls are compatible with the most common vacuuming systems. 

    Simple Houseware Vacuum Sealer Bags 11'' x 50' Sous Vide...
    • Safety Features: BPA Free, Simmer and Microwave Safe,...
    • Universal Compatibility: Designed for use with all vacuum...

    Why Did We Like It? 

    This pack of vacuum sealer bags rolls from Simple Houseware is by far one of the premium quality plastic bags we have seen on the market. Even though the material is thick, it seamlessly melts while sealing and keeps your food airtight. And, the multi-ply plastic keeps your food from getting dehydrated when kept in the freezer. 

    That's not all, as simmering or cooking via the sous vide method was especially simple with this bag. It's easy to seal the mouth of these bags, irrespective of the length you want to keep. If you follow the proper sealing method, the bags won't open while in the bath. 

    Moreover, you don't need to worry about safety as the plastic used in this bag roll is BPA-free so it doesn't react with the food. It's also safe to be used in the microwave and doesn't melt even at relatively high temperatures. 

    What Could’ve Been Better?

    We have to say that this is one of the best vacuum sealer rolls we have tried out. While going through the past reviews, we found out that the bag doesn't perform well in high temperatures like 195° F. Don't get discouraged as it supports microwaving, but you will need to use a lower temperature setting. 


    Pros

    • Strong airtight seal
    • Easy to use
    • Stores a lot of food
    • Works with most vacuum sealers


    Cons

    • Can’t stand very high temperatures


    5. WishDirect Vacuum Sealer Bags Rolls

    Are you planning to pack a huge amount of food in one go? If yes, these vacuum sealer bag rolls from WishDirect might be the best option. It comes in a pack of four, which makes it perfect to keep the annual stocking of food in your pantry or freezer absolutely safe.  

    WishDirect Vacuum Sealer Bags Rolls Compatible with...
    • GREAT VALUE: Half of the money to buy 4 pack of 11 inch x 25...
    • HEAVY DUTY & STABLE: Two layers 4 mil heavy-duty vacuum seal...

    Why Did We Like It? 

    To begin with, we have to say that a combo of four vacuum sealer bag rolls is an excellent product for those with big families. On top of that, each roll has a length of 25 feet, so you can easily customize the size of each bag. And, the length is pretty manageable for a single person who is vacuum-sealing the bags.

    However, the best part about this plastic bag roll combo is that the material has texture on both sides. Hence, your meat wouldn't get freezer burns even when stored for a long time. We also felt that the quality of these rolls was better than other plastic bags available in the market. 

    Furthermore, you can seal these plastic bags with the best vacuum sealers available in the market. The bags can stand high temperatures and are compatible with microwaves, sous vide baths, and dishwashers. 

    What Could’ve Been Better?

    A common complaint we came across while reading the customer reviews was about the rolls being a bit tight in the FoodSaver machines. Hence, if you happen to use one of the FoodSaver vacuum sealers, try to measure the inside to check its compatibility with these vacuum sealer rolls. 


    Pros

    • Simple to use
    • Fast and tight vacuum sealing
    • Good for microwaving food
    • Value for money


    Cons

    • Might need to adjust for fitting into FoodSaver machine


    6. Avid Armor 1 Vacuum Sealer Bags

    As soon as we got hold of the Avid Armor vacuum sealer bags, we knew that it would be helpful for many people. We suggest these vacuum seal bags to those who have to pack food for commercial purposes or stock up food for a small kitchen. So, let's check out the features. 

    Avid Armor Vacuum Sealer Bags 200 Quart 8x12" For Food...
    • Preserves Food Quality - Keep your food fresh and delicious...
    • Tough Enough for Any Job - Need a trusty packing solution...

    Why Did We Like It? 

    Let's start by talking about the size of these bags. You can get the 8 inches x 12 inches or quart-sized bags in a pack of 200 or 300 units. The size is perfect for individual portions and can even fit a good amount of cooked or dry foods. 

    One of the best features of this product is the cross-hatch pattern present on the plastic. This added texture allows you to store moist foods in these bags and to vacuum seal them easily. It's often hard to seal bags that lack texture as the liquid tends to escape from the packets. And, the bags are compatible with most commercial vacuum sealers. 

    When it comes to the quality, one side of the bag has a thickness of 3 mil, while the back has a thickness of 4 mil. So, you can be sure that the vacuum-sealed food will stay fresh and nutritious for long.  

    What Could’ve Been Better?

    Before saying the negatives, we do have to mention that this is one of the best individual-sized vacuum seal bags available. However, the only problem you may face with it is that learning the right way to seal the bags may take some time. So, you may need to try a couple of vacuum sealers for the bags. 


    Pros

    • Handy sized bags
    • Keeps food fresh for long
    • Good for commercial use
    • Holds liquids well


    Cons

    • Sealing the bags takes time


    7. O2frepak 6 Pack Vacuum Sealer Bags Rolls

    Do you vacuum seal foods for commercial purposes? If so, then buying a multi-pack of vacuum sealer rolls might be better to save a few bucks. This product from O2frepak comes with six plastic rolls to let you store a lot of food without needing to rebuy the vacuum bags. 

    O2frepak 6Pack 8"x20'(3Rolls) and 11"x20' (3Rolls) Rolls...
    • Universal Design:Compatible with Any Types Vacuum Sealer...
    • Economical and Customized Size :6Pack 8"x20'(3Rolls) and...
     

    Why Did We Like It? 

    First of all, this multi-pack of vacuum sealer bags contains rolls with two width variants. Hence, it allows you to portion the food according to personal preference. It's also suitable for storing dry and cooked foods as the volumes are often different. 

    Coming to the quality, the plastic used to make these vacuum sealer bag rolls is pretty good. It even has embossed lines to prevent freezer burn as well as any liquids from escaping the bags. If you want to store raw meat, don't worry, as the bone guards make these bags strong against accidental cuts. 

    As we have said already, this pack is perfect for those who want to pack food for commercial purposes. The bags can be closed with the most common vacuum sealers available on the market. On sealing, the plastic forms a strong bond that doesn't break easily, and the food stays fresh for long. 

    What Could’ve Been Better?

    This isn't really a drawback of the quality of these vacuum sealer bags, but it does take a lot of time to prep the bags. You will need to spend a considerable amount of time measuring and cutting the bags. A small tip, prepare the bags before you start assembling foods to save time.


    Pros

    • Customizable length
    • Various width options
    • Sturdy and durable material
    • Seals quickly


    Cons

    • Prepping bags is time-consuming


    8. Nutri-Lock NL(11+8)x50 Vacuum Sealer Bags 

    Compared to other vacuum sealer bag rolls available in the market, this combo from Nutri-Lock is one of the most affordable options. However, the brand doesn't compromise on the quality and instead provides superior quality plastic bags that let you store food for a long time. So, let's check it out. 

    Nutri-Lock Vacuum Sealer Bags - Set of 4 11x25 & 8x25 Inch...
    • Universal - These bags are compatible with almost all...
     

    Why Did We Like It? 

    As you might have noted, these vacuum sealer rolls come in a combo. The rolls have a similar length of 50 inches but vary in the width of 11 inches and 8 inches, respectively. This allows you to customize the length of each bag according to your need, making these rolls perfect for storing large pieces of food, like pork ribs or lamb shanks. 

    Now, coming to the quality, one of the best things about this product is the thickness of the plastic bags. At 3.5 mil, the bags contain the freshness of food items for a long time. It also makes these bags excellent for storing food in a freezer, pantry, or even for sous vide cooking. 

    Moreover, these vacuum sealer rolls are compatible with most clamp-style vacuum sealer machines available on the market. So, you need not worry about buying any specialized vacuum sealing system. 


    What Could’ve Been Better?

    Even though it's pretty easy to use these bags, you will have to spend considerable time measuring and cutting the rolls. This does give you the ability to store any amount of food items according to your preference. But, based on the extent of your needs, it may take you a whole day when using these vacuum sealer bag rolls. 


    Pros

    • Durable material
    • No freezer burn
    • Works well in hot and cold temperatures
    • Affordable


    Cons

    • Cutting bags is time-consuming


    9. Wevac A101101 Vacuum Sealer Bags

    Last but not least, we have some pre-cut vacuum sealer bags from Wevac. The pint-sized plastic bags are perfect to portion out single servings of fish, meat, or even soups, especially while meal prepping. And, the thick plastic with an airtight seal protects the freshness of each meal. So, let's see the features. 

    Wevac Vacuum Sealer Bags 100 Pint 6x10 Inch for Food Saver,...
    • HEAVY DUTY AND PUNCTURE PREVENTION - 6x10 pre-cut pint bags...
    • INCREASE STORAGE TIME FOR NUTRITION AND FLAVOR - 3-6 times...

    Why Did We Like It? 

    There are many reasons to get these vacuum sealer bags, the first one being the commercial quality. Along with being thick, the embossed micro channels on the plastic bags help them to seal efficiently without developing any leaks. So, these bags can be easily used for sealing meat or even for sealing delicate items. 

    Additionally, these bags come with bone guards to prevent the plastic from tearing. Hence, you can use the bags for sealing steaks like T-bones and even ribs that have sharp edges. 

    Furthermore, cooking meat in sous vide baths is easier with these bags due to its watertight seal along with the ability to stand warm temperatures. Don't worry about the taste of your food, as Wevac bags are meant to keep the freshness intact, with the ability to prolong shelf life.

    What Could’ve Been Better?

    One of the things you need to remember while ordering these vacuum-sealed bags is a small size. As it's pint-sized, each bag can hold up to 473 ml of food. On top of that, you'll need to leave some space for sealing the bag. The good thing is that it's available in larger sizes. 


    Pros

    • Easy and convenient to use
    • Takes less time to assemble
    • Works well for sous vide recipes
    • Strong and durable plastic


    Cons

    • For small sized portions only


    Vacuum Sealer Bag Buying Guide 

    Are you still confused about which vacuum sealer bag would be best for your home? Don't worry, as we have gathered some important points to help you select the right product. We have also used these points while choosing the vacuum bags present in the list. So, do remember this before making the final purchase of any vacuum bag for storing food items

    1. Quality Of Material 

    The first thing to remember while getting any vacuum seal bag is to check the quality. As your aim is to store food items, the bags should be made of food-grade plastic. On top of that, it's a prerequisite to choose BPA-free material so that the plastic doesn't react with the food. 

    Another key point is to opt for heavy-duty material if you're looking forward to storing food for a long time. This is also true for keeping meat items in the freezer to avoid burns from the cold temperature. Moreover, a multi-layer material ensures that the food remains safe in high temperatures. 

    An easy way to know if the bags are made of quality material is to check the thickness. In vacuum seal bags, the value of thickness is defined by the unit of "mil." And, most brands will mention it on the packaging. Also note, that some vacuum sealer bags from brands like FoodSaver call for the use of special machines because of their thickness. 

    2. Size Of The Bags 

    A common mistake that people make while buying vacuum seal bags for food is to pick the wrong size. This is especially true for instances where a person goes for pre-cut bags. Apart from following the size of the bags according to their width and length, pay attention to the volume. This would give you an idea about the amount of food that might fit into the bag. 

    Moreover, if you want to store a lot of food at once, try to opt for a bag roll rather than individual vacuum seal bags. The plastic rolls typically have a length of 25 - 50 feet. But remember to leave a few inches for sealing the bag. 

    Furthermore, check the height of a roll to ensure its compatibility with any vacuum sealer machines you might have for sealing the bags. 

    Plastic sealing machine. Vacuum packaging of fresh tomatoes.

    Verdict 

    So, that's everything we had to tell you about getting the best vacuum sealer bag for storing your food. We hope that this guide will help you get the right product to keep your food fresh and nutritious for a longer time. 

    Among our recommendations, we will suggest the FoodSaver 11" x 16' vacuum seal roll to anyone looking for the best-quality plastic bags to seal their food items.

    On the other hand, the FoodSaver pre-cut vacuum seal bags are best for storing small portions of food. However, it's a bit expensive to get these individual-sized bags. 

    Having said that, remember to read the proper procedure of vacuum storing any food item before attempting to keep it for long. And, don't forget to let us know about the vacuum sealer bag you like the most. 

    Till then, take care, and goodbye! 

    Related Articles

    9 Best Microwavable Dishes

    Best Chef Knife Bags

    15 Best Portable Single Burner

    28 BBQ Recipes for Fall & Winter Grilling

    34 Smoked Sausage Recipes

    7 Best Spice Grinder

    13 Best Garbage Disposals Under $100

    2 Wusthof Classic vs. Gourmet

    Every DIY enthusiast will encounter the unavoidable need to collect several types of UV glues at some point.

    UV glues fall under the category of special adhesives and have a different function than regular superglue. The best UV glue is one that cures fast and hard while resisting scratches and stains. And since UV glues are often used to create beautiful resin designs, it would help if they were clear and tint-free after curing.

    With an abundance of UV glue brands on the market, selecting the right one might be challenging. So, we compiled a list of the best products to help you discover the perfect adhesive for your project. 

    Without further ado, let us see some of the best UV glues available right now. 

    Best UV Glues

    Colorful tubes of super and moment glue with brand information realistic vector isolated on white background with reflection. Different size original container of cyanoacrylate glue for instant gluing

    Here is the list of the 6 best UV glues that you can use to bond virtually any material together quickly and efficiently.

    1. ONGHSD UV Resin Glue - Best for DIY Jewelry Making

    The first option we have for you is the UV resin glue by the brand ONGHSD. This product is available in four different bottle sizes, ranging from 25 grams to 200 grams per bottle. The glue comes in compact bottles complete with nozzles and can be squeezed directly on the surface of choice.

    Epoxy UV Resin Clear Hard,ONGHSD UV Jewelry Resin Glue...
    • Resin Material - It's made of excellent harmless clear...
    • Widely Used - UV Resin can be used for small items...

    Why Did We Like It? 

    Firstly, we decided to go through all the possible glues available on the market and shortlist them based on our needs. We were looking for an adhesive that was made of good quality epoxy resin or acrylic and had a short curing/drying process. And we were glad to stumble across this option which was a UV resin glue that turns completely transparent after drying.

    One good thing about this light-curing glue is that it does not form bubbles and takes smooth, clear shapes upon curing. This makes it an excellent option for decorating, DIY jewelry, castings, and coatings for crafts. In case you need colored glue, you can also mix it with other solutions to get the color required.

    Furthermore, the glue can cure quickly with UV light, like LED UV lamps, blacklight, and flashlights. However, make sure to store it in a dark place away from sunlight. 

    What Could've Been Better? 

    Even though this glue is quick-drying, there may be variations depending on the material to the glue is applied on. Wood and paper projects will dry and cure much sooner than other materials like plastic. Also, if the temperature is too low and the atmosphere is humid, the curing will take much longer. 


    Pros

    • Ideal for DIY and jewelry making
    • Easy to use
    • Tight cap that prevents drying
    • Does not form bubbles


    Cons

    • Does not cure fast on all materials


    Quantity: 1 Bottle | Volume: 0.88oz | UV Light Included: No | Cure Time: 2 to 4 Minutes (36W UV Lamp), 10 to 15 Minutes (Direct Sunlight) | Dry Color: Clear | Resistance: N/A

    2. BONDIC - Best for Household Repairs

    Next, we have a transparent adhesive UV glue that can be used to bond, build, fix, repair, and fill most surfaces. Whether you need to fix the ends of phone chargers, jewelry, glasses, children's toys, or even shoes, this UV glue can do it all. Meaning, it is ideal for any household DIY project.

    Bondic UV Liquid Plastic Welder, Super Glue, Cures Quickly,...
    • BOND ANY MATERIALS IN SECONDS - Our Bondic UV welding glue...
    • STAYS LIQUID UNTIL CURED - Unlike traditional glue, Bondic...

    Why Did We Like It? 

    To begin with, this option is 100% waterproof and heat resistant upon drying. This means that you can use it in various locations, no matter the climate and it could even hold well on surfaces that are prone to leaks or water seepage.

    Apart from that, the glue dries clear and can be painted over or sanded down once it hardens. That’s why it can be used for carpentry and woodworking projects. Apart from wood, this UV glue cures on a number of surfaces like rubber, ceramic, metal, PVC, leather, and steel wiring.

    To add to that, the glue pen has an incorporated LED UV light that has an easy press button. When the Bondic UV glue is exposed to UV light, it takes a few seconds to form a permanent bond and hardens. Using this UV light glue, you can conveniently pull off multiple home decor projects.  

    What Could've Been Better? 

    This product is a good option for everyday repairs and fixes, especially since it has its own UV light. Also, it is non-toxic, so you can use the glue pen often. However, if you happen to run out of glue, the replacement comes at a pretty steep price. 


    Pros

    • Water-resistant
    • Useful for woodworking projects
    • Easy to apply
    • Non-toxic


    Cons

    • Refills are expensive


    Quantity: 1 Cartidge | Volume: 0.13fl oz | UV Light Included: Yes | Cure Time: 4 Seconds (UV Light) | Dry Color: Clear | Resistance: Waterproof, Heat-Resistant

    3. DecorRom - Best for Resin Artwork

    Next, we selected the 4336846259 model by the brand DecorRom. While looking for the perfect DIY glue, we found this UV adhesive that dries clear and has a simple, quick curing process. This solvent-free formula is also non-toxic and great at creating durable bonds.

    No products found.

    Why Did We Like It? 

    First of all, this product contains ultraviolet resin, which cures to form a clear, glassy finish that is much more durable than other UV light glue. The formula contains epoxy resin which hardens to form a scratch-resistant surface, while also being resistant to stains and yellowing.

    Once you apply the product from the nozzle, it self-levels and self-degasses, meaning the end result will be even and bubble-free. Understandably, it has a wide range of applications ranging from casting and coating to crafts, jewelry making, and resin paintings. You can also use glue on fabric and attach accessories safely to garments.

    Now, the good part is, the UV adhesive requires no preparation and is ready to use from the tube. You can use a UV lamp to provide UV light to cure the glue, but sunshine does the job just fine too.  

    What Could've Been Better? 

    We thought this product delivered on most of the aspects we were seeking. And yet, we wished the brand released a variety of packaging sizes. The UV glue comes in only one size - a bottle that holds 60 grams of the product, but this quantity might not be enough for extensive resin-making projects.


    Pros

    • Varied uses
    • Non-toxic materials
    • Environment-friendly
    • 100% money-back guarantee


    Cons

    • No variety in packaging size


    Quantity: 1 Bottle | Volume: 2.11oz | UV Light Included: No | Cure Time: 10 to 15 Minutes (Sunny Day), 30 to 60 Minutes (Cloudy Day) | Dry Color: Clear | Resistance: Resists Water, Scratching, Staining, Yellowing

    4. QIAO QIAO DIY UV Glue

    The search for the best UV glues leads us to another brand QIAO QIAO DIY. This product is available in five sizes, ranging from a 25-gram to a 500-gram bottle. Requiring merely sunlight or a UV lamp to harden, this option is relatively easy to use for household repairs and DIY projects.

    UV Resin Clear Hard,QIAO QIAO DIY UV Epoxy Resin Glue Quick...
    • This UV resin can be cured under UV or direct sunlight...
    • Made of non-toxic and high-end materials,harmless and low...

    Why Did We Like It? 

    To begin with, unlike other low-quality UV adhesives, this option is suited for gap-filling because of its short curing time. No one wants to wait around pressing two surfaces together just to apply a coat of paint or sand wood. Thus, this product is the perfect option for quick fixes and small repairs in fabric and carpentry projects. 

    Also, this product has an easy curing process and dries clear under UV light. While other products might turn yellow or not be able to repair plastic correctly, this UV glue emerges as a reliable option for DIY builds. Although it requires ultraviolet light to cure, the UV adhesive forms durable bonds under sunlight as well.

    Furthermore, you can mix UV glue with other materials like dye and pigment to create jewelry and craft projects. The squeezy bottle combined with the pointed nozzle design makes it easy to pour and apply over surfaces precisely. 

    What Could've Been Better? 

    Going through the online reviews, we found some customers stating that their projects needed rework because the glue formed bubbles. Also, if you live in cold climates with little sunlight, the adhesive will take a long time to set. For best results, it is recommended that the mold is exposed to UV light for curing. 


    Pros

    • Non-toxic formula
    • Anti-yellowing feature
    • Cost-effective
    • Precise nozzle for better application


    Cons

    • May form bubbles


    Quantity: 1 Bottle | Volume: 0.88oz | UV Light Included: No | Cure Time: 30 to 90 Seconds (6W to 9W 405nm UV LED Light & Direct Sunlight), 2 to 4 Minutes (UV Lamp), 20 to 40 Minutes (Cloudy Day) | Dry Color: Clear | Resistance: Resists Yellowing

    5. Limino

    We decided to wrap up our list with premium UV resin glue by Limino. This product does not require measuring, mixing, or wasting time with ratios. It is a ready-to-use UV resin formula that sets to form a hard surface and is available in 200-gram bottles. 

    UV Resin - 200g Crystal Clear Ultraviolet Curing UV Glue for...
    • CONVENIENT & EFFICIENT - Do not need to measure, mix the...
    • PREMIUM - Crystal Clear UV resin with self-leveling and...

    Why Did We Like It? 

    Straight off the bat, this UV glue comes in a handy bottle with a spout that is ideal for poring just the right amount of glue. This is one of those UV glues that self-level and de-gasses, so you do not have to worry about bubbles appearing after UV curing.

    Comparable to liquid plastic, even a thin layer of this glue is enough to form a durable bond between two dissimilar surfaces. This formula falls under the category of hard UV adhesives, and it easily bonds plastic together. Its fast-curing, anti-staining, anti-scratching properties make it a popular choice for creating resin art.

    With this option, it is easy to make castings, jewelry, craft decorations, figurines, and resin paintings. To add to that, this formula does not show any signs of yellowing under visible light. And you can always mix it with mica powder, colorants, and glitter to get finishes in colors of your choice.  

    What Could've Been Better?

    Incidentally, most UV glues with an acrylic base are ideal for small repairs or decorating small projects. This also means that the formula cannot be used to make larger resin objects. For example, making an ashtray using this UV glue is not recommended as any amount of curing time will not be enough. 


    Pros

    • Ready to use formula
    • Non-toxic
    • Resistant to scratches
    • Anti-yellowing feature


    Cons

    • Not ideal for larger projects


    Quantity: 1 Bottle | Volume: 7.05oz | UV Light Included: No | Cure Time: 1 to 2 Minutes (UV Torch), 10 to 15 Minutes (Sunny Day), 30 to 60 Minutes (Cloudy Day) | Dry Color: Clear | Resistance: Withstands Temperature Up to 248°F, Resists Scratching, Staining, Yellowing

    6. Aventik Edison UV Glues Combo Tool Kit

    The Aventik Edison Bonding UV Glues Combo Tool Kit is a versatile and essential tool for DIY enthusiasts and professionals alike. It includes three types of UV glues, each designed for different materials and purposes, making it a one-stop solution for various bonding needs - whether you're fixing household items, creating jewelry, or working with electronics. The kit also features a 395nm UV pen to streamline the curing process and ensure a strong bond.

    D Aventik Edison Design Three Best Selected Bonding UV Glues...
    • Combo tool kit of three best selected bonding function UV...
    • Fast Cure within 10 seconds under Aventik zoom-able 395nm UV...

    Why Did We Like It? 

    The Aventik Edison UV Glues Kit sets itself apart with its wide range of applications, providing a solution for almost any material. Whether you're working with acrylics, PVC, glass, ceramics, metal, or PET, there's a specialized glue to suit your needs within the kit. The all-purpose UV glue is particularly helpful for tackling miscellaneous repairs. The kit's compatibility with many materials makes it an essential addition to any DIY toolbox.

    The 395nm zoomable UV pen is another standout feature, turning a traditionally tedious waiting period for curing into a quick 10-second process. With a specialized UV-through lens and a high-quality LED head, the UV pen ensures fast and reliable results, offering convenience and efficiency.

    What Could've Been Better?

    While the Aventik Edison UV Glues Combo Tool Kit excels in many aspects, one slight drawback is the sticky residue it may leave, particularly if a thicker layer of glue is applied. Being mindful of the application amount and taking the time to clean up any excess glue will help to alleviate this issue.


    Pros

    • A strong bond for various materials
    • Multipurpose, suitable for various projects
    • Fast curing time with the UV pen
    • Set of 3 specialized glues for tailored use
    • Great value for money


    Cons

    • Glue may feel slightly sticky


    Quantity: 3 Bottles | Volume: 0.33fl oz Each | UV Light Included: Yes | Cure Time: 10 Seconds (395nm UV Light) | Dry Color: Clear | Resistance: Withstands Extreme Temperature, Humidity, Vibration

    Best UV Glue Comparison Table

    Product Quantity Volume UV Light Included Cure Time Dry Color Resistance
    ONGHSD UV Resin Glue 1 Bottle 0.88oz No 2 to 4 Minutes (36W UV Lamp), 10 to 15 Minutes (Direct Sunlight) Clear N/A
    BONDIC 1 Cartidge 0.13fl oz Yes 4 Seconds (UV Light) Clear Waterproof, Heat-Resistant
    DecorRom 1 Bottle 2.11oz No 10 to 15 Minutes (Sunny Day), 30 to 60 Minutes (Cloudy Day) Clear Resists Water, Scratching, Staining, Yellowing
    QIAO QIAO DIY UV Glue 1 Bottle 0.88oz No 30 to 90 Seconds (6W to 9W 405nm UV LED Light & Direct Sunlight), 2 to 4 Minutes (UV Lamp), 20 to 40 Minutes (Cloudy Day) Clear Resists Yellowing
    Limino 1 Bottle 7.05oz No 1 to 2 Minutes (UV Torch), 10 to 15 Minutes (Sunny Day), 30 to 60 Minutes (Cloudy Day) Clear Withstands Temperature Up to 248°F, Resists Scratching, Staining, Yellowing
    Aventik Edison UV Glues 3 Bottles 0.33fl oz Each Yes 10 Seconds (395nm UV Light) Clear Withstands Extreme Temperature, Humidity, Vibration

    Buying Guide For The Best UV Glue

    Now that you have had the chance to see the kind of brands out there, it might be time to narrow down to one option. Here are a few factors you can consider before buying any new UV glue-

    1. Type Of UV Glue

    A. Acrylic UV Glue

    Acrylic UV glues are known for their adhesion to glass, metal, and various plastic elements. The good thing is, acrylic UV glues do not shrink in size even if they are exposed to extreme temperatures or chemicals. 

    Furthermore, they are quick to dry and seal. However, there is a chance of the glue changing color and developing a yellowish tinge over time.

    B. Epoxy Resin UV Glue

    This type of UV adhesive forms some of the strongest bonds possible. It can bond to most surfaces, including wood, plastic, metal, and even glass. Epoxy resins are generally fast curing when exposed to UV light and are perfect for filling cracks in surfaces. 

    Upon use, you will find that epoxy UV glues emit a strong odor while curing, which is relatively harmless. This glue is often resistant to heat, and water but it is known to shrink slightly upon curing.

    2. Durability

    Over time, the glue can undergo various changes that diminish the appearance and integrity of the adhesion. You want to make sure to select an adhesive that does not wither over time. The best way to better understand the product is by checking customer reviews regarding durability. 

    3. Resistance To External Factors

    Ideally, you'd want a glue that works just as well in cold climates as it does in warm ones. When it comes to epoxy UV glues, temperature, and humidity might affect the curing time if the UV light is incorrectly applied. Generally, this issue does not arise in acrylic glues since it is not sensitive to temperature. 

    UV Glues FAQs

  • What are the advantages of using UV glues?

    UV glues offer several benefits, such as rapid curing time, strong bonds, no solvents, and precision application. UV glues can harden within seconds, depending on the wavelength and intensity of the UV light, and create durable and stable bonds that resist heat, chemicals, and moisture.

    They are also solvent-free, making them an environmentally friendly option, and allow for a selective application and precise control over the bonding process.

  • Are there any limitations to using UV glues?
  • Are there any safety precautions to follow while using UV glues?

    When using UV glues, adhere to safety guidelines such as wearing protective gear (gloves and safety glasses), avoiding direct skin and eye contact with the glue, working in a well-ventilated area, following the manufacturer’s instructions for UV light exposure and proper curing times, and not looking directly at the UV light source.

  • Can UV glues be used outdoors?

    Yes, some UV glues are formulated to be resistant to sunlight and weather conditions, making them suitable for outdoor applications. Check the manufacturer’s specifications before using a UV glue outdoors.

  • How do I apply UV glue?

     To apply UV glue, first clean and dry the surfaces to be bonded. Then, apply a thin layer of UV glue to one surface, align and press the surfaces together, and expose the glue to a UV light source (wavelength and intensity should follow manufacturer’s guidelines) until it cures.

  • How can I remove cured UV glue?

    Fully cured UV glue can be difficult to remove. Some methods include gently scraping or using a razor blade to remove the glue, applying heat to soften the adhesive and then scraping it off, or using solvents or commercial adhesive removers with caution.

  • What is the shelf life of UV glues?

    The shelf life of UV glues varies depending on the formulation and storage, typically lasting between 6 months and 2 years when stored in a cool, dark, and dry place. Always check the manufacturer’s guidelines for specific shelf life and storage instructions.

  • Realistic vector tubes of glue packaging mockup template.

    Conclusion

    Here we conclude our list and guide for the best UV glue options available. Even though all the options presented are great choices in their own right, we did have a couple of favorite products. 

    The UV resin glue by ONGHSD was by far the most complete option with quick-drying abilities and plenty of DIY uses. Another product that we liked was the Bondic UV glue which came with a complete kit, including a small UV light. 

    We hope this guide assists you in figuring out the best UV glue for your home and DIY needs. Until next time, bye!

    Related Articles

    9 Best UV Light Glue for Amateurs & Professionals

    3 Best Adhesive for Carbon Fiber

    The Difference Between Epoxy & Super Glue

    How to Remove Gorilla Glue From Skin Safely & Easily

    Best Glue for Jewelry

    11 Best Permanent Fabric Glues

    10 Best Leather Glue

    11 Best Glue For Paper & Paper Mache

    11 Best Glue For Metal

    4 Best Glue for Silicone

    Best Glue For PVC Pipe

    10 Best Glue for Shoes

    10 Best Ceramic and Porcelain Glue

    11 Best Glue For Glass

    11 Best Glue For Rubber

    11 Best Glue for Polypropylene

    7 Best Glue for MDF

    11 Best Glue For Styrofoam

    9 Best Glue for Metal to Wood

    11 Best Fabric Glue 

    7 Best Glue for Vinyl

    9 Best Glue For PLA

    7 Best Glue for Glass to Wood

    9 Best Glue For Foam

    9 Best Glue For Acrylic Plexiglass

    9 Best Glue for Plastic Eyeglass Frames

    10 Best Glue For Stainless Steel

    Polyurethane Glue 101

    Gorilla Glue vs. Super Glue

    7 Best Glue For Aluminum

    JB Weld VS Gorilla Glue | Comparison & Winner

    7 Best Glue for Jewelry 

    7 Best UV Glue

    7 Best Glue For Cardboard 

    9 Best Glue For Hardwood Floors

    8 Best Heat Resistant Glue

    7 Best Glue For Rhinestones

    7 Best Glue For Cork

    5 Best Glue For Marble

    11 Best Glue For Miniatures 

    7 Best Glue For Particle Board

    Gorilla Wood Glue Vs Titebond 

    5 Best Glue To Fix Fridge Plastic

    7 Best Glue For Legos

    7 Best Adhesive For Acoustic Foam

    Glue That Works On ABS And PVC

    5 Best Glue For Mirrors 

    Cleaning upholstery fabric is quite a task, and calling up for professional services means spending a lot of money. But there is a way out. 

    Steam cleaners can be bought and kept in the house, and they will help you maintain fabrics, floors, and other surfaces. Now people have different needs, and while some might want to clean large expanses of fabric, others might want to spot clean parts of the surface. 

    Remember that the best upholstery steam cleaner will be able to take care of all your needs without being too bulky. It should help in deep cleaning as well as serve any extra purposes that you might have in mind. 

    In the next section, we will discuss the top 11 products and their benefits. We will then talk about the pros and cons in detail so that you can make an informed choice.

    So, dive in! 

    11 Best Upholstery Steam Cleaners Reviewed 


    woman vacuums the gray sofa with a washing vacuum cleaner. Cleaning and cleanliness concept.

    1. McCulloch MC1275 

    If you are looking for a versatile upholstery steam cleaner, then the McCulloch MC1275 will work perfectly well. It offers a host of benefits and comes with a large tank. You will be able to clean all areas of the house easily without having to hire professional services. 

    McCulloch MC1275 Heavy-Duty Steam Cleaner, 45 Minute...
    • 18 VERSATILE ACCESSORIES — Equipped for steam cleaning...
    • CHEMICAL-FREE CLEANING — Naturally deep clean without the...

    Why Did We Like It?

    A good upholstery cleaner should be able to clean all kinds of hard surfaces, and this one will fit the bill. 

    It can completely clean the grime, dirt, and greases off wood flooring, ceramic tile, grout, granite, sealed surfaces, grills, laminate, autos, and more. This option will offer you chemical-free performance, and you will not need harsh chemicals to see results. Instead of that, pressurized steam is used to clean the areas. 

    Moving on, you will get the benefits of a 48-ounce tank that can heat water within 8 minutes. Then you can constantly clean with steam for 45 minutes at a go. The steam cleaner also has a lockable steam option, and that will ensure a steady flow. 

    That’s not all, as you will be receiving 18 different accessories. These include a scrub pad, floor mop pads, nylon brushes, window squeegee, and a brass brush, to name a few. 


    What Could've Been Better?

    This portable steam cleaner works very well, and you will not face any difficulties with the functioning. However, there is no extra space provided to keep the cords, and they will be hanging out when stored. While this does not affect productivity, you will have to be a little careful while storing it. 


    Pros

    • Heavy-duty steam cleaner
    • Tough stain tool
    • Pressurized steam cleaning
    • Natural deep cleaning


    Cons

    • No additional space for cord storage


    2. Bissell 3624 

    Up next is an upholstery steam cleaner that will clean stains in a jiffy. The Bissell 3624 is known for its superior suction ability, and it is perfect for houses with kids and pets. All the stains and marks that they leave behind can be cleaned easily with this option. 

    Bissell 3624 Spot Clean Professional Portable Carpet Cleaner...
    • Every Bissell purchase helps save pets. Bissell proudly...
    • Our most powerful portable spot and stain cleaner for...

    Why Did We Like It?

    This is a portable carpet cleaner that can be easily taken around without any issues. It weighs 13 lbs and comes with a 20 feet cord that will help you reach all the corners easily. 

    Plus, it is known for its superior cleaning action, and it can scrub any piece of fabric. It is an essential requirement for carpet cleaning, and will ensure professional results. Using this you can get rid of pet stains from carpets, rugs, upholstery, stairs, automobile interiors, and many other surfaces. 

    Next, this carpet cleaner can also be used for deep cleaning and will take out embedded grime and dirt. There is a 3-inch tough stain tool for spot cleaning and a 6-inch stair tool for wider areas. The brand also provides a tough stain removal trial pack, which you can use to clean and protect surfaces. 

    Moreover, the Bissell pet foundation is on a mission to save homeless pets, and every purchase made by you will help save pets. 


    What Could've Been Better?

    When we received the package, we found that the hose had not been packed well and hence, it had cracked. Therefore, we were a little worried and called customer care immediately. They were of great help and sent us a replacement product within a few days. 


    Pros

    • Permanently eliminates messes
    • Perfect for cleaning stairs
    • 20 feet hose included
    • Can access hard-to-reach areas


    Cons

    • Inefficient packaging


    3. Dupray DUP020WNA

    One of our top recommendations for portable steam cleaners is the Dupray DUP020WNA. It will ensure chemical-free cleaning with the help of steam. You can use it for all types of hard floors, and the continuous steam will do a wonderful job. 

    Dupray Neat Steam Cleaner with 17-Piece Kit - Powerful,...
    • Powerful Chemical-Free Cleaning: Generates superheated steam...
    • 17 Multipurpose Accessories: Versatile kit is engineered for...

    Why Did We Like It?

    Steam cleaners are supposed to be easy to use and should be able to clean surfaces without using harsh chemicals. This machine meets all the requirements and is equipped with a kit with 17 pieces. You will get a window tool, floor tool, nylon and brass brushes, extension tubes, lance, and microfiber pads, to name a few. 

    Adding on, you will get a large tank, and it will enable you to use the steam cleaner for 50 minutes at a stretch. A long power cord of 5 meters will allow you to move around easily without having to worry about electric plug points. 

    Also, steam cleaners degrease and clean floors, but this option goes the extra way and deodorizes floors as well. You can use the Dupray neat steam cleaner with any cloth or towel, and there is no need to purchase expensive pads separately. 


    What Could've Been Better?

    You should know that this steam cleaner will take time to fill up, and that’s why you should be prepared to give it at least 20 minutes. Some might find it time-consuming, but you would not need to deep clean every day. Find time to work on the weekends, and this should not be an issue at all. 


    Pros

    • Offers chemical-free cleaning
    • Equipped with a retractable handle
    • Portable and very light
    • Comes with wheels


    Cons

    • Takes time for water to fill


    4. Bissell 39N7V

    A very good option when it comes to handheld steam cleaners is the Bissell 39N7V. It is small in size, and one can easily carry it to different areas of the room and the house. Eliminate the usage of all kinds of hard chemicals and replace them with this. 

    No products found.

    Why Did We Like It?

    To begin with, we loved the color-coded brushes that come with the pack. These brushes have separate uses and are needed for different kinds of messes. The varied colors will help you identify the one that is needed easily. 

    Plus, you will get a grout tool, a flat scraper tool, and an angle concentrator tool in the pack. The grout tool will help clean grout in the bathroom and any tiled areas. 

    On the other hand, the flat scraper tool can be used to clear dirt, grease, and grime from stovetops, microwaves, and ovens. The angle concentrator will allow steam to flow in and clean hard-to-reach areas.  

    Moreover, steam cleaners are supposed to be able to clean up germs and bacteria, and this option will do a great job at it. It uses a powerful high-pressure mechanism that will not only clean but sanitize surfaces and will eliminate 99.9% of germs and bacteria. 


    What Could've Been Better?

    The one thing that we noticed here is that you cannot work from far when you are using this steam cleaner. For the perfect steam cleaning, you will be required to hold the steam jet nozzle close to the surface, and then you can work with it. This way, you will not face any problems. 


    Pros

    • Comes with color-coded brushes
    • Easy-to-press trigger
    • Tank capacity of 6.6 oz.
    • Heats up in 30 seconds


    Cons

    • Cannot work from far


    5. Hoover FH11300PC

    If you are looking for more options when it comes to portable steam cleaners, then the Hoover FH11300PC is a brilliant choice. It will help in cleaning up conveniently, and you can scrub, spray and remove stains easily. We were very happy with the performance and ease of usage offered. 

    Hoover Spotless Portable Carpet + Upholstery Spot Cleaner...
    • PORTABLE CARPET CLEANER MACHINE: Featuring a lightweight...
    • CONVENIENT DEEP CLEAN: This spot and upholstery cleaner...

    Why Did We Like It?

    A major problem with upholstery steam cleaners is that they tend to get dirty, and molds can start growing inside. However, this product is equipped with self-cleaning technology, and it is extremely beneficial. It will flush the hose every time you use it, and that will immediately remove the bacteria and dirt. 

    Next, this upright upholstery cleaner is equipped with dual tank technology, and you will be able to keep the clean and dirty water separately. In the end, just empty the dirty water, and the machine will be clean. It can store 36 ounces of dirty water at one time. 

    Furthermore, you can use this upholstery cleaning machine for deep cleaning mess made by pets and kids. It is perfect for everyday usage, and one can reach every place with it. Take care of corners and hard-to-reach places with the long hose that this comes with. 


    What Could've Been Better?

    While this new upholstery steam cleaner can clean spots and fabric on furniture easily, it is not suitable for cleaning large spaces in a short amount of time. It is small in size and is known to be a portable cleaning option. But if you want to use it in large spaces, then the process can be time-consuming. 


    Pros

    • Dual tank technology
    • Lightweight and easy to transfer
    • Pretreat gel and cleaning solution included
    • Long hose


    Cons

    • Not for cleaning large spaces


    6. AutoRight C900054.M

    Now that we have reached the middle of this list, it is time to introduce the AutoRight C900054.M steam cleaner. It will ensure that your car is always clean, and this option is used by a number of car repair and servicing shops. 

    No products found.

    Why Did We Like It?

    A good quality upholstery steam cleaner should be able to run long enough for you to clean all the parts of the house well. This option comes with a 40-ounce boiler tank, and it can provide 45 minutes of continuous cleaning. 

    Plus, there is a built-in handle that can be used to move the device around whenever needed. It weighs 9.75 pounds, and you can carry it around easily in your house. You can also use it for your cars, and they will work on leather, carpets, car interiors, upholstery, and dashboards. 

    Moving on, you will be getting 11 accessories in the kit, and that should serve all your purposes. You will also be able to take it across surfaces, and it will clean off all kinds of stains left by pets and humans. No chemicals need to be used, and hence, you do not have to worry about the color fading off. 


    What Could've Been Better?

    The one thing we did not like about this product is that it did not come with a bag to keep the tools in. Hence, there is a chance of misplacing them, and we bought a separate bag to keep the tools in. The brand could take a look into this and provide an additional pouch along with it.


    Pros

    • Run time of 45 minutes
    • Built-in carrying handle
    • Boiler tank of 40 ounces
    • For all household cleaning projects


    Cons

    • No place to keep the tools


    7. Bissell 2837

    Do you have to take care of tough spots and stains? Then the Bissell 2837 is going to help you out with it. It is equipped with advanced technology, and it will work its way through stains and marks. We are very happy to see that it runs on battery.

    Bissell Pet Stain Eraser PowerBrush, 20-min runtime,...
    • Every Purchase Saves Pets. BISSELL proudly supports BISSELL...
    • Rotating DirtLifter PowerBrush. Our only portable carpet...

    Why Did We Like It?

    Pet accidents can happen at any time, and good upholstery steam cleaners should be able to take care of it. We used to get very worried when the mess was made on upholstered furniture. But this option uses a rotating DirtLifter PowerBrush, which works like a charm on the sofas. It loosens and helps clear off pet stains while keeping the fabric from fading. 

    Next, most upholstery cleaning machines need a power outlet to connect, but this one does not need that. It offers the convenience of a cordless option where you can use the lithium-ion battery to run the machine. 

    That’s not all, as you will be getting a ready-to-use PRO OXY spot and stain formula that acts as a cleaning agent. You can use both of them without mixing any water, and the process involves no hassle at all. 


    What Could've Been Better?

    The one thing that you need to keep in mind regarding this upholstery cleaner is that it will only run for 20 minutes while it takes a few hours to charge. Now that means if you need to cover large areas, you will have to charge it in between and then continue using. That would take a lot of time.  


    Pros

    • Comes with a lithium-ion battery
    • Pet tool for tough messes
    • Prevents fabrics from fading
    • Cordless steam cleaner


    Cons

    • Not for cleaning large areas


    8. LIGHT 'N' EASY Steam Mop 7688ANW

    There is no need to hire a professional cleaning service when you have got the LIGHT 'N' EASY Steam Mop 7688ANW in the house. This is one of the upholstery steam cleaners that stand out because of the ease of usage offered. It works best for houses with infants and pets. 

    LIGHT ‘N’ EASY Steam Cleaner, Multi-functional Steam Mop...
    • On-demand HI, MED and LOW steam settings fit for various...
    • Detaches into a separate handheld steam cleaner for...

    Why Did We Like It?

    Garment steam cleaners are essential if you need to wear wrinkle-free outfits every day. This option is very similar and will give you the opportunity to remove wrinkles from clothes, as well as it will give you the benefits of a natural upholstery cleaner. Many customers also use it for cleaning bathrooms and kitchens. 

    Moving on, you can easily shift among high, medium, and low settings and the steam will flow accordingly. It can be used on various surfaces like vinyl, laminate, marble, grout, tile, stone, sealed wooden floors, as well as on fabric. You can slant and use it on any surface, or you can remove the handle and use it for garments. 

    Besides, the steam cleaner uses steam at 212 degrees Fahrenheit to remove sticky substances and stains. It will easily dissolve the dirt and grease and then suck it in. You can use it with tap water and distilled water, and it will work well to clean most home essentials. 


    What Could've Been Better?

    We would have liked it better if the upholstery steam cleaner manual was a little more detailed. This one does not contain enough information, and you might face some challenges while using the manual. We will recommend calling up customer service and asking them for help. 


    Pros

    • Multi-purpose steam cleaner
    • 3 steam modes
    • Removes wrinkles from clothes
    • Lightweight and portable


    Cons

    • Manual does not come with proper instructions


    9. Hoover BH12010

    Another very efficient and portable steam cleaner in the market is the Hoover BH12010. You can move it around and clean messes without having the device attached to a cord. We were able to carry it on vacations where our pet accompanied us. It can be stored easily and will not take up to much space. 

    Hoover ONEPWR Spotless Go Cordless Portable Carpet +...
    • ONE BATTERY. CLEANS ANYWHERE: Enjoy automatic cleaning and...
    • TOOLS FOR EVERY MESS: This spot and upholstery cleaner...

    Why Did We Like It?

    Good steam cleaners ensure convenience and power at the same time, and this option provides one with both. You can literally grab it and go, thanks to the less weight. It will only weigh 7 pounds and you can take it in your car easily.

     Plus, the compact size makes it easy to store, and you can keep it in narrow storage spaces. That is not all, as the item has dual tanks that keep the freshwater solution separate from the dirty water. You can easily empty it without much hassle and then fill the other tank with a cleaning solution. 

    Also, you will get a scrubbing tool and a removable hose along with the pack. These will help in cleaning areas better. A trial solution will be provided so that you can immediately start working. 


    What Could've Been Better?

    While you will easily be able to work on fabric and upholstered furniture, they have to be near you. The hose that is provided along with it is not very long, and you cannot reach far places. Keep this in mind before purchasing, and you should not face issues. 


    Pros

    • Compact and easy to store
    • Removes tough messes
    • Comes with a scrubbing tool
    • Rechargeable battery provided


    Cons

    • Hose is very short


    10. COSTWAY Steam Cleaner

    There are steam cleaners meant for cleaning as well as sanitizing a place, and the COSTWAY Steam Cleaner will work out for both. It features an ergonomic design that will ensure easy portability. We have been using it for multiple kinds of surfaces, and it has been working out great. 

    COSTWAY Multipurpose Steam Cleaner with 19 Accessories,...
    • [Efficient & Deep Clean]Our Steam Cleaner uses up to 226 °F...
    • [Large Water Capacity]The Steam Cleaner includes a 1.5L...

    Why Did We Like It?

    Steam cleaners come with some accessories, and this one is equipped with 19 of them. We had tools to clean every kind of surface, be it tiles, carpets, metal, mirrors, or glasses. There is no need to use harsh chemicals as the device will take care of it all. You can work to eliminate 99.9% of pathogens, bacteria, molds, viruses, and bedbugs. 

    Next, the steam tank is large, and you will get a capacity of 1.5 liters. That will ensure that you can work for 45 minutes at a stretch. The steam reaches a temperature of 226.4 degrees Fahrenheit, and that would mean that the grease and dirt would dissolve completely. 

    You will also be happy to see that there is a pair of wheels that is attached to the body. A comfortable handle is provided so that you can drive it around easily. There is no need to lift it because the wheels will allow easy movement. 


    What Could've Been Better?

    While the product worked out well for us, we were not very satisfied with the customer service. We wanted some more information about using the tools provided. But nobody picked our call when we reached out to customer care, and we ultimately took the help of Youtube videos. 


    Pros

    • 226 degree Fahrenheit hot-pressure steam
    • Ergonomic design
    • 2 wheels for easy movement
    • 16 feet power cord


    Cons

    • Inefficient customer service


    11. Kiato Handheld Steam Cleaner

    Our final suggestion is the Kiato Handheld Steam Cleaner, which is known for its lightweight design and large tank capacity. This product has multiple uses, and you will be able to clean floors and fabric with it easily. We are also happy with the sufficient water tank that is provided. 

    Kiato Handheld Steam Cleaner, 10 in 1 Handheld Steamer for...
    • 𝟰𝟱𝟬𝗺𝗹 𝗖𝗮𝗽𝗮𝗰𝗶𝘁𝘆...
    • 𝗖𝗢𝗡𝗦𝗧𝗔𝗡𝗧 𝗦𝘁𝗲𝗮𝗺...

    Why Did We Like It?

    Handheld steam cleaners need to be lightweight and easy to carry. You should be able to move one around, and this option will allow you to do just that. Once you have a target area set, you can spray continuously. The dirt will dissolve and then be sucked in by the machine. 

    Besides, the water tank capacity is 450 ml with a load capacity of 250 ml. So, you will not have to refill often, and you can concentrate on cleaning the place. Also, there is a power cord of 16.4 feet that is attached to the steam cleaner. You can work with it from a distance for 8 minutes constantly. 

    Moreover, you will be getting a 10-piece accessory set, which includes a nozzle with brush, fabric steamer tool, and wipers, to name a few. You will be able to clean countertops, kitchen ink, toilets, floors, pet mattresses, and sofas. 


    What Could've Been Better?

    If you are trying to get rid of molds and mildew, then you will be required to scrub a lot. Although the steam will make it easier to get the molds off, you will have to use the scrubbing tool provided and put in some amount of effort. 


    Pros

    • Lightweight and portable
    • Long cord of 16.4 feet
    • Dissolves dirt easily
    • 10-piece accessory set included


    Cons

    • Molds will require scrubbing


    Set with modern professional steam cleaners on pink background. Top view, flat lay. Banner with copy space. Cleaning service concept.

    Upholstery Steam Cleaners Buying Guide

    Now that you know about the top steam cleaners on the market, it will be easier to select one for your house. But you must have realized that different options serve various purposes, and keeping your needs in mind is very important. To provide you with an example, the best upholstery steam cleaner may not work well for hard floors

    Let us make this choice easier by telling you about the factors that you need to keep in mind. Read on carefully to know all about them. 

    1. Purpose

    There are some upholstery cleaners that work well for hard floors, and you can use them on granite, tiles, grout, and other concrete surfaces. However, they may not work well for fabric or rugs. You will find other options, which will work better for rugs and fabrics. 

    Some products may work better for dirty spots and for reaching narrow areas, while others may work wonders for larger areas. So, make a note of the needs that you have and purchase accordingly. 

    1. Tools And Accessories 

    You will be getting a set of tools and accessories with upholstery vapor steam cleaners, and you should check if the needed tools are provided. If pet mess needs to be cleared from upholstered furniture, then you will need a good quality scrubber and a squeegee. 

    Also, if you have to reach difficult corners, there are nozzles for that. Check the options well, and you should have a fulfilling experience. 

    1. Portability

    A portable cleaner is the need of the day, and the one you purchase should be movable. There are handheld steam cleaners that can be easily moved by hand. Other heavier options may come with wheels for easy movement. 

    If you have stairs in the house, then a lighter one will be a good choice. But if you have a large surface area to clean, like a hall or a big one-floor house, you can use a product with wheels. 

    Cleaning car salon dry cleaning with vacuum cleaner. Professional use of a steam vacuum cleaner to remove stains

    Verdict

    The best upholstery steam cleaner should last for a long time, and you should not have to spend too much time and money on maintenance. We will always suggest purchasing these instead of artificial and harmful chemicals. There are other choices on the market too that you can look at. You can also use vacuum cleaners for this purpose. 

    Before we wrap up, let us take you through our favorite steam cleaners once more. The McCulloch MC1275 is a versatile option that can be used on large expanses. On the other hand, the Bissell 3624 is perfect for spot cleaning. And the Dupray DUP020WNA offers a very long hose to reach narrow spaces. 

    Let us know about your favorite options in the comment section below. And do not hesitate to call up customer care if you have any queries regarding any of the products. 

    We are signing off now! 

    Related Articles

    9 Best Clothes Steamers

    6 Best Vacuum Cleaners for Mattress

    Bissell 3624 Vs. 2694 [SpotClean Portable Cleaners Compared]

    Bissell 1806 vs. Bissell 1940 [Steam Mops Compared]

    You must have come across the term sheet metals in various instances. But do you know about their different types and uses?

    Widely used in commercial, industrial, residential, and commercial applications, these flat and compressed forms of metals offer diversity in terms of functions and use. That being said, each sheet is prepared carefully using different types of metals and manufacturing processes to stand out from the others.

    Remember the chapters on metals and alloys? Well, it’s time to go back to the basics of chemistry, folks!

    With various metal alloys and manufacturing processes like galvanizing and electroplating determining the types of metal sheets, each can be differentiated accordingly. On that note, it’s time to get into the depth of the 9 types of sheet metals and their diverse uses.

    So, without further ado, let’s dive in.

    Basics of Sheet Metals

    Stack of steel sheets ; ready to use ; stock ; for laser cutting

    Before going into the details of its types and uses, we would like to take a few minutes of your time, in order to provide you with the basics of this topic.

    So, what is sheet metal? Well, to define the term in a simple way, it is basically a kind of metal, which undergoes a manufacturing process for compression into flat sheets. By way of operations involving riveting, cutting, shearing, punching, and folding, they are processed through cold metals.

    Mostly, each sheet comes with exceptional quality and a thickness below 6 mm, offering versatility in a wide range of applications. Hence, it serves as an essential tool or equipment for every metal worker.

    By now, we hope you are pretty clear about the whole concept. That being said, you can now take a run-through of our list and recommendations.

    Types of Sheet Metals and Uses

    1. Stainless Steel Sheet Metals

    Stainless steel is the most common metal used in the making of metal sheets, especially because of its high resistance to atmospheric moisture. In other words, it ensures durability, even after being exposed to acid, rain, salt, and other similar elements, bringing it to the number one position on our list!

    In fact, it doesn’t end there! With a composition of less than 13% chromium and additional components, including Nickel and Molybdenum, you can expect these sheets to offer high strength and quality.

    That being said, based on metallic combinations, stainless steel sheets are also classified into three different types. Have a look at the list below:

    • Ferritic steel sheets
    • Austenitic steel sheets
    • Martensitic steel sheets

    Uses of stainless steel sheets

    Being extremely durable and strong, stainless steel sheets help in shielding, manufacturing, and other purposes. Let us now go through the ways in which these sheets can be used:

    • In offering protection against corrosion and natural decays
    • Used in machines that process chemicals and liquids
    • Ideal for machines undergoing rigorous pounding
    • Ensures durability and stiffness

    Take a look at this recommended stainless steel sheet available on Amazon:

    Broan Backsplash Range Hood Wall Shield


    1. Copper Sheet Metals

    Being highly electrically conductive with no composition of additional metals, copper sheets are popular and mostly used as conductors. Apart from this, it can be easily fabricated while its high resistance against fatigue and corrosion makes it strong and durable. 

    That being said, you can expect these sheets to be useful for commercial and industrial purposes. Not only this, but it also finds its use in making ornaments and jewelry that are significantly popular in modern fashion.

    Uses of Copper Sheet Metals

    The use of copper sheets is not only restricted to electrical wiring and other electronic parts. It’s now time to go through some of the uses of this conductive and pure type of sheet. Have a look at the points given below:

    • Can be used in making modern fashion jewelry and ornaments 
    • Being highly conductive, it can be used in electronics and electrical parts
    • Widely used in architecture and structural engineering
    • Helps in interior designing and decorative art

    Take a look at this recommended copper sheet metal available on Amazon:

    Copper Sheet Metal


    1. Brass Sheet Metal

    Before knowing about brass sheets, it is important to know the basic composition of brass. So, for most of you who don’t know, brass is an alloy manufactured primarily using copper and zinc.

    Like the previous two types of metals, brass is also highly corrosion-resistant with high durability and tensile strength. For this reason, you will notice that it is highly used for industrial purposes. In fact, despite being strong, you will be surprised to know that it is lightweight compared to other alloys. A pretty rare combination, right?

    Furthermore, depending on the amount of copper and zinc used during the manufacturing process, five types of industrial-grade brass sheets can be obtained. So, let us take a quick run-through:

    • Red brass sheet
    • Naval brass sheet
    • 330 brass sheet
    • Cartridge brass sheet
    • Free machining brass sheet

    Uses of Brass Sheets

    Thanks to its corrosion resistance and high tensile strength, brass sheets are highly used for commercial, industrial, and residential purposes. Here are some of the vital ways in which you can utilize brass sheets:

    • In case you need a lightweight, yet durable sheet for operation
    • For decorative purposes, including both indoor and outdoor decoration
    • Can be used in machines, which require sheets to be cut in different shapes and sizes
    • Take a look at a recommended brass sheet available on Amazon:

    K & S Engineering Brass Sheet


    1. Aluminum Sheet Metal

    Coming to another type of sheet, this one is also made using a popular metal, namely aluminum. That being said, aluminum sheets are quite delicate and soft compared to the other types mentioned on the list. 

    For this reason, it is not classified as recognized industrial-grade sheet metal. In fact, manufacturers often have to add metals like iron, copper, and silicon to its composition in order to enhance strength.

    Uses of Aluminum Sheets

    Let’s talk about the uses of an aluminum sheet. We already mentioned that it is not recognized much for industrial applications. So, how is it used? Well, take a look:

    • Mostly used in the manufacture of fan blades, electronics, and household appliances
    • Help in making jewelry and ornaments
    • Used in household coverings and roofing
    • In parts used to service corrosive liquids like salt water

    Take a look at this recommended aluminum sheet available on Amazon:

    RMP 3003 H14 Aluminum Sheet


    1. Corrugated Sheet Metals

    Being highly durable and robust with high tensile strength, corrugated metal sheets are widely used for residential and commercial purposes. From roofing to siding jobs, this sheet should ideally be your number one choice.

    Coming to their manufacturing process, corrugated sheets are prepared through the cold-form process. What happens during this process? Well, firstly, the sheets are pressed flat and then taken for roll forming to achieve the required shape and pattern. After this, the sheets are cut into the appropriate length.

    When you see a corrugated sheet, you may notice a wavy pattern. In fact, this is a characteristic feature of the sheet, which helps in its easy identification. That being said, there are also a few other patterns that you may come across.

    Uses of Corrugated Sheets

    Let’s now talk about the uses of corrugated metal sheets. Take a look at the points below:

    • Used for residential purposes where minimum maintenance is required
    • For resistance and protection against dents, buckles, and warp
    • Roofing for general protection against wind, rain, hail, etc.

    Take a look at this recommended corrugated metal sheet available on Amazon:

    A-Street Prints Silver Corrugated Sheet


    1. Galvanized Sheet Metals

    Ideally, made using steel, galvanized steel sheets are equally important compared to other types mentioned on the list. That being said, depending on the process used for galvanization, there are two kinds of sheets, namely hot-dipped metallic coated and electro-galvanized sheets.

    Need more details on both these types? Read on.

    Hot Dipped Metallic Coated Sheet

    Pre-treated through a hot-dipped process, these sheets are also referred to as cold-rolled hard steel plates. Furthermore, they are coated well with good-quality zinc for strength and durability. In fact, anti-fingerprint coatings are applied as well.

    Electro-Galvanized Sheets

    The base metal used in the preparation of this kind of sheet is cold-rolled annealed steel. But how is it made? As the name suggests, the base steel metal is electroplated with a pure and thick layer of zinc. However, instead of being dipped, the metal absorbs the zinc coating.

    Coming to the cost, electro-galvanized sheets are more expensive compared to hot-dipped metallic coated sheets. Furthermore, they are mostly used in mechanical applications.

    Uses of Galvanized Sheets

    Another popular type of metal sheet with diverse applications. Given below are some of the uses of galvanized sheets, take a look:

    • Provides heat resistance and durability to metallic pipes
    • Helps in the manufacture of nuts, bolts, and nails
    • Used in constructing canopies, handrails, fences, ladders, furniture, and more
    • Used for insulation purposes 
    • In making pipes for plumbing work

    Take a look at this recommended galvanized sheet from Amazon:

    M-D Building Products Galvanized Steel Sheet


    1. Cold Rolled Steel Sheets

    Another type of steel sheet, is manufactured by deforming steel into sheets. So, how is it done? In this process, a metal alloy, in this case, steel, is placed between two rollers to produce a fibrous sheet.

    After this is done, it is washed off using acidic materials before compiling it into the final roll. Last but not least, to ensure strength and better finishing, the sheet is treated with heat. 


    Uses of Cold Rolled Steel Sheets

    Despite being a non-recognized industrial-grade metal sheet, its improved strength and finishing make it widely used for projects requiring precision. Let us now take a look at some of its uses:

    • Ideally used in the manufacture of metal furniture and home appliances
    • Construction of garages, industrial buildings, steel sheds
    • Commonly used in making school lockers and metal filing cabinets

    Take a look at this recommended cold rolled steel sheet available on Amazon:

    Steelworks Boltmaster Steel Sheet


    1. Hot Rolled Steel Sheet

    Other than the difference in temperature, the process involved in the manufacture of hot-rolled steel sheets is quite similar to its cold-rolled counterpart. That being said, in this case, steel is pressed down into a flat sheet between two rolls at a temperature of more than 1400 degrees Fahrenheit.


    The high temperature helps in increasing the thickness of the sheets. For this reason, hot-rolled steel sheets have a thickness ranging between 1/6 to 5/6 inches, making it useful in tackling delicate functions.

    Furthermore, unlike cold-rolled steel sheets, which offer a great finishing, hot-rolled sheets come with a lackluster finishing. Yes, the term is used to describe dull and boring, but truth be told, these sheets serve as one of the most interesting types, in terms of appearance.

    Uses of Hot Rolled Steel Sheets

    We now come to the use of hot roll steel sheets. Please take a look at the points mentioned below:

    • Its unique finishing makes it widely used in the creation of art sculptures
    • Formability and strength of the sheet help in the manufacture of agricultural equipment
    • Used in truck and automobile frames

    Take a look at a recommended hot rolled steel sheet available on Amazon:

    Shapiro Supply Hot Rolled Steel Sheet


    1. Mild Steel Sheet

    By now, you must have realized that steel plays a major role in the manufacturing of metal sheets. And yes! You guessed it right, yet again, we bring you another variation of steel sheets.

    Mild steel sheet is the last type of metal sheet on our list, which can also be considered as a sub-type of cold-rolled steel sheets. The only point of difference between the two is that the steel alloy used in the preparation of mild steel sheets contains comparatively less carbon. That being said, it is neither too ductile nor brittle, and it is also easy to manufacture.


    Uses of Mild Steel Sheet

    Last but not least, we now come to the ways in which mild steel sheets can be used. Being highly versatile and cost-effective, these steel sheets fulfill its purpose in various applications. Let’s now look into the uses of this type of steel sheet:

    • In manufacturing automobile and machinery parts
    • Helps in welding work
    • Used in pipes for transporting water and natural gas
    • Construction of building steel frames
    • In making cookware, cutlery, etc.

    Take a look at a recommended mild steel sheet available on Amazon:

    Bullseye Metal Steel Sheet

    Sheet Metals FAQ's

  • What are the common types of sheet metal?

    The most common types of sheet metals include steel, aluminum, stainless steel, copper, and brass. Each type has its own unique properties and is suitable for different applications.

  • What are the advantages of using sheet metal?

    Some advantages of using sheet metal include its high strength-to-weight ratio, durability, formability, and recyclability. It can be easily cut, bent, and shaped into various forms to meet specific design requirements.

  • What are the different thicknesses available for sheet metal?

    Sheet metal thickness is measured in gauge, with a lower gauge indicating a thicker sheet. Common sheet metal thicknesses range from 30 gauge (0.012 inches) to 7 gauge (0.1875 inches) or even thicker, depending on the specific material and application.

  • How is sheet metal measured and cut?

    Sheet metal can be measured using a gauge tool or a caliper to determine its thickness. It can be cut using various methods, including shearing, laser cutting, plasma cutting, or waterjet cutting, depending on the desired precision and material.

  • What are the common applications of sheet metal?

    Sheet metal is widely used in various applications such as roofing, construction, automotive, HVAC (heating, ventilation, and air conditioning), aerospace, electronics, and manufacturing of appliances, furniture, and enclosures.

  • How can I protect sheet metal from rusting?

    To protect sheet metal from rusting, it can be coated with a layer of protective finish such as paint, powder coating, or galvanizing. Stainless steel is naturally resistant to rust, while aluminum forms a thin oxide layer that protects it from corrosion.

  • Can sheet metal be recycled?

    Yes, sheet metal is highly recyclable. It can be melted down and reused to produce new sheet metal or other metal products. Recycling sheet metal helps conserve resources and reduce waste.

  • How do I determine the right thickness and type of sheet metal for my project?

    The thickness and type of sheet metal required for a project depend on factors such as the application, structural requirements, desired aesthetics, and budget. It is recommended to consult with a professional or refer to engineering guidelines to determine the appropriate sheet metal specifications for your specific project.

  • Clean aluminium fence to protect construction area.

    Conclusion

    As you already know, sheet metals find their use in a variety of industrial, commercial, and residential applications, including construction and manufacturing. However, their functions depend on the composition and processing technology. In other words, it is critical to gain sufficient insight regarding the different kinds of sheets.

    In fact, to help create a better understanding, we have also mentioned a recommended option for each type. You will notice that the most commonly used metal in the preparation of these sheets is steel because of its strength and durability. On the other hand, aluminum sheets are softer and more delicate compared to the rest.

    On that note, we now come to the end of our informative guide on the 9 different types of sheet metals and their uses. And we hope this article was able to boost your knowledge on this topic.

    Till next time!

    Related Articles

    9 Best Rebar Cutter & Bender Reviews + Buyer’s Guide

    19 Different Types of House Siding to Consider

    A saw is a simple enough instrument, right? After all, you just have to move it hard enough, and it cuts through the material quickly. 

    If you’re one of the many people who think along the above lines, then think again. A saw is a very specialized piece of equipment any handyman (or woman) can have in their toolbox. Simple yet effective, saws are perfect cutting instruments that get the job done. 

    However, if you try to think about the total number of saws in the market, the results can be mind-boggling. Not only are there dozens of saw types, but each has a different name and use. What’s more, they can also be segregated based on the kind of power they use and the material they cut. 

    In today’s comprehensive guide, we’re going to list some of the different saw types, along with pictures. So, stick around with us till the end. 

    Different Types of Saws

    Hand Saws

    A hand saw, as the name suggests, is meant for use by the hand. Powered by pure muscle, hand saws come in various avatars such as Hacksaw, Bow saw, and Veneer saw. In this section, we’re going to explore some of the useful types of hand saws. 

    1. Backsaw

    Backsaw


    We begin our list with the Backsaw, which is characterized by its small size as compared to other saws, and narrower blade. A Backsaw is called so because it sports a reinforced back, which provides it with added strength while making cuts. 

    Backsaws are most frequently used with miter boxes and can provide consistent straight cuts. They are also useful when you need to cut corners at 45 or 90 degrees. Based on the region of use, a Backsaw is also called a Tenon saw, or a Miter saw. 

    1. Bow Saw

    Bow Saw

    A Bow saw is also known as Swede saw, Finn saw, or Bucksaw. Called so because of its peculiar bow shape, a Bowsaw is perfect for making straight as well as curved cuts. The saw has a long blade, and the teeth are crosscut to remove materials from the path of cutting. 

    When it comes to usage, Bow saws are better used outdoors than indoors. Outside of your home, a Bow saw can come in handy for a lot of things such as trimming and cutting trees, shaping logs, and making otherwise rough cuts. 

    1. Coping Saw

    Coping Saw

    One can easily recognize a Coping saw from its characteristic D-shaped frame and the thin yet durable blade. A simple enough arrangement, the device is extremely useful for cutting metal as well as wood. 

    One of the most exciting features of a Coping saw is the removable blade fixture. This can be used to change the type of blade as and when required. If you’re looking for a saw to use in work such as scrolling or molding, or any job that requires precise and fine cuts, then a Coping saw might be just right for you. 

    1. Crosscut Saw

    Crosscut Saw

    Perfect for indoor as well as outdoor use, a Crosscut saw can be easily recognized by its thicker blade and large, crosscut cutting teeth. Available in both large as well as small sizes, a Crosscut saw is just right for making rough woodcuts. 

    Whether you’re using a two-handle Crosscut saw for felling trees or want a device that’s fit for splitting wood, this is the best type of saw that you can get. Remember, however, that this is a device for making rough cuts, so don’t expect a pearly finish. 

    1. Fret Saw

    Fret Saw

    Similar to a Coping saw in design, a Fret saw is distinguished by a larger frame that’s attached to a thinner, more delicate blade. The Fret saw can be used for making tighter cuts and more delicate curves than the Coping saw. 

    Although this saw can be used to make intricate cuts in wood, it must be remembered that the Fret saw blade cannot be rotated. This means you’ll have to adopt awkward cutting positions during the operation. Also, the blade of this saw type is pretty fragile, and incorrect handling can easily break it from the middle. So it’s best to take care. 

    1. Hacksaw

    Hacksaw

    Hacksaws are versatile saws and can be used to cut metal, wood, and plastic with equal ease. They are lightweight and hence can be easily carried around in any toolbox. 

    The hacksaw sports a C-shaped frame together with a fine blade that’s held by the framework. Hacksaw blades usually have up to 32 teeth per inch and are particularly suited for fine and straight cuts. However, as the Fret saw, the Hacksaw blade can also break unless operated carefully, so extra precaution is needed to maintain the right cutting angle. 

    1. Japanese Saw

    Japanese Saw

    Japanese saws are used for traditional Japanese woodwork and are available in three types: kataba, dozuki, and ryoba. These types of saws usually have a strong blade together with a single handle. 

    Japanese saws have a significant advantage over Western saws in that due to their thin and precise construction, they can easily reach positions that aren’t possible for other saws. Plus, they leave lean, accurate cuts that get the job done correctly. 

    Japanese saws have a combination of crosscut and rip-type teeth that allow users to cut through softwood easily. However, this type of saw can’t be used to cut hardwood, which limits its usability to no small degree. 

    1. Keyhole Saw

    Keyhole Saw

    A Keyhole saw is a simple arrangement that consists of a roundish handle attached to a single, pointed blade. This type of saw is also known by other names such as Jab saw and Alligator saw. 

    The purpose of a Keyhole saw is to cut circular patterns and make curved cuts. This type of saw is very lightweight and can be easily carried in any toolbox. These saws come in the following types: retractable blade and fixed blade and can be used for making delicate cuts in walls. 

    1. Pruning Saw

    Pruning Saw

    A Pruning saw is used precisely for what it sounds like pruning and making cuts in both directions. This saw typically has blades that are anywhere between 13 to 15 inches long, and are attached to a curved handle that resembles a “pistol grip.” 

    The blade of a pruning saw is curved, and the coarse teeth are designed to cut when moved in either direction. This allows the saw to cut through the target material faster. Perfect for home jobs, Pruning saws can also be used for topiary and landscaping services. 

    1. Rip-cut Saw

    Rip-cut Saw

    Also known as a hand saw, this is the most common type of saw used for cutting wood. Carpenters mainly use these saws for all kinds of framing and wood removal tasks. 

    Usually, Rip-cut saws have a lesser number of teeth per inch as compared to other saws. These are filed to sharp points for removing wood easily. They seem very similar to the Crosscut saws, but there’s a significant difference between the two, as experts know. 

    For example, Crosscut saws cut perpendicular to the wood grain, while Rip-cut saws cut parallel to the grain. Also, in a Rip-cut saw the teeth are angled at eight degrees, while for Crosscut saws, the angular inclination is about fifteen degrees. Plus, Rip-cut saws give you a more delicate cut as compared to the Crosscut variant. 

    1. Veneer Saw

    Veneer Saw

    Specially crafted with a short, double-edged blade, the Veneer saw is a must-have for veneering tasks. Each blade edge has about 13 teeth per inch, and the saw has a roundish handle that makes operating it a cinch. 

    When working with veneered surfaces, it’s essential to use a Veneer saw to achieve the desired results. Ordinary saws can’t cut through wooden veneers easily, which is where the utility of the Veneer saw comes in. 

    1. Wallboard Saw

    Wallboard Saw

    Often power tools need a starting hole in a wooden panel, and for this purpose, the Wallboard saw is a perfect choice. It’s constructed similarly to the Keyhole saw but has a blade that’s shorter and wider. 

    Another defining characteristic of Wallboard saws is that they have fewer teeth per inch when compared to the Keyhole saw. This saw is double-edged by design but maybe single-edged as well. 

    1. Pole Saw

    Pole Saw

    This is a rather ingenious contraption that’s used for cutting and pruning tall trees. The saw has a pruning blade that’s six to eight inches long and is attached to a telescopic pole extending to about sixteen feet. 

    Pole saws are primarily used for cutting tree branches and pruning excess growth at extended heights. Although traditionally hand-powered, modern versions of these saws do have motorized attachments that make the operation easier. 

    1. Wire Saw

    Wire Saw

    Wire saws are continuous cutting instruments that make use of metallic cables for cutting through hard materials. Although some Wire saws used in factory settings are motorized, they are usually operated by hand for cutting in and around construction sites and quarries. 

    A wire saw consists of a pair of rings (metallic typically) attached to a hard wire that has serrations that enable the cutting of materials. This type of saw is usually used by a pair of operators working together to make a cut. 

    1. Camping Saw

    Camping Saw

    The final entrant in the Hand saw category is the Camping saw, also known as a Backpacking saw. As the name suggests, this type of saw is best suited for camping trips and can be easily packed with your luggage. 

    Similar to a curved knife, the saw has sharp cutting teeth that can be used to prune away branches or chop firewood with equal ease. What’s more, many models of the saw are foldable, which makes them extra portable. 

    With that, we come to the end of our list of hand-held saws. But don’t think we’re done yet; in the next section, we’re going to introduce you to some more saw types that you’ll find irresistible. 

    Power Saws

    As opposed to a hand-held saw, a power saw is an electrically operated motorized device that makes the task of cutting easy. Power saws aren’t exactly hand-saws attached to a motor, but rather have separate characteristics of their own. The following are some of them explained. 

    1. Stationary Bandsaw

    Stationary Bandsaw

    A stationary bandsaw consists of a large standing table, which has a pulley mechanism attached to it. This arrangement is used to move a motorized band that has cutting teeth embedded in it. 

    It’s this toothed band that performs the cutting operation in a bandsaw. These types of saws can easily cut metal, wood as well as plastic, but they’re limited by the depth to which they can cut. Also, cutting with bandsaws is an intricate operation that requires careful handling. 

    1. Portable Bandsaw

    Portable Bandsaw

    If you’re a moving workman who wants to achieve all the capabilities of a stationary bandsaw, then we suggest you go with a portable one. Yes! Portable bandsaws have all the benefits of their stationary counterparts. 

     The only difference between the two lies its portability and limited cutting depth. A portable bandsaw has the edge over a stationary one in terms of ease of use and flexibility. Hence most professionals prefer to have one in their toolbox. 

    1. Chainsaw

    Chainsaw

    Perhaps the most famous saw of the lot, a Chainsaw is a powerful instrument driven by a strong engine. It has a toothed chain that rotates along with a linked frame and is rotated by the motor. 

    Chainsaws are mostly used for felling large trees or cutting through hardwood. They are very loud devices and have immense power based on the make and model. However, special expertise is needed to handle a chainsaw. In the hands of a novice, this device can easily become a hazardous contraption. 

    1. Chop Saw

    Chop Saw

    This is the portable version of the circular saw that’s a staple in most workshops. A rather large device, the Chop saw is compact enough to be carried from job site to job site. This type of saw can cut metal as well as stone. 

    The Chop saw blade is of the toothless variety and has special abrasives that work to cut materials. One aspect of Chop saws that must be remembered is that these devices can get very hot and dusty. That’s why many arrangements use a special water cooling system to reduce this problem. 

    1. Circular Saw

    Circular Saw

    After the Chop saw, we bring you the circular saw, which is yet another versatile device. Circular saws usually have detachable circular blades that are toothed. These saws are capable of cutting anything from metals to plastics to stones. 

    Circular saws can go up to 9 inches in diameter and have multiple blade types that are each suitable for unique purposes. This type of saw can be subdivided into two types: the Sidewinder and the Worm drive. 

    A Circular saw is perfect for making cross as well as rip cuts. The blade height is adjustable and by altering this, you can get different depths of cut. Overall, it can be said that a circular saw will seldom let you down. 

    1. Compound Miter Saw

    Compound Miter Saw

    A Compound Miter saw can assist you in making straight, Miter, as well as compound cuts. This saw is characterized by a circular blade mounted on an adjustable arm that enables complicated cuts. 

    While a Compound Miter saw can assist you in multiple jobs, it’s best suited for adding crown moldings or for window trimming purposes. It can also be used for simplifying complicated scrollwork. 

    1. Flooring Saw

    Flooring Saw

    Floor cutting is a serious business, and as its name suggests, a Flooring saw is meant to assist you in resawing floors. No matter what kind of flooring you’re using, a Flooring saw is well-suited for the job. 

    Experts are of the opinion that with the flooring saw, you can essentially perform all the activities of a table or Miter saw. It’s a complete tool that’s guaranteed to fulfill all your floor-cutting needs. The most significant factor in favor of the device is its portability, which means you can take it where the work takes you. 

    1. Jigsaw

    Jigsaw

    No matter what the name suggests, a Jigsaw is undoubtedly not a toy. In fact, it’s one of the most powerful power saws on the list. A Jigsaw can be easily identified by its characteristic design and curved housing that holds the blade. 

    The Jigsaw blade is of the reciprocating type and can be used for cutting metal as well as wood. It’s best used with sheet metal, though, and can be used to attain custom shapes in the sheets. 

    The Jigsaw blade is distinguished by its finely toothed edge, which helps to achieve curves and non-linear cuts easily. Jigsaw blades can move at variable speeds, and shouldn’t be used with much force, as this can cause the blade to break. 

    1. Miter Saw

    Miter Saw

    The specialty of a Miter saw lies in the fact that it provides you with accurately measured cuts. The Miter Saw has been expressly designed to fulfill the functions of a hand saw and can be used for trimming and angular cuts. 

    Perfect for Miter cuts and woodworking perpendicular to the grain direction, a Miter saw is also suited for frame cutting. However, everything depends on the choice of blade, which needs to be selected based on the type of work to be done. 

    1. Radial Arm Saw

    Radial Arm Saw

    A Radial Arm saw comes attached to an extended arm protruding from a table, which acts as a base for the work material. The cutting table can be used to hold the workpiece in place while the saw performs the cutting operation. 

    Using a Radial Arm saw, you can easily make Miter cuts; compound cuts are also possible to achieve with this saw. Radial Arm saws also have interchangeable blades and can operate at extremely high speeds. Some of them can also be used with circular saws. 

    1. Reciprocating Saw

    Reciprocating Saw

    If you’re looking for a saw that’s perfect for demolition work, then the Reciprocating saw can be your best companion. Somewhat similar in operation to a Jigsaw, a Reciprocating saw blade performs faster back-and-forth motions that allow easy cutting. 

    When going for a device that cuts wood and metal equally well, look to the Reciprocating saw. What’s more, this saw can also be used to shape and cut plastics, which makes it a complete cutting tool. 

    1. Rotary Saw

    Rotary Saw

    As its name suggests, Rotary saws are cut using a rotational motion. The blade is fixed with the handle, and the device can be cordless or with a power cord. 

    Rotary saws operate at variable speeds, which makes them great for cutting through walls and wooden panels. Versatile in design as well as operation, this is indeed a very oft-used tool by professionals and amateurs alike. 

    1. Scroll Saw

    Scroll Saw

    A Scroll saw is a power saw that’s used for making precise and curved cuts. Similar to a sewing machine in design, Scroll saws can have reciprocating or continuous blades. What’s more, it can even operate with a saw band. 

    One of the most significant advantages of a Scroll saw is that it comes attached to a table. This allows the workpiece to be laid quickly and enables the cutter to achieve precise detailing. Scroll saws are particularly adept at precision cuts that incorporate curvatures. 

    1. Table Saw

    Table Saw

    Needless to say, a Table saw comes with a table, and this makes the laying of the workpiece a much easier task. The saw motor is located beneath the table, and the blade embedded in the table bed can be adjusted for the depth of the cut required. 

    Table saws have removable blades, but these need to be compatible with the saw motor. Using a Table saw requires extreme concentration as accidents can easily happen otherwise. However, modern Table saws have advanced safety features that prevent this from happening. 

    1. Masonry Saw

    Masonry Saw

    This saw type is primarily used for construction purposes and is designed to operate with pushing strokes. The saw comes with a pistol grip handle and a circular, removable blade that has large serrations. 

    In this type of saw, the gap between the teeth is slightly larger than regular hand saws. This makes a Masonry saw perfect for cutting concrete and stone blocks. However, these saws usually generate a lot of dust and debris; hence they are typically fitted with gullets that can carry this waste. 

    1. Oscillating Saw

    Oscillating Saw

    An Oscillating saw is ideal for a large variety of purposes. Whether you’re looking for cutting, sanding, or grinding, this saw can get the job done. Clean and fast in operation, Oscillating saws make for clean cuts and don’t produce much dust. 

    The oscillating saw has an elongated housing that serves both the handle and the motor seat. The saw blade is short and helps cut in constrained spaces. What’s more, since the blade of this type of saw vibrates in variable arcs and speeds, they can be used to make better, more angular cuts. 

    1. Track Saw

    Track Saw

    If effortless sawing is what you’re looking for, then the Track saw is the best bet for you. A combination of circular and table saws, this is a device that makes cutting and sawing a smooth task. 

    The saw comes attached to a guide rail, which sticks to the surface of the workpiece/material to be cut. This ensures that the saw doesn’t glide or move away from the expected cut line. Now, all that’s needed to be done is to fix the saw on the rails and cut away. The only drawback of this saw is that it can cut only along straight lines. 

    1. Tile Saw

    Tile Saw

    The final item on our list is the tile saw, which is used to cut through tiles of different shapes and sizes. The design of a Tile saw is similar to the Miter saw, and it can be used to cut glass as well as ceramics with equal ease. 

    A Tile saw blade is usually coated with diamond, which makes it one of the hardest and most durable saw blades available. However, this saw generates a large amount of heat and dust, which is why it uses a water reservoir to cool the system and reduce dust formation. 

    Different Types Of Saws Verdict

    Now, this has been a long list, and we hope you’ve enjoyed every bit of it. For any professional or DIY enthusiast, the above list can act as a comprehensive resource on all things saw. 

    After going through the above list, you can easily decide on the kind of saw that you need to complete any project. Whether you’re looking to complete a professional contract, or merely searching for a device for small household tasks, this list has something for you all. 

    And yes, if you feel we’ve left out any saw type that should’ve been included in the list, do let us know. We’ll be glad to include it in the next iteration of the list. 

    Till then, saw with care! 

    Related Articles

    8 Best Lapidary Saws

    Simply the Best Stained Glass Ring Saws

    49 FREE DIY Router Table Plans For an Epic Home Workshop

    Top 10 Longest Pole Saws For Tree Pruning

    13 Best Tile Saws

    11 Best Sliding Compound Miter Saws

    13 Best Sliding Miter Saw

    13 Best Hybrid Table Saw

    5 Best Toe Kick Saws

    11 Best Track Saws

    13 Best Hybrid Table Saw

    Table Saw Vs. Circular Saw

    Reciprocating Saw vs. Jigsaw

    10 Inch Vs. 12 Inch Miter Saw

    Single Bevel Vs. Double Bevel Miter Saw

    DeWalt DW745 Vs DWE7480

    9 Best Hybrid Table Saws Under $1000

    11 Best Budget Bandsaw Reviews

    11 Best Dry Cut Metal Chop Saw

    11 Best Bow Saw

    11 Best Table Saw

    7 Best Cabinet Table Saws

    9 Best Band Saw

    7 Best 12-inch Miter Saw

    13 Best Contractor Table Saws

    Best 20″ Chainsaw

    11 Best Table Saw Fences

    Bosch 4100-10 Jobsite Table Saw

    Hack Saw Vs Bow Saw

    9 Best Compact Circular Saws Of 2023

    How To Sharpen A Bow Saw And Bow Saw Maintenance

    7 Best Budget Miter Saw

    7 Best Dado Blade Sets

    6 Sabre Saw Vs. Jigsaw

    9 Best Manual Pole Saw

    Radial Arm Saw vs Miter Saw

    ROCKWELL VersaCut RK3440K Mini Circular Saw

    Is it too often that you find any food item suggested by fitness trainers being included in a party menu? Surely not!

    Well, nuts are one of those healthy few, rendering a crunch and flavor that’s key to some of our favorite chicken, pasta, and cookie recipes.

    Most of the nuts have the perfect blend of nutrients, allowing you to gain the extra calories needed without having to add flab to the body. There is a multitude of health benefits, depending on the nut that you include in your diet.

    In this article, we talk about the 20 different types of nuts, their nutritional benefits as well their use in different food items. You will surely be amazed at how healthy a food choice they can be!

    So, read on to know more.

    20 Types of Nuts + Benefits & Nutritional Information

    Types of Nuts

    1. Pistachios

    Pistachios Pistachios

    This nut is widely grown in western states of the USA and has its origins in parts of Western Asia and the Middle East. Pistachios require desert-like sand to grow and thrive.

    Although you can have these in the raw form just after rinsing, many prefer roasting Pistachios for consumption as the taste is enhanced. The nut has higher fiber compared to other varieties and helps improve cholesterol levels. It is significantly helpful in increasing levels of the “good” HDL cholesterol.

    Other factors determining the risk of heart diseases such as blood pressure, oxidative status, and weight can also be improved by consuming pistachios. Oxidative status indicates the blood levels of oxidized chemicals that can contribute to heart diseases.

    Pistachios

    California pistachios are the dominant variety in the domestic market, but it’s great if you can get hold of the Turkish and Persian varieties. The latter has a darker shell and skin and is much more flavorful. Pistachios can be used in famous delicacies such as kulfi, spumoni, pistachio ice cream, and baklava.

    1. Walnuts

    Walnuts Walnuts

    A favorite ingredient of all the bakers out there, this is one of the few nuts available through all seasons. Walnuts are grown in many countries across the world, including Iran, the USA, Turkey, China, and Mexico.

    The stone fruits growing on large trees can be shelled and eaten in raw, roasted, as well as seasoned forms. Before consumption, you just need to make sure they are thoroughly washed and dried.

    Walnuts contain high amounts of antioxidants and alpha-linolenic acid (ALA), an omega-3 fatty acid. The high ALA content helps to reduce the risk of heart ailments and also reduces LDL or bad cholesterol levels. They also maintain proper blood flow through the circulatory system.

    Walnuts

    Interestingly, a study conducted on college students has found that walnuts have beneficial effects on the brain by improving the power of perception.

    Besides being a popular garnish for sweet dishes, walnuts are also used to make desserts such as brownies and khoresht, a traditional Iranian delicacy.

    1. Almonds

    AlmondsAlmonds

    While a majority of these nuts are grown in California, they are also found in Spain and Italy. Almonds can be consumed fresh from the tree, but drying them out for at least two weeks ensures they have the maximum flavor. Unlike some other nuts, they are sold in whole, slivered as well as sliced forms.

    As for the nutritional value of almonds, they are rich in monounsaturated fats, vitamins, proteins, and minerals. Maintaining an almond-rich diet has been found to reduce levels of harmful cholesterol in the body, which is integral to heart health.

    Added to this, almonds also aid weight loss and lower the blood pressure of those suffering from obesity. They have also been found to reduce inflammation in type-2 diabetes patients.

    Almonds

    The mildly sweet flavor of almonds is loved by many, which is why they are used in several dishes such as almond-crusted chicken, salads, and cereal meals. This flavor is magnified to prepare several by-products such as almond extracts, marzipan, and almond paste.

    1. Cashews

    CashewsCashews

    Having an almost neutral flavor, the popular South American nuts add shape, crunch, and texture to any recipe. They made their way to Indian and Thai cuisines several centuries ago through Portuguese explorers.

    At present, Cashews are grown in a number of wet and dry tropical regions, including Vietnam, Africa, and Southeast Asia. To be made fit for consumption, the outermost shell of cashews must be removed. The shell contains a caustic liquid which may cause severe skin burns.

    Cashews have a lot of uses due to their immense value as an antioxidant. Hence, when added to any diet, they increase its antioxidant potential. They are also highly rich in magnesium, which helps in improving joint flexibility. For people suffering from metabolic syndrome, cashews improve blood pressure.

    Cashews

    Besides, cashews constitute an extremely important ingredient in savored delicacies from around the world. They are used in dishes such as cashew chicken and stir-fry, chicken salad, and chocolatey desserts. Cashew milk is also a quite popular nutritious alternative to dairy.

    1. Hazelnuts

    HazelnutsHazelnuts

    The round-shaped nut is a primary ingredient of the commercially available Nutella, a universal favorite. Their pairing with chocolates in this world-famous spread gives a taste that is no less than heavenly!

    Hazelnuts are commonly grown in several regions of North America, Europe, and Asia. They need to be dried out within 24 hours after picking and should be shelled before consumption.

    The nuts can be eaten in raw form, but roasting helps to enhance their flavor and also increases their crunchiness. This way, they can also lend a great texture when used in salads and soups. Besides this, hazelnuts are also commonly used for flavoring coffee.

    Although nuts have a lesser protein content, other essential nutrients make them extremely beneficial for health. Some of these include vitamins, monounsaturated oil, and minerals. Similar to other types of nuts, they also help in alleviating risk factors of heart diseases.

    1. Brazil Nuts

    As the name suggests, this giant nut is native to Brazil and can be spotted throughout the rainforests of the Amazon. The nut can either be eaten in raw or blanched form. But it has an extremely hard shell that must be cracked before consumption.

    Importantly, these nuts are storehouses of vitamins, including calcium, iron, niacin, and the antioxidants vitamin E and selenium. Small quantities of these antioxidants are essential in an ideal diet. You can fulfill this requirement easily by consuming around 28 grams of these nuts daily.

    Besides these benefits, brazil nuts also help to reduce the level of cholesterol in the body and improve the functioning of blood vessels. The nuts even assist in reducing inflammation in both healthy people and those who are undergoing hemodialysis.

    You can add this nut to a variety of dishes such as macaroons, cookies, and salads. Brazilians add this nut to lend a different flavor to their milk and cheese.

    1. Pecans

    Native to the continent of North America, pecans have a characteristic sweet flavor that makes them an ideal ingredient for cakes. They are a tree-fruit and are frequently found in orchards and groves throughout the USA.

    The nuts must be dried for a minimum of two weeks within their shells to get the right taste and flavor. Although many people also prefer to consume the nuts after shelling and roasting. Even for adding them as an ingredient other than while baking, it is best to use the roasted form.

    Containing as many as 43 different nutrients, pecans are a quite healthy option to include in your diet. Studies have shown they can lower the “bad” LDL cholesterol in people who have normal cholesterol levels. Moreover, regular consumption of pecans also improves the antioxidant profiles in the blood.

    A hugely popular dish made using pecans is a pecan pie. The nuts are also used in other delicacies like candied pecans, chicken salad, and chocolate turtle candies.

    1. Macadamia Nuts

    Mainly grown in Australia and Hawaii, these large nuts are quite a palpable option to include in the diet. Currently, they can also be found in several regions of the continents of Latin America, Asia, and Africa.

    The nearly buttery flavor gives a unique taste to macadamia nuts. They grow in large and bushy trees that might take as long as 5 years to start bearing fruits. Ideally, they should be shelled within 24 hours after picking.

    Macadamia nuts have a wide variety of nutrients in them. Primarily, they are an excellent source of monounsaturated fat, vitamin A, iron and protein. A diet rich in these nuts has been shown to produce effects similar to a heart-healthy diet advised by the American Heart Association.

    Macadamia nut cookies are a favorite among people with a sweet tooth. The nuts are also used to prepare other palpable desserts such as muffins, granola, and fudge. Moreover, when chopped up, these nuts go really well with fish as well as chicken.

    1. Peanuts

    Technically, peanuts are legumes like beans and peas, but they are considered to be nuts due to their culinary usage. They are quite affordable and have a year-round availability, making them popular among people worldwide.

    Many of you may not know that peanut grows under the soil, though the plant flowers are above the ground. They should be shelled during harvesting and are fit for consumption after thorough rinsing and drying in the sun. Although, some people also prefer roasting peanuts to maximize the earthy flavor that they possess.

    Interestingly, peanuts are a rich source of plant-based protein, making them an ideal component of a weight loss diet. The protein content also alleviates the risk of heart disease. Moreover, the consumption of peanuts by mothers during pregnancy has been found to lower rates of asthma and allergic diseases in children.

    The “nuts” are most popularly used to make peanut butter, a favorite of people from across the world. Apart from this, they are used in their whole form in baked products, granola, and trail mix.

    1. Pine Nuts


    Produced in several regions of Europe, North America and Korea, the small beige-colored nuts grow in multiple species of pine trees. The taste and shape of the nuts might vary a little depending upon the species of pine. For example, the Italian pine nuts are more slender than their Chinese counterpart.

    For consumption, pine nuts are normally dried out and then roasted. Although, many of you may also like them as a snack in the raw form for the characteristic buttery taste.

    Pine nuts are rich in the trace mineral manganese, which helps in carbohydrate metabolism and maintains the proper blood sugar level. Studies have shown that fatty acids present in the nuts also help to boost satiety hormones.

    The nuts can be added as an accent to several fish and meat recipes, salads, and baked bread varieties. The mild flavor of pines along with a soft chewy texture is loved by many when incorporated into any dish.

    1. Chestnuts

    Growing on trees or shrubs, chestnuts are found mainly in China, South Korea, Greece, the United States, and South America.

    These nuts can be eaten raw just after peeling them, but are rather bland in this form. It is best to consume them after storage in the refrigerator for a few days, as the starch changes to sugar.

    Importantly, chestnuts are rich in carbohydrates, as opposed to other types that contain oils. They also contain amides and a number of vitamins such as folic acid and Vitamin B that help in fighting anemia.

    The nuts have also been found to help in digestion. Apart from this, minerals such as magnesium and potassium help in reducing risk of cardiovascular diseases as well.

    Chestnuts also attain an appealing taste when they are candied, steamed, deep-fried, or grilled. They are used in desserts such as pies and cakes, but can even act as a thickener for any soup or sauce.

    1. Cedar Nuts

    Obtained from the cedar pine trees of Siberia and East Russia, these crunchy nuts are a variety of pine nuts. Cedar nuts can be eaten in the raw as well as roasted form. Being a rare variety, many people are aware that the tasty seeds of the cedar cone have great health benefits.

    These nuts are known for their ability to facilitate weight management. Studies have shown that cedar nuts are effective in suppressing a person’s appetite. Pinolenic acid present in these nuts stimulates a hormone that sends signals to the brain that the stomach is full.

    Apart from this, cedar nuts are rich in beta-carotene, which helps to maintain eye health. Lutein present in the nuts also prevents the eyesight from deteriorating with age. Antioxidants in them destroy free radicals that encourage the development of terminal diseases such as cancer.

    These nuts are generally eaten in plain form but can be added to savory beef recipes and salads to enhance the taste and flavor.

    1. Coconut

    This might be hard to believe, but coconut is indeed classified as a nut as well as a fruit! The tropical nuts with a fat hard shells are produced by palm trees. These trees grow in several tropical regions around the world, including South and Central America, the Caribbean, and India.

    These nuts can be eaten in their raw form after shelling or can also be added as an ingredient to several dishes. The bare white portion inside each coconut, called the kernel, has the perfect balance of sweetness and texture.

    This incredible taste along with a number of health benefits makes coconuts a universal favorite. The minerals present in coconuts help in maintaining bone health and nutrient metabolism. Also, the high fiber content and low carbs in coconut help to stabilize blood sugar.

    Apart from the delicious taste and health benefits of the kernel, consumption of the oil extracted from the nut also helps in reducing belly fat. The dried kernel is generally chopped or grated to add that special coconut flavor while cooking.

    1. Marcona Almonds

    Having origins in Spain, Marcona almonds are much flatter, rounder, and sweeter than the classic buttery variety. The delicate aroma and taste of this variety are akin to the almond essence used in bakery products.

    These almonds are generally sold in a pre-cooked form- by frying or roasting and then salting them. They make for a great snack in this version.

    Their appealing mouthfeel and unique taste can turn an ordinary dish to a special one. This is why they have also won the hearts of chefs and gourmands from across the world. The variety can be sauteed in oil and sprinkled over a salad or can be chopped and added to baked goods.

    Coming to the health benefits, this variety of almonds contains higher amounts of monounsaturated fats, which is a key to proper weight management. It also contains vitamins and minerals in high amounts, which help to maintain cardiovascular health.

    1. Flaxseeds

    Commonly found in Canada, Europe, and Russia, flaxseeds have several health benefits and are obtained from a flowering plant around 2 feet tall.

    But before they can be fit for consumption, flaxseeds must be rinsed thoroughly and dried. You can surely eat them raw and whole, but they are easily digestible when ground up.

    Flax seeds are emerging as a superfood, as scientific studies have pointed to their wide range of health benefits. Just a tablespoon of flax seeds can provide you with a substantial amount of protein, amoeba-3 fatty acids, and fiber. Moreover, they are rich sources of important vitamins and minerals.

    Flaxseeds can act as an exciting dressing on salads of all kinds and can also be added into cooking, muffins and bread. They can even be sprinkled on cereal meals for breakfast. All in all, having flax seeds in your meal makes it tasty and healthy at the same time.

    1. Kola Nuts

    Coming from the Kola tree native to the rainforest climate in Africa, the nuts are enclosed in white shells inside the tree’s star-shaped fruits. The nuts taste bitter in the mouth initially but become sweeter with chewing.

     Interestingly, these large nuts are an important cultural symbol for ethnic groups in African countries. They are given to guests during weddings, naming ceremonies, and funerals. Members of such ethnic groups also use nuts as a medicine due to their beneficial properties.

    Kola nuts are rich in caffeine, which boosts metabolism and improves blood circulation. Caffeine is also well-known for boosting energy levels. Studies have shown that the extract of this nut has antibacterial properties.

    Due to their caffeine content, Kola nuts are widely used as flavoring agents in beverages. Due to its flavor, the raw nut is also frequently chewed in West African cultures.

    1. Acorns

    The edible nut comes from oak trees in the USA, Europe, Asia, and Northern Africa. For making acorns fit for eating, they must be treated for tannic acid, which can have toxic effects on humans. A repeated drying and boiling procedure is used in this treatment.

    These nuts also have an interesting background, as studies have shown them to be historically significant as a staple in North American and Indian diets. These nuts can also be roasted for consumption and contain a whole lot of essential nutrients.

    Acorns are high in potassium, vitamins A and E, iron, and various other important minerals. Added to this, they are low in calories, making them a great fit for weight loss diets. Having these nuts included in the diet also boosts energy levels.

    After Acorns have been treated to remove the tannins, they can be used in several recipes as a taste enhancer. Some common meals where acorns can be used are porridge, acorn flatbread, and acorn flour honey cake.

    1. Sunflower Seeds

    Technically, they are fruits of the sunflower plant from North America and are harvested from the plant’s large flower heads. Due to their firm but tender texture and mildly nutty flavor, sunflower seeds have similar culinary uses as nuts. Currently, they are also grown in Ukraine and Russia.

    A single sunflower might contain as many as 2000 seeds. The sunflower crop has two varieties- while one is grown for edible seeds, the other is used to extract the oil. The seed which is consumed is enclosed in black-and-white striped shells known as hulls.

    Sunflower seeds are highly beneficial in reducing chronic inflammation that is linked to an increase in the risk of heart disease. Apart from this, they help to lower blood pressure and blood sugar due to the presence of Vitamin E, magnesium, protein, and fatty acids.

    Similar to nuts, roasting sunflower seeds enhances their flavor. The seeds are popular as a stand-alone snack and can also be used as toppings for salad and yogurt.

    1. Pumpkin Seeds

    These seeds are obtained from the pumpkin plant found growing in countries such as the United States, India, Egypt, and China. To prepare pumpkin seeds for consumption, they need to be gathered from the meat of the fruit and washed off.

    The seeds can be eaten in their raw form or maybe roasted for a greater flavor. They are a popular snack item across different regions of the world.

    Pumpkin seeds are quite small in size, but don’t go by that! They are little powerhouses of nutrients, with a number of health benefits. With a high protein and unsaturated fat content, the seeds can be a perfect companion throughout your weight-loss journey.

    Pumpkin seeds are also helpful in preventing complications in diabetic patients by keeping cholesterol and blood sugar levels under control. Being higher in fat content in comparison with many nuts, they are also commonly used in oils and butter.

    1. Cacao

    Popularly referred to as cocoa beans, these seeds grow in the lowland rain forests of the Amazon and tropical areas of Asia, among other regions.

    The bean pods of cocoa are harvested after they ripen, and the seeds are extracted after a ten days drying period. This is not the end of the processing, as they are fermented and dried again to make them ready for eating.

    Cacao seeds are highly rich in flavonoids that help to lower blood pressure and improve the flow of blood to the brain and heart. The fiber present in them facilitates proper digestion and antioxidants reduce inflammation as well.

    The seeds are not consumed as a snack on their own but are an important ingredient in some very popular sweet dishes. A few tablespoons of cacao powder are integral to that magical taste of a chocolate smoothie. Similarly, the gluten-free raw brownies that vegans love are prepared using cocoa beans.

    Types Of Nuts Conclusion

    Isn’t it marvelous how different types of nuts come with such a varied range of health benefits? Add to this the various tastes and flavors, and they could very well be considered the superheroes of the food world!

    Certain fats common in nuts, such as mono and polyunsaturated fats, can aid in weight loss and reduce the risk of cardiovascular diseases. This is contrary to the popular belief that nuts are high in calories and fat.

    You can add any one of these nuts as your evening snack or include it in the breakfast diet. After all, their beneficial effects can be maximized with minimal processing, so you don’t have to put in a lot of effort to consume them.

    So, go ahead and select the one that you would prefer!

    While modern electric machinery is slowly taking over, hand planes are still doing well, and you can easily find them in woodworking shops. 

    These were initially a part of Japanese carpentry and would be maintained and passed on for generations. The simple tool would be kept clean as a symbol of a good craftsman. In fact, the Kanna is even found today in certain places, and it is the traditional form of hand planes.

    But today, multiple varieties are sold in different shapes and sizes. You can choose one, depending on the work process and the size of the wood pieces you are working with. 

    Moving on, we will take you through the top 19 types of hand planes and will explain how to use each of them. Just make sure you check the length of the products and their blades to understand the difference in how they function. 

    So, without further ado, let us dive in! 

    Types Of Hand Planes & How to Use Them

    Woodworker using a hand plane to clean up a wooden board. Hands of the master closeup at work. Working environment in a carpentry workshop

    Before we begin with the 19 different types, the essential parts will be discussed. This is to ensure that you get complete knowledge about every part and can understand the differences among the various options. 

    Parts That You Need To Know About

    Although most hand planes flaunt a simple design, they can be complicated when it comes to functioning. Hence, it becomes difficult to replace them with modern machines. In this section, we will discuss the standard components that serve various essential functions. 

    1. Body

    As you can already guess, this is the central part of a hand plane that makes the core framework. Usually, it consists of a wooden or metallic frame with other components attached and sealed to it. The body is always made of sturdy materials to prevent any forms of damage and to keep the other parts safe. 

    1. Blade

    Next is the blade, capable of all kinds of shaving, slicing, and cutting activities. The blade or the cutting mechanism is usually shaped like a rectangle and has a beveled tip. 

    This will either be facing upwards or downwards, determining the use. At times, it also sticks out to provide better cuts, while some are designed to stay inside and slice better.

    1. Chip Breaker

    The chip breaker sits on top of the blade and plays a crucial role in cutting wood chips into smaller pieces. It works well with wood chips produced by the blade and the breaker breaks them up to prevent any form of clogging. 

    1. Knob

    The knob is generally not found in smaller hand planes, but they are a part of medium to big-sized options. This will allow one to use both hands while working, and that is required for bigger wood pieces. You will find the part located near the front of the blade. 

    1. Frog

    The frog refers to a seat that blades sit on, and it is designed to hold the blade in place. It can come with levers and knobs, allowing one to adjust the angle and orientation of the blade. 

    1. Lever Cap

    This fits on top of the blade and will protect it from outside forces. A lever cap is a part dedicated to safety, which allows you to store your plane easily without damaging the toolbox or drawer. 

    1. Mouth

    The mouth is the slot-like opening, present in every sole and it is a very crucial part of a plane. It will help the blade protrude out, but this is not applicable for chisel planes. 

    1. Tote

    The tote will help you hold a hand plane and is generally placed on the rear side. But this is absent in finger planes as they are small enough for you to hold the sole itself. 

    1. Sole

    The sole is present on the bottom of a plane and will keep it straight against any surface that you may be working with. There is also a slot in the sole to help keep the blade assembly in place. 

    Different Types Of Hand Planes 

    1. Block Plane

    [easyazon_image align="center" height="500" identifier="B079DVDD2S" locale="US" src="https://m.media-amazon.com/images/I/417rktEiJAL._SL500_.jpg" tag="homesthetics0a-20" width="500" type="image" link_id="237247"]

    If you are a DIY enthusiast looking for a compact and efficient device, then the block plane will serve you well. It is known to work wonderfully and can be easily controlled by beginners. 

    What’s more, it offers a hoard of benefits, and you can use it to shape, cut, grain, and chamfer wood. The versatility offered is impressive, and we were able to use it with one hand too. 

    The one-handed operation makes it an incredible finish tool that is also cost-effective. Being affordable for all, you will find local woodworkers using it. 

    That’s not all; as there are 2 types of block planes, which include the standard angle and the low-angle version. The standard one features a blade with a bevel facing upwards at 20 degrees. On the other hand is a pocket-sized miniature version of this, making it easy to carry around. 

    1. Bench Plane

    [easyazon_image align="center" height="347" identifier="B002LTUOI6" locale="US" src="https://m.media-amazon.com/images/I/41JugeriW2S._SL500_.jpg" tag="homesthetics0a-20" width="500" type="image" link_id="237248"]

    Bench planes can be very versatile and can range from 5 to 30 inches in length. They are very popular among those who work with wood a lot and are known to be a crucial part of the work process. 

    Moreover, it has a sharp blade that sits on a pitch and is placed at 45 degrees. The bevel side faces downwards and cones with a cap iron with which it is reinforced. This prevents clogging of any kind and will help in its continuous and smooth functioning. 

    Moving on to the types, there are many different types, and each has a different size. But the most popular ones are smoothing, jointer, and fore planes. 

    1. Bullnose Plane

    [easyazon_image align="center" height="397" identifier="B005W11QTG" locale="US" src="https://m.media-amazon.com/images/I/41r7tqqfAbL._SL500_.jpg" tag="homesthetics0a-20" width="500" type="image" link_id="237249"]

    Next, if you are looking for a product for detailed work, then the bullnose will be a great choice. It is small and measures 3- 4.5 inches, making it perfect for use with rabbets that are smaller than the piece. 

    There is a small metal nose in the front of the blade, and that acts as a natural stop. Hence it is required to use rabbets that are smaller in size. 

    Moreover, the blades are wider than the body, ensuring smooth functioning. It can be used to cut along the grain and the end grain. 

    1. Combination Plane

    [easyazon_image align="center" height="500" identifier="B006ZB9T2I" locale="US" src="https://m.media-amazon.com/images/I/31bAsgChQEL._SL500_.jpg" tag="homesthetics0a-20" width="500" type="image" link_id="237250"]

    One major problem that beginners face is that they cannot afford to buy the entire set of special tools for crafting. This leaves many processes incomplete, and you can often not work with many objects of various shapes and sizes because of this. 

    However, that is exactly where combination planes step in. These are not used a lot, but they will let you replace the cutter making it perfect for a wide number of jobs. You will get the benefits of a rabbet and a molding plane both from this product. 

    1. Chisel Plane

    This is a very simple option that will allow workers to work with perfection. They do not have any form of guard on the front side of the blade. This makes it easier to cut and clean until the edges which blades with guards cannot reach. So, if you are looking for creating intricate designs, this might help you out. 

    1. Finger plane

    [easyazon_image align="center" height="500" identifier="B07RDL1Y7B" locale="US" src="https://m.media-amazon.com/images/I/41nfFbLssKL._SL500_.jpg" tag="homesthetics0a-20" width="500" type="image" link_id="237251"]

    If you have to work on thin boards, then finger planes are perfect. These have narrow widths and are made for highly specialized jobs. This includes making a violin where these can be used to clean the joints after having glued them well. 

    Now the downside here is that you cannot adjust them in any way. It proves to be a problem, especially in an artisan’s workshop where there can be soles of several kinds. 

    Hence, use this for straightforward jobs, and you should have no problems with it. We will suggest measuring the thickness of boards that need to be worked on before proceeding. 

    1. Compass Circular Plane

    [easyazon_image align="center" height="500" identifier="B000MGVWF4" locale="US" src="https://m.media-amazon.com/images/I/41RTZbudggL._SL500_.jpg" tag="homesthetics0a-20" width="500" type="image" link_id="237252"]


    While finger planes cannot be used for curved soles, the compass plane is specially designed to take care of that. This is a very unusual type and is also known as a circular plane. It works on curved surfaces and will allow you to smoothen them well. 

    1. Jack Plane

    [easyazon_image align="center" height="500" identifier="B000E326ZK" locale="US" src="https://m.media-amazon.com/images/I/41MdOASvcCL._SL500_.jpg" tag="homesthetics0a-20" width="500" type="image" link_id="237253"]

    If you are looking for the jack of all trades, the jack plane is what you would want. True to its name, this offers a lot of versatility and will help you remove twists and warps in no time at all. They can also be used for truing boards of all sizes. 

    Now generally, a jack plane is 12 to 17 inches long, and you can purchase a specific size depending on the use. They are often used by artisans as a replacement tool or when there are a limited number of tools. 

    1. Fore Plane

    [easyazon_image align="center" height="500" identifier="B000LFTOJM" locale="US" src="https://m.media-amazon.com/images/I/31nREck0+JL._SL500_.jpg" tag="homesthetics0a-20" width="500" type="image" link_id="237254"]

    This is one of the longest bench planes on this list, and it is 14 to 20 inches in length. The length makes it indispensable to professionals working with wood. This is usually used on rough boards, and it can remove excess material fast. The length will let you straighten a workpiece, and that adds to its benefits. 

    1. Kanna Japanese Plane

    [easyazon_image align="center" height="500" identifier="B003EIG856" locale="US" src="https://m.media-amazon.com/images/I/411ta0OuRuL._SL500_.jpg" tag="homesthetics0a-20" width="500" type="image" link_id="237255"]

    Next up is a tool that is very popular among the Japanese and is almost religiously taken care of. It is cleaned and sharpened by every Japanese artisan each day before work begins and is kept with care. Plus, the Japanese are known to pass it down to the next generation of artisans, and these stay as sharp and strong as ever. 

    Moving on to the build, this one is a great example of fine art when it comes to Japanese woodcraft. They are simple to look at and have everything that is needed to call it a hand plane. 

    There is a polished and beautiful oak body, a chip breaker pin, and a blade that is held in place by the pin. A mallet tap is also present and that can be used to make adjustments to the blade. 

    What’s more, the Japanese plane is supposed to provide one with superior control and complete accuracy. This makes it a great match for Western tools, although it is a lot simpler and minimalistic.

    1. Jointer Plane

    [easyazon_image align="center" height="500" identifier="B007CFFYIO" locale="US" src="https://m.media-amazon.com/images/I/41H9x-7LjlL._SL500_.jpg" tag="homesthetics0a-20" width="500" type="image" link_id="272388"]

    If you are looking for something for straightening jobs, then the jointer plane might be a perfect choice. It is known to be the longest one among the lot and has a length of 22 to 30 inches. You can use it for large pieces which are otherwise difficult to deal with. 

    1. Molding Plane

    [easyazon_image align="center" height="500" identifier="B07WV39K85" locale="US" src="https://m.media-amazon.com/images/I/31MHpylHTxL._SL500_.jpg" tag="homesthetics0a-20" width="500" type="image" link_id="237257"]

    Molding planes work excellently well when it comes to making furniture and other forms of craft. They are designed to work on edge trims and molding and will help you take care of the corners. 

    And that’s not all; this is known to be very durable and can last for years. Some are even used after having crossed 100 years, and that surely makes it cost-effective. 

    1. Levelling Plane

    [easyazon_image align="center" height="500" identifier="B007CFFYIO" locale="US" src="https://m.media-amazon.com/images/I/41H9x-7LjlL._SL500_.jpg" tag="homesthetics0a-20" width="500" type="image" link_id="237256"]

    As the name suggests, this works the best in flattening rough surfaces and for straightening edges. It is long and is pretty wide, and it makes absolute straight cuts. Also, because of the length and width, it can cover a lot of area in less amount of time. This makes it perfect for a large amount of work, and professionals often choose this. 

    1. Rabbet Plane

    [easyazon_image align="center" height="500" identifier="B07GZQSSFM" locale="US" src="https://m.media-amazon.com/images/I/51BCr+yFqeL._SL500_.jpg" tag="homesthetics0a-20" width="500" type="image" link_id="237259"]

    If you are looking to cut rabbet joints, then the rabbet plane will be very useful. Not only has it been around for centuries, but it can also make perfect square cuts, making it indispensable at times. This belongs to the specialized tools category and is used by professionals generally. 

    Now, if you are wondering how it makes absolute square cuts, look at the blades which protrude from the sides a little. This prevents binding up, and you will be getting clear cuts. 

    1. Plow Plane - Duplex Rebate Plane 

    [easyazon_image align="center" height="500" identifier="B0001IW4XW" locale="US" src="https://m.media-amazon.com/images/I/51yJiiuazvL._SL500_.jpg" tag="homesthetics0a-20" width="500" type="image" link_id="237260"]

    Also known as a grooving plane, this includes a depth gauge and a fence that will allow you to cut rabbets and grooves. This works well because of the angle of the blade, and that is fixed at a 35-degree angle. 

    Coming to its usage, this works well in cutting tongue, window sashes, and floorboards. If you are into making houses, then this could prove to be very beneficial. 

    1. Scrub Plane

    [easyazon_image align="center" height="407" identifier="B078TKBNC5" locale="US" src="https://m.media-amazon.com/images/I/41jKnNthHiL._SL500_.jpg" tag="homesthetics0a-20" width="500" type="image" link_id="237261"]

    While all the other options are similar in a way, this one stands miles apart and is a category of its own. This was actually designed to help in ripping, and you can use it to rip and trim materials quickly. Many use this on large boards to trim it down and bring it to the required size. 

    1. Router Plane

    [easyazon_image align="center" height="500" identifier="B07Q6PSYY8" locale="US" src="https://m.media-amazon.com/images/I/51OMAAzz2dL._SL500_.jpg" tag="homesthetics0a-20" width="500" type="image" link_id="237262"]

    This is a rare tool to see these days and has been vastly replaced by modern equipment. However, it used to work very well and would replace the need to have a chisel. It is uniquely designed, and many consider the shape to be pretty uncommon. 

    The strange shape ensures that one can flatten the underside of depressions in furniture and helps in further detailing with this. You can also flatten the corners and give it a proper finished look. 

    1. Shoulder Plane

    [easyazon_image align="center" height="333" identifier="B07DGYT651" locale="US" src="https://m.media-amazon.com/images/I/310PCAM402L._SL500_.jpg" tag="homesthetics0a-20" width="500" type="image" link_id="237263"]

    The shoulder plane is very similar to the bullnose plane and can be used for detailed jobs. It is around 8 inches in length and comes with a long nose. Since the nose is long, it helps in keeping it flat. This makes it perfect for use with tenon joints and shoulders of rabbets where you need to cut and trim parts. 

    Moving on, these were used a lot in the early 1800s, and today, you might find this in local woodworking stores and with local artisans. However, bigger bodies have already shifted to modern machines as it is easier and less time-consuming to do shoulder work with them.

    Now, although bullnoses and shoulder planes are seen to be very similar, bullnose ones do not work well with the shoulders, and there lies the difference. 

    1. Smoothing Plane

    [easyazon_image align="center" height="500" identifier="B01E9FSV7U" locale="US" src="https://m.media-amazon.com/images/I/41PA3Yza6qL._SL500_.jpg" tag="homesthetics0a-20" width="500" type="image" link_id="237264"]

    We have come to the final type, and this one is used for smoothing surfaces. Just like the name suggests, these smoothing planes work very well and will get the surface ready for finishing. These range from 5 to 10 inches and can take care of small to moderate sizes of wood. You can also use it for high spots that need to be leveled. 

    How To Use Hand Planes?

    Hand planes are used to smoothen a surface and make it ready for finishing. To use this, you will have to slide it across the surface while you apply pressure. Because of the pressure, the blade will slice through wood like a chisel. The shavings will then be passed out through the slit or its mouth. 

    Next, the chip breaker will then cut these slices into smaller pieces so that the mouth is not clogged. Remember, the finishing will depend on the size of a plane. Bigger options will provide the roughest cuts, while smaller ones will provide a smoother surface. 

    Hand Plane Buying Guide

    While every kind of hand plane has its own advantages and disadvantages, you will have to select one based on your requirements. This section contains factors that you need to remember before purchasing to ensure that you are on the right track. Read on to know all about them.

    1. Type Of Body

    The two materials that are generally used for this purpose are metal and wood. Metal bodies are heavier but are very resistant to wear and tear. These are not easily damaged and last for long. You can easily work with abrasive wood, and the body will not see scratches. 

    On the other hand, the wooden ones are lighter and easier to work with, especially for those who are going to use them for long hours. These work best with professional woodworkers who work with intricate detailing. The wooden sole will also not leave any marks on the surface while working, which metal ones might do. 

    1. Blade Thickness

    If the blade is very thin, then there is a chance that it might flex during the work process leading to uneven ridges. You might have to do the work over again with another piece because of this. These work better with small surfaces, which need little work. 

    On the other hand, thicker blades are very resistant to flexing and will not move out of the way. These offer clean ridges and cuts and will provide you with a smoother finish. 

    1. Blade Angle

    The angle of a blade can determine the effect that it will have on a wooden piece. In the case of lower angles to the workpiece, you will be able to cut end grains perfectly. This is because it will be slicing wood instead of shaving it. 

    And if blades are placed at very high angles, then they are best suited for burrs and exotic timber, which usually has a very complicated grain pattern. 

    On the other hand, most planes have their blades at a 45-degree angle which will allow working with most softwoods and hardwoods. If this is your first time working with this, it is best to choose this last option. 

    Bench plane, wooden boards and saw dust on table in carpenter's workshop

    Final Words

    When it comes to price, hand planes are available at different price points. If the cost is high, an excess amount is generally charged for high-quality metal and the precision parts that it contains. 

    This varies with different options and the brands that make them. Handcrafted objects are much costlier as you will be paying for the intricate handwork. 

    Moving on, we hope that you have a clear understanding of the different types of planes in the market. Understand your requirements before you proceed to purchase one. And we will suggest reading the manual or watching YouTube videos before you begin. 

    We will end this guide here, and you can tell us about your favorite kind of hand planes in the comment section below. 

    Until next time. Take care! 

    Related Articles

    13 Best Bench Grinders of Saws

    13 Best Screwdriver Sets on the Market Today

    11 Best Tap And Die Set on the Market Today | Buyer’s Guide

    11 Best Torque Wrenches on the Market Today | Buyer’s Guide

    13 Best Jigsaws  

    13 Best Tile Saws  

    11 Best Wood Chisels to Enjoy Today | Buyer’s Guide

    11 Best Sliding Compound Miter Saws

    11 Best Belt Sanders Right Now

    13 Best Stud Finders – Review & Buyer’s Guide

    Tekton Tools Review | Craftsman vs Husky vs Tekton vs Gearwrench

    Best Electric Hand Planers to Use 

    11 Best Dowel Jigs [Most Accurate & Durable] 

    11 Best Kreg Jig Pocket Hole Alternatives To Consider 

    To try and define concept art is, in a way, to attempt defining creativity itself.

    In recent times, concept digital art has established itself on a level that’s as high up as any traditional form of art. But the one thing that sets it apart as a unique area altogether is its ability to transform conventional art by animating them on screen!

    And we bet no other thing in this world could ever bring a real dragon to you if it’s not digital art! (well, except ancient Asian magic, we suppose)

    The task of a concept artist is to primarily come up with ideas and fit them into a narrative to create a digital project. Concept artists, in various ways, design such ideas in certain styles and ways so that they could complement the narrative.

    And if you are an aspiring concept artist, then you gotta know a thing or two about how the different types of concept art make up the digital art industry!

    Featured Image via Travis Lacey

    So, here’s a guide on the subject that will not only explain these categories for you but will also tell you how to pursue them for your career goals!  

    Types of Concept Art

    Image via Christian Dimitrov

    1. Environment Concept Art

    Environment Concept Art primarily focuses on structuring and designing landscapes. It is used for setting and defining the place of the action and estimating the time of the action sequence.

    Since the setting of this sequence is one of the most challenging aspects of environmental concept art, the skill sets for the artist will require them to possess a good eye for composition, architectural design, and perspective.

    Environmental concept art emphasizes the layering and texturizing of the overall layout of the image. Each stroke on the screen that goes into creating the scene should be in accordance with the rest of the subjects, props, and the kind of action that is soon going to take place.

    For instance, if an adventurous sequence is going to take place on a sunny day, then the overall layout with all its color and tonal variations would be much different texturally and visually than the one which is meant to portray a much laidback or calming sequence. There would be a considerable difference in the mood of the two sequences.

    These environmental sequences are mostly created using 3D software where the artist is in complete charge of reflecting and translating all the digital elements in the final designs. This will form the atmosphere and mood that the project requires.

    Image via Christian Dimitrov

    Essentials to understand

    Understanding the fundamentals of designing anything is the first step to get the job done successfully and in the best way. However, it is only by regularly practicing what you are trying to depict that will help you perfect your art. This holds true for every kind of conceptual art form.

    If you do want to take up designing environments, then you should focus on correcting your perspectives first. This plays a significant role in each piece.

    Remember that, if any part of your perspective does not fit with the rest of your design, then it may ruin the entire effect of the painting. Environment artists also have to be swift and deft with their art portrayals as that is a crucial aspect of depicting any fantastical or foreign object in an equally unfamiliar environment, such as aliens on a strange planet.

    As an environment artist, your primary task would be to imagine and visualize the worlds that don’t exist and turn them into convincing, real thing for your audience to marvel at.

    Apart from fundamentals, you need to have an eye for great design and understand the basic objects such as plants, animals, the natural and geological attribute at least to the point where you would be able to easily replicate these ideas.

    Once you do understand these essential points, you should really practice environments as much as you can. You can even create a series of thumbnail sketches and painting over a set period of time like a month or so.

    Image via Christian Dimitrov

    Suggested Approach

    It could initially be a pretty challenging job for a paid concept artist to manage all of it on their own when they start creating stuff at first as they will not get to choose what they create. You may select a particular look for your art, but it’s always gonna be the client or the studio who makes the final, decisive call. 

    And this means that you will have to be an expert enough to portray anything they ask for, whether it is a plush manor interior, a serene village escape or a sandy desert landscape. This will be a real test of your versatility as an artist.

    And since environments can often have people in them as well, you will have to be clear in your understanding of human anatomy and gestures as well as understand the height and weight differences.

    References and tips

    A good way of adding perspective to your work is by adding a person or animal somewhere in the environment. You could find impressive artworks demonstrating the use and placement of birds for defining perspective in a project on subreddit/r/BirdsForScale.

    For learning or brushing up on the basics, you could comfortably rely on [easyazon_link identifier="1933492732" locale="US" tag="homesthetics0a-20" type="link" link_id="275766"]Scott Robertson’s How To Draw[/easyazon_link]

    The selection of colors and creating a color scheme is what makes or breaks an art project be it traditional or digital. However, for designing environments digitally, you can get sufficient help from two of these reference guides that will help you learn and progress far in your studies: [easyazon_link keywords="Color and Light" locale="US" tag="homesthetics0a-20" type="link" link_id="275767"]Color and Light[/easyazon_link]and [easyazon_link identifier="0740785508" locale="US" tag="homesthetics0a-20" type="link" link_id="275768"]Imaginative Realism[/easyazon_link], both by artist James Gurney.   

    1. Character Concept Art

    Character concept art emphasizes the overall creation of the convincing characters as well as the creatures for the project. The required skills set for a concept artist mandates them to possess the ability to create and coordinate the different aspects of the characters. These attributes include everything from the costumes, anatomical features, and color variations to the overall movement of the structure and gestures of the character.

    The artist is required to have substantial knowledge of human and animal anatomy as well as the perspective to portray them in the right ways.

    Image via Sangsoo Jeong

    This is required for creating realistic body types. But more than that, it’s needed to create fantastical creatures and beasts and monsters.

    The artist’s in-depth knowledge of anatomy and biological features of humans and animals allows them to create marvelous and compelling characters of creatures that do not exist in real life. 

    The artist solely does this by basing the creature’s design on the natural proportions of whatever it has been inspired from or just any other point of reference. Conforming to these vital rules of proportions is what makes the make-believe world created by the artist to actually seem believable.

    Image via Sangsoo Jeong

    Essentials to understand 

    Designing characters is one of the most in-demand jobs in the field of digital arts. The designer artists are paid to create characters that are based on the background, personality traits, as well as other design features that are recommended by the client or studio.

    Although the initial designs are mostly etched out in 2-dimensional forms and structures, for the most part, the 3-dimensional renders of the designs are what the industry is actually centered around. Some of the highest level projects also involve both 2D and 3D with more number of artists taking up the task for both kinds together.

    Artists designing characters for video games usually have a style that is different than that which visual development or character artists generally use for animation. Animation actually gives more freedom to the artist to try out various creative styles than just plain realism.

    This also means that the illustrators may, at times, choose to venture on the character route with their focus more on creative animation than the conventional techniques of depiction.

    It is, in fact, just as competitive as designing for video games, and hence, the jobs are similar when it comes to quantity. However, if you are confident that you’re good at, you need not worry about placements at all!

    Image via Sangsoo Jeong

    Suggested Approach

    To get a good place in this field, you would have to put many hours into perfecting your skills. The quality of your work is going to be the be-all and end-all in this line of work, and that is what is going to pave your way to success. Practicing will help you understand the requirements for character art and the things you could do to speed up your learning process.  

    As soon as you understand all the fundamentals of character designing, you would want to dive headfirst into etching out your characters from all angles.

    You could look up these inspiring and unique examples created by Moize Opel for a head start. 

    Character artists can often get assigned with the task of designing fantastical creatures and monsters, mostly for video games. These are often the villains encountered in in-game battles. This requires minute details and just the right levels of movements to be rendered in a realistically simulated action. 

    References and tips

    It goes without saying that character designers work tirelessly to come up with a brilliant and unique idea to animate on the screen for you. With dedication, hard work, and a genuine love for story-telling, you could make it real big in this department. 

    Being involved in the community for character concept art is one of the best aspects of it. From character art forums to character artist interviews and also other related YouTube Videos, you find a lot online to help you in this field.

    You could even check out these books that cover practically everything from basic designed to digital painting technique:

    • [easyazon_link identifier="1440329583" locale="US" tag="homesthetics0a-20" type="link" link_id="275769"]Mastering Fantasy Art-Drawing Dynamic Characters[/easyazon_link]
    • [easyazon_link identifier="0415745098" locale="US" tag="homesthetics0a-20" type="link" link_id="275770"]Character Design from the Ground Up[/easyazon_link]
    • [easyazon_link identifier="1452122288" locale="US" tag="homesthetics0a-20" type="link" link_id="275771"]Funny!: 25 Years of Laughter from the Pixar Story Room[/easyazon_link]
    • [easyazon_link identifier="B008W3GSJY" locale="US" tag="homesthetics0a-20" type="link" link_id="275772"]Creating Animated Cartoons with Characters[/easyazon_link]
    1. Weapon and Asset Design

    The concept art of creating weapons is actually one of the most challenging tasks in the digital concept art department. This focuses on the creation of weaponry that is meant to be used by the characters in the sequence and the other beings in the plot who are supposed to populate the world that the project will be depicting for its audience.

    Similar to the creation of all the environments, weapons and assets are also designed using 3D software.

    This artist digitally designing weapons and assets should be proficient in the knowledge of the processes of creation used in industrial designs. The statistics and calculations involved in the charting of industrial designs involve pretty tedious calculations and equations. 

    Digital engineering required to give shape and form to these objects of warfare also requires for the artist to understand how to customize a particular weapon for the main characters. This will also depend on the nature of the character.

    This type of art also provides a vital insight into the department of product designing.

    1. Vehicle Design

    Pretty similar to designing weapons and assets, creating the layouts for vehicles is a vital part of producing industrial designs. It is undeniably a pretty tough cookie to crack when it comes to the calculations and equations part of designing.

    The designing of vehicles requires the artist to have a thorough knowledge of the programs and tools that are required to chart what could traditionally be called a car or aircraft design.

    Image via DARKO DARMAR MARKOVIC

    However, in such an industry that deals with the modes and means of digital entertainment, the artistic approach deviates from the obvious and conventional designs that are found in the automobile and aeronautical industry.

    It so happens that a concept artist who is working on films and video games will often find himself designing fantastic vehicles such as strange spacecraft or flying cars.

    So, what we can understand from this is that that reference points to any industrial structures or designs will be mandatorily based on realistic objects forming the base for all such layouts. 

    1. Props Design

    The most important requirement for a digital artist is to be able to design any object from any given angle. Since 3-dimensional projections could be extremely challenging to equate and calculate, it usually takes a well-informed and well-experienced expert to make carefully reviewed choices and approaches when it comes to designing.

    And more than being restricted to just video-game designing, creating prop-layouts is one of the essential dimensions of animated movies or TV series.

    The visual development artists involved in the project have to first experiment with the different colors and tonal variations in order to be able to set a specific mood and edge to a single sequence.

    If you want to practice designing props, you can start by studying anything that appeals to you. Apart from mentally determining the properties of the object itself, an artist has to closely observe and analyze the styles and aesthetics of different periods to place a prop correctly in the appropriate frame and the sequence to which it belongs.

    For instance, the props for a story that has been set in the Victorian era in Britain will be very different from the props that should be in a sequence from, say, the American civil war.

    It goes without saying that all celebrated artists have always observed and drawn inspiration from what they have seen around them in real life. The history and evolutionary phases of everything had always played the greatest part in studying the structures and forms of whatever it is that you’re keen to depict.

    One of the ideal things that you can do is take a tour to museums or old, heritage places and houses. You could keep a sketchbook and doodle to capture every form that appeals to you.

    Drawing will help you understand the shapes and structures better as well as enrich your “visual library” of new ideas.

    Image via POCH Romane

    Essentials to understand

    Even the most ordinary, commonplace objects such as stoves, lamps, tables, and literally anything that you want to place in your imaginary world. Because these design and style will provide you with an essential insight into the evolution of designs throughout the ages.

    It is entirely up to the designer of props to imagine and visualize how a certain thing will look from different angles and to render the minute details to them accordingly, from scratch!

    Artists who take up the task of designing props may often specialize in different types of designs and layouts. While some may take up designing commercial objects of various sorts and kinds such as clothes, domestic things, or other stationery, some artists might take up designing vehicles or weapons specifically. 

    And even if it isn’t a score on your versatility as an artist, if you are indeed good enough in a specific area of digitally designing props, you stand a fair chance of getting noticed and hired by top-notch studios for freelancing on major projects.

    Image via Nuno Nobre

    Suggested Approach

    The only thing that you should keep in mind is that the best way to improve your prop-designing skills is to practice drawing props as much as you can. Perfect your concepts and finishes. Add more realistic details to whatever you want to design.

    However, this doesn’t mean you should neglect other concepts such as figure drawing or so. And better yet, once the fundamentals of these designing concepts get clear to you, it will help you decide what exactly is it that you want to take up in this field and put more emphasis on those parts accordingly.

    References and tips

    Remember that all of these efforts will go into making a fantastic props design portfolio. So, it should serve as a goal and an incentive for you to practice what you’re doing and get better at it.

    You could check out some of these book recommendations for drawing from imagination or for sharpening your digital structuring abilities and skills.

    Image via Cem Alpay

    About the Industry

    If you are aspiring to be a concept artist or just starting out in the field, it is likely that you wouldn't know much about the mechanisms of the industry.

    Well, it is absolutely needless to say that it is a massive one and incredibly competitive in every segment and department that lie within it.

    The industry is run by a number of creative head personnel in each department, a number of publishers to take care of the written work and a considerable body consisting of top-notch artists or designers as you may call them. 

    Along with experts in the technical departments, their creative-heads and mentors, these artists weave sheer fantastical magic on to the screen putting life into some of the most incredible and unbelievable creatures to entertain you. 

    And if you desire to join the team, then hard work to perfect your skills is all that you should focus on creating a flawless concept art portfolio.

    This could mean practicing drawing and sketching for up to 8 hours in a single day on a single piece of art (if need be) for as many days as you could possibly devote to your cause.

    The industry is significantly competitive, and it’s not going to be easy. Rejections may be the norm for some time initially.

    But, if you have the confidence to be one of the best illustrators and the tenacity to hold on, then you the stars will align for you just right eventually.

    One of the things that the industry professionals look forward to is sharing bits and snippets from their journeys and teach the newcomers the tricks of the trade. This fills them in on how the industry works. 

    Art Podcasts 

    A great way to fill up some time while drawing is to listen to art concept art or digital art podcasts. You will get a bunch of these on the web easily. Apart from being immensely helpful for your line of work, but they are excellent spirit boosters that keep you motivated, interested, and focused on your work.

    Some that you could check out right now are:

    Conclusion

    And that was it for our extensive guide on types of concept art that you could pursue today.

    We hope we were able to provide you with all the vital insights into the subject and the workings of the industry in general.

    And we sincerely wish you all the very best and all success in your future endeavors in the field!

    Till next time! 

    Related Articles

    40 Types of Art for Your Home

    53 Best Medibang & FireAlpaca Brushes & Textures For Digital Artists

    25 Best Free GIMP Brushes for Drawing & Painting Digitally

    20 Free FireAlpaca Brushes for Digital Painting & Drawing

    21 Best Manga Studio & Clip Studio Paint Brushes [Free Download]

    Best Free Aseprite Tutorials For Pixel Artists & Game Designers

    21 Best Paint Tool SAI Brushes and Textures 

    Speed Paintings 101 |What It Is, Tips, Tricks, Tools & Video Tutorials

    54 Best Photoshop Brushes | Best Drawing & Painting Brush Packs

    80 Best Procreate Brushes for the Realm [Free & Premium Brush Sets]

    14 Amazing Free Krita Brushes and Brush Packs for Digital Art

    11 Best Color Theory Books for Artists Everywhere

    13 Websites With Copyright and Royalty Free Art to Consider

    Types of Digital Art Right Now Explained

    25 Best Concept Art Books for Artists Everywhere

    8 Best Cartooning Books For Artists Today

    10 Epic Tips & Tricks for Concept Art Portfolios Today

    51 Enigmatic Forest Concept Art That Will Amaze You

    67 Surreal Castle Concept Art Depictions to Surge Inspiration From

    16 Best Pixel Art Programs and Software | All OS

    77 Epic Knight Concept Art To Inspire You

    This product is discontinued in the market and not available in any e-commerce website.

    Stalling engines, frequent malfunctions, inadequate grass-cutting efficiency - do any of these embarrassing situations sound familiar? If yes, then it’s time to upgrade your lawn mower!

    Anybody who’s truly passionate about DIY home renovation/improvement isn’t a stranger to the tedious hassle of yard maintenance. And that’s why lawn mowers are becoming a must-have gardening tool for every American household.

    However, it’s not easy to find a reliable product at an affordable budget in the market these days. It’s also the reason why most of us end up paying higher maintenance costs to cope up with a cheap impulsive purchase.

    Speaking of reliability, we’ve recently tested the Troy Bilt TB230 lawn mower, one of the best-selling products these days. Keeping it short, if you’re searching for a long-lasting machine at a negotiable price tag, then it should be your go-to option.

    Now, without any further ado, let’s get into the deets!

    Troy Bilt TB230 Review

    One of the main reasons why Troy Bilt products sell like hotcakes is because this brand never compromises with performance and durability to cut down on costs. The TB230 comes equipped with almost every feature you’d want in your ideal lawn mower, and even more. To be more precise, here are the key features that set this product apart from every average, low-priced lawn mower.

    1. Design and Build Material

    When it comes to purchasing tools as expensive as lawnmowers, it’s wise to play safe and opt for products that offer higher user convenience and durability. Fortunately, this product has it all covered with its durable all-steel construction body. It gets even better as the manufacturers provide a set of all-metal axles for wheels, extending product life a bit longer. 

    Speaking of its intelligent design, this product features a front-wheel-drive setting that rids the users from the stress of motor resistance. As a result, it becomes easier to turn the machine around for a comfortable lawn mowing experience. Also, big ups to its 11-inch wheels for providing optimal maneuverability even in the roughest of terrains.

    Furthermore, it offers an extended deck to create a higher vacuum, which makes room for higher grass circulation. This feature isn’t commonly found amidst medium-duty lawnmowers, which makes the TB230 a tad more special.

    Last but not least, its single-lever control feature has impressed us with the user convenience it offers by letting us adjust the cutting height with ease.

    1. Motor Efficiency

    For those who are tired of average-performing lawnmowers, the TB230 features a beast of an engine that will make you forget about frequent motor malfunctioning problems. In brief, this product is built in collaboration with Briggs & Stratton co., which is the secret behind its powerful 163cc OHV motor. Most of the buyers have rated it quite high in terms of motor efficiency for delivering high-end performance consistently.

    However, the cream of the crop here is Troy Bilt’s patented ReadyStart technology, a breakthrough feature that solves one of the most common lawnmower issues. Thanks to this feature, turning this machine on is guaranteed at the very first, or at most, the second attempt. Although most of lawn mower engines require being choked from time to time, this product gets the job done with a single pull.

    Also, the brand promises to service the product for free if it isn’t on by the second attempt, which speaks volumes about its reliability. If you value user satisfaction, then this model should be your go-to pick.

    1. Triple Action Mulching Ability

    As customers, we’re typically inclined towards products that offer higher versatility, and that’s why this Troy Bilt model stands out as an efficient one-for-all model. It raises the bar too high for mulching ability with its advanced settings, giving itself the upper hand over most of its similarly-priced alternatives in the market.

    To put it simply, the TB230 features a triple-action mulching setting that lets you customize the yard maintenance session at your comfort. If you’re in the mood for some typical mulching, this product is one of the most appropriate options to consider. However, if you’re in a rush to get it done quicker, change its settings to side discharge mode for a faster mowing experience.

    Also, its rear bag feature comes equipped with a 1.8-bushel grass catcher capacity. This feature reduces the amount of generated waste that isn’t caught by the trash bag. Consequently, you have to clean lesser clippings by yourself later on, which makes lawn mowing an appropriate pastime for your lazy weekends.

    1. Advanced Secondary Features

    Coming on to its secondary features, this product comes with a variable speed control feature. This feature allows for covering a larger cutting area within a short time, which is quite amusing for a medium-duty machine. Also, not to forget, its squeeze-grip lever helps the model in offering 100% user control, making it quite suitable for beginners with no prior experience.

    Furthermore, this product gets a thumbs up for its ease of use, which is supported by numerous features. But, most importantly, we’re a fan of its advanced blade control button that comes in handy at stopping the machine and its blades at one click. So, in case you need to halt urgently while mowing the lawn, it won’t be necessary to turn the device off completely.

    Not to forget, the TB230 is one of the most efficient self-propelled products in the market these days. For those who aren’t familiar with this category of lawnmowers, these are a lot more self-sufficient in comparison. As a result, you need to use very little manual power to push it around the property, which is a lot more convenient.

    Last but not least, the manufacturers offer an extended 2-year warranty period with this product. However, if appropriately maintained, multiple buyers have claimed that it can last for around 6-8 years without malfunctioning even once.

    What Could’ve Been Better?

    Nothing is perfect, and similarly, the TB230 also comes with a few limitations of its own. For starters, this product may appear a tad short for anyone above 6’. It’s because its handle is merely 38 inches high, and doesn’t come with sufficient adjustment settings.

    Furthermore, it could've been a little better if the trash bag were a bit larger, considering its wide body. However, the more significant issue to worry about here is that the product doesn’t offer sufficient traction due to its front-wheel-drive mode shenanigans.


    Pros

    • 163cc Briggs & Stratton engine
    • 1.8-bushel grass catcher capacity
    • ReadyStart technology
    • Triple action mulching setting
    • 2-year warranty period


    Cons

    • Inadequate traction efficiency
    • Small trash catching bag


    Troy Bilt TB230 Verdict

    Troy Bilt TB230 Verdict

    Lawnmowers are slowly becoming a necessary addition to make our lives more comfortable, and everyone’s always on the lookout for a sturdy and long-lasting model for the best value. Speaking of which, Troy Bilt is the ideal brand for anyone who’s searching for mid-range mowers under a bargain-basement price tag.

    Even though finding reliable models isn’t a walk in the park, one can rely on this product with their eyes closed. On that note, we’ll take your leave for now, but we promise to return soon with more fun reviews.

    Till then, stay tuned!

    Related Articles

    The 5 Best Lawn Mowers for St Augustine Grass

    5 Best Gas Hedge Trimmers

    4 Best Walk Behind Brush Cutter

    3 Best Yard Hydrant

    5 Best Stick Edger

    13 Best Trimmer Lines | Multi-Sided, Round, Square, Twisted & Serrated

    6 Best Electric Start Self-Propelled Lawn Mowers

    13 Best Wheelbarrows

    Husqvarna YTA24v48 Review

    10 Best Lawn Dethatchers

    With winter knocking on our doors, we can’t help but fret over snow-covered driveways! 

    Sure, the sight of a snow-covered lawn on a bright day is one to behold. But how do we get over the thought of all that back-breaking effort to clear it? Perhaps by having a snow thrower at our disposal. 

    So, when we heard about the Troy-Bilt 2100 208cc Single-Stage Snow Thrower, we were eager to try it. And when we got to know that it integrates some features of a two-stage model, we knew it wouldn’t disappoint! 

    While at it, we also decided to walk you through all the details to help you make the best call. Now without any further ado, let’s begin! 

    Troy-Bilt Squall 21" Single-Stage Snow Thrower Tested

    [easyazon_image align="center" height="500" identifier="B072DVGCKQ" locale="US" src="https://m.media-amazon.com/images/I/51QTbcXQ-gL._SL500_.jpg" tag="homesthetics0a-20" width="500"]

    No products found.

    The tagline of Troy-Bilt reads, “We’re built for life.” In that sense, the longevity of their snow throwers always plays an important role in their popularity. However, there are various other factors that make the Squall 2100 model worth considering. Read on to know all the deets. 

    1. Power

    For starters, let’s talk about the power source. At the heart of the Troy-Bilt Squall 2100 lies a robust 208 cc 4-cycle engine. Its power generation is almost equal to that of a 5.5 or 6 hp engine, which is what you’ll need when there’s a lot of snow to clear. 

    Another advantage of a 4-cycle engine is that though it needs both gas and oil, the separate chambers means there’s no need to mix them. The four pistons draw fuel to the engine, resulting in optimum combustion but without any annoying fumes or smoke. 

    1. Start

    On a related note, the unit employs an electric push start button that works just fine to cut down on your efforts. Like any other gas-powered engine, this one too isn't free from priming requirements. However, once you do that, the next step is to simply push the button for seamless ignition. 

    This feature is especially beneficial for users who don’t have a lot of physical strength. In fact, the hassle of a pull start mechanism is what keeps some users from opting for a more powerful model in the first place. 

    1. Maneuverability

    To be honest, we weren’t very confident about the unit’s maneuverability, considering that it weighs almost 100 pounds. But we were in for a surprise when we saw how easy it was to move the snow thrower around. 

    Despite not having a self-propelled system, its auger creates a propelling effect that helps in the smooth forward movement. Thus, you can go about your job quite efficiently in less time. Additionally, there’s a couple of rear tires that aid easy movement. 

    Sure, it won’t be easy lifting this machine on patios, decks, or other raised areas. That said, its ability to move on varied surfaces compensates for the portability factor. 

    1. Single-Stage Auger

    Undoubtedly, one of the most important aspects of a snow thrower is its snow clearing ability, so here it goes. For starters, this unit is equipped with a 21-inch wide auger, capable of removing 13-inch high snow accumulation. Not only that, but it also collects all the snow without requiring a set of secondary paddles. 

    In this regard, it’s not unusual for snow throwers to utilize a set of paddles, whose spinning action simultaneously chops up and feeds the snow to the machine. But thanks to its robust 208cc engine, the Squall 2100 can accomplish both tasks using only one heavy-duty auger. 

    Even for heavy snowfall, you should be able to get it all with a couple of rounds on a larger driveway. 

    1. Remote Chute

    Another praiseworthy feature is the 2-way 190-degree polymer remote chute, which can be rotated in any direction using a dedicated handle. As a result, you don’t need to plan your clearance path ahead of time; walk through the snow with the machine and decide the direction of throw as you move along. 

    But what really appealed to us is that unlike most of its competitors, the Squall 2100 utilizes a 190-degree chute to offer greater flexibility for choosing the throw direction. Long story short, the larger angle allows you to throw the snow behind and not just straight to the sides. 

    Other than that, the chute can also be controlled to adjust the throwing height. In case of higher piles, it can dispose of snow at 30 feet or more. 

    1. Drift Cutters

    Talking about piles, homeowners often find heavy snow accumulation on the sides of the driveways, which needs to be moved out of the way. And this is where the snow thrower’s adjustable drift cutter arms come to the rescue. Much like the auger, they are capable of cutting into the drifts while also picking up and pushing the snow away.

    This feature will come in especially handy during the last months of winter when the snow begins to pack down on the sidewalks. Plus, the drift cutter helps maintain a nice level surface by keeping the snow from falling back to what has already been cleared.

    1. Storage

    No matter how compact a snow thrower looks, the real test of storage is figuring out a proper space where the handle fits without incurring damage. And the foldable gull-wing handle of this unit does just that. With a slight twist, the handle folds down,facilitating hassle-free storage. Furthermore, the ergonomic grip ensures optimum comfort for users of varied strength and height.

    1. Warranty

    With a 2-year manufacturer’s warranty, Troy Bilt provides enough time for users to replace any defective parts or the unit as a whole. Beyond that, the brand also offers a fast, responsive customer service helpline that assists users with easy returns.

    1. Customer Reviews

    The Troy-Bilt Squall 2100 has earned a reputation for efficiency, especially in areas with heavy snowfall. Among the most liked features are its electric start, ease of maneuverability, and the combination of a powerful engine and robust single-stage auger.

    However, some users have raised concerns about poor packaging and broken parts on delivery, which are replaceable under warranty.

    [easyazon_image align="center" height="500" identifier="B072DVGCKQ" locale="US" src="https://m.media-amazon.com/images/I/41ZLlhi1vAL._SL500_.jpg" tag="homesthetics0a-20" width="500"]

    What Could’ve Been Better?

    It’s practically impossible for any product to be absolutely perfect, and the same can be said for this snow thrower. Apart from the obvious challenges of portability mentioned earlier, there are some minor flaws that we must mention.

    Firstly, the wheels could’ve been sturdier since it’s meant to tackle heavy snow. Also, they tend to get stuck while moving on heavy and wet snow. That said, you can always replace the wheels for a few extra bucks.

    If the snow accumulation is deeper than 13 inches, you might have to go over a couple of times to clear everything. This can feel like an added task, but we didn’t mind sparing some more time for precise cleaning.


    Pros

    • Comes fully assembled
    • High-efficiency engine
    • Smooth start and pickup in colder temperatures
    • 190-degree remote chute
    • Adjustable drift cutters to break intense piles


    Cons

    • Wheels could be sturdier
    • May require multiple passes for clearing snow deeper than 13 inches


    a man cleans up in the yard removes the snowthrower

    Troy Bilt Squall 2100 Gas Snow Thrower Buyers’ Guide

    Before we put down our final thoughts, here’s a bonus buyers’ guide that states the most important features to consider before buying a single-stage snow thrower.

    1. Power Source

    One of the first things to consider while buying a single-stage snow thrower is the power source. And there are three types to choose from. Gas-powered units, like the Troy-Bilt 2100, are generally more powerful than the others.

    On top of that, most of them don’t require you to hook the machine to a power source. However, they are more suitable for clearing large patios or driveways. Besides, they also need more maintenance, especially when you take one out after the warmer months.

    Electric single-stage snow blowers, on the other hand, are more convenient to use. Sure, you’d need a power source and cord extension, but they are your best bet if you have a smaller lawn. For one, their lightweight design aids hassle-free maneuverability. Plus, they don’t require oil or gas changes, meaning there are fewer chances of leakages and mess.

    Battery-run single-stage snow throwers are slowly on the rise. Not only do they cost comparatively less, but they save you from the trouble of having an electric power source, gas, and oil nearby. Moreover, they have almost zero sound emission, making them suitable for use at any time of the day.

    1. Chute Rotation

    Irrespective of the power type, chute rotation is a must-have feature to save time and effort while cleaning snow. You can select a chute that can be rotated across 180 degrees or more for optimum custom disposal. But do keep in mind that you have to change its direction according to the wind. Furthermore, many snow throwers come with the option of adjusting the throw height.

    1. Auger Width

    The auger width you go for will depend on the area that is to be cleared. Naturally, a wider width is better for clearing larger driveways and patios. But the thing to note here is that you don’t want a snow thrower that is too wide for the hard to reach areas.

    So, if you’re looking to clear compact spaces, we’d recommend going for a narrow auger width, even if you have to go for multiple rounds in the wider areas.

    1. Ergonomic Handlebar

    Whether you spend a few minutes or a few hours working with a snow thrower, the last thing you’d want is strained hands. And to avoid that, look for models that have some sort of a protective covering, be it a cushioned padding or PE waterproof guard. Beyond that, you can also opt for a foldable handle that will save storage space.

    1. Tires

    It’s advisable to select a model that has sturdy and slip-resistant tires. Apart from that, we will recommend investing in a snow thrower whose tires can be changed if the user isn't satisfied.

    1. Headlights

    Headlights are a popular additional feature that potential users generally look for. Depending on the weather, you may have to bring out the snow thrower at night or  in low light conditions. So, instead of carrying a separate light, the integrated LED headlight will do the job.

    man cleaner in uniform using snowblower snow removal concept african american worker cleaning winter snowy park landscape background flat full length horizontal vector illustration

    Verdict

    Now, to answer the big question - is the Troy Bilt Squall 2100 Single-Stage Gas Snow Thrower worth it? 

    In our opinion, it’s definitely worth the money. The combination of nifty features on this unit makes it a very suitable choice for small-to-medium-sized lawns. Although you may have to go over more than once for the latter, the precision on offer will make up for the added effort. 

    Besides, the adjustable chute cuts down on the task of planning a clearance path in advance. That said, its portability and sub-standard wheels aren’t the most sought-after features, but those aren’t dealbreakers. 

    So, go ahead and bring home this highly efficient unit to make your winters a bit more bearable. And when you do, let us know about your experience in the comments down below. 

    So long! 

    Related Articles

    51 Best Snow Sculpture Ideas to Consider this Season

    What to Do When Your Snow Blower Won’t Start

    Ariens Vs Husqvarna Snow Blowers | Obvious Winner?

    5 Best ATV Snowblower Attachments

    13 Best Snow Joe Electric Snow Blowers

    4 Best Remington Snow Blower

    4 Best Tractor Snow Blower Combinations

    How Much are Snow Blowers? [Costs & Maintenance]

    13 Best Single-Stage Snow Blower

    10 Best Snow Blowers For Large Driveways

    7 Best Snow Brooms

    4 Best Greenworks Snow Blower

    Best 3 Cub Cadet Snowblowers

    Buying a new toilet calls for a lot of brainstorming and intensive research!

    Given how indispensable toilets are, you don’t want to end up with a sub-par model that provides neither comfort nor efficiency. So, shelling out a few extra dollars and getting a reliable model might be the most intelligent way to go about your purchase.

    Toto is one of the leading toilet manufacturing brands since 1917, and we’re sure the internet has told you as much. With its durable frame and powerful flush technology, its appeal and functionality are unrivaled.

    The Neorest range from the brand, in particular, offers several smart toilets with highly advanced features. In this guide, we’ve reviewed the best Neorest toilet models and included a buyer’s guide to help you make an informed decision.

    So, without further ado, let’s begin!

    Top Toto Neorest Toilets

    White urinal and washbasin and shower in granite bathroom, Modern house bathroom interior, luxury bathroom

    1. NX1

    The perfect integration of luxury and comfort, the NX1 is one of the finest models from this series. Its elliptical silhouette becomes a stylish addition to your bathroom, and the durable ceramic framework enhances longevity. Besides, several hi-tech features add to its overall appeal.

    TOTO MS900CUMFG#01 NEOREST NX1 Dual Flush 1.0 or 0.8 GPF...
    • Ultra-high efficiency TORNADO FLUSH siphon jet flushing...
    • CEFIONTECT ceramic glaze creates a very smooth surface for...

    Why Did We Like It?

    The Toto Neorest NX1 offers a customized experience with its adjustable spray that includes pulsating, oscillating, rear, and soft rear cleanse options.

    It comes with a dual, automatic flush system that operates on siphon jet technology and focuses on water conservation. As a result, the flush works independently and alternates between 0.8 GPF and 1 GPF, depending on the requirement.

    Besides its Tornado flush system, we have Ewater+ technology that automatically sprays electrolyzed water to keep the bowl in top-notch condition and reduces the need to use harsh cleaning chemicals. In addition, the Cefiontect glaze ensures that residue doesn’t stick to the bowl.

    Also, we’d like to highlight certain features like the nightlight, remote control, and seat sensors that activate automatically and enhance the overall toilet experience. Finally, there is the air deodorizer that keeps the air around the toilet clean and odor-free.

    What Could’ve Been Better?

    With the inclusion of numerous deluxe features, it doesn’t come as a surprise that this unit is pretty expensive. Besides, although the one-piece design makes it easy to clean and install, in case of any damage to one part, the entire toilet needs to be replaced. This can be pretty inconvenient, given the price of the model.


    Pros

    • ADA-compliant construction
    • Luxurious design
    • Powerful tornado flush system
    • Minimal maintenance requirements
    • Remote control operation


    Cons

    • Expensive
    • Integrated design makes replacement difficult


    1. 550H

    Another favorite among buyers, the 550H is for all the minimalists out there! With its Sedona beige finish and one-piece design, it can blend with your bathroom décor and fit into small spaces. But that’s not it; read on to know what makes this product such a popular pick.

    Why Did We Like It?

    A cold toilet seat on winter mornings is an inconvenience we’d all like a solution to, and you have to look no further than this Toto Neorest 550H model for it. The seat sensors open and shut the lid automatically, and you’ll always be met with a comfortable, heated seat.

    Moving on, we have its cyclone flush technology that pushes down water at an accelerated pace for efficient flushing. Adding to the water conservation efforts of Toto, this model features a dual, automatic flush option, using 0.8 GPF and 1 GPF for different requirements.

    Focusing especially on hygiene, the Ewater+ technology uses electrolyzed water to rinse the bowl and disinfect the wand, thus preventing dirt and debris accumulation. In addition, the SanaGloss glaze minimizes the chances of mold, gunk, or bacteria sticking to the surface and keeps your toilet in a sanitized condition throughout.

    Finally, we have the three adjustable washlet modes - rear, soft, and front - for proper cleaning.

    What Could’ve Been Better?

    Although single-piece toilets are usually easy to install, that is not the case with this Toto Neorest model. Even if you are an expert in DIY plumbing jobs, the task at hand is quite tricky, and you should go through the instruction manual carefully.

    Alternatively, we recommend hiring a professional to install the toilet for you.


    Pros

    • Durable vitreous china construction
    • Robust flushing technology
    • In-built air purifying system
    • Prioritizes hygiene


    Cons

    • Tricky assembly


    1. 700H

    The Toto Neorest 700H is the meeting point of opulence and quality. Its sleek appearance and single-piece design can fit into any bathroom space and enhance its overall appearance. Despite being compact, it doesn’t compromise on comfort and is ADA-compliant too. Keep reading to know all the deets about this brilliant product!

    TOTO MS992CUMFG#01 Neorest 1.0 GPF and 0.8 GPF 700H Dual...
    • Bidet seat with rear cleanse, soft rear cleanse, front...
    • Auto Open/Close lid and seat with heated seat and...

    Why Did We Like It?

    Made of high-quality ceramic material, the toilet is durable and features an elongated bowl for added comfort. Besides, the Cefiontect glaze doesn’t let debris or mold cling to the surface, thus improving the longevity and hygiene of the toilet.

    The tornado flush technology releases a powerful stream of water that cleans the entire bowl in one go while merely using 1 GPF.  In addition, the rimless bowl design prevents the sticking of dust or bacteria.

    Moving on, the Ewater+ technology acts as a bleaching agent and cleans the bowl and the wand with an electrolyzed solution. This helps in keeping the toilet stain-free and well-sanitized.

    Furthermore, the toilet comes with a wand that offers multiple washing options such as front, rear, pulsating, and oscillating modes to ensure efficient cleaning.

    With automatic seat sensors, a night light, an air deodorizer, and remote control operation, this model has a range of hi-tech features that improve its performance.

    What Could’ve Been Better?

    The 700H model from Toto is a near-perfect unit, and we don’t have any complaints as such. However, it’s quite an expensive purchase, thanks to its numerous new-gen features.

    Besides, since this model is tankless, it depends on electricity to function correctly. This can be an inconvenience in case of a power failure.


    Pros

    • Low water consumption
    • Focus on proper sanitization
    • Efficient flushing technology
    • Multiple wash options
    • Stylish and comfortable design


    Cons

    • Costly
    • Needs electricity for optimal performance


    Toto Neorest Toilets Buyer’s Guide

    Those were our reviews for the top three models from the Toto Neorest range. These models have made quite a name for themselves with their numerous and highly advanced features and intrigued potential buyers. But, which model should you buy? To make the decision easier for you, we’ve curated this buyer’s guide. So, let’s take a look!

    1. Water Consumption

    The growing focus on sustainability across the globe has compelled leading brands to launch toilets with water-saving technology. Incorporating a powerful flushing system and dual flush technology are surefire ways to guarantee low water consumption.

    The water consumed is measured in gallons per flush (GPF), and the industry standard is 1.6. Any toilet model that consumes 1.6 GPF or less can be classified under high-efficiency toilets.

    Besides, brands like Toto have teamed up with WaterSense to combat water wastage and design highly sustainable models.

    1. Flushing Technology

    A toilet is only as good as its flush. Cyclone flush or tornado flush technology creates a powerful siphon that allows water to flow downwards in full force. This eliminates the waste while also ensuring the residue doesn’t stick to the surface.

    Furthermore, the dual flush option allows the user to alternate between half and full flushes, depending on the type of waste.

    1. Design

    Toilets come in different shapes and sizes. The type of toilet you need primarily depends on the space availability, bathroom aesthetics, and of course, the features.

    Single-piece toilets are compact with an integrated tank that makes installation easy. Owing to its stylish appearance, it has gained widespread popularity on the market.

    Moving on, toilet bowls usually come in three shapes - elongated, circular, and square. The elongated design is the most popular, given its comfort and large surface area. Today, most brands, including Toto, focus on manufacturing elongated yet compact bowls that can fit into narrow spaces.

    Lastly, we'd like to point out that all models in this range are ADA-compliant, with seat sensors and auto flushing, making it a fantastic choice for people with mobility issues.

    1. Advanced Features

    Besides the fundamental factors, there are certain advanced features that enhance the overall efficiency of a toilet. Let’s see what they are!

    • Multiple Wash Modes

    The Toto Neorest range offers multiple cleaning options, such as front, rear, soft rear, oscillating, and pulsating modes. The adjustable wand helps you set your preferred positions and ensures proper cleaning.

    In addition, you can also modify the water pressure and temperature as per your needs.

    • Ewater+ Technology

    Perhaps the most striking feature of this range is the Ewater+ technology. In this, regular tap water is converted into an electrolyzed form that cleanses the bowl and prevents the accumulation of dust and residue.

    It acts as a bleaching agent and breaks down any stains that might form on the ceramic seat. Once it is done cleaning, the acidic water goes back to its original form. Thus, you don’t have to waste time scrubbing your toilet with harsh chemicals to get a clean washroom.

    • Smart Features

    Certain smart features such as night light, seat sensors, remote control operation, and auto open/shut lid add tremendously to the overall user experience. Minimizing the need for human intervention, these features create a comfortable atmosphere for you.

    It also makes controlling the device a breeze, thus simplifying operation and increasing user satisfaction.

    • Air Deodorizer

    The in-built air deodorizer comes with a carbon filter that absorbs unpleasant odor from around the toilet, creating a pleasant atmosphere. You can activate and control the deodorizer through the remote control or the side panel.

    toilet and bathroom in modern style in house. Toto Neorest Toilets Verdict

    Toto Neorest Toilets Verdict

    With that, we come to the end of our reviews and buyer’s guide.

    The Toto Neorest series is one of the most reliable and efficient toilets on the market, with a particular focus on hygiene and user comfort. It's exceptionally advanced features and luxurious design make it an excellent addition to your bathroom space.

    Besides, with in-built deodorizers and a self-sufficient cleaning system, it saves time and effort. We hope our guide has helped highlight the key features and advantages of the three best models in this range.

    Although their characteristics closely overlap, we’d still recommend the 550H unit for those looking for a relatively low-priced model. If you want a highly advanced toilet with all the upgraded features, then look no further than the 700H model.

    That’s all for today. Do let us know which model caught your eye in the comments below.

    Until next time, take care!

    Related Articles

    9 Best American Standard Toilet

    8 Best Bidet Toilet Combos

    13 Best Soft Close Toilet Seats

    13 Best Toilet Seats

    7 Best [Macerating] Upflush Toilets

    11 Best Composting Toilet

    7 Best Toto Toilets

    13 Best Septic Tank Treatments

    7 Best Dual Flush Toilet

    Is Kohler A Good Brand?

    How to Use a Sauna Right

    Kohler Santa Rosa Toilet

    Convenient Height Toilet

    11 Best Toilet Flapper

    5 Best Gerber Toilets

    11 Best Toilet Clog Remover

    Do your kitchen counters need a makeover? You’re sure to like some of these design ideas for a fresh and updated look. 

    As you can imagine, there are limitless options of countertops which you can choose from. But we know that everyone and their neighbor has a preference! That is why we have curated more than a dozen ideas if you are looking to change the look of your kitchen.

    Now, there is a reason why tile is the most popular option for countertops. The main reason is that, unlike natural stone or laminate, tiles offer an incomparable variety of options ranging from hexagons to mosaics. 

    Also, when it comes to working with tile, the advantage is that you can do it yourself. That in itself saves a massive chunk from the budget.

    So, without further ado, let’s see the different types of tiles and designs.

    Types Of Tiles

    Best Tile Design Ideas For Countertop

    1. Porcelain

    Porcelain is made using clay, sand, and feldspar, which are baked in high-temperature ovens. The final product is quite dense and durable lasting for many years once installed. Porcelain is non-porous and is often applied to walls, flooring, kitchen countertop, and backsplash. 

    Also, it can be found in many outdoor projects because of its resistance to pressure and water. As far as maintenance is concerned, they are pretty easy to clean and take care of.

    1. Ceramic 

    Ceramic tiles are also made out of clay which is heated and set into shape. The reason they are so popular is that they come in a wide variety of patterns and colors. The good thing about ceramic tiles is that they are scratch and stain-resistant. However, they are prone to cracking if you drop heavy containers on them. 

    1. Vinyl 

    This is a synthetic option often used for flooring and countertops and even kitchen backsplash. They have a stone-like finish but can be designed to appear like wood. One interesting feature about vinyl is that you do not need to remove the previous installation to add new tiles. 

    Also, it gives a smooth and seamless appearance which is pleasing to look at. However, they are not durable enough to hold very heavy objects.

    1. Vitrified Tiles

    Have you seen glazed tiles with a gleaming appearance? It is most likely that those are vitrified tiles. They are similar to traditional ceramic tiles, but they have an additional ingredient, silica. 

    While mixing, clay and silica are blended together to form tiles that look shiny like glass. The benefit of this tile is that it is water and frost-resistant, along with being durable enough to last many years.

    1. Stone Composite Polymer 

    These tiles appear like stone, but if you take a closer look, you’ll find they are, in fact, composite polymers mimicking stone tiles. They are constructed using a composite material with a mix of PVC, limestone, and stabilizers. 

    What makes this option so popular is its use in multiple areas of the house, not just countertops. It can be used in kitchens, bathrooms, and porches due to its heat and fire resistance, impact resistance, and waterproof properties.

    Tile Designs For Countertops

    1. Square White Tile Countertop

    Square White Tile Countertop

    Let’s start with the classics. The square tile kitchen counter itself comes in many styles, but we recommended you check out this clean floor-to-ceiling tile pattern. The straight-lined edges are far too familiar anyway, so you can opt for these unique curved lines which cover the entire countertop. This retro design extends to the sink and microwave slot and gives a uniform and clean look to the kitchen.

    1. Large Neutral Color Tiles 

    Large Neutral Color Tiles 

    Some people prefer larger tiles because they have lesser seams which offer a gorgeous and lush look. They are also easier to clean and wipe. There are various sizes available, but the most common is 12 or 13-inch tiles which look great in neutral colors like beige and pale yellow. 

    You can install the same kind of stone on the peripheral. However, the stone tile needs to be sealed to grout before use.

    1. Large Format Tile Countertop

    Large Format Tile Countertop

    These are much larger tile options for those of you who want to avoid installing separate tiles altogether. This option comes in large pieces which are arranged to fit the size of the counter. Large-format tiles help the countertop to appear larger and even. If your kitchen already has various colors and patterns, this simple look will give a pattern break for a harmonious look.

    1. Handcrafted Rustic Kitchen Countertop

    Handcrafted Rustic Kitchen Countertop

    If you are looking for a rustic, cottage-core aesthetic for your home, this option will fit right into this vibe. This design involves handcrafting individual pieces of stone and placing them one by one on any surface you want. 

    The slightly uneven effect gives a warm, rustic vibe which works well in neutral colors. However, this option is on the pricier side, so you may have to reconsider if you are on a budget. 

    1. Pop Of Color Retro Design

    Pop Of Color Retro Design

    Another option we have selected for you is this lovely color pop option giving a retro look to your countertop and kitchen. You can recreate this look in your kitchen by choosing a neutral color and selecting a secondary color to add interest. 

    For example, the backsplash and bottom of the counter can be white, but the countertop can be a pale shade of yellow, blue, or grey.

    1. Handmade Square Tiles

    Handmade Square Tiles

    You must consider this option if you want a unique look for the kitchen or even the bathroom. There are endless color options to play around with, and there are different sizes that you can select for different areas of the house. 

    For the kitchen, a square tile with a pastel color would go well, especially if there is plenty of sunlight flowing in through the windows. 

    1. Hexagon Pattern Countertop

    Hexagon Pattern Countertop

    This style gives your kitchen a lovely retro feel. The hexagon pattern adds interest and gives a visually distinct look that is suitable for primary colors like white and beige. If you are looking to keep the color scheme simple and classic, then this is an attractive option to add a unique touch.

    1. Marble Hexagon Tile Countertop

    Marble Hexagon Tile Countertop

    Another beautiful European-inspired tile countertop is the marble hexagon one which gives a smooth finish. The good thing about this design and choice is that it is quite durable and does not shatter easily, even if you drop heavy utensils. A smaller-sized hexagon tile in a pale grey or blue would look amazing, just like a Swedish kitchen. 

    1. Mismatched Color Countertops 

    Mismatched Color Countertops 

    For eye-catching and distinct looks, you can opt for opposing color schemes and mismatched counter options like this one. There is no limit to the creative possibilities with these patterns, and you can make your own unique look by experimenting with placing options. 

    One idea we liked was selecting three colors and placing them in either chunks or a whimsical mix to create a never seen before pattern. 

    1. Glossy Tile With French Style Trims

    Glossy Tile With French Style Trims

    If you love European-style furniture and decor, you are sure to find this beautiful tile stunning. This is a lovely 6-inch tile created for a smaller kitchen in a lovely shade that has a glossy finish. Apart from that, it has an eye-catching trim that is 3-inches wide and adds to the beauty of your countertop. This type of pattern is available in porcelain and vitrified material.

    1. Mosaic Tile Kitchen Countertop

    Mosaic Tile Kitchen Countertop

    One of our favorite patterns is the old-fashioned mosaic. Even though it has been widely used for decades, the look never gets old. You can use it to add short bursts of focus to an otherwise plain kitchen.

    However, you might want to tone down the color if you are not a fan of a busy-looking countertop. Sand, cream, pale pink are excellent color choices for subtle coloring with a stunning mosaic look.

    1. Italian Stone Countertop

    Italian Stone Countertop

    This design looks extravagant even though it is simple and classic. Adding Italian stone-cut tiles to the countertops immediately elevates the beauty of the kitchen. You get many customizable options to select the size and color of the natural-looking stone or porcelain. Some brands also provide matching quarter rounds and caps for completing the installation. 

    1. Terrazzo Tiles 

    Terrazzo Tiles 

    If you are looking to add some pattern to the countertops, terrazzo might be a suitable option. Since there is no defined design, the end product you get will always vary. This type of tile is usually made of marble or glass elements added to cement bases. 

    They are widely used for flooring due to their durability, but you can also opt for this design on countertops. If drastic color patterns are not your style, you can customize a terrazzo pattern with only one color.

    Best Tile Design Ideas For Countertop

    Final Words

    So, here we reach the end of our guide for the best tile design ideas for countertops.

    As we mentioned previously, there are literally hundreds of designs already available, and on top of that, you can create customizations to your liking. But the design you select must match the overall aesthetic of your kitchen or bathroom. 

    That should not be too difficult since all you need is an idea of a color scheme. First, select a countertop that would go harmoniously with the room. Next, you can select a few color options that suit the rest of the walls and floors. 

    And that’s it! All you have to do is go to the store or check online for a similar pattern. After the final selection is made, hire a professional to apply the tiles or simply do it yourself. We hope this guide gave you plenty of ideas for your next countertop project. 

    See you in the next one, bye!

    Related Articles

    25 Spectacular 3D Wall Tile Designs To Boost Depth and Texture

    8 Best Basement Cement Floor Paints [Reviews & Buyer’s Guide]

    5 Best Liquid Floor Wax for Hardwood Floors Right Now

    Best Vacuums for Tile Floors 

    Tattoo drawing is one of the first creative works of humanity. It has been around for ages and has evolved from simple primitive drawings to intricate works of art.

    With the help of technology, you can get inked for just about any tattoo design on your body these days. You’re only limited by your imagination and the ink you are willing to take!

    But how can you choose which ones to have in this vast world of drawings?

    If you’re a new tattoo artist looking for inspiration or someone considering getting inked, you’ve come to the right place.

    Take a look at these 74 popular tattoo drawing ideas. You might find one you’ll be dying to get!

    Popular Designs for Tattoo Drawings

    There is no one template on how tattoo drawings should be. Hone your creative side with these drawing ideas.

    Tattoos are artistic expressions of one’s emotions, memories, beliefs, and values. You will often find flora, fauna, a famous scene, life, death, words, and symbols a common theme.

    Tattoo drawings differ in shape, size, and concept. They can also be made up of defined lines and shading and often use black ink as the primary color option.

    Here are 74 popular tattoo drawings to consider:

    1. Crow Tattoo Designs

    Crow Tattoo Designs

    Source: TattoosBoyGirl

    Crows are clever birds known for their wits and resourcefulness. Many also see them as a symbol of strength, power, and versatility. With that said, people often get crow designs as a statement of masculinity.

    This drawing's fairly complex, so you and your tattoo artist need to practice getting it right. To avoid using too much paper, try a cheap drawing tablet!

    2. Tree Tattoo Design Draw Up

    Tree Tattoo Design Draw Up

    Source: TattoosBoyGirl

    Tree tattoos are perfect for those who want to remember the beauty of nature. These tree designs can be simple or detailed, depending on your style.

    This one, in particular, has its roots shaped like a double helix signifying family oneness. It uniquely plays with the idea of a family tree.

    3. Skull and Flowers Tattoo Design

    Skull and Flowers Tattoo Design

    Source: Sandra Dee Matthews

    Many artists explore their creativity by combining opposing components like intricacy and the dark side.

    This results in a beautiful drawing worthy of being inked on the skin. This design screams, “Beauty can bloom even in adversity.

    4. Celestial Tattoo Drawings

    Celestial Tattoo Drawings

    Source: u/iovulca

    If you’re into cosmology and numerology, celestial-inspired tattoos are perfect!

    This design entitled “The Creation of the Universe” showcases planets, stars, galaxies, the moon, and the sun at the centermost in a beautiful bohemian way.

    5. Anchor Tattoo Drawings

    Anchor Tattoo Drawings

    Source: Johnnyy_cost

    You’ll find one too many anchor tattoos inked among men. It’s one of the oldest designs ever! Anchors symbolize stability, given that they keep a ship grounded.

    For anybody wanting to remain strong and afloat in difficult times, an anchor tattoo is for you.

    6. Gypsy Girl Tattoos

    Gypsy Girl Tattoos

    Source: samphilipsdesign.tumblr.com

    A favorite among women is the gypsy girl tattoo. These tattoos depict a beautiful woman with nice flowing hair dressed in ornate clothes and accessories.

    This beautiful drawing signifies a strong and independent woman. It’s the go-to feminine-themed design.

    7. Dragon Tattoo Design

    Dragon Tattoo Design

    Source: Astuces de filles

    A dragon is a legendary creature born in the ancient world. Popular dragon designs are often of Chinese dragons.

    These traditionally symbolize power and strength as these dragons are known to have control over water, rainfall, typhoons, and floods.

    8. Cobra Tattoo Designs

    Cobra Tattoo Designs

    Source: Joaquimpassos

    Among snake tattoos, cobra tattoo design drawings are the most common. Cobras symbolize wisdom, power, and protection. If you want safety and control, consider a cobra design.

    9. Snake Skull Tattoo Drawing Design

    Snake Skull Tattoo Drawing Design

    Source: Vexels

    A snake skull tattoo is a symbol of transformation and rebirth. The snake winding around the skull gives off the feeling of power and danger. It can also be a symbol of death and the underworld.

    This drawing is a nice suggestion if you want a dark and dangerous design.

    10. Snake Tattoo Drawing Ideas

    Snake Tattoo Drawing Ideas

    Source: PetPress

    We’re not done with snakes! A snake tattoo is a popular design because snakes are powerful, evocative creatures.

    There are a ton of snake drawing ideas out there that will make your design research a breeze!

    11. Mushroom Tattoo Drawing Ideas

    Mushroom Tattoo Drawing Ideas

    Source: qecbalis

    Mushrooms are mysterious and magical organisms. They can also symbolize fairytales and fantasies. This trippy design has mushrooms growing out of eye sockets.

    It’s one of those unique drawing ideas that attracts hippies.

    12. Octopus Tattoo Design

    Octopus Tattoo Design

    Source: Aeron Brown

    An octopus tattoo can mean many things, such as illusion, mystery, and intricacy. It is also a symbol of the ocean and water.

    If you want an animal-themed design, this sea creature has much potential for artistic interpretation.

    13. Owl Tattoo Designs

    Owl Tattoo Designs

    Source: Victor Bondarchuk

    Owl Tattoo Designs

    Source: Unknown

    This sketch of an owl beautifully showcases its eyes which are famous for their ability to see in the dark. Owls represent wisdom, knowledge, and protection. As nocturnal creatures, they are also associated with the moon.

    An owl is a good idea if you want a deep spiritual tattoo!

    14. Melting Clock Tattoo Design

    Melting Clock Tattoo Design

    Source: Cherry Pie Art Stamps

    A melting clock tattoo is one of the more popular philosophical drawings you can find. It represents someone’s fear of the future.

    If you are somebody who wishes to express their anxiety for the future, this tattoo design does not disappoint!

    15. Pocket Watch and Compass Tattoo Designs

    Pocket Watch and Compass Tattoo Designs

    Source: TattoosBoyGirl

    A pocket watch and compass tattoo are popular for people fascinated with the unknown. These two items also symbolize magic and spells.

    16. Samurai Tattoo Designs

    Samurai Tattoo Designs

    Source: Mungfali.com

    Samurais are Japanese warriors devoted to protecting the lives of their people. Samurais are known for their courage, strength, and discipline.

    A samurai tattoo drawing is perfect for those who want to show off their samurai values and warrior spirit literally on their sleeves.

    17. Minimalist Geometric Tattoo Drawing Ideas

    Minimalist Geometric Tattoo Drawing Ideas

    Source: BeWhoYouAre

    Many tattoo shops specialize in minimalistic geometric drawing ideas. These designs are good ways to kick-start your career for any beginner artist.

    They are simple yet elegant. And because of its pure nature, it’s common for people to get multiple tattoos inked in one session.

    18. Leo's Head Tattoo Designs

    Leo's Head Tattoo Designs

    Source: Alessandro Pikeno

    Lions are on top of the food chain for a reason. They are brave and powerful—a lion tattoo designed for anybody who wants to wear their pride and masculinity on their sleeve.

    19. Elements of Nature Tattoo Drawing Ideas

    Elements of Nature Tattoo Drawing Ideas

    Source: freddy3698

    Here’s another nature-inspired design!

    This one beautifully encapsulates the four elements of nature, fire, earth, air, and water. Its clean, distinct lines make this work of art even more elegant and stunning.

    20. Aries Tattoo Designs

    Aries Tattoo Designs

    Source: Tattoosforyou

    Many tattoo artists take inspiration from zodiac signs. A Ram represents the Aries. People with the Aries sign are thought to be independent, impulsive, energetic, ambitious, and passionate.

    If this is your zodiac sign, getting tattooed for it would be nice.

    21. Japanese Koi Fish Tattoo Drawing Design

    Japanese Koi Fish Tattoo Drawing Design

    Source: Nomadic Canadian

    Koi fish swim against the current, making them a relevant symbol for anybody bracing and overcoming difficulties. Koi fish in Japanese culture represents strength, power, and determination.

    If you want to be reminded of these beliefs, you better start sketching some koi!

    22. Flowers Tattoo Designs

    Flowers Tattoo Designs

    Source: Marco Brandao

    A lot of women go for delicate floral designs. They’re easy on the eyes and bring great joy to anybody who sees your tattoo.

    For a light-hearted design, these daisies do just the trick! Learn to draw beautiful flowers with these drawing ideas.

    23. Angel Tattoo Drawings

    Angel Tattoo Drawings

    Source: Elisabeth Brekke

    An angel is derived from the Latin word “angelus,” meaning the “messenger of God.” Most people get angel tattoo drawing ideas to represent their faith. Angels also serve as a reminder that you are protected.

    Angel tattoos like this can be simple, elaborate, or even comedic.

    24. Feathers Tattoo Drawings

    Feathers Tattoo Drawings

    Source: mcgrafite

    Many get feathers and birds to symbolize their free-spiritedness, bravery, and strength. Its spiritual meaning comes from its Native American roots.

    Feathers are popular designs for those who believe in themselves no matter the circumstance.

    25. Rose and Dagger Tattoo Designs

    Rose and Dagger Tattoo Designs

    Source: Kayla Rae

    Rose drawings are one of the most popular tattoos for men and women. A rose and dagger tattoo drawing represents life's harshness, playing with the phrase, “Life is no bed of roses.”

    It’s one of those sketch tattoos that never go out of style.

    26. Rose and Snake Tattoo Designs

    Rose and Snake Tattoo Designs

    Source: vicink

    Here is another rose tattoo drawing, but this time with a snake winding around its stem. The snake is fierce, while the rose is elegant. This combination represents love so strong that it has lost its innocence.

    27. Rose and Skull Tattoo Designs

    Rose and Skull Tattoo Designs

    Source: Chelsea Peters illustration

    This rose, and skull drawing carries the meaning of rebirth after facing adversity. A skull symbolizes death and darkness, while a rose symbolizes hope. These beautiful sketches are easy to build with more color, depending on your taste.

    28. Tiger Tattoo Ideas

    Tiger Tattoo Ideas

    Source: xgtfyh

    The tiger is well-known as a powerful beast. This tiger drawing can easily fill up your whole sleeve and represent strength.

    29. Butterfly Tattoo Drawings

    Butterfly Tattoo Drawings

    Source: Lilly

    Butterflies as a tattoo on someone’s body is always a beautiful sight to see! Butterflies are symbols of new beginnings and transformation. It’s a great tattoo drawing for anyone going through a major change.

    30. Eagle Tattoo Drawings

    Eagle Tattoo Drawings

    Source: Russ

    An eagle tattoo drawing is associated with wisdom, power, and spirituality. They can also mean freedom and independence.

    Many people get an eagle tattoo to represent their patriotism and warrior spirit.

    31. Tribal-inspired Tattoo Drawings

    Tribal-inspired Tattoo Drawings

    Source: Mungfali.com

    In many cultures and tribes, only certain members receive tattoos to symbolize their courage, leadership, and loyalty.

    Tribal tattoos vary in shape and patterns and have ethnic origins. Undoubtedly, any tribal tattoo will make you look fierce and brave.

    32. Birds, Arrow, and Skull Tattoo Drawings

    Birds, Arrow, and Skull Tattoo Drawings

    Source: Nikita Sergushkin

    Any skull tattoo drawing on the body will represent some adversity experienced in the past or present.

    This powerful combination of a skull, arrow, and bird means you can rise again from these troubles.

    33. Sword in Horned Skull Tattoo Design

    Sword in Horned Skull Tattoo Design

    Source: Dominika Bulka

    A sword in a horned skull is the perfect design for anybody who wants a dangerous tattoo. Naturally, both the skull and blade represent fighting to the death.

    This blade in a horned skull drawing also symbolizes your willingness to fight for what you believe in.

    34. Tribal Wolf Tattoo Drawings

    Tribal Wolf Tattoo Drawings

    Source: justsmoke5358

    Wolves are considered noble warriors, great leaders, and family protectors. Native American warriors get tribal wolf tattoos to represent their loyalty to the tribe and willingness to protect their own people.

    35. Mandala-inspired Tattoo Drawings

    Mandala-inspired Tattoo Drawings

    Source: Tiare kalehua Alconcel

    Mandala tattoos are popular drawing ideas today. They are not the easiest to sketch or tattoo on the body, but they can be worth it! Mandala tattoos represent eternity and perfection, given their intricate and seemingly endless patterns.

    36. Ornamental-inspired Tattoo Drawings

    Ornamental-inspired Tattoo Drawings

    Source: Nurul Islam

    Ornamental tattoos may look simple. But don’t be fooled. These tattoo drawing ideas are not that easy to sketch. Ornamental tattoos have to be perfectly symmetrical. A steady hand will do the trick!

    37. Judgment Chain Tattoo Design

    Judgment Chain Tattoo Design

    Source: Nana

    If you are interested in anime, you'll love this! Most artists draw inspiration from shows, cartoons, and characters too.

    This tattoo drawing, in particular, has a Hunter x Hunter reference. It's the perfect tattoo drawing for Japanese manga fans!

    Cartoon drawings are another great option if you're looking for a more whimsical style.

    38. Landscape Tattoo Drawing Ideas

    Landscape Tattoo Drawing Ideas

    Source: Diyhaustiere

    Landscape and scenery tattoo drawing ideas are the perfect designs for someone who wants to be reminded of certain memories of places.

    It can represent a recent trip, where you grew up, where you first met a lover - the design possibilities are endless!

    39. Hand, Skeleton, Butterflies Tattoo Drawing Ideas

    Hand, Skeleton, Butterflies Tattoo Drawing Ideas

    Source: Daniel_malin

    Hand, Skeleton, Butterflies Tattoo Drawing Ideas

    Source: ash

    Hand, Skeleton, Butterflies Tattoo Drawing Ideas

    Source: Madina

    This minimalistic sketch of a hand, skeleton, and butterflies is a work of art! These simple yet impactful tattoos are easy on the eye. This tattoo, in particular, represents the beautiful fleeting moments of living.

    40. Skeleton, Butterfly, Flowers Tattoo Drawing Ideas

    Skeleton, Butterfly, Flowers Tattoo Drawing Ideas

    Source: Oona Dole

    Now it’s not just a skull; it’s the whole rib cage! This skeleton, butterfly, and flower tattoo drawing is a unique play on life's relationship with death. It is symbolic of the circle of life.

    41. Emotional Intelligence Tattoo Drawing Ideas

    Emotional Intelligence Tattoo Drawing Ideas

    Source: Mind Help

    This tattoo of a hand-playing puppet with the mind and heart works on overcoming difficulties in decision-making. What prevails, emotions or logic? This sketch is a beautiful piece that represents emotional intelligence.

    42. Elephant Tattoo Drawing Ideas

    Elephant Tattoo Drawing Ideas

    Source: Greg

    In the animal kingdom, elephants represent strength, loyalty, divinity, and good luck. These sketch drawings can be simple or intricate, with shading to look as realistic as possible. It’s up to you!

    43. Cat Tattoo Drawing Ideas

    Cat Tattoo Drawing Ideas

    Source: Mits

    Many people like to have an immemorial keepsake of their pets. If you have or have a cat, getting a tattoo drawing of them would be a great idea!

    It's up to you how you want to remember them. This sassy sphinx is almost human-like.

    44. Dreamy Tattoo Drawing Ideas

    Dreamy Tattoo Drawing Ideas

    Source: Arlene Banks

    Let your imaginations run wild and free! Get creative with your drawings. This dreamy hot air balloon, sailboat, and ocean drawing look like they came off a fairytale page!  

    45. Wings Tattoo Drawing Ideas

    Wings Tattoo Drawing Ideas

    Source: Debra Perkins-Thoroughman

    Tattoo drawings of wings can fill up your whole torso or back or can be whatever size you want them to be.

    They symbolize freedom, dreams, and faith. As wings are an essential part of angels, they usually have religious or mythological origins.

    46. Wolf with Lily and Arrow Drawing

    Wolf with Lily and Arrow Drawing

    Source: tattoodesign

    The three elements have strong and deep symbolism. The wolf represents loyalty, love, and integrity. The lily represents purity and innocence. The arrow represents struggle and triumph.

    47. Skull with Smoke/Wind Drawing Design

    Skull with Smoke/Wind Drawing Design

    Source: Cool Tattoo Ideas

    Skull tattoos are very visually striking. This is a unique take on the popular and classic smoking skull tattoo designs. It is a symbol of the working class and a humble beginning.

    48. Ghost Mushroom Tattoo Drawing

    Ghost Mushroom Tattoo Drawing

    Source: Amuleto Tattoo

    In many cultures, mushrooms represent good luck. They also symbolize magic and mystery. This ghost mushroom will make a cute little addition to your tattoo count!

    49. Bird Skull with Crystals

    Bird Skull with Crystals

    Source: Sarah Winiarski

    This bird skull and crystal tattoo look both creepy and cool. Bird skulls often mean courage and the power to rise again from trouble. Crystals growing from that could mean a beautiful triumph.

    50. Diseased Tongue with Eyes

    Diseased Tongue with Eyes

    Source: u/spooky_tricks

    There is no limit to your imagination when it comes to spooky tattoos! This creepy fanged mouth with a diseased tongue has Halloween all over it.

    51. Skull with Mushrooms

    Skull with Mushrooms

    Source: Unknown

    There is no limit to your imagination when it comes to spooky tattoos! This creepy fanged mouth with a diseased tongue has Halloween all over it.

    52. Moon with Mushrooms Tattoo Design

    Moon with Mushrooms Tattoo Design

    Source: Cat Mallard

    If you are into magic and fairytales, this is a pretty design. This crescent moon tangled with mushrooms and strawberries is a feminine design you can easily have on your arm.

    53. Beast Woman Drawing

    Beast Woman Drawing

    Source: Euphoria

    This beast woman can mean power and independence. It can also represent your ambition and ferocity. Some people also get these tattoos when they feel devilish or ruthless.

    54. Animal Woman with Flower Crown

    Animal Woman with Flower Crown

    Source: Archzine.net

    This animal or fairy-looking women's tattoos are drawn with beautiful, distinct lines. They’re great for feminine-themed tattoos that also give that mythical and magical vibe.

    55. Mushrooms and Crystals

    Mushrooms and Crystals

    Source: LLArtisticDesigns

    People with crystal tattoos are often seen as firm and strong-willed. Matched with the mushroom drawing representing good luck, it’s all positive energies for this tattoo drawing of choice!

    56. Floral Face

    Floral Face

    Source: Omar Faruq Rijibi

    This tattoo with distinct deep eyes almost seems to look into your soul. This unique play with floral designs makes this tattoo drawing very visually striking.

    57. Thoughts Shape Reality

    Thoughts Shape Reality

    Source: DantesDots

    This detailed tattoo drawing is very intriguing. Different elements that represent math and sciences growing out of the figure of a thinking man could mean these are the thoughts that consume him and shape his reality.

    58. Intricate Geometric Tattoo Drawing

    Intricate Geometric Tattoo Drawing

    Source: Soufanielfanany

    This intricate geometric tattoo has symmetry all over it. It is also composed of various elements that represent all living things and nature. It could seem religious or scientific to get a tattoo design like this.

    59. Double Helix Geometric Tattoo

    Double Helix Geometric Tattoo

    Source: Mara Dann

    This tattoo that involves a meditating human and a double helix could be interpreted in many ways. But all in all, the theme is about living and balance.

    60. Twin Faces

    Twin Faces

    Source: Pedro Alonso

    The two-face tattoo symbolizes the balance of good and bad in one’s eyes. Humans face many circumstances that shape themselves into meaning and purpose. This is a good tattoo if you’re working on what nature throws at you.

    61. Bleeding Eye and Cloudy Moon

    Bleeding Eye and Cloudy Moon

    Source: Akvector

    A popular interpretation of this tattoo is the omnipresent eye of god watching over you from above. It is a symbol of providence and guidance from the divine. It’s a good tattoo design to represent your faith.

    62. Blindfolded Woman Tattoo Drawing Ideas

    Blindfolded Woman Tattoo Drawing Ideas

    Source: Sh Albinali

    A blindfolded woman could mean Lady Justice. This is a good tattoo design if you fight for justice and equal rights.

    63. Grasped Hands with Planets

    Grasped Hands with Planets

    Source: Twism

    Grasped hands tattoo designs could represent two people committing to each other. This tattoo with the planets and the sun surrounding the grasped hands could play with the thought of “us against the universe.”

    64. Comedy and Tragedy Tattoo

    Comedy and Tragedy Tattoo

    Source: Unknown

    This two-face design is an artistic interpretation of the line, “Laugh now, cry later.”

    It is a popular expression to remind us that there are always good and bad times in our lives. Stay positive even when times are tough.

    65. Skull On Butterfly Wing

    Skull On Butterfly Wing

    Source: wakia

    As skull tattoos remind us that death is inevitable, and butterfly tattoos signify rebirth and change, this unique combination can remind us of accepting fate and living in the present.

    66. Damaged Love Doll Tattoo Design

    Damaged Love Doll Tattoo Design

    Source: Unknown

    Voodoo dolls are used to manipulate people they are associated with through witchcraft and black magic.

    This damaged voodoo doll design could represent your heartbreak and the pain it has cost you.

    67. Heart Potions

    Heart Potions

    Source: Unknown

    This tattoo is a clear representation of love potions in heart-shaped bottles. It could mean love is bottled up for safekeeping.

    This design is bright and bubbly. It brings a smile to those who see it.

    68. Hummingbird

    Hummingbird

    Source: Westend Tattoo & Piercing Budapest

    Hummingbirds with a floral theme are very popular designs among women.

    This design symbolizes lightness, vulnerability, purity, and grace. It’s a way for girls to showcase their sensuality and tenderness.

    69. Woman Emerging from Split Skull

    Woman Emerging from Split Skull

    Source: Doriana Popa

    The skull with a sword between it symbolizes any trouble you might have experienced.

    The woman with a flower crown emerging from it could metaphorically mean triumph after bracing through a tough time.

    70. Valkyrie

    Valkyrie

    Source: Simbolos y su Significado

    In Norse mythology, Valkyrie means the “chooser of the slain.” These are a group of maidens sent to battlefields to choose the slain worthy of Valhalla, the “hall of the fallen.” Valkyrie is an image of female domination, power, and prestige.

    71. Woman Framed by Flowers

    Woman Framed by Flowers

    Source: Chiktattoo

    Beautiful girls adorned with floral designs are popular tattoo drawing designs for those who want to show off their sensuality and vulnerability.

    The complexity of the design can vary depending on your taste. Some like to add colors too.

    Realistic females aren't the only kind of feminine drawings you can create! Here are some more drawing ideas for girls.

    72. Deer Skull With Crescent Moon

    Deer Skull With Crescent Moon

    Source: Wasi Kendedes

    A deer skull represents re-growth, rebirth, protection, and balance. Crescent moons represent wealth and good luck. Combining these two elements in this tattoo generally means protection against negativity.

    73. Ruined Church Skull Tattoo Drawing

    Ruined Church Skull Tattoo Drawing

    Source: Sa Brina

    This dark and scary tattoo could be interpreted as a person leaving behind a certain chapter in their past and is about to start their life anew. This could be in terms of religious beliefs or a way of living.

    74. Frog with Toadstool Hat

    Frog with Toadstool Hat

    Source: laura

    Frog tattoos differ in meaning from person to person. But generally, a frog tattoo symbolizes wisdom, transformation, growth, and abundance.

    In Japanese culture, they are also believed to carry good luck and protection. Have this design inked to carry luck everywhere with you!

    Tips for Beginner Tattoo Artists

    Tattooing skin isn't easy. You must have strong artistic skills and a good hand with the technical stuff.

    Admittedly, there's no such thing as “the perfect design.” One design might be better than the other based on the eyes of fellow tattoo artists.

    However, any criticism should only help you better create your style and push you harder to pursue this artistic passion!

    If you are a beginner tattoo artist, here are a few tips to help you develop your craft:

    Practice Drawing

    A successful tattoo artist needs to have strong sketching skills. Designs will vary per client, so you better be equipped to fulfill their requests.

    These tattoo drawings may be as basic as lines, geometric shapes, and patterns. But they can also be as detailed, intricate, and realistic-looking as a full-bodied dragon on a full sleeve!

    If you're just getting started, consider these drawing ideas for beginners.

    Drawing is difficult to master. But your drawings should look better daily as long as you put in the work hours.

    Experiment with the Tools

    Before tattooing real skin, you must practice using tools and machinery on the affected skin.

    This will help prevent clients from making expensive and embarrassing mistakes on clients. If you're not ready to practice on fake skin, consider making digital drawings on an iPad instead.

    Build a Portfolio

    Every tattoo artist should create a strong portfolio for future clients to believe in and buy into their craft. Make sure to showcase your best works.

    If you’re still new, start working on a portfolio now!

    Apply for an Apprenticeship

    Find yourself a mentor, or look for tattoo shops that accept interns.

    In the tattoo industry, it is crucial to learn and be amongst the masters of the craft to be successful.

    How to Make Your Own Tattoo Drawings

    How to Make Your Own Tattoo Drawings

    Designing your own tattoos will make the experience even more meaningful!

    Remember, tattoos are amazing works of art that permanently stay on the body. So get creative and make it personal!

    If you don’t know where to start, here are some great tips:

    Consider the Placement of the Tattoo

    Before considering what tattoo drawing to get, consider where you want your tattoo to be inked.

    Do you want to show off your tattoo to the whole world? Or do you prefer it to be more discrete?

    Draw Inspiration From Tattoo Magazines

    Consider a theme, belief, or message that you live by. Or perhaps an image that reminds you of a significant someone, something, or event in your past.

    Look up relevant keywords on Google or gather ideas from art books and tattoo magazines. Discover a list of ideas for things to draw.

    The best works of top-notch tattoo artists get showcased in these magazines. No doubt, you’ll find something that will catch your eye!

    Start Sketching

    If you have the talent, sketch your tattoo design. If you have a lot of ideas in mind, jot them out on paper and brainstorm on incorporating them into your tattoo design.

    If you want color on your tattoo, that's fine. But do consider the need for ink touch-ups in the future since colored tattoos require more maintenance.

    Most people will choose a monochromatic tattoo design because it also looks cleaner. Other options include glow-in-the-dark and white ink.

    If you're sketching a black-and-white tattoo, try using mechanical pencils to avoid the hassle of sharpening.

    Find the Right Tattoo Artist

    After coming up with your desired tattoo design, look for an artist to bring it to life. Ideally, you want someone professional and licensed to ensure the job is done correctly.

    Examining their portfolios is the best way to determine if they're the perfect fit for you. Some tattooists may even give you valuable suggestions that can take your idea to a new level.

    Tattoo Drawing Ideas Conclusion

    Tattoo Drawing Ideas Conclusion

    Tattoo artists and tattoo enthusiasts, your opportunities are limitless!

    Creating beautiful and meaningful designs is at the tip of your pencils and, eventually, at the end of a needle.

    Whether your tattoo is an eagle for strength, a flower for femininity, or a skull for death, every tattoo should be memorable and worth permanently marking on the skin.

    We hope this article stoked your creativity and helped you choose your tattoo design!

    Learn how to stretch watercolor paper like a pro! My article will guide you through the process with tips and tricks for optimal results. So, let's dive in and get ready to stretch!

    If you're a watercolor artist, you know that painting on stretched paper is the way to go. But why? The answer is simple: stretched paper allows you to control the paint better, leading to fewer accidents and more satisfying results.

    Plus, it prevents the paper from warping or buckling as you apply the paint. In this article, I'll show you how to stretch watercolor paper and some tips and tricks to get it just right.

    Essential Materials for Stretching Watercolor Paper

    Essential Materials for Stretching Watercolor Paper
    © Homesthetics - Dylla Setyadji

    To get started, you'll need a few materials to prepare the watercolor paper. Let's take a look at what you'll need:

    First up, you'll need some masking watercolor tape to secure your paper to the watercolor stretching board. A watercolor stretching board is also a must-have - this will keep your paper taut and prevent it from warping as you work. Butcher tape paper towel, and gummed paper tape are also great to have on hand to keep your workspace clean and tidy.

    Of course, you can't stretch watercolor paper without, well, watercolor paper! Look for a large watercolor paper that is thick enough to handle the process but not so thick that it becomes difficult to work with. A watercolor block is great for smaller paintings, while larger watercolor sheets are perfect for bigger projects.

    Next, you'll need some watercolor paint, a flat surface to work on, and a wet sponge. Thicker paper will also come in handy, as will a spray bottle for misting your paper as you work. You may also want to invest in a palette knife for mixing your paint and some blotting paper to soak up any excess water.

    It's important to make sure your paper stays flat as it dries, so a sturdy board is a must. Marine-grade plywood is a popular choice, but any flat surface will do. And don't forget about watercolor cleaning supplies! You'll want clean paper and a clean watercolor stretching board to work with, as well as a damp sponge to clean up any messes.

    Finally, you'll need a few hours and a lot of patience. Many artists opt to soak their paper before stretching it to help the fibers expand evenly. Once you've stretched your paper and allowed it to dry flat, you're ready to start your watercolor painting journey!

    Unlocking the Magic: Benefits of Stretching Paper

    Now that we have discussed the materials needed for stretching watercolor paper let's talk about the benefits of this technique. Trust us, stretching your large watercolor paper is worth the extra effort!

    Firstly, stretching your watercolor paper keeps it taut and prevents it from warping or buckling when wet. This ensures that your painting will have a smooth and even surface, which is crucial for achieving those fine details and creating a professional-looking piece.

    Secondly, stretching your paper helps to keep the paper fibers intact, preventing them from getting damaged during the painting process. This means that your paper will be more durable and able to withstand multiple layers of watercolor paints.

    Thirdly, stretched watercolor paper is able to absorb water and paint more evenly, allowing you to achieve a wider range of textures and gradients. This gives you more control over your painting and allows you to experiment with different techniques.

    Finally, the stretched watercolor paper makes the painting process more enjoyable and less frustrating. By keeping your paper flat and even, you can focus on your art without worrying about your paper warping or buckling.

    So, there you have it! Stretching your watercolor paper may take a little extra time and effort, but the benefits are well worth it. Not only will it improve the quality and durability of your paintings, but it will also make the painting process more enjoyable.

    How to Stretch & Prepare Watercolor Paper

    Stretching watercolor paper is a fun and rewarding experience that every watercolorist should try. With a little bit of practice and patience, you can easily master this essential skill and create beautiful watercolor paintings that will leave everyone in awe.

    So, are you ready to create beautiful watercolor paintings on stretched paper? Well, there are two common methods you can use: wet stretching and dry stretching. Let's dive into the step-by-step process for each method:

    Wet Stretching Method

    If you're looking to achieve a perfectly flat and smooth surface for your watercolor paintings, the wet stretching method is a great option. Here are the steps to wet stretching:

    1. First, cut your watercolor paper to the desired size.
    2. Next, soak the paper in cold water for about 5-10 minutes to help the fibers expand.
    3. While the paper is soaking, make sure you have a clean, flat surface to work on.
    4. After soaking, remove the paper from the water and place it on a flat surface, making sure the smooth side is facing up.
    5. Secure the edges of the paper to the surface using masking tape.
    6. Finally, allow the paper to dry completely before you start painting.

    One of the benefits of wet stretching is that it allows the paper fibers to expand and relax, which creates a flatter surface for painting. Additionally, by soaking the paper before stretching, you can avoid any buckling or warping that may occur when painting on dry paper.

    However, wet stretching can be a bit time-consuming and requires some patience, as you need to wait for the paper to dry completely before you can start painting. Additionally, it's important to use the right kind of tape to secure the paper to the surface, as some tapes may damage the paper or leave residue behind.

    Overall, the wet stretching method is a great option for artists who want to achieve a smooth, flat surface for their watercolor paintings.

    Dry Stretching Method

    If you're looking for an alternative to wet stretching, the dry stretching method can be a great option for stretching your watercolor paper.

    1. Again, start by cutting your watercolor paper to the desired size.
    2. Using a spray bottle or watercolor brush, wet the back of the paper with water.
    3. While the paper is still damp, place it on a clean, flat surface, making sure the smooth side is facing up.
    4. Secure the edges of the paper to the surface using masking tape, ensuring that the paper is taut and wrinkle-free.
    5. Finally, allow the paper to dry completely before you start painting.

    Dry stretching is a great option if you don't want to deal with a tub of water and the potential mess that can come with wet stretching. Plus, with dry stretching, you can start painting sooner, as it doesn't need as much time to dry as with wet stretching.

    One thing to keep in mind with the dry stretching method is that the paper may not be as taut as with wet stretching, which can result in some buckling or warping. However, this can be easily remedied by flattening the paper after it dries using a heavy book or similar object.

    Overall, both wet and dry stretching methods have their pros and cons, and it's up to you to decide which method works best for your needs and preferences. For wet stretching, soaking will help prevent tearing during the process. For dry stretching, wetting the back of the paper is key. Make sure your paper is completely dry before you start painting for the best results.

    Don't be afraid to experiment and find the method that works best for you. With practice, you'll soon be creating beautiful, professional-looking watercolor paintings on perfectly stretched paper. Now, let's get creative!

    Common Mistakes to Avoid

    It's easy to make mistakes during the process of stretching paper that can result in a less-than-ideal painting surface. Here are some common mistakes to avoid while stretching watercolor paper:

    1. Not Properly Soaking the Paper

    Whether you're wet stretching paper or dry stretching, it's important to make sure you have thoroughly dampened or soaked the paper before securing it. This will help prevent tearing and ensure a smooth surface.

    2. Using the Wrong Type of Tape

    Not all tapes are created equal when it comes to securing watercolor paper. Avoid using strong adhesive tapes or tapes that are difficult to remove, as these can damage the paper or leave a residue.

    3. Overstretching the Paper

    It can be tempting to really stretch the paper tight to avoid any wrinkles, but overstretching can actually cause the paper to become too thin and fragile. This can result in paint bleeding through the paper or even tearing.

    4. Rushing the Drying Process

    It's important to let the paper dry completely before starting to paint. Using a hairdryer or other methods to speed up the process can cause the paper to warp or buckle.

    5. Over-wetting the Paper

    While it's important to wet the paper before stretching it, overwetting can cause the paper to become too delicate and prone to tearing. Make sure to only wet the paper enough to allow for easy stretching, and avoid soaking it for too long.

    6. Under-taping the Paper

    When securing the edges of the paper to the surface, it's important to use enough masking tape to keep the paper taut and wrinkle-free. If the tape isn't secure enough, the paper may shift or warp while it is drying, resulting in an uneven surface for painting.

    By avoiding these common mistakes, you can ensure that your watercolor paper is properly stretched and ready for painting. Remember, taking the time to properly prepare watercolor paper stretchers will ultimately lead to a more successful and satisfying painting experience.

    Creating Artwork with Watercolor Pencils on Stretched Paper

    Creating artwork with watercolor pencils on stretched paper is a great way to experiment with the medium and produce beautiful, vibrant pieces. By following a few simple steps, you can create stunning artwork that showcases the unique qualities of both watercolor pencils and stretched paper.

    First, start by stretching your watercolor paper using the method of your choice. Once it is stretched and dry, use a regular pencil to sketch out your design. Then, use your watercolor pencils to add color to your sketch.

    When working with watercolor pencils on stretched paper, it's important to keep in mind that the colors will appear more vibrant and saturated than on regular paper. You can layer the colors to create depth and texture and blend them with water to create a more watercolor-like effect.

    To blend the colors with water, use a clean, damp brush and work in small sections. Be careful not to use too much water, as this can cause the paper to become overly saturated and potentially warp or buckle. Instead, work slowly and allow each section to dry before moving on to the next.

    Once you have finished adding color, allow the paper to dry completely. You can then add additional details using watercolor paints or other art materials if desired. When your artwork is complete, you can display it proudly, knowing that you have created a stunning piece using the unique qualities of watercolor pencils and stretched paper.

    Overall, creating artwork with watercolor pencils on stretched paper is a fun and rewarding process. With a little practice, you can create beautiful pieces that showcase the unique qualities of both mediums.

    Pro Tips For Mastering Watercolor Paper Stretching
    © Homesthetics - Dylla Setyadji

    Pro Tips For Mastering Watercolor Paper Stretching

    Pro Tips Tip #1 Tip #2 Tip #3 Tip #4
    Tips for Preparation Choose the right adhesive for your paper, considering its weight and thickness. Measure and cut your paper to the desired length before soaking it in water. Avoid using too much water to prevent over-soaking. ---
    Tips for Soaking and Applying Adhesive Use a tray to soak the paper and allow it to rest for at least 5-10 minutes. Remove the paper from the water and place it on a clean surface. Use a ruler to ensure the paper is straight and even. Apply the adhesive to the edges of the paper using a paintbrush or your finger.
    Tips for Stretching and Securing the Paper Fold the edges of the paper onto a piece of medium-density fiberboard (MDF) or canvas and staple them down. Use a utility knife to trim off any excess paper. Hammer the staples down to ensure they are secure. ---
    Tips for Drying and Finishing Allow the paper to dry completely, using a fan or hair dryer if necessary. Once dry, remove the staples and trim off any excess MDF or canvas. Applying a primer or sizing to the paper before stretching can also help improve its absorbency and prevent pigment from sinking into the paper fibers. ---
    Additional Tips To prevent fingerprints on your paper, handle it with clean hands or use drawing pins to hold it in place instead of your fingers. If you're having trouble getting the paper to stick to the MDF or canvas, try using a candle or wax to create a wax seal on the edges of the paper. --- ---

    Stretch watercolor paper with butcher tape, gummed tape, or stretching boards. Soak paper and place it on a flat surface, then use a spray bottle to apply excess water. Keep edges taped to prevent warping. Use a sturdy board and avoid air pockets. Clean and dry the paper before stretching. Use a large brush to apply glue on one side of the paper for a watercolor paper stretcher. Use watercolor sheets and ensure they are the same size.

    Use a large brush or clean sponge to remove excess water and air bubbles, ensuring a smooth surface. The paper should be allowed to dry flat on the board. When purchasing art materials, it is important to choose a clean board and clean paper to prevent any damage to the surface.

    Many artists prefer to stretch large sheets in the same direction to avoid any unwanted marks or creases. Heat and angle should also be taken into account during the papermaking process to prevent any unwanted watermarks or damage to the paper.

    Metal should be avoided when working with watercolor paper, as it can leave scratches on the surface. Overall, stretching watercolor paper is an important step in creating successful paintings and should be done with care and attention to detail.

    With these pro tips for mastering watercolor paper stretching, you'll be able to create a perfect surface for your watercolor painting, allowing you to fully express your creativity and achieve stunning results.

    Alternatives to Stretching Watercolor Paper

    Stretching watercolor paper isn't always feasible or desirable. Luckily, there are other methods for preventing your paper from buckling. Here are a few alternatives:

    1. Using Heavyweight Paper

    One way to prevent the paper from buckling is to use heavyweight paper. A heavier paper can absorb more water, making it less likely to warp or buckle. This method is a good option if you don't want to go through the stretching process, but it does have its drawbacks. Heavier paper can be more expensive, and it may not work as well for certain techniques.

    2. Using Watercolor Blocks

    Watercolor blocks are pre-stretched pads of watercolor paper that are glued together on all four sides. Because the paper is already stretched, there's no need to go through the stretching process. This method can be convenient and time-saving, but it can also be more expensive than buying loose watercolor sheets of paper.

    3. Using Masking Tape

    If you're looking for a quick and easy way to prevent your paper from buckling, you can try using masking tape. Simply apply masking tape to the edges of your paper before you start painting. This will help keep the paper flat as it dries. However, this method can be a bit messy and may not work as well for larger pieces of paper.

    4. Using a Paper Press

    A paper press is a tool that can be used to flatten and dry your watercolor paper. This method involves placing your wet paper between two pieces of absorbent material (such as blotters or towels) and then pressing them together using a press. This can be a good option if you don't have the space or materials for stretching, but it does require an additional investment in the press.

    Watercolor artists who want to try alternative methods to stretching paper have a few options to choose from. One popular method involves using a stretch fabric or textile, like cotton, to create a taut surface for the watercolor paper.

    Another option is to use poly(methyl methacrylate) or gelatin sizing to prevent moisture from seeping into the paper. Some artists also use foam or punched tape to create a textured surface that helps keep the paper in place.

    Additionally, natural rubber can be used to create a gummed paper tape that can be applied to the edges of the paper to prevent warping. It's important to note that these methods may have pros and cons, such as requiring more time and effort or not providing the same level of tautness as traditional stretching methods.

    Each of these methods has its own pros and cons, and it's up to you to decide which one is the best fit for your needs. Whichever method you choose, remember that preventing buckling is crucial for achieving a professional-looking watercolor piece.

    Watercolor Paper Stretching FAQs

  • How do I know if my watercolor paper needs to be stretched?

    If your watercolor paper begins to buckle or warp and weft when it becomes wet with watercolor paints, it may need to be stretched.

  • What materials do I need to stretch watercolor paper?

    You will need watercolor paper, masking tape, a clean flat surface, and either cold water (for wet stretching) or a spray bottle/brush and water (for dry stretching).

  • Can I stretch watercolor paper after I've already started painting it?

    It’s possible, but it may be more difficult and could cause the paint to buckle or warp. It’s best to stretch the paper before starting to paint.

  • What's the best way to stretch watercolor paper?

    There are two common methods for stretching watercolor paper: wet stretching and dry stretching. Both methods have their advantages, and it depends on personal preference.

  • How long should I soak my watercolor paper before stretching it?

    For wet stretching, soak the paper in cold water for about 5-10 minutes.

  • Can I use a hair dryer to speed up the drying process after stretching the paper?

    It’s not recommended to use a hairdryer as it may cause the paper to warp or buckle. It’s best to allow the paper to air dry completely.

  • What happens if I don't stretch the watercolor paper?

    If you don’t stretch watercolor paper, it may buckle or warp when it becomes wet with watercolor paint.

  • Are there any alternative methods for stretching watercolor paper?

    Yes, there are alternative methods, such as using heavier-weight paper or a watercolor block.

  • Can I reuse stretched watercolor paper?

    Yes, you can reuse stretched watercolor paper multiple times as long as it’s in good condition.

  • How often do I need to stretch my watercolor paper?

    It depends on personal preference and the specific paper you’re using. Some artists prefer to stretch every watercolor sheet, while others may only stretch large watercolor sheets or those with heavier washes.

  • What type of watercolor tape is best for securing watercolor paper during the stretching process?

    It is recommended to use acid-free paper masking watercolor tape or artist tape to secure watercolor paper during the stretching process.

  • Can I use a stretching board or a paper stretcher bar instead of taping the paper to a flat place?

    Yes, you can use a stretching board or a paper stretcher instead of taping the paper to a flat place. These tools can make the stretching process easier and more precise.

  • Can I use a different type of water-based medium on stretched watercolor paper, such as gouache or acrylic paint?

    Yes, you can use different types of water-based mediums on stretched watercolor paper, such as gouache or acrylic ink. However, keep in mind that these mediums may behave differently on stretched paper than watercolor, so it’s important to experiment and test the paper beforehand.

  • Is it possible to overstretch watercolor paper, and what are the risks of doing so?

    Yes, it is possible to overstretch watercolor paper. Overstretching can cause the paper to become too thin and fragile, making it more prone to tearing or damage. It’s important to stretch the paper just enough to achieve a flat surface without overdoing it.

  • How can I store my stretched watercolor paper to prevent damage or warping?

    To store stretched watercolor paper, it’s best to keep it in a dry and flat location, away from direct sunlight and humidity. You can store it in a portfolio or a cardboard sleeve to protect it from dust or accidental damage.

  • Stretching Watercolor Paper Conclusion
    © Homesthetics - Dylla Setyadji

    Conclusion

    Alright, folks, I've reached the end of my guide about stretching watercolor paper. So, let's do a quick recap of the benefits of stretching, shall we?

    Firstly, stretching your watercolor paper helps to prevent it from buckling or warping when you add water to it. This is especially important if you're using a lot of water in your painting, which is pretty common with watercolor.

    Secondly, the stretched paper provides a smooth and even surface to work on, which is crucial for achieving those stunning watercolor effects. Plus, it just looks so much more professional and polished than a wrinkled or uneven surface.

    So, there you have it, the importance of stretching and proper paper preparation for watercolor painting. Remember, practice makes everyone perfect, so keep experimenting with different techniques and find what works best for you. Happy painting!

    Related Articles

    Cold Press vs. Hot Press vs. Rough Watercolor Paper

    Best Watercolor Painting Books

    9 Best Water Brushes for Beginners, Professionals & Calligraphy

    10 Best Watercolor Palettes for Beginners & Professionals

    13 Best Watercolor Pencils and Water Soluble Art Supplies

    15 Best Watercolor Paints

    Best Watercolor Paper

    12 Must-Know Watercolor Tips for Beginners & Pros

    Why and How to Use Watercolor Mediums to Enhance Your Painting Game

    Learn How to Use Watercolor on Wood

    13 Best Watercolor Sketchbook for Creatives

    11 Best Watercolor Brushes for Beginners & Professionals

    15 Must-Have Watercolor Supplies for Beginners & Artists

    Learn How to Paint Watercolor on Canvas Easily & Successfully

    16 Must-Know Painting En Plein Air With Watercolors

    Learn The Basic Watercolor Painting Techniques

    Expand Your Knowledge With Watercolor Painting

    19 Incredibly Beautiful Watercolor Painting

    Are you a budding artist? A beginner who wishes to make a mark in the art industry? 

    Confused about making a start and how? Or are you looking for inspirations nowhere to be found?

    Here’s an outline into why you must look into Still Life drawing and Paintings which would provide the kickstart to the project you’ve been longing for!

    Art comes in several forms and types. One of the most ancient ways of drawing and painting is that of Still Life, which continues to gather momentum in the contemporary era. 

    Still Life drawings and paintings, primarily, focus on objects which we tend to overlook but possesses its unique beauty, when provided with deep focus and kept motionless.  

    These include objects such as flower vase, utensils, and ceramics, or any subjects kept at a dining table, etc. In general, the matter of interest does not move at any point in time. 

    Still Life Drawing and Painting in Detail

    Still Life Drawing and Painting in Detail

    Painting by damie-m

    How it differs from other drawings?

    Primarily, the subject of the art does not represent a symbolic entity, such as an older man or a damsel in distress, for instance. In other words, Still Life Art does not encompass subjects comprising of any live human model. 

    How to play with Still Life Art?

    This form of drawing and painting may appeal to the observer through the charms of luster, such as shine from fruit or glaze from a flower vase.

    Any arbitrary object might be transformed into a matter of interest in Still Life art, provided it remains still. Even a simple pen or a pencil might be able to create a subject matter for Still Life. 

    Still Life Art and its Traits

    Typically, a kettle or a bowl containing fruits, possessing traits of simplicity in shapes and structures constitute this medium of drawing and painting. 

    Still Life also lay the stepping stone of any budding artist, through which one develops their skill sets, eventually, creating a more sophisticated art form. 

    Keeping in mind that the subject matter will remain stationary at all times, it becomes easier for beginners to put life into their work. 

    However, many distinct types of media and styles comprise to form Still Life Art. As long as the matter of interest remain inanimate, Still Life art can be classified through the brush strokes. Brush strokes can be accurate and noticeable or abstract, based on the requirement of the art. 

    Still Life Art and its Traits

    Painting by anna-lakisova

    Progression of Still Life as an Art form

    Starting as a tool for beginners, this form of drawing and painting has quietly developed into an advanced art genre. Artists have the option of using graphite and charcoal pencils, acrylics, watercolors, or the commonly used oil paints.

    Usually, it is the instructor in a classroom who arranges the composition for a beginner. But, you can have a free hand while choosing the arrangement of objects, when working on a personal project with liberty. 

    Perks of working with Still Life art form is that you can curb the magnitude of reference from a photograph, thereby, fabricating ideas from life directly. 

    Progression of Still Life as an Art form

    Painting by karincharlotte

    Common Themes of Still Life Art

    Some of the more familiar themes applied in this type of drawing and paintings are enlisted below:

    1. Symbolic Representations - These include implementation of various colors, composition, and visuals through which painters or artists depict a specific pattern to their work. 
    2. Miscellaneous Representations - Normally, these themes include various objects which do not seek much attention in a household but holds deep meanings when subjected as a matter of art. 
    3. Decorative Arrangements - Use of flowers, leaves, focus on petals, bouquets and flower vase are common in these types of arrangement 

    Apart from the themes mentioned above, one common theme is that of table spread or objects in a dining table in general. These find broad applications in Still Life Art.

    Earlier, the use of dead animals was used to portray the unpredictability of lifespan, which remains a common subject in these avenues of art, even in the modern era. Spectators often comprehend the concept of the pursuit of earthly possessions and its utilization in the afterlife through the visual medium.

    Identifying Still Life as an Art through the Eras and Various Movements 

    In this section, we try to identify Still Life and its components through multiple eras and movements. 

    Primitive Art

    Still Life Paintings can be traced back to 15th Century BCE during Egyptian Civilization. Deep excavations carried out at the ancient burial sites discovered several funerary artworks of edibles. 

    Primitive Art


    One of the most famous Still Life paintings discovered was in the Tomb of Menna, which depicted images of fish, birds, crops, and other objects. Moving to Europe, Greek and Roman civilizations also sheltered many Still Life artworks

    Most prominent of them being ‘Still Life with Glass Bowl of Fruit and Vases’ during (63-79 AD). This wall painting which originated in Pompeii depicted a collection of inanimate objects such as an enormous bowl and pitcher housing fruits such as grapes. 

    Medieval Period

    During the medieval period, the Northern Renaissance artists flourished with their trademark flower paintings. The artist popularized still life iconography by displaying colorful flora. 

    Jan Brueghel the Elder - Flowers in a Wooden Vessel

    Jan Brueghel the Elder - Flowers in a Wooden Vessel

    Jan Brueghel the Elder created ‘Flowers in a Wooden Vessel’ in 1606-1607 which was coming together of various flowers from different part of the world in a single vase. 

    Cubism

    Cubism is an early-20th-century art movement which brought European painting and sculpture historically forward towards modern art. Its various forms inspired other related changes in literature and architecture. 

    Some of the famous artists during the movement were - Pablo Picasso (Spain), Georges Braque (France), Salvador Dali (Spain). 

    Cubism

    Photograph of Violin and Checkerboard by Juan Gris, 1913, Oil on Canvas

    To cite out the best example for Still Life as art during Cubism, Violin and Checkerboard (1913) by Juan Gris should be the most appropriate of them all. The graphic has been integrated into several directions, creating a mesh haphazardly, but still holding meaning in it. 

    The vague concepts portrayed in the art voluntary made admirers think towards the alternative spectrum. 

    Realism

    In recorded history, Still Life drawings and paintings gained the pinnacle of prominence during the 16th Century Realism, which originated in Holland. The paintings glorified aristocracy prevalent using objects which glorified the social hierarchy. 

    Realism

    Still Life with Ewer, Vessels and Pomegranate by Willem Kalf, 1619 - 1693; mid-1640s, Oil on Canvas

    Ewer, Vessels, and Pomegranate(1640) by Willem Kalf is a classic example of the reason why this art form flourished during Realism in 16th-17th Century Europe. In the painting, we tend to observe the majestic lifestyle in the form of lavish crockeries, precious jugs, laced in gold. 

    Impressionism

    During the modern age, movement known as Impressionism took shape in the form of prominent artist such as Pierre-Auguste Renoir. The baton during the Post-Impressionist period was passed on to Vincent Van Gogh who took up flower vases as one of his critical subjects in ‘Sunflowers’ (1889).

    Impressionism

    Later, Paul Cézanne in 1895, painted the famous series ‘The Basket of Apples’ which contained water jugs, wine urns, and apples, in an irregular table surface. 

    Dutch Golden Age

    Vanitas paintings gained prominence during the Dutch Golden age, which condemned against the pursuit of inflated pride and self-consciousness. 

    Dutch Golden Age

    Pieter Claeszoon, Vanitas Still Life, 1625

    This genre of paintings reminded the spectators that man is a mere mortal and the pursuit for earthly possessions go in vain in the afterlife. In 1630, Pieter Claesz painted Vanitas Still Life which comprised of a human skull along with an hourglass and a burning candle to point out the inevitability of life and death. 

    Fauvism

    Finding prominence in the 19th Century, Fauvism dealt with the magnification of day to day objects using bright, bold colors, thereby, promoting a radiant and lustrous tone in the style of art.

    FauvismALFRED H. MAURER, Aestheticism to Modernism, Fauve Still Life, Oil on Canvas

    Alfred H. Maurer, in his work ‘Fauve Still Life’ (1908-10), used a combination of various colors to depict different objects, which attempt to counter each other for attentional superiority. 

    Both elements in the picture, i.e., the wall and the tablecloth demand an equal level of attention due to its boldness and exaggeration. 

    Pop-Art

    This form of art was pioneered by American illustrator, Andy Warhol, who shot to fame with his artworks in Campbell's Soup Cans (1962), Coca-Cola (3) (1962) and Gold Marilyn Monroe (1962). 

    Pop-Art

    Andy Warhol, Campbell's Soup Cans, 1962

    Pop-Art, through the work of Andy Warhol, glamorized objects which are usually taken for granted, by using intrepid lines and radiant colors. It is a well-known fact that Warhol, himself, was an ardent fan of soup and had it for lunch every day. 

    The salient feature of Campbell’s Soup Cans was that every one of the cans was hand-painted with no stress on lighting or shading.

    Pop-Art

    Roy Lichtenstein, Still Life with Palette, 1972, Oil and Magna on Canvas, Acquavella Galleries Art © Estate of Roy Lichtenstein

    Contemporary Art

    Inspired by the rich heritage of Still Life painting as a full-fledged genre of art, modern artists portray their adaptations by adding a hyperrealistic tone to their work. Contemporary artists tend to come with the most bizarre inanimate objects and turning them into masterpieces. 

    Contemporary Art

    Painting by Hannah Moghbel

    The Essence of Still Life

    A decent understanding of Still Life acts as a catalyst in the transformation of even the most mundane objects into an artwork, based on the capabilities of artists. Also, this form of art notably enriches the skill sets of the painter or sketcher. 

    Still Life practice is nothing but a method of simple compositions and scenes by providing an element of realism into it. Further, it includes the lighting, use of different colors, and shapes to create a radiant work of art. 

    Additionally, through Still Life paintings, artists have a free hand in the composition of the scene which, in turn, makes room for experimentation and improvisation. 

    So what are you waiting for? Look around in your vicinity to find the subject matter and start your Still Life Artwork. It can be anything from a stale sandwich or a composition of your study desk!

    Related Articles

    111 Best, Fun, and Cool Things to Draw