Inflatable pool volleyball nets, like the Intex Pool Volleyball Game, are generally made from top-quality materials that do not tear, ensuring you have a great time in the pool. They are available in various sizes, and will surely amplify your playing experience.
If you're looking for a fun, new way to exercise and rehabilitate the body, you can invest in the best pool volleyball nets for a fun workout in the pool.
It is a fast-paced game that's easy to set up and can keep you and your friends entertained for hours. Also, remember that the pricing for pool volleyball sets varies a lot. There are lots of options, from low-cost models to more expensive ones.
Complete inflatable volleyball set for the swimming pool
Inflatable poles are easy to deflate and store
What we like
Comes with a repair patch
Made of durable plastic
Takes less than ten minutes to assemble
Available in two colors
What we don't like
Inflatable volleyball is too light
Product Review
If you are looking for an inflatable pool volleyball net that will make your kids want to enjoy more time in the pool, this option can be a great pick.
Because of its steady and durable build, you can keep it in the pool for long hours without having to worry that it will get damaged. It is made of 0.25 mm thick vinyl that enhances stability and provides better side support.
Not to mention, there are additional grommet bags and pole bases that add all the necessary weight. And to make maintenance easier for you, the manufacturer has included an inflatable volleyball and repair patch. That way, your kids can enjoy some fun swimming pool games without you having to spend a hefty amount.
And lastly, do not forget that it is best suited for use by children above six years of age. In case they are older, they might find the inflatable volleyball a bit too lightweight.
Material: Plastic/ PVC | Weight: 2.2 pounds | Size: 4 x 10 x 12 inches
SUPER VALUE. Inflatable Pool Float Set includes an...
REAL FUNCTION. The pool volleyball net needs to use the 2...
What we like
Easy to inflate
Affordable option
Works with most electron pumps
Comes with child safety features
What we don't like
No net included in the package
Product Review
Are you in search of the perfect inflatable pool float set? Then look no further, as we have the top suggestion for you. The package is filled with a number of pool toys that will help you successfully create an inflatable volleyball court. In the package, you will find basketball hoops, two weight bags, and an inflatable volleyball and basketball.
Moreover, what requires a special mention is that this pool float set covers quite a large area. We measured and gathered that the court covered around 105”x28”x35”. On the other hand, the inflatable basketball hoops measured around 27”x23”x27” approximately.
And when it comes to durability, this product is a great bet! The product is made of high-quality raft material and is safety test approved. The only problem that you might face when buying this item is that it does not come with a net.
Material: High-quality raft material | Weight: 4.77 pounds | Size: 12 x 11 x 4 inches
What makes this product stand out among its competitors is its stellar build. It is made of eco-friendly, non-toxic, sturdy PVC material. This is what makes it perfect for a summer-themed party where your kids can use it worry-free. Rest assured that even after heavy use, it will remain without scratches and easily last for a long time.
Furthermore, the pool floats will not give you a hard time when you set them up. There are two straps installed at two ends of the volleyball frame that let you adjust the net according to your convenience. Also, you will find two sandbag anchors in the package that helps keep the inflatable court in place.
Be it birthday parties or school pools - this product is ideal for all situations. It meets all necessary safety standards, and you can rest assured that your children are safe when playing with it. The only bummer is that it keeps deflating from time to time.
Material: Polyvinyl Chloride | Weight: 3.26 pounds | Size: 11.77 x 9.84 x 3.66 inches
Inflatable Pool Float Set includes an Inflatable Volleyball...
The Inflatable Volleyball Court measured Approximately...
What we like
Comes with two weight bags
Inflatable volleyball and basketball hoops
Top-quality raft material used
Perfect for kids and adults
What we don't like
No instruction booklet provided
Product Review
Sloosh Pool Floats are perfect for a day out in the pool, and both adults and kids can play with them. It comes with an inflatable volleyball court, two weight bags, and inflatable basketball hoops. That’s not all, you will find additional inflatable volleyball and basketball in the package.
If you are wondering about the size, let us tell you that the volleyball court measures 105 x 28 x 27 inches. Plus, the hoop stands 27 inches tall with a 23-inch diameter hoop, and it has a durable carry bag that is perfect for storage or carrying to the beach.
That is not all; the product is made from top-quality raft material, which does not tear easily. So, you can expect the pool float to last for a long time. And it is perfect for kids and adults alike. The product meets the US child safety standards, and it is considered to be non-toxic. All kids above the age of three years can play with it.
The only drawback is that the packaging does not contain any instructions for setup and installation.
Material: High-quality raft material | Weight: 6.01 pounds | Size: 11.85 x 11.73 x 5.47 inches
SPLASH NET AIR: Splash into the ultimate pool day with...
MAKE A SPLASH: Splash Net Air is 9.5 ft wide and designed to...
What we like
Fast inflation
Resists tipping over
Sturdy built
Suitable for everyone
What we don't like
Deflates fast under heavy use
Product Review
For enjoying a splash net sports game with the kids in the pool, there’s nothing better than this product. To ensure that kids of all ages can have fun with this, the package contains two volleyballs and not one. One is of standard size, and the other one is a large volleyball.
Moreover, to make it easy to inflate and deflate this item, the manufacturer has used rapid valve technology. Because of this feature, you can inflate or deflate the net ten times faster than traditional valves. So, if you are looking for a pool volleyball net that can be instantly set up, this is the one to go for!
What requires special mention is the fact that this item is 9.5ft wide and is pretty stable. It is designed in a way that it floats in the pool without turning over. And because of its sturdy construction, you have lesser chances of tripping and falling.
There’s only one problem that you might encounter when using this. With heavy use, the net seems to deflate quite fast.
Material: Plastic | Weight: 5.9 pounds | Size: 12.83 x 11.1 x 5 inches
Things To Look For When Purchasing Pool Volleyball Net
1. Design
Apart from purchasing a super value pack, it is always essential that you focus on getting an inflatable volleyball court of your choice. So, it is essential that you choose the color variant you like. Before making a pick, we suggest discussing with the kids what you should get for the house pool.
Most of the options that we have mentioned on our list come are available in a range of colors that you can pick from.
2. Pool Type
Not every pool is the same, and you will have to select a pool net accordingly. Pool basketball or volleyball will be fun only when the volleyball net you choose is right for the kind of pool you have and if it meets the required safety standard.
Good news for in-ground pool owners! You have plenty of choices and can purchase any type of pool volleyball net that you want. All types of nets are compatible with these pools.
However, if you have an above-ground swimming pool, your options will be rather limited. For these types of pools, the only option that you have are the inflatable models. Wondering why the above-ground pools have a dearth of options when it comes to volleyball nets? Well, as the name suggests, these pools do not have a ground to which you can anchor the nets.
So, when you cannot fix the nets to the pool grounds, the only option that you are left with is inflatable variants.
3. Net Types
Broadly water volleyball nets come in two variants- floating and fixed. While fixed nets are stuck to the pool edges permanently, floating nets are not. There’s no doubt that the advantages offered by fixed nets are noteworthy. Because the nets are fixed to the pool ground, there’s hardly any chance that the net will float away in the middle of a game.
However, they do have some disadvantages too. Unless you have prior experience, these nets are pretty heavy and take a bit of time to set up. So, when it comes to portability, these are not the best choices.
But, in this regard, floating nets are a great buy. They are lightweight and can be easily transferred from one place to another. Even for floating nets, you get two variants- inflatable and ones that are fitted-over floating devices. As mentioned earlier, the major challenge that you might face with floating nets is to keep them in place throughout the game.
Unless you use proper anchor sandbags, there is always a chance they will get displaced. But what makes up for this inconvenience is that you can easily carry this net around. You can carry it to your school classroom or take it on a weekend camping trip.
Simply put, portability, ease of installation, and pool type are some of the most important things to take into consideration when purchasing pool volleyball nets.
4. Pool Dimension
Before deciding on what kind of inflatable pool volleyball net would be good for you and your kids, first measure the pool dimension. Not all the nets on the market are of the same dimensions, and you will need to read the package carefully to know the exact details.
Only when you know the exact pool size can you begin to hunt for the perfect volleyball net that will be compatible with the pool.
5. Type Of Set
Your kid might be interested in trying a few types of water sports and not just stick with volleyball. If that is the case, you can opt for sets that offer a combination of basketball and volleyball. In case your kids enjoy both games, it is best to invest in a combination set like this. However, keep in mind that they are a bit pricey when compared to solo sets.
If you have a money crunch, or your kids prefer to stick to playing volleyball, simply purchase a solo swimming pool volleyball set.
Inflatable Pool Volleyball Net FAQs ?
How high should an average pool volleyball net be?
Pool volleyball nets need to be around 2.5-3 feet in height. However, if the pool has a depth of 3.5 to 4 feet, then the net needs to be at least six to seven feet high.
How to play pool volleyball?
You will need an inflatable volleyball net to play this game. It is played in two teams, mostly comprising of one to four players. One of the teams is chosen to serve initially, and they serve for two consecutive rimes. After that, the other team that did not serve first, gets to serve twice. The game continues in this fashion. The first team that scores eleven points gets to win the match.
For water volleyball, how deep should the pool be?
There’s no direct answer to this question, as the right depth of pool for water volleyball is simply dependent on the height of the players. If your kids play this sport seriously, you should get them to the sports pool, which is mostly around 3.5-4 feet deep.
Some may argue that the pool is not too deep. But ideally, that should be the case. The depth should be moderate, and your kids must be able to jump up and down the water comfortably. When the water level is too deep, jumping and swimming while the game is on might get difficult for little ones.
Top Inflatable Pool Volleyball Net Verdict
When looking for the best volleyball net set for your pool, the main thing to remember is that it should be fun and durable! After all, if you're spending money on the kit, then you will want it to last at least a few years.
In our opinion, the Intex Pool Volleyball Game is the best on the market because it's durable and will stay in place throughout your games. Or if you want something for the entire family to enjoy, then JOYIN Inflatable Pool Float Set may be better.
Hope you have fun in the pool!
Nobody likes soggy food and meltwater greeting them every time they open an ice-cooled box. It is time for a solution.
With the all-new Igloo Iceless Thermoelectric Cooler, you do not have to worry about ice or meltwater anymore. It uses electricity to cool drinks and snacks, so you need not use ice or cooling gel at all. This makes the product light and provides more space for you to keep drinks inside.
Although this product has a few faults, it will ensure that you have a smooth experience wherever you go in a car or an RV. Without further delay, let us get into the details so that you can understand why we like it.
Read our Igloo Iceless Thermoelectric Cooler review today, and get ready to hit the road with your favorite drinks!
Igloo Iceless Thermoelectric Cooler Review
No products found.
Why Buy This Product?
We have listed the top features of this product in the section below. Read on to know all about them.
Storage Space
The best part about this cooler is that there is a lot of storage space even though the body is compact. This is because no space is taken up by ice, and the entire space can be used to store drinks.
Plus, the body is light, and you can keep a number of cans at once. The 26-quart product can hold 32 cans of 12 ounces each. You can keep 26 - 28 quarts of fluids and snacks inside without worrying about space. That will be sufficient for 2-3 people on a hot day.
Weight
The cooler weighs 9-10 lbs. in general, and that is pretty light, according to us. Now, this is the weight when it is empty; you can expect it to be a lot heavier when you fill it up with drinks and snacks.
To help you carry it around, there is a swing-up handle. This, along with a curved design, makes it easier to carry single handedly.
In case there are a lot of snacks inside, the handle is long enough for 2 people to hold it at one time.
Plus, the body is compact, and you can keep it in between both the front seats in a car. Portability is not an issue at all, and you can enjoy your chilled drinks on a hot spring afternoon in the wild.
Cooling
This product will help you keep your drinks at 36 degrees Fahrenheit lower than the outside ambient temperature. This means that you can use it easily in a place with temperature less than 90 degrees Fahrenheit, and the drinks will stay perfectly chilled.
Now there could be a few problems in case the area is very hot. This is because the drinks will only be cool and not completely chilled. For example, if the temperature is 100 degrees Fahrenheit, then your drinks will be kept at 64 degrees Fahrenheit.
So, yes the drinks will be a lot cooler but may not be chilled. This should not be an issue for anything other than ice creams.
Power
This product comes with an 8-foot long power cord that can be attached to a portable generator or a car. If you are using a portable generator, connect it to the DC outlet, and it will keep your drinks cool.
But remember that if you are attaching it to your car with the engine turned off, turn on the engine after 2 hours. This will ensure that the battery is not drained completely.
On the other hand, it is possible to power it in a hotel room or your home via an AC outlet. In this case, you will have to purchase an AC power convertor from the company. This is not very expensive but purchase it depending on your needs.
Purpose
If you plan to buy a cooler for a family of 3-4 people who will be accompanying you on road trips, then this is the perfect option. It will meet the needs of everyone and can hold a number of juice and beer bottles at the same time.
We took it as a personal cooling device on long trips, and it ensured that we had a chilled drink at all points in time.
Price
Although this is not a cheap product that is priced very less, it provides value for money. It does not need any ice in the long-run, and you save a lot of money buying packets of ice every time. If you go on long trips often, this will indeed be a cost-effective option for the years to come.
Plus, you can always keep this product plugged in without needing to stop for purchasing ice. We were very happy with this factor as it saved us time while on the trip.
Size
There are 2 sizes of this same product available, and you can make a choice based on the number of people in your family. If you have 1-2 people, then the 26-quart option is perfect, and it will provide ample space to keep all your drinks and snacks.
On the other hand, for a larger family or a group of friends, the 28-quart one would be a great option. It is a bit larger and will hold your drinks well.
Efficiency
One of the major reasons why we prefer this over standard ice coolers is the absence of melted water. Ice keeps melting over time, and the water often gets into food packaging. This might not only destroy the food but may also make the ice chamber smell.
But the Igloo iceless thermoelectric cooler will provide you with a safe space to store your food without any ice. Just plug it in, and your drinks will stay cool even at high temperatures.
Iceboxes have often been used as a seat for kids when on a picnic. However, this product cannot be used as a seat at all. Be very careful as the entire mechanism can be destroyed even if some amount of weight is placed on the lid.
But remember that the structure is pretty sturdy in general. It is just that the cooling mechanism is placed right inside the lid, and there are perforated vents on top and below. If you sit on this box, then the plastic of the vents will touch its fan, and that will immediately make it malfunction.
So, if you have pets or kids, keep them away from this cooler. Place it at a height, and that should ensure that your toddlers will not reach it at all.
When purchasing a cooler, you need to keep certain points in mind. This will help you make the right choice without regretting later. In this section, we have listed them down in detail.
Size
We believe that size is a major factor while selecting a cooler. You would not want to be stuck with a bulky option when you just need it for a few drinks for the ride.
The cooler should be sufficient enough for you to keep your drinks but should not offer extra space as that will add to the weight and size. Since these are generally made for traveling purposes, you would not want to carry extra weight.
So, first, decide on the number of people and snacks that you need to carry and then decide upon the size.
Weight
Check how much the cooler weighs without anything in it. It should be light and easy to carry by itself. If you opt for a bulky product, then it might become very difficult to lift with drinks in it. We will always recommend getting a light item and then filling it up.
Also, check if there is a handle on top. The handle should be able to take the weight, and you should be able to carry it around easily. We would suggest looking for long handles which can be held by 2 people in case the box becomes very heavy.
Cord Size
We will recommend purchasing a product that comes with a long cord. This will help you while charging as the power outlet could be far from the ground. You do not want to be carrying an extension cord on trips, and hence this is necessary.
Also, coolers will mostly connect to a DC outlet, but you can connect them to an AC outlet, too, with a convertor. So, purchase a converter along with the product if you are going to charge it through an AC outlet.
Although the cooler works very well, it may not be suitable for very hot places. The drinks will then be cool and not chilled. But despite these minor drawbacks, this is a very cost-effective option that offers value.
Plus, it is compact and easy to take around. It will fit into any car, and you can have it plugged in to ensure chilled drinks throughout the ride. This is the best personal cooler option in our opinion, and it has indeed touched the adventure spirits in us.
Having said that, we will now take your leave, while you get ready for the next outdoor adventure!
Are you trying to revamp your room by repainting some old furniture? Are you confused about which HVLP spray gun to buy for optimum results?
Worry not, because we have got you covered!
As you probably know, HVLP spray guns are the ideal equipment for your home and professional painting needs. They not only give quicker results than brushes but also cause much less of a mess than their high-pressure counterparts.
In this article, we have handpicked the 9 best HVLP spray guns available on the market today. Apart from detailed reviews of each of our recommendations, you will also find a buyer’s guide to simplify your decision-making process.
So, what are we waiting for? Let’s dive right into it.
This HomeRight HVLP spray gun in the variant “Super Finish Max” provides a very professional quality finish on all surfaces you use it on. It’s ideal for DIY paint projects of all shapes and sizes because of its adjustable mechanisms that help you customize your paint flow. This spray gun is also one of the more affordable high-quality options out there.
PAINT SPRAYER FOR COUNTLESS DIY PROJECTS: The HomeRight...
ADJUSTABLE SETTINGS TO SUIT ANY PROJECT: You can adjust the...
Why Did We Like It?
This spray gun is not only great for more intricate DIY projects but also other larger projects such as painting furniture, cabinets, and so on. It has easily adjustable spray settings and alternative spray tips that allow you to customize the material output and paint flow according to the needs of the project.
Since the spray gun functions on 450 watts of power, it offers a rather powerful spraying experience, making it a versatile product for a variety of projects. It also comes equipped with a cleaning brush that makes the process of cleaning a lot quicker and more efficient.
That’s not all; the USP of this product is the 2-year warranty and highly-rated customer service provided by the company. The spray gun also has a rather large paint capacity (39 fluid ounces) that facilitates longer spraying without having to refill very often.
What Could’ve Been Better?
While this sprayer claims to require little to no thinning of the paint before use, a few customers seemed to have experienced the exact opposite. The tips that this spray gun comes equipped with are very tiny and therefore easy to lose. It is especially easy to lose them down the sink while you’re cleaning. Hence, we recommend having a dedicated plastic bowl to keep and clean your tips in.
Pros
2-year warranty available
Easy to clean and maintain
Superior quality finish
Versatile and can be used for a variety of projects
Next up, this Fuji paint spray gun has an unconventional design and is one of the very best HVLP options available on the market. The product has professional precision and very high durability, which is why it is also one of the most expensive products on the list.
Professional non-bleed Spray Gun with Adjustable Pattern Fan...
1.3mm Air cap set installed
Why Did We Like It?
One of the biggest reasons why this product is so popular is because of its strong and sturdy build as compared to other spray paint models. Moreover, the gun provides a very uniform and precise spray pattern, and an adequately fast spray speed, making it one of our top contenders!
Moving on, we love how this product is non-bleed, which means the moment you release the trigger, the paint automatically stops flowing, thereby avoiding any potential mess. The 25 feet hose that comes with it has an air control valve that significantly reduces overspray and bounceback as well.
Also, this model of the Fuji Spray gun is convertible, meaning it can be switched between the bottom feed cup and gravity feed cup for ease of use. That’s not all; it has an ergonomic stay-cool handle and is very easy to disassemble and clean, which has quickly made it a fan favorite.
What Could’ve Been Better?
While this HVLP spray gun is one of the best 2-spray systems out there, it is significantly heavier - weighing 26.1 pounds. The price of this paint gun is also significantly higher than its counterparts, but we feel that it’s well worth its high price.
This spray gun, while being one of the lowest-priced spray guns on this list, is also one of the highest-rated. It uses high volume low-pressure technology to provide a smooth and consistent finish on all surfaces, from doors to decks to furniture.
HVLP PAINT SPRAYER: The Control Spray Max paint sprayer uses...
USE WITH A WIDE VARIETY OF MATERIALS: Powerful two-stage...
Why Did We Like It?
Like most spray guns on this list, this too has customizable settings to control and optimize the pressure and flow of the paint. Furthermore, the air cap of this tool is adjustable, thereby allowing you to choose your spray pattern - round, horizontal, or vertical.
Moving on, a feature that sets this spray gun apart from the rest is its stationary base and lightweight build that significantly reduces hand fatigue. Since the turbine is placed on the ground, it makes it a lot more convenient to hold the tool for extended periods of time.
That’s not all; we love how affordable this tool is compared to its counterparts with the same features. So, if you’re looking for a budget-friendly HVLP spray gun that has high performance and a year-long warranty, this is the one for you!
What Could’ve Been Better?
This tool works optimally only with light materials like stains or thinned-down paints of different kinds. This makes this tool less than ideal for people looking for thicker coverage on their projects. However, this does not compromise the overall performance of this spray gun.
Pros
Professional, consistent finish with minimal overspray
If you’re looking for a spray gun that has one of the most professional finishes, then this is the one for you. It comes equipped with the latest atomization technology and delivers a superior finish on most surfaces. This product doesn’t come with a motor though, so ideally it’s for someone who is just trying to replace the paint gun from their set.
The New HVLP Finishline 4 series from Devilbiss offers the...
Achieve superior results with its precision machined air cap...
Why Did We Like It?
This HVLP spray gun is most well-known for its high-precision spraying capabilities and is one of the top picks of working professionals. It comes with precise fluid nozzles and high-quality air caps that enable it to deliver superior results. From auto-body work to painting kitchen cabinets, this gun can provide top-notch results.
While it may be on the expensive side, the precision with which it delivers the spray paint is unmatched by most other guns. What’s more, its anodized internal passages make it very easy to clean and maintain while using it on a regular basis.
Also, this spray gun is comparatively lighter than its alternatives, which is a major benefit in our books! So, once you pair this gun with a high-quality air compressor, there is next to nothing that it can’t achieve.
What Could’ve Been Better?
As we mentioned earlier, this spray gun is mostly used by working professionals. One of the major reasons behind this is that there is a certain level of experience and technique required to use it to achieve optimum results. Hence, if you’re a beginner looking to invest in a spray gun, this is not the one for you.
Earlex, just in case you didn’t know, is one of the leading brands of spray gun equipment. The Earlex 5500 is designed specifically for automotive work, serious woodworking, and light contractor work. Long story short, this is another HVLP spray gun that is ideal for professional rather than home environments.
SEMI-PRO PAINT SPRAYER: The Earlex Spray Station 5500 is...
ACHIEVE THE PERFECT FINISH: The professional metal spray gun...
Why Did We Like It?
One of the most impressive qualities of this spray gun is the user-friendly performance that makes it ideal for both working professionals and beginners alike. This, coupled with its sturdy and long-lasting building, makes it an ideal investment for many woodworking enthusiasts.
Furthermore, this spray gun is extremely convenient to carry around because of its handle along with the onboard storage for the hose and the gun. Its all-metal paint gun with stainless steel tip and powerful turbine provides a more polished finish on wooden surfaces as compared to its other counterparts.
Moving on, the innovative push-and-click spray pattern adjuster in this tool allows you to quickly shift between the various spray patterns. It also has a paint flow control dial and comes with a pick-up tube for overhead and downward spraying. This, along with its high non-bleeder gun control features, comes in especially handy while painting with a wide variety of water-based and oil-based materials.
What Could’ve Been Better?
This gun is specifically designed for small to medium-sized woodworking projects, thereby restricting its use. If you’re looking to attempt more versatile projects, then this HVLP spray gun is not the one for you.
Yattich is one of the best brands of HVLP guns on the market today. Its products are not only very affordable but also perfect for home use and smaller DIY projects. The 191 model has a unique design aimed at enhancing user experience. It has a double layer of insulation that makes it very safe to use outside of a professional environment.
【3 Spray Patterns & 5 Nozzle Sizes】Paint sprayer can be...
【Perfect Design For User Experience】Detachable, making...
Why Did We Like It?
This model of the Yattich Spray gun is known for its large variety of nozzle sizes and unique trademarked copper composition. These copper nozzles are not only more versatile and durable, but they also avoid blockage, which reduces resistance and can extend the life of the motor significantly.
What’s more, these spray guns are extremely versatile and can be used on a variety of surfaces, ranging from craft steel and walls to wood. Its suction tube can be easily adjusted according to the angle at which you require it to spray, while its customizable spray modes add to the ease of use.
If that wasn’t enough, this spray gun is quite affordable, thereby making it a rather ideal investment for anyone interested to purchase it.
What Could’ve Been Better?
This product is majorly made of plastic, so it is not as long-lasting as its metal counterparts. This could also be an issue for more environment-conscious consumers who do not wish to invest in plastic equipment.
Wagner is one of the leading companies to manufacture the HVLP spray gun and is best known for its versatility in the same. And that can be said about its model FLEXiO 890 that gives a high-quality consistent finish on projects of all textures and sizes.
PERFECT FOR A VARIETY OF PROJECTS: The FlexiO 890 paint...
PORTABLE PAINT SYSTEM: The turbine sits on the ground,...
Why Did We Like It?
This model of Wagner is built like a high-performance professional spray gun while being priced at a comparatively lower rate, which we love. It’s built ideally for home-improvement projects and can be used both indoors and outdoors with relative ease.
One of the best features of this spray gun is its integrated storage which allows you to easily store the hose and nozzles within the system after usage. Since the turbine base is stationary, this spray gun avoids hand fatigue and has a long 11.5-feet flexible air hose that allows you to cover more area with ease while working.
Apart from being user-friendly, this spray gun has one of the fastest spray speeds amongst all the other products in this guide. This means it can cover a larger surface area in a relatively high-quality shorter period of time making it a very good painting tool. You can also use unthinned paints of all kinds in this spray gun which sets it apart from all its competitors.
What Could’ve Been Better?
The nozzles of this spray gun tend to require cleaning at regular intervals. This makes it kind of a hassle to use, especially for larger projects. The spray tip of this equipment is also not very precise and tends to overspray frequently.
Next up, this model is called the Earlex 6003 Pressure. Known for its professional finishing capabilities and high durability, it’s no surprise that this spray gun is one of our topmost recommendations. Its powerful motor and onboard gun docking system has made this tool gun one of a kind.
PERFECT FOR WOODWORKERS: Designed for the serious woodworker...
SPRAY A VARIETY OF COATINGS: Features a 3-stage turbine with...
Why Did We Like It?
This spray gun is ideal for people looking for a high-performance and durable tool that can spray everything from milk paints to varnishes and lacquer. It is also designed specifically for users who engage in serious woodwork, so it delivers a flawless finish in all its projects.
Moving on, the nozzle of this spray gun is non-bleed and precise, which along with its pressure-fed gun, stay-cool handle, and dual adjusters provide maximum performance. Not only that, but its 360-degree rotating air cap allows you to spray even the most difficult crooks and crannies with ease.
Furthermore, its 25 feet Hyperflex hose gives this stationary spray gun maximum maneuverability in and around any project area. Earlex also provides customers with a 2-year warranty and highly rated customer service which is always a pro in our book.
What Could’ve Been Better?
While this spray gun is marked on the more expensive side, most customers agree that it is well worth its price. Some customers have pointed out that the paint gun is prone to spitting which may hamper the final finish of projects in certain cases.
This gravity-feed HVLP spray gun is great for a beginner in painting projects looking for an affordable tool that gives high quality and consistent finish. It works best on wooden projects ranging from cabinets to door frames and smaller furniture. The product also comes with bonus accessories that include a cleaning brush, a spanner wrench, and a pressure gauge.
Professional Performance: High-performance car paint spray...
Complete Control System: Precision adjustment knobs for...
Why Did We Like It?
This paint spray gun is made for the typical DIY user and can cover regularly to heavy-duty work. Hence, it is very easy to operate even without prior experience using paint sprays. Users rated it rather highly, mentioning that the more you get used to it, the better finish it provides.
Also, it is entirely made of stainless steel and hence very durable. And it comes with the expected one-year warranty and decent customer service. Apart from that, the lightweight build of this tool gives it high maneuverability and provides a beautiful consistent finish on all surfaces.
The 1.44mm spray nozzle it comes equipped with is great for most painting projects. However, you can also replace the nozzle with other differently-sized tips available on the market. This product also has full control over air pressure and spray pattern thanks to its adjustable control knobs.
What Could’ve Been Better?
The gun comes equipped with only one kind of tip which is kind of a let-down for people who do want to be able to do a variety of projects. This gun also works optimally better with thinned paints and pigments which could prove to be another letdown for users.
Pros
Ideal for basecoats
Lightweight and portable
Very easy to use
Durable
Affordable
Cons
Only comes with one tip
Not great with thick paints
HVLP Paint Spray Guns Buyer’s Guide
That brings us to the end of the list of our top 9 picks of the best HVLP paint spray guns. But we understand that 9 options may still seem like a lot to pick one out of. For this reason, we’ve compiled an in-depth buyer’s guide discussing factors to look out for that should help you make this decision.
Spraying Speed
Most HVLP spraying guns have a lower rate of painting speed as compared to their higher-pressure counterparts. Even within the options for this spraying, different tools have different spray speeds. So, you must decide how quickly your project needs to be completed and buy one of these accordingly.
Nozzle/Tip Size
The nozzle and tip at the end of the spray are what determine how smoothly the paint will be applied on any surface. A larger nozzle will help you cover a larger surface area at once while a smaller one will help you zero in on details.
Some guns come equipped with multiple nozzles and tip sizes and that gives the spray added versatility. Hence, depending on the kind of project, you’ll have to choose a spray gun accordingly.
Paint Adaptability
HVLP spray guns have different levels of adaptability when it comes to the kind of paint or lacquer you want to apply on a certain project. If you’re going to be working with a lot of different thicknesses of paint, you’re going to require a spraying gun that supports it. Some guns come equipped with a thinner funnel that helps you thin down paints to the required amount before use.
Adjustability
These spray guns also come with a variety of customizable and adjustable options such as rotating air caps and boost power dials. These variations help you adjust things like the spray rate and help you achieve different types of finishes and patterns.
Length Of Hose and Capacity
If the paint sprayer has a stationary base, then you will require a long hose in order to easily walk around and work in your station. You should also prefer a spray gun that has a larger cup capacity so that you don’t need to waste much time refilling it.
Cost
One last factor to consider while buying an HVLP spray gun would cost. Different brands of spray guns have marked them at different prices. Higher-priced products will usually have more professional level equipment with additional features. However higher price does not always mean higher quality, and hence one should study the features in detail before deciding which one to invest in.
Verdict
With this, we come to the end of our comprehensive guide to the best HVLP spray guns. We hope it will now be easier for you to pick the ideal product for your needs. But if you need another nudge in the right direction, read on.
To summarize, the YATTICH 191 is the most affordable as well as DIY-friendly spray gun. So, if you’re a beginner looking for a low-budget and easy-to-operate product, this is the one for you.
On the other hand, if you’re a professional looking for high performance, high quality and a flawless finish, then Earlex 0HV6003PUS and Fuji 2203G are ideal for you.
Before signing off, we would also like to give honorable mentions to the Earlex HV5500 and TCP Global G6600-14 for their high customer reviews and versatility. Wagner 052902, alternatively, has the fastest spraying speed among all the paint guns on this list.
Grow tents are one of the most popular methods of growing plants indoors.
However, when using grow tents, ensuring that your plants have enough moisture at all times can be challenging. This is where humidifiers can be beneficial.
Residential humidifiers come in all manner of sizes and styles, and it is possible to find many options designed to fit in small growing spaces, such as grow tents. However, selecting the one that best meets your needs from many options is easier said than done.
It is a task that requires both time and effort since different types of humidifiers have their advantages and disadvantages. To help you out, we’ve compiled this in-depth review and guide listing the best humidifier for grow tent on the market.
Furthermore, we’ve included a buyer’s guide to help make your task easier. So, without further ado, let’s dive in.
We will be starting with the HCM-350/HCM-35-TGT from Honeywell. For those who do not know, Honeywell is one of the most famous American manufacturers of a wide range of home and office solutions. Unsurprisingly, it is also the manufacturer of top-notch humidifiers for growing plants, offering innovative features and excellent performance.
GERM FREE –This cool mist humidifierfeatures a patented...
Why Did We Like It?
The HCM-350/HCM-35-TGT is undoubtedly one of the best humidifiers for grow tents, coming from a brand well-known for quality products that offer a great experience. It comes with a range of innovative features such as a wicking filter and UV technology that can improve air quality.
That said, the UV technology ensures up to 99% germ-free humidification. Similarly, the QuietCare technology makes sure that the device operates noiselessly, so you do not need to worry about getting disturbed.
Another excellent feature that makes the HCM-350 an excellent product suitable for grow tents is its continuous operating capacity; it can run for up to 24 hours. And since it is a dishwasher-safe product, cleaning it is incredibly easy.
Furthermore, you can easily adjust the moisture output with the help of the three settings to ensure your plants have the optimal amount of moisture.
What Could’ve Been Better?
Performance-wise, it is hard to find a better product on the market currently. However, this warm-mist humidifier might not be the best option for those with a humble budget. It is one of the costlier options you can get, and several more affordable alternatives are readily available.
Our next item on the list is the HME020020N model from HOmeLabs, another prominent brand dedicated to developing high-performance home and kitchen products. At first glance, the HME020020N is a compact humidifier that provides indoor plants the required amount of moisture they need to grow.
Our hOmeLabs personal air purifier has a filter with 99.97%...
Our rigorous, 4-stage filtering process includes a...
Why Did We Like it?
The HOmeLabs HME020020N is one of the most efficient humidifiers we tested while compiling this list. It has a 99.97% efficiency rating that provides the required amount of moisture and ionizes the indoor air for reducing odor. These work with customizable fan settings that allow you to select between low power and high power settings as and when required.
This product comes with clear instructions that help you easily install and use it without any hassles. What is more, the HME020020N measures 6.7 x 6.7 x 7.5 inches, an ideal size for small grow tents.
The humidifier also has an indicator light to let you know when it is time to change the filter. Furthermore, HOmeLabs has excellent US-based customer service that you can quickly contact through email, chat, or phone. They are highly efficient in helping you resolve any issues that you might come across.
What Could’ve Been Better?
Once again, we could not find any significant downside to this impressive product. We only wish the manufacturer had included an option to turn off the blue light that turns on while the machine operates. It can be a slight nuisance at night if you place the humidifier in the bedroom.
The Pure Enrichment PEHUMIDIF has been specifically designed to provide exceptional performance with excellent features at a great price point. It is one of the premium products that can easily be used in grow tents for providing plants with the required amount of moisture.
Instant Dry Air Relief: Ultrasonic cool mist technology...
Year-Round Comfort: High and low-speed settings combined...
Why Did We Like It?
The PEHUMIDIF is one of the humidifiers that can easily be used all around the year. It comes with a 360-degree mist nozzle that makes it easy to balance and regulate the moisture level in your grow tent, creating the ideal conditions for plants to thrive.
This cool-mist humidifier also has a sizeable easy-fill tank that is ideal for use in various spaces, such as bedrooms, offices, etc. Due to the large-sized tank, it can provide plants with enough moisture without requiring frequent refills.
Another thing that we liked most about the PEHUMIDIF is that it comes with all the accessories required. These accessories, such as the AC power adapter, disk cleaning brush, and a replacement cap, can be quite costly when you go out to buy them separately.
Additionally, the manufacturer provides a guaranteed five-year warranty on this humidifier, which makes it one of the best available options.
What Could’ve Been Better?
The only drawback that users may notice about this otherwise impressive product is that it lacks a separate accessory filter for the water. However, it is an extra component that is not required for the operation of the machine. You can even get it for free by posting a review online.
The Crane EE-5301 is one of the most attractive humidifiers capable of impressive performance, thus offering an excellent choice for use in grow tents. Essentially, it is a cool-mist humidifier that can operate for long hours and comes with a huge tank to prevent the air from drying out.
TRANQUILITY: Experience the tranquility of a well-humidified...
ADJUSTABLE HUMIDITY: Take control of your environment with...
Why Did We Like It?
While searching for the best humidifier for a grow tent, we came across the Crane Drop Ultrasonic Cool Mist Humidifier. Among the several impressive features, the 360-degree cool-mist lid immediately caught our eye. It allows users to send the mist in any preferred direction and can be helpful for plants that require a more considerable amount of moisture.
Furthermore, this grow room humidifier comes with variable output settings, allowing you to easily adjust the amount of moisture required at any time of the day. On that note, the standard-setting is ideal for spaces as large as 500 sq ft. When placed in a grow tent, it can quickly provide complete coverage, creating the perfect environment for your plants.
Regarding the design of this product, this ultrasonic cool-mist humidifier features a detachable bottom fill tank that allows you to clean the tank easily at periodic intervals. Similarly, the cap and water level sensor are easily removable for added convenience.
What Could’ve Been Better?
It is one of the best ultrasonic humidifiers for growing plants indoors that also offers a sleek polished design and durable build. Unfortunately, the dehumidifier does become noisy after a few months of use. However, it is an excellent choice to go with if noise is not a major issue.
Unlike most other humidifiers, the Levoit ultrasonic cool-mist humidifier has been explicitly designed to be suitable for growing plants using grow tents. Its ultrasonic technology ensures a uniform spread of fine mist that keeps the tent moisturized so that your plants have enough moisture and can bloom and blossom.
Most humidifiers that people use for growing plants are general-purpose products placed in a grow tent. WIth the Levoit ultrasonic humidifier, the manufacturer has focused on making it specifically suitable as a grow tent humidifier.
This ultrasonic cool mist humidifier has an effective range of up to 376 ft² / 35 m², making it an ideal choice for a grow tent. Not only tents, but you can also use them in grow rooms since they offer complete coverage with their uniform spraying technology.
Moreover, the product is equipped with unique features, including an essential oil tray. Indeed, you can now enjoy the benefits of aromatherapy while providing your plants with adequate moisture.
Also worth mentioning is the four-liter tank that enables the machine to perform all day efficiently, while the auto shut-off feature turns it off when the tank is empty.
What Could’ve Been Better?
The one thing you need to remember when going for this product is that it is not compatible with smart outlets. That is why it is not possible to operate the humidifier remotely. Needless to say, don’t forget to check for compatibility before going with this option.
The Raydrop Cool Mist Humidifier is an ideal choice if you are looking for the perfect combination of style, a compact design, and stellar performance. Moreover, the slim and practical design includes a powerful spray that makes it great for any grow tent.
The slim design is the most striking feature of this grow tent humidifier that separates it from similar products. This design makes it widely applicable in all sorts of spaces. Even if you have a small grow tent, the Raydrop cool mist humidifier will fit in with ease.
This humidifier also comes with a dial knob control, enabling you to select the moisture output conveniently and make adjustments as required. Besides that, the smart indicator lets you know when there is no water left in the tank. And, the shut-off feature will automatically turn off the device in such situations.
Plan on getting a humidifier for a long continuous operation? You will be delighted to know that this cool mist humidifier can run continuously for up to nine hours. Also, it makes very little noise so that you won’t get distracted or disturbed.
What Could’ve Been Better?
The manufacturer has included a small window in the tank so that users can see how much water is left. Unfortunately, the window is too dark to see the water level in practice. However, this minor design flaw does not affect the working of the device.
Reliable, innovative, and high-performing — the Pure Guardian H964AR is an excellent ultrasonic cool mist humidifier that can easily control humidity levels indoors. It is incredibly easy to use and promotes healthy plant growth with its excellent coverage.
The Pure Guardian H964AR is one of the most dependable products we found that made providing indoor plants moisture a simple task. It comes with a one-gallon tank that can easily cover spaces as large as 320 sq. ft.
Besides offering superior coverage, this ultrasonic humidifier can run continuously for up to 70 hours. In the case of extremely dry indoor conditions, this device is one of the most effective ways of ensuring that your plants do not die from a lack of water.
Another impressive feature is the clean tank, which does not allow mold to grow on the tank surface, a common problem with such products. Furthermore, the aromatherapy tray allows you to add essential oils to the tank to create a pleasing and calming environment.
Add to that a low-water indicator light and a night light feature, and you get one of the best products in the category.
What Could’ve Been Better?
It is also one of the more compact humidifiers you can get at this price point. However, in our experience, we found this product to be comparatively difficult to clean. The tank does not come with handles, making it difficult to hold for cleaning purposes.
Vicks is a household name, generally known for over-the-counter medications. However, what many people do not know is that the American brand also manufactures a range of excellent home products, such as this V745A/V745-JUV humidifier. It is one of the best grow tent humidifiers that offers easy operation and powerful performance.
Breathe Better, Live Better: Maintain ideal humidity levels...
Portable, Easy to Use and Clean: With a top fill, 1 gallon...
Why Did We Like It?
Unlike most products on our list, the Vicks V745A/V745-JUV is a warm mist humidifier that releases a fine spray for maintaining the desired humidity levels. What makes it especially suited for a grow tent is its ease of use, helping you effortlessly maintain humidity levels at 40-60%.
We really liked the filter-free design, which helps in saving effort and time since you do not need to change filters. Combine this with the wide tank opening provided for easy filling and cleaning, and you get one of the best grow room humidifiers on the market.
This humidifier comes with a one-gallon tank that allows it to run continuously for up to 24 hours. You can simply place it near your plants in the grow tent and let it run. Furthermore, it operates without noise and the two different settings are great for adjusting the moisture levels easily.
What Could’ve Been Better?
As with most warm air humidifiers, the Vicks V745A/V745-JUV is also highly susceptible to mold growth. To prevent that, you will need to clean it very frequently. One way to prevent mold growth is by using purified or filtered water, which hinders the growth of fungi.
If you are looking for a humidifier that can be used for long hours continuously without the need for monitoring, the Everlasting Comfort cool mist humidifier is a great choice. It is an ultrasonic humidifier with a 1.6-gallon tank and comes with an excellent replacement policy.
ADJUSTABLE MIST NOZZLE & TIMER FOR SLEEP: This large room...
Why Did We Like It?
This ultrasonic cool mist humidifier is one of the most powerful items on our list and can operate continuously for up to 50 hours. This feature makes it an excellent choice for promoting healthy plant growth indoors.
Equally impressive is the fact that it can easily cover spaces as large as 500 square feet, efficiently removing dry air to improve the humidity level. It is one of the cool mist humidifiers that come with an essential oil tray, enabling you to add pleasing fragrances to the water.
Furthermore, this is a filterless humidifier, helping you save effort and time while providing your plants with the required amount of moisture.
You will also be pleased to know that the Everlasting Comfort humidifier comes with a two-year replacement warranty. In case you encounter any issues, the manufacturer will quickly replace the product or parts, or provide a complete refund.
What Could’ve Been Better?
There is no doubt that this device can easily last for many days without refilling. According to the manufacturer’s claims it can last for up to six days, but it only lasted for five during our testing phase. It is still a reasonable period, and you won't be disappointed with this product.
As we near the end of our list, it is time to introduce to you the Magictec Cool Mist Humidifier. Magictec is an American manufacturer of high-quality home products for comfortable living. This product is one of the best cool mist humidifiers on the market that is great for growing plants indoors.
Magictec is known for its quality products that offer impressive performance, and this cool mist humidifier is no exception. It comes with a 2.5-liter water tank that can be quickly filled from any sink. It is large enough to allow the humidifier to operate continuously for 24 hours.
Then, there is the 360-degree humidifier mist nozzle that you can use to direct the mist in any direction you require. This feature doubles as an air humidifier for grow tents since it can even reach plants kept away from the humidifier.
Included with the adjustable misting settings is the power-saving auto shut-off feature which helps turn off the device when the humidity level is not too low. You can save on power bills easily while getting the best output with this device.
Finally, the device operates at less than 30 decibels, making it an excellent whisper-quiet option on the market.
What Could’ve Been Better?
These cold-mist humidifiers are highly effective in improving relative humidity levels in any space. However, it comes with a complicated water tank that requires a lot of effort for removing, refilling, and reinstalling it. The manufacturer should work on the design to make it more user-friendly.
Coming to the final product on the list, the Vornado HU1-0048-43 is an exceptional product that comes with an innovative design and intelligent humidification function. It is a powerful humidifier that can easily be used for growing plants in a grow tent by controlling the humidity level in any room.
The Vornado HU1-0048-43 comes with deep pitched blades that work efficiently to pull large volumes of dry air with the help of the 360-degree air intake. The device also offers complete humidification of all spaces with the help of the signature Vortex action.
The HU-0048-43 also impressed us by its intelligent sensing technology, due to which it can estimate how much humidity and circulation is required. This device can easily maintain the humidity level that is ideal for your indoor plants.
Furthermore, the simple push-button controls help you select from 3 different fan settings and six output levels, depending on the preference. The fan can be set to low, medium, or high, according to how much moisture the plants require.
Another impressive feature is the SimpleTank System that makes refilling and cleaning the device very easy, helping you save time and effort.
What Could’ve Been Better?.
While the Vornado HU-0048-43 performs as the manufacturer claimed, the included humidistat does not display the humidity levels very accurately. We tested it using other products, and the humidistat was off by a significant margin. If you are not concerned about the working of the humidistat, then this is an excellent product.
Pros
Easy to use
Efficient performance
Attractive design
Superb build quality
Cons
Inaccurate dehumidistat
Humidifier For Grow Tent Buying Guide
Now you know about the best humidifiers available on the market for use with grow tents. However, knowing about them is winning only half the battle.
Several factors need to be considered when buying a humidifier for your grow tent. We’ve compiled a detailed buying guide that lists all these essential factors in the following section.
Going through them will help you understand the elements that should be considered before making a purchase.
1. Humidifier Type
One of the first things to consider is the type of humidifier you plan to get. Generally, humidifiers can be broadly classified into warm mist and cool mist humidifiers.
Warm mist humidifiers are also known as steam vaporizers and are generally the cheapest option on the market. However, they do use more energy than cool mist humidifiers. On the other hand, most humidifiers available on the market are cool mist humidifiers,
Cool mist humidifiers may use evaporative technology or ultrasonic technology. For providing your plants with enough moisture, both types of humidifiers can be a great option.
2. Humidifier Size
The size of a humidifier plays a crucial role in determining several aspects of using a humidifier. It affects how long the device can function, where you can place it, what is its water holding capacity, etc.
For grow tents, which are smaller in size, humidifiers having a compact form factor are the best choice, while you can use larger humidifiers in grow rooms. Smaller humidifiers are also more portable, so you can easily move them about as required to ensure that all your plants are getting enough moisture.
You need to be careful when selecting a humidifier, as getting a very large one can lead to extra condensation on surfaces, which can be detrimental to plant health. Larger humidifiers can also lead to too much moisture in the atmosphere, leading to the growth of mold as well. Smaller
3. Tank Size
The size of the tank directly influences how much water a humidifier can hold. The bigger the tank, the longer the period for which a humidifier can run. Larger tanks also help save time and effort since you do not need to keep refilling them at frequent intervals.
Generally, small-sized humidifiers have a water holding capacity ranging from 200 to 300 ml and can run for 12 hours. You will need to refill the tank about twice a day in such cases. On the other hand, humidifiers with 6-liter tanks can even run continuously for 60 hours.
However, just as is the case with the humidifier itself, a smaller tank is much more manageable and portable. It can also be cleaned quickly and easily. You will need to select between a more manageable or a large capacity tank.
4. Ease of Use
Easy to overlook, ease of use is a significant factor when buying a humidifier. Before buying, you should check how easy it is to empty and refill the tank and operate the humidifier. Many devices offer several settings that let you make precise adjustments as required.
Also, when looking to use it for growing plants indoors, make sure to check how easy it is to move about. In the case of humidifiers that utilize evaporative technology, make sure that the wick is economical and straightforward to replace. Additionally, the controls should also be user-friendly and should not require technical know-how to operate.
5. Maintenance
The level of maintenance that a humidifier requires is also one of the most important things to consider. The easier to maintain a humidifier, the more convenient an option it is. Maintenance involves cleaning the device and taking other steps to ensure that it can run for as long as possible.
You can find humidifiers that come with easily removable tanks, caps, and other components that make them very easy to clean and maintain. Additionally, spare parts such as caps and tanks should be easily available on the market for a product that you plan to use for a long time.
6. Additional Features
Manufacturers offer various features to provide a good user experience for their customers. These features may be in the form of night lights, automatic turn-off functionality, mist adjustment, and more.
Night lights are an aesthetic feature that can help you sleep better at night. Additionally, they can also enable you to see how much water is left in the tank. Similarly, the mist adjustment feature allows you to control the amount of mist being dispersed by the humidifier.
The auto-shutdown feature is one of the most useful features that automatically turns off the device after a specified time or when the water tank becomes empty. It can also help extend the life of your humidifier, as running on an empty tank can damage it.
Several options on the market offer different types of features. However, keep in mind that a greater number of features also results in a higher cost. Alternatively, it can even make the user experience unnecessarily complicated.
7. Customer Service
The first thing to look for in this case is how easily you can contact the manufacturer. The manufacturer’s customer service determines how easily and quickly issues can be resolved. They may provide different means of contacting them, such as by phone, chat, or email.
Also, speak to other buyers to know how quickly and effectively the manufacturer resolves any issues. The manufacturer’s ability and willingness to honor warranties and guarantees and offer replacements or refunds all form a part of the customer service.
8. Budget
Last but not the least, your budget will determine which humidifier is the most suitable for your needs. Generally, larger humidifiers and those that offer more features are more expensive. Smaller humidifiers may be more affordable, but make sure such products do not compromise quality and performance.
To be safe, select a product that is neither too costly nor misses out on too many features for the best experience.
Verdict
Now, it is time for us to wind up. It’s been an exciting ride, and we hope you enjoyed reading our guide as much as we did putting it together. But before we go, we would like to let you in on our favorites from the list.
Our top pick would have to be the Honeywell , which offers excellent performance with unparalleled ease of use. Then, there is the HOmeLabs , which is more suitable for those who want a customizable option at a great price.
Finally, you have the Pure Enrichment PEHUMIDIF, which comes with a great warranty and all the accessories included in the box. With that said, it is time for us to sign off. Be sure to leave a comment below and let us know what you think of our favorites.
In this tech-driven day and age, a drawing tablet is an indispensable tool in any graphic artist’s arsenal.
Not only have these amazing products made designing digital art a smooth breeze, but the level of efficiency and accuracy they offer is simply unmatched. And the best part? They are available in various sizes, allowing users to choose as per their requirements.
Thus, if you are a graphic artist, going for such a product would certainly be a wise decision. However, since the market is flooded with various cheap brands that offer below-par performance, choosing the right one can seem like a daunting task.
That’s why we have compared two of the most renowned drawing tablet brands, Huion and Wacom, to help you decide which one would be a better option for you. And to make matters a bit more interesting, we’ve provided detailed reviews for some top-quality drawing tablets from both brands.
So, make sure you read the entire article!
Huion Vs Wacom | Brand Overview
Huion was founded in 2011 in China and is best known for manufacturing and designing LED light pads, pen display tablets, and a range of other interactive input devices. It is dedicated to optimizing user experience and bringing their requirements to life, which is why it has customers from across the globe, including the USA, Japan, Canada, and more.
On the other hand, Wacom is a Japanese brand founded in 1983 that mainly focuses on producing graphic tablets and other related devices. Also, it is known for offering solutions to top educational and medical companies and top-notch user interface technologies. The brand has many creative customers globally, from auto-design and manga to cinema and animation.
Huion Vs Wacom | Detailed Comparison
Here, we have provided a detailed comparison between both brands.
1. Multi-touch And Express Keys
Multi-touch enables graphic tablets to identify different points of contact at the same time. Thus, it helps improve the functionality of the device, especially when it comes to zooming in and out and rotating. You can enjoy this feature in Wacom tablets across its Cintiq and Intuos series but not on any Huion tablet.
But even though it is a handy feature, it is certainly not a must-have like the express keys, so it is not a deal-breaker for most people.
Speaking of the express keys, they are common in pretty much every drawing tablet as they are useful for functions such as zooming, saving, and undoing. The main difference usually lies in how many buttons the drawing tablets come with. Generally, you get to see more buttons on bigger tablets, which can help make the workflow easier.
Now, as far as Wacom graphics tablets are concerned, all of them sport such functional keys, with Wacom Intuos pro featuring a unique touch ring. This touch ring enables you to zoom in and out by simply sliding your finger on the wheel. Huion tablets also come with express buttons except for the 420 models.
2. Connectivity
There are mainly two types of connectivity available on the market: wired and wireless.
If you are someone who has to spend a significant amount of time working outside or away from the desk, make sure to choose a wireless option. However, if your work is mainly desk-oriented, a wired model, we think, would be a better option.
Moving on, the Bluetooth connectivity available in Wacom Intuos models do better than the 2.4Ghz RF wireless in some Huion tablets, as the former can be connected wirelessly. On the other hand, the 2.4Ghz wireless technique of Huion means that you will have to plug it into the USB adapter.
Thus, it can be safely said that Wacom beats Huion in terms of connectivity.
3. Design
Both Wacom and Huion tablets feature aesthetically pleasing designs. If you compare the Huion Kamvas 22 Plus with the Wacom Cintiq 22, you can see that both of them are essentially screens without express buttons like other drawing tablets.
However, you can get a Wacom express key remote featuring 17 customizable keys and a touch ring for the Wacom model. Unfortunately, the Huion Kamvas model doesn’t offer a matching accessory. You will have to connect it with an Android device and then work on the graphic tablet.
Apart from that, both the models feature an adaptable stand that enables users to adjust the height as per their requirements. However, the Wacom stand is more flexible as it has an angle adjustment ranging between 16 and 82°.
The Huion stand does a great job as well, with an adjustment range between 20 and 80°, but certainly doesn’t match the flexibility offered by the Wacom stand. Therefore, Wacom is a notch better than Huion in terms of design.
4. Pen/Stylus
The stylus/pen is perhaps the most important of a graphic tablet. And in order to get the most out of your product, always ensure that it comes with a battery-free digital pen.
Such pens are not just durable and easy to use, but they also last longer. And unlike the ordinary styluses, they don’t use batteries but the inductive current from the tablet’s surface to power themselves.
Almost all Wacom models come with battery-free styluses. On the other hand, Huion provides them only in its Kamvas tablets, but don’t worry; you can purchase them separately. Also, both types come with express keys and pretty much work the same way.
Apart from that, another important factor that you should consider is how the pen erases. Graphic tablets such as the Cintiq Pro from Wacom come with a unique feature that allows users to turn their stylus upside down and erase the art. However, other digital pens from the brand need the artist to push aside the button to erase the drawing.
Nevertheless, Wacom’s Pro models allow for the most natural erasing motion. Plus, with Wacom tablets, users can customize the pen functions through the tablet properties. A pen tilt feature, for instance, detects the angle at which the tool and the drawing tablet are inclined. This results in natural-looking pen, brush, and eraser strokes in apps that support tilt sensitivity.
While talking about digital pens, it is difficult to keep their nibs out of the conversation. Both Wacom and Huion tablets come with extra nibs so that you can replace them when they wear out with time. Additionally, Wacom tablets come with flexible nibs, made using soft plastic in addition to the ordinary ones, which we are sure a lot of users love.
Lastly, it is worth noting that Wacom tips are not compatible with Huion tablets and vice versa.
5. Display
When comparing the displays, the tablet monitor size is a crucial factor to consider as it directly determines the cost of the tablet.
The Kamvas tablets from Huion boast outstanding colors. In fact, the Huion Kamvas 22 Plus features a 140% sRGB color gamut, which, we must say, is quite impressive. This is because of its special Quantum Dots Technology, which offers a 1:1,200 contrast ratio on the screen.
You might be surprised to know that it is the same technology used in Samsung OLED panels, making it one of the best displays for drawing tablets. The same thing goes for the Huion Kamvas Pro 16, which has a 120% sRGB color coverage, slightly better than the 96% of the Wacom Cintiq 16.
Finally, both Wacom and Huion tablets include matte, anti-glare displays that make them easy to use under bright lighting conditions.
6. Pressure Sensitivity
Both brands design their drawing tablets with top-notch pen pressure sensitivity that ensures they offer a natural and fun drawing experience. Thus, it means the amount of pressure a user exerts on the screen determines the heaviness/lightness and thinness/thickness of the lines they draw, just like a real pen.
Although, when the number of levels crosses 1,000, it becomes very difficult to point out the difference between the devices. This is because all drawing tablets can pick up details from even the minutest of variations in the applied pressure.
However, since Wacom and Huion are two of the leading manufacturers of drawing tablets, they offer at least 2,048 pressure sensitivity in their digital pens. Therefore, it is pretty much useless to compare the level of pressure sensitivity between the two brands, as you will barely find any difference.
7. Resolution (LPI)
Measured in lines per inch (LPI), the pen resolution of a tablet dictates how well the tablet can detect minor changes. Newer drawing tablets can capture up to 5,080 LPI, thereby offering artists an incredible level of detail. However, even a tablet with 1,270 LPI can provide enough detail to capture projects perfectly well.
Although there are differences between the Wacom and Huion tablets in this aspect, both of their pen resolutions are sufficient for most users.
8. Performance
When it comes to performance, the tablets of both brands are outstanding. Wacom offers a refined texture on their drawing tablets, which is neither too smooth nor too rough to draw on. On the other hand, Huion tablets aren’t as smooth as Wacom tablets, yet they still work well.
9. Warranty & Support
Usually, Wacom and Huion drawing tablets are backed by a one-year warranty. But the tablets from the Wacom Pro series provide a two-year warranty. And while Wacom offers 24/7 online chat and phone support, Huion provides support through email, Skype, and chat. Thus, in terms of warranty and support, Wacom beats Huion.
10. Price
Huion tablets are economically priced. So, naturally, that makes them a perfect choice for newbies that want to use the tablets occasionally and for those on a limited budget.
On the other hand, Wacom tablets tend to be three times costlier than Huion tablets. That is because they do a better job, be it in terms of providing customer service quality, multi-touch functionality, pens, etc. Not to mention, Wacom tablets are made using high-quality and durable materials and therefore can resist rough usage and drops better than Huion tablets.
Huion Vs Wacom | Top Drawing Tablets
Here, we will be taking a look at some of the top drawing tablets from both brands to help you make an informed purchase.
1. Top Drawing Tablets For Professionals
These are the best drawing tablets for professionals from both brands:
Pro-level Picture Quality: Enjoy the 4K UHD (3840x2160)...
Precise Color Expression: Featured with industry-leading...
Apart from providing one of the best digital drawing experiences, the Huion Kamvas Pro 24 can meet all your online teaching needs by allowing you to use various teaching software. Artists and online tutors from all across the world have praised this device for its highly functional features. So, let’s dig a little deeper.
Why Did We Like It?
Straight off the bat, this pen display tablet boasts a full laminated screen, which minimizes the parallax effect and delivers an incredible aesthetic experience. Coupled with this is an anti-glare glass that lessens the distracting glare caused by the ambient lights and enhances the brightness and viewing angles of the display.
Thus, the pen tablet not only enhances your drawing experience but also protects your eyes from the harmful “glare” effect.
Apart from that, it comes with a battery-free pen, which allows you to work continuously for prolonged periods without having to worry about the pen running out of juice. Furthermore, the pen supports the tilt function, thereby offering a natural drawing experience with top-notch accuracy, which is no less than a bonus in the books of professional graphic artists.
Additionally, this Huion tablet sports two touch bars and 20 customizable express keys, allowing users to scroll the page or zoom in and out of the canvas without breaking a sweat. And the best part? It is designed for right and left-handed users, unlike ordinary pen tablets.
Last but not least, the HUION KAMVAS Pro 24 is backed by a one-year warranty. So, you don’t need to worry about defects and technical issues; at least for the first year, the brand has got you covered.
Stunning 23.6" touchscreen display with 4K resolution so you...
True-to-life color with 99% Adobe RGB & 97% sRGB color...
Now, let’s talk about the Cintiq Pro 24 from Wacom, which is meant for designers and artists looking to add a revolutionary pen-on-screen drawing experience to their PCs. Sporting a beautiful 4K display, this Wacom drawing tablet brings a powerful array of capabilities, which professionals wouldn’t want to miss out on.
Why Did We Like It?
We were impressed with almost everything this Wacom tablet had to offer. However, what caught our attention right from the start was its 4k display, offering spectacular viewing angles and incredible color accuracy. Therefore, users can see every minute detail of their artwork. On top of that, it is etched, thereby reducing reflections and glare while offering a tactile and distinct drawing experience.
The graphics tablet offers users one of the most advanced digital pen performances. With four times higher pen pressure sensitivity and accuracy than the previous Wacom pens, the Pro Pen 2 offers unmatched results in creative control. Thus, you can rest assured that it will provide a realistic pen-on-paper feel to help you achieve outstanding results.
Moving on, the express key remote sports 17 customizable buttons within easy reach, which is great. But especially fascinating are the radial menus and the on-screen keypad that further offers one-touch shortcuts. Naturally, one of the best graphic tablets that any professional graphic designer can hope to get their hands on.
Pros
Offers top-notch pen performance
Delivers spectacular viewing angles and color accuracy
Reduces reflections and glare
Offers decent battery performance
Cons
Sports an expensive price tag
2. Top Drawing Tablets For Beginners
These are the best drawing tablets for beginners from both brands:
Android Supported - HUION H610 Pro V2 is compatible with Mac...
Innovative Tilt Control System - Provide you better pressure...
If you are an amateur hobbyist or a new designer looking for an affordable yet quality drawing tablet, then the HUION H610 PRO V2 is for you. With no software or fiddly drivers to download, the product makes for a practical solution to all those who have little to no experience of using a drawing tablet. Keep reading to know all the features on offer.
Why Did We Like It?
First things first, the drawing tablet features eight programmable express keys, which provide easy access to your set shortcuts. Thus, it not just helps improve your efficiency but also saves you precious time. Additionally, the product works with drawing programs such as Clip Studio, Illustrator, Paint Tool Sai, Photoshop, which gives it an edge over other tablets in a similar price bracket.
Plus, it comes with OTG connectors out of the box that let you effortlessly connect the drawing tablet to your Android device and draw on the go. So, compatibility should be the least of your worries with this product.
With the highly advanced pen tilt technology, its PW100 battery-free pen performs like traditional markers, pencils, and brushes. Thus, you get to have more fun while drawing. And since it is battery-free, you can start working immediately without charging.
At under 3 pounds, it is ultra-thin and portable, thereby making it easy for you to put it in a bag and carry it around wherever you want. Finally, it sports an affordable price tag, which ensures it delivers good value for money.
Pros
Good value for money option
Boasts a lightweight construction
Supports a wide range of drawing applications
An ideal choice for beginners and amateur hobbyists
Wacom Intuos Small Graphics Drawing Tablet: Enjoy industry...
Works With All Software: Wacom Intuos tablet can be used in...
The Wacom Intuos CTL4100 has been specifically designed for those who are fairly new to editing photos, writing, or drawing on their Android device or computer. Sporting a large drawing area, this drawing tablet helps bring your best ideas to life. From our experience with this product, we can assure you that it has almost everything that would help you get creative digitally.
Why Did We Like It?
To begin with, it comes with a pressure-sensitive pen that offers both control and top-notch accuracy at the same time. Plus, it has been designed for both right and left-handed users, making it an instant hit among the masses. Oh! And did we forget to mention that it’s battery-free? Thus, you can use it whenever you want without any issues.
Additionally, the two programmable express keys on the pen and the four on the drawing tablet deserve special mention as they keep your favorite shortcuts at the push of a button. Now, users owning a Chromebook will be glad to know that the drawing tablet has been tested to the compatibility standards of Google and hence is compatible with a Chromebook.
Lastly, when you register the product on the computer, you get access to premium software like Clip Studio Paint Pro, Corel AfterShot Pro 3, and Corel Painter Essentials 8. Overall, one of the affordable yet high-quality drawing tablets currently available on the market.
Pros
Comes with a top-quality pen
Available at a reasonable price
Sports a fairly large drawing area
Easy to use
Cons
Takes a while to install the necessary drivers
Verdict: Huion or Wacom?
So, which is a better brand, Huion or Wacom?
In our opinion, a Huion drawing tablet, in many ways, can perform as well as a Wacom drawing tablet for an affordable price. So, if you have budget constraints, we strongly recommend going with Huion as it has some really exceptional options in its repertoire.
Also, if you will be using the drawing tablet to enjoy your hobbies rather than professional purposes, go with Huion without a second thought.
However, if you want the absolute best experience and your budget permits, then Wacom would be the brand to go with. That is because Wacom tablets come with better styluses, sport a durable construction, and offer top-notch customer service quality. Not to mention, 4K resolution and multi-touch functionality are also available on some Wacom products, but not on any Huion tablets.
Hopefully, now you will be able to make the right choice as per your requirements. So, on that note, we’ll call it a wrap. Until next time, take care!
Paris is a city renowned for its beauty and charm, and one of the most iconic landmarks that capture its essence is Le Consulat café.
The quaint establishment, located in the charming neighborhood of Montmartre, has been popular among artists, writers, and intellectuals for over a century. Want to grab breakfast with friends? Head over to Le Consulat. Looking for a subject for your next art project? Grab a seat outside the café and recreate the Parisian gem on paper!
It’s adorned with vibrant red and green hues, the color combo that screams “Pa-ree!” As such, capturing the beauty of Le Consulat in watercolor will surely be a rewarding process, even for beginners. With the right materials and techniques, you can create a stunning painting that pays homage to this iconic café and the city of Paris itself.
So, without further ado, let’s get started…
Painting Paris Le Consulat In Watercolor
The right tools can make all the difference when it comes to creating a successful work of art. So, I suggest using a comfortable paintbrush that offers durability and versatility. You should also consider investing in good-quality watercolor paints that offer a consistent texture and high pigmentation, you can read more about the types of watercolor paints here.
That said, here’s what I’ll be using for painting the legendary café:
Paint: Kuretake Gansai Tambi Watercolors 12 color | Paper: Saunders Waterford Watercolor Paper - White, 300gsm | Brush: Raphael Kolinsky Sable Fine Point Round Brush 8404
First off, sketch a basic outline of the Le Consulat building on your paper. Although I’m using watercolor paper, you can use your sketchbook or just any paper that’s thick enough to hold watercolors.
As for the pencil, I’m sticking to my “holy grail” - a light-colored pencil! The soft tip of colored pencils helps me create a light sketch, visible enough to act as a guide while I paint. On the contrary, if you use a regular pencil, you may end up with harsh lines, which may be difficult to hide beneath sheer watercolors.
Slowly, I’ll add some details while sketching. I don’t do this often and simply draw a rough sketch. However, considering the various intricate elements of this café, I think it’s best to create a detailed sketch to avoid mistakes while painting.
After all, you wouldn’t want to mess up painting Vincent Van Gogh’s favorite café!
Next, use just a tad bit of yellow mixed with a lot of water for the first layer. Remember to keep it very light and add more color gradually - not all at once.
I’ll use the same consistency for the second and third floors of the café. I recommend leaving out the windows and other details right now and focusing on the walls only.
Perhaps the most iconic part of Le Consulat is its canopy. The vibrant red and green combination makes the tiny café visible from miles away, allowing everyone to flock to its door every morning! I especially like how this bright canopy creates a striking contrast against the neutral color scheme of this house-turned-café.
Once the canopy is painted using vibrant shades of red and green, paint the first layer of the ground floor. Here, I’ll use brown, while keeping it as light as possible.
Once the first layer is dry, proceed to add some details, like windows, plants on the balcony, cracks on the walls, the name board, etc.
Note that I’m only painting according to my memory from the last time I visited Paris and the pictures I managed to click amidst the crowd. But if you’ve been lucky to drop by the café recently, feel free to add new details to the building.
After painting the windows and doors, you can add a second flush of color to the painting. I’ll start with the canopy, as that should be the focal point of the scene. Notice how I’m gradually adding a thicker consistency of paint on each part of the canopy. As I’m adding more reds and greens, the café is slowly coming to life - I can already sniff the freshly prepared crepes!
Let the painting dry completely before making any final touches.
Finally, I’ll add more details and sharpness to the artwork by painting the outlines of the door and windows. Use a small brush, just as I am, to make precise strokes. While I may not remember the intricacies of Parisian architecture very well, simply outlining basic structures can make a world of difference.
I’ll further paint the cute little chairs outside the café, which are usually occupied throughout the day. But that didn’t stop me from grabbing a treat whenever I craved something sweet!
And just like that, with a few more details, my rendition of the cozy café at the heart of Montmartre is ready. What do you think?
Besides painting on watercolor paper to be framed and propped up on your wall, I suggest turning it into a postcard and sending it to a friend. Or, you could make a birthday card with this warm and inviting painting of Le Consulat in the front and gift it to someone who loves Paris!
For a more personalized touch, consider writing a message explaining why you chose the painting or what it means to you. Regardless, I guarantee any art enthusiast or travel junkie will appreciate such a thoughtful gift.
Other than that, you can experiment with the composition - maybe paint the sky or add more trees surrounding the café. Your imagination is the limit!
So, take your time and experiment with different colors and techniques to create your unique masterpiece.
Watercolor is a unique medium that allows seamless blending for stunning effects on paper. And with an iconic subject like Le Consulat, you can express your creativity in capturing the beautiful heritage of Paris.
With this step-by-step guide, I’m sure you’ll be able to create a painting that showcases your artistic skills. And if you’re a beginner, I hope this article inspires you to try your hand at watercolor painting and explore your creative side.
Just remember to take your time and enjoy the relaxing and rewarding process, and if you enjoy this one do cast a glance over our next tutorials on How to Paint Berlin with Watercolor and How to Paint Trees with Watercolor, they're both beginner-friendly watercolor tutorials that you'll surely enjoy!
Happy painting!
We all know that even the idea of installing a spa cover lifter yourself sounds like a scary one. However, all of this is a myth as the installation process is much easier than you think. The installation process is not too long, it takes about an hour at most and does not require any power tools.
Before we discuss the process of installing a cover lifter, here is a brief introduction summing up the need for a spa cover lifter.
You might think that you can move the cover of a brand new hot tub by hand. One look at the size and shape of the hot tub cover is enough to make you rethink the need for a hot tub cover.
The enormous size and shape of the hot tub cover make removing and stowing the cover a challenge for most people. Additionally, you are also at risk of facing serious back injuries if you lift the heavy object without any support.
Given the challenge ahead, it makes complete sense to opt for a spa cover lifter. Even the simplest of the models allow the user to cover the spa with little effort.
The frequent use of a spa cover means that, after a time, the cover will absorb water vapor from the spa. After absorbing the vapor from the barrier, the weight of the cover will start to move upwards, as the evaporation process continues. It is not until the cover becomes waterlogged that you should consider replacing it. Till the cover becomes completely waterlogged, a little mechanical help will make your life considerably more comfortable.
The use of a spa cover lifter means that you have the help of an extra pair of hands for opening and closing the spa. With the help of a spa cover lifter, you can use the spa to carry out quick water checks without hassle. The use of a lifter also eases the cleaning process because you don't stand the chance of hurting yourself in the process.
The life and performance of the hot tub are influenced by the maintenance routine you follow. The maintenance routine becomes more comfortable if you install the spa lifter following the procedures mentioned below.
Step-By-Step Installation Process
The first part of the procedure is to figure out whether the lifter comes with a mounting system or bracket. Follow the instructions mentioned in the instruction manual regarding the nature of the lifter. Given the nature of the product, you may be required to drill holes to screw the lifter in. Use a drill bit that is narrow for the purpose and ensure that you don't drill holes too far as it can damage the tub.
Once you are done drilling the holes, you will not face many problems in attaching the mounting bracket. You can use a drillor screwdriver to assist you during the process.
The package that comes with the cover lifter includes support arms that are responsible for connecting the two pivoting arms. You can then attach the pivoting arms with the brackets that are placed on the free pivots. Hydraulics are also available with some packages, especially if you order a powerlifter.
The next step is to ensure that the cover lifter is attached to the cover of your spa. Before you go about carrying out this step, it is imperative to discuss the issue with the manufacturer. Different lifters specified for various models have contrasting ways of finishing the act.
Most cover lifters also come with handgrips. You can slide the handgrips to whichever position suits you. You should look for convenience in this matter as the hand grips need to function effectively for you and work in a manner that is best for you. Additionally, if the package comes with any other components, be careful when attaching them. In the case of electrical components, avoid contact with water.
If, for one reason or the other, the spa cover lifter is not working, go through the directions, and rectify the mistake.
Required Materials
Here is a list of materials that you should possess if you are willing to install the cover by yourself. If you are looking to install a hot tub cover lifter, we advise you to purchase an entire cover lift package.
These are some of the essential elements that are required to aid the smooth operation.
Precautions
Before you set out installing the spa cover lifter, take note of the following precautionary methods.
Use all the appropriate tools
Before following the instruction manual, ensure that it offers the right advice
Don’t forget to wear protective gear
Be cautious throughout the process to prevent damage.
The installation of a hot tub cover lifter will ease the process of removing the cover. The installation will simplify the process by making it faster and easier. Keeping the lifter clean does not require much work.
The process of installing a spa lifter is not as challenging as it sounds. Once you start the process of installation, you’ll realize that it’s not as tough as it seems!
The dream of having a kitchen does not end with its design and usability; you must also consider the air quality.
Something that will help us have better air circulation around the kitchen, especially during meal preparation and cooking, is a range hood.
If you decide to buy one and struggle to understand how to install a range hood, whether you're doing a DIY or hiring a pro, we have a full installation guide in this article.
Let's get started!
Range Hood Installation: Step-By-Step Instructions
Before knowing how to install a range hood (photo above), it is essential to understand what this kitchen appliance is and what it offers.
A range hood is an appliance designed to suck, filter, and vent gasses through its exit point.
These hoods can filter the air, odor, smoke, steam, and excess heat produced within your cooking area, whether you're preparing Gordon Ramsey's Beef Wellington or simple scrambled eggs.
Now that you know what it is, it's time to learn what you'll need and the specific steps to install a range hood through the following section.
What You'll Need
To efficiently install a range hood, the first thing you need to do is prepare the specific materials and tools, like the following:
Caulk gun, Chisel (optional), Drill
Drill bits, Ducting, Hammer (optional)
Hole saw, HVAC foil/aluminum tape
Oscillating tool, Pencil, Range hood
Screw, Screwdriver, Tape measure
Wall cap, Wire stripper, Wire nuts
After gathering the aforementioned materials, you must follow this step-by-step guide:
Step 1: Take Down the Old Range Hood if There Is One
The first step involves removing the old range hood and its embedded components if your goal is to upgrade it
However, if you do not have an existing range hood or you will be installing it in other parts of your kitchen, then you can skip this step and proceed with the second one.
Step 2: For Safety, Shut off the Electricity
Before drilling and doing other steps to install a range hood on the wall, you must first switch off the electrical power from the breaker box.
Turning the electricity off will keep you or an expert from the dangers of electrocution, especially when dealing with old or faulty electrical wiring.
Step 3: Hire Electricians for the Electrical Wiring Setup if There is None
The next step you need to do is to settle the electrical lines that will run the range hood by letting an electrician set it up.
However, if you have existing wirings from your old vented range hood and there are no existing problems, pull the electrical cable, separate, and remove the protective paper to prepare it for connection in the later steps. Then, you can proceed to the next step.
Step 4: Measure and Mark the Vent Holes
After performing the first two steps, you must measure and mark the wall area where you will need to drill locator holes and set up the hoods.
Remember that this is only applicable for a ducted range hood (which is what most range hoods are) and not for the ductless range hood.
Nevertheless, you can do this by placing the round or rectangular duct at the chosen wall where you plan on mounting it and marking its diameter or area based on size.
Step 5: Drill or Cut Space for the Vent
When you have gotten the exact measurements of the range hood and the vent hole, it is time to drill or cut through the wall to make space for the vent.
In this process, you will need appropriate tools, such as the drill and drill bits. After preparation, follow these steps:
For circular vents, use a hole saw to drill a hole for the ductwork inside
For rectangles and other shapes, drill a hole through the wall using drill and drill bits
You can also use the oscillating saw or a cold chisel and hammer to perfect the hole
Check the wall entry points of the duct (flow)
If there are obstructions, relocate the holes in the wall
If there are none, proceed with drilling through the exterior wall
However, if you have ductless range hoods, it will not be necessary as they use a unique charcoal filter system to circulate clean air back into the kitchen.
Tip
If the obstruction includes pipes, plumbing, and wires, you can ask the help of professionals to relocate pipes accordingly.
Step 6: Install the Ductwork
The sixth step you must do is the process of installing ductwork. The duct is the pathway through which the air suctioned by range hood fans passes until it reaches the exit point.
In doing this, you must first put a mounting bracket (architecture) at the exterior hole using adhesive and mounting screws. After that, proceed with these steps:
Connect the metal wall cap or duct cap with the end length of the ductwork (duct extension) using aluminum tape and screws.
Then, install the connected ductwork into mounting brackets.
Using mounting screws, secure the ductwork into the mounting brackets.
Now that you are done with the exterior wall, proceed by finishing the route (ductwork) on the interior by connecting the remaining duct length.
This is done by inserting it in the interior wall's hole using aluminum tape.
Step 7: Run the Electrical Wiring
After you install ductwork, it is time to connect and run the electrical wiring for your hood.
Using wire nuts, connect the electrical wires in the electrical box; this means black to black wire, white wire to white fixture lead, and green grounding wire to green lead.
Once all the wires are connected and in their proper places in the electrical box, cover the ductwork and electrical wire with the duct cover.
Remember
A duct cover or an electrical cover is essential to protect the internal electrical work, duct connector, and other materials from damage.
Step 8: Mount the Range Hood
When the ductwork has been settled, it is time to mount the range hood into your wall. In doing this, the following actions must be performed:
Drill the mounting brackets into the wall, where the range hood will be attached based on the manufacturer's instructions, and fix them with mounting screws
Secure the hood on the wall with screws driven at its intended spots on the top
Cover the rest of the ductwork installed (seams) with a duct tape
Step 9: Turn on the Power and Test the Range Hood
When you have finished the first up to the eighth steps, you can proceed with the last (and most crucial step): turn on the electric power and range hood.
To check if the new appliance is working, here are the things you must watch intently:
If the hood runs when turned on (e.g., after plugging through an outlet nearby)
If the lights are working properly
If the vented range hoods suction air
If the air passes swiftly out through the exterior wall exit point
Remember
Aside from the light of the kitchen hood, you can also elevate the lighting of your space using the best under-cabinet lighting listed in the article.
In installing a range hood, there are essential factors that you need to consider and things you must prioritize. Well, don't worry because we have your back!
Based on our firsthand experience and knowledge of appliances, here are some of our tips that will surely make your installation smooth sailing:
Always check your local building codes before installing a new hood.
Always remove the old hood when it is not needed or when it is where you will place the new hood.
Choose and find range hoods based on functionality and aesthetics (i.e., your cooking needs and kitchen design). You can check out the best range hoods on the market through this article.
Don't forget to buy a range hood similar to the size of the space you will place it in.
Prioritize safety when installing a range hood.
Check your vent holes.
Range Hood Use and Maintenance Tips
After installing your kitchen hood, the best way to keep it nice and running is to use it cautiously and take good care of your range hoods.
To preserve the pristine condition of your wall-mounted range hoods, as experts in the field, here are our use and maintenance tips for you:
Regularly clean the vent hood where the air passes through to prevent grease buildup, which can be a fire hazard.
Regularly clean the exposed parts of the hood.
Regularly clean the fan blades and air filters to prevent the accumulation of dirt and debris that can damage the range hood.
You must remember that in conducting the maintenance tips mentioned above, you must have the wall-mounted range hood shut off to prevent electrocution.
Also, you can use a degreasing solution, cleaning spray, soap, and hot water for the filters and other parts.
Nonetheless, when using the new range hood, always follow the instructions and safety protocols laid out by the manufacturers in the guide given along with the appliance.
Tip
If you want to delve more and find the answer to the question 'Do I need a range hood?', check out this article!
Install a Range Hood DIY Vs Hiring a Pro: Which is Better?
Nowadays, a do-it-yourself (DIY) remedy has been at the heart of most appliance installations because of the recent pandemic and the availability of online tutorials.
Yet, it is still undeniable that pros in the appliances field are there for a reason. So, which is truly better, a DIY job or hiring a pro?
On the one hand, you can do DIY for a range hood, especially when you know how to measure and drill holes and accurately follow the steps in this article. However, lifting heavy hoods would still require someone to help you out.
Nevertheless, a DIY can help you save some money, as hiring a pro can cost between $100 and $600, depending on the specifications of your appliance.
On the other hand, hiring a professional Heating, Ventilation, and Air Conditioning (HVAC) contractor will assure you of the following:
Faster installation
Preventing electrical wiring mishaps
At the end of the day, it will still be up to you whether you do the installation yourself or ask for the help of professionals.
Range Hood Installation FAQs
Learning how to install range hoods undoubtedly sparked some questions in your mind. Do not worry because we are here to answer some of your FAQs through this section.
Do Range Hoods Have to Be Vented Outside?
No, hoods do not have to be vented outside (wall, ceiling, or roof) all the time because there are ductless range hoods.
How High Should a Range Hood Be?
A range hood must be 20 inches to 30 inches above the heat source. Specifically, if you have an electric cooktop, ensure the range hood installation is 20 inches to 24 inches above.
On the other hand, if you use a gas stove as a cooking surface, ensure you install the range hood at least 24 inches to 30 inches above.
Remember
You can always refer to the article on how to buy a gas range for specific measures, tips, and reminders.
How far should cabinets be from the range hood?
The hood mounted on the wall should have a 1/2-inch space from the existing cabinetry.
A range hood in your kitchen (or wall) is an essential appliance that provides proper ventilation, particularly within your kitchen area, whether it be a ducted range hood or a ductless model.
The key to properly installing a range hood on your wall is to follow the steps above with caution and accuracy (double-check).
Now that you have all the necessary steps, use, and maintenance tips, you can indeed install your range hood yourself or have the installation done by professionals!
Are buzzing yellow jackets making it impossible for you to relax in the garden even for a while?
We understand your concern. Finding loads of yellow jackets foraging now and then can be a headache indeed. And when you have children and pets at home, this can be all the more worrisome since these insects leave really painful stings.
Hence, controlling these yellow jackets becomes essential. In this guide, we have compiled all the various ways in which you can tackle these insects. We have also included some essential information that you need to know about yellow jackets and their habits.
So, without further ado, let’s get started.
How to Deal With Yellow Jackets
Yellow Jacket - The Insect
The insect, which is known to people around the world as a “wasp” is also referred to by the name yellow jacket. Native to North America, this insect got such a nickname due to its striking yellow color with black stripes.
In fact, this is why you might mistake it for a bee, which is much gentler in nature and is a more endangered insect. The hornet is another similar looking wasp which is often mistaken to be the yellow jacket.
These insects have a slightly smaller size than the regular bee or wasp and are only around 12 mm long. However, queen yellow jackets can grow to a length of 19 mm.
What makes them dangerous is the fact that they can repeatedly sting without being affected, unlike the bee which will die as the stinger is attached to its heart. They generally tend to build nests in protected areas in a garden which are not directly exposed to rain, sunlight or wind.
What Do They Feed On?
Yellow jackets also have similarities with wasps in their food habits, since they prey on several other insects and arthropods. As such, if these insects are present in small numbers and keep away from any human activity, they can be useful in controlling other pests.
Yellow jackets also look out for food items which are rich in carbohydrates and sugar. You will often spot them around flowers, on tree barks, and on fruits. Also, the larvae require protein to grow, for which the larger worker insects search for fish and meat to feed them.
Life Cycle and Habits Of The Yellow Jacket
These insects have a similar life cycle as that of other bugs. Starting off as an egg, they gradually become a larva, then change to pupa, and ultimately develop into the adult wasp. A queen yellow jacket finds a nest site and makes a small nest from paper where it lays the eggs.
The queen insects can generally lay upto 50 eggs at once. When the eggs hatch, the tiny insects are fed up to 20 days until they develop into small versions of the fully matured wasp.
These insects eventually take over from the queen and keep on feeding the rest of the larva. You would usually find them maturing into adults during the summer.
Habits
Yellow Jackets are social wasps and belong to the Vespula genus. A surprising as well as worrisome fact is that a season is enough for these insects to produce several thousand workers.
The genus has a total of 18 species, which consists of several types of yellow jackets. These differ according to their growth habits and are identified by the area they are found growing in. Identifying them is important so that you are able to deal with the insects properly and effectively. In the next section, we have categorized yellow jackets according to the place where they build their nests.
Types of Yellow Jackets and Yellow Jacket Nests
The German Yellow Jacket
Yellow Jackets Found in Structures
The German yellow jacket, which has its origins in Europe, is located across the midwestern and northeastern regions of the United States. These are widely distributed throughout many temperate areas of the country. They are usually found in wall voids, attics, cracks and crevices in a building surface, and crawl spaces.
The Southern Yellow Jacket
Found in Both the Ground and Structures
The yellow jacket found most commonly is Vespula vularis and occurs in many states in the USA. Their nests are found both below and above the ground level. Eastern yellow jackets or Vespula maculifrons is another type that has ground nests mostly but can also have aerial nests. Vespula squamosa or southern yellow jackets also have terrestrial as well as aerial nests.
The Western Yellow Jacket
Found in the Ground
The Eastern yellow jackets or vespula maculifrons and the western yellow jackets or vespula pensylvanica make nests in the ground. They are commonly referred to as “meat bees”. Such yellow jackets also make their nests in rodent burrows and enlarge the cavity as the colonies grow.
Aerial Habitat
A few yellow jackets, like the D. maculata and D. areanara build nests that are attached to the eaves of structures or hang from a tree. These are not as aggressive as other types.
Dealing With Yellow Jackets
When these insects forage in large numbers in areas of human activity or even are nesting nearby, they can create a lot of problems. Most types of yellow jackets become quite aggressive if their colony is disturbed and may sting anyone they find nearby.
In such circumstances it becomes necessary to control the infestation. There are several ways of dealing with yellow jackets, depending on the severity of the situation. These include some preventive control measures that can be taken beforehand.
Sanitation
You must keep in mind that if yellow jackets find food in an area, they would continue foraging that area at intervals. You can face this even after the original food source is dealt with. Hence it is important to maintain some sanitation practices even prior to noticing yellow jackets in any area. This will also help in dealing with the problem without having to kill them. Here are some methods:
Keep Garbage Cans Sealed
Make sure you have no food sources kept outside for yellow jackets to live off from them. Un-emptied cans, animal food or leftover food lying outside can attract these insects and their larva. So, keep the garbage in sealed cans and put your pet food inside instead of the backyard.
Keep Sugary Foods and Drinks Inside
You must not forget that these insects feed on anything sugary. So, in case you are having dinner on an outside table and are thinking of bringing dessert along, dump that idea. You can have it to your heart’s content indoors.
Keep Sliced Cucumber Pieces
It might seem surprising, but cucumbers can indeed be helpful in keeping away yellow jackets. This vegetable contains an acid which yellow jackets don’t like, so you can slice some and scatter them all around your garden before any outdoor gathering.
Killing the Nest
If you are tired of the frequent foraging of yellow jackets and may even have been stung sometimes, you can consider removing the nest itself. But this should be carried out carefully and slowly.
You should also be aware of the nesting habits of these insects which we have discussed earlier in this article. Remember that though all wasps would defend their nests, hornets and yellow jackets turn specifically aggressive for protecting the queen.
If you disturb the nest, these bugs may swarm out from the colony and attack what they consider to be the disturbance. So, you need to take the necessary protective measures and proceed in the right way. Here is a guide for how you should proceed to kill a nest of yellow jackets:
Locate the Nests
You should do this during the daytime, so that you can identify the worker insects entering and leaving the points of entry. Search for multiple entry points and make sure you mark them.
Treatment
Treat the nest only when it is dark. Yellow jackets don’t have a strong vision, which reduces the chance of getting stung. Besides, at night the entire colony will be there in the nest which would make the treatment most effective.
Use a Pyrethrum Aerosol
You should treat the nest with pyrethrum aerosols such as CV-80D, Stryker 54 Contact Aerosol and PT 565. It is the pyrethrum that forms a gas and fills the cavities in the nest to kill these insects on contact. Use a good-quality sprayer to spray the aerosol in areas hard to reach.
Apply Insecticide Dusts
Wait for about 10-15 minutes for the aerosol to become dry and then dust the opening with insecticide dusts like Tempo Dust. This dust will stop any future hatch outs. You must also dust the entrance, the whole nest and surrounding areas.
Check the Nests
After a day, you must go and check the nest to see if the insects are dead. This can be verified by the lack of any activity in and near the spot. Repeat the process if you find some of them are still alive.
Use of Baits
Baits for yellow jackets can either be made using available resources at home or may be purchased from the market or online shopping sites. Here are two such baits that can effectively control yellow jackets:
DIY Protein Bait
Using this innovative method often helps to keep away yellow jackets. Fill some 5-gallon buckets with soapy water. Then use a string of some length to secure a protein food as bait such as a small piece of ham.
In this way, the bait will dangle a few inches above the water. Finally, cover the bucket with a wide mesh that allows the jacket to enter. The insects which want to take the bait will fly within the water and drown. Also, make sure that the traps are well away from any patio or picnic areas.
Alpine Yellow Jacket Bait Stations
These bait stations can be purchased online and are designed for use with Onslaught Insecticide. First, you have to supply the station with fresh meat along with the Onslaught. This lures the insects into the bait station, after which they ingest the mixture of meat with insecticides. It kills the yellow and black bugs then and there.
This bait is widely used during the summer and spring months to kill the most common yellow jackets which consume meat and protein.
These include the German yellow jackets and western yellow jackets. Remember that during the months of fall, yellow jackets prefer carbohydrates to meat, so this bait may not be effective.
Trapping
You will find yellow jacket traps useful if you cannot locate the nest. Using a lure such as meat or fruit juice with a trap like the Advantage Yellow Jacket Trap works perfectly in such cases.
You can put up such traps by some simple steps mentioned in a guide along with the pack or on the product label itself. This trap is really beneficial during cookouts and picnics, as it draws the insects away from you. Keep in mind these points while you put up the trap:
Ensure the trap is placed away from where you will be. It is then that they will be lured into it.
Meat works well as a lure during early season, while fruit juice works better in the fall months and summer.
The Winter Months
In case some of the bugs enter into the walls when it is cold, some reproductive yellow jackets may survive in the walls. In the spring, they would come out to venture outside.
The reproductive insects won't sting, so there is nothing to worry about that. However, if the nest is located in a warm place, then it may survive the winter in its entirety. To kill the nests you can use the Stryker 54 on the entrance during the dark.
Treating Yellow Jacket Stings
Usually, you will know straight away when a yellow jacket has stung. The symptoms of such a sting are really unpleasant but can be treated. First of all, you will feel the pain, and within a while, the area will redden and start swelling.
To treat a sting at home, you can mix one spoonful of baking soda in water and apply on the sting with a cotton ball. This would help in neutralizing the venom of yellow jackets. To reduce itching, put a little vinegar on cotton and pat on the area.
However, for a small section of people who are more allergic, the sting has life risks. This is known as anaphylaxis and leads to dangerous symptoms such as itchiness, swelling of tongue and skin rashes. Immediate medical consultation and treatment are needed in such cases.
Conclusion
So, if you have been struggling to get rid of these aggressive insects from your garden, we hope this article has been of some help to you.
You may have assumed earlier that it would be a herculean task, but it’s not so difficult after all. You just need to be careful at every step and make sure you are protected when going near the nests.
Wearing gloves and boots, shirts with long sleeves, and trousers with sealed cuffs would help to prevent stings and disturbances.
So, now that you know all about it, go ahead and bring your garden back to its old glory!
Cleaning a carburetor is not as difficult as you may perceive. If it looks and sounds dangerous, read on.
Are you under the impression that lawnmowers need to be taken to garages or a repair store every time you need to get it cleaned? Let us break the bubble. With a few essential pieces of equipment, you can do the job at home itself.
But again, you must take specific precautionary measures beforehand. If there are problems with the mower, it is best to let an expert handle the job. But if the mower is working fine, then you can do the job yourself.
Let’s proceed to the tools that are required for this process, and we will also be giving you tips along the way so as to not go wrong. The engines will be purring perfectly by the end of this guide.
How to Clean the Lawn Mower Carburetor Without Removing It?
Required Tools for Cleaning
Now that you have decided to clean the machine instead of taking it apart, you will need the following sets of equipment for partial cleaning.
Air compressor gun
First, before using any other tool, an air compressor gun needs to be used to remove any visible dirt from the machine. There are chances that lumps of grass or soil may be stuck with grease in some areas of the machine. Use this device to blow off the dirt, and then rags can be used to clean it further.
Screwdriver
A screwdriver is essential in any place where screws need to be removed. Here you can choose a Philips product for opening the filter. It can also be used for opening snapped on parts of the machine. Again, if you feel you do not know how to go about using a screwdriver, opt for a plastic card, which is a safer choice and will help in the process.
Aerosol cleaner
For those who do not know what an aerosol cleaner is, it is a liquid solution that is generally used to clean electrical equipment. It can be used on all the parts as well as any other device which runs on fuel. This solution works wonders for machines and keeps them free from rust and other forms of discharge.
Rags
Cotton rags are a must while working with machinery and machine parts. You will be soiling your hands multiple times, and would not want the grease to remain on the fingers for long. So, make sure that you carry a piece of cloth to clean your hands as well as to clean the carburetor.
Flashlight or headlamps
It is essential to have the inner parts of the carburetor visible to the naked eye. So, make sure that you have a flashlight or headlamp while working because even if the room is well lit, the parts may not be visible. A headlamp is a better choice, as this will keep both your hands from being occupied.
Kinds of Lawn Mowers
There are mainly three types of lawn mowers presently available.
Traditional
The traditional lawnmower is one that is devoid of any engine. It works on kinetic energy that is produced when the blades of the wheels inside keep turning. It is a pretty basic machine and cannot be expected to run very efficiently.
Walk-behind
The walk-behind lawn mowers work very smoothly, and you only have to push it where you want the grass to be cut. It slices off the grass and leaves a neat looking lawn. Blades below this machine, which is powered with the help of a carburetor, are the main tools that cut through your lawn.
Ride-on
The last type is the ride-on lawnmower, and yes, it is fun to operate. One just has to sit on it and steer it in the right direction. This is essential for larger fields where walking would be very tiresome. In such cases, this machine cuts off grass efficiently and quickly.
Steps to Have a Clean Carburetor
Before starting this process, you need to assess the condition of the mower. If you are using it on a daily basis and it is maintained well, then we are assuming it is in good condition.
Have you left your gadget in the garage for long, and there is rust on its body, or the mower has seen a lot of rain and is filled with dirt? If that is the case, this process will not work. The mower would be needing professional servicing and has to be taken down to the repair shop to be deep cleansed.
We will now begin with the steps to take care of a machine that is in good working condition.
Step 1
Firstly, to prevent any kind of mishap or injury, make sure the device is switched off. We will require you to switch it on in the middle, but it has to be shut down to begin with.
Step 2
Your second work would be to analyze every part of the unit that is visible to you. This is a required step before proceeding further. For instance, if you see a wire which has been torn off, it may have been a rodent’s doing.
If you see any parts which are rusted, there is a chance that the machine was damp and did not dry up instantly. This led to rusting inside the device. Making a note of these points is important because it will help you decide if you want to go forward with partial clean up or if disassembly is required.
We would advise you here to take some pictures of how the carburetor looks presently. This will help you in the end when you are trying to put everything back in place.
Step 3
We will begin with the air filter. Remember that this can be partially dirty or extremely dirty, depending on your usage. All the air that is pulled in passes through the filter, and thus there is a high chance that it would be very dirty. You could use a rag to clean this, or you may choose to do it with a vacuum cleaner.
See if the air filter is removable as it can be better to remove and clean both sides of it.
Step 4
Focus on all the internal parts of the cleaner with a flashlight or headlamp. There can be an exposed wire, and you do not want to be touching it or having any other wire touch the end. Also, a slight pull may tear a wire. So be very careful while working with the parts.
Any exposed wire should not come in contact with another wire or lumps of grass. This could cause a fire as the grass is inflammable.
Also, since carburetors have dark paint, it may be difficult to see rust, discoloration, or grass stuck inside. A light source will guide you to find these.
This is actually an excellent habit to pursue if you want to become a DIY mechanic or an expert at fixing/cleaning parts. This helps you gain knowledge about the parts.
Step 5
This is where the air compressor gun comes into use. The machine must have seen a lot of grass and dirt throughout its lifetime, and there will be specks of it in the inside of your device.
There are parts which you can only reach with a lot of difficulties, and we would suggest not to do so with your bare hands. It could turn out to be a dangerous endeavor. Use an air compressor gun to clean out the dirt and debris from inside.
A word of caution here. Do not use the highest setting to do this activity. It may end up dislodging a part of a wire. Use it on medium mode for best performance.
Step 6
Now it's time to take out the aerosol cleaner. Do not use water or spray water on the parts. This may cause some portions to rust, and the machine would break down completely. Aerosol cans have a solution which tends to stick to parts and are made to be used explicitly with electrical devices.
Turn on the machine now as every component inside has been cleaned. The cleaner has to move inside the engine completely, and so it is essential to be turned on.
Spray aerosol liquid in the middle of the carburetor in 10 -15 pulses. It is time to let the machine work for another minute. This ensures that the liquid spreads throughout the device, and we can attain full coverage.
After a minute, turn it off and spray the liquid on to the throat of your machine properly. This ensures that you cover the lower plate, which may also have accumulated grime and moss. Make sure it is absolutely clean before proceeding.
Step 7
Now that you have allowed the air compressor gun and aerosol liquid to work their magic on the device, it is time to use your rag for complete cleaning. First, dampen the rug and then use it to wipe off leftover grime.
The rug should be damp and not dripping, as that may lead to damaging parts. Keep rinsing the cloth once in a while, so dirt does not get transferred from one region to another. Continue doing this until every part is visibly clean.
Step 8
After you have completed the job, inspect every part using a light source. View the pictures that you had initially taken of your machine to compare and see if the parts are in order.
To test if the product is working alright, start the engine and keep it running for a few minutes. It should start smoothly without much sound. If it is vibrating less or you hear no chugging, kudos! The job is done.
Why does a carburetor stop working?
The engine can face blockages because of the constant dirt and grass it collects. Also, it may so happen that the machine accumulates a lot of dust and dirt if kept idle for an extended period.
Gasoline deposits, varnishes, and oil deposit may be other materials which can lead to the formation of blockages inside the machine. This directly affects the functioning, and the machine works slower or makes a lot of sounds while it operates.
Tips
If your machine is under warranty, first call up customer care and see if the device can be cleaned up for free. If that is the case, it is best to send it off for professional cleaning.
It is vital that you keep cleaning every part once in a while. This will keep the device running and in good condition, and you would not have to take it to the store for deep cleaning often.
You must know the exact problem that your device is facing before taking the gadget to a store for deep cleansing. Shops tend to make money out of it as they are not expecting someone to know a lot about the working of the device.
The aerosol cleaner has to be of the right variety. If you get a wrong type of cleaner, it may lead to malfunctioning. The bathroom’s disinfectant cleaner is not the right choice and cannot be used as an alternative. You will find a specific product dedicated to lawnmowers.
Final Words
We will again want to reiterate the fact that deep cleansing is not replaceable. You will have to take the mower for deep cleansing once in a while. But partial cleaning at home can be done once a week or once in two weeks, depending on your usage. This will keep the mower working well and the interiors free from rust.
We are sure that you are now ready to clean your own lawn mower. For added help, you can also look up some YouTube tutorials regarding this topic. Let us know how it worked out for you in the comments section below.
Have you ever browsed through cooktops, eyed that fancy one which claims to have 30,000 BTU, and secretly wished to buy it?
It is okay if that sounds like you because we get it; those high-powered fancy and professional stoves are quite attractive. Which begs the question: is it really necessary at home? Let us answer that - not unless you plan to open a restaurant that only serves during rush hour.
Having a stove with that kind of power is not needed even if you entertain many people or have a big family with an even bigger appetite. Which makes way for another question: how much BTU in a stove is suitable for residential use? That is precisely the question we are going to answer today.
We have put together this short guide on how much BTU you need and how you can potentially save money by buying the right stove with the right cooking power.
So, without further ado, let’s get right into it!
How Much BTU You Need to Save Money on Cooking
What Is A BTU?
A British Thermal Unit, aka BTU, is a measurement unit used to measure how much heat the stove is delivering. Whether you are buying a stove, boiler, burner, or an oven, its BTU measurement will always be mentioned. It is a great way to compare the different heating capacities of products.
From a technical standpoint, 1 BTU of a stove can be described as the energy the stove needs to get 1 pound of water to 1 degree Fahrenheit (-17 degrees Celsius). To put it in perspective, the energy released in one BTU can be placed at an equal footing as one lit matchstick.
If you go through the manual for stoves or look at the label in a store, BTU will be mentioned in a range. One end is the maximum output and the other end is the lowest it can go after which the flame goes out.
Bigger Is Not Always Better!
A stove’s power is dependent on the BTU, and a higher BTU does not always mean it is the ideal stove to buy. A stove with a higher BTU means considering more things like a higher price point, higher gas consumption, higher ventilation, and so on.
When you buy a commercial stove with high BTU, it can be quite a hassle because these stoves cannot remain consistent on very low power. This leads to an inability to slow cook or simmer the food.
Additionally, with high BTU stoves, it is essential to have the right-sized pans. If the pan is not correctly sized, the stove’s heat will heat the room instead of what’s inside the pan. This is also why a lot of high BTU stoves are made to direct the heat upwards and not in every direction.
BTU Recommendation For Residential Kitchens
Commercial cooktops usually have high BTU as that’s needed for high-speed cooking in large volumes. But, this is not the case at home where one can cook at a regular pace and in small-to-moderate quantities. This is why it is essential to be practical about the required BTU of a stove at home.
At home, having one strong burner with a combination of two or three medium to low burners is the sweet spot for most users. And a mix of different BTUs on the stove allows more flexibility while cooking. Stoves of this kind are usually around 19,000 BTU or higher, with the strongest burner being around 12,000 BTU.
Final Words
High-end gas stoves are great to have but are often unnecessary for home setups and cost a lot. Investing in a practical cooktop for the house is better, cost-effective, and offers a broader range while cooking.
We hope this short guide has shed some light on the topic and will help you make the right choice. We will be back soon with more such informative guides.
Mowing the lawn seems like a straightforward task, right? But did you know that there is a right and a wrong time to do it?
Whether you consider yourself a lawn expert or not, growing grass isn’t entirely child’s play. If you have recently planted seeds or installed a new turf, you might be worried about the slow growth rate. But, if properly cared for, grass can begin to grow very quickly.
In fact, it can be tempting to bring out the lawn mower and start trimming immediately. However, this could do more damage than good.
It is essential to wait for some time before you begin trimming, as it can damage seedlings. So, if you’re wondering how long you should wait before mowing your new lawn, don’t fret! We have curated a detailed guide to help you understand this and more.
So, without further ado, let’s get straight to the deets!
How Long Should You Wait Before Mowing Grass?
Well, there is no universal correct answer to this. Depending on the kind of seed you use, it might take anywhere between 5 to 30 days before any grass starts growing. Of course, you should not bring out your lawn mower right away!
To encourage healthy grass growth, you need to water, feed, and provide adequate sunlight. However, allowing the grass to grow until a certain point is also beneficial to its health.
How Long Should You Wait Before Mowing Seeded Grass?
Let’s say that you decided to grow the grass on your lawn from scratch. Once you buy the right kind of seeds and plant them, it could be a long wait before you begin to see any growth. In fact, seeded grass can take the longest time to grow.
If planted during the active growing season, you should be able to see some growth within eight weeks. By this time, the grass blades should be around 3 to 3.5 inches tall. However, don’t get started with the mower just yet.
The first time you mow grass on the new lawn, make sure to tread carefully through the turf. Applying excess pressure or pulling on the blades violently can cause the seedlings to be forced out of the soil. This harms the grass as well as the soil, and it can be challenging to replant in the same area.
So, how do you mow the new lawn properly? Well, it helps to maneuver the lawn mower gently at first, without applying too much pressure or going too fast. Move the mower in one direction slowly, and then the opposite direction (to get smooth, even trimming).
It will also ensure that the roots of the grass remain protected and don’t suffer damage.
How Long Should You Wait Before Mowing Sod & Sprig Installations?
In contrast to seeded grass, sod takes a relatively shorter period to grow. Once the germination process begins, you can mow your lawn after about two weeks. That being said, heavy mowing can damage the grass, and we recommend that you wait for a few weeks.
Ideally, waiting for a month before mowing your new turf will ensure that the grass grows well, is healthy, and doesn’t go through unnecessary trauma.
When it comes to sprig installations, we recommend waiting for three to six weeks. Carefully observe the growth of grass - typically, sprig installations require more space to spread out and grow horizontally.
Even so, it is possible that the turf is still not wholly established. So, how can you know for sure?
Well, an easy way to check is to tug lightly at the corner edge of the installation. If the grass remains tightly bound to the soil, you can proceed with mowing. However, if you notice the blades coming off too easily or they seem loose in the soil, it is best to wait a few more weeks before mowing.
Why Do You Need To Wait Before Mowing?
You might be wondering why we recommend waiting for a few weeks before mowing the lawn. After all, no one likes a shabby looking garden, right?
We understand! However, if you mow too quickly, the grass does not get enough time to grow properly. Once the grass reaches about 2 inches in height, it automatically provides a shade or a sun and dirt barrier to the lower portion of the grass and soil.
Moreover, the taller grass blades protect the topsoil from losing excessive moisture. To keep the moisture locked into the topsoil and protect germinating seeds, it is imperative to allow grass to grow a few inches.
Another issue that can occur by over-mowing the lawn - drought stress. When grass is trimmed excessively, it can lead to shallow root systems. This, in turn, causes drought stress. With the top blades of the grass perpetually missing, the process of photosynthesis is compromised.
This leads to grass being in a perpetual state of distress and encourages pest infestations and pathogens. Ideally, you should allow your turf to grow (and stay) at least 2 inches in height.
The Proper Way To Mow Grass
Did you know there is a proper way to mow grass? Well, it turns out there is, and doing it may help you have a lush, healthy lawn.
Ideally, you should allow the grass to grow at least 3 inches tall, but not more than 4 inches. Before mowing, it will enable the grass blades to dry completely, as it will provide a healthy environment and ensure a neat, clean cut.
Stop irrigation for at least 48 hours - this is adequate time for the grass blades to dry. Furthermore, it enables you to trim the blades without causing them to tangle or get torn.
If you feel that the height of the grass is still too long, you can trim it in the opposite direction the next morning. It is best to allow the grass to rest for a day, as over-mowing can cause distress.
Ideally, you should remove only one-third of the length at a time. This leaves enough room for the grass blades to photosynthesize.
Pro Tip - Leave the grass clippings behind (instead of raking them up and disposing of them). These clippings will leave behind nutrients that are important for the soil and roots. Moreover, they help the soil retain moisture without adding excessive water to it.
In case you notice seeding weeds, it is advisable to bag up the clippings and dispose of them. You should also dispose of the trimmings if they are too long, as it will cause a mess rather than provide adequate nutrition).
The Right Way To Water Grass For Best Growth
If there is a proper way to mow a lawn, there must be an appropriate way to water it, too, right? Well, there is! The correct watering technique is one of the most critical factors that ensure proper, healthy grass growth.
When you plant seeds or seedlings, it is important to keep them moist, but not entirely wet. This moisture is what allows the seeds to develop and germinate into healthy grass blades. The topsoil (or the top 1-inch) of soil should be kept moist at all times.
We recommend watering your new lawn twice a day until you mow it. Seed hulls require an adequate amount of water to germinate into healthy plants. This new growth is unable to survive under certain conditions, like dry roots. Ensure that you keep a strict watering schedule to prevent roots from drying.
Once the seedlings have grown into taller grass and their roots have developed, you can reduce the frequency of watering. That being said, keeping a consistent watering schedule will ensure that your turf is perpetually lush, green, and healthy.
Final Words
Even those who consider themselves gardening lovers often forget that there is a right and wrong time to mow grass.
We hope this guide helped you understand more about healthy grass growth and when you should trim it. Be sure to familiarize yourself with the type of seeds you plant and the right conditions required to thrive.
With that, we have come to the end of our guide. Like any other plant, your turf requires a little attention, care, and maintenance to thrive and stay lush.
Very few things can be as depressing as seeing dirt on your carpeted floors.
Such a sight will surely make you think about the best possible way to clean up the mess. Hiring carpet cleaners is often quite expensive, so like most other people, you will look up DIY methods. But, those hacks can actually be quite damaging to your floorings.
Instead, a better choice is to get a specialized carpet cleaner to keep the carpets mess-free. Hoover is one such well-known brand that has been producing great vacuum cleaners meant for cleaning carpets.
The Hoover Power Scrub Deluxe and the Hoover Turbo Scrub are the best upright carpet cleaners currently available on the market. As the appliances may seem very similar, we came up with this informative guide to steer you towards making the right choice.
Before we move on to compare the two carpet cleaners, let's check out both appliances individually. Hoover has been producing great vacuum cleaners for many years, and these models have to be the best performing appliances from the brand.
And a great thing about these products is the similarity, which lets you get away with purchasing the lower-priced model, as both are equally powerful. So, let's take a peek at what makes these carpet cleaning devices excellent.
PROFESSIONAL-LEVEL STAIN REMOVAL AT HOME: Achieve pro...
DEEP CLEAN EVERY SURFACE: Transform dirty carpets, refresh...
When you have a look at the current product catalog of Hoover, you'll surely find the Hoover Power Scrub Deluxe at the top of the list. It has been specially designed for cleaning carpets, and the 360° SpinScrub brush helps in getting rid of all the dirt present in the fabric.
Moreover, for faster cleaning, Hoover has equipped this appliance with a DualV nozzle which makes sure to suck up all the dirt uniformly from a surface. So, it will get rid of the common problem of uneven cleaning in carpets.
As this vacuum also comes along with a water tank, you won't have any problem deep cleaning the carpets all by yourself. While vacuuming, the device also produces hot air to quickly dry a surface, so the floor can be used instantly after cleaning.
One of the best features of the Hoover Power Scrub Deluxe model has to be the 20 ft. cord that doesn't get in your way. This vacuum includes many necessary accessories, including the stair tool and the upholstery tool.
It also comes with the ability to mix the detergent automatically with water, so you wouldn't need to worry about getting the proportions wrong. You can fill up to 16 oz. of detergent at a time, which is enough for cleaning multiple rooms.
The Hoover Turbo Scrub is one of the top-performing models of the brand. It looks similar to the other upright vacuum cleaners from Hoover and has a lightweight design, making it great for everyday use.
This vacuum also comes with the SpinScrub brush that lets you clean carpeted or hardwood floors from all angles. Additionally, there's a water level indicator in the tinted tank of this model which enables you to keep an eye on it while cleaning. And, it even has the quick-drying technology to suck out all the moisture as soon as you're done cleaning.
We really like the strategically placed handles on this vacuum that makes carrying it up the stairs easier. And, because the handle is D-shaped, it's comfortable to maintain a grip while cleaning or during transportation.
Along with a sample of cleaning solution, the Hoover Turbo Scrub carpet cleaner comes with an upholstery tool to clean other fabric surfaces like your bed or couch. And, the eight-foot accessory hose lets you extend the vacuum for cleaning hard-to-reach crevices and corners.
Of Hoover Power Scrub Deluxe Vs Hoover Turbo Scrub
1. Cleaning And Drying
As we are looking at vacuum cleaners, it's important to note the cleaning efficiency of the products. And, it's great to see that both these Hoover carpet cleaners prove to be excellent at their job.
If this is your first vacuum cleaner, you can choose any one of them as there aren't many differences. Both products come with 360° SpinScrub brushes that let you clean the carpet from all angles. The brush rotates to pick up dust particles present in the pile of carpets or area rugs.
You can use water and detergent with these vacuum cleaners, so keeping your carpeted floors clean throughout the year won't be a problem. Moreover, cleaning on the heated mode gives professional quality results, especially while removing stains.
When it comes to cleaning, the Hoover Power Scrub Deluxe is one step ahead of the other model because of its DualV nozzle. The nozzle, along with the rotating brush, makes cleaning quick and easy by sucking up all the dust particles. So, the Hoover Power Scrub Deluxe is great for those who don't want to spend much time cleaning chores.
However, if you have pets, the Hoover Power Scrub Deluxe upright carpet cleaner would be a good choice as it's great at removing pet hair from carpets due to the special nozzle.
Besides, both these Hoover vacuums have the ability to blow hot air while you are cleaning the carpet. So, there's no need to wait for the carpet to dry, and you can use it again immediately. Along with added convenience, the quick-drying features helps to extend the longevity of your carpets.
2. Accessories
One of the mistakes that people often make is to not pay attention to the accessories or attachments that come with a vacuum cleaner. Rather than being freebies, attachments like the accessory hose and the crevice tool make cleaning easier.
If you're someone who is looking for an all-in-one vacuum cleaner that you can use on multiple fabric surfaces, then it's better to go for the Hoover Power Scrub Deluxe carpet cleaner. It comes along with a lot of accessories, including an eight-foot hose, a crevice tool, an upholstery tool, a stair tool, a mesh tool storage bag, and even a sample of cleaning solution from Hoover.
On the other hand, the Hoover Turbo Scrub carpet cleaner comes with the same eight-foot hose, an upholstery tool, a tool storage bag, and the cleaning solution. So, even though there aren’t many differences, the extra attachments provided with the Hoover Power Scrub Deluxe come in handy while cleaning the whole house.
3. Tank System
The dual tank system present in both Hoover carpet cleaners is quite impressive because there are dedicated tanks for dirty and clean water. Hence, there isn't a possibility of the dirt getting mixed up with the clean water.
Moreover, both vacuums come with detachable tanks, so filling and discarding the dirty water is straightforward. And, unlike earlier models of vacuum cleaners, there's no need to spend on dust collecting bags. The tank also has a water capacity of one gallon, so you can clean a large area without the need for stopping to discard the waste.
Even though the tank systems are pretty similar in both models, the Hoover Power Scrub Deluxe carpet cleaner has a transparent tank, so it's easier to look at the water level. But, even the tinted tank of the Hoover Turbo Scrub carpet cleaner features a water level indicator, so it won't be a problem to detect when the tank is empty.
4. User Friendliness
One of the things we like about Hoover is that the brand believes in making the products user-friendly. Both of these carpet cleaners have a simple design making them useful for beginners. Hoover even provides extensive instructions with each upright carpet cleaner.
We also like the 20 ft. cord present in the carpet cleaners as it lets you move between rooms without repeating the cycle of plugging and unplugging the appliance. With a weight of just 18 lbs., both items are easy to pick up without breaking into a sweat.
Hoover Power Scrub Deluxe Vs Hoover Turbo Scrub Final Words
You might have guessed by now that there's no clear winner, as both these Hoover carpet cleaners have their unique advantages when it comes to cleaning carpets. And, both appliances are equally adept at letting you clean carpets and bare floors to get professional-looking results.
Having said that, we would recommend the Hoover Power Scrub Deluxe carpet cleaner to those who want to get done with their chores quickly. We especially like how easy it is to clean floors with this appliance.
On the other hand, the Hoover Turbo Scrub is equally efficient at cleaning and comes at an affordable price point. However, as it's an older model, you will need to find sellers who still have it in stock.
Do let us know if you have any further queries about these multi-surface floor cleaner models. Till then, goodbye, and take care!
With all that noise around the Honeywell True HEPA HPA300 Air Purifier, we just couldn’t keep our hands off it!
Widely regarded as a good player in the HEPA filtration technology category, we wanted to test the features that have contributed to its popularity. Plus, an affordable air purifier should never be off the charts!
Although it isn't entirely free from flaws, we found the benefits to be way more intriguing. So, after using it for a significant period of time, here we are with our in-depth review to help you out.
EXTRA LARGE ROOM AIR PURIFIER - Honeywell HPA300 HEPA Air...
HELPS REDUCE ALLERGENS - This HEPA air purifier has 3 air...
Why Buy This Product?
Before taking you through the details, allow us to introduce you to the brand. As most of our readers may already know, Honeywell is a world-renowned manufacturer of home-based appliances like fans, ACs, coolers, and air purifiers. Likewise, the HEPA HPA300 Air Purifier upholds that reputation with its sleek design, robust filtration system, and seamless touch controls.
On that note, let’s dive into the positives one by one…
Design
Starting with the design aspect, the Honeywell HEPA HPA300 is a classic black ribbed purifier, which looks like, well, a majority of the brand’s purifiers. Weighing around 17 pounds and measuring 10.8 x 20.8 x 22.4 inches, it’s one of the most lightweight units from the brand. In tandem with the sleek structure and integrated grips, users can safely tick portability from their must-have list!
Talking about the material, it has an ABS plastic body for efficient heat and impact resistance. The other advantages include shock absorption and scratch resistance without costing a fortune. So, that’s a bonus!
Aside from the strength, what also impressed us was the lack of gaps in the overall design of the body. As you may be aware, such openings tend to allow the unfiltered air to escape into the room, thereby contaminating the area even further. The front and rear pretty much have an identical appearance with a front air intake, behind which lies the filtration system.
Likewise, the outlet is located near the touch controls at the top of the unit. On that note, the control panel comprises functions like power on/off, check filter indicator, check pre-filter, turbo power cleaning, lights dimmer, and auto-off. The controls are clearly labeled for optimum user-convenience, and you need to use the related control only once to activate the function.
Filtration System
Now, coming to the most important aspect of it all, the unit is actually named after its powerful HEPA (High Efficiency Particulate Air) Filter. In addition, it has the Honeywell A and A+ pre-filters, responsible for the first stage of filtration.
These filters are integrated with activated-carbon particles to capture large particles more than 0.3 microns in size, like fibers, dust, pet dander, lint, and hair. Aside from that, they play a crucial role in eliminating gases, odors, and VOCs (Volatile Organic Compounds).
One important thing to know here is that the filters have a lifespan of approximately three months. The check filter indicator will keep you notified about the replacement time, and we’d recommend getting genuine, certified Honeywell filters to ensure high performance.
The second stage of filtration is dominated by the R-certified true HEPA filters for efficiently removing up to 99.7% of microscopic allergens, measuring as small as 0.3 microns. As a result, you can get rid of several contaminants, including dust mite debris, fine dust, pollen, bacteria, mold spores, viruses, etc.
We are decently happy with how these filters reduce airborne germs with utmost efficiency. Besides, the true HEPA filtration has zero ozone emission (certified by the California Air Resources Board), making it completely safe for use for prolonged periods. This is largely due to the absence of an ionizer that can often produce small amounts of ozone, which may irritate the lungs.
In fact, this two-stage, powerful filtration system equips the unit with a CADR (Clean Air Delivery Rate) of 300 for smoke, 320 for dust, and 300 for pollen. In terms of coverage, it can clean up to 465 square feet five times per hour, meaning the air will get filtered every 12 minutes. We’d advise replacing the HEPA filters every 12 months for best results.
Turbo Cleaning Function
An out-and-out highlight of the HPA300 Air Purifier is the turbo cleaning function that integrates four cleaning levels: general, allergen, germ, and turbo. After you have switched on the unit, tap the power symbol again to switch between the cleaning modes.
For starters, you have the allergen mode that optimizes the unit to filter allergen particles such as dust, pollen, mold spores, dust mite debris, and others. This feature will be especially beneficial during the peak allergy seasons of spring and summer.
Then you have the general cleaning mode that’s suitable for everyday air purification. Many users prefer using it while they are away for a vacation to remove large particles and microscopic allergens from the air indoors. Similarly, the germ cleaning mode enhances the germ capturing ability of the purifier.
Lastly, there’s the powerful turbo cleaning mode that speeds up the entire contaminant removal process from the air. Upon selecting this mode, the fan begins operating at its highest speed to suck in maximum air from the front intake system, which then passes to the filters.
We liked how the design has integrated the reference guide into the body of the purifier. It contains a list of instructions that will help users, especially first-timers, to get the hang of things better. You can find it in the small tab near the touch control panel.
Noise Level
Considering its speed and high CADR count, we aren’t mad about the 63 dB noise level that it produces operating at the highest fan speed. To give you an idea, normal human conversation produces around 60 dB noise. Sure, it may be slightly difficult to hear other people in turbo mode, but it’s nothing that will hammer your ears.
Since you’re likely to operate it in the low to medium fan speed (producing 40 to 60 dB sound) for the majority of the time, rest assured about minimal sound interference.
Power Consumption
The HEPA HPA300 has an Energy Star Certification, meaning it saves on your utility bill. Considering that it doesn’t have the lowest power consumption, we don’t mind saving some bucks!
Additional Features
Among the noteworthy additional features are the auto-timer mode and auto-dimmer mode. While the former allows you to automatically operate the unit for durations of 2, 4, or 8 hours, the latter keeps the light level to a minimum for nighttime use. Apart from that, it has three fan modes, namely, allergen, general clean, and germ.
And as we’ve already mentioned, the electronic check filter indicators will inform you in advance about pending filter replacements so that you can keep track of the dates.
Finally, it comes with a 5-year long warranty against all defects, which is one of the longest for models in its price range.
Customer Reviews
This unit has been showered with rave reviews by both existing and new customers. While most of them have praised it for its simple yet effective operation, others have talked highly about the user-friendly control panel design. The ability to turn the blue light off for use in the dark has been the cherry on the cake!
What Could’ve Been Better?
Despite scoring highly on most fronts, there are a number of things that we feel potential customers should be wary about.
One of the first things that can be a constraint is the high energy consumption. Depending on the fan speed and duration of use, it can consume electricity anywhere between 40 and 130 watts, resulting in elevated power bills.
Secondly, some users have lamented the absence of automatic mode change. But if you ask us, we aren’t really mad about it, considering that the HEPA HPA300 has a reasonable price tag. However, one area where we’d like to see the brand make improvements is the customer service, or rather the lack of it. It doesn’t offer a free shipping policy like some other competitor brands.
Not only that, but you are also required to notify them of any damages within one business day in case of shipping through third-party services. Otherwise, they won’t take any responsibility for it. In case of returns and exchanges, customers have to pay for the shipping charge, and should also pay a 10 to 30% restocking fee if the company finds no manufacturing or shipping defects.
Pros
Sleek design and easy touch controls
High CDRA rating
Dual filtration with activated carbon and advanced HEPA technology
Certified for no ozone emission
Four cleaning levels and three fan speeds
Cons
Slightly high power consumption
Customer service is not very customer-friendly
Honeywell True HEPA HPA300 Buyer’s Guide
To speak the truth, choosing the correct air purifier requires something more than merely checking out product reviews. Unless you know about your requirements to the tee, it’s highly likely that your preferred unit won’t serve the purpose, no matter the price tag or range of advanced features.
As such, we have listed some crucial points to keep in mind before making that all-important purchase decision. So, hang in tight!
Room Size
No surprises here that perhaps the most important thing to consider before you can shortest models is measuring the room size. In other words, it’s about filtering out (no pun intended) how much space you want to be purified. While desktop units won’t certainly be sufficient for large spaces, a large unit may be a bit too much for your baby’s nursery or the kid’s room.
A good way to figure out the ideal match for your desired space is to check the unit’s air changes per hour count, which is nothing but a measure of the filtering air per hour.
For example, a small purifier that turns over the air for a 250 square feet area eight times per hour will do so only four times in a 500 square feet room. Hence, you’d want something with more filtering capacity for the latter.
And if you still can’t decide the area to clean, we’d suggest going for a slightly larger capacity than what you think should be needed to make room for extra space.
Types Of Pollutants Filtered Out
The market is full of specialized air purifiers! So, that’s something you might want to consider before buying one. While some units are adept at filtering out smoke and dust, others are designed to catch pet hair, allergens, and germs. If you are looking to subside allergies, then we’d highly recommend opting for an air purifier that does so.
Similarly, asthma patients should look out for units that remove odor, chemicals, and dust. That’s why air purifiers are mostly rated on how well they filter out contaminants. And in case of no specific requirements per se, we’d advise opting for a general air-quality improvement purifier.
CADR Rating
With regards to efficiency, air purifiers have a CADR number to help customers understand the filtering ability even better. And there’s no rocket science here; the larger the number, the more contaminants it can filter out. So, if your preferred purifier has a 300 CADR for pollen, it means the unit can reduce pollen concentration while adding the equivalent purified air.
This rating should especially be considered for general air purifiers, with a count of at least 200 for all the categories. However, since the numbers are for best-case scenarios and recorded in controlled conditions, the efficiency may be affected in different environments. Therefore, it won’t be a bad idea to opt for higher numbers as long as your budget permits.
Types Of Air Filters
A lot of air purifiers use mechanical filtration, meaning the air, along with its contaminants, is physically trapped as it passes by the filters. As such, most air purifiers use a dual filtration process, where the first stage catches large particles and the second layer removes the smaller variants.
Pre-filters are mostly washable, vacuumable, or disposable. They are usually made of foam or non-woven polyester and may have activated-carbon elements for absorbing gases, odors, and chemicals.
But what really matters is the main filter that forms the second layer. We are heavily inclined towards true HEPA filters that can clean allergens, pollen, animal skin, mold spores, dust, and a lot more. With an efficiency rate of over 90%, these are a popular choice for air purifiers across brands.
Irrespective of the type, it’s always advisable to keep an eye on the replacement time and use only certified, branded filters as replacements.
Power Consumption
The power consumption of an air purifier will largely depend on the filtering capacity. Simply put, the more filtering it does, the more will be the power consumption. That said, units with Energy Star certifications can take some load off the power bills.
Noise Level
For anything that runs on a continuous basis, sound level becomes a vital consideration. Hence, most air purifiers come with low noise operation to minimize user-inconvenience. That said, the sound level can change from one mode to another, so make sure it isn't too loud at the highest setting.
Its dual-filtration mechanism with HEPA technology and different cleaning modes make it an all-rounder. On top of that, the touch control panel aids user-friendliness. It doesn’t produce too much noise either, making it a fit for almost any room or office space.
Although it could have employed more automatic features and low energy consumption operation, we are pretty satisfied with how it performs for the price. So, go ahead and give it a try if you want to get a good air purifier without breaking the bank.
Imagine returning back from the office and not being able to relax because of the hot weather. Yes, it does sound like a disaster.
Having the right temperature in your personal space is very important. Not only will this keep your mind at peace but will also help you cool down after the entire day's work. Now you may already have air conditioners, but if the space is larger, then the cold air may not spread around evenly.
And that is where an air circulator fan comes in! It can help promote the movement of air to provide you with a blast of cold air from several feet away.
So, today, we will review the Honeywell HT-900, the HT-904, and the HT-908. We will also be pointing out the similarities and the differences among them so that you find it easier to take a pick.
Let's get going!
Honeywell HT-900 Vs HT-904 Vs HT-908
In this section, we will first talk about each of the models individually and then compare them with each other. Before beginning, we should tell you that they are pretty similar and come with a range of similar or common features. But again, there are some noteworthy differences, and we will be discussing them too.
This is one of the smallest corded electric circulator fans, which offers powerful performance and can be placed anywhere in the room. It measures 10.9 x 6.3 x 10.9 inches and is easily portable. You can place it at any corner, and it will help in circulating the air to provide a relaxing atmosphere.
Plus, the Honeywell HT-900 is pretty powerful, so you can feel the gush of air from 25 feet away. The speed of the fan can be adjusted and there are 3-speed settings to choose from. Also, it is equipped with a pivoting head that can move up to 90 degrees. We found that it is a perfect fit for small to medium rooms.
Moreover, this air circulator fan is one of the cheapest options available in the market which will easily fit it into your budget. At the same time, you can save on energy bills while improving the airflow in the house .
In hindsight, the Honeywell HT-900 air circulator fan sports an aerodynamic turbo design that allows better air circulation.
Small floor or tabletop fan: Honeywell TurboForce Air...
Feel the power: Honeywell TurboForce fans have an...
The Honeywell HT-904 functions a lot like the HT-900, and it comes with a number of similar features too. But when it comes to the design, the HT-904 looks more aesthetic and comes in a beautiful white color.
This powerful air circulator fan sports a compact build and can even be mounted if needed. You can tilt the head of the fan up to 90 degrees to facilitate better air circulation.
Another important feature is that it can be used with an air conditioner to help save energy. When you switch it on, the fan will circulate the cool air to effectively bring down the temperature in the room. The AC can then be switched off after a while, and the room will remain cool for a long time.
Other than this, we were very happy to see that it works quietly, just like the HT-900, so rest assured that you won't have to deal with loud noises.
MEDIUM FLOOR OR TABLETOP FAN – Honeywell HT-908 TurboForce...
FEEL THE POWER – Honeywell TurboForce fans have an...
The Honeywell HT-908 is one of the more expensive options when it comes to turbo-force air circulator fans. And although it may require you to stretch the budget by quite some bit, it is more powerful than the other two options and can cover a larger space. So, if you have a big room, then this is a good option to opt for.
But despite having a bigger build and design, it can still fit on tabletops, chairs, and desks. This air circulator fan comes with a pivoting head and 3 fan speed settings like the previous options. So, you can choose a speed depending on your air flow needs. The air flows with force, and you will be able to enjoy the efficiency fan from about 32 feet away. Talk about being powerful!
But as we have already mentioned above, it features a heavy-duty design, meaning it will weigh more the other two options (5.7 pounds, to be precise) that we have listed. So, you can place it on one side of the room and enjoy the pleasant air that will be cooling you down from a distance. Furthermore, this air circulator fan can keep the entire area cool without making too much sound.
Honeywell HT-900 Vs HT-904 Vs HT-908 Buyer's Guide
1. Size And Weight
The Honeywell HT-900 and HT-904 are both small in size, with a slight difference between both. You will notice that the HT-900 measures 10.9 x 6.3 x 10.9 inches while the HT-904 model measures 11 x 6.46 x 11.22 inches. On the other hand, the Honeywell HT-908 is bigger in size and measures 14.4 x 8.1 x 15.2 inches.
Now, the last Honeywell model would still fit on tabletops, but you will need larger table space for sure. You will not be able to place it on small side tables by the bed.
Moving on to the weight, while the HT-900 weighs 2.6 pounds, the HT-904 weighs 3.7 pounds, and the HT-908 model weighs 5.7 pounds. The last product is the heaviest, making it slightly less portable.
2. Noise
A powerful turbo force air circulator fan shouldn't be making a lot of noise while it controls air movement and regulates the air flow. The best part about Honeywell products is that they are quiet when compared with other air circulator fans.
The Honeywell products are all known to make 25% less noise than competitor brands, and hence, you will not be disturbed by the noise level. The quiet functioning is well-loved by customers as we could comprehend after reading the reviews.
3. Color
While the Honeywell HT-900 is available in black color, the HT-904 turbo force air circulator fan comes in an attractive shade of white. Both of them sport a very sleek design and are well-suited to be kept on tables, near sofas, chairs and can also be wall-mounted.
You can choose a color based on the wall and furniture shades in the room. Let us tell you that both are beautiful, but customer reviews suggest that people like the white shade more.
On the other hand, when compared with the HT 908, customer reviews suggest that the black color of this product is well-loved. Hence, we believe that your choice depends on personal preferences and the space that needs cooling.
4. Design
Overall, we found that the design of all the Honeywell air circulator fan models is similar, and they look nice. The Honeywell models sport a modern design with a fan that does not show too much. Also, there are grills on the front side to prevent any accidents in case you have a child at home.
We will still recommend keeping pets and kids away from the fan as you would not want them to put any of their body parts inside through the gaps.
Spotting The Major Differences
Now you know that there are some key similarities among the Honeywell HT 900, HT 904, and HT 908, while they have some different features. One of the top differences is that the Honeywell HT 900 and the Honeywell HT 904 can be wall mounted if needed because they are lightweight and small in size. However, the Honeywell HT-908 is larger and cannot be mounted up on the wall.
Another major difference is with the movement of air. While the first 2 products can cover an area of 25 to 27 feet, the last product can cover an area of up to 32 feet. So when considering the larger fan model, you can feel the air from far, and hence, you will not need to keep moving the product.
So, if you wanted to mount a fan on a wall, then the first 2 air circulator fans would work well. However, there is a difference in color, and that could be a determining factor for you.
Honeywell HT-900 Vs HT-904 Vs HT-908 Final Word
Regardless of the Honeywell model you purchase, if you want the air circulator fan to last for a longer time, then take good care of it. That would involve taking the fan apart and cleaning the parts every few months.
The blades of the fan may catch a lot of dirt, and hence, regular cleaning is necessary. Learn about how to take the fan apart and then do the cleaning yourself.
So, we have finally reached the end of this guide, and it is time to sign off. We are sure that you will be able to purchase the right one from the 3 Honeywell options given above.
Let us know if you have any further queries in the comment section below, and we will try to address them in our next guide.
A well-lit garden or a porch looks welcoming and helps keep the house safe, but it can consume a lot of electricity.
That is where solar lights come into the picture. The best solar spotlights are equipped with a built-in photocell sensor to detect the brightness level outside. It allows the solar spotlights to switch on when the sun sets and switch off after sunrise.
You can let these solar lights work on their own, and they will not increase the energy bills at all. Just pay the one-time cost and then let the solar spotlights work independently. In this guide, we will discuss the best high-output solar lights and their pros and cons.
So, read on!
Best High-Output Solar Spot Lights
To help you find the finest options available, we have curated a list of the 10 best high-output solar spotlights. Get ready to brighten up your outdoor world with these exceptional lighting solutions. Here's the list of the 10 best high-output solar spotlights.
Are you looking for solar lights that would brighten the lawn at night without you intervening? Well, then you are at the right place. This URPOWER 4 LED Solar Light will help you light up your lawn every evening without incurring any additional costs. So, let’s see what else it offers!
2 Brightness Levels: Low light mode (10hrs) / high light...
Separately Adjustable Light & Solar Panel: The solar...
Why Did We Like It?
This is one of those solar spotlights that enables the user to adjust the brightness as and when needed. Additionally, the solar panels installed in this device are pretty broad, and the battery does not take too long to get fully charged.
Also, note that both the light head and the solar panel are totally adjustable. Once you install it, your outdoor space will be flooded with bright light after sunset. You can modify the solar panel and set it in a way that it gets maximum sun exposure.
Moreover, this solar spotlight gives you ample options when it comes to installation. You can use stakes to stick the lights on the ground, or you can even consider mounting them on a wall. For that, however, you will need some screws.
What Could've Been Better?
After a few months of using the product, we noticed that the plastic color had started to fade. So, if you are placing it in areas that receive strong sunlight throughout the day, you might reconsider as that might lead to the color fading a bit.
Are you on the lookout for outdoor solar spotlights that are sturdy and easy to use? Then, it is best that you try the InnoGear Solar Lights. This is one of the best solar spotlights that we tried; with highly adjustable features, it managed to impress as well.
Independently Adjustable Light & Panel: Other solar lights...
Improved Brightness & 2 Working Modes: With super...
Why Did We Like It?
These outdoor solar spotlights allow the user to adjust the light as per their requirements. If you want a brighter light, you can change these solar outdoor lights to meet your needs and very well use them as landscape lights.
The solar panels in this set are made in a way that captures direct sunlight in the best possible way. All the light heads are adjustable and can be rotated up to 90 degrees, thereby enhancing the lighting range considerably.
This is one of the brightest solar spotlights that we tried, and we can say with conviction that it is super-efficient. The company has upgraded its technology, which has helped increase the conversion rate by almost 30%. And the best part is that the moment the sun rises, they get switched off automatically.
What Could've Been Better?
A fair warning: these solar landscape spotlights won’t work the best if they fail to harvest the sun’s energy properly. Simply put, unless there is direct sunlight, they will take a long time to get charged. They can be used for landscape lighting only if the space receives ample sunlight.
One of our top recommendations for a high level of brightness is the Linking StarRay Solar Landscape Spotlights. The lights are of supreme quality and are known to be IP67 waterproof. You will love this eco-friendly option that will consume very limited energy and can work for 30,000 hours.
[Larger and Flexible Solar Panel] Enjoy faster charging with...
[Super Bright & Energy Efficient] Solar lights outdoor...
Why Did We Like It?
This spotlight pack comes with two installation options to choose from. You can either use a wall bracket or a ground stake to keep the solar spotlights in place. To place it directly on the ground, you can insert the stake and then attach the spotlights. Otherwise, fix the wall bracket with the help of screws to the wall.
Moving on, you will get two brightness modes, and you can choose between high light mode and low light mode. The dusk-to-dawn solar spotlights can detect the brightness around and then settle for the mode needed. It will switch on by itself when the area becomes dark and will switch off when the sun rises.
Plus, there are 16 lamp beads with a 90 degrees beam angle that can produce 650 lumens of 6500K light output, which should be enough to light up a single spot. You can then adjust the angle of the light. It is adjustable up to 90 degrees vertically and 180 degrees horizontally.
What Could've Been Better?
You should know not to place these spotlights in partially lit areas. They have to be placed right under the sun so that they can receive proper sunlight and get charged. If you put it in partial sunlight, the light will only last for two to three hours at night, which may not serve your purpose.
Enjoy your evening walks peacefully with the Nekteck Solar Lights, an advanced lighting option. It will meet all your lighting needs in outdoor spaces, and you can rest assured that the backyard will be lit up throughout the night. Plus, the adjustable angle will make sure that the doorway is never in the dark.
Upgraded 4th Generation Solar Lights & Panel—The Advanced...
Highly Resistant for all kinds of weather- Nekteck solar...
Why Did We Like It?
First of all, you can safely use outdoor solar spotlights as they are weather resistant and can withstand temperature fluctuations. You will be happy to see that they will work well in frost, snow, sleet, and rain. There are two ways to install the spotlights; you can mount them on walls or stick them on the ground.
Next, there are two brightness modes to shift between. Four LED bulbs present inside offer high and low modes that can meet all your lighting needs. The lights can remain on for six to ten hours, depending on the charge level. Also, it will switch on and off automatically, saving you a lot of work.
To top it all, the light angle can be adjusted up to 180 degrees to achieve the right amount of illumination. Specific dark areas can easily be highlighted thanks to this feature.
What Could've Been Better?
The outdoor solar spotlights are not sealed very well, and we have noticed dust accumulation inside. Now, you can clean it off, but that can be highly time-consuming. Hence, make sure that you cover the top with something while installing.
Another brilliant pair of lights that can always ensure that your doorways or gate area are lighted up is the LEREKAM Outdoor Solar Spot Lights. The bright cool white color is perfectly splendid and will keep peeping Toms away at night. You can also use a battery or a USB to charge the device.
Cool White Solar Spotlights Outdoor: A nightly light show!...
3 Brightness Lighting Modes: LEREKAM 40 LEDs solar outdoor...
Why Did We Like It?
One often wonders what to do in cloudy weather when there is no chance of solar-powered spotlights brightening up the pathway at night. That is because they do not get charged, but this product is different. Here, you get a rechargeable battery with a USB port for charging.
Next, you can opt for three brightness levels, which include high, medium, and low lighting. The battery will last for 8 hours on high mode, 15 hours on medium mode, and 25 hours on low lighting mode.
Also, take into consideration that the spotlights will light up the way with 40 LEDs and a 360 degrees lighting angle along with a 120 degrees big solar panel that is adjustable.
That is not all, as solar lights come with a waterproof exterior, and they can light up trees and bushes. Many use these lights to highlight parts of the landscape.
What Could've Been Better?
While you will get a USB-powered battery and wire, no wall plug is provided to use with it. Now, this should not be a big issue as plugs are commonly found around the house. If not, take the USB wire to a nearby electronic store and get a plug that fits.
Now that we have reached the middle of the list, it is time to introduce the Claoner Solar Spot Lights. These are highly efficient and can work automatically when the sun sets for the day. We have used it beside the pool, and the entire area remains lit up throughout the evening.
🏡【Cold White Solar Spotlights】Brighter 32 LEDs with...
🏡【High-efficient Solar Panel】The outdoor solar lights...
Why Did We Like It?
The product is made with ABS plastic, which is very durable. It can sustain high impacts and is made to be waterproof. You can use it in a place with a high level of rainfall, and it will still light up the porch in the rain.
Moreover, like most solar lights, this one can be installed in two ways, you can either mount it on a wall with screws or stick it in the ground.
To top it all, the solar spotlight comes with three brightness levels, which can last for different amounts of time. The low light mode can be used for 24 hours, medium lighting for 12 hours, and high lighting mode for 6 hours. This spotlight will detect the brightness level of the surrounding by itself and will adjust accordingly.
What Could've Been Better?
This solar spotlight features batteries that cannot be removed, and you will have to dispose of the entire light if the battery malfunctions. However, this does not affect productivity, and we will not hold it as a drawback.
Up next is a brilliant set of lights that can light up the deck or patio at night. The Billing Solar Spotlights can be stuck into the ground or mounted on a wall wherever necessary. You will love how easy it is to fix the lights in place.
Upgraded Solar Spotlights Outdoor 3000K warm white light,...
Bright Solar Lights for Outside- Each solar spotlight is...
Why Did We Like It?
The product features an IP67 waterproof design, which means that it can sustain adverse climatic conditions. You can use it in places that see a lot of rain and snow. Plus, it can add to the lighting and decoration of the place. It can also be used as a security landscape solar light.
Moving on, the color of the light is warm white, which adds a beautiful glow to the garden. You can install the lights easily on the ground, and they are adjustable up to 90 degrees.
Adding on; you can switch between the two lighting modes easily with one button. The low bright mode will be able to light up the area for 15 hours when charged fully. And if you use the high brightness mode, you can keep the light switched on for around 10 hours.
What Could've Been Better?
In case you are going to use these spotlights to light up the garden and trees in it, you should know that they work well for shorter plants but not for taller trees. Hence, you will need stronger lights if you wish to light anything taller than ten feet.
If you are looking for an all-weather lighting option, then the Magictec Solar Spotlights will be a great choice. The option comes in a pack of two and will light up your pathway or trees in the yard. Plus, these solar lights are well-known for their durability and energy efficiency.
No products found.
Why Did We Like It?
The best part about these solar spotlights is that they are adjustable, and you can change the direction vertically by 90 degrees. Plus, the solar panel can be rotated up to 180 degrees when needed. This should give you a stunning lighting experience.
Moreover, you will love the warm light glow of the solar spotlights. There is a built-in light sensor in every model, which automatically detects the brightness level outside. It will then light up when needed and switch off when the sun rises in the morning again.
On the other hand, the solar-powered lithium-ion battery is very powerful and rechargeable. It will provide power for 10+ hours once it is fully recharged.
Also, the body is made of plastic and is waterproof. You should be able to use it in bad weather conditions.
What Could've Been Better?
Remember that you will be getting a warm light that will provide a subtle glow. Please do not expect this solar spotlight to be very bright. It works best as accent lighting and if you need to light a pathway. But for pathways, you will need a few lights to install along the way.
Do you wish to change the color of your spotlights depending on your mood? The ROSHWEY Outdoor Solar Spotlights will allow you to do just that with its brilliant range of colors. These are made with ABS plastic and can be a part of your garden for a long time.
Solar Powered: Our solar garden lights last about 6-10 hours...
9 Working Modes: Colored solar outdoor lights provide 7...
Why Did We Like It?
There are seven different colors that you can toggle among depending on your mood and requirement. Plus, there are two auto color-changing modes that can be used for special occasions. The lights are perfect for a wide range of applications like Halloween, Christmas, or Thanksgiving.
Moreover, the solar panel, which is attached to the lights, can be rotated at an angle of 180 degrees vertically and 360 degrees horizontally. That would mean that they can capture the sun's rays well and use natural light to generate energy.
Adding on, the solar-powered spotlight pack comes with a 45-day money-back guarantee and a 12-month warranty. Hence, you can purchase without worrying about functionality. In case of any issues, you can call up customer service immediately.
What Could've Been Better?
The solar spotlight is pretty big in size, and you will not be able to hide it after installation. Since it has to be installed directly under the sun, the big head of the unit will always be visible. The brand could work on this and make it a little smaller.
Another super bright option that can light up patios very well is the Brightown Solar Spot Light. You will find two lights in one pack, which should light up the front of the house. The glow spreads over a large area, making it possible for people to see around in the dark.
【 Super Bright & Natural Light Solar Spotlights 】: The...
【 Energy-saving & 360° Adjustable Solar Garden Lights...
Why Did We Like It?
To begin with, this product is easy to install and will last for a long time. It is made of ABS plastic with triangular patterns on the side. The floor insert material is also very strong, and you can easily stack it on the ground. We found that this outdoor light can last for up to 1000 uses.
Moving on, the solar lights come with a 600 mAh battery, which is rechargeable. It is an eco-friendly and energy-saving option with a large solar panel. Just make sure that the solar panel is placed right to capture the most amount of light, and you should have no other problems.
Additionally, the color is naturally white, and each spotlight is equipped with 30 lumens of LED lamp beads.
What Could've Been Better?
It is best to read the description of the product well before purchasing. This option is pretty bright, but it will only last for eight hours or less. Hence, it will turn off sometime in the middle of the night, which can be a problem if you are going to use them as security lights.
Buying Guide For The Best High Output Solar Spot Light
By now, you must have noticed that most of the lights are pretty similar, with minor differences among them. This might lead to confusion, and you may be unable to make a choice. In this section, we will talk about the factors that need to be kept in mind while making a choice. These should help you distinguish among the top products, so read carefully.
1. Illumination Distance
What is the area that you want to illuminate? You might want to highlight a tree in the garden, or you might want to throw light on the pathway. The illumination area varies for different solar lights, and you should select one that will fit your purpose.
In case you want a light for garden plants, then check for solar garden lights online which may work better for highlighting specific spots.
2. Weather Proofing
Since these are outdoor light modes, they need to be resistant to bad weather conditions. This is especially true for areas that see rough weather often. So, while purchasing, please check for the IP rating and only buy products with a high IP rating.
According to us, IP65 should be your starting point, and you can choose any solar spotlight, which is above that rating. Anything below that will not last for a long time.
3. Light Modes And Types
You will generally find cool white light, warm light, and other light color options when it comes to solar spotlights. Now, if you wish to add a warm glow to the backyard, warm yellowish light can be used for accent lighting. On the other hand, the cold white light will be brighter and will work better as a security measure.
Then there are options where you can toggle among a few colors. These work very well for festivals and pubs. You will also find solar path lights which can help in lighting up pathways leading up to the house. However, if you wish to install solar lamp posts, then there are separate options that can be placed on the streets.
High Output Solar Spot Lights FAQ's
What Is The Maximum Distance That A Solar Spotlight Can Illuminate?
You can light up an area that is 100 feet away from the light with very high-quality spotlights. Please check the distance the light can cover before purchasing so that all the dark zones are well-illuminated at night with the lights you buy.
Does a Solar Spotlight Have A Motion Sensor?
Some spotlights can have motion sensing technology which will turn on the lights automatically for about 20 seconds in case movement is detected. This is generally done by a PIR motion sensor that can detect and scare intruders when needed.
These can sense movement from 55 feet away, but again, these motion sensors will not be present in all solar spotlights.
How Long Does A Solar Panel Take To Charge?
You will have to install these solar panels in a sunny outdoor space for them to generate and store energy. Now, to get fully charged, it will take around 12 hours of exposure to the sun. However, you might need to charge for two days initially if the solar panel is not of very high quality.
Conclusion
This has been quite a long read, and we will give you a moment to take it all in. But before we can leave you to it, let us take you through our top choices one last time. The URPOWER 4 LED Solar Lights Outdoor, is a great option if you are looking to light up the porch in the evening.
With this, we have reached the end of this guide, and it is time to say goodbye. You will find othersolar-powered dusk-to-dawn lights on the internet which can also help you out.
Tired of trying to find the best heat-resistant glue for metal objects to fix? Some substrates demand stronger adhesives to be bonded, and this is where heat-resistant glue helps. These adhesives bond different materials and are essential to many industrial, commercial, and manufacturing applications.
As these adhesives can resist extreme temperatures, they are extensively used for automobiles, batteries, and various electrical items that need to operate in high-temperature conditions. These adhesives are also suitable with various other materials like rubber, ceramic, etc.
Let’s take an example of bonding metal to wood; here heat resistant adhesive is a must. Because without proper adhesion, the metal or wood can tear off. If you search for highly-rated glue for metal to wood, you can find most of them are heat-resistant.
But, with all that information, you must be wondering which is the best heat-resistant glue that will fulfill all your needs. You can opt for super glue that works on metal, but remember, not every adhesive for stainless steel is resistant to heat. That’s why we have compiled this list to help you choose the best heat-resistant glue among all the options out there.
So, without further ado, let’s get started!
Listed below are the 5 best heat-resistant glues for metal from our list:
J-B Weld ExtremeHeat: This heat-resistant metallic paste from J-B Weld provides a strong bond that can withstand high temperatures, replacing the need for torch welding. Its main advantages include its environment-friendly, non-flammable formula, versatility in metal repair, and capacity to seal and repair pipelines and appliances extensively.
Rutland Silicone Sealant: This heat-resistant silicone adhesive works excellently in highly humid areas. It creates permanent rigid and flexible bonds with various materials, including metals, plastics, rubber, and ceramics, and its dark color helps it blend in with surfaces such as granite and stone countertops.
Henkel Corporation Loctite Stik n' Seal: Distinguished for sticking and sealing in extreme conditions, this adhesive from Henkel Corporation is ideal for outdoor objects. It resists harsh weather, moisture, UV rays, and extreme temperatures. It bonds a range of materials, even wet surfaces, making it perfect for outdoor repairs.
J-B Weld 8297 HighHeat: Known for its high performance, J-B Weld HighHeat epoxy glue is versatile and known for bonding various materials under extreme temperature conditions. Its high resistance to temperature fluctuations, fast curing time, and post-curing versatility are its main selling points.
KDGENG Metal Repair Gel: An excellent welding substitute, KDGENG's metal repair gel creates a strong, permanent bond on smooth, clean metal surfaces. Set apart for its high-temperature resistance and ease of use, it provides a durable bond suitable for repairing anything made from metals.
Here is the list of the 5 best heat-resistant glues for metal that can be used to securely bond metals together, even in the toughest conditions.
1. J-B Weld ExtremeHeat - Best for High-Temperature Repairs
The first heat-resistant glue we have for you is the 37901 heat-resistant metallic paste from J-B Weld, a brand well-known for manufacturing metal adhesives. This heat-resistant metallic paste was developed as an alternative to torch welding, and as promised by the brand, it can withstand temperatures as high as 1300 °C.
This J-B Weld high-temperature resistant metallic paste is formulated to repair metals like steel, iron, and other metal surfaces at maximum temperatures. This easy-to-use glue is non-flammable as it contains no solvents or VOCs, making it environment-friendly.
Also, this adhesive is water-based, which means it will not harm your health if you are exposed for a long time. It’s also very lightweight and requires less time to create a stronger permanent bond than steel.
The best part about this glue is that it provides a powerful bond after being cured. And, the cured glue can go through drilling, machining, or sanding. Moreover, this glue is also suitable for repairing crevices, tiny gaps, cracks, and holes in pipelines or appliances, etc.
One major drawback of this metallic paste is that it doesn’t handle expansion well. Many customers have pointed out that even though the glue provides strong adherence, it cracks open where the expansion happens in exhaust manifolds and fireboxes, which is an inconvenience.
What We Like
Inexpensive product
Fast-bonding formula
High-temperature resistant
Environment-friendly
What We Don't Like
Cracks under expansion
Quantity: 1 Container | Volume: 3oz | Set Time: 1 Hour | Cure Time: At Least 24 Hours | Dry Color: Gray | Resistance: Withstands Up to 1000°F
2. Rutland Silicone Sealant - Best for Humid Areas
The heat-resistant silicone glue from Rutland can be an ideal choice if you are searching for an adhesive that can work in extremely humid areas. This silicone adhesive will work to create a permanent bond and seal any item.
This silicone adhesive from Rutland forms rigid and flexible bonds and works well with a range of materials including metals, plastics, rubbers, and even ceramics.
So, whether you’re looking to seal a gap between your stove and the counter or trying to repair a chimney, this is the product you can bank on. It cures to form a tough and strong seal, which ensures the longevity of the joints.
We also like how the formula is water-based, which means any stains or spills can be wiped away easily. The dark color ensures it blends in with surfaces such as granite and stone countertops.
The one flaw we found was that the product emits a nasty smell like vinegar upon application. However, the good news is that it goes away after some time, so you shouldn’t have to bother about it for long.
What We Like
The dark color makes it less noticeable
Best for humid areas
Works on smooth surfaces
Easy to apply
What We Don't Like
Smells like vinegar
Quantity: 1 Tube | Volume: 2.7fl oz | Set Time: N/A | Cure Time: 24 Hours | Dry Color: Black | Resistance: Withstands Up to 500°F
3. Henkel Corporation Loctite Stik n' Seal - Best for Outdoor Objects
The next item on our list is the Henkel Corporation 1360784 Stik n' Seal adhesive, which has a Flextec formulation that bonds surfaces faster than any ordinary household adhesive. Its low odor, which contributes to a safer work environment, sets this product apart from other glues available on the market.
One of the many reasons why we like this product is because it creates long-lasting bonds even in the most extreme conditions. This adhesive has excellent resistance to harsh weather, moisture, UV rays, and extreme temperatures, making it a reliable product for fixing outdoor objects.
Also, this heat-resistant adhesive seals and repairs almost all materials, including glass, mirror, ceramic, plastic, wood, fabric, concrete, metal, and porous surfaces. It’s also capable of creating a solid bond on wet surfaces.
This adhesive is an excellent option for sealing or repairing wooden frames and other household materials. Besides that, you can use this glue for creating crafts and DIY projects at home because it provides a superior bond that is hard to break.
The one problem we faced when using this glue is that while dispensing it from the applicator, it tends to roll into a glob. This can quickly harden and block the applicator opening, making it tough to use.
The J-B Weld High-Heat 500 Degree Epoxy Glue is a versatile, high-performance adhesive designed for bonding various materials under extreme temperature conditions. Known for its strength, heat resistance, and durability, it has become a top choice for individuals and professionals alike. We put it to the test and evaluated it based on the factors that matter most to users.
The J-B Weld High-Heat 500 Degree Epoxy Glue performs exceptionally well in bonding different materials such as metal, plastic, PVC, wood, concrete, ceramic, tile, and fiberglass. Its strong formula creates a high-tensile-strength bond that withstands temperature fluctuations.
With impressive continuous heat (450°F) and intermittent heat (500°F) resistance, it remains functional under demanding conditions.
The glue requires just an hour to set and about 8 hours to cure fully, providing convenience to users who may want to sand, paint, or drill the coated surface. Its fast curing time and post-curing versatility are standout features.
The only noticeable drawback of the J-B Weld High-Heat 500-Degree Epoxy Glue is that it does not dry clear. Instead, it cures to a machine gray color, possibly affecting the aesthetic of certain applications. However, if appearance is not a primary concern, this issue should not deter users from choosing this high-performing adhesive.
This set of glues from KDGENG is an excellent substitute for welding as it can repair cracked or damaged metals without any blemish. Formulated to create a strong and permanent bond, you can use this adhesive to glue all smooth and clean metal surfaces.
The KDGENG metal repair gel is a premium adhesive that can withstand high temperatures of up to 150 ℃. This glue provides an extremely solid and long-lasting bond when it gets fully cured. Just give it 24 hours, and it will become strong enough to be machined.
Furthermore, this adhesive is easy to use. You just need to mix the two pastes, apply the mixture to a surface, and allow it to dry for a few hours. Note that you must follow the volume ratio of 1:1 for the glue to cure effectively.
Another great aspect of this product is that it can be used for repairing anything made from metals, such as filling in casting defects, cracks in plumbing, or even fuel tank repairs. Overall, this is one of the better metal adhesives on the market today.
It was hard for us to identify a limitation of this product. But in the end, we discovered that this product doesn’t have a scraper to mix the two products and apply it to a surface. The only solution to this is buying or DIYing one.
What We Like
Aging resistance
Waterproof insulation
Easy to use
Suitable for all metal surfaces
What We Don't Like
Scraper not included
Quantity: 2 Tubes | Volume: 3.52oz Each | Set Time: N/A | Cure Time: 24 Hours | Dry Color: Light Gray | Resistance: Withstands Up to 302°F, Resists Aging, Waterproof Insulation
What is the Best Heat-Resistant Glue for Metal?
In this section, we present a detailed analysis of the finest heat-resistant glues tailored for metal applications. The subsequent table outlines a comparative study that focuses on essential characteristics, including Quantity, Volume, Set Time, Cure Time, Dry Color, and Resistance.
Withstands Up to 302°F, Resists Aging, and Waterproof Insulation
Buying Guide for the Best Heat-Resistant Glue for Metal
You might have picked the glue that meets all your requirements by now. If not, then don’t worry. We are far from the finish line. To ensure you end up with the right glue, below are some FAQs and a buyer’s guide that will answer all your doubts about heat-resistant glues.
A. Higher Temperature Resistance
Before buying any metal glue, you need to check its ability to resist breakdown at higher temperatures.
The best heat-resistant adhesives are formulated to resist higher temperatures exceeding 300 ℃. So, it’s best to ensure that the metal glue you buy has the highest heat resistance.
B. Drying Time
Another significant factor you must consider before buying any metal glue is drying time. This will depend on the type of project you are working on, but the faster the drying time, the more efficient the work will be.
C. Exposure to Environmental Elements
You must know that environmental factors might affect the bonded surfaces. Metal glues should stay put if the repaired surface is exposed to dust, water, heat, and other elements. However, some adhesives crack when they are exposed to extreme heat.
For this reason, when choosing the best metal adhesive, it’s essential to keep weather resistance in mind. Any glue that’s not weather-resistant is one you should avoid.
What are heat-resistant adhesives?
Heat-resistant glues are formulated to resist higher temperatures of over 300 ℃. These adhesives are alternatives for welding metals which is a costly as well as a risky process.
Are heat-resistant adhesives durable?
Heat-resistant adhesives are highly durable sealants that retain their strength even when exposed to extreme temperatures. They can also withstand aggressive environments because of their thermo-oxidative stability and their resistance to chemical reactions.
Are hot glue and heat-resistant glue the same?
Hot glue is partially heat-resistant. This means the temperature resistance varies depending on the formulation.
Pedro Friedeberg was one of the most famous designers from Mexico, known primarily for his surrealist works that included ancient and religious symbols.
One of his most well-known pieces, the Hand Chair with Foot, became a cultural symbol in the 1960s and 1970s. It was essentially a wooden chair designed in the shape of a hand, with the palm acting as a seat and fingers for the back and sides.
Most experts agree that this is his most groundbreaking artwork to date. On that note, Friedeberg’s hand chairs serve as an excellent furniture piece if you want to add some vintage style to your home décor.
And due to the popularity of this iconic carved unit, you can find similar items from other manufacturers. To help you find the one that best suits your needs, here is a list of some excellent hand chairs for your home.
This hand chair undoubtedly takes inspiration from Pedro Friedeberg’s Hand Chair with Foot and resembles a hand with the palm facing the front. It is made of a solid granite block and has been hand-carved with the utmost skill and care.
According to the seller, this piece was constructed during the 1970s and is still in excellent condition. After all, being built from granite, this chair retains its solid and stately appearance, making it suitable for outdoor use as well.
If you are looking for miniature hand chairs, then this pair of vintage carved hand chairs is a perfect choice. Needless to say, the size makes them ideal for use as children’s chairs, sculptural decorations, or even conversation pieces.
As for the units themselves, these chairs are made of wood, and its origins can be traced back to the late 1970s. And since these are available in a set of two, you can use them as functional seating or just as home décor.
Perhaps one of the best-looking hand chairs on the market, the Silver Hand Chair offers a unique look to your living space. This hand chair was manufactured in the Mexico region during the late 1960s and has retained its excellent quality.
Besides being hand-carved to perfection, it comes with a soft silver finish that sets it apart from similar products on the market. This silver appearance provides an elegant accompaniment to other pieces of furniture and accentuates your living space.
This piece is a hand chair that takes inspiration from Friedeberg’s sculptures, but also creates its separate identity. That said, the fingers that form the chair’s back are narrower and straighter than those on other hand chairs, creating a more sophisticated look.
It is made of hand-carved wood, and even the base has been designed as a shirt cuff with buttons. What’s more, its distinct folksy look provides an edge that sets it apart from other projects by Friedeberg.
5. Carved Walnut Pedro Friedeberg Style Hand Chair
While most hand-foot chairs are not designed with comfort in mind, serving more as decorative fixtures, this Carved Walnut Hand Chair is an exception. It has a more extensive, thicker base than most other hand chairs, allowing you to rest comfortably.
The manufacturer has used high-quality walnut wood to hand-carve it, giving it unique wood grain patterns. As an added tip, you can create a contrasting theme by using this hand chair with a white background.
6. Sculptural Wooden Hand Chair In The Manner of Pedro Friedeberg
One of the hand chairs manufactured in Mexico during the 1960s, this sculptural wooden hand chair is the perfect addition to your furniture collection. Despite being over 60 years old, it still manages to retain its original warm platina. So, if you are a collector looking for a unique product from the 1960s that pays tribute to Friedeberg’s works, this is the one to go with.
7. Pedro Friedeberg Mahogany Wood Hand Chair Surrealist Mid-Century Modern
You’ll be delighted to know that the following product is one of the original pieces from Pedro Friedeberg. It is made from high-quality mahogany wood and is a great piece for decorative purposes.
Despite being a product from the 1980s, it is still in excellent condition and a perfect piece for decorative purposes. Not to mention how the artist’s signature in black ink is still visible at the bottom as a proof of authenticity.
8. Rare Editioned Bronze Hand And Feet Chair By Pedro Friedeberg
This hand and feet chair from the ‘80s is one of the best examples of Pedro Friedeberg’s surrealist works. Instead of a single hand, this chair features two hands and feet joined at the center.
It has a cast of bronze and a design that represents Mexican folklore tradition to perfection. What’s more, it is one of the rarest pieces that survive today, with only nine rare-edition chairs being produced originally. You can also find Friedeberg’s signature on one of the legs.
9. Pedro Friedeberg Style Carved Hand Chair Sculpture
If you are unwilling to spend a hefty sum on getting one of Friedeberg’s original designs, this Carved Hand Chair Sculpture is a great alternative. It is an eye-catching sculpture that will help you accentuate any space effortlessly.
The sculpture is made of premium quality wood and can serve as a great conversation starter. This functional sculpture can also be used for seating purposes, with the fingers serving as back and armrests.
10. Mexican Carved Hand Chair In The Style Of Pedro Friedeberg
Those who are looking for a studio-carved hand chair are sure to love this hand chair. It was crafted in Guadalajara, Jalisco, Mexico, during the 1960s. The chair comes with rich details, such as an intricately carved love line and lifeline. It even has richly detailed fingernails, folds, and joints of the palm.
Additionally, the base is in the form of a two-button cuff with a decorative vine that adds to the beauty of this sculpture. This sculpture is ideal for use in all types of settings, both outdoors as well as indoors.
11. Carved Hand Chair In The Style Of Pedro Friedeberg
This hand chair is an excellent mid-century modern product belonging to the 1970s. Just like the previous product, this one also has some finely crafted details. The fingernails on this hand chair are exceptionally crafted, and it is also made of superb quality wood.
As far as carved furniture is concerned, this is one of the most delicate pieces on the market. It is one of the hand chairs manufactured in Germany and is still one of the most exotic pieces to get.
The Gold Hand Chair is another piece of art from Friedeberg’s original works. It has a wooden base covered with a gold leaf and is a fantastic example of the artist’s skill. It makes for the ideal interior decoration item and is a must-have for collectors of rare sculptures and decorative pieces.
This hand chair comes with a certificate of authenticity signed by the artist. Additionally, you can find the signature at the base of this Pedro Friedeberg hand chair.
Black is the perfect color if you are going for an understated look, and this hand chair in black is especially suited for that purpose. It is available as part of a two-piece set, but you can also purchase only one.
Besides serving as a great showpiece, this chair can also be functionally used for sitting purposes. For areas such as porches, this hand chair in black can help create the perfect look. You can even use this superb hand chair in your living or dining rooms, or out on the porch.
It is much easier to find Friedeberg’s hand chairs than his hand and foot chairs, which is why this carved Mexican walnut hand foot chair is one of the rarest products to find. This chair was produced by Friedeberg in Mexico City during the late 1960s using the best quality walnut lumber.
The walnut wood also provides an excellent appearance to the hand and foot chair. It also comes with a branded signature of Friedeberg at the base of the sculpture.
The Gilt Hand Chair is one of the hand chairs that is made to order by the artist. It is made of wood, with a gold leaf covering for a gilded appearance. Besides making for a stunning piece of artwork, you can also use this hand chair for sitting purposes.
The base of this gilded chair has an unusual flat surface, and the chair is accompanied by Friedeberg’s signature as well as a certificate of authenticity. This chair can be customized according to your preferences, with different colors, materials, and styles.
As the name implies, this iconic hand foot chair is one of the most well-known hand and foot chairs. The sturdy and solid wooden base has a coat of red paint that stands apart from the rest of Friedeberg’s sculptures.
The artist’s signature appears on the thumb of the chair and has also been burned into the chair at the bottom. Unlike most hand and foot chairs This hand foot chair was also manufactured in Mexico and is the perfect symbolization of the 1960s era.
Final Words
With that, we’ve reached the end of our list of the best hand and foot chairs on the market. These hand and foot chairs not only serve as excellent décor pieces but also provide great functionality.
Not to mention how some of them are incredibly rare and very hard to find. For collectors and art enthusiasts, this list might come in handy for finding coveted items. Anyhow, these hand and foot chairs complement all types of settings, both indoors and outdoors.
So, if you are planning to redecorate your home, get a hand and foot chair that suits your style.
Related Links
Curious to know more about the popular Guardian Protection Home Security? Could it be the right choice for you and your family?
Well, these questions will take some time to answer as this home security system has numerous features and benefits. After going through its excellent customer feedback, we were intrigued to find out what the hype was all about.
Is this home security system apt for everyone to use, or does it cater to specific target audiences? What are the benefits it offers, and do they outweigh its flaws? We are here to discuss these questions through our in-depth review.
Of course, our review and guide aren't based solely on customer reviews and our research. We also tested it out for two weeks before coming to a conclusion. We understand how vital home security is to you and want to introduce only the best system for your family's safety.
So, sit back, and let us tell you all about our findings.
Guardian Protection Home Security Review
About the Brand
Guardian Protection strives to make life just a little easier for you by giving you one less thing to worry about - your family's safety. The company prides in its customized approach to each customer, providing personalized solutions from their experts. With 24/7 monitoring, rest assured that Guardian Protection is working hard for your security, even when you are sleeping.
The company was founded in 1950 in Pittsburgh, providing security to jewelry stores. Within the next two decades, its popularity shot up, making its way up to the Inc 500 list of the fastest-growing companies in America.
As they improved their technologies and customer service, it was not surprising to see them rising through the ranks. From featuring in the list of the top 100 security system companies in SDM Magazines to receiving the Monitoring Center of the Year Award in 2015 and 2022.
Currently, Guardian Protection is the largest privately-held security company with over 1,000 employees and 265,000 satisfied customers.
Pricing And Standout Features
Guardian Protection strives to create packages for everybody - whether you live alone, with your family, travel frequently, or need security for your business. Moreover, you can customize the packages to fit your specific needs.
Here is a breakdown of the basic packages:
Standard Package - $34.95/mo
Essential Package - $49.99/mo
Premium Package - $499 upfront
Features Offered
Guardian offers several features that equip homeowners and business owners to keep a strict eye on overall security and safety. These features and technology have been developed to create a seamless integration with your smartphones and other smart devices. While their smart home security systems are relatively standard (and slightly expensive), there are a few which we really liked.
Wireless Systems
Almost everything we own is now wireless - from our phones to speakers, charging devices, computers, and even our home security. All of Guardian Protection's systems and features are wireless. No drilling into walls, no messy wires, and no opportunity for criminals to cut the cords.
Tamper-Proof Sensors
A relatively small but essential feature introduced by Guardian Protection is their Tamper-Proof sensors. These sensors immediately set off alerts if anyone tries to disable them. It will alert you discreetly about an invader trying to tamper with your systems so that you can take immediate action.
24/7 Professional Monitoring
This is probably the most important feature you can have on your home security system. The 24/7 professional monitoring keeps your home security system connected to their servers and monitoring centers. In case of any emergency, the agents are immediately notified and can take action within seconds.
Touchscreen Controls
Built to look and function like a tablet, the Guardian IQ2 Touchscreen Control Keypad is a great feature. The built-in panic button, weather display, and picture snap features are highly coveted and loved by customers.
The Different Systems & Equipment
Now that you know a little bit about the standout features offered by Guardian Protection, you're probably curious to find out more. Well, let us tell you about the different systems they offer, along with their advanced equipment and technology.
Smartphone & Device Control
An excellent feature offered by Guardian Protection includes their smartphone and device control system. With a simple setup process, your home security system will be synced with your smartphone, computer, laptop, and other devices such as your smartwatch, tablet, etc.
You can efficiently set up customized security features and alerts for your home security system. The integrated systems allow you to keep track of your home security, no matter where you are in the world.
Moreover, the Smart Home Automation system allows you to keep track of all your passwords, schedules, alerts, reminders, and much more. A simple push of a button or a swipe on your screen can control all the features no matter how far away you are.
Indoor Wi-Fi Cameras With Night Vision
Do you spend a lot of time away from your home? Or maybe you're planning a long trip and need to keep an eye on your property. The indoor wireless camera with night vision will equip you to do that effortlessly.
The night vision cameras work beautifully to provide crystal clear video images that you can watch on your devices' screen. Furthermore, the video footage is recorded so you can go over it any other time.
Geo-Services
Want to arm or disarm your system, but you're still far from home? Or maybe you need to turn off the lights at home, which you forgot to do on the way out? With the Geo-Services system, you can.
Control all your home security as well as home command features right from your smartphone, no matter where you are located. Moreover, you can draw a virtual fence around your property and arm certain security features while you're away, just for added protection. With the geo-services system, the security systems can get activated or deactivated based on your smartphone's location.
Video Analytics
Wondering what that pesky creature is that's chewing up your shrubs when you're not home? Are you suspicious that a stranger is walking around your property or trying to enter in your absence? With the outdoor camera system, you can watch exactly what's going on when you're not around.
It not only detects any movement but also records it in crystal clear quality. Moreover, the night vision feature does the same - even in the absence of daylight or artificial lights.
Mobile Alerts
One of the most advanced and popular security features offered is the Mobile Alert system. Customers can personalize their home security system and sync it up with their smartphones.
You can now receive immediate alerts on your mobile phone in case of any alarms, sensors going off, or any other emergency. It allows you to act on the spot without wasting a second, increasing safety and security for your home.
Guardian Protection Equipment
Depending on the kind of package you decide to purchase, you will be given some of the best, most advanced equipment to facilitate your home security.
The standard equipment includes the following:
Fire/medical security
Geo-Service
Mobile arm/disarm
Smash & crash protection
Text & email alerts
24/7 monitoring
Along with these, you can also get additional security equipment, as mentioned below. All these features and equipment add to the safety and security of your family or business.
110-dB Siren
Carbon Monoxide Sensor
Guardian IQ2 Panel
Room Temp Sensor
Smart Door Lock
Smart Garage Door Opener
Smart Thermostat
Video Doorbell
Smoke & Heat Detector
Indoor Camera
Outdoor Camera
Glass-Break Detector
Now that you can see the impressive list of systems and equipment offered to you by Guardian Protection, you can pick out the ones you might need the most. However, keep in mind that while the immense selection is great, it can also turn out to be quite costly if you're not careful.
To keep things within a budget, it is crucial to make a list of all your requirements first, and your budget, and then pick and choose from the options. Get the best home security you need without burning a hole through your pocket.
Why Buy This Product?
Hopefully, the exhaustive list we created above helps you decide what kind of features and security systems would best fit into your needs. One of the best things about Guardian Protection is the fact that every customer has the luxury of personalizing their security systems.
This gives you the freedom to choose what you want and leave the rest and gives you control over your budget. Now that you know what kind of features and equipment to expect, here are some compelling reasons why we think you should buy this product.
Professional Installation
While the installation process is not free of charge ($99), the entire process was extremely professional and effortless. A Guardian technician is sent over to your home within a few days after you subscribe to their home security system. Each technician is highly trained and an expert at their job, so you can rest assured that you will receive top-quality service and products.
The installation process itself is relatively quick and does not require any intervention from your end. The expert professionals will complete the installation process in no time, making your home safe and ready.
Excellent Customer Service
One of the most important aspects of any home security system is its customer service. What good is home security if you cannot get in touch with their executives any time you require help?
Fortunately, the Guardian Protection team is always ready to help you. They provide reliable 24/7 customer service, which is prompt, accessible, and available at all times. That being said, if you are someone who enjoys the DIY approach, you might find their service slightly lacking.
While their customer support is impeccable, they don't have much in terms of How-To articles, troubleshooting guides, or tips on how you can work your way around the system independently. Of course, this isn't much of an issue when you weigh it against their prompt and reliable service.
Guarantees
Another compelling reason why we think you should buy Guardian Protection is the generous guarantees they offer. Surprisingly, you won't find many competitor brands in the market that provide the same guarantees as Guardian.
One of the guarantees offered by them is a $500 cover for your insurance deductible, in case you have a break-in into your home or office while their services are armed and monitored.
We especially like their Home Relocation Guarantee, which promises you a free installation and setup in case you decide to move to a new home (and continue subscribing to their home security services).
If you don't have your own home and frequently rent and change residences, you will appreciate this guarantee. Of course, it is advisable to speak to their customer service representatives to get details on the guarantees and services.
Long-Lasting Equipment
When purchasing a home security system, it's obvious that you want it to last you for years to come. Guardian Protection has built all its systems and equipment, keeping this in mind. Not only are their products durable and long-lasting, but their services are also easy to use and accessible.
One of our favorite features was the IQ2 touchscreen controls, which allowed us to arm or disarm our home security system using easy touchscreen controls. Along with that, we also loved the Home Automation features, which were excellent for day-to-day use in and outside our homes.
Never again will you suffer the consequences of your absent-mindedness! With easy controls on your smartphone or tablet, you can control all the switches and alarms of your home - even when you're away.
Wallet-Friendly Options
We understand if you are one who prefers functioning on a budget. Not everyone has extravagant funds that they can spend on lavish home security. Guardian Protection earned our respect with their customizable options and budget-friendly subscriptions. Of course, if you can afford to pay a higher amount for increased security, you can always change your subscription details.
The entire process is easy, and you will be guided by their brilliant customer service team at all steps.
What Could've Been Better?
After going through our extensive review, you surely won't be surprised to know that Guardian Security is the largest privately-held security company amongst competitors. That being said, we understand that nothing comes without its flaws - and so does Guardian Protection.
We had a few bones to pick, the first being that they don't have any options to purchase their security systems online. To do this, we had to speak to a customer service representative. Now, this wasn't a terrible experience; in fact, it was the opposite. However, we would've liked to have the option to do it online.
The second issue we had was that their website did not contain any informational articles, guides, or troubleshooting options to have a DIY experience. Again, we appreciate the fact that their impeccable customer service provided us with assistance at any point during the day or night. For some customers, the absence of DIY options could be a turn-off.
Lastly, we noticed that although their 24/7 monitoring and response team were very prompt, they took a few seconds more than competitor companies did. If we were to make a comparative study, we would mention this as an issue, but otherwise, it seems fair.
Pros
Excellent customer support
Long-lasting, durable equipment
Budget-friendly as well as lavish security options
Generous guarantees
Advanced Guardian IQ2 Touchscreen Control Keypad system
Cons
Cannot purchase their system online
Lack of informational articles and guides
Guardian Protection Home Security Buyer’s Guide
We hope we have answered most of your questions regarding Guardian Protection Home Security. We have almost come to the end of our guide, but before we leave, we would like to tell you a few factors you should consider before buying a home security system.
Professional Monitoring
When looking for a home security system, it is crucial to purchase one that provides 24/7 professional monitoring. While self-monitoring is always an option, it is not a feasible one. The reason you would buy home security is so you can rest assured that your home is safe when you are away.
If you need to monitor your home every few hours, it eliminates the entire point of opting for additional security.
Budget
We acknowledge that most people need to run their lives on a budget. Unless you have set aside a substantial amount of money for home security, you're probably looking for budget options in the market.
It is important to go through all the features, equipment, and systems with a fine-tooth comb. You can opt-out of anything which you feel you don't require in your home. Additionally, you can add a few more features or systems if you think it is necessary. Have a budget in mind beforehand, so you don't end up spending an exorbitant amount.
Complete Smart Home Setup
Most people have made the wise choice to switch to smart home devices. These not only make our lives easier but are also necessary in terms of home security and protection.
When choosing the best home security system, opt for one which offers a complete smart home setup. You should be able to sync all your smart devices to your security system so you can control everything with the touch of a button - no matter where you are located.
Customer Service That Just Keeps On Giving
Customer service is arguably one of the most important aspects of any purchase. So when it comes to your home security, make sure you pick one that customers have reviewed to have excellent customer service.
You should personally have a chat with their customer support team, so you have a fair idea about how they function. When you are in need of help, you should be able to rely on their excellent customer support team.
Guardian Protection Home Security FAQ
Is There A Contract Involved?
Yes. Guardian Protection Home Security offers various contracts which last from 36-months to 5-years, depending on customer needs. Surprisingly, their contracts last longer than contract lengths provided by most of their competitors.
Is There Any Money Back Guarantee?
No, there is no money-back guarantee. However, as we mentioned earlier, there is a $500 cover toward your insurance deductible, which they offer in case your home gets broken into while their systems are active and monitoring your home.
How Can You Cancel Guardian Protection Home Security?
If you wish to terminate your contract with Guardian Protection Home Security, you can do so by getting in touch with their customer service representatives. They are available 24/7 over the phone, and it is effortless to get in touch with them for any assistance you require.
That being said, we should mention that their cancellation policy is pretty strict. Typically, customers are locked into a minimum one-year contract. In case you wish to cancel your security system, you will be obliged to pay termination fees, which might be a little high. It makes more sense to wait and complete your contract with them.
Are Their Systems Wireless?
Yes, all of Guardian Protection’s systems are wireless. You don’t need to worry about drilling into your walls, dealing with messy cords and wires, or even the risk of criminals cutting the cables to your security system.
What Are Their Response Times?
Unfortunately, this is an area where we think Guardian could do with some improvement. Although their response time is less than 60 seconds, which is excellent, it is still slower than industry standards.
What Are Their Video Capabilities Like?
Guardian Protection offers both indoor wireless video cameras as well as outdoor ones. Moreover, they are equipped with night vision so that they provide you with crystal clear, color images and videos even during the night.
However, they offer just one indoor and one outdoor camera. If you wish to equip more in your home or office, you will have to purchase additional equipment from their company.
Is There A Self-Monitoring Option?
Unfortunately, no. The only monitoring options they have are their excellent 24/7 monitoring systems, watched over closely by reliable professionals. Although there is no self-monitoring option, we must point out that their remote monitoring was impeccable and had no system flaws.
Do They Offer Professional Installation?
Yes. Guardian Protection offers professional installation services that are prompt, reliable, and inexpensive. You have to pay a one-time fee, which will cost you $99. With their Home Relocation Guarantee, you will enjoy the benefit of free installation and setup if you decide to move homes.
What Is The 7-Day Orientation Period?
Guardian understands that it often takes a few days for homeowners to get comfortable with their new security systems. Keeping this in mind, they have developed the 7-day orientation mode, which allows you to get comfortable with your new system’s functions and features. During this period, you don’t need to worry about any false alarms and related fines.
Once you feel comfortable enough to turn off the orientation mode, the home security system will work as expected. They will be obliged to alert emergency responders in case of any emergency.
However, keep in mind that Guardian will alert the emergency responders in case you have monitored smoke or carbon monoxide detectors. This will be done regardless of your orientation mode being turned on or off.
Guardian Protection Home Security Verdict
We understand how important home security is, and so does Guardian Protection.
Their systems have been designed by experts who have their own families and understand the ever-present need for safety and security. Keeping affordability in mind, they have created various systems and subscriptions which are apt for all kinds of buyers.
After using their home security system, we were pleased with the overall performance. Even the slight flaws they had did not outweigh the tremendous benefits we enjoyed from their security system. As such, we believe that Guardian Protection is an excellent choice for most people.
This brings us to the end of our guide. Until next time, stay safe!
Choosing the correct adhesive for your next DIY task can be a bit challenging.
There are endless options on the market, so how do you choose the best one for your task? We understand your dilemma, and so to help you choose the correct one, we’ve narrowed down our options to Gorilla Glue and Super Glue.
Honestly, the glues of both brands provide excellent adhesion and are versatile. Plus, they are the crafter’s favorite. They work as paper, wood, plastic, leather glue and much more. And so, deciding which one is the best of the two types of glue isn’t as easy as pie, particularly when both are the best. And so, deciding which one is the best of the two types of glue isn’t as easy as pie, particularly when both are the best.
And so, to ease your task, we’ll walk you through the two types of glue, what’s good and what’s bad. So that you can compare the two products and choose the best one for your needs.
So, without any further ado, let’s jump right into the deets!
Gorilla Glue Vs Super Glue
No matter what task you have at hand, there’s always a tool in the market to help you complete the tasks in a breeze. And so, for all the carpenters, woodworkers, DIYers, enthusiasts, or even hobbyists, there are adhesives to ensure a firm and durable bond to all your wooden projects.
And no matter what project you’re working on, firm and durable bonds are what you must be looking for. We decided to give a shot to the two of the crafter’s favorite brands, Gorilla Glue and Super Glue.
If you’ve been in the woodworking line for quite some time, you must be aware of the two brands. No doubt, the adhesives of both brands are of top-notch quality and are the go-to brands for all the crafters and woodworkers.
Both brands manufacture adhesives that are safe to use at home and are pretty much identical in terms of performance and efficiency. But, they are unique and also differ from each other in quite a few aspects. Of course, you would like to invest in a brand that will provide firm and durable bonds. So, let’s dive into the two products to know which one will be the best for your DIY tasks, simple repairs, and other woodworking projects.
Whether you are looking to fix delicate toys or your living room cabinets, Gorilla Glue is perfect for fixing anything and everything. Because of its strong adhesive strength, you can also seal porous surfaces with this.
Be it sanded woods, metals, ceramics, plastics, or glass surfaces, Gorilla glue can pretty much stick to whatever you throw at it. Plus, the wide variety of glues offered by Gorilla Glue is impressive.
If you want to mend the fences of the garden or quick fix the cracks on the door, you’ll have to go for the glue suited for outdoor applications. Not all glues can withstand all elements, and only outdoor glues can provide you with the much-needed durability and firm bonds to your surfaces.
As such, the Gorilla Glue Original works perfectly for mending the exteriors, thanks to its resistance to extreme temperatures. What’s highly impressive is that the glues of Gorilla brands create the toughest bonds when exposed to moisture or water on surfaces and act efficiently to create a lasting and durable bond.
Features Of The Gorilla Glue
If you are on the lookout for mending the cracked lights or wooden surfaces, then Gorilla Glue is perfect for tackling all your bonding needs. With its quick drying time combined with its sheer versatility, Gorilla Glue has transformed the world of woodworkers.
So, let us explore the features of Gorilla Glue to understand what makes it the go-to brand for all the bonding needs of the crafters and professionals.
Versatility
Plenty of brands offer glues of excellent adhesive strength, yet, everyone tends to go for Gorilla glues because they can bond almost anything. Whether it is wood, metal, plastics, rubber, leather, or any other material, Gorilla Glue’s excellent adhesion works efficiently to bond anything you want.
Because of its sheer versatility, this glue is a must-have for all your quick-fix, DIY tasks, and woodworking projects. Plus, Gorilla Glue does an excellent job in manufacturing a variety of adhesives for different bonding needs.
Irrespective of your needs, the Gorilla Glue is perfect for all your needs. Whether you are looking for a quick-drying glue or one with excellent adhesion strength, Gorilla Glues are ideal for all your bonding tasks. Also, you can use this for both exterior and interior surfaces.
Gorilla Glue is most preferred by crafters and professionals because of its versatile nature. From fast repairs to quick-drying, Gorilla Glue is an excellent choice for all your bonding needs.
Durability
One of the most striking aspects of the Gorilla Glue is its high durability. They are 100% water-resistant and can withstand the elements, so you can use them for bonding the exterior surfaces.
No matter what you’re looking to fix, you can trust Gorilla Glue for all the repairing and the DIY tasks. Its adhesive strength can bond your surfaces stronger than the wood itself. For any wood-to-wood tasks, the Gorilla Glue is an excellent option because of its exceptional bonding power.
Plus, while curing, the Gorilla Glue expands up to 3 - 4 times, resulting in strong and durable bonds. If you are on the lookout for non-breakable and long-lasting bonds, then Gorilla Glue will be an excellent choice for all your bonding needs.
Drying Speed
Gorilla Glue is quite popular among woodworkers and enthusiasts because of its sheer versatility. It has been designed to adhere to a variety of surfaces. The drying speed of the glue depends upon the temperature of your room or environment. However, it takes more or less 24 hours to dry completely.
After applying the glue on the surface, it requires clamping. Additionally, clamping with heavy substances will ensure better cinching. Plus, it dries natural wood color. Humidity and temperature also play a significant role in determining the curing time of the glue.
Gel glue formula: Our thick, no-run Gorilla glue gel formula...
All purpose glue: Gorilla Super Glue is formulated for...
This Gorilla Super Gel glue is our absolute favorite because of its fast-setting formula. Plus, its unique gel consistency makes it perfect for all kinds of applications. The Gorilla glue packs quite a powerful punch in its 20 gms of adhesive bottle.
Why Did We Like It?
We absolutely loved this glue’s unique gel consistency, which makes it perfect for vertical applications. It is extremely difficult to bond such surfaces without the adhesive creating a mess everywhere because of dripping. But thankfully, this glue doesn’t drip, thanks to its no run control formula.
Moreover, the glue dries pretty fast. It stands true to its claim of drying within 10 - 45 seconds without any clamping. Furthermore, it features an anti-clog cap so that the glue doesn’t dry up and can be used hassle-free.
Furthermore, it is highly versatile and can be used on a variety of surfaces. Be it ceramic, leather, rubber, wood, plastic, paper, and other similar surfaces. Also, the 20 gms of glue is sure to last long for only a few drops will bond your surfaces in almost no time. Whether you’re a DIY person, crafter, or hobbyist, this glue is perfect for all your bonding needs.
What Could’ve Been Better?
The Gorilla Super Glue does an outstanding job in bonding almost anything and everything. However, the 20 gms adhesive isn’t an ideal option for professional woodworkers or even large projects. So, if you’re working on large projects, we recommend you buy in large quantities to ensure the tasks are completed smoothly, without running out of glue.
While Gorilla Glue works best for bonding the porous surfaces, the Super Glue will give you exceptional results on vertical and bumpy surfaces. Belonging to the Cyanoacrylate family (CA), the Super Glue is perfect if you have to bond small surfaces or those areas which call for extra precision.
Super Glues dries in a fraction of time and leaves a clear finish. And so, after spreading the glue, you need to act quickly while the glue is wet to ensure efficient bonding. Super Glue is available in a variety of sizes and forms. With such diverse varieties, you can choose the perfect glue for your bonding needs.
Those which are gel-based ensure more controlled application, thanks to their nozzles. They are ideal if you have to bond small surfaces or areas. The nozzles are designed in a way to let you control the flow of the glue.
But, if you’re looking for an adhesive for sealing and bonding challenging cracks or gaps, then Liquid Super Glues are perfect. Because of their thin consistency, they dry faster than gel ones. Also, you can apply them with a brush. Super Glue is a well-known brand, and its adhesives are most commonly used in the medical and industrial fields.
What’s highly striking is the unique bonding condition of these glues, thanks to their cyanoacrylates. These glues dry and bond best in the presence of moisture. They form tight bonds instantly when exposed to water or moisture. Plus, they are only minorly toxic, so you don’t have to worry much while using them.
So, because of cyanoacrylates, you can use this to bond the moisture-prone areas without worrying about the bonds. It forms tight bonds in almost no time. All in all, Super Glues are perfect for all your woodworking, DIY, and crafting projects.
Features Of Super Glue
Accidents do happen, no matter how careful you are. And when that favorite coffee mug of yours drops accidentally or somebody knocks over those precious ceramic pots, doesn’t your heart sink a little?
And so, Super Glue has designed various adhesives to fix all those common cracks and breaks. They are super easy to use, and their adhesive strength works efficiently to mend all the cracks and gaps.
So, let us dive into the features of the Super Glue to know why they’d be ideal for all your bonding needs.
Versatility
Because of their high versatility, they can bond any surface or material you want to. Unlike other glues, which have difficulty bonding uneven and bumpy surfaces, the Super Glue bonds those surfaces efficiently. As such, you can use this for your woodworking projects.
Also, the presence of moisture or water is necessary for efficient mending surfaces. And so, you can use them to bond porous surfaces. But, this isn’t much of a concern because the moisture in the air works in tandem with the glue to provide firm and durable bonding to your surfaces.
Super Glue is perfect if you’re looking for an adhesive to fix the cracks and gaps around your home. For all your DIY projects, crafts, and household work, this glue is excellent for it sticks almost whatever you throw at it.
Drying Speed
If you are a professional woodworker, you must know that no two types of glue have identical drying speeds. All the other glues that we tried dried after the evaporation of the liquid. However, this isn’t the case with Super Glue - it dries pretty quickly.
Super Glue dries immediately when it comes into contact with moisture. As such, this doesn’t mean you need to add water to make the Super Glue work because the moisture in the air is sufficient to let the glue do its job.
Since the super Glue is one of the fastest drying glues, this means you need to act fast enough on your surfaces to avoid any mistake while gluing.
No other glue in the market dries as fast as Super Glue. So, if you are in a hurry to complete DIY projects or looking for a quick fix, Super Glue is the perfect option to go for all your bonding needs.
Staying Power
Super Glue is compatible with almost any material and surface but mainly works best for uneven surfaces. Also, it dries in virtually no time. Its staying power further complements the versatility and the drying power of the glue.
DIYers, hobbyists, and crafters have been using this for ages because of its holding power. It can almost hold anything and everything because of its unique bonding characteristics. The high strength of cyanoacrylates makes it perfect for even exterior applications as it can withstand high temperatures.
Also, it does not require any heavy substance or pressure for clamping because of its high performance. So, whether you are a DIYer, hobbyist, or crafter, Super Glue is perfect for all your bonding needs because of its plenty of staying power.
Original Super forms the strongest bonds on clean breaks of...
Super Glue for wood, ceramic, fingernails, metal, pottery,...
Irrespective of your needs, this Super Glue 15187 is there to help you out with all the woodworking tasks. Its fast-drying formula ensures that your surfaces are bonded instantly. Additionally, the multi-pack is perfect for reusability.
Why Did We Like It?
The Super Glue is extremely useful in repairing any accidental fractures that might occur on your surfaces. It dries clear after application, thanks to its transparent color. As such, you can use this on anything you want without worrying about the stains.
Be it ceramics, pottery, jewelry, metals, fingernails, or any other material you want. Its ease of use makes it perfect for all DIY jewelry crafts, enthusiasts, and hobbyists.
What makes this Super Glue great is its precision applicator. You can apply the glue to any challenging cracks and gaps you want without worrying about dripping or damages due to the running formula. This allows you to work and bond materials with utmost precision.
Plus, any extra glue peeping out can be easily sanded away. Also, with its fast-drying formula, your materials will be bonded within 10 - 30 seconds. Lastly, this super glue offers quite a great deal. With the multi-pack of 12 tubes, they are perfect for reusability.
What Could’ve Been Better?
While testing the product, we did not come across any significant drawbacks. However, our only gripe is the packaging of the product. Although it comes in sturdy packaging, it is pretty challenging to slit the box.
But later, we figured out that the box is meant to be pulled apart into two pieces. Apart from that, the product works exceptionally well.
Pros
Dries clear after application
If excess can be sanded
Allows utmost precision while working
Bonds materials within second
Cons
Unpacking the glue is quite a challenge
Gorilla Glue Vs Super Glue Buying Guide
By now, you know almost everything about the Gorilla Glue and the Super Glue. But, have you decided which one’s best for your tasks? Of course, it isn’t that simple. With both the brands offering high-performing glues with excellent adhesive strength, it is pretty challenging to choose one.
And so, we’ve put up this buyer’s guide to help you decide between the two brands. We’ve discussed all the essential factors which you must consider while buying adhesives for your projects.
Interior or Exterior Use
The first and foremost thing that you should keep in mind is the nature of your application. Not all glues are formulated for both interior and exterior applications. Some are designed for the outdoors, and some for the indoors.
If you’re looking for bonding exterior surfaces, you must go for adhesives that are water-resistant and can withstand the elements. The Gorilla Original Glue is perfect for all exterior and interior applications because of its excellent adhesive strength.
Meanwhile, the Super Glue’s adhesives aren’t ideal for exterior uses but provide excellent adhesive strength for bonding minor repairs, cracks, and non-porous surfaces. So, if you’re looking for a versatile adhesive, the Gorilla Glue is what you must go for. The Gorilla Glue stands out in terms of versatility of application.
Toxicity
Irrespective of which brand you are using, adhesives can be dangerous. But, not all glues are detrimental to health. Because of their fast-drying power, most of them can stick to your hands, whereas others do not. And so, while choosing an adhesive for your use, you must consider its toxicity.
Gorilla Glue consists of harmful fumes which if inhaled, can lead to permanent lung damage. Also, they are dangerous to use around pets or kids. And so, it must be used in a well-ventilated space.
Meanwhile, the Super Glue is not as toxic as the Gorilla Glue. The fumes of the Super Glue aren’t as dangerous as the Gorilla ones, and they also do not cause any damage to your lungs. And so, the Super Glue stands above the Gorilla Glue in terms of toxicity. It is pretty safe to use and not as dangerous as the Gorilla Glue.
Cleaning
While working with adhesives, spills do occur, making bonding a messy affair. And so, while choosing glue, you must consider whether cleaning is a breeze or a challenging task. Mostly, the adhesives can be easily cleaned with a splash of water and a wet rag. However, there are even those which are difficult to clean.
While testing the two adhesives, we found the Gorilla Glue was relatively easy to clean. Rubbing a wet rag was enough to clean the spills. Meanwhile, the Super Glue isn’t as easy to clean as Gorilla Glue, but it isn’t impossible.
In case of spills, you need to pour rubbing alcohol on the surface and let it sit for some time for the glue to loosen its grip. However, in terms of cleaning, the Gorilla Glue stands above the Super Glue. And so, it will be ideal for all your household needs.
With that, we have come to the end of our comprehensive guide. Both the brands manufacture top-notch quality glues, and so it is extremely difficult to pick a winner.
Both the Gorilla Glue and Super Glue have certain advantages over the other, and so, ultimately it all boils down to the user’s needs and preferences.
After extensive testing and research, we’d recommend Gorilla Glue because of its unique formula and versatility. Super Glue will be ideal if you’re looking for an affordable and less toxic option for fixing minor repairs or DIY projects.
Let us know your opinions in the comment below. Till then, take care!
Silicone glue is one of the most commonly used adhesives in household applications. Hence, it's crucial to choose a premium-quality product to get optimal results.
However, buying a quality silicone glue that offers permanent flexibility and protects against stains caused by molds may not be that easy after all. There are many factors to consider, and with the availability of a ton of options on the market, choosing an ideal one can be challenging and time-consuming.
So, to make your task simpler, we have handpicked and reviewed the 5 best silicone glue options currently available on the market after hours of extensive research and testing. Plus, we have included a buyer's guide towards the end of the article to help you make an informed purchase.
So, without further ado, let's jump right in!
Best Glues for Silicone
Here is the list of the 5 best glues for silicone that you can use to create a strong and durable bond.
J-B Weld is one of the leading manufacturers of high-quality adhesives for plastic, wood, metal, and general-purpose use. And on that note, let us introduce you to the 31310 All-Purpose RTV. This silicone glue is designed for use in mechanical or household applications and may deliver satisfactory results every time.
Clear Silicone Sealant & Adhesive: Is A General Purpose...
Why Did We Like It?
As a piece of adhesive from a 40-year-old brand, we are happy to say it lives up to our expectations.
This product delivers a durable seal that can stand the test of time with ease, making it an ideal adhesive for automotive and household applications. Plus, it is available with a wide variety of color options, thereby enabling users to choose a shade as per their requirements.
Now, the major issue with most sealants and adhesives is that their beads are susceptible to mold and mildew growth that tend to affect the bond of your project. But you don't have to worry about that with this product, as it tackles the issue beautifully with the inclusion of mold and mildew-resistant features.
Lastly, it sports an affordable price tag, which makes it an ideal buy for those on a tight budget.
What Could've Been Better?
It is undoubtedly one of the best options on the market, given its durability and affordable pricing. However, while testing this product, we found that the nozzle of the tube tends to clog up pretty quickly, which was a little disappointing. But other than this, it does the job quite conveniently.
For over 70 years, GE Sealants has dedicated itself to designing innovative and top-notch sealants for all our home sealing projects. And the Silicone II Household Glue & Seal from the brand is the perfect example of a reliable option that can deliver optimal results on a range of surfaces. Keep reading to know more.
No products found.
Why Did We Like It?
We were quite impressed with what this glue has to offer. For starters, it can be used on multiple types of surfaces, which include wood, painted surfaces, fiberglass, ceramics, and a lot more. Hence, you will be able to use this product for all types of projects.
It forms a durable and flexible coating that doesn't tend to shrink or crack over time; this means you can rely on it to stay intact for a very long time. Also, it is super easy to apply, which is no short of a bonus for people who are new to DIY applications.
On top of that, this glue is backed by a limited lifetime guarantee by the manufacturer. This enables you to return the proof of purchase for a refund if you are not satisfied with the results. And finally, it has a low odor, which you will barely be able to smell while using it.
What Could've Been Better?
During our period of usage, we didn't come across any significant downsides to this product that would affect the results. That said, we did notice that it takes a while to completely dry, which might be an issue for people that don’t like waiting too long.
Our next pick is an effective product from the house of Beacon, a brand well-known among DIYers for its range of adhesives, sealants, and coatings. Equipped with a slew of features that work to deliver a permanent seal, the 318OZ Advanced Craft Glue from the brand is an option you wouldn't want to miss out on.
Crystal clear waterproof provides instant grab which dries...
Great for all kinds of hobby and craft projects
Why Did We Like It?
This product is known to resist water and provide a tough seal that lasts a lifetime; hence it is appropriate for bathrooms and areas that come in contact with water. However, you can use it on other surfaces as well, including plastic, metal, fabric, or wood as per your requirements.
We loved the fact that it dries up pretty fast, so you don't have to wait around for too long. And the best part is that even though it dries up fast, it still allows time for moving pieces in place if required. As such, if you feel the need to make small corrections to your project, don't hesitate.
Apart from this, it is priced quite reasonably, ensuring that it delivers good value for money. Overall, it is one of the top-rated glues for silicone on the market.
What Could've Been Better?
The only drawback of this otherwise exceptional glue is that the packaging material used is poor. When it came to us, the packaging was warped, and the glue was leaking. This was a bit annoying, to be honest, given the brand's popularity.
Next, we have included the 8212302 Max Strength Clear from Gorilla, one of the most popular glue brands in the country. It helps deliver an outstandingly durable seal in all weather conditions. Obviously, there’s a lot more to it so let's take a closer look.
OUR STRONGEST FORMULA: Maximum bond strength with a clear,...
DRIES CRYSTAL CLEAR: Dries crystal clear with a non-foaming...
Why Did We Like It?
For us, the main highlight of this glue is its non-foaming formula, which ensures a crystal-clear seal that is extremely heavy-duty. Needless to say that it can withstand all weather conditions with ease without shrinking or developing cracks. So, be it winter or summer, you can use this product without worrying about its durability.
On top of that, it is 100% waterproof and can work even underwater; now, this is something you don't get with the normal glues on the market. From tiles to ceramics to drywalls to woods, it can be used on a wide variety of surfaces. This means that you can use this product for different DIY projects without hassle.
Not only that, but we also loved how easy this product is to work with and apply. All you need to do is unscrew the nozzle and place it in a caulk gun, and you are good to go. Lastly, it has a low odor, which is something we truly appreciate.
What Could've Been Better?
We couldn't find anything faulty with this product. That said, we would have really liked it if it had a faster drying time. Unfortunately, it takes quite a long time to dry. But since this doesn't comprise the results, we'd definitely recommend it.
GE Sealants & Adhesives brings you their Advanced Silicone Sealant, a highly reliable and premium product designed to meet various adhesive requirements. Focusing on durability and resistance, this silicone glue is formulated to withstand various environmental factors, such as freezing, UV exposure, and water, ensuring a long-lasting seal.
No products found.
Why Did We Like It?
This silicone adhesive has been tested in extreme conditions, proving that it does not shrink or crack with temperature fluctuations. It can be used on metals without leaving a discolored blemish, offering versatility across applications.
Additionally, it provides protection against stains originating from mold, mildew, and water damage. With its permanent flexibility and strong adhesion, this sealant offers an exceptional solution for various sealing jobs.
What Could've Been Better?
While it offers many benefits, there are some limitations to using this adhesive. For example, it cannot be painted, which may be a concern if aesthetics are important for the project.
Moreover, it requires a caulking gun for application, which may not be convenient for everyone, especially first-time users or those without easy access to the required tool.
Pros
Weatherproof
Resists freezing and UV rays
Will not shrink or crack from temperature fluctuations
Now that you have gone through all 4 products, are you able to make a choice? Something tells us you are still confused about which product to go with. Well, to be honest, we are not surprised as just the brand names, specifications, and a few pros and cons are barely enough information when buying the best silicone glue.
You see, there are a few other factors that you need to keep in mind in order to make the right choice. The following buyer's guide will help you in selecting the product that will meet all your requirements. As such, we strongly recommend reading the entire section carefully; otherwise, you might miss a thing or two.
Color Tint
More often than not, silicone glues are available in a wide range of color options. So, before buying, check the color mentioned on the package and ensure it's the same as the color of the surface on which you are going to apply it.
However, if you get confused, simply go with the 'clear' color option, as they work well on most surfaces.
Drying Time
The drying time is a very crucial factor that you must consider when buying the right glue for silicone. In most cases, it is advisable to go for a fast-drying product so that the users don't have to wait around too long.
That said, slow drying also helps on certain occasions, especially when there's a need to make small corrections in a project. Slow drying time allows time for moving pieces if required. So, choose as per your requirements.
Waterproof
Your silicone glue should be able to resist water, especially if it's used in bathrooms. Otherwise, water will affect the strength of the bond, and eventually, it might shrink and crack. So, before buying, make sure you check the specifications to ensure that it is resistant to water.
Versatility
Versatility is also an important factor that people often tend to overlook. Since buying silicone glue requires a significant investment, you will want to make sure that you can use it on multiple projects and a wide variety of surfaces without any difficulty. So, be sure to check the surfaces it adheres to before buying.
Steps To Glue Silicone
If you are a first-timer, you need to know the process of bonding with silicone glues. In this section, we have explained each step in detail.
Materials Required
You will need the following items to glue with silicone
Clean-up liquid
Soft cloth
Caulk gun
Silicone glue
Surface Preparation
Before you start with the process of bonding the silicone, make sure that the surface is thoroughly cleaned and free of debris. You can clean it by using water or other cleaning agents such as acetone and isopropanol.
Once you are done cleaning, let the surface dry entirely before you start the silicone bonding process. If the surface has uneven areas, ensure that you fill them up. After that, you can prepare the cartridge and put it together with a caulk gun for use.
The Process Of Bonding
We strongly recommend practicing on a piece of cardboard before applying the silicone glue to the surface. If you are able to handle it properly, you can start by applying silicone beads on one side of the surface. If the surface is too big, make sure that you use more silicone glue and lay down the beads tightly.
Now, you can join the two surfaces by exerting high pressure. If you notice some silicone glue escaping, be sure to pick it up with your finger or a spatula and wipe it off using a soft cloth.
Allowing It To Dry
This is the part where you wait. The drying time mostly depends on the silicone glue you have used. So, refer to the instruction manual that came along with it to know the drying time. In general, it takes about 24 hours for silicone adhesives to completely cure.
That said, if you can afford to wait a few more hours, we suggest you do it.
Glues for Silicone FAQs
What does ‘RTV’ mean in silicone glues?
RTV stands for Room Temperature Vulcanization. If your silicone glue is an RTV one, it means it will start curing as soon as it is exposed to air.
Can silicone sealants be painted on?
Unfortunately, glues for silicone are not paintable, unlike latex-based glues, also known as caulks.
What is the right temperature for applying silicone glue?
For best results, it’s important to apply silicone glue at room temperature.
Conclusion
So, we have finally reached the end of our review-based guide and you know that choosing the right silicone glue is not complicated.
You just need to consider a few factors to make the right buying decision. But before we call it a day, we will let you in on our favorite products from this list.
The J-B Weld is the best model overall, mainly because it sports an affordable price tag and provides a durable seal. Moreover, the GE Sealants Silicone II Household Glue & Seal is a great option if you want a product that has a low odor and is backed by a lifetime warranty.
But if you are in search of a product that dries up in a jiffy and can be used on several surfaces, you can't go wrong with the Beacon. With that, it's a wrap. See ya!
No matter how much we try to maintain our shoes, we can’t expect them to remain as good as new over the years.
Thus, if a shoe becomes worn out or its sole detaches, fixing it the right way is what we can do. But running to a nearby cobbler every time your shoes start showing problems can be quite a hassle. Isn’t it?
Instead, what if you had good-quality shoe glue at home to fix the problem? You will just have to take out the leather glue every time a repair is needed, apply it as per the instructions on the pack, and you’re good to go! Hence, purchasing shoe glue is always a better alternative.
But we understand that there’s an overwhelming number of options available, which makes the task of choosing a truly efficient glue quite difficult. That’s why we’ve put together this guide to the ten best options you can find on the market.
So, let’s get started!
Best Glues for Shoes
Here is the list of the 10 best glues for shoes that can be used to repair your shoes, reattach soles, and keep your favorite shoes looking their best.
Finding it difficult to deal with a tear in your favorite office shoes? You can trust this super-strong Gorilla Super Glue gel to get the job done. Be it thick leather shoes or boots, the formula is equally effective for all heavy-duty footwear, which is why it’s among our top recommendations.
Gel glue formula: Our thick, no-run Gorilla glue gel formula...
All purpose glue: Gorilla Super Glue is formulated for...
Why Did We Like It?
The best thing about using this glue is its controlled gel formula, which ensures you are able to apply just the desired amount on a particular spot. So, you can very well forget about any messes or inconsistent applications!
The anti-clog cap adds to its efficiency, as it prevents the glue from drying out. Furthermore, its strong formulation resists any impact to facilitate a long-lasting hold. That’s why you can rest assured that the shoe, once fixed, won’t give in easily.
Another wonderful addition to its features is its fast-setting property, as it dries to the touch in just about 10 to 45 seconds. Also, you don’t need to clamp the joined part after applying the glue.
Last but not least, the glue is super-easy to use as you just need to shake the tube once, hold it above the part to be repaired, and tap it for release.
What Could’ve Been Better?
We only wished the glue came in a larger-sized tube, as this one might not last for more than a month if used regularly. But as far as its performance is concerned, we have no complaints since it does a great job.
Pros
Prevents messes or inconsistent applications
Cap prevents drying out of the glue
Facilitates a long-lasting hold
Easy to use
Cons
Small-sized tube
Quantity: 1 Bottle | Volume: 0.71fl oz | Set Time/Dry Time: 10 to 45 Seconds | Cure Time: 24 Hours | Dry Color: Clear | Resistance: Resists Impact
If you prefer using a specialized product for shoe repairs, look no further than this Shoe Glue from Boot-Fix. Coming with one of the best formulations on the market, it’s completely safe for use on any footwear material you can think of. So, bringing this home will rule out the need for any other shoe-repairing glue.
This professional-standard glue is mainly composed of cyanoacrylate, known to be among the strongest adhesives in the world. Its extremely fast-bonding property and colossal strength set it apart from other compounds used in glues.
Another noteworthy feature is its specially formulated viscosity that can bond with different kinds of footwear materials. As such, this shoe is the best bet when you have to work on a range of shoe repair projects.
And if you’re wondering about the drying time, let us tell you that it ranks high in this regard, too, as the repaired shoe becomes ready for use within minutes. Plus, you won’t require clamping the bonded part for this product as well.
We also loved how the bonds are entirely waterproof and equally efficient in withstanding icy cold winters and blistering hot summers.
What Could’ve Been Better?
You’ve got to watch out for the packaging of this glue, as the plastic bottle and even the cap might arrive damaged sometimes. This is most probably due to wear and tear during delivery, and it’s best to report such issues to the manufacturer and request a replacement. But performance-wise, this one gets a perfect score from us.
Pros
Fast-bonding glue
Bonds well with different footwear materials
Short drying time
Entirely waterproof
Cons
Poor packaging
Quantity: 1 Bottle | Volume: 0.7fl oz | Set Time/Dry Time: 10 to 45 Seconds | Cure Time: 5 Minutes | Dry Color: Clear | Resistance: Waterproof, Resists Hot & Cold Temperatures, Moisture
Our next pick is another top performer among shoe glues, thanks to its unique formulation that has been praised by many. Packed with a slew of beneficial features, it offers the ideal strength and durability that you need for any of your shoe repairs. So, let’s move on and learn more about this incredible glue.
Rubber Toughened: Loctite’s most durable cyanoacrylate...
No Drip Or Run: No-mess formula is ideal for vertical...
Why Did We Like It?
With this glue at your disposal, you can be confident of getting ultra-flexible, water and impact-resistant bonds in any type of shoe. And what does the trick is its unique rubber-toughened formulation that you’ll find in only a few brands.
So, after your favorite pair of scandals is fixed with this glue, the bond will remain intact no matter how frequently you’re wearing them.
Another feature that really appealed to us was the patented side-squeeze design of the bottle which facilitates absolute accuracy and precise dispensation. Plus, the screw-on cap with a self-piercing opening ensures the nozzle is always clog-free and retains the freshness of the glue.
Not to forget its super-gel formula, which sets fast and is transparent, thereby maintaining the look of the bonded area perfectly.
What Could’ve Been Better?
In case you have to work on several shoes, the amount of glue in one tube might not be sufficient as it’s just 0.14 fl oz. So, it’s best to buy quite a few tubes during each purchase. We felt the manufacturer needs to look into this aspect as it might lead a section of the customers to adopt another option instead.
Pros
Ultra-flexible and impact-resistant bonds
Accurate and precise application
Cap keeps nozzle clog-free
Retains the look of the bonded area
Cons
Less glue content
Quantity: 1 Bottle | Volume: 0.14fl oz | Set Time/Dry Time: 15 to 30 Seconds | Cure Time: 12 to 24 hours | Dry Color: Clear | Resistance: Resists Water, Impact, Shock, Vibration
Dealing with the toughest of shoe repairs is not a problem with this Super Glue from Krazy Glue by your side. Its versatile formula can help fix your shoe anytime and anywhere, just that you need to tuck it along with other essentials during any trip.
Krazy Strong, Krazy Fast Bonding: Everyday fixes made easy!...
Brush-on Control: Cover large areas with ease using the...
Why Did We Like It?
To begin with, its brush-on applicator seemed to us to be the most beneficial feature. This applicator provides a sufficiently wide coverage that can also be controlled on both hard-to-reach spots and larger surfaces. So, the Krazy Glue makes it easy to tackle all bonds, big and small.
You also don’t need to worry about the freshness of the brush over time as the anti-clog bottle ensures it stays intact, with the bristles staying loose. In addition, the bonds are formed “Krazy fast,” with the shoe becoming ready for use within a few minutes.
But you must be wondering about the durability of the bonds at this point. Well, even that’s spot on since the fixed spots remain super-strong for the years to come.
What Could’ve Been Better?
Packaging can be an issue with this glue, as the package might arrive torn in several places due to wear and tear during delivery. More importantly, this might sometimes affect the glue bottle as it may become exposed. That’s why it’s essential to report such issues to the manufacturer as soon as possible.
Halfway through our list, we’ve included this highly versatile glue that’s a pro in handling any shoe repair job. Also from Gorilla, this product is especially popular for its ability to bond separated shoe soles strongly and permanently. Many customers have even testified of its ability to fix hiking shoes most efficiently.
Fast Grab Formula: Bonds in seconds, no clamping required.
Why Did We Like It?
When it’s about repairing a fault on the front portion of a shoe, we often think twice before using glue and prefer to get it done by a professional. But this product won’t land you in that dilemma since it comes in a crystal-clear form. So, rest assured that your shoes won’t look different after they’re fixed.
We were also impressed by the flexibility that this glue offered, as the bonded part never felt stiff, and the shoe wasn’t uncomfortable to wear. Plus, its strong formulation gives it the ability to create bonds with ultimate strength.
And the icing on the cake is its completely waterproof property which rules out concerns of the bond getting weaker on coming in contact with rainwater.
What Could’ve Been Better?
Perhaps the only drawback of this glue is that it takes more time to dry than several other products. You’ll have to wait for at least 24 hours to let it cure completely. So, if you’re looking for a quick fix that would make the shoe suitable for use within minutes, this wouldn’t be your best bet.
Pros
Doesn’t alter the look of a shoe
Provides flexibility to the bond
Ultimate strength in all bonds
Completely waterproof
Cons
Longer drying time
Quantity: 1 Tube | Volume: 3fl oz | Set Time/Dry Time: In Just Seconds | Cure Time: 24 Hours | Dry Color: Clear | Resistance: Waterproof
Offering great bonding power, this glue has been a favorite of all cobblers for decades. So you can count on this product to bring back any shoe to its old form. You can even order the glue in bulk or a gallon-full of it; just contact the Barge customer support, and they’ll make sure it’s delivered to your place.
Once you try this cement, you'll see why it's considered one...
Industrial use, all purpose cement provides a strong bond...
Why Did We Like It?
First of all, the TF Cement is effective on a range of shoe materials, including cotton, neoprene, and leather. This is a property you’ll rarely find in any other glue on the market, as most of them are too tough for relatively softer materials such as cotton.
Furthermore, the product is totally waterproof and free from the harmful and pungent chemical, Toluene, commonly used in many adhesives. It even takes as little as 20 minutes to dry completely, and in the next two minutes, you can put the shoe on and start your journey!
Another big advantage is its bigger size compared to other shoe glues, as it comes in a 2-fl oz bottle that’s enough to last for around six months.
What Could’ve Been Better?
We felt the design of the glue tube could be better, as it may sometimes lead to inaccurate dispensing on smaller spots. So, you must be careful while using glue to repair a minor fault in any shoe.
Another specialized glue to look out for, the Gear Aid Shoe Repair Glue can make all your shoe repair jobs smooth and efficient. It’s the perfect choice for any biker, mountaineer, or sportsperson as they might often be faced with tears or other such faults in their shoes while in action.
Make long-lasting repairs and seal leaks on hiking boots,...
Use this durable urethane adhesive (formerly Freesole) that...
Why Did We Like It?
The highlight of this glue is the double-urethane formulation that provides absolute strength to any bond and ensures it stays intact over time. Thus, it dries as a flexible, tear-proof, and rubbery joint, and your shoes remain in good shape despite years of use.
Another great benefit is the clear formula, which prevents any transformation in the appearance of a shoe after its application.
Added on to this is the exceptional abrasion resistance, which is rare to be found in shoe glues. It makes the product ideal for specialized shoe repair jobs such as rebuilding worn-out heels or creating work boot protectors.
Moreover, its waterproof property shields the bond from weakening due to sudden contact with rainwater or moisture. As for the size of this glue, that’s also bigger than many other products on the market, which is why it can easily last for at least six months.
What Could’ve Been Better?
The longer drying time taken is a factor that puts it behind other glues with similar features. This product takes at least 8 hours to cure totally, so you’ll have to wait till then to wear your favorite pair after it has been fixed.
Pros
Provides absolute strength to any bond
Dries as a flexible, tear-proof, and rubbery joint
Are you a boot lover seeking a super-effective adhesive meant for boot repairs? Then this is surely one of the best products you’ll find out there. This Boot Protector Guard has been praised by lots of boot lovers across the country as it works like magic each time, keeping your boots in the perfect shape.
Extra Tough Shoe Glue for Boot Waterproofing: Take better...
Toe Guards for Shoes and Boots: The Tuff Toe Boot Guard 2...
Why Did We Like It?
First and foremost, this glue creates bonds offering excellent heat and abrasion resistance so that your boots never weaken despite repeated use in a tough work environment. What makes this possible is the use of ballistic-grade technology in the manufacturing process, which provides great intrinsic strength to the adhesive.
Speaking of the formulation, its two-part polyurethane content is highly versatile and suitable for a variety of boots and other shoe types as well. So, be it fixing a pair of gorgeous stilettos, rugged hiking shoes, or even combat shoes, this glue will get the job done.
Even the flexibility of the bonds is commendable as your boots feel just as cozy and flexible as they were before the application. Lastly, the brand takes pride in sourcing all the raw materials and manufacturing the product entirely in the US.
What Could’ve Been Better?
We found its application procedure to be a bit complicated and lengthy, though the steps are mentioned in detail in a manual provided in the package. So, you need to be very careful with each of the steps and see to it that the application is accurate.
Pros
Offers great heat and abrasion resistance
Highly versatile
Bonds are flexible
Indigenously made
Cons
Complicated application procedure
Quantity: 1 Double Syringe | Volume: N/A | Set Time/Dry Time: N/A | Cure Time: 24 Hours | Dry Color: Black | Resistance: Waterproof, Resists Up to 742°, Fire, Puncture, Stain, Abrasion
The Amazing Goop II Max is great at establishing firm and extremely long-lasting bonds on a range of shoe materials. Thus, keeping this adhesive at home will suffice for all the shoe repairs you might need from time to time. To know more about all its features, move on to the next few sections.
Uv Inhibitors-Resists Yellowing Or Cracking Through All...
Flexible-Does Not Become Brittle Even In Cold Weather
Why Did We Like It?
The most significant feature of this glue is undoubtedly the presence of UV inhibitors which help prevent the yellowing or cracking of the bonded part during all weather conditions. Plus, the bond remains equally flexible throughout and doesn’t turn brittle even if it’s exposed to cold weather.
And if you wish to polish or paint the shoe after it’s fixed, you can easily do it without having to worry about its impact on the bond strength. The bond will be as strong as ever, and the shoe will look as good as ever!
Also, the glue is perfectly waterproof, implying that the bond won’t be affected by moisture or rainwater at all. And like a few of our other recommendations, it comes in a 2-oz bottle that’s enough for completing several shoe repairs for six long months.
What Could’ve Been Better?
This glue includes certain harsh chemicals in its formulation, which makes it a bit riskier to handle than many other adhesives. So, it’s best to wear gloves while you’re working on this product. Apart from that, we were quite satisfied with its performance.
Pros
Prevents yellowing or cracking of the bond
Provides great flexibility
Bond isn’t affected by moisture
One bottle lasts for 6 months
Cons
Includes harsh chemicals
Quantity: 1 Tube | Volume: 2fl oz | Set Time/Dry Time: N/A | Cure Time: N/A | Dry Color: Clear | Resistance: Waterproof, Resists -40°F to 180°F, UV, Cold Weather
Towards the end of our list, we’ve included the Shoe GOO, another reliable option specially meant for shoe repair jobs. It delivers a pretty decent performance in fixing all kinds of problems in shoes ranging from damaged heels to detached soles. Coming with a variety of effective features, there’s a lot you can do with this simple product.
Straight off the bat, its strong formulation bonds really fast to create a permanent joint that remains intact for years. It also provides resistance to abrasion and ensures better adhesion than most other products out there.
What’s more, it acts as the perfect sealant to patch the smallest of holes in your shoes accurately. And the bond is entirely waterproof and stays secure even through rough weather conditions.
Furthermore, this glue can be used on gloves and skateboards as well. Note that the latter requires an adhesive that offers extra traction, and this product fits the bill perfectly.
Last, but not least, it’s made entirely in the US, which makes it the ideal option for users who always prefer indigenous products for all purposes.
What Could’ve Been Better?
The much smaller size of this glue tube is its only downside, owing to which it may not last for more than a month if used frequently. So, purchasing several tubes at once will be the best way out in this regard.
Making the right choice is of paramount importance when you’re looking for shoe glue. That’s why it’s important to consider some key factors that impact the performance of these products. Making a hasty decision might lead you to derive only partial results from the product. So, here are the points that you need to keep in mind while choosing a suitable shoe glue.
Drying Time
This is a crucial consideration to make while picking the right shoe glue. While some products require you to wait for hours before they dry, it’s just a matter of seconds for others. So, your choice would depend upon whether you want the shoe to be fixed within a short duration or not.
Note that larger shoe repairs like re-attaching the sole will need glue that’s more flexible, which may take much longer to dry. Likewise, smaller shoe repairs can be fixed easily using super glues that dry quickly.
Shoe Material
The shoe glue must, of course, be suitable for the material of the shoe that you plan to use it for. So, while going through the details of a product, make sure it’s suitable for the types of shoes that you have at home. And in case you are looking to repair a specialized shoe, take extra care to ensure that you’re going for the right glue.
Versatility
You should also remember to refer to the instructions from the manufacturer about whether it can be used for multiple shoe materials or not. Also, a versatile glue should be effective for small as well as large shoe repair projects. That’s why you should check the customer reviews to ensure the product can handle both types.
Impact Resistance
You would always want the repaired shoe to remain intact throughout its use. Thus, the bond created by the glue should offer enough impact resistance to ensure that the shoe stays in good shape. For ascertaining this, you will need to refer to the customer reviews again to find out what customers have to say regarding the resistance offered.
Glue Color
Ideally, shoe glue should come in a transparent and clear form so that the repair isn’t visible. That way, the look of a shoe will be retained. Or you can opt for colorful glue products if your shoes are embellished or vibrant.
Glues for Shoes FAQs
What types of shoes can I repair with shoe glue?
Shoe glues can generally repair various types of shoes, including athletic, casual, dress, and work shoes. Performance may vary based on material and quality.
Can I use shoe glue on both leather and synthetic shoe materials?
Yes, there are many shoe glues available that work effectively on both leather and synthetic materials. Always check the glue label for recommended materials.
Can shoe glue be used to fix tears in the shoe fabric?
Shoe glues can often repair small tears in shoe fabric. However, the effectiveness will depend on the fabric type, location, and extent of the damage.
Can shoe glue repair sole separation?
Yes, shoe glue is particularly effective at repairing sole separation. Apply the glue evenly and follow the manufacturer’s instructions to ensure a long-lasting bond.
Can I use shoe glue to attach shoe accessories?
Shoe glue is suitable for attaching a variety of shoe accessories, such as patches, studs, spikes, and ornaments. Ensure proper adhesion by following the manufacturer’s instructions.
How do I apply shoe glue to my shoes?
Thoroughly clean the area to be glued, apply a thin layer of glue according to the manufacturer’s instructions, press the pieces together, and clamp if necessary. Allow the glue to dry for the recommended time.
How do I remove excess glue from my shoes?
To remove excess glue, gently use a fabric or a brush moistened with a compatible solvent. Depending on the glue, this may be rubbing alcohol or acetone. Always test a small area first to ensure no damage.
Conclusion
With this, we have reached the end of our guide.
We hope you’ve been able to zero in on the most suitable shoe glue by now. But in case you’re still hesitant, we’d suggest recapitulating your needs and going through the buyer’s guide once more. This will surely help clear all your doubts.
Before we wrap up, we’d like to share with you our favorites from the list. If you are searching for a product that’s specially made for handling shoe repairs, the Boot-Fix Shoe Glue will be an ideal choice.
However, if you have no such preferences and are searching for a truly effective glue suitable for a variety of shoe repairs, it will be best to go for the Gorilla 7700104.
Let us know whether you agree with our verdict in the comments section below. See you soon with more interesting guides. Till then, take care!
Plastic is a tricky material to work with, especially when bonding them to each other or other materials.
With so many types of glues available, it can be hard to determine which is the right one for the job. Most plastics are pretty flexible, which can, in turn, affect the strength of the bond. However, certain glues and adhesives have been formulated explicitly with the nature of plastic in mind.
Whether you are working on a large project like repairing boats or a smaller craft project, using the right adhesive can make a world of difference. And to help you find the best glues for a plastic surface, we have compiled the top options as well as a guide on how to pick the best one.
With that being said, let’s get into it!
Best Glue For Plastic
So whether you're repairing a broken plastic item or creating a new plastic project, you can be confident that these glues will do the job right. Without further ado, here's the list of the 7 best glue for plastic.
Making repairs and fixing chips and cracks is a cinch with this Gorilla super glue at your side. It can be used on various materials, acting as either wood glue or plastic glue, making it a truly multi-purpose option. A high-strength bond that lasts can be achieved with a drying time that is much faster than common adhesives.
Anti Clog Cap: Keeps glue from drying out. It's Gorilla...
Why Did We Like It?
Working with the Gorilla super glue was a breeze, thanks to its thick formula. Most glues have a thin consistency that makes applications a bit messy at times. But we didn’t face any issues while applying this one on plastics and different materials, even for vertical orientations.
Another handy feature is an accessory that Gorilla included in their glue sets. A metal tip helps keep the nozzle free from buildup. Of course, the amount of buildup is also controlled by the anti-clog design of the tip, unlike other adhesives that can prevent any glue from coming out of the package.
As for the strength of the glue, it is a potent adhesive that can bond in no time at all. Gorilla claims that the glue can achieve a strong bond in less than a minute. This means no clamping is required to fully cure the glue.
What Could've Been Better?
Although the Gorilla glue has a thick consistency, it can impact its accuracy on the target material. This is mainly due to the design of the bottle which is difficult to wield with one hand to get the glue out.
Pros
Versatile use
No clamping needed
Fewer harsh chemicals
Fast drying time
Cons
Formula is difficult to extract
Type: Cyanoacrylate | Material Compatibility: Metal, Plastic, Wood, Ceramic, Leather | Set Time: 10-30 sec | Cure Time: 24 hours | Max Temperature Resistance: 200°F | Waterproof: No | Bond Strength: 3200 PSI
This two-part epoxy from Loctite has a unique design that eliminates measuring and mixing the two parts for application. It can be used on various materials, like plastic, metal, and glass, even acting as a filler that provides a strong bond.
A crucial step in getting the strongest bond possible out of an epoxy kit is mastering the ratio that each part should be mixed. But Loctite solves this by including both in a syringe design that mixes the parts for you. For those who are not as experienced in working with epoxy, this can save you an extra step in the application process.
Moreover, the nozzle design controls the amount of epoxy coming out as well as the pressure. The limiter helps for a more stable application that is especially useful for precise work and eliminating clogging.
Additionally, the formula is incredibly robust in its resistance to various external factors. From the water, and moisture to solvents and chemicals, it can hold its bond with ease. As a bonus, it can be treated after curing for sanding or painting to achieve a seamless, clean look.
What Could've Been Better?
One downside to using a self-mixing epoxy is the limit on how often you can use it. Loctite only includes two nozzles in this kit, so if you plan to use it beyond two projects or sessions, you may want to stock up on extras.
Pros
Waterproof formula
Does not shrink
Can be tinted, painted, and sanded
Easy application
Cons
Only two nozzles included
Type: Epoxy resin | Material Compatibility: Metal, Plastic, Ceramic, Wood | Set Time: 5 min | Cure Time: 24 hours | Max Temperature Resistance: 212°F | Waterproof: No | Bond Strength: 2500 PSI
Bonding in seconds, this super glue from Rhino Glue is both versatile and robust. Whether you are bonding plastic, cement, or glass, there is little that the Rhino superglue can’t handle. The unique clear formula helps in precise applications to help you get the strongest bond.
Bonds in seconds: plastics, vinyl, wood, rubber, metals,...
Why Did We Like It?
One benefit to using a clear consistency super glue like this is seeing where the glue is actually being applied. This is especially helpful if you are working on small pieces or want a clean result. It can also help create a more cohesive bond between the two surfaces, as you can apply it to only the contact areas.
Furthermore, once the glue has been allowed to dry, its waterproofing and impact absorption properties can help extend the bond's lifespan. They also protect the underlying surface from potential damage from moisture or undue pressure.
Applying the glue is an effortless process, thanks to the simple squeeze design bottle, and it dries out within about 20 minutes. Compared to other adhesives, this drying time is incredibly fast for the resulting bond created.
What Could've Been Better?
It should be noted that this particular bottle from Rhino Glue does not have the largest of capacities. If there is a large area to be covered, or if it is needed for extensive use, buying a couple of bottles at a time is recommended.
Pros
Precise application
Stress-resistant bond
Fast bonding time
Easy to use
Cons
Small volume bottle
Type: Cyanoacrylate | Material Compatibility: Metal, Plastic, Wood, Ceramic | Set Time: 15 sec | Cure Time: 24 hours | Max Temperature Resistance: 200°F | Waterproof: No | Bond Strength: 3300 PSI
A two-part epoxy cold weld system from J-B Weld, this Marine Weld is ideal for surfaces that may see regular contact with water. Plastic, cement, and other such durable surfaces will benefit from the strong bond that can enhance their durability against external damage.
J-B WELD MARINEWELD: A two-part epoxy cold weld system that...
CURE AND SET TIME: After mixing the tubes at a 1:1 ratio, it...
Why Did We Like It?
First and foremost, this epoxy glue from J-B Weld is extremely resistant to chemicals and moisture. The formula was designed to be used on marine surfaces, so it is safe to say the waterproofing capabilities are second to none.
Apart from that, it can be painted on, sanded, molded, and even drilled once cured. All these options allow a cleaner finish that can potentially hide the seam of the surfaces. If aesthetics are a priority, manipulating the bond can make for a seamless, high-quality result.
Additionally, it has a straightforward application process in terms of the mix ratio of the epoxy and hardener. A one-to-one mix means you can easily gauge how much of each part is required to get the job done.
What Could've Been Better?
Although this particular epoxy is excellent at resisting moisture and water, impact and stress are another story. The bond itself is strong; however, it is susceptible to cracking under extreme pressure or constant abrasion. Those planning on using this epoxy on high-contact surfaces especially should take note of this.
Pros
Water and chemical-proof formula
Applicable on a range of materials
One-to-one mix ratio
Dark grey color once cured
Cons
Susceptible to break under heavy force or abrasion
Type: Epoxy resin | Material Compatibility: Metal, Plastic, Wood, Ceramic | Set Time: 4-6 hours | Cure Time: 15-24 hours | Max Temperature Resistance: 550°F | Waterproof: Yes | Bond Strength: 3960 PSI
Testors have formulated this glue as an adhesive plastic model cement that grips rubber particles with ease. It is exceptionally effective at joining different plastic types, from flexible plastics to more robust surfaces. Packed with an extra tube and four precision tips, this makes for a soil glue kit.
Bonding plastic can be challenging, especially when working with different kinds of plastics. And this Testors cement glue can help you achieve just that with absolute ease. Thanks to its specially designed formula, it is meant explicitly for plastic surfaces, be it hard or soft plastics.
Furthermore, it does not involve a lengthy application process. It can be applied straight out of the tube using one of the included precision tips. There is no need to struggle with mixing, lining up the glue, or cleaning up any excess.
So long as the cap is replaced after every use, the formula won’t harden or become unusable. This incredibly long shelf life makes it a value purchase that lasts for a long time.
What Could've Been Better?
While using this plastic cement glue, there was an issue with the structural integrity of the tube while storing it away. The tube needs to be rolled up to prevent the formula from coming out consistently, which may cause small tears to form along its edges. And the resultant gaps can potentially dry out the formula prematurely.
Pros
Easy-to-use tube design
Create a strong and permanent bond
Precise application
Specially manufactured for bonding plastics
Cons
The tube may get damaged if rolled up
Type: Cement | Material Compatibility: Plastic, Metal | Set Time: N/A | Cure Time: 24 hours | Max Temperature Resistance: N/A | Waterproof: No | Bond Strength: N/A
Krazy Glue takes a unique approach to apply adhesives with this super glue that incorporates a brush into the cap’s design. Using a brush to apply glue has several benefits that can create a lasting bond between various materials.
Krazy Strong, Krazy Fast Bonding: Everyday fixes made easy!...
Brush-on Control: Cover large areas with ease using the...
Why Did We Like It?
Truly a one-of-a-kind bottle design, the brush attached to the bottom of the bottle’s lid does come in handy when applying the adhesive. For one, it makes covering a larger area much more accessible than using traditional methods. It can also be spread better and evenly, so the bonding strength is pushed to its full potential.
Furthermore, the bottle design of the superglue limits the frequency of clogs. A tight fit on the lid ensures the glue doesn’t dry out prematurely. As an extra layer of security against clogging, the bristles on the brush are designed to not bunch together into clumps.
As for the application process of this super glue, it couldn’t be more straightforward. Simply dip the brush into the formula, then run it across the surface. The brush does all the work of making an even layer, giving you more control over where it is being applied.
What Could've Been Better?
While using a brush as an applicator can have its perks, it also limits the bottle to this single method. There were instances of the brush becoming detached, in which case the formula becomes inaccessible without a precise nozzle for application. This risk should be considered if you are contemplating using this method of application.
Pros
Simple application
Reduced frequency of clogging
Wide surface coverage
Bristles don’t clump up
Cons
Brush adhesion can come undone
Type: Cyanoacrylate | Material Compatibility: Metal, Plastic, Wood, Ceramic, Rubber | Set Time: 10 sec | Cure Time: 24 hours | Max Temperature Resistance: 180°F | Waterproof: No | Bond Strength: 2600 PSI
With low viscosity, this instant adhesive from 3M is a solid glue for plastic or any other substrate. The formula is manufactured to cure quickly on these materials without causing too much distortion. Rounding off the package, a unique pinch container helps keep the adhesive flowing for easy application.
Bonds to a number of substrates, including plastics and...
Precise application: pinch container for a precise drop or...
Why Did We Like It?
3M has designed this container to be easily accessible to make one-hand applications more manageable. A pinch is all that is needed to pull out the adhesive from the container. Depending on the amount of force applied, the formula will come out as drops or a steady bead for precise or ranged application.
Additionally, the formula has a low viscosity, which works well in the case of plastics and other similar materials. By permeating the surface, the resulting bond is much deeper and solid than a superficial surface adhesion.
Keeping the curing time to a minimum is another one of the benefits of using this adhesive. The workflow can be kept moving without having to wait for the adhesive to fully cure.
What Could've Been Better?
As stated before, all that is needed to pull the formula from the container is a pinch with varying degrees of pressure. Combined with the low viscosity, this feature can cause cases where the adhesive is prematurely ejected and cause a mess. Hence, caution should be practiced while using this particular adhesive.
Pros
Fast curing time
Durable, lasting bond
Low viscosity formula
Precise application
Cons
Formula is ejected quickly
Type: Cyanoacrylate | Material Compatibility: Plastic, Rubber | Set Time: 10-30 sec | Cure Time: 24 hours | Max Temperature Resistance: 180°F | Waterproof: No | Bond Strength: 1500 PSI
The best plastic glue is the one that can form a solid bond that lasts. Before you settle on a particular adhesive, there are a few factors to consider to find the right glue for your use. To ensure you have the best quality bond, keep these factors in mind while making your decision.
1. Types Of Adhesives
Among the many adhesives on the market, there are mainly two camps that plastic glue options fall under. The first is epoxy adhesives that demand more attention in the application. The second would be standard superglues that are comparatively easier to use and apply.
Plastic bonding using an epoxy putty mixture can be challenging for those who are unfamiliar with the procedure. However, there are specially designed bottles that can aid novices by mixing the proper ratio for them.
On the other hand, super glues make for a much simpler plastic bonding experience. As far as the various application processes of glue for plastic, this is relatively straightforward. Simply uncap the nozzle and apply the formula to the desired surface.
2. Durability
Tensile strength and various resistance to external factors are crucial features to look out for in adhesives. An impact-resistant bond, for example, keeps the plastic parts together even when exposed to trauma. Sealants are a type of adhesive that can be applied to the surface of the material to add increased durability and resistance against specific factors.
Additionally, a water-resistant adhesion is a valuable feature to have, especially on a non-porous material like plastic. A water-resistant glue for plastic acts as a barrier to protect the underlying material.
While heat may be essential to fully cure the adhesive, too much can distort the plastic. That is why a heat-resistant formula is recommended if the treated surface is to be exposed to high temperatures.
3. Ease Of Use
Factors like how easily the adhesive can be cleaned up and the time taken to dry can significantly impact the user experience. Depending on your needs, these features can be adjusted to find a suitable match for you.
Among adhesives, there are various degrees of drying and curing times involved. There is a rubber instant adhesive on one end of the spectrum that can chemically bond and dry instantaneously. On the other end, some glues may take a few hours to fully cure.
The glue dries at different speeds, depending on the flexibility of the material. With more flexible surfaces like fabric and plastic, the material must be broken down to some degree to attain a strong bond.
Furthermore, cleaning up excess applications of these adhesives can be a chore if you are not careful. Common methods include mineral spirits and denatured alcohol that are rubbed on after the glue dries. Steel wool or warm soap water are other popular cleaning methods used on other materials to have a more professional, finished look.
Glue For Plastics FAQs
Can you use hot glue on plastic?
Hot glue can be used on some types of plastic, but it may not be the best choice for all applications. It is great for bonding two surfaces quickly but may not hold up well over time if the plastic is exposed to moisture or high temperatures. For a stronger bond, consider using epoxy glue.
What type of glue is best for bonding plastic to metal?
For bonding plastic to metal, a strong and durable adhesive is recommended. Epoxy glue is a good choice for this application as it forms a strong bond between the two materials.
Can you use super glue on plastic?
Yes, superglue can be used on plastic. However, it may not be the best choice for all types of plastic as it can become brittle over time and may not hold up well under stress. For a stronger bond, consider using epoxy glue.
How do you remove glue from plastic?
To remove glue from plastic, you can use a solvent such as acetone or rubbing alcohol. Apply the solvent to the glue and allow it to sit for a few minutes. Then, use a scraper or a cloth to remove the glue. Be sure to wear gloves and work in a well-ventilated area.
Can you weld plastic instead of using glue?
Welding is not an option for bonding plastic as it can melt the plastic and cause damage. Glue is often the best option for bonding plastic. However, some plastics can be heat-welded using specialized equipment and techniques.
Conclusion
Hopefully, you now know a bit more about the different types of plastic bonder adhesives available and how to choose the best one. Finding high-quality glue and creating permanent bonds to adhere to plastic can be challenging. All that is left now is to choose the right one for you.
Our all-around choice has to go to the Gorilla Gluefor a thicker formula that is easy to apply and stumps many adhesives. However, if you are looking for epoxy, the self-mixing Loctitebottle design is effortless to work with.
Whether you are looking for a quick repair or a long-term project, suitable glue in the right hands can make all the difference. Invest in the proper tools, and you’ll be sure to get the job done in no time at all!
Although we as a society are shifting towards a plastic-free environment, we have not managed to remove all its uses, have we? However, today's discussion is not going to be about plastics that we use every day. Instead, we'll be discussing the creative subject of 3D printing.
Any 3D printing job is not possible without high-quality glue, so we've curated a list of the best adhesives for bonding PLA.
PLA or polylactic acid is a biodegradable form of plastic that is safe for the environment. Since it is thermoplastic, we can use it to mold and shape it into various forms. This is why it is a favorite amongst those who like to create 3D models with printing.
So, without further ado, let's find out which glues are best suited to bond PLA and other plastics for 3D printing.
Best Glue For PLA
Whether you're looking to join two PLA parts together or fix a broken 3D-printed object, these glues will help you get the job done. So, without further ado, here's the list of the 9 best glue for PLA.
We had to include one of the most popular glue brands on our list. This particular model is the 7501201 by Gorilla, which is a pretty versatile product. The distinctive feature of this product is that it has a dual dispenser. Find out more about it below.
2 ways to dispense: Our classic clear Gorilla glue with 2...
All purpose glue: Gorilla Super Glue is formulated for...
Why Did We Like It?
First off, we liked the tough impact this glue has on various types of materials. It might not be visible to the eye, but the product has unique rubber particles that increase holding strength.
Another noteworthy feature of this glue is its multipurpose nozzle. The dispenser can be switched to a nozzle or a brush whenever you need it. This added option gives better control and accuracy when applying a fine or delicate line. The fine bristle brush is perfect for controlled coverage making the application process mess-free.
Moreover, if you want to use the brush applicator, all you have to do is unscrew the cap. Next, wipe the brush on the inner rim of the bottle to remove the extra glue. Finally, you do not need to wait for long after application since a thin coat of the product dries within a minute.
What Could've Been Better?
When it comes to critical issues, we didn't think there were any significant ones worth mentioning. However, we do believe it is essential to note that if the packaging is faulty, you may receive a glued-up packet. This might cause issues in applying since it will have dried up.
Pros
No clamping required
Quick and easy to use
Fine bristles for easy application
Mess-free
Cons
Faulty packing may dry the glue
Type: Cyanoacrylate | Material Compatibility: Metal, Plastic, Wood, Ceramic, Leather | Set Time: 10-30 sec | Cure Time: 24 hours | Max Temperature Resistance: 200°F | Waterproof: No | Bond Strength: 3200 PSI
Next, we have the Thick Viscosity Glue by the brand Glue Masters. This is an industry-strength cyanoacrylate adhesive that comes in bottles of 2 ounces each. If you are looking to add all-purpose glue to your tool or repair box, this is the ideal candidate for that.
Firstly, what's unique about this product is its viscosity. The product is pretty thick, so there is no chance of it running and spilling around while applying. In fact, this option has the perfect viscosity and gluing power for all types of materials like wood, paper, glass, plastic, and metals.
Apart from that, if you like DIY projects, there are various ways in which this glue will help you. It's the perfect option for making and completing dolls, models, and puzzles for kids and adults. This clear glue is pretty much all you need for creating new toys or mini models of planes, trains, and boats.
Also, this product comes in handy for carrying out repairs in and around the house. In that sense, it is a beneficial addition to your toolbox. The 2-ounce container should be enough to handle big or small fixing jobs. Finally, it easily handles household repairs like shoe fixing and small carpentry projects involving wood.
What Could've Been Better?
While some online reviewers claimed that this product was the best and gave excellent value for money, there were some who were not happy.
A major concern among users was that this glue did not adhere correctly to fabrics and plastic. When we tried it ourselves, we noticed that it did not manage to bond fabrics. Well.
Pros
No-spill formula
Glues all kinds of surfaces
Many bottle varieties
Cost-effective
Cons
Does not bond fabric
Type: Cyanoacrylate | Material Compatibility: Metal, Plastic, Wood, Ceramic, Rubber, Leather | Set Time: <10 sec | Cure Time: 24-48 hours | Max Temperature Resistance: 200°F | Waterproof: No | Bond Strength: 3000 PSI
Here we have a unique gluing solution called "Bedweld" by Layerneer. This product is described as a professional-grade 3D printing adhesive. Each bottle of fluid glue comes in a packaging of 4 ounces each. This is the perfect solution if you are having trouble with parts warping or detaching from the printer bed.
THERMAL DYNAMIC COATING: Based on science, works like magic;...
LONG LASTING: Print several times on a single coating;...
Why Did We Like It?
Right off the bat, we liked the super-strong formula, which is designed to help you if you have challenges related to printing and printer beds. Essentially, "Bedweld" is intended to enhance the print surface so that it grabs hold of the most critical first layer. This step occurs when the build surface is hot and the adhesive clings onto it with a "gecko-like" grip.
And, after the print is done, the coating changes as the printer bed cools down and relaxes its hold allowing the user to remove parts. The good thing is that detaching will not require any tools, so there is no need to worry about chipped glass or broken pieces.
Apart from that, we need to discuss the unique applicator that allows for smooth application creating zero messes and spills. Once you apply the product, the coating dries quickly to form a film over the surface, which is not sticky and thus does not leave any clogs or residue on the nozzle.
What Could've Been Better?
There were many reasons why we liked this product which is why we may have overlooked some of its flaws. But, that does not mean that this product does not have any. There was one incident in which we realized that the glue sticks to glass alright but sometimes fails to stick to ABS or PLA.
Pros
Parts stick to each other when cooled
Long-lasting solution
No odor
90-day manufacturer guarantee
Cons
Does not stick to ABS and PLA
Type: Adhesive | Material Compatibility: 3D Printing Bed Surface | Set Time: N/A | Cure Time: N/A | Max Temperature Resistance: N/A | Waterproof: Yes | Bond Strength: N/A
Up next on the list, we have the 15187 model by the brand Super Glue. This brand has been a well-known and trusted option for adhesives in the market since 2005. It is available for purchase in 0.48-ounce tubes, but you can grab the 12-pack offer online.
Original Super forms the strongest bonds on clean breaks of...
Super Glue for wood, ceramic, fingernails, metal, pottery,...
Why Did We Like It?
One of the features we liked about this product was its durable formula which formed the strongest bonds on various materials. Do you want to bond ceramic, metal, plastic, china, jewelry, or pottery? If yes, then you will find many good uses for this product.
Another thing we liked about this option was its fast-drying formula which takes not more than 10 or 30 seconds to set. Of course, the drying time does change a bit depending on the material that needs to be glued together. We found that glass, ceramic, china, and pottery bonded pretty quickly at 30 seconds. Meanwhile, metal and wood took up to a minute to set and harden.
Furthermore, this product comes in small tubes which are easy to hold and maneuver. Additionally, the nozzle is well-designed and precise, which prevents any unwanted drips and leaks while applied on a surface.
What Could've Been Better?
We actually liked this product as it managed to bond surfaces efficiently as advertised. However, we did have complaints about the packaging. The 12-packet container that it comes in was too tight and required additional tools to open it.
Pros
Reusable storage
Versatile glue
Paintable and sandable
Low cost
Cons
Poor packaging
Type: Cyanoacrylate | Material Compatibility: Metal, Plastic, Wood, Ceramic, Rubber | Set Time: <10 sec | Cure Time: 24 hours | Max Temperature Resistance: 200°F | Waterproof: No | Bond Strength: 3200 PSI
Another glue we decided to include in our list of best glues was the 1363589 model by Loctite. The glue comes in small bottles with 0.48 ounces of product per packet. This super glue has the consistency of gel for smooth application, and it sets clear.
Rubber Toughened: Loctite’s most durable cyanoacrylate...
No Drip Or Run: No-mess formula is ideal for vertical...
Why Did We Like It?
Let's start with what we like the most about this product. This instant adhesive is rubber toughened which resists jarring and impact, if any. It also can withstand moisture and freezing temperatures and scoring sun, making it an excellent glue for outdoor projects.
The next thing we liked about this glue is its versatility. You can use it to bond materials like metal, rubber, wood, ceramic, leather, paper, and plastic, among other things. And, even though the glue bonds well, it allows the user some time to move around the materials. It doesn't dry instantly, so you can use this for projects that take longer to set and arrange.
Moreover, if talk about the applicator, it is designed to be firmly in your hand, giving a sturdy grip. This makes it suitable for use over long hours too. Apart from that, you need not worry about any yellowish layer of the film appearing after the glue dries because it is absolutely transparent after drying.
What Could've Been Better?
When we first used this product we were quite satisfied with the results. The glue stuck two parts of wood efficiently, and after drying, it did not move from the place at all. However, the disappointing part was when we tried sticking plastics. It refused to dry and remained in liquid form for the longest time.
Pros
Can be used on most surfaces
Builds strong bond
Durable product
Impact and water-resistant
Cons
Does not stick plastics
Type: Cyanoacrylate | Material Compatibility: Metal, Plastic, Wood, Ceramic, Rubber | Set Time: 10-30 sec | Cure Time: 24 hours | Max Temperature Resistance: 212°F | Waterproof: No | Bond Strength: 3200 PSI
Here we have another high-quality glue that is specially designed to bond plastics. Generally, this product comes in a packaging of 5 fluid ounces per piece, but there are also other sizes for you to choose from. Read on to find out more about this product.
No products found.
Why Did We Like It?
If you are looking for a glue that effortlessly bonds with plastics, this option might be a perfect choice. This glue bonds with rigid PVC, ABS, styrene, butyrate, and polycarbonate to themselves as well as to each other. In short, you can expect this product to work as an adhesive for all types of plastics and porous surfaces.
Along with that, the formula is a robust solvent cement for bonding acrylic with a tensile strength of 1700 pounds per square inch. In fact, the formula is so tough; it can withstand freezing temperatures as well.
However, this product does not dry instantly, and that doesn't have to be a disadvantage. There are some projects where you need to be careful about the placement of wood or plastic so that it aligns evenly. That is when a slow drying glue saves the day; it allows you to work carefully without the stress of the adhesive drying quickly.
What Could've Been Better?
Overall, we liked this product and thought many people working with plastics could use it too. However, there seems to be some issue with the packaging. We ordered two boxes and one of them came damaged. The glue tube was punctured and leaking, and we couldn't replace it.
Pros
Low VOC content
Adequate viscosity
Moderately priced
Dried clear
Cons
No replacement policy
Type: Solvent-based | Material Compatibility: Acrylic, Polycarbonate, ABS, PVC, Nylon | Set Time: 5-10 min | Cure Time: 24 hours | Max Temperature Resistance: N/A | Waterproof: No | Bond Strength: N/A
Yet another glue we included in our list is the CECOMINOD040301 model by the brand Starbond. The product is available in tubes of 2 fluid ounces and a bunch of different nozzle sizes. Read on to know more about its gap-filling and repair properties.
✅ PREMIUM SUPER GLUE, SINCE 1988: For over 35 years,...
✅ GLUE LIKE A PRO: Great for gap-filling applications,...
Why Did We Like It?
The first thing we need to mention is that this product is quite popular for its repair and gap-filling properties. It is a premium ethyl cyanoacrylate superglue that has industrial-grade strength. Since the glue is thick and viscous, you can pour it into gaps to even out a surface. The perfectly viscous solution measures 2000 cPs making it the same thickness as fresh honey.
Moreover, these properties make it the perfect solution for heavy-duty bonding. It is no surprise that you will find it used for fletching in archery and fragging coral reefs. Moving on to the accessories, the product comes with different nozzle types which do not clog over time.
Finally, this brand is trusted mainly because of its long shelf life and lifespan. It even manages to tolerate sub-zero temperatures if it is sealed correctly.
What Could've Been Better?
We didn't find any significant flaws to point out because the high-quality adhesive managed to glue everything and anything. However, the only thing we noticed was that it took too long to dry on some surfaces. We tried to bond a broken plastic toy, and it took more than an hour to dry.
Pros
Long shelf life
Clog and mess-free
Affordable
100% replacement guarantee
Cons
Dries slower on some plastics
Type: Cyanoacrylate | Material Compatibility: Metal, Plastic, Wood, Ceramic, Rubber, Leather | Set Time: <10 sec | Cure Time: 24-48 hours | Max Temperature Resistance: 200°F | Waterproof: No | Bond Strength: 4000 PSI
Next, we have one of the few types of glue we reviewed which were not in liquid form. As the name suggests, this 3D Printer Glue Stick by ACEIRMC is specially designed for bonding 3D elements. Read on to find out its applications.
Let's start with the unique features of this adhesive. It is essentially a solid green gum that is non-toxic, acid-free, and easy to apply. The product is highly viscous and dense, making it easy to solidify after application.
Moreover, the application is pretty easy too. First, spread the glue on the hotbed printing area and allow the cooling process to finish. Just lightly apply the glue to the printing bed; there is no need to cover the whole surface. Once the build plate has cooled down enough, gently release the 3D print. And that's it! It's this simple to use this glue for prints.
Also, the glue stick lasts for a long time, with one stick being more than enough for over 100 prints. You can also use these glue sticks to remove 3d models easily and apply them in various crafts, projects, and artworks.
What Could've Been Better?
When we picked this up at the store, we had a few doubts about its quality because of the glue stick appearance. However, it worked just fine for us! But not everyone had the same experience; some online reviews did not find the adhesion strong enough to make 3D prints.
Pros
Non-toxic and acid-free
Easy release and application
Perfect for multiple uses
Affordable
Cons
Not reliable
Type: Adhesive | Material Compatibility: 3D Printing Bed Surface | Set Time: N/A | Cure Time: N/A | Max Temperature Resistance: N/A | Waterproof: Yes | Bond Strength: N/A
Here we have another glue meant explicitly for 3D printing and heated print beds. One bottle comes in a packaging of 4 fluid ounces per bottle. Also, this adhesive can be used in multiple types of hotbeds; read ahead to know the details.
We liked this product for various reasons, but the feature that it is designed for stood out to us the most. The adhesive is perfect if you need to glue PLA, ABS, PETG, and TPU. It also works on borosilicate glass, PEI, BuildTak, Kapton, and other bed surfaces.
Furthermore, since this is a starter pack, you get valuable tools for beginners and advanced users alike. The package includes a detailed quick-start guide, a custom sponge brush, leveling cards for hot and cold leveling, and a beveled spatula.
In essence, the T-80 was specially engineered to solve common problems which arise in 3D printing projects. It takes care of warping issues and helps to realize the parts when complete. Finally, this adhesive is hassle-free and pretty easy to clean and wipe. Also, it is water-soluble, non-toxic, chemical-free, and virtually odorless.
What Could've Been Better?
Like the other glues on our list, we liked this brand and model too. But every product has its flaws, and the T-80 is no exception. While testing this glue, the first three prints turned out just fine, but the last print formed a warped product, raising questions about its consistency.
Pros
Overcomes warping issues
Odorless
Certified safe to use
Cost-efficient printing
Cons
Inconsistent product
Type: Cyanoacrylate | Material Compatibility: Metal, Plastic, Wood, Ceramic, Rubber, Leather | Set Time: <10 sec | Cure Time: 24-48 hours | Max Temperature Resistance: 200°F | Waterproof: No | Bond Strength: 2900 PSI
Now that you have seen the good and not-so-good aspects of each option, it's time to determine what makes a good glue for PLA. Here are a few things to keep in mind before finalizing on one glue-
Glue Flexibility
Different glues have varying degrees of viscosity, thickness, and flexibility. When we talk about flexibility, we mean the degree to which the product can mold into the surface or substance.
Adhesives like superglue are rigid, and you cannot manipulate them much. On the other end, you have liquid glues, which are more flexible and can fit into the tiniest corners and spread on surfaces evenly.
Drying Time
The drying time can vary from a few minutes to a few hours. The instant-drying ones will not require more than 5 minutes in total to settle and dry in small quantities. Others need to be left alone for hours and will require clamps to hold them in place to allow them to set.
If your project cannot be clamped, select a quick-drying option. But, keep in mind that you'll have to work way faster on these faster-drying adhesives.
Appearance
How obvious is your repair work going to look? This depends on a few factors. The placement of the repair seams and the finish of the glue contribute to the final appearance. Some adhesives leave a visible film or seam, which might not look smooth and even. Others leave a yellowish color after drying.
Considering these factors is essential if you cannot compromise on the appearance of your project. A clear-drying glue that spreads thinly and even is the most aesthetically pleasing for most 3D print works.
Effects Of Gluing
Some glues might undergo chemical reactions when bonding and sealing two pieces of materials. Some of them may heat up because of this chemical process. If the plastic or PLA can not handle additional heat, you'll have to be careful not to use these glues on your surface. If care is not taken, the soft plastics can melt irreversibly with the wrong adhesive.
Surface
In this article, we are mainly discussing the glues for PLA and plastics. However, if you are using these glues for other surfaces, it's better to check beforehand if they are compatible. Also, if your build needs to be sanded after glue, select an adhesive that has the ability to sand down if required.
Glue For PLA's FAQs
What is the best glue for PLA?
The best glue for PLA is typically a cyanoacrylate or epoxy-based adhesive. Cyanoacrylate glue, commonly known as super glue, is a fast-drying and strong adhesive that works well for small or intricate PLA projects. Epoxy-based glues provide a more robust and durable bond for larger or heavier PLA objects.
Can you use hot glue on PLA?
Yes, hot glue can be used on PLA, but it may not provide a strong bond. Hot glue can be a good choice for temporary or low-stress applications. However, for more robust applications, it is recommended to use a cyanoacrylate or epoxy-based adhesive.
How do you glue PLA together?
To glue PLA together, first, make sure the surfaces are clean and dry. Apply a small amount of cyanoacrylate or epoxy-based glue to one surface and press the two pieces together. Hold the pieces in place for a few minutes to allow the glue to dry and set.
Can you use acetone to glue PLA?
Acetone can be used to fuse PLA together, but it is not recommended as a glue. Acetone acts as a solvent, melting the PLA and fusing the pieces together. However, this technique is best used for joining large parts and not for intricate or small parts.
Can you weld PLA instead of using glue?
Yes, PLA can be welded together using a specialized 3D printing pen or welding tool. This technique melts the PLA and fuses the pieces together. However, welding is typically used for larger PLA parts and not for intricate or small parts.
How do you remove glue from PLA?
To remove glue from PLA, use a solvent such as an isopropyl alcohol or acetone. Apply the solvent to the glue and let it sit for a few minutes. Then, gently scrape off the glue with a plastic scraper or brush. Be careful not to scratch or damage the PLA surface.
Can you use PVA glue on PLA?
PVA glue is not recommended for bonding PLA. While it can work on some types of plastics, it does not provide a strong bond with PLA. It is recommended to use a cyanoacrylate or epoxy-based adhesive for bonding PLA.
Conclusion
So, here we reach the end of our reviews and buyer's guide. We hope our reviews helped you determine the good and the underwhelming aspects of each option. Ultimately, you can weigh the pros and cons yourself and decide on a final product.
Our favorite glue, however, was Layerneer 3D printing adhesive. It was the most versatile glue with a super firm grip for all kinds of home repairs. Another glue worth mentioning is the 7501201 model by Gorilla. We liked it because of the nozzle options, and the adhesive itself is durable.
While making jewelry, the first thing that you will realize is that you have to work with precision. But messy glues can cause problems in this case.
The best glue for jewelry is one of the indispensable tools that need to be in your craft box. Now, you will find a variety of jewelry glues on the market but not every option will give you the same results.
While some will provide you with a great option for jewelry repairs, others might work well for bead jewelry. Then there are products that will not turn yellow because of UV light. You can use these options for jewelry made for rough and everyday uses.
To make it easier to choose, we will recommend some of the top options, which will help you find the best glue for jewelry. We have also added a buyer’s guide towards the end to ensure that you make the right choice.
If you are into jewelry making with metal pieces, then Aleene's 21709 can be a perfect choice. It will offer you a hoard of benefits and also help you with all kinds of DIY projects. You can purchase one tube for making 2-3 pieces of jewelry.
This jewelry glue comes in a tube with a gel formula inside. It can flow smoothly and is easy to apply. It will flow out easily once you turn the tube towards the beads. We recommend using gloves and newspapers while working. Place the newspaper well before you keep the jewelry pieces on top.
To top it all, the glue for jewelry will dry to form a clear transparent layer that is very strong. It can be stretched, but the bond will not break. We used it for our art and craft classes, and it worked out well.
Next, you can use it on a variety of surfaces, including glass, metal, as well as stones. Plus, the nib of this glue is thin, so you can work with repairing old pieces of jewelry too.
What Could've Been Better?
This glue for jewelry will work out well, but you can have a very messy experience if you're not careful. Remember that the glue is in a gel form; hence, do not squeeze too hard. Once you learn the technique, it should not be very difficult anymore.
One of our top recommendations for jewelry making is the CAT PALM B-7000 Adhesive. It is perfect for metal jewelry and is known for its versatile usage. You can use it as a bead adhesive because of the precision that it provides.
★Using a needle design, can be opened after use, won't get...
★Multi Purpose,Able to permanently bond various...
Why Did We Like It?
To begin with, you will love the needle design that will prevent the tip from getting blocked. Also, this jewelry glue will work for multiple applications. You can permanently bond metal surfaces, paper, wood, cloth, nylon, textile, ceramic pieces, PVC, rubber, fiber, and cloth.
Next, this is the right jewelry adhesive if you are looking to create jewelry from various kinds of materials. Kids can use it for making jewelry with ceramic, wood, and rubber. You can also use it for minor jewelry repairs or as an instant glue adhesive.
Moreover, the glue will help you seal surfaces, which will prevent airflow. You can make jewelry last for a long time and ensure that the whole crafting process is smooth.
Moving on, this is an effective glue that can be used for mobile repairs along with attaching gemstones. It is specially formulated and can be stretched 900% more than its length without breaking the layer.
What Could've Been Better?
While the craft glue works for jewelry making very well, it does come with a limited shelf life. Please check the expiry date of the glue before purchasing. If you keep this in mind, then there should not be any further problems.
The G-S Hypo JA-GSHYPO is not only used for jewelry making but also can help bind non-porous surfaces well. So, if you are looking for glue that will help you put together beautiful pieces of jewelry of different types, then go for this.
Great for highly detailed work, perfect for small jewelry...
Why Did We Like It?
For starters, this jeweler’s glue will provide a very strong bond that will last for a long time. You can use it to put together pearls and beads on other surfaces. That’s not all, as you can attach a nice diamond stud firmly so that it stays in place.
Another important factor is that you will require very small quantities of the liquid to work. Jewelry pieces need very precise application along with neat placement of the beads. This glue cement will ensure that you can work with pearl jewelry and gold jewelry.
Moreover, this flexible glue will help you create art and craft projects along with creating jewelry. Not all glue can be used for versatile purposes; hence this stands out.
Plus, you will get a small tube that can be used to make 1-2 pieces of jewelry. That way, it will never dry up, making them a great option.
What Could've Been Better?
Rhinestones are often used in making jewelry but ensure that you do not use this jewelry glue with them. This is not the right adhesive for rhinestones as it may spoil the finish and the surface of it. Remember this while making a choice.
One of the best jewelry-making glue is the E6000 glue, which has brilliant jewelry adhesive properties. It is known for its industrial strength formula, which will help you work with all kinds of materials. Many professionals use this glue for making art pieces.
No products found.
Why Did We Like It?
This is a waterproof glue that will work for all kinds of jewelry. The formula is very strong, and it can bind surfaces together easily.
Also, the best part about this product is that there are 4 tips provided in the pack. This will help you use the glue easily, even if 1-2 tips get blocked. You can work with the glue for a long time with the same amount of precision.
Moving on, the tips are very thin, ensuring that you can only squeeze out tiny drops of glue. This will make it easier to work with, especially when you need to attach tiny beads. It is a bead glue, but you can also use it for repairing jewelry.
That is not all; this great glue can stick fabric pieces as well as can be used for making jewelry with metal. Some customers have used it to fix screws in place, and it has offered a permanent solution.
What Could've Been Better?
While the jewelry glue will work well, the smell can be bothersome. This adhesive releases chemical vapors, so it is best that you wear a mask while working with it. Then leave the jewelry in a dry place for a week before you start using it.
One of the best glues for jewelry is the G-S Hypo GSHYPOGLUE, which works very well as a jewelry adhesive as well as for a host of other purposes. We wanted to design some jewelry with plastic for a kid’s art class, and it worked out very well.
Dries Clear: The cement dries clear for a clean look
Material Compatibility: Works with glass, ceramic, plastic,...
Why Did We Like It?
The jewelry adhesive properties work very well when you are using it with glass, metal, ceramic, and crystals. It will surely keep the beads or the tiny parts in place, making it one of the sought-after craft glues on the market.
Moving on, this glue will take very little time to dry. After application, wait for a few minutes, and you will see that a transparent flexible layer has formed on top. The best part here is that this will work well as a jewelry adhesive as it will not stick to your fingers.
Adding on, you will get 9 ml of the jewelry glue in the pack. This should help you work with a small or medium-sized jewelry project. Please close the cap after you are done to prevent the excess glue from drying around the mouth of the tube. You can use a nail polish remover to wipe the mouth if you see a lot of glue around the tip.
What Could've Been Better?
Remember that this jewelry glue will flow out easily. Hence it is recommended that you understand the dispensing rate of the tube before using it on fine jewelry. That way, you will know not to squeeze too much, and you can easily apply it with precision.
If you are looking for an extra permanent solution to use for your jewelry, then the Beacon Dazzle Tac JG1OZ will be a good option. It can help you create and repair jewelry pieces. We were very happy to see that this option worked out well with semi-precious jewelry.
If you are trying to work with plastic or you want to attach a mirror to a frame, this will be a great option. It can glue all kinds of materials together, making it an ideal choice. That is not all; the layer will dry fast and will be flexible. You can rest assured that there is no chance of it breaking down.
Moving on, the jewelry glue will ensure that the layer is waterproof. It is also resistant to UV light, making sure that the layer will not turn yellow on exposure to sunlight. You can use it for mirrors, wire, beads, metal surfaces, mosaics, and stones.
Some people also use it for making jewelry for regular wear. We will recommend letting the glued pieces lay in a dry place for a few days before you start wearing them outdoors.
What Could've Been Better?
Before you use this product, you should know that the vapor can be harmful to humans. Hence, please wear a mask while working. We will recommend working in a well-ventilated area where the fumes can easily disappear. After the job is done, leave it for a few days before using the jewelry.
One of our final recommendations is the Lermity B-7000 Adhesive, which is known to be a multipurpose glue. If you were looking for a product that could take care of many projects at once, then this might fit you well. Read on to know all about its features.
This jewelry glue comes with a very thin tip that will help with fine and detailed application. It can be applied without creating a mess, making it easy to use. Just point the tip towards the exact spot and squeeze the tube.
Moving on, the glue will take around 3 to 6 minutes to dry to touch. But it will take approximately 24 to 48 hours to dry up completely. We will recommend leaving it alone for a few days before using the jewelry or any other product on which you are applying this glue.
Additionally, you can work with multiple surfaces, which include fiberglass, cell phones, rubber, plastic, metal, leather, PVC, ABS, textiles, sponges, and films, to name a few. This is a multipurpose glue that will save you the hassle of purchasing other glue types for different surfaces.
What Could've Been Better?
Since the formula is in a slightly runny form, you will have to be careful while using the glue. Please do not squeeze too hard, as that could lead to a lot of glue coming out at once. Press gently and test the flow of the glue before working with precious jewelry.
Jewelry making is known to be a great hobby for some, while others may want to do it professionally. The best glue for jewelry will ensure that you can stick all the parts easily without having to worry about a stone coming loose.
Now there are different pieces of jewelry, including bracelets, earrings, rings, and necklaces. You can either repair older pieces or create new ones from metal pieces. Knowing the purpose of your use is very important, and the following points will help you in choosing one from among the lot.
Time Taken To Dry
The drying time varies a lot with different brands of glue for jewelry. Now, if you have limited time or you have to finish working on a number of jewelry pieces in a short period of time, then the glue can be very helpful. These will dry within minutes, and you can go about attaching the next piece.
However, if you want the bond to be long-lasting, then let the jewelry glue rest for longer. Then it will harden up more, providing you with a better hold.
But remember, if you are a novice, it is better to select a glue that takes a longer time to dry. That is because you can make adjustments and place the parts in the perfect position. Then you can allow it to dry.
Tips
Please check the tips well before purchasing any jewelry adhesive. Not all glues will have a thin tip, which can make it easier to apply tiny amounts for jewelry making. You may need very tiny amounts for attaching small pieces of beads or diamonds. Epoxy resin glue may not be able to help you out, and you might need a gel-like formula with a very thin tip.
The best jewelry glue should be such that you are able to work without the jewelry adhesive running all over the surface. You will need good consistency, and you can test it on a different surface to understand the dispensing rate.
Strength
Jewelry that is worn every day may be exposed to a lot of rough usages. One thing that you need to remember while creating jewelry is that the glue should be strong. It should not be affected by high temperatures.
Moreover, most people wear their rings or earrings while taking a bath. Hence, the right glue should be able to resist water and other fluids. You do not want your beads or stones to become too loose very often, making strength a necessary factor.
Now there are superglues like gorilla super glue gel and epoxy glue on the market, which are very strong. Epoxy glues are used for making molded jewelry, while super glue or gorilla glue can help you fix almost anything. So you can choose them too if needed.
Glue Flexibility
A jewelry adhesive should be able to dry without becoming brittle. When a brittle layer is formed, then it can crack and lead to the beads falling off. More pressure might be created for the beads or the parts, but this can be avoided. Look for a jewelry adhesive that is flexible and can be used easily.
Glue For Jewelries FAQs
How do I remove glue from jewelry?
To remove glue from jewelry, you can use acetone or nail polish remover on a cotton swab or cloth. Gently rub the affected area until the glue starts to dissolve. Be careful not to use too much acetone, which can damage some materials like pearls or delicate stones. Additionally, be sure to rinse the jewelry thoroughly with water and dry it before wearing it again.
Can I use glue for repairing broken jewelry?
Yes, glue can be used for repairing broken jewelry. However, it’s important to use a strong and flexible glue that will hold up over time. E6000, Aleene’s Jewelry and Metal Glue, and Gem-Tac are all good choices for repairing broken jewelry. Be sure to clean the area to be repaired and follow the manufacturer’s instructions for the best results.
Is there a glue that works on all types of jewelry materials?
There is no glue that works on all types of jewelry materials. Different materials require different types of glue for the best bond. For example, E6000 is a good choice for bonding metal to glass or plastic, while Gem-Tac is better for bonding beads or stones to the fabric. It’s important to choose a glue that is specifically designed for the materials you are working with to ensure the best results.
Can I use super glue for jewelry making?
Super glue can be used for jewelry making, but it may not be the best choice for all types of jewelry. Super glue is great for bonding metal to metal or metal to plastic, but it can weaken over time if exposed to moisture. If you are making jewelry that will be exposed to water or sweat, you may want to use waterproof glue like Epoxy or Gorilla Glue.
Is hot glue good for jewelry making?
Hot glue can be used for jewelry making, but it is not recommended for high-stress areas or for attaching heavy beads or stones. Hot glue is best used for attaching small embellishments to jewelry pieces. However, it can easily melt when exposed to heat, so it’s not the best choice for pieces that will be exposed to sunlight or high temperatures.
What glue do jewelers use?
Jewelers use a variety of glues depending on the materials they are working with. Some popular choices include E6000, Aleene’s Jewelry and Metal Glue, and Gem-Tac. These glues are designed for jewelry making and offer strong bonds and flexibility.
Conclusion
The best glue for jewelry will always work out and will make it easy to create beautiful pieces. If you are not very confident about it, you can use a toothpick to apply the glue from the tube onto the item.
With this, we have finally reached the end of this guide, and it is time to take you through our favorites. The Aleene's 21709 is an incredible option for metal jewelry. But if you are looking for something to use for beads, then the CAT PALM B-7000 Adhesive will work well.
On the other hand, the G-S Hypo JA-GSHYPO will help in bonding porous surfaces. Let us know about your favorite jewelry adhesives in the comment section below.
We use aluminum somehow or the other in our daily lives, and there might arise a situation when we need to bond it together.
Welding is one of the most commonly known ways of bonding aluminum together, but it is not the only way. Using aluminum epoxy is just as effective and way easier too. It is a faster process that doesn’t require any tools per se.
There is also no follow-up required if you’re using adhesive to bond metal together, and glue is more durable than an unskilled welding job. The only thing required is to use a two-component adhesive and have an appropriate workplace where the glue application can be carried out.
So, if you’re wondering which adhesive you should go for, we have selected some effective options available in the market and given them a try. Read on to know more about the best glue for aluminum.
Best Glue for Aluminum
These glues have been tested and proven to work well with aluminum, giving you the confidence to create your next masterpiece with ease. So, without further ado, here's the list of the 7 best glue for aluminum.
Let’s kick off this list with this versatile epoxy from Gorilla, which is compatible with aluminum, steel, wood, glass, ceramic, and more. Mighty tough and durable, this product can be used for household and automotive repairs. Its volume is 25 milliliters, and it comes inside an attractive tube.
5 minute epoxy: This epoxy resin kit in just one applicator...
Why Did We Like It?
Gorilla is a well-known brand that is known for making quality products, and this one is no less. Despite its diminutive size, the adhesive is incredibly strong and will last a long time. It is excellent at filling gaps and effectively filling spaces between uneven and vertical surfaces.
Additionally, it provides excellent adhesion for multiple surfaces and for when you need to repair heavy-duty products. It is clear and colorless and gives a clean finish to whatever you’re working with.
We really liked how this glue had a 5-minute set time, so you have enough time to reposition your things or simply correct a mistake. It is solvent resistant and can also withstand moderate exposure to water.
There are separate barrels of resin and hardener, so the epoxy doesn’t harden and ruin the glue. It is also convenient to use and comes with a syringe that dispenses glue evenly.
What Could’ve Been Better
Gorilla Glue is an excellent product; however, the 5-minute drying time mentioned isn’t always accurate for all cases. In the case of heavy-duty products, the dry time could be longer. Thus, people should be cautious when using the product post the 5-minute mark.
Pros
Strong and works with heavy-duty materials
Long-lasting and permanent bond
Allows time to reposition/correct mistakes
Easy to use
Cons
May take longer than 5 minutes to set
Type: Epoxy resin | Material Compatibility: Metal, Plastic, Wood | Set Time: 5 minutes | Cure Time: 24 hours | Max Temperature Resistance: 200°F | Waterproof: Yes | Chemical Resistance: Yes | Bond Strength: 3300 PSI
This is a classic product that weighs 5 oz and provides solid and long-lasting repairs to metal and other kinds of surfaces. It is mixed in a ratio of 1:1 and takes 4-6 hours to set and 15-24 hours to cure.
J-B WELD ORIGINAL PRO SIZE: Professional 5 OZ Tubes of the...
CURE AND SET TIME: After mixing the tubes at a 1:1 ratio, it...
Why Did We Like It?
Right off the bat, one of the things we like about this adhesive is that once the glue is set and cured, its color becomes dark gray. Dark gray is a generic color that mostly won’t sully the appearance of a product even if it shows.
We also really liked how it is steel enforced and dependable and has a tensile strength of 5020 PSI. This means that it can hold even weighty parts together. It can also withstand up to 550°F and is water resistant.
What's more, this adhesive is chemical-resistant and doesn’t corrode even if it comes in contact with an acidic substance. Due to all the reasons mentioned earlier, it can be used for household, automotive, marine, and mechanical repairs!
What Could’ve Been Better
J-B Weld is a company known for making quality products, and its adhesive was just as effective as we had envisioned it would be. However, when we had the product delivered to us, we noticed that only the epoxy resin was delivered, much to our dismay. We had to request the manufacturer to send the hardener separately.
Pros
Generic gray color upon setting that blends well with repaired products
Steel-enforced and dependable
Waterproof and can withstand high temperatures
Resists chemicals and corrosion
Cons
Package may be delivered without the hardener
Type: Epoxy resin | Material Compatibility: Metal, Plastic, Wood | Set Time: 4-6 hours | Cure Time: 15-24 hours | Max Temperature Resistance: 550°F | Waterproof: Yes | Chemical Resistance: Yes | Bond Strength: 3960 PSI
Loctite is an established company that is five decades old and manufactures super hardy epoxy that can be used for various projects. It has a volume of 59 ml and comes in a 2-part system consisting of an epoxy resin and a hardener.
Considering that Loctite is a veteran of adhesive and sealing solutions, we had high hopes for this product. And we are pleased to say that the Loctite 1360700 met them well!
When the epoxy resin and the hardener are mixed, they create a tough and strong adhesive and can even be used as a convenient alternative to welding. You can use it to glue aluminum and iron, steel, copper, pewter, and other materials.
It has a tensile strength of 3355 PSI and won’t fracture even if it has to hold together a lot of weight. The adhesive doesn’t shrink and is resistant to common fluids like diesel, gasoline, anti-freeze, motor oil, hydraulic liquid, and transmission fluids. This makes it an all-weather tool for maintaining and repairing machinery, appliances, pipes, etc.
We also love the metallic gray finish of the glue once it is fully cured.
What Could’ve Been Better
We liked the utility of this product a lot, but we had to return the product the first time we got it and re-order a fresh one from the manufacturer. This was because the first time we ordered it, the package we received was past its expiry date, and the epoxy had hardened within the tube and was unusable.
Pros
Effective alternative to welding
Metallic gray finish looks smooth and natural
Resists common household fluids
Does not shrink
Tough, strong, and heavy-duty
Cons
May send expired products sometimes
Type: Epoxy resin | Material Compatibility: Metal, Plastic, Wood | Set Time: 5 minutes | Cure Time: 24 hours | Max Temperature Resistance: 212°F | Waterproof: Yes | Chemical Resistance: Yes | Bond Strength: 2800 PSI
Another efficient product on our list is the adhesive from HY-POXY which weighs almost 7 ounces and packs a strong punch with its sealing skills. The package comes with two separate tubes for epoxy and hardener and makes for a great aluminum putty repair kit.
This product stood out because it is especially recommended and geared toward the aluminum material repair. And it did not let us down in that department.
The epoxy formulation consists of carefully selected pure aluminum particles, modified curing agents, and special high-quality additives. These provide the glue with great strength and durability.
What’s more, the easy application of each substance from its own tube ensures that the product doesn’t waste materials. Even a tiny amount can be dispensed from the tube, which makes it ideal for the repair of small items as well.
This product also fits into any toolbox and is especially popular among HVAC tradesmen, plumbers, and auto mechanics. It leaves an attractive, non-rusting, and non-magnetic aluminum finish once done.
What Could’ve Been Better
This product is easy to use and drill. It states that it takes 4-5 hours to cure in an environment above 40°F. However, after 14 hours in a room of 70°F, the mix was still soft and needed a hit from a blow-torch to dry it and make it machinable.
Pros
Geared toward the aluminum-based repair
Strong and durable
Fits into a toolbox of any size
Prevents wastage
Attractive finish
Cons
Dries a bit too slowly
Type: Epoxy resin | Material Compatibility: Metal, Plastic, Wood | Set Time: 5 minutes | Cure Time: 24 hours | Max Temperature Resistance: 180°F | Waterproof: Yes | Chemical Resistance: Yes | Bond Strength: 2500 PSI
Another quality product on our list is the Permatex 84109, which is versatile and easy to use. It’s a two-part adhesive with separate epoxy resin and hardener tubes, which can be mixed to create a tough adhesive with a dark gray appearance.
Versatile, easy-to-use, multi-metal dark grey epoxy adhesive...
Water and solvent resistant epoxy sets in 4 minutes with no...
Why Did We Like It?
If you are looking for an adhesive for gluing aluminum and other metals, this is for you. It sets in just 4 minutes and doesn’t require clamping. It can be used to drill, sand, thread, or file upon curing it.
We like how it is strong and reliable and can eliminate the need to weld or solder something. Such processes are technical, time-consuming, and need safety equipment, and this adhesive can effectively replace all of these.
If you’re worried that it might not be durable enough, fear not because it is resistant to water and solvents and has a tensile strength of 4500 PSI, which is relatively high. It can also withstand temperatures ranging from -60°F to 300°F, making it ideal for all types of repair work.
What Could’ve Been Better
Though this epoxy is supposed to have high bond strength and incredible durability, it, unfortunately, misses the mark a little. We noticed that it tended to not stick when used with heavy-duty goods but was effective on lighter appliances. We believe that the manufacturer can work on this factor.
Pros
Eliminates the need for welding and soldering
Resistant to water and solvents
Fast setting
Requires no clamping
It can be used with a wide range of materials
Cons
Doesn’t work as efficiently with heavy-duty goods
Type: Epoxy resin | Material Compatibility: Metal, Plastic, Wood | Set Time: 5 minutes | Cure Time: 24 hours | Max Temperature Resistance: 300°F | Waterproof: Yes | Chemical Resistance: Yes | Bond Strength: 3200 PSI
3M is an established company developing and perfecting adhesive sealants for marine applications for over five decades. So, for anyone looking to repair a boat or any kind of watercraft, this product is tailor-made for you. It can be used in any part of the water vessel- below the waterline, topside, and any other surface where a boat can run!
USE WHAT THE PROS USE – Extremely strong adhesive sealant...
BONDS PERMANENTLY – Ideal for sealing, bonding and...
Why Did We Like It?
We like how 3M has carved a niche for itself in the world of marine adhesion and does a great job at the repair and maintenance of marine vessels. This adhesive can bond trim, toe rails, and other fittings. Additionally, In case you want to seal boat hulls, hatches, hinges, or any trunk joint, this metal glue has got you covered.
This product includes a new generation of advanced polyurethane and silane-modified polymers and is specially designed to withstand the rigors of a marine environment. Using this adhesive will help the vessel resist weathering, shock, vibration, shrinkage, and even swelling, and it won’t sag or flow in vertical or horizontal seams. We were also impressed by how easy it was to apply the adhesive using a manual caulking gun.
All in all, the stellar quality of adhesion and its durability, strength, and temperature resistance are the biggest highlights of this product. And in addition to that, the adhesive doesn’t require any mixing, making it suitable for beginners.
What Could’ve Been Better
This product exceeded our expectations regarding its adhesion strength and effectiveness with marine appliances. However, the cure time taken is too long, and even after a lapse of around a week or so, the adhesive doesn’t fully cure and requires extra time.
Pros
Helps vessels resist weathering, shock, vibration, shrinkage, and swelling
Easy to apply
Durable, strong, and resistant to extreme temperatures
Doesn’t require any mixing
Cons
Very long curing time
Type: Polyurethane sealant | Material Compatibility: Metal, Fiberglass, Wood | Set Time: 48 hours | Cure Time: 7 days | Max Temperature Resistance: 200°F | Waterproof: Yes | Chemical Resistance: Yes | Bond Strength: N/A
Wondering what's the difference between this adhesive and the other from J-B Weld? The J-B Weld 8276, also known as the KwikWeld, is a fast-setting version of the original J-B Weld two-part epoxy. The difference lies in the time needed for setting and curing the glue and the tensile strength.
J-B Weld Kwikweld: A Fast Setting Version Of The Original...
Cure And Set Time: After Mixing The Tubes At A 1: 1 Ratio,...
Why Did We Like It?
If you’re looking to make repairs to metal and other heavy-duty surfaces at a fraction of the time needed by the original product from J-B Weld, this is for you. This takes 6 minutes to set, which is relatively less compared to the 6 hours needed by the original.
The KwikWeld also takes 6 hours to cure, whereas in the original, curing would have just commenced within this period!
Once cured, this adhesive turns dark gray, and it can be tapped, filed, sanded, molded, and drilled. It is hardy and can withstand pressure up to 3127 PSI and a temperature of 300°F.
Lastly, you can use glue on various surfaces like metal, plastic, PVC, ceramic, tile, and the like, and it is effortless to use, even by a complete novice.
What Could’ve Been Better
We noticed something strange as we were mixing the epoxy resin and hardener, but we could, unfortunately, find no explanation for this. Basically, we made two small batches of the mix, and one was ready to use within the specified time. However, the other didn’t mix well, and the dark gray color didn’t appear.
Pros
Takes very little time to set
Takes just a few hours to cure
Elegant color
Can withstand high pressure and temperature
Cons
Some batches may not set and cure within the specified time
Type: Epoxy resin | Material Compatibility: Metal, Plastic, Wood | Set Time: 4-6 hours | Cure Time: 15-24 hours | Max Temperature Resistance: 550°F | Waterproof: Yes | Chemical Resistance: Yes | Bond Strength: 3960 PSI
While picking the best glue for your work, we recommend that the following key factors be kept in mind:
1. Purpose
It is imperative to consider the intended use of the adhesive while buying the right glue. Some products might have less tensile strength and thus won’t be ideal for your project. Or maybe you want to fix a broken sail in a boat, and you need something waterproof.
Thus, you must read the properties of each product carefully to determine whether it is ideal for your work or not. For example, if you are looking for an adhesive to repair marine applications, 3M fits the bill.
2. Easy to Use
If this is your first time looking to repair using epoxy adhesive, we recommend that you get a product that's easy to use. For instance, one of the products on our list requires a manual caulking gun for application, which isn’t ideal for someone new to this.
We recommend the J-B Weld 8276 in this case since it is fast-acting and leaves little room for error.
3. Tensile Strength
This is probably the most essential factor to keep in mind because no one would want something they just repaired to fall apart! So, if you’re looking to repair something heavy-duty, it is recommended to go for an adhesive with high tensile strength.
As such, we recommend the J-B Weld 8281, which boasts a tensile strength of 5020 PSI.
Glue For Aluminum FAQs
Can you use super glue on aluminum?
Yes, superglue can be used on aluminum. However, it may not be the best choice for all applications as it can become brittle over time and may not hold up well under stress. Epoxy glue is a better option for bonding aluminum.
What type of glue is best for bonding aluminum to wood?
A strong and durable adhesive is recommended for bonding aluminum to wood. Epoxy glue is a good choice for this application as it forms a strong bond between the two materials.
Can you use hot glue on aluminum?
Hot glue can be used on aluminum, but it may not be the best choice for all applications. It is great for bonding two surfaces quickly but may not hold up well over time if the aluminum is exposed to moisture or high temperatures. For a stronger bond, consider using epoxy glue.
How do you glue aluminum to plastic?
To glue aluminum to plastic, you can use a two-part epoxy glue. Apply a thin layer of glue to the aluminum and plastic surfaces and press them together firmly. Be sure to follow the manufacturer’s instructions for the best results.
How do you remove glue from aluminum?
To remove glue from aluminum, you can use a solvent such as acetone or rubbing alcohol. Apply the solvent to the glue and allow it to sit for a few minutes. Then, use a scraper or a cloth to remove the glue. Be sure to wear gloves and work in a well-ventilated area.
Can you weld aluminum instead of using glue?
Yes, welding is an option for bonding aluminum. However, it requires specialized equipment and expertise, and may not be feasible for all projects. Glue is often a more practical and cost-effective option for bonding aluminum.
Conclusion
After meticulously trying out many different kinds of epoxy glues available, we had a tough time picking the winner. When making our choice, we decided to consider factors like strength, durability, and time to set and cure. We also kept in mind whether the product had limited or multipurpose use.
After much deliberation, the Gorilla emerged as the winner. Gorilla is a very well-known brand and lived up to our high expectations. It works well with heavy-duty products as well as lighter ones.
Another product we like is the J-B Weld 8281. It takes time to cure but provides the most tensile strength out of any products on this list.
This brings us to the end of our list, so do let us know your experiences with these products in the comment section. We shall be back soon with another article. Stay safe!
There are not few the ones that neglect the simple, humble garden fence that outlines our yard. There are not few that leave it in disgrace year after year until its wood cannot be saved anymore. It goes without saying that maintenance in our household should be priority number one, protecting every element in it and cherishing it as a necessary part of the bigger picture. We invite you to cast a glance in your yard and check the status of your items exposed to the elements. If greenery is not guarding them proudly we invite you to get creative with the 23 fence decorating ideas showcased below and complement them through greenery as things evolve.
23 Fence Decorating Ideas
#1 Furniture Elements Transformed Into Highly Creative Dragonflies
The wings have been salvaged from ceiling fans and the body is made from chair and table legs.
via lucydesignsonline.com
#2 Recycled Coffee Table With Functional Role Outdoors
Garages are important for providing shelter and protection to your vehicles. The make is very important of the garages as this decides the total space for storage and the capacity for optimal protection. If you have multiple vehicles, you will consider a design that will provide maximum space.
Garages in the past were primarily built separately in the backyard of the house and were referred to as detachable garages. With the increasing popularity of automobiles, garages are now mostly attached to residential buildings.
As the shed is of prime importance for your vehicles, you may hire an expert contractor to build your garage as well along with your home leading to increased costs. However, here is a list of DIY garage plans with detailed instructions that would reduce your total cost incurred to some extent.
Please note that local building codes always have to be considered whether you are creating this garage alone with your own two hands, with a professional, or with a friend by using a garage kit to save money and time.
Detailed DIY Garage Plans With Instructions
As homeowners, we often seek ways to maximize space and functionality while adding a touch of our personal style to our properties. Detailed DIY Garage Plans With Instructions is here to guide you on this journey, featuring an impressive collection of 23 carefully curated garage designs that cater to a variety of needs, preferences, and budgets.
Whether you're looking to build a simple, functional space or a multi-purpose garage with room for your workshop or home gym, these plans have got you covered. Each plan comes complete with step-by-step instructions and detailed illustrations, ensuring a smooth and enjoyable building experience.
Additionally, the use of garage design software streamlines the planning process, empowering you to create the perfect space tailored to your requirements. Get ready to embark on an exciting DIY adventure, transforming your property with a customized garage that reflects your vision and enhances your home's value.
1. Large Detached Garage
This is a detached garage and is also known as Garden Oak Garage and Workshop Plans. The plan is flexible to make a layout for two car garage, a two-car garage with a workshop, a three-car garage, and four car garage making this a plan ideal for anyone looking to make s large storage area. However, you need to have good carpentry skills to build a garage.
This free plan from Today’s Plans meets the regular standards and is ideal for average soil and weather conditions. However, it is always recommended to be reviewed by a building professional so that it is compliant with local standards.
This design from BuildEazy is often referred to as a Shell Garage. If you are in search of a plan where it will cost less to build your garage, this is the perfect plan for you as it does not require you to incur costs for the flooring. This garage gives protection to your vehicles and other items but might not be suitable for your items.
Before laying a concrete floor, this garage can be made. With some metal laid on the hard ground, it can serve the purpose of a garage floor indefinitely.
This detached garage designed by SDS-CAD Specialized Design Systems is a perfect design for not only providing space for the storage of two vehicles but also providing extra space for storing other equipment. The porch on the side of the garage adds a classy look to the garage providing a welcoming feel. You can also add a sitting area for relaxing outside.
This free garage plan from RONA is perfect for building a small storage place or garage for parking a single car with 16 x 22 feet in dimensions. If you invest more, you will be able to change the look, but the functionality of this structure remains the same. This plan requires some experience, so building contractors are recommended to lay the foundation for this project.
It usually requires ten days to complete the project and before starting, get in touch with the local authorities to know the local basic requirements and standards.
If you are looking for a basic structure for storing or protecting your belongings or vehicles, this free garage plan of 14 x 24 x 8 feet by SDS-CAD Specialized Design Systems is the ideal choice. Though very basic in structure, it has a nice look with a door, window, and garage door.
Another multi-functional and basic garage plan from SDS-CAD Specialized Design Systems allows you to park larger vehicles. On top of that, it provides extra space to store your other equipment and is preferred mostly by farmland owners who possess a truck and need additional storage space. The dimensions are 24 x 20 feet with a 7 feet garage door.
This is another single-car garage plan specially designed to create a workshop in the additional space it provides by MyOutdoorPlans that serves as an excellent functional addition to your property. You can park one full-sized vehicle and also a side entry door making the entrance and exit convenient. Proper planning is required to lay a strong foundation for the garage to be built so that it is durable. Also, durable lumber is recommended to be used in this plan like cedar, pine, or redwood.
This free detached garage plan from HowToSpecialist is a simple design and very easy to construct and follow the steps. When it comes to creating a small garage for one car, good quality materials and proper planning are required. It provides additional storage space for other tools or equipment. Also, you can fit a workshop in the garage.
This free garage plan includes a list of tools, materials, diagrams, and step-by-step building instructions. The diagrams can easily be followed as it includes the corresponding letters of the materials used.
This free plan for your garage is perfect if you have plans to build a garage for two vehicles. Many people prefer this plan because of its feasibility. The site also has man-free double car garage plans.
This plan from Call Cad Northwest (CADNW) not only gives you the opportunity to park two vehicles but also provides an excellent storage loft which is 5 feet tall where you can store your other belongings and is easily accessible from the right wall. It is a 24 x 24 feet garage with a personal door on the right side and six feet wide window.
This garage plan is shaped like a barn where you can keep a minimum of two vehicles. It also provides the space to keep your hay, farm equipment, feed items, and others. If you want, you can also include a workshop here even after parking two vehicles. You want to add this garage to your farmland that provides a large storage space. Also, this plan complies with all the required DIY standards.
This garage plan adds value to your property. It provides added space for other storage and meets all the general standards. This design, however, requires some expertise in construction. This pole-framing construction, however, reduces foundation, excavation, and site work. Free plans bring so much value to us all and this plan is an extraordinary example, with proper instructions that one could truly follow.
This is a multi-purpose pole barn designed by Today’s Plans that can be used as a one-car garage, tractor or equipment shelter, shed, backyard studio, or workshop. It provides storage space and is inexpensive to build which suits your budget and also meets all the general standards. If you have a good knowledge of post-frame building methods, then only you should try this plan as it is not recommended for beginners.
This is another two-car garage from Today's Plans that can serve the purpose of an equipment shelter, a backyard studio, or a workshop. This pole-frame structure serves many purposes and a unique addition to your property. The storage loft has an outside door that makes it convenient. The loft space is 420 square feet with a floor space of 560 square feet.
This free plan from Instructables offers a large garage to have because it provides the space to park many vehicles or can be used for other storage purposes. You can also add a workshop to this structure. This garage has a nice look with which you are sure to be satisfied. Moreover, this plan provides you with the complete process of not only building a garage from the ground up but also includes details of getting the permits and need-based hiring of subcontractors.
This free two-car garage plan from Western Construction can also be called as an Attic Truss Garage Plan. From this very name, you can identify that it gives you the opportunity to add a small apartment in the garage or you can use this additional space for storage purposes as well. This unique feature of this plan makes it very functional for its ability to hold other equipment and multiple vehicles.
This is a typical detached garage from Western Construction that goes well with the modern house. It can also be referred to as a Storage Truss Garage, and as the name goes, this two-car garage plan provides additional space to store other equipment and tools and also you can add a small workshop.
This Standard Truss Garage design provides space for parking two cars. This garage plan designed by Western Construction is detached giving you the leverage of using it as a workshop as well. It is a 20 x 22 feet garage plan with all the features including 16 × 7 feet steel overhead garage door, a steel garage service door, and a Vinyl Slider.
If you cannot afford any of the garages to protect your vehicles but need to make one very urgently to protect your investments, this is the garage that can help. Though it is not a traditional garage, you can build this to park your vehicle for protection or store your farm equipment. Here is a detailed video that shows how to build this kind of garage and if you already have the required materials available, this can be made for free.
Some homeowners prefer carport plans as it is very convenient to build with basic carpentry skills. The attached carport plan is an extended structural framework with the apartment where you can park your vehicle for storage. It also gives protection and allows better ventilation. The lumber that you choose should be very durable for this plan.
This plan is very cost-effective, and the shelter gives protection to your vehicles from bad weather. This also requires very basic woodworking skills. However, attention to detail is very important because of the many legal codes that you need to comply with.
This free plan is very convenient as it provides additional space to park two cars. This construction also takes very less time and can be completed on a weekend if you hire a company like the Valley Restoration and Construction team. Pressure-treated lumbers are recommended for this plan as they can withstand rough weather conditions.
Even if you are inexperienced but want to build a carport with a gambrel roof and have additional space for storage so that it looks great and is durable, you can accomplish this task within a weekend as it does not require much effort. You can use the storage space to keep extra tires or some other equipment you may desire to make this plan very functional.
Garage plans can be expensive due to factors such as design complexity, professional architects' involvement, customization requirements, and additional features like extra workspaces or storage areas. High-quality garage plans often necessitate more resources, labor, and expertise, resulting in increased costs for homeowners.
Do garage plans include material costs?
Garage plans typically provide a detailed outline of design and layout, including specifications on dimensions, building materials, and required construction techniques. However, material costs are usually not included in the plan itself. Homeowners should seek separate estimates for materials and labor costs to obtain a comprehensive understanding of the total project cost.
Do garage plans require permits?
Garage plans generally require permits, as they involve significant construction or modification to a property. Local building codes and regulations may vary, so it is essential for homeowners to consult with their local permitting office and comply with the necessary requirements. Obtaining permits ensures safety, and compliance with local regulations, and helps prevent potential legal issues in the future.
Do garage plans use normal garage doors?
Garage plans incorporate specialized garage doors for vehicle entry, which vary in styles, such as overhead, roll-up, or sectional doors. The choice of garage doors is influenced by factors like convenience, space constraints, and aesthetic appeal. Additionally, normal doors can be included for pedestrian access, depending on design preferences.
Do garage doors include soundproofing details?
Garage doors may or may not include soundproofing details, depending on the specific design and homeowner requirements. If noise reduction is a priority, homeowners should look for garage plans that incorporate soundproofing materials and techniques, like using weatherstripping, insulation, and specialized garage door materials that can minimize noise transmission.
If you are looking to build a garage but finding plans that cost an arm and a leg, here's a list of the free DIY Garage Plans that you may choose depending on your requirement and budget. Whatever you do, be sure to protect your vehicles and find additional storage space.
What do you think about the free plans above?
We would love to hear from you in the comment section below.
There’s hardly any space that can match the functionality of a garage!
Be it for parking your SUV, storing equipment, or doubling up for an in-house workshop; the garage can do it all! Naturally, you'd want to keep it safe from theft as well as the adversities of the weather. But does this always correspond to the traditional overhead garage door?
While we don’t discourage opting for the much-tried-and-tested alternative, there’s no harm in going for an efficient option that complements your modern home in every sense.
So, today, we’ve compiled a list of the top eight garage door alternatives, complete with their pros and cons. Whether you’re moving into a new home or simply looking to replace the existing garage door in your home, give it a read.
Now, without any further delay, let’s begin!
Garage Door Alternatives
Roll-Up Screen
We start the list off with something simple yet effective. Roll-up screens made from metal are a popular choice among homeowners for keeping their garage shielded from the sun and pesky insects. Plus, they are relatively inexpensive compared to traditional garage doors, as you can easily buy one online at an affordable price.
Moreover, installing a roll-up screen won’t require you to strain your muscles. It can be installed with basic tools in a matter of minutes, and rolling the screen up and down feels natural. However, we’d advise opting for one that uses magnets, so that you don’t face any problems while opening and closing it.
On that note, we’d also recommend getting a roll-up screen hardware kit as it contains all the right accessories required for the purpose. These often come with detailed instructions that will make the process absolutely hassle-free, this means you will not worry about garage door repairs anymore.
Despite praising roll-up screens for their affordability and practicality, there are a couple of downsides that can’t be ignored. Roll-up screens don’t have a locking system, meaning they can be rolled up easily. This also makes them incapable of trapping heat, which is something you’d not want, especially in winter.
So, if you’re someone who keeps a lot of valuable equipment in the garage or wants to keep it insulated all year round, then roll-up screens might not be the ideal fit for you.
Barn Doors
A solid wood structure like a barn door can be the perfect replacement for a conventional garage door. Its heavy-duty design is a more secure option than roll-up screens, and a simple latch-lock will keep your garage safe from unwanted intruders. Plus, these are quite capable of insulating the space on cold days.
Appearance-wise, barn doors render a distinct rustic charm, which will appeal to those who live for the down-home or countryside vibe.
Apart from that, there are a number of ways to go about this option. For one, you may decide to purchase an old barn door and restore it as required. Not only does this cut down on the overall remodeling effort, but it will also cost less.
On the other hand, DIY enthusiasts can take on the task of building one from scratch (there are various YouTube tutorials available). Although it won’t burn a hole in your pocket, this method does involve a fair bit of measurement and wood-cutting. But this shouldn’t be a problem for those who are familiar with the basics of carpentry.
You may even choose to buy a barn door hardware kit that should be available in any major hardware store. Since it includes both the tools and the door, the installation becomes somewhat easy. However, it will cost significantly more than the previous option.
Carriage Doors
Now that we are talking about DIY garage door alternatives, here’s another option to please the woodwork enthusiast in you. Carriage doors, too, have an old-school charm that provides your garage with a welcoming look.
Building a carriage door doesn’t require much work. First, construct a frame that perfectly fits the garage opening. Make sure you don’t leave any space between the floor and the frame. Next, cut vertical sections or boards to make the actual door. You’ll also need to add some hinges and a latch in the middle for the two doors to close together.
Some homeowners may also decide to build a little window on top of each door or add multiple small square windows for facilitating ventilation. Again, this will depend on how much effort you’re willing to put in for building the door.
The important thing to note here is that constructing a carriage door is a rather time-consuming task, even for the pro-DIY-ers. Thus, people who aren’t good at handling tools like hammers and saws may find it difficult to fathom the process. And if you’re running short on time, it’s probably better to look elsewhere.
Sheet Metal Doors
Sheet metal for a garage door may not paint the most visually pleasing picture in your mind, but it’s an efficient alternative nonetheless.
It’s a really inexpensive option that saves quite some money versus buying a traditional garage door. All you need to do is cut the metal sheet according to the size of your garage opening and convert it into a door by fixing some hinges and a handle.
The easiest way to go about building a metal sheet door is by employing the swing door design. Just like any other swing door in the house, this door will swing outwards on the hinges to give you access to the garage. Furthermore, a simple latch is enough to secure it firmly. However, be informed that this won’t create an air-tight seal, thereby affecting the insulation.
Many homeowners also prefer having a rolled-up metal sheet door, but building one the DIY way requires much time and effort. Considering that you have all the right tools and a decent work experience with metal, both options shouldn’t make you break the bank.
Sliding Doors
When it comes to user convenience, there’s hardly anything that can match the utility of a sliding door. It’s a no-brainer that sliding doors find a preference, irrespective of the garage size. The touch of class and sophistication on offer certainly amps up its appeal!
Like many other alternatives on our list, sliding doors also have a couple of different styles. The most common design is where two doors slide away from the vertical centreline of the opening. That being said, you may also opt for multiple narrow vertical panels on either side, which ultimately culminate in a bigger door. Furthermore, you can install a remote-controlled system for greater convenience.
Sliding doors are pretty expensive, and there are a number of things that should be kept in mind while installing one. First, the tracks don’t always sit firmly on the ground, which affects the overall orientation of the door. Hence, its weather-resistance ability is quite low compared to some other alternatives. Besides, the accumulation of dirt and debris requires frequent cleaning or even replacement.
Folding Doors
Folding doors have several advantages over conventional overhead doors in the sense that permit easy entry and exit while fully optimizing the space. Simply put, these doors don’t reduce the height of your garage, and neither do they narrow down the width of the garage opening.
Bi-fold doors, which are made of twin horizontal slats that fold outward and slide on a track, are generally preferred for small or medium-sized garages. When opened, both doors stack on either side to provide a completely unobstructed view. Thus, driving your vehicle in and out of the garage won’t require added effort. Moreover, they are available in a variety of materials, including UPVC, aluminum, and timber.
Larger garages may require a four-fold door to cover the entire opening, which operates in the same way as a bi-fold door with two extra slats on each side. Owing to the additional moving components, the four-fold variants usually require more maintenance and frequent servicing. Plus, a heavier material like aluminum can put undue stress on the rest of the structure.
Side-Hinged Doors
Side-hinged doors feature perhaps the most uncomplicated mechanism, and they can be either motorized or manually operated. If you don’t have a lot of space inside the garage to install a swing door, then a side-hinged door can be the perfect alternative.
Besides, there are almost zero chances of the door crashing on you, even if spring breaks. And these can be built from virtually any material, be it wood or metal. However, side-hinged doors aren’t entirely free from flaws.
In case you don’t have adequate space outside the garage, then these doors won’t be of any use as there won’t be enough space for them to open into. For instance, the door will invariably hit your car if it’s kept too close to the garage. Likewise, more than 6-inch snow on the ground will cause an obstruction for the door opening.
Tilt-Up Doors
In terms of appearance, tilt-up doors closely resemble overhead garage doors, except for a single panel instead of multiple horizontal sections. These doors are affordable, but they do come with a fair share of drawbacks.
Because they have a single heavy panel, regular lifting of the door puts a significant strain on the motor and other parts of the frame. Long story short, you can’t expect a long service life without hefty maintenance or replacement needs.
Unlike roll-up doors, tilt-doors kick out upon lifting, which again requires sufficient space on the outside. So, make sure that the adjoining driveway is kept free from potential obstacles for the door to operate smoothly.
Final Words
Now that you have a list of the best garage door alternatives, which one would you pick for your future home?
If you ask us, we’d say that there isn't a ‘one-size fits all’ policy. Choosing the right garage door alternative requires you to take into account various important factors like the available space, preferred material, budget, and additional considerations such as garage door soundproofing.
Roll-up screens are affordable, but may not be a very secure option. On the other hand, both barn doors and carriage doors require substantial woodwork knowledge and building time; buying a ready-made version may be a costly affair. Sheet metal doors are pretty secure and can be made either in the swing door or roll-up design. While a folding door results in an obstructed driveway, both side-hinged and tilt-up doors require sufficient clearance.
Soundproofing is another crucial element to consider, especially if you have a home workshop or use your garage for various activities. A well-soundproofed garage door can significantly reduce noise levels, providing a more comfortable environment for you and your neighbors.
With this comprehensive guide, we leave you to make the final call. But here’s a pro tip: regular maintenance will help you avoid an intensive garage door repair session in the near future. Remember to not only prioritize the design and materials but also the acoustic performance and functionality of your chosen garage door alternative.
GIMP, the GNU Image Manipulation Program, is an excellent alternative to the widely used Adobe Photoshop for digital artists and designers.
Not only is it available completely free of cost, but it also comes with an extensive set of features and add-ons that makes it just as good as Photoshop when it comes to digital art and design.
While GIMP is primarily a photo manipulation program, it has become very popular among digital artists in the recent years owing to the extensive selection of brushes, plugins, and scripts that you can add to it without spending a dime!
However, you'd probably not be very impressed with GIMP's default set of brushes at first. Most of them are quite basic and limited as to what sort of art you can produce with them.
But the fantastic thing about GIMP is that it accepts both GIMP brush files, as well as Adobe Photoshop brush files. This basically means that you have access to both GIMP's extensive selection of brushes, as well as the entire set of tools from Adobe's library. So the availability of brushes and plugins for GIMP is absolutely staggering!
So if you are a digital artist working with GIMP and are looking for some cool brushes to enhance your art, we've got you covered!
Here are some of the best GIMP Brushes you can get online completely free of cost !
The GIMP Paint Studio, also referred to as GPS, was developed in order to emulate high-quality painting features within GIMP. Compared to a lot of paid digital painting applications, GIMP does lack a bit when it comes to digital painting, mostly due to the lack of good default brushes.
However, with great brush designs like these, doubled with superior brush engine settings, GIMP has undoubtedly closed the gap with some of the topmost digital painting applications out there!
The GPS brush set adds some crucial brush strokes and textures to GIMP that were not previously available. Every single brush in this set comes loaded with default presets that get loaded as soon as you select a brush. The number of presets is significant for a lot of brushes, and many of them even have complex sizes and pressure variations.
The behavior of every single brush in the GPS Brush Set is customizable through the ‘Tools' options panel. You tweak the presets according to your needs and even combine brushes with different presets.
You get a total of 102 brushes with the GPS Brush Set, all of which are great additions to your stock of tools for producing amazing digital art!
There's a ton of different Crack Brush Sets available out there, and one of the most popular among them is the FrostBo set of brushes. You get a total of 34, high-quality brushes in this set, all of which are customizable in size.
This set of brushes lets you generate some pretty amazing textures, something that is required by all digital artists in their work. While you can always download Creative Commons photos for adding textures to your work, there arises a lot of situations in which you need to generate textures through brushes.
The process of using these brushes is very obvious and straightforward, but the outcome is absolutely stunning!
When it comes to realistic-looking art, LJFHutch's Water Brushes can provide some of the most outstanding results when used appropriately!
A lot of artists often face problems while painting water using GIMP. This set of brushes was designed mainly to address this problem. They produce amazing photorealistic effects that can be utilized to paint some very real looking water in your art.
There are two different brushes in this set, one for painting water and another one for painting realistic looking grass. These are basically just ripples that can be added as highlights on top of any color to produce a more realistic effect.
These set of brushes were originally created for Photoshop, but thanks to GIMP's extensive support for Photoshop brush files, you can use them on GIMP as well. They are great for generating textures, as well as regular painting on GIMP.
These "brushes" have more in common with stamps rather than regular brushes because they don't really allow you to paint with "strokes." You need to do is choose a color and then stamp the splatters to generate textures.
You can use these brushes to create a base layer for further painting or utilize the different presets to generate textures as required.
The set comes with a total of 32 high-resolution splatter brushes and three high photo textures.
While you'd probably not find too much use of these brushes in your regular digital artwork, I felt this set was worth sharing simply because they are a great example of creative brushes!
This GIMP brush set was created by Chrisdesign using assets from the famous Fedora Art team member, Nicubunu. It's yet another example of how Creative Commons has expanded the availability of creative works for artists to use and develop further.
This set generates a whole set of playing cards as you paint. Use it in your next artwork to create something unique!
If you're planning on creating comic sequences, these brushes are a must-have in your inventory!
There's a whole range of Comic Bubble Brush sets available on DeviantArt for all those of you that need such brushes for your line of art. Almost all of them are highly customizable and come with a ton of presets to match all kinds of styles and requirements.
Even if you're someone that doesn't do comic sequences, you can find a use of these brushes in a variety of different artworks. Since GIMP isn't that great when it comes to line-drawn shapes, having these brushes can be extremely convenient if you need to use these things regularly.
These are some of the most useful brushes I've used in GIMP in a lot of the open-source work I did. These things have so much use in editing and creating content that they should have been provided in GIMP's default brush set.
The Arrow Brushes are fairly simple, yet infinitely useful. It is just a regular arrow that can be resized, given a color of your choice and then applied to any picture or artwork that you are creating.
These brushes are especially useful when it comes to creating tutorial and other types of informative documents. Simply using these arrow brushes can save you a lot of hassle while creating informative pictures, which you'd otherwise need to import in a software like LibreOffice Draw or Inkscape.
The direction of the arrows can also be changed very easily –
90 degrees points the arrow upwards
0 degrees points the arrow to the left
90 degrees points the arrow downwards
180 degrees points the arrow to the right
The Tango Arrow Brush is available for download on Slackermedia.
8. K04sk Brushes
This one is for all those of you that are into concept art, illustration work, character design, and other similar forms of digital painting. You can do some amazing things with this free to download set of brushes, provided you know what you are doing.
These brushes were initially developed for Photoshop but were later converted into a GIMP Brush set after their tremendous popularity. The K04sk Brushes are for advanced users and require a lot of practice to master. So if you're a beginner, you'd probably struggle at first with these.
However, if you give it enough time, you'd be able to master these and create some outstanding digital designs!
9. Digital Oil Brushes
If you're planning on replicating the feel of a real paintbrush on a digital platform, there are very few brushes that better at doing such a great job than these!
These brushes are simply brilliant in the way they emulate the feel and texture of oil painting. Digital Artists can make use of these brushes to impart a wide variety of unique effects to their work and even create paintings that come pretty close to oil-based paintings done on a traditional canvas.
There's a wide variety of customizations available to make them as convenient as possible. You can choose between wet and dry brushes, customize the sizes and even impart dirty or clean effects to your painting with these brushes.
With a total of 13 brushes included in this set, there will always be a brush to suit almost every style of painting you can possibly imagine.
When it comes to painting on a digital platform, it's pretty hard to emulate the traditional styles of painting unless you have access to a wide variety of sophisticated brushes. For this reason, the Artistic Brush Set was developed to allow digital artists to replicate a number of different styles, primarily watercolor!
Designed by a well-known contributor of artistic brushes named Chirsdesign, this set was developed mainly for GIMP artists. Every brush in this set has been designed using dry paintbrush and actual watercolors to make them as realistic as possible.
These brushes, when used appropriately, provide some outstanding final results!
If you're planning on doing a lot of graphic designing, then this set of texture brushes are a must-have!
Anyone with even a little bit of graphic designing experience knows how essential texture brushes are in this field. There's no end to the number of things you can do with a good arsenal of texture brushes at your disposal.
Even in traditional digital painting, these types of brushes are extremely crucial when it comes to generating customized textures on an artwork. With the right blend modes, opacity, and other settings, you can create some breathtaking artworks using these brushes.
This is one of the simplest yet highly versatile texture brush sets out there, allowing you to do a variety of things from smudging to regular painting.
12. Count Brush Set
If you're open to experimenting with different art styles and creating something unique, do check out the Count Brush Set containing 20 different brush styles.
You can use these brushes to add variety to your regular artworks, and even use some of the presets for painting. However, most of these aren't really made for painting. Most of these brushes are meant for adding textures to your painting or for giving final touches to a piece.
These brushes are quite unlike most of the traditional ones used for digital painting. It is best used for experimental painting and playing around with ideas.
This set of brushes is a game-changer for all those of you that are into character designing and creating comic sequences. Drawing hair on a digital application has never been easier thanks to these type of brush sets!
Most artists will agree that painting hair using the default brushes of any digital painting platform is a very complicated process. These brushes were designed to make life a little easier for those that struggle to draw hair digitally.
This Hair Pack Brush Set comes with a ton different presets, all of which are highly customizable. The size of blending and fly away brushes can be increased up to 1000px while texturing and layering brushes can go up to a highest of 500px. This makes the Hair Pack Brush Set an incredibly convenient choice for designing brilliant looking characters on GIMP.
These brushes can be incredibly useful in a lot of different scenarios to create realistic-looking smoke or for adding textures to an artwork. Explicitly designed for GIMP artists, this pack contains a total of 12 different brush strokes for creating highly versatile smoke effects.
These brushes are a must-have for all kinds of digital artists since smoke effects tend to be required very often in a lot of artworks. This set has three versions of smoke brushes-
This is one of the biggest collections of free GIMP brushes available for download. If you're looking for a wide variety of different brush strokes and patterns that will go along with a broad range of styles, this is an excellent collection of brushes to have.
This is one of those sets that every GIMP Artist should have irrespective of the skill level!
It has a total of 101 brush styles to suit a variety of different styles and concepts.
Originally designed for Adobe Photoshop, the Alex Ruiz Brush set is one of the most unique brush sets out there. This set is absolutely amazing when it comes to sketching, painting, and even rendering. There's just so much you can do with these brushes that it actually deserves an article of its own!
These brushes are surprisingly simple to use, yet they produce some of the most astonishing digital artworks when utilized by experienced hands. These custom brushes were designed from abstract shapes and are also great for experimental painting.
It includes plenty of different brush styles with a good variety of textured ink, pen and airbrush styles markings, apart from several complicated pattern brushes.
This is a set of brushes designed by the well-known artist Darek Zabrocki for professional digital artists working with a variety of different styles.
These brushes became widely popular among digital artists after the author posted a series of highly impressive speed paintings online. There were dozens of fans in the comments sections requesting Darek's brush set to be released which prompted him to compile this set of brushes on DeviantArt.
All the brushes in the set are of professional-grade and require experienced hands in order to be used appropriately.
Every serious digital artist needs this set of brushes added to their stockpile on GIMP!
These are some of the most versatile set of brushes that can be used to create a wide variety of artwork styles and concepts. They are especially useful for creating Manga drawings and comic sequences.
You might need to play around with these brushes a little bit before you get the hang of it, but once you do, there's no limitation to the variety of things you can paint using these brushes!
These brushes work best when used either with the pen tool or the bezier curves. They even replicate the "blot" effect of an actual pen at the beginning and end of every line/curve.
This set of brushes comes directly from the Artist’s personal pack and is one of the most versatile and diverse brush sets I’ve ever come across.
Every serious artist out there needs to check out this set, irrespective of whether you are a beginner or an experienced artist. There’s just so much to work with in this set, it's crazy!
No matter what your style, you’ll find a brush to work with in this set!
If your style of art requires you to paint a lot of animals, then this brush set can make your life a hell lot easier!
The Mane and Tail Brush Pack is great for drawing animal hair, especially horse tails and manes. While I agree that this is a little bit specific, but I’ve personally found this pack to be extremely convenient when painting animals.
So go right ahead and download this pack of brushes if you’re into painting animals.
21. Pencil Brush by Nari
DeviantArt user Nari has done an absolutely amazing job at making this set of easy to use and versatile brushes for GIMP.
It comes with a large and unique mix of styles which will allow you to add a lot of detail into any art piece that you are attempting, irrespective of the style that you're going for.
It has a lot more options in variety to choose from than the average 'free to use' brush packs that you get out there today. Each of the brushes and their varying textures allows it to be versatile enough to fit a variety of projects and will come handy for both private and professional purposes.
Originally Nari had included around 6 brushes in the pack, then extended it to 11, and gave them varying widths as well.
The sheer versatility of this pack makes it just perfect for serious GIMP artists, who are looking for some unique brushes to make incredibly detailed pieces.
However, this doesn't mean that beginners cannot get much use out of them. The brushes are quite user-friendly, and amateur GIMP artists can indeed get to learn a lot by using them
No matter which digital painting software you're working on, may it be Krita, FireAlpaca or even GIMP, drawing human hair and fur is one of the most difficult tasks to accomplish.
You may be able to represent a few strands quite well, but accurately getting a whole set of hair down is another ball game altogether.
And the right set of brushes actually do help to get human hair absolutely right. Now this brush set from the DeviantArt user el-L-en comes with 8 GIMP brushes which are specifically made to just create hair.
It's an amazing set to work with, especially for the more adept GIMP users, who are looking to make some very unique and detailed characters from scratch.
These brushes are not that easy to use, and you will need to have a solid grasp on most of the basic tools and features of GIMP to make the most of them.
So you are new to the platform, do look up some tutorials first, to help you get oriented with the brush styles and accurately represent hair the best to your ability.
It's not every day that you need to use a paint roller in your art piece.
Their use is rather limited in the field of digital painting, but there are moments when their unique texture is perfect for certain art styles and projects.
So if you're looking to make a detailed skyline on your next landscape painting, or thinking of ways to create a picturesque dungeon and cavern themed piece, then rolled paint will help you achieve that unique texture to make your art look very attractive and appealing to any onlooker.
The rolled paintbrushes from Redheadstock is made for both the updated versions of Photoshop and GIMP. And is it's more suited for use in GIMP 2.2 and above, you might experience some performance issues and bugs on the older versions.
Another fantastic aspect of this brush pack is that each brush style inside it comes with a wide variety of textures and width. So, apart from coloring versatility, it will allow you better control over all your pieces as well as the final layers and texturing of your art piece.
Jonas De Ro has made quite a name for himself in the DeviantArt community with some of his incredibly unique digital art and graphic design pieces.
And to help out the wider digital artist community with the GIMP platform, Jonas has created a massive brush set which includes a variety of styles from the more basic to the unique stroke textures.
The pack comes with over 40-50 brushes, and each of them has a rather unique feel to them, and are used differently as well as they vary in both stroke texture and width.
All the brushes in the pack can be subcategorized into 6 different sets:
Basic
Paint
Nature
Environment
Special.
Guides.
Out of all these categories, 'Guides' is the one that stands out more than the rest. The brushes here are used more to jot down an outline and set out ideas on the go and help you create a concrete theme for your next project.
The other brush categories are meant to take that concept and realize it in the form of a painting.
This entire set is simply one of the best for concept artists as well as storyboard painters. And as it's, perfect for character design, a manga and anime illustrator can indeed put them to good use.
If you are still very new to the field of digital painting and are much more familiar with your traditional sketchbook and charcoal pencils, then these pencil brush sets might just be all you need to get you well underway.
The real pencil brush set from Elmerucr feels a lot like graphite on paper and gives off this real pencil-like feel with every stroke.
This brush set comes with three different styles of graphite, which can allow you to fit these into a lot of art styles. Though not as varied as the Nari set, these pencils are versatile enough in terms of their texture and can help you get a lot done.
Their quality is rather high as well, and are also easy to use, making them ideal for both professional and personal projects.
They capture the traditional look of pencil on paper quite perfectly and can make your sketches feel very authentic indeed.
Conclusion
So there you have it, a list of the best free-to-download GIMP brush sets for digital artists of every skill level!
We have compiled some of the most popular and versatile brush sets that you can use to enhance your artwork and hopefully create some amazing pieces.
All of the brushes listed above are entirely free to download and can be used flawlessly on the latest version of GIMP. We hope that we've managed to help you out in finding some interesting sets for your work, and we wish you all the best for your future endeavors!
With so many online painting tools to pick from, digital painters do tend to have a very hard time to figure out which ones can actually fit their purpose and which ones cannot.
However, FireAlpaca is one such painting tool that a lot of painters, professional and amateur alike are opting into more and more off-late.
FireAlpaca is very convenient to use; it’s one of the easier tools to pick up and has a variety of default brush sets that can help you get started with all your projects.
But, if you feel like adding a few more brush sets to your arsenal, then we have just the right list for you today.
The packs that we have reviewed today are free to use and download and cover a wide variety of uses and art styles, which can help you stay well equipped for any project that may come.
Now, when it comes to the variety of brushes and tools available for the FireAlpaca, not many can compete with what this pack from Cocobunnie brings to the table.
Apart from having a wide catalog of traditional-styled brushes which typically mimic a lot of the pencil works, Cocobunnie brings in something new called the ‘scatter brushes.’
These scatter brushes are a lot like stamp brushes which you can very easily replicate on any digital design work. Moreover, these brushes are incredibly easy to customize, and you can edit their settings to best suit your needs and design tastes.
However, if we were to pick the best application for this pack, then it would, without a doubt, be with the FireAlpaca landscape.
If you’re familiar with the landscape setting, you’re bound to have an amazing time with the ‘textured pencil brush’ feature. It’s the most useful tool by far in the pack and is also one of the reasons why more and more designers are getting more inclined towards the pack.
If there is a brush set which is a must-have for the new and amateur digital painters, then the painterly brushes by Candydesufoox would very easily top that list.
FireAlpaca already being a beginner and user-friendly app is simply one of the best for the up and coming digital painters. And this brush set from Candydesufox makes it all the more convenient and fun for the amateurs to get on with their next art project.
These painterly brushes are amazingly versatile, to say the least, and you will be able to use them almost anywhere and on any project.
Some of the tools here are perfect for making grunge designs, while the rest are exactly like paintbrushes and will help you to produce similar strokes. Additionally, you can even combine the two formats together and get some really unique strokes out of them, which you will not be able to find in any other brush set.
However, not all the brushes are free in this pack, but the ones that Candydesufox has released for free are just more than enough for beginner painters.
Here is another brush pack from Candudesufoox which we absolutely adore. The brushes from this tool set tend to follow a more familiar stylistic pattern to that of airbrushes.
The techniques are quite similar in comparison, and these brushes will be very easily able to produce watercolor strokes, which can go rather perfectly with a lot of designs.
However, unlike the painterly brush set, these ones lack in a lot of variety. This set is a pretty small one and contains only around 5 brush styles to pick from. But the designs that they are able to produce are just fantastic.
There is a lot you can achieve with them, and that’s precisely why more and more professional designers are tending to go for this set. The sheer amount of versatile strokes that it can produce allow these brushes to fit almost any art project.
The quality is incredible as well, and we highly recommend this set for all FireAlpaca users.
Cheapkrabs has been a rather new discovery from our part. It was only recently that we have had the opportunity of using their various brush sets, and we wouldn’t be lying if we said that we were absolutely sold form the moment the first stroke materialized on the FireAlpaca canvas.
But out of all of their brush sets, the #3 set is what captivated us the most.
Much like the Alternative Brush Pack from Candydesufox, the #3 Cheapkrabs set comes with 5 brushes which again might seem very small and limited at first but has incredible versatility.
You will be able to customize these brushes in whichever way you want to fit your work needs. And as most of the strokes look somewhat generic, you will be able to use them to blend into a variety of art styles and drawings which need a more traditional approach.
So, if you’re into painting a lot of anime characters or trying our hand at your very own illustration work, then these brushes can simply be a must have.
The free brush set from Oopoutto is another one on the list today that has an incredible amount of variety in terms of brushes, tools, and strokes.
The majority of the DeviantArt community recommend this set for amateurs and professionals alike and can be a very useful tool to those who are quite familiar with the FireAlpaca.
So, with this pack, you will most definitely get more than 20 different brush, many of them quite unique and not all that easily seen in other brush packs. The strokes they produce are just amazing and of high quality, which goes really well with a lot of drawing styles.
Moreover, the pack comes with its very own setup guide and instructions as to how to use the brushes. The tools are pretty simple to work with and will provide you with a versatile range of options for digital drawing, painting as well as inking.
The Ooupoutto brushes can be perfect if you are just getting into the digital painting field and need an ‘easy to use’ set of brush tools to get going.
If you love to work with nature and have a passion for representing scenic landscapes in the FireAlpaca digital art medium, then the Brush Pack #9 from DragonLoreStudios is a must have.
This very unique brush pack has a lot of foliage print designs which are as eye-catching as they are user-friendly.
The creator DragonLoreStudios has created a lot of brush packs for the FireAlpaca; however, it is this one which has captured our attention the most.
Presenting nature accurately in digital media can be quite challenging if one is not equipped with the proper brush set that can produce the desired strokes.
This brush set is just amazing when it comes to making things like forests, trees, dense vegetation, clothing, and even hair.
And just like the Freebie Pack by Cocobunnie, one of its best applications is with the FireAlpaca landscape. Mountain ranges and forests can look lifelike with these brushes, and best of all; they are absolutely free to use and download.
The Brokeh Brush Set from Mo-Fox is all about adding the finishing touches and making your art piece as elegant in appearance as possible.
We know that these light stroke brush sets may not be for everyone, and we’re definitely not recommending them for beginners as it’s more of an adept tool kit. It’s more oriented towards helping the professional designers in getting the precise artwork that they are looking for.
In the field of professional grade graphic designing and custom illustration works, these light brush sets can make or break a piece.
They’re perfect in making concept designs that need a certain degree of a magical flair and interesting lighting effects.
So, if your next art project requires a lot of attention to detail and you are in need of brushes that provide accurate light strokes, then these brushes might be exactly what you need.
The quality and versatility is fantastic as well, and have steadily grown to be a must-have in the professional sphere.
8. Configurable Brush Scripts from Bubsby
These brush sets are a bit different than what most artists are used to. They are highly configurable, and you can customize the set in any way to make a variety of versatile strokes to fit any type of art project.
These brushes will allow you to have complete control over the radius as well as the total stroke sie. It has a ton of fantastic features to pick from in the tool library, as well as opt for repeating patterns if your heart is set on making an intricate mandala.
However, these brushes aren’t exactly suited for full blown artworks that involve a lot of drawing.
They are more suited for rough sketching or inking out a finished piece, sketching down the last few touches to round off your project.
These brushes are also very user-friendly; hence if you’re are rather new to FireAlpaca; this brush set will help you ease right in.
The is the second brush set on our list today by Cocobunnie and features stroke styles and tools that have to do with creating fantastic aerial landscapes and skies.
Though these brushes aren’t exactly cloud patterned, they do mimic cloud styles and can be rather convincing to that effect.
These brushes are perfect if you’re planning to draw mountain ranges and landscapes that are covered by a lot of clouds and fog.
However, they are a bit harder to use than some of the other Cocobunnie packs, but they do come with their very own user-guide and explanations to help even an amateur get started on the right foot.
Moreover, these rushes are not going to serve your purpose for all types of painting works. Sure! They may have a lot of common textures and can be amazing to that end, but they are still more suited for landscape works.
Apart from having typical brush styles, the second brush pack series from DragonLoreStudios has a good mix of patterns which offers a unique range of stroke styles.
This increase in variety makes it a very versatile set of FreeAlpaca brushes to have, and these brushes go amazingly well with any art piece or art design that you want to use it for.
The Brush pack 2 is completely free to download and use and is a much easier tool to use. It comes with a lot of beginner-friendly features that can help get the new FireAlpaca user get oriented with this digital designing software.
The brush set has a mix of splot/splatter brushes along with certain other complex styles, likes bricks, which is a rather unique feature in our opinion.
However, none of the features or strokes are perfect when used alone. You can couple a variety of formats together and lay down the ground works for incredibly detailed art projects.
The spot bruises are just amazing and very fun to use and form a very high stroke quality.
This brush from Mo-Fox is just perfect for making some vegetation in any form of nature or landscape art project.
So, if you’re looking for some efficient yet easy to use set of brushes to digitally represent a forest on the FireAlpaca platform, then this brush set has got you covered.
The brushes present in the pack depicts designs of nature amazingly well. As it comes in a variety of patterns, mimicking various species of green grass, or even tree vines is not going to be a problem at all.
Moreover, the floating feather brushes come rather handy if you have to make some minor wildlife in the background. It will help you to draw smaller birds and floating feathers, and allow you to represent a very picturesque view of the natural landscape.
These brushes are patched with the latest FireAlpaca version as well, so you will not have any issues while using it.
Having trouble digitally representing the night sky in FireAlpaca just the way you always wanted to? Then this brush set might just come in handy when painting out your aspirations.
This fantastic sparkle brush set from Cocobunnie is meant to represent the starry night sky as realistically as possible. Each brush in the set has its very own shape, size, and designing pattern, so you will be able to fill up a dark background with a variety of clouds and stars of your choosing.
The brushes will help you make your night sky look as magical as you have always dreamt it to be.
However, realism is not the only thing that these brushes aim to provide. If you feel like going for a more cartoonish look, then this set also comes with brushes that can make more animated looking stars.
Some of the brushes are also capable of making pixie dust, or tiny bright dots in the background to make a complete constellation in the distance.
Making chain like realistic patterns and designs are perhaps one of the hardest things to represent in any digital painting platform, FireAlpaca included.
But this Chain Brush pack from Mo-Fox makes the whole process incredibly easy. So, no matter whatever project you’re working on, if it requires chains or even certain blocks just closely connected to each other, then you are not going to find a better set than this to help you out with.
This is indeed the best free option that you can get online and comes with three unique brush types so that you’re not stuck with just one single chain style.
All the brushes are quite useful when it comes to adding that bit of uniqueness to your artwork. However, if you’re going or a more conventional style, then Chain brush 1 would be the go-to option.
The entire brush set comes under just 1MB, and installing it is rather easy as well.
This bruh set is indeed very popular among a lot of the DeviantArt frequenters and has a lot of positive reviews on how easy to use it is and how great a quality its brush strokes possess.
Another aspect of the brush strokes which the users absolutely love is how unique they are and how their different style is not all that frequently found in any other brush set.
May it be the texture, the stroke outline, the width, or even the appearance, this brush set is indeed very different from some of the more standard packs that you get today.
Sure! You can primarily use the pencil brushes for sketches, but that truly is the highlight of the entire pack is the oil brush set. These oil brushes provide some of the best-mixed brush hues on FireAlpaca; they are not all that difficult to use, and you can make drawings from basic designs to intricate patterns rather effectively.
This is the only free brush set which offers the basics of both painting and drawing.
Randomly throwing paint on the screen might not always help you get that perfect messy splat that you’re looking for. However, this brush set can help you get that right amount of mess on the FireAlpaca background very easily.
Now, another thing that this set allows is the versatility and the different type of splat designs that you can get out of it. The pack comes with three separate brushes, each with their own unique strokes with the capabilities of mixing together and creating completely different splat-mess designs.
Moreover, may it be an oil splat or even a liquid mess, this brush set can handle both amazingly well.
So, if you ever feel like doing something new with your splat art designs, then do give this brush set a try. We promise that it won’t disappoint.
Stylistically speaking, when it comes to making some of the most intricate designs and artworks, DragonLoreStudios’ #8 is simply one of the best options available on the internet today.
This pack is one of the more versatile FrieAlpaca brush sets from the creator and is capable of creating a unique as well as a vast range of artworks from scratch rather easily.
However, the best use of this brush pack is in making certain thematic aspects of a painting like clouds, smoke, and other forms of inanimate objects which are integral to the setting as well as the theme of the painting.
It comes with 8 brushes, each offering a different type of color intensity of dark clouds, or balls of smoke. Due to their diverse textures and appearance, this brush pack is going to be your go-to when you feel like drawing a bit of an urban sky scrape, or a sky filled with dark thunder clouds.
Additionally, another feature of the set we really like is how it can be used to mimic certain species of grass. The unique brush edges on this set can you help do a lot on FireAlpaca.
Feel like having a bit of fun and experiment with the FireAlpaca platform? Then grab this brush set from Relma 2, which is bound to put a smile on your face as you start to lay down your strokes onto the digital background.
‘Colorful’ and ‘kid-friendly’ is what best describes the brushes from this set. They act a lot like sketch pens in FireAlpaca and can be a very enjoyable relaxing set of brushes if you ever feel like taking a break from your artwork and do some fun experiments.
Moreover, these colorful brushes come in two separate types. The initial type of brushes can be very easily edited and is adjustable by three separate colors of red, white, and blue, which again can be mixed together to create separate color strokes.
The second type of brushes offer a rainbow of colors, and can only be changed if you do some editing on the source code.
However, when combined together, this brush set can be very versatile in its uses, and can indeed achieve a lot with them.
If you love making art in FireAlpaca that requires a lot of luminescent balls, then you will probably need an amazing pair of scatter brushes to get the effects just right. And which scatter brush set can be more effective at helping you get what you want than this set from Nuubles.
This set has a variety of intensities of light which you can scatter around the screen to your heart's content and make some truly magical artwork out of. But, these brushes are best suited for making nighttime effects, especially seaside lighthouse illuminations, and fireflies streaming the dark side.
This set again comes with three brushes, and all you have to do to use them is just wave them across the FireAlpaca screen and watch as the balls come to life.
These brushes are perfect if you want to give your ‘night time setting’ artworks, a unique touch.
If you want to make your winter or mountain landscape art look snowier, then the Snowflake Brush set form Mo-Fox will be the ideal pick for such a setting.
Making very realistic winter imagery is not as easy as one would chart it out to be. Apart from getting the right tone and color, you will also have to get the shades just right to make snow look like snow and not melting vanilla ice cream.
The pack comes with 10 different brushes, each producing a different snowflake mimic which will help you make a very realistic mountain peak art.
The brushes have adjustable settings so you can customize the strokes according to your liking. Some brushes are semi-transparent and can help you make light snow beds on urban streets very easily.
However, one disadvantage of this set is that it’s best suited for winter projects alone. You will not get much use out of them outside that.
The Converted brush set from Kittykittykittyzz has a little bit of everything inside the pack. These brushes have been converted from a Photoshop file by the creator and do seem to work amazingly well on the FireAlpaca platform.
There are some noticeable default options in the set as well, but they are not as versatile or even as useful as some of the other brushes present, but you can still use them if you’re looking for some conventional strokes.
But, do try out these brushes before you decide on using them. There are a lot of brush types and models in the pack, and you may not have much use for all of them.
So select the ones that you think you will need and only download those instead of installing the entire set.
Final Thoughts
The world of digital painting has a huge list of painting tools to pick from, each with their own styles and features. But we hope that our list today was able to help you out with all your FireAlpaca brush set related problems.
Autumn leaves can look beautiful, but it is a task to remove them from the yard. What if we told you that there is an easy way to do it!
If you have worked with a rake all your life, autumn must come with a fair share of backaches. Well, it is time to turn to the Echo PB 580T, which will blow away leaves without you needing to bend down and hurt your back.
It is a premium choice that will have you bidding goodbye to the rake for good! If you have a large backyard, this powerful electric model will help you clear the entire area in the least amount of time - such is its power.
To make your job easier, we decided to test out the Echo PB 580T ourselves and then review it. In the process, we learned a lot about the way it functions and what its best and worst attributes are.
If you are wondering why we picked this product, we should tell you that Echo has become a well-known brand over time. This product is one of their best creations, and it works well in keeping the garden clean. We will move on to discussing each of its brilliant attributes one by one.
Powerful Performance
The durability of its engine is essential for you to be able to use the machine without worrying about it breaking down. The device is equipped with a 2-stroke engine and a tube-mounted throttle, which will easily last for long. It is very durable, and you can carry it around or transport it easily.
To add on, you can use the product for long hours without needing to refuel it. The fuel level can be seen easily, and you will never run out of fuel without being prepared for it. Easy visibility is an important addition which most devices do not have.
The machine will also allow you to control the power and speed accordingly. This makes it energy efficient and you can switch it off immediately after you are done.
Not only leaves, but different kinds of wastes and debris can also be cleared off with this. There are different settings for each of them.
Blowing Capacity
When it comes to blowing leaves, nothing can stand in the way of this blower! It functions quite well and will ensure that your garden is clean within minutes. The common problem with leaves is that they get wet easily and pile on in the yard. So, damp and wet leaves are heavier, and most blowers find it difficult to work with these.
This is where the Echo PB-580T comes in the picture with its brilliant capacity to deal with wet leaves too. Thanks to the blower's speed being very high, piles of wet leaves can easily be taken care of. A handheld throttle will help you control the speed, and you can adjust it according to the power needed.
Comfortable Straps
A good backpack blower needs to be very comfortable to carry around. Although this model weighs around 28 lbs, it should not be a problem since you will be carrying it on your back. The straps are what make it easier, and compared to other brands, this one offers wide and comfortable straps. They will mold on to your shoulders and provide you with ample support.
We were able to carry it around for a longer period without feeling the weight. What's more! You will not have to worry about a neck or shoulder pain as the straps ensure proper weight distribution. Older adults with back problems can also use them efficiently without needing any form of extra support.
5 Years Limited Warranty
Most companies manufacturing equipment do not offer long term warranty, and even if they do, it ranges from 6 months to 1 year. Echo, on the other hand, offers a 5-year limited warranty. This includes fixing the device any time it does not function well or there’s a problem with any of its parts.
However, the warranty does not extend to general wear and tear and will not be valid if the customer messes up any part. There are other rules that fall under the terms and conditions, and hence, it is best to go through their detailed list once the shipment is delivered.
Noise Level
Since this machine is considered to be very powerful, you must be expecting a loud noise along with it. But that is surprisingly not valid for this model, and the maximum sound is 70 dBA only. Yes, you will hear the machine whirring, but that should not disturb anybody inside the house or your neighbors.
Quality
The build quality of this product is excellent, and we were very happy to find the right balance between plastic and steel parts. The weight would have been much more if the entire machine was made of steel. On the other hand, too much plastic would mean less durability. A combination of both keeps the weight in check and makes the blower perfect for home and light-duty professional use.
Additional Attribute
Lastly, we will talk about that one extra feature that adds a feather in its cap. We know how difficult it can be to work in the sweltering heat. This is generally the case if you live in a tropical region or it is summer season. To keep you cool, this machine cycles cold air around you. It will not be very cold, but it will be enough to keep you feeling alright.
What Could've Been Better?
Although we have no complaints about its functioning, we should mention that the device is perfect for professionals and semi-professionals who have some experience of using a blower.
If you are a novice or this is the first device that you plan to use, it may be difficult to operate. You may take time to learn the process. Since this has professional-level controls, you might have to research a little and watch YouTube videos to know how to use it.
Secondly, the product is expensive and may not be an affordable option for the average homeowner. But we would still suggest that if you are able to splurge just a bit, then this is a great deal. It will last for long and will serve well in keeping the backyard or garden clean.
Pros
Easy to assemble
Works silently at 70 dBA
Known to be very durable
Perfect balance of steel and plastic
5-year limited warranty
Cycles cold air to keep the user cool
Cons
Very expensive product
Could be difficult to use for first-timers
Echo PB 580T FAQs
How To Know When To Fill The Tank?
The best part about this device is that it comes with a translucent tank. You can see through it to understand how much fuel is left. Fill it up when the level has come down to 25% so that the blower never stops functioning.
Are Instructions Provided Along With The Product?
You will get a booklet with the package, which contains details about how to use it. They are going to be helpful but may not be enough for first-timers. In such cases, you can call up customer care and ask them your queries. You could also go through links on YouTube about how to use it.
Does The Warranty Stand Valid For All Damages?
While the company has provided for a long term 5 years warranty, it is limited. It will not be extended to your machine in case of wear and tear or damage due to the user’s fault. However, if a part starts to malfunction, the company will take care of that.
Also, remember to not tinker with the parts yourself. First, call up customer care and get it checked by the company representatives. The warranty may become null if you have already dismantled the machine before.
Another point to remember is that the warranty would not work on second-hand products even if it falls within 5 years of purchase.
Can It Be Carried Around An Entire Farm?
Since there are no power cords attached to the product, you can take it around your farm easily. In fact, we were able to take it on our cross country road trip too to clear off spaces where we were going to set up camp. This would work well, and all you need to check is the fuel tank.
Is It Cost-efficient?
Although the price of this model is on the expensive side, we still feel it is worth it. It is packed with the best of features and is known for its durability. Designed for professionals, they can be used for long hours without any hindrance. Also, you can switch it off while walking around your yard, saving fuel. All in all, this is indeed cost-effective and should work well for you.
Echo PB 580T Verdict
If you have been looking for a blower for professional use, this Echo PB-580T is the best option to get. It will allow you to work for hours without needing a refill. We found it to be well-suited for large gardens and yards. Also, you can use it on farms if there are many trees surrounding the area.
Despite being expensive, we would say that it is worth the extra bucks. For the premium quality and efficient performance that it offers, it is a great deal indeed!
With this, we have come to the end of this article. Let us know about your experience of using this product in the comments section below.
How challenging can it be to buy something as basic a lawn mower? Not much, right?
Well, most of us think like that as it does not strike as a complex piece of equipment. But when we went on a spree to find the most efficient, easy start mowers, we had to go through several models with different configs.
And, to make things easier on your part, we decided to put together a comprehensive guide so you can acquire the ideal instant boot-up option. Naturally, we came across multiple options, some electric while others battery or gas-powered.
However, it was only after a ton of research that we were able to handpick the best of the lot. We ended up with 9 best easy start lawn mowers that have proven to be worthy recommendations. Also, to be completely sure, we tested each unit and judged them on every parameter to ensure easy operability.
Now without further ado, let's get moving, shall we?
Out top guy from Troy Bilt can deal with small to medium-sized lawns like a boss as it's a self propelled unit that operates with a powerful 159cc OHV engine. So if you need a reliable machine to get rid of unwanted growth in your garden after the rainy season, we suggest investing in this easy start model.
No products found.
Why Did We Like it?
First and foremost, we like that it comes with 3 cutting options and height settings ranging from 1.25 to 3.75 inches. Therefore, depending on your requirement, you can use this machine to mulch, bag, or even discharge as it includes a standard bushel grass catcher.
Also, we like how conveniently operable it is, owing to the easy-to-drive front and rear tread wheels, in addition to the ergonomic handle. On that note, apart from ensuring smooth navigation across the lawn, the adjustable handle also allows you to choose from a variety of height positions. Therefore, the machine can be operated by all users, regardless of their stature.
Apart from that, this self propelling unit can provide a smooth and clean cut without tiring out your hands. All in all, we recommend this appliance with a built-in 21-inch steel deck to busy homeowners who want to sort out their backyard in a jiffy.
What Could've Been Better?
To be honest, we like this lightweight, 3-in-1 cutting capacity unit the most as it can do the job efficiently without too much noise. However, it is not a very powerful appliance and you may have to devote some more time for mowing sessions if it's a medium-sized lawn.
Up next on our list is the Snapper P2185020 that has us thrilled with the superior cutting performance and incredible strength. That being said, this appliance is a powerhouse and will impress homeowners with neat and clean cuts without fizzling. Therefore, if you're looking for a dependable mower to get rid of the hideous overgrowth, give this a shot.
No products found.
Why Did We Like it?
Let's just start by saying that the P2185020 is a fast and ultra-efficient mower that can cut and bag grass using its superior blades. Furthermore, we like that Snapper did not skimp on the construction of the machine, unlike a lot of other brands in the market. Nevertheless, despite having a heavy-duty built, it offers easy maneuverability without damaging the grass.
But what we like best is the Hi VAC bagging feature that works in conjunction with the integral high-speed lift blades to provide your yard with a clean finish. Also, the powerful vacuum suction mechanism ensures effortless bagging of grass without any dirt blowing into your face.
Apart from that, this self propelled model features a rear wheel drive system with 10 inch high wheels that remarkably improve walk-behind mower traction and facilitate smooth-turning. Overall, it is an excellent product that functions on an OHV engine, offering Ready Start technology and quieter operation.
What Could've Been Better?
You might be wondering why we placed it second on our list even though feature-wise, it does better than our top model. Well, the only reason this Snapper product missed the first place is because of its steep price. The item costs a bomb and is not suitable for homes with a small-size lawn.
Husqvarna has been making a lot of waves recently with their 22-inch self propelled model, designed to meet all garden grooming needs. Our third entry is an exceptional gas lawn mower that ensures good performance even in the most demanding situations. Hence, you can consider this option if you need something affordable yet highly functional.
No products found.
Why Did We Like it?
To begin with, this is a phenomenal product from Husqvarna that can make your neighbors envious. We especially like the edgy and elegant appearance of the machine with a mix of vibrant orange and black.
But we are not all about looks, and so when it comes to performance, this super powerful and innovative mower has ticked all the boxes. Long story short, this appliance features a 3-in-1 grass cutting system including mulching, bagging, and side discharge. Therefore, it is the ultimate choice for moderate-sized lawns as it also runs on the high performing Briggs & Stratton engine.
And if that's not enough to convince you, the 9 cutting height options coupled with a comfortable handle surely will. To explain further, the mower provides height settings ranging from 1.25 to 4 inches, thereby allowing you to operate the machine on any terrain.
Lastly, you also get to control the mower speed according to your gardening needs. Therefore, it is easily one of the most versatile products with effortless manual starting on the market.
What Could've Been Better?
We are, for most parts, happy with the performance and high adaptability of this gas-powered machine. It is near about perfect except for one glitch, which is the noise it produces while running. However, it is not an unbearably loud and annoying mower, so it's not like you'll end up with a headache after a session.
The Lawn-Boy 17734 is designed to make your life easier with its seamless electric start feature even though it runs on gas. Furthermore, this is another self propelled model that has surpassed many competitors, primarily for its durable 21-inch stainless steel deck, which makes it a tough, long lasting choice.
No products found.
Why Did We Like it?
First off, the 17734 functions on a gas-powered 149cc Kohler OHV engine, which makes it suitable for use on moderately sized yards. Also, it's pretty low-maintenance since you do not need to change the oil in this model, simply topping up from time to time will do.
However, the key feature of this appliance is its adjustable rear wheel drive mechanism, which enables smooth cutting with minimal effort, whether you're working on a flat or sloped area. Moreover, you can conveniently navigate across the yard at your preferred cutting height by manipulating the two levers on the side of the handle.
Other than note, we like the 3-in-1 cutting function made easier with the large and sturdy collection bag. So if you've to engage in an unusually long grooming session, you don't have to worry about emptying the mower frequently. All in all, we're very impressed with the superior cut and low emission performance of this sleek and rugged machine.
This Lawn-Boy product has missed a few slots mainly because of its substandard performance on wet grass. So if you need a mower to clean the yard after some frequent spells of rain, this may not be a suitable option for the purpose. Nevertheless, it is still a reliable model for light-duty yard work.
Pros
No oil change required
Works on both flat and sloped areas
Comes with a large and sturdy collection bag
Features two adjustable levers for altering the height
So if you intend to spend a little more and buy a lawn mower with a wide range of features and higher capacity, we recommend investing in this Momox model. Furthermore, we consider this to be an excellent acquisition, especially for its convenient cutting function and easy DIY engine maintenance.
No products found.
Why Did We Like it?
Firstly, this machine looks like something from a James Bond movie, and that's not a description you can often use for a lawn mower. Nevertheless, we had to make sure that it looks as well as plays the part, and as far as its performance goes, we are really impressed.
To begin with, this self propelled unit has made its place on our list, mainly because of its top-notch features. That being said, it is a unique appliance that combines battery-operated electric start and 163cc gas-powered Briggs and Stratton engine. Therefore, with this, you can have the best of both worlds as you can boot it up in seconds and also achieve superior cutting.
Also, when it comes to handling and design, we love the 360° rotation feature on the front wheel, which allows precise cutting while surpassing all obstacles. Other than that, we like the 10 minutes quick charge option that proves very useful when you don't have the time for a full charge.
What Could've Been Better?
We could hardly find any flaws with this Momox model, especially in terms of performance and features. However, the design of the machine itself could be problematic for some users if they only used conventional mowers in the past. Long story short, this unit works on three wheels, unlike most other models and could take time getting used to.
We are halfway through our recommendations, and now is a good time to introduce this reliable and environment-friendly model from Ryobi. On that note, we are impressed with the performance of this battery-operated beast that can clear away unwanted growth in small and medium-sized lawns without the slightest malfunction.
Not all of us need a premium model with all the bells and whistles for a small or medium size backyard. Nevertheless, cleaning and grooming are still necessary as you don't want a horror show on your lawn this rainy season.
That's why Ryobi has cleverly created this high capacity model to provide efficient and affordable mowing solutions. To elaborate further, this sleek and powerful machine uses a powerful 5.0Ah battery that can charge to full capacity under 90 minutes, much faster than most other battery-operated models.
Other than that, this cordless, self propelled unit features rear wheel drive to ensure superior uphill traction and seamless straight line mowing. Furthermore, this mower offers a 2-in-1 mulching and bagging function and capability and 7 height adjustment levels on the handle for comfortable user experience.
Lastly, it's an eco-friendly alternative that runs without oil or gas and is ideal for homeowners looking for a lightweight, easy start unit.
What Could've Been Better?
We are very satisfied with the performance of this battery equipped model, and we especially like how easy it is to push around. However, while testing the product, we noticed that the battery drained pretty quickly when the propeller was used. Apart from that, there's no other drawback in this cordless mower.
Our seventh entry from the house of Oneinmil is an excellent machine that will impress even the most experienced gardening enthusiasts. That being said, it comes equipped with the highly functional 173.9CC OHV gas-powered engine that will make your mowing routine a breeze. So if you need a reliable machine to tidy up things in your yard, give this item a shot.
No products found.
Why Did We Like it?
If you thought we ran out of gas-powered options, we have this versatile unit from Oneinmil to surprise you. For starters, this is a comparatively lightweight model and is quite easy to operate for most users.
We especially like this self propelling machine for its unique rear-wheel drive system that allows you to push the unit forward effortlessly. Also, the option for variable speed provides exceptional maneuverability while mowing in tight spaces. Apart from that, we are very impressed with the Autochok electric start that turns up the machine with the push of a button.
But the list of positives does not end here! You'll also appreciate the 4-in-1 bag, side discharge and mulching function that lets you disperse grass clippings to the side, thereby returning key nutrients to your lawn for healthy growth. Besides, the 8 cutting height settings combined with the 10-inch rear wheels ensure a smooth grooming experience.
What Could've Been Better?
We found a few possible concerns in this otherwise high-quality mower. Chief among them being the slow propeller function and the noise it emits while running. The latter is not a major inconvenience if you have sufficient time in your hands; however, the noise could be an issue for some users.
Despite its position on our list, the GreenWorks 25142 Corded Lawn Mower is one of our favorites for its simple features and easy operability. It is among the most affordable options in the market right now that has wowed users with excellent cutting performance and convenient plug and go function.
Greenworks, 10 Amp 16-Inch 2 in 1, Rear Bag or Mulch...
10 Amp electric motor delivers enough power to cut through...
Why Did We Like it?
Firstly, we like how lightweight and manageable this unit is, making yardwork equivalent to taking a walk in the garden. All you gotta do is push the button to start and then take a stroll, while this corded mower quickly and efficiently deals with unwanted growth.
Furthermore, its 16-inch cutting deck is ideal for your small yard as it can complete the job quickly and efficiently. Other than that, this electric model is capable of 2-in-1 mulching and rear discharge functions. And frankly, that's actually a pretty useful feature given its bargain bin price tag.
Moreover, we also like the 5 position height adjustment and 150 ft cord length of this unit, allowing comfortable use across different areas in the lawn. Also, we love the foldable handles on this model, enabling compact storage. Overall, it's a great cost-effective option, especially if you need a noiseless, low-maintenance machine for your small-sized yard.
What Could've Been Better?
There are not many downsides to buying this GreenWorks unit, but we did notice some flaws while testing it. For instance, we would've preferred if the collection bag was larger and far easier to remove. Other than that, we also found some quality control issues which should be resolved by the maker's stat.
Now that we've reached the end of our list, we would like to finish off with this electric lawn mower by Sun Joe. So if you're on a shoestring budget and need a dependable unit to fix your lawn after the onslaught of rains, we recommend using this appliance to get the chore done.
No products found.
Why Did We Like it?
You will love this compact and lightweight unit that can simplify grooming sessions in a snap. It starts instantly with a push of a button and works exceptionally well in tight places. Therefore, you can rely on this to deal with overgrown grass in otherwise inaccessible corners of your yard.
Furthermore, MJ401E comes equipped with a durable steel blade that cuts a 14-inch wide swath with every pass. And while it does so, the 10.6-gallon hard-top rear bag simultaneously collects grass clippings and detaches easily for instant disposal.
In addition to its outstanding mowing capacity, the model also provides 3 position manual height adjustment and rugged all-terrain wheels to help you navigate across the lawn comfortably. Also, this small size mower packs the power of a gas machine in an electric unit and functions without any releasing harmful carbon emissions.
Lastly, if low maintenance and easy storage are what you seek from your new mower, then this lean and green appliance is your best bet.
What Could've Been Better?
Don't get us wrong, this is a great alternative to gas-powered units as it is more eco-friendly and emits low noise. However, it is a corded electric mower, but the package does not come included with the cord. Therefore, you must get the compatible cord for the mower to work at optimal capacity.
Pros
Compact and lightweight model
Low maintenance and easy to store
Comes with a sturdy, hard-top rear bag
Features rugged, all-terrain wheels
Cons
Cord is not included in the package
Easy Start Mower Buyers' guide
Knowing the 9 best easy start lawn mowers is hardly too much information. You still need to figure out which one of these options works best for you. And since you cannot take each model out for a test drive, we want to help you assess all our candidates and select the most worthy unit. And that's why this guide becomes relevant.
We have listed the various factors you need to consider when buying a lawn mower. Read on to know more…
Electric, Gas, or Battery?
First and foremost, you must decide what type of mower you want for your yard. A gas-powered one will obviously ensure higher capacity and less cutting time, but then those tend to be a little noisy, release carbon emission, and need oil top-ups. On the other hand, electric models are more eco-friendly, but they keep you tethered to a cord. Nevertheless, you also have a no oil, no wire, battery-operated option, which needs charging to run on full capacity.
Deck size
As you already know by now, that the deck size indicates the width or swath of grass a lawn mower cuts with each pass. Generally, 14-20 inches is the usual range of deck sizes you'll find on these units. Therefore, depending on the lawn size, you should focus on this double-digit spec to get the maximum use out of your machine. If you've got a considerably bigger space to groom, choose a higher capacity model for quicker completion.
Mower size and width
Obviously, the size of the deck is proportionate to the size of the overall machine. That being the case, a big-sized model will relatively require more effort to push and maneuver, especially if you've to deal with thick grass. Hence, it's best to choose a mower that's convenient to use and control, since you'll want to spend productive time together. Also, a compact machine is easy to store and does not take up much space.
Height adjustment
Now, this is a crucial factor that you cannot ignore at any cost as you do not want to cut the grass too short because it will turn wilt or die. Also, you definitely don't want to attempt cutting tall grass with a unit that's too low to the ground. Therefore, it's wise to invest in a model that has multiple height adjustment settings for seamless and effective cutting experience.
Mulching vs. Collecting
Both gas mowers and electric mowers can dispose of the grass clippings in several ways. After you've made a choice between them, check to see if the model has an attached collection bag, mulches the clippings to be left on the yard, or just ejects the cut grass out of a side chute. Most mowers have a 3-in-1 option letting you collect, mulch, or toss, so its best to choose with this trio mechanism.
Verdict
Lawn mowers should ideally give you a seamless driving experience and cut grass the way you like. They're hardly among the most complicated home appliances, but it'd be wise if you read up on all the specs and pick a unit best suited to your lawn size, enabling superior functionality and neat finish.
On that note, we have come to the end of this brief and informative guide about easy start mowers. And we hope you were able to select the most suitable option from our itemized reviews that'll best meet your needs.
But before signing off, let's reiterate our findings. The Troy Bilt TB220 is the best overall, and the Husqvarna 22 Inch Self Propelled offers great height settings. Moreover, the Oneinmil Electric Lawn Mower Self Propelled is the best budget buy, while the Ryobi 20" RY40190 is the most eco-friendly option.
Let us know in the comments section below if you agree with our verdict.
Are you having trouble coming up with subjects to sketch in your journal? You might wonder what to draw next as you stare at a blank page in your sketchbook.
We have 75 easy drawing ideas to help you start drawing if you want cool and simple drawing ideas.
You can sketch one picture daily, going through the list in sequence, or skipping to the ones you like best! The only way to advance is to master and keep practicing the basics.
It cannot be easy to develop original drawing ideas constantly, whether you need a creative break during the day, a weekend activity, or more drawing ideas to fill the pages.
We've put together an inventory of easy drawing ideas and a to-do list of each inspiration to help you get your creative juices flowing. So grab your supplies, and get to work!
75 Easy Drawing Ideas You Can Do
Here are the 75 easy drawing ideas you can try!
1. Islet
It is a very easy drawing idea by the illustrator/art designer David Rollyn Powell. The image shows an islet with a tree and boat on the shore.
An islet, by definition, is a small island. By the looks of it, it's truly easy to draw. You can start by drawing the waves first, and then next is the crescent-shaped boat.
You can directly draw a half circle for the islet and then draw the tree. It should be simple if you know how to make a Christmas tree (since it resembles one!)
2. Trees With Quotes
A branding and art design studio, Deep Bear, made this logo design. You can start drawing this minimalist logo with a faint circle using paper and pencil (you don't want the shape to be seen!)
Think of a quote or a line from your favorite song that you can put on top, and then draw some trees (maybe a Christmas tree) at the bottom part of the circle, and that's it!
Minty Sainsbury is a London-based artist who created this drawing. Her intricate, instantly recognizable stylized architectural pencil drawings are what she is best known for.
When you generate a few poor sketches that are out of proportion and appear a little strange, it is simple to become discouraged.
Don't worry; you must persevere and understand that discovering your rhythm may take some time.
5. Potion Bottle
We immediately fell in love with Eli Klemmeck's artwork, also known as "people," who is a daily doodler and star fanatic.
Whether a simple doodle or something more intricate, they're skillfully done and have a magical, cosmic vibe.
Beyond the intricate linework and lovely look of her work, the still life of her drawings will compel you to ponder carefully. Find a list of inspirations for drawing subjects.
6. Bulb With Antlers
It is from an unknown artist, but this easy drawing idea is doable. You draw a bulb first. Create a rough sketch of the light bulb and refine the outline immediately.
When drawing the antlers, draw a smooth line in the same position. Draw the spike and add more shapes for creativity to complete it.
You can use a pencil to fill the dotted lines on the antlers.
7. Starry Sky and Mountains
It is also from an unknown artist. It is a minimalist drawing inspiration and can be used as a tattoo design.
On a piece of paper, draw the mountains and then the stars and planets in outer space. Use your wide imagination and add more details. You can complete this in less than 5 minutes!
8. Broken Arrow With Quotes
It is from another unknown artist. To start, think of a nice quote or a line from your favorite song to write at the center, and then draw the broken lines for the arrow.
For the broken arrow effect, draw some pieces on the text. It can also make a good tattoo design.
9. Moon + Cloud + Anchor
It is another artwork from an unknown artist. As you can see, it looks like a tattoo design. It might have a deeper meaning, but unfortunately, we don't have an explanation.
Tattoo designs are mostly minimalist, so drawing some of them is easy. With this one, you can start by drawing the crescent moon and the cloud below.
On a piece of paper, draw a line through the cloud (for the tie), sketch an anchor, and draw a tie. That simple!
10. Mountain + Trees + Sun
This artwork is from another unknown artist. It is called line art. Line art is a type of illustration that combines negative space and simple line drawings to produce works of art.
In this one, you can see an inverted triangle with a mountain view. You can draw the triangle first and proceed with the sun, the mountain, and the trees.
It is also a good tattoo design!
11. River by the Mountain
It is another artwork by the illustrator/graphic art designer David Rollyn. He calls this great drawing idea a "river runs through it."
This drawing shows a mountain with a river running through it and a simple tree at the side. It is just one of his minimalist drawing ideas that beginners can sketch!
It is from another unknown source. We'll now look at the necessities for drawing or painting a successful, detailed flower.
At first, it could appear a little difficult, but if you follow the instructions, you can draw flowers easily and accurately without encountering difficulties.
The image shows a boy stargazing. It is just another minimalistic drawing, so it should be easy to copy.
You can start by drawing the crescent moon and then draw a line for the tie of the cradle that the boy is lying on. To finish it off, draw some little stars.
14. Hand on Chin
Drawing or painting a human figure can be a real challenge. In this image, this is a woman with a hand on her chin.
Remember one thing before you start: it takes a lot of practice to become a great comic book artist, so don't expect to become one immediately.
An excellent approach to loosening up your hand is to sketch a face. Also, since a sketch is not a final drawing, you're less stressed and more likely to have fun drawing.
15. Campfire
Another simple illustration from the artist David Rollyn Powell. He draws a lot of camping vibes sketches, and it's super easy to do!
You need to draw four elements: the crescent moon, the tent, the tree, and the bonfire. You can personalize it by adding quotes.
16. Treehouse
The artist called this "a treehouse on a floating island in the sky." It might not look very easy, but this one is super easy to draw!
You can start by drawing the floating island and the tree's body. Draw the house in the middle of the tree and add some clouds for creativity.
17. Cardinal Bird
The illustrator described this as a male cardinal bird. With this drawing, you can now use your coloring materials.
It just looks like 3 right-angled triangles. Create a rough sketch of the bird's body and then do the tree branch. After finishing the outline, you can do the coloring.
Consider purchasing an iPad with the appropriate specifications to have the greatest drawing/painting experience.
18. Touching Hands
Drawing hands is difficult since so many types of formation need to be rendered in perspective.
Each finger consists of several cylinders, and the main form's box must also be drawn in perspective.
To avoid needless irritation while you learn, attempt to practice more basic hand motions before moving on to more sophisticated ones.
19. Rose
Although they make beautiful drawing ideas, roses can be difficult to draw. Fortunately, you will discover the best drawing techniques for drawing roses for beginners today.
Make the flower's outline in rough detail. Place the flower's front-end petals exactly where they need to be to begin.
To achieve the most authentic appearance, give the edges a little bit of roughness.
20. Flower on a Heart Vase
It was drawn by a Korean tattoo artist named Masa. This illustration is for a minimalist tattoo. It shows a heart-shaped vase with a flower inside.
Drawing a heart and a flower requires less effort. Anyone can do this in less than a minute!
21. Bulb With Flowers Inside
This drawing was created by a Korean illustrator/author in Los Angeles named Kate Kyehyun Park. She usually draws and paints beautiful flowers.
This illustration shows a light bulb with flowers inside it. Just sketch the bulb first and then do the flowers next. Finalize it by putting more details inside the bulb.
22. Human Face Flower
It is another minimalist tattoo design by the Korean artist Masa. It is another very simple illustration that you can do in just minutes.
Draw the pot first and then outline a human face through the flower's stem, and that's it!
23. Galaxy in a Human Head
A Korean designer named Brian Lay illustrated a human dome with a galaxy in outer space. A few of our favorite artists have duplicated this artwork already.
You can draw the lower part of the face first and then finish off with the celestial bodies at the top. You can add your preferred colors to it. Look into girl-oriented drawingideas here.
24. Head in the Clouds
This artwork was designed by an artist named Emma Rooney. It is originally made as a tattoo design. I bet anyone can draw this one because of its simplicity.
You can start by drawing the lower part of the face and then proceed with the clouds at the top, and that's it!
25. Inverted Umbrella and Flowers
Pretty flowers grow in an umbrella turned upside down in a delicate and simple pattern—symbolizing development in unique or challenging circumstances.
Start with the inverted umbrella and flowers and do the human hand immediately. Finish it off with some broken line pattern (for the raindrops).
26. Heart-Shaped Waves
It is one of the most common tattoo designs for people who love the ocean. You, too, can make it!
Just start drawing a heart shape and start forming the waves. Outline the waves and erase the sketches you did.
27. Box of Flowers
Drawing a box is very simple since we all learned it in grade school. It is also one of the drawings you can do in less than 5 minutes.
Start drawing the box first and then the flowers. Make it more realistic by adding more details.
28. Whale in a Bulb Aquarium
It is another bulb drawing that you can try. In this drawing, these everyday objects are really simple to do. Although you see, there's a lot; it doesn't require details.
Draw the hanging bulb first and then the sand at the bottom. Draw small plants on the sand and then the whale. Lastly, put a heart on top of the whale.
Complete the drawing with other details, and add color to it. This drawing idea resembles a snow globe. Use your imagination and try other things you can draw inside the bulb!
29. Animals Holding Heart Balloons
You can do a very cute drawing/painting with kids! You can also have your kids try it themselves.
Draw an elephant and a bunny holding their heart balloons. We suggest you use coloring materials and add a rainbow/rainbows for this drawing to make it more attractive.
The drawing shows this cute turtle with big eyes. Kids can also try to draw this one since it is a cartoon-like character, and kids will love drawing it!
Start by drawing the turtle's body, and do the eyeballs last. You can easily outline the eyeballs since the eyes are very effortless to draw. Use your colored pencils on this one!
Because still-life female eyes have distinctive features and forms, drawing them can be difficult.
Fortunately, this implies that you may personalize your drawing so that it seems natural as long as you adhere to some fundamental rules.
Drawing the eye and brow outline first can help you get started. Then, while adding highlights, shade in the eye with a blending stump and kneaded eraser.
32. Random Things Inside a Bulb
These are other hanging bulb drawing ideas that you can try. In the image, you can see many hanging bulbs with random things inside them.
You can also customize and make your favorite things to draw inside the bulbs.
33. Kissing
Do you enjoy love stories or romantic comedies? A kiss can be a very difficult act to draw!
Look for tutorials that will show you how to arrange characters for a soft kiss, which is helpful for your sketchbook, love illustrations, and comic books.
34. Icecream + Cone
It is a straightforward illustration of two subjects: a cone and an ice cream. Both objects are simple to draw, adding smiley faces to them. Kids will have fun making this one!
Make use of your coloring materials to add more beauty to the characters.
35. Lips and Lollipops
A digital artist's unfilled flag makes this a cool illustration. The subject was originally a tattoo design, and it is called "drool." These two subjects are easy to do.
Knowing how to draw lips is a useful talent, particularly if you have fun creating self-portraits. You may learn to draw lips using simple instructions in tutorials.
36. Lungs and Flowers
This cool drawing is done by an artist named carling from Vancouver. She does a lot of bullet journals.
This drawing is challenging because it requires details. When it comes to intricate drawings, always do the free-hand sketching first until you get the right thing.
37. Elephant With a Big Balloon
It is a perfect drawing for your children's nursery or baby room. The subject is easy to draw since the elephant's body has no complicated details.
Make use of your coloring materials on this one!
38. Flower Girl
It is a creative piece of art that you can also copy. It might have some intricate details at first glance, but it should be easy through practice.
Its symbolic meaning is that the rose symbolizes her beauty while her thorny body keeps people away because she's blocked off due to some tragedy in her life.
39. Animals Playing With Bubbles
It is another baby room art that you can draw. Since you have already practiced drawing animals, it should be easy this time!
The objects don't have intricate parts on them. Don't forget to use your colored pencils on this one! You might also want to add a friendly dragon to this image.
Find out which Android drawing applications are the finest.
40. Heart in a Flower Vase
Although your heart certainly puts in a lot of effort, drawing it doesn't have to be difficult. It's simpler than you might imagine drawing a human heart.
Using a step-by-step online course, you can quickly draw and shade a realistic heart. Furthermore, you never know what you might discover along the way.
Therefore, grab a pencil and a sketchbook because we need to draw a heart!
41. Dandelion
Drawing a dandelion can be difficult for many individuals due to the flower's unusual shape.
But for a newbie artist, learning to draw a dandelion isn't challenging, especially after comprehending the flower's anatomy. It's a fantastic chance to enhance your drawing abilities.
42. Trapped Shadow
An artist can draw either a natural shadow or an artificial shadow, the two forms of shadow. Learn how to draw them and discover the differences between the two.
With this one, you can do some smudging to finish it and then add light areas on the parts facing the light source.
43. Spaceship and Pizza
This creative illustration shows a nice cartoon spaceship and a slice of pizza. It sure is an amusing one to make!
You will not have to draw an aircraft with multiple sections. A simple spaceship or rocket ship with a strange character (like this pizza slice) in it will be fine!
It can be hard to draw a skull without some research. With a reference image and an outline as a starting point, become familiar with the fundamental anatomy of the human head.
Make your own aesthetic, tackle any skull—tough-looking crossbones, eerie Halloween decor, vibrant sugar skulls for the Day of the Dead, a haunted house, and more.
This still-life portrait was created by an artist named Alice Embruch. About drawing or painting, planning comes first.
It will be quite beneficial to spend only ten minutes drawing rough ideas.
To choose between several stances and how to position the crown on the page, you should experiment with a few samples.
46. Three Bunnies Hiding
It is one of the easy drawing ideas you can try for your kid's nursery room. Drawing a bunny is now easier than ever with step-by-step drawing tutorials online.
You may also want to use an eraser to correct mistakes, and crayons, colored pencils, markers, or paints to fill the shade of your finished drawing.
47. Baymax
Baymax is the robot from Walt Disney's Big Hero 6. Many of your kids might find this character cute because of his fluffy appearance.
Start by drawing a small circle near the top of the page. It's just a guide for the first part of Baymax's head.
Baymax is a great character, so leave plenty of room under the dome for the body. Dragon/Dragons are mythical creatures and are another popular subject for kids to draw.
48. Woman With Leaves
This wonderful work of art was made by an artist named Mike Koubou. It shows a girl with leaves on her body. The artist titled this artwork "overgrown."
Make sure the body outlines of your female models are proportionate if you wish to advance your drawing.
After you've drawn the basic outline of a woman's body, you can add facial characteristics, draw clothing, or even color the figure.
49. Humanoid Robot
Another creative artwork from the artist Mike Koubou. It shows a humanoid robot which the artist titled "robogirl."
There are numerous different types of robots. Thus it can be challenging to draw one. The procedure is rather straightforward.
To illustrate the robot's shape and attitude, draw the wireframe. Draw the necessary body parts using three-dimensional shapes like circles, cylinders, and box shapes.
50. Skull and Butterfly
Skull drawing is fun and simple to learn. A pencil and paper are all you need. A pen, marker, crayon, or any different types of drawing tools you may have are also acceptable.
Knowing more about a butterfly's wing structure before drawing one is incredibly beneficial. It will assist you in organizing the intricate patterning and coloration.
Check out our list of inexpensive drawing tablets if you want a high-quality drawing tablet without breaking the bank.
51. Depressed Person
One of an artist's hardest and most rewarding experiences might be capturing depression in a drawing.
We've discovered that it can also be a therapeutic method to face inner demons and process difficult emotions.
52. Vampire's Mouth
A beginner-friendly step-by-step online course will make it simple to make vampire's lips. It's extremely simple to follow this illustration of a vampire's lips.
Make a horizontal line to serve as the lips' guide, and then make a vertical line as the mouth. Draw the fangs after you've drawn the teeth.
53. Women's Facial Shapes
Depending on their origin, age, the number of ears, etc., all faces appear slightly different, not to mention how each artist draws them.
Practice is quite beneficial when dealing with a task as difficult as the self-portrait of a girl.
54. Emotions
One of the many difficult aspects of drawing is that to learn how to draw a face, there are many different things you need to understand.
It is so because no two faces expressing the same emotion will ever appear alike.
The facial muscles can express almost endless expressions as they contract or relax. There are subtle and forceful expressions.
55. Face Features
Knowing how to draw facial characteristics is crucial to create convincing portraits.
Before drawing a face as a whole, you must first master how to sketch each facial feature separately.
You can only grasp the anatomy thoroughly and comprehend what to look for and what to depict in your drawing by focusing on one feature at a time.
56. Ballerina
The steps to the graceful position are broken down into manageable chunks in step-by-step instructions that may be found online to assist beginners in drawing a ballerina.
Practice is necessary to sketch the body accurately with the right proportions and the muscular curves in the proper locations.
57. Cow
Even though the shapes are quite basic, they combine to create a cow face that is both adorable and convincing.
The shapes first take up most of the paper and are straightforward and symmetrical. You have a body on one side and a lovely cow image!
58. Rope Handcuffs
Drawing handcuffs need not be difficult, especially if they are empty. Please choose whether you want to draw them closed or open, then begin using your method.
Each hand is distinctive. You won't be able to learn how to draw hands in an hour; we won't lie to you about that. Not even in a day or a week, perhaps. You'll need to put in a lot of practice.
59. Sad Boy
It is an illustration of a sad boy sitting alone. The details are not that complex, so it's considered one of the easiest drawing ideas anyone can make.
Knowing how to draw a boy might be useful, whether you're making your comic strip or creating a short story.
60. Spongebob and Patrick
With the help of his silly but adorable friend Patrick Star, SpongeBob SquarePants frequently finds himself in sticky circumstances.
You may learn how to draw them in a few easy steps from several internet tutorials.
61. Heart-Formed Hands
This creative drawing might be complicated because of the details. It shows two holding hands formed as a human heart and a flower on top.
Sketching before you do the final outline is a good idea.
62. Eyeball Candle
It is a creative drawing of a candle made from an eyeball. You can start sketching the eyeball and then the wick of a candle.
Do some outlines using a pencil and erase the unnecessary marks. Add some melting effects and more details on the eyeball to make it more real-life.
63. Penguin
Penguins are stunning aquatic birds that can be found throughout the Southern Hemisphere.
The well-known emperor penguin is a fantastic species to start with if you wish to sketch a penguin.
Whatever kind of penguin you choose to draw, the procedure is straightforward once you divide it into manageable sections.
64. Winnie the Pooh
People of all ages still adore Winnie the Pooh, who is still regarded as an iconic cartoon figure.
The demand for a drawing tutorial has skyrocketed due to Winnie the Pooh's popularity. You can create your scene from your favorite book. Have fun and express yourself creatively!
65. Finger Heart
It's possible to express your feelings for someone by using your hands. Making this image of a heart with your fingers and delivering it as a gift to someone is one technique.
The shape of a heart can also be made with your hands. Even if you are far away, this gesture can convey your affection to someone.
66. Eyeball Head
The expression "window to the soul" refers to the eye. Sometimes, all we need to see are someone's eyes to recognize them instantly.
The procedure is simple to follow. You must learn to be patient if reality is your goal.
67. Penguin Playing Hula Hoop
It is a creative illustration made by a bird lover artist named sheba.drawing. His illustrations are mostly penguins. At this point, you already know how to make a cartoon penguin.
In this drawing, you must create four positions of the penguin playing the hula hoop.
68. Worm
Start by sketching the body's lower half. Keep in mind that worms are long, slender, and capable of multiple bends as you draw two lines.
To make your worm look realistic, add a small amount of detail. In the body, add the extra details. These grooves, sometimes known as "furrows," divide the worm's several segments.
You can also create a game board out of this.
69. Alice in Wonderland Rabbit Hole
This creative artwork is a bit complex because there are a lot of objects. This scene is from our favorite fairy tale, Alice in Wonderland, which Chronicle Books published.
The hole resembles a keyhole. You can start by outlining the keyhole and proceed with the characters inside it. You can also use colored pencils on this one.
You can also try to make one from your favorite book.
70. Human Inside a Water Bottle
A Japanese illustrator makes this unique art style. He noted in this drawing that "the cooler the weather gets, the more I consume water."
It might not look very easy, but you will eventually get this creative idea through practice.
71. Bart Simpson
A member of one of the most well-known cartoon families in history is Bart Simpson. Although he is rather mischievous and disobedient, he occasionally lends a hand to others.
If you follow the straightforward instructions online, drawing him might come naturally to you!
72. Anime Schoolboy Character
Popular Japanese animation and comic book genres with unique visual aesthetics include anime and manga.
Start with drawing their body so you may sketch what they seem like if you want to draw your favorite character or create one on your own.
It's simple to understand why so many people's fantasies have turned a cute mushroom into a little dwelling for fantastical animals.
They appear to be made for that duty, with their strong umbrella-like structure. Using this example, your children can learn how to draw a mushroom.
74. Harley Quinn
Harley Quinn is a female supervillain or antihero from the DC Comics universe. She debuted in 1992's Batman: The Animated Series.
Would you like to illustrate the evil Harley Quinn? Paper and a writing instrument of your choice are all that is required. You could also wish to give your finished product some color.
75. Skull and Butterflies
Create a circle for the dome guidance since we will start with the skull. Next, start outlining the structure of the skull form using the circle as a reference.
Complete the skull's details before drawing the three butterflies on its head, as shown here.
What Are Good Drawing Techniques to Use When Filling Your Sketchbook?
Here are our top 5 drawing techniques for getting past the sketchbook initial overwhelm.
1. Create a “Collection” Page With Quotes From the News
It's much easier to get past your inner critic, feeling overwhelmed, or lacking inspiration by focusing on the minutiae rather than the broad picture.
Fill a blank page with little fragments rather than attempting to fill it with drawing prompts. You can devise a collection of easy things to draw or do throughout the day.
The meals you consume each day and the clothing you wear. From the pantry, ten items. Things scattered about the house.
The entire mess you cleared out in one day. Nothing is lost. These bits together create a fantastic and fun visual tale.
2. Search for Details in a Bigger Scene
Finding a tiny portion of the scene to draw first may make drawing the entire scene less scary.
How can one depict a beach? First, sketch a few shells. Draw just one flower, a few overlapping leaves, or the empty area between the fence posts to depict your garden.
3. Do Not Overthink Your Drawing
What should I draw? The solution can be found in simple items like your keys, wallet, bag contents, or favorite coffee mug.
These seemingly little details are incredibly intimate and reveal a small portion of your narrative.
If the drawing subject has meaning, don't worry about it. You give it meaning by drawing it.
4. Delay Doing Anything Other Than Creating Art
Rather than clearing the mess, draw it. Please take a seat, study it for a while, and then sketch it.
Take your crayons and draw the soiled dishes before washing them while seated next to the sink. The ingredients for the dish you're about to make should all be painted.
Draw your desk before opening your email inbox. Rather than washing your car, draw it. When you go to the store, your shopping list will be much more fun if you draw every item.
5. Don't Be Too Stingy With Your Blank Sketchbook
There are numerous pages in a sketchbook, so don't be too particular about them. You could sometimes be reluctant to do drawing prompts because you fear making mistakes.
When I feel that way, I remind myself that any drawing I produce will always be superior to one I don't produce.
Furthermore, you would have missed out on the joyful process of drawing, which is much more significant. Turn the page if you don't like the outcome. The next drawing is up!
Why Should You Use Your Drawing Skills?
There are many good reasons to start this wonderful activity, but these are the top 5:
1. Drawing and Sketching Are Excellent Ways to Develop Creativity and Boost Imagination.
You can see via art that most problems can be solved in more than one manner.
Open-ended thinking and creativity are fostered through the arts. These can be quite beneficial for problem-solving and personal growth.
You can use the drawing skills you get via sketching in many other aspects of your life.
2. Creating Drawings Stimulates a Variety of Brain Regions.
You improve your concentration and attention span, which can be highly helpful in your personal and professional life.
Additionally, it improves hand-eye coordination, making it easier for you to complete daily chores. However, it also fosters strategic thinking, a skill everyone should have to some degree.
3. Your Overall Health May Even Be Improved by Sketching.
You develop self-esteem and confidence through your artwork and sketches, which improve as you practice.
You'll start to feel accomplished and proud of your art, and you'll carry that confidence with you for the rest of your life.
Whatever your line of work, having confidence in it is tremendously helpful.
4. One of the Key Benefits of Drawing as a Hobby Is Rest.
When you sketch, you may relax and work at your own pace.
You can draw anything you want and have fun doing it because there are no rules, and no one instructs you what to do.
5. You Can Enhance Your Communication Skills by Sketching.
Since drawing ideas lack words, the artist must find alternative means to convey their message to the viewer.
Understanding your feelings and emotions better without using words can help you develop your other communication abilities.
Drawing Ideas FAQ
The following questions concerning drawing inspiration are addressed below:
Is It Too Late to Draw?
No. Adults with the necessary time, perseverance, and consistent practice can learn to draw. The fundamentals of drawing are covered in innumerable videos, courses, and books.
With the right work ethic, anyone may advance their talent and become a better artist.
Can I Learn Drawing In 1 Year?
You can learn the talent in one to a half years if you practice for 30 to 60 minutes daily.
You can easily shorten that period to a few months or a year if you practice drawing for 4-6 hours each day. Mastering the art of drawing depends on your capacity for fast strokes.
Is It Good to Draw All Day?
If you wish to, you can draw each day. However, there is no need to worry about drawing every day if your goal is to improve your artistic abilities.
What Are Life-Drawing Ideas?
It represents the human form, usually done while the subject is still life and naked. Still-life examples would be fruit or vegetable, old pair of shoes, a window, and more.
What Are Some Cool Drawing Ideas?
Some of the cool drawing ideas you can try are the following: cityscapes, landscapes., cartoon characters, vehicles, 3D forms, a window, a pair of shoes, ghosts, horses, and butterflies.
Conclusion On Drawing Ideas
We sincerely hope you have liked reading this list of 75 drawing inspirations. Feel free to post your works on social media platforms so others can get cool drawing ideas.
Some of these drawing ideas can be made by kids too. So next time your child feels creative juices, try one of these easy drawing ideas.
Also, we hope you discover a few small, inspired doodles to brighten your day, whether you're bored or attempting to improve your sketching abilities.
Please feel free to enjoy it and spread the word to your friends.
I love ducks. Do you have or plan to have water fowl as pets? Do you have ducks on your farm or in your backyard? Well, it's winter time, so that means ducks need extra protection from the harsh weather that's going to follow and in this article we have just the duck houses plans for the job !
Ducks are quite vulnerable to cold climate. They prefer hibernating and staying warm in an insulated shelter. Why not take this chance to to make your ducks and chickens comfortable this winter?
If your ducks have small hatchlings, they need security and protection from wild predators like foxes and wolves. The coops provide that security to your birds.
So you can take up a DIY backyard project for the winter, and make a strong and durable duck house for your precious bird friends. Here are some ideas you could use !
Making best out of waste is a very economic way to go. If you don't have enough experience with carpentry, reusing an old or a second-hand doll house would be a very simple option for your ducks and geese. Doll houses are just about perfect for ducks as most ducks aren’t much bigger than your average doll.
A few touch ups, finishing strokes, wooden repairs can be easily done. And you'll have your very own repurposed coop for your birds.
A small cob cottage is very easy to build with natural raw material. The tiny size of this duck house makes it preferable for ducks to live in cozily, after all they deserve warmth and comfort too in addition to safety and shelter.
The temperature inside the duck house can be regulated using soil and stone. So the ducks, geese, or chicken don't feel awfully warm in summers or chilly in winters. The grass thatched roof gives it a very natural feel.
More details at lasthomelyhouse.nl
3. The Barn Coop and Run
How about adding a little farm theme to your chicken and duck coop house? If you have a lot of birds around on your farm house, you could definitely use this idea to house them.
The barn house is quite huge, with multiple levels for both chickens and ducks. The netted enclosed run gives a space big enough for the birds to roam around. So if you're interested in letting your carpentry experience show, this is a very fine design.
Are you looking for a duck house design which isn't difficult to build? This design is something quite unique, different than most traditional duck houses. It follows the easy A-Frame construction technique, so building or replicating this design is not a time consuming task.
This duck house built in a triangular shape can fit in a small space, yet it seems comfortable for birds. The roof is sturdy enough to shelter your winged friends from harsh rains and snow and the extra space in the ceiling helps in air circulation with warmer air accumulating above and heating efficiently. It is available for purchase, and has a hatch on the side for effortless cleaning.
This design offers a very modern look for the duck house. It also seems like it would need less wood than other coops because this design has a metal sheet used for the roof. Metal sheets also remove the risk of rot for the wood or a termite infestation.
It also has a small running space outside the roofed area covered with nets, for extra protection for your ducks and chickens.
This is an easy DIY project, but it can also be purchased. I’d suggest you go for the former option as it is more fulfilling to build a house with your own hands for your little feathery friends.
More details at urbancoopcompany.com
6. The Cabin Duck House
Country houses or cabins can be quite comfortable for your birds just like they are for us humans. Now you can build your ducks a coop resembling a country house on your own.
It's a very easy to build backyard project but can be time consuming if you don't have enough carpentry experience. It's spacious and high enough for the ducks to fly and roam around. You could also build it next to a pond for your birds.
Additionally, if you’re looking for providing your feathery friends with some extra comfort and are willing to put more efforts and risk exhaustion, then you could dig a deep moat around the duck house and fill it with water, connecting it to the pond via a canal.
Sure, it sounds tiresome, but it can also be quite fun an exercise and in the end, when the moat is ready and your ducks fly into it at ease, you can look at it and feel like it was worth the effort. But, of course, this is merely a bonus.
This is a very innovative and cute design for your duck house. It follows the western inn theme for the interior and exterior decor. This idea adds a little character to an otherwise unassuming coop. Perhaps, with this theme running, you can name the ducks after heroes and villains from famous Westerns and when they brawl, you get to have fun witnessing them fight, though there is no gunslinging involved.
‘Eggcelsior’ sounds like a cool name for the hotel, and the rates put out on a board are quite funny.
It looks quite spacious for fifteen to twenty ducks or chickens. The entire construction procedure is given in the link with visual step-by-step aids, which is of course a great aid when following a how-to guide.
This duck house follows the traditional duck house building technique. It's a miniature simple looking shed house, but you can modify it in a lot of ways.
Adding a splash of color on it can change the entire look of a simple decor and make it stand out against the surroundings. Doesn't it look pretty against the frozen background?
The A-Frame houses are one of the older and traditional designs that still set the trend today. They can be modified and redesigned easily - paints, metal, glass, repurposed wood, and so much more. And they work not only for houses for humans, but for our animal friends too. From kennels to pens, they are popular amongst all kinds of residents.
An A-frame playhouse which is repurposed for ducks can be kept well ventilated with windows and doors and the vaulted ceiling ensures good air circulation and extra space to fly inside. Enclosing the duck house with nets can assure you that the birds don't escape.
As the name suggests, this duck coop has a private attached pond inside an enclosure for ducks. This helps them during colder temperatures and it is also easier for ducks to wade in. The duck house seems simple, with a cubic room and four-way slanting roof. It's raised high from ground with a ramp for the duckies. Seems cute, doesn't it?
Now this idea is quite clever. It's a small minimalist wooden shack, but really cozy inside. The windows are made from plexiglass for protection, but the placement allows a lot of sunlight to enter the room.
The barn door gives a nice vintage look to the contrasting modern built of the coop. It seems pretty simple and economic to build this from old wooden pallets. It can even be painted in your colors of choice.
Source Unknown
12. The Floating Duck House
How about building something off the land? If you have a pond or a small lake around your house, you could definitely try this design for your duck house.
It will float around easily if you use sturdy wood, and it will be durable too. You could anchor the coop in one place or keep it floating around. The ducks will be happy to come home in their tiny lake house.
This is a very adorable idea for a coop. It's similar to the country house above, with the framework of a cottage. It doesn't look too difficult to build with simple tools and basic building skills. You'll need basic cuts of wood for this duck house.
It seems small yet comfortable and cozy. It has a small ramp with cute railings on its either side, how quaint! There's also an enclosed run for the birds to roam about.
This is an easy design for an economic duck house. It uses old wooden pallets for construction. The best things about wooden pallets are the sturdiness, durability and the ability to modify them into something extraordinary.
It can look amazing as a rustic underground shack. The window at the top can make sure that your ducks get enough sun and air for their healthy growth. This is not accompanied with any instructions, but if you have basic experience with wooden projects, this won't be difficult to replicate.
Source Unknown
15. The Simple Duck Harbor
This is another type of simple duck house. It’s built on stilts so you can easily install it on the shores of a lake. It can even be installed in your backyard.
It's easily constructable if you have basic carpentry knowledge. Otherwise it can be purchased and redecorated to suit your style.
More details at rochestercoops.com
16. The Duck Tractor
Duck tractors are a really good idea for sheltering your ducks. They're low and can be kept safe from foxes and other predators. You can decide the size according to the number of ducks you have.
Adding a water tub inside, with a bird feeder, can benefit your ducks. You could use a lot of hay for the ducks’ nests and make the coop comfortable. Cleaning the tractor can be easy too.
More details at zombiehunters.org
17. The Aquaduck Floating Duck House
This floating house is available for purchase, as well as a DIY backyard project too. The designers made it with the basic intent of keeping the ducks and their nests safe and away from the predators. The best way to do that is to float your duck house in a pond or a lake.
The base is made of styrofoam and wood which makes it lightweight and durable. The roof hatch can be opened for cleaning and feeding purposes. Over all, this product ticks all the boxes of efficiency.
This lake house is quite a luxurious and spacious. If you cant afford to leave your ducks out unsupervised, they have enough space to run and fly around. It even has a detailed ramp leading to the lake.
The construction might seem difficult, but considering that youll be needing wood just for the framework of the house and stilts, it won’t be much time consuming. It can be covered by screening nets for protection. So if you have a lot of ducks or chickens on your farm, you can definitely go for this duck house.
More details at livereadynow.com
19. The Pallet Duck Coop and Run
Here’s another pallet made economic design for your duck’s shelter. Pallets just seem quite handy and repurposeful for backyard projects like these. They’re also easy to assemble and install and can fit anywhere.
Like this duck house, which is fixed adjacent to the house. It has a small shelter for ducks, which can probably fit less than five at a time. It also has a fenced run, which can be made with pallets or pickets. You can add a small pool within the fenced run, so you won’t have to let your ducks out every time.
If you’re looking for a simplistic approach to building a duck house, this can be the design you've been searching for. It’s a basic cubicle made with simple wooden planks.
It has a slanted roof to avoid retention of rainwater and snow. It doesn't have windows, but it has aint vents on the top to regulate the cold wind. The door is large enough, so it makes the cleaning job easier.
This idea is brilliant for a small or medium sized duck houses. It follows the A-Frame construction technique with some small window openings from the side or the top for sunlight and breeze. The rooftop is strong and sturdy, so the duck house is good for sheltering your ducks and their young ones.
I like the fact that the ramp can be folded in to be a door to the duck house. Using sturdy wood can keep the duck house safe from stormy winds and harsh weather. Painting the exterior in peppy colours will certainly add some charm to it.
If you’re a little tight on the budget, but you still want to build a charming and huge coop for your chickens and ducks, try this design. The website claims to have spent very little finances on it, but it does manage to look colorful and trendy for your backyard.
There’s no tutorial available for this, but there’s a step-by-step visual aid for the entire structure, so you can have judgement as to how to build it. The size seems huge enough to accomodate 20-30 birds easily. You can even fortify the entire duck house with nets.
This idea is quite clever and amazing. It has been converted into a spacious duck and chicken coop from a carport or a garage. The best thing about this repurposed coop is that it doesn't need to be constructed. Adding screening nets can keep your birds safe from predators.
It also has a small shelter inside the enclosure, so the birds can take shelter whenever the weather gets unfavorable. You can add a small or a large pond inside the enclosure so the ducks can enjoy swimming, and you won’t have to supervise constantly. This design seems nifty and easy to execute, so you can try it for sure.
Here we have another thematic duck house for your little birds. It’s a simple duck house, but elevated on a platform, possibly to keep predators away. It does add a lot to the looks of it.
There’s a ramp built to it, which leads directly to the main shelter.
The decor seems quaint and pretty from the outside. It has windows with flower boxes and a nice wind dial on the top. It actually looks like an inn from the wild, wild west.
Another inexpensive duck house made out of a few wooden plywood pieces. I love how ingenious this design is. Simple in built and looks, yet safe for all the ducks. You could even say that your ducks need to duck and enter the hut.
It's installed deeply into the ground so it won't fly off with harsh winds. The low entry makes sure your ducks stay safe from predators, rain and snow. The roof seems high enough for the ducks after entering.
More details at fresheggsdaily.com
26. The Modern Duck House
If you don't want a pre-fabricated duck house, you can build your own design from scratch. Like this modern duck coop and run was made by a beginner, and it turned out to be quite a success. So even if you're inexperienced with carpentry, you can give it a try too.
You may attach a slide door for the entrance of the enclosure. It's more or less like the duck tractor mentioned above, but it seems more extensive, large and safe. It has a wooden roof on the entire enclosure.
More details at frankiemakes.blogspot.ca
27. The Floating Cottage Duck House
Here is another idea for a floating duck house. You can build it, or buy and modify it. It is a simple house, tiny but comfortable for 2-3 ducks.
It has a pretty decor to the entire exterior. It even has a small ramp leading into the water. The railings on the side are too adorable to miss. So if you have a pond in your backyard, this duck house will look really charming, floating around in it.
This design complements the above mentioned Aquaduck Floating Duck House, but it's custom made and easy to make it yourself. But if you're not interested in a DIY project, you could easily get it built on this website.
The house is simply built with two entrances and a ramp from the floating platform. The roof can be detached for cleaning purposes. If you want to decorate it more to add color to your pond, you could paint it in pretty pastel colors as well.
Most people reuse cable spools after their intended purpose is complete. Cables spools can be really useful in backyard and DIY projects. This duck house is made of a similar repurposed cable spool.
It has been covered with wood from all sides, and a ramp is attached to it as well. There are two doors, one for the ducks, and one to make cleaning easy. All in all, this seems like a cozy shelter for your ducks, and doesn't seem expensive or difficult to build.
This duck tractor is quite easy to build and assemble. The variety from above doesn't seem too sturdy, so if your ducks are especially vulnerable to predators, you could give this model a try.
It has strong wooden walls, giving it more stability. The roof is made out of wood and covered with metal, so it gives extra protection from heat and rain. This duck tractor does seem efficient that way.
This bird coop is made out of repurposed wooden pallets and boxes too. It's easy and simple enough to build, and it can fit in small spaces conveniently.
You can add splashes of colors, colourful doors and decorative ramps for some extra charm. This duck house is inexpensive and can be built easily with visual and verbal instructions.
More details at homegrown.org
32. The Ducks Only Coop
This is a simple outdoor duck house, easy to build and charming in looks. It seems like a place ducks will feel comfortable to nest in, or sleep peacefully. There's even a side door for cleaning purposes.
You can build it on the ground or elevate it on a platform. Although if you choose to build it on a platform, you may consider adding a ramp for proper entry of the ducks. Adding fun signs like “Ducks Only” will make it look prettier. There is no tutorial available for this duck house, but if you have enough experience, you can build it according to the picture.
Source Unknown
33. The Playhouse Duck House
We often wonder what to do with a playhouse when kids grow out of it. Do you have such a playhouse sitting in your backyard? You can easily convert it into a spacious duck coop.
It has a human sized door, modified to keep ducks safe. And it also makes the cleaning easier. It has enough space for a storage and nesting too. So your flock can live in this shelter comfortably.
More details at projectzenstead.com
34. The Gaggle Duck and Goose House
This duck house can be built as well as purchased from this site. If you're skilled with carpentry, you could take an idea form the picture and build it in your backyard.
The shelter uses logs for construction, so it gives a cabin look to house. It is also portable since it has wheels attached to it. If you plan on keeping it stationary, you can modify it that way. The human sized side door allows you to clean the duck house properly.
More details at flytesofancy.co.uk
35. Enclosed Duck Tractor
This duck enclosure seems quite fancy, but is very easy to build. It's enclosed on all sides with a door big enough for humans.
There's also a repurposed kid's swimming pool used as a pond for the ducks. The shelter is small but can accommodate around 4-5 ducks. The whole enclosure is covered with a metal roof, so there are no weather or fox troubles.
This coop is another cheap idea for a duck or chicken house. Using old wine and whiskey barrels is a really clever idea. The wood keeps the shelter naturally cool.
The straw coop is easy to build from straw mats. If you find a similar dollhouse, you won't have to worry about making anything. You can add hay and grass for cushioning and nesting.
This was actually intended to be a chicken coop, but you can use it to shelter your ducks too. It's a bigger version of the barrel coop, and they have actually used an old metal water tank here.
With some pallet reconstruction, you can easily modify this into a duck or chicken house. Adding a ramp for the birds near the entrance will make it convenient.
This duck house is made up of old used barrels. The video has a proper step-by-step tutorial. You can make the plastic habitable by adding straw for cushion.
Although it seems easy to build, it's efficient as a makeshift shelter for ducks and chickens. I wouldn't recommend using it as a duck shelter for a long time or in hot summers.
This duck shed is quite easy to build if you have basic experience with woodworks. Even if you don't, the tutorial to build one is quite comprehensive and simple, with step-by-step visual aids.
Using recycled wooden pallets and planks will make it less costly. The top of the duck house is covered with screening nets for better ventilation. There's also a brooding box on the side for little hatchlings.
As the name suggests, this duck house is built on a deck. It's an elevated platform resting on stilts, and there's a small ramp for the ducks to climb towards their shelter. The deck is open from all sides, but you can add railings for security and extra charm.
You can fix a tub next to the duck house for your ducks to swim in. You could give the duck house extra protection by installing it inside an enclosure, but otherwise the duck house is not safe against predatory attacks.
There are surely quite a lot of options at your disposal for building a duck house. From traditional coops to spacious A-frame cabins, fun and innovative themed houses to pool inclusive residences.
So how many of these ideas did you like? I'm pretty sure you must have had your own ideas popping up too. But hey, that's the best part, you can modify these ideas as you like!
So get those tools out of the box, get your thinking hat on and let the imagination help you make your very own duck house.
41. The Quacker Box
This duck house is a very ingenious one. It can be built with the help of this easily comprehensible tutorial. It's a duck tractor which is enclosed on all sides with a screening net. There's a shelter and a run for the ducks.
Moreover, the roof of the shelter is a modified to a green roof or a mini garden with small plants and herbs. So if you're looking for some unique and garden inclusive ideas, this could be what you're looking for.
If ducks are frequent visitors in your backyard, but not pets, you can make this inclusive bird house. It rests on a high post, so animals won't try to prey on the ducks. It also helps shelter these ducks during wintertime and gives them a much needed asylum and a lot of warmth to trudge through the harshness of winter.
The tutorial is very easy to understand and replicate. It gives proper dimensions for the duck house, and can be easily modified. In the end, when you build a shelter for these strays, you will feel quite satisfied, and not just with the outcome but with the purpose this task fulfils.
If you have wooden packing crates just sitting around, you can modify and repurpose them into a duck house. Packing crates are usually quite sturdy to withstand shock and carry heavy material. You can very well use this property of the crates to make a stabilised duck house.
You can make a small door to the side for the chickens or ducks. The crates can also be opened for thorough cleaning. Painting them with bright pastel colors can add charm to an otherwise mundane wooden box.
Alright then! Now you know about 43 for most favorite duck house plans and how you can execute them to build shelters for them. Why don’t you go ahead and give them a try? Almost every one of these ideas is easy to execute and the structures you should last long if they are built the right way.
As a beginner artist, you can often reach the point where your mind becomes a blank slate.
Sometimes, every "masterpiece" feels so similar because your creative juices stop flowing, especially when drawing girls' facial expressions and other related drawing ideas.
We have a solution for you if you're looking for more inspiration on the female form.
In this article, we will give you 44 girl drawing ideas you can quickly sketch with your pencil. Have fun recreating these pieces step-by-step, and you're on your way to becoming a better artist.
44 Drawing Ideas For Girls [Easy Sketching]
In this article, we have 44 girls drawing ideas that can help you choose some ideas for your next artwork as an artist that likes drawing women. Read through!
Symbolic drawing ideas like this shattered face with flower petals speak of hope and a woman's freedom to think on her own, give color to artistry and inspire artists, increasing the flow of their creativity.
If you are still trying to find your art style as a newbie artist, this open-minded girl is a perfect drawing idea to recreate that is meaningful, beautiful, and fun to draw.
Not just that, but there are alsoflower drawing ideas you can learn and incorporate into your drawings.
Beginner artists often struggle to draw the full facial expressions of a human character because, in doing so, they need to capture the intricate details that ultimately reflect the woman you're drawing.
If you're one of those artists, you can always recreate the side profile for an anime/stylized girl drawing. Just make sure to emphasize the volumized hair, the wavy lashes, the pointy nose, and the curved jaw.
Dreaming is something you'll be doing much of as an artist, so why not embed that in your fun drawing idea by creating a girl drawing that's lost in thought?
All you have to do for this is draw a realistic-style girl looking up with her hair tied in a low bun. Make sure to emphasize her collarbones because it adds to the overall dreamish effect.
This anime/comic-inspired drawing idea contains more than meets the eye, nose, and lips. The image exudes power and elegance, evident in how the facial features are positioned, which follows a chin-up orientation.
To give this girl drawing idea life, you don't need to be a top-notch artist or anime cartoonist. You have to ensure the eye, nose, and lips are proportionate when doing contour lines.
As an artist, it is crucial to understand what you want to portray so you can reflect it properly in your drawing idea and, in turn, convey it directly to the audience. You can produce a state of peace or chaos using only your lines.
When you want your characters to portray serenity, you can do the side profile with wavy hair anime girl drawing discussed earlier.
Yet, if you want them to feel the rage or chaos in your characters, the best drawing idea is a full front-faced drawing with glaring eyes (done by darkening edges) and an opened mouth that is similar to shouting.
Some of you are keenly interested and love drawing fun anime comics as an artist, and a cute anime girl is a perfect way to start your drawing journey.
The trick to turning your typical girl drawing into an attractive anime girl is to emphasize points, lines, and edges, slightly exaggerating features to nail the anime style.
Moreover, if you want to make the character more relatable, you can give her comfy clothing items like a sweater or a hoodie.
Level up your symbolic girl drawing idea by incorporating glasses and flowers and transforming your non-realistic/simplified anime girl into a tea bag.
We love this anime girl drawing idea because it screams a mixture of sadness and growth, which can be very helpful in establishing your budding artist career and practicing your drawing skills.
Cameron Mark knows what fun drawing means, as he has drawn this pretty anime/Disney-style girl with detailed facial expressions.
Although the look of this anime girl seems intricate, it is actually beginner-friendly because you do not have to put much effort into drawing the details of both her eyes and teeth, which we love!
Nowadays, a finger heart is an unavoidable drawing idea when talking about a Japanese anime girl drawing (and even anime boys!) because it speaks of love, harmony, and kawaii cuteness.
This Korean-inspired love sign is easy to do, and you can incorporate it with the short-hair anime girl drawing idea we previously discussed.
Another symbolic drawing idea in this list is this beautiful drawing of flower-headed human beings hugging each other.
This anime drawing is relatively beginner-friendly, as you do not have to pour your heart into drawing the intricacies of faces. However, you will need to make an eye-catching flower design to substitute.
Sometimes, what you feel inside is different from what you portray outside because you want to conform to the rules or are afraid to show your true self.
If you want to put this idea into an actual drawing, you need to draw two different facial expressions that overlap.
The key to this beautiful drawing is to know where to connect the two realistic (or anime) faces. You can make the first drawing spacious, with a broad chin and long neck. Then, draw the second picture between those spaces.
An easy girl drawing to make is this realistic girl with hopeful eyes, a pointed nose, semi-parted lips, and a few strands of hair caressing the beautiful facial structure.
You can also choose a more anime-inspired style if you don't feel ready to work more realistically. Either option is fun and eye-catching.
If you are a mom with young students who need a girl drawing for their school project, this anime girl drawing is perfect for recreating.
The highlight of this anime girl drawing that you need to emphasize is the side-parted hair because it makes the drawing more youthful. It's highly detailed without being complicated.
An anime artist or Marvel fan in one would surely want to practice their creative hands and minds with some Marvel-related girl drawing ideas like this one.
As we all know, Ororo Munroe, or Storm, is portrayed without the pupil and the iris when using her powers. You can do it too with your girl drawing, but emphasize the lips and the eyebrows for a more detailed depiction.
The difference between an anime girl drawing and a realistic one often comes down to the range, as changing eye sizes, brow forms, and overall facial expression can take you from comic to anime to video games.
With this specific girl drawing, you need to be clear on where to arch the brows, which are aligned with the eyes.
Also, ensure that the eyes you draw are big enough to make them more appealing, cute, and expressive.
Another Cameron Mark drawing idea in this list is this anime girl with big eyes, an angled chin, and slicked hair.
This is one of the best sketch references for the girl boss category. Make sure you get the proper technique for the hair, as the rest can be patterned with other Cameron illustrations.
Sketch references for the strong and fierce girl drawing category are vast, but they all have a different aspect that makes each stand out.
For this fierce girl drawing, a facial feature to draw that will elevate her look is the different freckles. In recreating this, what you need to remember is that you must know their proper placement.
It is preferable to draw her with the dots near the nose's tip, upper lip, upper brow, and lower eye area.
The inside of a human being bears more weight than the outside because it yearns forcreativity, love, and, sometimes, madness in this crazy world.
You can put that in a drawing by recreating the image above. When you draw this project, the best aspect to emphasize is the details for each butterfly.
How you make the butterfly drawings and where you place them matter more because drawing the girl closing her eyes may be simple child's play for you.
Did you know that you can turn the guidelines when practicing your drawing skills into symmetry to stylize your girl drawing?
Do not erase the guidelines you primarily draw before the actual pencil sketches, as you can shade those lines to emphasize features and make your drawing eye-catching.
Also, choose thebest mechanical pencil for drawing to create eye-catching, expressive pieces!
Aside from the usual pencil sketch, you can level up your technique using coloring tools, like a blue-colored pencil and watercolor paint, when drawing your favorite cute girl illustrations.
To make this work, use different shading techniques to produce varying blue colors while beautiful eyes, brows, nose, lips, and even hair.
If you find this drawing idea a perfect pair for your skills, then you can lean your succeeding artworks more intocartoon drawing ideas.
When you want to create a comic book or anime, it is helpful if you know how to play with emotions by drawing facial expressions, just like the annoyed face.
To draw this, you need to narrow the gap between the eyes and the front part of the eyebrow. Also, scrunch the nose for a more effective portrayal.
This illustration is easy to recreate because you only need to draw one part of the face, as hair strands will cover the other.
The challenge when you draw this one is how you can communicate the sadness or tiredness on her face. It will depend on your shading. To make her look sadder, make the shading heavier around the eyes.
Recreating girls' faces may be redundant for some, but to make your anime girl drawing stand out, adding some glasses will surely be helpful for your project.
To emphasize the glasses, start drawing theiroutline using a pencil and shading the eyeglasses with a yellowish tone.
You can also highlight the eyes and the winged eyeliner, which sets your drawing apart from others.
Aside from the addition of eyeglasses, you can also use heart signs to convey love and contemporary winged eyeliner and nose piercings to create a Gen Z vibe for your girl anime girl drawing.
You can add love hearts on each cheek to do this. You can also do these hearts using different colors to deviate from the monotone of your pencil sketch.
If you are done with the plain girl drawings, you can elevate your drawing game by adding celestial elements (check outspace drawing ideas) and even a nose plaster.
This whole drawing look gives off a very Gen Z vibe, primarily when you draw some curtain bangs paired with short hair. You could even apply this to Ariana Grande drawings or other celebrity fan art.
This drawing type can help you gain Instagram popularity in no time! Of course, it will only happen if you know the proper placement of the added elements and the appropriate shading.
As an artist, you can be inspired by many things, whether they're random or related to your passion, just like mythology.
If you are an artist in mythology, you can surely take inspiration from Hathor, the Egyptian goddess of the sky, fertility, and love.
You can make your drawing similar to the illustration. You can elevate your drawing even further with the help of thebest cheap drawing tablets or thebest iPad for drawing.
A typical anime girl drawing always involves a woman resting her chin on her hand, though it makes for great practice when you use the same pose for more realistic drawings.
Make sure you know which parts to emphasize with shading, and learn how to appropriately draw a hand under the chin, as it can define the overall look.
Enhance your drawing skills by creating a woman and her reflection in the mirror.
You and the audience can draw out different meanings from this female creation, but what's essential is you ensure that lines, angles, and shapes are perfectly observed to stir emotions.
Human beings, especially women, have always been pulled every which way by society and even themselves.
As an artist, you can bring this observation to your art pieces by drawing two subjects in different orientations. You only need the first subject's side profile, while the second subject should face forward.
There are different ways to draw a girl's side profile; one involves drawing a smirk for her smile.
The eyes play a vital role in this concept because they must be fiery. To create that blazing stare, masking the entire outer eye with medium to dark shades of a pencil is an excellent technique to use as an artist.
As an artist, the future is bright for you if you make art with a girl looking forward to the future.
This illustration is simple to make, as you only need to follow the fundamental essence of all the drawing guidelines in the world: shading is the key to making your drawing pop!
Another way to elevate your anime girl drawing game is to draw a girl wearing a casual top for her clothes and have her hair in a cute bun.
Similar to the other illustrations in this article, this one's fast and simple to do, as you only need to play with lines and shades in the hope of giving justice to this girl-with-a-bun idea.
Last but not least is this drawing of a girl with leaves painted on her face, specifically on both sides of her cheek.
Again, this one's a simple art task; you only need to incorporate the guidelines mentioned in this article for other girl drawings and draw crawling leaves on her face to completely satisfy the concept.
Moreover, you can also find inspiration related to this drawing concept fromtattoo drawing ideas.
Tips for Drawing Hair
To practice drawing the hair of your girl subject when making your pencil sketch, you need to remember the following tips:
Draw the hair in a group and put lines and shapes to signify direction and volume rather than individual strands.
Always start a sketch where you hope the character should have her hair parting.
Make sure you seal the gap between the head and the hairline, as this is a common mistake that decreases the value of the character drawing.
Tips for Drawing Eyes
Drawing the eyes of a character is an efficient way to convey emotions and feelings to the audience. Here are some simple (yet vital) tips you must keep in mind:
Always use primary guidelines before drawing your character's lines and shapes.
Keep the distance of the characters' features in mind; they should be at least three eyes apart.
The shape of the iris and pupil can significantly enhance or degrade the overall look (as with anime), so make sure that the shape resonates with the purpose of the drawing.
Tips for Drawing Lips
Lips are vital components that emphasize the characters' emotions in a drawing. Here are some tips for drawing properly:
Start with a sketch of the middle and outer parts of the lips for proportions.
Define the shape of the lips.
Shade the lips of the character to highlight points and angles.
Drawing Ideas for Girls FAQs
We know you have some questions in mind that you want to ask regarding these simple drawings for girls. For that, we have answered some of your FAQs in this section.
What Are the Four Types of Drawing?
The four types of drawing are the following:
Symbolic drawing
Cartoon drawing
Realistic drawing
Expressive drawing
Yet, there are other, more specific types of drawing than these four general ones that you can practice, such as anime/stylized drawings.
What Can My Daughter Draw?
Your daughter can draw anything she likes from this list, and even otherdrawing ideas, as all are easy to do and relatively straightforward.
It is best if she starts with the anime girl with a cat on the hat and cute anime girl drawings to spark her interest.
Drawing Ideas for Girls Conclusion
Now that you know how to unlock your drawing potential to create a beautiful drawing of a girl character, you can surely elevate your skills and style (even your Instagram reach!).
So, what are you waiting for? Start practicing and unlock the fullest potential of the artist in you!
Drawing is a great way to express yourself on paper. While it does encourage creativity, there are times when you might find yourself struggling to find inspiration.
Whether you're looking to improve your drawing techniques or need inspiration to pass the time, having alist of drawing ideas is an excellent way to keep those creative juices flowing.
For this blog post, we've gathered the best drawing ideas for beginners to try.
40 Easy Drawing Ideas for Beginners to Practice Drawing
Seeing many pieces with complicated details online can overwhelm new artists.
However, finding more simple drawing ideas might help bring positivity and help you kick-start your sketching journey.
Here are 40 beginner-friendly drawing ideas for any beginner artist to try for their first draft.
This sketch might be intimidating at first. However, if you look at it closely, you can make out the simple shapes that create each element.
Start with identifying the circles and edges so you won't be overwhelmed. The intricate patterns on the planets also help with practicing your control over your pencil.
The sun and moon are common subjects in easy sketch ideas. These drawings are usually made of simple elements, making them an excellent starting point for beginner artists.
You can also see how other elements, such as wavy lines and dots, relate to a simple circle.
This simple sketch can help you become more familiar with the motions of water. Before going to the more complicated seascapes, you can start with this.
You can also practice working on curved lines and determining their relationships with other elements.
Creating drawings of mountains is a great way to practice shading and learn about light. The simple shapes are easy to draw, but it helps you understand how light can be expressed through shading.
You can add details, like other heavenly bodies, to make your drawing more interesting.
You can easily draw a message in a bottle as a little doodle. It'll help you work on the dimensions and depth of objects.
Besides being a cute sketch, it's a great way to work on your perspective. You can also try to draw other things in bottles, like ships, to make it more fun.
This fun little pose is a lot easier to do with animals. You can easily draw little variations with the main focus of having the animal in a specific position, with most of the body hidden out of frame.
You can also draw this pose with other animals, like a beloved pet, to challenge yourself with their details.
This little doodle is a simple way to start drawing ideas that are out of this world. A simple UFO abducting a human is also a funny way to say goodbye. Feel free to add a little alien friend in the UFO as well.
You can also look into otherspace drawing ideas to help you build on this one.
Here's a variation of a previous drawing idea that can help you understand how perspective affects your drawing subjects. While it has similar elements, you can see how these lines and curves are related.
These variations also make forgreat tattoo drawing ideas, letting you choose the different ways you can have a design on your body.
Dinosaurs are fun to draw, especially since they come in different shapes and sizes. Turning it into a smaller cartoon character helps simplify it, making it easy to draw.
Another one of those easy sketch ideas involves adding elements to the sun and the moon. It helps to combine different features which you won't usually see entwined in real life.
Instead of drawing eyes and a full head, get creative and replace it first with clouds and the sun. These are easier to draw and provide a fun twist to your art.
If you're up for a challenge with these clouds drawing ideas, you can also try removing some of the edges and turning them into a line drawing. This drawing method experiments with the outline of your subject.
This sketch idea is another way to hold off from drawing eyes. You'll have to draw the lower part of the face and add clouds for the upper part of the head. It's easy and fun to create.
Here is another of the many interesting and easy drawing ideas involving the sun and moon. It's also simple to create and focuses more on curved lines.
This easy drawing was once commonly found in our school notebooks when we were kids. They're simple drawings of swings that only requires you to draw a few lines.
This simple drawing is inspired by the Pixar movie called Up. It's easy to draw, involving a few lines and shapes. You can also play with the colors of this sketch to create interesting and vibrant color combinations.
To improve your drawing techniques, you can draw other Disney characters, like Baymax. There are many fun and interesting characters to choose from to help you become a better artist.
This simple drawing is an excellent way for beginners to practice the relationships between lines and edges. You can draw them from different angles to experiment with these concepts.
It's also a greatdrawing idea for girls, especially since it has an adorable love letter motif.
You can draw this along with otherflower drawing ideas to help you familiarize yourself with fauna. They're a great way to practice one of the most common subjects for realistic and still-life pieces.
This sketch is another adorable take on a dinosaur. Adding a little helmet isn't only cute to draw. It also helps you learn how to draw things inside other spaces.
Thanks to its simple design and colors, you can easily sketch this adorable tea-rex. If you're looking for something a little stronger, you can try having them hold a coffee mug instead.
This whimsical idea is one of the bestthings to draw, especially for beginners. It captures the simple things in life that every artist is familiar with.
This drawing style is a great stepping stone for working oncartoon and anime characters.
Beginners looking to draw adorable animals can also try to draw this bear while it eats noodles. It's a great start, especially when learning to draw human activities.
If you're looking for drawings for beginners, especially children, try small insects like bees. They have simple details which beginner artists can draw regardless of their skill level.
Burgeoning artists can improve the details as they progress with their techniques.
You can also draw a dinosaur with a telephone, which is another human thing for them to do. It's a cute sketch you can do in random notebooks, along with the other dinosaur ideas.
Groot is a beloved character who beginners love to draw. He's one of the easier drawing ideas but is still packed with details that can improve your skills for future drawings.
You can find a simple tutorial online to help you draw this picture of baby Groot and other similar Marvel characters.
Sketching this minimalist version of two people hugging helps make it easy to draw this specific pose. It has fewer details than actual people, making it easier to get the motions and emotions down.
This minimalist sketch of a face is an excellent example of line drawing. It simplifies the shapes and edges of the face, making it easier when you practice sketching.
You can try adding variations to how it's done, experimenting with the plants used to decorate the face.
Another Disney classic you might want to draw is Mickey Mouse. His details are fairly easy to work with, especially since he's mostly made of circles and shading.
You can also do drawings of his friends, like Minnie Mouse or Goofy, to further improve your sketching technique.
Drawing a delicious fruit is another step towards working on more realistic still-life pieces. They're typical drawings, especially for younger artists who see these in their reference books.
You can draw the small and simple details of these everyday objects, whether in cartoon form or by taking inspiration from the real deal.
One of the greatest inspirations you can have for drawing is your pet. Not only are they adorable, but they're also animals you see on a daily basis, making it easier for you to study their features.
You can simplify their appearance into small shapes and lines to help you work out the details.
These love birds may seem difficult to draw. However, they can be simplified to distinct shapes, which you can use as a guide. Slowly add the details as you go.
Your best friend for this piece will be the pencil since it will help you get all those shadows and shading for a more realistic finish.
This cute cartoonish take on the car makes it easier for beginner artists to draw. Like previous examples, it focuses on simple shapes which even a child can create.
You can check out a step-by-step guide online to help you draw a cartoon car.
Supplies to Gather Before Drawing
Before starting any sketch, you need a few tools to bring your drawing ideas to life.
These are the supplies any aspiring artist needs to start creating a masterpiece.
Paper
Your paper is the most important element of drawing. It's a blank canvas waiting to be filled with lines, shapes, and colors.
Avoid cheap paper because it can easily rip when you erase too much. Try to use decent-quality paper for your sketchbook or drawing pad. It doesn't have to be expensive.
If you're looking into digital art, you might want to look for thebest iPad for drawing. It will serve as your paper. However, take note of your budget for these kinds of gadgets.
Pencil
When starting out with drawing, it's best to start with a pencil. It lets you easily erase errors without having to waste paper. Even experts start drawing with this.
You can begin with a set of HB, 2B, 6B, and 9B. Then, you can expand your set as you improve your drawing skills. You can also look into amechanical pencil, depending on your preferences.
The H-scale is usually for sketching, while the B-scale is for your final lines.
You can also look into colored pencils if adding color is part of your drawing process.
Pen
Besides your B-scale pencils, pens are also used to finalize everything you draw.
Look into fine point or fine liner pens. Once you're happy with your lines, you can use one of these pens to finalize them. Then, erase any pencil marks after.
Eraser
It's best to look for a good brand of eraser to help you fully clean out those mistakes and to avoid smudging on the paper.
Whether you're working with a traditional or kneed eraser, a reliable brand will help make erasing easier.
Ruler
Besides helping you measure your lines, having a ruler around can help you easily draw a straight line.
It's best to have one of these around, even if you're not drawing straight lines.
Compass
While a ruler works on straight lines, a compass helps you get a perfect circle every time.
It can be difficult to draw a circle free hand. Having this handy tool will help you get them done in a snap.
Marker
Markers are used by kids and adults for coloring and outlining your beginner.
These tools are beginner-friendly but are still used by many experts for their solid colors.
Drawing Ideas for Beginners FAQs
You might have more questions about sketching and improving your drawing technique.
We’ve gathered the common questions on this medium to help you practice drawing.
What Is the First Thing to Learn When Drawing Ideas for Beginners?
Every artist should first start with the different shapes and forms. They may seem simple, but they build up any artwork.
Draw the 2D forms before moving to the 3D. Work on a circle before moving to a sphere. Draw a square before working on a cube.
This method will help you gain perspective and simplify how you draw your subject.
If you’re starting with digital art, you might want to consider using acheap drawing tablet before investing in more expensive devices.
These can help you get used to drawing simple shapes without having to cost too much.
What are the Five Basics of Drawing?
Drawing is a skill that can be developed in 5 basic steps. While they may seem simple, they can be the backbone of even the most complicated creations.
It can take time to master these basics. Even the best artists rely on these to help with their drawings.
Before creating the next best still life, you must practice the basics and take your time with art.
Edges
All art is made up of lines and edges that form geometric shapes. You need to understand how these work to properly show what’s happening to your drawing.
A great example would be a shape with three lines and edges. This shape will ALWAYS be a triangle. It’s entirely different from a square or a hexagon.
You’d also notice how these shapes would always have their lines connected. You would never see a series of three unconnected lines be called a triangle.
Over time, you’ll start to draw with more complex drawing steps. However, these edges and shapes will help make things simpler to draw.
You don’t exactly have to count every edge and line as your drawing skills progress. You simply need to understand their basics to improve your drawing practice.
Space
You will notice how your subject always takes up space when you draw. Anything surrounding it is called negative space.
A great example of this is a donut. While the donut occupies space, you also consider the negative space around it when you put it on paper.
By understanding your subject’s relationship with the space it DOES and DOESN’T occupy, you can draw it better with respect to everything around it.
Light and Shadow
Light and shadows provide depth and perspective to make everything you draw more realistic. Color is also heavily affected by how much light is on it.
The more light there is toward the object, the less shading you’ll have to do.
The brighter the object is, the more you’d have to squint to see its details. Those in darker places would be difficult to see, hence the more solid shading.
Try to observe what an item is like when it has light shining on it and the shadows that form when light is blocked.
Relationships
Every line, dot, shape, and curve is related to each other when you draw. That relationship is what makes your sketch make sense to the viewer.
Learn how each element is related to the other. Every small detail you draw contributes to your overall work and differentiates your drawings from others.
Knowing what figures will go where and their sizes before you start inking anything is also helpful.
Depending on your style, you might want to have everything in proportion to each other to fit the narrative of your work.
The Whole or Gestalt
The last skill you must master is putting the first four steps together. Each of these elements can work for your art.
However, if one stood out more than the other, there would be an imbalance in the final sketch.
These details have many similarities for a reason. How will the relationship of light, space, and edges come together?
It can take time to master this last one. However, having all of it together will make your work more coherent to the viewer and will improve your craft as an artist.
Drawing Ideas for Beginners Conclusion
At the end of the day, drawing is all about expressing yourself.
These are only a few simple drawing ideas to help keep those creative juices going. You'll still have to constantly work on it to become a master.
Pick up your pencil and paper and draw whatever your heart desires.
Using a pool and maintaining it are two different things; they lie on the extreme ends of the spectrum. Everyone loves to spend the long, blistering summer afternoons in the pool, but when it comes to pool cleaning, everything changes; and truthfully, people run from pool maintenance for some legit reasons. This product is discontinued by the maker, and not available in the market. More updated products without caddy are available from the maker such as Dolphin Premier Robotic Pool Cleaner
From keeping up the chlorine levels to clearing leaves and other surface debris and then making sure the floor, waterline, and walls of the pool remain clean and free of slimy algae buildups— you certainly need a lot of time and energy. Doing all of this by hand needs a full day. You also need to factor in the extensive use of the pool in peak summer when it has to be cleaned every other week.
With such a daunting maintenance and cleaning task at hand, won’t it be a good idea to find some automatic way to do it? Yes, this is certainly a great idea, and that’s why robotic pool cleaners have been designed in the first place. They come in really useful for cleaning your pool from inside— the most difficult part of pool maintenance.
The market is brimming with robot cleaners, making it quite difficult for buyers to settle on a single model. To make the purchase of a robotic pool cleaner easy for you, we have picked a single model for your consideration: Dolphin’s M400 with Caddy. Let’s have a comprehensive review of this state-of-the-art robotic pool cleaner.
Dolphin M400 with Caddy Review
Designed for in-ground pool types
Features dual-drive motor with a separate power supply
Clean walls, floors, and waterline of a pool
Dolphin M400 with Caddy is a powerful robotic pool cleaner (almost twice as powerful as similar units from other manufacturers). It comes with a long power cord that allows you to clean any pool with dimensions up to 50 feet thoroughly. In short, it is an ideal cleaning gear for all small and large home pools.
CleaverClean Technology Makes All the Difference
Besides power, the patented CleaverClean technology of Dolphin M400 is the reason why it stands apart among other automatic pool cleaners. Many buyers are skeptical of robotic pool cleaners because they think that these machines will only waste energy and time by cleaning the same patch over and over again.
Dolphin has dispelled this doubt by equipping its robotic cleaner with a technology that features an advance intuitive navigation system and scanning software. This combination of features makes Dolphin M400 a “Smart Cleaner.” The CleaverClean technology imparts the following abilities to the robotic pool cleaner.
It cleans the floors and walls of the pool by taking the most efficient path
It doesn’t go back to the freshly cleaned patch/line again
It smartly navigates around obstacles in the pool (stairs, etc.)
All these characteristics make the use of Dolphin M400 time-saving and energy-efficient.
Everything Dual
The other bit that makes Dolphin M400 the best robotic pool cleaner on the block is its beefed up maneuvering and filtration. It uses an all-direction dual drive that ensures optimal coverage and maneuverability. This allows the cleaner to deal with all sorts of pools irrespective of their shapes and the obstacles and slopes they have.
Moreover, the cleaner also features a dual-filtration system. When other pool cleaners only collect rough dirt and dust particles from the pool floor, Dolphin M400 takes care of fine and ultra-fine particles as well. Just don’t forget to clean the filter after every use so that the cleaner will continue to filter your water for maximum cleanness.
Even though the automatic system of Dolphin M400 is good enough to clean any pool without needing any assistance, but you still get the option to control the cleaner through a smartphone application. You can also set weekly timers and initialize the cleaning program via this app. The idea of the app control is to give you complete freedom to customize its working.
Many people refrain from getting automatic pool cleaners because they think that using electronics in water is not meant for long-lasting use. However, that’s not the case with Dolphin M400. It has a sturdy construction and a completely sealed frame. Moreover, the manufacturer has incorporated special features in its design so that it can withstand the natural buoyant push of the water while traversing through the pool floor.
Dolphin has used floats on the handle of the cleaner for ascertaining it can keep its traction on the floor while moving, turning, and scrubbing in water.
Pros
Ideal for in-ground pools
Smart navigation system saves time and energy
Dual filtration ensures more clean water
Cons
A bit difficult to operate through the app
Float and handle configuration is complex and confusing
Gets heavy after the use
Robotic Pool Cleaner Buying Guide
If you want to explore more options in the market, then evaluate any robotic cleaner by factoring in these features.
Coverage
The majority of robotic cleaners available in the market are only good for pool floors and collecting rough debris. If you are investing in a high-end machine, then make sure it can also offer vertical cleaning (pool walls) coverage as well. Also, its filtration system must clean water for fine dirt particles too.
Smart Navigation
The whole point of getting a robot cleaner is to avail maximum comfort with regard to pool maintenance. Therefore, make sure the pool cleaner you are buying features a smart navigation system so that you can leave it on its own rather than overseeing it all the while.
Long and Tangle-Free Power Cord
Robotic pool cleaners make a lot of maneuvers and turns. The lateral movement of a corded pool cleaner twists its power cable which can hinder its cleaning operations. So, it would be better if the cleaner you are buying features an extra-long power cord that doesn’t easily tangle.
Timer
Having a timer in your robot pool cleaner means you can use it while providing zero assistance. Try to pick a cleaner that is equipped with a programmable timer.
Dolphin M400 with Caddy is the right option for a cleaner if you are looking to clean the floor and walls of your medium-sized home pool without offering any manual assistance. Its powerful motor, sturdy construction, smart navigation, and dual filtration make it the best robotic pool cleaner in this price range.
Dolphin M400 FAQ
Is it Fitted with a Removable Filter?
Yes, Dolphin M400 comes with a detachable filter that you need to remove and rinse after every cleaning job. You also need to change it after 4-6 months, depending on your use.
How Long Does Dolphin M400 Take for Cleaning the Pool?
It varies from pool to pool, and the degree of cleaning a certain pool requires. But as per the manufacturer’s claim, it can clean a small home pool within an hour.
How to Know If Cleaner’s Cartridge Is Full?
The Dolphin M400 comes with a built-in indicator that lit up when the cartridge is full and needs to be cleaned. When this happens, remove the cleaner from the pool, detach the cartridge and rinse it with clean water and install it back.
Does Remote Come in the Package?
No, you need to buy it separately. However, you can use Dolphin’s app on your phone as the remote control for the cleaner.
Do you have dry patches in your garden that need to be covered up? Think twice before using the bag of seeds lying in your shed since the last season.
It may have lost its germinating power, and your effort might just go to waste. Also, old seeds exposed to moisture might have their germinating power reduced, so you will need more seeds to cover an area.
Furthermore, seed packets will have an expiration date stamped on them. Now, if that date has passed, it is best to throw away the container. If the date is close by or you bought the packets a year ago, it is best to test them first.
Read on to know about the best kind of seeds and how to test them. We have discussed the different reasons that seeds may go bad and how to store them for a longer shelf life.
So, without further ado, let’s dive in.
How To Select The Perfect Seeds?
Before getting into the reasons why seeds can go bad, let us first discuss how to select the right seed. You need to know that the most important thing is to determine the kind of soil on which your seeds will be planted.
What kind of area do you live in? Do you have a sandy backyard or your soil mostly consists of heavy clay? Answering these questions will help you figure out what kind of seeds you need. Every seed does not thrive in every kind of soil. In fact, you can have a different kind of grass from your neighbor.
A good way to deal with this situation could be by selecting all-purpose grass seeds, which generally go well with your region and climate. These will be available at any local nursery or plant store. It usually includes warm season grasses if you live on the southern side of the US. Cool season grasses are prevalent on the northern side and generally grow in every place there.
When you are purchasing blends, it will include all types. So, you will have some which grow well in shady areas, while others grow well under the sun. It will provide great coverage across the lawn and will help you cover barren areas.
Two variants of grass are most popular - Kentucky Ryegrass and Perennial Ryegrass. They are popular because these grow well in zones 3-9. They also have an extensive shelf life and can remain alive longer than most other grasses. Plus, you can purchase them from your local supermarkets as well as nurseries.
Although they might not be able to live through all kinds of situations, they are known to be quite adaptable.
What To Consider When Buying Seeds?
Moisture is something that can bring down the seed’s productivity or destroy it completely. So, make sure that you never buy open seed bags from shops. While moisture helps seeds germinate, that happens once you plant them. Otherwise, it can spoil the seeds and create pathogens. These pathogens break the seeds down, and they slowly decay with time.
This can happen even if a slight amount of moisture is present in the pack. Hence, watch the packet very closely for any tears.
Secondly, pay attention to how the seed packets have been stored. Ideally, they need to be kept upright with some space around them. This is needed for airflow, which keeps the seeds in perfect condition. If the packets are kept on top of each other with no space for airflow, they may again start catching moisture. This will prevent them from germinating well.
Also, check for the date which will be printed on the pack. It is best to avoid seeds that have been on the shelf for a long time. There is a chance that they might not grow as expected. So, always look for the latest date and choose that.
You may be purchasing extra grass seeds and may have to store it away for the winter. For this, it is best to select a bag with a mesh. This will allow air to flow through it while the mesh keeps insects away. Insects and rodents can be very detrimental for your seeds, and they can eat away all of it throughout the winter if not protected well.
Although experts say that a cold temperature is best for storing these seeds, it is better to keep them in the basement or garage and not in the garden shed. This is because they will be exposed to direct cold in an open shed.
You will need a temperature that is below 60 degrees, and the humidity level should be 60% or less. This is recommended by Oregon State University Seed Laboratory, and even if it is far cooler and drier than that, the seeds will survive.
Adding on, if you had been planning to store seeds, it is best to choose the best of the lot at any store. Purchase seeds that have a far expiration date and these should last long. Also, pick up high-quality seeds as they will again stay potent for a longer time.
By high quality, we mean seeds that have less than 0.5% weed. Also, the chaff or dirt present in the pack should be less than 2%. The presence of other crops should also not be more than 2%. If the seeds meet these criteria, then you should have a pack of healthy seeds.
Factor That Could Prevent Proper Growth
You might have purchased the best seeds and checked the date twice before buying. There are still chances that the seeds may not work properly after a year. The bag might have been tightly sealed, and the planting directions may have been given. In such cases, it can get very frustrating.
If the grass on your porch is not growing well, there could be certain reasons behind it. Read on to know all about them.
Less Sunlight
Most grass seeds need direct exposure to sunlight to grow well. They need to be placed under the sun for at least 3 hours every day. This would lead to good growth. However, if your seeds are planted in the shade, they may refuse to grow well or may take a lot of time to germinate.
To deal with such cases, it is best to opt for seeds of different variants that can grow in the shade. We would suggest that you first try out with a handful of seeds to see if they grow. If the seeds germinate, buy the same variant otherwise try out something else.
Cold Temperature
Cold weather can stop the growth of grass completely. Grass generally needs at least a soil temperature of 55 degrees to begin growing. Anything colder than that can prevent growth altogether. The air temperature needs to be at 60 degrees consistently. A higher temperature will not be a problem, but a lower one will be.
So, it would help if you were careful about the time of the year when you plant them. If they are planted too early, the seeds will not germinate and sit on the ground. This will not necessarily kill all the seeds, but many could be damaged by the time the temperature rises.
We would recommend waiting till the early days of summer before you plant them. Take a few days to see if the temperature is stable.
Wet Soil
Yes, the grass needs to get water regularly in order to grow well. But too much of it may destroy them. Make sure that water does not flood the area, or it does not settle on the surface. That would mean the seeds rotting or decaying away.
It is best to grow them after the rainy season. If you are planting it in the spring, ensure that you do it after heavy downpours are over before planting them. Water your seeds lightly every day, and that should provide them with enough to grow well.
How To Know If Grass Seed Is Still Good?
Before you go on to buy new seeds for the garden, it is best to try and see if your old seeds will still germinate. Follow the process below to see if they are alive and in a condition to grow.
Dampen a paper napkin and keep in a cup.
Fill up the cup with an inch of water.
Now, sprinkle your seeds in the cup. Make sure they fall on the napkin itself.
Create a greenhouse effect by covering the cup with plastic. For this, you can use a plastic bag.
Keep a watch on the napkin and ensure that it is moist at all times.
Leave the cup under the sun.
Once this is done, leave it for 12-14 days, and you should see the seeds germinate. If they do not show any development, then you will need to buy new seeds.
On the other hand, you can also understand if the seeds have expired by just looking at them. Some seeds will show you obvious signs that they cannot be planted.
Look for discoloration and any fungi growth on the body. These are initial signs of decaying seeds. Also, check if they have become damp and are sticking to each other. That could also be another sign of damage.
The Best Way To Sow Seeds
Grass seeds need a good and healthy start to begin the process of germination. We suggest that you should water the seeds daily twice a day in the beginning. Continue doing this till germination and make sure that the topsoil is always moist. But remember not to apply excess water at one time. This would only lead to waterlogging, and that could be fatal for the seeds.
Once germination begins, you can shift to watering the area once a day. Again, this depends on the type of climate. If your area is very dry or the sun rays are very strong, then it is best to continue watering twice daily.
As the grass grows above a height of 3 inches, mow it. The mowing will remove excess grass and will ensure that they grow well.
Now you need to make sure that the seeds do not dry out at any point. Do not cover them up with straws that might lead to the growth of weed, which you do not need. On the other hand, cover the top with a layer of soil. This thin layer will keep the seeds hydrated and will provide a warm and moist environment.
Seeds that date back to 2-3 years can also be used if they have been stored well. If you are using old seeds, try out with a few to see if they germinate. Then only plant the rest of them.
Final Words
It is better to spend a little extra to ensure that you buy a high-quality bag of seeds. Why? Because it works well and can be stored for a longer period. The leftover seeds need to be sealed properly and stored. So, it is best to keep them in any dark and cool cupboards with good airflow.
Good seeds can last for 3-5 years if stored properly, but remember that the effectiveness will reduce every year. You will have to use more seeds to cover the same area if you are using older ones.
Test them indoors before you actually plant them outside. Follow the process that we have mentioned above, and you’ll have nothing to worry about.
With this, we will take our leave. Let us know if you have any further concerns. Until next time!
If you've just built a shed in your backyard and are wondering how to protect it best, installing a gutter might not instantly come to mind. Nonetheless, it's crucial.
Most larger sheds come with gutters installed or built into them. However, smaller sheds which you build as a DIY project may not always have a gutter. You might be wondering if it's important to install one and how to best get it done.
To answer all your questions, we have made this comprehensive guide telling you all you need to know about it. Long story short - Yes, your shed needs a gutter. It is not only important for your shed, but also its surrounding area.
Keeping water away from your shed and its surrounding is essential. Moreover, if you live in an area that gets medium to heavy rainfall, a gutter for your shed is imperative.
So without further ado, let's dive right in!
Do Sheds Need Gutters ?
Reasons To Install A Gutter For Your Shed
If you have a shed in your backyard, installing a gutter can be a quick and easy process. All you need are the right tools and some technical expertise. You can also call in a professional to do the job for you.
Here are some telltale signs to look out for, telling you that your shed needs a gutter:
Soil Erosion
Sure, water is good for plants and the soil, but excessive rainwater can do more damage than good. One of the first signs to keep an eye out for is soil erosion in and around the area where your shed is built.
Notice if the soil around the area is moving away from specific places or if you can see bald spots. Also, keep an eye out for exposed roots or sediments collecting in unnatural areas. This is a clear sign of rainwater cascading down your shed's roof and oversaturating the soil around it.
When this continues to happen for an extended period, it can damage the foundation of the shed. The structure may be destabilized over time, tilt at an angle, or sink in certain spots.
Rotting Foundation
Typically sheds are made of wood. When rainwater continues to collect and pool around the foundation of your shed's structure, it can cause extensive damage over time. In the case of wooden sheds, you might notice the foundation starting to rot or grow mold and mildew.
If your shed is not built of wood, then you might not necessarily notice rotting. However, there are other telltale signs to look out for - such as the growth of mold, fungus, and mildew. You can also look out for splashes of dirty water and soil or the color of the shed fading where the water hits it.
Eventually, the rotting foundation will cause severe damage to the structural integrity of the shed. By then, it will be too late, and you might need to replace the structure altogether.
Interior Water Damage
Standing pools of water, color fading, and rotting wood are signs which are evident and superficial. However, interior water damage caused by rainwater or excessive humidity can take time to show up.
Typically, once you notice the signs of interior water damage, it is already too late. In these cases, you will need to call in professional help to repair and replace your shed and its accessories. Interior water damage can be extensive, and it is best to avoid it at the earliest.
What Are The Options?
Fortunately, you can choose from a variety of options for gutters for your shed. Depending on how large your shed is, the weather and climate of where you live, the amount of rainfall you receive, and your budget, you can choose from the following options.
Vinyl
These are easy to install, safe, and very cheap. However, they are not the most durable option.
Aluminum
They are the most common kind of material used for gutters for sheds. They come in a variety of shapes, sizes, and colors.
Wood
Wood shed gutters are not very common, and as you can guess, relatively harder to maintain. However, people choose wood for their shed gutters because they are super aesthetic and also long-lasting.
Mini Gutter
As the name suggests, these are a miniature version of the life-size gutters mentioned above. They are a common choice for smaller shed designs and are relatively easy to install, clean, and maintain.
Clamp-On Gutter
This option is being used more often now as people want to have the opportunity to clamp-on or remove their gutters. This kind of shed gutter is easy to install, cheap and can be maintained easily.
DIY Shed Gutters
The last option could be to build your own shed gutter at home. This is also quite a popular choice among those who don't want to explore the possibilities mentioned above. You can use wood, PVC pipes, aluminum panels, and other waterproof material to build your own shed gutter.
Tips To Keep In Mind
When considering a gutter for your shed, there are a few things to keep in mind. Here are some tips:
Regularly clean the leaves, water, and debris from the gutter.
Angle your gutter so that it slopes toward the water butt.
Collect recycled rainwater for later use.
Use good quality waterproof material for DIY projects.
Sheds Are Great, Should You Build One?
Wherever we go and ask, sheds are simply insanely practical, regardless of shape, size, gutter or no gutters, all homeowners are happy and proud of their shed.
It provides ample storage and a certain security for your equipment, garden tools, household items, lawnmowers, bikes, you name it; whatever you need, it’s there for you.
A home on the ground is simply incomplete without such a space, you need that exterior storage that a shed provides, even if it's just a broom, things need to be organized and the best part is that it’s inanely easy to build one as well. In most cases, sheds do not require planning permission and if one is enthusiastic enough, with a shed plan and some basic tools, one can do it himself.
You don’t have to take our word for it though, just browse around and you will find your tutorials, your plans and absolutely everything you need to get started right away, it just takes determination.
Final Words
When looking for the right gutter for your shed, remember to consider all your options.
While some options may look more aesthetic than others, their long-term functionality matters the most. It is always best to have some professional help if you are not entirely sure about building a gutter yourself.
That being said, there is no harm in opting for a DIY shed gutter. We hope you are successful in your attempt!
Ever since DCD777C2 was launched in the fall of 2016, it has taken the market by storm.
You must have heard about it quite often, or seen your friends and relatives using it. This drill driver was brought to the market by DEWALT, a well-established company in the world of worksite equipment for decades. (Fun fact: The brand was founded almost a century ago.)
Whether you are a professional or a beginner, you need appropriate gear and tools to work on DIY projects. And not just projects, drill drivers are almost a must-have for homes and always come in handy for minor repair works.
We did our research, tried, and tested this model for various aspects like performance, power consumption, build and structure, efficiency, efficacy, etc. This review-based guide contains everything you’d like to know about the drill before buying it.
DEWALT drill with brushless motor delivers more run time...
This power drill is compact (7.52" front to back)....
Why Buy This Product?
The DEWALT DCD777C2 is loaded with so many features that will appeal to the handyman (or woman) inside you. DEWALT is a brand that we trust, so we naturally had high hopes for their product. Did it surpass our expectations? Keep reading to find out.
Let us start by discussing its best qualities in rich detail to give you a clearer picture.
The Basics
It is a well-rounded drill engineered to be user-friendly and easy to maneuver. It is equipped with a dynamic brushless motor and a transmission that operates at high speed. The motor can work at two different levels - 0 to 500 RPM and 1750 RPM. For those of you who don’t know, RPM stands for Rotation Per Minute and is a measure of speed for rotating elements.
The drill machine has a lightweight and sleek design, but don’t let its body delude you. Despite being featherlight, it can muster up a torque of 500 inches per pound. DCD777C2 is powered by two 20 volts lithium-ion batteries that are fast to charge and last for long hours.
Additionally, it has a built-in LED light to provide a little more luminosity while working. You’d think that the light will drain the battery quicker, but that’s not the case. It has a low voltage of 1.5 volts and is gentle on the battery.
Not just the light, the whole drill is low voltage. And the best part is, you get to enjoy all these features at an affordable price.
Brushless Motor
Every DIY enthusiast knows that the motor is to a drill, what the heart is to a body. The motor is the powerhouse of any drilling machine and decides its overall performance. DEWALT DCD777C2 has a brushless motor, perfect for catering to the needs of everyone ranging from beginners to professionals.
You must be intrigued by now because we’ve mentioned it a couple of times, and are thinking, “Man! What actually is a brushless motor?” Don’t worry, for we’ve got your back! Things are about to get a little detailed, so you better pay attention.
A motor, typically an old-school motor, has four basic parts - an armature, a magnet ring, a commutator, and our beloved brushes. All of these parts serve as a medium to relay power from the battery to ultimately the armature, armature being the spinning entity here. We hope it is clear till now.
In advanced brushless motors, the commutator and the brushes are eliminated from the system, and a small circuit board is installed to coordinate the power delivery. Therefore, the brushless motor of this drill is much more efficient and smarter than others on the market.
Furthermore, the removal of the brushes and commutators prevents the motor from overworking, and as a result, it stays cool. You won’t have to deal with overheating issues while using this one. Consequently, it extends the lifespan of the product. You can also choose from two power settings to better control the drill and use it according to the need of your project.
Batteries
First of all, let’s appreciate the fact that we don’t need to deal with entangled wires and cord extensions anymore. What a drag it is to be limited by the wire; it feels like a dog’s leash, honestly. DCD777C2 is an effortless device to maneuver, and all the credit goes to its rechargeable lithium batteries.
When it comes to the batteries, you’ll be confused about whether you should go for a nickel-cadmium battery or a nickel hydride one. In our experience, Li-ion batteries outshine all the others. We’ll tell you why.
The Lithium batteries work efficiently even when they are charged only halfway. Normally batteries have a memory effect that degrades their performance over repeated charging, whereas Li-ion batteries do not. That’s why you can use the drill for years, and it’ll stay as good as new.
Imagine this situation, you charge your drill and store it. After four to five months, you take it out for use and find out the battery has discharged. How annoying will that be? This happens because the batteries tend to self-discharge. But with lithium batteries, you don’t have to fret about that, which is another highlight of this product.
Not only that, these batteries do not contain any toxic elements and are eco-friendly. They are also lighter than the other types, both in weight and on the wallet.
Lightweight and Ergonomic
We believe that hot and heavy drilling equipment is a thing of the past now. The DCD777C2 is armed with an ergonomic handle that won’t let your hands get tired even after long stretches of drilling. The absence of a heavy four-element operating system (as we discussed under the brushless section) and hefty batteries significantly reduce the overall weight of this drill.
In fact, if you are accustomed to using old-school models, then it’ll take a little time to get the hang of this one. Once you get comfortable, the device will feel steady, and you’ll get things done faster.
Getting into the practicalities of the drill, it weighs merely 2.5 pounds, while other options on the market weigh 4 to 5 pounds on average. The dimensions are also ideal for easy handling, with a length of 12.5 inches and a breadth of 3.8 inches.
Specifications
Let’s take a glimpse at all the significant qualities:
Dimensions of the model - 12.5 x 3.8 x 9.8 (inches)
We’ve given you a good deal of information about all that this drill has to offer by now. It is evident that the model is exceptional in every aspect, and you’ll realize that after using it too. We closely looked at every minor detail while testing it to offer a transparent and unbiased review.
Our first complaint is that the battery life wasn’t as long as we expected it to be. The motor needs high power to operate and consequently consumes the battery faster. It’s a given fact that lithium batteries are the best option on the market both in durability and environmental safety. We suggest using the drill at a lower power setting for prolonged use.
The body of the drill is sleek and handy; that’s why we were slightly disappointed to find out that its chuck is made of plastic. To be honest, that kind of seems out of place considering the sturdy build of this model.
Pros
A cordless model with rechargeable lithium batteries
Lightweight and user-friendly design
Brushless high-power motor with two-speed settings
Fast charging because of low voltage consumption
High torque generation for swift drilling
Cons
The chuck is made of plastic
Battery discharges quickly at a higher rotation speed
DEWALT DCD777C2 Buyer’s Guide
To simplify things for you, we went ahead and assembled a little but informational buyer’s guide. This guide will help you better assess the drill drivers and brief you about the features you should be looking for.
Corded or Cordless?
This is a major parameter you should be looking into. Decide whether you want to go for a corded drill or a battery-powered one. The traditional drill drivers are corded and consume a lot of power. They have movement constraints too.
Cordless ones come with a rechargeable battery and are much better at maneuvering. They are low voltage and convenient to use. However, they are pricier than the old-school ones, but they have modern technology and the latest features too if you look at the bigger picture.
Motor
We already gave you the nitty-gritty of the types of motors and their elements. The traditional type has four elements in the system that function more mechanically, whereas the new ones have an advanced circuit board in place.
The newer tech is less likely to heat or have performance overload. The brushless type is also famously known as the “keep cool” motor.
Uses
It is important to have a rough idea of why you are buying a drilling device and what things you’re going to use it on. Most probably, you’ll want to use it on masonry and furniture items, and for that, you’ll need one with a hammer action.
If you basically want to drill large holes in wooden items, we recommend going for a corded drill with a low-speed motor. However, if you want a multi-purpose driver for several materials like metal, plastic, and wood, then this one by DEWALT is perfect for you.
The drilling devices that have multiple speed settings and gear are more versatile and efficient. Additionally, ask yourself whether you want a screwdriver function? If yes, then go for a model that has a variable torque feature and is reversible. Reversible drills not just drive a screw in but also drive it out.
Battery
There are mainly three types of battery available with a cordless drill: Nickel-Cadmium, Nickel-Hydride, and Lithium-ion. The lithium type is the best option because of its lightweight and less self-discharge.
Because of the memory effect, nickel batteries tend to get drained quicker after multiple uses in the long run. They also get discharged even if they are not in use. Moreover, they are toxic and are predicted to get banned sooner or later. Lithium-ion batteries are less toxic for the environment and are considerably cheaper than the other options.
Types Of Drills
In this section, we’ll quickly acquaint you with the different types of drill drivers on the market and where the DEWALT DCD777C2 stands so that you can choose what’s better for you.
Power Screwdrivers
As the name suggests, these cordless power drivers are ideal for all your screw driving endeavors. Perfect for tightening screws in confined spaces, these handy power tools are much lighter than the others. Moreover, they have reversible settings and can both drive-in and drive out the screws. You can assemble the flat-pack furniture effortlessly using this type. The only thing is, they cannot drill holes.
Drill Drivers
If you are looking for a versatile driver that can be used for doing all the odd small jobs around the house, then this is the one for you. Ideal for hanging pictures, setting up shelves, and assembling flat-pack furniture, these drill drivers can make holes and function as screwdrivers too. This is the category in which our reviewed model falls.
Combi Drills
This all-rounder drill comes with three-in-one features. Along with all the qualities of a drill driver, these have the added benefit of the hammer-action. Therefore, these are hands down the best pick for masonry drilling.
Hammer Drills
This type also goes by the name of “percussion drills” or “impact drills”. These drills are designed to perform heavy-duty jobs like stonework or fixing the gutter in the home. They are heavily built and are the perfect choice for drilling tough surfaces like masonry and concrete.
Furthermore, you can adjust the power setting and simultaneously keep the rotation speed low. Doing this enables the drill to power through the surface while causing minimum damage. Although, they might not have the reversible screwdriver feature in all the models.
Impact Drivers
These are robust screwdrivers engineered for large projects. They are named so because they have an impact mechanism to save your hands from fatiguing while doing all the hard work.
DEWALT DCD777C2 Verdict
In our honest opinion, DEWALT DCD777C2 is a deal worth grabbing. It is packed with all the new and exciting features you would want in a drill driver. From the motor to the torque generation and from the ease of handling to the lithium-ion battery, this excellent product surpassed all our expectations.
This complete package is tied together neatly with the ribbon of its affordable price tag. It’s almost surprising to find all these amazing qualities in this range. There are a few downsides to the model, but they can be slightly compromised on the whole.
If you are contemplating buying it, then we’ll nudge you in its direction. Go for it, use it and let us know whether you liked it or not. We’ll be happy to hear your views.
Most of us can lounge around in an air-conditioned environment during hot and humid weather, but our cars and tools don’t have that luxury!
If the moisture levels in your garage are high, your car might be prone to overheating and, as a result, get damaged easily. Humidity also wreaks havoc on your vehicle by corroding the metal exterior of your car, speeding up rusting, and even causing the paint to chip off.
However, an effective dehumidifier can pull the excess moisture from the air and improve overall air quality. It also reduces the amount of mold and dust in the air, thereby making your garage more breathable and unpolluted.
But with so many options available online, how do you go about picking the best one? Worry not, because we have a detailed guide that will cover some of the best models, and we’re sure you’ll find one that fits the bill among these.
So, without further ado, let’s kick off this list!
First up on our list is the Pro Breeze FBA_PB-03-US, which is a compact garage heater that can remove up to 18 ounces of water a day. Moreover, it has a 52-ounce water capacity, and since it can cover up to 250 sq. feet, it is ideal for a medium-sized garage.
COMPACT & SMALL DEHUMIDIFIER: Lightweight, compact, and...
SAFE DEHUMIDIFIER WITH AUTO SHUT-OFF FUNCTION: When full,...
Why Did We Like It?
This dehumidifier comes packed with a host of impressive features that make it ideal for your garage. Due to its gigantic water-holding capacity, the dehumidifier can hold out for almost three days without the need to empty the tank and protects vehicles from pests, mold, and rust.
Another useful feature of this unit is its auto shut-off feature, which powers down the dehumidifier once it reaches its maximum capacity. So, you can leave your dehumidifier in the garage without having to worry about powering it down or draining it.
Yet another cool function of this unit is the Built-In-Thermo-Electric Cooling Technology, which allows the dehumidifier to function without a compressor. This is possible because it uses the Peltier effect, which also provides soundless operation of the unit.
Overall, the unit is easy to carry, and since its best operating temperature is between 59 to 86°F, it is perfect for a mid-sized garage.
What Could’ve Been Better?
This unit has stellar performance and can pull significant moisture from the air. However, we felt that including controls for wind speed and a panel displaying the amount of relative humidity in the room would have made it perfect.
The Inofia HD161A makes for a great buy if you want to get rid of the sticky feel of your damp garage. It is comparatively affordable and has a powerful compressor that can remove up to 4 gallons of moisture a day from a garage of 1500 sq. ft.
This energy-saving dehumidifier is pretty easy to use and can remove up to 30 pints of moisture from the air. We fit it in our tiny garage and felt that it was ideal for a room that size.
It is also quite intelligent and allows the user to set the desired humidity level. Once it reaches that, this garage dehumidifier stops automatically and starts up again when the humidity level increases. There is a regular 1-24 hour timer, too, so you can switch on the unit and go to sleep. You can also change the fan speed depending on the room temperature.
Further, it comes with a drain bucket that can hold up to half a gallon of water and makes a slight audible sound when the bucket is full and needs draining. To avoid repeated trips to empty the bucket, you can also attach a self-draining hose.
What Could’ve Been Better
Though the humidifier works well, we did feel that it doesn’t remove as much moisture as is needed. As mentioned before, it works well in a small garage but won’t be as effective in a bigger one. The drain bucket could have been bigger, too.
Pros
Auto switch off after unit reaches target humidity level
Unlike other bulky, loud garage dehumidifiers, this one blends into your existing decor and doesn’t sully the aesthetics of your garage. It can easily cover spaces that extend to 4500 sq. ft. and remove a whopping 70 pints of moisture under conditions of 95°F and 85% RH.
No products found.
Why Did We Like It?
First off, we liked the built-in wheels as well as the ergonomically placed handles that can move the unit quickly! The fan is adjustable and virtually soundless, and instead of concentrating all the four air outlets on one side, they are located on four separate sides of the dehumidifier. This design improves dehumidification speed and ensures that the unit does its job in all directions.
Additionally, the unit is intuitive and allows the user to pick a target moisture level using the intelligent touch control, and then it strives to reach the level. Once it does so, it automatically switches off.
The auto-switch-off feature also kicks in when the drain bucket reaches its maximum capacity. Plus, the Safety Standby Mode prevents overheating, and the internal components are manufactured using thermal resistant material.
A child-lock setting further helps save children and pets from any untoward incidents if they happen to venture into the garage.
What Could’ve Been Better
All Waykar products come with a 1-year warranty and a guaranteed replacement. However, according to reports, the parent company requires fake positive reviews to be submitted in return for replacing the units, which isn’t a very fair or pleasant situation.
Now, let’s look at the Yaufey 1, which is comparatively a more affordable option than some other garage dehumidifiers on this list. It is a versatile unit that can easily fit into a garage and even a bathroom, bedroom, or basement, basically any indoor space of up to 1750 sq. ft.
PROFESSIONAL & EFFICIENT DEHUMIDIFICATION: This dehumidifier...
CONVENIENT & SIMPLE TO USE: Home appliances don't have to...
Why Did We Like It?
Considering its lower price tag, this humidifier is an excellent option for garages that are slightly on the smaller side. It can remove up to 32.7 pints of moisture from the air, and this is usually when the average room temperature is under 95°F and 90% RH.
We also liked how incredibly simple this was to use since it featured a light-touch intelligent control panel, which could be seen from a distance and easily operated. Using the panel, you can set an ideal moisture setting, and the unit will run for 24 hours and then shut down by itself.
If you want to skip manually draining the machine, it comes with a 2-meter long drain hose to draw out the water.
There’s also a separate turbo mode, and the unit has wheels to allow it to be transported easily. All of these features are indeed very impressive for its price!
What Could’ve Been Better
This dehumidifier packs a punch with its extensive functionality and low price. However, even though it conveniently drains the collected moisture, the water tends to leak from the hose. This may lead to a messy situation, and thus, the fitting of the hose pipe should be reevaluated by the manufacturer.
Coming in next is the hOmeLabs HME020031N, a sleek, easy-to-use unit with an impressive 1.6-gallon tank capacity. Thanks to its large capacity, it is ideal for big rooms and garages and can extract excess moisture from the air, thereby purifying it. Simultaneously, it prevents mildew and dust formation, making for a fresh environment for your car.
4,500 sq ft Large Dehumidifier: Our 15.4 x 11 x 24.3 inches...
Designed For Modern Home: That most dehumidifiers are clunky...
Why Did We Like It?
Right off the bat, we liked the size of this machine. It has a vast capacity to store water and ensures that the filter doesn’t have to be emptied far too often. It was perfect for our garage, and we noticed significantly less moisture and dust.
Another thing that impressed us was the design of this dehumidifier. It wasn’t burly and clunky but intelligent and functional. It had convenient built-in wheels and handles to easily move it from place to place and a quiet fan that makes a minimal sound.
What’s more, running this dehumidifier involves minimal effort. You can adjust it to your ideal moisture setting, post which the machine will run for 24 hours until the tank fills up. When that happens, it will automatically shut off. No chance of a flood in the garage!
Not only this, but it also has an easy-to-clean filter and a turbo mode for maximum moisture reduction.
What Could’ve Been Better
The dehumidifier has an auto-defrost mechanism that is supposed to kick in by itself. However, sometimes it fails to do so, as a layer of white frost may cover the filter. Hence, fixing the auto defrost option and making it more robust would make this machine virtually perfect.
This is the most expensive dehumidifier on our list, but not without good cause. It is an industrial-strength unit that can extract 150 pints of moisture from the air, which is far more than any of the units on this list. So, if you have a massive garage, this is the product for you.
150 Pint Dehumidifier - Ideal for water damage restoration...
Convenient – This dehumidifier is packed with an automatic...
Why Did We Like It
Primarily, this dehumidifier is meant to be used for restoration in cases of water damage. If you’ve been unfortunate enough to have an unexpected amount of water flood the insides of your garage, workshop, etc., this unit will help pull all the excess moisture out.
It is jam-packed with features like an automatic water pump, RH and temperature sensors, and an hour counter, which offer immense flexibility and efficiency. It even has a smart LED display that allows one to monitor the unit easily and keep tabs on the humidity levels.
Since the unit can extract a gargantuan amount of moisture from the air, it can run continuously for days at a time without you having to worry about it. In addition to that, it is dent-resistant and can withstand the rigors of harsh environments, like construction sites.
What Could’ve Been Better
We ran into a minor technical problem with the humidifier a couple of days after receiving it. It was an easily fixable issue; however, the manufacturer wasn’t cooperative, and there was no response from customer care. So, considering its high price, we were disappointed with the lack of technical support.
Pros
Helps restoration in case of water damage
Easy to monitor
Can extract a large amount of moisture from the air
This compact yet practical unit is excellent for garages up to 2500 sq. ft. since it can remove about 34 pints of moisture from the air daily. This makes it perfect for medium-sized garages and large ones, where it can adjust humidity from 30% to 85%.
No products found.
Why Did We Like It?
First off, we liked the portability of the unit. It has 360° easy-roll hidden wheels that help it move from one place to another. It also has ergonomically placed handles that make it easy to pick up if needed.
The dehumidifier is quiet and doesn’t interrupt sleep, work, or conversation. You can even use it to dry clothes in humid weather- simply place the dehumidifier in a room, hang the wet clothes nearby, and they’ll dry up in a jiffy!
The Kesnos PD160A is also easy to drain, which you can do either manually or by using a drain pipe. The unit comes with a 2-meter drain hose which helps to auto-drain the moisture that builds up in the drain bucket. Alternatively, you can empty the drain bucket yourself.
Lastly, the bucket can hold up to 0.6 gallons of water and comes with an alarm that rings when it's complete.
What Could’ve Been Better?
This unit is great at dehumidifying a garage, but it does have one glaring problem. The hose that comes with the unit has to be attached at a particular angle; otherwise, the water leaks onto the floor. We believe that it is a minor defect with the hose, which the manufacturer can easily rectify.
Pros
Quiet and non-distracting
Water can be drained continuously
Can adjust ideal indoor humidity for maximum comfort
The final product on our list is the dehumidifier from Humsure that has a compact and lightweight design. You can use it not only in the garage but also in the bathroom, laundry room, or wherever you want - after all, it is highly portable. Moreover, it can efficiently remove moisture from any space within 4500 sq. ft.
This efficient dehumidifier can remove a significant 70 pints of moisture from the air, which ensures that your garage remains comfortable.
We liked how the unit comes with an intelligent control panel that is easy to maneuver and different modes to tweak the humidity levels according to need. The DRYING mode is ideal for high humidity levels, and the HUMIDITY mode is for regular humidity levels. Moreover, the unit also has a timer that shuts the unit off at a preselected time.
What’s more, the unit features an auto shut-off setting, which prevents leaks and damage to the unit by automatically powering off once the water tank reaches its capacity. Additionally, connecting the unit to a drain via a hose will continuously empty water without creating any mess.
What Could’ve Been Better?
Despite the superior performance of the unit, we did notice one thing that the manufacturers can improve upon. The dehumidifier comes with a 1.3-gallon tank, which isn’t enough to hold all the water it extracts from the air. So, amping up the water storage capacity of the unit would lead to a vast improvement in its overall performance.
Pros
Has an intelligent control panel
Protection from leaks and damage
Continuous drainage
24-hour timer available
Cons
Inadequate storage capacity of water tank
Dehumidifier For Garage Buying Guide
Picking the best garage dehumidifier can be an ordeal if you’re unsure what factors to consider while buying one. This is why we’ve listed a few things that must be kept in mind while investing in one.
1. Moisture Pulling Capacity
Since a garage is a comparatively more extensive area, the unit should undertake moisture removal effectively. Additionally, garages don’t have adequate ventilation, so the moisture level inside can get extreme.
It’s also relatively common for garages to have flooding accidents and water damage since they’re mainly situated on ground level. Keeping in mind this particular problem, we’d like to recommend the BlueDri. It’s ideal for water damage restoration projects since it can pull a massive 150 pints of moisture from the air.
2. Coverage Area
In our opinion, the best dehumidifier for a garage should cover a lot of surface area. So, when it comes to selecting a garage dehumidifier, the size of the garage will influence the choice of machine.
Given this, we’d like to recommend the Humsure , because it covers up to 4500 sq. ft., which is ideal for big garages.
3. Cost
One of the most critical aspects of buying anything is the value for money that the product provides. Striking the right chord between functionality and cost-efficiency is the Yaufey , which we recommend if you want something on the lower end of the pricing spectrum.
Verdict
Now that we’ve reached the end of our guide, we hope you have a bit more clarity on which dehumidifier would be suitable for your garage.
Our all-around choice would be the Pro Breeze because of its unique Peltier technology and large water-pulling capacity. However, a close second would be the Inofia, which boasts a powerful performance without compromising affordability. Both models are great performers and will reduce humidity in your garage effectively.
But regardless of whichever dehumidifier you choose to buy, all of them improve air quality dramatically and provide relief during times of high humidity.
That said, we hope to see you soon with another helpful guide. Until then, take care, and stay safe!
We all have dealt with days that were so humid that even breathing seemed like a chore.
This feeling occurs on particularly hot and balmy days when the air is saturated with moisture. Since it cannot take any more moisture, the sweat on our bodies ceases to evaporate, making us feel sticky and overheated.
Fortunately, dehumidifiers can be an excellent solution to deal with discomfort on such days. There are several options from different manufacturers that you can select from and add a dehumidifier to your bedroom. And choosing the right product from the vast number of products can be a challenging task.
That is why, after conducting extensive research, we have brought you detailed reviews about the best dehumidifier for bedrooms on the market today.
Additionally, we have included a buyer’s guide to help you select the right product. So, without further ado, let’s get straight to it.
1,500 sq ft Dehumidifier: Our dehumidifier removes up to 22...
We begin with the HME020030N model from hOmeLabs, one of the leading manufacturers of home and kitchen appliances. This humidifier is designed for the modern home and comes with a sleek design while delivering exceptional performance to ensure maximum comfort in your bedroom.
Why Did We Like it?
If you are looking for a dehumidifier capable of absorbing moisture from the room efficiently without resulting in a huge electricity bill, then the hOmeLabs HME020030N is the best choice. No matter if you have a medium or large-sized room, this is an ideal product that can help you save electricity.
The problem with many dehumidifiers is that even if they perform well, they have a terrible appearance that clashes with the décor of the room. You will be pleased to know that the HME020030N model has a modern and sleek design that lends a pleasing aesthetic.
Also worth mentioning is that this is one of the easiest to use dehumidifiers. You just need to adjust it to the ideal moisture setting, and it will turn off automatically once the tank is full.
And the best part is that all these functions operate without noise, ensuring a peaceful environment all day and night.
What Could've Been Better?
We did not come across any significant downsides to this product, except for the fact that the auto-defrost feature did not work at times. That said, the auto-defrost may work erratically — sometimes defrosting the dehumidifier during high temperatures when it is not needed. However, it does not affect the operation of the rest of the machine.
【Purifyair 3-Pack for Wider Coverage】Multiple Purifyair...
Next up on the list is the Vremi VRM010184N, another suitable dehumidifier for medium to large spaces. The manufacturer has designed this product with convenience and style in mind while ensuring superb performance for absorbing excess moisture from the air.
Why Did We Like It?
There are several things to like about the Vremi VRM010184N, but perhaps the most prominent one is its ease of use. Once you adjust it to the required moisture level, it will run on a 24-hour cycle to absorb as much moisture as possible from the room.
You will be able to feel the difference within minutes of starting the machine as the room begins becoming drier and more comfortable.
Also, this dehumidifier does not require a lot of maintenance and can be easily cleaned. That said, it is easy to remove the dust from the filter. The straightforward maintenance process further ensures that this dehumidifier lasts for a long time.
Additionally, this product from Vremi doubles as a portable piece due to the built-in wheels and handles that allow you to shift it from room to room easily.
What Could've Been Better?
While this product works incredibly well, one thing to note here is that this dehumidifier is relatively loud compared to similar products. On that note, it might not be the most appropriate choice for light sleepers who intend to use it in the bedroom. For them, there are quieter options available on the market.
COMPACT & SMALL DEHUMIDIFIER: Lightweight, compact, and...
SAFE DEHUMIDIFIER WITH AUTO SHUT-OFF FUNCTION: When full,...
For the uninitiated, Pro Breeze is a well-renowned manufacturer of home appliances, such as dehumidifiers, heaters, etc. Like other products from the brand, the PBA_PB-03_US model offers the perfect combination of superior performance and innovative features, topped off with a modern design.
Why Did We Like It?
The compact size of this dehumidifier, in addition to the built-in wheels, allow you to take it with you when you go on trips. Furthermore, the tank capacity of the water tank is quite huge, due to which it can easily extract up to 18 ounces of water per day.
Another feature worth mentioning is the auto shut-off feature, which is great for saving energy. You can now know when the tank is full as this feature will turn the dehumidifier off, and the LED light will turn on.
The FBA_PB-03_US model also offers an ultra-efficient and quiet operation because of the built-in Thermoelectric Cooling Technology. That said, it is ideal for installation in bedrooms, and even with the dehumidifier running, your sleep won't get disturbed.
What Could've Been Better?
This electric mini dehumidifier from Pro Breeze is undoubtedly a fantastic product that can be easily installed and used. However, an important thing to remember is that this dehumidifier does require a lot of power. Due to this, using it for an extended period can result in hefty electricity bills.
【90° Swing for Targeted Airflow】This unit features a...
If you are looking for a dehumidifier that not only removes excess moisture but also makes adjustments intelligently, then the Waykar 2000 is one product to look out for. This easy-to-use device comes with a unique design that can fit in with the décor of any room.
Why Did We Like It?
Coming from a brand that specializes in the production of humidifiers and dehumidifiers, the Waykar 2000 works like a charm to improve the air quality, even for large spaces. It can reduce humidity by 30% to 85% in areas as large as 2000 sq. ft.
Since it works so well for spacious rooms, its operation is even better in close quarters, such as bedrooms, as the effect becomes more concentrated. What is more, the manufacturer has designed this dehumidifier for modern sensibilities.
And besides the modern design, the Waykar 2000 comes with 360-degree rotatable wheels and ergonomic handles that allow you to move it around with ease. That means if you are looking for a portable option, this is one of the best choices to go for.
Additionally, the fan operates silently without creating any sound for relaxing evenings.
What Could've Been Better?
The Waykar 2000 is the best dehumidifier for the bedroomif you want the perfect combination of modern looks and excellent performance. However, it does not come with an Energy Star certification, which might be a deal-breaker for those looking for an energy-efficient device.
1,500 SQ. FT. DEHUMIDIFIER – Removes up to 22 pints of...
ULTRA QUIET OPERAION – This model has quiet operation as...
Midea is one of the world's largest manufacturers of household appliances, focusing on creating user-friendly products for the best experience. On that note, the MAD22C1AWS model is a perfect example of the unmatched quality and performance that products from the brand deliver.
Why Did We Like It?
This 1500 sq. ft. dehumidifier is ideal for different sizes and types of spaces, including the basement, bathroom, bedroom, etc. It can help you maintain the humidity levels at a healthy 45% to 55% for a comfortable environment.
One of the features you are going to love is the auto-restart function, which can limit disruption due to power shortages. It does this by engaging your selected settings as soon as power is restored, so you do not need to adjust the settings again.
Apart from this, the auto-defrost function prevents the collected water from freezing. Frozen water can damage the machine, but that is not an issue to be concerned about with this excellent machine.
There is also a continuous dehumidification mode that will keep your home at the required humidity level 24/7. Here, too, you can adjust the settings once and be at ease the rest of the day.
What Could've Been Better?
It is hard to find a downside to this excellent dehumidifier that offers such a stellar performance. However, you must note that the reservoir is not very easy to remove or reinstall since it is relatively heavy. You will need to put in an adequate amount of effort to do so.
3,000 SQ FT: Removes up to 35 pints (50 pints 2012 DOE) of...
AUTO DRAIN: This dehumidifier will stop running if the water...
The next product on the list is the Tosot GDN35BB-A3EBA2A, which comes with a host of exciting features and delivers excellent performance at a great price. This dehumidifier is yet another nifty solution to improve the humidity levels of your room while also saving energy.
Why Did We Like It?
The GDN35BB-A3EBA2A is one of the highest-rated dehumidifiers available on the market, and with good reason. It is one of the most efficient products and can remove up to 35 pints of water in a day, making it an excellent choice for the bedroom.
Among the several noteworthy features of this dehumidifier, we especially liked the auto-drain feature that stops the machine as soon as the reservoir fills up. Apart from saving you the effort to drain the water manually, you also save energy since the dehumidifier will not keep running needlessly.
On that note, the automatic drainage can be used by hooking it up with a ¾ inches dehumidifier drain hose. This feature was undoubtedly one of the things that set this product apart from the competition since most dehumidifiers require manual emptying of the tank.
Also, the control panel allows real-time monitoring of the humidity level easily, so you can make adjustments as required.
What Could've Been Better?
In our opinion, this dehumidifier from Tosot is a great choice for any room. The only thing we noticed is that it does not come with any manual that explains the operation of the product. Fortunately, you can look up the instructions online.
High-Efficiency:Struggling with excess moisture leading to...
Small but Powerful: This compact dehumidifier is perfect for...
The HA81W model from Gocheer is the next product on our list, and an equally exceptional product in the category. It is one of the most compact and lightweight dehumidifiers on the market and comes equipped with a 2000 ml water tank for efficient performance.
Why Did We Like It?
The Gocheer HA81W is equipped with in-built wheels and ergonomic handles that provide portability. If you are someone who goes on frequent trips and needs to take their dehumidifier with them, you will love this product.
Anyhow, the HA81W model can remove up to 1000 ml of moisture from the air, making it ideal for high-humidity areas, such as bathrooms, basements, and even bedrooms. Additionally, at less than 40 decibels, the silent operation makes it suitable for bedrooms.
This dehumidifier also comes with an auto shut-off feature. That said, it will automatically power down once the tank becomes full to prevent overflowing. Anyhow, the indicator lights up when the tank needs to be emptied.
Emptying the tank and refitting it is also a simple process requiring very little time or effort.
What Could've Been Better?
To be honest, we were very impressed by how effective this dehumidifier was in reducing humidity levels. However, it works best in rooms up to 50 sq. ft. For spaces larger than that, other options are available on the market that offer better coverage.
Fast & Efficient Dehumidifier: This Electric Dehumidifier is...
Portable & Compact Design: With a capacity of 17 ounces...
Moving onto the next product, we bring you the Pohl Schmitt MD500, one of the most powerful mini dehumidifiers you can get right now. It offers unparalleled humidity control and is ideal for smaller rooms due to its compact size.
Why Did We Like It?
The lightweight and compact design caught our attention right from the start. We could easily carry it to different rooms where required without a hitch, due to the in-built wheels. Yet, despite the small size, it delivers an impressive performance and can easily cover areas as large as 2200 cubic feet.
Not only that, but this excellent machine can absorb moisture quickly from any room due to the Peltier technology, removing up to ten ounces of water in a day. Also, once the 17-ounce water tank is full, you can easily remove and empty it before re-installing. The entire process did not take us more than five minutes to complete.
It just doesn't end there! This device is also an excellent option from a safety point of view. The manufacturer has made it a point to ensure that the dehumidifier does not contain any chemical substances that might be harmful.
What Could've Been Better?
When compared to similar competing products on the market, the Pohl Schmitt dehumidifier has a relatively small heat sink. While the smaller sink does not affect its performance and the dehumidifier works well, a larger heat sink would have made absorbing moisture even faster and more efficient.
Seavon is a well-known brand for its high-performance home appliances that are meant to make life easier and more convenient. That is why the next product that we bring to you is the MD-819 from the brand. It has an ultra-quiet operation that can alter the air to the desired humidity level.
Why Did We Like it?
Equipped with a 500 ml capacity water tank, the Seavon MD-819 can easily cover up to 2200 sq. ft., making it one of the best dehumidifiers for any bedroom size. It can also easily be used in other areas, as the compact form makes it easy to carry around.
Besides being portable, the small size also helps save space in your bedroom.
Apart from this, this mini dehumidifier has built-in thermoelectric cooling technology, which allows continuous operation while keeping the noise levels below 30 decibels. For a quiet sleeping environment, the MD-819 is the best dehumidifier you can get for the price.
You will also be pleased to know that it has only one switch, making it highly convenient to use. This ease-of-use comes along with efficient performance, and the dehumidifier can remove up to 400 ml of water every day while using only 0.23 KW of electricity.
What Could've Been Better?
The only downside to this otherwise fantastic product is that it lacks a proper way of emptying the catch-tray. The only way to do that is to turn it upside down and let it pour or drip out of the hole. Unfortunately, this technique does not empty the tray.
Pros
Easy to use
Helps conserve energy
Quiet working
Saves space
Cons
Lacks a proper way for emptying the tray
Top Bedroom Dehumidifier Buying Guide
By now, you must have gone through our list of the top ten dehumidifiers. So, were you able to make a decision? Well, it's not that simple.
We know that selecting the best product from a list can be highly confusing. Besides the brand name and price, other significant factors need to be considered when buying a dehumidifier.
For that reason, we have compiled this comprehensive buyer's guide, explaining a few essential points that will help you make the right decision. Read on to learn more.
1. Size Of The Dehumidifier
The size is one of the most important factors to consider when purchasing a dehumidifier. Dehumidifiers are available in several sizes, ranging from less than 30 pints and going up to 70 pints. Select the size best suited for the indoor humidity levels and the size of the space where it will be installed.
2. Size Of The Room
The size of the dehumidifier is directly proportional to the area that needs dehumidification. Different sized rooms require different sizes and types. Calculate the cubic meters of the space where the dehumidifier needs to be installed before purchasing the product.
3. Type Of Humidifier
As mentioned above, several different types of dehumidifiers are available on the market suitable for different kinds of spaces. The whole-room unit type of dehumidifier is the easiest to use, while mini dehumidifiers offer portability and save space. Select the type of dehumidifier that is best for your requirements.
4. Maintenance
Another essential factor to consider is the amount of maintenance required by a dehumidifier. Dehumidifiers that require less maintenance over more extended periods are generally better as they help save effort and money.
That is what makes desiccant dehumidifiers a better option because they do not use refrigerants and have a longer life span.
5. Drainage
A dehumidifier works by sucking in moisture from the air, which is collected by the unit and needs to be drained. Dehumidifiers from different manufacturers come with varying types of drainage solutions. For instance, dehumidifiers with duct systems can drain the water automatically, while other types may require manual draining.
Select the dehumidifier after considering the amount of time you can set aside for draining it.
6. Ease Of Use
How easy it is to use a dehumidifier plays a critical role in selecting the right product. Some dehumidifiers come with a one-touch operation mechanism that allows setting it and letting it run automatically.
On the other hand, some options offer greater manual control through adjustable settings. These are the factors you need to consider when considering how easy to use the product.
7. Moisture Removal Efficiency
The more efficient a dehumidifier removes moist air from a room, the better. Efficiency depends upon various elements, such as the size of the room and the rate at which the dehumidifier can absorb moisture.
Remember that efficiency is always considered in relation to a specific area size, and the same dehumidifier may not work well in different-sized rooms.
8. Energy Conservation
Nowadays, many dehumidifiers come with an energy star certification, which means they use a lesser amount of power for their operations. Energy conservation is vital since it helps keep the electricity bills low.
Different types of dehumidifiers require varying amounts of power to run, with whole-room units needing a more significant amount of power than portable ones.
9. Cost
Before making a final choice, you also need to consider the cost. After determining the type, size, and additional features required, you can compare the available options based on the pricing. It is recommended to go for an option that is neither too costly nor compromises on the quality and performance for the sake of affordability.
Best Dehumidifier For Bedroom
How will I know if I need a dehumidifier in the bedroom?
If you are observing strange musty smells in the room, it could be due to mold growth from excess humidity in the air. Some people also feel extra warm and clammy in their rooms without any structural or furnishing changes in the space.
Additionally, if the windows show condensation or wooden floorboards start to look uneven, the structural damage could be a sign that dehumidifiers are required.
Which size of dehumidifier do I need?
Depending on the bedroom size, you will have to place a small or slightly larger dehumidifier in a corner. The smaller dehumidifiers are perfect for cramped, dark, or damp rooms measuring up to 500 square feet. Medium-sized options are better suited to larger areas like a bedroom attached to a hallway sizing up to 1000 square feet.
However, if the humidity situation in your home is severe, it might require a larger and more powerful dehumidifier to control the moisture levels.
Is it alright if I leave the dehumidifier on overnight?
Generally, there should be no problem in leaving the dehumidifier on for hours and even overnight. These devices are perfectly capable of running for a long time, and prolonged use will not affect your health either. Avoid using it when the display shows an error sign referring to issues in air flow or leakages, otherwise, it should be entirely fine.
As a precaution, always check if the safety features like automatic shutoff are activated before sleeping.
How long does it take for the moisture to reduce when using a dehumidifier?
Considering the dehumidifier you have selected according to your bedroom size, the moisture levels should go down within a few days to a week. If there is a long-standing dampness issue with the walls and ceiling, then getting the moisture under control will take longer.
However, if a serious problem like pipes bursting or water flooding has occurred recently, one dehumidifier might not be enough to get rid of moisture.
How can a dehumidifier help with my allergies?
Most allergens thrive in an atmosphere rich in moisture. As the humidity in the room increases, so does the population of allergy-causing elements. For instance, many people have an allergic reaction to the presence of mold spores, and mold can grow in low humidity levels of 60%.
Similarly, dust mites can increase in numbers when the humidity levels cross 50% in the room/house. Using a dehumidifier will reduce allergy-causing spores, thus keeping you healthy.
Final Verdict On The Best Dehumidifier
The problem of humidity is one that many people have to deal with due to seasonal or locational factors. People depend on dehumidifiers to deal with this problem since they offer choice and convenience.
We hope that this review-based guide has helped you learn about the best dehumidifiers to bring you relief. And before we end our guide, let us mention a few of our favorites.
Our top pick, the hOmeLabs, is the overall best product that offers a sleek design and easy-to-use functionality. However, if you are looking for a portable and low-maintenance option, the Vremi may be a better choice. Finally, the Pro Breeze electric mini dehumidifier offers silent operation capabilities and energy efficiency.
On that note, it is time for us to sign off. Take care!
Moisture and humidity can be like a slow poison for your bathroom as they can accelerate the growth of mold and mildew.
Anyhow, it’s no surprise that your bathroom is more vulnerable to moisture than any other part of your home. The constant use of water makes it increasingly easier for moisture to stay locked inside the bathroom. Hence, the humidity levels of the bathroom are naturally significantly higher than any other room in the house.
That’s why we recommend installing a dehumidifier to keep your bathroom hygienic, clean, and, most importantly, dry. However, choosing the right dehumidifier can be a daunting task if you don’t know much about this nifty piece of bathroom equipment.
But, don’t worry because we’re here to help you find a dehumidifier for your bathrooms. A dehumidifier's effectiveness can vary with how big your bathroom is in size to fit a small or big dehumidifier, if you want to know more about this, checkout our exclusive article on the particular subject.
This article will highlight the best dehumidifiers for your bathroom that are currently available on the market. So, without any further ado, let us get on with it!
Fast & Efficient Dehumidifier: This Electric Dehumidifier is...
Portable & Compact Design: With a capacity of 17 ounces...
The first product on our list is the electric dehumidifier from Pohl Schmitt that is identifiable by its compact and lightweight design. You can use it in the bathroom, bedroom, laundry room, or wherever you want — after all, it is easily portable. Also, it can efficiently remove moisture from any space within 225 sq. ft.
Why Did We Like It?
You can clean excess moisture from the air in no time by installing this electric dehumidifier, whether you live in a dry or humid area. That said, you can easily cover a bathroom space within 2200 cubic feet and remove up to 10 oz. of water.
Anyhow, the unit comes with a maximum water capacity of 500 ml, which may be sufficient to dry up small to average-sized bathroom spaces. Furthermore, the small and compact design makes carrying the dehumidifier from one room to another.
And, through it all, the Peltier technology offers an ultra-quiet performance. So, if you have a baby in the house, you don’t need to worry about waking them up every time you use the dehumidifier. On that note, this dehumidifier can improve the air quality at home, ensuring that all your loved ones breathe in healthier, cleaner, and drier air.
What Could’ve Been Better?
If you’re planning to install this electric dehumidifier in an ample bathroom space, it might not be the best idea. It is not suitable for areas any more than 2200 cubic feet. But considering how bathrooms are generally the smallest rooms in the house, this compact device may be ideal for most buyers.
Next up is this low-maintenance electric dehumidifier from Seavon that is super-easy to operate. You only need to press a single button, and the dehumidifier will work independently. Indeed, no more worrying about switching it off as it is equipped with an automatic switch-off feature.
Why Did We Like It?
The electric dehumidifier comes with the advanced Peltier technology that ensures thermo-electric cooling and an ultra-quiet performance. This fine piece of equipment produces a sound lower than 40 decibels so that you can enjoy a quiet and comfortable sleep.
Moreover, the product greatly helps in improving air quality by removing around 11.8 oz. of excess moisture from the air. This effective moisture removal can help you have a better and healthier lifestyle.
Furthermore, you can carry around this mini dehumidifier anywhere in the house. So, why just stick to the bathroom when you can also keep the damp air out of your bedroom? It also comes with a LED indicator that displays when the tank is full.
Plus, this small and portable dehumidifier releases dry and clean air that helps you breathe comfortably. Hence, it can be an excellent choice for keeping your bathroom fresh, dry, and mold-free.
What Could’ve Been Better?
Patience is a virtue — especially when using this dehumidifier, as it takes a lot of time to remove 11.8 ounces of water from the air. In fact, you might even have to wait for hours for the bathroom to get completely dry.
Furthermore, its water tank capacity is relatively small compared to similar products. So, you may have to empty the reservoir tank after every 12 hours or so.
Small Dehumidifier, Big Water Capactiy: This small but...
Ideal for Small Rooms: The perfect size for petite spaces...
The third product on our list of bathroom dehumidifiers is this small dehumidifier from Pure Enrichment that is equipped with a compact water tank to match. Despite its size, this machine can efficiently remove 300 ml of moisture per day from your bathroom, closets, or any other small spaces in the house.
Why Did We Like It?
One of the most convenient features of this electric dehumidifier is its transparent and removable water tank. You can easily see the water level and change it whenever the tank fills up. Furthermore, with a capacity of 27 oz., the water tank can efficiently absorb 300 ml of moisture per day for three to four days straight.
Additionally, it comes with a single switch, making it easy to operate. Indeed, you need only turn on the button, and the dehumidifier will do the rest on its own. What’s more, it will automatically turn off once the water tank is full to ensure safety and prevent overflowing.
And there’s more; this dehumidifier offers a whisper-quiet performance and won’t disturb the peaceful environment as you take a relaxing bath. It also offers year-round comfort and protects your home from harmful allergens through effective humidity control.
What Could’ve Been Better?
Like other mini dehumidifiers, you cannot use this product for drying up large spaces. Moreover, the drying-up process can take a lot of time if you plan to install this dehumidifier in your bathroom. On that note, some customers have mentioned that it takes hours to remove 60% moisture from spaces as small as 50 square feet.
【Multi-Purpose But Ultra Quiet】 - This Dehumidifiers for...
As we move forward with our list of best bathroom dehumidifiers, we come to this electrically-powered portable mini unit from Trudin. This pocket-sized device can cover an area of up to 215 square feet and prevent the spread of mold and mildew in your bathroom or any other small damp spaces in the house.
Why Did We Like It?
This mini dehumidifier is small but has multipurpose applications. That said, you can use it to dry bathroom floors, keep your bedrooms clean and dry, and keep the closets fresh. Doing so helps maintain a healthy atmosphere in your home and keeps the growth of mold and mildew at bay.
Furthermore, the 900 ml water tank ensures effective absorption of moisture and offers you clean and dry air to breathe. On that note, it can easily remove 350 ml of moisture each day from small spaces between 50 and 215 square feet.
When you look closely, you’ll see that the dehumidifier can be operated with the one-button control, making it very convenient to use. And that’s not all; you can easily remove the water tank, clean it when it is full, and put it back once you’re done. At the same time, the auto-shutoff feature ensures that the tank does not overflow and cause a bigger and wetter mess.
What Could’ve Been Better?
If you have an utterly wet bathroom floor, this mini dehumidifier might not be powerful enough to make the bathroom bone dry and moisture-free. Moreover, if you live in areas with a high humidity level, this product may not be the best choice.
2 Modes & Low Noise. 2 working modes: normal and sleep, to...
The fifth product on our list is the small and portable dehumidifier from Ayafato that comes with seven LED lights. It also has two working modes suitable for your bedroom, bathroom, closet, office, and RV. That said, the dehumidifier can be ideal to dry up small to average-sized rooms in your house.
Why Did We Like It?
The most impressive feature about this mini dehumidifier is its seven color-changing LED lights, which switch automatically to create a soothing environment. Additionally, the thermoelectric Peltier technology ensures ultra-quiet performance to maintain a peaceful home.
Moving on, the machine has two working modes — normal mode and sleep mode. You can pick between these, as per your demands for a small dehumidifier for your bathroom. On that note, the dehumidifier noise becomes less than 35 decibels if you select the sleep mode. It will offer a whisper-quiet performance that won’t interfere with your peaceful slumber in any way.
And on top of that, it comes with an auto-shutoff function that prevents overflowing to prevent any accidents. Moreover, the built-in memory chip helps the equipment to continue working as per its former setting. These nifty additions do away with the need to worry about updating the settings each time you use the dehumidifier and give it a truly “ no-mess no-fuss” character.
What Could’ve Been Better?
Even though the mini dehumidifier works wonderfully in small spaces, it is not at all suitable to remove moisture from large spaces with an area of more than 2600 cubic feet. So, it won’t be of any use in keeping the damp air out of your spacious living room.
High-Efficiency:Struggling with excess moisture leading to...
Small but Powerful: This compact dehumidifier is perfect for...
Next on our list, we have the electric mini dehumidifier from Gocheer that falls under the category of small bathroom dehumidifiers. Hence, it works beautifully in small spaces. Plus, it can offer an ultra-quiet performance that maintains the peace of your house. It can be a good choice for keeping the dampness and moisture out of your bathroom.
Why Did We Like It?
The dehumidifier starts working when the relative humidity is over 45%. You can clearly feel the air getting dry and damp-free — no more moldy smell in the bathroom. And not just in the bathroom, this portable dehumidifier works wonderfully in any small space, including bedrooms, kitchens, and closets.
Along with that, it comes with the automatic shutoff function to help save your electricity bill and ensure low power consumption while also preventing overflowing. Anyhow, the nifty LED indicator light will warn you when the water tank is full.
Plus, the dehumidifier is super-quiet as it works without a compressor. The working sound is lower than 45 decibels. Furthermore, this bathroom dehumidifier can easily cover an area up to 480 square feet and absorb 700 to 1000 ml of moisture each day. Thus, it can be an ideal dehumidifier for preventing bathroom mold.
What Could’ve Been Better?
We think the primary issue with this dehumidifier is overheating. It’s normal for bathroom dehumidifiers to heat up when they are being used. However, this product is often overheated and becomes too hot to touch with bare hands.
Dehumidifier with Removal Water Tank: Easily keep track of...
Ideal for Mid-Sized Areas: Compact humidifier design...
Now, we’ve come to the seventh product while discussing the best bathroom dehumidifier. The dehumidifier from Pure Enrichment comes with a 1.5-liter water tank and can remove 500 ml of excessive moisture each day. It offers you better air quality by removing harmful allergens and moisture. It also comes with ultra-quiet Peltier technology that ensures its quiet operation.
Why Did We Like It?
One of the features that really attracted us to this bathroom dehumidifier is its two convenient speed levels. You can choose the speed settings from high to low, and the machine will absorb up to 20 ounces of moisture from the air each day.
Furthermore, it works beautifully to tackle damp environments in small to mid-sized spaces, starting from small bathrooms and bedrooms to kitchens and closets. Plus, with its safe auto-shutoff feature, it ensures energy efficiency. You can set the timer at four or eight hours, after which the machine will turn off automatically to conserve power.
Moreover, the automatic turn-off option ensures that the water tank doesn’t overflow when it’s full. The transparent water tank also makes it easy to track the water level and remove the tank once it’s full. Additionally, the machine offers a quiet operation without compromising the peaceful environment of your home.
What Could’ve Been Better?
Durability can be a major issue with this small dehumidifier. Many customers have complained that the machine works really well for the first few weeks, but it stops working properly after a few months. Hence, you might just be wasting your money and need to switch to another dehumidifier pretty soon.
【Easy to Operate & Auto Shut Off】One-button control...
Moving on with our list of the best bathroom dehumidifiers, we have the electric, portable dehumidifier from Hysure that is ideal for smaller rooms like bathrooms, baby rooms, closets, and so on. It is a compact device that has high moisture extraction capacity and can prevent mold from spreading across the bathroom walls.
Why Did We Like It?
We were most attracted to the strong dehumidification of the product. Depending on the temperature and relative humidity, it can easily absorb 750 ml of moisture per day. Thus, it can protect your home from unpleasant mildew odor and keep your bathroom air clean and fresh.
You’ll also see that the product has a sleek and compact design, which makes it an excellent portable dehumidifier. Kitchens, closets, bathrooms, bedrooms, you can practically carry it anywhere. Plus, the dehumidifier has a low energy consumption design that can help you in saving your electricity bill.
Additionally, it also comes with the advanced Peltier technology, which ensures ultra-quiet performance. In fact, the dehumidifier produces noise less than 35 decibels. It runs so quietly that it won’t hamper your sleep or work.
What Could’ve Been Better?
This thermoelectric dehumidifier comes with a LED indicator light that is a bright green that makes the whole unit glow at night. So, this bright LED night can be a hindrance if you’re trying to have a good night’s sleep after a tiresome day at work.
Efficient Dehumidification- LEEL small dehumidifier comes...
Energy Saving- The dehumidifier with an output of 42W which...
The next product is the portable ultra-quiet dehumidifier from LEEL that covers any room with an area of 2300 cubic feet. You can easily install it to remove moisture from your small bathroom, kitchen, bedroom, or closet. It operates best between 41°F to 122°F and can easily extract 28 ounces of water each day.
Why Did We Like It?
We seriously liked the core patented dehumidification technology that comes with this LEEL dehumidifier. It ensures fast and effective moisture removal from bathrooms, bedrooms, and other spaces around your house. It can also ensure your health and well-being by reducing allergens and air pollutants and improving air quality.
Plus, it is highly energy-efficient and produces 42 watts of power output for 24 hours by using only 1 kilowatt of electricity per hour. It saves much more energy as compared to any large, desiccant dehumidifier. Also, its compact design and lightweight make it very easy to carry around the house.
It also comes with an automatic timer option. You can set the timer at 6 or 12 hours, after which the machine will automatically shut down. Furthermore, you can easily clean the water tank once it is full without any hassle.
What Could’ve Been Better?
Even though the dehumidifier works best between a relative humidity of 45% to 60%, it fails to show any satisfactory results when the humidity level is below 40%. It cannot absorb moisture under mildly humid conditions. So, if you’re experiencing moderate humidity, this product might not be your best pick.
1,500 SQ FT: Removes up to 20 pints (30 pints 2012 DOE) of...
AUTO DRAIN: This dehumidifier will stop running if the water...
As we are almost at the end of our list of favorite bathroom dehumidifiers, we bring you the energy-star-rated electric dehumidifier from Tosot. It comes with three different speed settings that are pretty easy to control. It also comes with a built-in hygrometer to optimize its performance by monitoring the surrounding humidity levels
Why Did We Like It?
The most impressive feature of the dehumidifier is its speed settings. It has three different speed settings - high, medium, and low. And based on the speed settings, its operating volumes also change. The maximum working sound is at 52 decibels, while the minimum is at 48 decibels. So, if you’re trying to get a peaceful sleep, you can simply set the operating speed at low.
It is also highly energy-efficient. It comes with an energy star rating, which means that it consumes less power and can help you save your electricity bill, along with removing moisture. Plus, it is UL-approved and meets all the highest safety standards for its use in your home.
Additionally, it has a spill-proof drain bucket that collects all the moisture. You can easily remove and clean it once it is full. In addition to all this, the dehumidifier has an in-built hygrometer that regulates its operation as per the surrounding humidity.
What Could’ve Been Better?
Even though the dehumidifier is effective in covering large spaces for the dehumidification process, it can be a bit difficult to carry around the house. It has a weight of 32 pounds, which affects its easy portability. Hence, it’s not a small, portable dehumidifier.
LIGHTWEIGHT BUT POWERFUL – Enjoy Adjustable Humidity...
The last and final product in our list of best bathroom dehumidifiers is the desiccant dehumidifier from Ivation that comes with a continuous drain hose pipe. It works well in small spaces that are up to 270 square feet. Plus, it offers a quiet performance that doesn’t interfere with the peaceful environment of your home.
Why Did We Like It?
The desiccant dehumidifier works well in both high and low temperatures. It can easily dehumidify rooms between 33℉ and 104℉. Plus, it expelled warm air, which is perfect for drying clothes and keeping away the moldy smell from your rooms. So, it helps to keep the air fresh and dry by improving the air quality.
Furthermore, the desiccant rotor technology makes it suitable for use all year round. It can easily adjust to high and low temperatures. The dehumidifier also allows you to adjust the fan speed as per your needs. Additionally, it can easily cover spaces up to 270 square feet for effective dehumidification.
On top of this, the dehumidifier has an LCD that signals every time the reservoir is full. And once the tank is full, the auto-shutoff feature turns off the machine to ensure safety and prevent overflowing of the tank. Hence, it can be a good choice for keeping the damp and moist air out of your small bathroom.
What Could’ve Been Better?
When it comes to affordability, this dehumidifier might not be your best option. Although it comes with many advanced features, it is way too costly as compared to other small bathroom dehumidifiers. So, if you’re running on a tight budget, this product isn’t an ideal choice.
Pros
Works between 33℉ and 104℉
Suitable in every season
Easy to clean air filters
Whisper-quiet performance
Cons
Not very affordable
Top Dehumidifiers For Bathroom Buying Guide
Choosing the right bathroom dehumidifier can be an overwhelming ordeal if you don’t know the key features that make up a good dehumidifier. So, in this section, we’ve highlighted some of the important factors that you can consider to make a well-informed purchase decision. Let’s take a look at the best dehumidifiers for bathrooms!
1. Coverage Area
While purchasing air purifiers and dehumidifiers, it is essential to consider how much space they can cover while purifying the air and improving the air quality. In the case of small and portable dehumidifiers, they mostly work well in small to average-sized rooms that are around 250 to 270 square feet.
There are also bigger dehumidifiers that can cover spaces as large as 1200 square feet. Hence, you need to choose the right dehumidifier depending on your room size carefully.
2. Moisture Removal Capacity in the Tank
The moisture removal capacity of the dehumidifiers depends on various environmental conditions such as temperature and the relative humidity level. It is always better to choose the dehumidifiers that remain functional under both high and low temperatures. In that way, you can use the dehumidifier every season and all year round.
3. Quiet Performance of the Bathroom Dehumidifier
If you’re planning to install a dehumidifier in a small bathroom, make sure it doesn’t make too much noise. Thermoelectric dehumidifiers come with the Peltier technology that helps in offering an ultra-quiet performance so that the peaceful environment of your house isn’t hampered. Furthermore, you can also choose a dehumidifier that comes with a sleep mode to minimize its working sound further.
Best Dehumidifier For Bathroom FAQ
When should I run the dehumidifier inside my bathroom?
If your bathroom constantly stays humid and easily attracts moisture throughout the day, even when you are not showering, run the dehumidifier for around 30 minutes twice a day. It’ll help to reduce the humidity and dampness in the bathroom.
You can also keep away mold and mildew from the bathroom and maintain your hygiene by using a dehumidifier to keep the moisture in control. Choose the right dehumidifier, depending on your bathroom space, for the best results.
Are bathroom dehumidifiers better than exhaust fans?
Both exhaust fans and bathroom dehumidifiers come with unique benefits that cannot be entirely replaced by the other. Dehumidifiers are designed to keep your bathroom moisture-free to prevent dampness. They work better than exhaust fans in removing moisture.
However, dehumidifiers are not as effective in maintaining bathroom ventilation as exhaust fans. These fans facilitate easy air circulation throughout the bathroom to keep it well-ventilated. So, dehumidifiers might be better for keeping your bathroom dry, but exhaust fans ensure better aeration inside the bathroom.
Is it safe to run a dehumidifier while showering?
Yes, you can use a dehumidifier while taking a shower so that machine can remove all the steam and moisture from the bathroom. You won’t be left with a steamy mirror or water droplets on the bathroom floors and walls.
Also, it’s best to run the dehumidifier for around 15 to 20 minutes after showering to eliminate any moisture buildup inside the bathroom. It will help to promote some air circulation in your bathroom.
What’s the ideal dehumidifier for an average-sized bathroom?
If your bathroom is around 250 to 270 square feet, you can go for a small and portable dehumidifier that’s easy to install and carry around. It should be good enough to cover your entire bathroom area and remove excess moisture.
However, you might need to look for bigger models if you have a large bathroom space of about 1200 square feet or more. So, carefully measure the floor coverage of your bathroom before choosing the best dehumidifier.
How often do I need to empty the dehumidifier in the bathroom?
If your bathroom tends to get overly humid, it’s best to empty the dehumidifier twice a day to avoid overworking the machine. The capacity of the machine will also determine the frequency of emptying it.
For instance, if you have a large dehumidifier, you can empty it once every two to three days without going through the hassle of doing it daily. Also, if your bathroom stays relatively dry, you don’t need to worry about emptying the dehumidifier every day.
Verdict on the Best Dehumidifiers for Bathrooms
It is alright to feel a little confused while selecting the best bathroom dehumidifier. Anyhow, after going through our reviews, we hope you’re feeling a little more confident about your final decision.
If you ask us about our favorite bathroom dehumidifiers, we will definitely go with the Pohl Schmitt or the Seavon because of their performance quality and affordability. Indeed, you don’t have to break the bank to get access to excellent bathroom dehumidifiers.
However, you can also pull up your sleeves and do some more research before making any final decision.
And on that note, we’ll be signing off. Until next time!
High humidity is never a good thing, especially in smaller households, which is why getting a dehumidifier for your apartment is always recommended.
Not only can these dehumidifiers control humidity levels, but they can also improve indoor air quality, limit environmental triggers for sicknesses, and deal with mold as well. Even smaller dehumidifiers, which may not seem very powerful can easily cover larger spaces. This is incredibly useful in a small apartment area, where the space is limited.
If you need pointers on how to get started on finding the best dehumidifier for an apartment, worry not. Our in-depth guide covers a few of the top models and how to pick the best apartment dehumidifier no matter how much area you need to be covered.
If a compact, efficient, and portable dehumidifier is what you need, then this hOmeLabs dehumidifier is worth checking out. Not only does it have a sleek look, but it can also remove an incredible 22 pints of excess moisture. Whether it is left to work autonomously or through continuous draining, your target humidity levels are within reach with this unit.
1,500 sq ft Dehumidifier: Our dehumidifier removes up to 22...
Why Did We Like It?
This dehumidifier unit is unique because of the built-in wheels to help transport it around. As such, the portable construction is perfect if you need to move the unit around the apartment throughout the day. Having the ability to position it exactly where you need is especially important to get maximum coverage, be it for the basement, bedroom, or any other small space.
Additionally, there is an attached drain hose for continuous operation if you need it to run beyond a regular cycle. Otherwise, the collected moisture will gather into a water tank for removal until it is completely full.
Placing this humidifier in a bedroom is also feasible as it runs without much sound. While it is not the quietest dehumidifier, the fan noise levels are quiet enough to allow for binge-watching your favorite series without any distractions.
What Could've Been Better?
Unless a drain hose is attached to this hOmeLabs dehumidifier, you may find yourself having to regularly empty out the water tank. As the capacity is pretty low, it can not hold much moisture. And the 22 pints of moisture removed by it are sure to fill up the tank in no time.
This Frigidaire dehumidifier runs efficiently throughout the day, whether on a pump or while using the high-capacity tank. With three fan settings to choose from and a washable filter, it has a user-friendly design to remove excess moisture with ease.
Easy-to-Clean Washable Filter: Capture dust from the air and...
Custom Humidity Control: Maximize your comfort with...
Why Did We Like It?
One of the standout features of this dehumidifier designed for apartment spaces is its built-in filter that can capture dust mites and improve air quality. Of course, an air filter will eventually need some maintenance, so the filter is washable to keep the long-term operating costs down.
Another feature that came in handy was the large capacity of the water tank. A 20-pint dehumidifier running constantly would have quickly filled up any other water tank. However, the Frigidaire dehumidifier is an exception, as it gives two gallons to work with before needing emptying.
On the other hand, there is the option to have a continuous running drain as well if you don't feel like emptying out the tank every few hours.
What Could've Been Better?
One minor inconvenience that we came across was that the water outlet seal was not as tight as we would have liked it to be. Unless you use a floor drain or have a sealant, you may find some water leaking out from the area between the pipe and the hole.
What makes the Yaufey 1 dehumidifier stand out is the ultra-quiet Peltier technology that it employs. With the quiet operation and excellent coverage of up to 1500 square feet, it blends into the setup of any room. Aside from auto-control, it has a defrost and shut-off feature to help make the user experience as seamless as possible.
PROFESSIONAL & EFFICIENT DEHUMIDIFICATION: This dehumidifier...
CONVENIENT & SIMPLE TO USE: Home appliances don't have to...
Why Did We Like It?
There are a few modes and settings that the dehumidifier work can at. One method involves manually emptying out the tank when full; however, the inclusion of a drain hose allows for a continuous draining cycle.
Tailoring the operating times of this unit to meet your energy needs and schedule is made incredibly convenient with the built-in timer and shut-off system. Once the desired humidity levels are reached, the system will shut off by itself to facilitate optimum energy efficiency. Additionally, the auto mode can detect moist air and begin operating to maintain humidity control.
Overall, the user experience is improved by including an intuitive touchscreen control panel to adjust the customizable settings. What's more, there are wheels and handles along the top of the unit to help you move it around the apartment with ease.
What Could've Been Better?
In case you are not able to attach the included drain hose to an outlet, you may find the manual emptying of the tank to be quite regular. Even in small spaces, we observed that the unit could only run for a few hours before reaching its full capacity.
This GE dehumidifier is not only portable but is also energy-star certified for humidity control, even in larger spaces. Packing a large capacity tank and a number of modes and speeds to choose from, it is perfect for eliminating moist air in a small apartment without hiking the electric bill.
35 PINT - This GE Energy Star dehumidifier removes 35 pints...
EMPTY BUCKET ALARM - This feature alerts you if the bucket,...
Why Did We Like It?
Eliminating humid air is an easy task with this dehumidifier working away; simply set the desired humidity levels on the adjustable humidistat and let it do the rest. Plus, three fan speeds allow the unit to work at varying degrees of moisture removal. Once the desired humidity level is reached, the dehumidifier will automatically turn itself off to preserve power.
Speaking of energy consumption, this unit is Energy Star certified, which means it is obviously energy efficient while performing at an optimal turnover rate. This can help cut down a few precious hours of operation, saving you a few bucks in the process.
Furthermore, the entire unit has a sleek white design with hidden roll wheels for transportation. Built-in pocket handles also help make the dehumidifier easy to move around small spaces without having to lift or assemble anything.
What Could've Been Better?
Of course, in every dehumidifier, there is bound to be a slight increase in the temperature around the unit when it's operating. However, in the case of this GE model, there was a considerable increase of more than 10 degrees. This may be a cause for concern, especially for those in a small apartment area.
Covering 3,000 to 4,500 square feet, this 50-pint dehumidifier from TOSOT is a solid investment for any apartment. There is an internal pump and real-time monitoring of humidity, making it one of the best dehumidifiers for convenience. Add onto that a simple control panel and quiet operation, and you get a high-quality dehumidifier unit.
4,500 SQ FT: Our dehumidifier can remove up to 50 pints of...
INTERNAL PUMP: The internal pump automatically removes...
Why Did We Like It?
Being able to gauge the humidity level in real time is an incredibly useful feature that this unit provides, as the adjustments to the settings can be made accordingly. As this 50-pint dehumidifier has an internal pump, it is possible to leave it running continuously to maintain the desired humidity in small spaces. Once the water reaches a certain level in the drain bucket, any excess collected moisture can be removed either sideways or vertically.
The alternative is manually emptying the drain bucket, which is not as challenging as it seems either. And to further simply the process, the brand has included a swivel handle and spill-resistant baffles to keep the water from spilling.
With an Energy Star rating, this TOSOT dehumidifier is able to run efficiently even on low power. This also helps it to maintain a low noise level regardless of which fan speed setting it is on.
What Could've Been Better?
One caveat to this model is the small capacity of the drain bucket. Because it is a 50-pint dehumidifier, it will fill up quite fast depending on the amount of moisture in the air. Unless a hose is attached to the pump for constant draining, you may find yourself emptying out the bucket every few hours.
Honeywell has designed this modern room dehumidifier with a range of smart features to improve the air quality in your home. A reusable filter, continuous drainage, and heat-safe internal casing are just some features to help make your life easier and healthier. The option to control it wirelessly over Wi-Fi is another unique feature to future-proof this handy dehumidifier.
No products found.
Why Did We Like It?
You can tell this Honeywell dehumidifier was built with the user experience in mind. This is evident from the heavy-duty handles and smooth gliding wheels to help make transportation a breeze. A built-in cord winder also helps keep the unit looking neat and clean.
This dehumidifier works well, whether it is manually emptying the water tank or attaching a drain pipe to the pump. If it is not possible to use the included pipe, then the water tank is still convenient to empty out. With a sliding rail, sculpted handle, and splashguard, it is easy to transport and dispose of the collected moisture.
Additionally, Honeywell has also included the option to control the settings from fan speed to humidity all from your phone or tablet. The dehumidifier is also compatible with Amazon Alexa, so voice commands can be used as well, making for a seamless experience without having to interact with the unit directly.
What Could've Been Better?
While using this dehumidifier, it was observed that the fans were constantly in operation even when the desired humidity had been reached. This problem seemed to occur for many other reviewers as well; whether it is intentional or not is unknown, but it is a minor inconvenience that should be noted.
Controlling the humidity level in a room is much easier with the HOGARLABS PD11C, featuring three different modes to choose from for optimal performance. With an effective coverage of up to 3500 square feet, it is a contender for one of the best dehumidifiers in terms of versatility.
3500 SQ. FT 50 PINTS ENERGY STAR DEHUMIDIFIER - HOGARLABS...
ENERGY STAR - Dehumidifier with ENERGY STAR certification...
Why Did We Like It?
When it comes to the ambient humidity in a living space, there are multiple facets to consider, which is why the three different modes on the PD11C are so useful. A "DEHU" mode keeps humidity at a healthy level, while the "CONT" mode is perfect for particularly damp areas needing constant dehumidification. Furthermore, a specialized "DRY" mode can help air out wet clothes and protect cotton materials from moisture.
Being able to eliminate high humidity is not the only standard that the best dehumidifiers should be held to; the design is a big consideration as well. The PD11C has a top handle as well as embedded side handrails to give a firm grip while transporting the unit.
Some useful maintenance features like a timer and resuming operation after a power outage improves the user experience by allowing for autonomous operation. A hygrometer can also read the levels of moist, cool air in a room to make adjustments accordingly.
What Could've Been Better?
Unless the PD11C is used in conjunction with the included drain hose, then the frequency of emptying out the collected moisture substantially increases. With such a low-capacity tank, the dehumidifier fills up in no time at all, so repeated trips to empty out the tank are inevitable.
Pros
Easy transportation
Three modes
24-hour timer
Reusable filter
Cons
0.6-gallon tank
Dehumidifier For Apartment Buying Guide
Before you decide on a dehumidifier for your apartment, there are a couple of things to be aware of. As there is no standard for the best dehumidifier for apartment use, you may not get the same results as other users, even if it is the same model. That is why these factors should be kept in mind so you can get the best performance possible out of the unit.
1. Energy Consumption
Dealing with a musty odor in a compact area can be challenging and time-consuming, especially if the machine is not cut out for the task. As such, the energy efficiency of a dehumidifier is one of the most crucial factors to consider; continuous operation can rack up quite a hefty power bill in the long run.
One of the reasons why having an energy-efficient dehumidifier is so important is that it helps other HVAC unit pieces, like an air conditioner, run more efficiently. The temperature of dry air is easier to change as compared to heavier, moist air. As such, air conditioners may see a jump in efficiency simply by having a dehumidifier in the same room.
Additionally, efficient power consumption can help to cut down on the operating costs of the dehumidifier. Some cases see up to 30% less power consumption, which adds up to a considerable amount in terms of power bills. These efficient performers give the same quality air without consuming drastic amounts of power, allowing them to be left running without racking up a huge bill.
As a general guideline, to get the best dehumidifier for apartment areas, a model that is Energy Star rated is a good indication of quality efficiency. These units have been tested and approved as having efficient and low-power consumption without a drop in performance.
2. Drainage
A. Drain Hose
One of the favorite methods of disposal for excess water in a dehumidifier is using a draining pipe attached to an internal sump pump. This effective combination allows the unit to continuously drain water, which effectively leaves the tank in a constant state of emptiness. The result is never having to empty out the water storage, keeping the machine running 24/7 if you so choose to.
Another benefit of having a built-in pump is the constant air circulation in your living space. Similar to an air conditioner, the moist and dry air will keep moving, eliminating dust buildup.
B. Manual Tank
On the other end of the spectrum, a manual method of removal involves more work; however, it does depend on the capacity of the tank itself. A low pint dehumidifier will not generate much in terms of moisture, so a corresponding volume tank is essential. Pairing a high pint dehumidifier with a low capacity tank will result in multiple trips to empty it out.
3. Air Quality
An additional feature that can help remove mold spores is a filter for air. To keep maintenance costs to a minimum, look for a model that uses a washable filter. Many models do feature a washable and reusable filter, so finding one shouldn't be difficult.
A smart dehumidifier model that acts as an air purifier is one of the best ways to control moisture and improve the quality of air. Not only can it manually adjust its settings to match the quality of the air, but it operates only when needed, which again helps with power consumption.
4. Control Panel
Accessibility should not be overlooked when it comes to selecting the absolute best dehumidifier for apartment rooms. Whether it is electronic controls or tactile buttons, these factors determine how you interact with the machine. A control panel has all the settings and modes as well as additional features like a timer and auto shut off.
Electronic control panels usually use an LED light to indicate the settings and modes that the dehumidifier is currently set at. However, it has the downside of remaining bright, which can be a nuisance in a living space where light is not desirable. Tactile buttons are beneficial in the sense that they offer ultimate control without getting in the way, whether it is light or dark in the room.
Verdict
With that, it is safe to say you know a bit more about the best dehumidifiers for apartments and how to pick the right one for you.
If you ask us, our all-around choice has to be the hOmeLabs for its efficient operation. However, a close second is tied between the Frigidaire and the Yaufey as they can improve air quality while removing dust mites and other respiratory triggers.
Regardless of the dehumidifier model that you do end up choosing, these machines have a drastic impact on air and health, especially in a compact apartment. So, rest assured, any dehumidifier for apartment use will help you focus on the important things and not worry about how safe the air is.
Take a step in the right direction, get yourself one of these fantastic machines, and breathe a healthier sigh of relief.
Evenings can be a great time to spend outdoors, and if you have a large backyard or a farm, there is nothing like it.
But mosquitoes and insects can be extremely bothersome and spoil a nice evening. This is where the Cutter Natural Bug Control comes into the picture. It will help prevent those itchy ankles and swollen hands and help your kids explore the world outside your home.
This formula is specially designed to keep insects at bay and prevent new ones from coming into your space. You can finally host barbeque dinners in the backyard after spraying the whole area with this unique formula.
If you are wondering whether it will still suit you, read on! We have a detailed guide ahead, which will tell you about the benefits of the product, followed by a FAQ section.
Value pack: two-pack combo includes Cutter backyard bug...
With hose-end spray concentrate: use Cutter backyard bug...
Why Buy This Product?
This formula has been known to be the ideal choice for making the outdoors safe. Made of a variety of rich ingredients, this product will please you and your family. Read on to know about the host of benefits that it boasts of.
Natural Ingredients
Lemongrass oil is a natural insecticide that can prove to be very beneficial for everybody. While artificial chemicals could cause health issues and could be detrimental for those with breathing problems, this can be used even if you have both kids and older adults in the family.
Lemongrass is a fresh scent that is liked by people. You can safely spray it outside on the lawn when your family is already outdoors. This will repel insects and will protect you from insect bites.
While this kills insects, it does not harm the grass growing on the ground. You can have freshly growing grass and not worry about it.
Protects The Lawns
As we mentioned, the grass will stay protected, while this product will kill all kinds of insects and ants that may hinder the growth of grass or plants. This makes it an excellent choice for farmers or DIY gardeners who invest in various types of crops or flowering plants. We often see parts of it being eaten by insects, but with this natural spray, that would be prevented.
Easy To Spread
If you have a large area to cover and spraying it from a bottle does not seem ideal, there is another excellent solution. You can attach it with a hose, which you generally use to water your plants. This will help in spreading over all patches that are infected.
Besides, the solution does not need to be mixed with water or any other kind of carrier fluid. It is not in a concentrated form and can be used out of the can. This will save you a lot of time and will ensure that you get the job done fast.
Wide Coverage
One of the major issues that occur with bug control sprays is the amount. When you have large areas to cover, you will need a cost-effective solution for it. The Cutter Natural Bug Control will provide you with exactly what you need as it covers an area of 5,000 square meters with one bottle. Hence, you can use it for large lawns, farmyards, and park spaces.
Suits All Weather Conditions
This product will work well in all kinds of weather. From summers to winters, you can use it whenever you wish to. But remember, if you are going to use it in the rainy season, you may need to apply it more frequently to see the desired result.
Kills All Types of Pests
From flies and mosquitoes to insects that pose a problem while harvesting, this spray will take care of all kinds of insects. The product is widely used by carpenters, too, while working with wood. If wood needs to be stored, use this spray frequently to ensure that insects do not make holes in it, or destroy the wooden planks.
The versatility that was offered was truly impressive, to say the least. From using it to prevent mosquitoes near our backyard pool to keeping our farmyards safe, this took care of all of it efficiently.
Also, it can eliminate ant hills completely, hence can be used in public parks and children's play areas.
Works as a Lawn Freshener
This also works as a yard or a lawn freshener, removing all kinds of nasty or weird smells. It boasts of a subtle scent of fresh lemongrass that will be very pleasant. Since the smell is absolutely natural, it does not seem out of place in gardens and open spaces.
The scent hangs in the air for some time to make this experience last. Spray it before your kids come out to play, and it should last till they are done.
Although the solution mostly consists of natural ingredients, it does have traces of artificial chemical compounds too. The artificial ingredients are necessary to make it work better and more efficiently. But we were happy to find that the chemical was not harmful to humans or plants and hence did not pose a problem.
Also, the formula will not last in the air for more than a day. In some cases, with enclosed open spaces, the effects may last for 2 days, but it is best to spray another time after 24-36 hours. If you are tackling an area with a lot of greenery, you may need to spray more often.
Pros
Has no toxic elements
Easy to apply
Covers 5,000 square meters
Smells fresh
Kills all kinds of insects and bugs
Cons
Needs constant reapplication
Presence of non-toxic artificial components
Cutter Natural Bug Control FAQs
Does it cause any damage to surfaces?
While the product does have artificial compounds in it, it is absolutely safe for all surfaces. This is only targeted towards pests and will not harm anything else. Just make sure that you do not directly spray it on your skin.
Since it is not made to be skin-friendly, and some might have sensitive skin, this may lead to rashes. Spray it in the air and wait for some seconds before you walk through the area.
What kind of pests are targeted?
It will help you get rid of most flying insects, including mosquitoes, cockroaches, houseflies, and silverfish, to name a few. We found that it works well with crawling insects too, like ants and other bugs that eat up plant leaves.
How long does it take to show results?
You will be able to see results almost immediately. Spray the affected areas and then wait for a few seconds. You will see an immediate drop in the number of flies, and you will stop hearing that irritating buzzing sound.
Cutter Natural Bug Control Verdict
Despite having the few flaws that we found, it is essentially a beneficial product and will not disappoint you. Cutter Natural Bug Control does its job well and will not prove to be harmful to you or your pets.
We have finally been able to get rid of the constant insect bites, and what's more! We could carry our food outdoors too. Previously, we could not take it out because of insects flying around and settling on our plates. If you face the same issue, this is going to give you a lot of peace.
With this, we will take our leave. Go ahead and try the product out. Let us know how it worked for you in the comment section below.
Have you changed several hand-held tools because you're disappointed by the quality and performance?
You can opt for Tekton Tools to solve your woes in the workshed. It's one of the best brands in the market, thanks to its range of top-notch products, delivering unmatched performance and thereby reducing your stress.
It's very reliable due to the sturdy construction while the unit and components have enough strength to withstand the daily demands of work. Likewise, it doesn't compromise with the output and offers a great deal of versatility. But the question is, how do you choose from the numerous products that are lining the market?
In fact, how will you distinguish between two or more different brands? To help you, we have narrowed down the eight best tools available from Tekton Tools while looking at the various aspects in which the brand does better than its rivals.
So, let’s get started, shall we?
1. 6-point Socket and Ratchet Set
The 6-point Socket and Ratchet Set is one of the top products in the market and with valid reason. It comes with quality components capable of solving most of your problems in the workshed. And it has generated mostly positive reviews, making it quite popular.
First and foremost, it comes with roll-stamped markings etched onto the surface to make for excellent viewing even in low-light conditions. You can organize them neatly and choose the correct tool depending on the type of work. Moreover, thanks to the radiused corners, the force is applied on the flat side.
It provides smooth operation while helping to prevent round-off. Plus, due to the narrowed diameter, you get much better coverage allowing you to reach even tight spots with ease. In that regard, the 90-tooth ratchet comes in handy, with further support provided by the ¼" drive.
Apart from these, the noticeable upgrade comes in terms of its durability. It flaunts a chrome-plated finish, ensuring it can handle the toughest of tasks every day. Besides, it has a storage case for all the components, preventing accidental damage, and enhancing longevity. So, you have no reason to worry and can work uninterrupted.
For all that's good about it, there are a couple of issues with the unit. The sockets may not work well on occasions, which may hamper your work, and you'll have difficulty in tightening or loosening the bolts. Plus, the case needs to be more compact because the extra space goes to waste.
What We Like
90-tooth ratchet
Chrome-plated finish
Prevents round-off
6-point sockets
Storage case
What We Don’t Like
Sockets may not fit well
The case could be compact
2. Click Torque Wrench 24335
The Click Torque Wrench 24335 has several similarities with some of the other products in the market, but it has made some exciting upgrades. These inclusions have helped it quickly climb the charts, with users showing a lot of interest in purchasing it. No surprises then, that it's receiving positive reviews.
Straight off the bat, the dual-range scale has sufficient contrast, allowing easy visibility even in low-light conditions. You can clearly distinguish between the different components, thereby increasing productivity and saving time in the work shed. The significant addition is the reversible ratchet, capable of driving in both directions.
Also, you can use it to measure the torque by turning it clockwise. Likewise, it's pre-calibrated, thereby saving you the trouble and increasing accuracy to within 4%, making it possible to get the desired outcome on your tasks. Another crucial upgrade is the torque conversion chart, which amps up user-friendliness.
You get the desired efficiency, providing for simple operation. Moreover, it's incredibly durable, thanks to the all-steel construction, ensuring you can use it for a long time. There's also a sturdy storage case for keeping your components organized and protecting them from minor bumps and falls.
We have seen that the bolt may break, which doesn't bode well for the machine you're fixing. We received reports stating that users failed to understand when the bolt adequately tightened, causing it to break off. As a result, you may think twice before purchasing it.
What We Like
All-steel construction
Pre-calibrated
Accurate
Storage case
Torque conversion chart
What We Don’t Like
Bolt may break
3. Combination Wrench Set
The Combination Wrench Set is right up there with the top products in the market, making for a highly desirable unit. Tekton has given attention to detail, providing a comfortable operation even for long hours. It has made quite a name for itself, and most buyers have it on their wish list.
Firstly, you'll find that the open end has an angle of 15 degrees, which serves a couple of purposes. You can flip the wrench to fit the fasteners tightly, providing a secure attachment, and reducing the time you need to spend on the task. It ensures you get double the speed even in the tightest of spaces.
Additionally, the 12-point box end makes it easier to use by providing more angles to work with. Plus, it leaves enough room for your fingers, enabling you to use it for a hassle-free experience. So, it scores high on user-friendliness and combined with the ingenious design; you get excellent performance.
Besides, it grips the flat sides rather than the corners to prevent round-off, ensuring you get a seamless experience. Apart from that, the chrome vanadium steel construction makes it extremely sturdy to withstand the daily demands of work and complements the mirror chrome finish.
It's slightly costlier than the other units in the market, which may deter potential buyers. The price is one of the first things people see, and if it exceeds your budget, you are better off opting for some other model. However, you won't be disappointed if you decide to be flexible with the price.
What We Like
Clearance for fingers
12-point box end
Prevents round-off
Folding handles
Store-and-go keepers
What We Don’t Like
Slightly costly
4. Manual Hand Impact Driver Set
The Manual Hand Impact Driver Set may look like an innocuous unit, but there's no cause for concern. It has all the essential aspects to stand out from the crowd, and you're guaranteed to get highly reliable output to handle various situations with ease.
Right away, it generates a high-torque instant impact force meaning you can work on rusted or frozen bolts without damaging them in any way. Moreover, it works both in the forward and backward direction proving highly effective in handling various tasks.
Besides, Tekton has focused on user-friendliness, seen with the non-slip grip making long working possible. You can use it in the tightest of spaces without worrying about losing your control, and you get a comfortable performance under different conditions. Also, the entire unit, along with the components, is very portable.
And apart from portability, the storage case offers protection helping to keep your tool in prime condition for a long time. Likewise, you get the option of organizing different elements for smooth operation with its corrosion resistance, further enhancing robustness.
We have seen soft metal bits used for construction. It's not a significant worry, and it doesn't compromise durability, but it's also true that it may disintegrate earlier than some of the other products. Yet, it's not a significant variation, and you won't be disappointed with the performance.
What We Like
High-torque impact force
Reversible drive
Frees corroded screws
Portable
Corrosion resistant
What We Don’t Like
Soft metal bits
5. Hex Key Wrench Set 25232
We are at the halfway point of our guide, but there are many products we are yet to cover. Our next recommendation is the Hex Key Wrench Set 25232, which flaunts an exceptional design for unmatched output at work. The high versatility has endeared it to people leading to a great response.
To start, the ball end design ensures you get a wide angle of entry at 25 degrees, helping you to work your way around obstructions. It comes with both chamfered and straight ends, forming a tight fit with the fastener head. As a result, it reduces wear and tear and allows you to get the work done quickly.
Furthermore, it sports a black oxide finish, along with chrome vanadium steel construction, providing excellent durability. Likewise, it doesn't require any added plating, thereby reducing the risk of chipping off when working on tough projects. Similarly, with both the long and short arm, you get a high degree of versatility.
While the long arm increases the reach, the short arm generates extra leverage. The significant addition, however, is the color-coded housing to distinguish between the different sizes. You can organize them effectively and instantly identify the various accessories for an uninterrupted experience.
Users have reported issues with engagement, thereby making it difficult to tighten or loosen the bolts adequately. You may find it slipping off, which also brings us to the problem of weak grip strength. Consequently, many people may have a frustrating time working with it.
What We Like
25-degree entry angle
Snug fit
Reduces damage
Extra leverage
Chrome vanadium steel
What We Don’t Like
Issues with engagement
Poor grip strength
6. Click Torque Wrench 24330
The Click Torque Wrench 24330offers the perfect blend of power and durability to ensure you can use it for a long time while getting consistent results. The inclusion of quality components makes it a valuable acquisition, with most people having mostly positive things to say about it.
First and foremost, the 3/8" drive comes in handy to provide smooth operation, and the torque conversion chart will also help you get better results. So, it scores high on user-friendliness, meaning you won't have difficulty producing the desired output. Similarly, while using the wrench, you'll hear a click, letting you know when you reach the preset value.
Moreover, the dual-range scale makes it easy to read even in low-light situations allowing you to work uninterrupted in various conditions. Further adding to the effectiveness is the reversible ratchet head, which works in both directions. Plus, you can use it to measure the torque by rotating it clockwise.
Additionally, it's highly durable, thanks to the all-steel construction. Tekton hasn't used plastic parts, which could break off, while the sturdy design ensures you can use it for a long time. Likewise, it's highly precise and comes pre-calibrated, making it accurate to within 4%.
It's not aligned correctly, which has several implications. It may not show the correct value, and you'll find it challenging to get optimum performance. Plus, the alignment may also have a bearing on the bolts, and you need to be careful lest you tighten it too much, causing it to break.
What We Like
Torque conversion chart
Dual range scale
Reversible ratchet head
Pre-calibrated
Accurate
What We Don’t Like
Alignment is a worry
Bolt may break
7. 6-point Impact Socket Set
We are nearing the end of our list, but there are a few more products we are yet to go through. Next up is the 6-point Impact Socket Set, scoring high on user-friendliness, thereby enabling you to tackle an array of tasks making it extremely popular in the market.
Straight off the bat, ½” drive along with the 6-point socket design is essential for gripping the flat sides of fasteners. As a result, you get a tight fit, which helps prevent run-off and provides a seamless experience. Another fascinating inclusion is the extra-deep broach allowing you to use longer fasteners.
Meanwhile, you'll find laser-etched markings embedded on the side to help distinguish between the different components. You can easily read the engravings even in low-light conditions, so your work never stops. However, the crucial upgrade comes in terms of durability.
It has a chrome vanadium steel construction that has been heat-treated to ensure your tool has an excellent lifespan. Moreover, it has a black-oxide finish to prevent corrosion, and coupled with the storage case; you can keep your components organized and free from damage. Finally, the 15 sockets provide a vast range from 10 to 24mm.
It comes with the size etched along the side, and over time, the markings tend to fade. Now, it's something familiar to all units, but you'll have a tough time identifying the right tool when the writing diminishes. It may prove to be an inconvenience that most people would want to avoid.
What We Like
Size markings
Easy to read
Chrome vanadium steel
Black phosphate finish
Corrosion-resistant
What We Don’t Like
Laser etching may fade
8. Hex Key Wrench Set 25253
The Hex Key Wrench Set 25253 features an ingenious design, thereby offering great flexibility in the work shed. It's a simple tool but packs a punch making it a favorite among most people. You'll love all that it offers, providing exceptional efficiency, and reducing the time it takes to complete any task.
Firstly, it has both chamfered and straight ends, forming a tight fit with a fastener head. Now, you can turn it in one quick motion, thereby preventing run-off and also reducing wear and tear. So, your tool as well as the machine you're working on remains unharmed. Plus, it features a long arm and short arm design.
While the long arm provides better reach, the short arm offers more leverage for a complete performance. On top of that, there are markings along the side of the components to distinguish between various parts. It's also easily readable even in low-light situations allowing you to work without any difficulty.
Besides, it's exceptionally robust due to the black-oxide finish, which prevents corrosion and reduces the need to have additional plating, which could break off during tough jobs. Moreover, because of the hinged storage case, you can organize various components.
The storage case isn't the best, and you need to be careful lest you drop it to the floor, thereby damaging your equipment. Furthermore, it's pricey, which could keep away potential shoppers leading to a reduction in the buyer base. You may not want to spend too much when there are enough products to choose from.
What We Like
Snug fit
Corrosion-resistant
Hinged storage case
Easy to read
Extra leverage
What We Don’t Like
Poor storage case
Slightly costly
Everything You Need to Know About Tekton Tools
If you're looking for the best hand tool manufacturers, then there's very little chance you'll come across one better than Tekton Tools. It's a USA-based company that has expanded its reach to several other countries.
Most importantly, the organization takes feedback from customers to create better and more innovative products. The essential production centers apart from Michigan, and the USA, are in China and Taiwan. Here, it's worth mentioning that regardless of the origin, you're guaranteed to get quality products.
If you live in the USA, the brand is much more accessible to you. However, the centers in China and Taiwan are equally efficient, producing excellent units, saving valuable time in the workplace. So, you can opt for Tekton without any worries.
Tekton Vs Husky
Husky came into the market long before Tekton, but the younger competitor is making all the right noise. Husky produces quality hand and pneumatic tools, which rate high in versatility and storage. It offers a lifetime warranty to customers, something rarely seen in other brands.
However, in everything else, Tekton has the upper hand. It offers a lot of flexibility and ease of use, far superior to its older rival. Since Husky has been around longer, some products are more suited to your needs, but Tekton has more to offer in terms of performance.
Besides, most models from Tekton are available at a reasonable price, thereby generating a lot of attention. People are more interested in getting a better output rather than a lifetime warranty.
Tekton Vs Gearwrench
There are several similarities between the two brands, and DIY workers highly prefer both for quality and output. You're sure to get your money's worth; however, Tekton offers a much better warranty against the market price as compared to Gearwrench.
Again, you can perform heavy-duty applications with tools from both brands, thanks to the necessary components to handle various situations. But Tekton outscores Gearwrench when it comes to socket and ratchet sets, while the latter expertises in wrenches. With Tekton, you can get a 6-point socket while Gearwrench focuses on 12-point sockets.
Moreover, Gearwrench produces models in lesser numbers than Tekton, but it has the edge over its counterpart when it comes to reversible sets. Overall, it's a close call between the two brands, but it's a pleasant headache to have.
Tekton Vs Craftsman
If you're looking for mechanical tools, then it's hard to find two better brands. While Craftsman may be the favorite for a lot of people, Tekton isn't far behind either. Both of them present the perfect blend of versatility and innovation, thereby producing classy equipment.
You'll have a tough time choosing between the two because of the sturdy construction and the ability to generate consistent performance. With Tekton, you get excellent variety in various models and sets, while Craftsman has mainly focused on delivering units for wrenching jobs.
However, the crucial aspect lies in the exterior portion in which Tekton ensures you get a glowing polished finish providing resistance against corrosion. But when it comes to Craftsman, you won't get a quality finish. Again, products from both brands last a long time, thanks to the high-quality metal parts used in construction.
Apart from that, models are available at an affordable price, allowing you to carry out easy tightening or loosening operations. It may be challenging to split the two, so; you won't have to face any problems regardless of which brand you choose due to the supreme performance.
How good is Tekton as a brand?
While there are several top brands available, Tekton has got a firm footing in the market. And given that its units deliver a cracking performance, along with sturdy construction and enhanced versatility, it’s one of the fastest-growing brands.
Are Tekton tools useful?
You can use Tekton tools to pull out corroded nuts and bolts. You can also tighten them in the fastener in a more comfortable and more precise manner. Sporting state-of-the-art designs, you’re likely to get consistent results in all your applications.
Can the sockets pull out wheel nuts?
You can use the sockets to pull out wheel nuts, but it’s best to avoid doing so. The standard sockets are capable of handling the typical nut comprising light machinery, households, or other similar applications.
Are etched markings better than the stamped version?
The etched markings are preferred because they last longer than the stamped ones. Whatever the type of markings, however, it must make for easy reading while being visible in low-light situations.
Can it be used on a tight nut?
Yes, because the gripping is one of the best things about Tekton tools. It forms a tight-fitting, which is excellent for undoing even the tightest of nuts.
Where to find Tekton tools?
As they are hand-held tools, you can visit the nearest automotive or electric shop. You can also order your set of tools online on Amazon, Walmart, or Kmart, but be careful about the shipping.
Craftsman Vs Husky Vs Tekton vs Gearwrench Verdict
We have reached the end of our guide and hope you have a better idea regarding Tekton Tools.
While there are many top brands, overall, Tekton has an edge over its rivals. No surprise then that it's expanding at a rapid pace, and while there may be areas where other products may match up, the performance from Tekton remains superior.
You get a lot of options to choose from in terms of versatility, durability, and user-friendliness to handle an array of tasks. And before signing off, we have decided to assist you further by narrowing down the top products in various categories.
That's all the time we have, and we believe you'll bring home the ideal tool. Ciao!
The Coway AP-1512HH is leading the air purification market from the forefront. But will it be the ideal pick for you?
Unfortunately, there’s no direct answer to this question as there’s no single air purifier that’s right for everyone. However, we can assure you that this model comes with many innovative and advanced features worthy of discussion.
That doesn’t mean there are no downsides to investing in it, but these flaws are almost negligible. And they don’t really take away its credibility as an efficient filtration system. So, will it add value to your home?
The primary objective of this guide is to help you find the answer to that question. That’s why we’ve come forward with this detailed review of the Coway AP-1512HH Mighty Air Purifier. We’ve also highlighted its pros and cons to help you reach a decision.
Coway Mighty (AP-1512HH) is designed to accommodate room...
4 Stage Filtration System (Pre-filter, Deodorization filter,...
Why Buy This Product?
Since its foundation in 1989, Coway has been dedicated to the innovation of technology to create household products that provide us with a conducive living environment. Today, it’s a trusted brand and a global leader when it comes to making award-winning air purifiers like the AP-1512HH.
We’ll now begin by highlighting the positives of this model in detail.
4-Stage Filtration System
To eliminate the number of indoor air pollutants, you’ll need an air purifier with a multi-stage air filtration system. And the Coway AP-1512HH meets our requirements in this aspect. It comes with a four-stage filtration system, comprising three filters and an ionizer, through which the air passes.
Here, we’ll explain each stage of the filtration process to help you get a better understanding.
Pre-Filter
The washable pre-filter helps remove mold spores, dust, pollen, pet hair, and other allergens from the air.
Activated Carbon Odor Filter
The next stage involves removing household smells associated with pets, cooking, smoking, and other activities. Here, air passes through a granular activated carbon filter that traps harmful gases and odors.
True HEPA Filter
This is probably one of the most crucial stages of the filtration process. The HEPA filter efficiently removes 99.97% of pollutants and allergens as small as 0.3 microns, including dust, pollen, and smoke particles.
Ionizer
The fourth and final stage involves the use of an ionizer powered by Coway’s “Vital Ion Technology.” It releases negative ions to clean the air even further while adding freshness to the room.
Now, there’s an option of turning off the ionizer if you’re concerned about ozone production. But you can rest assured as this model is certified by the California Air Resources Board to produce less than 0.05 parts per million of ozone. So, it’s well within safe limits.
High Clean Air Delivery Rate (CADR)
This air purifier comes with a CADR of 240 (pollen), 233 (smoke), and 246 (dust). You can change the air output and speeds of its three powerful fans according to your air purification needs.
Furthermore, with a maximum CFM of 268.39, it can efficiently clean a 340-sq.ft room within just 10 minutes. This makes the unit ideal for both small and medium-sized rooms.
Energy-Efficient
Coming to its power consumption, you’ll be pleased to know that Coway’s Mighty air purifier is Energy Star-certified. Even at the highest fan speed setting, it consumes 77.8 watts of power, and at the lowest setting, it uses only 4.9 watts.
It also comes with an eco-mode that automatically turns off the purifier when no pollutants or allergens are detected for more than 30 minutes. So, you need not worry about high electricity bills every month. Instead, just sit back, relax, and breathe in fresh air while binging on your favorite movies and TV shows.
Noise-Efficient
What we liked the most about this model is the fact that it doesn’t generate much noise during use, unlike some of the other air purifiers out there. Even at the highest speed setting, it produces only 53.6 decibels of sound. Now, this is indeed higher than the average noise level at home (40 dB), but then again, it’s lower than the noise level during a normal conversation (60 dB).
On the contrary, it will run quietly when switched on at its lowest speed setting. It will only produce 24.4 decibels of noise, which is way below the average noise level at home. In fact, this is even lower than the sound generated by rustling leaves or when you play soft music (30 dB).
So, you can easily use the Coway AP-1512HH at night while sleeping. It can also be put in your baby’s room. The air cleaner is noise-efficient enough to not disrupt your little one’s sleep.
Compact And Aesthetically-Appealing
Don’t be fooled by its name; the “Mighty” air purifier from Coway is not mighty in size but rather in its performance. In fact, it features a compact design, measuring 18.3 inches in height, 16.8 inches in width, and 9.6 inches in depth.
So, you can place it on a nightstand, office desk, or any corner of your living room, bedroom, kitchen, or baby room. You won’t even face much of a hassle while moving it from one location to another as it’s not that heavy, weighing only slightly more than 12 pounds.
Coming to its aesthetic appeal, this model features an elegant and sophisticated design that will match your contemporary or modern home decor. Plus, it’s available in two colors - black and white, so you can choose a variant as per your style preference.
Finally, we have to mention its BAF Seal of Approval awarded by the British Allergy Foundation. This is another impressive addition to both its design and credibility. The seal signifies that this purifier is perfect for treating asthma.
Advanced Features
Besides the benefits mentioned above, this air purifier has a lot more to offer, thanks to its technologically-advanced features. Let’s check them out.
Air Quality Indicator
The color-coded air quality indicator continuously senses pollutants in real-time. It changes to blue when the air is clean, but if it’s red, it means the air is highly polluted.
Now, if the pollutant concentration is high, the sensor will send a signal to the purifier to adjust the fan speed accordingly. This helps ensure that you and your family are always breathing in fresh air.
Filter Change Reminder
You need not replace the pre-filter as it’s washable. But the purifier comes with two filter indicators to notify you when it’s time to replace the carbon and HEPA filters.
Auto Shut-Off
This feature comes in handy when you go to sleep at night. It enables you to set the air purifier to automatically shut off after one, four, or eight hours.
Auto And Eco-Modes
It’s better to switch on the auto-mode to obtain the best purification performance. In this mode, the air purifier will automatically adjust the fan speed based on the air quality.
For instance, if it detects the smell of smoke, it will automatically increase the fan speed for improved performance. It will then lower the fan speed when the air quality improves. And if the quality remains at an optimal range for more than 30 minutes, it will switch to eco-mode. Here, the fan will shut down to reduce noise and save energy.
What Could’ve Been Better?
There’s no doubt that this air purifier from Coway meets our expectations in terms of performance. But that doesn’t mean it’s without flaws. In this section, we’ll be discussing the drawbacks of this model, which aren’t really dealbreakers, to be honest. However, the brand can definitely make improvements in these aspects.
Having said that, we’ll start by highlighting the fact that this air purifier doesn’t come with a remote control. The auto-mode does make it convenient to use, eliminating the need for manual operation. But we’d prefer using a remote control to adjust the fan speeds with ease, even from a distance.
Other than this, we find it important to mention the fact that the CADR of this air purification system isn’t AHAM verified. This means it isn’t tested to meet the highest air filtration standards. Nonetheless, it’s a reliable investment option that’s bound to reduce indoor air pollutants and allergens up to 99.97%.
And if the Coway looks into these two factors, the AP-1512 will definitely stand out as one of the best air cleaners.
Pros
Energy Star-certified for energy-efficiency
It comes with the BAF Seal of Approval
Compact, elegant, and available in two colors
Operates quietly in both high and low-speed settings
Real-time air quality status
Cons
It doesn’t come with a remote control
CADR isn’t AHAM verified
Coway AP-1512HH Mighty Buyer’s Guide
Now that you’ve gone through the detailed review of this air purifier from Coway, it’s time for you to weigh the pros and cons. This will help you decide whether or not it’s the right pick for your home or office space. But we understand that this isn’t a simple decision.
That’s why we’ve gone ahead and curated this brief yet comprehensive buyer’s guide. Here, we’ll be explaining the factors that should be considered while buying an air purifier. If you find that this model matches the criteria, then rest assured, you won’t regret making a purchase.
Filtration System
First things first, understand the filtration system of the purifier to make sure it’s the right choice. Remember, it’s always better to opt for a multi-stage purification system that includes a pre-filter, HEPA filter, and carbon filter.
The pre-filters like foam and non-woven polyester will eliminate particles like pet hair and pollen before the next stage. On the contrary, carbon filters absorb gases and odors to neutralize smoke, chemicals, and food smell.
But the most important filter is the true HEPA filter as it removes almost 100% allergens from the air. It also improves the air purifiers’ performance and longevity, making them ideal for asthmatic patients and people living near construction sites.
However, you even get purifiers that come with UV and PCO filters, further adding to the filtration process.
Room Size
The size of your room will play a vital role when it comes to choosing a suitable air purifier. You’ll need a large model capable of operating in a space that’s 20% to 40% larger than your room for the best filtration performance. Luckily, the Coway AP-1512HH provides extensive coverage despite its compact size.
And since it’s noise-efficient, you can use it in any room, including your bedroom or baby room, and sleep peacefully at night.
CADR Rating
You should also consider the CADR rating of the purifier before making a decision. It’s a number that helps consumers understand the effectiveness of the unit when it comes to filtering the air in specific room sizes.
For instance, a CADR of 200 pollen signifies that the air purification system can reduce pollen concentration by adding 200 cubic feet of fresh air per minute. In simple words, a unit with a higher CADR will be able to remove more particles and purify the air of a larger room.
Now, it’s important to note that some models come with a single CADR number. On the contrary, others like the Coway Mighty Air Purifier have different numbers for smoke, dust, pollen, and similar particles.
Noise-Level
Next, you need to check how much noise the air purifier makes. Most models like this one come with internal fans that pull air through a series of filters. Now, these fans are usually silent when they are on the lowest speed setting, but they tend to create a humming sound as you turn up the speed.
And like we mentioned earlier, It’s important to choose a unit that is relatively quiet even in high-speed settings if you wish to use it in your bedroom or baby room. So, check the specs of the device before making a purchase. Here’s where you’ll find its noise-level measured in decibels.
Note that it’s better not to choose an option that can reach noise levels of more than 60 dB.
Additional Features
When buying an air purifier, it’s equally important to ensure that it comes with additional features that add to your convenience. The filter replacement indicator will indicate when it’s time to change the filters, while the programmable timer let’s you set a time for the unit to automatically switch on/off.
Now, the best part about the Coway AP-1512HH is that it comes with most of these advanced features. It’s also quite reasonably priced, making it a top pick. But before you make a decision, we’d suggest looking into the estimate of its maintenance costs so that you’re well within your budget.
We’re sure that you won’t hesitate while investing in this energy-efficient model after going through its features and our buyer’s guide. Yes, it does come with a few minor drawbacks, but they don’t really come in the way of its air filtration performance.
What’s more, you can place the unit at any corner of your home, be it on the nightstand or your office desk, thanks to its compact design. The best part is that it provides ample room coverage despite its small size.
So, go ahead, and try it out for yourself. You’re surely going to love it!
If you’re enthusiastic about carrying out repair work without external help, then you need a cordless drill.
A cordless grill works on a battery as opposed to electricity, making it more convenient to use and safer. So, no more tripping on wires while you work!
Using a cordless drill also means fewer chances of a short-circuit or a blown fuse, which would just add to any problems you’re trying to fix.
There are many options available on the market; however, we decided to list the ones that are under $100. That narrows the scope and makes it easier to choose a drill without burning a hole in your pocket.
So, if you’re looking for the best cordless drill under 100, read on to know more!
First up on our list is the Dewalt DCD7721C2, which measures 13.88 x 9.88 x 4.25 inches, and weighs 3.64 pounds. It comes in black and yellow and is designed to operate on standard 120V household electrical power. Overall, Dewalt is a well-loved brand, which is evident since this cordless drill is a bestseller.
High performance motor delivers 300 unit watts out (UWO) of...
Why Did We Like It?
First off, we love how compact and lightweight this drill is. This means it's easy to move around and perform repairs in places that might be a little hard to reach.
It delivers 300 UWO of power ability, which means it can undertake various functions. It also boasts two-speed options (450 RPM and 1500 RPM) that can be used for a range of drilling activities.
If you have used such equipment before, you’d know how essential it is to grip the device tightly. So, to enhance the safety of use, it comes with a 0.5-inch single-sleeve ratcheting chuck. It also boasts ergonomic handles that make it easier to control the device.
What Could’ve Been Better
Despite the overall brilliant performance of this drill, when we ordered it, we got a dead battery. There was no way to test how the product worked. So we had to place a request for a battery replacement, which was slightly time-consuming and tedious.
The following cordless drill on our list is this one from Craftsman, which has a high-performing motor that can churn out 280 W of power. Measuring 10.88 x 2.75 x 10 inches and weighing 5.2 pounds, it is compact and convenient to use.
1/2inch Cordless drill/driver with high performance motor...
2speed gearbox with speeds of 0350/01, 500 for speed of...
Why Did We Like It?
Apart from being a great performer and super easy to use, this cordless drill also comes with 0.5 inches of keyless chuck. This provision makes it easy to replace drill bits and helps save time. Not just this, the unit also comes with 2-speed gearboxes with speeds of 350 and 1500 RPM, which makes it fast and versatile.
Another handy feature is the LED light, which improves low-light visibility. This is helpful, especially during winter months when the sun sets faster and it becomes a pain to carry out repairs in the evening.
This machine also comes with a 20V battery that enhances performance and prolongs its run time. The lithium-ion charger that comes with it also ensures that only around 60 minutes or less are needed to charge the tool. The tool is also compatible with the Versatrack hook hang, making it easy to store.
What Could’ve Been Better
We were pretty impressed with the performance of this cordless drill and can vouch for its functionality. However, certain bits needed for basic repair work aren’t included with this drill and have to be purchased separately. This means spending extra money and possibly going over budget.
Now, we have another tool that you simply can’t go wrong with because of its durability and versatility. The Bosch is super lightweight and easy to use and measures just 2.14 pounds, which is almost half of some of the other machines on this list.
High Torque Output: This power drill delivers a maximum...
Precision Torque Control: The electric drill is equipped...
Why Did We Like It?
We like how this drill is so light and easy to handle yet makes one feel like a total professional when used because of its impressive features! Plus, it has a 7-inch head that can easily fit into tight spaces and a fuel gauge on the side for easy battery management.
Its streamlined and smart design makes it ideal for continuous overhead work, and it ensures you won’t tire out easily. It also has a ⅜-inch sleeveless chuck that can accommodate 90% of household applications.
Interestingly, the Bosch PS31-2A has two speeds of 350 RPM and 1300 RPM, and 21 torque settings, for making precise torque adjustments and accurate drilling. The unit also has a great grip so that no untoward accidents happen.
Another feature we’d like to point out is the LED light that helps illuminate dark corners. This ensures that you don’t compromise on timely repair in favor of working when there is light.
What Could’ve Been Better
This product is near perfect, and despite having a motor with less voltage than some other ones, it still delivers a power-packed performance. However, we did notice that the battery is tough to remove for charging, and pliers are needed to do the job. This can get quite tedious and time-consuming.
Pros
Compact and easy to use
Precise torque adjustments and accurate drilling
Can work in low light areas
Can accommodate a multitude of household applications
The Makita XFD131 is an excellent drilling solution for people looking for a high power-to-weight ratio. It measures just 10.16 x 15.08 x 6.06 inches and weighs 3.8 pounds, making it compact and portable. Despite its less weight, it is effective and provides quite a bang for the buck.
Mechanical 2-speed transmission (0-500 and 0-1,900 RPM) for...
BL Brushless motor delivers 440 in.lbs. of Max Torque
Why Did We Like It?
Initially, we were apprehensive that the drill wouldn’t be steady due to its less weight, but we were glad to have been proved wrong! On using it, we felt that it was durable and stable, and the lithe battery of 3.0 Ah reduced the need for constant recharging.
Powered by an 18 bolt motor, this drill is equipped to take on any challenge you may throw at it. It also combines 440 in-lbs of max torque with an efficient brushless motor, which helps the drill achieve 50% more work per charge and increased power and speed.
One of its most impressive features was that it supports a drill speed of up to 1900 RPM, which is an absolute steal for a device of this price range. The higher the speed, the better the drilling quality and experience.
What Could’ve Been Better
Since this is the priciest product on our list, we’d expected all the bits and accessories to come with it. However, the bits have to be purchased separately along with the accessories. We believe this product would provide better value for money if these were included with it.
Here we have another cordless drill that is an excellent option for anyone looking to undertake a repair job or indulge in some DIY. It has a 20 V motor which is sufficient for most novices. It is an affordable and easy-to-use option, and we couldn’t recommend it more for beginners!
Part of the 20V* MAX System - A System that Demands...
By providing extra level of control, the 24 position clutch...
Why Did We Like It?
One of the most impressive features of this drill has to be its capacity to hold a charge for a really long time. When storing the drill, it can keep the machine at the same charging level for 18 months. This way, you don’t have to worry about charging the drill when some sudden repair work comes up.
The 20V motor of this unit is suitable for basic repair and maintenance work and can drill through many hard metals. At the same time, it also provides a lot of control while working the unit in the form of a 24-position clutch that helps prevent stripping and overdriving screws.
Holding the drill is also comfortable and safe because of the soft grip handle that helps prevent user fatigue. Plus, it can provide a speed of up to 750 RPM and comes with 30 accessories for you to use depending on the need of the situation.
What Could’ve Been Better
Despite its impressive battery-retention capacities, we couldn’t help but notice that the battery runs out pretty fast when the unit is used. Thus, it is advisable to buy a second battery so that there is no forced stoppage due to a lack of charge.
One of the most affordable products on this list, the Avid Power ACD316 measures 8.66 x 3.15 x 9.65 inches and weighs 2.2 pounds. As light as it is functional, this cordless drill does a great job of helping around the house. You can use it to drill holes in wood, plastic, and even metal.
Long-Lasting Battery for Occasional Users - AVID POWER 20V...
Note: Regardless of whether you use it immediately, please...
Why Did We Like It?
The ACD316 is packed with a host of features that will impress you. One of its highlights is its multipurpose battery pack that does more than just charge the unit. Its 1.5 Ah lithium-ion battery is also a real-time capacity indicator and has a handy USB output that can be used to charge phones.
The unit is also pretty compact and is designed to minimize hand fatigue so that drilling and screwing chores can be done more efficiently. Its ergonomic design stands out as the rubber-covered handle provides a comfortable grip. We were able to use the drill with only one hand, which freed up the other to maintain balance.
Another feature that you’d be hard-pressed to find in most drills is the electric brake, which helps in making sure that your drill work is accurate. The unit also comes with an LED light for working in darkness.
What Could’ve Been Better
This drill came packed with unique features that made it stand out from other drills in its price range. We were definitely impressed with all it had to offer but couldn’t help lamenting over the lack of replacement batteries available in the market. Once the battery runs out, there is no way to get the unit up and running again.
Pros
Multipurpose battery
Compact and lightweight
Ergonomically designed
Can be used in low light
Cons
No replacement batteries available with the manufacturer
This cordless drill from TECCPO is yet another must-have under $100 that is ideal for non-professional users and DIY lovers. It has a 20 V motor and weighs 3.3 pounds, making it compact and lightweight. In addition to that, it comes with a 2000 mAH battery which gives it a long-lasting charge.
🔑【 2000mAh Li-Ion & Fast Charger】TECCPO drill with...
🔑【530 in-lbs Torque & 24+1 Clutch &2 Speed...
Why Did We Like It?
First off, we liked the max torque of this unit, which is 530 in-lbs. This is complemented by the 4-pole copper motor, which is more powerful than the 2-pole motors used by other drills in its price range. This superior motor also ensures 25% more stability and long-term operation.
Another feature that stood out to us was the 2A ultra-fast charger accompanying the unit. This fast charger ensures that even if the battery depletes, it can fill up again in no time, which means that your work won’t be impeded.
Adding to its roster of unique features is the ½-inch metal chuck, which provides better accessory compatibility and durability than drills with a ⅜-inch chuck.
There’s also an LED light installed into the drill that can be activated with a trigger. This ensures uninterrupted work even when the sun goes down, or in low-light areas.
What Could’ve Been Better
Though there are a ton of features in this product that makes it a stellar cordless drill to have, we did notice some scope for improvement. The plastic case that contains the accessories was dented and looked flimsy. Thus, the quality of the casing can be improved, and it would be nice if it were made of something other than plastic.
Pros
Powerful motor
Ultra-fast battery charging
Upgraded accessory compatibility and durability
Can be used in low light
Cons
Plastic case containing the accessories was dented
Next up, we’ve got the Bielmeier BCDK-58, a fine yet more affordable specimen. It weighs just 2.2 pounds and offers excellent functionality, considering it is at the lower end of the cost spectrum. It is available in black and blue colors and boasts a 1.5 Ah battery and charger.
【3/8’’ AUTO CHUCK, 64+1 CLUTCH & VARIABLE SPEED】64+1...
【MULTI-PURPOSE】 LED light illuminates dark working...
Why Did We Like It?
We came across this cordless drill while searching for affordable yet efficient options, and we’re pleased to say that this didn’t disappoint. It has 64+1 torque (285 in-lbs) that provides excellent control for any sort of drilling activity.
You can drive in screws, drill wood, and even tear into plastics and ceramics with ease. This is further facilitated with the Brad Point bit and HSS-R Metal bit, used for wood and iron, respectively.
Bielmeier has also taken special care to make the unit easy and safe to use by giving it an ergonomic design. Apart from being compact and lightweight, it has a rubber-covered handle that provides a tight yet comfortable grip. It also ensures that the unit vibrates less and doesn’t slip away and fall.
In addition to this, it has a flexible shaft with an LED light to help in low-light areas.
What Could’ve Been Better
Our experience with this drill was mainly a good one. However, we did feel that the drill bits that came with it were too flimsy. As a result, we couldn’t use them and had to get separate, stronger bits instead. This raised our overall expenditure on the product.
This cordless drill from Ryobi is another affordable piece that you can get online. This is great for anyone looking to carry out basic repairs on a shoestring budget since it has an 18V motor. This much voltage makes it a great investment for anyone who is just starting with drilling.
KEEP YOUR BITS IN PLACE: The onboard magnetic tray at the...
BELT CLIP: The attached belt clip will keep this drill at...
Why Did We Like It?
Look no further than the Ryobi P252 if you’re an entry-level driller and looking for a cost-effective product to undertake elementary repairs. It has an 18V brushless motor that is adequate for most tasks and will last longer and perform better than its counterparts.
The unit gives a convenient speed of 1800 RPM, and its 24-position clutch and 2-speed gearbox are added highlights. These help the drill easily switch between heavy-duty drilling jobs and ones involving precision.
Probably our favorite thing about this drill is its in-built magnetic tray, which helps to carry multiple drill bits. This makes it easier to swap bits when you need to shift from one kind of work to another.
What's more, the drill has a rubber grip for comfortable holding and an LED light to enable one to work in low-light areas.
What Could’ve Been Better
This drill is affordable and relatively easy to use, especially for someone who is just starting out with drilling work. However, it isn’t very light and can cause fatigue if one works with it too long. It also isn’t ideal for advanced drilling work and can only successfully perform preliminary drilling.
Pros
Magnetic tray for carrying multiple drill bits
Rubber grip for comfortable holding
Can work in low-light areas
Can switch easily between heavy-duty drilling and precise drill work
The penultimate pick on our list is the Kimo K13811, which is an affordable cordless drill plus cleaning tool that we’re sure will live up to your expectations. It has a 20V motor that can drill through fairly hard indoor and outdoor surfaces. Moreover, it comes in black and green and looks sturdy and impressive.
🚀 【Masters the Precision Power with Dual Speeds】KIMO...
Why Did We Like It?
To start with, we’d like to talk about its most unique feature, which is the three brushes that come with the drill. All three are of varying shapes and sizes, and they help clean surfaces like bathtubs, carpets, floors, etc. Plus, the brushes are made of nylon, which won’t scratch the surface of things you’re looking to clean.
This fantastic drill has a ⅜-inch keyless metal chuck, which secures the bit and provides around 40% more gripping power than a standard chuck would. In addition to that, the unit comes with a soft grip handle for added comfort and a forward/reverse option for greater control. Interestingly, setting the switch to the center position also helps to lock the tool safely and prevents accidents.
Considering its low price tag, we must commend the 45 accessories and bits that come with the drill. These bits can be used for screw driving, impact drilling, spinning, etc.
What Could’ve Been Better
We were delighted at the excellent functionality of the product, as well as the thoughtfulness behind its design. It came with a multitude of useful accessories. However, the unit was a little heavy and couldn’t be easily maneuvered with one hand, and required a considerable amount of strength to operate.
Pros
Provides more gripping power than a unit with a standard chuck
Closing our list is this affordable yet handy tool from DEKOPRO. Measuring 8.2 x 8.2 x 3.1 inches and weighing 3.04 pounds, it is small yet packs a punch. It comes with a 20 V battery that has exemplary performance and also lasts for ages without the constant need for charging.
18+1 Torque Setting:18+1 is the torque gear. 18 Torque...
Why Did We Like It?
To start with, we liked how the drill comes with two variable speeds of 350 RPM and 1350 RPM. The former is for heavy-duty projects, and the latter is great for projects that require precision and accuracy. However, both modes provide optimized torque and are powerful enough to get the job done.
We also liked the 18+1 torque settings of the drill, with the additional one allowing for concise drilling. You can also forward or reverse the direction of the rotor, which means better control over the machine.
Furthermore, this drill comes with 1.5 Ah lithium-ion batteries which can charge completely in just an hour. It also has three lights that warn you when the battery is close to running out.
Another feature worth mentioning is the LED work light which illuminates your workspace and makes your work hours flexible.
What Could’ve Been Better
This is a great tool that is handy and easy to use. However, we felt that the instruction booklet accompanying the drill was rather outdated, and could use an overhaul. It mentioned parts that weren’t included with the drill, for instance, a charger.
Pros
Equally effective for heavy-duty drilling and precision-oriented drill work
Effective control over the machine
Can work in low light areas
Battery can charge completely in an hour
Cons
Outdated instruction manual
Cordless Drill Under 100 Buying Guide
There are a few things to be kept in mind before investing in a cordless drill. These are:
1. Speed
As you may have noticed, many of the cordless drills on our list come with multiple speed options, whereas some come with one. In an average household, a single-speed drill would do, and these generally tend to be cheaper as well.
However, if you’re looking for more complicated repairs, it is advisable to go for a two-speed variant. We’d recommend the Bosch if you’re looking to get your hands on one.
2. LED Work Light
A majority of the products on our list come with an LED work light, which, if you ask us, is indispensable. Sometimes one may need to carry out repair work in a dimly lit basement or garage.
So, instead of holding a torch with one hand, it would be easier if the drill itself acted as the source of light. If you’re looking for an affordable option with an LED work light, you could consider Avid Power.
3. Chuck
You might have read through this entire list without fully understanding what a chuck is. Well, a chuck is where the drill bit is inserted, and its size determines the size of the bits you can use.
You can also choose between drills with keyless chucks vs. those with keyed chucks. Since keyless chucks can be customized, we recommend going for the KIMO.
Verdict
We’ve finally reached the end of our list, and we’re sure your mind must be swirling with options. Who knew buying a cordless drill could have so many considerations?
After keeping all the factors in mind, we’d like to recommend the Dewalt because it excels in pretty much every way. To put it succinctly, it is an all-rounder and will work well for a beginner as well as a trained professional. Another great choice is the Craftsman because of its multiple speed settings and exceptional performance.
We hope we helped you make up your mind; do let us know in the comment section about your final pick. Stay safe!
Imagine having a beautiful and perfectly trimmed garden right in front of the house! While it sounds amazing, it can be difficult to maintain.
That is where we come in! We found that with a good quality string trimmer, you can achieve a well-shaped garden with no weed or excess grass growing on the sides. Although a lawnmower cannot be used to clean the sides, a string trimmer will do the job for you.
Moving on, you will find different options on the market, starting from corded electric string trimmers to cordless string trimmer options. Some come with a large cutting swatch, while others have a smaller one. You will also find other tool attachments, which can help you use the machine easily.
We have reviewed the best corded electric string trimmers on the market, which will help you find the ideal option. So, without further ado, let us dive in!
If you are looking for an option with a strong build that can eat through weeds easily, then the Greenworks 21142 string trimmer will fit the job well. It is super powerful, and can be operated very smoothly. We found that we could completely depend on the product in the long run.
10Amp motor with straight shaft and .080 dual line bump feed
Light weight and simple electric start with cord lock...
Why Did We Like It?
For starters, the string trimmer sports a 20 Amp motor along with a straight shaft. You will also get a 0.080 dual-line bump feed, which will help work in a smooth manner. This item is perfect for trimming large amounts of weed and can be used around your garden, thanks to the cutting path measuring 18 inches.
Next, the cord lock feature makes it very easy to use. It is lightweight and consists of a simple electric start. In addition, you will get shoulder straps to hang it conveniently while working.
Moreover, if you are a DIY gardener, you may need to use the corded electric string trimmer for long hours. Now let us tell you that the handle is well made and cushioned for you to grip well. Plus, it is molded to enhance the gripping experience, so you will not face any hand fatigue after using the corded string trimmer.
What Could've Been Better?
If you are going to take the Greenworks trimmer around the garden, then an extension cord will be needed. Please make sure that you buy a powerful one, which can support the product. Otherwise, the string trimmer might not start, or the extension power cord can get damaged. Invest in a good one, and you should not have any further problems.
Up next is a corded electric trimmer along with an edger packed in one body. The BLACK+DECKER ST8600 is a brilliant option for those looking to take care of small to medium-sized gardens. Read on to know more about its bells and whistles.
2-IN-1 - Corded electric Trimmer and Edger cuts along...
EASY HANDLING - Lightweight and easy to handle with...
Why Did We Like It?
If you have flower beds in the garden, then this product can help you eliminate all excess growth around them. While it can be easily used in tight spaces, the trimmer head can cut off tall grass too.
Plus, the cutting width is 13 inches, which is wide enough for medium-sized areas. Hence, you can sufficiently cover the entire lawn in a short period of time.
Along with this, you will find that the automatic feed system needs no bumping, ensuring that you can achieve more control. It is easy to handle and maneuver, and you can adjust the height however necessary. The corded string trimmer has a lightweight body, which will make the work process simpler.
Additionally, the string trimmer comes with power drive transmission technology, which provides one with better torque along with enhanced cutting power. The string head can slice through the excess weed leaving you with a clean lawn.
What Could've Been Better?
This corded electric string trimmer edger comes with a plug that cannot be used with the general extension cord that you would find in your home. The plug is recessed, and you will need to purchase a cord that fits the design. Therefore, we will recommend waiting till you get the item before purchasing a new cord.
The Toro 51480 corded electric string trimmer is one of our top recommendations as it comes with a hoard of benefits. If you were looking for a reliable and relevant device that could keep your gardens clean, then this can be a great choice. It is also backed by a 2-year warranty which helps in building trust.
No products found.
Why Did We Like It?
When looking for string trimmers, the first thing to be done is to check the motor. This model comes with a powerful 5 amp motor along with a 14-inch wide string trimmer head. The powerful motor ensures that you can cut through tall and thick grass easily. Also, the trimmer head will help you clear weeds faster because of its breadth.
Moreover, you will get a telescoping aluminum shaft that can be extended depending on your height. This provides you with extended reach, making sure you can reach the grass and weed around the far borders. An adjustable handle is attached, which will further help in the process.
That’s not all; you will get an auto-feed trim line where the trimmer will automatically adjust the line once you pull the trigger. Additionally, thanks to this, you’ll get the perfect cutting length.
What Could've Been Better?
The only issue that we faced with this string trimmer was that the tap-to-advance string feature was missing. Hence, if you are trimming an area like the sides of a garage, you will have to constantly pause and use the trigger to advance the trimming line. This can make you spend some extra time cleaning up the weed.
The Sun Joe TRJ13STE is one of our top choices as it comes with an automatic feed as well as a comfortable handle. Working with it is very easy, and you can take it around your garden in a smooth manner. The corded trimmer will also help you work in narrow areas making it a very trustworthy choice.
While most string trimmers are devoid of this feature, Sun Joe will provide you with a flower guard. This wraparound flower guard protects one from coming in contact with the trimmer. It will help you work with ease without having to constantly watch over the edge.
Next, the corded electric string trimmer comes with a 180-degree rotating shaft that will help you use it as an edger. You can take care of the corners and sides of footpaths and garden walls.
Moving on, you will be getting a powerful 4 amp motor. This will help you work through heavy weed growth and tall grass quickly.
Plus, the corded trimmer has a 13-inch head, which will make it easier to work through your garden. The wide head will clear your path quickly, and you can get the job done within an hour.
What Could've Been Better?
The bottom sides of the product are made of thin plastic, and you will have to be careful while using it. Make sure that you do not put any extra pressure on the bottom so that it works out well. Just keep this in mind, and you should have a pleasant experience.
The CRAFTSMAN CMESTE920 is a very efficient corded electric string trimmer that can be used to work around the garden easily. You will also be receiving replacement parts, making it one of the most efficient options. We used it on our farm, and it was able to clear it efficiently.
Adjustable, Comfortable Telescoping Pole - Allows Easy...
Why Did We Like It?
What are the qualities that you can expect the best corded electric string trimmer to have? You will probably be looking for a good cutting width, wheels for easy movement, and a pole that is adjustable. Well, this string trimmer has got all the qualities and more.
It runs with the help of a 6.5 amp motor, which is known to provide excellent performance. The string trimmer can easily eat through overgrowth and can help you finish off the job quickly.
Next, this is a wheeled weed eater that is easy to maneuver. You can remove tough weeds from the corners of the lawn without any issues. This corded string trimmer can be used to shape the sides in an even way. Also, the 14-inch cutting head will help you cut with utter finesse.
That’s not all, as you will be getting 2 replacement spools along with the pack. There is no need to buy anything new, and that should save you money.
What Could've Been Better?
The only issue we faced with this corded string trimmer is that the cord can get in the way when working. This especially happens when you start a long way away from the power plug. However, you can work with it easily if you can hold the cord with the pole together to keep it out of the way.
The Worx WG119 is one of our final choices when it comes to finding the best electric weed eater. We have family members of different heights in the house, and this device can be used by them all. Paired with a pivoting head along with other amazing features, this option is sure to impress you.
2 IN 1: Rotating shaft turns this trimmer into an edger and...
AUTO LINE FEED: The dual-line feed system gives you fresh...
Why Did We Like It?
To begin with, this product comes with a dual-line feature that will provide you with a new trimmer string every time you work with it. You can always achieve the right length, thanks to this. Moving on, you can use the telescopic pole to reach further away while you stand at one spot.
Equipped with modern and cutting-edge technology, the product is equipped with a flower guard. This will keep you from accidentally cutting plants while working on the leaves. You can use this around ornamental plants and for landscaping.
To add to the comfort, this hedge trimmer comes with a handle that can be used in multiple positions. You can work with it in a way that you have complete leverage. Also, the 90-degree pivoting head will help you work on slopes and inclined areas.
What Could've Been Better?
The hedge trimmer is slightly heavy and may cause a problem for people who are not used to working with weight. You might face some amount of fatigue at night. However, if you do not use the trimmer for long hours at a go, then this should not be a problem.
Pros
Powered by cutting-edge technology
Flower guard to protect surrounding plants
Automatically feeds trimmer string
Gives you complete control
Cons
Slightly heavy
Corded Electric String Trimmer Buying Guide
While looking for the best string trimmers, we also found battery-powered string trimmers along with gas-powered string trimmer options. These do not have a power cord making movement easier over large spaces.
However, batteries can be expensive, and you may need to pause work to recharge them. With gas-powered trimmers, the machine can become pretty heavy, which may not be a feasible option.
Now that you know about the best corded electric string trimmers on the market, we will move on to some of the important factors to keep in mind.
Remember that you will need to make a choice based on your purpose rather than choosing the most expensive or popular string trimmer. List out your needs, and then see which one fits the best.
To know more, keep reading.
Size Of The String Trimmer Head
The width of the head of string trimmers will determine how much weed and grass can be removed at one time. If you have a large garden or a lawn, then opt for a wider head measuring around 18 inches. Then you can remove a lot of grass at one time.
On the other hand, you can opt for a thinner head if you have a small to medium-sized lawn. Also, if you need to cut around edges and in tight spaces, a thin head will work better.
Adjustable Shaft
The shaft or the pole should technically be adjustable. It should be fitted in such a way that people of different heights can use it. This will make it more versatile.
Length Of Cords
One of the major problems with corded string trimmers can be a short cord. A cord that does not allow you to cover the entire garden could be problematic. In this case, you will need to purchase extension boards separately. However, if you are doing this, ensure that the extension cable is long and dependable. Only then will it prove to be of help.
Flower Guard
Some products come with a flower guard, which can protect surrounding plants from getting affected while working. You do not want to damage the ornamental plants while you remove the weed around them.
Also, a flower guard will prevent you from accidentally coming in contact with the trimmer. This can prevent unnecessary accidents.
Verdict
When it comes to picking the best corded electric string trimmer, we hope you will make the right choice after having taken in all the information. There are other brush cutter and weed eater options to explore too on the web. We also found 4-cycle weed eaters that work for some people.
We will now be taking you through our favorites. The Greenworks is one of the best corded electric weed eaters, which comes with a powerful build.
On the other hand, the BLACK+DECKER will fit your medium-sized gardens well. But the Toro will offer you the benefits of a trimmer and edger.
With this, we have reached the end of this guide, and hence, it is time for you to make a choice. Let us know about your favorite option in the comment section below.
Perhaps you’re an aspiring photographer, or an amateur artist looking for some inspiration that can help you out with your next project
Or maybe you’re just an up and coming entrepreneur or web designer in need of some fantastic stock photos and art images to add to your website.
Whatever your profession, it’s essential that you find the right stock copyright free image that can fit your needs.
However, with so many public domain image websites out there, it can be rather difficult to pick the one that houses the exact image you want or contain photos which are well curated and license free.
Hence, to help you out we have compiled a list of some of the best websites with copyright and royalty free images online.
From landscape images to art illustrations and food pics these sites have something to offer everyone.
Sick of traditional stock imagery? Well, why not take a look at Unsplash and their amazing collection of photographs that does more than just break the traditional mold.
The website was initially created by a group of photographers who believed that copyright free image websites should house more than just the typical stock images. So, they decided to offer their very own collection of high-resolution pictures for free for budding photographers or entrepreneurs who are about to launch their very own website.
Though Unsplash started small, they have now grown into a rather big creative-community with a multitude of active users and over 250,000 exclusive photos that span a variety of genres.
Every photo present on the website can be very easily copied, modified and even distributed throughout all the users. Moreover, you will be able to use the images for commercial purposes as well, under just a custom license.
This custom license is more or less like a CC0 license. It will allow you to download the images that you want without asking for permission or providing any sort of attribution when you use them to set up your very own website.
We recommend this website for those users who need copyright free images more for personal reasons than for commercial really.
Public Domain Pictures has one of the biggest lists of high-quality photos out of all the websites that we have listed today. But, we suggest that you make sure to check the license which is listed on each individual photo as many of them might just require you to credit the original photographer.
Now, this is precisely the reason why we won’t be recommending this website for commercial purposes. However, if you are a photography enthusiast who wants to set out to create his/her very own collection, then this site is just perfect to draw some inspiration from.
But if you do decide to use the images present on this website for commercial purposes; apart from the photographer's credit, also make sure that the release was obtained by either the original author or you especially for images of people and property.
Public Domain Pictures houses an incredible library of high-quality images, but not all of them are open to the public. Some of the more exclusive ones are reserved for the premium members of the site.
It seems like it was only yesterday when the British Library released over one million images into the public domain for use in both personal and professional spheres. But, the release was really done some years ago, and the buzz about it is still there and for good reasons, to be honest.
The website has scanned pages from books which dates all the way back to the 17th century. The vast collection of vintage art is hosted on Flickr and is just amazing to view for any designer or painter who wants to dab their brushes into a bit of Renaissance and Victorian artwork.
The images present on the website are segregated into specific albums each designated by the century it is from as well as the genre that it belongs to.
All you have to do is click over to the albums for images which cover specific categories such as typography or even decorative papers representing instruments and animals and download the ones which suit your needs the best.
Unlike Public Domain pictures, all the images on this website are within the public domain and can be accessed by anyone without having to worry about rights and credits.
Looking to set up your very own restaurant website and in dire need of some attractive designs that will help haul in your customers?
Then the Foodies Feed might just be exactly what you’re searching for.
One of the best things about Foodies Feed, in our opinion, is how lifelike and original, the food photos seem. Most food-photo public domain websites that you will go to, generally have images that represent cuisine that look stiff and even fake to some degree, if we are being perfectly honest.
These stock photos are not at all inviting to the average food lover, and in many cases does seem to drive away potential customers than goad them in with their substandard allure.
The high-quality images in Foodies Feed look quite appealing and lifelike. Their gallery features genres which cover a wide category from baristas all the way to home cooked meals.
There are also quaint photos of well-arranged food platters and even produce, which are just perfect for a variety of commercial uses, especially when setting up a website or postering the menu of your restaurant.
The history and inspiration behind Barn Images is a lot like that of Unsplash. It was first launched by two Latvian photographers who wanted to redefine the traditional stock photography industry as they felt that most of these images are lackluster and devoid of any sort of life-like quality.
They have proudly named their images as ‘non-stock’, and as the years went by, they have created an amazing library of images which covers a multitude of genres from every aspect of daily life.
They add new images almost every weekday, and almost all of the photos on their website is available for both personal and commercial use.
However, there are some images which are not available in the public domain and can only be accessed after getting a premium membership.
For just a small fee, you will be able to have unlimited access to a variety of high-quality and intriguing curated photo packs. You will also be given access to a unique dropbox set that will be filled with over a thousand high-resolution photos which are otherwise not available for free to the rest of the users.
Freerange is a free to register and free to access public-domain-image website which supports thousands of high-resolution stock photos right within the reach of your fingertips. The images on the website are free to use and download for whatever purpose, may it be for professional or personal projects
Additionally, apart from having access to a vast catalog of unique images, the site also provides more than 20,000 CC0 photos most of which possess accurate descriptions along with keywords.
However, Freerange doesn’t just stop at providing free images for its users. For budding photographers who wish to upload their own images, Freerange offers them Google AdSense revenue sharing as well. So, if you ever feel like becoming an active user on this site, feel free to contribute, and keep adding to their ever-growing library.
Moreover, the team who designed and started Freerange has another site which specifically deals in housing vintage images and photos called Vintage Stock Photos.
Accessing the content on that site, previously required payment, but they have removed that policy and opened up the images for the public domain. Here you can easily download and share over $25,000 worth of high-quality content without any additional charges.
As one of the largest public domain images site in the world, the Wikimedia Commons is going to be our most popular pick for copyright free art and image website.
However, even though most of the images in Wikimedia Commons are free for public use, there are still some of the images which have certain restrictions. There are some licenses which require that the original creator be attributed, there are some that require that the license in question be identified before use, while the rest require that if you modify the artwork the modifications must also be similarly free licensed.
It may seem like Wikimedia Commons might not be all that of a good pick for downloading images for commercial purpose. But with the sheer amount of free to use images in its library, we don’t feel that commercial usage will be a problem at all.
One note of caution: if you do decide to use the licensed images for professional use, make sure that you triple-check the license tag for each of the images. As Wikimedia Commons doesn’t guarantee the correctness of the licensing for each image, it’s important to look out for any licensing issue.
There are not many artists or even photographers who have heard of Burst, and therefore it’s vastly gone unnoticed by a major portion of the artist and web designing community.
But we are here to put this brilliant website on their radars as Burst is just amazing when it comes to housing one of the most unique and vast collection of concept artwork and landscape pictures.
One interesting thing about this website is that it offers photos at both high and low resolutions, so you can pick the correct resolution of choice depending on what you’re going to use it for.
May you be searching for pictures for your website or for graphic designing, Burst is bound to have something for everyone and for every purpose.
Like Unsplash, Burst has a very sleek, attractive and user-friendly interface that will seamlessly allow you to explore and select from a vast category of images which you can download and modify.
The idea that lead to the creation of Fancy Crave was rather simple really, the creators wanted a public domain image website that would help photographers and artists discover something new every day.
The website is all about helping the creative community at large. All of the photos and images present in the site are of incredibly high resolution and have been previously curated by the renowned professional photographer Igor Ovsyannykov.
Under the CC0 the images are made free of any sort of copyright restrictions and are free to download and modify without much hassle for both personal and commercial reasons.
One amazing thing about Fanny Crave is that it adds an image to their library almost every day. They have a wider community who uploads photos from all aspects of life and helps to ever improve the collection of free stock photos.
Their amazing library of photos and art images are not the only reason why we have decided to place Magdeline in our list today. The other aspect which is just amazing about his website is the interface which is as inviting as it is easy to use.
It has a convenient search column on the right-hand side of the webpage where you can browse the vast amount of categories from nature, food, art piece, etc.
Moreover, apart from those above-mentioned keywords, you can even search their library by dominant color. This color scheme for browsing is just perfect if you’re looking for a bit of cohesiveness on the web page you’re designing or the art piece you’re willing to try your hand at.
However, while searching, do make sure that you filter the images down to CC0 licensed images, as there are many photos in this domain which require attribution.
The Old Book Illustration domain is highly popular among new and amateur artists and also certain professionals who are looking for inspirational ideas and art styles for their next piece. This website offers a fantastic collection of public domain illustrations which have been scanned from older and newer books spanning across centuries.
The website also houses a variety of vector illustrations which can be very easily modified and distributed for both commercial and personal purposes.
Much like the British Library website, the Old Book Illustrations too has an amazing list of vintage art which is sure to capture the attention of any onlooker.
The vintage art photos are of very high resolution and there is a lot one can learn from these classical masterpieces. These pieces will help you to try out your hand in making Victorian and Renaissance designs.
Now if you’re not looking for images which have people, property or trademarks on them, then the 1 Million Free Pictures website houses a plethora of landscape photos and images of art and daily objects that you can choose from.
Originally, the creator of the website was the one who made all the initial photos on this website, which he slowly started releasing into the public domain.
The search engine of this site is rather simple to use, and you can browse through different collections which have been curated and segregated by not just style, but also subject, purpose and a whole lot more.
As none of the images contain people or even property, you will not have to worry about any sort of trademark or licensing issue and you can download and distribute them as you see fit.
Created all the way back in 2011, Public Domain Review, began as a simple well-curated website for public domain photos, artworks, illustrations, audio files, and even texts.
However, the Public Domain Review community is always evolving and has slowly over the years grown into a vast cultural space for history buffs and vintage art enthusiasts.
If you’re looking for some classical designs and art pieces then this website can come rather handy.
You can browse through their unique range of media which primarily deals with a particular historical context, or take part in their monthly Curator’s Choice special. During that time, a special guest is appointed where he/she makes a certain media post (from art images to text or audio) which celebrates a lesser known part of history.
The Public Domain Review website is as educational as it’s inspirational.
Guide for Browsing Through a Public Domain Image Website
In the field of cultural resource for artists and photographers, free public domain images do play an incredibly vital role.
However, when it comes to picking the right images to fit your needs, many of these websites take up a considerable amount of time to look through, because of the sheer volume of content that they possess.
But there are a lot of images in them that are worth finding, so just keep these following things in mind when perusing through their list:
See if the image is licensed and the license allows you to distribute it the way you want it to.
The image you wish to choose should come at a quality that specifically caters to your needs, the better images have a quality that supports both printing and web uses.
Make sure that the images are defined as ‘public domain images’ by the copyright laws of both the countries that you and your client are citizens of.
Double check or even triple check the license every time to wish to use it for commercial projects.
Always try to check for trademarks or if the image includes products, property or even people. If they are present, make sure that the release has been obtained.
The Laws Regarding Public Domain Images
When it comes to such websites and the images that they house, the licensing laws are a bit different in every country.
So not only must the picture be a public domain image in your country, but for the country that your client is a citizen of as well.
The laws behind public domain images can be rather sketchy and do tend to fall under a gray legal area. And this is precisely why a lot of the professional artists and web designers tend to pick stock imagery which are licensed as it’s a much safer alternative.
So if you do plan to use these websites and images for commercial reasons then it’s important to check with a trademark/copyright attorney before doing so.
However, if you have thoroughly done your research behind your selected images, you can find some amazing art pieces and photos to use in all of your projects.
Final Thoughts
The stock image sites that we have listed today are just amazing when it comes to inspiring budding artists and photographers for their next project. They house a plethora of images ranging from vintage art pieces to breathtaking high-resolution snaps of landscapes, people, property, and even food.
As a majority of these images are in the public domain, you can use them for commercial purposes as well, just make sure that you double check the license and release before you do.
We hope that our list and guide today was able to help you with all your stock image related problems.
Till next time!
During the pandemic, we all had to become self-reliant, which included learning to cook our food.
Then again, having the right equipment is always essential for preparing a sumptuous meal. Today we've decided to discuss two of the top brands when it comes to choosing the best cookware.
Copper Chef and Red Copper are trendy, but what makes their products stand out? For starters, the non-stick nature of the Copper Chef frying pan is second to none, while Red Copper delivers more in terms of durability. Also significant is the affordable pricing offered by both brands, attracting a large group of buyers.
But how will you choose from the many premium-quality units available out there? We've narrowed down six top-notch models, three from each brand, that are taking the market by storm.
So, light the flame, and let's cook some tasty dishes.
The A-00438-19 fry pan model from Copper Chef is highly sought-after, owing to its innovative plates and patented non-stick design. Plus, it's easy to clean, and you can cook various dishes, leading to a positive response from buyers. No wonder it finds a spot on most wish lists.
STAINLESS STEEL INDUCTION PLATE: Each pan has a steel...
PTFE & PFOA FREE: Cerami-Tech is Copper Chef’s exclusive...
Why Did We Like It?
We'll begin by discussing its stainless steel induction plate, which allows even heat distribution throughout the surface. This ensures that the food is perfectly cooked. Moreover, you can place this pan in the oven or on any stovetop, running on electricity, gas, or induction.
Coming to its non-stick coating, we loved how Copper Chef has developed a Cerami-Tech technology to prevent sticking. It delivers an unmatched performance as it doesn't allow even butter or cheese to stick to the surface. Additionally, it's easy to clean, and you can put it into the dishwasher.
Apart from that, the engineers have included hard-anodized pans featuring a heavy-duty aluminum construction. Therefore, it'll last a long time, offering much-needed reliability to stand out in the market.
Lastly, its compact yet sufficient dimensions provide greater maneuverability.
What Could've Been Better?
We noticed that it doesn't come pre-seasoned, so you'll need to be patient to carry out the proper seasoning. This isn't a serious issue, but it takes time which is slightly frustrating. And after the season, you can cook anything, but eggs pose a challenge since it's tricky to flip them over.
After the Copper Chef reviews, it's time to look at what Red Copper has up its sleeve. For those searching for reliability, you can try the 10824 model which provides fantastic value for money, making it highly popular. Additionally, it delivers exceptional versatility in your cooking needs.
At the very outset, let's talk about its durable design before moving on to the other aspects. The engineers have developed a tough-grade, copper-infused ceramic cookware set that prevents sticking and is long-lasting. As a result, it's easy to clean, thereby making it low-maintenance, which is sure to please you.
Further adding to its robustness is the scratch-resistant coating, which prevents damage, ensuring users can use it daily for consistent output. Moreover, it can withstand extreme temperatures up to 500 degrees Fahrenheit, allowing you to cook fast while promising an even distribution of heat.
However, significantly it's PFOA and PTFE-free, meaning there are no harmful effects, thereby keeping your family safe. Along with that, this ten-piece set is extremely versatile, consisting of different-sized fry pans, sauce pots, and an aluminum steamer insert.
Finally, it comes with glass lids permitting you to keep an eye on the food while effectively regulating the temperature.
What Could've Been Better?
You can't put this model in the dishwasher, which is inconvenient. It must be cleaned by hand, meaning you'll have to spend longer on maintenance. Other than that, we noticed that the coating starts wearing out after daily use, leading to discoloration, although it doesn't affect performance.
Our next recommendation is the 10687 model, which isn't eye-catching by any means, but there's a reason it has generated substantial buzz among potential buyers. Chefs love its ceramic coating and heat-resistant design, ensuring it has ticked all the right boxes to be a valuable addition to your kitchen.
Copper-infused 10" fry pan includes a high-heat-resistant,...
Naturally non-stick ceramic surface allows you fry up your...
Why Did We Like It?
Right away, you'll notice that this copper-infused model is heat-resistant, allowing for even heat distribution throughout its surface. Furthermore, it's PFOA and PTFE-free, so that you don't need to worry about harmful chemicals and can cook delicious, healthy food daily.
We loved its scratch-resistant ceramic coating, meaning it doesn't chip, flake, or peel for long-lasting performance. Hence, chefs can cook various dishes such as eggs, vegetables, brown chicken, and chops.
Also noteworthy are the aluminum rings that prevent hot spots while making it easy to clean. What's more, you can easily transition from stovetop to oven-top, thanks to its high-temperature resistance of 500 degrees Fahrenheit. Therefore, professional chefs and homegrown cooks alike will get nothing short of the best, making it a highly sought-after unit.
What Could've Been Better?
If we've to nitpick, we would say that you can only clean it by hand, which is a disadvantage. You can't put this unit in the dishwasher since it might cause fading and damage the surface. So, the only option is to scrub it with baking powder to clear the leftover food.
The 10688 model is the top choice among customers, thanks to its innovative additions. With aluminum rings for efficient heating and an ergonomic handle delivering maneuverability, it's not uncommon to see this 12-inch pan in most kitchens. Rest assured, cooking tasty dishes will be easier than ever.
Copper-infused fry pan includes a high-heat-resistant, PFOA...
Naturally Non-Stick Ceramic Surface Allows You Fry Up Your...
Why Did We Like It?
This copper-infused fry pan has several similarities to the 10687 model, so why does it feature on our list? For starters, we loved its aluminum cooking rings which have several benefits. It allows even heat distribution throughout its 12-inch diameter while preventing hot spots for a smooth experience.
Plus, the manufacturers haven't used PFOA or PTFE materials, making it non-toxic and suitable for daily cooking. In that regard, its scratch-resistant construction proves useful, allowing you to maintain its quality for a long time. Moreover, you can cook various items like eggs, vegetables, and meat without any hassle.
Coming to its other attributes, you'll love its seamless transition from stovetop to oven, highlighting its versatility. As a result, users can sear food in the oven or try different cooking techniques for various occasions.
Another interesting addition is its ergonomic handle, reducing fatigue while improving maneuverability.
What Could've Been Better?
Our only gripe is that the red button on the base of the pan causes wobbling, which may lead to hesitation among buyers. Although it doesn't affect cooking, you’ll need to be watchful as the food might fall out. Also, it takes time for the pan to warm up to the proper temperature.
Pros
PFOA and PTFE free
Non-toxic construction
Ergonomic handle
Easy storage
Versatile
Cons
May wobble
Takes time to heat
Copper Chef vs. Red Copper Buyer's Guide
Let's progress to the buyer's guide, where we'll be highlighting the essential aspects of both brands. Although we've looked at six different products, there are bound to be similarities between them.
Therefore, in this section, we've listed the important points that will help you choose among the top models.
Non-stick Nature
First and foremost, premium-quality models come with a non-stick coating, allowing you to prepare various dishes with ease. As you've seen, users had trouble flipping eggs with some of the products on our list. So, check whether the non-stick surface is ideal for cooking different food items.
Durability
The next important attribute is sturdiness which offers reliability, making the unit worth your money. If it lasts a long time, you can cook tasty meals daily without any hassle. Plus, all the components should be corrosion and impact resistant for the best results.
Cleaning
Finally, after everyone has had their fill, it's time to clean, and you need to check whether you can wash the pan in a dishwasher. If not, it needs to be washed by hand, but remember not to scrub too hard, as it might cause the coating to wear off.
Conclusion
Those were our picks of the top models from Copper Chef and Red Copper, and hopefully, our guide piqued your interest.
There's a lot to choose from, and it's easy to feel overwhelmed. So, a simple technique is to ask yourself how you wish to use the frying pan. This will help declutter the brain.
But for those who are still unsure which unit to pick, we've decided to highlight our favorite products in different categories. After a lot of thought, we found that the Copper Chef A-00438-19 Fry Pan's sturdy structure and non-stick design is the most well-balanced combination.
Apart from that, among the Red Chef products, the BulbHead 10824 is incredibly versatile and easy to use. That's all the time we have, but we'll be back soon with more exciting product reviews. Till then, don't stop experimenting with new recipes; cook satisfying meals for every occasion with your new frying pan.


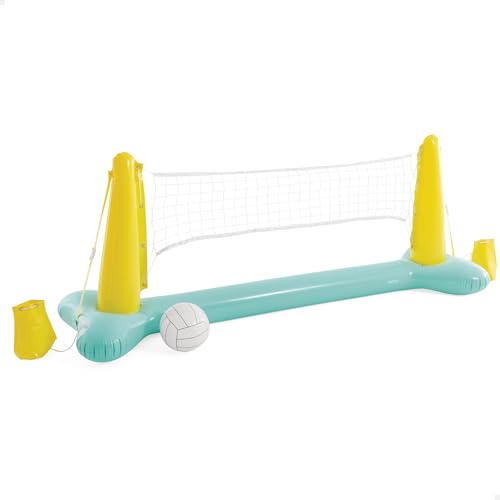
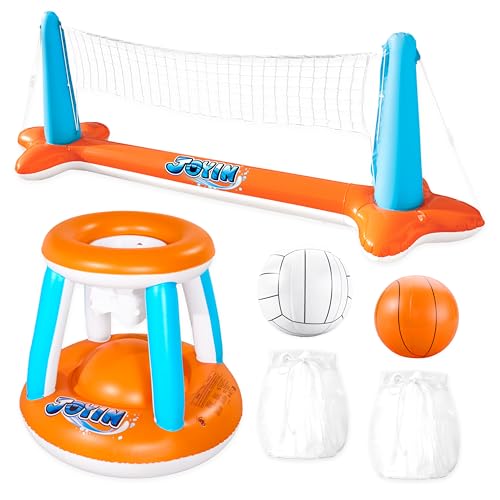

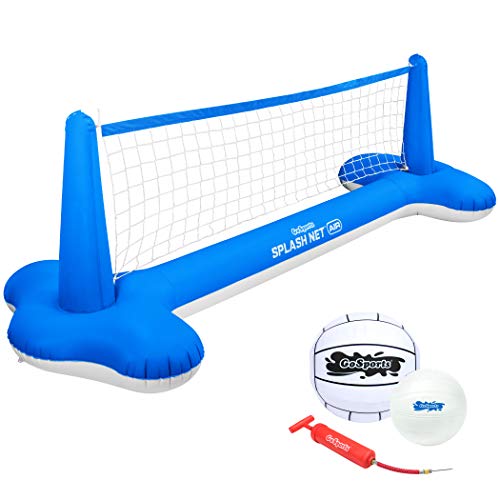

![9 Best HVLP Spray Gun [Review & Buyer’s Guide]](https://homesthetics.net/wp-content/uploads/2021/07/Best-HVLP-Spray-Gun-0011.jpg "9 Best HVLP Spray Gun [Review & Buyer's Guide]")

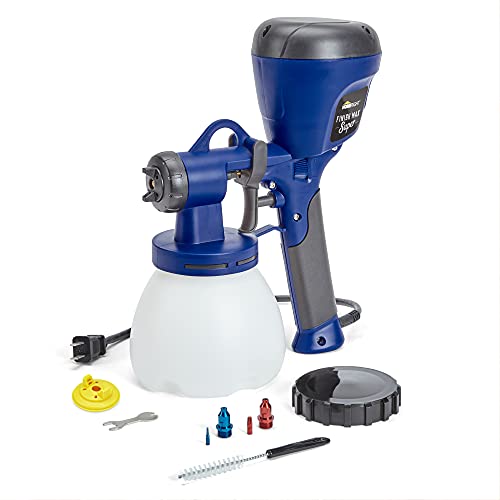
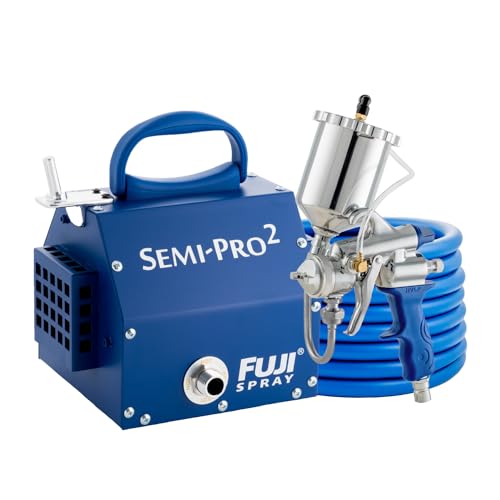

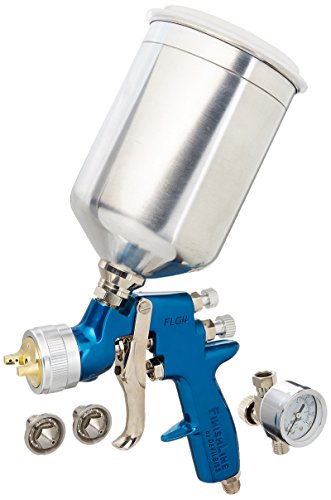


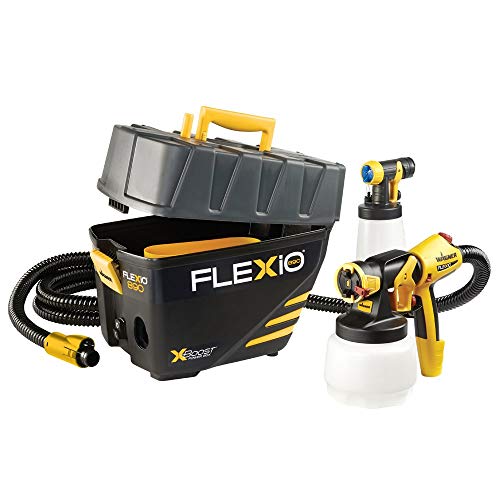
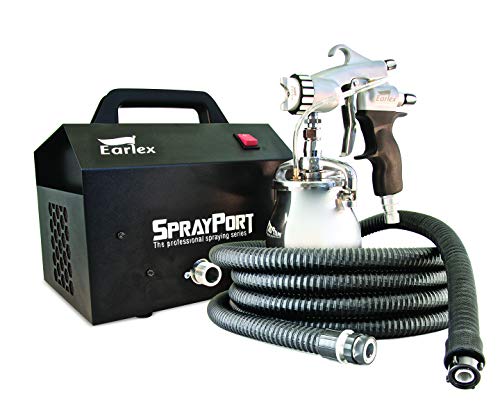
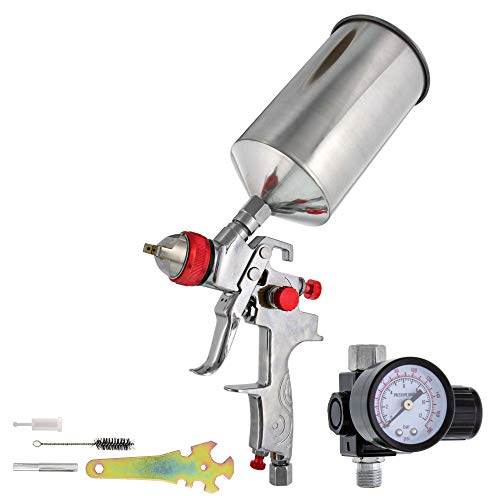
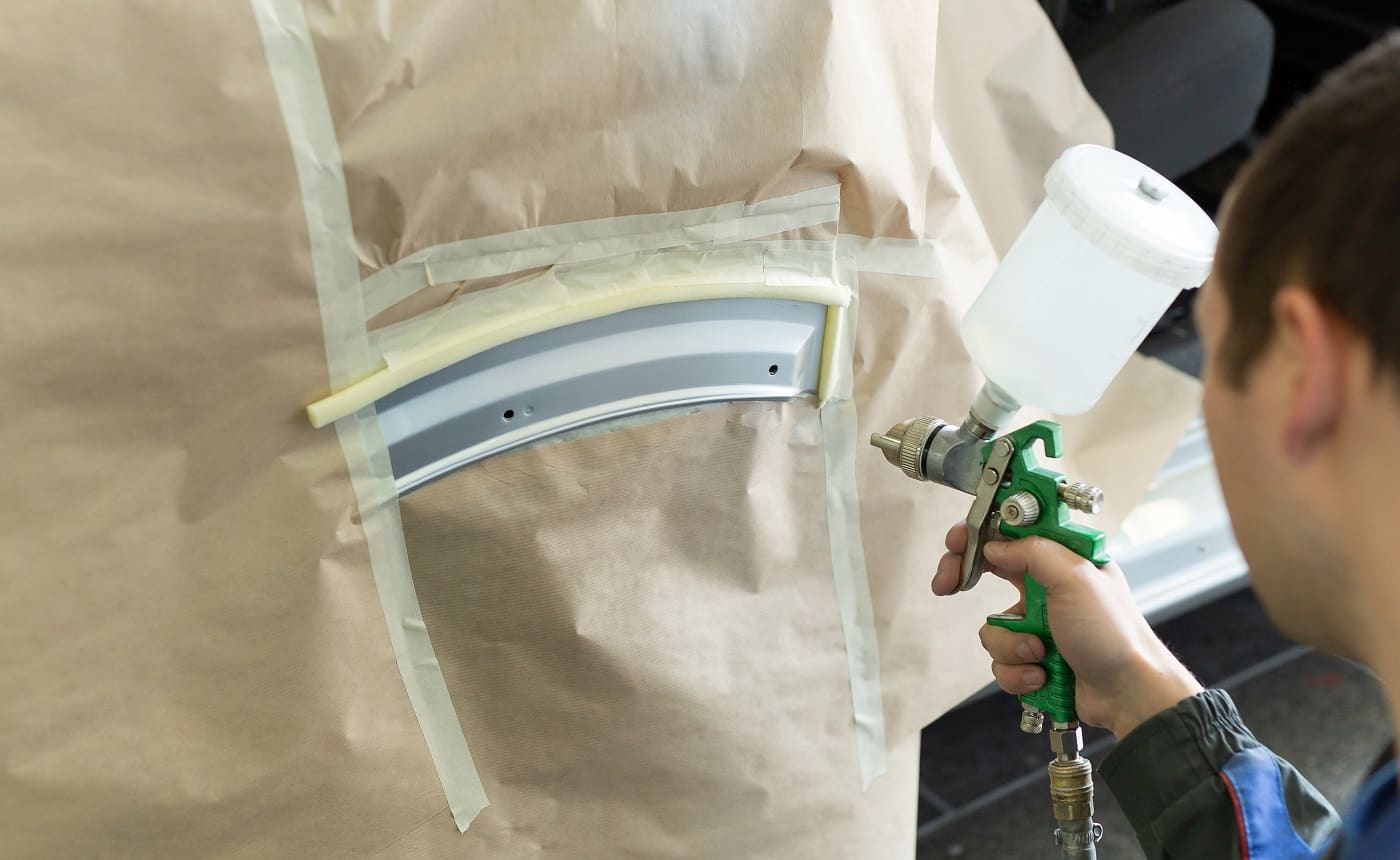


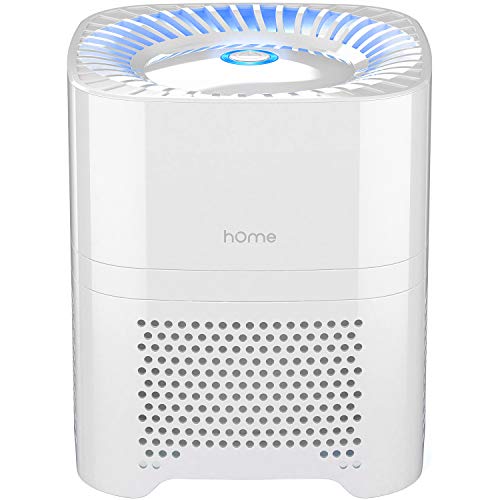
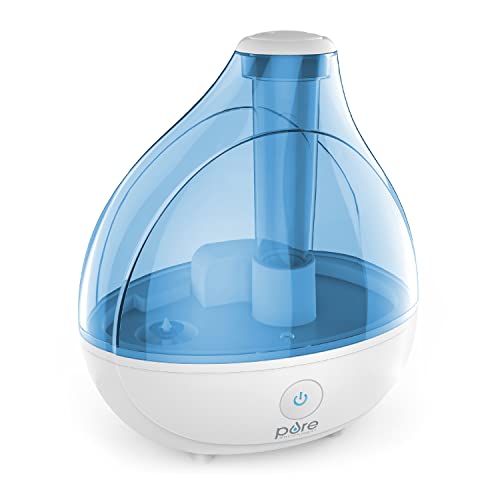
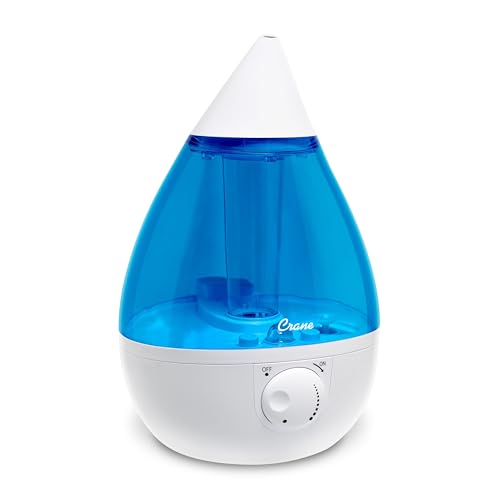
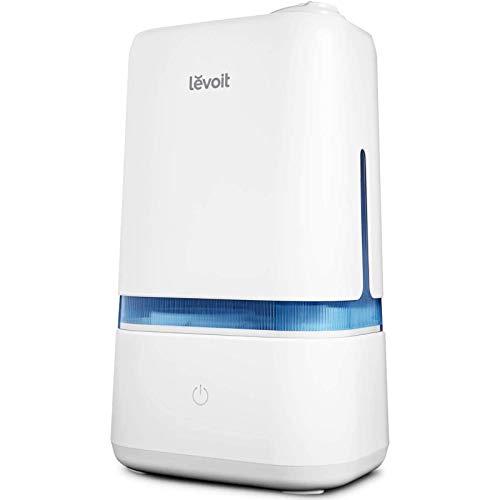
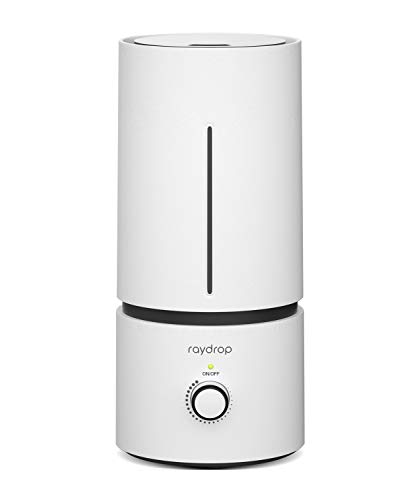
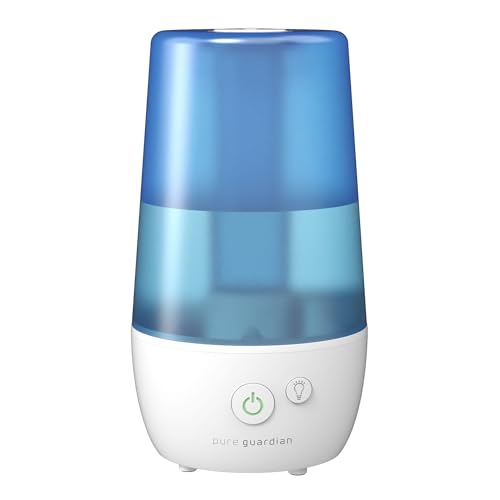


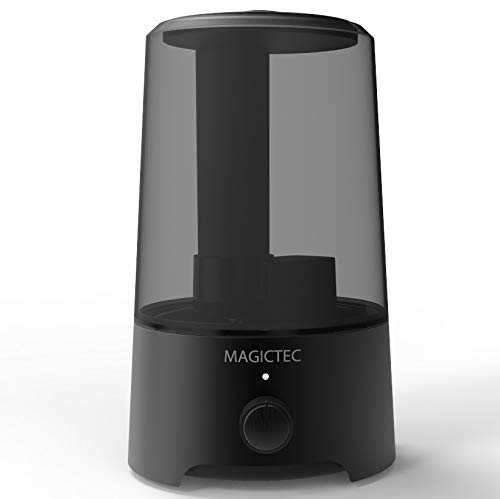
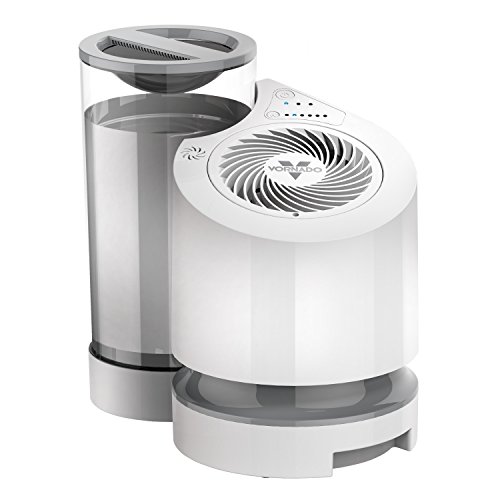


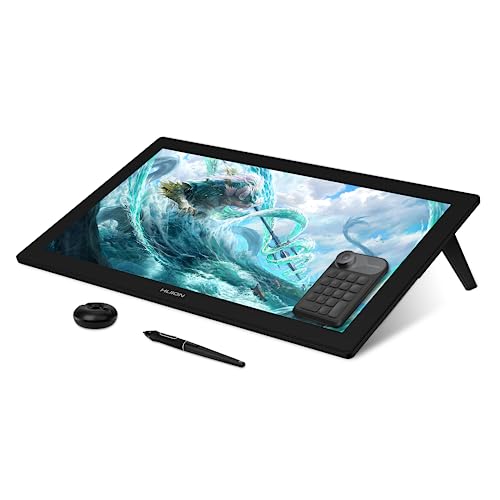

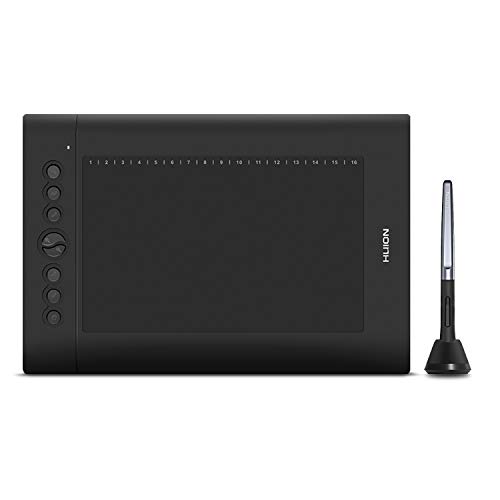


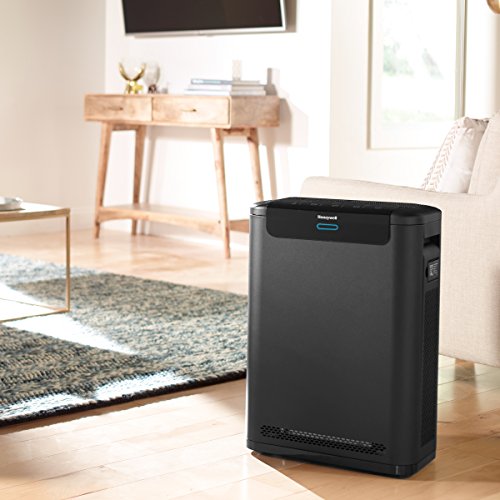
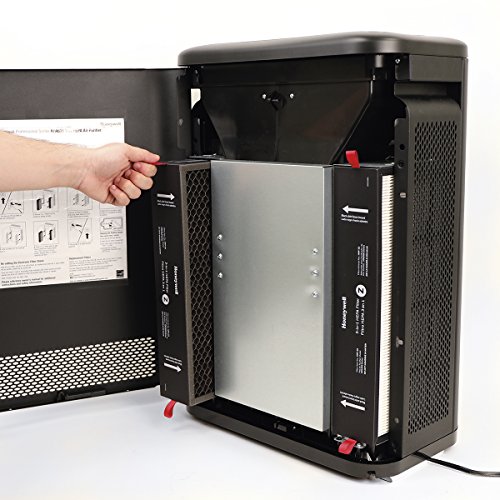
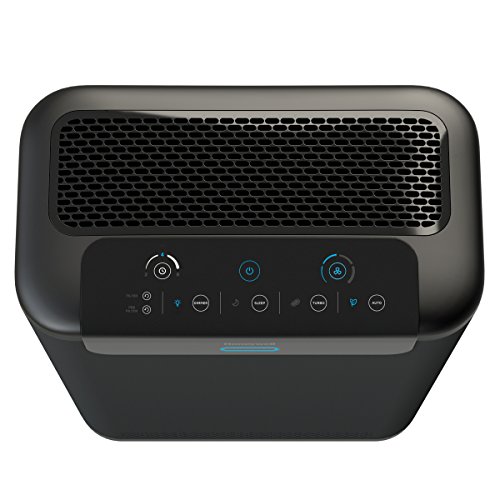
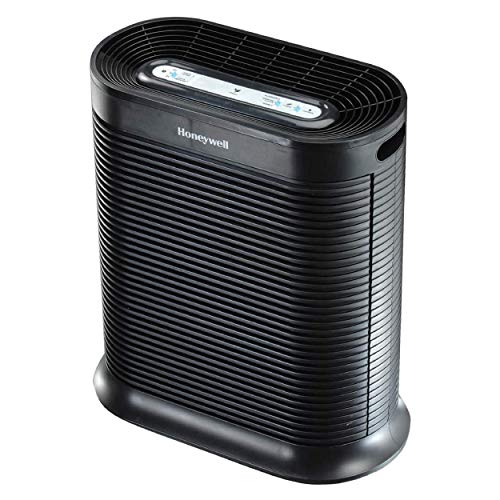


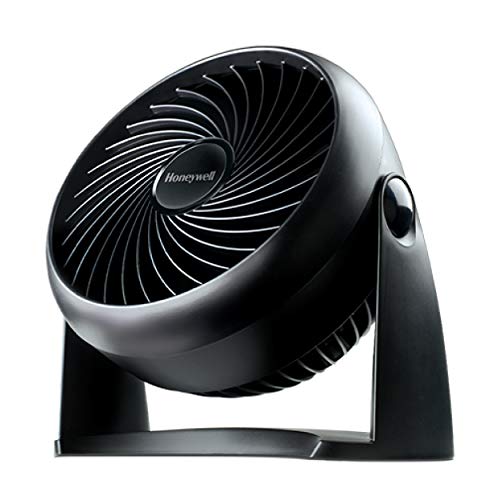

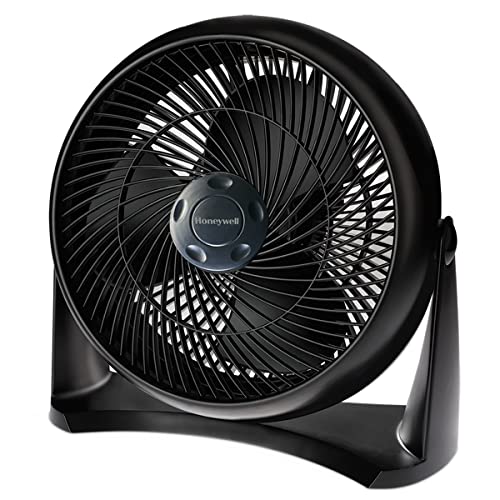


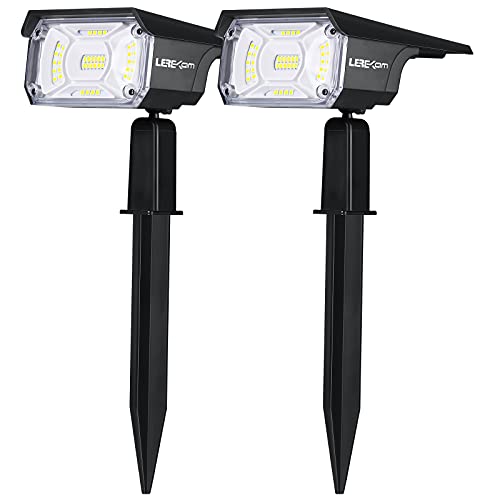
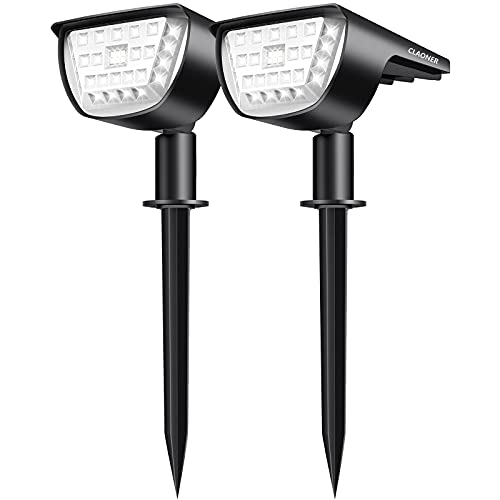


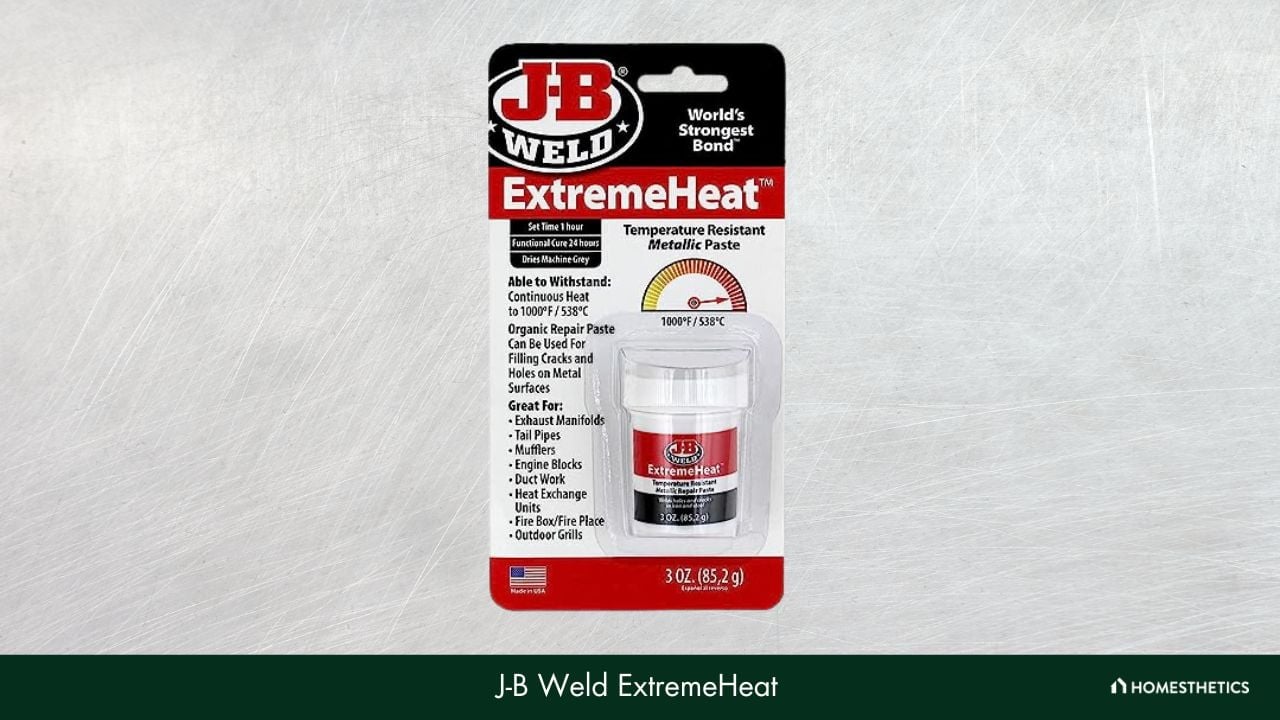
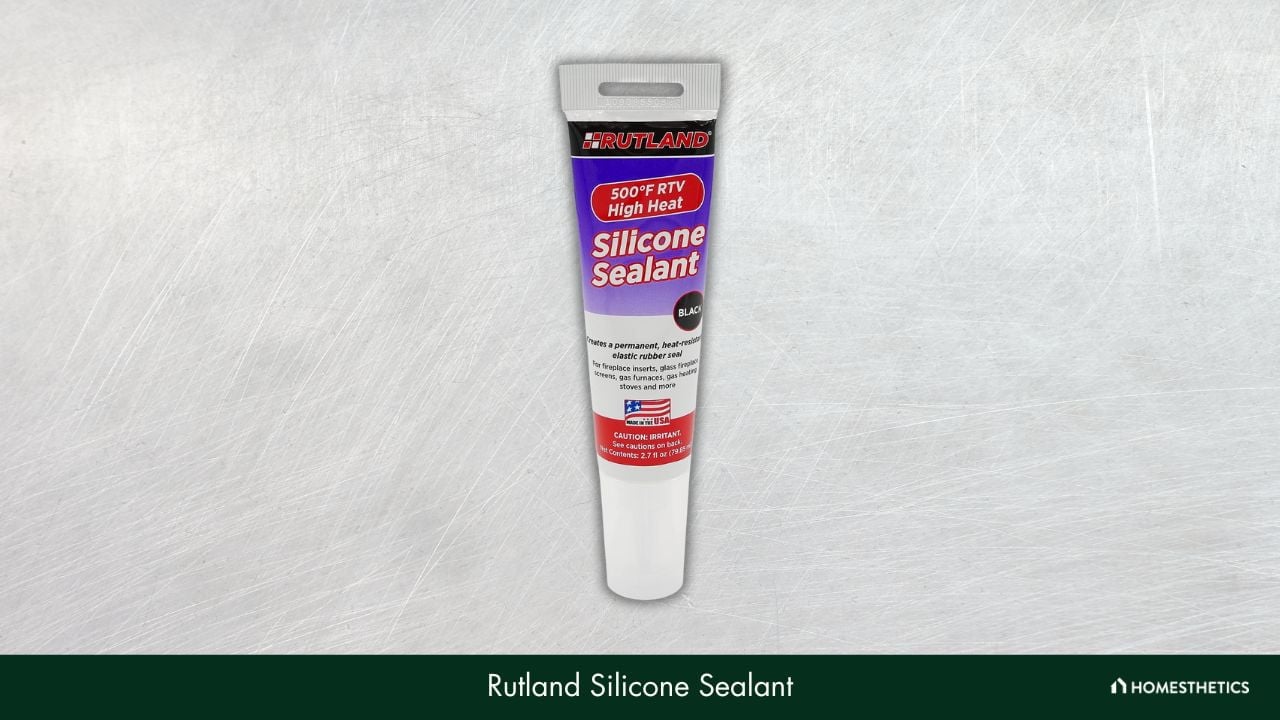


![5 Best Glues for Silicone [Reviews & Buyer’s Guide]](https://homesthetics.net/wp-content/uploads/2021/12/Glue-for-Silicone-1.jpg "5 Best Glues for Silicone [Reviews & Buyer's Guide]")


![9 Best Glue For PLA Of 2024 [Reviews & Buyer’s Guide]](https://homesthetics.net/wp-content/uploads/2022/01/Best-Glue-For-PLA-1.jpg "9 Best Glue For PLA Of 2024 [Reviews & Buyer's Guide]")


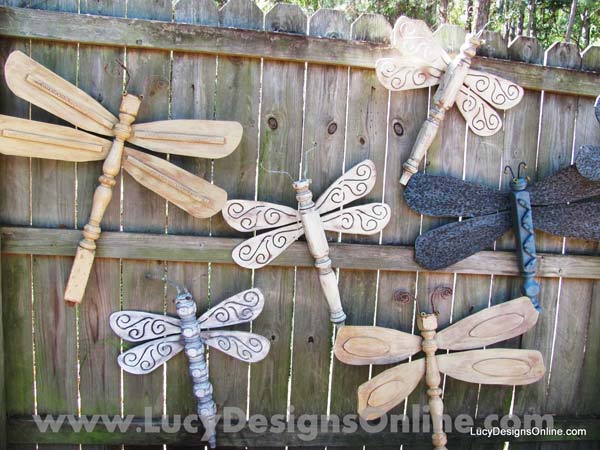
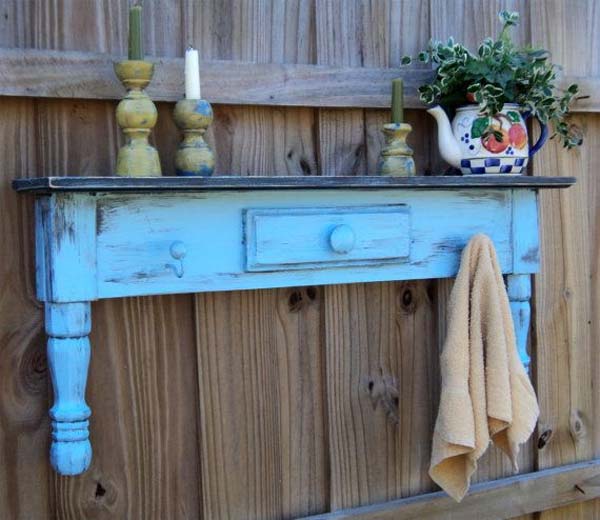


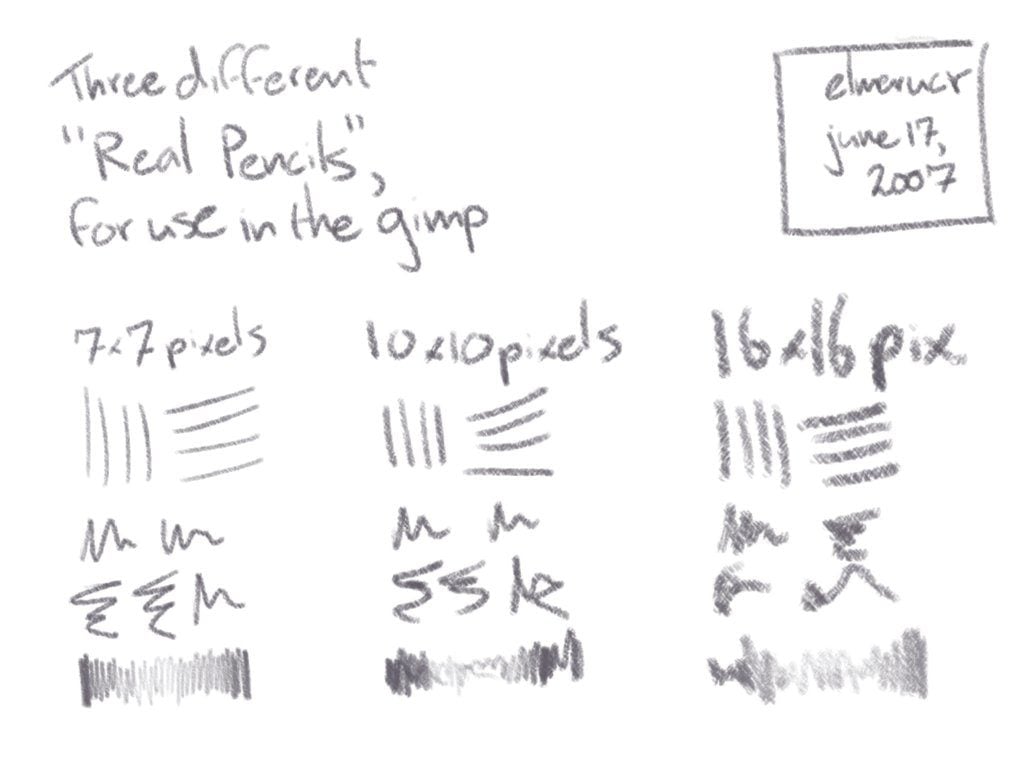

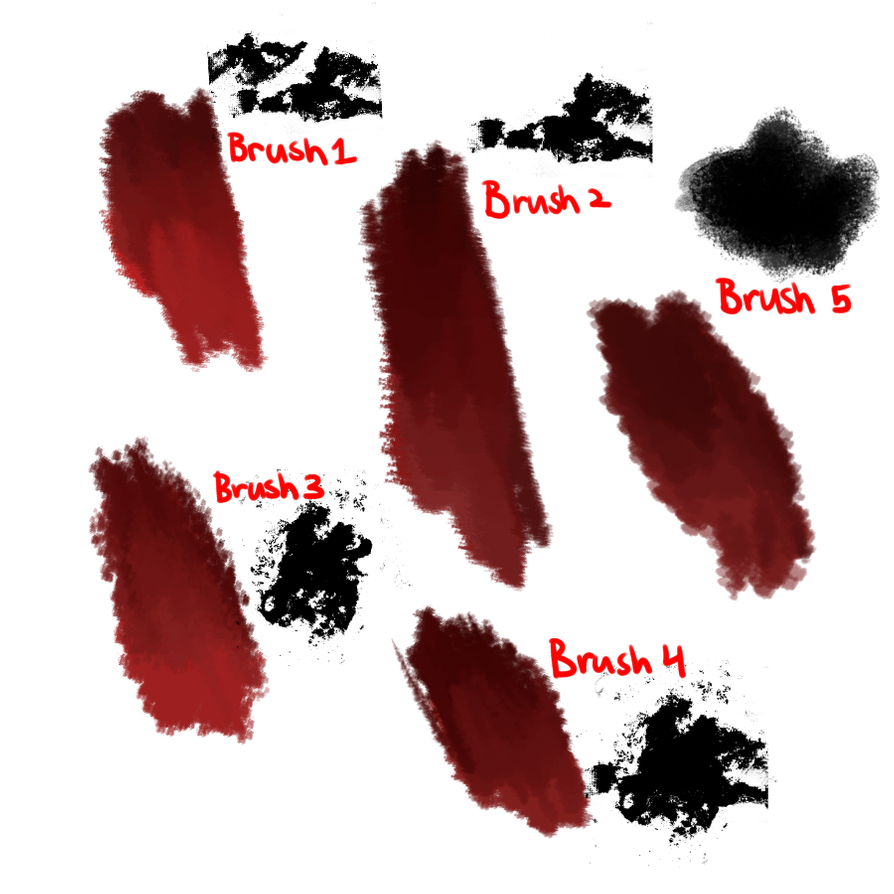
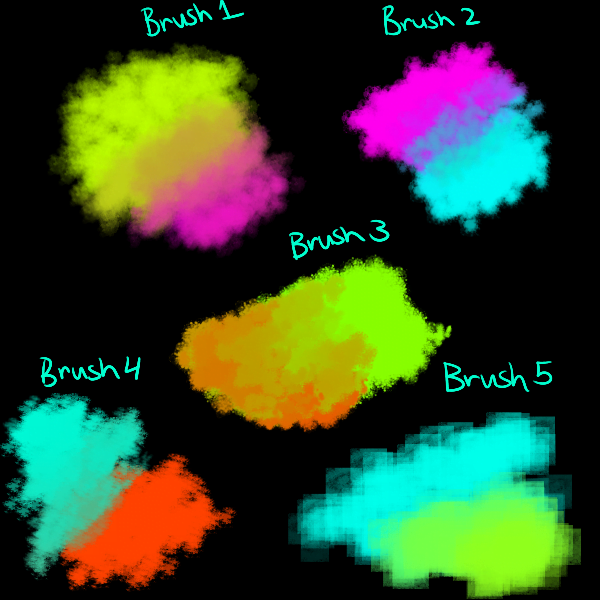


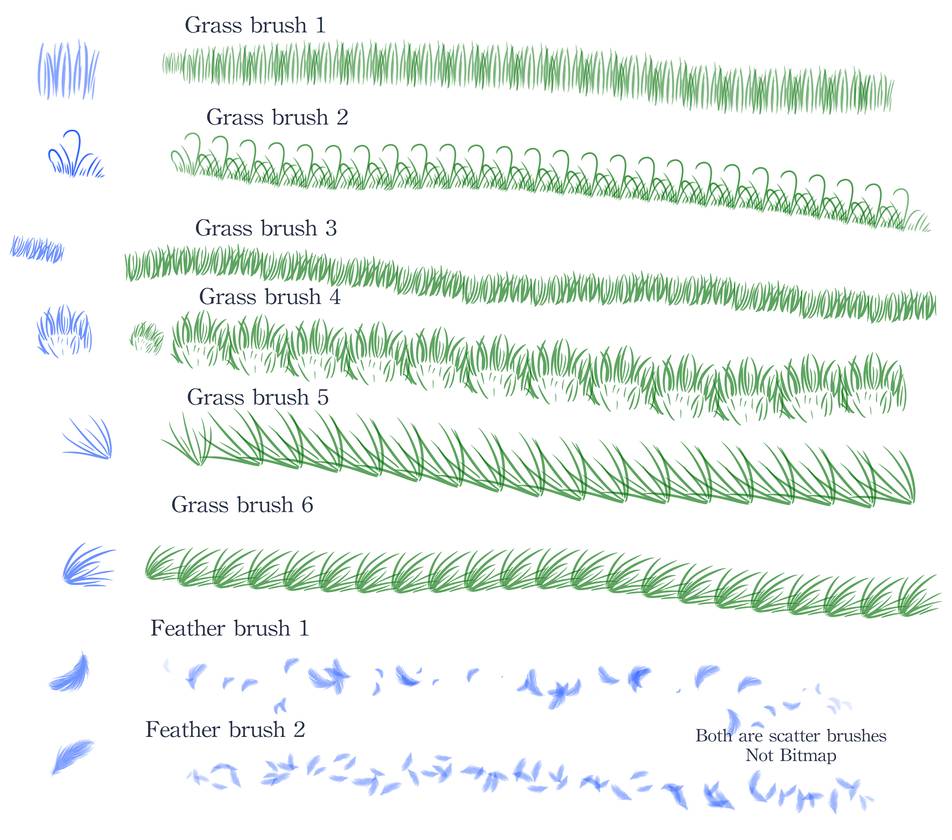

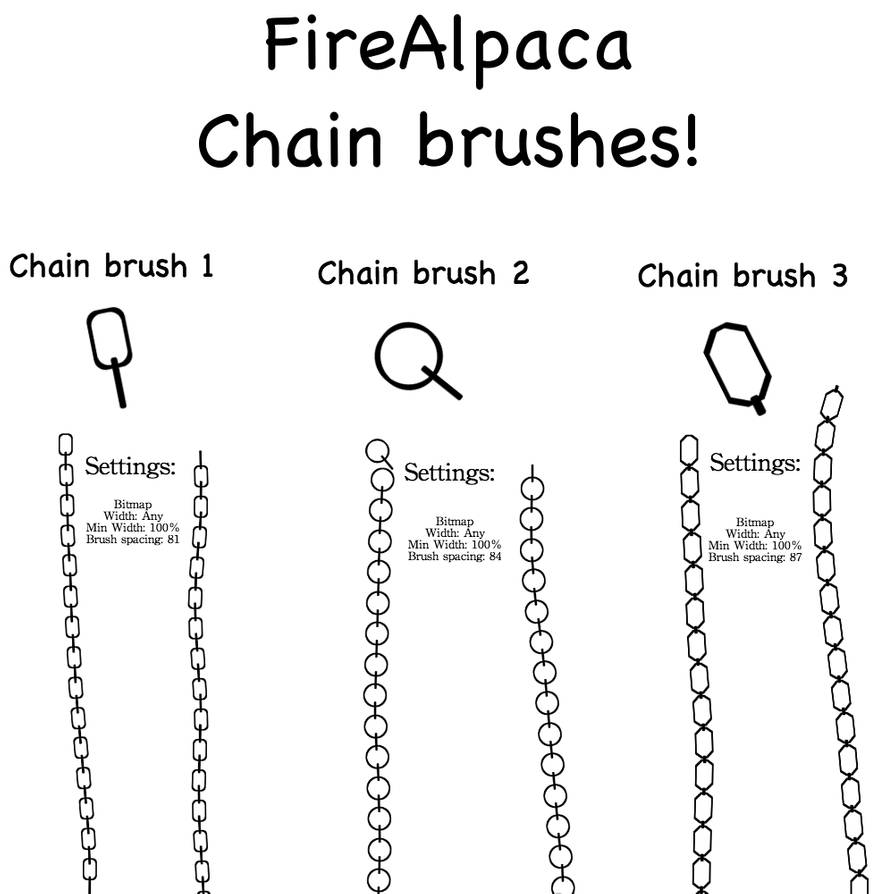

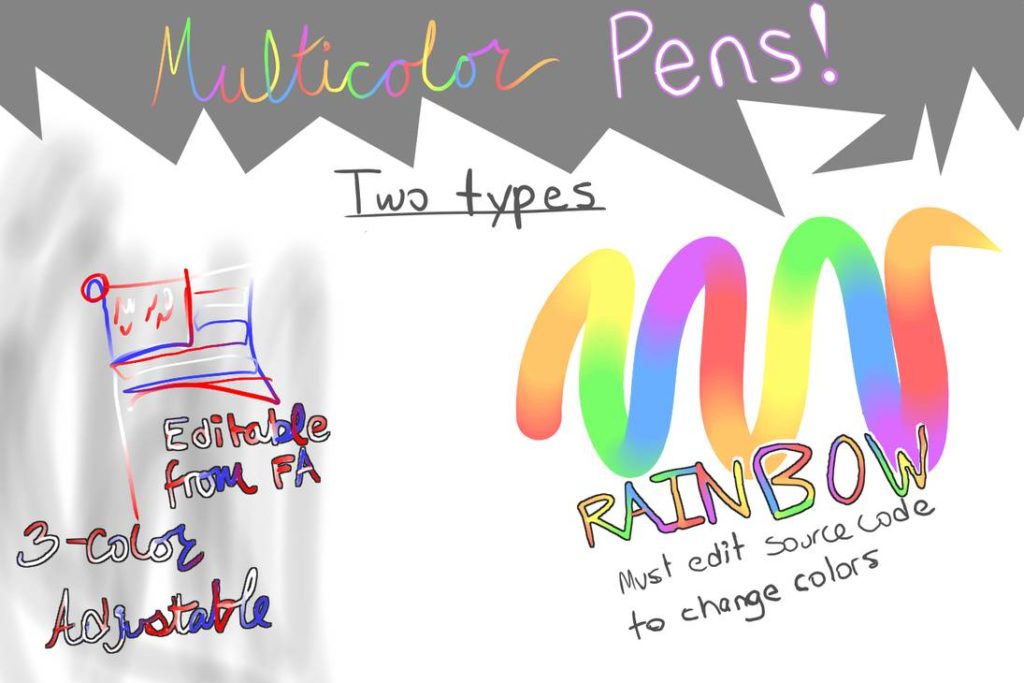


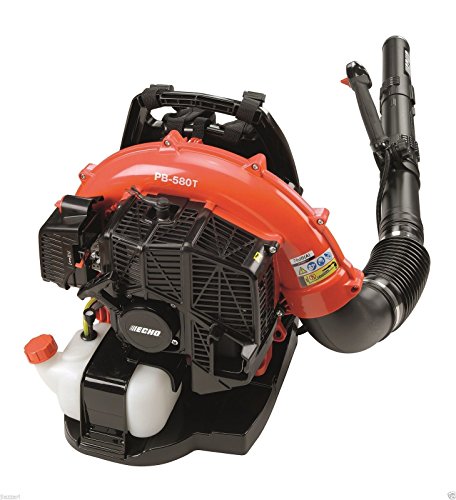


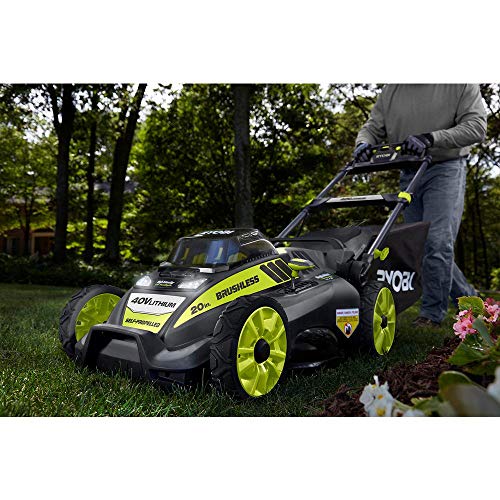
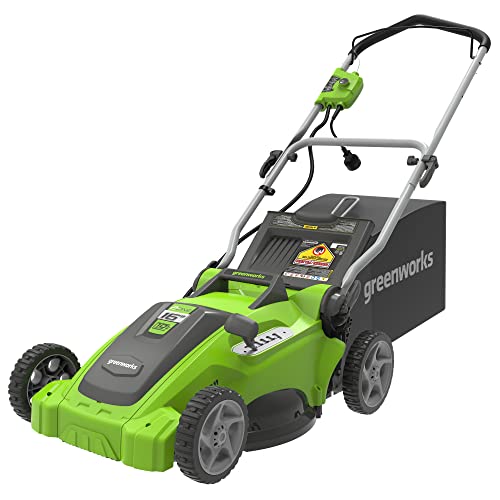


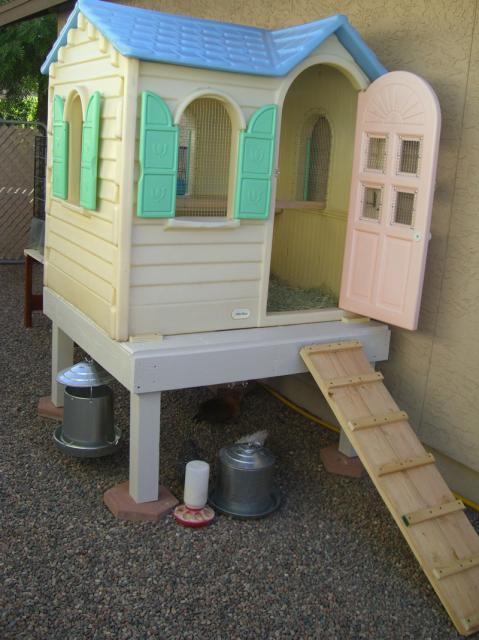


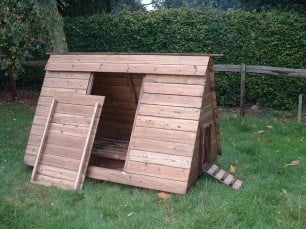


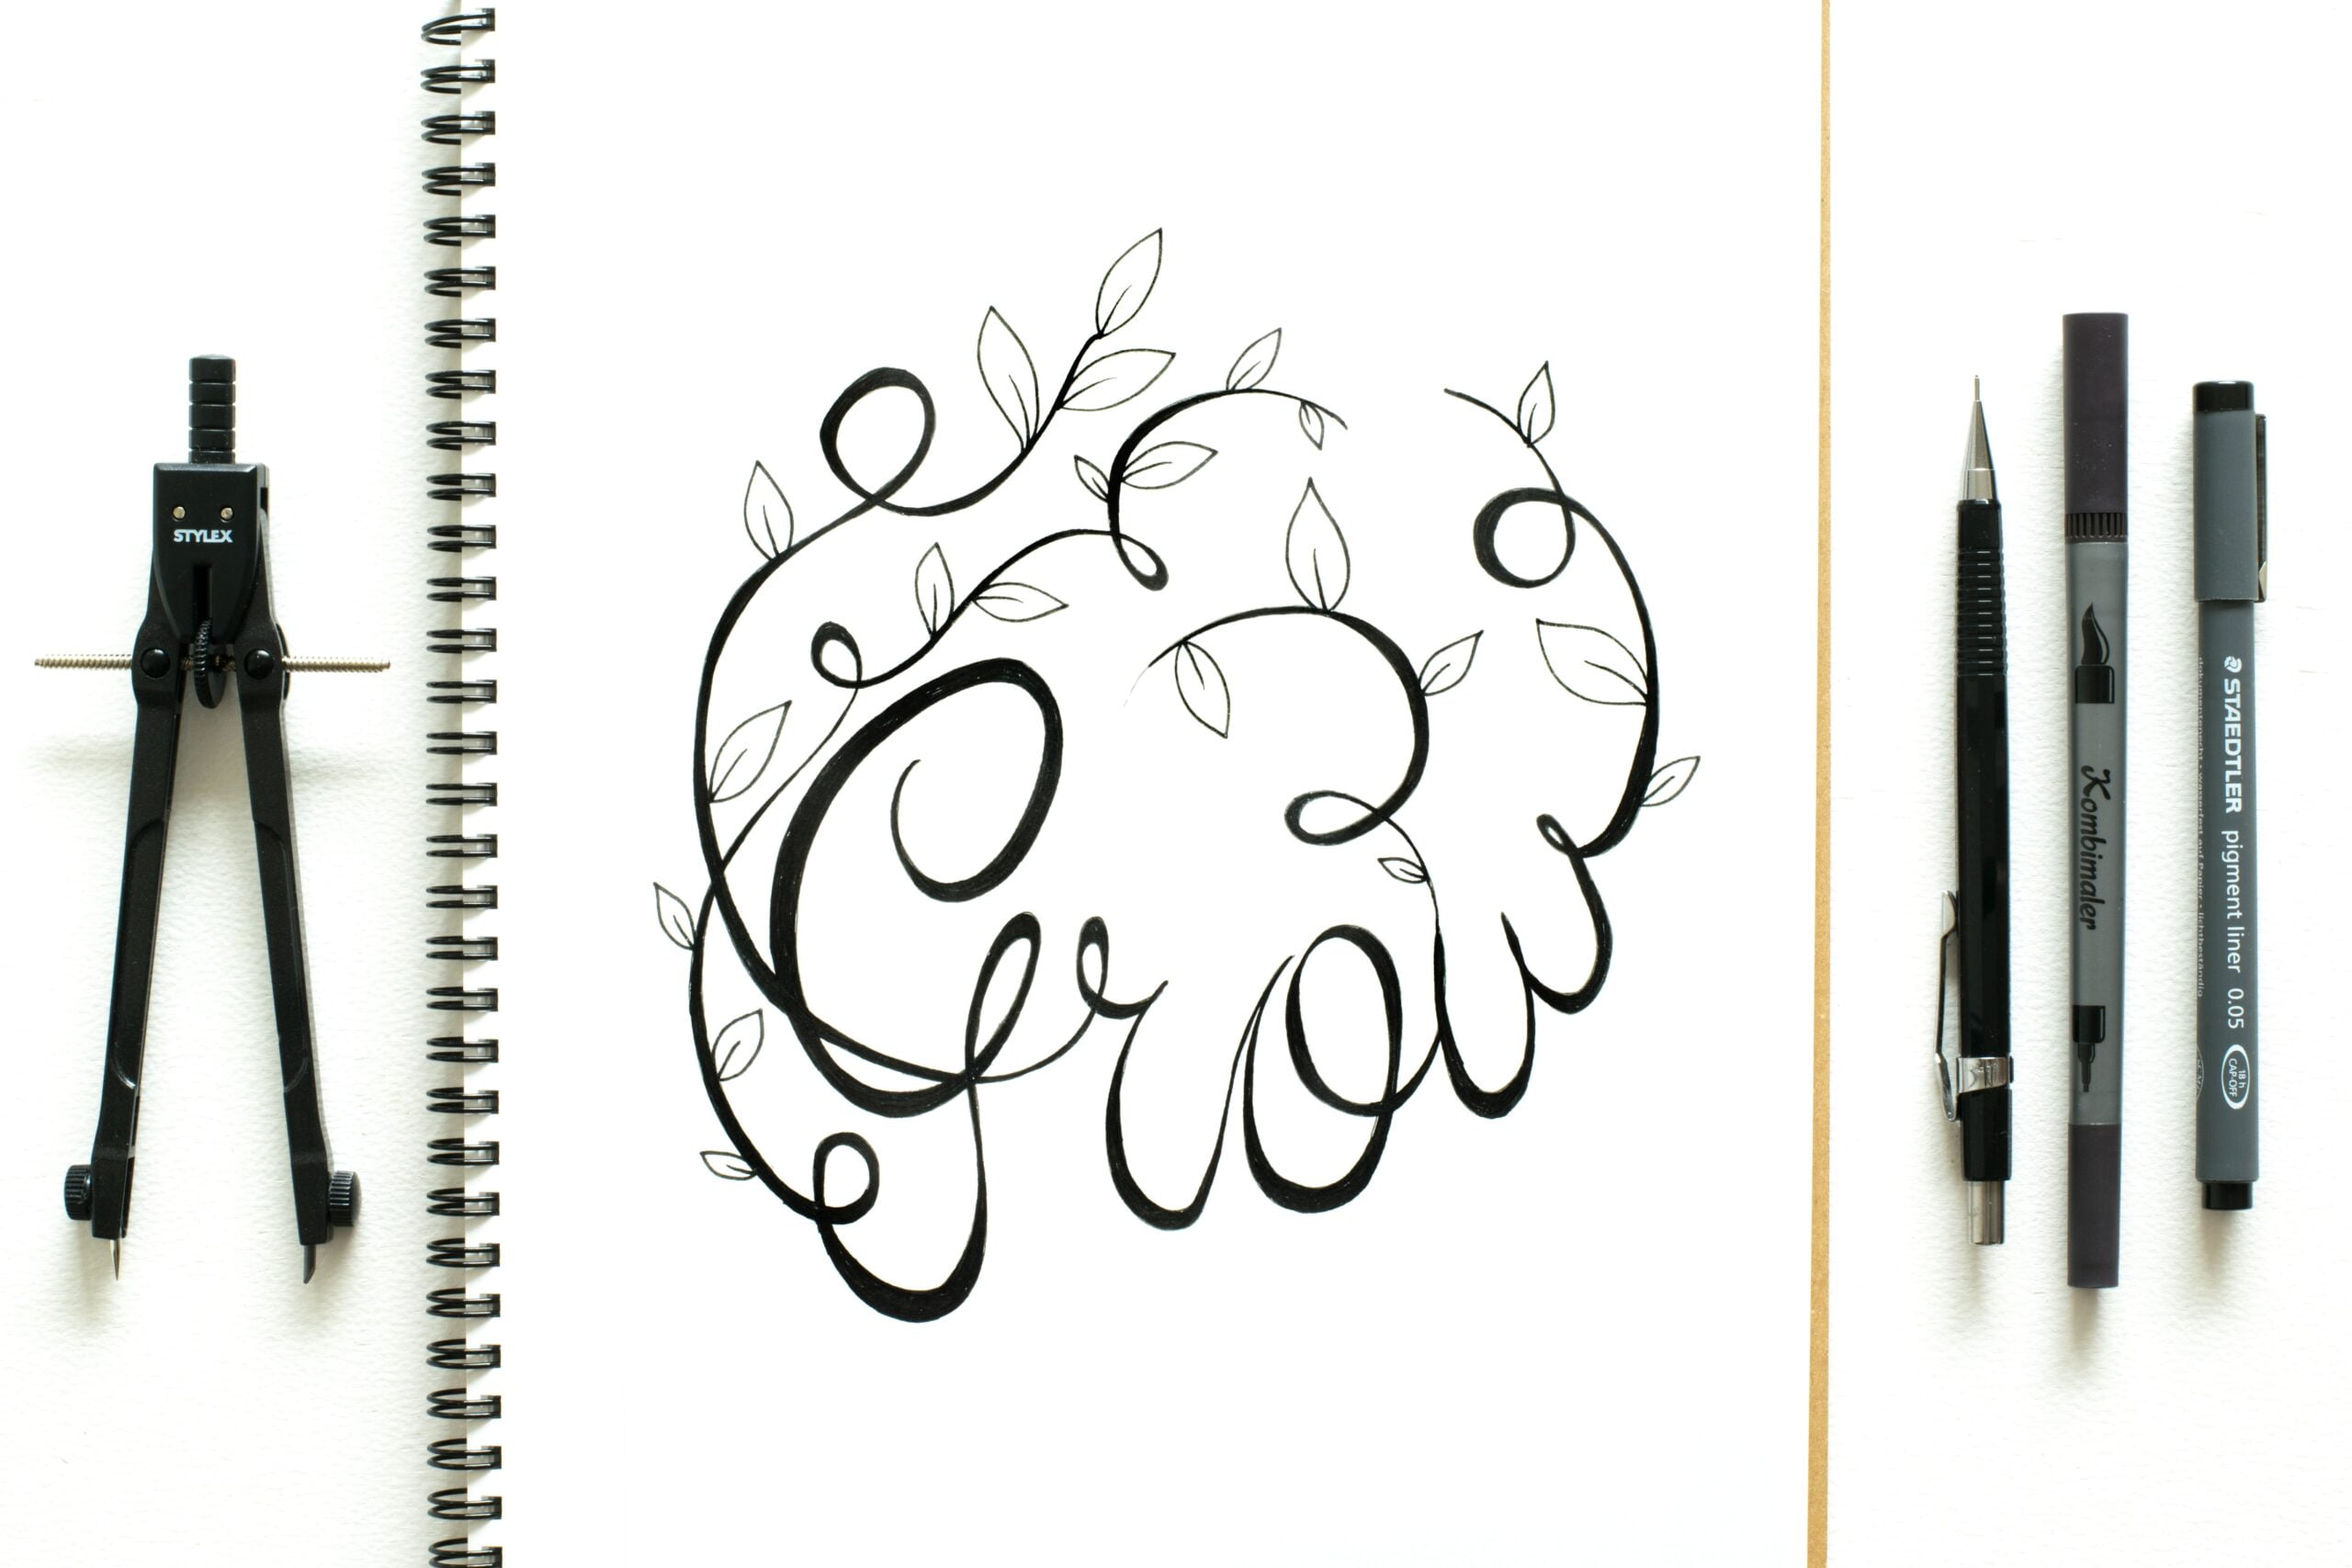


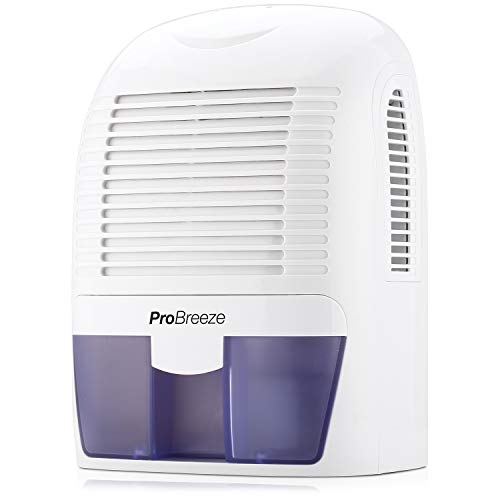
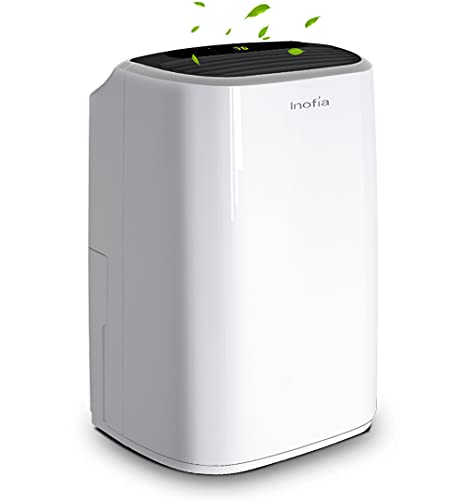
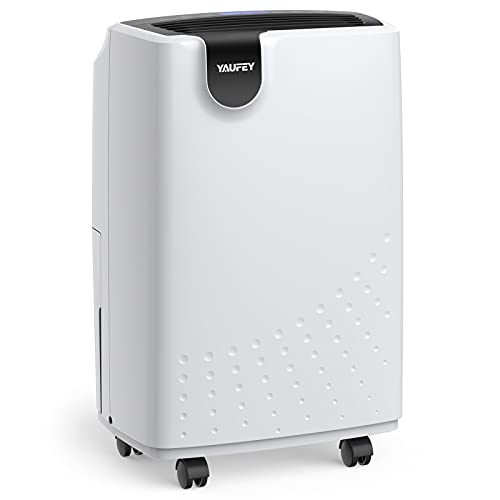
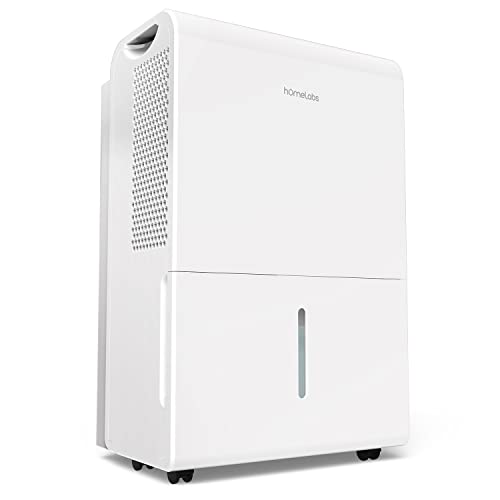


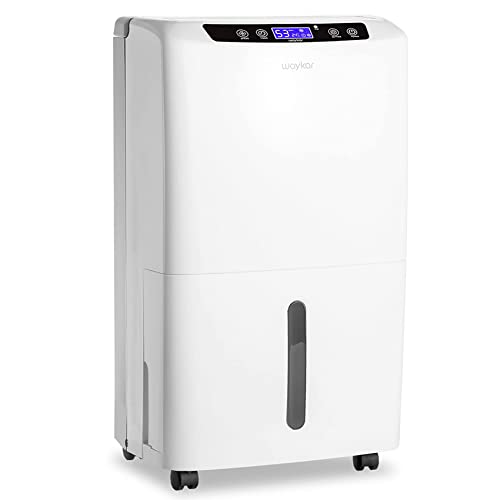


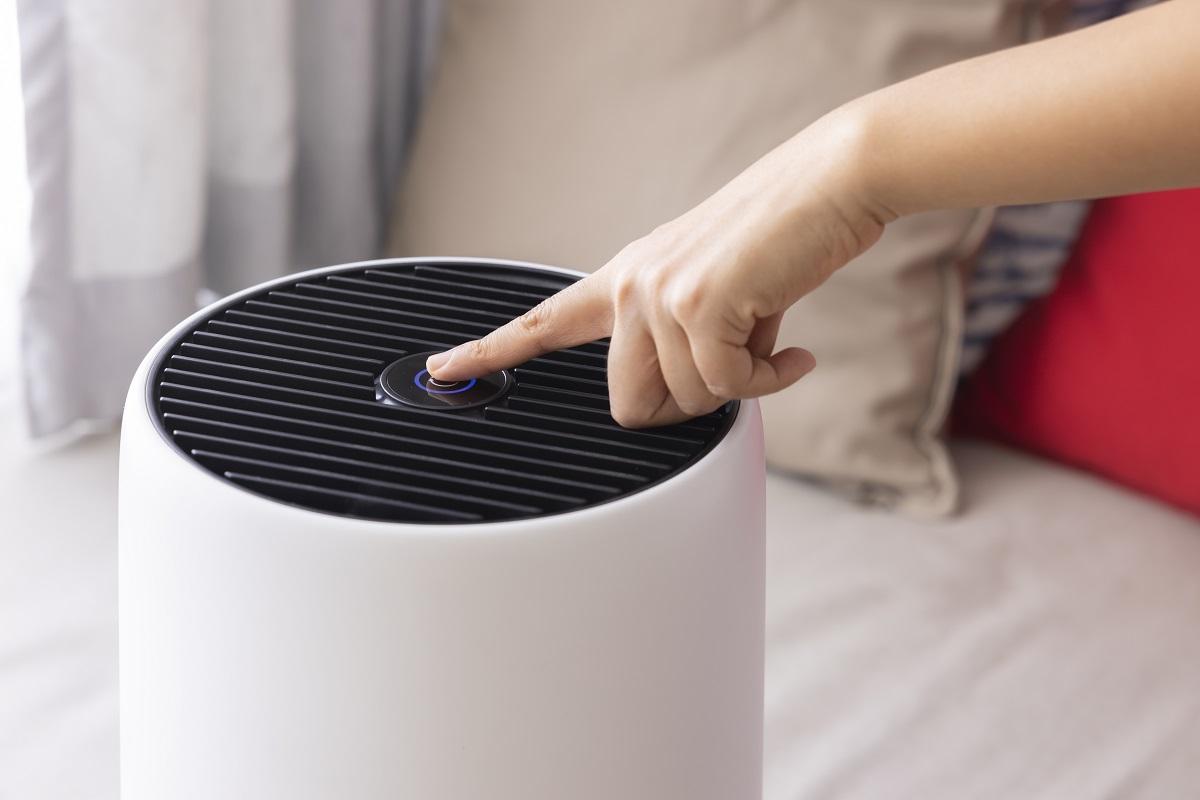


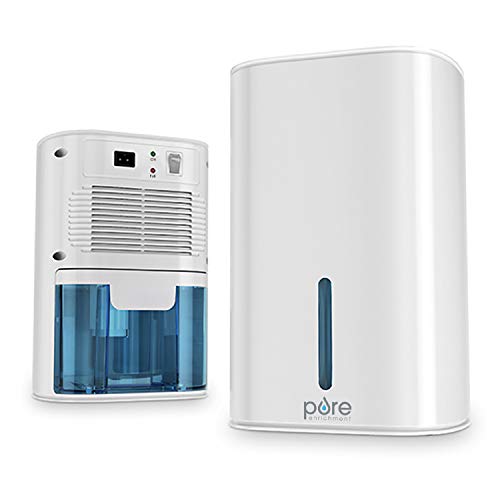

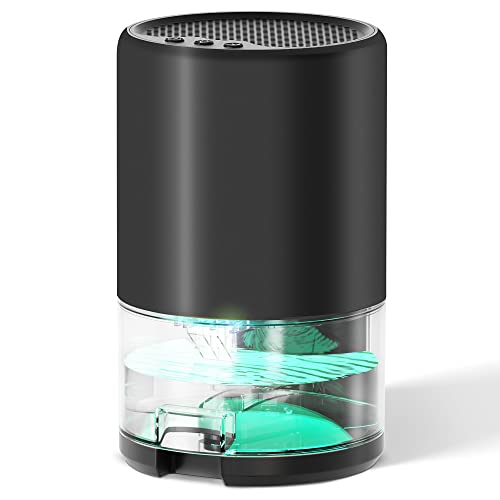


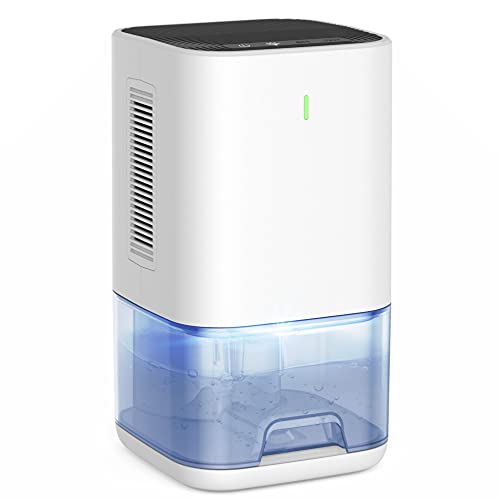
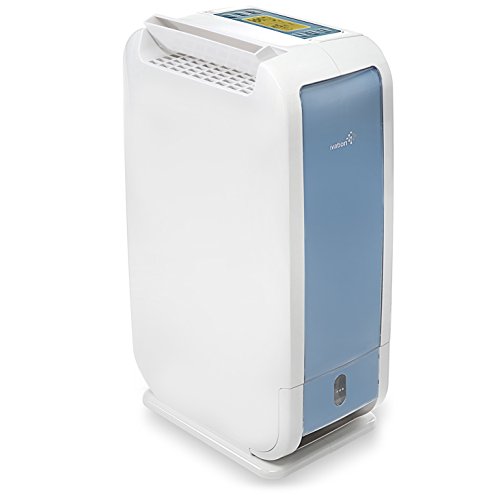

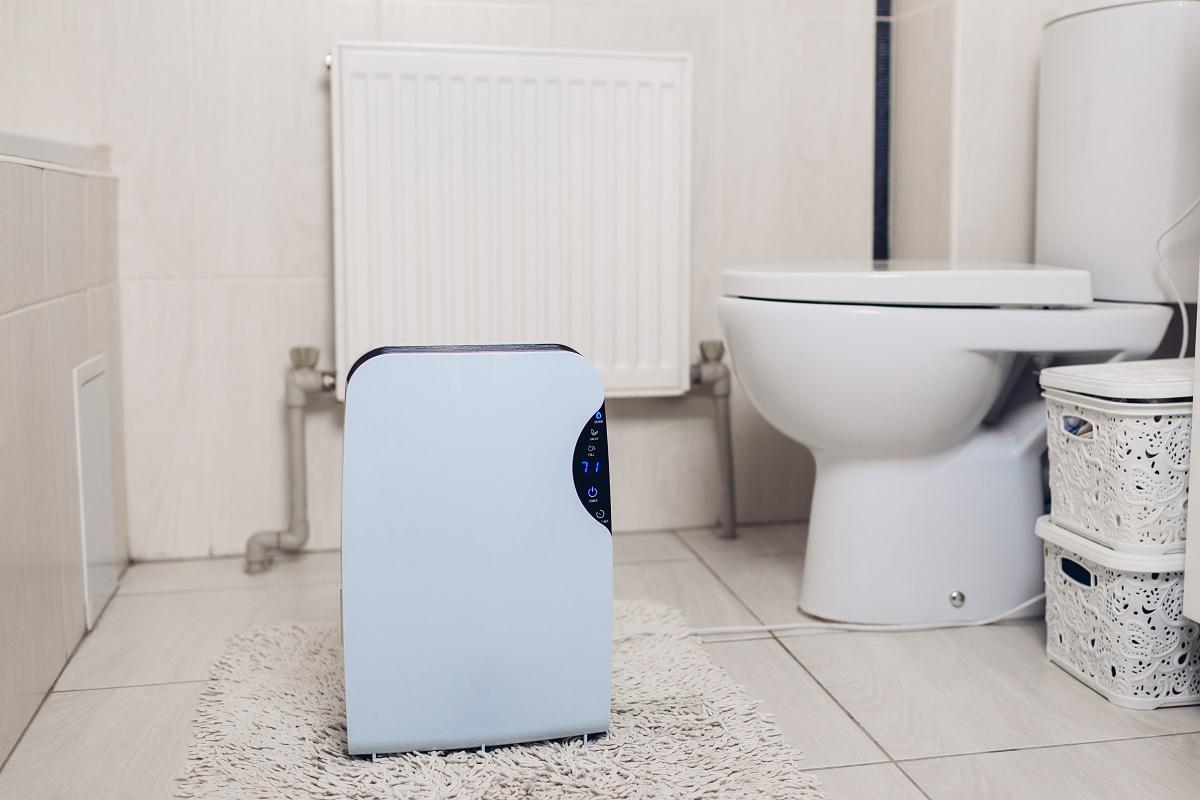

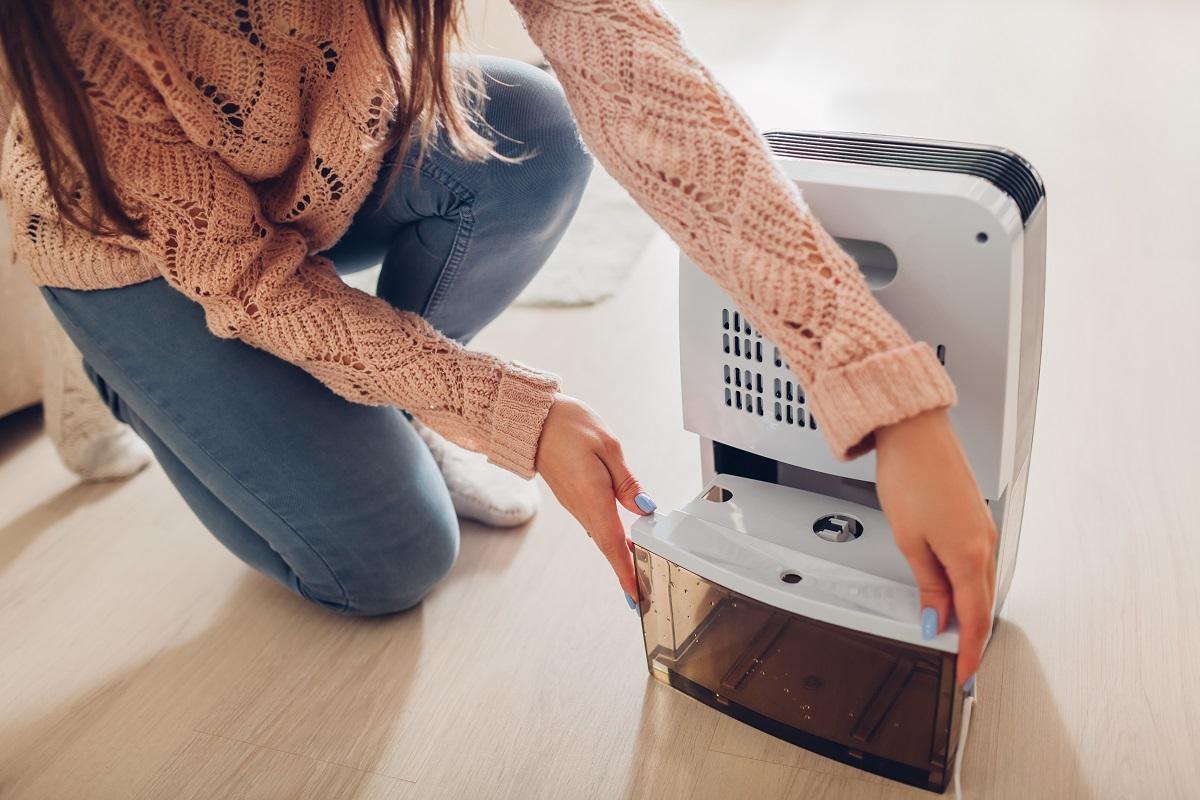
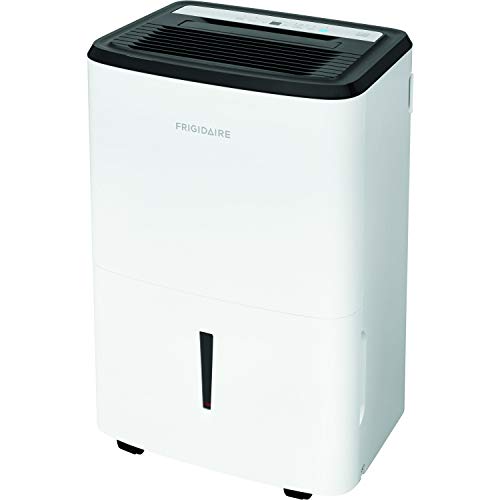


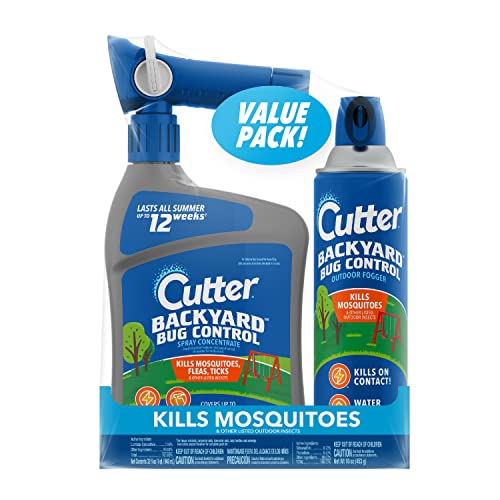


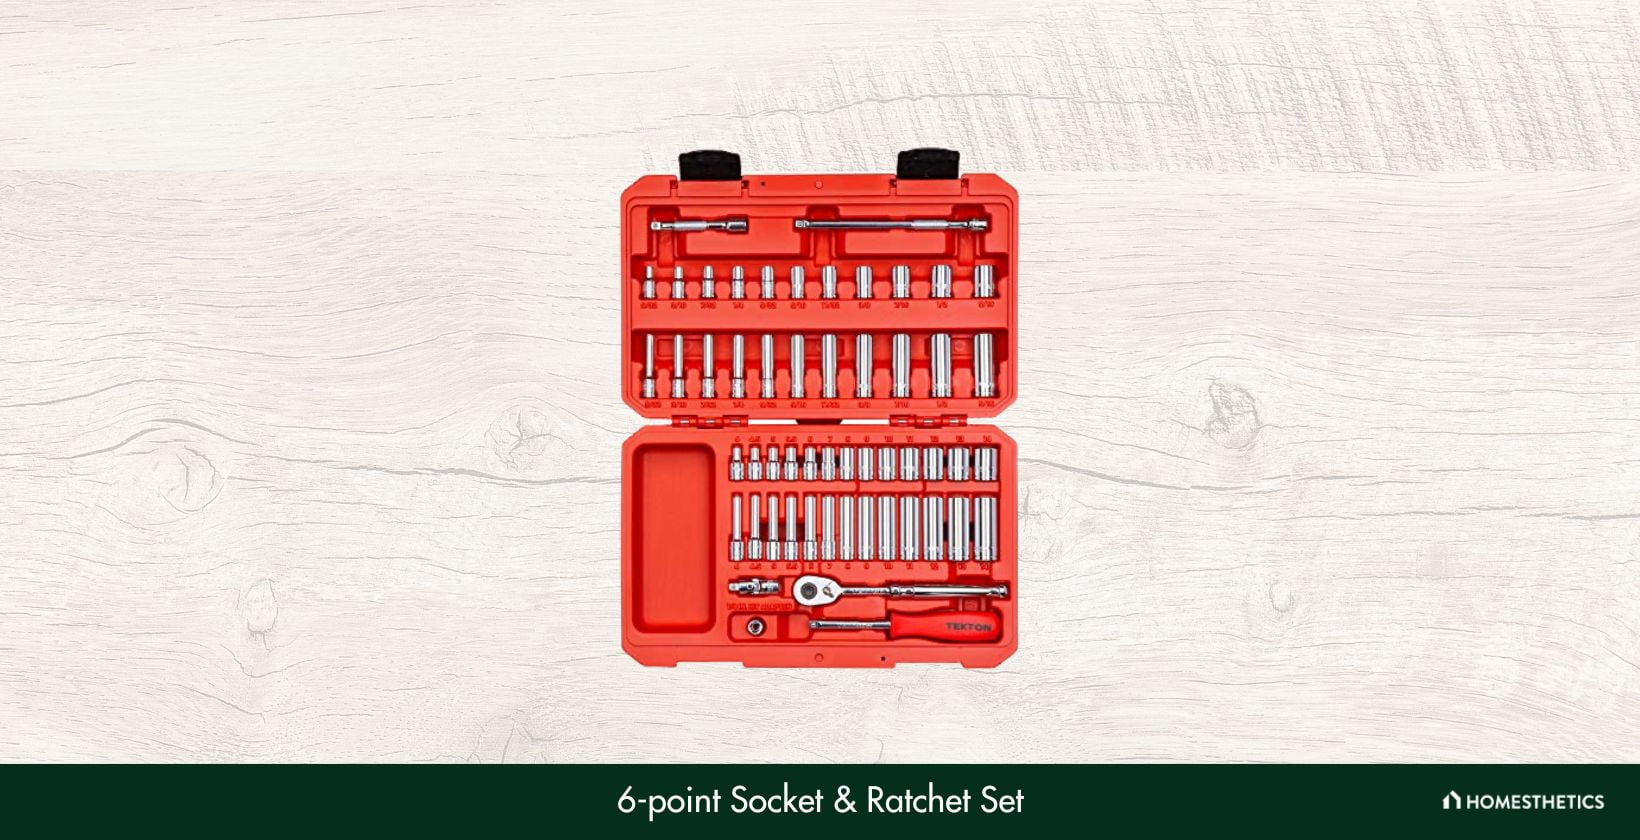
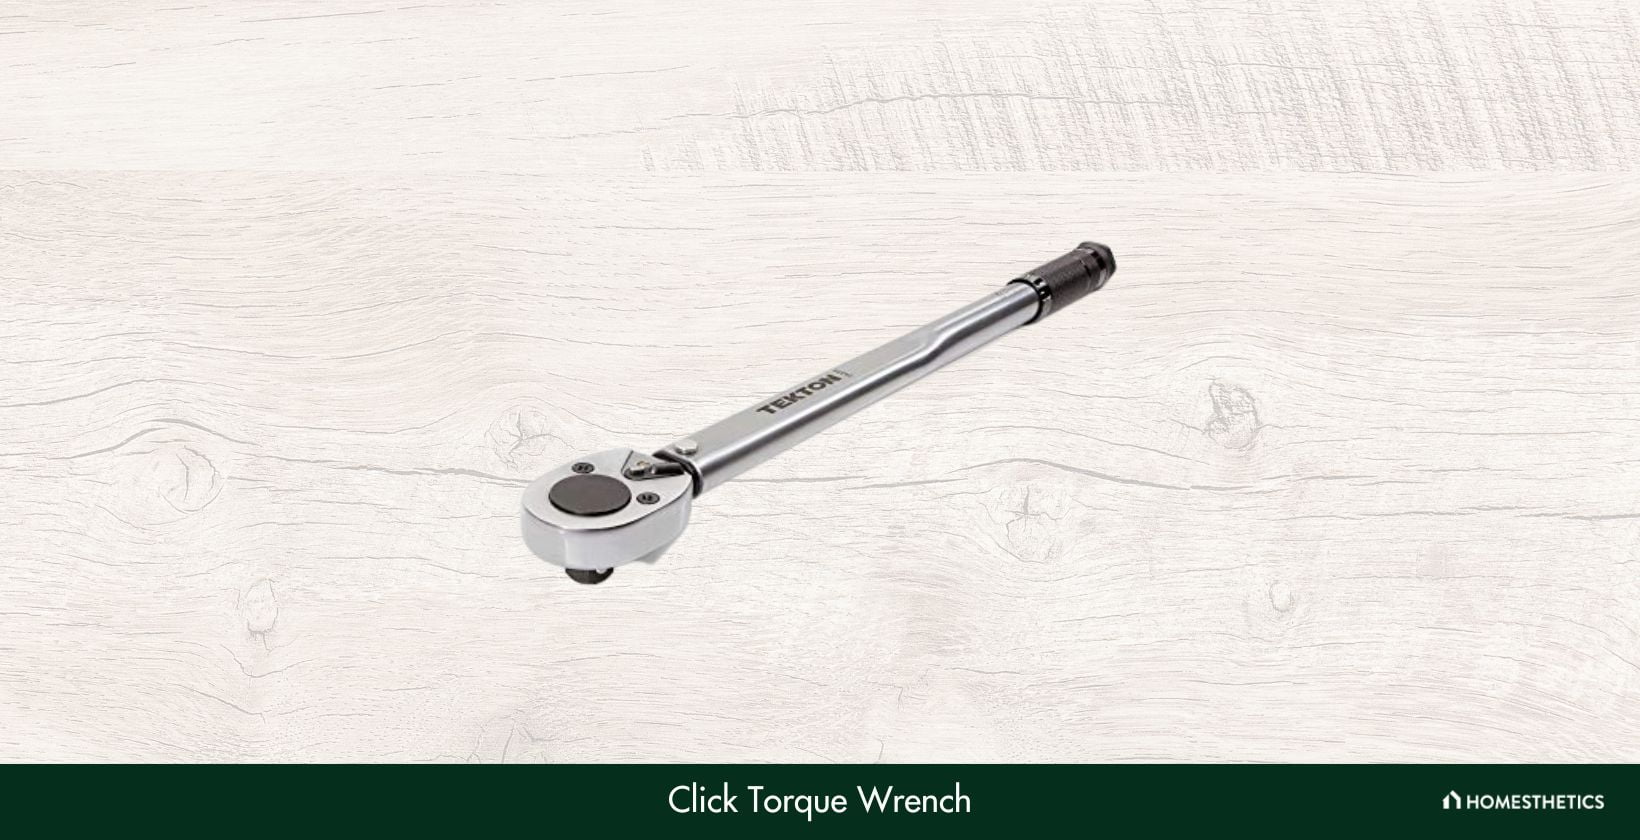

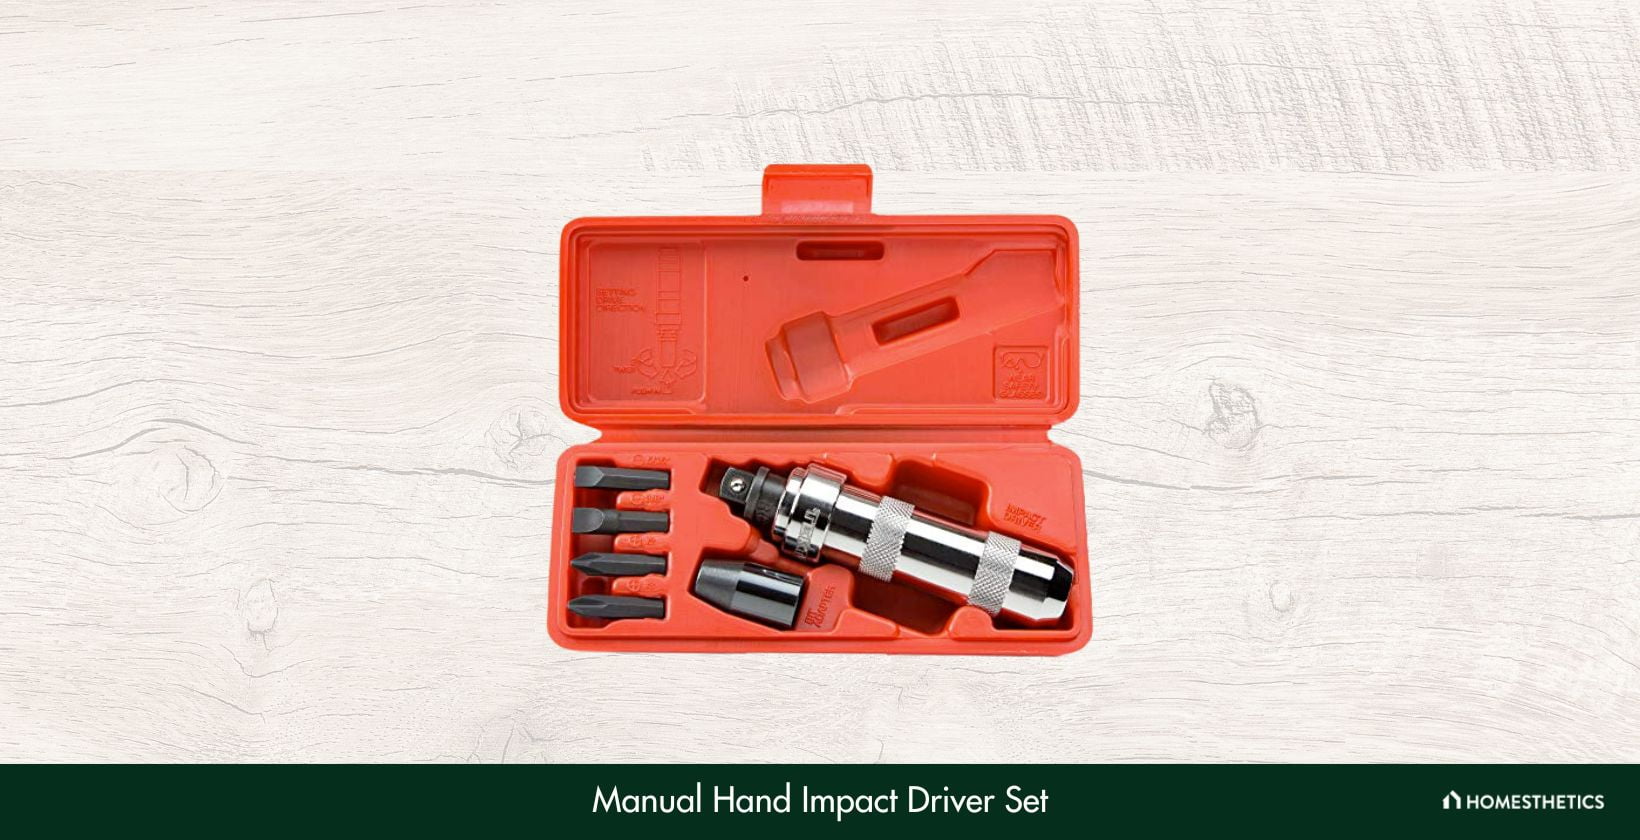
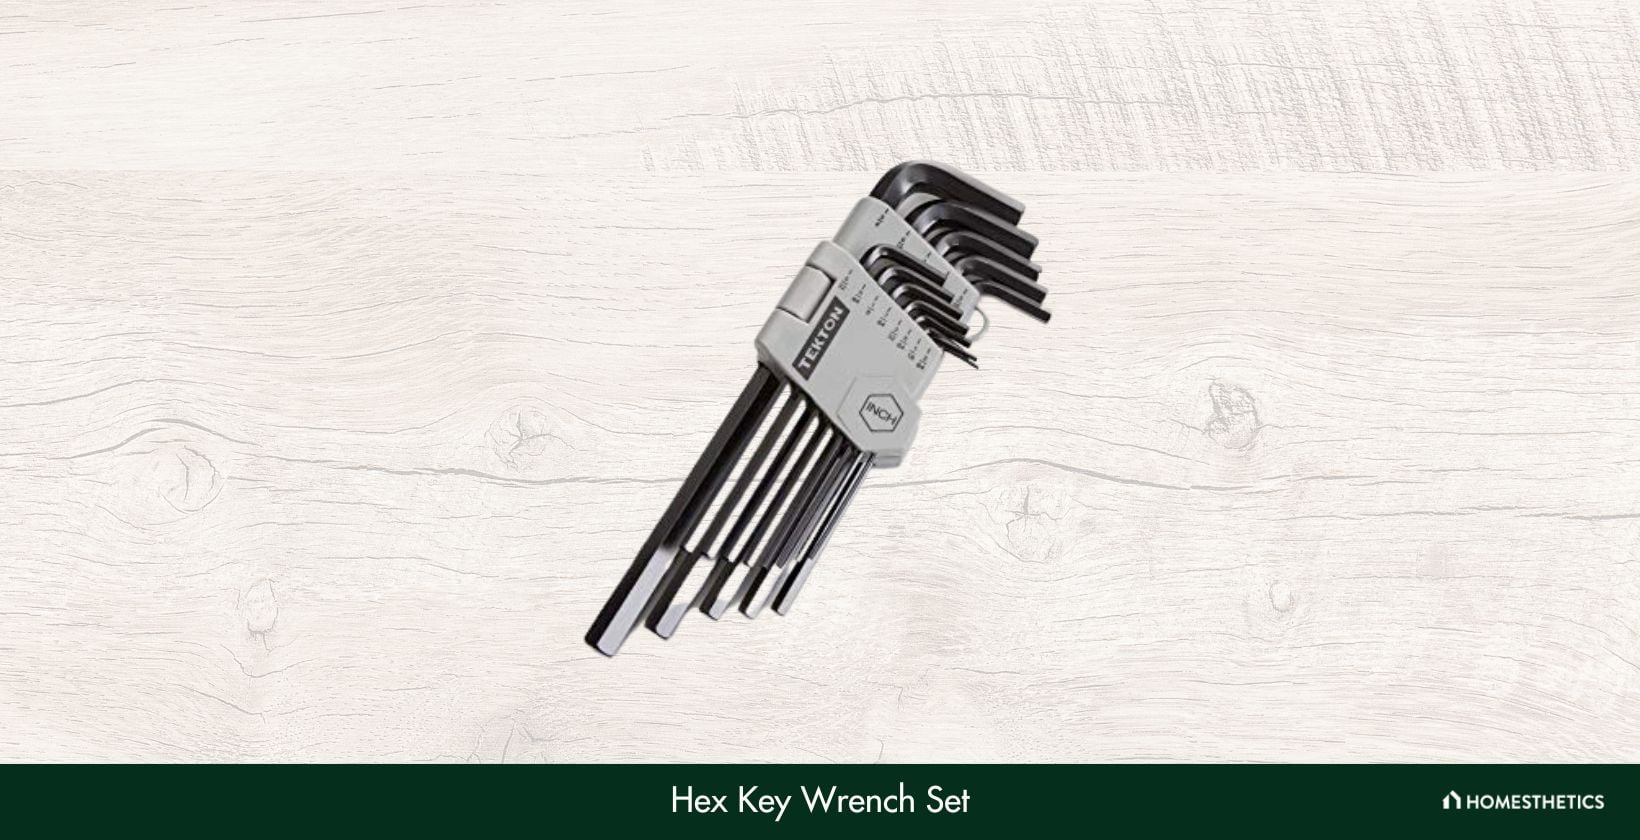

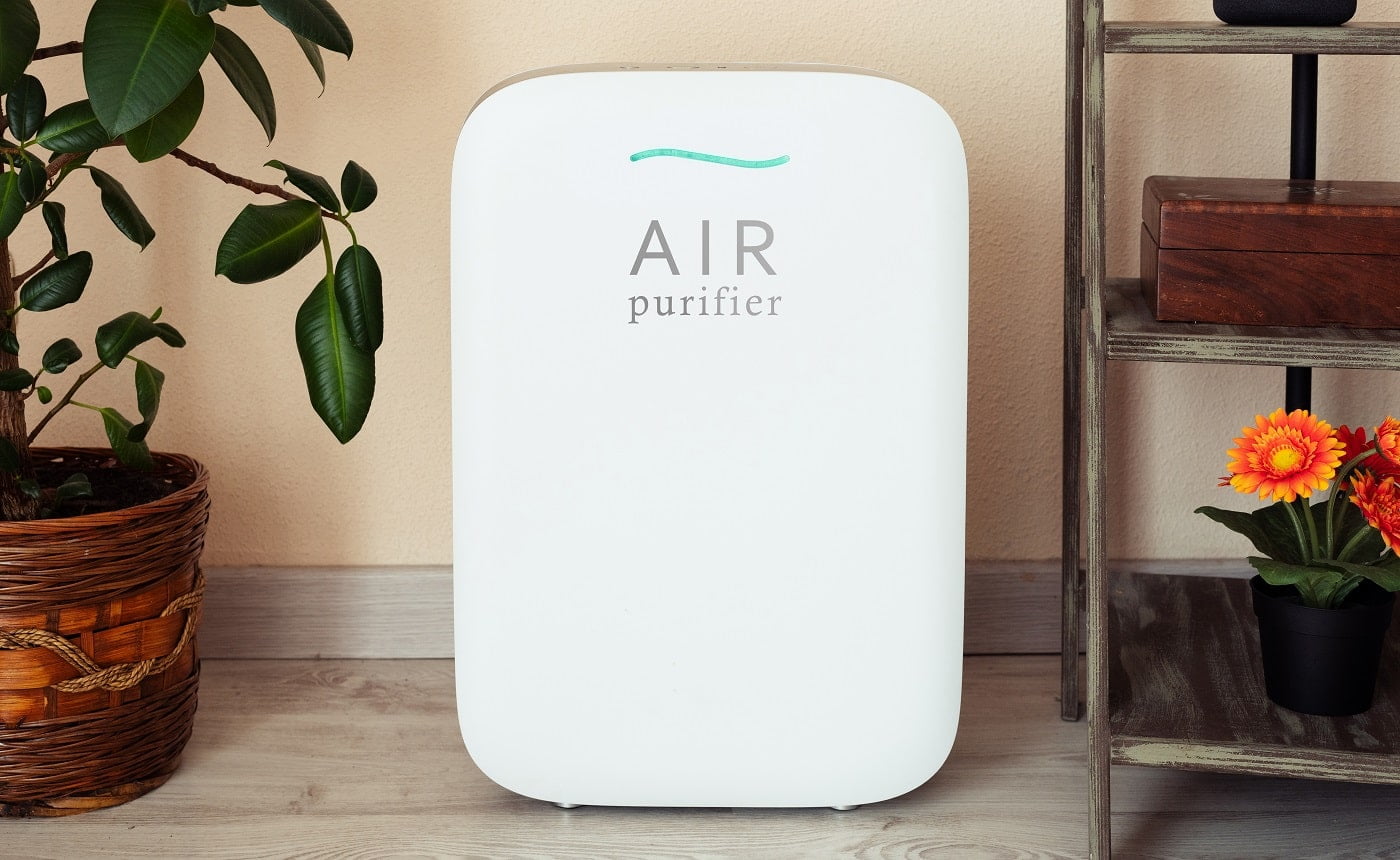
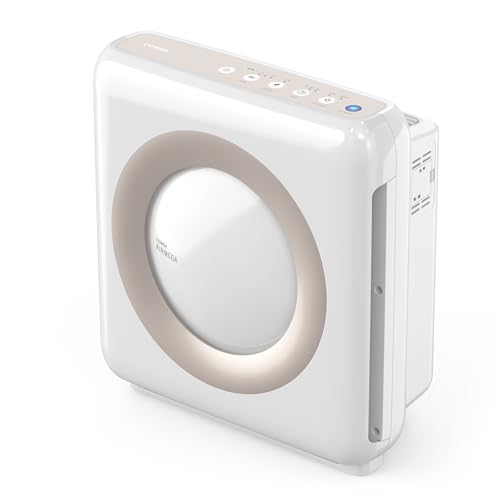
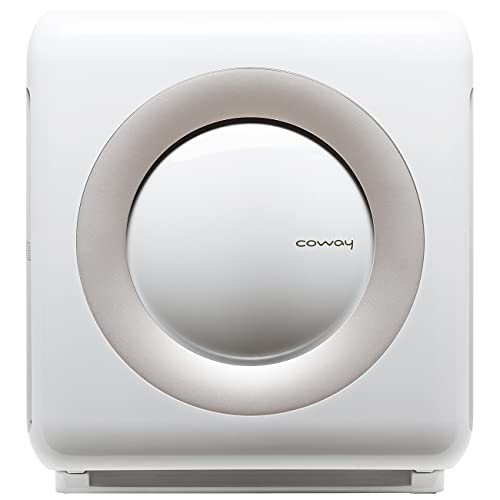


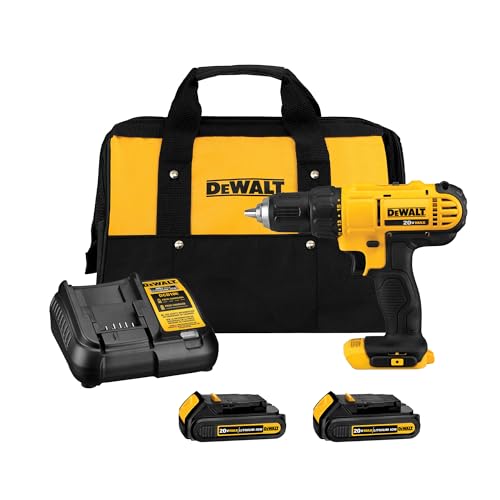
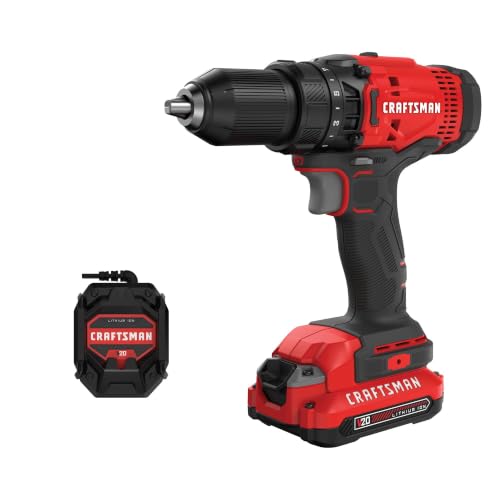


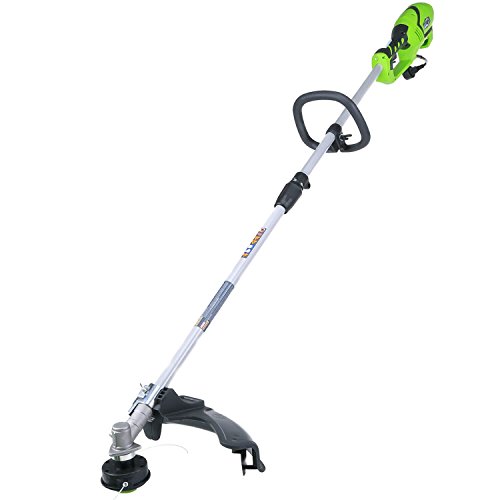


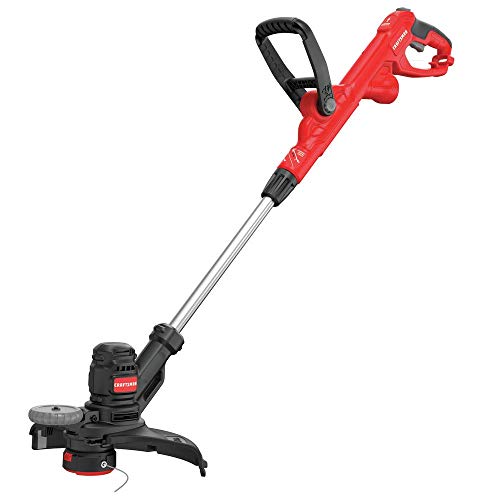
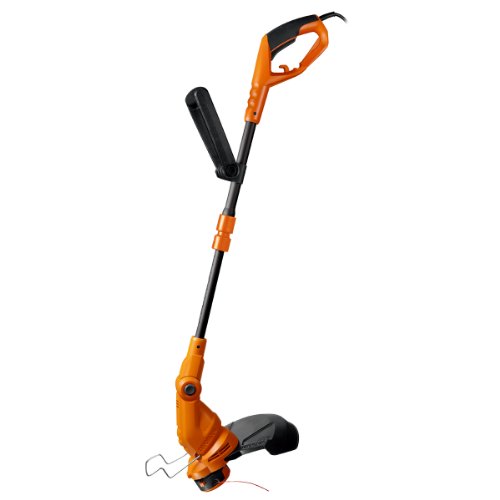


![4 Copper Chef vs. Red Copper of 2024 [Reviewed & Buyer’s Guide]](https://homesthetics.net/wp-content/uploads/2021/03/Copper-Chef-vs.-Red-Copper-of-2021-01.jpg "4 Copper Chef vs. Red Copper of 2024 [Reviewed & Buyer's Guide]")


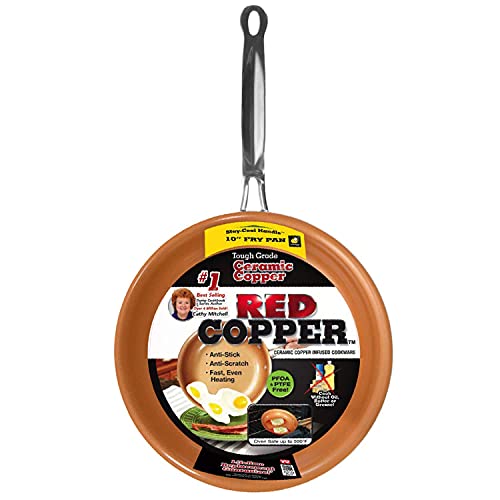

