X

Inspiring Ideas for Modern Home

The holiday season is almost around the corner. While there is still some time left before it is upon us in full swing, you know how hectic Christmas preparations can get when the time comes near. Most people reuse their decorations from the Christmases that have come and gone. It makes sense since it is practical, but how long can you keep on using the same decoration pieces?

If you feel that you need to give your Christmas preparations this year a makeover to revitalize your home, you will understand the importance of buying more decorative items. One of the most integral parts of Christmas decorations in every American home is the inclusion of burlap ribbons and wreaths.

For those of you who are looking for some fresh décor ideas to make your house beautiful, ambient, warm, and cozy this year and fully enjoy the Christmas spirit, we have put together a list of the best Christmas decoration burlap ribbons and burlap wreaths that you should consider buying.

Best Burlap Ribbon Options 

We are going to start off with reviews of some of the best burlap ribbon options that you can purchase for Christmas 2022.

Etercycle came out with a burlap ribbon roll set that includes 12 different styles of burlap ribbon rolls. It is our top choice as it is the most pragmatic product out there. It is the perfect Christmas décor item.

All of the items within the Natural Burlap Ribbon Rolls Set by Etercycle are made using soft and natural jute material, which is durable and of good quality. The burlap ribbon rolls consist of ribbons made in a way that they are not easy to break or tear. This means that the Natural Burlap Ribbon Rolls Set by Etercycle is an investment that can last a long time before any natural wear and tear start to affect its quality.

Each of the ribbons in the Natural Burlap Ribbon Rolls Set by Etercycle is 6-and-a-half feet long with varying width options that you can choose from. There is a jute twine in the package as well as four burlap flowers with two different designs that you can choose.

Easy to use, the Natural Burlap Ribbon Rolls Set by Etercycle comes in small rolls that you can cut at any length and shape. You can use the set and combine all the different burlap ribbon rolls to be as creative as you want to be with your Christmas decoration needs.


Pros

  • Made with soft jute material
  • Easy to use
  • Does not tear easily


Cons

  • Some customers found the rolls to be disheveled
  • Some customers found the packaging poorly done


M&A Décor really knows how to help people prepare for special occasions throughout the year with their wonderful line of products. It comes as no surprise that when looking for the best products to help you prepare for Christmas celebrations this year, a product by M&A Décor is also on the list.

The Burlap Ribbon Twine Set for Crafts Wired 2 inch ribbon jute string on a spool by M&A Décor is a set of wired burlap lace and jute twine, perfect for all kinds of Christmas decoration options. The burlap ribbons in the Burlap Ribbon Twine Set for Crafts Wired by M&A Décor are 2 inches wide and 5 yards long. It is safe to say that there is more than enough length in one set for the entire Christmas decorations for your home. 

The Burlap Ribbon Twine Set for Crafts Wired by M&A Décor features wired ribbons that make it a lot easier for you to create as many shapes as necessary or your Christmas decoration options. You can go for customized decor as simple or as complex as you require. How you use the Burlap Ribbon Twine Set for Crafts Wired by M&A Décor is all a matter of your personal preference.


Pros

  • Made with high quality fabric
  • Twine string allows you to create any shape
  • Wired design for better customization


Cons

  • Not as durable as other products
  • Not a lot of design options


SS Shovan is known for its Christmas decoration items. The reason for this is that their products are simple and elegant. Very easy to use, SS Shovan products help customers get a complete look for their Christmas decorations so that they can enjoy the holiday season with the cozy and warm vibes that their products create.

The Natural Burlap Ribbon Roll with White Lace Trims Tape by SS Shovan comes in a set of 6 different rolls of natural burlap ribbons. Their white lace trips have an intricate yet elegant design, giving a rustic aesthetic to the products.

79 inches of ribbon in each spool of the Natural Burlap Ribbon Roll with White Lace Trims Tape by SS Shovan give you more than enough length to make your own way as far as Christmas decorations are concerned. Use your imagination and craft the perfect set of ribbon decorative elements for your home’s Christmas decoration this year.

The Natural Burlap Ribbon Roll with White Lace Trims Tape by SS Shovan is definitely one investment you want to make for an enjoyable and memorable Christmas with your family this year. Set your imagination free with this product and satisfy your creativity by exploring your decorative options through this wonderful product.


Pros

  • Ideal length of ribbons
  • Is a set of very easy to use decorative ribbons
  • Simple yet elegant designed white lace trims


Cons

  • Just enough for one time use for Christmas
  • Some customers did not like the rustic look


When you are finalizing your Christmas preparation list for decorating your home, you might think you are done and you have almost everything sorted out. But after a few days, you may feel like something is missing and there a need to add to the decorations. That’s where you need something like this.

LWR CRAFTS Natural Burlap Ribbon with Lace (Blue)
  • The Burlap Ribbon Is Made of Nautral Jute and Lace.
  • It Is 2 3/8 Inches Wide, 6 1/2 Feet Long. The Edge is...

LWR Crafts introduced this simple and effective product in convenient packaging. The Natural Burlap Ribbon with Lace by LWR Crafts is a 2 3/8 inch thick ribbon that is around 6 feet long. Made from completely natural jute fabric and embellished with lace in blue color, the Natural Burlap Ribbon with Lace by LWR Crafts is a pretty good way to add to your Christmas décor without making it too obvious. 

For those who love the simplicity and do not want wastage, the Natural Burlap Ribbon with Lace by LWR Crafts is perfect for decorating your home this Christmas. LWR Crafts has created this product with lacings of four different colors that you can choose from White, blue, pink, and grey. You can choose a combination of the different colors to create wonderful decorations so that you and your family can enjoy a warmer and cozier Christmas this year.


Pros

  • Made with reusable jute fabric
  • Is an eco friendly product
  • Simple way to make your home look more beautiful


Cons

  • Shorter than described on the packaging
  • Some customers found the packaging done badly


Sometimes, you need a comprehensive solution when it comes to your Christmas decorations. While it is fun to be able to make your own Christmas decoration ornaments by customizing the ribbon spools, it can be a lot of effort. That is where products like the Natural Burlap Flowers Set by Amaoz come in to make your life easier.

The Natural Burlap Flowers Set by Amaoz is a complete set of natural burlap ribbons, which has readymade burlap flowers that have a unique and rustic feel to them. The fabric used is natural jute, which is adorable and has a chic finish to it.

The Natural Burlap Flowers Set by Amaoz consists of a set of 12 different handmade burlap ribbon flowers as well as other cute decorative elements. That and the fact that there are four different rolls of burlap ribbons Natural Burlap Flowers Set by Amaoz that are laced with exquisitely done white trimmings make it a set that you should really consider getting this year.

The best thing about it is that you can use the Natural Burlap Flowers Set by Amaoz for decorations throughout the year for a variety of different applications, other than for Christmas decorations.


Pros

  • Made with eco friendly fabric
  • Versatile product
  • Readymade burlap ribbon ornaments


Cons

  • Not a lot of options of style
  • Some customers found it too small in size and quantity


Are you looking to achieve a greener and more natural look for your Christmas decorations this year? Sometimes, it pays off to go for something out of the box when it comes to your Christmas décor and create an ambiance that is odd yet refreshing at the same time.

Tenn Well Burlap Leaf Ribbon, 66 Feet 5mm Natural Jute Twine...
  • PREMIUM QUALITY: The burlap leaf ribbon consists of...
  • DURABLE TWINE: This 4 ply natural jute twine is soft but...

If you really are going for it, then the Natural Jute Twine, 5MM Burlap Leaf Ribbon with Artificial Vine Green Leaves is your best bet to getting creative with your Christmas decorations this year. The premium quality Natural Jute Twine, 5MM Burlap Leaf Ribbon with Artificial Vine Green Leaves is essentially a burlap ribbon with artificial leaves attached, which creates a natural-looking environment.

If you are looking to add a touch of nature to the ornamental display on this auspicious occasion, then the Natural Jute Twine, 5MM Burlap Leaf Ribbon with Artificial Vine Green Leaves gives you the ability to do just that. The jute rope used is 4-ply which allows it to remain soft yet durable at the same time.

The Natural Jute Twine, 5MM Burlap Leaf Ribbon with Artificial Vine Green Leaves is the best way to add some greens in a natural style to your home for creating a warmer and cozier ambiance for Christmas this year.


Pros

  • Creates an out-of-the-box look
  • Has a length of 66 feet
  • Perfect for decorating your home


Cons

  • Customers have reported that the leaves fall off
  • It is a little difficult to use


If you want the perfect product to put the finishing touches of all your hard work into your Christmas decorations, you want to add something that has a delicate look along with a strong finish so that it can stay this way throughout the holiday season. David Accessories has made just something that might fit that role.

Burlap Ribbon Perfect for Wedding Home Decoration Gift Wrap...
  • There are clear plastic on the both side in order to...
  • Burlap ribbon in natural jute available in color grey.

The Burlap Ribbon for Christmas Decoration by David Accessories is a simple solution for all the Christmas decoration enthusiasts who are looking for a solid bit of ornamental ribbon, which will make their decorative work look even better this Christmas. The Burlap Ribbon for Christmas Decoration by David Accessories consists of a readymade and well-bound burlap ribbon flower. 

In order to ensure that this beauty retains its shape for a long time, the ribbon used in the Burlap Ribbon for Christmas Decoration by David Accessories is covered with a thin layer of plastic that keeps it in a study shape for a long time. It is so easy to use. All you have to do is find a place for it and stick it there. It does not get simpler than that when you do not have the time to keep on fixing your decoration every day.


Pros

  • Very easy to use
  • Durable and strong
  • Accentuates your Christmas décor


Cons

  • Wired edge is too rigid
  • There have been cases of flawed weaving


Christmas holidays and the color red have a special connection with each other. There is no Christmas you will ever see without a necessary dash of this beautiful color adorning Christmas decorations throughout American homes or around the world. How about getting a beautiful burlap ribbon that allows you to get the most elegant shade of red as part of your Christmas decorations this year?

DARICE 2914-052 240gm Burlap Ribbon, 2.5-Inch by 10-Yard,...
  • Burlap Ribbon 2.5 Inch Sewn Edge 10Yard Red 240gm
  • It is 100 Percent Jute

We think that the Red Colored Burlap Ribbon by Darice is by far the most superior quality red burlap ribbon that we have come across. Made from 100 percent pure jute material, this is a high-quality ribbon. One of the biggest complaints that people have with Jute ribbons is the fact that the sides are so fragile that the whole thing starts to fall apart. Not the Red Colored Burlap Ribbon by Darice.

Darice put in a lot of effort in its products to make sure that the Red Colored Burlap Ribbon does not fall apart. The sides are sewn properly to make sure that the whole ribbon stays well put together in your Christmas decorations throughout the holiday season without the need of fixing or replacing the decorations every single day.


Pros

  • Made with 100 pure jute
  • Has a very beautiful red color
  • Sides are sewn properly


Cons

  • Made in China
  • Not too long


Perhaps one of our most favorite when it comes to the recommended burlap ribbons that you should consider for your Christmas decorations this year, the Red and Black Plaid Burlap Ribbon Christmas Wired Ribbon by Uratot is one thing you do not want to miss out on.

URATOT Red and Black Plaid Burlap Ribbon Christmas Wired...
  • Classic style: the burlap ribbon is designed in red and...
  • Multi-functional ribbon: the hemp texture looks perfect for...

If there is anything that can make your home’s Christmas decorations warmer, cozier and a lot more welcoming with the spirit of Christmas, it is the Red and Black Plaid Burlap Ribbon Christmas Wired Ribbon by Uratot. It is simply too good not to use for your Christmas if you do not already use it every year.

The Red and Black Plaid Burlap Ribbon Christmas Wired Ribbon by Uratot has a beautiful and classic style adorned with an immaculate composition of black checks on a red-colored fabric that is soft to the touch and so warm.

Easy to use, convenient and so well made, the Red and Black Plaid Burlap Ribbon Christmas Wired Ribbon by Uratot is a bit of an investment to make in terms of how much it costs but it is one thing you will regret not buying. It is easily one of the top recommendations for burlap ribbons to help you create a warm and cozy Christmas home.


Pros

  • Made with high-quality fabric
  • Has a very beautiful color scheme
  • Perfect for Christmas decoration


Cons

  • A little on the expensive side
  • There simply isn’t enough of it in a single roll


Best Burlap Wreath Options for a Cozier Christmas

Now that we have taken a look at some of the best burlap ribbons that you can consider for your Christmas decorations this year, we think it is right about the time we take a look at burlap wreaths. After all, your Christmas decorations can never be complete without wreaths in there, can they?

No Christmas decoration is complete without a wreath hanging on the door that opens into your home, is it? Well, if you are looking to make an impact of going green and you want to get a wreath that is eco-friendly, we have just the thing on this list for you.

Spring Front Door Wreath Mesh Wreath 24 Inch Handcraft...
  • Unique Design- Made of handcraft natural burlap. Design is...
  • Adjustable Dimensions & Premium Quality- 24*24*4in. It is...

The Inch Handcraft Natural Burlap Christmas Door Wreath by Huashen is made from pure jute that has a rustic finish to it. Adorn it with any number of ornamental elements to give it a more Christmas-like touch and you have the perfect wreath to hang from your door. This wreath is made of handcrafted and completely natural burlap with a 22-inch diameter. You get plenty of room to design this wreath according to your preferred style. Whether you are going for something extravagant or something incredibly simplistic, you will be able to pull it off with this natural burlap Christmas door wreath made by Huashen.

Make your Christmas cozier and warmer with our top pick for the best Christmas burlap wreath by getting the Inch Handcraft Natural Burlap Christmas Door Wreath by Huashen. The price is so reasonable, you might not be able to help yourself and get some more of these to gift to your friends and family as well.


Pros

  • Made with 100 percent pure Jute
  • Is Display on window door or anywhere in your home
  • Creates a welcoming ambience as you enter the house


Cons

  • You need to buy decorative elements separately to beautify it
  • Lack of color options to choose from


The best wreath you can get to add a classic-looking and rustic aesthetic to your Christmas decorations is just what you need. Something designed keeping in mind the fact that people like to add their own touch to the wreath, the Decorative Rustic Wreath with Burlap and Vine Accents by Darice is definitely a very good investment to make.

Darice Decorative Rustic Wreath with Burlap and Vine Accents...
  • Decorative rustic wreath with burlap and vine accents
  • This product is manufactured in china

Made using a combination of burlap and vine accents, the Decorative Rustic Wreath with Burlap and Vine Accents by Darice is effectively like an empty canvas for the Christmas decoration DIY enthusiast who wants to get their own way with how they adorn their doors this year’s Christmas. 

The wreath measures 16 inches in diameter while being around 2 inches deep. This means you have plenty of room to add as many ornamental decorations and really become creative with how you design your own wreath for this Christmas.

The Decorative Rustic Wreath with Burlap and Vine Accents by Darice is a very popular item that starts flying off of the shelves as soon as it comes in stock. So you should make it a point to get one of these as soon as you can. You can go for as complex or as simple an aesthetic as you want with the Decorative Rustic Wreath with Burlap and Vine Accents by Darice.


Pros

  • Made with burlap ribbon and vine accents
  • Highly customizable
  • Accentuates your Christmas decorations


Cons

  • is too large to use on windows
  • Some customers found the packaging poorly done


When it comes to Christmas wreaths, nothing gets better than a beautiful and green-colored burlap wreath. Sometimes, sticking to the classics is all you need. If you do not want to go for something that uses artificial plastics and other synthetic decorations, the Green Burlap Round Wreath for Christmas by VHC Brands is perfect.

VHC Brands Solid Color Textured Jute Farmhouse Christmas...
  • Single fabric
  • Loom woven, machine stitched, hand-wrapped

Imagine getting the same aesthetic as those nature-centric Christmas decoration wreaths without the use of any plastic. That is what the Green Burlap Round Wreath for Christmas by VHC Brands offers you. This simple yet elegantly designed wreath is a highly customizable wreath that comes in a deep green color that resembles the color of pine needles.

This Christmas wreath also comes with a 12-inch thick 3-ply twine which allows you to easily hang it once you are done with designing this wreath and adding everything you want to so that your Christmas is warmer and cozier this year.

Aligning with the Christmas spirit aesthetic, you can adorn the Green Burlap Round Wreath for Christmas by VHC Brands with as many ornaments as you want to give it that extra bit of vibrancy to make the best of your Christmas celebrations this year.


Pros

  • Made with burlap
  • is a completely single-fabric loom
  • Accentuates your Christmas decorations


Cons

  • Quite pricey compared to other products
  • Some customers found the packaging poorly done


Who says that all your purchases have to be something that you need to put extra work into to hang as a part of your Christmas decorations? Sometimes, you just do not have the kind of time to add more decorations to the wreath. That is where the Burlap Wreath by Palmetto Moon Boutique comes in to make your life easier.

The Burlap Wreath by Palmetto Moon Boutique is a ready-to-use wreath designed and manufactured by Palmetto Moon Boutique. This is a handmade and incredibly ornate Christmas wreath that really has an ethereal quality to it.

The Burlap Wreath by Palmetto Moon Boutique is a mint-colored burlap wreath, which is intricately decorated with a lot of simple colored elements complete with a beautifully-knotted burlap ribbon flower to make it look even better. This wreath is so well made that you can hang it on your door straight from the box but the burlap material allows you to add as many decorations to it as you would want to make it look just right to hang on your door for this Christmas.

The Burlap Wreath by Palmetto Moon Boutique is an easy-to-use wreath that you just have to hang on your door straight out of its packaging.


Pros

  • Comes ready to use
  • Made with high-quality burlap fabric
  • Accentuates your Christmas Decorations


Cons

  • Expensive Christmas wreath
  • Some customers don’t like the lack of colors on the wreath


Are you tired of getting the same old green-colored wreaths for Christmas every year? We get that it is a good idea to stick with traditional color schemes, but you have to admit that it does kind of tend to get a little bit boring. If you’re looking to change things up a little bit, you might have the perfect solution with the Burlap Pumpkin Wreath by Accent Depot The Lakeside Collection.

The Lakeside Collection Harvest Gatherings Burlap Pumpkin...
  • Vibrant autumn colors! Looks great all season long Details:...

The Burlap Pumpkin Wreath by Accent Depot The Lakeside Collection is a burlap wreath that has that distinctive autumn leaf color, which has a shade almost like it’s made from pumpkin essence itself. This beauty is a vibrant wreath that you do not have to do much to make even better.

Simply using the Burlap Pumpkin Wreath by Accent Depot The Lakeside Collection as it comes out of the package is enough. But if you want, you can adorn it with ornaments to give it a splash of different colors to make your door even more welcoming during this Christmas season. 

This is definitely one of our top choices when it comes to Christmas decorations since it allows us to take our Christmas decorations out of the norm. you can even use this as a centerpiece for your overall Christmas decorations and hang it inside the house along with other decorations to get that extra special look this Christmas.


Pros

  • Made with premium quality burlap fabric
  • Has a very vibrant color scheme
  • Accentuates your Christmas decorations and stands out


Cons

  • Might be a little too brightly colored
  • Some customers found the color scheme that does not seem Christmas like


Are you looking for a burlap wreath to adorn your windows or your door this holiday season that has a more somber look? If you are, then Burton & Burton might have made just the perfect thing for you. Something that is neither too boring nor too flashy, their Brown and Beige Plaid Wreath is ideal.

The Brown and Beige Plaid Wreath by Burton & Burton has a neutral color scheme, which is a mix of both brown and beige-colored burlap ribbons with embellishments of white-colored lace intricately worked into the ribbons. The pine needles composed within the whole burlap ribbon wreath make for a look that is both somber and Christmas-esque at the same time. 

The Brown and Beige Plaid Wreath by Burton & Burton has a strong foam housing that allows you to add as many ornamental elements to it as you want to create a look that will suit your needs this Christmas season. Whether you are going for a display on the door, the walls inside your home or in the windows, the Brown and Beige Plaid Wreath by Burton & Burton is a special product that will not disappoint you.


Pros

  • Made with natural neutral shades
  • Easily customizable
  • Durable foam body


Cons

  • It is a lot more delicate than other models
  • Some customers found the wreath to be boring


While you might find this entry on the list a bit odd, Easter Wreath is a company that makes wreaths for use on Christmas, but that does not mean you cannot take advantage of them and utilize them as a part of your Christmas celebrations, right?

For those of you who have a sense of adventure and a little willingness to do a bit of DIY, the Speckled Easter Eggs Burlap Wreath by Easter Wreath makes for a pretty fantastic Christmas wreath. Made using burlap and foam, the Speckled Easter Eggs Burlap Wreath by Easter Wreath features a string for easy hanging and has a host of different pale-colored eggs adorning it.

If you take the time out and paint the eggs on the Speckled Easter Eggs Burlap Wreath by Easter Wreath based on a Christmas theme, you will get a unique and incredibly beautiful wreath for Christmas this year, which everyone will fall in love with. You can even leave the eggs unpainted and choose to decorate it with different colored ribbons for that warm and vibrant look so that you can reuse this wreath when the Easter holidays arrive. What more could you ask for?

Get your whole family involved and get a Speckled Easter Eggs Burlap Wreath by Easter Wreath to make your Christmas a lot cozier and warmer.


Pros

  • Made with high-quality burlap
  • Features an easy-to-use string
  • Allows you to be more creative with your decorations this year


Cons

  • Not meant to be used for Christmas
  • Some customers found the packaging poorly done


If you want to make the most of your Christmas decorations and take advantage of two of the most popular Christmas wreath trends, you might want to consider getting the Black and Natural Chevron Burlap Wreath by Simply Blessed Gifts.

The Black and Natural Chevron Burlap Wreath by Simply Blessed Gifts is actually a brilliantly designed Christmas decoration wreath. Manufactured using the most popular wreath materials right now: Burlap and Chevron, the Black and Natural Chevron Burlap Wreath by Simply Blessed Gifts has an intricate design that gives it a completely different aesthetic than what you are used to. You can use the Christmas wreath and hang it up straight as it is from the box or decorate it further to create a more vibrant and colorful look this Christmas. The choice is up to you but however you choose to go about it, one thing is guaranteed – this will make one of the loveliest parts of your home’s Christmas decorations this year. 

Both the chevron and the burlap are beautifully interwoven into the Black and Natural Chevron Burlap Wreath by Simply Blessed Gifts to make a beautiful wreath that is just perfect to make your Christmas warmer and cozier this year.


Pros

  • Made with burlap and chevron
  • Is an important Christmas symbol
  • Accentuates your Christmas Decorations


Cons

  • You need to Scotchguard the wreath
  • Some customers found the packaging poorly done


Final Thoughts

If you have been reusing old Christmas decorations every year, you must probably be surprised to know about the different kinds of options for you to choose from.

We hope that the reviews of all the best burlap ribbons and burlap wreaths will give you quite a few ideas on how to plan your home’s Christmas decorations this year.

Related Articles

14 Awe-Inspiring Ceramic Christmas Decorations

19 Christmas Tree Paper Decorations for a Delicate Look

14 Best Christmas Tree Lights to Consider This Year

Learn How to Store Icicle Lights After Christmas

17 Burlap Ribbon & Wreath Options

Want to fulfill your dream of having a garden with perfectly leveled grass and uniform bushes?

You must have already come across the Worx GT 3.0 during your online research on gardening tools. But, are you absolutely sure that it would be the right one to go for?

Well, to answer that question, a lot of facets of the product must be considered, including its faults. But we are confident that you will be impressed with the great features it offers. We can say that because we’ve used it extensively for a couple of months.


In this article, we bring to you a review of this multi-tool based on our experience, which will help you form a better idea about the product.

So, without any further ado, let’s get started.

WORX GT 3.0 Trimmer Edger Review

Sale
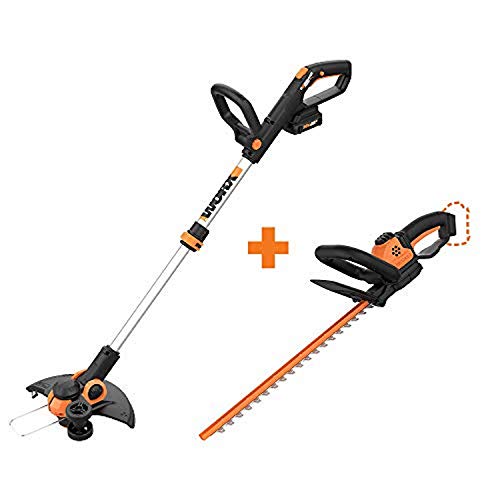
WORX WG163 GT 3.0 20V PowerShare 12" Cordless String Trimmer...
  • [KIT INCLUDES] WORX Power Share Grass Trimmer and Hedge...
  • [TRIMMER & EDGER 2-in-1] Easily converts from a string...

In case you didn’t know, Worx is one of the most popular brands when it comes to garden and lawn equipment. The brand had initially come up with Worx GT2.0, an award-winning grass trimmer and edger with exceptional versatility, precision, and power.

This Worx GT3.0 is its successor, with a number of improved features and enhancements that make it the best solution for your gardening needs. So, let’s take a look at all the benefits and features that the product offers.

  1. Easy Multi-use Tool

With this tool, we got a grass edger, a trimmer, and a mini-mower. It is a unique system that incorporates the functionalities of all these three tools. Here, we briefly talk about each of these three modes of functioning:

  • Trimming

We loved how the multi-use tool converted between the three modes without using any additional tools. Trimming is the first mode that operates by adjusting the position of the handle. For initiating a trimming action, we just stood in front of the bush that we wanted to polish up and worked our way along. One thing you have to make sure is that the device stays in the right position.

  • Edging

For going to the edging mode from trimming, we just had to adjust the angle of the handle pivoting at the base. We held it steady and continued to edge along the perimeter of the garden and other obstacles in between.

Furthermore, it was very easy to use this mode. In fact, with our previous edgers, it was not at all a smooth process. So, it is safe to say that this product has really been a blessing in disguise!

  • Mowing

Mowing your lawn with those regular weed eaters can be a tough task. But thanks to its 90 degrees rotating head, it becomes quite easy to reach spots where the regular ones won’t. Some of these spots include those under the ground-level deck or under low-hanging trees.

It has sturdy wheels attached so that you can adjust the handle pivot once more and move it in the same way as a mower. Meanwhile, you can be sure that the wheels guide and keep the cut line steady.

  1. Handle Design and Adjustability

When it comes to gardening equipment, having an efficient design is of prime importance. If the design makes it difficult to handle, you wouldn’t be able to work with it in the right way.

But in the case of this product, even the design has been crafted with much effort from the makers. It has a two-hand gripping system, which you can also hold using one hand depending on the application. For better comfort, there is extra cushioning on the grips which are also slip-proof.

What impressed us the most was the handle, which could be adjusted to any height that we desired. This edger, mini-mower, and trimmer system feature seven lock height modifications. Besides, you can also move the auxiliary handle to multiple positions. As a result, it becomes equally convenient for tall as well as short users.

Furthermore, its cordless trimming mode is super easy to handle. You can forget about the hazard of using heavy, gas-powered trimmers or the tripping problem with the electric variants.

  1. Powerful Battery System

Ultimately, what you want from a gardening tool is the right performance that makes your garden just how you want it. For achieving this, you need a powerful battery system, which most trimmers and edgers lack.

But the Worx GT3.0 is a complete exception to this trend, as it features a battery capacity twice that of its predecessor. Its cutting system functions with the latest Max-Lithium batteries of high density. Hence, you wouldn’t have any problems even after using it regularly for a full season.

Besides, these Li-ion batteries can be recharged. We could trim a medium-sized garden twice by one charge of the product, which was far better compared to our previous trimmers. Needless to say, we were overjoyed.

Note that the batteries come uncharged when you purchase the tool. However, after the first charge which takes a maximum of 12 hours, the batteries only need about 3 hours of recharging.

  1. Cutting System

This is something that many of you might not be aware of, but it plays a vital role in making a weed cutter or trimmer truly successful. A trimmer must have a quality cutting system for ensuring that your cuts are as precise as they can be.

You will find different kinds of trimmers adorning difficult cutting systems. While some are average in performance and suited for light to moderate work, others are meant for heavy-duty work such as cutting woody plants.

This multi-tool from Worx has a string-cutting system, which is suitable for moderate yard work. The system works on the principle of centrifugal force to deliver seamless trimming. It consists of a string that spins fast enough and is held by a rotating spool by centrifugal force. A faster rotational speed would make the string stiffer.

Added to this, the Worx GT3 features a standard round trimmer line which cuts the grass more than other vegetation. This line has a diameter of around 0.065 inches, which is suitable enough for light to moderate trimming.

  1. Cordless Ability

Using electric trimmers or edgers involves the use of extension cords and that’s where all the hassles lie. You must have a cord that is long enough for the trimmer or edger to reach the grass lawn. Also, while moving them around the extension cord may get pulled out now and then.

But with this all-in-one tool, you are relieved of all these hassles as it is completely cordless. You can take it with you wherever you need it, without worrying about any extension cords. As a result, spots that you earlier ignored can be worked on easily.

  1. Lightweight

Moving about in your garden with a heavy tool can be tiring. This is the case with most of the ordinary trimmers and edgers available. But not with the GT3.0, as it weighs less than 6 lbs. You can therefore comfortably move it from place to place. Even lifting it high for trimming some of the hedges won’t be a problem.

What Could’ve Been Better?

Although the product is undoubtedly among the best gardening equipment available, it has some minor faults. However, this doesn't make much difference in its efficiency.

Firstly, the diameter of the round trimmer line sometimes makes it difficult to cut the tougher bushes or grass. Hence its capability is limited to moderate trimming. Also, while attempting to cut the tougher weeds, the trimmer line becomes prone to snap. But this problem is rectified to some extent with its reinforced nylon material which offers extra strength and resistance.

Apart from this, draining out the battery of this tool when the charge is finished may lead to problems in its functioning. Usually, the battery automatically shuts off when the charge reaches a certain point.

But if you try to squeeze out that remaining charge as well, it might kill the life of the battery. So be careful to take it off the tool and recharge it. You can also purchase some spare batteries. They come at an affordable price.


Pros

  • Multi-use tool with three modes
  • The handle can be adjusted to any height
  • The convenient design makes it easy to handle
  • Rechargeable lithium battery
  • Light weight makes it easy to carry around


Cons

  • Round trimmer line not suitable for tough grass
  • Draining out the battery may affect its functioning


Young man work with string trimmer cutting the grass in the garden. Worx GT3 Buyer's Guide

Worx GT3 Buyer's Guide

Choosing quality tools for gardening purposes is important if you really want your garden to be in the right shape. Trimming, edging, and mowing are some of the key practices that help to maintain the health of your lawn or garden weeds.

Hence, it is important to have a clear idea about what your needs and preferences are. Here are a few points that you should consider:

  1. Reaching The Hard Areas

It is you who knows best about your garden and not anyone else. Your yard might have a lot of small and hard-to-reach places, and obtrusions like fences or decks. In such cases, ordinary edgers or trimmers won’t be too useful and you need to go for an option like the Worx GT3.0. Note that even a large mower may not provide you with close-range cuts along rocks and stairs.

  1. Bushes Or Hedges That Grow Fast

All plants don’t have the same rate of growth. As such, some of your bushes or hedges may grow faster than others. To maintain uniformity in the garden, such bushes need frequent trimming. If you have several such bushes in your garden, it is best to go for a tool like the Worx. On the other hand, if you have a basic lawn that needs little polishing, this might not be the right tool.

  1. Durability

Purchasing a gardening tool can well be regarded as a long-term investment. Naturally, durability is a must quality. Ordinary edgers or trimmers might be made of cheap material that might not be as long-lasting as you want them to be. Hence it is essential to check the material from which the equipment is made. In the case of Worx GT3.0, high-quality materials provide the tool with the durability you desire.

Using The Worx GT3.0

After you bring the multi-tool home, some simple steps have to be followed to make it ready for use and to store it afterward. This product comes pre-assembled and just requires a few installations using a screwdriver and some screw pins. Here’s is a brief list of the steps involved: 

  1. Charging

Begin by charging the battery using the charging system provided. Note that the battery must be fully charged before making it ready for use.

  1. Assembling the Product

Before you use the product for the first time, attach the safety guard on the trimmer. To do this, unscrew the pin on the bottom portion of the guard and gently place it onto the rear side of the trimmer. Keep pushing the guard carefully until you hear it snap into place. Then fasten the guard with the screw pin.

  1. Placing the Wheel

This would vary depending on how you wish to use the three-in-one system. For using the edger mode, you need to attach the wheels to the side of the trimmer. Slide the wheels over the metal plate on that side.

For using the mini-mower feature, the wheels must be fastened to the back of the safety guard. Do this by sliding the wheels vertically on the metal plate below the safety guard till they lock perfectly.

  1. Storage

This product is very adjustable. Hence you can store it just anywhere you want to. You can keep it hanging on your garden shed wall or any other small space. All you need to do is adjust the tool to its smallest size.

All That’s Included In The Box

After you purchase the product, here are the things you’ll get in the box:

  • The Worx GT 2.0 multi-use tool
  • One miniature shaft which adjusts between the modes
  • One or two 20v or 32v MAX Lithium-ion battery
  • One standard three-five hour charger or one rapid charger
  • Three spools
  • Instruction manual
  • Warranty

Price, Warranty, And Availability

Most of the time, many of you might think that going for a high-quality product will be cost-intensive. Honestly saying, it does hold true for several cases, but not all! And surprisingly, the Worx GT3.0 falls among those few products. It is quite fairly priced in comparison to other edgers and trimmers of similar caliber.

As for its availability, it can be readily found in your local supply store or can be purchased online. If you go for the latter option, ordering it from the Worx website or an authoritative site like Amazon would be better. An added advantage of buying from the Worx website is that they allow you to pay the amount in three installments.

This product also comes along with a two-year warranty that is extendable up to three years. If any malfunctions occur or you are not satisfied, there is a 30-day money-back guarantee as well.

A municipal worker in an lawn mower mows fresh, green grass on the lawn near a residential building. WORX GT3.0 Verdict

WORX GT3.0 Verdict

With this, we come to the end of the review and we hope you have found it helpful.

The Worx GT3.0 multi-use tool is something you should seriously think about if you need multiple tools to maintain your garden. It will help you consolidate your trimming, mowing, and edging needs into a single tool.

Added to this, its advanced features and compact design help you achieve the best possible results while saving room in your garden shed. And the best part is that all these benefits come at an affordable price!

So, go ahead and try out this three-in-one tool. Let us know about your experience in the comments section. We’ll be glad to know about it.

Till next time, Adios!

Related Articles

The 5 Best Lawn Mowers for St Augustine Grass

5 Best Gas Hedge Trimmers

3 Best Polymeric Sand

5 Best Paver Sealers for a Wet Look of Epic Proportions

8 Best Dump Carts for Lawn Tractors & ATVs

4 Best Walk Behind Brush Cutter

3 Best Yard Hydrant

5 Best Stick Edger

7 Best Shoes for Cutting Grass Comfortably

9 Best Small Hedge Trimmer

9 Best Small Hedge Trimmer

7 Best 21-inch Mulching Blade

13 Best Trimmer Lines

6 Best Corded Electric String Trimmer

The bedroom is one of the most important parts of our home. Almost half of our lives is spent sleeping so a certain degree of importance must be given to this room when it comes to its organization and design. Lighting, storage, ambiance, color scheme, furniture design all come together and merge into what should be a relaxing, comfortable environment meant to inspire and offer the most needed rest. We have previously presented several ideas on how to enlarge your bedroom or on how to decorate small bedrooms :30 Small Bedroom Interior Designs Created to Enlarge Your Space 5 Easy Bedroom Makeover Design Ideas, Beautiful Creative Small Bedroom Design Ideas Collection.

So today we have decided to present you some of the most beautiful, luxurious, opulent bedroom collection from all around the world in the hope that you will feel more inspired in decorating your own personal oasis of relaxation.

World's Most Luxurious Bedrooms

1.Taj Mahal Palace, Mumbai, India

Opulence is the best  word to describe this enchanting 1,800 square feet suite which combines modern technology with elegant decor. Crystal chandeliers, golden marble floors, dark colored wooden furniture, all combine to give this hotel suite a luxurious apparel worthy of its guests. Noteworthy hotel guests include The Beatles, Jacqueline Kennedy Onassis, Bill and Hillary Clinton, and President Barack Obama.

Taj Mahal Palace, Mumbai, India
Taj Mahal Palace, Mumbai, India bedroom

Taj Mahal Palace

2. Abu Camp, Okavango Delta, Botswana

This particular bedroom is among this list of world's most luxurious bedrooms due to its special location. Although it was built to resemble a tent it hosts all the luxuries of a modern hotel suite but with extraordinary panoramic view of the African vegetation and its beautiful elephants. Decorated with natural materials such as zebra rugs and strong airy cotton walls for a relaxed atmosphere  this special bedroom is a perfect choice for those of you who can enjoy the wonders the African continent has to offer.

Abu Camp, Okavango Delta, Botswana

Abu Camp

3. The Opposite House, Beijing

Number 3 on our luxurious bedrooms tour is this 5,000-square-foot two-story penthouse from which you can admire China's busy capital. The overall design suits its location, offering an airy relaxed environment with modern touches merged with traditional Chinese decor.

The Opposite House, Beijing

 The Opposite House

4. W Retreat & Spa, Vieques Island, Puerto Rico

If you are into the Caribbean vibe, the W Retreat & Spa is the perfect place for you and..you pet. Here animals are being very well pampered in an exotic ambiance surrounded by exquisite furniture combined with eclectic art pieces and calming color schemes. The perfect place for relaxation!

W Retreat & Spa, Vieques Island, Puerto Rico

W Retreat & Spa, Vieques Island

5. Little Olarro, Loita Hills, Kenya

If you want to experience a change of pace and culture, visit Little Olarro in Kenya. Here you will have the authentic African experience in a traditional decor made of lofty rough-hewn wood-beamed ceilings, mud walls and a woven grass roof, all combined into an elegant creation.

Little Olarro, Loita Hills, Kenya

Olarro Lodge

6. The Nines Hotel, Portland, Oregon

Ok, so Portland Oregon does not seem to be a perfect destination for your holiday bu just in case you stop by here is a beautiful hotel which offers its guest the perfect mix of art deco and modern design. with a touch of turquoise as a statement color.Fine high quality fabrics, a tasteful decor and a very very comfortable bed make the Nines Hotel in Portland a great stop along your holiday journey.

The Nines Hotel, Portland, Oregon

The Nines Hotel

7. Abu Camp, Okavango Delta, Botswana

With panoramic view of the Okavango Delta, the world's largest inland delta, this tent in Abu Camp offers you the unique experience of watching  more than 400 species of bird, plus giraffe, wildebeest, antelope and zebra from your own private bedroom. And although it is a tent, the decor and abidance screams luxury and good taste with hardwood floors, leather furnishings and a view to die for.

Abu Camp, Okavango Delta, Botswana

 Abu Camp

8. Pashan Garh, Panna National Park, India

Another incredible experience can be lived at the Panna National Park India where you can have the luxury of having your very own stone cottage with Indian decor influences and admire the surrounding jungle and observe even the Bengal Tiger from the comfort of your bed. Strong contrasts of colors and materials offer this private retreat an elegant vibe perfect for an exotic adventure.

Pashan Garh, Panna National Park, India

Pashan Garh, Taj Safaris

9. Zungulila Bushcamp, South Luangwa National Park, Zambia

After a long day prowling the savanna on one of Luangwa's famous guided walking safaris relax into this private tent next to the Kapamba River . Available only from June to January, sleep into this exotic bedroom decorated with a baldaqin bed and eclectic furniture, whilst admire the animals attracted by the river's clean water.

Zungulila Bushcamp, South Luangwa National Park, Zambia

Zungulila Bushcamp

10. Taj Lake Palace, Udaipur, India

Surnamed Luster of the Moon, this Indian suite is the most impressive of Maharana Jagat Singh II's 250-year-old pleasure palace. Built in 1746, this impressive location decorated with ceiling frescoes, marble carvings, and a rich luxurious color scheme situated on an island in India's Lake Pichola,  was used as Octopussy's lair in the 1983 James Bond film and has long been a destination for European royalty and American celebrities.

Taj Lake Palace, Udaipur, India

Taj Lake Palace

From Africa to India, these 10 beautiful luxurious bedrooms do not probably pop to mind the second you think of luxurious destinations. But for the ones eager for adventure and for something new and out of the ordinary these locations offer more than you can imagine in mesmerizing decor and incredible surroundings. Enjoy!

Related Articles

12 Ways To Put Your Bedroom Corner Space To Good Use

29 Brilliant Easy to Build DIY Platform Bed

21 Mindbogglingly Beautiful Fairy Tale Bedrooms for Kids

21 Super Small Nightstands Ready to Fit in Petite Bedrooms

37 Simply Spectacular Tree Bed Designs to Pursue

Recycled Pallet Bed Frames – DIY Pallet Collection

15 Creative Small Beds Ideas For Small Spaces

30 Small Bedroom Interior Designs Created to Enlargen Your Space

37 Smart DIY Hanging Bed Tutorials and Ideas to Do

Bedroom Christmas Lights Ideas For A Cozy Atmosphere

32 Dreamy Bedroom Designs For Your Little Princess

100 Inexpensive DIY Headboard Ideas for Your Bedroom Design

47 Stylish Floating Bed Design Ideas

53 Incredible Hanging Beds to Float in Peace

33 Epic Navy Blue Bedroom Design Ideas to Inspire You

6 Best Vacuum Cleaners for Mattress  

33 Simply Brilliant Cheap DIY Nightstand Ideas

Yes, indeed, having wood in bathrooms is today considered a big no-no. Humidity, splashing water all around could damage and warp the natural essence in the long run indeed; is this true today or have we found solutions to these problems? More and more treatments surface each day, professionals today argue hat polyurethane coatings and pre-finished hardwood floors are far more resilient to water damage than they were years back, there are even parties claiming that hardwood flooring can easily become waterproof.

Does this sounds like a fairy tale?

It does indeed, mainly because hardwood floors still require great caution and professional hardwood manufacturers will always prompt caution when it comes to wet areas.

Caution does not translate into a big no-no though!

The oil-based polyurethane sealers and careful maintenance is aimed at sealing cracks between floor boards can bring wooden surfaces into the bathroom. No professional working with wood would call it waterproof regardless of their experience with sealants but many will call it water-resistant if the right treatments are used; simple water puddles for example must be mopped and dried in a couple of minutes if you want to actually claim that moisture-resistant warranty!

So we have options but we always have to keep in mind that with great power, comes great responsibility, a few things to keep in mind if you want to install wood in your bathrooms:

  • Hardwood floors, wooden walls in the bathroom and even vanity pieces will require express maintenance and possibly a yearly application of finish designed for wet environments
  • Moisture-resistant warranties are a thing yet manufacturers often challenge the claims if the products are not properly maintained and installed; also keep in mind that the moisture-resistant warranty does not translate into wood bathroom warranty, not all products that come with this warranty are fit for bathrooms, always consult with the specialists on this small but important detail
  • You will have to be far more careful in a bathroom that contains wood than in a regular one, spilled and splashed water must be addressed rapidly even if you are using the greatest waterproof treatments

To these treatments and these special maintenance thoughts, one could add robust exhaust fans able to dry a bathroom quickly and reliably, removing moisture, one of the toughest concerns when it comes to wood in the bathroom. Needless to say, the amount of care required makes this choice a bit less fit for children and people who see the bathtub as a pool yet for a small powder room or guest bathroom it is well worth the effort.

Naturally, for some people all the aesthetic benefits are worth the risk, if you are ready to put in the maintenance work, every room in the house can boost this cozy, warm, splendid material. The clinical, cold look of most bathrooms can go out the window with its moisture rapidly when wood comes in, imagine the options in terms of texture, color, imagine how personal, warm, and delicate your bathroom would look with a wooden wall or hardwood floors!

In terms of style and interior design is well worth it reason for which, extraordinarily beautiful project follow categorized in five big chunks, we invite you to browse our gallery and leave your feedback in the comment section below!

Wood in Bathroom Design Ideas 

Wooden Floors for Bathrooms

Hardwood floors are a feature sought by many homeowners, a must-have greatly appreciated able to change a room rapidly, one that starts to gain popularity in the bathroom too these days. The floors are of-course the most difficult place in which you can bring wood in the bathroom but is also the most popular by far.

A very important step is to fill the cracks between the boards, after that is secured you will need several oil-based polyurethane coats to seal the deal.

Keep in mind that even after this point you still have to apply a yearly treatment on wood as well as great care daily, mopping potential puddles and splashes as soon as possible.

Always pay attention to the top coat of the finish and test it out when you have doubts, spill a couple of drops of water on the surface and observe the process, if the beads remains fully formed on top, you are good; if it sinks, you will need to add another coat of polyurethane as soon as possible.

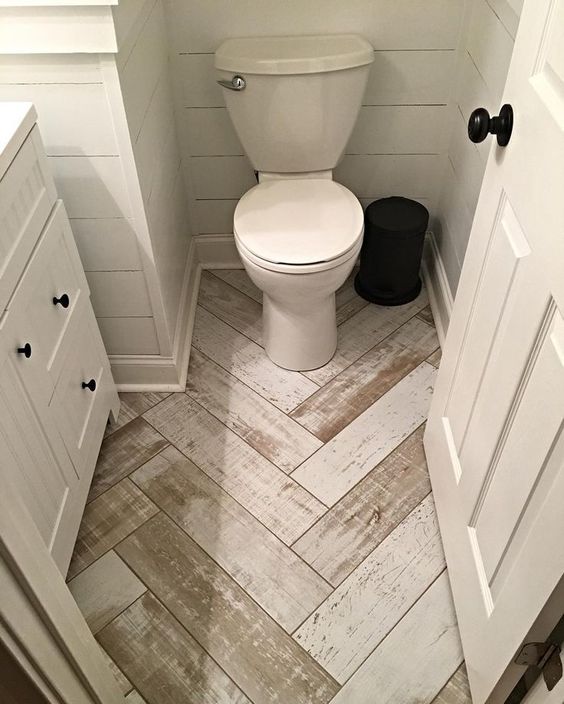
1. Use White Withered Wooden Flooring

1. Use White Withered Wooden Flooring

A simple and chic finish for the bathroom, it emphasis the feeling of space, brings coziness and has a touch of that farmhouse that we often search whilst looking modern.

Image via Instagram

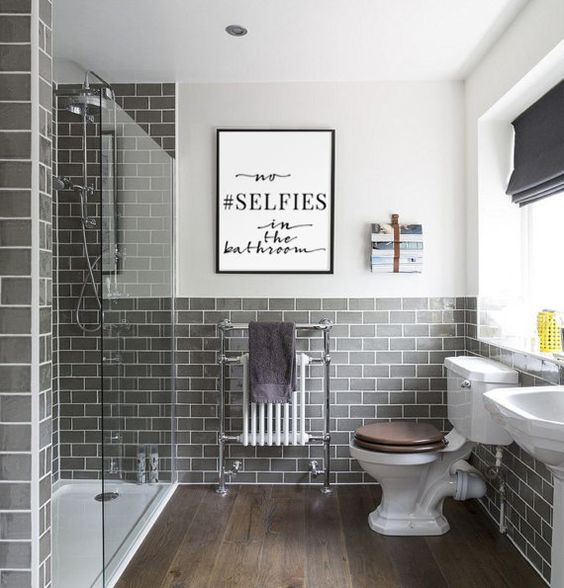
2. Wooden Flooring Paired With Gray and White

2. Wooden Flooring Paired With Gray and White

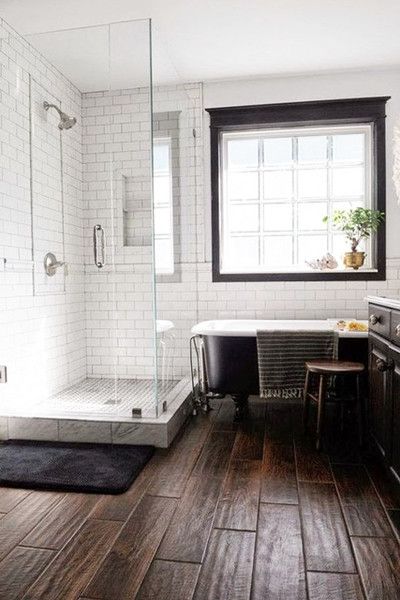
Yes, a timeless and fail-proof color scheme can be brought into the bathroom and it will transform it epicly! Notice the size of the window and the openness of the shower cabin and you immediately realize that this ordinary bathroom; gaze next at the radiator and piping  and the leather strap holding magazines to surge inspiration from an interior with great attention to details.

Image via Etsy

3. Wooden Flooring in Bathroom Flooded by Light

3. Wooden Flooring in Bathroom Flooded by Light

There are a few things in this world which would suffer from light, the bathroom above is certainly not one of them; note the airiness and the amount of light, how do you see this bathroom?

Image via lonny.com

4. Herringbone Patterned Wooden Floor for Bathrooms

4. Herringbone Patterned Wooden Floor for Bathrooms

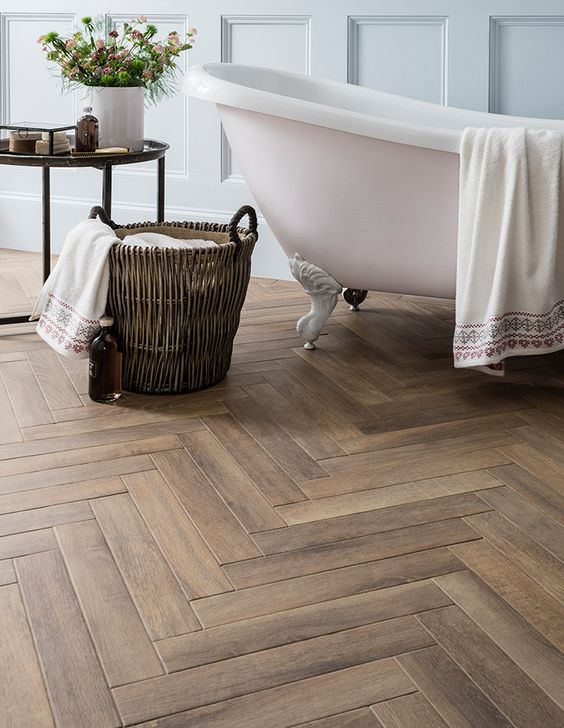
Simple, natural look bringing in the coziness and warmth in the elegantly-sophisticated herringbone pattern that we all love.

Image via toppstiles.co.uk

5. Green Mint, White and Wooden Floors

5. Green Mint, White and Wooden Floors

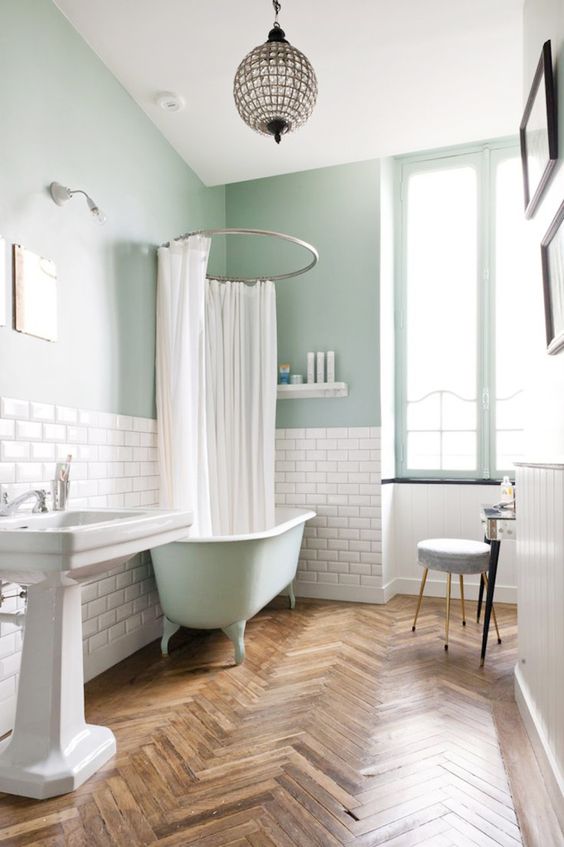
A spectacular chromatic balance enjoying a really sunny spatiality; Scandinavian design enthusiast will surely appreciate this interior!

Image via glitterinc.com

6. Elegance and Wooden Floored Bathroom

6. Elegance and Wooden Floored Bathroom

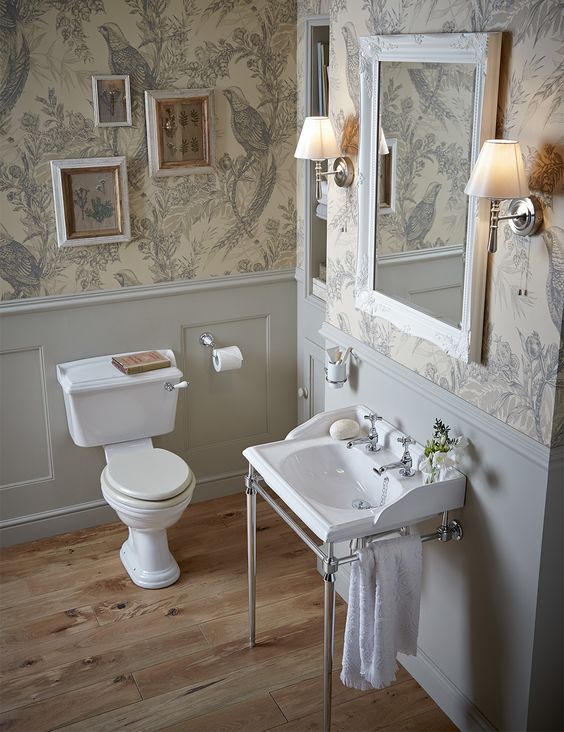
A bathroom design with classic tendencies can be greatly emphasized through the naturalness brought by wooden floors.

Image via Pinterest

7. Large Wooden Planks Floor the Bathroom

7. Large Wooden Planks Floor the Bathroom

When you have wooden floors in your home by default it is your duty to refresh them; these days such features are rare in the world of plastic, one ought to take advantage of them.

Image via jasoningram.co.uk

8. White Brick, Wooden Ceiling and Wooden Floored Bathroom

8. White Brick, Wooden Ceiling and Wooden Floored Bathroom

A sublime recipe for success is the white wall trapped between wooden floors and painted bathroom ceilings yet when the white wall is on textured brick, everything changes, sheer beauty, at its best!

Image via Imgur

9. All Wood Cabin Bathroom

9. All Wood Cabin Bathroom

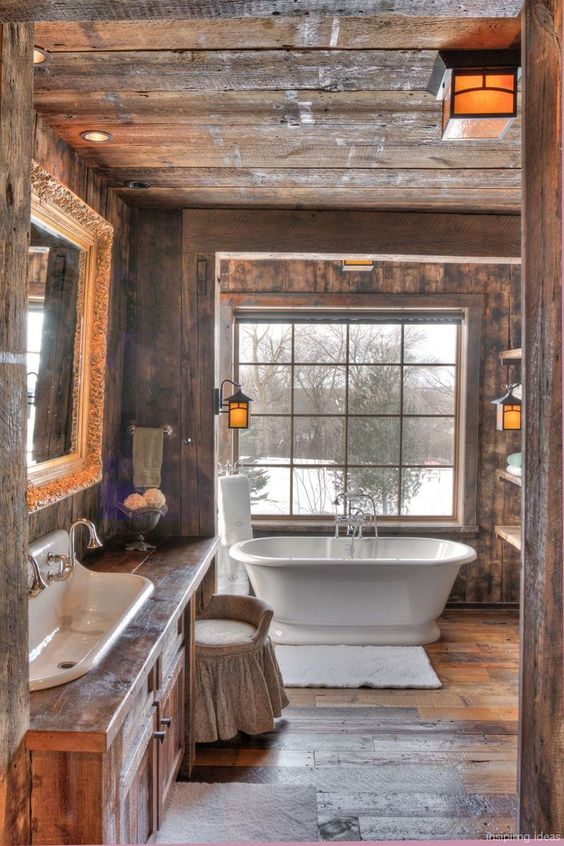
Elegance in a wooden chalet, one stand alone bathtub centered to an immense windows allows the user to enjoy expansive snowy landscapes nestled a cozy an warm shelter. Does it get better than this?

Image via Pinterest

Wooden Countertops

A rich texture brought in the bathroom, under the sink, to an area with which you interact daily, can you imagine the impact?

Moreover, let's imagine that this is reclaimed wood, aged, with memory and background; it can even be fresh wood from the family tree that felt in the last storm, the piece immediately gains far more importance that it already had: a rich texture of sublime beauty that brings in coziness and warmth, sounds amazing right?

It does, reason for which you need to do it and you need to make sure you take great care of it! Tung oil is an option, a naturally-derived oil used waterproof ship hulls; if we were to recommend a brand rapidly, Waterlox would be the top choice. You can also use Rubio Monocoat, a product friendly to environment that brings both color and protection in a single layer, basically a mix of wax, linseed oil and catalytic driers aimed to protect from stains. If you really want to bring in the big guns, you need epoxy you need epoxy, the most durable, most expensive treatment for wood, a plastic-like resin most commonly known for coating surfboards. The downside of epoxy is that it comes with a plastic look, it changes the overall appearance quite a bit but it also makes it impossible to penetrate in theory.

Sounds good?

Let's bring that wooden counter-top into the bathroom then!

10. Warmth in a Wood Carved Sink 

10. Warmth in a Wood Carved Sink 

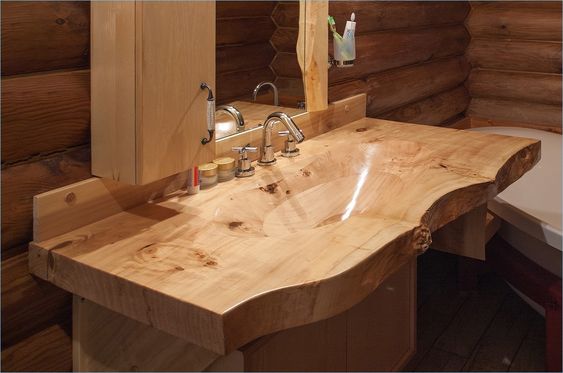
It may not be everyone's cup of tea but is is certainly spectacular and one can easily state that it is one of a kind. Notice how the wood shines and reflects the light heavily? It is the wood epoxy  wood epoxy protecting the natural material, a side effect of the finish.

Image via Pinterest

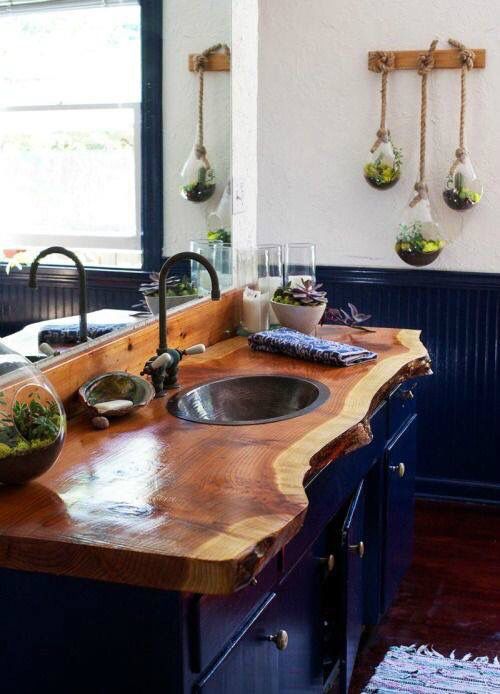
11. Living Edge Wood Nestling Metal Sink

11. Living Edge Wood Nestling Metal Sink

A rather simple and extraordinarily rewardful DIY project once you find the right piece of wood, a project that surely uplift your bathroom heavily and more importantly one that you can replace or change easier than wooden floors or walls; do note that floors are wood here as well but in the picture above they're heavily shadowed by the live slab.

Image via Pinterest

12. Double Living Counters 

12. Double Living Counters 

An extraordinary bathroom design stands above; two counters of sheer beauty sit in a rather plane and uninteresting bathroom perfectly, they are the key elements, nothing challenges them, everything is subdued to them; one could argue that it would be a bad move to add other interesting pieces to this scenario. As a result, this legendary scenario can become truly affordable if one would start hunting for the pieces of wood and save the budget for them from the ceramics and decorations that you should avoid in order to declutter.

Source Unknown

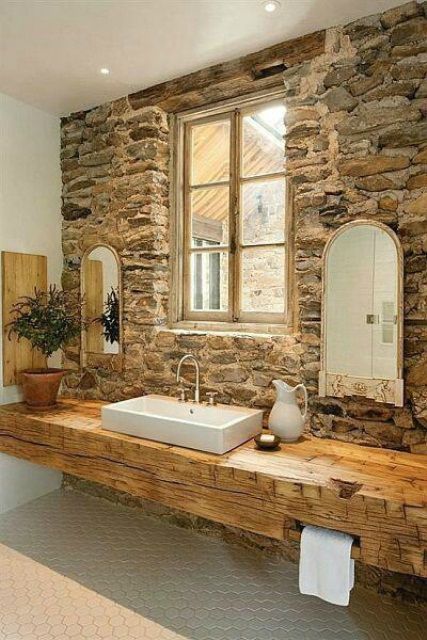
13. Wooden Beams Become Bathroom Counter

13. Wooden Beams Become Bathroom Counter

A bold, strong solution for that speaks of greatness just as much as it speaks of sensibility, coziness and warmth; a solution that become a sculptural focal point in their own by default but which at scale be supported in the gesture by other complementary textures, here, the rock wall and the window.

Image via Pinterest

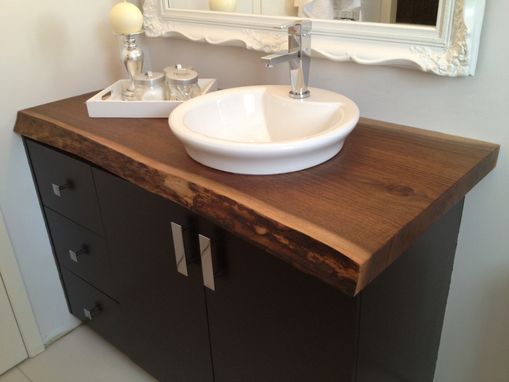
14. Wooden Counter on Regular Furniture

14. Wooden Counter on Regular Furniture

Small pieces of furniture can too receive the warm support of a wooden counter; here a sober vanity is topped with a splendid texture to spice things up. Note that the furniture piece is a clean black that puts the focus on the counter itself; in a small space, challenging the countertop fixture with a highly decorated vanity might defeat the purpose.

Image via custommade

15. Living Edge Counter & Rock-Sculpted Sink

15. Living Edge Counter & Rock-Sculpted Sink

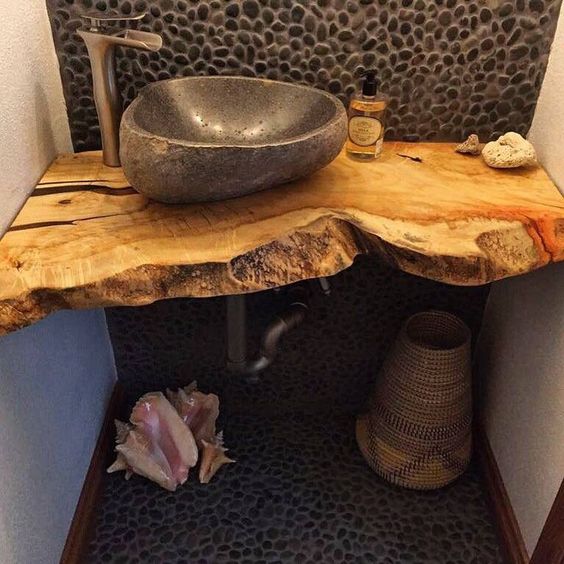
Nature nestled with in a bathroom, river rocks tailored on the floor and wall accent holding a splendid living edge that seems to move and breathe. On top, an immense boulder has been sculpted into a sink, a sculptural water faucets serves it.
Image via dekoration19.ml

16. Simple Wooden Counter Boosts a Timeless Design

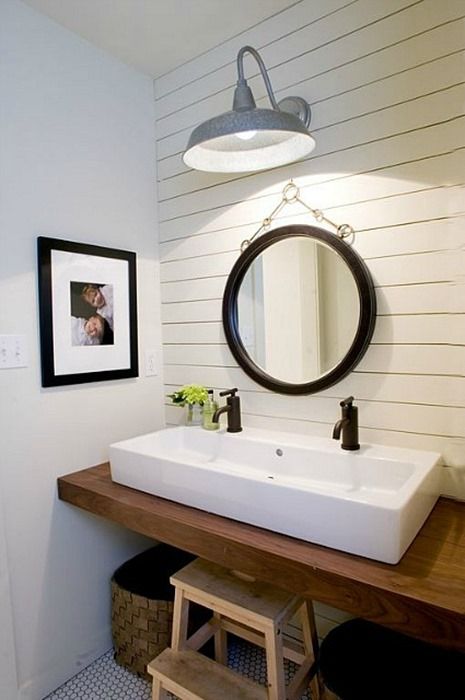
Modern, splendid interior carrying conservative elements into contemporaneity, notice the vintage look of the faucets and lighting fixture as well as the horizontal slats in the accent wall. All of them in a balance that does not put the wooden counter-top forward but it supports it beautifully and discreetly.


Image via Pinterest

17. Wood and White Elegant Bathroom

17. Wood and White Elegant Bathroom

Now what we have above is something else entirely.
Why, you might wonder?
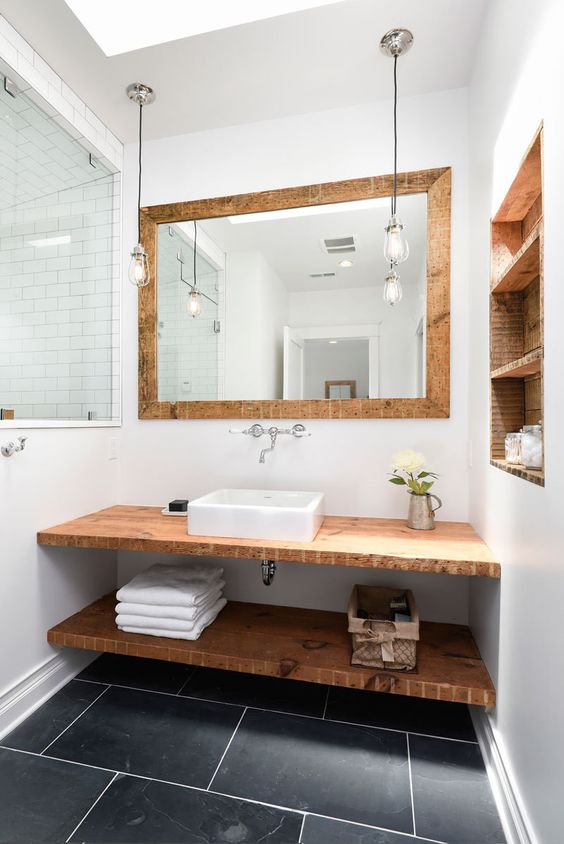
Simply put, a insanely simple white space flooded by light receives as focal points elements with very powerful, rustic feel, roughly finished wood abruptly enters the picture with a very natural warm feel; here the wood is not in disguise, his beautiful imperfections are present and greatly enhanced by the amount of light and attention they receive thanks to he lack of details around them.

Image via Pinterest

18. A Carpenter Bench Becomes Vanity

18. A Carpenter Bench Becomes Vanity

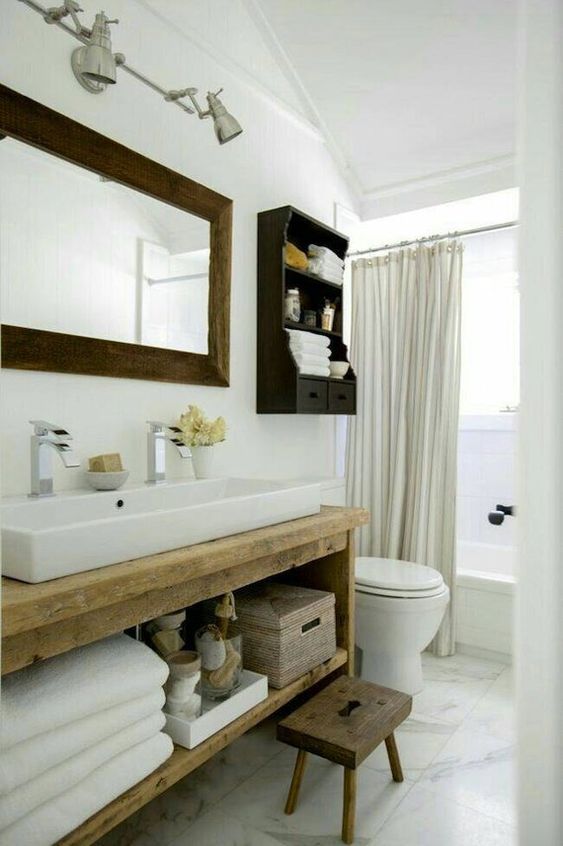
If you are not convinced yet, take a look at the adorable little stool and imagine how the owner's memories may be packed into these pieces, how with the support of these former utilitarian he or she built his or her career or how their relatives, friends did. Items that stand the time of time have a story to tell, you have the choice of continuing it or putting to rest.
What do you do?
Image via etsy

19. Salvaged Wood at Home

19. Salvaged Wood at Home

It is not for everyone but it is extraordinarily beautiful whether you like or not. A wooden surface is enriched in time and so was the one example above; if you feel like it's too rustic or too harsh, ask around, list it on Craglist, you will surely find people to cherish such pieces.
Image via Pinterest

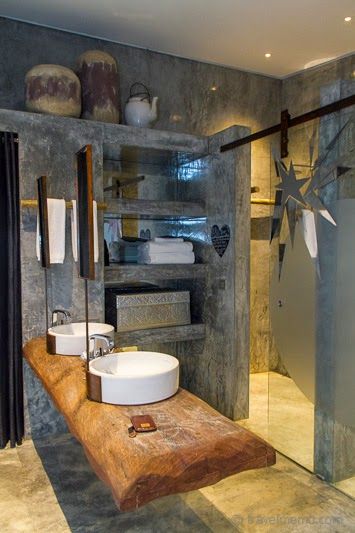
20. Suspended Wooden Counter Caries 2 Sinks

20. Suspended Wooden Counter Caries 2 Sinks

Might look unnatural, might look surreal but who could argue that they setting above is something else but beautiful?
If the harsh concrete feel of the surrounding bothers you, imagine the suspended ensemble in any other setting, complete black bathroom, complete white or two-three toned bathroom; would it affect its aesthetic values? One could argue that a less cluttered scenario in terms of texture would actually enhance the piece.
Image via Pinterest

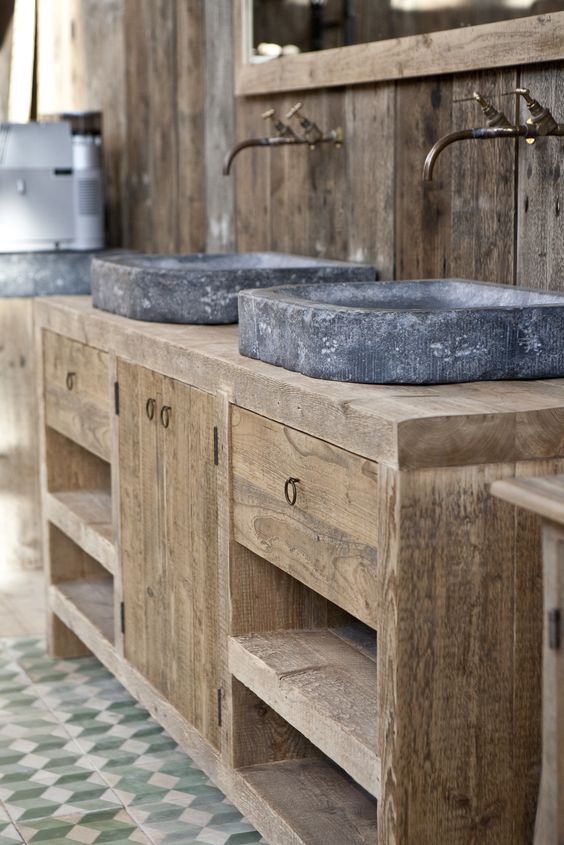
21. Sinks Sculpted in Stone Rest on Wood

21. Sinks Sculpted in Stone Rest on Wood

Image via Pinterest

Reclaimed Wood Vanity

Reclaimed wood or not, a wood vanity in the bathroom can be most sustainable way to bring in the cozy material if you are not certain yet that you can keep up with the maintenance of a hardwood floor. Using salvaged wood would certainly boost the aesthetics whilst keeping the costs down but any wood vanity would do as long as you love it.

The Achilles heel of the wooden vanity is often the area at the base of the sink which is in most cases in the shadow of the sink; this area becomes a bit gray though making it harder to see clearly each time if there is spillage. This should not stop you though. Simply pay attention and enjoy every moment, a wood vanity or counter are extraordinarily beautiful pieces that bring in a splendid farmhouse look that one cannot simply overlook.

22. DIY Rustic Vanity Made from Beams

22. DIY Rustic Vanity Made from Beams

While it looks rustic, note the surface can be made smooth at silk without affecting aesthetics. Open-shelving underneath is the usual go-to design option when it comes to such design projects but you can also fill the open shelving with boxes and containers that you find interesting.
Source Unknown

23. Modern Bathroom Features Wall

23. Modern Bathroom Features Wall
While the subtitle might sound odd, in here the wood is subdued to the sober ambiance, everything seems to be still, frozen, only the highly contained but extensive wood surfaces seem to bring in warmth to an otherwise cold setting. How do you see it?
Image via archilovers.com

24. Iron Window Mirrors Bathroom

24. Iron Window Mirrors Bathroom
he wooden presence here is notable but the interior is buit around the old window frame which is now a mirror, the splendid metal piece enhances the bathroom through its presence, the rest of the materials, while important, are subdued. Note how the sink joints the wooden counter.
Source Unknown

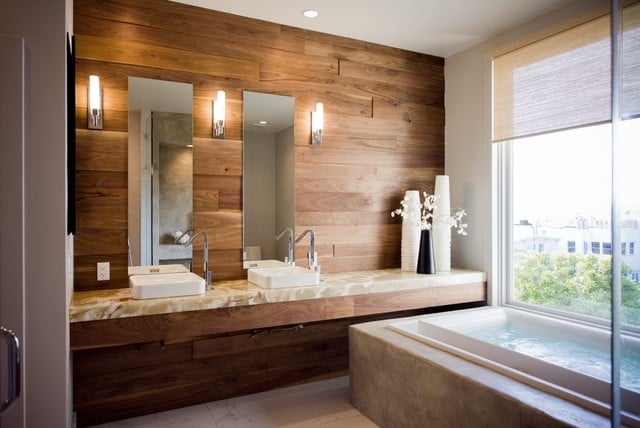
25. Wooden Wall Meets Wooden Counter

25. Wooden Wall Meets Wooden Counter

The vanity has been re-painted and supports through a neutral palette, thanks to it, a slim and elegant wooden counter meets the immense wooden wall accent.

Source Unknown

26. Bathroom Wooden Counter With Concrete Top

26. Bathroom Wooden Counter With Concrete Top

An extraordinarily showcase of power this vanity is, a top heavy concrete presence rests on a salvaged vanity that looks to have priorly called home a carpenter's workshop; together, the mix defines the bathroom completely, nothing else matters.

Source Unknown

27. White Sink Submerged In Bathroom Wooden Counter

27. White Sink Submerged In Bathroom Wooden Counter

This can be the result of a DIY project, a custom vanity piece tailored around the sink of choice; a vanity can also be sliced and sculpted to shelter it. Regardless, ensure stability of the heavy sink and imagine that in rare occasions, this reservoir might be filled with water, prepare the structural load for these events.

Source Unknown

28. Intricate Wallpaper Textures Around A Wooden Vanity

28. Intricate Wallpaper Textures Around A Wooden Vanity

A simple setting can invite intricate textures, it can invite complementary or contrasting colors, you are the creator of your old universe.

Source Unknown

29. Copper, Wood and Flowered Tiles

29. Copper, Wood and Flowered Tiles

Powerful elements with strong visual presences may challenge one another in a bathroom relentlessly as long as you understand this duels. One could argue that above the accent wall paired with copper faucets and light fixtures are in a permanent contradiction but it is not always that simple, if you like, it makes sense, it's that easy!

Source Unknown

30. Wooden Vanity in an Ocean of White

30. Wooden Vanity in an Ocean of White

It can be lonely up there indeed, the wooden vanity above caries a marble top between a multitude of different white texture, everything around it is white but nothing is alike, in this airy ambiance, the wooden beams up-top salute the cozy wooden presence.
Image via Pinterest

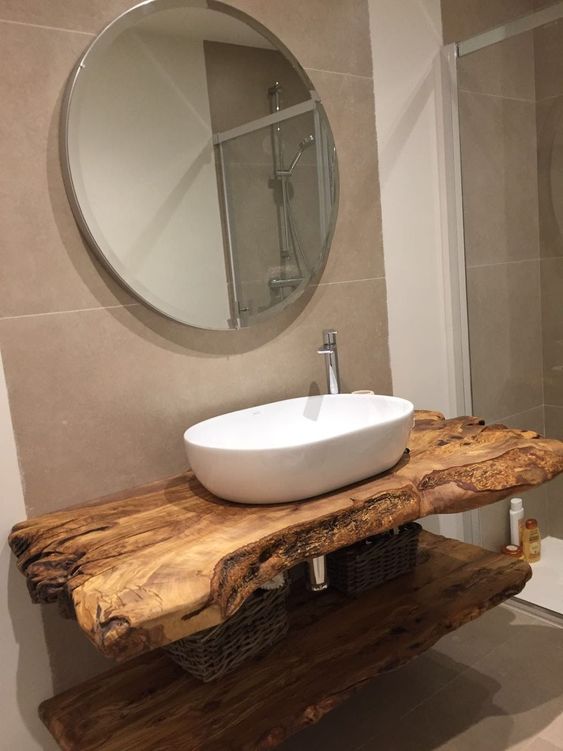
31. White Bathroom Receives Wooden Vanity

31. White Bathroom Receives Wooden Vanity

A small bathroom by no means less aesthetic values, cast a glance above, the sheer beauty of this this simple setting will surely impress you; from the round mirror to the cozy warm wooden textures, everything fits, the scale and relation between elements is crystal clear. Source Unknown

32. Copper, Wood and Black Marble Bathroom

32. Copper, Wood and Black Marble Bathroom

There are more elements in the bathroom above of-course but these do seem to stand out, do they not? The light texture of the wood above and the support it receives from textiles contributes to the overall balance; no one element control the setting above but they all contribute.
Source Unknown

33. Modern Bathroom Invites Wooden Surfaces In

33. Modern Bathroom Invites Wooden Surfaces In

In the bathroom above, wood seems to dominate in square meters covered yet the overall look is airy, tropical almost, very light on the eye; is the lightness of the wood used helping?
What do you think?
Image via Pinterest

Wooden Sinks and Tubs

A tricky one, a wooden bathtub or a washbasin made out of wood sounds like a dangerous design choice isn't it?

No, not really, wood has been used for bathtubs for a long time now even without the really state of the art treatments that we have today; and wood barrels are still a thing right?

Cedar, hinoki, walnut and other aromatic hardwoods have been the main resource of Japan in the making of ofuros  or deep soaking tubs in English. Sailors and shipbuilders around the world have showcased the resilience of teak and it's water capabilities.

Why would a wood sink or tub scare us then? In Japan and Denmark, wooden tubs are revered traditions, in no way a novelty as seen by most of us in United States.

As you can imagine, most of the wooden bathtubs that you would really love are custom designed off the hardwood of choice yet mass produced wooden bathtubs are readily available too!

In terms of maintenance all solutions above stand; it is recommended to rub the tub or sink with linseed oil every few months and rinse the surfaces well to get the soap off them. remove the soapy residue.

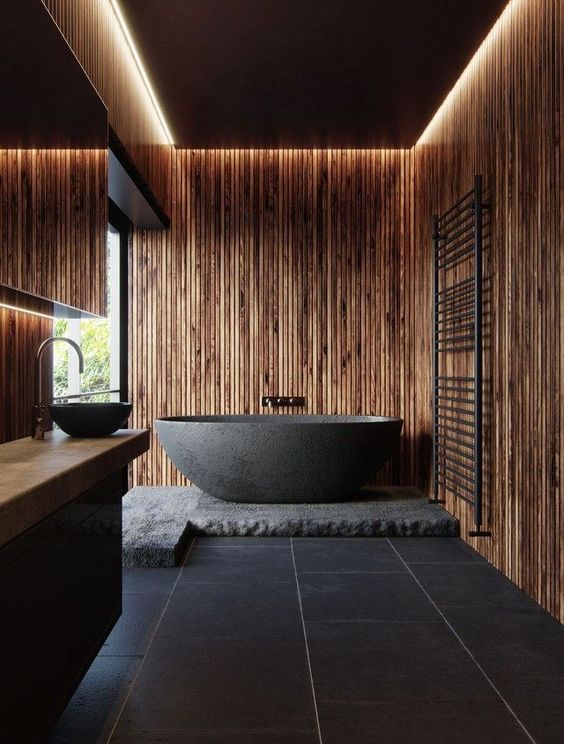
34. Wooden Lines Embrace a Bathroom

34. Wooden Lines Embrace a Bathroom

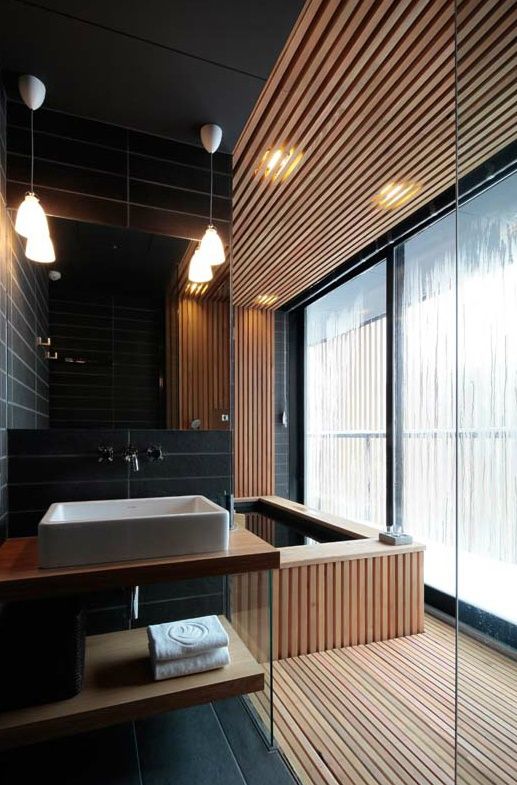
Half of the bathroom is black, half wooden, extraordinary extensive views can be captured from the bathtub and everything is flooded by light; it doesn't get much better than this.

Image via dishmonusa.com

35. Utter White Simplicity and Wood

35. Utter White Simplicity and Wood

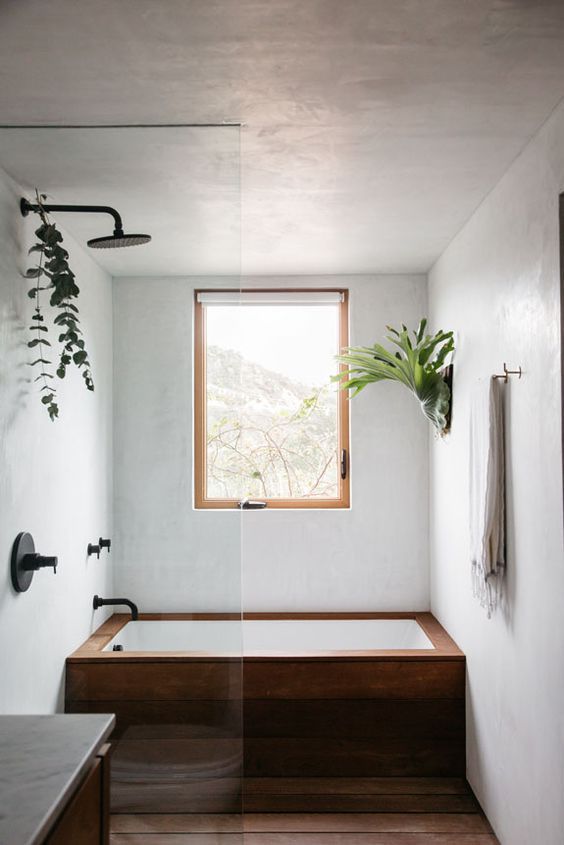
Wooden flooring continues upwards a tad to embellish a bathtub in coziness and warmth, a huge window invites light in and serves as a live snapshot of the green surroundings. Vegetation is brought in the too, tranquility is key.

Image via sfgirlbybay.com

36. Skylight and Wood in a Warm Bathroom

36. Skylight and Wood in a Warm Bathroom

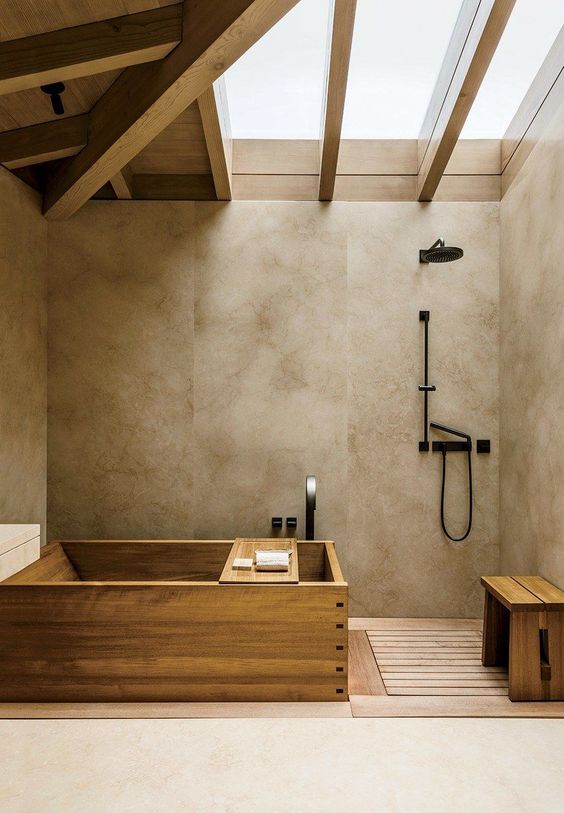
A splendid bathtub, ready for you ritual, and a large shower area stand side by side splendidly, playing under the light of a skylight supported by exposed wooden beams.

Image via Pinterest

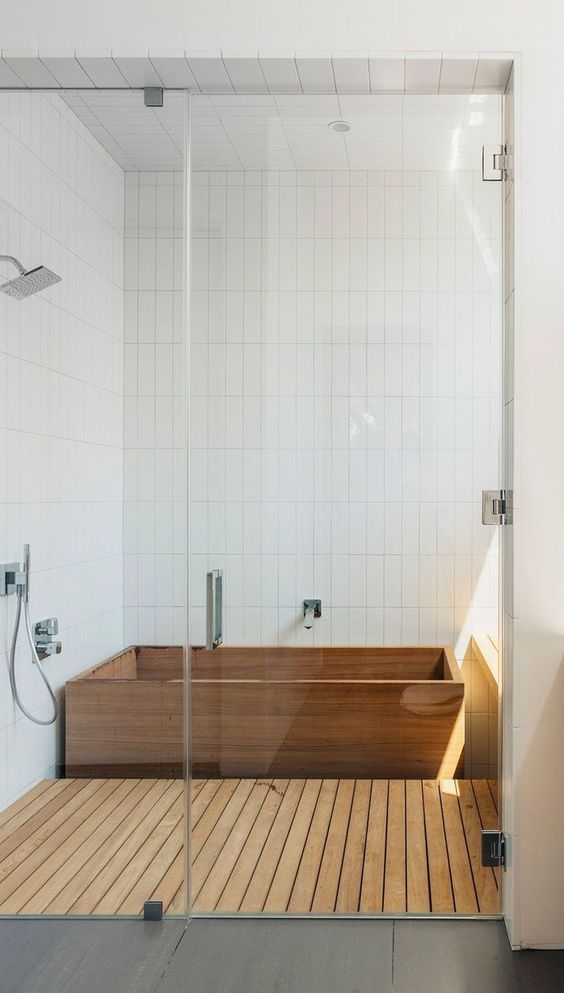
37. White Bathroom With Wooden Bathtub & Flooring

37. White Bathroom With Wooden Bathtub & Flooring

Notice the joints between the ceramic pieces, how delicately sensible they meet to forward one's focus downwards onto the bathtub and wooden flooring, adding dynamicity through elegant rhythm.

Image via lalulalang.site

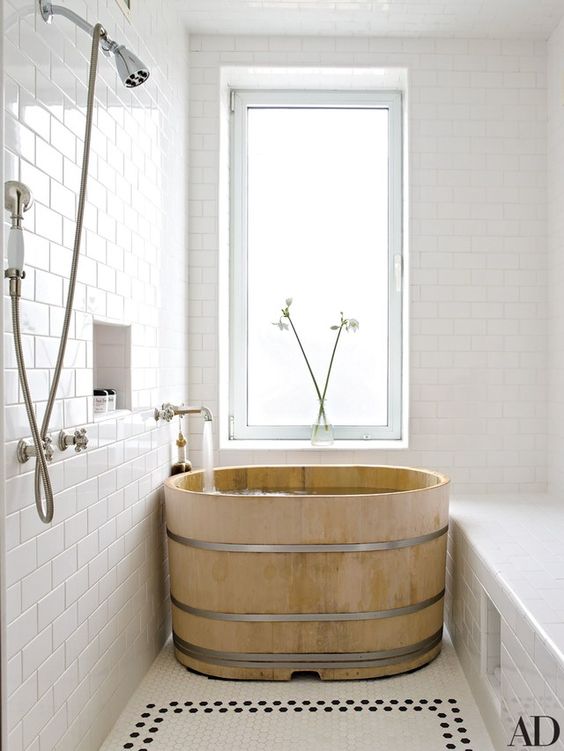
Simple Wooden Bathtub

It can be that simple, construct the right neutral ambiance for you and place one element of focus, a cozy wooden bathroom that you can purchase with two clicks off Amazon.

Image via architecturaldigest.com 

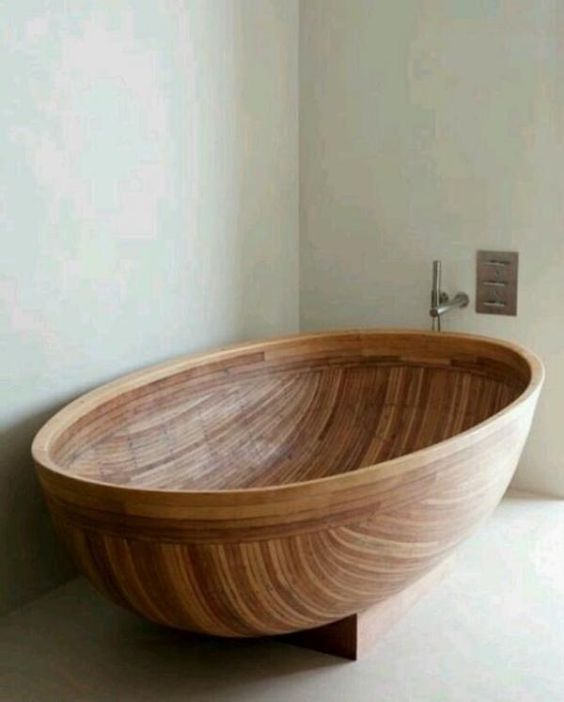
39. Oval Shaped Custom Bathtub

39. Oval Shaped Custom Bathtub

Just cast a  glance at the lines shaping it and tell us in the comment section below if you like it or whether the wooden texture has been lost in the details.

Image via addictdecor.com

40. Sculpted Wooden Tub

40. Sculpted Wooden Tub

It looks like one piece, priceless one of a kind presence.

Image via Flickr

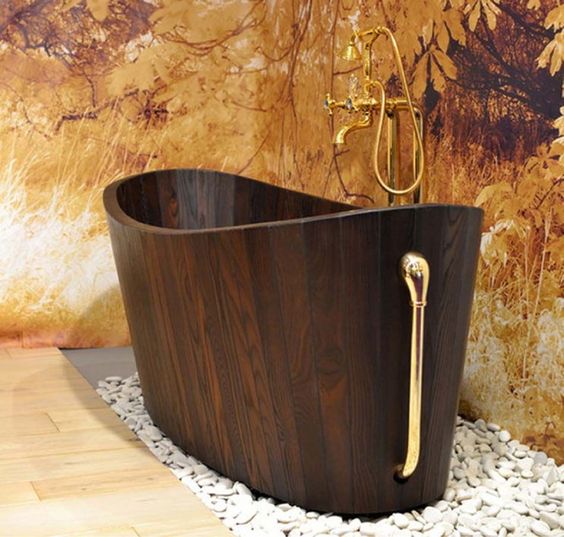
41. Golden Accents Enhance a Wooden Tub

41. Golden Accents Enhance a Wooden Tub

The tub appears to nestle in a meadow.

Image via covethouse.eu

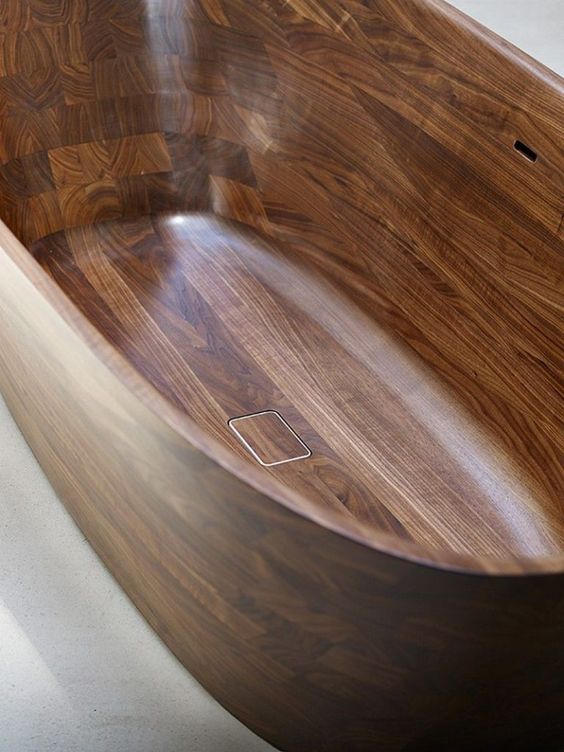
42. State of the Art Walnut Bathtub Craftsmanship

42. State of the Art Walnut Bathtub Craftsmanship

One simply cannot describe this beauty.

Image via Nina Mair Architecture

43. Organic Wooden Bathtub for Two

43. Organic Wooden Bathtub for Two

Everything is better when you can share it with someone.

Image via vauu.eu

Wooden Wall Designs

After hardwood floors, wooden floors are definitely the most desirable option when it come to wood in the bathroom and one could argue that they're also the easiest to install and easiest to maintain as these can avoid areas where water splashes are common completely.

They also have gravity on their side, puddles are not an option right?

Wooden wall designs can be extraordinarily inexpensive if you use salvaged wood, an extraordinarily impactful move, immense coziness and warmth will change your bathroom rapidly.

Shower and bathtub area might be avoided, yes, but if you are ready with linseed oil, wax treatments, epoxy in no way you should worry; as the gallery above will showcase, wood can be featured in wet areas flawlessly boosting the style of choice; whether you are going for a modern cozy look or for the rustic farmhouse look, wooden walls will be by your side, literally!

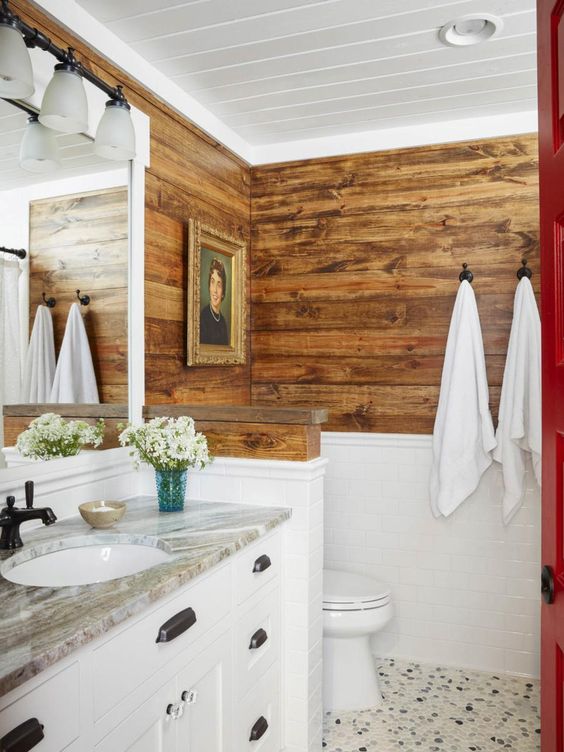
44. Bathroom With White Bottom Half, Wood Top Half

44. Bathroom With White Bottom Half, Wood Top Half

It is usually the other way indeed, how do you like the norm challenged?

Image via HGTV

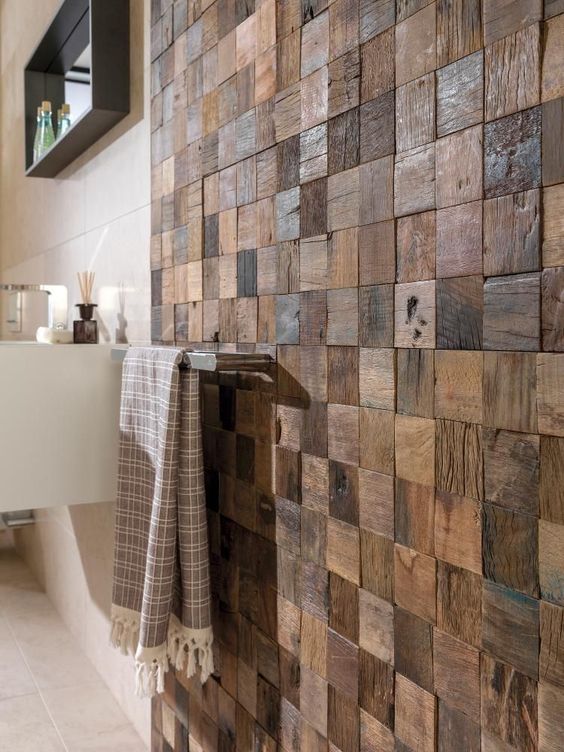
45. Rectangular Wooden Patchwork Bathroom Wall

45. Rectangular Wooden Patchwork Bathroom Wall

A incredibly simple design to realize with the right tool and patience, one that can change a bathroom in an instant; simply salvage wood and collect different essences, textures and hues and start assembling your own wooden puzzled wall!

Image via Pinterest

46. Ceiling and Accent Wood Wall Distort Space

46. Ceiling and Accent Wood Wall Distort Space

It looks upside down and yet brilliant, all you have to is to reverse the traditional placement of wooden surfaces, go for an accent wall and the ceiling and everything and the perception of your bathroom will change rapidly.

Image via Pinterest

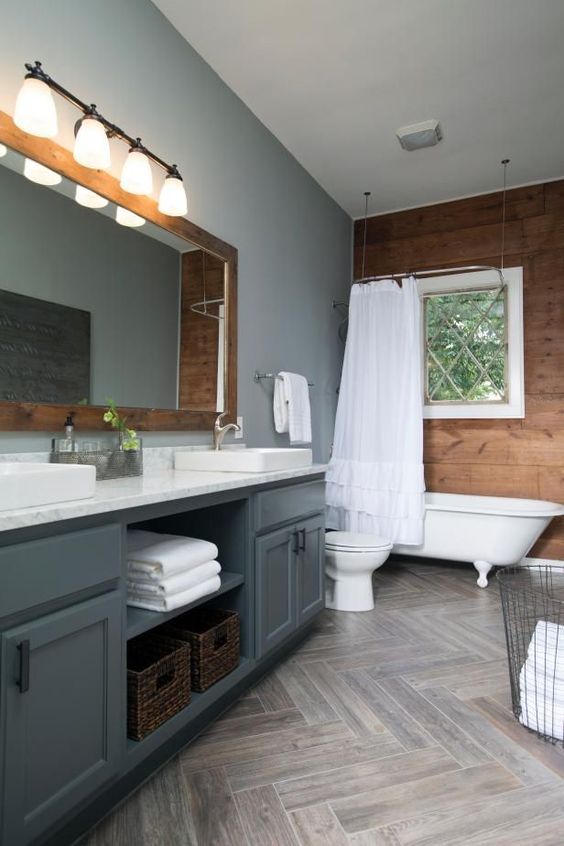
47. Wooden Wall and Gray Colors

47. Wooden Wall and Gray Colors

One can argue that two textures of wood might be too much, wood is an easy thing to overdo, find the right balance in your interior.

Image via HGTV

48. Exquisite Wood Embraces Bathroom

48. Exquisite Wood Embraces Bathroom

Image via Pinterest

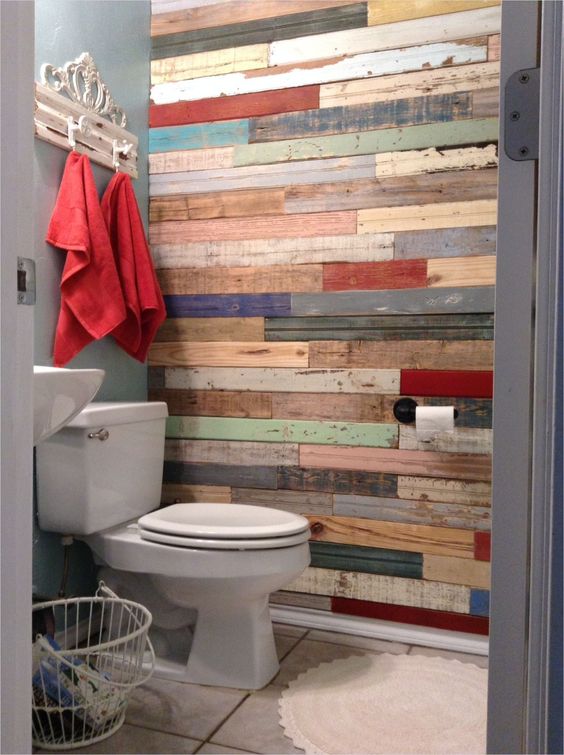
49. Colorful Salvaged Wood Bathroom Wall

49. Colorful Salvaged Wood Bathroom Wall

If you salvage wood, color can be kept, a beautiful patchwork can be tailored.

Image via Pinterest

50. Wooden Panels Replace Bathroom Tiles

50. Wooden Panels Replace Bathroom Tiles

In the bathroom, the wet area is contained, the rest is embellished in wooden textures. White Contrasts this presence, completing the scene.

Image via gcicenter.com

51. Wood and Marble Bathroom

51. Wood and Marble Bathroom

Source Unknown

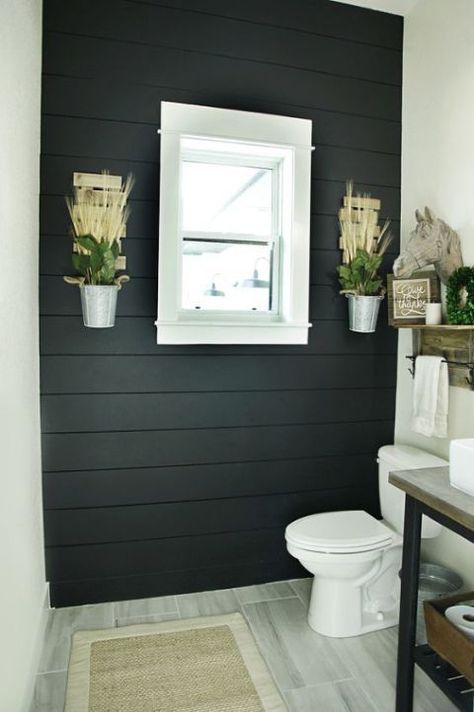
52. Black Wooden Accent Wall Dominates Bathroom

52. Black Wooden Accent Wall Dominates Bathroom

One could argue that painting the accent wall black defeats the purpose but the brilliant interior above is pretty hard to contest.

Image via Pinterest

53. Modern Chromatic Balance With Wood

53. Modern Chromatic Balance With Wood

Image via stylebyemilyhenderson.com

54. Herringbone Patterned Bathroom Wall

54. Herringbone Patterned Bathroom Wall

As clearly expressed above, one can use salvaged wood to bring in coziness and warmth, arranged in a herringbone, sophistication is brought into the picture as well.

Image via Pinterest

55. Washed Green Mind and Wooden Wall Bathroom

55. Washed Green Mind and Wooden Wall Bathroom

So simple and so great, note the trash, how original in color and shape it is, just like garland!

Image via homebnc

56. Farmhouse and Industrial Meet in a Bathroom

56. Farmhouse and Industrial Meet in a Bathroom

It fits, it works, what else can one say? Pick the right elements and the composition can hardly ever go wrong.

Image via Pinterest

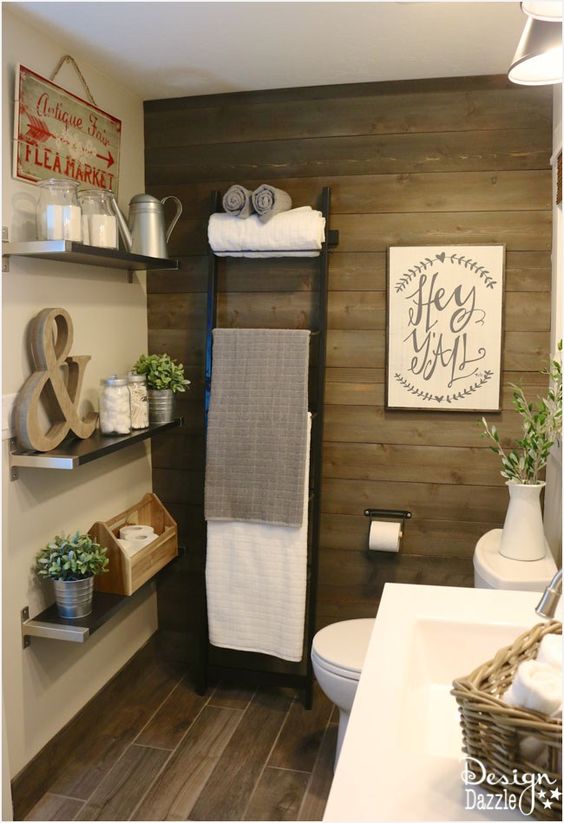
57. Wrap the Everything Around Wood

57. Wrap the Everything Around Wood

Note that in this bathroom, the farmhouse style is at home; it is clear that every element in the design has been picked to match the wall; they all complement and support each other, there is no contradiction, no contrast.

Image via Design Dazzle

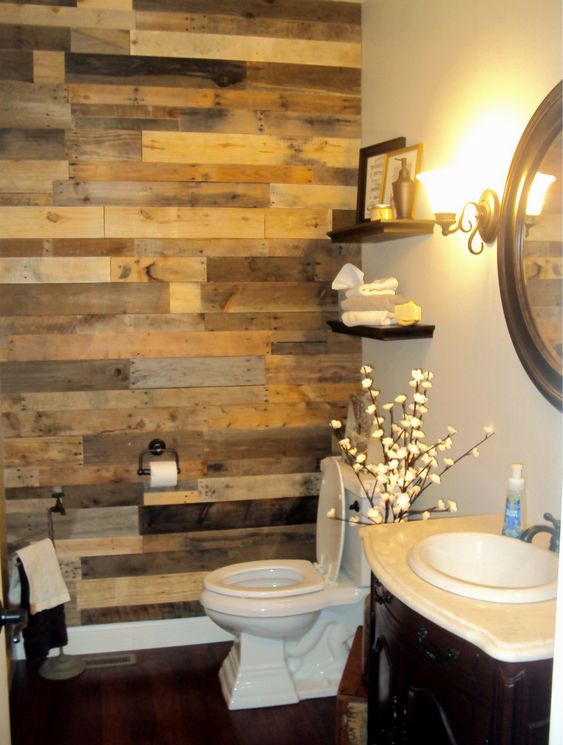
58. Salvaged Wood Accent Bathroom Wall

58. Salvaged Wood Accent Bathroom Wall

Regardless of how one sources the wood, the aesthetic values remain the same, you simply cannot dismiss how much wood, and natural materials in general can do.

Source Unknown

59. Neutral Pastel Contains Wooden Wall


Yep, it is that easy, it looks that good and you can create it that fast, most of the work with this DIY project is naturally, in planning; what do you think?

Image via citygirlmeetsfarmboy.wordpress.com

60. Frame Your Oasis Bathroom in Wood

60. Frame Your Oasis Bathroom in Wood

It goes without saying that for a couple of us, the most important place in the bathroom is the tub and one can easily imagine cherishing this place with expansive views and a different finish in its area; wood may embellish you in coziness and warmth, would this be your choice?

Image via Pinterest

61. Gray Borders Wooden Wall Bathroom Accent

61. Gray Borders Wooden Wall Bathroom Accent

Looks simple but extraordinarily good, nothing fancy nothing grand, just superb elements brought together in balance in a bathroom. Do not overlook how perfect the plane intersections are and pay great attention to this aspect in your future design; as the intersections are visible, creating a frame, you would need to ensure you have control of the way the frame pans out.

Image via Pinterest

62. All Wooden Bathroom With White Wall

62. All Wooden Bathroom With White Wall

You would expect it to be the other way around but just gaze at it, notice how the white fixtures and a small portion of wall are exceptions here, notice how light is used to illuminate a carved shelf.

Image via Pinterest

63. Chromatic Balance With Expansive Wood 

63. Chromatic Balance With Expansive Wood 

Color is a very powerful color, with great power comes great responsibility, if you would like go down this path create mood boards, find the right bathroom color scheme for you, on Homesthetics we dissected more than 100 bathrooms into color palettes, cast a glance here.

Image via Pinterest

64. Half Wood Bathroom Wall


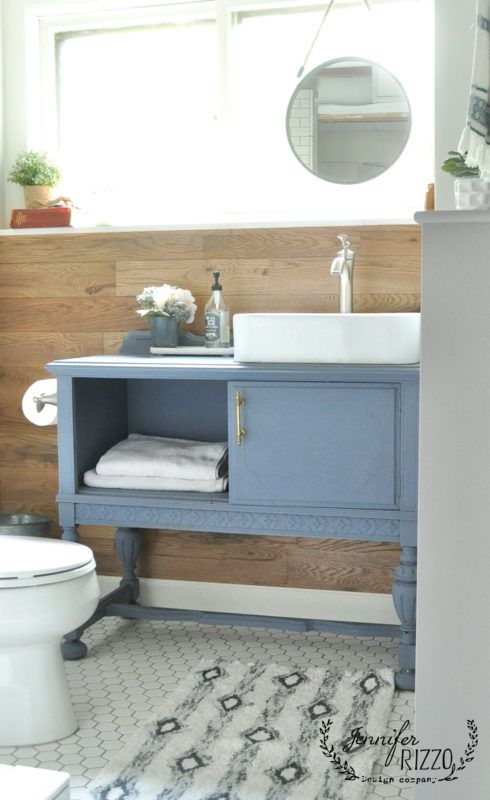
64. Half Wood Bathroom Wall

You can treat sections only, just make sure you have clear limits, clear ways to definite why only that section is wood.

Image via jenniferrizzo.com

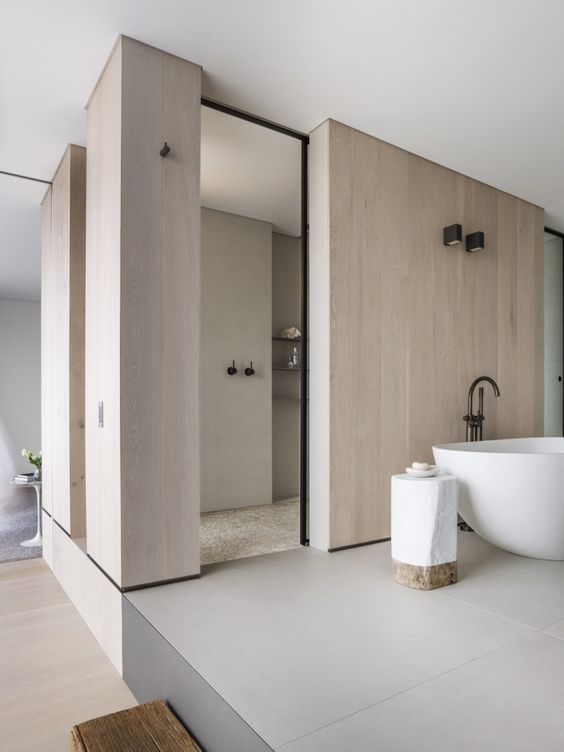
65. White Wood Discreetly Enhances Neutral Bathroom

65. White Wood Discreetly Enhances Neutral Bathroom

If you would like to avoid actually having the strength of the wood essence in your interior, you still have options, you can always modify the color and impact of wood with the right finish, above wood is present with a wooden trunk, a step for the level difference and two whole walls but the texture complements the elegant subtlety, they're not the focal point, they're presence is not a statement.

Image © Justin Alexander

66. Wooden Wall and Concrete Gray Bathroom

66. Wooden Wall and Concrete Gray Bathroom

Once more the wooden walls take the vertical planes, gray stands down, literally, beautifully covering the floors.

Source Unknown

What do you think, how do you see the awesome design ideas above?

Have you considered that these wooden surfaces can also be made out of exotic materials? Bamboo flooring are quite popular!

Do keep in mind that to protect wooden surfaces, besides finishes you can also use felt patches felt patches that would prevent furnishings from scratching the surfaces as well as hairpin leg protectors and other ways of saving other posh, sensible, and awesome surfaces.

We would love to hear from you in the comment section below!

Related Articles

39 Spectacular Tree Logs Ideas for Cozy Households

Wood is an extraordinarily material as it speaks of naturalness, coziness and warmth. Snow left us and now during spring it is time to prune our trees, to prepare them for an extraordinarily succesfull season, in the process you will remove twigs, branches maybe even logs that once sliced can be used to various diy projects. In the following article you`ll find elegantly beautiful wood slices crafts to consider after your next pruning session, cast a glance.

Beautiful Wood Slices Crafts

1. Use wooden slices as shelves

1. USE WOODEN SLICES AS SHELVES

A really swift project that you will surely love, these can hold your flowers, they can display your collection or even act as a floating nightstand in your bedroom.

via hometalk.com

2. Create Wood Slices Ornaments

2. CREATE WOOD SLICES ORNAMENTS

One ink pen or a sharpie can help you a great deal in the simple craft above, sensible, highly personal the tree ornaments will surely be used for years and years.

via 100directions.com

3. Simple Sliced Wood baby mobile

3. SIMPLE SLICED WOOD BABY MOBILE

A simple wood slice can hold various iconic elements, here the fish silhouettes have been shaped in wood too and the pastel colors are offering them a really extraordinary finish, you can also use something like the Silhouette Cameo or other cutting machines along with the best heat transfer vinyls to obtain the result without painting.

via homemadeginger.com

4. DIY Wood Slice Owl

4. DIY WOOD SLICE OWL

A craft that speaks of re-purposing and can become an extraordinarily educative lesson for children of any age.

via houseofhawthornes.com

5. Strong and Courageous with color

5. STRONG AND COURAGEOUS WITH COLOR

Paint your favorite quotes and use them to emphasize your state of happiness, the exemplary piece above can await one in the hallway everyday.

via etsy

6. HOme Sweet Home

6. HOME SWEET HOME

Offer your home an exemplary design element, crafted with love.

via localadventurer.com

7. Encourage and Build

7. ENCOURAGE AND BUILD

via instagram

8. DIY Botanical Wood Slices

8. DIY BOTANICAL WOOD SLICES

Based on the simple procedure of wax paper photo transfer exemplified in the tutorial below one could create absolutely anything.

via ellaclaireinspired.com

9. Shape one`s Heart

9. SHAPE ONE`S HEART

via Pinterest

10. Create Wood slices Table Runners

10. CREATE WOOD SLICES TABLE RUNNERS

via simons.ca

11. Shape Christmas Decor

11. SHAPE CHRISTMAS DECOR

via etsy

12. Realize DIY Wood Photo Transfers

12. REALIZE DIY WOOD PHOTO TRANSFERS

One of the most appreciated wood slice crafts is the photo transfer, it can be easily realized with wax paper and it is often an extraordinary surprise.

via parentalperspective.com

13. Create Custom Wood wreaths

13. CREATE CUSTOM WOOD WREATHS

via etsy.com

CREATE CUSTOM WOOD WREATHS

via findinghomeonline.com

14. DIY Wood Slices Hanging Planter

14. DIY WOOD SLICES HANGING PLANTER

Start crafting, nestle your greenery in style !

via thehatchedhome

15. Petite Tic Tac Toe Board

15. PETITE TIC TAC TOE BOARD

One of the most extraordinary housewarming DIY gifts that one could offer, a splendid swift craft to be appreciated by children and adults alike.

via lindsaystephenson.com

16. DIY wood Slices Mirror 

16. DIY WOOD SLICES MIRROR 

A simple solution that can change a great deal.

via thatsmyletter.blogspot.com

17. Splendid Engraved Christmas Tree Ornaments 

17. SPLENDID ENGRAVED CHRISTMAS TREE ORNAMENTS 

An engraver or a pen can help you deal the unique snowflake that will make your Christmas decor.

via designmom.com

18. Shape Garden Decorations 

18. SHAPE GARDEN DECORATIONS 

Wooden butterflies can be nestled in your garden as a punctual decoration, a beautiful surprise, feel free to color them with your little ones.

via esty

19. Wood Slices Christmas Garlands

19. WOOD SLICES CHRISTMAS GARLANDS

Create a simple garland out of slices of wood, paint or engrave the letters or simply color the inner circles for a colorful one.

via overtheedgedesign.wordpress.com

20. Wooden Wedding Name holders

20. WOODEN WEDDING NAME HOLDERS

A really chic, elegant solution with little to no costs that speaks of simplicity and purity.

via elizabethannedesigns.com

21. Simple slices of Wall art 

21. SIMPLE SLICES OF WALL ART 

Use a couple of slices to create a pack of wall art, here the dandelion simply drawn in three colors is extraordinary graphic and sensible, the scale helps and the amount of details helps the overall ensemble.

via joann.com

The collection above is nothing short of extraordinary, the coziness and warmth encapsulated by the slices of wood paired with the amount of sensibility and elegance infused by the creation act is remarkable. How do you see the crafts above? We would love to hear from you in the comment section below.

Frustrated with all the holes, cracks, and scratches on your wood furniture? Then it's about time you got yourself a quality wood filler. 

These products have gained significant popularity among DIYers over the years because they can handle pretty much all sorts of repairs, from hiding blemishes to filling holes on wooden surfaces. Not to mention, they leave an excellent finish and are easy to use. 

Hence, going for such a product would certainly make sense if you are not planning on replacing your wood furniture anytime soon. However, since the market is flooded with a ton of options, choosing the right product can be pretty complicated and time-consuming. 

That's why we have compiled a list of the top 9 wood fillers currently available on the market to make your search easier. Plus, we have included a buyer's guide towards the end of the article to make things a notch more interesting. 

So, without further ado, let's jump right in! 

Best Wood Fillers

putty of wooden crevices, window door restoration with the Best Wood Filler

1. Elmer's

For over 65 years, Elmer's has been committed to delivering quality adhesive solutions that turn ideas into reality. And the E855 Carpenter's Wood Filler is a noteworthy example of what the brand can offer. From filling gouges to hardwood floors to filling nail holes in molding strips, this product can make every task effortless. 

Sale
Elmer's E855 Carpenter's Wood Filler, 3.25-Ounce Tube, White
  • Paintable and sandable
  • Sands easily to a smooth finish

Why Did We Like It?

As a wood filler from a brand that has been in the industry for decades, we are pleased to say that it exceeded our expectations in most aspects. It is paintable for starters, which means it allows you to apply a fresh coat of paint on the wooden surface that you've repaired. 

Apart from that, the product sands smoothly and leaves an even finish, something that all users will love. It offers a drying time between 12 and 24 hours, which may not be the fastest on the market, but it allows you to make any last-minute changes if required. So, a longer drying time is not that bad after all. 

Additionally, it is durable; not only can it fill voids with ease, but it can also resist cracking and shrinking due to daily wear and temperature changes. Lastly, it features an economical price tag, ensuring that it is the go-to choice for those on a limited budget. 

What Could've Been Better?

Even after having tested it for a significant period, we could not find any downsides to this product. But having said that, we have to admit that it tends to get a bit dry in the tube with time, which might make it just a bit difficult to be pushed out. 


Pros

  • Easily sandable and paintable
  • Sports an economical price tag
  • Leaves a smooth finish
  • Can resist shrinking and cracking


Cons

  • Gets dry in the tube with time


2. Goodfilla Water-Based Wood & Grain Filler

Next up, we have an outstanding product from the house of Goodfilla. This Water-Based Wood & Grain Filler from the brand can help you fill large holes with a trowel, including hard floors. It is equipped with all the necessary features to provide the desired results. 

Goodfilla Red Oak, 1 Quart (3.7lbs) Wood and Grain Filler,...
  • ⚒️ HIGH QUALITY & MONEY SAVING: Save time and money with...
  • ⚒️ DESIGNED FOR PROFESSIONAL WOODWORKERS: This is the...

Why Did We Like It?

To begin with, this wood filler offers top-notch adhesion, which ensures it doesn't crack or shrink with time. This saves both your money and time. Even though it's designed for professional woodworkers, any novice can use this water-based wood filler to fill holes on damaged wood because of its easy application. 

A major problem with wood fillers is that they tend to get harder with time, which makes it difficult for the users to push them out of the tube. Thankfully, this product is water-based and offers a very long shelf life, so users no longer have to worry about hardened wood fillers. 

Finally, it is backed by a 365-day warranty; therefore, if you don't get satisfactory results with this product, the brand will refund your money without asking any questions. 

What Could've Been Better?

Again, we couldn't find many flaws with this product except for the strong odor, which made it a bit difficult for us to test it for this guide. Also, it took a few days for the odor to go away, which was a little annoying. But other than that, it worked perfectly.   


Pros

  • Backed by a 365-day warranty
  • Safe to use
  • Has an unlimited shelf life
  • Offers top-notch adhesion


Cons

  • Offensive odor


3. West System

West System is widely known for its assortment of highly functional epoxy wood fillers that help users fix their wood flaws without a hassle. And the CECOMINOD050909 Low Density Filler from the brand offers the same efficiency. So, let us learn a bit more about this product in the next few sections. 

West System 407-5 Low Density Filler 4 oz
  • 407 Low-Density is a blended microballoon-based fairing...
  • Add 407 to a mixture of epoxy resin/hardener to create a...

Why Did We Like It?

First and foremost, it's easy to sand and carve once it has cured, which enables users to paint their wood surface after repairing it. Understandably, this helps users apply a new look to their rotted wood without breaking a sweat. 

Like any other West System product, it is high quality and can easily stand the test of time despite weather changes and daily wear and tear, which is great. Additionally, it sports a reasonable price tag, making this epoxy glue wood filler an instant hit among DIYers and novices. 

What's more, the product offers the "Peanut Butter Consistency," which ensures it can cling to vertical surfaces such as stands. Overall, it is one of the best wood fillers on the market that comes extremely handy for bonding uneven surfaces, fairing, fileting, and gap filling. 

What Could've Been Better?

We couldn't find any considerable drawbacks with this product during our usage. But one thing that you should keep in mind is that being a low-density fairing filler, it may not be ideal for general bonding hardware with epoxy.


Pros

  • Sports a reasonable price tag
  • Can easily cling to vertical surfaces
  • Highly efficient
  • Easy to sand


Cons

  • Not ideal for general bonding hardware with epoxy


4. West System 404-45

Since West System is such a dependable brand for versatile wood fillers, we thought of adding one more product from it to our list. Allow us to introduce you to the  404-45 High-Density Filler from the brand, which is a great option if you are looking for an epoxy thickening additive. 

WEST SYSTEM 404-45 High Density Filler 46oz.
  • THIS EPOXY THICKENING additive maximizes epoxy's adhesive...
  • HARDWARE OR STUD BONDING is a popular use of this filler....

Why Did We Like It?

Anyone who knows a thing or two about wood fillers would agree that the key highlight of this product is its formulation. It is mixed with epoxy for top-notch compressive strength. Thus, it makes the product ideal for hardware bonding and other applications that require a tough interface between dissimilar materials. 

Believe it or not, even a small amount of this wood filler can help minimize cracks in the epoxy. All you need to do is mix it into liquid epoxy to make a moderately loose slurry, which will stay in a hole on a horizontal surface. 

Apart from that, it is the go-to choice for boat repair. Needless to say, it can withstand the harshest of marine elements and will last a long time. Overall, it is one of the best-selling epoxy fillers on the market that any DIY or boat enthusiast can hope to get their hands on. 

What Could've Been Better?

Without a doubt, this product is one of the best epoxy fillers on the market. But the thing is, since it's a high-density adhesive filler, it may not be the perfect choice if you are looking for a product that can be used for fairing epoxy surfaces. 


Pros

  • Ideal for boat repair and building
  • Can withstand the toughest of marine conditions
  • Offers top-notch compressive strength
  • Comes at an affordable price


Cons

  • Not recommended for fairing epoxy surfaces


5. Timbermate Water-Based Wood Filler

Founded in Australia in 1992, Timbermate is a brand that specializes in the manufacture of unique filling products. On that note, we bring to you the Water-Based Wood Filler from the brand, which can be used for regular wood maintenance work. Now, there's a lot more to it, so keep reading. 

Sale
Timbermate Wood Filler, Water Based, 8-Oz Alder
  • Easy preparation
  • Timbermate is versatile and may be used for all interior...

Why Did We Like It?

We were pretty impressed with what it had to bring to the table. Firstly, this stainable wood filler is highly versatile, which means it can be used to repair wood voids on various interior surfaces. So, be it your furniture or the guitar, you can apply it to real wood without thinking twice. 

Beyond that, it takes only a few minutes to dry, unlike many other ordinary tube fillers that take as long as an entire day. Thus, it allows you to go about your daily life without wasting much time covering wood flaws. 

Plus, if you have any excess filler on the surface, you can scoop it up and place it back in the bucket, which is great. Since it falls under the category of water-based wood fillers, it is non-toxic and safe to use, which, in our opinion, is an added advantage. 

Lastly, it comes in a pack of 2, ensuring you have enough material to complete your project. 

What Could've Been Better?

If you are looking for water-based wood fillers that can be used on heavy-duty outdoor projects, then it might not be the right choice for you. This is because it is ideal for interior use only; as such, it may not be as durable to withstand harsh weather elements. 


Pros

  • Has a quick drying time
  • Can be applied on various rough surfaces
  • Safe to use
  • Easy to prepare


Cons

  • Can’t be used outdoors


6. 3M

We are halfway through this list, and it's time to talk about a bondo wood filler from 3M, a popular US-based brand dedicated to manufacturing products that improve people's lives. Now, as far as the 01131 Platinum Plus is concerned, it is no exception as its super malleable and consistent substance spreads easily for quick applications. 

Sale
3M Platinum Plus Filler 01131, Lightweight, Stain Free, Tack...
  • EXCELLENT GRIP: Contains an adhesive promoter that...
  • MULTI-SURFACE VERSATILITY: Recommended for use with...

Why Did We Like It?

A common issue with most wood fillers is that they shrink and crack after a certain time because of numerous factors, including temperature changes and daily wear. But this one offers a durable adhesion that can last for a long time on rough edges of various surfaces. 

Additionally, it features an advanced formula, making it the go-to choice for using aluminum and galvanized steel. Besides applying it on wood fiber, you can use it on other metallic surfaces with ease. Sounds good? Well, keep reading. 

Different wood fillers have different curing times, but we can all agree that a shorter curing time doesn't make users wait too long to apply a fresh coat. Thankfully, this product has a shorter curing time, which lets you sand and apply a new coat of paint in as little as 20 minutes. 

So, if you have too many projects to deal with, you might want to consider this one. 

What Could've Been Better?

The packaging material used by the brand was not good. Since the can wasn’t durable, it was slightly dented in the transit, making it difficult for us to get the lids off. That said, this issue doesn't compromise the performance of the product, and we'd recommend going for it nonetheless. 


Pros

  • Stainable wood filler
  • Has a short curing time
  • Ideal for galvanized steel and aluminum
  • Features super malleable and consistent substance


Cons

  • Poor brand packaging


7. Woodwise Wood Patch

Next, this Wood Patch from Woodwise can take stains like hardwood. Its higher solid content makes it the perfect choice to fill large holes on different wood species. Thus, it makes it an ideal choice for professional woodworkers and DIYers looking for a reliable wood filler. 

Woodwise Wood Patch "Ebony" Quart Wood Filler
  • Pre-mixed ready-to-use
  • Takes stain like hardwood

Why Did We Like It?

We liked pretty much everything this product has on offer, but what truly caught our attention was its easy application; it comes pre-mixed and ready to use. So, applying this product won't be a hassle for experienced DIYers and professionals. 

Plus, this wood patch has a higher solid content, making it a perfect option for filling large cracks and spots. Hence, no matter how big the rot is on the surface, the product will make it sand-ready in a jiffy. Not to mention, it is easy to clean up as well. 

What's more, it cures to an aesthetically pleasing gloss finish on the surface, which is good. But especially pleasing is its budget-friendly price tag, making this product the go-to option for many DIYers who are starting new. 

Overall, from our experience with this product, we can assure you that it is an option that you wouldn't want to miss out on. 

What Could've Been Better?

We weren't able to find any significant flaws with this product. But if given a choice to nit-pick, we'd say that even though it's easy to use, the filler itself can be a bit messy to apply, so first-timers may require some time to get used to it. 


Pros

  • Can fill large holes
  • Easy to apply
  • Cures to an aesthetically pleasing gloss finish
  • Sports a budget-friendly price tag


Cons

  • Wood filler is a bit messy


8. Timbermate

We won't be wasting any time introducing you to Timbermate as we've already included a quality product from this brand previously. As for the CECOMINOD049315 Hardwood filler from the brand, it is just as good as the other picks. So, let's dig a little deeper. 

Timbermate American Cherry/Brush Box Hardwood Wood Filler...
  • Easy preparation
  • Timbermate is versatile and may be used for all interior...

Why Did We Like It?

First things first, this wood filler dries pretty fast, which lets users sand the wood and apply a new coat of paint or stain in a matter of minutes. So, if you are a professional, who has a deadline to be met, this product could be your best bet. 

We also liked that it features non-toxic solvents that don't cause harm to the wood, unlike ordinary fillers that tend to take a toll on the integrity of the wooden surface. What's more, it cures to a durable filler, which doesn't shrink or crack with daily use. Rest assured, this product is dependable, strong, and reliable and can accept all finishes. 

If it dries out in the container, there's absolutely nothing to worry about, just add some water, and it'll be brand new. Thus, it ensures that there's no wastage. Overall, we think it's safe to say that this wood filler can easily meet your highest professional standards. 

What Could've Been Better?

No doubt, the product dries quickly and is easy to use. But the color of filler when it cures is not what we had expected. The label says "American Cherry," but it turns into a lighter color than cherry when it dries. So, that's something you need to keep in mind if you decide to go with this product. 


Pros

  • Dries quickly
  • Can take almost any finish or stain
  • Strong and reliable
  • Doesn’t contain any harsh solvents


Cons

  • Dries into a different color


9. DAP

Our next pick is from the brand DAP, a leading supplier and manufacturer of wood fillers, adhesives, sealants, and caulks. The 00585 Latex Wood Filler from the brand contains real wood fibers, making it a great choice for those who want a filler that feels and looks like real wood. 

Sale
DAP Plastic Wood All Purpose Latex Wood Filler, White, 6 Oz...
  • DAP plastic wood filler looks and acts like real wood; ideal...
  • Easy-to-use, latex-based formula can be planed, cut,...

Why Did We Like It?

Perhaps, the most advantageous feature of this product is that it contains real wood fibers. This not only makes it feel and look like real wood once it dries but is also durable enough for indoor and outdoor use. Besides, once it hardens, it becomes three times stronger than the wood itself, something you wouldn't see with other wood fillers in a similar price bracket. 

Furthermore, it can be painted, varnished, stained, planed, screwed, drilled, or cut, so you can rest assured this product can be used professionally. Now, as far as the drying time is concerned, you will be pleased to know that it dries quite faster, allowing you to sand and paint it right after. 

Another that we particularly liked about this product is the fact it is crack and shrink resistant. Long story short, the DAP 00585 is for those looking for a heavy-duty and professional-grade latex wood filler at an economical price. 

What Could've Been Better?

We were pretty impressed with the results delivered by the product for the most part. But keep in mind that If you have a larger project to deal with, a single tube of this product may not suffice. In fact, you might have to buy many of them to get the job done. 


Pros

  • Contains actual wood fibers
  • Durable enough for indoor and outdoor use
  • Available at an affordable price
  • Dries faster


Cons

  • Doesn’t have sufficient quantity for large projects


Wood Filler Buying Guide

Hopefully, you have gone through the list of the top 9 wood fillers on the market by now. So, were you able to make a choice? Well, it's not all that simple. To buy the best wood filler, there are some important factors to keep in mind apart from the specifications. 

That's why we have written this buyer's guide, explaining all those important factors in detail, so make sure you read it carefully till the end.

1. Packaging

One of the most important factors to consider when purchasing a wood filler is the packaging of the product. More often than not, they come in the sticks, squeeze tubes, and tubs. Those that come in tubes are either two-part fillers that must be mixed before application or no-mix, which can be applied on the surface with a putty knife.

As far as tube fillers are concerned, you only need to squeeze out the required amount of the filler to fill voids and pores. On the other hand, you just need to rip off a small chunk and apply it by hand with stick fillers. 

Tubs tend to hold a good amount of the product and hence are considered to provide good value for money. Also, they are the go-to choice for larger and heavy-duty projects, while stick fillers provide the least value for money and are mostly used to repair cracks and scratches.    

2. Color

Most wood fillers available on the market come in wood-inspired shades or white. If you plan to stain or paint the cured filler, make sure you choose a product stainable or paintable, either in white or in a lighter color. However, if you don't intend on applying a coat of stain or paint on the repaired area, then going for a shade that matches the original wood color would make sense.

3. Consistency

Consistency is another crucial factor that needs to be considered to get the best results. Fillers can have a thin or thick consistency. Usually, thicker wood fillers are used to fill voids, while thinner wood fillers are mainly used to fill open-grain wood pores. 

You must choose the right consistency for your project. This is because thinner usually lacks the body to sufficiently fill voids, and thicker fillers feature large particles that don't easily fit into pores. 

That said, keep in mind that some thicker fillers can be converted into thinner fillers by adding water.      

4. Task

Wood fillers are used for a range of tasks. While some are used to fill pores in open-grain wood, others are used for filling voids such as gouges, holes, or divots in all wood species. However, versatile wood fillers can fill both pores and voids with ease.    

5. Application Environment

Usually, most fillers on the market are for "interior/exterior" use or 'interior-only." This indicates how well the wood filler will hold up in the mentioned environment during and post-application. 

A. Interior-only Fillers

These types of fillers can be safely applied to wooden pieces in your home, such as furniture like tables, chairs, etc. If you apply the same filler outdoors or to furniture that'll stay outdoors, such as a patio table, the filler will likely shrink or crack. 

B. Interior/Exterior Fillers

You can apply this type of wood filler to wood pieces that will live both indoors and outdoors since they can tolerate the harsh weather elements without shrinking or cracking.    

    furniture restoration, the master closes the hole in the wooden surface with wax pencils close-up. Wood Filler Verdict

Wood Filler Verdict

With that, we have almost come to the end of our review-based guide. And we hope that it helps you buy the right wood filler based on your requirements. But still, if you have trouble zoning in on a single product, we strongly suggest going through our top picks from the list.   

The Elmer's is the best overall, in our opinion, the reason being it leaves a smooth finish and can resist shrinking and cracking. Closely following the Elmer wood filler is the Goodfilla Water-Based Wood & Grain Filler, which is a great choice if you are looking for a product backed by a warranty and safe to use.

However, if you want a quality wood filler that can easily cling to vertical surfaces, we strongly recommend checking out the West System.

Do let us know in the comment section if you have any further doubts or queries. Till then, goodbye!  

Related Articles

Wood Filler vs Wood Putty

5 Best Epoxy Wood Filler

5 Best Epoxy Resin for Tumblers

5 Best Wood Hardener

7 Best Glue for Glass to Wood

9 Best Exterior Wood Stains

9 Best Glue for Metal to Wood

9 Best Primer for Bare Wood

9 Best Varnishes for Wood

11 Best Epoxy Resin For Crafts

Food Safe Epoxy Guide 101

11 Best Concrete Crack Filler

Sanding Epoxy Resin Guide 101

The Difference Between Epoxy & Super Glue

11 Best Bar Top Epoxy

Waterproof Epoxy 101

What is Resin and How It’s Used

Epoxy Paint For Wood 101

10 Best Epoxy for Plastic

Epoxy Garage Floor 101

Surfaces Resin Won’t Stick to

Heat Resistant Epoxy 101

Epoxy Cement Guide 101

How To Stabilize Wood

How To Mix Epoxy 101

How to Remove Wood Glue

How To Harden Sticky Resin

How To Fix Epoxy Mistakes

For most of us, grey is considered to be a neutral tone, bland, mundane, unusual.Yet when allowed to shine in different intensities and matched with coppery and gold accents the grey transforms, becoming an elegant, complex hue which, if used properly in interior design, will add an unique cozy yet modern and luxurious appeal. Today we are reflecting upon grey bathroom ideas, an association meant to replace and offer an alternative to the all white classical idea we are all used to.

Wonderful Elegant Grey Bathroom Ideas-homesthetics.net (1)

Source

Wonderful Elegant Grey Bathroom Ideas-homesthetics.net (2)

Source

grey hues for the walls

The base is the foundation of any interior design, setting the mood, capturing and reflecting light, imposing a direction and a standard.Grey paints come in multiple hues and tones, from cold, rigid ones to warmer shades that add a discreet coziness to the atmosphere. Choose the tone according to the natural light induced in the room, a darker hue will have a bolder contrast but will capture and aborbe more light that a fine delicate grey owl hue. Think carefully and try out samples on the walls before making a decision.

grey-paint-colours-by-benjamin-moore-paint-colors

Source

the right bathroom tile

When you say bathroom you instantly think about tiles. If the walls have been left white, direct yourself towards a white and gray bathroom tile design. The model below might seem overwhelming but take into account that tiles are not supposed to cover the entire walls of a bathroom, choose to decorate just the wet ones and play with scale to obtain depth.

contemporary-bathroom-renovation-ag-apartment-vinohrady-formafatal-03

On the other hand, if a neutral grey wall has been chosen you can play with a little bit of color inserted in tiles decorated with Moroccan motifs, a very in trend right now in interior design.Choose from a  variety of designs, floral, simple, geometrical, according to taste and budget.

Jatana Interiors tiles1

Source

blue_grey_bathroom_tiles_11

Source

The third option involves the usage of a simple grey tile and a certain accent piece that will draw the entire attention. In the below design a niche has been created int he shower wall designed for bath products storage and decorated with a different tile design with discreet blue floral motifs.

s-l1600

Source

adding natural grey materials

If you are on a tight budget and investing money in a natural stone bathtub is not an option you can always transform your existing tub by applying a layer of granite to its exterior. You cannot deny the beuaty of natural materials, the richness of the natural neutral grey and its wonderful slightly rough texture.

airstone-for-bathroom

Source

Use a pure grey floor

Have a stark white bathroom and desire a change in decor? Star with the floor. A natural stone -marble floor will transform the space in an unusual way, adding elegance and luxury to a bland space.If you are not a fan of cold, rigid spaces, choose a stone with a warmer tone to sweeten up the white.

090516_6

the grey exquisite bathroom sink

An example of the most simple beauty where the sturdiness of the wooden counter balances the powerful grey hues of the ambiance. The entire imagery is completed by the concrete sink that sits heavily on the wooden counter.

5d29c77f788fd153c07120e55e865d50

Source

The same principle has been applied below, yet the focus and attention falls on the shiny sink that captures and reflect the natural light flowing from the window.

bathroom-vanity-22

Source

going furniture grey

Another wonderful option of incorporating grey hues into bathroom decor is through furniture. Choose one essential right piece, the vanity one and create the rest of the decor around it.

Contemporary-48-inch-Single-Bathroom-Vanity-Gray-Finish-No-Top

Source

invest in quality grey bathroom accessories

Last but not least, you can truly redecorate an entire white bathroom by adding new fresh grey accessories, from a cozy rug to concrete toiletry storage and even a flower vase to keep things fresh.

Kristofer_Johnsson_1540

Source

-24-130 Zinc Pitchers with greens

You can even add designer pieces such as concrete lighting fixtures for an unique appeal.

ec9d876e6671ac592c4f7a7ad61a83e1

Source

36167aac5c5f72ef78d424af7b32597d

Invest in quality fabrics for the bathroom as they will exude class and will last longer.

97867452aa0ae870e0dc5dd3eb613e47

Source

A grey bathroom can surprise anyone, exuding elegance, grace, luxury and style in an unique neutral way. Have you ever considered designing such a bathroom in your home? Feel free to share your thoughts in the comment section below.

Related Articles

13 Best Paints for Bathroom Ceilings

99 Super Cool Shower Curtains to Transform Your Bathroom

111 World`s Best Bathroom Color Schemes For Your Home

Water leaks are a major thing in American homes, and if not fixed right away, they can cause water damage and massive disruption. 

Thankfully, we have automatic water shut-off valves in this tech-driven day and age. These amazing devices inform you of water leaks and shut off the mainline to prevent water damage or flooding. What’s more, you can install it on the existing water intake pipe without spending a hefty amount on installing new pipes.   

If the fear of water damage keeps you up at night, you should definitely purchase such a product. However, the problem is, since there are numerous factors and options to consider, you can’t just expect to settle on the right product based on luck.

In this article, we have reviewed the top 10 options on the market and provided a buyer’s guide to help you make an informed purchase. Now, without further ado, let’s get started.   

Listed below are the top 5 recommendations for the Best Wireless Water Shut Off Valves:

  • Owfeel WIFI & Bluetooth Smart Water Valve: Owfeel WIFI & Bluetooth Smart Water Valve offers affordability, easy installation, remote control via smartphone and voice commands, and compatibility with Google Home and Amazon Alexa. It needs slight modifications for mounting.
  • LeakSmart 8881300: LeakSmart 8881300 ensures swift leak detection, operates during power outages, and provides easy installation without pipe cutting. It comes with a relatively high price tag.
  • Owfeel WIFI Smart Valve: Owfeel WIFI Smart Valve stands out with its reasonable price, remote control via smartphone and voice commands, and timing control feature. Its installation process may pose a challenge due to unclear instructions.
  • Moen: Moen conducts daily tests for an efficient water supply, offers 24/7 leak protection, and allows water consumption tracking via the Moen app with a 1-year limited warranty. It comes with a difficult installation process and an additional subscription fee for basic functionality reporting.
  • Aubric Smart Valve: Aubric Smart Valve combines economy, durability with an IP65 waterproof ABS material housing shell, easy installation, and hands-free voice control with Google Assistant and Amazon Alexa. The downside is the absence of warranty information is notable.

1. Owfeel WIFI & Bluetooth Smart Water Valve - Best for Smart Budget

One of our top recommendations is the Owfeel WIFI & Bluetooth Smart Water Valve, which can be connected to WiFi to control the closing and opening of the water valve.  It can be used for various other applications; hence it is an option you wouldn’t want to miss out on.  

For starters, this automatic water shutoff valve is easy to install. Rest assured, you can put it together without any professional help in just a matter of minutes. Furthermore, it is equipped with a power indicator and a power button on the top, making the installation process even more convenient.

This wireless water shutoff valve can be controlled remotely, so when you are on a trip or away from home, you can control the valve with the smartphone. On top of that, it is compatible with Google Home and Amazon Alexa, enabling you to control the functions of the unit through your voice, which is great. 

But what’s even more pleasing is the affordable price tag, which ensures it delivers good value for money.     

To be honest, there’s not much that can be found faulty with such an exceptional device. However, it requires some modifications to make the mounting bracket fit right. So, that’s something you might want to keep in mind if you decide to go with this model.   

Weight: 1.57 lbs | Dimensions: ‎7.48 x 4.02 x 3.66" | Compatible Pipe Size: N/A | Smart Home Integration: Amazon Alexa, Google Home | Connectivity: Wi-Fi | Special Feature: Voice Control

2. LeakSmart 8881300 - Best for Advanced Leak Protection

For over 85 years, LeakSmart has been protecting American homes through its quality and technologically advanced products. Hence, it should come as no surprise that the 8881300 Automatic Water Shut-Off Valve from the brand is among our noteworthy recommendations. Let us learn more about this product in the next few sections. 

Anyone who has used a LeakSmart product before can vouch for the quality of the products the brand offers. And naturally, this model of wireless water valve is no exception. 

It shuts off the water supply automatically whenever it detects a leak within 5 seconds, so you don’t have to worry about water damage in your house with this product. And since it operates off a smart home protocol, it features a battery to keep functioning even when there is a power outage, which is no less than a bonus. 

Apart from that, this automatic water shut-off valve is easy to install. You are not required to cut any pipes as it works perfectly with the ball or gate valves. Thus, it means that you don’t have to hire a professional plumber and spend a hefty amount to get this wireless shut-off valve to work. 

Overall, it is one of the best smart home devices that any homeowner can hope to get their hands on.   

Without a doubt, this product is an excellent addition to a smart home system, especially because of its easy installation and 24/7 protection. But that said, it sports a pretty expensive price tag, which is why it may not be ideal for those on a low budget. 

Weight: 5.44 lbs | Dimensions: ‎10.7 x 9.8 x 6.7" | Compatible Pipe Size: N/A | Smart Home Integration: LeakSmart Hub | Connectivity: Wi-Fi | Special Feature: LeakSmart Sensors

3. Owfeel WIFI Smart Valve - Best for Cost-Effective Smart Home Integration

Since Owfeel products are so nifty, we thought adding yet another efficient wireless water shut-off valve from the brand to this list would make sense. Meet the Owfeel WIFI Smart Valve that allows you to open or shut down the valve automatically with a smartphone so that you can enjoy a carefree vacation.     

Thanks to the remote control feature, this product gives you complete control over the closing and opening of the water valve even when you are not at home. Just connect it to the WiFi using the “Smart Life” app, and you are good to go.

Additionally, it is compatible with two of the most famous voice command apps Google Assistant and Amazon Alexa. So, if you feel too lazy to use the app, you can just speak the commands directly, and it will make sure that they get executed immediately without any issues. 

Furthermore, it features timing control, enabling you to set when the valve controller shuts or opens as per your requirements. Now, that’s something you don’t see with the other ordinary wireless shut-off valves on the market. 

Last but not least, it is priced reasonably well, which makes it an instant hit among those who don’t want to invest a big amount in smart home systems.     

A few customers have complained that the installation was not hassle-free. Indeed, the instructions that came along were a bit unclear and not of any help, so you might need to hire a professional to install this product. We tried doing it ourselves, but it took a while to get it right. 

Weight: 1.34 lbs | Dimensions: 11.93 x 5.12 x 3.5" | Compatible Pipe Size: 0.8-1.7", 0.8-1.18" | Smart Home Integration: Amazon Alexa, Google Home | Connectivity: Wi-Fi | Special Feature: Voice Control

4. Moen - Best for Water Consumption Tracking

Our next pick is from the house of Moen, a well-known brand dedicated to designing and delivering innovative and reliable products that last a lifetime. As far as the 900-001 Smart Water Shut-Off Valve is concerned, it is an ideal example of what the brand can bring to the table.   

First, this smart water valve runs daily tests to ensure the water supply line is running efficiently. 

It continuously checks for potential vulnerabilities and leaks in the pipes and automatically turns off your home’s water supply in case there are issues, thereby offering 24/7 leak protection. So, rest assured that you won’t have to deal with the catastrophic effects of water damage as long as this product is installed in your house.

Plus, it is compatible with the Moen app, which lets you set water consumption goals, turn your water valve on and off remotely, and track water usage. Thus, it helps you save money and water for your home, which is truly amazing. 

Lastly, it is backed by a 1-year limited warranty. So, you don’t have to worry about manufacturing defects within the first year of purchase; the brand has got you covered!     

We were pretty disappointed to find out that it doesn’t come with the basic functionality reporting unless a hefty subscription fee is paid. Also, this product is a bit difficult to put together, so you will have to call a professional plumber to get it to work. 

Weight: 4.75 lbs | Dimensions: 5.75 x 2.6 x 5.9" | Compatible Pipe Size: 3/4" | Smart Home Integration: Amazon Alexa, Google Home | Connectivity: Wi-Fi | Special Feature: Microleak Technology

5. Aubric Smart Valve - Best for Outdoor Use

Next up, we have a product from Aubric, a relatively new entrant to the market. Like most other products on our list, this one, too, is easy to install and is an excellent add-on to the existing levered ball valve. And the best part? It is priced economically, so it can be a great option if you want to save a few bucks.   

The durable build quality of the product is what caught our attention from the get-go. The entire wireless water shut-off valve is covered by a top-quality ABS material housing shell, which is durable and IP65 waterproof. So, you don’t have to worry about rain ruining the longevity of the product. 

Additionally, the application is super easy to use. All you need to do is add this wireless valve controller to your existing ball valves to control the water supply from anywhere with a touch on the smartphone. 

When paired with Google Assistant or Amazon Alexa, the smart water shut-off valve offers you hands-free voice control over your home. This means you can control the functions of the device the way you want without having to move an inch, which is truly remarkable.  

This product from Aubric is undoubtedly one of the best smart valves out there, but we didn’t find any information related to the warranty offered by the manufacturers. So, you might have to make additional expenses to repair or replace this product if it breaks down the road. 

Weight: 1.17 lbs | Dimensions: ‎2.76 x 2.76 x 2.95" | Compatible Pipe Size: 1/2", 3/4", 1", 1 1/4", 1 1/2" | Smart Home Integration: Amazon Alexa, Google Home | Connectivity: Wi-Fi | Special Feature: Voice Control

6. E-SDS

The ESDSWLD02 Water Leak Detector will automatically shut off the main water supply to the appliances to prevent your house from flooding when you are away. Naturally, this makes the product the perfect choice for vacation homes. So, let’s take a closer look at what it has to offer.   

The best part about this unit is that it sounds a loud alarm whenever it detects a leak and sends a signal to shut off the main water supply. Thus, it ensures that your house doesn’t get flooded.

Moving on, you can install this exceptional product on a water heater or on the power outlet of a washing machine and see the amazing performance for yourself. Rest assured that you won’t be disappointed. 

The device allows you to manually shut off the water when you are away on vacation, thanks to the vacation mode. We were also pleased to find out the manufacturer didn’t skimp on the warranty. 

In fact, this water leak detector is backed by a 2-year warranty, so you can get in touch with the manufacturer if you have any issues or concerns with this product.     

While it features a top-notch leak detection system, it has a couple of drawbacks. For starters, even though it supports battery life, it doesn’t come with any batteries out of the box, so be prepared to make additional expenses. Other than that, we found the 6-meter cable to be a little short.    

Weight: 1.3 lbs | Dimensions: ‎6.06 x 5.67 x 4.29" | Compatible Pipe Size: 3/4" | Smart Home Integration: N/A | Connectivity: N/A | Special Feature: Water Leak Sensor

7. Ufairy

Now that we are almost near the end of the list, here’s another product from Ufairy that you should consider. Tested by experts to meet the highest quality and performance standards, the GR-W-105 Smart Water Valve from the brand can shut off the water supply when it detects leaks. 

The single biggest advantage of this product is that it uses stainless steel double hose clamps, which ensures it makes the product 20 times more durable than its predecessor. So, longevity should be the least of your concerns if you decide to go with this smart water valve.    

Additionally, this product works with a quarter-turn ball valve, even those found on radiant heat systems and water heaters. Thus, it makes the product stand out from most of the options on the list, which is great.  

We also liked that it can be used remotely using the “Smart Life” app without hidden costs. So, no matter where you are, you have complete control over the functioning of this product. And you no longer have to worry about a burst pipe and other unforeseen water leaks while at work or on vacation.      

Unfortunately, this smart water valve is not backed by a warranty, which is undoubtedly disappointing. So, if it faces any problems down the line, you’ll have to spend a few bucks from your pocket to repair it. Other than that, it is a top-notch option available at a reasonable price. 

Weight: 1.61 lbs | Dimensions: ‎11.97 x 6.1 x 2.91" | Compatible Pipe Size: 1/2", 3/4", 1", 1 1/4", 1 1/2" | Smart Home Integration: Alexa, Google Home | Connectivity: Wi-Fi | Special Feature: N/A

8. Orbit

Orbit is a popular brand known for manufacturing products that help save water and money and make life easier. On that note, allow us to introduce the 21004 Wireless Faucet Timer, one of the most notable of the brand. This product features a built-in flow meter and allows you to track your daily water usage conveniently.   

The WaterSense technology automatically adjusts the watering based on the conditions of the site, ensuring the product delivers the right amount of water to your plants. Hence, you don’t have to worry about water wastage anymore. 

On top of that, the built-in flow meter gives you a rough idea of how much water you will use to water the plants. Thus, it makes it the ideal choice for gardening and hydroponic applications.

If you are worried about the installation, you will be pleased to know that it is pretty straightforward. All you need to do is download the app, create an account, and then set up the timer at the hose faucet. Plus, the brand offers a 2-year warranty, which we truly appreciate.

Overall, we found this product quite efficient, so you can most certainly keep it under consideration.   

Sadly, this product doesn’t feature a battery backup, which can be an issue when you are not within the Bluetooth range or when the WiFi is down. That said, if you can look past this minor problem, you will find an otherwise outstanding product that offers unmatched performance.  

Weight: 1.03 lbs | Dimensions: ‎2.9 x 6.44 x 8.7" | Compatible Pipe Size: N/A | Smart Home Integration: Alexa | Connectivity: Wi-Fi / Bluetooth | Special Feature: WeatherSense Technology

9. Guardian

Now, let’s talk about the Guardian Leak Prevention System. You can install this valve controller in just minutes over the existing quarter-turn ball valve without using any additional tools and not worry about water damage ever again. In addition, it sports highly functional leak detectors that offer a long detection range.    

Firstly, we found the leak detectors of this product to be truly promising, making the product applicable in a range of places, including toilets, water heaters, sump pumps, etc. Not to mention, they can be placed up to 1000 feet away from the valve controller without any hassle, which we must say is quite unique. 

Regarding the build quality, the product is constructed from high-quality materials from top to bottom, and hence couldn’t be more durable and long-lasting. Moving on, it features an optional battery backup, meaning it can work without the internet or electricity to protect your home.    

Whether you are worried about a burst pipe, a broken washing machine, or an overflowing pump, we think it’s safe to say the product has your back.  

The only gripe we have against this product is that it is not compatible with any other smart home hubs, apart from its own app. This can be an issue for those people who want to track their smart devices through a single application.  

Weight: 6 lbs | Dimensions: 13.54 x 10.47 x 6.42" | Compatible Pipe Size: 1/2-1" | Smart Home Integration: N/A | Connectivity: Wi-Fi | Special Feature: N/A

10. MyGuard MGWLD

Honestly, this list would have remained incomplete had we not included the MGWLD Water Leak Detector from MyGuard. This product could be a notch above most of the options we have mentioned on this list regarding usability and performance. Want to know more, then keep reading. 

If you want to protect your business or home from water damage and save money, then this product could be your best. For one, it is easy to install; simply attach it to the existing plumbing, keep the water sensor on the floor, and you are done. Oh! And don’t forget to download the app, which is free, to control it remotely.

Additionally, it comes with all the necessary accessories, including the floor sensor, pipes, and power adapter, thereby saving you from the hassle of purchasing any important item separately.    

Besides sending notifications on your phone when the water leak is detected, the product continuously rings a loud alarm of 85 decibels before shutting off the main valve. Not to mention the quick response time, which reduces the chances of water wastage and water damage in your home.  

Some disgruntled customers have complained that this product tends to trigger a false alarm. They have further mentioned that the system won’t reset after triggering the alarm, which could be frustrating. Now, all the units from this brand may not have this issue, but still, we thought it was worth letting you know.  

Weight: 3.75 lbs | Dimensions: ‎2.75 x 14.55 x 9.35" | Compatible Pipe Size: N/A | Smart Home Integration: N/A | Connectivity: Wi-Fi | Special Feature: Audible Alarm

What Are the Best Wireless Water Shut-off Valves?

Wireless Water Shut-Off Valves are essential for remote water flow control, providing convenience in the efficient management of water systems.  This table clearly shows the weight (in pounds), dimensions (in inches), pipe compatibility (in inches), smart home integration, connectivity and special features of different wireless water shut-off valves.

Product Weight Dimensions Compatible Pipe Size Smart Home Integration Connectivity Special Feature
Owfeel WIFI & Bluetooth Smart Water Valve 1.57 lbs ‎7.48 x 4.02 x 3.66" N/A Amazon Alexa, Google Home Wi-Fi Voice Control
LeakSmart 8881300 5.44 lbs ‎10.7 x 9.8 x 6.7" N/A LeakSmart Hub Wi-Fi LeakSmart Sensors
Owfeel WIFI Smart Valve 1.34 lbs 11.93 x 5.12 x 3.5" 0.8-1.7", 0.8-1.18" Amazon Alexa, Google Home Wi-Fi Voice Control
Moen 4.75 lbs 5.75 x 2.6 x 5.9" 3/4" Amazon Alexa, Google Home Wi-Fi Microleak Technology
Aubric Smart Valve 1.17 lbs ‎2.76 x 2.76 x 2.95" 1/2", 3/4", 1", 1 1/4", 1 1/2" Amazon Alexa, Google Home Wi-Fi Voice Control
E-SDS 1.3 lbs ‎6.06 x 5.67 x 4.29" 3/4" N/A N/A Water Leak Sensor
Ufairy 1.61 lbs ‎11.97 x 6.1 x 2.91" 1/2", 3/4", 1", 1 1/4", 1 1/2" Alexa, Google Home Wi-Fi N/A
Orbit 1.03 lbs 2.9 x 6.44 x 8.7" N/A Alexa Wi-Fi / Bluetooth WeatherSense Technology
Guardian 6 lbs 13.54 x 10.47 x 6.42" 1/2-1" N/A Wi-Fi N/A
MyGuard MGWLD 3.75 lbs 2.75 x 14.55 x 9.35" N/A N/A Wi-Fi Audible Alarm

Wireless Water Shut-off Valves Buying Guide

Believe it or not, knowing just the top 10 recommendations and a few pros and cons is just not enough information to buy the best wireless shut-off valves. You need to keep in mind a few factors apart from the specifications in buying the right product based on your needs.

Don’t worry; we have explained all of these factors here in detail, so kindly read this section very carefully.

1. Feedback Time

Perhaps the most important reason people buy wireless water shut-off valves is that it automatically detects leaks. This provides top-notch protection from potential flooding, water damage, and other water leakage problems in the house by alerting you when the device detects a leak. 

However, the feedback time should be fast enough to ensure no water wastage and that the damage is kept to the bare minimum. So, before buying, make sure you check the response time of the product. More often than not, it is mentioned in the specifications or the product description section.   

2. Connectivity

Connectivity is another important factor you must consider. A quality product can offer multiple connectivity options such as WiFi and Bluetooth, allowing you to remotely control the product and manage its functionality from your smartphone. 

Therefore, you must ensure your product supports wireless connectivity before buying.  

3. Installation

While some units are made for the entire smart home, others are specifically designed for a particular outlet. 

We strongly believe that it’s more beneficial to go with a product made for the entire smart home because, with it, you get better control of all the outlets. This, in turn, allows you to take the necessary precautions before you leave for a vacation. 

Also, before buying it, make sure that it is compatible with your water valve; otherwise, it’d be a waste.

Apart from that, if you prefer installing the product by yourself instead of having a professional do it, then it’s best to go with a model that’s easy to install. Thankfully, most units in this day and age are easy to install and don’t require additional pipes or tools.   

4. Accessories

When choosing a quality wireless shut-off valve model, it always makes sense to go with a complete kit. This saves you from the hassle of making a quick trip to your local hardware store to buy the additional equipment needed for the setup.

5. Additional Features

Many devices available on the market sport additional features such as a water timer, consumption indicator, temperature, and water pressure monitor to enhance the versatility and efficacy of the product. 

As far as the water consumption indicator is concerned, it sends you a notification when the water usage is higher than usual. Thus, it helps you detect early signs of burst pipes or other types of leakage and get them fixed immediately. 

Moving on, temperature monitors come in handy for people living in freezing temperatures, as they can keep track of how cold the water is and prevent burst pipes. So, if you want to defect any anomaly in your water supply, we strongly recommend going with a product that sports these types of additional features.      

6. Build Quality

Build quality is also a crucial factor that should be considered. After all, the more durable the build quality, the better the chances that it will last a long time. Always go with a valve that is made of sturdy materials such as stainless steel, bronze, or brass, as it will ensure that the product will last for years.   

How does a wireless water shut-off valve work?

Equipped with wireless communication technology like Wi-Fi or Z-Wave, these valves can be controlled via a mobile app or smart home hub. In the event of leaks or emergencies, the valve automatically shuts off the water supply, preventing potential water damage.

What are the benefits of using a wireless water shut-off valve?

The primary benefits include remote control and monitoring of water usage, protection against leaks and water damage, and the ability to shut off water quickly during emergencies. Some models integrate with smart home systems for enhanced automation.

Are wireless water shut-off valves compatible with smart home ecosystems?

Indeed, many wireless water shut-off valves are designed to integrate seamlessly with popular smart home platforms like Google Home, Amazon Alexa, and Apple HomeKit. This enables users to incorporate water shut-off control into their existing smart home setups.

How difficult is it to install a wireless water shut-off valve?

Installation difficulty varies among models, but many are designed for easy installation without professional help. They come with step-by-step instructions, and some even offer video tutorials. If uncertain, consulting a professional plumber is recommended.

Can I receive alerts on my smartphone for water leaks with these valves?

Certainly, most wireless water shut-off valves provide real-time alerts for potential leaks. Users receive notifications on their smartphones, allowing immediate action to prevent water damage.

Are there different types of wireless water shut-off valves available?

Yes, various types exist, including motorized ball valves and motorized gate valves. The choice depends on specific plumbing system requirements and user-preferred features.

Can I control multiple water shut-off valves in different areas of my home?

Many wireless water shut-off valves support the control of multiple valves within the same system. This enables users to manage water flow in different areas of their homes independently through a single app or smart home interface.

What maintenance is required for wireless water shut-off valves?

Regular testing and inspection are recommended to ensure proper valve function. Additionally, users should replace batteries (if applicable) according to the manufacturer's guidelines and perform any maintenance tasks outlined in the product manual.

We have finally reached the end of our review-based guide, and we hope that you have enjoyed the long yet exciting ride. But hold on, we will not let you leave before we mention our top picks from the list. 

In our opinion, the Owfeel WIFI & Bluetooth Smart Water Valve is the best overall because it’s easy to install and sports an affordable price tag. Additionally, the LeakSmart 8881300 can be a great choice for those looking for a product that detects leaks in an instant and works with voice command software.

However, if you want a product that gives you complete remote control, we strongly recommend going with the Owfeel WIFI Smart Valve. That’s all for today. Do let us know in the comment section below if you agree with our top picks.

Till then, sayonara! 

Installing wireless doorbells can be an excellent way to improve home security without the hassle of in-wall wiring. However, placing a wireless doorbell on a UPVC frame requires special equipment, such as self-tapping screws, wedges, corner mounts, or no-drill mounts. 

Your home security is not a matter of joke, and installing the best wireless doorbells is an affordable and effective way to ensure safety. 

Since wireless doorbells operate on radio waves, their installation is pretty straightforward, and you can place them anywhere without worrying about any electrical wiring. That said, installing them on UPVC frames can be trickier. So today, we'll discuss the installation steps and methods for setting up wireless doorbells for UPVC. 

Wired Vs Wireless Doorbell Installations 

Closeup of the intercom in new build residential building. Wired Vs Wireless Doorbell Installations.

You need some kind of doorbell - wireless or wired - to ensure better home security and your family's safety. But whether you want to go for a wired or wireless model solely depends on your preferences and the installation requirements of the doorbell. 

Even though wired doorbells offer a more permanent solution, the installation can be cumbersome. You'll need in-wall wiring and remove some sections of your drywall to install the 20-gauge wires for a wired doorbell close to a power source. In contrast, since wireless models don't require in-wall wiring, they are much easier to install. 

Furthermore, you can install the chime base anywhere in a wired doorbell, but you'll need to wire it. The bell chime unit is always installed at the main outlet for a wireless model. You'll also need to consider the limitations of wall blockage and distance for a wireless doorbell, while wired variants don't have such limitations. 

Some wireless models might also face radio interference if you install them near other wireless bells. On the other hand, wired doorbells don't pick up radio frequencies and won't face any interference. Moreover, a wireless doorbell requires a battery for its push button unit, but a wired model doesn't need batteries anywhere in its system. 

What Are The Features To Look For In A Wireless Doorbell?

1. Heat And Water Resistance 

Since a doorbell is installed outside the main door, people always expect it to be weather-resistant. However, not all doorbells have weather-resistant qualities and can break down quickly under harsh weather conditions. 

It's essential to look for a doorbell with water and heat-resistant qualities that can last through different seasons without getting damaged due to rain, snow, or fluctuating temperatures. In this context, any Ring doorbell can be an excellent choice because all Ring doorbells are specially designed to withstand all weather conditions. 

Tip

Always check the product description and packaging to determine whether the doorbell is genuinely weather-resistant. 

2. Signal Strength

The signal strength of a chime will determine its standard distance at which you can detect its signal without any wall interruptions. For instance, the 50-meter chimes have a signal strength to cover short distances, so they are mostly used in reception areas. Additionally, their bell push unit is installed in a wooden frame by the front door. 

100-meter chimes have more signal strength and can cover larger areas. However, 200-meter chimes are more suitable for large residential properties with thick walls, and you can also use them as portable units because of their excellent signal strength. 

Some manufacturers offer 250-meter and 500-meter chimes to cover extended areas wiring additional push buttons to the main chime unit. Additional push buttons ensure that you can install suitable wireless doorbells for hard-of-hearing people.  

3. Signal Frequencies

Since a wireless bell depends on radio waves to transmit its signal, it's best to choose a model that can work using multiple radio frequencies. This way, you can ensure that no other wireless device is interfering with the signal transmission of your wireless doorbell. However, if you face some kind of radio interference or signal disruption, you can change the bell's privacy code to adjust its frequency. 

4. Battery-Powered Vs. Electric Models 

Depending on their power sources, wireless doorbells are of two types - electric and battery-powered. If you want to install the doorbell near a power outlet, you can use an electric model. On the other hand, if you don't have a working power outlet near the doorbell location, you may prefer a battery-powered variant. However, make sure to buy extra batteries and change them when required. 

5. Several Chime Options

Modern wireless doorbells offer different chime options for the doorbell sound, from traditional dings and basic buzzing sounds to elaborate melodies. You can choose any chime option based on your preference. Not to mention, you can choose the customizable chime option to upload your favorite doorbell sound. 

6. Chime Volume Control 

Some wireless doorbell models feature audio control options to easily adjust the chime volume as you want. With these wireless models, you can quickly turn down the chime volume at night while sleeping or turn it up if you're working in the kitchen. 

7. Bell Size And Style 

It goes without saying that wireless doorbells are available in various styles and sizes. Always consider the amount of space you have near the front door where you'll install the doorbell to choose the right size. If you don't have enough space but select a large doorbell, it'll look completely out of place. 

Similarly, choosing a doorbell with the right design and style is important to maintain the outdoor decor of your house. Basic wireless doorbells usually have a plastic body and are primarily available in neutral colors. However, luxury doorbells offer various colors, styles, designs, and finishes, such as metal, wood, and ceramic. So, choose a doorbell style and design that goes well with your house decor. 

Steps For Wireless Bell Installation 

Before you move on to installing a wireless bell, sort out all your tools and equipment carefully so that you don't run back and forth to get the tools in the middle of the installation. You'll need the following equipment for the installation process:

  • Flat-tip screwdriver 
  • Drilling machine 
  • Drill bit and drivers
  • Measuring tape 
  • Wireless doorbell 

Once you've gathered the tools, it's time to take a look at the steps to install the doorbell. 

Step 1: Plug In The Wireless Chime Unit 

If you have an electric wireless doorbell, find a 120V power outlet closer to the front door to plug in the chime unit. You can simply install the chime unit on the wall for a battery-powered doorbell. 

Make sure to set up the chime unit at a place close to the main entrance door but yet inside enough so that you can hear the bell chimes from anywhere in the house. If your house has a front hallway or corridor, it can be a good spot to place the chime unit. 

Warning

Make sure to turn off your home's circuit breaker first while plugging the chime unit into the power socket for an electric doorbell. Moreover, don't set up the bell chime unit near any heat source, like a baseboard heater or radiator. 

Step 2: Place Battery Inside Bell Push Button

Whether you're using a battery-powered or an electric model, you need batteries for the push button as long as it's a wireless doorbell. Use the flat-tip screwdriver to remove the opening of the battery door and insert an AA battery inside the unit. Double-check the directions of the battery and close the battery space. 

Step 3: Choose A Location To Place The Push Button 

The accurate height at which you should place the push button is typically between 44 and 48 inches from the ground. Use the measuring tape to mark the height on the doorknob side of the frame instead on the side of the hinges to place the push button properly. 

Step 4: Test Push Button 

Hold the push button at the chosen location and press it to check whether the chime unit receives the signal. There will be an audible ringing sound once the doorbell chime receives the signal. It's always best to test the push button before installing it in your doorframe to avoid removing it again if there's any signaling problem. 

Step 5: Mark Screw Locations Of Push Button Unit

Some push-button units have a separate back mounting plate you can use to make the locations of the drill holes. Other units use the back of their housing as a standard baseplate for mounting. In that case, you have to open the unit using a flathead screwdriver and use its back to mark the drill hole locations. 

Step 6: Install The Push Button Unit

Once you've tested the push button unit and marked its drill hole locations, it's finally time to place it on the doorframe. Drill pilot holes around half of the diameter of the push button's mounting screws. Next, attach the baseplate by drilling in the screws, and then place the unit on the mounting plate and test it. 

What Is An UPVC Frame?

Courier in medicine mask and gloves with parcel calls the intercom to deliver the order to the customer. Coronavirus and quarattine concept. What Is An UPVC Frame.

Installing wireless bells in UPVC door frames can be a bit different from installing them on traditional wooden doors. But before we discuss the installation methods, it's essential to know what UPVC frames are. UPVC, or Unplasticized Polyvinyl Chloride, is a sturdy, high-quality, and cost-effective material widely used to frame windows and doors. 

However, a UPVC frame doesn't have a flat surface and is similar to crown molding, making it challenging to mount wired or wireless devices, like the Ring Doorbell. So, you must apply the correct methods to set up a wireless doorbell on UPVC frames, as we've discussed in the next section. 

What Are The Different Ways To Mount Wireless Doorbells On UPVC Doors?

1. Using Self-Tapping Screws

Self-tapping screws can come in handy when you need to work with materials that are accessible from only one side. These screws are quite effective in installing wireless doorbells on UPVC frames. Self-tapping screws are of two types - thread-cutting and thread-forming. It's best to drill pilot holes before installation if you're using thread-forming screws because they are flat-tipped. 

On the other hand, you can simply drive the base plate in the desired location without drilling any pilot hole while using thread-forming screws. But you can also drill holes for thread-forming screws if you want to make the installation easier. 

Since many wireless doorbells have a surveillance camera, install the doorbell around four feet from the ground allowing the camera to capture the footage of anyone approaching the door. 

2. Using Corner Mounts And Wedges

You can also use corner mounts and the wedge to properly install the wireless doorbell based on the shape of the UPVC frame or desired installation location. Some doorbell manufacturers sell corner mounts and stackable wedges, or you purchase them from your local hardware store. 

A corner mount or wedge will help to offset the angles of your wedge-shaped UPVC frame, offering a clear view of any visitor approaching the door. Place the corner mount like a standard baseplate and secure the wireless doorbell. A single or double corner mount will also help to set the doorbell in a forward-facing position if you have an angled UPVC frame. 

3. Applying Adhesive On Base Plate 

Installing wireless doorbells becomes a lot easier if you use no-drill mount baseplates, which use adhesives to attach the baseplate to the UPVC frame. However, these mounts are only suitable for attaching doorbells on flat surfaces. It'll be difficult to use adhesives to attach base plates on a curved surface or a surface having ridges. 

Make sure to clean the surface of your UPVC frame thoroughly before applying the adhesive to attach the doorbell's base plate. Try to avoid using an adhesive for installation when the weather is particularly humid. 

Place the adhesive tape and hold it for a while before releasing it and peeling the other side. Repeat this process when installing the base plate. The no-drill mounting adhesive is waterproof, so you don't need to worry about the base plate breaking down under harsh weather conditions once it is installed properly. 

4. Applying Silicone On Base Plate 

Using silicone can also effectively mount base plates without drilling any pilot hole in the UPVC frame. Place the doorbell's base plate on the selected location and apply a thin layer of silicone around its edges. Once the silicone has dried up, you can attach the doorbell to the base plate.

Warning: Never apply silicone on the wireless doorbell itself because silicone prevents the device from letting out the heat generated.  

How To Troubleshoot A Wireless Doorbell?

A UPVC frame can disrupt radio signals, limiting the signal range between the outside push button and the inside chime unit. Under such circumstances, the push button won't be able to send signals to the chime unit, and your wireless doorbell will stop working. So, you might ask - how to fix a wireless doorbell if it faces such frequency disruptions from the UPVC material? 

The simplest thing to remedy this situation is to move the location of your push button unit from the UPVC frame. Moreover, if your doorframe has metal wall studs, reposition the unit by a few inches, so it's not placed directly over them. Removing the push button unit to a new location can help improve the signal range of your wireless doorbell.

You might also need to troubleshoot your wireless doorbell under cold weather conditions because temperatures below 41℉ can degrade the life of the push button battery. So, try to replace the battery much more frequently during winter to keep the doorbell running longer. Also, keep the push button unit dry because snow or rain can cause the battery terminal to rust. 

3d illustration. Sliding windows winter summer. Hotel resort. Forest and nature. Country holiday. Wireless Doorbells For UPVC Doors Final Thoughts.

Wireless Doorbells For UPVC Doors Final Thoughts 

Installing wireless doorbells on UPVC is easier than installing them on brick or concrete walls. However, you need to follow the installation procedure accurately to avoid causing any damage to the doorbell units while setting them up. 

Furthermore, test the doorbell after you have set up all the units to check whether the device is working properly. If the doorbell requires troubleshooting, you can follow the steps mentioned above or call a professional. 

Always exercise caution while dealing with electrical outlets to set up electric wireless doorbell models. You can hire a professional for the installation if you're not comfortable with applying DIY techniques. 

At 115 dB sound level, the AVANTEK Mini Wireless Doorbell is neither too loud nor too soft, so it’s ideal for homes with hearing-impaired members. Doorbells from SECRUI, SadoTech, and Ring Video are also dependable options for hard-of-hearing individuals. 

Installing the best wireless doorbells can make a world of difference for people with profound hearing loss. 

As against standard doorbells, a wireless doorbell is a customizable alert system that combines extra-loud chimes with flashing lights. Thus, people with hearing aids won’t miss a delivery or a visitor again. 

That said, we’ve rounded the ten best wireless doorbells that are worth considering. So, without further ado, let’s dive in! 

10 Best Wireless Doorbells For Hard Of Hearing

1. AVANTEK Mini Wireless Doorbell

Sale
AVANTEK Wireless Door Bell, Mini CB-11 Waterproof Doorbell...
  • SIMPLE SETUP: Just plug the mini receiver into a socket and...
  • 300 M/1000 FT ULTRA LONG WIRELESS RANGE: 1 plug-in receiver...

The AVANTEK Mini Wireless Doorbell features a 29mm stereo speaker to deliver crisp and rich sound. This unit boasts 52 melodies and comes with buttons to go back and forth when choosing a tune. Moreover, this unit is sturdy and can withstand harsh weather conditions. 

Why Did We Like It?

Lightweight, compact and elegant, the AVANTEK Mini Wireless Doorbell arrives with everything you need to set it up– anchors, screws, a piece of double-sided bonded tape, and a key. All you need to do is connect the receiver to a socket and mount the transmitter to a wall, and your doorbell is ready to use. 

Powered by a long-lasting CR2032 lithium battery, this doorbell system comes with two transmitters, which are designed to cover an impressive range of 1,000 feet. On top of that, its 29mm speaker produces clear sound and has a flashing LED light, so people with impaired hearing will hear the doorbell whenever someone rings it. 

Aside from a handful of chirpy tunes and a classic “ding-dong” sound, this doorbell comes with 50 different chimes. With just the click of a button, you can choose your favorite tune and adjust the volume up to 115 dB. 

Despite its small size, this unit is designed to take a beating, and its IP55 ratings testify to the same.

What Could’ve Been Better?

The only caveat is that it doesn’t come with a rechargeable battery, so you’ll have to take the pain of changing it every time it drains. Other than this minor flaw, this unit makes for a perfect option for homes with people who have difficulty hearing doorbell rings. 

2. SECRUI Wireless Doorbell

Sale
SECRUI Wireless Doorbell, Easy installation, Waterproof,...
  • [Work Out of Box] This wireless doorbells for home has been...
  • [Long Range] This high-frequency electronic technology...

Sleek, stylish, and energy-saving, this wireless doorbell by SECRUI allows users to change from 58 different chimes from a harsh buzzing sound to a long chiming ring. This easy-to-install doorbell has a strong signal strength and comes with a sensing range of up to 1,000 ft. 

Why Did We Like It?

Tired of searching for visual alert doorbells with industrial aesthetics that score well on longevity? Well, the SECRUI Wireless Doorbell might fit the bill because of its sleek silhouette, multiple customization features, and IP55 rating. 

Adopting the FM signal scheme, this remote control doorbell boasts strong anti-interference features and connects up to 1,000 ft in open areas. So, people with a hearing aid can hear the doorbell no matter whichever corner they are in. 

What’s more, it comes with a colorful LED flashing light, so it’s a must-have for homes with seniors who cannot hear sounds. The unit contains 58 short ringtones, which you can change according to your mood with the button on its body. 

The white color certainly oozes elegance, but what’s impressive is that its body is crafted of high-quality ABS material. Thus, it works excellently in harsh weather conditions– be it rain, snow, or sandstorm. 

What Could’ve Been Better?

Owing to its functionality, this extra loud doorbell is a worthy addition to large homes with hard-of-hearing individuals. One minor flaw of this unit is that it doesn’t come with a “next” or “previous” button, so you’ll have to cycle through all the tones to return to the one you like. 

3. SadoTech Wireless Doorbell Kit

SadoTech Wireless Doorbells for Home, Apartments,...
  • WIRELESS DOORBELL KIT: Includes everything you need for DIY...
  • EASY TO SETUP: Our portable doorbell easily pairs and...

Ideal for townhomes, condo apartments, and warehouses, the SadoTech Wireless Doorbell Kit is a versatile kit that comes equipped with LED lights that add to user-friendliness. Though it has an operating range of up to 1,000 ft, you can extend the coverage by adding multiple doorbells and receivers. 

Why Did We Like It?

Businesses that are generous enough to hire deaf people must install the SadoTech Wireless Doorbell Kit in their workplace. This doorbell kit contains two plug-in chime receivers, a doorbell ringer, a battery, and fittings needed for setup. 

What’s more, you get to choose your favorite door chime from more than 50 melodies, which can be adjusted to four different volume levels. Another noteworthy aspect of this portable doorbell is that you can set the two chime units with distinct ringtones. 

Thanks to the built-in memory, the unit remembers every setting from volume level to selected tones after a power outage. 

Equipped with the highest-quality microchips, this flashing light doorbell has an operating range of 1,000 ft. And since it comes with two plug-in chime receivers, you can install them in any corner you want.

What Could’ve Been Better?

Available in multiple color options, the SadoTech Wireless Doorbell Kit blends well with all kinds of exteriors. Though weatherproof, the doorbell doesn’t come with an IP rating like the previous models. So, it may not be suitable for places prone to torrential rainstorms.

4. Ring Video Doorbell 4

Ring Video Doorbell 4 – Previous Generation
  • 1080p HD video doorbell with improved video previews and...
  • All-new Color Pre-Roll Video Previews of all motion events...

Have a completely deaf person at your home who refuses to put on a hearing aid? Then this Ring Video Doorbell 4 is a worthy investment because its high-definition video camera sends notifications whenever someone’s at the door. Compatible with Amazon Alexa, this video doorbell allows two-way communication, so you can speak to visitors without opening the door. 

Why Did We Like It? 

Confused between Arlo wired vs wireless doorbell for your home? We’ve got a perfect alternative– the Ring Video Doorbell 4 is an investment you wouldn’t regret. With improved video previews, motion sensors, and night vision, this video doorbell secures your property. So, you won’t have to worry about the safety of your loved ones. 

Boasting a maximum resolution of 1080p, this system records video in high-definition and captures every little detail, offering head-to-toe visibility. On top of that, its motion sensors detect lurkers and send alerts to your smartphone, doubling as a security camera. 

As the system comes equipped with speakers and microphones, it allows for two-way communication. So, whether the hearing-impaired individual is mowing the lawn or relaxing in their bedroom, they can answer the door through their smartphone. 

What Could’ve Been Better?

Aside from video quality, the motion detection sensor helps people with severe hearing loss to answer the door quickly through their smartphone or Alexa. However, the battery life is very short, and you’ll have to subscribe to the Ring Protection Plan to save and share videos. 

5. NOVETE Wireless Doorbell Kit 

Wireless Doorbell Kit, NOVETE Door Bell Operating at Over...
  • 【Expandable Doorbell System】Expand your existing...
  • 【Ultra-Long Wireless Range】Boasts a remote connection of...

Jam-packed with 52 melodious chimes and five adjustable volume ranges, the NOVETE Wireless Doorbell Kit can connect up to 1,300 ft in open environments. What makes it ideal for people with severe or moderate hearing loss is that it comes with an LED indicator. Rest assured, hearing-impaired individuals won’t miss the doorbell the next time it rings. 

Standout Features

  • 1,300 ft connection range
  • IP55 dustproof and waterproof rating

Why Did We Like It?

Operating on a replaceable 230mAh CR2032 lithium battery, NOVETE boasts a strong signal penetration that can range up to 1,300ft. For this reason, this is a popular pick among large homes, warehouses, factories, and industrial establishment owners. 

Folks who aren’t fond of the classic doorbell sound will be pleased to know that this doorbell comes with 52 different chimes. Thus, you can browse through them and set the one you find most pleasant. 

The speakers of this doorbell produce around 115 dB, but you can adjust it through five levels to suit the needs of your hearing-impaired family members.  

Aside from functionality, this unit wins brownie points for its sturdy body made of ABS material. Interestingly, the push-button is robust and waterproof, so it can tolerate harsh weather. To top it off, it is rated IP55, which means it is resistant to water and dust. 

Lastly, we appreciate the addition of an LED indicator that makes it easy for people with severe hearing impairment to answer the doorbell. 

What Could’ve Been Better?

Hassle-free setup, weather-resistant, and decent sound output– this wireless doorbell is perfect for everyone on a budget. However, you’ll need to spend a few bucks on batteries because this unit consumes a lot of power, so you’ll have to change them frequently. 

6. Honeywell Home Portable Wireless Doorbell

Sale
Honeywell Home RDWL917AX2000/E Doorbell Portable Wireless...
  • Downloadable MP3
  • Adjustable volume, sleep mode and mute to adapt use for time...

Another reliable option for people who are hard of hearing is this portable wireless doorbell from Honeywell Home. It has a wireless range of 450 ft, and the volume can be adjusted to the preference of members using hearing aids. Additionally, the push-button features weather-resistant plastic, so its durability is top-notch. 

Standout Features

  • Runs on C-alkaline batteries
  • Weather-resistant plastic

Why Did We Like It?

While there are plenty of things to like about this wireless doorbell, the first thing to appeal to us is its portability. Bedroom, lounge, yard, or basement– you can carry the receiver of this wireless doorbell wherever you go. Its portability makes it a perfect option for elderly members with moderate hearing loss. 

And in case your family member doesn’t like wearing a hearing aid because of discomfort, let us tell you that it’s equipped with a halo light, offering seven color options. So, the light will flash whenever someone rings the doorbell, and hearing-impaired individuals will be alerted. 

Available in six styles, this wireless doorbell features only 11 pre-installed tunes. However, you can download your favorite ones using the USB that comes with the package. 

If your hard-of-hearing family member naps with their hearing aid in their ears, you can set the doorbell on “sleep” mode or mute it. 

What Could’ve Been Better?

Though compact and portable, this wireless doorbell has an operating range of only 450ft, so it won’t be the right pick for large spaces. However, you can extend the range by connecting a second doorbell to the chain, but you’ll have to fork out extra cash. 

7. Coolqiya Wireless Doorbell

Wireless Doorbell, Coolqiya Door Bell Chimes Kit with 3...
  • 🔔【IT'S DURABLE AND SAFETY FOR PEOPLE】: Transmitter...
  • 🔔【SUPER LONG DISTANCE TRANSMISSION】: Made of...

Still haven’t found the right wireless doorbell for your hearing-impaired wife? Then this Coolqiya Wireless Doorbell would make an excellent addition to your abode, thanks to the operational range of 1,000 ft. The transmitter isn’t only waterproof, but it is also RoHS, CE, and FCC-certified. 

Why Did We Like It?

This wireless doorbell from Coolqiya earns a solid score when it comes to aesthetics, but it wins brownie points for its outstanding performance. This small device operates at a range of up to 1,000 ft, which makes it ideal for bungalows, farmhouses, and assisted living facilities. 

It produces about 110 dB of maximum volume, which might be loud for people with normal hearing but not ear-splitting. As the volume is adjustable, you can set it to the highest range when leaving for work. So, your hearing-impaired family members can answer the door in your absence. 

Other than that, you’ll find a blue LED indicator that flashes whenever someone presses the doorbell, which makes it perfect for people with profound hearing loss. 

Setting up this wireless doorbell unit is easy– mount the transmitter outside your main door, pair it with receivers and plug them into an electrical outlet. What’s more, you can use the transmitter to leave messages for your visitors and vice versa. 

Also, the brand goes the extra mile to satisfy its customers by backing its doorbell with an 18-year warranty. 

What Could’ve Been Better?

If you’re looking for a wireless doorbell for a large space, this one by Coolqiya will fit the bill. However, the double-sided tape that comes with the unit doesn’t work well in colder regions, so we suggest using rubber-based adhesive for mounting the transmitter. 

Fosmon WaveLink Wireless Door Chime with 500 Feet Range, 58...
  • [MONITOR THE AREAS MOST IMPORTANT TO YOU WITH WAVELINK...
  • [58 UNIQUE CHIMES] 58 unique ringtones and chimes allow your...

Running on a 1.5V AA alkaline battery, the Fosmon WaveLink Wireless Doorbell is a multi-functional unit that serves both as a doorbell and a home security system. With five adjustable volumes and 58 pleasant ringtones, you can customize this unit to suit your preferences. 

Why Did We Like It?

For homes with multiple windows and doors, the Fosmon WaveLink Wireless Doorbell will be the best option because the receiver can be paired with multiple transmitters. Thanks to the magnetic door and window sensor, the doorbell notifies you whenever a window or door is opened. 

Additionally, you can choose your favorite tune from among 58 unique chimes, including lullabies and long melodies. Whenever someone presses the push-button of the doorbell, it rings your set chime at 110 dB, which of course, can be adjusted as per your preference. 

Besides, this doorbell creates a visual alert, thanks to the LED indicator on the receivers. Thus, anyone with profound hearing loss will know whenever someone’s at the door due to the visual cues triggered by the doorbell ringing. 

Furthermore, it can withstand temperatures between 5°F and 140°F, so you can install the bell outdoors without worries. This wireless doorbell comes with clear instructions, so setting it up won’t be much of a challenge. 

What Could’ve Been Better?

Despite boasting a huge selection of more than 50 melodies, this wireless doorbell may not be suitable for a commercial or industrial establishment. That’s because it hardly features any classic or professional melody; instead, they are packed with lullabies. So, if you’re looking for a wireless doorbell to make your commercial space deaf-friendly, this won’t be the right pick. 

9. PHYSEN Wireless Doorbell

Wireless Doorbell, PHYSEN Waterproof Door bell Chime Kit...
  • Long Wireless Range Doorbell System - Our wireless doorbells...
  • Waterproof Doorbell Buttons & Easy to Install - The door...

This 110 dB wireless doorbell is ideal for various establishments that wish to make their space deaf-friendly– offices, retail stores, villas, and homes. Thanks to the LED indicator, people with profound hearing loss won’t have trouble answering the doorbell. 

Why Did We Like It?

Covering an extensive range of over 1,300ft, the PHYSEN Wireless Doorbell produces chimes at 110 dB, which is loud enough to notify deaf people that someone’s knocking at the door. 

All four receivers in the package feature an LED indicator that lights up whenever someone presses the push button of the doorbell. As such, the flashing light grabs the attention of people who are hard of hearing but don’t wear hearing aids. 

Besides five adjustable volume levels, this unit offers 58 chimes, so you get to choose a plethora of options to choose the ringtone. 

Crafted of ABC material, the body of the transmitter is weatherproof and waterproof, and it can survive extreme temperatures. The push button is IP55-rated, so it’s tested against water and dust– no matter the weather outside, you can rest assured that your doorbell will resist everything. 

That’s not all; the model is equipped with a 23A, 12V battery that lasts for two to three years. Hence, you won’t have to go through the hassles of changing it every few months. 

What Could’ve Been Better?

While setting it up, we found out that all receivers ring the same chime, no matter how much you try to set different ones. So, it doesn’t live up to its claims of allowing users to customize transmitter tones for different doors of their homes. 

10. Anpress Wireless Doorbell

Anpress 7 Color Lights Flash + Music Doorbell, Doorbell, The...
  • 【Music Doorbell with Colorful Light】Appearance elegant...
  • 【3 Working Modes】1, Only flash; 2, Only ring; 3, Both...

With a wireless range of up to 164ft and seven colorful flashing lights, the Anpress Wireless Doorbell is a dependable option for small spaces with hearing-impaired individuals. This easy-to-operate unit comprises 16 melodies, which can be adjusted to five different volumes. 

Why Did We Like It?

Despite its affordable price tag, this wireless doorbell from Anpress packs a powerful punch. This quick and easy-to-install doorbell is equipped with an LED indicator that lights up whenever anyone rings the bell. So, deaf people will instantly understand that someone’s at the door. 

Certainly, you can customize the doorbell by setting your favorite tune out of the 16 melodies that come with the unit. Like other doorbells, it allows you to set different tunes for different doors, so you won’t have trouble identifying which door is ringing. 

Not just that, but you can also adjust the volume level to the liking of your family members who wear a hearing aid. 

It offers three working modes– only ring, only flash, or both ring and flash, which adds to its user-friendliness. Lastly, we like the minimalist white body of this doorbell that blends well with every exterior. 

What Could’ve Been Better?

Unlike other wireless doorbells, this doesn’t come with screws or anchors for mounting; instead, you’ll have to use adhesive patches to install it outside your front door. On top of that, the body isn’t as durable as other options on the list, so it may not survive harsh weather conditions. But for the price paid, it offers excellent value for money. 

Wireless Doorbells For Hard Of Hearing Buying Guide

Out of so many wireless doorbells for UPVC doors, choosing the right one for hard-of-hearing people is challenging. That is why we’ve shortlisted a few important factors that you must keep in mind while shopping for wireless doorbells. So, let’s check them out. 

1. Range

The wireless range between the receiver and the doorbell differs from model to model, which is why it’s the first thing you need to consider when buying a wireless doorbell. For large homes, you must go for systems that boast an operating field of up to 1,000 ft, while anything between 164 ft to 500 ft will be ideal for small spaces. 

2. Power Source

Most doorbells run on non-rechargeable batteries, whereas some feature rechargeable ones. Non-rechargeable batteries can last up to two to three years, depending on the size of your home. Conversely, rechargeable batteries consume more power, so you’ll have to recharge the doorbell system much more often. 

When compared, wireless doorbells with disposable batteries are cost-effective in the long run, so you must opt for them. 

3. Additional Features

When shortlisting wireless doorbells for your property, pay attention to the extra features that come with the system. Like, a doorbell with an LED indicator will be more helpful for hearing-impaired individuals than one without it. 

Also, check whether the volume levels are adjustable or not because a system producing extra loud sounds can damage the ears of people with hearing aids. Other features to look for in a wireless doorbell are motion sensors, high-definition video capture, security sensors, and two-way communication. 

Top Wireless Doorbells For Hard Of Hearing Verdict

Leading a normal life for hard-of-hearing individuals is challenging– but very few people understand that. 

One way you can make your hearing-impaired relatives’ life easy is by installing a wireless doorbell. Thus, they can live independently without worrying about missing an important visitor or parcel. 

Before we sign off, here’s a quick rundown of our favorites from the list. The AVANTEK Mini Wireless Doorbell is our favorite because it’s easy to install and boasts an ultra-long wireless range. 

But if you’re looking for a more deaf-friendly device, you can’t go wrong with the SadoTech Wireless Doorbell Kit. That’s because the unit has LED lights that flash whenever someone rings the bell. 

That’s all for today. See you later! 

Wine has been a staple in many celebrations and festivities. It's one of our favorite companions when throwing a dinner party with friends and families.

When the night ends, and you've chugged down all the wine, all you're left with are empty bottles and wine corks. You could even have a whole stash of wine corks lying around.

This begs the question: What do you do with all the wine corks sitting on your dinner table?

In our case, we like collecting leftover wine corks to make creative wine cork crafts! You can make many DIY projects with all the old wine corks you can save.

Are you interested in making amazing wine cork crafts? We'll give you a list of DIY wine cork ideas before you do so! 

50 DIY Wine Cork Projects for Your Home

DIY crafts are great ways to upcycle reusable materials to create decorations and knick-knacks while sparking your creativity and imagination.

With these, you can make unique ornaments that you can give as gifts and party favors or use them to decorate your home. The limits are your imagination and creativity.

1. Wine Cork Coasters

via diycandy.com

If you plan to drink more wine, you'll need coasters to protect your table from getting damaged by cool wine glasses. One of the best ways to reuse corks is to turn them into coasters.

You can easily cut them up and glue them together. Whether you need a place to set your glasses or wine bottles, this is the best way to protect your tables.

2. Wine Cork Garden Markers

Wine Cork Garden Markers

via Donna

Need an easy way to identify the herbs and plants in your garden? Try these DIY wine cork garden markers. They're eco-friendly and easy to make.

They're incredibly intuitive, only needing your old wine corks, dowels, and markers to construct. Label the wine corks according to the plant you want to match them with.

3. Wine Cork Bird Houses

Wine Cork Bird Houses

via douglasfoster4

Making a whole birdhouse could seem like one of the more complicated wine cork projects. However, many templates online can guide you through this project.

Use a hot glue gun to ensure your birdhouse will be safe for the birds living there.

4. Wine Cork Jewelry Organizer

Wine Cork Jewelry Organizer

via Crafts For All Seasons

You won't have to look for your accessories when you have them all organized. Sorting them out just got easier with a wine cork jewelry organizer.

You can use the corks as the pegs or hooks of your jewelry organizer to hang your accessories in place and make them easier to look for.

5. Wine Cork Bulletin Board

Wine Cork Bulletin Board

via Emma Chapman

Why buy boards when you have wine corks left from your last dinner party? When you collect enough material, you can create your own wine cork bulletin board.

Cork boards are made with the same materials as this DIY wine cork project. Making it on your own makes it more fun to create.

This DIY wine cork craft idea is excellent, especially if you need a place to put up essential notes and memories.

6. Cork Planters

Cork Planters

via Unknown Artist

This fun project is one way to give your plants a new home. It provides a more rustic vibe to the plants you have indoors.

Whether you have succulents or taller plants, this would be a great way to show them off.

7. DIY Wine Cork Keychains

DIY Wine Cork Keychains

via lizkingdesigns

This easy craft has become how people add their personal touch to small everyday items, like wine cork keychains. You can give it as a gift or keep it for personal use.

You can screw in or stick beads onto wine corks to make them more unique. Not only are these wine cork keychains super cute, but they're also a great way to keep your keys in check.

8. DIY Wine Cork Tray

DIY Wine Cork Tray

via Rebecca Kilbreath

You'll need a way to carry things around for your next dinner party. You can use your wine corks to make a DIY wine cork tray.

The wine corks would greatly support whatever you need to carry and do it aesthetically, elevating the event's entire look.

9. Wine Cork Bath Mat

Wine Cork Bath Mat

via Crafty Nest

Keep your bathroom floors dry by creating a wine cork bath mat. They're reasonably easy to make and allow you to use your leftover wine corks.

We recommend having wine corks of the same size to make it easier to assemble and to lessen the gaps between the corks. Use a hot glue gun to attach them to a shelf liner to make them more sturdy.

10. Wine Cork Place Card Holders

Wine Cork Place Card Holders

via Jochem and Jamie Veldhuijzen

If your next dinner party is big, you can easily tell people where to sit by making wine cork place card holders. It's an easy craft project that anyone can do.

You'll only have to cut part of the cork to slip a piece of paper with your guest's name.

11. Wine Cork Trivet for Pots and Pans

Wine Cork Trivet for Pots and Pans

via dailydoseofsparkle.com

Another way to protect your tables from hot pots and pans is to have a wine cork trivet. This simple craft is sturdy enough to support your kitchenware, no matter how hot they get.

You can also arrange the wine corks differently to make them more fun.

12. Vase Filler

Vase Filler

via pinterest

Using your wine cork as a filler for glass vases is a great way to keep your flowers upright, especially if you use a bigger vase.

It adds to the aesthetic of your place and is earth-friendly enough to keep these corks out of landfills.

13. Coat Hooks

Coat Hooks

via pinterest

Besides jewelry, larger wine corks would also be great for hanging up coats. You'll only have to hot glue them onto a board or attach them directly to your wall.

This DIY craft is another great way to decorate your home and add a more vintage touch.

14. Bottle Stopper

Bottle Stopper

via Lemons Are Blue

Wine bottle stoppers can be great party favors, especially when personalizing them. Corks are easy to carve and cut according to the design you want.

You'll be able to reuse wine corks for their intended use and add a personal touch to your bottles.

15. DIY Wine Cork Tic Tac Toe

DIY Wine Cork Tic Tac Toe

via pinterest

Turn your old wine corks into a little game with this DIY project. Use them as dividers and the base for a tic-tac-toe game. This project will be great, especially for kids.

You can also use the corks to make the Xs and Os you'll need for the game. Add your own designs to make them completely unique from others.

16. Wine Cork Photo Clip

Wine Cork Photo Clip

via Studio Calico

Try this creative wine cork photo clip if you want a cute gift idea. It's a great way to display pictures of important memories.

Personalize your photo clip based on your design and add a little something to make your photo clip more special.

17. DIY Wine Cork Wall Art

DIY Wine Cork Wall Art

via Morgan Hanson

There are many ways to add art to your walls. Maybe you can consider using wine corks as your décor. You can create any design you want and assemble it.

This wine cork wall art can go well with a pallet wall or match other DIY bamboo projects, thanks to their rustic vibes. They're also a cool gift idea.

You can also combine this with wine bottles to make the design more unique.

18. Wine Cork Stamps

Wine Cork Stamps

via Rebecca D. Dillon

Stamps can be your best friend if you're into scrapbooking or journaling. You can make wine cork stamps to personalize your other crafts.

Carve out the white space of your design so it can be raised to transfer it onto paper.

19. Wine Cork Pendant

Wine Cork Pendant

via Lisa Storms

If you're looking for a new way to accessorize, letting a personalized cork pendant hang on your neck may be the answer.

You can paint different designs and colors on the surface to personalize them. You can also carve your designs to add texture to your pendant.

20. Wine Cork Christmas Tree

Wine Cork Christmas Tree

via pinterest

If you're looking for a unique way to decorate your house during the holidays, making a Christmas tree can be one of the wine cork craft ideas you can try out.

Use the wine corks as your tree's leaves and decorate them with small ornaments to spread Christmas cheer.

If you're out of wine corks, use plastic spoons to craft your Christmas tree.

21. Wine Cork Vase

Wine Cork Vase

via Design Improvised

Another way to show your flowers off at home is by having a wine cork vase. They're another rustic way to turn your plants into an exciting centerpiece.

You can also use a wine bottle as the base of your vase. Use a hot glue gun to secure the wine corks around it to make your vase.

22. Wine Cork Candle Holder

Wine Cork Candle Holder

via pinterest

If you're into the fancy dinner vibe, you can try adding a candle holder to your wine cork projects. You can easily assemble the cut-up parts to form the protective barrier for your little candles.

Fun Fact

If you dip a cork into acetone alcohol, you can use it as a candle. Just be careful when working with alcohol and fire since they can be dangerous.

23. Chandelier Made of Wine Corks

Chandelier Made of Wine Corks

via Max & Fodder

Creating a chandelier out of wine corks is a great way to decorate your house. Tie them onto a frame and let them hang to form the chandelier.

It's a cool way of using a lot of wine corks and creating something for your home. They can also match other things in your house, like cabinets and privacy screens.

24. Wine Cork Wreath

Wine Cork Wreath

via Nikki, In Stitches

If you don't want to worry about leaves (real or not), creating a wine cork wreath might be the best solution. They're not as messy, and the wreath is an easy design to make.

This DIY wine cork craft is a great way to reuse your corks while decorating for the holidays.

25. Wine Cork Utility Knife Handles

Wine Cork Utility Knife Handles

via pinterest

If you have old canape knives, you can easily attach them to old wine corks to make a small utility knife. They can be a great gift or something to use around the house.

Be sure to use sturdy corks when making one of these cork crafts since blades and knives are dangerous.

26. Wine Cork Monogram

Wine Cork Monogram

via  pinterest

Whether you're looking for party décor or something to add to your house, use your corks to create a monogram. It can be the first letter of your name or someone important to you.

These cork crafts tend to go well with paintings on canvases and similar crafts.

27. Wine Cork Candle Votives

Wine Cork Candle Votives

via Smdecoración

Corks can easily absorb heat, making protecting you from hot objects like flames easier.

You can tie a bunch of wine corks around your candle holder or glass to make them easier to pick up without sacrificing aesthetics.

28. Wine Cork Backsplash

Wine Cork Backsplash

via Ibrand1

One of the best things about wine corks is how they don't absorb water, making them great against splashes. Set them up against the sink to prevent any backsplash.

This is one of the many cork crafts that can help enhance your house's decor while protecting the structure, making it highly functional.

29. Wine Cork Bungee Ties

Wine Cork Bungee Ties

via The Kim Six Fix

Keep the wires in your home organized by reusing your corks as bungee ties. Create holes on a cork and slip in an elastic to hold your wires in place.

These are some of the more functional wine cork crafts on the list rather than decorative ones.

30. Wine Cork Spools

Wine Cork Spools

via pinterest

These wine cork spools can be a quirky gift to display on a table. They're easy to make and can look great with any decor.

They can be a great way to decorate your house or add your personal touch to your cubicle at work.

31. Wine Corks Drawer Knobs

Wine Corks Drawer Knobs

via Rhonda Greene

You can personalize your furniture with these kinds of wine cork crafts. It's easy to make door knobs out of old corks.

You may need some experience with power tools to work on this craft.

32. Wine Cork Ornaments

Wine Cork Ornaments

via pinterest

Turning your corks into Christmas ornaments is another excellent way to reuse them.

Add small embellishments to your cork, or paint them green and red. Painting can be challenging, given its size, but it can be worth it.

33. Wine Cork Utensil Holder

Wine Cork Utensil Holder

via amagicalmess.com

Personalize your utensil holder by adding corks onto them. You can glue them onto a holder or craft one out of cork.

Setting it near the sink protects your utensils from the backsplash since the corks will repel water.

34. Wine Cork Kitten

Wine Cork Kitten

via pinterest

Here's an adorable craft for the kids to make wine corks friendlier to them. You can use different materials to make the features of your kitten.

Be careful when cutting any elements for these kinds of wine cork crafts, especially if you're doing it with a child.

35. DIY Wine Cork Centerpieces

DIY Wine Cork Centerpieces

via Lisa Nelsen-Woods

It's easy to make centerpieces using corks and a mason jar. Fill the jar up with corks and add a string for the ribbon.

You can also use them to hold a candle in the middle.

36. Wine Cork Pumpkin

Wine Cork Pumpkin

via My Gourmet Connection

Instead of making a jack-o-lantern, you can easily craft a pumpkin to be the centerpiece of your Thanksgiving dinner.

Painting one side orange should help make it look like a pumpkin. For other occasions, you can use different colors for other fruits.

37. Wine Cork Craft Toppers

Wine Cork Craft Toppers

via At Home Arkansas

Corks are designed to protect all kinds of liquids in bottles, not just wine.

Use your wine corks for their original purpose but add a twist. Make it your own by adding beads or knobs for a more creative or ergonomic look.

38. DIY Wine Cork Wall Hooks

DIY Wine Cork Wall Hooks

via Lisa Nelsen-Woods

You can screw a cork into the wall to make them hooks. You can add a board in between for variation.

You can use this for your keys, IDs, and other things to hang near your front door.

39. Wine Corks Pine Trees

Wine Corks Pine Trees

via Jane and Sonja from Sustain My Craft Habit

Add a twist to your cork Christmas tree with a pinecone.

The cork will be your trunk, while the pinecone will become the tree's leaves. You can paint them any color you want.

40. Monogram Wine Cork Earrings

Monogram Wine Cork Earrings

via Savedbylovecreations

Craft something to match your cork pendant. These monogram wine cork earrings are a great way to upcycle while you accessorize.

It can be tricky for some people to paint the letter on. You can try using a stencil or a marker to help you.

41. DIY Wine Cork Heart

DIY Wine Cork Heart

via Hello Society

This heart made of corks can be a great addition to your living room. You can dip some of the cork in your wine to make the natural colors seep in.

You can paint on the wine corks and add this to your fairy tale bedroom décor.

42. Ball Centerpiece Made of Wine Corks

Ball Centerpiece Made of Wine Corks

via Vidya

You can make larger centerpieces out of your corks, depending on their size.

Feel free to paint and make variations of this simple ball design.

43. DIY Wine Cork Crafts Wall Decoration

DIY Wine Cork Crafts Wall Decoration

via pinterest

You can also make different wall decorations, like paintings and statement pieces.

You can paint it something wine-related to make it more appropriate for the theme!

44. Glass Lamp Filled with Wine Corks

Glass Lamp Filled with Wine Corks

via pinterest

If you have a glass lamp, you can fill it up with wine corks to add a twist. You can also try adding flowers and leaves for a more rustic vibe.

If you're not into glass lamps, you can make a wooden lamp to fit your décor.

45. Tile Piece Made of Wine Corks

Tile Piece Made of Wine Corks

via Jenilek Cork Group

Corks are currently being reused to make tiles for the house. They're cut and arranged to fit the flooring you want to cover.

These can give a unique pattern to your rooms.

46. Wine Cork Angel Ornament

Wine Cork Angel Ornament

via CreativelyBeth

Here's another unique ornament you can make for the Christmas season.

You can use different ribbons and wires to get the details of your angel right.

47. Halloween Decors Made of Wine Corks

Halloween Decors Made of Wine Corks

via Claire at Pillarboxblue

You can also turn them into Halloween décor, making skeletons and mummies to scare anyone off.

If you want to work with more extensive Halloween décor, use PVC pipes or tires for your crafts and set them outdoors.

48. Wine Cork Magnets

Wine Cork Magnets

via Framed Chic

Furnish your fridge by adding magnets to your corks. You can paint them with different designs.

Add fake plants to give it an even greener touch.

49. Wine Cork Pencil Holders

Wine Cork Pencil Holders

via Content in a Cottage

You can form a little box to place your pencils using your old corks. You wouldn't have to stick to those boring plastic holders anymore.

Be sure you use hot glue to keep the different corks in place.

50. DIY Wine Cork Mirror Frame

DIY Wine Cork Mirror Frame

via Sarah

Design your mirror frame by adding your old corks onto it.

It adds texture to your simple frame, making it more unique and personalized to your taste.

DIY Wine Cork Projects FAQs

  • You may have a few questions on wine cork crafts and how to make your DIY ideas come to life.

    We’ve gathered the most common questions to help you on your next DIY project.

  • Can You Use Regular Glue for Wine Cork Crafts?

    Most wine cork crafts can work with regular or school glue, especially if you’re doing the craft with a child.

    However, we recommend using a hot glue gun since it’s sturdier and won’t be easily absorbed by porous materials, like wine corks.

    If you plan to use your final work for everyday use, using hot glue that lasts much longer is best.

  • Can Corks Spoil After Being Used in Crafts?

    Yes, corks can spoil IF they’re not stored properly. Since they’re biodegradable, they can break down over time, especially when exposed to harsh elements.

    Corks can also grow mold when exposed to humid environments unless treated beforehand.

    However, corks can last 3 to 10 years if you can store them correctly.

  • Crafting Wine Cork Conclusion

    While there are more DIY ideas, going for cork crafts is a great way to reuse your leftover corks instead of throwing them out.

    Start saving a lot of wine corks, and take a trip to your nearest craft store for supplies so you can try out these craft ideas!

    Window frames can truly speak volumes about your refined taste in architectural designs and home improvement ideas.

    If you're renovating your home or simply want to install new window frames, you can experiment with a variety of styles and build materials depending on your budget and requirement. But regardless of the type you choose, it should also be practical in the long run as you'd want the frames to hold up against the elements of nature.

    That's why we have included every intricate detail so you can find frames that will work best for your home.

    Without further ado, let's get started.

    Window Frame Types 101

    Key Window Factors to Consider

    Like we said, not all window frames are viable for your home, as you should also look beyond the aesthetics and find something that will serve your purpose. The following are some of the essential factors you must consider.

    1. R-value

    It evaluates the window's ability to check heat transfer - how it prevents the room temperature from getting affected by the temperatures outside. In this case, the higher the R-value, the better.

    1. U-value (U-factor)

    It's the inverse of the R-value. Since U-value measures the tendency to transfer heat, a lower unit is ideal.

    1. Solar Gain

    Solar gain (also referred to as solar heat gain coefficient) indicates how much a window will heat a room when it receives direct sunlight. While it's a good thing in cold weather conditions, solar gain can spike your air-conditioning costs in peak summer.

    1. Wind Resistance

    Wind Resistance is measured in cubic feet per minute (CFM). There should be two numbers for accurate assessment: one for 70°F and one for 0°F.

    Types of Window Frame Materials

    Now that you know about the different factors that should guide your purchase decision, the next thing you should do is choose the window frame material. Take a look at this list to find the ideal option.

    1. Wood

    Wood, undoubtedly, is one of the most common choices, primarily for its visual appeal and excellent insulating properties. It keeps the interiors cool while resisting the heat from outside and vice versa. However, wood is more susceptible to wear in humid climate areas and requires maintenance to retain their look.

    Since wooden frames expand and contract depending on the weather, sanding, painting, and sealing become necessary. So, if you want window frames that you can put up and forget, wood is not the ideal option. But if you are looking to create a vintage look that will enhance the decor of your home, wood is the obvious winner.

    That said, wooden frames are relatively more expensive, but that may not always be an indication of high quality. Before buying the frames, make sure to check for smooth window operation and corners that provide a good fit. Any exposed parts should be blemish-free, and there shouldn't be any visible finger joints.

    1. Vinyl

    Vinyl frames are gradually breaking the dominance of wood frames because of their affordability, effective insulator qualities, and low maintenance needs. Besides, vinyl frames can be built for any size opening, and you can choose from a wide range of color options. Also, they're easy to clean with some water and sponge.

    Nevertheless, there are a few downsides to vinyl. In extremely hot climates, vinyl windows are prone to warping. Plus, it's not for everyone, as the look may not be suitable for your home.

    Close-up detail of new narrow plastic vinyl window installed in house wall of brown natural wooden planks and boards. Real estate property, comfortable cottage and professional construction concept.

    When shopping for vinyl frames, make sure it has a uniform color coating throughout the structure. Additionally, it's best if the joints are heat-welded rather than screwed or fastened. In case you're getting it custom-made, be sure of the delivery time as it usually takes about 4-6 weeks.

    1. Aluminum

    Aluminum frames are similar to vinyl in terms of affordability and upkeep, but they offer an added advantage of durability. Long story short, they won't warp in the heat and can even withstand tropical storms.

    But you should know that aluminum frames conduct heat and are prone to winter condensation. Despite its drawbacks, aluminum is a viable, low-budget option for hot climate areas.

    So, if you settle for aluminum frames, invest in a model with an integrated thermal barrier. Usually, it is a strip of rubber or plastic placed between the inside and outside of the frame to minimize heat conduction and condensation.

    Sliding glass door detail and rail embed in floor

    While they are not the best in insulation, aluminum frames make up for it in strength and durability. Therefore, if you're looking to get good value for money, this is an excellent metal option.

    1. Wood Clad

    Wood clad frames combine the strength of other materials with the insulation property of wood. This is essentially achieved by building the exterior part of the structure using durable, low-maintenance materials while the interior is made from wood.

    The outcome is a sturdy structure with a high insulation value. We recommend proper installation for longevity as shoddy work could bring about water damage to the wood interior. Furthermore, you may also purchase window frames with hard-baked paint finishes to extend longevity.

    1. Composite

    Composite frames constitute a mixture of wood byproducts and plastic. In fact, they're closer in appearance to their wood counterparts. Furthermore, they are structurally sound and effective insulators that require minimal maintenance.

    When it comes to thermal resistance, their performance is comparable with that of wooden frames. Even though they are constructed using wood byproducts, composite frames can perfectly handle moisture, even in sub-tropical climate zones.

    1. Fiberglass

    Fiberglass frames make a durable choice, thanks to their superior thermal resistance. Apart from that, these structures are resistant to corrosive air pollutants and do not warp.

    Therefore, they are suitable for coastal environments and also for industrial use. As far as insulation is concerned, fiberglass and composite are at par, and both outperform wood. The only negative bit about fiberglass is its cost, but it's still cheaper than wood.

    Just like vinyl frames, make it a point to buy fiberglass models with heat-welded joints instead of fastened ones. Simply because superior heat-welded alternatives will always outlast screwed or fastened joints.

    Window Frame Design Types

    After deciding on the material, it's important that you focus on the window frame design. Mentioned below are some of the top choices.

    1. Double-Hung Windows

    The double-hung window is the most common house feature, primarily for its versatility and ease of use. It includes several specialized parts that add to its utility. For instance, it has a sloped exterior sill for runoff water and an interior stool (or inside sill) wide enough to keep a small plant and other accessories.

    For the frame to work properly, the stop moldings and parting stops must be accurately aligned. This ensures proper sealing of the windows as well as seamless sliding of the sashes. The weight-and-pulley mechanism is typically found in older wood windows. Whereas, newer models use friction or springs to hold the sashes in place when they are raised.

    1. Tilt-Out Windows

    Tilt-out windows are the ones that can be pulled inside, which is quite convenient for cleaning and maintenance. However, we advise examining the quality of these frames as some cheaper varieties break when you snap the window back in.

    1. Storm Windows

    A well-built and snugly fit storm window is a viable solution if you're looking to reinforce an old window. It will significantly increase insulation by trapping several inches of air thickness between the existing structure and the storm window.

    1. Glazed Panes

    • Single-glazed Windows

    These are the most affordable type, featuring a single pane of glass in each sash. They facilitate increased heat transfer and can shoot up air-conditioning costs. In older windows, the pane is usually secured with a glazing compound (putty) on the outside. With newer structures, putty is replaced by snap-in molding pieces.

    • Double-glazed Windows

    Also known as the insulating glass (IG) or thermal glass, can significantly increase any window's energy efficiency. It includes two panes with a sealed air space between them, creating the insulation. Therefore, the thicker the air space, the higher the insulation.

    • Triple-glazed windows

    You also have the option of three panes and two air spaces. Nevertheless, triple-glazed windows are not that common as the extra insulation hikes up the expenses.

    You can enhance the insulation of a double-pane window by opting for argon or krypton gas between the panes instead of air. However, gas-filling will add to the total bill and might delay delivery. That said, the gas will leak out eventually but at a snail's pace. Even after 20 years, the pane will retain 90% of the gas.

    1. Flanged and Block Frames

    As the name suggests, a flanged window is installed using a flange, which is nailed or screwed to the exterior sheathing. Meanwhile, a block-framed window has no flange and easily slips into an opening. The latter is a suitable choice for window replacement in an existing frame.

    1. Removable Grids

    A removable grid can be attached on a single pane to create an old-fashioned window or door with muntins and several small panes of glass. Since the grid lifts off, cleaning and maintenance is a cinch.

    Final Words

    While 'window-shopping,' it's essential that you chalk out your budget before browsing through the options. At the end of the day, you'd want your window to stay functional throughout all seasons without taking any big hits.

    On that note, we've come to the end of this guide, and we hope you could find the most suitable option for your home, office, or any building for that matter. However, before we leave, here's a piece of advice.

    Make it a point to clean the interior and exterior of the windows to prevent the accumulation of dust, soot, and grime, which can dampen the overall appearance.

    Till next time!

    An electric fan blowing hot air is a common problem that may occur due to various reasons. These can include the weather, your body temperature, fan speed, and others. Cross ventilation is often the most effective method of dealing with this problem. 

    Like a blower fan in winter, ceiling fans have become indispensable due to frequent heat waves in summer. 

    However, in many situations, such fans may not be the ideal solution and can actually make the problem worse by blowing hot air. But this leads to the question, why is the fan blowing hot air? 

    Don’t worry; we’ve put together this guide on the subject to answer that question. So, check it out now! 

    Reasons Behind Fan Blowing Hot Air

    Electric fan in white with a modern design for cooling the room on a blue background. Free space, minimalistic style. Reasons Behind Fan Blowing Hot Air.

    1. The Ambient Temperature

    Unlike an air conditioner, an electric fan does not cool the air in the room but instead just circulates the air already present and improves the airflow. On hot days, the temperature of this air is very high. When your fan blows this humid air, the heat present in it gets absorbed by the skin, making the summer even more unbearable. 

    This is similar to the way in which an oven functions, using convection to heat up food.

    2. Functioning Of The Human Body

    The human body continuously generates heat which needs to be dispersed effectively to prevent overheating, which is why it has blood vessels and sweat glands. Water is stored in the dermis, the middle layer of the skin, and when the temperature becomes extremely high, this water is excreted through the sweat glands as sweat. On the surface, the sweat evaporates, helping cool your body down, and a fan simply accelerates this process of evaporative cooling. 

    However, in situations where the heat is excessive, the fan may not be able to help the sweat evaporate efficiently. In such cases, you will just be feeling the hot air, and the sweat will simply make the situation worse. 

    3. Improper Ventilation

    Using a fan in an improperly ventilated room is another reason why you may be experiencing hot air coming from it. Air blown by a fan in a room with closed windows and doors has no way to go out. Similarly, fresh, cool air from outside cannot enter the room, keeping its temperature high. 

    Cross ventilation is essential to replace the hot air with cold air, which can then come in as the warm air goes out. For that, make sure the curtains and blinds are closed during the day to prevent the room from heating up but open them up when the sun goes down.

    When your windows and ventilators are open at night, hot air rises and escapes outside through these, while cooler air comes in to take its place, cooling the house. 

    4. Low Fan Speed

    You may also feel hot air if the fan runs at a low speed, making it ineffective in extremely hot weather conditions. This may be due to various reasons, such as damaged ball bearings, accumulation of dirt and dust, etc. Cleaning up the fan or replacing the bearings, as the case may be, may make it more effective. 

    Fan Blowing Hot Air Frequently Asked Questions ?

    For How Long Can You Continuously Run An Electric Fan?

    With severe heat waves becoming common, you may need to keep your electric fan running continuously for several hours. On average, such fans can be left running continuously for about eight hours without accidents like fires or ceiling damage. 

    That said, it is best not to leave such fans running for very long hours, if possible, as that can cause the motor of the fan to overheat. Other moving parts can also generate heat due to friction, which can cause problems in the long run. And in the case of a ceiling fan, regular investment in maintenance is recommended. 

    This is because these fans can collect dust and grime, and an extensive buildup of such materials can cause overheating and even lead to fires. 

    What Are Some Factors That Can Cause Your Blower Fan To Stop Working?

    A blower fan is an important component in furnaces, and its role is to blow hot air into your home. However, like other components, at times, it can malfunction and leave you wondering, why is my blower fan not working?” There can be several reasons for this, such as dirty air filters, bad motor, faulty capacitor, and others. 

    Blower fans can also stop working when the evaporator coil freezes up, or the fan relay may have gone bad. Alternatively, there may be a problem with the electrical connection, and the fan may not be getting any power. 

    Many of these problems can be fixed using DIY techniques, but some may require professional assistance. 

    Can Car Seat Covers Help You Keep Cool?

    When it comes to keeping cool in your car, you may be wondering, “Are car seat covers worth it?” for cooling purposes. The answer to that question is yes, they are worth it, depending on the quality of the covers. Good quality cooling car seat covers have a mesh that promotes better breathability, and some even feature built-in fans.

    These cooling car seat covers work by spreading cool air across the seat surface to help you remain cool. They also promote better air circulation to the back, thighs, and legs while absorbing heat and reducing sweating. 

    Which Is Better For Keeping A Kitchen Cool, An Exhaust Fan Or A Chimney?

    The exhaust fan vs. chimney debate has been going on for decades, with no clear conclusion since both options offer different advantages and are suitable for different situations. While both of these can help keep your kitchen cool, a chimney can also get rid of grease, while an exhaust fan cannot. 

    Because of this, kitchens with chimneys do not require as much cleaning as those with exhaust fans. On the other hand, an exhaust fan is extremely economical and can be installed easily compared to a chimney. Also, chimneys tend to consume more electricity than exhaust fans. 

    Fan Blowing Hot Air Final Thoughts

    Fan Blowing Hot Air Final Thoughts

    Now you know about some of the reasons that can make a fan blow hot air, you may be able to deal with the situation more effectively. In the absence of air conditioning, the best way to ensure proper cooling is to create a cross breeze. 

    To do that, keep your window open in the evenings and use two fans. One fan should be placed near a window and face outwards, pushing air (hot) outside. The other fan should be placed near another window and face inwards, blowing cold air inside. This can help keep the room cool even on the hottest days. 

    And with that, we shall be concluding this guide. Until next time! 

    Your wireless doorbell may be ringing constantly due to frequency and battery issues, among other things. These problems can usually be resolved on your own without the extra cost of repair. 

    As popular as wireless doorbells have been getting, their maintenance is considered negligible. But this is not true. Any smart device will need proper care to function without hassle. 

    The constant ringing of a smart doorbell is one common issue that many do not know how to resolve. In this guide, we help you figure out exactly what you need to do to fix it and how it can be avoided in the future. 

    How Does A Doorbell Keep Ringing By Itself?

    How Does A Doorbell Keep Ringing By Itself

    There can be many factors like dust, shortage of wires, or installation issues that make a wireless doorbell keep ringing on its own. You are more likely to face this problem if you have an old doorbell that isn’t cared for very well. That’s why your doorbells need proper maintenance, too, just like other electronic or battery-operated fixtures in your home. 

    A constantly ringing doorbell can be both frustrating and confusing. You may assume someone to be at the door in the middle of the night but end up finding nobody. Similarly, you may think that the ringing is on its own when in actuality there is someone at the door.  

    Although there are various reasons as to why your doorbell may be ringing on its own, we can boil it down to four main factors.

    • Sticking doorbell buttons
    • Frequency signal interference 
    • Battery issues
    • Corrosion and moisture accumulation
    • Doorbell chime

    The good news is that most of the issues mentioned-above are generally rectifiable the DIY way, and we will tell you all about them in the following sections. 

    What Is A Sticking Doorbell Button?

    If you have been using your doorbell for a while now and failed to do proper maintenance, you may be facing the sticking button issue. But what exactly is a sticking button?

    It happens when the doorbell button gets stuck in a position that ends up pressing the doorbell, thus making it ring constantly. This can result from the accumulation of dust and dirt from your hands on the doorbell. 

    Initially, it would be an occasional occurrence, maybe when you press the button. But eventually, the stuck button and consequent ringing will turn into a regular problem to leave you frustrated. 

    Furthermore, if a small gap forms between the connecting points of the doorbell due wear and tear of time or other unforeseeable factors, it’ll develop electrostatic charges that will end up making the doorbell ring continuously. This is why keeping a check of your wireless doorbell is absolutely necessary.

    How To Fix This Issue?

    The first and foremost thing to do will be to clean your doorbell and the area around it. Once you have cleaned the area thoroughly, you can unscrew the doorbell from the wall. You can then separate the casing from the doorbell button and look for any accumulation of dirt around the button. 

    We’d also suggest using compressed air to make sure all of the dust and dirt is removed from the button. Once you’re satisfied with the cleaning, put the button back on the casing and attach it to the wall.

    It is important to remember that regular maintenance of your doorbell will help prevent such false alerts from occurring again.

    A little trick you can do to close the gap on the bell is to spray a little WD-40 on the gap. Be sure not to overspray, as that can cause more dirt and dust to get accumulated. A little goes a long way with this trick.

    If cleaning the button does not solve the problem, check the powerbox of the doorbell. Chances are either the powerbox or the doorbell's connection to the powerbox is the culprit. 

    What Are Some Other Causes Of A Ringing Wireless Doorbell Ringing On Its Own?

    1. Signal Interference

    Wireless systems have gained popularity and are usually the first choice for homeowners when it comes to home security. However, many wireless systems can end up ringing on their own due to signal frequency interference.

    If your doorbell is from Ring or any popular brand, for that matter, you would know it uses a frequency range of 400MHz to 500MHz to function. This is a standard frequency range.

    The doorbell ends up ringing when the doorbell chime receives these frequency signals. But if a nearby doorbell also uses the same frequency, it will cause signal interference and end up making your doorbell ring. 

    Considering that the frequency range for most wireless doorbells are the same, the chances of this happening are quite high. 

    Likewise, similar frequency bands or wireless devices in the vicinity can cause this issue. For example, if your CCTV camera uses the same frequency as your wireless doorbell, it increases the chances for signal interference.

    How To Fix This Problem?

    Most wireless devices have a privacy code, also known as channel selector. This code enables you to set the exact amount of operational frequency you want for that device. 

    So, you can change the sub frequencies of your wireless doorbell by simply changing the privacy code. For example, if the current frequency is 400MHz, you can change it to 400.5MHz.

    You do have to keep in mind that the doorbell button transmitter and the doorbell receiver should be of the same privacy code. This will help the doorbell use the same frequency to operate while reducing the chances of signal interference from other devices.

    People most often change the sub-frequency by 0.5 so that there is no drastic change in frequency and the other devices around would not be using the same frequency.

    Privacy codes are usually found at the back of both the transmitter and the receiver. It can be a slide or a small button where to change the frequencies, you will have to slide it to the desired frequency.

    You may have to change your frequency a certain number of times before you find the right one with very little signal interference. The instruction manual of your device will provide you with clear information on how to change the privacy code.

    What If You Cannot Change The Frequency?

    Most doorbells these days do give you the option of changing frequencies. So, facing this issue would be a miniscule probability. 

    However, if you do face this issue, you first need to identify the device that your doorbell's frequency is clashing with. Once you have managed to identify that, you can proceed to change said device’s frequency. This stops the frequencies cursing interference. 

    Most doorbells these days do give you the option of changing its frequencies. So, facing this issue would be a miniscule probability. 

    However, if you do face this issue, you first need to identify the device that your doorbell's frequency is clashing with. Once you have managed to identify that, you can proceed to change said device’s frequency. This stops the frequencies cursing interference. 

    2. Dead Batteries

    If your wireless doorbell has been functioning for a while now, and you haven’t replaced the batteries, checking on them would be a wise choice. Even the best batteries won’t retain charge for a lifetime, so it’s imperative to keep a check on them and change them when needed. You can use a multimeter to check if the batteries still have charge or are dead. 

    How often you change the batteries  will largely depend on the model of the wireless doorbell. Certain models can continue functioning for long periods of time, like a year or two, without needing a battery change. On the other hand, some models will need you to change the batteries every couple of months. 

    Low batteries do not cause the constant ringing most of the time, However, in certain cases they can be a significant reason as to why your doorbell keeps ringing.

    3. Corrosion And Moisture

    Although most doorbells and their buttons are waterproof, nature has a way of playing its tricks. Moisture and corrosion can sometimes get to the doorbell and cause it to function poorly.

    To inspect your doorbell, all you have to do is remove the cover of the pushbutton and look for any corrosion. If you do not find any, you are good to go.

    In the event that you do end up finding corrosion, you can remove it gently or scrape it off the doorbell. And conducting regular checks will prevent moisture and corrosion destroying your wireless doorbell.

    4. Doorbell Chime

    Oftentimes, the problem lies with the doorbell chime unit kit, which makes your doorbell ring. Check your digital kit to see if this is the case, and replace it with a new one if required. Make sure that the new kit is compatible with your doorbell. 

    Brands like Ring and Nest have a certain set of digital bell kits that are compatible with their devices. So, make sure you get the right one to avoid inefficiency.. 

    Wired Or Wireless- Which Doorbell Is Better ?

    Cropped shot of delivery worker ringing doorbell and holding packages. Wired Or Wireless- Which Doorbell Is Better.

    A wired doorbell system is generally much harder to install as compared to wireless systems since there is a complicated wiring process that is involved. So, unless your house is being remodeled, the better idea would be going for a wireless system. 

    Wireless doorbells are easy to install and can save you time as well as cost of installation. Unlike wired doorbells, wireless doorbells do not need drilling or any other extra steps that may take time. These doorbells contain every component a wired doorbell contains but can be installed a lot quicker.

    Another reason wireless doorbells stand out are the added safety features and convenience they offer, which are rarely present in wired doorbells. Many popular doorbell brands like Ring or Nest offer more features within their wireless models, like:

    1. Extra Receivers

    Some wireless doorbells may enable you to add multiple receivers. You can place one near your door or your living area and another at the farther end of the house. So, if someone were to press your doorbell and you happen to be away from the living room, you can still hear them.

    2. Flashing Light

    These doorbells also have a flashing light on their receivers, which blinks when someone presses the doorbell. This is a great feature for those with hearing impairment, as they will still be alerted about someone's presence at their door.

    How To Install A Wireless Doorbell?

    Now, you may be wondering “how to install a wireless doorbell afterall?” So, we’ve got you covered here!

    1. Plug The Chime Unit

    To install your wireless doorbell, you need to install a chime unit first. Ideally, it should be plugged into a 120v outlet near to your living area. The chime should be heard throughout the house so locate an outlet that is preferably in the center of the house.

    2. Place Battery In Push Button

    The second step to installing a wireless doorbell is to place the battery in the button. For this, you can use a flathead screwdriver to open up the push button unit. Then place the batteries that were provided with the doorbell into the unit. Make sure they are placed correctly. Once you are done, close the push button unit.

    3. Install The Push Button

    Once you have the push button ready, you can look for a good spot to fix it- anywhere at your front door with a height that is comfortable would be fine. But before you screw the button unit in place, it would be a good idea to test the doorbell. Once you make sure that it works fine, you can go ahead and screw in the push button at the desired location. 

    Can A Faulty Doorbell Cause A Fire?

    If you own a wired doorbell, there are possibilities of a fire if it has exposed wires. It also poses a threat to the ones using the bell as there are chances of electrocution. However, if you're using a wireless doorbell, there is very little to no chance of a fire. This is because there is no doorbell wiring, thus reducing the risk of a fire.

    How To Fix A Ringing Wired Doorbell?

    If your wired doorbell is facing the same issue, and fixing the sticking button did not solve the constant ringing, it’s highly likely that a short or loose wire is causing the issue. Or if you are really unlucky, it could be both. However, these problems can be solved by checking the transformers or the doorbell chime.

    Food delivery worker ringing doorbell while riding electric scooter. Wireless Doorbell Keep Ringing Final Words.

    Wireless Doorbell Keep Ringing Final Words

    A doorbell ringing constantly at random times is a very common issue, but you don't have to worry about it too much. A little DIY can help you save money and your ears that probably might need some rest after the continuous ringing. You may also want to keep an eye out for some little prankster who may be doing this to your doorbell! 

    We hope this article helped you with your smart doorbell issues. If you found this information helpful, do check out our article “How do wireless doorbell systems work?” on our website. 

    Solar lights are the perfect alternatives to electrical lights, candles, or even kerosene lamps.

    They’re affordable, energy-efficient, and environment-friendly, but like any other appliance or gadget, they do come with a few drawbacks. Well, nothing too significant, to be honest, yet worth mentioning.

    Unfortunately, there are times when solar lights fail us. They stop working altogether when needed the most, i.e., during the night. Why does this happen? There are many reasons that may affect the basic working mechanism of the solar panel and light. And in order to fix the issue, it’s crucial to find the root cause.

    Are you in a similar situation? Don’t panic; you don’t need to invest in a new one, at least not right away.

    Today, we’re here with this informative guide on why solar lights stop working; along with this, we’ve provided a few quick solutions that will help you get them to work within no time. But before that, we’ll highlight the working principle of a solar light.

    So, without further ado, let’s get going!

    How Do Solar Lights Work?

    Before jumping to the problems and fixes of non-functional solar lights, it makes sense to understand their basic working principle. That being said, solar lights usually work differently and more uniquely compared to other light sources.

    They use the photovoltaic effect to work. The photovoltaic, aka solar cell, is an essential part of the light, which helps change sunlight into direct electric current.

    Ideally, the solar cell comes in the form of a dark panel and is installed above the solar light. It’s made of multiple layers of crystalline silicon and chemicals that generate layers of positively-charged particles and electrically-charged electrons.

    When the panel absorbs the sunlight, the negatively-charged electrons move to the positively-charged particles. Later, the electrons move through the wires to the rechargeable batteries and electricity is stored in them till the light is ready for use.

    After dusk, when the sun goes down, the solar cell converts the stored electric energy into light. Consequently, the solar cell turns on as soon as the photoreceptor detects darkness. And again, when the sun rises, the receptor stops working, allowing the panel to resume converting the sunlight into electricity.

    Why Aren’t Your Solar Lights Working  

    light bulb with solar panel isolated on white background

    Solar lights are energy-efficient and cost-effective, but they often tend to cause trouble and eventually stop working. This can happen due to several reasons, so if you’re struggling with getting them to work, here are a few tips to consider.

    1. Check If The Solar Light’s On

    First things first, ensure that the solar lights are turned on, provided they come with a switch. You’d be surprised to know how often people tend to forget to turn on the on/off switch.

    1. Replace The Batteries

    Ideally, solar lights come with Li-ion or NiMH rechargeable batteries inside them that charge by the day and discharge by night while the lights are on. So, it’s quite natural for batteries to lose their charging capability with time.

    A common sign to tell if the batteries require replacement is the reduced runtime of the lights in the evening, even after a bright sunny day. That said, a good battery should last for up to 2 years or more before needing replacement.

    1. Cover The Solar Panel

    Solar lights remain off during the day as they’re busy converting the sunlight into energy to be stored in their rechargeable batteries. And at night, the energy is then used to power the lights.

    But if your light doesn’t come on well after dusk, there might be some other light source hitting the panel, tricking it into thinking it’s still daylight. Try covering the panel to trick the light into thinking it’s night; if it comes on, you know the problem.

    1. Dodging The Shadows

    It’s best to avoid shadows falling on the solar panel, especially during midday when the sun is at its strongest. So, make sure you take a look at the panel every 3 to 4 months around midday to see how shaded your panel is.

    1. Positioning The Solar Panel

    Did you know a solar panel is like a satellite dish? It has to be positioned facing the right direction to work effectively. As the sun rises in the east and sets in the west, a south-facing panel is bound to harvest sunlight to its full potential from dawn to dusk.

    That said, even though solar lights still work when they’re not facing south, they won’t be working to their full potential.

    1. Check The Panel Angle

    The angle of the solar panel can affect the light’s runtime, especially during winter, when the sun is very low in the sky. But if your solar light’s panel that’s easily adjustable, you’re in luck. Getting it up to a 45-degree angle when winter is at its peak will help in harvesting sunlight to its optimum potential.

    1. Tackling Water Ingress Issues

    Solar lights may suffer from issues due to design flaws and water ingress. That’s why we strongly recommend keeping an eye on their IP ratings to know more about the safety features.

    Well-designed and manufactured lights allow water to drain away without causing harm to any of their sensitive electrical wiring or parts. However, if water or moisture is the reason for your light to stop working, there are a few tricks you can try.

    Firstly, remove any cover that might be holding the moisture in place. Once that’s done, store the light in a cupboard for a few days to dry it out. You can then reassemble the light while double-checking to make sure the batteries are seated well. Give it a day or two before turning on the light at night.

    Also, don’t forget to check with the manufacturer to ensure whether the warranty of the solar light covers issues related to water ingress. If yes, email them a picture and expect a replacement within no time.

    1. Dealing With Snapped Wiring

    The wiring of the solar panel can snap due to a number of reasons; squirrels and other wildlife chewing on it is one. Usually, the damage can be repaired with patience and some electric tape. But if this isn’t possible, check with the manufacturer to see whether they have spare parts to save the product, instead of having it entirely disposed of.

    It’s also important to note that wires are always subjected to tension so try to leave sufficient slack between branches during installation. Even strong winds put undue pressure on the cables causing damage that’s hard to fix.

    1. Passive Infra-Red (PIR) Dials

    Advanced solar lights feature adjustable dials to fine-tune motion detection sensitivity, preventing the movements of cats, birds, and other wildlife from triggering the light unnecessarily. Usually, the dial should be set after taking three factors into consideration:

    i) The height at which you install the solar

    ii) Motion across the PIR’s field

    iii) Distance of the light from the motion you wish to detect

    So, if your light isn’t activating when needed, a bit of trial and error to provide the required motion will help in getting it to work.

    1. Lux Sensor Dial

    Apart from the PIR dial, advanced solar lights include lux sensor dials to determine how dark it has to be before the light activates. This feature comes in handy if there are other sources of light tricking the solar lights into thinking it’s still daylight - a common reason why they stop working.

    However, at times, they might be installed in relatively shaded areas while their remote panels are installed in a bright and sunny spot. In such cases, setting the light to activate in darker ambient lighting can prevent it from working when not required.

    1. Check If The Lights Are Plugged In

    Believe it or not, we often forget to plug in the light to the dedicated power source, which is a common reason why it doesn’t work. If your remote solar panel is separate from the lamp, make sure you check whether the cable is firmly plugged in with tightened waterproof connectors.

    Ideally, solar lights come with batteries stored inside their panels, but at times, the batteries might be stored in the light head itself. So, if the panel fails to charge them or the charge is unable to reach the lamp, you’ll end up getting disappointed.

    1. Plug-In The Main Charger

    Plugging a mains charger into your solar light or removing the batteries to charge them separately can be a great idea. Just make sure the charger is compatible.

    Now, solar panels output specific voltage compatible with the battery voltage and circuit componentry. If you use the wrong mains charger, it may fry the circuit or even overcharge the battery. Ultimately, you’ll end up spending money on buying a new one.

    You can expect your solar light to perform for a night or two, provided the batteries are easily removable, clearly labeled, and the charger is compatible. But it’s also important to find a solar-friendly location to charge the lights. And in case of any doubt, you can always follow the instructions or seek assistance from the company or manufacturer you purchased them from.

    1. Soldering Can Help

    Consider firing up a soldering iron to tackle wiring issues so that you don’t have to get rid of your light just because of loose wires. But make sure you contact the solar light company before beginning the soldering process. You wouldn’t want to invalidate the warranty now, right? Of course, it’s fine if you’ve already had a chat with the company.

    1. Clean The Solar Panel

    The performance of your solar panel might dip over time because of dust and dirt buildup on its surface. This is a common problem for those living near busy roads, and their panel is installed in a dusty spot.

    A dirty panel can also impact the amount of charge received by the solar light batteries. To make sure it works to its full potential, give the panel a quick wipe using a damp cloth every now and then.

    We suggest cleaning your panel at least twice four times a week to increase its efficiency. It’s also essential to keep your solar light in a safe place when not in use so that it lasts for an extended period.

    1. Avoid Charging Behind The Glass

    We can easily feel the sun’s warmth even while sitting behind glass windows and doors, but it’s not the same for solar panels. Double and triple-glazed windows are commonly used these days. And if you notice, they render the sun’s rays hitting the panel useless.

    That’s why it’s best to place the panel outdoors when charging in a spot, which receives the maximum amount of sunlight. Also, ensure that the number of obstructions between the solar panel and the sun is minimal for it to charge more efficiently.

    1. Check The Battery Seating

    Don’t forget to check whether the batteries are properly seated or not. If they’re loose or not touching the terminal contacts, the panel won’t be getting charged by the day, preventing the solar lights from working at night.

    So, in case you detect loose batteries, give them a day or two to charge before they allow the lamp to work. Be patient as the battery may have been flat, to begin with. It would help if you did this regularly with your solar lights for them to keep operating at night.

    1. Check The Pull Button

    Solar lights come with one or more buttons to help you operate the system without any kind of hassle. Newly bought lights may feature a pull button that needs to be removed before turning on the switch.

    However, first-time users often forget to take the pull button off, preventing the solar light from working to its full potential. So, if your new light suddenly stops working, make sure you check whether or not the button is removed.

    Lamp on the terrace in raindrops, garden lamp solar powered.

    Final Words

    With this, we come to the end of our informative guide on solar lights. And we’re hopeful that this article has managed to provide you with the relevant information on what can cause solar lights to stop working.

    But if you take the right measures and maintain them on a regular basis, the chances of this happening are minimal, if not zero. Replacing its batteries, checking the wiring, and positioning the panel in the right direction are just a few of the many things you can do to make the lights work.

    We have explained everything in detail, so you need not worry. Just follow the steps, and you’ll be good to go.

    On that note, we bid you goodbye. Take care!

    Related Articles

    13 Best Fertilizers for Blueberries 

    13 Best Organic Lawn Fertilizer

    11 Best Fertilizers for Trees 

    13 Best Fertilizers for Hibiscus

    13 Best Fertilizers for Roses 

    11 Best Fertilizers for Lilacs  

    9 Best Fertilizers for Hydrangeas

    9 Best Fertilizers for Petunias Right Now

    11 Best Fertilizers for Citrus Trees Right Now 

    How to Grow Cilantro Indoors Easily

    11 Best Lawn Fertilizer Options

    9 Best Cheap Grow Lights

    11 High Output Solar Spot Lights [Buyer’s Guide]

    13 Best Rated Solar-Powered Dusk to Dawn Lights

    A lawn mower is an essential piece of equipment that you need to keep your lawn in tip-top shape.

    Buying one, however, is a complicated matter. There are a large number of lawn mower makers out there, and everyone claims to be the best. So, how do you know who makes the best lawn mower engine?

    To solve that problem for you, today we’re going to address that very question. We’ll take a look at all the factors that make a lawn mower engine tick, and then see who is the best manufacturer of the same.

    Who Makes The Best Lawn Mower Engine

    Lawn mower cutting green grass in backyard on a sunny day. Garden cleaning services.

    A Matter of Efficiency

    The efficacy of a lawn mower depends on a wide range of factors. You have to take careful stock of its fuel efficiency, engine power, and the availability of replacement parts. Keeping all of the above in mind, it’s evident that Honda makes the best lawn mower engines today.

    Utterly durable and long-lasting, Honda lawn mower engines offer extreme power and reliability at reasonable costs. The results that you get from Honda Engines are unmatched as compared to the other players in the market.

    The Secret Behind Honda Engines

    Honda is a company that’s known for building high-quality power tools. Honda engines make up the core of many major lawn mower brands such as Husqvarna and Troy-Bilt. What’s more, they are also found in a large number of riding mowers.

    But what makes them so in-demand? The secret lies in the impeccable craftsmanship of the Honda engineers. Honda engines are specifically created to provide long term operational efficiency, and operate under any condition.

    Most of them come with advanced features such as auto-choke and cold start, which makes them easy to operate. Plus, they offer the ability to mow through the toughest of garden growth, thus making the task effortless.

    Why Honda Is The Best

    Apart from the above features, Honda lawn mower engines also have a reputation of being among the most fuel-efficient in the market. They glean the greatest power from the least amount of fuel and are also low on emissions that damage the environment.

    What’s more, due to their widespread use and popularity, spare parts for Honda engines are easy to come by. This means in case you do need to get a Honda engine repaired, you won’t have to settle for counterfeit parts from shady suppliers.

    A man starts a lawnmower motor in the store.

    Final Thoughts

    Low on cost and high on performance, it’s no wonder Honda is the leading manufacturer of lawn mower engines today. Not only do they deliver unmatched power, but they are also efficient and cost-effective.

    So, the next time you need to get a lawn mower, look for a Honda under the hood. With one of their engines powering your mower, you’ll get past the unwanted yard growth in no time. After all, if it has a Honda engine, then it spells reliability in any situation!

    Related Articles

    How to Sharpen Reel Mower Blades?

    The 5 Best Lawn Mowers for St Augustine Grass Right Now

    6 Best Electric Start Self-Propelled Lawn Mowers of 2022

    5 Best Gas Hedge Trimmers  Reviewed

    4 Best Walk Behind Brush Cutters | Buyer’s Guide

    3 Best Yard Hydrant | Buyer’s Guide and Reviews

    5 Best Stick Edger | Buyer’s Guide

    13 Best Trimmer Lines | Multi-Sided, Round, Square, Twisted & Serrated

    Troy Bilt TB230 Review

    13 Best Lawn Tractor Batteries

    Zero Turn Vs Riding Mower, Differences & Best Solution for 2022

    13 Best Loppers in 2022 | Buyer’s Guide

    13 Best Chipper Shredders

    13 Best Lawn Aerators

    How to Clean the Lawn Mower Carburetor Without Removing It?

    10 Best Lawn Dethatchers

    6 Best Zero Turn Mowers for 5 Acres

    Airiness shaped indoors brings the inhabitant calm, peace and tranquility as it creates and extraordinary breathable, awe-inspiring state often pursued by the individual. This splendid ambiance is often conjured in interior designs through the extensive use of stark white and light in the pursuit of serendipity.

    In the attempt to change your indoor ambiance though pattern whilst using white you can use white painted wood, withered wood, tiles and custom 3D wall options that ought to remap the surface with a certain design motif, white brick walls are also a common option in industrial design.

    A collection of white brick walls have been curated in the attempt to help one in the pursuit of this airy ambiance through the use of a pattern that provides rhythm,texture and depth alike : white bricks. These could be installed white directly or they can be painted but for the latter one ought to keep in mind that this effect is not reversible.

    White Brick Walls Shaping Airiness Follow

    timeless white brick wall with black and white picture frames

    A brick wall can bring forward a gallery offering it a supporting texture.

    Source Unknown

    simple water brick wall in the bedroom

    The white brick can be considered a design component itself greatly contributing to simply decorated spaces with a neutral almost deaf coziness.

    via decor8blog.com

    impeccable interior design with white brick

    The wooden texture can become a focal point in both color and texture, use it to create that warm point of interest without distressing that neutral white ambiance that supports it with a contrast of coldness and stillness.

    via www.home-designing.com

    traditional wooden exposed beams surrounded by airy white bricks

    The brick texture creates the feeling of a whole chimney despite the lack of volume, the lower shelf, and the above chimney mantel thus shaping the extraordinarily elegant package with very few elements.

    via maiedae.blogspot.com

    white brick and teal furniture rendering

    The texture here creatures contrasts with the mirror finish of the teal furnishing, the latter contradicts it in flatness and color alike creating a very powerful indirect contrast. The blanket on the couch and sculptural glass items on a side table in front support the strong position of the furnishings thus creating balance in the interior with little color effort.

    via www.iwantwallpaper.co.uk

    shabby chic industrial bedroom with white brick wall

    The dream-like dimension brought by a brick wall encourages the inhabitant to happy simplicity; notice how natural and elegant a simple mattress looks placed directly on the concrete floor above. The bedding rightfully respects the dialogue between concrete and the white wall and contributes to the scenery with the right chromatic.

    via urbanoutfitters.com

    white brick corner

    Stainless steel and leather may look overwhelmed, and subdued in the presence of a strong texture with which no connection is created.

    via looknookhook.wordpress.com

    minimalist bedroom design with white brick wall

    An extensive wooden surface can function with a brick wall in white and give the right balance; here the proposed wood contributes with texture only, and the color fades out.

    Source Unknown

    matte black wall contrasts with white brick wall and wooden ceiling

    The contrast of a wooden texture with white and black can always win the game, brick simply spices up the game.

    via Rikki Snyder

    white brick wall in industrial bedroom

    Black and white contrasts are timeless solutions that can always become more or less through the addition of various supporting elements.

    Source Unknown

    faux white brick wall

    A white-yellowish solution should be sustained by a strong interior statement, "God is in the details".

    www.kitchensourcebook.co.uk

    brick wall in white tailored in beige bedroom

    To create the illusion of time and memory and a freshly built building white brick walls can be used successfully.

    via Pinterest

    airy white brick studio rendering

    Balance ought to be pursued in any setting regardless of the design expression chosen.

    www.revedecor.com

    attic white bricks and exposed wooden beams

    In an open plan kitchen-dining-living room space the feeling of airiness can be built easier through sufficient light and white to bounce it throughout. The concrete floor grounds the interior space with a slight contrast that simply elevates the vertical planes here conveniently in white.

    www.ideasforinterior.com

    small attic bedroom with white bricks

    The intricate detailing of the texture brings coziness in small settings.

    via Pinterest

    impeccable modern bedroom with a brick in white

    Balanced and airy setting in a modern setting embracing neutral tones.

    Source Unknown

    dreamy shabby bedroom using white bricks on the walls

    Stark white throughout anchors settings in the realm of fairy tales, the simple awe-inspiring ambiance is often pursued but rarely materialized.

    lezoemusings.com

    modern rustic dinning room adjacent to white brick walled kitchen

    Wooden tones with memory contribute with a time fingerprint in a simple setting that sustains this dimension through the white brick wall that does not challenge the interior in chromatics.

    via decorcology.com

    black and white brick walls in the bathroom

    Elegance can be brought in through different means, notice the intricate pattern on the floor that diminishes the brick`s importance and creates great depth as here the surface is shattered and occasionally has breaks in rhythm that might be generated by stone inserts. The sculptural mineral presence in black and the uniquely shaped sink come forward despite the immense amount of detail in an intense-extraordinarily beautiful setting.

    Source Unknown

    airy interior design living room with white bricks

    A simple impeccable setting is obtained through a perfect balance between wood and white in a setting flooded by light.

    via b-vds.co.uk

    rendering of a room with bricks in white

    The intense dynamic of the interior above is uncertain; the pillar in white disrupts the white-purple brick surface thus creating a great unbalance. The sculptural black chair and glass dining table also have an odd connection with the floor. Elements are missing and there is no balance between the interior`s components. How do you see this interior?

    www.ghoofie.com

    wooden headboard doubled by white bricks on the wall

    A white brick wall beautifully highlights the simply extraordinary wooden sculptural element that undoubtedly defines the interior.

    Source Unknown

    shabby chic kitchen with white kitchen wall

    Balance in a chic ambiance. Simple color accents subdued to the overall theme construct a very cozy ambiance effortlessly.

    via remodelista.com

    small living room with white bricks

    Simplicity requires a certain composition hierarchy, here uncertain.

    Source Unknown

    chich bedroom with wooden bricks, barn door and wooden pallet bed

    Wooden pallets, brick walls, and a sliding wood barn door in their simplicity are extraordinary elements that can easily carry a great interior.

    Source Unknown

    shabby chic kitchen with wooden bricks in white

    Wooden textures testes by time, bricks with memory, and greenery are a recipe for success.

    via dig-mig.blogspot.dk

    simple interior with white on the bricks in the wall

    Simple interiors can win the day any day.

    via www.iroonie.com

    walnut furniture on a white background of brick

    A beautiful wooden texture can always use the support of stark white.

    Source Unknown

    industrial white stark interior design with painted bricks

    Frame the beautiful and complement it with aged items.

    via Pinterest

    bricks painted in white in modern interior design

    To emphasize the feeling of space acrylic chairs have been successfully used above.

    via Pinterest

    white bricks and heavy textures on modern apartment design

    Color can be substituted with patterns and authenticity in design.

    via roombowl.com

    airy interior with lots of light and bricks painted in white

    Few elements, all sculptural in one airy space.

    via modernmagazin.com

    bricks painted in white used indoors

    Wooden textures become focal points, black creates contrast and a dark green contributes with a neutral-subdued color.

    Source Unknown

    white brick walls emphasize the feeling of space

    via Pinterest.com

    geometric wooden shelving on white brick wall

    The geometric playfulness with cozy wooden textures complements the frozen stillness of the brick wall behind in both color and rhythm through dynamic alike.

    via babasouk.ca

    brick wall in white

    via interiordesign777.com

    shabby chic white brick wall surrounded by plants and textiles

    Curtains are undoubtedly key elements, here, in a space already boosting color, naturalness, and coziness, the perfect balance is achieved.

    via Lonny

    white and red wooden brick interior design

    The option to create withered bricks, somewhere between their natural look and the white state is common as the unfinished look describes a setting with great identity with little to no effort; the result is also closer to the industrial look of a natural brick that can enrich an interior with coziness.

    Source Unknown

    wooden shelves on white brick wall

    Wood is always a beautiful supporting texture, here in contrast.

    Source Unknown

    natural material on distressed background with painted bricks

    Three elements in a space with two textures shape something unique. Authenticity in equilibrium.

    via espritcampagne.canalblog.com

    brick white wall with greenery and light

    Emphasizing a wall with memory with light and greenery is always a good idea.

    Source Unknown

    airy modern Scandinavian design including white brick walls

    The mirror emphasizes the feeling of space in an airy setting aided by white brick walls.

    Source Unknown

    white wall and bricks exposed in a splendid bohemian decor

    Withered aged wood, greenery, and walls that stand the age of time and recorded their part of history holding an industrial frame towards the exterior medium. This space shelters memory in an extraordinary frozen state of calm.

    via cocolapinedesign.com

    rustic industrial bedroom featuring white bricks

    Small spaces too can shelter the white-brick wall + wood + greenery trio successfully.

    via bloglovin.com

    industrial loft design with white bricks

    Industrial interior design has always been a means of expression that knew how to use brick walls to its advantage regardless of their state.

    Source Unknown

    splendid transparent eclectic design with white bricked wall

    Acrylic furnishings are often used in sophisticated small interiors to overwrite clutter.

    via white-glam.blogspot.pt

    white bricks on a contemporary living room background

    A blue intricate rug with naturalness in pattern grounds the neutral interior design composition above, which has the individual as the main element around which all gravitates.

    Source Unknown

    stark white interior with light and white bricked walls

    Ethereal ambiance with stark white throughout, grounded with white-wooden floors.

    Source Unknown

    airy white design emphasized by brick wall

    by Elk Studios

    brick in white and red in modern design

    Notice how the brick wall has been painted in the bedroom only to enlarge that particular space.

    by  Travis Dubreuil

    How do you see the spaces above and the role of white brick walls in interior design? We would love to hear from you in the comment section below.

    There are different types of angle grinder discs, such as diamond-tipped, serrated blades, etc., which can be used for tile cutting. However, choosing the right one for the purpose will mainly depend on the tile material. 

    Picture this: you need to resize a few tiles for your DIY kitchen or bathroom renovation, but buying a wet saw is too expensive an option. You ask a friend for help, who hands you an angle grinder. Sounds weird, right? 

    But angle grinders can help you with tile cutting, provided you have the right disc attachment for the tile material. And in the following sections, we will tell you all about how to choose it. 

    What Is An Angle Grinder After All?

    The plasterer master cuts the marble tile round the ceramic disc 2018. What Is An Angle Grinder After All.

    An angle grinder is a power tool that can be either corded or cordless (battery-powered), typically used for cutting, smoothing rough edges, grinding, and finishing metals. It’s equipped with a rotating abrasive disc, which performs all these tasks. 

    And as you may have already figured out, there are different types of discs, depending on the type of material you want to work with. We will talk about them in a later section.

    Used for both residential and commercial purposes, angle grinders come in handy for different tasks, including:

    • Sharpening gardening mower and shear blades 
    • Deburring steel frames
    • Cutting protruding metal pieces
    • Cutting ceramic, natural stone, and porcelain tiles

    Which Angle Grinder Should You Use For Cutting Tiles?

    Although angle grinders may not be the perfect tool for cutting tiles, the good news is they do the job pretty well. Moreover, there are different discs available for the job, which we’ve listed below.

    1. Stone Cutting Disc

    Stone discs or blades are the most affordable choice, suitable for users who don’t really need a lot of precision while cutting tiles. These discs make thick cuts and generate a lot of dust, so you should always use them outdoors and wear proper protective gear to protect your eyes and nose.

    Another thing to note is that a stone grinding disc isn’t very durable either, so you need to constantly keep an eye on it. The moment you notice the blade chipping, replace it with a new one.

    2. Steel Disc

    A steel disc is undoubtedly one of the most reliable options to achieve satisfactorily clean cuts, thanks to the diamond coating on it. In other words, a steel blade is essentially a diamond-tipped blade that can take on heavy-duty tile cutting.

    These discs make it easier to make both curved and straight cuts on tiles without straining your nerves too much. Although they are more durable than their stone counterparts, their lifespan will ultimately depend on the intensity and frequency of the cutting.

    3. Continuous Dry Cutting Discs

    Another option in the diamond-tipped category is the continuous dry-cutting disc, which is a solid disc best suited for edging the tiles with straight cutting. A pro tip- wet the tile with a spray gun from time to time to help the blade cool down and prevent it from overworking.

    4. Diamond Tile Saw Blades

    As the name may have already suggested, diamond saw blades can cut through tiles made from glass, ceramic, natural stone, porcelain, granite, etc. In fact, the best diamond tile saw blades are extremely sharp to provide the smoothest of cuts without chipping.

    Many users who use angle grinders for cutting ceramic tiles (or any other type, for that matter) consider these blades to be the best, as they can cut even the toughest tile. But these high-power blades tend to be more expensive than the other types.

    Furthermore, diamond saw blades can be categorized into dry and wet blades. While the former can work on dry surfaces, the latter will require the surface to be sprayed down with water at regular intervals. This helps to cool their core, making them perform longer without any significant issues when used properly.

    5. Serrated Blades

    If you aren’t particularly looking for a smooth cut on your tiles, then a serrated blade is a good option to go for. But that’s not the only advantage it provides, as serrated blades are extremely helpful when it comes to cutting concrete tiles. 

    Likewise, they are a preferred choice for cutting tiles made of materials like natural stone, which are harder than their ceramic counterparts.

    6. Carbide-Tipped Blades

    These blades offer you a decent mix of price and performance, as they generate satisfactory cutting power without burning a hole in your pocket.  

    7. Abrasive Wheels

    Abrasive wheels are perhaps the cheapest option out there; however, the low price comes at the cost of low durability. But one benefit of these blades is they are compatible with most materials.

    Best Angle Grinder Discs On The Market Right Now

    Now that you have a fair idea about the different types of angle grinder discs, let us quickly take you through some of the best models on the market. You will see that all of them come under the diamond blade category, as most professionals recommend this type for cutting ceramic tile with the best results. 

    1. Adust 4.5-Inch Diamond Tile Blade

    First up is the Adust 4.5-inch diamond tile blade, which is a preferred choice for cutting porcelain tiles. However, it also works well for ceramic, slate, marble, and other types of natural stone tiles. With a super thin turbo mesh rim and X-tooth design, it can provide faster and cleaner cuts with minimal chipping for your bathroom or kitchen tiles.

    Moreover, it weighs a little more than 12 ounces, so you can rest assured that it won’t add much to the overall weight of your angle grinder. It’s also one of the most durable options on the market today for both professionals and DIYers.

    2. Casaverde 4.5-Inch Super Thin Blade

    Yet another angle grinder blade that’s worth considering is this unit from Casaverde, which offers chip-free cuts even on the toughest tiles. It facilitates dry and wet cutting alike, and a special heat-treat function keeps the temperature down when dry cutting for longer periods.

    Users have liked how this unit is compatible with different materials like reinforced concrete and metals without compromising on a smooth finish. And if you’re wondering what angle grinder disc for wood will work best, then this unit can be a suitable answer to that, too.

    3. Rok 4 ½-Inch Diamond Saw Blade Set

    For people who may want to get their hands on a cost-effective blade set, Rok has got the perfect solution. According to the brand, this pack of 3 blades is suitable for making straight as well as angle cuts on varied materials, including granite, marble, ceramics, and concrete. 

    Each unit is equipped with a 1-inch turbo cutting rim that takes care of speed and precision, no matter if it’s a wet or dry cutting job. However, some users complain that the blades may not be very effective for longer cutting tasks. 

    Some Other Tips To Choose The Right Tile Cutting Blade

    1. Size

    Aside from the type of blade, you should consider the size (diameter) of the blade, as a bigger blade will easily cut more surface in one go.

    2. Shape

    Grinder blades come in different shapes, with square, rectangle, and segmented variants being the most commonly used ones. And each one brings different benefits and some drawbacks. For instance, squared-shaped tiles make it easier to perform straight cuts, but they may not be very useful for making curved cuts. 

    Rectangular blades, on the other hand, can be the perfect bet to make long, uninterrupted cuts, thanks to their larger surface area. However, they don’t score very high in terms of precision.

    How To Use An Angle Grinder For Cutting Tiles?

    How To Use An Angle Grinder For Cutting Tiles

    The Preparation

    Before starting with the job, ensure that you have the right tool and blade for the purpose. 

    For the unversed, angle grinders come in different variations, but the electric-powered ones are more popular, especially for standard DIY tile cutting and similar tasks. This is mainly because they can cover a larger area without requiring too much effort from the user. 

    Electric angle grinders are further divided into corded and cordless models, and you can choose one according to your needs and budget. 

    As for the tile cutter blade, it should be picked according to the material you will be working with. While a diamond-tipped blade with a smooth edge is considered most suitable to cut ceramic tiles, you can achieve cleaner cuts with notched blades for porcelain tiles.  

    After this is done, the next important thing is to wear adequate safety gear like work gloves, safety goggles, and a dust mask. Otherwise, you will expose yourself to injuries from the moving blade and flying debris from the tiles.

    You can also use a pair of earplugs, as tile cutting generally produces a lot of noise, irrespective of the material. And now that the preparation is over, it’s time to get down to business!

    Step 1

    Start by securing the ceramic or porcelain tile to the work surface using clamps so that it doesn’t move through the cutting process. Dedicate adequate time to this step; otherwise, you will invariably risk injuring yourself, damaging the workspace, and messing up the cut itself.

    Step 2

    Once you’re sure that the tile is properly secured on the work surface, draw an outline of the cut on the tile. And if you haven't measured the area where the tile is to be set, this is the time to do it, as you need to cut the tile according to that measurement.

    Depending on your needs, the cut outline can be of any shape, but always ensure that its perimeter is protected with mask tape to prevent chipping from the edges.

    Step 3

    Begin cutting the tile by holding the grinder at an angle most suitable for the cut. Straight cuts are better achieved by keeping the blade straight while making curves will require you to hold the tool at an angle. In fact, an angle grinder can perform better than a wet saw when it comes to angled cuts.

    Keeping the blade vertically along the marked area will help you cut directly into the surface of the tile. On the other hand, a horizontal blade movement that’s kept flush with the outline facilitates making rounded cuts with better precision. In hindsight, you shape the tile by cutting away smaller bits at one go rather than cutting into the surface directly. 

    Similarly, the pressure applied for the cut will largely depend on the thickness of the material. Thicker materials will obviously need more pressure, which is not the case with thinner materials.

    We’d suggest starting with moderate pressure, as you can increase it gradually. Too much force from the get-go can mess up the cut, and you won’t get the chance to rectify it.

    Continue cutting until the tile has the desired shape and size. 

    A construction worker cutting a tile using grinder round the ceramic disc. Angle Grinder Disc For Tiles Conclusion.

    Angle Grinder Disc For Tiles Conclusion

    So, which is the best angle grinder blade for cutting tiles?

    Well, the answer to that will depend on the type of tile you're working with. And if you’re still unsure, refer to the instructions of the manufacturer of the blades. 

    With that, it’s time for us to say goodbye, but not without a final pro tip: some tiles are prone to chipping and breakage from the vibration of the blade. So, use the angle grinder tools to tighten the blade properly, thereby minimizing the vibration.

    If you want to know more about angle grinders, refer to our other read on ” See you again! 

    Isn’t a lush green turf just a sight to behold in rains and sunshine alike? Not only do these look and feel absolutely amazing, but these also contribute to the natural process of earth’s restoration by doing their bit at the “grass-root level.”

    An elaborate St. Augustine grass lawn could undeniably give you one of the most beautiful turfs. It is very popular in Florida and the Gulf states for its ethereal bluish-green dense beauty!

    But as turf breeders would know, growing a St. Augustine could be a daunting task, especially from grass seed.

    And, if you’re on the lookout for substantial information on how to get the process of growing St. Augustine just right, then you, my friend, have stumbled upon just the ideal comprehensive read for the purpose!

    Simply read on to know more on this subject!

    Good St. Augustine Grass Seeds & How to Grow Them

    Growing a St. Augustine’s lawn using sods

    The St. Augustine’s grass lawn has a considerable tolerance to humidity and heat. The bluish-green blades develop quickly to form plush, dense turfs, and it’s adjustability to significantly saline soils, make it a perfect choice for coastal yards.

    One of the easiest ways to get the process of growing a St. Augustine’s lawn done is to plant the plugs from the established turf.

    The plugs are the rooted sod pieces, and when you plant them, they grow up to gradually fill in the spaces between them, giving you a full, luxuriant lawn.

    Even though you can also buy St. Augustine’s sod, it will be a bit expensive than most other grass sods.

    Planting a St. Augustine’s lawn from seeds

    It can be considerably difficult to grow a St. Augustine’s lawn from seeds as it’s infamously bad at proliferating this way.

    This is one of the primary reasons why we don’t get its seeds for sale that easily in the stores.

    This is also why the St. Augustine’s sod farmers usually leave strips of the turf behind for a new St. Augustine’s to grow from instead of completely harvesting the previously.

    However, some farmers who do breed and grow St. Augustine grasses for seed during their development and breeding cycles, do so by using “quantities of seed which is often selected and blended,” and planted in these exact quantities to procure a few other new

    kinds of grass for different selections.

    How to plant a St. Augustine’s lawn?

    1. Estimate your lawn area

    Measure the dimensions of your lawn and the kind of areas that you want to plant. Purchase as much sod as you would require to fill in that area. Getting a tray of around 18 plugs will be sufficient to cover an area of approximately 32 sq.ft.

    1. Prepare the area for planting

    Remove all old sods and weeds using a sod cutter, if you’re planning to regrow an existing lawn. Apply a “non-selective herbicide” for about 2 weeks before you plant, to kill all weeds and ensure no residual is left behind to harm the new saplings.

    1. Apply fertilizer 

    Do treat the soil using a natural or organic fertilizer and use a biological restorative agent to nourish it back to health. Since St. Augustine’s requires considerably fertile soil to grow, it’s not a good idea to skip this step. This will also help the sod fill in faster.

    1. Water the area

    Make sure to thoroughly water the ground before planting, as it makes the soil more pliable and accommodating to the roots of the plug, providing immediate moisture to them. However, do remember that the water should soak in thoroughly and not stagnate on the surface.

    1. Dig in

    Start by digging the holes in a diagonal planting pattern, so that each group creates a diamond. Space these holes 12 inches apart from each other ( the holes across the center of each diamond should be 15 inches apart). Dig each hole a bit larger, but of the same depth as the plug’s root ball.

    1. Plant the plugs

    Push the plug firmly into the hole ensuring that it’s level with the surrounding ground. If you think that the holes are a bit deep, use a little fertile soil to fill in the extra space.

    1. Continue watering

    Water the plugs daily until you see them firmly rooted and gradually spreading. It usually takes about 7-14 days for the roots to settle. After this, water every week unless there’s sufficient rainfall to do away with manual watering.

    1. Screen for critters and diseases

    A newly planted and gradually establishing St. Augustine’s lawn can fall prey to pests bugs and plant diseases, which can affect both its roots and turf. If you notice mildew or any brown spot beginning to manifest, do contact your local extension agency for treatment options.

    Where and when to plant the St. Augustine seeds?

    Where and when to plant the St. Augustine seeds?

    The St. Augustine grass grows and proliferates best in warm springs and summers when temperatures are normally between 80-100 degrees Fahrenheit. It develops full colors at approximately 10 degrees lower than the temperature which discolors and fades Bermuda grass.

    It can tolerate some shaded places during hotter summers but can develop thin and spindly turf in densely shaded regions.

    The grass can be grown in most soil types as long as it has proper drainage facilities and is fertile. The pH range for growing the St. Augustine grass should preferably fall between 5.0 to 7.5, but at higher levels than that, it could develop a chlorotic appearance.

    St. Augustine's has a tolerance for a salinity level of up to 6 mhos, unlike Bermuda grass which has only slight tolerance for high salinity.

    If you’re planting the plugs or sods in the full sun, make sure to give it a minimum of 90 days “before your region’s first estimated fall frost” for the grass to develop. Since this grass develops rather quickly, it won’t be necessary to go over frequent checks and estimations.

    Maintaining the lawn

    When the new lawn begins to fill in, and the blades reach a “mowable” height, cut them with the mower. Make sure that the mower is set at 3-4 inches. Once the leaves start to turn bluish-green, water them regularly and add any organic lawn food every 6-8 weeks to feed the grass until they have filled in.

    How to Grow Augustine's Grass Conclusion

    So, this was all about how to grow a beautiful, flourishing St. Augustine’s grass lawn and maintain it thereafter.

    Hope you got an insight into the subject.

    Thanks for reading. Till next time!

    Related Articles

    The 5 Best Lawn Mowers for St Augustine Grass Right Now

    5 Best Gas Hedge Trimmers 

    4 Best Walk Behind Brush Cutter 

    3 Best Yard Hydrant  

    5 Best Stick Edger 

    13 Best Trimmer Lines | Multi-Sided, Round, Square, Twisted & Serrated

    7 Best Shoes for Cutting Grass Comfortably | Buyer’s Guide

    13 Best Fertilizer Spreaders

    13 Best Expandable Hoses 

    11 Best Pine Straw Rakes

    11 Best Mosquito Fogger Insecticide

    9 Best Fertilizers for Petunias Right Now

    9 Best Fertilizers for Hydrangeas

    11 Best Fertilizers for Lilacs

    How to Install Landscape Fabric for Weed Control

    How to Grow Cilantro Indoors Easily

    13 Best Fertilizers for St Augustine Grass Reviewed

    13 Best Fertilizers for Palm Trees

    13 Best Weed Torch

    How Long After Grass Starts Growing Can You Mow It?

    Does Grass Seed Go Bad | Expiration Dates Explained

    Winter is fun till splitting logs for the fireplace makes your back cry for help!

    That’s why a lot of homeowners have opted to buy a log splitter for regular residential use. But there’s one problem, most of them don’t come cheap.  And if you’re a first-timer, it may be even more challenging to get the right model according to your needs.

    So, what can you do? It’s rather simple-rent a log splitter! That way, you have first-hand experience without spending a lot of money. And if you don’t split logs regularly, that’s all the more reason to rent one. Once you’re comfortable with the operation, decide if you’d buy one.

    On that note, we’ve listed down the top 13 places to rent a log splitter from. So, let’s begin!

    Places To Rent A Log Splitter

    Close up strong man lumberjack in uniform chopping wood with sharp ax on wooden hemp, sawdust fly to sides. Powerful ax blow, woodworking, harvesting wood for winter. Splitting logs with sharp hatchet

    1. Home Depot

    Numero uno on our list is Home Depot. It boasts a professional-grade and well-stocked inventory that has a solution for almost all your equipment requirements, be it for indoor or outdoor use. We love the log splitter that’s powered by a Subaru EX27 engine and has a 14-seconds cycle time.

    Just specify your location, and you will have the details regarding their nearby stores (from over 1,200 stores) and competitive prices. However, you may need to pay a deposit fee upfront. What’s more, you might also avail same day pickup. Home Depot offers its rental services to users above 18 years of age, so ensure that you carry a valid ID card to the store.

    1. Rental HQ

    Although not a rental service per se, Rental HQ is a director-based intuitive website connecting users to rental companies. In this case, you need to enter the equipment you’re looking for and the desired location, after which it will fetch information about nearby rental stores. Select the most convenient option from their exhaustive drop-down list.

    Additionally, the website houses articles on various DIY projects, and how-to-use guides for first-time users. So, that’s a bonus!

    1. Sunbelt Rentals

    A South Carolina-based company, Sunbelt Rentals is a subsidiary of the Ashtead Group and America’s second-largest rental service. With more than 700 locations, it offers both pickup and delivery services.

    We tried our hands on the 26-ton log splitter with 14 seconds cycle time that’s powered by a robust 270cc Honda GX engine. Besides, it has multiple noteworthy features like steel fenders and E to Z lift hinges.

    Apart from log splitters, you will also find a host of other equipment for residential, DIY, commercial, and industrial purposes. They also have a 24x7 emergency delivery system consisting of vehicles, dispatchers, and mechanics, who are available on call. The three-decade-long years of operation are a testimony to their quality service.

    1. Herc Rentals

    Keeping client convenience in mind, Herc Rentals offers daily, weekly, and monthly rates for their log splitter. The website features a Barreto 920LS 25-inch log splitter that runs on an 8.7 hp gasoline engine. Beyond that, torsion axle suspension reduces bounce, enhances tracking, and improves the low-towing ability of the unit.

    While the rubber bump stop shields the splitter during the transition from vertical to horizontal, the two-handed control system takes care of accessibility. And with the cushioned log cradle and spring-loaded cleaning wedge, safety is hardly an issue. It’s the ideal choice for landscaping or tree removal; just enter the location for specific price quotes.

    1. United Rentals

    If you’re looking for a hydraulic splitter fuelled by gas without spending a ton of money, then United Rentals will come to the rescue. The website houses a heavy-duty hydraulic splitter, and you can specify the period for which you need it. Not only that, but it also allows you to set the quantity.

    That said, the price will depend on the location, and if its location is not serviceable, they advise you to get in touch with their customer service via call.

    1. A Tool Shed Equipment Rentals

    A Tool Shed Equipment has a 20-ton vertical log splitter that’s powered by a Honda 8.7hp GX270 engine and has a 20-second long cycle time. Moreover, you can rent the unit on an hourly, daily, weekly, or monthly basis without paying any sales charge. Depending on the location, prices usually start from $30 per hour and go up to $1,050 for a month.

    You may also opt for an equipment protection plan that has separate charges. Plus, the monthly rates are levied for a minimum of 28 days or a maximum of 160 hours.

    1. Koopman Lumber

    Similar to Rental HQ, Koopman Lumber is a directory-based service that matches users with rental services for various locations across the country. They generally provide information about three main models, namely; the Cadet LS25, Cub Cadet LS27, and Oregon 22-Ton. Each of them is sturdy and offers plenty of power for regular residential wood splitting, be it for a fireplace or renovation purposes.

    1. Simplex Equipment Rental

    Simplex is a Quebec-based family business in operation since 1907. It provides a Wallenstein 24-inch gasoline-powered log splitter that has both horizontal and vertical orientation. Their web prices include daily, weekly, and monthly categories. Besides, a 7.9% waiver fee is applicable upon placing the order, and special weekend rates may be available on request.

    1. Rent Equip

    As we near the end of the list, Rent Equip finds a deserving mention. It has a 700-ton, 270cc Honda engine, and a hydraulic system-operated heavy-duty wood splitter with a 12-second cycle time. Unfortunately, we couldn’t find a lot of details about the rates, but you should be able to get them for at least 24 hours.

    1. Handy Rents

    True to its brand name, this rental service rents out equipment and full-line tools for your different needs. The log splitter on offer is again a 700-ton, 12-second cycle time, and 270cc Honda GX powered model. You can rent it on an hourly, weekly, or monthly basis, but you must have it for a minimum of 4 hours ($64). The monthly prices can reach up to $834.

    An exciting thing about this site is the rental reward program, which gives you a 3% discount on every order. You can accumulate the points and use them within 6 months. Furthermore, new users are automatically enrolled in this program!

    1. Battlefield Equipment Rentals

    Despite being a Canada-based service, Battlefield Equipment Rentals provide its services in different parts of America. It comprises a directory that can be used to locate log splitter rental services in your location. Moreover, the prices depend on the location and period of use, be it daily, weekly, or monthly requirement.

    1. Rental Village

    The rental village offers pocket-friendly prices for those looking to rent log splitters for a few hours as the rate starts from about $45 per hour. However, for monthly requirements, the prices may shoot up to $1,080.

    1. Complete Rent-Alls Orillia

    Depending on how long you need to use it, this rental service provides a 20-ton log splitter that can be rented for a few hours, days, or weeks. The prices will mostly depend on the period of use.

    For instance, those who plan to rent it for four hours may have to shell out about $45. Similarly, the daily rates hover around $60, and the weekend rates may have to pay up to $90.

    Carpenter working on a sawmill on a wood manufacture

    Final Words

    So, there you have it - our top 13 recommendations for renting a log splitter.

    Interestingly, most of our suggested services don’t stop at log splitter renting. Not only do they offer a wide range of indoor and outdoor pools, but they may also provide tents, chairs, tables, etc., for outdoor events. So, go ahead and check them all!

    With that, it's time for us to wrap up the guide. But before we do, allow us to stress two important factors. First, make it a point to carefully go through all the terms and conditions of use. The last thing you’d want is to pay extra money for any accidental damage.

    Also, we’d suggest going for a service that has quick and responsive customer service. You never when you may run into problems during operation, so it’s better to have professional help easily accessible.

    See you again!

    Related Articles

    6 Best Wood Stove Fans | Buyer’s Guide

    11 Best Rocket Stoves for Camping and Survival Enthusiasts

    27 Insanely Cool DIY Rocket Stove Plans for Cooking With Wood

    10 Best Small Pellet Stoves | RV & Tiny House Compatible

    The 10 Most Efficient Wood Stoves For Home Heating

    A snow blower should ideally start within the third pull of its starter rope. So, how can you troubleshoot it when it refuses to start? Let's find out.

    There can be nothing worse than getting ready to clear snow only to hear the disappointing whirr of a snow blower refusing to start. Well, just like any machinery, a snow blower requires periodic maintenance to operate. If you haven't used it in a while, it may give trouble when you initially try to start it up.

    First of all, there is no reason to panic. Gas-powered snow blowers require regular maintenance and may take some time to warm up. But if you simply cannot start it, it is time for some good old troubleshooting. We will tell you precisely how to do this in our guide.

    Let's get started!

    How To Troubleshoot A Snow Blower That Won't Start

    Teenager removing snow with a shovel in the winter

    1. Check All The Switches And Valves

    The latest snow blowers have a plethora of switches and valves which need to be set in their correct positions. Of course, it can get very confusing for a first-time user to understand it all. This is why we recommend pulling out your owner's manual (or checking a copy of it online) and getting acquainted with the different parts.

    Every machine will be different and might require different switches to be turned 'on' or 'off.' Some snow blowers might require you to set the throttle on 'high' and the choke on 'full' before you can turn the switch 'on.'

    Your snow blower refusing to start can be as simple of an issue as not having all the switches in the correct positions.

    1. Check The Fuel

    Unless you experience snowfall throughout the year, it is likely that your snow blower will be sitting idle for several months at a stretch every year. More often than not, this causes the fuel to become old and gummy. Old fuel can also cause issues with the carburetor.

    To fix this, you need to siphon out all the old fuel from the tank using a small siphon pump. You may clean the tank if you wish to, but it is not always necessary to do this. Drain the old fuel and replace it with new fuel to get your snow blower started once again.

    Sometimes, there is too little fuel in the tank for the machine to run. If this is the case, you can top off the tank with the additional fuel it requires and start the engine. 

    1. Add Fuel Stabilizer

    The next thing you should do is add a fuel stabilizer to your tank. Essentially, this helps the fuel stay fresh and prevents it from becoming gummy and sticking to the carburetor. Moreover, the old fuel you drained out may have sticky residue that is clinging on to the carburetor and making it difficult to start the machine.

    Adding a fuel stabilizer dissolves this sticky fuel by liquefying the residue. Pull the starter cord repeatedly to enable the stabilizer to spread through the fuel tank. If you see that the snow blower is still reluctant to start, you can try waiting for an hour or two before trying again. This additional time will allow the stabilizer to dissolve more gummy fuel and enable the machine to start.

    1. Prime The Engine

    Gas-powered engines can be troublesome during cold weather. Not only do you need to maintain the machinery properly, but you also need to use the choke and throttle appropriately in order to get the fuel running without flooding the engine.

    To prime, the engine, press the flexible primer bulb (a small silicone bulb located near the carburetor) about three to four times. Doing this forces a small amount of fuel into the carburetor. This enables the engine to ignite more quickly, especially if it has not been running for a few months.

    That being said, priming the engine during the winter may cause it to flood. To prevent this, put your choke on 'full' and put the throttle at ¾ speed (or higher). You may need to do this a couple of times for the engine to ignite finally.

    1. Spark Plugs

    The next thing that the engine requires is a spark. Without this, the engine cannot ignite. It is possible that you may need to clean or completely replace the spark plugs.

    Using a socket wrench and spark plug socket, carefully remove the plugs from their place. Inspect the porcelain surface and look for any cracks or damages. If there are none, continue to clean the spark plugs and put them back in their proper place. However, if you notice cracks or damage, you may need to replace the plugs entirely.

    Using a carburetor cleaner and a thin wire brush, clean up any built-up carbon deposit from the ends of the spark plugs. After drying the plugs thoroughly, place them back in their original positions.

    1. The Fuel Line

    Next up, you need to scrutinize the fuel line. This is a flexible and pliable line that runs from the carburetor to the gas tank. However, over time these fuel lines can harden and cause fuel to leak. This leak can prevent fuel from reaching the carburetor.

    Check the fuel line carefully for cracks, kinks, or if it has hardened. If you notice any of these signs, it may be time to replace the fuel line with a new one. 

    1. Clean The Carburetor

    It may so happen that you have followed all of the steps above, and your snow blower still refuses to start. In this case, you may need to take a more aggressive approach.

    The carburetor is located under the air filter, so in order to access it, you will have to first remove the air filter cover, the air filter, and then have access to the carburetor itself. This piece of machinery has a vital job - it combines fuel and air in a very precise ratio for efficient combustion.

    So obviously, if the carburetor is clogged, it cannot function efficiently. In order to clean the carburetor, you can use a carb cleaner (a solvent that typically comes in an aerosol spray can with a straw attached to its nozzle). This handy spray can deliver a high-pressure shot of spray that efficiently dissolves any gunk attached to the carburetor.

    Next, spray this solvent in the air-intake valve as well. This is a cylindrical valve connected to the carburetor. Once you've completed these steps, replace the air filter and air filter cover, and try to start the snow blower again. 

    If The Engine Starts But Continually Stops

    Great, so you got the engine running, and you can finally start using the snow blower. But next thing you know, the engine keeps stalling or turning off. What does this mean?

    Well, it could be something as simple as a carburetor issue. With continual use, the carburetor collects some amount of dust, grime, oils, and other residues that can choke air as well as fuel flow. As we mentioned in our previous step, you can clean the carburetor thoroughly, and your machine should run smoothly.

    However, if this still doesn't work, you likely need to replace the old carburetor with a new one. Fortunately, this piece of machinery is relatively inexpensive and not too much of a hassle to replace!

    We should mention that checking the fuel cap vent is another important step that many people often forget. The air that enters the tank makes up for all the fuel that is being continually used. However, if the vent is clogged with residue or grime, it can cause issues with starting.

    To check this, try running the snow blower with a slightly loosened fuel cap vent. If you notice issues with the air vent, you may need to replace it with a new vent cap.

    Call A Professional

    If all else fails, we recommend calling a professional for the job. The snow blower may likely need to be completely disassembled and checked thoroughly, which is a job best done by an expert.

    If your snow blower is still under its warranty period, you can get it repaired for free. Otherwise, you can visit any engine repair shop and get the machine looked into by a professional.

    Close-up of female mechanic holding spare parts of car at repair garage

    Conclusion

    As you have probably realized from our guide, a reluctant snow blower isn't a reason to instantly shell out money for a new one.

    More often than not, simple troubleshooting can help you fix the machine in no time. Of course, if you are unable to do it yourself, you can ask a professional to look into the matter. It is important to remember that most gas-powered snow blowers require regular maintenance.

    If you use your snow blower just once in a few months, the reason for it not starting is relatively simple and easy to fix. We hope our guide helped you in understanding the simple mechanism of troubleshooting a snow blower.

    Until next time!

    Related Articles

    Ariens Vs Husqvarna Snow Blowers | Obvious Winner?

    Troy-Bilt Squall 2100 208cc 21″ Single-Stage Gas Snow Thrower [Reviewed]

    5 Best ATV Snowblower Attachments  

    13 Best Snow Joe Electric Snow Blowers  

    4 Best Remington Snow Blower Reviewed | Buyer’s Guide

    4 Best Tractor Snow Blower Combinations  

    How Much are Snow Blowers? [Costs & Maintenance]

    13 Best Single-Stage Snow Blowers 

    10 Best Snow Blowers For Large Driveways

    7 Best Snow Brooms [Reviewed & Buyer’s Guide]

    4 Best Greenworks Snow Blower [Buyer’s Guide]

    7 Best Oil for Snow Blowers

    5 Best Honda Snow Blowers

    4 Best Simplicity Snow Blower

    11 Best Snow Blower for Gravel Driveways

    5 Best Commercial Grade Snow Blowers

    7 Best Ariens Snow Blowers

    Best 3 Cub Cadet Snowblowers

    There’s no dearth of different tankless water heaters in the market. But that’s where the problem lies!

    Choosing a model from a wide range of options, which ensures the endless flow of hot water to your home, may seem simple but isn’t. This is because hot water demands differ from one household to another.

    That said, we understand that selecting a model that best meets your requirements can be a daunting and time-consuming task. Several factors need to be considered before the installation process - size being the most crucial.

    We’ve carefully created this comprehensive guide to help you find a suitable tankless water heater. Through this article, we’ll be addressing a critical question - “what size tankless water heater do I need?” Furthermore, you can go through our FAQs and examples provided in each section to gain all the relevant information on the topic.

    So, without further ado, let’s get going!

    Guide To The Ideal Size Of A Tankless Water Heater


    When you want to choose a water heater for your home, it’s important to consider its size before going ahead with your purchase. Ideally, traditional water heaters can be selected based on the size of your family, but determining the size of a tankless model isn’t that simple.

    Factors such as GPM or flow rate, and types of fixtures come into play while selecting a unit that supplies the required amount of hot water to your home. That being said...

    In this section, we’ll be taking you through an in-depth guide to help you find the tankless water heater that’s perfect for your home. We’ve explained a few crucial points and calculations that need to be considered during the selection process. So, let’s dive right in, shall we?

    1. The Size Of Your House

    With tankless water heaters varying in sizes, choosing a model that meets your requirements should be a priority. Although almost all modern units can easily steam the entire water supply of your home irrespective of its size, opting for a smaller model can be inefficient if you own a big house with more than one bathroom.

    It may only allow you to heat water flowing into specific bathrooms in your home. This is why it’s crucial to consider the size of your house and determine the output required to fill all your spa and shower rooms.

    1. Calculating The Water Flow or GPM

    Unlike regular water heaters, tankless models steam water as it runs into your home. In other words, the flow rate offered by your water heater helps in determining the water output of your taps.

    This is why you need to consider the GPM of the appliance to make sure it allows you to run more than one tap or shower simultaneously with the same flow rate. There’s a simple calculation that can help you determine the maximum required GPM for the tankless water heater.

    All you need to do is add up the flow rates of each water fixture in your home that supports the flow of hot water. You can refer to user manuals to find the specific values of the individual fixtures or simply search their model numbers online.

    Don’t have the original paperwork or model number? Well, there’s no need to worry; you can use generic GPM numbers depending on the water fixture type. Estimate charts are readily available on the internet for you to find the required information. However, you can also consider the following list of flow rates:

    (a) Bathroom faucet: 0.5 GPM - 1.0 GPM

    (b) Dishwasher:1.5 GPM - 2.5 GPM

    (c) Showerhead: 1.5 GPM - 2.0 GPM

    (d) Laundry washer: 2.5 GPM - 3.5 GPM

    (e) Kitchen faucet: 2.0 GPM - 6.0 GPM

    Now, we come to the basic formula to help calculate the GPM for your water heater:

    Required GPM = Sum of all the flow rates for individual hot water fixtures which run simultaneously

    Consider the following example for a better understanding - suppose two showers with the usual water flow rate of 1.8 gallons per minute each run at the same time. You can calculate the required tankless water heater GPM by adding the rate of both fixtures, i.e.

    Required tankless water heater GPM = 1.8 GPM (shower 1) + 1.8 GPM (shower 2) = 3.6 GPM

    1. Determining The Required Temperature Rise

    Now that you’re done calculating the required flow rate, it’s time you determined the amount of heat your heater needs to generate to sufficiently warm water.

    For this, you’ll need to calculate the temperature rise; rather, the amount of heat needed to increase the temperature of groundwater to the desired level. It’s therefore important to know the temperature of water flowing into your home, and that of the water you wish to obtain from your faucets or shower fixtures.

    Finding your region’s groundwater temperature is easy provided you use a ground temperature map, offering temperature listings over broader areas or specific values for smaller areas. Once you know the groundwater temperature, simply follow the given formula to determine the required temperature rise.

    Required temperature rise = desired water temperature - groundwater temperature

    For example, let’s assume the preferred hot water temperature is 105 degrees F, while your home’s incoming groundwater temperature is 45 degrees F. So, the required temperature rise will be 60 degrees F.

    To sum up, if your shower flows at a rate of 1.8 gallons per minute, your heater must be able to heat 1.8 gallons of water by 60-degree F every minute to deliver the desired hot water temperature.

    1. Knowing The Power Source

    Next up, you’ll need to consider the power source for your tankless water heater to determine the required size. Ideally, gas water heaters are less expensive and more powerful than their electric counterparts as they can easily heat 5 gallons of water up to 70 degrees F in a minute.

    On the other hand, electric tankless heaters are more affordable and simple to install. They can only heat 2 gallons of water up to 70 degrees F within the same duration. Hence, they’re more suited for homes with higher incoming groundwater temperatures and smaller heating requirements.

    Before going ahead with your purchase, consider the availability of the power source. Does your home have the power access for a gas or an electric water heater? Once you’re convinced with the price and power source of the unit, you may check out the features offered by the model.

    1. The Size Of Your Household

    Without a doubt, this is one of the most crucial factors to take note of before buying a tankless water heater for your home. It should be able to handle the hot water usage of individual faucets without compromising their flow rate.

    The frequency and total volume of hot water consumption are dependent on the number of members in your family. It’s quite obvious that a family with four members will use more hot water than a couple living in a condo, even though they might not use heated water at all times.

    However, you must also consider scenarios in which the water usage may peak, like when guests are over, or when you’re planning a wedding. And choose the size accordingly to avoid running out of water on such occasions.

    This is why it’s important to add up the flow rate of each fixture. It will enable you to determine the maximum GPM required for the tankless water heater, depending on the simultaneous activities of the different users and members of the family.

    Let’s take a look at a few examples to help you understand the concept better.

    (a) What Size Tankless Water Heater Will A Couple Need?

    A couple living in a condo will obviously have a single bathroom and no on-site dishwasher or laundry. Hence, the hot water requirements and usage would be substantially lower than larger families with four to five members.

    Suppose after adding up the flow rates of their individual water fixtures; the maximum required water heater flow rate is just 5 GPM. To raise the temperature from the average 68 degrees F to the desired 110 degrees F, the couple will need a water heater capable of heating 5 gallons of water by 42 degrees F per minute.

    (b) What Size Tankless Water Heater Will A Family Of Four Need?

    A family of four will have to consider how many people at their average-sized home might run hot water at the same time. Let’s assume the family might have to run a dishwasher (2 GPM), kitchen faucet (3 GPM), and up to two showers (1.5 GPM each) simultaneously.

    Considering all the appliances run efficiently, the maximum required water heater flow rate would be 8 GPM. And if they’re living in Hawaii, for all that matters, they might need a heater capable of raising the average groundwater temperature of 77 degrees F to 120 degrees F.

    In other words, the family of four will require a tankless water heater capable of heating 8 gallons of water by 43 degrees F in a minute.

    (c) What Size Tankless Water Heater Will A Family Of Five Need?

    A family of five can always opt for a gas tankless water heater as it’s not only cost-effective, but it’s also powerful enough to fulfill their hot water requirements.

    That said, consider five of them living in a home with the same appliances as our previous example. To this list, we’ll add an extra bathroom with an additional 1.5 GPM bathroom faucet. It’s quite obvious that they would be running two showers at the same time, along with a dishwasher and washing machine.

    Adding the individual flow rates of each fixture, the maximum required water heater flow rate reaches 9.5 GPM approximately. Now, assuming their home is located in Oklahoma, we’ll take the average groundwater temperature as 57 degrees F.

    With the family preferring their hot water output to be 120 degrees F, they’ll need a water heater capable of heating 9.5 gallons of water by 63 degrees F per minute.

    1. Can a tankless water heater fill your tub?

    A smaller tankless water heater will take longer to fill a large tub, so if you want to get it done within no time, opt for a unit with a substantially higher flow rate.

    1. Can a tankless water heater be too big for a family?

    There’s nothing as too big when it comes to tankless water heaters. Opting for a unit with a capacity smaller than what’s required will not provide sufficient hot water to meet your requirements. You’ll eventually run out of hot water.

    On the other hand, you may consider going for a water heater with a larger capacity than required, provided you don’t mind overpaying. This is why proper sizing is crucial before making a purchase.

    Final Words

    Tankless water heaters are designed to save more space compared to traditional geysers. That’s not all; an efficient model can help readily supply hot water to your household without compromising the water flow rates of your individual faucets and fixtures.

    However, to ensure this, you’ll need to choose a water heater size depending on your household size and overall water usage. Simply follow the two primary steps - firstly, calculate the maximum required flow rate of the unit. And secondly, find the temperature rise based on the desired output and incoming groundwater temperature.

    Once you’ve determined your requirement, all that’s left to do is select a suitable power source. With this, we now come to the end of our informative and comprehensive guide.

    Here’s hoping you were able to gain the required insight on the topic. On that note, we’ll take your leave.

    Till next time!

    Related Articles

    13 Most Energy-Efficient Space Heaters For 2022

    5 Best Above-Ground Pool Pads | Buyer’s Guide and Reviews

    5 Best Epoxy Pool Paint | Buyer’s Guide and Reviews

    10 Best Pool Cover Pumps | Buyer’s Guide and Reviews

    Learn How to Install a Spa Cover Lifter

    Dolphin M400 with Caddy Review & Buyer’s Guide

    Top Tier APEC vs. iSpring RCC7 | Water Filtration Systems Compared

    11 Best Pool Handrails + Buying Guide

    13 Best Salt Water Chlorinators

    5 Best Auto Chlorinators for Pool  

    Ceramic VS Infrared Space Heaters | What’s the Difference?

    13 Best Wireless Water Shut-Off Valves

    The length of a water volleyball court should range from three to six meters and two to five meters in width. As for the net, it should run across the width while being centered along the length to provide players with an equal amount of court. 

    When planning to create a water volleyball court, volleyball pool nets, and mounting hardware are usually the first things people think about. 

    But they often forget one of the most important things– deciding on the size of the swimming pool. Determining the ideal pool size depends upon several factors, such as the number of players and the size of teams. 

    And the pool size, in turn, will determine the size of the volleyball net. 

    The Optimal Size For A Volleyball Pool

    The Optimal Size For A Volleyball Pool

    A volleyball pool should be at least three meters long but can go up to six meters. Additionally, it should be at least two meters to a maximum of five meters wide. While these are the standard dimensions, some players, especially new ones, may find it challenging to play in larger pools. In such cases, it is better to go with a smaller size pool with a smaller net. 

    Now, you must be wondering how to build a pool volleyball net- right? This can be done using PVC pipes and bungee cords or straps, which should run across the breadth of the pool and be centered along its length. 

    Most pools have shallow and deep ends, and placing the net close to the deep end will make the game fun and exciting. It will ensure that both sides have an equal amount of space to play in. 

    Tip

    While volleyball courts on lakes are built with standard dimensions, residential ones can be built according to custom specifications. Therefore, it’s wise to seek advice from a professional player for the best results.

    The Difference Between Pool Volleyball And Other Types Of Volleyball

    Several differences exist between pool volleyball and other types of volleyball. For instance, indoor volleyball requires a heavy ball that can move faster in a larger space. On the contrary, the ball used in pool volleyball must be large, waterproof, and tear-resistant. 

    Another key difference is that the court size is smaller in the case of water volleyball compared to other types of volleyball. The reason is that it is quite difficult to run in a pool compared to running in an indoor court. 

    What Size Pool for Volleyball Final Thoughts

    What Size Pool for Volleyball Final Thoughts

    With that, this guide explaining what size pool for volleyball is best has come to an end. Generally, you can purchase pool volleyball kits according to the size of your pool, but in some cases, you may have to take the DIY route. 

    You can also have an electric awning constructed over your volleyball pool, but make sure to check how to manually retract electric awning before doing so. Also, take proper measurements and use the highest-quality materials. 

    That’s all for today. Until next time! 

    Choosing the correct type of humidifier for your house can bring a drastic improvement in air quality.

    There are different sizes of humidifiers available that are suited to cover a certain square footage. Matching a suitable model with its corresponding square feet is vital to get the most benefits out of it.

    While there are whole-house humidifiers available, using one unit for a single room has its own benefits as well. Saving on power consumption and controlling which rooms are ventilated - just to name a few.

    With so many considerations and factors that affect the efficiency of a humidifier, what is the best size for your home? We will go over this and a few quality models to choose from in our comprehensive guide.

    Without further ado, let us get into it!

    What Size Humidifiers Do I Need?

    Still life with an aroma diffuser to humidify the air and interior decor details in a Scandinavian style.

    Humidifiers - Mist Temperature

    Humidifiers are available in two options of what temperature mist they release. You can go with either a cool mist or a warm mist humidifier.

    Going with either temperature variant has its own unique benefits to add moisture back into the air. After all, regulating the moisture output and humidity of a space can help cut down on respiratory allergens.

    A. Cool Mist Humidifier

    Cool mist humidifiers are used widely for their coverage and health benefits. In homes with young children and pets, the cool mist given off by the humidifier can limit the number of fire hazards in a room.

    Additionally, cold mist humidifiers are versatile in that they purify the air besides maintaining the humidity level of a space. The number of square feet that a cool-mist humidifier covers are more than that of its warm mist counterpart.

    In essence, a cool-mist humidifier is a two-in-one unit that does it all with more energy efficiency than a warm mist model. It does this by turning the warm air cold with the cool mist droplets.

    However, they come at a higher price tag as compared to a warm mist model. Additionally, the cool mist generated requires an internal fan to maintain the temperature as the mist is released. As such, the noise levels can be high when working in higher settings.

    It is a great investment if a cool temperature and additional health and safety benefits are what you are looking for.

    Types of Cool Mist Humidifiers

    There are two types of cool mist humidifiers available - classified depending on the method of distribution of the water particles into the air. These come in either an evaporative or an ultrasonic unit.

    In evaporative cool mist humidifiers there is a wick filter within the unit that absorbs the water from the tank. This water is then evaporated and spread throughout the room by a fan blowing air through this wick filter. The resulting output is a fine cool mist spread throughout the room

    The second cool mist humidifier type is known as an ultrasonic humidifier. These units use ultrasonic vibrations to generate the ultra-fine mist. What's more, they are usually quieter in operation as compared to the evaporative models.

    Features Of A Cool Mist Humidifier

    Using a cool mist humidifier can bring about a change in the air quality and temperature in the room. As the unit does not require any heating, there is a considerably lower power draw, saving you a bit on the electric bill.

    Additionally, these models are safe for use around children and pets as there are no potential accidents due to hot water. The cool mist adds a refreshing feeling to any room's humidity levels.

    Using a cool mist humidifier does have a few drawbacks such as the higher noise level. Furthermore, the colder mist can make a room feel slightly colder. If you live in cold climates, you may want to reconsider before spreading cold moisture throughout your rooms.

    B. Warm Mist Humidifier

    Warm mist humidifiers are widely used as they are able to remove bacteria by heating up the water in the tank. Before the steam and warm mist are released into the air, mold spores and bacteria are killed off.

    As the mist has been heated, it is able to have a higher concentration in the air. This can be especially beneficial in acting as a heating element in colder rooms.

    What's more, warm mist humidifiers ensure minimal noise levels during operation. And the internal fan that is necessary for the cool mist model is not required in this humidifier.

    Features Of A Warm Mist Humidifier

    Using a humidifier that utilizes warm mist to regulate humidity levels in a room can bring additional health benefits. By heating up the water to a boiling point within the tank, any bacteria and mold is killed off right away.

    Furthermore, the warm mist humidifier works silently as there is no internal fans required for its operation. This makes using them in areas where noise is a factor such as nurseries and offices more plausible.

    However, warm mist types of humidifiers are not as efficient in terms of their coverage. The warm mist takes time to travel and is limited to the immediate area around the humidifier. As the mist is evaporative, by the time the droplets travel away from the system, they have cooled down and dissipated.

    What's more, the price of buying one of these machines tends to be more than the cool mist counterpart. Although, it is beneficial in doubling as a heating element and potentially save some energy spent on heating.

    What Is The Ideal Humidifier Size?

    If an air humidifier is not a centralized unit, it is typically portable to some extent. These smaller-sized units are used to control the humidity level of a single room at a time.

    Classifying the types of humidifiers according to their size can be done based on their water tank size, how many square feet they cover, and their water output.

    A. Small Size Humidifier

    On one end of the spectrum, there are small 1/4-liter humidifiers that can be powered with a USB cord. These models are not as effective as a larger-sized model.

    When it comes to efficiency and effectiveness of these types of humidifiers, they are more suited for smaller rooms and areas. The moisture output is not sufficient to have an effect on the overall humidity of a room.

    Due to their compact design and limited effective area, they are ideal for use in cars and small office spaces. In fact, controlling the humidity is much easier when the area to be covered is small.

    B. Large Size Humidifier

    On the other side, we have large industrial models that are heavy-duty performers—effectively covering more square feet along with more moisture output.

    These humidifiers are capable of covering 3,600 square feet, so regardless of the room size, they will be sure to maintain the humidity level in the air easily. With such extensive coverage, these large models can be essentially used as whole-house humidifiers.

    Larger humidifiers typically have a larger water reservoir to store the gallons of water needed for the steam and mist. On average, they can store up to six gallons of water while having an output of 12 gallons. It is easy to see how quickly dry air becomes hydrated and healthier to breathe.

    When choosing an air humidifier model, keep in mind the quoted capacity on the packaging refers to the tank capacity, not the moisture output. On average, the volume of moisture output is more than that of the water tank. And a larger water tank volume will benefit in cutting down on frequent refills.

    However, a large-size humidifier should be used only in rooms that are capable of taking full advantage of its coverage. A misplaced large humidifier in a small room size can cause mold and bacteria to form. Moreover, the humidity level will saturate the entire room to the point of excess, compromising the safety of your respiratory system.

    Taking proper measurements of the square footage of a room is essential to match it with a compatible humidifier size. The relative humidity given off by a compatible unit can determine how beneficial it is in improving air quality in the room.

    A safe choice of an adequately sized humidifier is one that can cover 700 square feet. These models are able to cover most bedrooms and a living room easily without compromising on safety. However, to guarantee a large-sized humidifier is the right choice for you, it is recommended to use one only in rooms with an open layout.

    Best Humidifiers

    1. Honeywell Ultrasonic Cool Mist Humidifier

    A quiet humidifier from Honeywell, this model can gently release cool moisture back into the air. It has an incredibly easy refill design from either the top of the humidifier or by removing the tank entirely and refilling at a faucet. By being able to remove the tank, maintenance is also an easy process with this model.

    There are no filters involved in this cool mist humidifier, so you won't have to buy a replacement filter eventually. Instead, a nebulizer is vibrated at an ultrasonic frequency then released by a directional mist outlet. Using this unit can cut down on dry air and dust that can irritate the respiratory system.


    Pros

    • 1.25-gallon tank capacity can be used for 36 hours
    • Low noise level
    • No filter required
    • Automatic shut-off when the tank is empty


    Cons

    • Requires distilled water to run efficiently


    2. Everlasting Comfort Cool Mist Humidifier

    Everlasting Comfort has an ultrasonic humidifier that is rated to humidify rooms up to 500 square feet. With such a wide operation range, it can be easily used in almost any room of the house. What makes it unique is the essential oil tray that spreads a fresh aroma throughout the entire room.

    Additionally, this humidifier has a filter-less design, saving you on further costs to replace the filter. Although this is a cool mist model, it operates silently thanks to the ultrasonic technology to dissipate the mist.


    Pros

    • Little to no noise level; less than 30 DB
    • Fragrant oils can be spread by the unit
    • Six liter tank lasts up to 50 hours
    • Perfect for homes; 500 square feet coverage


    Cons

    • Can be difficult to clean and maintain tank


    3. Levoit Cool Mist, Essential Oil Diffuser

    Perfect for colder climates, this humidifier doubles as a diffuser for essential oils and can relieve symptoms like dry skin. With a smart connectivity feature, the humidity in a room can be regulated easily.

    This model is perfect for nurseries as the noise levels while in operation are minimal. Additionally, there is a sleep mode to keep the control lighting off or dimmed.


    Pros

    • Automatic shut off when empty
    • 1.05 gallon tank can run for 40 hours
    • 360-degree nozzle for full coverage
    • Three mist control settings


    Cons

    • Bottom refill design can be challenging to access tank


    Why Purchase A Humidifier?

    Placing a humidifier in rooms can not only control the humidity of the house, but save you from certain side effects of respiratory irritants. The mist that the system gives out is effective in cutting down on germs and white dust.

    Taking into account all the benefits of a humidifier, there is not many things to consider. The benefits of using an air humidifier system outweighs any potential drawbacks.

    Some common side effects due to dry air include sore throats, cracked lips, itchy skin and bloody noses. In some extreme cases it is possible to have respiratory ailments and an irritated sinus passage. All these side effects can be minimized or removed completely simply placing a humidifier in your rooms.

    Beyond just personal health benefits, a humidifier can preserve the wooden elements in your house. Everything from furniture to the flooring and structural integrity will become more durable and less susceptible to damage. By putting moisture back into the air, the amount of damage due to drying out is minimized.

    Additionally, plants can also benefit from having a humidifier in the same rooms they are in. The unit acts as a regulator to humidify the room and remove any dry air. As a result, white dust is kept to a minimum while the water level in the air is kept at an ideal level.

    Aroma humidifier therapeutic home device

    Conclusion

    With the benefits of using a humidifier in your house, it is clear to see how this investment pays off in the long run.

    Any of the three portable models listed above can function efficiently regardless of what room size you have. Placing humidifiers in each of your rooms can significantly cut down on white dust and improve air quality.

    So, to sum up, investing in air humidifiers is worth the price tag they come with. Your house as well as your respiratory system will thank you, and be that much healthier.

    Related Articles

    8 Best Crawl Space Dehumidifiers  

    13 Best Dehumidifiers for Basement

    Best 40 Pint Dehumidifier

    Best 70 Pint Dehumidifier

    Best Dehumidifier For Garage

    Best Dehumidifier For Bedroom

    Best Dehumidifier For Apartment

    Best Humidifier For Grow Tent

    13 Best Charcoal Air Purifier 

    9 Best Dehumidifiers for Basements 

    9 Best Personal Air Purifiers

    12 Best Steam Humidifiers

    15 Best Commercial Dehumidifiers

    8 Best 30 Pint Dehumidifier

    You’ve finally revamped your room by adding that baseboard you had been eyeing for a while. But now you are faced with another predicament - finishing nails!

    Finishing nails can make or break your baseboards as they are the primary determiners of durability and strength. Using the right nail is extremely crucial and this usually depends on the kind of project they are required for and the material of the baseboard itself. 

    Let’s give you some worst-case scenarios which could happen due to using the wrong size of finishing nails in your baseboard. The board could split open, or worse, you could end up penetrating an unknown pipe! We don’t want that, now, do we?

    So, what we have done here is compiled an exhaustive guide for you, outlining some factors that you must keep in mind before making a selection. 

    Let’s get started, shall we?

    Right Gauge Size

    The man secures the baseboard to the wall

    The important rule of thumb to remember is that, the larger the gauge number, the smaller the diameter of the nail it shoots. The largest nails are usually employed by finish nailers and these range between 15 to 16 gauges, which denote smaller nails. These are ideal for a smoother finish as they leave no space or holes, thus reducing the need for fillings.

    Baseboards require nails with smaller diameters. Thick nails have chances of splitting the wood, while the longer ones may go right through surfaces and/or pipes, causing damage that’s difficult to repair.

    Using the right gauge size also proves useful while painting the house. As part of your interior wall, baseboards are generally of the same color as your wall. So, in order to minimize sanding or putty to cover up spaces left behind, it is best to carefully consider the size of the finishing nail.

    In the case of unpainted baseboards, we would advise you to sink the stained hole and then use putty. Not only does this offer a finish to the board but it also camouflages the nail. Thankfully, there is no chance of any structural inconvenience here, as baseboards simply have a decorative or protective function.

    Long story short, the nail you use must be long enough to secure the baseboard firmly to the wall. That is the primary function of a finishing nail. The reason why we insist on the correct size is so that even the most minor damage can be averted. This brings us to the next factor that you must consider - the material.

    Baseboard Material

    This is quite the no-brainer. Baseboards come in a variety of construction materials as they cater to the decorative requirements of the house. Design aesthetics, therefore, are influential in deciding the material of the baseboard.

    This, in turn, becomes important while choosing finishing nails for the board. Nailers shoot in the nails with considerable force and being strong and sharp themselves, the nails can potentially cause immense damage. This is why the right size and material go hand-in-hand while it comes to selecting the ideal finishing nail.

    In addition to that, it is important to take into account the climatic conditions of your location. A large variety of wood tends to shrink or expand, depending on the temperature and humidity. This inadvertently has an impact on what kind and size of finishing nail is then suitable for use on that particular baseboard.

    To avoid this, we recommend that you leave the baseboards inside your house for 24 to 48 hours before nailing them in. By then, they will have grown accustomed to the temperature conditions indoors.

    Using a Punch

    This is a very specific but essential part of the trimming process where the baseboard has not been painted. In that case, as we mentioned above, it would be advisable to first sink the hole and then use putty or filling. Now, while there are other ways of doing this, we would suggest using a punch in order to prevent the slightest damage.

    Punches are widely available in the market at any hardware or machinery store. Not only do punches ensure that the nails are driven smoothly through the boards, but the sharp tips on the top of the punches also make the process much easier.

    8d Finish Nails

    8d finish nails are simply a type of finish nails, where the ‘d’ stands for ‘penny’. This is an indicator of the length of the nail according to a system that dates back to the time of the Romans! 

    The strength of the nail depends on its length and diameter. If it is of the precise length, then there will be no problem in driving the nail far enough into the wood in order to secure it.

    The diameter determines the strength as well, in the sense that it directly affects the quantity of wood fibers that come in contact with the nail. A wider nail has the capacity to bear a larger quantity of wood fibers, which results in a stronger link.

    Female hands hold a heavy drill tool and make a hole in the wall for attaching the baseboard. Home repairs. Feminism

    Conclusion

    We hope we have been able to guide you adequately regarding the right nail size for baseboards. Gauge size and material are the two key points while using a punch and bearing in mind the temperature conditions also result in a smoother experience. So go ahead, and install that baseboard.

    Cheers!

    Related Article

    Freeman PFR2190 Framing Nailer Review + Buyer’s Guide

    13 Best Finish Nailers for Woodworking

    What Size Nails Do You Need for Framing?

    Pin Nailer vs. Brad Nailer 101 | Key Differences, Advantages & Disadvantages

    13 Best Roofing Nailers  

    9 Best Framing Nailer

    A 4.5-inch angle grinder is best suited for small-scale projects and tasks that don't require any extensive cutting or grinding. On the contrary, 7-inch grinders are versatile enough for a wide range of professional projects. 

    Angle grinders come in all shapes and sizes but choosing the best angle grinder for the task can be tricky. 

    In fact, choosing the right angle grinder for the task doesn’t solely depend on the size since other features play an important role as well. For instance, a power tool like an angle grinder should offer safety features to keep the person safe from unwanted accidents. 

    So, without further ado, let’s proceed! 

    Angle Grinder Sizes - Full Guide

    Angle Grinder Sizes

    When it comes to angle grinders, different brands produce them in different sizes, which makes it hard to choose the right model for the task. However, each size serves a unique purpose. As such, you can not use the same angle grinder for every task. Keeping this in mind, this section will highlight the different angle grinder sizes and their applications. 

    1. 4-inch Angle Grinder

    Out of all the models, this is considered to be the smallest angle grinder a person can purchase. Although it is small in size, this unit still has plenty of features to offer the user. For instance, it usually comes with a 6 AMP motor, which is more than sufficient to take care of small and minor projects. 

    Apart from that, the motor can deliver a speed of 11,000 RPM without having any loading conditions. This makes it extremely efficient since you don’t have to wait for a long time to start the power tool. In addition, it only weighs around 3.7 lbs, making it extremely portable and lightweight. Ideally, we recommend using this unit for cutting thin pieces of metal and for small grinding tasks. 

    2. 4.5-Inch Angle Grinder

    Just like the previous model we mentioned, a 4.5-inch angle grinder has similar specs. The motor delivers an average speed of 11,000 RPM while drawing an average of 120 Volts from the main power source. 

    On that note, this model even has similar applications in comparison to the 4-inch unit. Normally, these units are best suited for small jobs in workshops. Hobbyists can also purchase this angle grinder if they don’t have any extensive cutting to perform since this unit can only handle thin metal pieces. 

    3. 5-Inch Angle Grinder

    Unlike the previous two units, this category of angle grinders usually has more powerful motors. The motors come between ranges of 9 AMP and 12 AMP. As such, they can deliver a maximum power of 1440 Watts. However, powerful motors are bulky and heavy, which makes it tough to carry these units everywhere. 

    Due to their compact sizes and power-efficient motor, these angle grinders are best suited for DIY projects and small-scale projects. 

    4. 6-Inch Angle Grinder

    A 6-inch angle grinder falls under the middle-sized angle grinder category. It usually delivers higher power output since it uses motors that have a range of 10 to 13 AMP. And since it is heavy, the unit has a very low speed of 9000 to 10000 RPM. 

    Moreover, these angle grinders are rarely used since most people prefer to opt for a 7-inch model or the small ones to get the job done. You can still purchase this unit if you are looking for something powerful while being compact in size. 

    5. 7-Inch Angle Grinder

    Amongst all the different size angle grinders, the 7-inch angle grinder is the most popular unit on the market. It comes with a powerful motor that ranges between 13 to 15 AMP. Thus, the motor is capable of delivering a power output of 1600 to 1800 Watts. Apart from that, it has an average speed of 6500 to 8000 RPM. 

    When it comes to application, this grinder can be used by a wide range of professionals. For instance, construction workers and metal operators can benefit a lot from using this unit since it can cut a wide range of metal and surfaces. Plus, it can be used for extensive grinding projects and activities. 

    6. 9-Inch Angle Grinder

    Lastly, the 9-inch angle grinder is the largest angle grinder on the list. The specs include a 15 AMP motor which delivers a speed of 6500 RPM. In fact, some 9-inch units require a larger motor since they have a power requirement of 230 Volts. 

    This angle grinder is mostly popular amongst folks that prefer to work with thick metals. It is also ideal for heavy usages such as cutting concrete stones and thick metal pieces. Welders, contractors, and construction staff use this unit for their work.   

    What Size Angle Grinder Do I Need?

    Now that we have talked about the different angle grinder sizes, we can determine which is the right angle grinder for your task. In general, the 4.5-inch and 7-inch angle grinders are capable of covering 99% of your daily activity. Therefore, you will not need another unit if you have these two powerful tools. 

    Nevertheless, the applications can differ from one person to another. Keeping this in mind, we have carefully mentioned a few guidelines you can follow while choosing the right angle grinder for the task. 

    Firstly, small tasks around the house can be completed by using a 4.5-inch angle grinder. You can also use this unit to cut various materials, such as concrete and metal surfaces. But you should avoid using it extensively since it can spoil the disc. 

    7-inch angle grinders are versatile power tools since they can be used for a wide range of projects. For instance, a 7-inch angle grinder is best suited for a home restoration project. 

    Finally, a 9-inch angle grinder is ideal for heavy-duty tasks and extensive cutting.

    Key Factors To Consider While Buying Angle Grinders

    Key Factors To Consider While Buying Angle Grinders

    Apart from choosing the right angle size, there are several other factors you should consider if you want to find the best angle grinder.

    1. Disc Diameter and Disc Size

    One of the most important components of the angle grinder is the disc. As such, an angle grinder with a large disc size is ideal for cutting all types of surfaces irrespective of thickness. Moreover, angle grinders with bigger disc diameters are usually considered powerful since they can handle extensive tasks easily. 

    Smaller discs usually rotate at a higher speed, but they are not capable of cutting through thick layers of metal. Thus, you should carefully select the disc size according to the type of project you are working on. 

    2. Wattage

    Grinders with higher wattage are well-known for delivering high power output while cutting through tough materials such as thick steel. If you do plan to use the power tool for a long period, make sure to purchase a high-wattage unit.  

    3. Power Source

    When it comes to power sources, angle grinders are available as corded models as well as cordless models. 

    A. Corded Angle Grinders

    Corded angle grinders can generate more power at a consistent rate since they draw power directly from the main power outlet. However, they do have one major drawback, which is that they are limited to a confined physical location. As such, you will need a power cord to reach far places while working. 

    In addition, a corded model can also cause a tripping hazard if you are not careful while working. 

    B. Cordless Angle Grinders

    Cordless grinders usually deliver less power in comparison to their corded counterparts, but they are ideal for portability purposes. Besides, a cordless angle grinder is dependent on the battery capacity, so a larger battery will provide it with a longer run time. 

    That said, a cordless angle grinder offers a hassle-free experience since the users can move wherever they want while using the tool. 

    4. Speed

    When it comes to measuring the speed of an angle grinder, we usually measure it by the revolution it makes within a minute (RPM). Most units have a speed ranging between 5000 and 10000 RPM. However, you should keep in mind that these speeds are measured under the “no load” condition. This indicates that speed is calculated while it is running in mid-air without cutting any object. 

    Once you start using the device for cutting and grinding purposes, the speed reduces significantly. Thus, units with higher speeds are recommended if you want to complete the project faster. 

    Nowadays, most brands design variable-speed angle grinders that can easily adjust their own speed to serve different purposes. If you plan on working with different surfaces and projects, we recommend using a variable-speed angle grinder. 

    5. Hand Guard

    Another important feature you must keep an eye on while buying an angle grinder is a reliable hand guard. While working with grinders, the chances of getting into an accident are very high. As such, hand guards become a crucial safety measure to keep hands safe. 

    This safety guard covers half of the disc, which helps to protect your hands while it prevents debris and spark from reaching your body. Apart from this, some models come with movable guards, which can easily be adjusted to provide better protection. 

    However, if you don’t tighten the guard properly, there is a chance of it falling off, which can trigger an accident. Thus, we highly recommend wearing safety glasses and gear to protect yourself from a serious injury. 

    6. Soft Start Or Slow Start

    Whenever you start an angle grinder, there is a high chance of it recoiling due to the sudden surge of power. This can be risky at times since you can lose your balance while working, which can cause accidents. In fact, heavier and larger angle grinders have a higher tendency to recoil each time you start them. 

    To tackle this problem, brands use a soft-start or slow-start technology, which reduces the overall power output whenever you start the motor. This feature ensures that the motors don’t cause the angle grinder to recoil during the start-up. It also prevents injuries on the arms and wrists. 

    Safety Measures While Using An Angle Grinder

    Safety Measures While Using An Angle Grinder

    Working with an angle grinder is one of the most dangerous jobs since the chances of getting into an accident are very high. Nevertheless, you can reduce the chances of meeting with an accident if you follow these guidelines, which include:

    1. Always Keep The Device Switched Off

    Before plugging the angle grinder into the main power outlet, you should always make sure to turn it off. If the device is turned on before plugging it in, there is a high chance that it will recoil and injure you in the process.

    2. Read The Manual Carefully

    Unlike normal home appliances that are easy to set up and use, an angle grinder is a complicated device. As such, you should always read the instruction manual whenever you purchase a new unit. Doing so will help you understand the device better, and you become familiar with all the features. 

    Similarly, you should always refer to the instruction manual if the unit is malfunctioning or not working efficiently. Fixing the unit by yourself without any technical knowledge can cause accidents and ruin the device completely. 

    3. Use The Right Clothing And Safety Gear

    Most accidents that take place while working with angle grinders are because of not wearing appropriate clothing and safety gear. Whenever you cut metal with an angle grinder, it produces sparks. If you wear cotton and nylon clothes, they can easily catch fire which can cause first-degree and second-degree burns and scars. 

    Similarly, you should wear the appropriate safety gear and dust mask since angle grinders produce a lot of debris and dust while cutting metal. In some instances, it can even cause harmful fumes, which can make you feel sick while working. Some units generate a lot of noise, so wearing ear defenders can prevent you from losing your hearing ability.

    4. Always Stay Focused

    Lastly, you should always stay focused while using an angle grinder, even if it offers various safety features. Sometimes accidents can occur no matter how safe the device is; however, you can reduce the chances by paying close attention to small details. Moreover, you should avoid any form of distraction while using these tools. 

    For instance, if you notice the motor is hot, you should immediately turn off the device. This will prevent it from overloading or getting damaged from extensive work. 

    Can You Use An Angle Grinder On Wood?

    Most people have the common misconception that you can use an angle grinder on wood. However, this is a totally wrong belief since angle grinders are designed to polish and grind concrete, stone, and metal surfaces. As such, if you use them to cut wood, you can get into a serious accident. 

    Thus, we highly recommend not using an angle grinder for cutting wood since it is not a compatible device for the task. Moreover, you can damage the device while cutting the wood, and this can cost you a lot of money. If the device can’t be repaired, you might have to purchase a new model for a silly mistake. 

    Can You Use Angle Grinder To Buff Car?

    Wondering if you can use an angle grinder to buff the car? Normally, we wouldn’t recommend using an angle grinder to buff the car since it rotates at high speeds and cannot be controlled easily. Moreover, if the angle grinder doesn’t have a dedicated soft switch, you should avoid using it to buff the car since it can cause a lot of damage. 

    Instead, we recommend using an angle grinder with a variable-speed adjustment feature. In this way, you will be able to adjust the speed to 3000 RPM, which is ideal for buffing cars. Models with soft-start are also recommended since it prevents injuries from recoils. 

    What Size Angle Grinder Conclusion

    What Size Angle Grinder Conclusion

    With that, we have reached the end of this informative guide. We genuinely hope you found this guide to be informative. When it comes to the construction business, construction workers need to take several factors into consideration while choosing the best angle grinder. Factors such as high speed, disc sizes, paddle switches, surface preparation, and many more can significantly influence the overall performance. 

    Before signing off, here are a few tips that can help you make a wise decision while choosing the right model. 

    Firstly, always examine the metal surface before choosing the angle grinder size. Thick pieces of metal will require larger angle grinders, while a small grinder is ideal for thin pieces of metal. 

    Apart from that, you can always opt for variable-speed grinders if you are planning to work with different surfaces and textures. Cordless angle grinders are more convenient if you don’t have a power source nearby. 

    Do you want to give your home a fresh new appearance? Then you can consider giving it a fresh new coat of paint. 

    Painting your home from time to time keeps it looking new. Although there are certain things that you need to keep in mind while undertaking a home painting project, which includes purchasing different paints for your walls and ceiling. 

    If you’re not a DIYer, you might feel confused with the above statement. The ceiling is just like the other walls in your house. So, what is the difference between regular and ceiling paint anyway? 

    Well, for starters, ceiling paint is thicker than wall paint, and its composition is slightly different. But there are more differences besides these, which is what we have addressed in this brief guide. So, if you are suddenly feeling curious about it, then allow us to satisfy that curiosity. 

    Let’s get going, then! 

    What Is Ceiling Paint?

    Dipping roller brush in paint. Home renovation, Handyman renovating. Apartment redecoration and home construction while renovating and improving. Repair and decorating. What Is The Difference Between Ceiling Paint And Regular Paint.

    When we were conducting our own research on this topic, one of the first questions that popped into our minds was this one. And that’s why we have discussed a little about ceiling paint first in this section. Once we are done, we can get to addressing the differences between the two paints.

    If we were to answer the above question simply - ceiling paint is a special type of paint that is best suited for painting your ceiling. Well, obviously, the name makes that clear enough, so you could make it out on your own. But there’s more to it than just that; allow us to elaborate further. 

    Ceiling paint is a type of paint that is highly viscous and dense so that it doesn’t drip from the ceiling. Typically, ceiling paint is made from latex resins, which are responsible for its thickness and viscosity.

    What’s more, it is designed to give your ceiling a flat paint sheen. Its texture and chemical composition can resist staining and discoloration when exposed to dirt, dust, or smoke. Furthermore, it can resist stains and water patches caused by roof leaks. And as a bonus, a good quality ceiling pain will prevent the growth of mold and mildew.

    On the flip side, you do not get too many ceiling paint color options. So, if you want to apply a fresh coat, then be advised - you’ll get only a handful of shades to choose from.

    How Is Ceiling Paint Different From Regular Wall Paint?

    Now that you know what ceiling paint is, it’s time to address the main question. In this regard, there are quite a few points of difference between the two paints, which have been described below.

    1. Composition

    There are some obvious differences between the composition of ceiling paint and wall paint or interior paint. For starters, ceiling paint is usually latex-based, while conventional wall paint is acrylic.

    Ceiling paint uses water as a solvent, which gives it a dense texture, similar to latex resins. On the other hand, due to most wall paints being acrylic, they use different chemical solvents and thinners.

    There are some instances where wall paints are water-based. But even in such cases, they do not have the density and texture of ceiling paint.

    2. Viscosity

    The most obvious point of difference between these two paints is their viscosities. Ceiling paint is highly viscous, while typical wall paint is thinner and less viscous in comparison. 

    This can be explained in light of the previous point of difference. Due to the water-based nature of ceiling paint, it is thicker, which, in turn, makes it more viscous. In contrast, the presence of thinning solvents makes regular wall paint more fluid.

    Because of its high viscosity, it does not drip as much as wall paint. But, it is comparatively less elastic than wall paint, which means it does not contract or expand as easily.

    3. Finish

    If you have painted your home before, then you know that regular wall paints come in a variety of finishes. You have satin wall paint that has a subtle shiny finish. Then there is the eggshell finish, which is slightly less polished compared to the satin paint finish. It has an appearance that is similar to an eggshell, hence the name.

    You also have semi-gloss paint that is comparatively shinier than satin paint. And if you want a higher gloss, you can opt for high gloss paints for your walls, which will give them a shiny finish. Or, simply go with matte finish paint if you don’t prefer shiny walls.

    On the contrary, ceiling paints are only available in a flat finish. If you are wondering why that is, then the answer is simple. Flat paints are non-reflective, which helps them conceal stains and imperfections better. Besides, the flat appearance of this paint helps minimize the reflection of natural light, as a reflective ceiling may be too bright to look at. It's important to note that while textured wall paints might offer minor acoustical benefits, ceiling paint does not provide such improvements. If sound reduction is a concern, you should consider exploring alternative soundproofing materials and strategies.

    4. Durability

    Ceiling paint can be considered to be durable, as it does not become stained or discolored as easily. And since it is thicker, it is less prone to flaking or chipping.

    Wall paint is comparatively not as long-lasting, especially if it has a glossy finish. In fact, as the paint gets glossier, it becomes less durable. The polished surface of such paint is not so great at preventing stains and discolorations. And they are more prone to chip off from the walls.

    5. Coverage

    Ceiling paint has a considerably greater coverage than wall paint. Usually, when using ceiling paint, one coat is enough to give you a uniform color. However, with conventional wall paint, you need to apply two or three coats to get uniform coverage.

    6. Color Choices

    Another point of difference between these two paint types is the color choices. With wall paint, you get a relatively diverse selection of colors but the same cannot be said for ceiling paint. This paint generally is available in a flat white color, with some occasional lighter shades. 

    Can You Use Wall Paint On A Ceiling

    Can You Use Wall Paint On A Ceiling?

    So, now you know what makes ceiling paint different from conventional wall paint. The question that now arises is - can you use regular wall paint for painting ceilings? The answer is yes, you can, but there are some limitations to it.

    First off, you will have a lot of drip spots on your ceiling if you use wall paint on it. On top of that, the paint will spatter all over your room, which can create quite a mess. As a result, the cleanup after you are done will be a major headache.

    However, there are ways by which you can manage these problems. If you use a paint sprayer instead of a brush or roller, there will be fewer drips. It will also eliminate the issue of paint splattering all over your room. But using a sprayer can be a lot slower and more inconsistent than a roller or a brush.

    Conversely, you could minimize the mess by undertaking extensive prep work. Start by covering the whole room with a drop cloth to protect it from drips and spattering. Or, you could clear out the room by removing all of the furniture and fittings before starting the paint job.

    On that note, the above steps will make the work significantly more inconvenient and time-consuming. So, it is simpler just to use ceiling paint instead.

    Can You Use Ceiling Paint On Walls?

    As a counter to the above question, you may now ask - can ceiling paint be used for painting walls? Simply put, you can definitely use ceiling paint on your walls. It might even be advantageous in some cases, thanks to the viscosity and thickness of ceiling paint. 

    Moreover, if you use it to paint walls, your paint job will be a lot less messy than using regular wall paint. That’s because you will have considerably fewer drip spots on your wall. 

    Also, it is far easier to fix noticeable drip spots with ceiling paint. All you have to do is roll over these drips once, and the thickness of the paint will take care of the rest.

    However, there is one downside to using ceiling paint for your walls. You will not have a lot of color options to choose from. And due to its finish, all of your walls will have a flat sheen. So, if you are fine with that, then, by all means, go ahead and use it.

    Otherwise, use ceiling paint as a primer to get most of its benefits without being limited to a few colors and finishes.

    What Are The Best Scenarios To Use Ceiling Paint?

    There are certain scenarios where using ceiling paint is more favorable than using wall paint. These include areas that are more vulnerable to dust and stains, such as basements, stairwells, and closets. Here’s where you can color both the ceiling and the walls with the same ceiling paint.

    It can also be used when you want a uniform look for your entire room. In that case, your walls and ceiling will have the same sheen and coloration.

    Can You Mix Ceiling Paint With Wall Paint?

    There is no rule against mixing these two paints together. So, if you want to experiment a little bit, you can do so. But be advised - the resultant paint mixture might not be as consistent or uniform as its constituents.

    For instance, if you mix glossy wall paint with flat ceiling paint, the paint that you get might have a peculiar finish. Moreover, the difference in composition of these two paints may not create a very stable mixture. 

    The best method to mix these two paints together is to apply them separately. You can use ceiling paint as an undercoat or a primer and apply a topcoat of wall paint as the finishing. This indirect method of mixing may give you better results than blending them both directly.

    Is Flat White Paint The Same As Ceiling Paint?

    Based on our previous discussions, you may think that ceiling paint is the same as flat white paint. However, that is not the case, as there are some obvious differences between them.

    Yes, most ceiling paints are white, but that doesn’t apply to all of them. You do get a few color choices, even though they are pretty limited. Besides, flat white paint is not as viscous as ceiling paint, which is further proof that they are not the same.

    That said, there are certain similarities between them. For starters, both of them have a flat appearance, and they are good at concealing or covering up stains and other imperfections. But those are the only similarities, and since they are not that significant, it is safe to say that these two paints are different.

    Difference Between Ceiling Paint And Regular Paint Final Words

    Difference Between Ceiling Paint And Regular Paint Final Words

    That’s all we have to say about the differences between ceiling paint and regular paint. While in some cases, they can be used interchangeably, for the most part, they are two distinctive types of paint. 

    So, keep these differences in mind the next time you want to paint your home. It will help you decide better on which paints to buy for your interior walls and your ceiling. And it will make the paint job a whole lot more convenient.

    It is time for us to wrap up this guide. In the meantime, check out our other article on ceiling paint vs wall paint for more head on comparisons. We will be back with more informative guides in the future.

    Until then, we bid you farewell!

    If you are a DIY enthusiast, then the term “resin” should not seem like a foreign concept, considering how commonly it is used. 

    One of the main reasons it is used for DIY projects is that it is easy to mold and set. While it may look like plastic, it is actually much stronger. Additionally, with resin, it is easy to replicate stone or metal looks which are not possible with traditional plastic. 

    Resin is naturally occurring and can also be made synthetically. The best part is that most natural and synthetic versions aren’t that different in properties and benefits. So, if you are looking for more information on resin, this is the guide for you. 

    After careful research on all things resin, we have put together this guide to help you understand this compound a little better. Hopefully, it will clear things up for you. 

    Now, without further ado, let’s get into some details.

    Resin - What Exactly Is It?

    resin


    Let’s get technical for a second. Resin comes from a mix of unique chemical compounds and, as mentioned earlier, is naturally occurring. To use it for everyday projects, resin can be bought from the store in liquid form along with a hardener which turns it into a stronger (and often reusable) resin. Additionally, it can be modified or synthetically created for commercial use. 

    Some common examples of resin are amber, frankincense, and even hashish. Interestingly, resin is not just derived from plants but also insects. A prominent example of insect-derived resin is shellac.

    Uses Through the Ages 

    The history of resin is quite fascinating, but we will not bore you with too many facts. However, you might find it pretty interesting to know that resins have been around for centuries.

    As there were no synthetic resins for jewelry and art back in the day, everything came from nature. Amber was a very popular naturally occurring resin among many cultures as it could be used in beverages and as a kind of drug (similar to cannabis). In Greek culture, specifically, amber was seen as a source of electricity as rubbing it together produced an electric charge. 

    As you can tell, resins are not a thing of the modern world as they were discovered and used centuries before we existed. However, the modern world has allowed us to explore and even create resins. 

    Resin Types And Modern Usage 

    While there are multiple types of resin found and created, all of them can be divided into two categories - thermoset and thermoplastic. While the former is a type that sets once it is cured, the latter includes resins that can be remelted and reused.

    In the current market, there are around 12 types of resin that are commonly used. These are made out of different chemical components and are used for varied reasons. Let's explore some of these reasons below.

        1. Epoxy 

    Epoxy resin is quite common among DIY enthusiasts as it has excellent adhesion properties. Additionally, it is resistant to heat and chemicals, making it the perfect choice for coatings, lining, adhesives, and laminates. This type of resin is non-recyclable (thermoset) and, once cured, cannot be remelted for further use. 

        2. Silicone 

    The next popular type of resin with DIYers is silicone resin. This is a non-naturally occurring resin and is made by man as a better alternative to rubber. One of its best qualities is that it's flexible, resistant to water, and quite stable when put under extreme temperatures. 

    When used on any surface, it coats it properly and forms a hard shell over this. This is why it is a popular resin as laminates and coating and has the potential to make any surface more durable. 

        3. Polyurethane 

    Polyurethane resins, as the name suggests, are made with two different components. This makes it highly versatile and open to being combined with other resins. Furthermore, by combining it, it only becomes better as it can increase elasticity and adhesion. For this reason, it is mainly used as clothes liners, adhesives, and insulation.

        4. Polyester 

    If you are looking for a low-cost resin with excellent properties, this is the one to use. Polyester resins are usually resistant to pretty much everything - heat, water, and chemicals. Since it is not as expensive as the others, it is pretty standard in multiple industries. 

    Apart from DIYers using it for decorating purposes, it is used commercially as well. Many construction companies and repair companies use it. 

         5. Acrylic 

    Unlike Epoxy resin, acrylic resin can be melted and reused even after it is cured. An added advantage is that acrylic resin can handle a lot of pressure and is UV resistant. For these reasons, it is ideal to be used as coatings, adhesives, and even for decorative purposes. 

         6. Polyamide 

    Another great reusable type of resin is Polyamide. Polyamide resins can be reused multiple times, and the best part is that it does not shed any of its defining properties. One of the advantages is that it is a high-density resin with excellent heat resistance. 

    It is also quite strong, meaning it does not damage easily. This makes it a strong choice during manufacturing tires and gears.

         7. Polypropylene 

    Even the medical industry needs good quality resins, and this is where polypropylene resins come into the picture. Primarily used to make medical equipment, this type of resin is resistant to chemicals. Additionally, it has no color or taste and is free from BPA. Other than medical equipment, it is used to make toys, electricals, and coatings.  

         8. Polystyrene

    Polystyrene resins, much like acrylics, are low cost and hence, quite popular for various purposes. Apart from affordability, it is highly resistant to acid and salts makes it even more appealing. Additionally, it is pretty flexible and is widely used for insulation and to use on dashboards. 

         9. Polyethylene 

    Another very common resin is polyethylene which is mass-produced everywhere. Because it is flexible and resistant to chemicals and moisture, many industries choose to use this type of resin. The most common use is packaging, so bags, films, and sheets are manufactured using this resin.

         10. Phenolic 

    Phenolic is a type of non-reusable resin, just like Epoxy. One of the reasons it cannot be used more than once is because it sets permanently after being cured. Once set, it is resistant to heat and impact, making it ideal for heavy-duty work. It is also chemical and moisture resistant, making it suitable for cement work. 

         11. Alkyd 

    Alkyd resins have been in the market for many years as they have eye-catching properties. This type of resin has excellent resistance to chemicals as well as thermal and electrical properties. First made in the 1920s, this type of resin was widely popular as surface coatings. Now, it is still used in paint, but it can also be used for electrical insulation. 

    What’s The Big Deal About Resin?

    Based on the previous section, it is evident that resin can be used for multiple reasons. It is evident that its properties appeal to everyone, causing them to try out different types of resins for commercial and personal use. Here are some of the reasons people turn towards resins:

    1. Flexibility 

    One of the biggest reasons is that, despite density, it remains pretty flexible. This is why it can be used for multiple reasons like making jewelry, medical equipment, electrical components, coatings, etc. Moreover, even bigger furniture and trash bins can be made using resins since it can adapt to any situation.

    1. Affordable Alternative

    Procuring certain materials, especially metals when making jewelry, can be expensive. This is the main reason why people turn to resins, as it can replicate the look and feel of these metals without costing anyone a fortune. 

    And the same goes for other materials such as rocks, gemstones, or color glass. It is much easier to use resin since the production cost is low, and it can look like any material. 

    1. Low Maintenance 

    Apart from being low cost, it is also low maintenance. One of the most significant selling points of resin is that there is no need for regular maintenance (compared to precious stones and metals). Resin-based products are pretty durable and do not get stained quickly.

    Moreover, most resins are water, heat, and impact resistant. Hence, the material can protect itself with little to no help.

    Resin For 3D Printing And Casting 

    One of the more modern uses of resins is using it for 3D printing. Since all resins come from polymers, they react under UV light. Moreover, most resins are tough, flexible, and reusable, so changing their state and setting it can be effortless with suitable machines. 

    Another method of creation is casting. Used widely in the medical industry, resin casting is nothing but putting resin in a cast and letting it set in the shape of the cast. Once fully set, it will easily slip off the mold.

    Resin FAQ’s

    Are Resins As Strong As Wood?

    This entirely depends on the resin and wood in question. In general, resin is known to be stronger since it is impact-resistant, making it much more durable. Thus, most DIYers tend to coat wooden projects with resin for added protection.

    How Is Resin Different From Plastic?

    Although it may seem like they are similar materials, resin and plastic are quite different - right from their chemical makeup. Moreover, since resins are derived mainly from plants, it is more natural than plastic.

    resin

    To Sum It Up

    That’s all, folks! We finally come to the end of this guide on resins and how they are used. We have tried to keep it simple to help you understand the world of resins better. 

    Before signing off, we want to reiterate that resin is quite versatile. It has been used through the ages for multiple purposes and is still used in almost every industry. The fact that it is lightweight, flexible, and affordable makes it quite appealing for commercial and personal use.

    On that note, we shall sign off now. We will back with many more informative guides like this one.

    Until next time!

    Related Articles

    How to Make Resin Jewelry 101 [All You Need to Know]

    Sanding Epoxy Resin Guide 101 [All You Need to Know]

    11 Best Epoxy Resin For Crafts [Reviews & Buyer’s Guide]

    5 Best Epoxy Resin for Tumblers [Complete Tutorial]

    11 Best Bar Top Epoxy [Reviews & Buyer’s Guide]

    Waterproof Epoxy 101 [Is Epoxy Waterproof?]

    5 Best Epoxy Wood Filler

    Epoxy Paint For Wood 101

    10 Best Epoxy for Plastic Today

    Totalboat Resin Epoxy 101 | Reviews + Buyer’s Guide

    How To Make Resin Dice 101 [All You Need to Know]

    How To Make A Resin Geode [Complete Guide]

    Art n Glow Resin Review [All You Need to Know & Buyer’s Guide]

    Alcohol Ink and Epoxy Resin 101 [All You Need to Know]

    7 Best Resin 3D Printer 

    How to Color Clear Epoxy Resin [Coloring Resin

    How To Fix Radiator Leak With Epoxy+ Best Radiator Repair Epoxy

    Epoxy Garage Floor 101 [All You Need to Know]

    Mold Release Guide + Best Epoxy Release Agents

    Surfaces Resin Won’t Stick to [All You Need to Know]

    Heat Resistant Epoxy 101 [A Guide for High Temperatures]

    Epoxy Cement Guide 101 [How to Repair Concrete with Epoxy]

    How To Mix Epoxy 101 [Measuring & Mixing Epoxy Resin Guide]

    How To Harden Sticky Resin [Uncured Epoxy Solutions]

    How To Fix Epoxy Mistakes [Tackling Common Epoxy Problems]

    6 Best Pressure Pot For Resin Casting Right Now

    In the world of digital painting and concept artwork, there are a lot of techniques and methods that can speed up your workflow while simultaneously providing you with outstanding results.

    In practice, these tricks and techniques differentiate the medium from the traditional pen and paper counterpart.

    Today, in this guide we are going to discuss a similar unique method that makes digital painting more productive and convenient, and it is called Photobashing.

    So, let’s dive deeper into the subject and find out what you can do with it!

    Featured Image via artstation.com

    What is Photobashing & How to Use It


    What is Photobashing & How to Use It

    Image via davidkirkconceptart.wordpress.com 

    What is Photobashing?

    Photobashing is a unique technique in which you can use real images and 3D assets as a framework to create original artworks.

    In short, an artist can use real assets and pictures that match with their concept and place them around in a canvas and use that as a base of their finished product.

    Of course, this technique sounds a bit like cheating, similar to using butter paper for tracing, but this technique actually takes a good understanding of lighting and how you can realistically merge assets into a piece of work.

    Creators usually use this technique to increase their workflow and make their artworks get a more realistic look.

    More importantly, it can help them get and add many details that usually get neglected while working from scratch.

    But we’ll discuss the feasibility of Photobashing and the particular use-case that fits Photobashing the best in the next section.

    Why and When Do You Use Photobashing?

    We have already discussed why most artists use Photobashing in their workflow. But we also need to understand when we should use it to avoid wasting our time trying to use this technique when it’s actually not necessary.

    One of the most popular examples where artists like to use Photobashing is in concept artworks. For example, if you want to create a dystopian or alternate-universe picture of a real-life landscape, you’d prefer to use real scenery for reference.

    Another great example is if you have to work with character design. Let’s say that you want to create a character and depending upon his/her attributes you want them to pose or look a certain way in the concept art.

    In that case, you can simply use a stock model photo that looks similar to the way you have imagined and begin your work from there.

    All and all, there are many ways you can use Photobashing to enhance your work but the ideal situation is where you can use most of the elements in the original picture or you can get the skeletal framework from somewhere else.

    Photo Courtesy of Adam Wong

    Wait, Isn’t It Photoshopping Rather Than Photobashing?

    To be honest, there’s a grey thin line between the two techniques. In Photoshop, the artist usually alters the original image to a point where there’s no resemblance to the original picture.

    But in Photobashing, you enhance the original image rather than change it beyond recognition.

    As you might have already guessed it, this creates a grey area where one can’t decide upon the legitimacy of the artwork created through Photobashing.

    And unfortunately, this is an ongoing debate in the community. Many established institutes and communities don’t even admit artworks that have a hint of Photobashing.

    Many artists like to use software like Blender to create their own 3D assets and work on it after that to work around this argument.

    But overall, that’s not for us to discuss. Even though, we personally believe that if it’s original, even if it is worked on other assets, then it’s legitimate.

    What Should I Use to Photobash?

    Some of you might have already guessed it, but the answer to this question is Photoshop. From our experience, there’s no better software to Photobash than Photoshop even though there’s a bit of a hefty fee attached with it.

    The main reason for our choice is the sheer control the software gives you on your artwork. Photobashing needs you to do a lot of lighting and color manipulation to make it look seamless. And the tools that Photoshop provides, are splendid for the job.

    Some of the tools that you should get a good grip of before you start Photobashing are brushes, clone brushes, layer manipulation, blending options and filters.

    There are many more tools and honestly, we believe that no one can truly get done with photoshop in a countable number of sittings.

    If you are not willing to shell up for the expensive price tag of Photoshop, there are other tools that can help you Photobash. The ones that come to our mind are GIMP and Krita.

    Out of the two, we’d like to recommend Krita because it’s a lot easier to learn. It’s less complicated and the community is much more fleshed out to feed your niched puzzles.

    Image via arteneo.com

    The Individual Skills Needed for Photobashing

    There are some skills that you need to master to make sure you can do Photobashing with ease. These individual techniques are quite important in other types of work as well but the lack of them will severely defect your Photobashing skills.

    1. Picking up the right images

    Before you do anything, you need to get savvier with the world of stock images. You need to know of all the paid and free websites that can give you the most ideal images for working on your artworks.

    The usefulness of a reserve is seriously subjective, so, we highly recommend you to talk with your friends and family members who work in the similar genre of digital painting and ask them where they collect their assets.

    Some of our recommendations include Unsplash, Freepik, Pixabay, Pexels and even Pinterest.

    Sites like Unsplash, Pixabay, and Pexels have more photographic images than digital artworks. One of the main reasons we love these sites is because of their free license system and the high-resolution images you can get there.

    But you might have to settle for less than ideal images for your artwork because these sites are designed more for photographers than digital artists.

    Freepik is an awesome website that has loads of free assets, images, and illustrations. Many of our professional designers love to pick up reference items from this website, so, we thought it deserves a spot here.

    And don’t judge us for Pinterest. It has the potential to give you whatever you may dream but you just have to make sure that you can use it - it’s all about the license.

    Full Tutorial @ husso.artstation.com 

    2. Processing the initial image or asset

    Of course, you can’t just put a border on the stock image and use it as your own. You need to process the image ideally to get the things you need.

    This includes separating the individual elements and manipulating it, so that, you can work on it.

    One of the most important tools that most beginners tend to overlook is the famous Pen tool of Photoshop. You need to get good with it!

    Not only it will help you draw custom shapes better but it’s super important for selection, and if it hasn’t hit you already, being good with selection tool is crucial for isolating the elements perfectly.

    Another tool we’d like you to get acquainted with before you start Photobashing is the Blending Options that you have on each layer.

    There are a plethora of actions in that dialog box and you must get handy with almost all of them! The most important of those is the shadow tool.

    Full Details @ therookies.co

    3. Manipulation layers

    The most unique and crucial feature of Photoshop is its extremely fleshed out layer system. The layer system is heaven-sent in photoshop and digital artists who have tried working on other software understand its importance.

    In Photoshop, the layers can be easily manipulated and moved around. You can mess with the layer’s colors, masking properties, blending options, filters, black levels, etc.

    To truly understand the creativity of Photobashing and execute it perfectly, you need to get used to manipulating layers in Photoshop. And yes, that does need you to master the shortcuts as well!

    So, What Should I Do Now?

    To be honest, this article can’t encompass the magnitude of exploration you need to do for Photobashing.

    Apart from mastering the skills we have mentioned above, you’d have to venture on your own to find the right way to do Photobashing.

    But don’t worry because there are loads of free tutorials and videos on YouTube that can teach you Photobashing.


    We’d recommend you to pick up your own project and learn on YouTube how you can do that. That way you can learn in the most natural way and you’ll also learn fast.

    Conclusion

    With that, we are done with this piece.

    We hope you found this article helpful and that it got you started with Photobashing.

    We wish you well and thank you for reading!

    Related Articles

    14 Amazing Free Krita Brushes and Brush Packs for Digital Art

    Keeping a small bedroom clean and tidy isn’t easy. Right?

    Well, in our opinion, it’s almost next to impossible. With no extra space for furniture or to store essential items, the compact area is bound to get cluttered and messy.

    But this can be avoided. How? It’s really simple! Instead of cramping up your room with cupboards and cabinets, just opt for an ottoman bed. It will solve all your problems related to space and clutter within no time whatsoever, thanks to its built-in storage system and compact design.

    Seeing its popularity and functionality, we decided to take you through an in-depth analysis of an ottoman bed. For this reason, we’ve come forward with this informative and comprehensive guide, where we address two primary questions to know whether it ticks all the right boxes.

    Firstly, what is an ottoman bed? And secondly, how to use them?

    So, without further ado, let’s get straight to the deets.

    What Is An Ottoman Bed?

    We’ll begin our informative guide by answering the most crucial question - “what exactly is an ottoman bed?” Well, it’s a bed that comes with a built-in hidden storage system beneath the mattress. You can access this storage space using the hydraulic lift system, which allows you to lift the top of the bed, either from the foot-end or side.

    Unlike regular bed frames, ottoman beds have no empty space underneath them. Instead, their attractive bases feature seamless finishes to enhance the modern aesthetics of your room. What’s more? The built-in storage space helps in decluttering your compact bedroom.

    Origin Of Ottoman Beds

    Now that you’ve understood the basic concept and design of an ottoman bed, it makes sense to know more about its origin. That being said...

    It’s interesting to note that the modern-day ottoman bed that’s available in a variety of styles has come a long way since its inception in Turkey. In fact, the term “ottoman” itself was derived from its place of origin - the Ottoman Empire. This was a ruling power founded during the thirteenth century.

    By the end of the eighteenth century, the distinctive design of ottoman furniture comprising footstools, wooden chests, and beds became immensely popular. And since then, manufacturers have been customizing upholstery, finishes, colors, and storage spaces to create standout statement pieces to suit modern and traditional tastes.

    Opening Of An Ottoman Bed

    As mentioned earlier, ottoman beds utilize a gas hydraulic lift system, allowing you to easily open or close the top of the bed for accessing its built-in storage. In this section, we’ll be discussing the two primary opening mechanisms of this type of bed.

    1. Foot-End Opening

    The foot-end opening ottoman usually opens from the end of the bed’s base. That being said, there are two types of ottoman beds based on their foot-end opening mechanism.

      • Full Ottoman

    A full ottoman is hinged from the headboard. So, when you open the storage space, it raises the foot of your mattress to the ceiling.

      • Half Ottoman

    Unlike the previous type, a half ottoman is hinged in the middle of your bed, opening only halfway. You may install drawers in the unopened section to maximize storage in a room with a slanting ceiling.

    1. Side-Opening

    These Ottomans open from the side, instead of the foot-end of the bed, allowing you to access the entire storage space from one side. You may consider opting for these beds depending on the placement of the bed and the area around it.

    How To Use An Ottoman Bed?

    Just like any other bed, ottomans are constructed with lightweight frames and robust fittings to ensure maximum comfort and support to your body. But that’s not all it’s used for. There are a ton of benefits of an ottoman bed, provided you utilize its functions to the fullest.

    In this section, we’ll be discussing how you should use an ottoman bed. So, without further delay, let’s get going!

    1. A Comfortable & Supportive Bed

    First things first, it’s imperative to use an ottoman bed how it’s intended to be used, i.e., as a comfortable and supportive bed. The frame itself plays a vital role in determining the overall comfort level, but like any other bed, an ottoman needs a mattress for the purpose.

    You’ll need to consider certain factors while choosing the right mattress for your ottoman bed, such as the level of firmness, material, or if you want to go for latex or allergen-free variants. That said, it’s advisable to choose a lightweight option to make sure the gas hydraulic system works smoothly.

    Traditional metal-sprung variants tend to be heavier, restricting the opening mechanism. But even then, if you’re set on going for this mattress, we’d suggest looking for a slightly thinner one.

    1. For Decluttering Your Room

    The built-in storage space of an ottoman bed plays a significant role in changing the appearance and feel of your bedroom. It gives you the opportunity of decluttering the room with minimal effort.

    You can use the bed to keep all your essential items, including towels, beddings, and linens such as sheets, pillows, and duvets inside its storage space. That’s not all. It also enables you to store away seasonal and occasionally used items like blankets and curtains.

    Being contained within a closed space, you won’t have to worry about them gathering dust. In fact, all your valuables will remain clean, even if enclosed for over a year, while you get to unwind in a calm and tidy space of your own. You won’t even have to bother pulling out boxes from under the bed for regular cleaning.

    1. Use It In Smaller Rooms

    Extra storage space always comes to our rescue at the time of need. However, modern apartments and homes are being made to meet smaller specifications, leading to a shortage of sufficient space.

    To overcome this, you should use the space underneath ottoman beds, especially in smaller rooms and apartments. They serve as excellent space-savers, allowing you to store all your essential items.

    You may not have additional space for extra furniture in a guest room, loft room, or even a box room. Ottoman beds are perfect for these areas of your home as they help reduce the reliance on extra storage.

    1. To Enhance Home Decor

    Ottomans aren’t just clever built-in storage systems in a bed frame. Available in a variety of styles and finishes, you can use them to add a touch of elegance and sophistication to your overall home decor. The standout bed can also be customized to meet your personal style requirements.

    Elegant, wooden, antique bookcase in a dark, modern bedroom interior with a black wall and beige paintings with golden elements

    Final Words

    Ottoman beds come with sturdy construction that offers greater weight load and storage capacities than most storage beds, such as divans. It requires minimal space and can be used to declutter compact bedrooms.

    Furthermore, the bed frame is capable of delivering optimal support and comfort. However, you’ll need to invest in a good quality and lightweight mattress if you wish to enjoy restful sleep in a calm and tidy environment.

    To sum up, there’s no doubt that ottomans are comfortable to sleep in. But you can also use this highly functional bed to ensure several other benefits. On that note, we now come to the end of our informative guide.

    With this, we’ll take your leave. Till next time!

    Related Articles

    12 Ways To Put Your Bedroom Corner Space To Good Use

    29 Brilliant Easy to Build DIY Platform Bed

    21 Mindbogglingly Beautiful Fairy Tale Bedrooms for Kids

    21 Super Small Nightstands Ready to Fit in Petite Bedrooms

    37 Simply Spectacular Tree Bed Designs to Pursue

    Recycled Pallet Bed Frames – DIY Pallet Collection

    15 Creative Small Beds Ideas For Small Spaces

    30 Small Bedroom Interior Designs Created to Enlargen Your Space

    37 Smart DIY Hanging Bed Tutorials and Ideas to Do

    Bedroom Christmas Lights Ideas For A Cozy Atmosphere

    32 Dreamy Bedroom Designs For Your Little Princess

    100 Inexpensive DIY Headboard Ideas for Your Bedroom Design

    47 Stylish Floating Bed Design Ideas

    53 Incredible Hanging Beds to Float in Peace

    33 Epic Navy Blue Bedroom Design Ideas to Inspire You

    6 Best Vacuum Cleaners for Mattress

    13 Best Loft Beds With Slide Reviews

    A storyboard is where the ideas conceived by the artist is given its actual visual form and expression which is then developed into a single action-strip in a comic book or an animated motion-picture or film.

    A storyboard artist is, thus, the creator and director of any animated film, comic book or TV show. The storyboard artist’s job actually goes beyond what we might think is only putting down a particular scene on to the paper or electronic pad, nowadays.

    This is because not only the artist conceives and gives a visual structure to an idea, they are responsible for developing the myriad of emotions that an absolutely fictional, animated character exhibits, forming an unbelievably beautiful relationship with its audience.

    So if you’re interested in visual story-telling and knowing more about what a storyboard artist actually does, keep reading the following extensive guide that bares all about the profession of animation and the genius behind the screen!

    What is a Storyboard Artist & Ultimate Guide for Beginners


    First of all, how should one describe a storyboard and its artist?

    Every sequence or clip in an animated movie that you see is formed by delicately weaving numerous panels together. Visual story-telling for animation finds expression on the artist's table where he creates and composes these snippets of scenes that relay an incident.

    And the very layout on which these panels are created and arranged to form a scene is known as the artist’s “storyboard.”

    In short, this is where the real magic for all animation movies begin!

    Now, apart from just character sketches and situations or actions unfolding, storyboard panels also consist of sequences dealing with numerous reactions, movements, and locomotions, which are developed painstakingly by storyboard artists. These include everything from body language, the movement of limbs, the effects that each tiny movement has, and most importantly, each and every tiny facial expression of each and every character in the story.

    These expressions are what relays the state of mind and thought processes of a character to us. These are what portrays the personal and ulterior motives and intentions of a character onto the screen and makes its virtual, imaginary “existence” believable to us.

    If you think about it, the expressions of an animated character could make or break the illusion of his existence that we love to believe in and form a relationship with.

    And this is where the genius of a storyboard artist lies.

    So, how does a storyboard artist develop a visual sequence from just an idea?

    A storyboard artist is the one who creates a visual story out of just a mere concept and or a script containing the idea, making it “real” for the world to see.

    A storyboard artist is in complete control of how others might perceive a character and the entire project, for that matter. The storyboards serve as a critical reference point for all of the members of production and development, no matter which sub-department they belong to. Hence, the clarity of every storyboard for the entire project is a crucial requirement for all. 

    Thus, it is required for a storyboard artist to be absolutely confident, crisp and precise in all of his depictions of the plot so that it is absolutely clear and comprehensible to every member of the team even if joins midway or is responsible for undertaking just a segment of the story. This decides the vital “energy” of the panels which motivates and drives an entire production house.

    As has been previously mentioned, a storyboard artist is responsible for the clearly depicting literally each and every tiny aspect of every scene and character in the story, including emotions, reactions, and gestures (subtle or otherwise).

    Now, the critical point over here is to develop these actions with minimal or no words (dialogues) at all. The entire plot should be strong enough to not depend on any spoken word as such and should be able to hold its structure without scripted context. This tests the strength and depth of a visual story-sequence and is the ultimate parameter for judging the mettle of an artist or a beginner in the field.

    This is the reason why each storyboard artist is a great visual communicator for every field that deals with virtual reality such as animated movies, TV shows, video games, and a great many forms of story-telling!

    How does a storyboard artist handle visual story-telling?

    The primary job of any storyboard artist is to sketch scenes that explain the story. They seldom require any word or dialogic to convey the story. The process and the methods that the storyboarders employ vary from one artist to the other. Often, it so happens that the rest of the production or development team also influences a storyboarder’s methods and style.

    If there happens to be more than one artist at the storyboard, then one artist can also mimic the style of another. This is to ensure the uniformity of the storyboards to help maintain the clarity of the vision and comprehensibility of the plot.

    Also, in the case of movie projects, a director’s personal style at handling a particular storyboard could influence the way another storyboarder creates scenes. This is a pretty beneficial way to ensure great flexibility in a team that also helps obtain the maximum benefits of an artist's personal style. However, the clarity of a storyboard shouldn't be compromised in any way no matter how many artists are working at a particular storyboard.

    In certain ways, storyboard artists could like sketching a comic-book strip of a movie or video game. This is because, apart from visualizing scenes, an artist at the storyboard will have to describe the movement of the camera.

    Based on your preference, you can realize the scenes on the computer screen or manually. A digital depiction and rendering of the scenes make it easier to exhibit and share. However, for traditionalists at the art, nothing beats the incredible appeal of pen on paper.

    What are the specific things that a storyboard artist has to work upon?

    Even though a significant portion of a storyboarder’s work involves drawing the fundamental structure for the characters and sketching in the details, there definitely remains a fair bit of room for text as well owing to the requirement of technical description. These go in their respective slots in the panels.

    Since the clarity of a storyboard is the essential and utmost requirement of the production procedures, it is understandable that visual representations may at times fall short in conveying a clear message, especially if someone is starting out from the middle of the story or handling a part of it.

    In such circumstances, using text often becomes a necessity to explain the specifics in greater detail, or even for listing the details from a technical standpoint.

    On projects like that of video games, storyboard artists are often responsible for developing on so many other fronts than just visualizing scenes. Sometimes they have to work on various levels within the game or on the constituent elements of character design. They are responsible for developing and maintaining the “visual continuity” of a story.

    According to celebrated game design artist, Lauren Walsh, a storyboard could be essentially termed as a sketch of the finished product, that lets a storyboard artist unleash their creativity without any sort of boundaries, restraints or limitations. 

    This crucial “sketch phase” allows an artist to freely explore several different themes, concepts, environments as well as vital story-telling tools as different means of communicating their ideas to the team. It is way easier and cost-effective to make simple changes to a storyboard before devoting precious time and resources to a concept or an idea that way.

    How does “pitching” a storyboard works for an artist and the rest of the unit?

    Storyboard artists are essentially responsible for “pitching” their art panels and boards to the director of a film or to the creative head of a development team. If you’ve got the knowledge and the talent of how things work in the storyboard department, then, this is how you can make your work have a substantial impact on a unit.

    Once you have taken a concept or a script and woven a rough visual representation from it, your “pitch” is what is going to become the deciding factor for you.

    It is because your “pitch” is the point where you perfect your visual representation, instilling life into it. This is where you provide the director or immediate mentor with an extensive walkthrough your entire story, narrating and describing your panels and boards.

    These could include sound effects (better start polishing those explosion and spaceship sounds right away!). However, it is fundamentally your drawings that will decide the impact, speaking for themselves.

    What you need to at this point is to take the recipient of your pitch into your world and keep them intrigued enough for them to stay there. Remember that like any other “sales-pitch,” here too, it is required for you to focus on selling your visual interpretation. This is why any pacing, sound, or rhythm will hold the power to make a drastic impact on your pitch.

    And if your pitch makes a spectacular impact on the viewer, the script itself could be adjusted to include all those vital parts of your storyboard that has influenced the storyline so much!

    This is because your visual representation of a concept not only serves to entertain, but they inspire other creative minds to create in turn!

    How can one become a storyboard artist?

    So, now, to answer the million-dollar-question of how does one become a storyboard artist, we would like to tell you that there are a number of ways to go about achieving that feat.

    For starters, there are several tools available online that can help you out with your aim. A substantial portion of all of it goes into creating an ideal storyboard, so, it’s better if you tested your knowledge of the field and skills out for before you go ahead with the application procedures. This way, you can know for yourself if you are equipped for the job or not.

    Some of the best storyboard software out there right now include:

    To excel at storyboarding, you require great drawing skills. This is a crucial point of the work. Your storyboards do need to relay the scene clearly to their audience, and this is why you will be required to illustrate the emotions and gestures of your character correctly and prominently on your panels on the board. You will also have to render the setting for the scene as cleanly as you can.

    All in all, you would have to draw pretty much all of the time to create your boards well. If this sounds appealing to you now, then do remember that jobs like these are some of the most viciously competitive ones that you’ll ever come across. 

    There is always going to be someone better than you at the job or more talented, but this doesn’t mean that you can’t reach their levels or go beyond it by perfecting your craft. With real patience and dedication, you could become the next best thing at your work that everybody looks up to. And this case, all you have to do is draw every day, for the majority of the time until you get the perfect circle!

    No wonder people working at Pixar talks about staying up all night drawing and practicing. They mention working “48 hour days!”

    Tips and tricks to practice better!

    One of the most exciting and fun ways to practice drawing and get better at it is to do a “draw every day” challenge. This way, you can capture (and you should), whatever is happening around you and to you during the day or an incredible dream that you might have had last night and create your panels out of these memories and concepts!

    This will build your interest in the task as well as strengthen your skills of visually representing a though.

    Knowing a bit of cinematography will help you immensely with getting the fundamental dimensions of the picture right. This is because you would be required to draw whatever the “camera” sees, and that would be very different from what your own eyes would see. This is why you have to learn the difference between physical and cinematographic perspectives when it comes to defining perspective angles on the storyboard

    Although video games and animated films aren’t filmed with a camera, they still have different perspectives.

    Limitations of concepts such as that of the 180 degrees rule

    The 180 degrees rule ensures that the viewers are absolutely oriented in the scene. Fundamentally, when you set your scene up, you get a straight line running through the middle of it. Now, for every shot in the scene, your camera perspective requires to be on the same side of that line.

    The Warburton Labs offers a pretty helpful comic that correctly and accurately illustrates this concept. You could get the second part of the comic right here. It also discusses several other essential concepts that are closely related to storyboarding specifically.

    To hone your skills, you could take art and theatre courses as well as various courses in photography and cinematography. Every part of this field, no matter which department it is, will contribute substantially to your growth and development as a storyboard artist.

    How to apply for the job and be successful at it?

    The first thing that you should do if you’re looking to bag a storyboard project is to search for internships, while you’re in art school. Try applying in bigger studios and smaller ones alike. As you achieve more and more reps, your chances of getting noticed at bigger studios such as Pixar and of the likes, get higher.

    And if you’re looking for an entry-level job that doesn’t require much of a formal collegiate education, then do work hard and extensively on your portfolio as that needs to be pitch-perfect for these openings. Various workshops and classes can help you learn the technical parts of the art and assist you in honing your skills.

    In all circumstances, you should focus on concentrate on constructing a portfolio that displays your deft skills as an artist as well as visually relay your story to the viewer in the perfect way.

    Remember: draw all the time!

    Now for the most challenging part: learn to prepare yourself for a lot of “no”s. Like any other job in the industry, this too will test your patience, perseverance, and positivity in the most brutal ways.

    But, be assured, that with a strong portfolio and a persistent approach towards cracking the code will definitely get you to your goal eventually, if not fast enough.

    A simple way to make it even more motivational and fun for you is to chalk it down to a “PSP” (not the Sony one, though), formula which stands for “Persistence, Strong Portfolio.” This is bound to get you closer to your destination by the day.

    However, at bigger studios, it’s more than likely that you won’t find entry positions for storyboard artists. So, if you have already had some experience of working at a storyboard, then chances are that you may be hired directly for the spot.

    Whereas smaller studios will often depend on their animators for helping with the storyboards. With smaller projects or indie ones, the pressure could be high, but these would provide you with all the scope to develop substantially on your skills and personal style and help you prepare for applying at bigger studios.

    Skills and Education

    Knowing how a film and animation differ from each other and their basic constituent elements are intrinsic parts of storyboarding.

    You will be expected to have profound knowledge and in-depth understanding of acting, staging. Devote time in learning about cutting, which is the process of splicing scenes together as well as the language of a film.

    Since your primary responsibility would always be that of communicating the story clearly through visuals, developing strong draftsmanship should be your top priority. Strengthen your skills as an artist as studios will always look for well-drawn storyboards with panels that can communicate tiny, tricky, and subtle details such as gestures and expressions with ease and clarity.

    When you're dealing with portraying expressions and emotions, try covering as much as you can on them. Stories consist of a myriad of emotions. If you choose to depict only a singular emotion, for instance, humor in your panels, then a lot of questions about the plot and the characters would be left unanswered for the reviewer of your portfolio.

    Make sure that you include emotionally-charged scenes, thrilling action panels or such that contain multiple emotions.

    Based on requirements, you’d often have to be a collaborator or sub, especially if you’re looking to work in a studio. Working closely with the members of a team will spell bliss for learning the specifications and technicalities of the work.

    However, if it’s specifically a solo or personal project or even for any indie game you want to design, then you need not require to collaborate with others as such if you aren’t really looking to.

    A few potential challenges for a storyboard artist

    One of the things that you would have to learn to accept is that not all ideas that you have would be perfect or enough to impress. Be prepared to take scathing criticisms and absorb all the precious feedback thrown your way. Not all panels you draw will bring in favorable judgments or remarks from your fellow team-mates. 

    But the best part about it is the incredible opportunity it will provide for you to improve your work. As long as you’re ready to turn a brutal criticism into a positive result for your work, things would pan out for you just fine!

    Often it may happen that you’d be asked to rework your scenes over and over and in the process, combine different elements of the iteration until you’re able to create the very thing the team is looking for. You will have to be very flexible that way in order to tackle the struggles of creating perfection on the storyboard.

    There could also be a lot of pressure when it comes to pitching as storyboard pitches could involve executive producers, backers, and several other decision-makers. Pleasing all at the same time could be the most challenging feat to win in this field. However, with a positive attitude and mindset towards it, all will get you where you want to be!

    The Industry Advices!

    One of the most influential figures at Pixar studios itself is that of Ted Mathot, who is the story supervisor and the creator and artist for comic books. He had posted his “story advice” where he talks about creating the ideal portfolio for you to be able to apply at studios like Pixar on Tumblr three years ago. It is available even today.

    He talks about some of the vital things to keep in mind such as the length of your portfolio, which, according to Mathot, should be limited within 15-20 pages worth of boards.

    Avoid cramming these as many panels as you want. Trying to keep everything clear and legible enough: this is of utmost importance. Mathot recommends about 6-9 panels per page.

    Always put up your best works as no one would have the time to go through all that you may have created in the past 15 years.

    Your best works on panels should convince the reviewer or interviewer of your skills, reflecting clearly and precisely whatever it is that you specialize in. This way you’d be showing value for their time.

    And for the subject matter, Mathot is of the view that a little depth and personality could be just the thing that could impress the reviewer. Apart from the conventional character or setting, bringing in scenes from real life (such as coffee shops, airports, etc.) could spell a breath of fresh air, defining a unique character and tell its story.

    In this context, keeping a notebook or journal at hand could indeed be a wise call, so that the next time something interesting happens in your surroundings or you visit a place that inspires a story, you’ll be able to record it. And according to Mathot, this sort of work is exactly what could make a vital difference.

    He clearly states that “communicative single image story-telling” provides very personal insight into the artist’s mind as well as his style.

    So now you know what to do and how to do it all!

    Conclusion

    This was it for our ultimate guide to storyboarding for beginners! We hope we were able to provide you with an insight into what exactly storyboarding is supposed to be and how the industry works.

    And we sincerely hope you liked our effort!

    Take care and keep drawing the smiley!

    See you soon!

    If you need to know more about sheds or you are simply wondering what is a shed, you`ve come to the right place ! Sheds have been used for a very long time globally and having multiple uses; it is a very convenient utility option for people who own gardens, backyard, or even limited spacing. Typically single story, these structures are versatile and easily modified to fit the needs of the individual, they're commonly structures which have a roof and four walls, situated outside the house. A shed could vary from a couple of square meters in size to a dozen depending on how they are utilized, whether it is for gardening purposes or industrial usage, sheds play a major role in storage.

    Sheds Defined, Structure Types, Advantages and Disadvantages

    What are the different types of sheds?

    Sheds, as mentioned above, come in all shapes of sizes as well as dozens of materials. The most common presence in the domestic setup is built in wood yet nowadays vinyl and plastic variants start to gain ground as they are less expensive and a tad easier on maintenance compared to their wooden competitors.

    As sheds grow in sizes complex wooden structures and professional carpenters come into the picture when it comes to wood, alternatively iron and a professional welder could achieve brilliant results too when it comes to medium and large sheds.

    via bhg

    Domestic sheds

    Yes, you could even DIY a shed! Did you know that?

    A very interesting choice indeed, sheds could be available in the DIY form, and by using simple methods, they could be constructed according to our needs. A simple tool like a screwdriver can help you in assembling a shed, whether it is plastic, wood or metal. These sheds are versatile and their uses range from gardening storage to chemicals and equipment storage or home workshops, people often store in them items which otherwise could not be stored inside the house.

    Shed kits could be the horizontal, vertical or corner type with modifications inside the shed to meet your needs! They could be apex, pent or reverse apex roofed. Pent shaped roofs are for places which have heavy downpours or even snow, it is sloping downwards and helps in water run-off. An apex type roof is basically like an inverted V, often common to houses too. The reverse apex roof, on the other hand, has a side door, not a front. This facilitates the door to open in the largest and widest section of the shed rather than the narrowest, aiding in better visibility and room.

    There are salt-box style roofs or gambrel type roofs too, which have lofts attached to them. The prices of these sheds naturally vary, and so do their functions. 

    Source Unknown

    Larger sized sheds

    A little heavier on the pocket, larger sheds are used for domestic purpose too and while their footprint is larger, they have better ventilation and can also be used for purposes other than gardening or typical tool work. Often such sheds can also be transformed into a cozy outdoor office, a photo studio or library, they are often hobby related and they enjoy a better build quality overall.

    People often see these as small retreats, comfort dwellings within reach.

    Sheds which have more specific usage

    From being used in the mall for parking to university, restaurants and other commercial spaces, sheds are a major contribution towards protecting vehicles both two-wheeled and four-wheeled vehicles. We encounter bike sheds and carports everywhere, both type of sheds that protect and safeguard our belongings with a basic design.

    An ever more particular usage would be boat sheds or, structures envisioned for rowing and drying materials.

    Agricultural sheds

    Farmers use a lot of agricultural sheds, again for storage and protection of farm equipment and produce. Depending on the production, these could be from small to large and are largely modifiable according to requirements. This also includes shearing sheds in which cattle are kept.

    Raw Materials

    The most common type of materials which are used to build the framework of a shed depends again on its usage, but most often it is PVC, metal or wood. They could also be vinyl-sided sheds, everything depends on the owner and their requirements.

    via pinterest

    Metal Sheds

    Metal rooftop, framework, and galvanized aluminum sheets are used to build sheds. They tend to rust with time, and their durability is weaker than wooden sheds when maintenance is overlooked, they also tend to dent faster. Metal sheds have the advantage of being strong and termite resistant. For this reason, corrugated metal sheds are preferred as they are stronger than their counterparts. Financing into an anchoring kit for a metal shed makes sense as they could be susceptible to weather-related damages.

    via familyhandyman.com

    Plastic Sheds

    Plastic and PVC sheds are also quite popular and are the least expensive type. Also, they are easier to maintain than the metal ones. Plastic sheds are very lightweight in comparison to metal or wood and are also UV protective, rot-proof, and termite free. They could be modified with extensions like plugs, boards, shelves, skylights, etc. 

    Wooden Sheds

    The classiest of them all, wooden sheds are classics and therefore, more expensive. The maintenance of wooden sheds is higher than vinyl or plastic, but they are excellent when it comes to durability. It would be recommendable to research well before investing in wooden sheds as proper varnish and good quality wood last for a very long time. Cedar wood is pretty much water-resistant. There are typically two ways by which wood could be treated, dip or pressure treatment. Pressure-treated sheds last longer and don't need additional preservatives, whereas dip-treated ones will again throw you into the maintenance game every few years.

    via nzhouseandgarden.co.nz

    Vinyl and Asbestos Sheds

    Vinyl, as well as asbestos sheds, are also popular and good alternatives to plastic or wood, even though the major framework would probably still be wooden or metal. They are stronger than metal or plastic sheds and are also easy on the pocket.  There are many color options that could suit your aesthetic appeal.

    All these types of sheds are available in kit form and could be DIY too.

    Organizing your shed

    One should do all in his power to organize a shed clutter-free in an attempt to maximize its storage. A simple trick would be to utilize the vertical wall space to build new shelves and cabinets, one could also use rods to suspend organizers and possibly mount oddly shaped items that he does not use often under the pitched roof. It is highly recommended to reuse and recycle, anything can be of use in your shed, plastic bottles split in half can rapidly become nail organizers for example, creativity is key!

    At all times, keep in mind that a clutter-free shed is a happy shed, seek solutions that help you keep the space clean in the long run and everything will be far easier, maintenance included.

    The advantages and disadvantages of sheds

    Whether someone owns a big area in their garden or backyard, or whether it is tiny and cluttered- a shed could solve a lot of your organizational problems. They sure are affordable and come in a varied range of prices for everyone out there. Sheds could also be innovated into dainty personal spaces which could be used in various ways apart from storage.

    Sticking to the basic idea of having a shed, as a storage unit, there are certain pros and cons to them, and it would be advisable to discuss a few.

    via findinghomefarms.com

    Advantages 

    Storage

    The most important advantage and usage of a shed is obviously storage. They act as huge storage spaces and occupy very little space overall. Whether it is for domestic purposes, or for commercial needs, sheds are extremely important storage units. This makes your backyard clutter free, giving you more space inside and outside the house.

    Organization

    Sheds account for very good organization spaces, and since it can store a lot of objects and materials under one roof, it is easy to organize them according to our needs. This makes work much easier and of course faster.

    Budget-friendly

    Since sheds come in various sizes as well as quality and type, they are quietly affordable. Sometimes investing in huge-scale storage could be difficult for some people, under such circumstances, making the perfect use of limited space, sheds make a great choice. For commercial purposes, like train goods, or parking, sheds help in keeping things organized in one area in a friendly.

    Protection and safety

    Sheds actually could be installed with very good protective measures. This ensures that the goods/vehicles/valuables are kept safe and away from burglars. Vehicle sheds require more attention, and so do private homes. Sheds could be installed and modified with specialized locking devices which make sure that there is no unnecessary theft.

    Easy Peasy

    One could express his creative side by redesigning his shed through paint, coloring it towards happiness. Shed kits are usually DIY, and this means that anyone could follow a set of simple instructions and assemble their shed with very basic tools present in the house.

    Anything You Want

    Depending on the need and location of the shed, any raw material, starting from wood to metal and vinyl to asbestos can be used, one can choose from many options in the market. They could make their shed colorful and at the same time productive.

    Maintenance

    A very important factor to consider when buying a shed is what type of material is used. Certain materials like PVC, plastic, and certain metals are very easy to maintain and thus save a lot of hassle as well as maintenance costs. Find out what suits your requirements the best and invest in the most suitable shed for yourself.

    Durable

    One of the important factors to consider is the longevity and durability of the product we invest in. Depending on the material, sheds come with a manufacturing warrant. Plastic sheds are durable and so is steel. The classics, wooden sheds are a tad more expensive and a little bit high maintenance yet their expression sends an entirely different message.

    Temperature control

    Plastic sheds and wooden sheds are usually quiet temperatures friendly. Even in extreme climates, there is a moderate temperature that could be maintained inside these sheds, and this makes them more user-friendly. Also, one should consider hazard protocols. Wooden sheds have more susceptibility to catching fire than metal, and thus it should be kept in mind. Everything depends on the owner, the location, and the type of storage they want to make.

    via poppytalk.com

    Disadvantage of sheds 

    Hectic Maintenance

    Some of the problems which are faced when having any shed are maintenance related, especially if the quality is sub-par. Wood is usually prone to catch fungus, termites, foul smells as well as various pests. Unless it is a superior manufactured shed which a have all precautionary measurements like varnish paint, wooden sheds could be hard to maintain. Metal sheds are prone to get dented, even though they don't get damaged otherwise. Paint too tends to chip off and peel easily and thus requires additional investment.


    via statesmanjournal.com

    Expensive

    Even though, otherwise budget-friendly, wooden sheds could be quite expensive. They tend to be the most durable too, but it depends from person to person on what quality of wood they would invest into. It is always advisable to spend a few bucks extra to get the best deal quality-wise.

    Immobile

    Except for certain kinds of sheds, most of them are immobile and cannot be moved easily. These sheds thus have to be lodged in one area permanently.  This is the most applicable for wooden sheds as they are heavy and bulky and almost impossible to move.

    via bhg.com

    Too many pests 

    Again, if not maintained well, sheds could be a hub of unwanted pests, bugs, and eventually diseases. This is especially if they are unused for a very long period. So ensure that when there is a routine cleaning of your home, the shed to is a part of it.

    Noise

    Sheds are nowhere near as soundproofed as garages, their low mass especially on plastic and thin wooden sheds is not sufficient to break down sounds, their main objective being storage. If you are planning to use power tools in the shed occasionally for woodworking or any other hobby that might generate noise do research soundproofing costs and options that will help you maintain the peace in the household.

    Conclusion

    Sheds are a smart choice and their popularity is a testament to their greatness, simply ensure that you pick something that fits your needs and requirements and prepare yourself for an awesome experience with your next structure!

    Related Articles

    Backyard Landscaping Design Ideas-Charming Cottages and Sheds

    10 Best Shed Locks Right Now Reviewed

    9 Best Shed Alarm Systems for Enhanced Security

    8 Best Carport Kits  

    10 Best Pergola Kits for an Awesome Summer

    A screen printing machine is used to print designs on items like clothing that are meant to be sold. But such machines are also used in several other industries for creating artwork, posters, medical devices, electronics, etc. 

    If you’re thinking of starting a screen printing business, you may be searching for the best screen printing machine. But finding the right screen printing machine isn’t an easy task since there are several units on the market. 

    You need to have proper knowledge about how they function to find the most suitable one.   That’s why I’ve shared this guide explaining all about screen printing machines here to help you out. 

    Screen Printing - What Is It And Why Is It Used?

    Screen Printing - What Is It And Why Is It Used

    Screen printing is a printing process where ink is pressed through a mesh onto a substrate to create a printed design. This printing process is used in many industries, including clothing, art, electronics, and even for manufacturing medical devices. But its most popular use is for creating custom clothing products, like printed t-shirts. 

    Also known as serigraphy, screen printing has multiple forms, such as spot color screen printing, grayscale printing, halftone printing, and more. Another common name for the process is silk screen printing since silk was traditionally used for creating the screen used in the printing process. 

    The primary reason why screen printing is so popular is that the designs are printed in very vivid colors. Additionally, the ink is applied to the surface in multiple layers, which makes the item tactile and pleasant to touch. 

    With screen printing, it is even possible to print the same design several times using the same stencil. This means that creating multiple copies of the accessory or clothing is easy, and large batches of products can be manufactured efficiently. 

    Screen printing further allows the creation of highly detailed designs, though this limits the number of colors that can be used despite the color combinations being intense.

    Origin And History

    It is an ancient technique that was first used in China around 950 AD for printing designs on fabrics. But the technique was later adopted by Japanese artisans for transferring patterns onto paper with the help of a hard brush. Moreover, the pigment was pressed through a screen that was made using human hair. 

    In the 18th Century, screen printing arrived in Europe, though it did not become very popular immediately because silk was very expensive at the time. As silk became easier to import, thanks to the Silk Road, its cost went down, which led to screen printing becoming more widespread. 

    Then, photo-sensitive emulsions began to be manufactured by the early 20th Century, and these made the process of creating detailed stencils easier. During the 1930s, screen printing became popular as a medium for art, and was referred as serigraphy. 

    Thus, screen printing was used as a form of fine art, and artists like Andy Warhol and Eduardo Paolozzi utilized it for their work during the 1960s. Often called pop art, this method was used to create multiple copies of the same image. And Andy Warhol’s Marilyn Diptych is one of the most famous examples of this art form.  

    In modern times, screen printing is used both as an art form and for commercial printing purposes, perfectly suited for producing large batches of custom clothing.

    Other Uses Of Screen Printing 

    Being much more versatile than most other printing techniques, screen printing can be used for different purposes. It also does not require pressure to be applied for printing, as in lithography and etching, while the surface does not need to be completely plain. 

    What’s more, screen printing can be done with different inks and on various materials, including ceramics, glass, paper, wood, metal, and textiles. That is why it is used across many industries for manufacturing items like balloons, medical devices, decals, clothing, displays, signs, and electronics. 

    Screen printing is also used in the manufacture of wafer-based solar photovoltaic (PV) cells, where the silver buses and mesh have to be printed. In printing electronics like solar cells, screen printing becomes indispensable because it allows you to control how thick the print should be.

    Additionally, the size of solar wafers is increasing while their thickness is getting reduced. This means the printing process has to be carried out carefully to minimize breakage, which is possible with this printing method. 

    The Process Of Screen Printing

    In its most basic form, screen printing involves the creation of a stencil on a mesh screen through which ink is pressed onto the surface underneath. While the screen printing process remains the same in most cases, the creation of the stencil can vary.

    Common methods used for preparing stencils include applying vinyl or masking tape to cover selected parts, screen blockers like lacquer or glue, or a light-sensitive emulsion. The mesh is usually made of polyester, though stainless steel and nylon ones are also available. 

    Selecting the right mesh depends upon the texture of the surface, the complexity of the design, and the size of the mesh. Once the mesh is selected, it is coated with a light-sensitive emulsion on which the design is placed. 

    When exposed to light, parts covered by the print design remain liquid, while the uncovered parts solidify. After exposing the stencil for a predetermined amount of time, the emulsion is washed, and the screen is dried before being placed on the screen printing machine. 

    The piece of clothing to be printed is placed below the screen after which the screen is then lowered, and ink is added for printing. Most businesses use an automatic rotary carousel printer, whereby multiple screens can be used simultaneously. This also allows them to apply different colors quickly. 

    For multicolored designs, multiple screens are used, as only one color can be printed at a time. After the printing process is complete, the screen is washed to remove the emulsion so it can be used again with new stencils.

    This is an important aspect, which is why employees need to learn how to clean screen printing machines properly.  

    Mechanism Of A Screen Printing Machine  

    Screen printing machines usually have a squeegee or blade that moves across the surface of the mesh screen. This pushes the ink through the mesh, after which the blade movement is reversed to allow the screen to touch the surface material.

    Generally, in an automatic screen printing machine, there is an electric or pneumatic center, around which the printing stations are arranged similar to the spokes of a bicycle wheel. Then the clothing on which the design has to be printed is placed on rotating platens, also called print pallets. These rotate around the machine allowing each piece of clothing to be colored.

    Individual print stations are represented by the spokes, and the number of print stations and screens determines the type of printing machine. For instance, a screen printing press with 4 stations and 6 screens is referred to as a 6/4 press. 

    One thing to understand here is that a screen printing machine will always print fewer colors than it should be able to. The reason is that the process requires the use of flashing and cooling stations. Flashing stations allow the clothing to be cured, improving the printing quality, while cooling stations let them cool before the next round of printing.

    Several types and sizes of screen printing machines are used for printing different items, but they can generally be classified into automatic and manual screen printing presses. In a manual screen printing press, a worker has to move the squeegee for printing while there is no need for manual labor in automatic screen printers.

    Usually, businesses involved in screen printing begin with manual machines and shift to automatic ones as they grow and expand.

    Screen Printing Equipment

    Screen Printing Equipment

    To be able to use a screen printing machine most effectively, it is important to learn about the various pieces of equipment and their functions. 

    1. Screen Printing Press

    A screen printing press can make the printing process more efficient by printing multiple items easily. The purpose of the press is to hold the screen during the printing process so that the operator can replace the items to be printed.

    3 types of printing presses are used for screen printing; automatic, semi-automatic, and manual. As the name indicates, an automatic screen printing press does not require manual input, while semi-automatic ones require limited human input. And manual presses need to be operated by hand. 

    When large quantities of items need to be printed, fully or semi-automatic presses are most suitable. These presses minimize errors, help speed up the process, and make printing more efficient. On the other hand, a company that operates on a smaller scale can rely on a tabletop or hand bench press.  

    2. Inks

    Inks or pigments are used to press against the mesh screen so that the stencil design gets printed onto the t shirt or other item. But selecting the right inks is not as simple because different types of inks create various effects. 

    Some common inks that can be used include puff inks, texturized inks, or glittery inks each resulting in a unique appearance. Also, you need to consider the fabric type on which the design is to be printed since certain inks work better on particular materials.

    In the case of clothing items, machine washable ink that has undergone heat treatment is generally used. This results in designs that can be used multiple times without fading away. 

    3. Screen 

    Screen printing requires a mesh screen that has a wooden or metal frame on which a mesh fabric is spread out. Modern screens use polyester fabrics instead of silk, which deliver similar results but are much more affordable. 

    But the thread count and thickness of the mesh depends on the texture of the material that has to be printed. As a rule, threads that have smaller spaces in between result in more detailed prints.

    After coating the screen in emulsion and exposing it to light, it can be used as a stencil. And the emulsion can be washed off afterward so that the screen is ready for printing another design.

    4. Squeegee 

    The squeegee is a rubber blade that is attached to a long handle made from plastic, metal, or wood. Its purpose is to press the ink through the screen onto the material which has to be printed. The size of the squeegee depends on the size of the frame of the mesh, as this ensures proper coverage. 

    Apart from the squeegee size, the firmness of the rubber blade can vary, and a firmer blade is more suitable for printing highly detailed designs. It can ensure that even the tiniest openings on the stencil get a uniform layer of pigment. 

    Meanwhile, a squeegee with a softer blade is generally used for painting fabrics or a less intricate design. 

    5. Washing Station 

    After they have been used, mesh screens need to be washed properly to remove the emulsion coating. In the case of large printworks, huge tubs of acid or cleaning fluid may be used to clean the mesh. Alternatively, a power hose, sink, or trough can be used to remove the emulsion. 

    Comparison Of Screen Printing With Other Printing Methods

    1. Screen Printing Vs Digital Printing

    DTG, or Direct To Garment printing, is a digital printing method used for fabrics and requires a specialized printer, similar to an inkjet computer printer. This prints the image directly onto the fabric or other surface. 

    The biggest advantage of this printing method is that multiple colors can be printed simultaneously without layering since there is no use of a stencil. Because of this, DTG printing is perfect for printing very colorful or detailed designs. 

    Moreover, DTG printing does not require a complicated setup as in screen printing, so it is more cost-effective and can even be used to print single items or small batches. It uses a computerized image, which produces highly detailed and even photographic images. 

    The only downside to this printing method is the colors are applied using CMYK-style dots instead of solid ink blocks. So, the completed image does not offer as intense colors as screen printing. 

    Also, it is not possible to create textured prints using a digital printer. 

    2. Screen Printing Vs Heat Transfer 

    Screen Printing Vs Heat Transfer

    Heat transfer printing utilizes heat to print a design on any surface. In this method, the design is printed onto a material that has a heat-reactive adhesive coating applied to it. This is called sublimation or transfer paper, and when a heat press is applied to it, the adhesive sticks to the material underneath, creating a design.

    Unlike screen printing, heat transfer is good for small orders, proves more cost-effective, and is much easier to use. It can print detailed designs on different items, such as footwear, bags, and hats. 

    Heat transfer printing can also be used with digital printing methods, and this process is known as digital heat transfer printing. In this, the design to be printed is created on the computer and printed onto a white transfer paper. Then, a plotter is used to cut it out along its digital outline for accuracy. 

    Once the transfer is complete, it is placed on the clothing item or other material, and heat treatment is done to make it stick to the fabric. With heat transfer printing, it is important to keep in mind that the quality of the printed item will depend on the quality of the materials used.

    In recent times, this method has acquired a poor reputation because printers often use low-quality materials for the process. That is why proper techniques and good-quality materials are crucial for the best results.

    3. Screen Printing Vs Laser Printing  

    When it comes to screen printing vs laser printing, both are among the most common industrial printing methods in use today. But while screen printing involves applying ink or pigment to the printing surface, laser printing uses a laser beam that removes or oxidizes selected areas of the surface material. 

    Being a more modern technique, laser printing results in greater efficiency and allows very precise printing. It is also better for the environment since less waste material is produced. But laser printing only allows the use of limited colors compared to screen printing and is more expensive, at least initially. 

    Most importantly, this printing method can only be used on select materials. 

    Why Should You Use A Screen Printing Machine? 

    The screen printing industry is growing rapidly, and the trend is expected to continue for several years. One of the reasons for this is that screen printing is versatile and finds use in many other industries. 

    Governments, educational institutions, electronics manufacturers, and technological industries are all now relying on screen printing. Additionally, with more and more online stores selling goods like custom clothing, on-demand printing has made this printing method an extremely lucrative venture. 

    At the same time, manual printing methods are becoming obsolete with the easier availability of automatic screen printing machines. Such machines have not only made the process faster and more efficient but have also led to a reduction in problems like workers suffering from carpal tunnel syndrome.   

    Because of these reasons, many people are looking to start a screen printing venture, and a screen printing machine can be an excellent investment.

    Choosing A Screen Printing Machine 

    A screen printing machine is a huge investment, and you may need to spend thousands of dollars to get a complete setup. That is why planning carefully before using such a machine is crucial. 

    You also need to opt for the best brand, which can be a bit challenging since there are numerous options to choose from. Moreover, a screen printing business needs additional equipment, such as:

    1. Heat Press Or Dryer

    When printing with a screen printer, a dryer is used to cure the ink applied to the fabric by exposing it to a temperature of 350 degrees Fahrenheit.

    2. Printing On Transparent Films

    A printer that can print on transparent films is required for screen burning, which is the process of coating the screen with emulsion and exposing it to UV light.

    3. Flash Curing Unit 

    This is used to cure the fabric when multiple colors have to be printed.

    4. Exposure Unit Or Light Box 

    The light box is used to expose the mesh screen to UV light for hardening the emulsion. 

    5. Mesh Screen

    Investing in a good-quality screen is vital to ensure that the completed fabric is of good quality. 

    6. Software

    You need the right software for screen printing as they make it easy to create and sell the artwork. Several manufacturers offer starter kits that contain everything you need, but it should be kept in mind that entering the screen printing business can be quite expensive in the beginning. 

    And for those unfamiliar with screen printing, relying on a local printing shop may be a better choice.   

    What Is A Screen Printing Machine Used For Final Thoughts

    What Is A Screen Printing Machine Used For Final Thoughts

    Several printing methods are available, and many of them, such as laser printing and DTG printing, offer certain advantages over screen printing. But despite that, screen printing is still the most popular method, especially for creating custom goods like shirts, posters, and accessories. 

    The versatility of screen printing machines allows them to be used for various purposes. So, if you’re thinking of entering this business, this may be the perfect time to do so. Just make sure to consider factors like automatic or manual functionality, machine and screen size, multicolor support, and your budget when getting a screen printing machine.  

    Tip

    Investing in a manual or semi-automatic printing machine is a good idea when just starting out, as more resources need to be conserved. Such machines are more affordable than fully automatic ones. 

    A pergola is not often defined despite its huge popularity, what is a pergola is common in landscaping and more importantly how is a pergola different from an arbor or car park one might find itself wondering. If you look for a fast answer, a pergola is a custom outdoor frame structure most commonly realized out of wood or metal. The structure beautifully emerging in your future landscape is based on posts covered with a roof or arch, it is envisioned to support vines. The top, roofing grid of the pergola can be left open or used as cover to shelter the individual from the elements. Built to add privacy and shade like a natural extension of the home with an outdoor sitting area, the pergola is most commonly attached to the home but it can be often found freestanding on open field, as a focal point in landscaping. The pergola offers privacy, obstructs unwanted views thanks to trellises and sculptural vines that shape the ensemble in pure beauty.

    The pergola pronunciation is intuitive and simple : per`go`la . The origin of the word dates back to 1645-55 from the Italian, Latin word "pergula" - projecting roof, arbor.

    What is a Pergola? 44 Inspiring Pergola Design Ideas & Pergola Types Explained

    Wooden pergola design painted in dark green nestling iron and marble dinning set, all emphasized by Wisteria vines.

    Found on cane plex

    The regular pergola is often confused with the following structures, these are terms that define either similar structures or relevant components to a pergola ensemble reason for which in the following rows their similarities and difference will be explained  to avoid future misunderstandings and misuses of the terms. The terms in discussion are:

    • Arbors
    • Gazebos
    • Trellises
    • Lattice also known as “latticework”
    • Carports

    Differences and similarities- Arbors and Pergolas

    The most common misunderstanding is found between arbors and pergolas, two highly similar outdoor structures that are often confused. Arbors are commonly used structures that can be found in public parks and private gardens alike, these are often realized out of materials with high resilience like vinyl or coated metal to avoid their maintenance where pergolas are usually realized from wood. Arbors are freestanding, rare being the cases in which it is attached to a garden fence to serve as a gate, embellished in natural elements. The biggest difference between them is that arbors lack the beautiful architectural design features that define a pergola, moreover they do not serve a leisure role as an outdoor sitting area but as a graphic element that emphasizes the landscape through its presence, as an anchor for beautiful flowers and vines.

    In contrast, pergolas are larger structures in all three dimensions and they`re customized to a certain extent to fit the requirements of the individual using it, pergolas can receive masonry columns for a beautiful renaissance monumental aspect and their top is often flat. The pergola dates back to the birth place of the Renaissance, Italy, where the term pergola firstly emerged describing masonry pergolas of great beauty. In contemporaneity the term pergola is often found describing ensambles realized in wood and iron more often then stone. Mixed pergolas with stone and wood, metal and wood can be found as well.

    An outdoor extension for the indoor living space is the most common stance of the word pergola, when they`re freestanding, pergolas are used as dinning areas and outdoor enterntaining ensembles nestled between greenery or outdoor enterntaining features like fireplaces, swimming pools, outdoor cooking areas.

    Landscape Architect, Cynthia Cash describes the deference between an arbor and a pergola below:

    “The primary difference in an ‘arbor’ and a ‘pergola’ is that an arbor is a free-standing structure (also used to support vines), whereas a pergola is a long linear structure over a garden pathway.”

    Gazebos and carports compared to pergolas

    The beautiful and functional outdoor structure known as "gazebo" is often confused with pergolas as well. Gazebos are enclosed structures, they have a closed roof and unlike pergolas, they usually feature a round shape on a raised floor that protects the users fro, humidity in the rainy season, it is used for outdoor entertaining, usually as a dinning area, a very practical, neat outdoor structure..

    The carport is the outdoor structure that resembles the common pergola the most, a high end car port can sometimes be better looking than a normal, common pergola, this happens because both ensembles share the same structure, the difference between them being on function and purpose rather than aspect. The carport is used to offer refuge to car in the alley where pergolas are used for entertainment, relaxation and comfort. The practical values of the carport cannot be compared with the leisure valences of the pergola in which memorable experiences are written in comfort and beauty. Both are commonly constructed out of wood and both serve as anchors for vegetation usually.

    44 Inspiring Pergola Ensembles For Your Backyard & Pergola Types Explained homesthetics decor (44)

    Rustic Gazebo ready to shelter an extraordinary dinning experience in complete privacy and full comfort.

    Found on Woodmeister Master Builders

    trellises, LATTICEWORK,Vines & Pergolas in LANDSCAPING

    The purpose of all these structures at the end of the days it to bring vegetation in the vertical plane, greenery that sculpts space and clothes the bare wooden structures transforming them completely. Common vines like Virginia Creeper, Hardy Kiwi, Wisteria, Bougainvillea, Hardy Kiwi, Dutchman`s Pipe are wrapping the structures around the world in sheer beauty, emphasizing their existence and beautifying the ensemble, adding visual comfort in most modern gardens.

    The trellis is a small part of these ensembles, a framework that helps climbing roses, vines to grow. Trellises can be made out of wood, vinyl or metal and they`re confused with the word lattice thanks to the looks of the latter. Lattices have a crisscross or check-board pattern that troubles the eye, determining the confusion with trellises. Where trellises are freestanding pieces, lattice and latticework are mounted on the sides of a pergola or arbor, as anchors for the vines, easing the climbing of the plant up to the roof.

    44 Inspiring Pergola Ensembles For Your Backyard & Pergola Types homesthetics dream pergolaExplained (11)

    Wooden pergola design sheltering a sofa swing, latticework protects the sides from unwanted views.

    Found on janiceparker

    44 Inspiring Pergola Ensembles For Your Backyard & Pergola Types homesthetics dream pergolaExplained (7)

    Modern pergola offering shade by the pool, naturally extending living space outdoors.

    Found on Titan Designs

    44 Inspiring Pergola Ensembles For Your Backyard & Pergola Types homesthetics dream pergolaExplained (6)

    Beautiful Mediterranean Pergola designs offering shade for a sitting area with expansive views.

    44 Inspiring Pergola Ensembles For Your Backyard & Pergola Types homesthetics dream pergolaExplained (5)

    Pergola ensemble with hammock and extraordinary expansive views.
    44 Inspiring Pergola Ensembles For Your Backyard & Pergola Types homesthetics dream pergolaExplained (4)

    Olive green pergola design with orange curtains ready to offer privacy to the individuals using it.
    44 Inspiring Pergola Ensembles For Your Backyard & Pergola Types homesthetics dream pergolaExplained (3)

    Outdoor bar area protected by white pergola design; industrial timeless bar chairs emphasizing the spatiality in which they reside.

    44 Inspiring Pergola Ensembles For Your Backyard & Pergola Types homesthetics dream pergolaExplained (8)

    Vinyl white pergola design offering a sitting area by the pool, protected and emphasized by greenery.
    44 Inspiring Pergola Ensembles For Your Backyard & Pergola Types homesthetics dream pergolaExplained (9)

    Living pergola design sculpting space around it, defining the space through greenery.
    44 Inspiring Pergola Ensembles For Your Backyard & Pergola Types homesthetics dream pergolaExplained (10)

    Custom metal pergola design nestled in greenery.

    If a small pergola definition was to be sought the answer would describe the pergola as garden structure that sculpts a shaded sitting area, passageway or walkway used for leisure purposes; the garden structure described would be build by vertical posts and pillars that support cross beams along a constant width. In the ensemble latticework gracefully trains plants, vines to grow into the vertical plant, complementing the vertical layout with organicity, naturalness and sheer beauty, emphasizing the aesthetic values of the landscape and home, redefining the outdoor living spaces and inviting new protagonists, greenery, in a previously undiscovered territory. The comfort of the household is boosted thanks to the privacy added, shade provided and opportunities opened in sublime comfort.

    Latticework and pergolas

    The common pergola design includes posts, beams and latticework, simple and easy to realize at home with an extra hand. The common footprint measures 10 ft with, 10 ft depth and 8 ft height, the sides are usually covered with latticework, from time to time latticework being placed on the roof top as well. Redwood is used to reduce the maintenance and add longevity to the ensemble. To customize your pergola you can use any paint to either nestle the design in the overall decor or contrast it. Through a simple pergola you can earn shade, privacy and a great deal of comfort.

    Columned pergolas

    The beautiful mixture between materials has always been much appreciated when realized properly. In pergola designs too materials can be mixed to great results, columned pergolas for example are preserving the roots of the stone pergolas, ensembles that brought a monumental architectural presence into the setting to sculpts space, now beautifully combined with the more modern presence of the word pergola, wood. The instance in which Corinthian or Roman Style columns are tailored with wood are highly fortunate, these are today realized out of polyvinyl chloride, PVC, in which concrete is poured for stability and resilience. Traditional settings, Tuscan homes and various other eclectic scenarios use the visual impact of the column often obtaining great results.

    pergola with columns and wood beautiful design ideas

    Exemplary pergola design ideas with stone architectural columns and wooden roof top, ensemble wrapped around a superb fireplace, everything embraced by flowers, vines, greenery.

    Pergola with Arches

    A solution that denies the flat, regular plane on the roof top is the arch pergola. The curve resolved on the top of the posts reshapes space, simulating the sky vault on which flowers will be present. Iron and redwood are used to create the arches but today certain ready arches can be purchased, all weather resistant. With wooden arches you can also obtain a rustic look that adds warmth and an inviting allure.

    44 Inspiring Pergola Ensembles For Your Backyard & Pergola Types Explained homesthetics decor (43)

    Sculptural custom made arched pergola sheltering sitting area.

    Japanese pergola

    The Japanese garden inspires calms and serenity and is often the birth place of garden structures that vary from mini pond bridges to custom pergolas and arbors. Cedar and Redwood is used commonly used, occasionally painted red to serve as a garden centerpiece. Eclectic gardens inspired by the Japanese gardens often adopt pergolas as transitional items between different styled garden zones. Wisteria and rose flowers are the plants of choice in these setups.

    CONTEMPORARY pergola designs

    In contemporaneity pergolas are often designed with recycled plastics and vinyl as they reduce the maintenance of your ensemble to zero. The new pergola materials do not decay or rot nor do they need any painting like wood. It goes without saying that wood infuses different values in your scenery but if you`re short on time and you find yourself unable to spend it on maintenance, modern solutions are the way to go, they can be quite graphic.

    Modern Metal pergola ensembles

    A strong solid structure realized in metal can last an eternity. Use metal to you advance, copper will create a patina of green-mint, blue greens that no other material can replicate, metal can be shaped in various shapes and sizes so pick it up for custom setups. Curved or angular garden structures can also be realized with metal. Do not use rebar, it will rust swiftly. Coated metals are superb solutions with extraordinary resilience, they can take extraordinary shapes that will emphasize your garden for decades.


    Living materials shaping structures

    You can sculpt with living matter, you can use flexible shrubs, trees to sculpt your own structure. Tie and train the branches to embrace the modelling strong and unite them on the top to create a living ensemble. Bamboo is often used to serve as a pillar for the future living posts. This technique requires immense patience and dedication but the result is inexplicable beauty.

    design tailored for your needs

    Light or heavy, minimal or highly decorated, rustic or formal in design, your solution must require a perfect fit in your scenery. You simple need to realize something that will complete your garden setting at first glance. Plants and flowers must require thought just as much as the building material, the garden paths that lead to your pergola and the furniture enclosed in it. Pay great attention to details and you will obtain a design tailored to your needs that while emphasize your garden and offer you privacy and comfort.

    ensure privacy and win comfort

    More often than not pergola ensembles and trellises are installed to obtain privacy. The latticework on your pergola includes this statement and will offer privacy and shade through the presence of beautiful vines like wistera, grapes or whatever flamboyant climbers you choose to use. You pergola can lead the way in your design, serving as an example of sheer beauty; it can inspire future arbor and trellises installation beautifully tied by garden paths and flowers. The new setup can be brought by your outdoor fireplace or swimming pool as well, enhancing the entertaining area great deal.

    If you choose to build your pergola at home as a do it yourself project, we applaud you, it is a course of action that many individuals take, it leads to great results. Keep in mind that safety comes first if you build at home, use safety equipment, read the instructions for the power tools used and cement mixture alike, nothing should be overlooked.

    You`ll also need an extra set of hands, especially in the first part of the project, call a friend and make this project a really fun and constructive hang out.

    If you choose to use pergola kits, research well, use kits on which you`ve found positive feedback; some kits might make your job harder than they should.

    Take your time and build in your rhythm, you set the pace, you know the design you aim for. Ensure the proper result with patience.

    44 Inspiring Pergola Ensembles For Your Backyard & Pergola Types homesthetics dream pergolaExplained (12)

    Simple wooden pergola protecting an outdoor bed by the pool.

    Found on SNOEI

    44 Inspiring Pergola Ensembles For Your Backyard & Pergola Types homesthetics dream pergolaExplained (13)

    Complete outdoor festive entertaining suite on terraced ground.
    44 Inspiring Pergola Ensembles For Your Backyard & Pergola Types homesthetics dream pergolaExplained (14)

    Two toned wooden textures providing an unique sitting area. Notice the metal barrels doubling as coffee tables; notice the pattern on the patio floor. Superb details on simple elements.
    44 Inspiring Pergola Ensembles For Your Backyard & Pergola Types homesthetics dream pergolaExplained (15)

    Minimalist metal pergola design with clear lines battling vegetation.

    Found on Jacqueline Volker

    wooden corner pergola

    Wooden corner pergola design offering a small refuge in the garden.
    44 Inspiring Pergola Ensembles For Your Backyard & Pergola Types homesthetics dream pergolaExplained (18)

    Privacy curtains used in a simple pergola.

    Found on  HGTV Magazine / Lisa Romerein

    44 Inspiring Pergola Ensembles For Your Backyard & Pergola Types homesthetics dream pergolaExplained (19)

    Arched pergola design with complete outdoor kitchen and fireplace, ready for festive entertaining at its best.

    Found on group one

    pergola adding privacy through curtains

    Rattan furniture complementing the wooden textures of the pergola in a simple decor, curtains ready to offer privacy in an airy, ethereal ambiance.

    Found on  The Handmade Home

    44 Inspiring Pergola Ensembles For Your Backyard & Pergola Types homesthetics dream pergolaExplained (21)

    Simple pergola of an exemplary design filtering light in the favor of the individual whilst providing shade and forging a highly graphical image.

    Found on A Beautiful Mess

    44 Inspiring Pergola Ensembles For Your Backyard & Pergola Types Explained homesthetics decor (24)

    Simple balcony redefined by a light pergola and the vines surrounding it, sheer beauty in simplicity.

    Found on Backyard Unlimited
    44 Inspiring Pergola Ensembles For Your Backyard & Pergola Types Explained homesthetics decor (26)

    Wisteria wrapped pergola sheltering a dinning area in what one would call a perfect scenery.

    Found on DIY network

    44 Inspiring Pergola Ensembles For Your Backyard & Pergola Types Explained homesthetics decor (27)

    Monumental pergola ensemble with solid pillars and massive wooden beams opening up towards expansive views.

    Found on BHG

    44 Inspiring Pergola Ensembles For Your Backyard & Pergola Types Explained homesthetics decor (30)

    Arched pergola built around a fireplace, closed on one side.

    What is a Pergola? 44 Inspiring Pergola Design Ideas & Pergola Types Explained

    Traditional looking pergola with architectural columns, emphasized through lighting .

    Found on Midwest Living

    44 Inspiring Pergola Ensembles For Your Backyard & Pergola Types homesthetics dream pergolaExplained (32)

    Alley shaped to construct perspectives, leading to a circular pergola.
    44 Inspiring Pergola Ensembles For Your Backyard & Pergola Types Explained homesthetics decor (33)

    Simple beautiful pergola, transitional element in a mesmerizing garden.

    Found on Ana White

    What is a Pergola? 44 Inspiring Pergola Design Ideas & Pergola Types Explained

    Wooden pergola sheltering a small dinning area.
    44 Inspiring Pergola Ensembles For Your Backyard & Pergola Types homesthetics dream pergolaExplained (36)

    Simple corner pergola limited on two sides. L shaped sofa used to accommodate a happy group of friends.
    44 Inspiring Pergola Ensembles For Your Backyard & Pergola Types homesthetics dream pergolaExplained (37)

    Versatile greenery suffocating a pergola with immense immense beauty.

    44 Inspiring Pergola Ensembles For Your Backyard & Pergola Types Explained homesthetics decor (41)

    Airy, breathing pergola design, open an all sides trembling at the sound of the nearby water fountain with pure joy.

    Found on BHG

    A garden, like a home, carries great importance. It helps us relief stress, it shares with us fresh air, privacy, comfort. If you are happy enough to call a small plot your own, make it worth it, enjoy every inch to the fullest, be sure you make the best out of it. We all have different needs, while one will require a swimming pool another might seek a vegetable garden. Meadow, vegetable garden or bachelor outdoor entertaining center, enjoy your garden, love it, appreciate it.

    What is a pergola? What do you think? How do you use your garden? We would love to hear your valuable feedback on the subject in the comment section below.

    Related Articles

    Backyard Landscaping Design Ideas-Charming Cottages and Sheds

    10 Best Shed Locks Right Now Reviewed

    9 Best Shed Alarm Systems for Enhanced Security

    8 Best Carport Kits of 2022 Reviewed

    10 Best Pergola Kits for an Awesome Summer

    9 Best Metal Pergola Kits for Your Backyard | Buyer’s Guide

    So the other day, my little [might I add naughty as well?] cousin came home for a visit. Being the usual menacing self, he leaped across the house from table to table and chair to chair. And this time, our awesome salt lamp had to pay the price. No, he wasn’t unapologetic, he just stood there, looking at us sheepishly and then got back to jumping around.

    Now, to the most crucial part of the whole story – the victim, our salt lamp. What happened when our salt broke? Usually, I’d get a replacement for the lamp immediately, but somehow I got caught up with work and didn’t have enough time to do so. And we had to stay without the lamp for quite a while.

    What to Do When Your Himalayan Salt Lamp Breaks

    It is a hard time, I've been there; here's how I handled it !

    How did the salt lamp help me?

    I have always been suffering from dust allergies for years now, and have been heavily dependent on nasal sprays for relief. Even a small amount of dust can also trigger a sneezing spree in me. But ever since I’ve bought a Himalayan salt lamp, my allergies began to be in control, thanks to the air purification and dust filtering role of the salt.

    Also, as a writer, my work schedules can be really crazy and stressful. I work at odd times often, and this affected my sleep cycles. And with this salt lamp, I have even noticed that my sleeping patterns have become considerably better over time.

    What changes did I see after the lamp was broken?

    Once my cousin knocked off the lamp into pieces, I observed that my sneezing bout had been back again, though slowly. Also, I wasn’t able to sleep as peacefully, though it was not glaringly evident. One day, it struck to me that it might be the aftermath of the breaking of my Himalayan salt lamp. Fortunately, I saved the broken pieces aside. And so I immediately looked it up to see what I can do – whether there’s any way to repair it or do something else about it.

    Can salt lamps be repaired?

    Truth be told, salt lamps are fragile. If yours doesn’t break after a fall or a heavy pressure applied to it, the chances are that its fake. Sometime, these lamps could even develop cracks, and most of them wouldn’t survive a fall, thanks to my cousin for proving this to me. And then there’s the chipping of the salt too, which can happen, but rarely.

    So, after spending hours on the internet looking up and experimenting to repair the salt lamp myself, I gave up and decided to buy a new salt rock lamp, so I choose one the coolest himalayan salt lamp, guess which one !

    Back to repairing a salt rock lamp now !

    Smaller cracks seemed easier to repair with the help of some salt powder, filling in the cracks and spraying water to fix it. But my salt lamp was in pieces. There’s no way that I could repair it and make it look flawless.

    IS THERE ACTUALLY A WAY TO WORK AROUND WITH BROKEN SALT LAMPS?

    Is there actually a way to work around with broken salt lamps?

    I was a little disheartened to throw my salt lamp away. But then I remembered something. While researching about the salt lamp before the purchase, I have read that the Himalayan salts are actually edible. That means I can add them to food, and they give a distinct and better flavor to the food than regular table salt. So, I thought why not give it a shot? I ground a few of the broken blocks of salt into a powder. And since it was a little coarse, I decided to season my salads with it, by mixing it up with little olive oil, instead of using it for cooking. I must say, that really gave my salad a peculiar taste, and it was great.

    Now I was left with some more salt, and I wondered what else I could do with the broken leftovers of this ingeniously fantastic salt lamp? A little more digging on the internet, I learned that they could be used both as a foot soak or a bath salt. I was pleased. I mean who wouldn’t want to relax their feet or have a calming bath with some amazing salts in it. So I did. I ground the salt block, coarser than before and added them to the water for about 20 minutes, and I had my very own foot spa day along with an unwinding bath at home.

    And oh, before I forget, there’s another use for the salt as well. It works wonders in relieving your neck pain and headaches. You might be thinking how? You can make a Himalayan Salt heating and cooling pouch all by yourself with these leftovers, and use it as a compress whenever you’re feeling a little pain. I would have done that as well, but sadly, I didn’t have much salt left. I might probably save it for some other time when my cousin decides to break my replacement lamp as well. Ha-ha!

    The Result?

    So there, people, from experiencing an accidental fall to ending up in my food and as a foot soak, this is what happened to me when my Himalayan salt lamp broke. All in all, it was a great adventure. Now, what are you thinking of doing with your broken lamp?

    You might have seen the term “RSVP” written on many invitations like a cocktail party, birthday party, wedding invitation, or other invitations for an event. Did you actually ever think what the term means? The term “RSVP” is actually an abbreviation of the French phrase “Répondez s'il vous plaît” meaning “Respond please” that has found its place in mainstream English.

    If this term is written on an invitation, it means the host asks the guests to inform if they are planning to attend the party or not. It followed in from the etiquette rules followed by most Western cultures to inform the host if you have received a written or formal invitation.

    This makes it easy for the host to know the head-count of the guests attending the planned party and order the number of plates or make other arrangements for the party. This term is often confused with “Regrets only” where you only need to respond if you are not attending.

    If only RSVP is mentioned, you should always respond to an invitation even if you are going to attend the party. Missing out on not responding to the host within the specified date creates troubles for the host in making the arrangements for the celebration.

    Any invitation to RSVP contains instructions on how to inform the host. A wedding invitation or any other formal invitations are enclosed with a response card which the guests can use to convey the message by simply mailing it back. With strict etiquette rules, you must write your reply to a written invitation.

    With informal invitations, you can either call or text the host on the phone number provided. Some informal invitations have the option to accept or decline through social media platforms.

    In this digital age, the use of electronic RSVP invitations has gained its popularity reducing the chances of any responses getting lost in the mail. They either come with email addresses where you can respond in writing or use links to any site usually social media where you can choose to accept or decline with the use of buttons.

    Some hosts send "Save the Date" cards before sending the RSVP invitations to make the guests aware of the place and date of the celebration. Usually, these are sent out when the location of the party is in a distant place to allow the guests make travel plans or the date of the event to be held quite a considerable time in future.

    RSVP, Regrets only

    With the term "Regrets only", you are supposed to inform the host only if you are unable to attend the party because the host expects you to be present. Make sure to respond to the host as instructed if you are not attending. If you intend to attend the party, it is better not to reply as it might create confusion. You can use other ways to show your enthusiasm to attend the party.

    If you are the host, don’t use “RSVP, Regrets only” invitations if you can’t get any refund for guests who have not turned up or if you need an exact headcount to make the party arrangements. Also, it is recommended not to use these invitations if you panic to know who is coming and end up calling or emailing all your guests.

    Most importantly, it is a simple courtesy to let the host know who was nice to invite you even if it is to say that you are not coming with regret.

    RSVP, Number of Guests

    Some invitations come with a mention of the people who can accompany you like couples are often referred to as "together," or at times they can be mentioned as "family" which also includes your children. There are also invitations where you can bring in guests along with you which will include a number written like "+1," and if there is no mention, the invitation is explicitly for you only.

    You can also write the number of guests accompanying you in the correct black space. The invitation usually has the details of the total number of guests who can accompany. Just check with the host if the total number of guests exceeds the limitation to see if any arrangements can be made to accommodate more guests. Or you may simply decline the invitation if you are unable to leave them behind.

    RSVP Timing

    Usually, invitation requesting an RSVP requires the guest to respond within a specified so that the host gets a proper head-count beforehand to make appropriate arrangements for the party. It's always better to let the host know as soon as possible without delay. This helps the host to make arrangements for guests of other invitees or can also invite others who were not on the initial list of invitees.

    If you are unsure whether you are going to attend the party or not, it's better to decline before the deadline. It is good to be honest about your situation and explain to the host with regret.

    Changing or Canceling RSVP

    Without a strong reason, you should not cancel an RSVP as the host had already planned and made arrangements based on your attendance. It creates a bad impression if you cancel an RSVP without a sound reason because it might lead to the host of not inviting you in any future events. Strong reasons to cancel an RSVP are death in the family, serious illness, or any other emergencies.

    If you have previously informed the host that you will not be able to make it to the party but later decided to attend, you can check with the host, but you need to understand that in some situations, the host might not be able to alter plans. Make sure to express your understanding in these situations.

    No Requested RSVP

    Sometimes an invitation does not mention RSVP which does not obligate you to respond. However, it is advisable to check with the host and inform whether you are coming or not, especially if you are bringing guests because it might happen that the host has forgotten to include the RSVP request.

    Importance of RSVP

    It is very important to RSVP because the host makes the decision based on your response. If you think that you don't want to disappoint the host by saying a no and don't RSVP, you are wrong because this creates more trouble for the host in making the arrangements. If you are unsure of the situation and don't RSVP within the specified date to commit, this also causes difficulty for the host. In these situations, let the host know about this if they can manage some arrangements which are uncertain.

    Final Words

    The author of etiquette books and American journalist, Judith Martin, who is better known as “Miss Manners” which is the pen name states that “RSVP” is a polite way of reminding people: You should reply whenever you receive an invitation. So, if you receive an invitation next time, just respond to your host promptly.

    Photo Courtesy of Hanan Paikin on Etsy

    If you need a specialized nailer that you can use around the house to work on cabinets, trims, and moldings, a brad nailer is an excellent product.

    We wanted to work on some DIY projects inside, which required detailed wood applications. With a brad nailer that fired brads efficiently, we were able to bind our wood trims correctly.

    It is mainly a smaller type of finish nailer, but unlike the bigger version, this one takes care of more minor work needs. If you use a big device to work on tiny parts or thin surfaces, there is a chance that you will crack it. 

    With a brad nailer, we felt completely safe while using it for our home projects. Read on to find out about the different purposes it is used for and the benefits it comes with.

    What Do You Use a Brad Nailer For?

    Gauge Finish Nailer man nailed slats custom house building contractor up a wall section for luxury custom house

    This device has a remarkable way of providing a strong bond between thin wooden trims without splitting or cracking them. It uses thin 18-gauge brads that measure 2 inches long or smaller. Since they are relatively tinier than most nails, they do not make a big hole. This prevents any unnecessary cracking of a thin surface.

    If you are looking for a product for home renovations, this is an excellent device to have in your toolbox. Why, you may ask? Because it makes very detailed trims on wooden surfaces of furniture, cabinets, and even smaller objects like photo frames.

    Also, it can be used for coves, baseball shoe remodeling, and railings. If you are into making home furniture, a top-notch brad nailer will provide the peace of mind you deserve!


    Safety

    A brad nailer is considered to be comparatively safer than finish nailers. This is because of the relatively tinier size of the nails. But again, these could cause injury if proper precautions are not taken. So, it is essential that you wear safety glasses to protect your eyes.

    Make sure there is no loose end of clothing hanging from your outfit. Also, use hearing protection in case you are working inside a closed space with a noisy device. Since the machine uses an air compressor, the sound level may go up. But again, it does not use up a lot of compressed air, and the noise can be controlled.

    Types of Brad Nails

    There are mainly two types of brad nailers, the 18-gauge and the 21-gauge one. The one which is most frequently used is the 18-gauge version. This one is fit for woodwork and will be a better choice to go for in case you need it to bind thin wood films.

    Going forward, since you will mostly choose an 18-gauge version for your household work, the next most crucial thing to know is the height of required fasteners. The average nail length that this model uses is between ⅝ inch to 2 inches long.

    Before you choose the nail size, remember that the length of these nails must be three times the width or thickness of a wooden block that you are nailing it with. If you are wondering why this is essential, the nails need to be long enough to pierce through the wood surface and then set inside another surface. Only then will it be able to perfectly attach both the planes.


    Electric Brad Nailer

    A brad nailer can be a superb gadget when you are looking to modify your interiors or work on a DIY project. It helps you go about your work smoothly and come up with brilliant designs.

    But if a pneumatic model is not what is desired as you do not want to link it to a compressor whenever you use it, we have a solution! The electric brad nailer is one of the best alternatives available today as it does not use an air compressor or hose to perform.

    Instead, it is available in corded and in cordless forms, which are operated with the help of cells. The only requirement is nail strips, and when you have a few, you can begin working and hammering in seconds. They are way easier to get started and work efficiently.

    These devices can fire 18-gauge brads with perfection. They operate simply with the electric motor loading an air compressor chamber. As the chamber releases air, the nails start firing. Here we should say that the pneumatic model is more powerful though the electric model can drive 2-inch long nails into a thin wooden trim with ease.

    The best part about this product is that since it is not connected to an air compressor, you can take it around easily. So, you can perform a wide range of tasks one after the other, beginning from installing trim on windows and doors to various furniture you have in the room.

    Carpenter brad using nail gun to moldings on doors, all power tools have on them shown illustrating safety concept

    Conclusion

    It is essential to distinguish between a brad nailer and a finish nailer because both are not the same. A finish nailer can crack or split a thin board if it is used on one while a brad nailer is suitable for thinner surfaces.

    One safety tip which we would like to give you here is to not try using a brad nailer too close to the end of the boards. This may result in splitting, so one should use this machine to attach the surfaces leaving a good margin near all the edges.

    Also, try making sure that there are no knots in the wooden piece as the nails can easily bend if they come upon a knot. This can lead to the chipping of a side of the wood. 

    Now that you know everything about a brad nailer, it is time to try using it for yourself. For any additional help, follow one of the numerous tutorial videos available. Let us know about your experience in the comments section below.

    Till next time!

    Related Article

    Freeman PFR2190 Framing Nailer Review + Buyer’s Guide

    13 Best Finish Nailers for Woodworking

    What Size Nails Do You Need for Framing?

    Pin Nailer vs. Brad Nailer 101 | Key Differences, Advantages & Disadvantages

    13 Best Roofing Nailers  

    What Size Finishing Nails For Baseboards?

    9 Best Framing Nailer

    If you have a car, you need fuel to run it.

    But you also need another important thing - a fuel to run the power steering system of the car. This is where the power steering fluid comes in. It is a hydraulic liquid, which allows for the easy transmission of power from the wheel to the steering mechanism of the car.

    Another key function of this fluid is to ensure and maintain the smooth working of the mechanism by protecting and lubricating all parts of the system. Long story short, this fluid moves your car.

    In its absence, not only does your car face serious operational problems, but the entire steering mechanism is also compromised.

    But what color is this fluid? And how do you recognize what it indicates?

    If you are left wondering, read on to learn all about the colors of power steering fluid and put your doubts to rest!

    What should the ideal color of a power steering fluid be?

    car interior. Modern car speedometer and illuminated dashboard. Luxurious car instrument cluster. Close up shot of car instrument panel

    As a defining characteristic, color plays a major role in understanding power steering fluids.

    They come in a variety of hues that differ greatly from model to model, or brand to brand. You may have a number of questions: is your steering fluid of the color it is supposed to be? Has it changed since the time you bought it?

    These are questions that befuddle the consumer while handling a new vehicle. A simplified answer would be: even though the color of the fluid varies from one manufacturer to the next, the most common ones are pink, red, or clear.

    However, an important point must be kept in mind in order to avoid problems in the functioning of your car. The color is prone to change, and this is the indication that you must pay attention to.

    A change of color from red, pink, or clear to black or brown is a surefire sign of contamination. It means that the fluid may have become dirty and unfit for use. This usually happens due to prolonged use, and it must be replaced immediately to mitigate the damage.

    What does a leaking power steering fluid look like?

    Leakage in the car is a serious matter and can leave you utterly frustrated and confused. How do you fix a problem if you can’t tell the source? The fluid could be anything: your auto-transmission fluid, or instead, your power steering fluid!

    Most manufactured options are dyed pink or red, so as to be distinguishable from other fluids in the vehicle. Others dye it clear, which usually turns yellow upon long-term use. And the former is likely to change into dark brown or black.

    So in case you see a yellow, reddish, pink, brown, or black-ish liquid flowing out, there is a high possibility that it is from the power steering system of your car.

    Different colors point to different conditions. Knowing the various indications of each color is a smart step towards identifying the underlying issue, and thus, fixing it.

    Let’s take a look at the shades.

    Light Brown to Black

    This particular shade does not mean trouble for your power steering system every time. Such liquids are found even elsewhere in your car. It may be motor oil, which is normally seen around the center of the car. It could also be lube oil if it’s light brown with a stench similar to that of a rotten egg. These leaks are again found in the center or the rear axle.

    Light Yellow to Dark Brown

    A yellowish fluid is likely to be the brake fluid more than anything else. So while a leaking yellow liquid means all is well with your steering system, you should probably take a good look at your brakes!

    However, brown can be super confusing as it could mean any one of the two: brake fluids or motor oil. The trick is to touch and feel the texture. If it’s slippery, it is the brake fluid; motor oil is much thicker.

    Whatever its source, a leak is a serious issue especially when it comes to brakes. Not a matter to be taken lightly, a leaking brake system can wreak havoc on your driving and must be addressed immediately.

    Red or Reddish

    A reddish shade is possibly the surest sign that your power steering fluid is leaking. They are dyed red or pink precisely to stand apart from the other fluids. But how can you be sure?

    To correctly identify the problem, first inspect the location of the leak. A leaking power steering fluid is usually to be found under the front portion of the car.

    Secondly, in case of leakage, the fluid may also be smeared across the power steering pump, or below the reservoir. If it feels runny and slippery to touch, you may definitively conclude that it is indeed the power steering liquid.

    Orange

    A leaking orange fluid could be the transmission fluid, one that is likely to be found around the center of your car. The color is between light orange and dark orange, and may also be reddish-brown.

    Sometimes, antifreeze leaks mixed with rust may produce a similar color leading to further confusion. However, that mixture is of a thin consistency and does not have a specific location of leakage.

    Yellow, Green, or Pink

    Bright colors like these are predominantly used in the water-cooling system. Pink can point to both, the power steering fluid as well as a coolant. You can use the location to guide you, as the latter is found around water-pump bearings and the pump gasket.

    Your car’s age is an important factor in deciding whether a coolant leak should be a concern or not. An old vehicle is prone to such leakages and it’s only normal. However, if your car is new and faces such problems, then it’s time to consult an expert.

    Clear

    A clear liquid could be either the power steering fluid or plain water. Excess condensation can lead your air conditioner to expel some amount of water. But this is not something to worry about.

    However, if it indeed is the power steering liquid, that could pose problems. To be sure, do the simplest test and touch it. If it does not feel like water but is slightly sticky, it’s a leakage of the power steering fluid.

    Top Three Power Steering Fluids

    With that, we have covered the essential information on the color of your power steering fluid. And also for your convenience, we have picked out the top three power steering fluids available in the market. Take a look!

    1. Honda 08206-9002PE Power Steering Fluid Pack of 3

    • For genuine OEM Honda parts
    • Available in 3 and 12 oz bottles
    1. Genuine Honda Fluid 08206-9002 Power Steering Fluid

    • Manufactured for Honda steering systems
    • Fits all Honda models
    • A PSF from a different manufacturer may damage Honda’s power steering systems
    1. Idemitsu PSF Universal Power Steering Fluid for Asian Vehicles

    • Unique friction-free technology for noise-free operation
    • Advanced formula for exceptional performance and protection in severe work conditions
    • Excellent low-temperature performance for protection against cavitation

    Frequently Asked Questions (FAQs)

    1. What color is the Honda Power Steering Fluid?

    Although most power steering fluids are dyed red, pink, or clear, the Honda Power Steering Fluid is of a bright golden hue.

    1. What color should a power steering fluid be?

    They vary in color, and have a wide variety of hues ranging from brown and red to pink and clear. Black and dark brown are usually indicators of contaminants.

    1. Are there other ways to detect if the fluid is still clean and safe for use?

    Apart from color, the smell is the best indicator. A burnt smell usually means there might be a problem with the fluid.

    1. What color is Maxlife Valvoline Power Steering Fluid?

    Most fluids from this brand are dyed an amber hue and are not suitable for Honda vehicles. However, they have a stop-leak feature that prevents leakage from the reservoir.

    1. What color is Dexron II Power Steering Fluid?

    Power steering fluids from Dexron also double up as auto transmission fluids and are red in color.

    Lastly 

    Like all the best things in life, a good power steering fluid requires maintenance and care on your part.

    To ensure that your car is up and running and that there are no squeaks that go unaccounted for, the power steering fluid must be checked and replaced regularly. Ideally, you should change it every four to five years. Another way would be to switch it up after having driven the car for 50,000 miles.

    If you notice a change in color, don’t let it fester. If the fluid turns dirty, brown or black, then it’s probably time to replace it. Keep in mind the brands you use; they make all the difference to efficiency. Reputed brands come with a feature to prevent leakages, thus providing greater safety for both you as well as your car.

    Related Articles

    10 Best Garage Floor Paint 

    7 Best Paint for Interior Garage Walls Right Now

    7 Best Garage Speakers

    23 FREE Detailed DIY Garage Plans With Instructions To Actually Build

    19 Garage Makeover Ideas To Transform Unused Spaces

    8 Best Blowers For Drying Cars This Year

    13 Brightest Light Bulbs For Garage  

    10 Best Hand Cleaners for Mechanics and Grease  

    5 Best Garage Door Seals

    Gray is one multifaceted color that is fun to work with. 

    However, we understand if you're finding it difficult to match colors for the first time. Matching colors to create a harmonious appearance may seem easy at first, but any interior designer can tell you there are several nuances to consider. 

    When colors don't make sense, the simplest thing to do is fall back on the neutrals. Neutrals do not disappoint, no matter where you place them, and gray is simply the most superior of them all. It's not just us; many experts agree that gray is one of the most versatile choices for creating a timeless, calming atmosphere in any space. 

    And while gray is just a mixture of black and white, there are tons of gray hues that need care when pairing with any color. A deeper look into the undertones is necessary to get the harmonious color combination you are looking for. Read till the end to find the best color goes with gray. 

    Colors That Go With Gray 

    1. Steel Gray With Brown And Yellow 

    A bedroom with gray, white, warm brown, and honey-yellow colors makes for a soothing combination. While the steel gray will have a hint of blue undertones, it somehow goes well with warmer shades of brown and yellow. 

    Steel Gray With Brown And Yellow 

    To get the best of this combination, you can use the gray for walls, curtains, carpets, and the head stead of the bed. Then add different gray shades but make sure they lean towards the warmer side of the palette for a gentle contrast. To jazz up further, include lines and texture in the bedding and carpets. 

     Gray With Brown And Yellow 


     Gray With Brown And Yellow 


    2. Charcoal Gray With Blush Pink 

    It's a tried and tested combination- gray and pink are superb companions if you select the correct shade. We think that adding charcoal gray to pastel pink creates a cohesive look because it allows the lighter color to pop. The dark and dramatic gray adds cool tones that create a striking contrast with pale pink. 

    2. Charcoal Gray With Blush Pink 

    A clever way to improve the warmth in such a room is by adding brass pieces to the decoration. The color schemes might seem unusual at first but surprisingly work well if you put them together. 

     Charcoal Gray With Blush Pink 

     Charcoal Gray With Blush Pink 

     Charcoal Gray With Blush Pink 

    3. Pale Gray With Classic Crisp White 

    You can't go wrong with the classic combination of pale gray with bright white. Whether it's the living room, lounge, or bedroom, this combination can easily adapt to any style you select. When it comes to darker grays, proportion, and tone can change the effect entirely. 

    So, if you are going for a breezy, dreamy look, use clean white furniture, adding a few gray pillows to the mix. If the end result is too simplistic for you, using textures like weaves, marble, wood, and even rugs in fluffy whites will add interest. 

    Pale Gray With Classic Crisp White 

    Pale Gray With Classic Crisp White 

    4. Neutral Gray With Sage Green 

    Hues of green are good with gray, but sage green provides by far the most superior gray-green combo that we know of. This collaboration will remind you of earthy features and natural elements and show up as a clean and calming combination. 

    Neutral Gray With Sage Green

    If you want to maintain a mostly gray room but introduce a secondary accent color, light green will be the ideal choice. Pale gray and light green will blend in together to create a harmonious mix of neutral colors. But if this happens to look too light overall, you can add depth and color by introducing dark brown and wooden textures. 

    Neutral Gray With Sage Green

    Neutral Gray With Sage Green

    Neutral Gray With Sage Green

    5. Gray With Beige, Red, And Orange 

    Natural gray and beige is a cozy and subtle pairings that can lighten the mood of any room. But if you want to add a hint of drama or a pop of color, orange and red go surprisingly well with this combo. The intensity of red and orange is up to you. 

    A subtle addition would look like a few pillows or curtains in warm orange with a background of gray and beige carpets. But if you want to create a statement section, adding red or orange chairs with light shades of gray and beige should do the trick. Navy blue and cobalt blue will also have the same eye-catching effect but will add a cooler tone to the space. 

    Living room with yellow armchair on empty dark blue wall background,3D rendering

    1. Gray Adds Elegance To Any Interior Style 

    Gray is the perfect color to add a modern yet classic appeal to interiors. Lighter shades on the walls are used to create a spacious and airy atmosphere. But adding darker gray and its various shades creates a cozier vibe, especially during winter. 

    The good thing about using gray for interiors is that it allows other elements to shine. Natural wood, velvet, or even leather look great in varying shades of gray. And if you are worried about the room looking dull after selecting gray as the primary color, do not worry. 

    The final result does not have to be a monochromatic look. Instead, you can add plenty of bold color choices for contrast. Predominantly wooden furniture with gray walls gives a contemporary feel to any kitchen or dining room

    2. Gray Is The Most Versatile Color 

    When you think of neutrals, gray might be one of the first colors that pop up in your mind. Needless to say, this color is a perfect match for any other neutral color, too. You don't see this kind of flexibility with any other neutral shade. 

    Since it is neither black nor white, not too dark and not too light, there are endless ways in which you can use gray shades. Combining light gray with beige, cream, or taupe creates a soft palette for the bedroom, giving it an unsurpassed cozy feeling. 

    3. Gray Is Understated And Minimalist 

    You could reduce unwanted clutter from your interiors and bring quality pieces for a relaxed, minimalist room. Instead of decorating each aspect with various colors, select one or two and combine them with gray for a Scandinavian-inspired interior. Beige, pink, navy blue, and even orange are great for adding personality and oomph to a clean gray and white room

    4. Gray Allows Natural Elements To Take Center Stage 

    If you select the correct shade, a gray room can be the most soothing and relaxing corner of your house. And it also pairs beautifully with natural elements so that you can add plenty of natural woods, furniture, and plants with the cool-toned gray background. 

    Since gray is a neutral color, it complements the rustic elements in the room and helps them appear warmer. If you are looking for a stark contrast, use the same natural elements with a backdrop of coal gray and see the splendid effect. 

    For example, you could use gray tones on the walls, countertops, and chairs with a lighter wooden dining table. Simply adding plenty of natural light to the mix will create a charming farmhouse look. 

    5. Gray Combines Perfectly With Bold And Pastels Alike 

    The gray color palette does not distract from other elements and colors added to the room. This is why it is the perfect background color for bright and muted colors alike. Nowadays, pops of a vibrant color like bright red are popular for living rooms and lounges. We will also discuss how to make a statement with bright colors with tones of gray in this article. 

    But if pastel colors are your calling, there is no need to change the gray background. Light blue, pink, and green go with gray exceptionally well. Adding accent pillows is a smart way to add texture to gray couches and carpets. 

    Final Words 

    In conclusion, we would like to say that gray can be your go-to option for interiors because it goes well with almost any color you can think of. You can create the best possible combination by playing with tones and adding colorful or white shades to gray. 

    And, if you adore monochromatic looks, don't be afraid to pair gray with gray. We'll admit it's a risky move because the room can easily become dull with an overdose of gray. However, the challenge is to discover contrasts and differences in tones to create harmony within the gray color scheme. 

    Have fun decorating the space with contrasting and neutral tones to complete the look. 

    Related Articles

    Colors That Go With Orange-Orange Color Combinations

    8 Best Basement Cement Floor Paints

    An angle grinder is a handheld power tool that can be used to perform a series of mechanical tasks like cutting, grinding, and polishing. When equipped with a grinding or diamond blade, the tool cuts concrete efficiently. 

    Do you think that working with concrete is a messy business? If you aren’t very experienced in DIY projects but would like to learn a thing or two about angle grinders, then this guide is for you. 

    Angle grinders are versatile tools that can be used to do an array of mechanical tasks. Whether you want to cut a concrete block or polish a tile, an angle grinder can do the job perfectly. 

    Different Attachments For An Angle Grinder

    Cutting disc for Angle grinder. Different Attachments For An Angle Grinder.

    Angle grinders are highly versatile and can be equipped with a variety of discs to suit the task at hand. From grinding to cutting and from sanding to polishing, an angle grinder can be used to do any job. 

    1. Angle Grinder Discs

    Grinding discs are the most common ones and come in different sizes and types. Just like sandpaper, their hardness is measured in terms of grit. A higher grit number indicates less coarse texture, while a disc of a lower grit level is more coarse. 

    The latter can grind faster, but it produces more sparks while working and gives a rough look to the final product. When our team compared both the types, we noticed that angle grinder cut concrete more efficiently when it was equipped with higher grit disc.

    Moving on to its usage, grinding blades can be used to remove excess material from a surface, prep up metal before welding, and clean up cuts. You can use them to sharpen your gardening tools or grind metals before welding. 

    2. Cut-Off Wheels

    As the name suggests, cut-off wheels are used for slicing metal. They are the most dangerous type of angle grinder blades due to their thin build for delivering accurate cuts. They are the best for doing detailed work, but we suggest being extra careful while working with them. In case you abruptly change the position of the grinder, a cutting blade can easily shatter, and the small flying parts can cause serious injuries.

    Moreover, you can use cut-off discs for cutting metal tubes, bars, and sheets. They are also good for altering the length of bolts and cutting welds. Just ensure that you are properly geared up while using them. 

    3. Flap Blades

    Moving on, a flap disc is quite similar to a grinding wheel but is primarily used for finishing. It has a smooth texture and can be used to polish ceramic tile, metal, concrete materials, and several other solid materials. Just like grinding blades, flap discs also come in different grit levels. The higher the grit, the smoother the blade will be.

    If you are looking for an angle grinder attachment to remove scratches and burrs from your project, then a flap disc is a competent choice. It can also be used to smoothen the edges and polish gouged-up metal. 

    4. Wire Discs

    Wire discs are brush instruments made with wire bristles typically used for cleaning paint and rust. Depending on their texture, wire discs are of two types - crimped and knotted. The former has wavy or twisted filaments and is used for light polishing, while the latter, with metal wire loops, is better suited for heavy brushing. 

    These attachments are ideal for scraping rust and corrosion, removing waste from metal and concrete surfaces, washing, surface painting, mixing welds, polishing, and deburring. Furthermore, if you want to remove resin from a concrete block, then this one is your best bet.

    5. Segmented Rim Diamond Blades

    Diamond blades are hands down the sharpest angle grinder attachments. They are called so because the wheels have segmented rims and synthetic diamonds at the edge. The sharpness and durability of the blade increase with its number of segments. 

    Owing to their diamond rims, the blades can be used to cut hard-to-penetrate and tough materials like granite, porcelain tile, concrete pavers, etc. It is used for dry and wet blade operations alike and is efficient for both types of cutting. 

    6. Polishing Pads

    Lastly, polishing pads are made of smooth material and are used for gently polishing a surface. You can find a lot of options on the market and choose one based on the desired smoothness level. For instance, if you want to polish a dent in your car, then a buffing wheel made of wool is the perfect option, as you don’t want to scratch it. 

    However, if you want to polish concrete blocks, then you can choose a more coarse polishing pad. Another thing worth noting while using these attachments is the speed. As a rule of thumb, maintain an optimum speed while using polishing pads, as going faster can damage the surface while going slower won’t make much of a difference to the finished product. 

    Are Angle Grinder Blades Universal?

    Angle grinder blades are generally universal and can be used with any model. However, some grinders might come with unique orientations and connecting ports, so it is best to check your exact model before buying a blade. 

    What Angle Grinder Blade Cuts Metal?

    Metal is a tough material, and it takes enormous strength for tools to cut through it. Therefore, it is essential to select the right angle grinder blade for cutting metal. If you pick the wrong one, the blade can shatter during the process and injure you. While a sharp and thin blade is more prone to slipping, a blunt one can leave the job unfinished. 

    To strike the right balance, we suggest working with cut-off or diamond blades. Both these attachments are sharp, cut deeper, and make clean cuts. This eliminates scratches and burrs, giving a smooth and finished edge to the metal pieces. 

    How To Use Angle Grinder Blade To Cut Concrete?

    We told you how to equip your angle grinder according to the task, be it cutting metal or concrete. Now let’s discuss how to use your handy tool to perform that task, as in, how to cut concrete. Concrete cutting process can be daunting, but here are a few simple steps you can try: 

    1. Put On Safety Gear

    Handling an angle grinder blade is no easy task, and even some experienced DIYers are prone to hurting themselves while using it. So, as a rule of thumb, wear proper personal protective equipment to keep yourself safe from accidents and injuries. A complete protective kit for cutting concrete comprises the following gear:
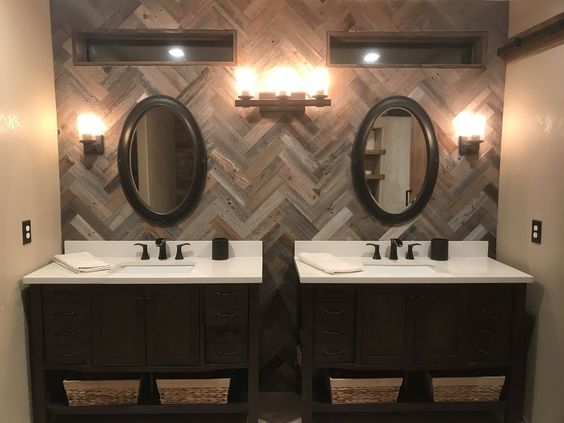
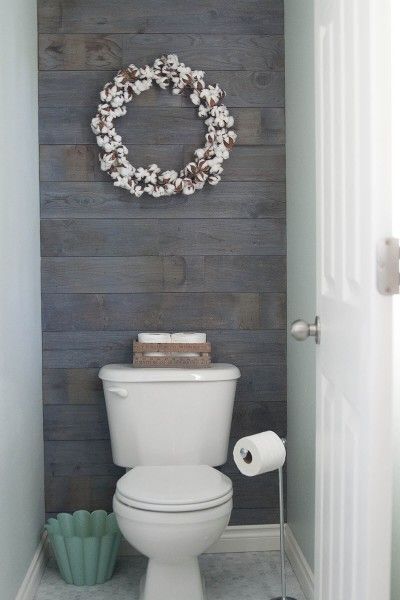
    • Safety glasses to keep your eyes safe from debris and sparks 
    • Earmuffs to stay clear of the noise
    • A dust shield or face mask so that you don’t inhale any powdered concrete dust or silica
    • Gloves for holding the handle better and preventing slips and accidental cuts
    • Boots to stay safe from debris
    • Tightly-fitted clothes so that fabric doesn’t get caught by the angle grinder disc

    2. Prep Up Your Workspace

    Once you have put on the safety gear, you need to prepare your workspace. We suggest using the angle grinder in an open and clear area where there are not many people, especially kids. Try and avoid using it in your garage because it is usually cramped up with discarded stuff. Declutter your workspace, taking special care that the floor isn’t littered so that you don’t trip and fall. 

    Equip your angle grinder beforehand and set its disc by opening the spindle and inserting the preferred diamond blade. After equipping the blade, move on to the concrete slab you will be cutting. 

    Make markings using chalk and ruler to ensure perfect cuts. If the block you want to cut is small, then we emphasize clamping it down to your workstation. That’s because you will be more prone to slips due to the smaller working surface, not to forget that tiny pieces fly more easily while cutting.

    3. Fire Up The Angle Grinder

    When everything is ready, plug in your angle grinder to a power source and adjust the blade guard such that it is positioned between the tool and your body. Now turn it on, and once the disc reaches its maximum speed, let it run for at least half a minute. 

    4. Cut The Concrete Slab

    Move the grinder toward a concrete slab at an angle of 90° and make a cut of nearly half the depth of the slab. After making the initial divot, keep cutting until you reach your desired depth by moving the grinder to and fro. 

    Start carefully with a light hand, cut slower, and eventually work your way through the concrete. You can apply more pressure as the cut gets deeper. Just make sure that you don’t force the blade into the slab. After a minute or so, you will gain momentum and will be able to cut the slab effortlessly. 

    Worker is using angle grinder for cutting cement block, hand tool, focus at blade and isolated over white. Angle Grinder Blade For Concrete Conclusion.

    Angle Grinder Blade For Concrete Conclusion

    An angle grinder is the only tool that can be used for a plethora of tasks, such as grinding, polishing, cutting, deburring, etc. It is a handy device that comes with different types of attachments and handle accessories to be better suited for carrying out different projects.

    However, if you are looking for an attachment that is the best for cutting concrete, then we recommend using diamond blades. That’s because these are the sharpest and cut the concrete’s surface efficiently. 

    That said, we have reached the end of this informative guide. Thanks for reading, and do try using an angle grinder for cutting concrete. We’ll see you next time!

    Different angle grinder discs such as grinding wheels, cut-off wheels, flat discs, and others can be used for carving, shaping, and cutting wood. However, the power tool should be used carefully with the right technique, or else it can cause a potential hazard. 

    If you have delved into woodworking in the past, then you will know that it is a fairly complex task. Thankfully, with the help of tools, such as an angle grinder, the process can be made a little easier. 

    But if you haven’t used an angle grinder a lot before, you may not know what grinding disc to use for cutting wood. And without the right disc, you may end up complicating the task even further. 

    That’s why we have prepared this guide to give you an idea about what angle grinding disc to use for woodworking. Let’s dive in! 

    What Is An Angle Grinder Disc?

    Grinding discs for angle grinders, macro photography of a grinding disc. What Is An Angle Grinder Disc.

    An angle grinder is a handheld power tool that can be used for a wide range of tasks, such as polishing, cutting, grinding, and so on.

    The tool uses a disc rotating at high speeds to accomplish these tasks. Because of this reason, it is also known as a disc grinder. This disc is strong enough to cut through wood and other rigid materials, such as rocks and metals. 

    Needless to say, it plays a crucial role in the effectiveness of angle grinders. But it is important to note that the disc is not universal by design and cannot be used on all types of surfaces. Different discs exist today, with each being suited for a particular kind of task. We have discussed them later on in this guide, so we suggest that you read on.

    Can You Use An Angle Grinder For Woodworking?

    As you can guess by now, the answer to this question is yes but it does pose certain safety risks. That’s why it’s crucial that you use the correct disc in the angle grinder to carve and cut wood. 

    For instance, if you have a wood carving disc attached to the machine, then make sure to use it only for carving wood. If you use it for any other task, you run the risk of damaging the machine, not to mention messing up the wooden materials.

    Similarly, the technique you are using should be considered too. After all, this is a powerful tool that uses sharp high-speed blades to get the work done. So, if you use the incorrect technique, then the chances of making mistakes increases. And even the slightest mistake while operating the angle grinder can lead to serious injuries.

    What Types Of Angle Grinder Discs Are There?

    Broadly speaking, there are several types of angle grinder discs in existence, with each having a specific use case. In this regard, the ones which are commonly used in woodworking have been discussed below.

    1. Grinding Wheel

    The grinding wheel is the most basic disc used in an angle grinder. These wheels are available in different diameters and feature a ribbed grinding edge that helps to cut through wood or any other material.

    A grinding wheel is suitable for use in most wood fabrication tasks, which provides a decent degree of versatility. However, they cannot be used for high-precision wood carving and cutting. Also, these wheels have a tendency to heat up quickly during usage, which means you need to be careful while using them.

    2. Flap Disc

    If you want to polish the wood surface, then this is the disc that you need to use. Flap discs have an abrasive surface, which essentially makes them the angle grinder equivalent of sandpaper.

    As such, these discs can be used to chamfer edges, smoothen sharp corners and remove irregularities from the wood surface with high degrees of precision.

    3. Ceramic Sanding Disc

    The ceramic sanding disc is an alternative to the flap disc, typically used for sanding wood. It comes with an even more abrasive surface, which makes it a perfect pick for precision wood carving. Besides, the blade is made from ceramic materials instead of metal, which reduces its tendency to heat up during usage.

    However, these discs are comparatively more expensive than normal flap discs, which is why they are not as commonly used by woodworkers.

    4. Cut-Off Wheel

    The cut-off wheel features a thin profile, complete with a sharp edge and tapered design, which makes it a great choice for cutting wood. Usually, these discs do not possess any sharp teeth at the edges, which facilitates a smoother cutting process.

    In some cases, the disc surface may be rough, which allows for the abrasive cutting of wood. It smoothens the surfaces of the wood, ensuring that the cut edges do not have any imperfections.

    5. Diamond Disc

    Also known as a diamond saw blade, this disc is embedded with abrasive diamond shards at the edges. As such, it is even more effective in cutting wood than regular metal cutting blades. In fact, if you were wondering what angle grinder blade cuts metal, concrete, and tiles in addition to wood, then this is the answer to it. 

    However, its diamond-embedded design makes it a fairly expensive option compared to a regular metal-cutting disc. That’s why it’s only used by woodworkers as the last resort to cut through tough lumber. 

    How Do You Use An Angle Grinder To Cut Wood?

    How Do You Use An Angle Grinder To Cut Wood

    Provided you use the right disc and observe all the necessary safety measures, using angle grinders on wood is pretty straightforward. 

    All you need to do is turn on the power and hold the angle grinder with a steady hand at the correct angle and orientation. You also need to apply the right amount of pressure to get the job done quickly. But make sure not to rush it, as that can lead to accidents.

    That said, you do need to keep some factors in mind to make the most of your angle grinder. These have been mentioned below.

    A. Disc Diameter

    The first thing that you need to consider when using an angle grinder to cut wood is the diameter of the wheel. You cannot use a large wheel since it will be more difficult to control. Besides, it might not fit the head of the grinder properly.

    However, the diameter shouldn’t be very small either, as it will reduce the overall effectiveness of the tool.

    B. Spinning Speed

    When it comes to woodworking, you will find out that a single speed cannot be used for all types of tasks. The spinning speed necessary for cutting through wooden materials is considerably different from the spinning speed that is used for carving and shaping wood. 

    That is why most angle grinders come with a variable speed setting, which allows you to change the rotation speed accordingly. If you use the proper speed setting, then you can complete the task with higher precision and without any trouble.

    In this section, we have mentioned some of the best angle grinder discs you can use to cut wood. These discs are decently priced and will be efficient for most large and small jobs.

    1. Arbortech TurboPlane

    This blade is a great option for carving and shaping wood. It comes with carbide cutters embedded in sturdy steel frames for durability. What’s more, the blade design helps apply a strong shearing force on the wood, which produces uniform cuts.

    2. King Arthur Lancelot

    The King Arthur Lancelot comes with a chainsaw-like design, which makes it a great choice for aggressively carving through tough wood. However, it is a bit difficult to control due to its design, so you need to be careful while using it.

    3. Graff Speed Cutter

    If you want to cut through wood, then you will find the 3-toothed design of this cutting blade quite useful. The teeth geometry allows this wheel to shear through wood with very little effort. You can use the disc for occasional carving tasks too, which is a bonus.

    4. Kutzall Extreme Shaping Disc

    This is a highly abrasive blade that comes with numerous tungsten carbide teeth, specifically designed for sanding wood. The teeth extend all the way to the edges, which allows you to sand a large area at once. However, it generates a lot of dust, so make sure you use the proper protective gear.

    Angle Grinder Safety

    Safety is of the utmost importance when using an angle grinder for woodworking. Keeping that in mind, here are some useful safety tips that you should follow.

    1. Wear Adequate Protective gear

    It goes without saying that you need to keep yourself protected when using angle grinders. Using an angle grinder on wood generates a lot of dust that can get in your eyes, nose, or mouth. Not only that, but the grinding process can also be quite noisy up close. And of course, there are the usual operating risks for handling this tool. 

    So, make sure to wear safety goggles and masks to prevent breathing in the dust and debris. You should also wear suitable ear protection in the form of earmuffs so that the angle grinder noise does not bother you. Likewise, be sure to wear cut-resistant gloves and any other equipment that can protect you from physical injuries.

    2. Declutter Your Workspace

    Make sure that there are no unnecessary materials in the workplace, as they can interfere with the work and increase the likelihood of errors. Keep all of your tools, toolboxes, wires, and accessories away from the site but in an easily accessible location. 

    3. Have A Fire Extinguisher At Hand

    It is always a good idea to keep a fire extinguisher handy when using an angle grinder for woodworking. That way, you can avoid major accidents if things go sideways for some reason.

    On that note, we would suggest that you keep any flammable items away from the angle grinder as well.

    4. Avoid Working In A Wet Area

    If you intend to use an angle grinder for woodworking, then make sure that the workplace is clean and dry. Working in a wet environment can cause slipping accidents, which can be deadly with a powerful tool such as this. 

    Besides, the water on wet surfaces may cause short circuits and electrical hazards, both of which are equally dangerous.

    What Other Power Tools Can You Use For Wood?

    As we have mentioned before, an angle grinder is a great tool for woodworking. But considering all the safety precautions that you need to take, it cannot be considered the safest.

    With that in mind, you can use circular saws as a safer alternative to an angle grinder. The circular saw blades are designed specifically for cutting and shearing wooden materials. For carving purposes, you can use miter saws, which have blades that can carve wood surfaces and smoothen edges with extreme precision. 

    Cutting discs for angle grinder isolated on white background. Angle Grinder Disc For Wood Final Words.

    Angle Grinder Disc For Wood Final Words

    An angle grinder is, without a doubt, one of the most versatile power tools. Apart from woodworking, you can use an angle grinder disc for tiles, cutting concrete, plastic, and metal.

    With the correct blades, you can drastically cut down on the time and effort required for such activities. Of course, you do need to use it carefully, or else you run the risk of getting badly injured. So, make sure to follow all the safety tips which have been highlighted in this guide.

    An abrasive type 1 or type 27 angle grinder blade can effectively cut through metal of any density. With appropriate cutting techniques and safety protocols, the abrasive blade makes the cutting process extremely safe and efficient. 

    When tackling woodworking projects, you will inevitably face the conundrum of having to cut through metal. Using a hacksaw for the task can be taxing and time-consuming, and that’s where an angle grinder shows its versatility. 

    But before you grab your trusty grinder and start working, you should consider a few things about both the power tool and the blade. Let’s explore how you can maximize your efficiency by using the right metal cutting discs and the right techniques. 

    Cutting Sheet Metal With Angle Grinders

    Cutting Sheet Metal With Angle Grinders

    Angle grinders are capable of cutting through even the densest of metals, provided they are fitted with the right disc. And while grinders are usually used for refurbishing and polishing metal materials, you needn’t limit its use to that. 

    You can use your angle grinder for a variety of metalworking purposes, ranging from making knives to automobile body parts. Each application of this hand-held power tool can be performed with a metal disc that suits the job well. 

    A good angle grinder and blade combination will leave no room for complaints once you’ve finished with cutting dense steel and even sheet metal. And so, the role of a blade in metalwork cannot be understated. The right kind of disc will make cutting metal or polishing hard edges significantly easier. 

    The Right Cutting Blade For Metal

    The right cutting blade for metalwork is an abrasive cut off disc, also known as a cutoff wheel. These discs have abrasives embedded in the grinding wheel suited for specific metals, such as aluminum cutting discs using aluminum oxide and silicon carbide abrasives. You have the option of using a one-blade-cuts-all disc, but they may turn out to be less effective than metal-specific abrasive discs.

    Here is what you should consider when picking the right kind of metal cutting disc for your angle grinder.

    1. The Make

    Cutting discs best suited for metals are made with resinoid-bonded abrasives, which results in the abrasive materials being fused into the wheel. In short, the abrasives don’t wear off easily as the disc continues to age, enabling you to cut metals with it for longer. 

    2. The Durability

    A cutting disc that breaks midway through a job is less than ideal, which is why the disc should be able to withstand prolonged pressure. To this end, most cutting wheels utilize fiberglass to strengthen them and resist damage when they are used.

    3. The Thickness

    Thinner discs cut metal faster and produce much less waste. These range from 0.04 to 0.045 inches in thickness and their point-of-contact with the cutting surface is minimal.

    On the other hand, thicker discs cut slowly, produce more heat and can lead to the potential discoloration of the metal they cut. Thicker discs are also more durable, so if you’re willing to accept the trade-off, you may be able to work with them. Their thicknesses range from 0.06 to 0.09 inches.

    4. The Cutting Depth

    You can only fit a disc that can cut no deeper than 2.75 inches in a standard angle grinder. It would be wise to keep that in mind while looking into getting the correct cutting disc. 

    5. The Blade Type

    There are several types of cutting discs designed to cut metal, but the ones best suited for the job are type 1 and type 27. These discs cater to different cutting needs, surfaces, and environments, giving you options when choosing one for your specific task.

    Type 1 cutting discs are completely flat and are used to cut metal of all types, including mild steel. The downsides to using these is that they may make it difficult to make a flush cut and may break when used too much.

    In contrast, the type 27 discs feature a depressed center that allows your cutting wheel to get closer to the metal. The trade-off with type 27 discs is the high cost and a narrower range of applications.

    How To Use An Angle Grinder To Cut Metal

    1. Using The Right Tools

    Depending on the kind of metal you’re about to work on with an angle grinder, you’ll need an abrasive disc suited for the job. Hobbyists can get away with using an all-purpose disc for the job instead, as it’s more readily available.

    You can also use a C-clamp to keep the metal in place before you begin cutting. The less your metal moves as you cut, the better and safer it will be.

    Lastly, you can gather protective equipment such as safety goggles and earmuffs before you begin working. Sparks and stray pieces of metal may fly everywhere, and preventing any unfortunate injury as you work is paramount.

    2. Check Machine And Cutting Wheel Condition

    If you’ve been using the angle grinder habitually, you should check the machine before and after you use it. Over time, the handheld power tool can show wear and tear, and any chances of parts breaking and flying off should be reduced to the best of your abilities.

    The same goes for the cutting wheel, and you should ensure twice over that it shows no signs of corrosion. If you see any, address the issue at once, or else you may see shattered chunks of the cutting wheel breaking apart and damaging your project. Worse still, it can lead to serious injury if you don’t don the appropriate safety gear.

    3. Affix The Cutting disc

    Next, secure the cutting disc properly to the angle grinder and ensure that the disc fits snugly. Type 1 discs need to have the flat side of the nut facing downward against the grinder, while type 27 discs need the protruding part of the nut facing down.

    4. Final Checks

    You can perform a few final checks before you begin slicing and shaping your metal. These tests ensure that the cutting process remains as safe as possible while giving you the best results.

    See if:

    • The angle grinder turns on and functions properly
    • The metal is secured correctly with the C-clamp
    • Your protective gear (safety glasses and face shields) is in pristine condition
    • The cutting disc isn’t warped and doesn’t move abnormally
    • There are any hazardous objects in your vicinity

    Once you’ve marked all these safety points off the checklist, you can move on to the next step of the process.

    5. Turn The Grinder On

    When you turn the angle grinder on, you should have the guard face your body. The guard will protect your fingers from getting caught in the cutting blade as you work, but remember to be careful!
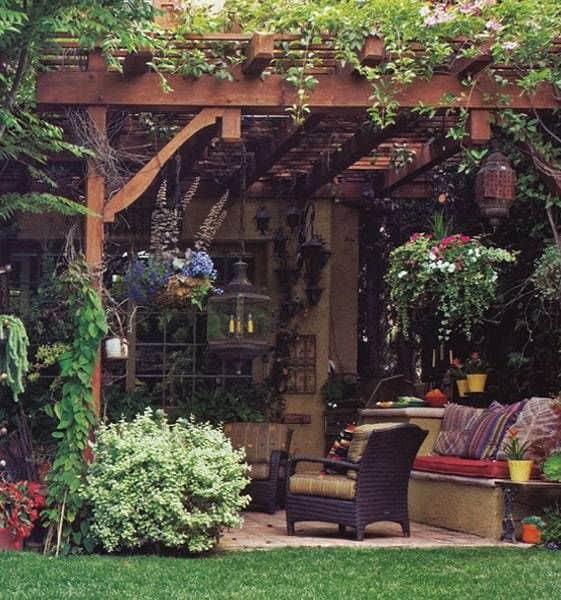
    You may position the machine in a manner that doesn’t require you to cross your arms while you cut. The last thing you’ll want happening while cutting is the grinder slipping from your hands, after all.

    6. Cutting The Metal Right

    Use the following checklist to ensure that you cut the surface well and prevent the cutting wheel from snapping:

    • Keep the cutting edge at a 90-degree angle with the metal
    • Be patient and take your time cutting the metal
    • Apply no more than moderate pressure on the wheel
    • Keep your eyes on the cutting surface
    • Don’t leave a cut unfinished, as it can lead to jagged metal edges

    Angle Grinder Safety Tips

    1. Workplace Safety

    As you cut through metal, sparks will fly in all directions and may end up igniting flammables in your vicinity. These sparks can reach up to 1,800 F, which is why you should clear your workplace of anything that can easily catch fire.

    These flammables include:

    • Wood and sawdust
    • Cardboard
    • Paper
    • Oils and fuel
    • Anything that uses aerosol
    • Power cables

    2. Proper ventilation

    Sparks may accompany fumes as well since metal discs can produce a lot of heat as they slice through metal. Keep your doors and windows open and if there’s a strong breeze coming in, position yourself in a way that directs the sparks away from your person.

    3. Protective Gear Checklist

    You should wear personal protective equipment while working with metal, such as:

    • Safety goggles for eye protection
    • Earmuffs
    • Face shield
    • Sturdy gloves

    In addition to these, ensure that you don’t wear excessively loose clothing to reduce the risk of it getting caught in the machine. Clothing made of synthetic fibers is a no-go, as it can catch fire much more quickly than any organic piece of clothing. Lastly, wearing a long sleeve shirt to cover exposed skin on your arms is also a good idea to protect you from minor burns.

    4. Fire Extinguisher

    It’s a no-brainer to have a fire extinguisher within reach and ready to be used in a workshop. Ensure that the extinguisher works properly by testing its functionality regularly and refilling in case it is depleted in a previous use.

    Angle Grinder Blade Cuts Metal Conclusion

    Angle Grinder Blade Cuts Metal Conclusion

    Thus concludes our guide on angle grinder blades and how they can be used to cut metal. Metal can be quite difficult to slice through, but an abrasive metal cutting disc can effectively do the job. 

    If you’ve used angle grinders before, you may have noticed that the blade types used for metal are different from the angle grinder blade for concrete. The process for cutting metal requires extra safety precautions with the additional safety hazards that it poses, especially when compared to the process followed with angle grinder discs for wood

    As long as you have the right power tools and safety gear with you, the process is safe and highly efficient. All things considered, you can pick out the right cutting disc for the material of your choice and get to finishing that DIY project of yours! 

    Unfortunately, this product is discontinued on most e-commerce websites. Try this newer model WEN 34034 6-Amp Wood Lathe

    The WEN 3420 Lathe is one of the most affordable options out there, but is it the right choice for you?

    Well, we hope that you get the answer to your question after going through our comprehensive review. The unit is equipped with some great features for its price, making it a viable investment option for sure.

    Having said that, it is also essential to consider its flaws in order to get a balanced idea. Yes, we wouldn’t say that this lathe from WEN is perfect. To be honest, no product is. But that doesn’t mean it shouldn’t be considered. So, through our guide, we bring you an unbiased review of the WEN 3420.

    We decided to test out the unit for you, so we are quite positive about our findings. But the ultimate decision is in your hands.

    So, without wasting any more time, let’s dive in. 

    WEN 3420 Lathe Review

    Industry lathe machine work. WEN 3420 Lathe Review

    For those who don’t know, WEN is a leading brand that deals with the manufacture of top-grade and affordable power tools. And the WEN 3420 Lathe is one of the many exceptional innovations from the brand. So, how about we discuss some of its incredible features?

    1. Variable Speed Control

    You will be pleased to know that the WEN 3420 Lathe features a speed control knob and a 2 amp slow start motor. In other words, it provides its users with complete control while working on various woodworking projects.

    We were able to adjust its speed from 750 to 3200 rotations per minute by simply turning the knob in the right direction. You can increase the speed by turning it clockwise, and decrease it by turning it anticlockwise. Yes, it’s that simple! However, make sure to keep the pace at the lowest setting when you start the motor.

    1. Capacity and Size

    We loved the compact design of this lathe which comes with a surface area of 8 inches by 12 inches. This makes it ideal for most benchtops with a lack of sufficient space. Not only this but it can also be moved from one workstation to another.

    It is always recommended to choose a lathe based on your workspace. That being said, we found the capacity and size of the WEN 3420 suitable for most workpieces. Furthermore, it includes a 5-inch faceplate, making it the best option for cups, turning bowls, and other non-spindle workpieces.

    1. Easy Operation

    As mentioned earlier, the unit comes with a variable speed control knob that allows you to adjust its speed settings easily. But that’s not all! Now, if you are a beginner, you might not know that a lathe requires a tool rest for flexibility and ease of movement. And this particular model comes with tool rests in two different sizes.

    Having said that, we were amazed at the level of comfort the tool rest of this lathe offered. It enabled us to move it left to right and back to front with ease. In fact, you will also find a lock lever near the tool rest. This will aid you to keep it securely in the right position.

    Furthermore, it comes with an on/off switch that makes it convenient to start or stop the motor as and when required. WEN has simplified the operation system of this unit so that every beginner can find it easy to use. And this is why it is a preferred choice for most first-timers.

    1. Safety

    When it comes to power tools and electrical appliances, safety should be your utmost priority. This is why it was essential for us to check out the safety features of the WEN 3420, and to be honest, we were quite impressed with our findings.

    Now, you already know that the unit comes with an on/off switch for its easy operation. But that’s not all! It features a safety switch lock, which prevents the motor from accidentally restarting. You can start it once the key is put back in place.

    The circuit breaker button is another exceptional safety feature of this lathe. It automatically switches off the unit in case of voltage fluctuations and overload. This, in turn, minimizes the cause of damage, keeping it safe and secure.

    In such situations, allow the lathe to cool down for a while. You can then press the circuit reset button, and switch the motor on again. But remember to keep the speed low at the beginning to ensure safety. That being said, you don’t have to worry much since it comes with a slow-start motor, which starts gradually in order to maximize safety and minimize damage.

    Apart from this, it is critical to follow the safety rules while using WEN 3420. For this reason, we would suggest you go through the instruction manual and thoroughly follow the safety guidelines. After all, safety depends on precautions!

    1. Accessories

    As we said, the WEN 3420 is one of the most affordable options available in the market today. And truth be told, seeing its price, we didn’t really expect it to come with so many great features. But what amazed us the most was the fact that it comes with a complete kit of accessories, which makes its operation even more convenient and comfortable.

    We have already mentioned that it includes two tool rests and a 5-inch faceplate. So, by now, you must also know their functions. Apart from these two types of accessories, the tool comes with a tailstock, a knockout rod, a headstock spur center, and more.

    The tailstock helped us set up the spindle at the desired position to get a tighter grip on the workpieces. On the other hand, you can use the knockout rod to remove the center cup when required. Not just that, but it also enables you to drill holes in the center of any of your workpieces.

    1. Durability

    When we invest in a product, we expect it to last us for a few years, if not a lifetime. On that note, you will be pleased to know that the WEN 3420 Lathe will surely ensure long-lasting performance. This is because of its sturdy solid cast-iron construction, which also makes it a handy power tool.

    Furthermore, it is backed by a 2-year warranty from WEN. So, you can go ahead and buy this unit without worrying about its longevity. It is a reliable investment that will prove to be beneficial even in the long run.

    What Could’ve Been Better?

    There is no scope of the doubt when it comes to the functionality and performance of this safe lathe from WEN. However, we did come across a few drawbacks related to the model, but these aren’t deal-breakers.

    Firstly, being a compact unit designed ideally for beginners, the WEN 3420 is suitable for smaller projects and DIY crafts. Why? Well, this is because of its low-powered slow start motor. Now, even though it minimizes damage and ensures safety, it lacks the power to tackle larger projects.

    And secondly, we found the unit easy to operate, but it was quite noisy. The high level of sound produced by the motor may disturb you and your surroundings. Also, this might compromise your overall working experience.

    That being said, despite its minor drawbacks, we would definitely recommend this lathe to first-timers who want to work on smaller projects.


    Pros

    • On/off switch with safety lock
    • Slow start motor
    • Available at an affordable price
    • Includes a variety of accessories
    • Comes with a 2-year warranty


    Cons

    • Noisy operation
    • Not suitable for larger projects


    Young carpenter processing wooden plank on special woodworking machine WEN 3420 Verdict

    WEN 3420 Verdict

    In our opinion, WEN 3420 is a must-have for every beginner despite its flaws. And there is really no harm in trying it out because it is a reliable investment option that’s not even too expensive.

    The model is equipped with safety features, preventing unwanted accidents and damage. In fact, it is also durable and sturdy. So, you can lay your trust in it to ensure accurate and precise results for years to come. To sum up, if you need to tackle a small woodworking project, this should be your go-to option.

    With this, we come to the end of our comprehensive review. And we hope by now you have made a decision.

    On that note, we take your leave. Till next time!

    Related Articles

    11 Best Wood Chisels to Enjoy

    How To Cut Wood Without A Saw Using Different Wood Cutting Tools

    Grizzly Lathe Review [Clear Winner?]

    Having a good quality grill is a key tool for having a backyard barbecue. But with so many high-quality options available in the market today, finding the perfect grill can be a tough nut to crack. Fortunately, there are some brands that stand out when it comes to quality grills, and Weber is definitely one of those companies. Here, we are going to take a quick look at the Weber Summit S-470 Gas Grill to find out if it’s a suitable option for you. 

    Weber Summit S-470 Gas Grill Review

    What makes the Summit S-470 a unique gas grill is that it offers you multiple cooking options. From simple tasks such as warming foods to smoking, grilling, searing or using it as a rotisserie, the Summit S-470 is a nice blend of all of these features in one single unit.

    It’s without a doubt that the Weber Summit S-470 is on the high-end side of grills and will make a dent in your pockets. But, what you are going to get is a premium grill that’s manufactured using heavy-duty steel to ensure its longevity. What you get is an extremely well-built multi-function grill that’s going to last you for many years to come.  

    Specifications

    • Cooking space 470 square inches
    • Warming rack 112 square inches
    • Side burner 12,000 BTUs
    • Sear station burner 10,600 BTUs
    • Smoker burner 6,800 BTUs
    • Rear rotisserie burner 10,600 BTUs
    • Plus, 2-years warranty on the paint.
    • 10-years warranty for grates and flavorizer bars

    The Design

    The design of the Weber Summit S-470 is another area where this grill stands out apart from delivering a host of functions. The unit is built with industrial grade stainless steel which is apparent right out the box. The stainless steel body is rust proof and a special coating makes cleaning it a breeze.

    Weber has always laid emphasis on their grill’s design and the S-470 is no exception. The unit is tall enough to use comfortably for hours without getting tired of hunching over. The lines and curves that have been added for appeal do not give the grill a traditional boxy design. Instead, what you get is an outdoor grill that’s not necessarily the sleekest in the market, but offers top-shelf standards when it comes to both design and functionality.

    The sturdy grill features a well-built shroud that’s over the enclosed cart, which provides better heat circulation while the food’s being cooked. Under that are the individual control knobs for all of the burners. The heavy duty control knobs feature red markings to enhance their appearance while providing the user with complete control over the grill.

    Under that are two stainless steel doors which lead to the large cabinet space. Here, you can store away tools and other essentials while using the grill. The stand out feature of the S-470 has got to be the cooking surface itself. Instead of the traditional single cooking plate on the rig, you get double hot plates to cook more food faster.

    The best part about using the Weber Summit S-470 is not only that it offers two hot plates for cooking, which is a full 470 square inches of cooking space. But, you get to take advantage of the different heat zones as well to cook at different temperatures simultaneously.

    Weber Summit S-470 Gas Grill

    Features

    The following are some of the features that make the Summit S-470 stand out.

    Heavy-Duty Stainless-Steel Build

    The S-470 boasts of a heavy duty stainless steel body. The rust-free coating on the stainless steel prevents the unit from getting rust, nicks, and scratches. The full-body stainless steel design also adds a premium feel to the grill, which makes it worth the investment.

    Large Cooking Space

    The Summit S-470 has many standout features, one of them being the significantly large cooking area. With the S-470, you get a sear station burner, a side burner, a smoke burner, and a rotisserie burner, all of which have been designed nicely into the grill, offering the user with more ways to cook than one.

    With the large overall cooking space of 580 square inches, you can expect to get more done in less time, which is the main selling point of the brand.

    Temperature Gauge

    The double-layer stainless steel hood that protects the main cooking area has been fitted with a heavy-duty thermometer that helps you keep track of the temperature. This is a nice addition for those who like to cook at a specific temperature.

    Grill Light

    With the Summit S-470, Weber seems to have thought about everything. With the new design, you also get a grill light that’s been fitted into the inside of the lid cover. This light is bright enough for you to make out where the steaks at.

    Snap-Jet Ignition System

    The S-470 features a nifty snap-jet ignition system which makes starting up the grill extremely easy. It’s also conveniently located so you can turn the grill on or off when needed. The jet ignition system also makes it easier to heat up the grill quickly so you don’t have to wait too long to get started.

    Other features include the enclosed storage space, six spots for holding tools, and a 10-foot long gas installation hose. All of the features of the Summit S-470 have been well thought of and excellently built. These features and tweaks to the previous grill design offer better functionality on a grill that’s great to look at and promises to cook some great tasting foods as well.  

    Warranty

    When purchasing a grill from a well-known brand such as Weber, you already know you’re paying for a quality product, but a little reassurance is nice. For that, Weber offers a full two-year warranty on the coat of paint that adorns the S-470. That’s not all: you also get a 10-year warranty for the flavorizer bars and the grates.


    Pros

    • Ultra full-function, quality construction grill with a smoker box, side burner, rotisserie, and sear burner 
    • Strong warranty and support from Weber 
    • Besides durability, the sharpener offers great-quality sharpening that will take good care of colored pencils
    • Six cooking zones deliver a versatile cooking experience 
    • Even, high heat from four stainless steel burners
    • Brushed stainless steel finish will not show marks as easily


    Cons

    • Handle light is more gimmick than useful 


    Conclusion For Weber Summit S-470 Gas Grill

    Conclusion For Weber Summit S-470 Gas Grill

    Weber has always been known for its high-quality grills, and the company has taken its level of quality up a few notches with the Summit S-470. Not only is this grill great to look at, but it also allows you to cook more food at different temperatures simultaneously.

    Related Articles

    Traeger Renegade Pro Review – Traeger Pellet Grills

    Blackstone 28” Griddle Review – One of the Best Flat Top Grills

    Saber R50SC1417 Gas Grill Review Under the Microscope

    Weber Spirit E-330 Review – Handpicked Gas Grills

    Napoleon Prestige Pro 500 Under Review

    Nexgrill vs. Weber | Budget Grills Product Comparison

    Broil King vs. Weber Grills | Two of the Best Compared

    13 Best Grills For Apartment Balcony at Tasty Prices

    Weber Spirit vs. Spirit II

    Rec Tec vs. Traeger

    Weber is already well-known for its appliances and the kind of quality and performance that it offers. But which Weber product will you choose?

    While they make excellent grills, they offer a variety of options, and it can be confusing to decide on one. Now, the Weber Spirit is the original series released earlier, while the Spirit II is an upgraded and slightly advanced version. The latter comes with a set of new and improved features that were released a few years later. 

    In the following section, we will explain each of the models of both series in detail. Read carefully to know all about them and then make an informed decision. 

    Dive in now! 

    Weber Spirit II E-210 And Weber Spirit E-210 | A Comparison


    In this section, we will be comparing both these models and will tell you about the pros and cons of each. They are similar in many aspects, but there is a slight difference which will be discussed. 

    Weber Spirit E-210

    This is one of the smallest models that are available in the market, and it is very cost-effective. Released in 2013, the E-210 has been very popular among consumers who were looking for a grill for their small flat or dorm room. We will discuss its features in the section below. 

    1. Performance

    This is a small and basic grill that comes with dual-burners. The burners are protected by heavy grates, and the best part is that they are not prone to catching rust. Plus, the surface is fade-resistant, and the color will stay for years to come. 

    Moreover, the grates will ensure that the heat spreads well, and you will get proper grill marks on your food. You can cook steaks and patties just like professionals. 

    Below the grates is something that Weber especially adds to its products. There are porcelain enamel bars that help in diverting the grease from the flames. This will protect your burner and ensure that it lasts long. Grease on the bar gets smoked, and this adds more charcoal-like flavors to a dish. 

    It also has a built-in thermometer which will help you keep track of the temperature at all times. You can ensure that the food never gets overcooked, thanks to this. 

    1. Cooking Surface 

    We will now move on to the cooking surface of this compact device. It comes with 360 square inches of cooking area with a 90-square-inch warming rack. 

    Although it is the smallest option, it will still provide you with ample space to cook meat and vegetables together. You can even cook a large turkey of 20 pounds at once on this. 

    1. Build

    Moving on to the build, it is a small product that is 50 inches in width and 32 inches in length. If you are working with an open lid, this will come to a height of 63 inches. You can use it for small and tight spaces, and it will easily fit in any kitchen. 

    Next, it is designed like a closed cart and has a small cabinet for the propane tank. There are hooks on the side to hang your cookware. The entire product is placed on 4 wheels which will let you move it around easily. What’s more, the wheels can be locked in place if you only want the body to move from front to back. 

    Coming to the materials, this is made of excellent quality stainless steel with cast-iron grates. The cooking area has a layer of porcelain, making it sturdy and attractive.

    1. Assembly

    The majority of the product is already assembled, and you will not have to spend too much time on it. There are only a few parts that need to be attached after it arrives. You will take half an hour to put them together, and you will need a screwdriver for the job. 

    Once you put the items in place, it might be a bit heavy. But the wheels will let you move it around easily, and you should not be facing any troubles.

    1. Usability

    Controlling this product is very easy, and you can work with the knobs in the front. A simple twist is required to switch on the burner, while another knob will help you control the temperature. 

    Moreover, it comes with a crossover ignition system that is powered by a battery. The flames are automatic, and this makes it easier to handle the grill. You will find the grill heating up very quickly, and that reduces the overall cooking time.

    Also, AA batteries and a fuel gauge are provided with the pack. The batteries will let you begin cooking immediately, while this product’s gauge will help you understand the amount of propane that is left. 

    Overall, we found this to have a great build, and it was straightforward to use. The only downside was that the burners could not be lit up separately. Both would light up together while cooking.

    Weber Spirit II E-210

    This model was released way later in 2018, and the company brought it out as a form of upgrade. It is known to be one of the latest products that Weber has to offer. This one has a few similar features, but some stand out. Read on to find out about them. 

    1. Performance

    So, when it comes to performance, the E210 works with a GS4 grilling system which makes it stand apart from the former option. The GS4 grilling system includes flavored bars, a grease management unit, easy ignition, and burners. There are 2 burners with an output of 26,500 BTU. Again, this is similar to Spirit 1, and the burners are well-spaced to allow for easy and even grilling. 

    The flavor bars are also similar, and there are 3 of them which prevent grease from falling into the flame. You will be getting a smoky flavor because of this, and you won’t have to worry about flare-ups.

    Now the feature that stands out the most here is that it is compatible with iGrill 3. This will allow you to monitor the cooking temperature with your phone. It is a very successful feature that the present generation loves, and you won’t have to bother about undercooking or overcooking your meal. 

    1. Cooking Surface

    The cooking space provided here is 360 square inches with a 90-square-inch warming rack. This is pretty similar to that of the previous item, and you should have an error-free experience. 

    1. Build 

    While the previous product was known to be the most compact when it was released, this one quickly took up the tag. It measures 48 inches in breadth and 26 inches in length. When the lid is open, the height is 57 inches, and you can easily place it anywhere. 

    Next, it comes with 2 side tables, but one of them can be folded down. This is entirely designed to look like an open cart which is pretty different from the closed cart design of the former option. This allowed better accessibility to the propane tank. However, it also has hooks on both sides of the table to hang your cookware and accessories.

    Moving on to the materials, the Spirit II E-210 is made of stainless steel with cast-iron grates and a porcelain enameled top. 2 giant wheels have replaced the 4-caster design of the previous model. The wheels are accompanied by 2 thick legs that help in placing them on any surface. You can move it on rough surfaces and grass, thanks to this. 

    1. Assembly

    Like the previous option, the Spirit II E-210 comes partially assembled with a few parts that need to be attached later by you. It is not very difficult, and you can call customer care representatives in case you face any issues. 

    1. Usability

    This product also has 2 knobs which you can use to control the temperature. The best part is that you can adjust the temperature of both burners separately. That will give you more control. You can cook something on high heat on one side while you can grill another food item on a low flame on the other. 

    Moreover, the Spirit II E-210 is equipped with an infinity ignition system which works better than the crossover one, which is present in Spirit E-210. This one will ensure that the grill ignites whenever you want it to. 

    Further, its fuel gauge remains similar, and you will get the same benefits of a propane scale that will help you measure the amount of fuel left. 

    So, in conclusion, we found that the Spirit II E-210 model is just a fancier version of the Spirit E-210 because of the variety of features that are offered. You will get a few differences, and there is a major change in design too. There have also been some improvements in the process of operation. 

    But the only issue is that you will not be able to fold one side of the table as we already mentioned. That might make it slightly difficult to store away in case you have to. 

    Weber Spirit II E-310 and Weber Spirit E-310: A Comparison

    Just like the Spirit E 210 models, the Weber Spirit II E-310 and E-310 also have certain similarities and differences. The E-310 was released in 2013, and that was followed by the Weber Spirit II E-310 in 2018 with some upgrades. In the next section, we have discussed them individually for your benefit. 

    Weber Spirit E-310

    This is a model that was initially released as an alternative to the E-210 and has been very successful in the market. We have discussed its features in the section below. 

    1. Performance

    This product comes with 3 burners instead of 2 like the previous models and boasts 32,000 BTU per hour when it comes to cooking power. You can rest assured that the heat will be evenly distributed and the food will be cooked completely. 

    Next, there are angled flavorizer bars that prevent the grease from dripping into the flames. The grease then creates a flavorful smoke that adds more taste to the dishes. Also, the excess grease is directed towards a funnel that then leads to a drip tray below. This makes the food healthy, and you can easily clean the grease by taking out this tray. 

    Moreover, it keeps the burner flames in check and prevents flare-ups. The burners do not clog as the grease does not reach them, and you can expect it to work for a long time. 

    1. Cooking Surface

    Although it has a compact body, this has one of the largest cooking surfaces. You will be getting 529 square inches of cooking surface. This includes 105 square inches of warming area, and the rest can be used for cooking.

    Moving on, you can use this for making meals for 5-6 people easily. There are hooks on both sides where ladles and spoons can be hung so that you can reach out to them quickly while in the process. 

    1. Build

    This is another compact unit, and it measures 52 inches in breadth, 32 inches in length, and 63 inches in height. Hence, it will not take up too much space, and the best part is that there are 2 foldable side tables. This helps in storage, and you can fold them down when not in use. 

    Coming to the materials, the item is made of stainless steel with a porcelain-enameled top which is very sturdy. The grills and the flavor bars are made of cast iron and then coated with porcelain. This makes it look attractive, and it can withstand high heat easily. 

    Now, when talking of storage, the Spirit E-310 has a lot of storage area, and you can keep your cookware easily. There is a steel door which will hide all the kitchen equipment away, giving you a clean look. 

    Then 4 casters will ensure easy portability. You can move the grill about easily, and the front wheels can be locked too. This will prevent it from moving side to side and provide more stability while using it. 

    1. Assembly 

    This is one area where there is a slight drawback as the device does not come assembled. The manual is not very clear, too, and you might take some time to put this together. This is heavy and weighs 120 pounds, and we will suggest taking the help of a friend or spouse to put it together. 

    Once it is completely assembled, there is nothing more to be worried about. 

    1. Usability 

    There are knobs placed right at the front, which will let you adjust the temperature of each burner. This is possible with 3 separate knobs. Also, it features an electronic crossover ignition system, and that makes it easier to switch on. All you have to do is push a button, and that will ignite all the 3 burners.

    This single button added to the convenience offered, and we did not have to spend much time on it. 

    Next, we will talk about its fuel gauge, which is built-in and which will help you understand the gas level in the tank. If it depletes, you can immediately refill without disturbing the grilling process. 

    And that’s not all, you also get a thermometer placed in the hood, and that will measure the temperature. This will let you achieve the perfect temperature while preheating or cooking. 

    Weber Spirit II E-310

    This is an improvised version of the previous model that we discussed. We were impressed with the excellent performance, reliability, and quality offered. And now we will be discussing all of it in the following part. 

    1. Performance

    The Spirit II E-310 has 3 burners but a slightly lesser heat capacity of 30,000 BTU per hour. Now we will not hold this as a drawback as the difference is not much. Moreover, the 3 burners can be operated separately, and you can manage the heat settings differently for each. They are spaced out and allow equal and even heating throughout the surface. 

    Next, you will find cast-iron grates that have a layer of porcelain. These can be reversed and used and will help the food get those perfect grill marks. It also retains heat and will keep your food warm for a while. 

    Coming to the flavorizer bars, they remain the same and will provide you with similar protection from grease. 

    Next, there is another feature that stands out and that is Weber’s iGrill 3 Bluetooth thermometer. This is introduced in the new model, and it will help you monitor the cooking temperature and fuel level via your phone. But yes, you will have to purchase it separately. 

    1. Cooking Surface

    This provides a large cooking area of 425 square inches with 105 square inches of warming rack. The cooking space is very similar to that of the previous model, and you can expect similar results. 

    1. Build

    The Spirit II E-310 is slightly more compact than the previous model and takes less space. It measures 52 inches in length, 26 inches in breadth, and 57 inches in height with the lid open. So, now you know that it is smaller when compared to the E-310 original option. 

    Now moving on to the side tables, this one poses a slight problem as only one of the side tables can be folded. The other one remains in place, and that means in case you want to store it, more space will be required. 

    Further, the grill is designed like an open cart with enough storage space. You can keep all your accessories and kitchenware in the cabinet. The gas tank here is kept outside this cart and not in a closed place like the previous device. This makes it easier to access the tank. But yes, it is best to keep this away from kids. 

    The next point of difference is the wheels as this one comes with 2 large wheels and 2 thick legs. The wheels will allow easier movement on rough terrains, while the legs will provide it with more stability. 

    This is accompanied by a 10-year warranty which makes it a very cost-effective choice. 

    1. Assembly 

    The griller is more compact and lighter than the previous model. However, the installation and assembly process is a bit complicated, and you might require a lot of time to get this in place. We will suggest that you call up customer care in case you face any difficulties. But once you have set it up, it will work out well. 

    1. Usability

    Like the previous product, this has 3 knobs which will let you control the different burners. This is also similar to the previous option, and then there is a thermometer in its hood which will help you check the temperature. 

    Further, the igniter has gone through a transformation, and you will be getting an infinity ignition system. This is way better and more reliable than the crossover system. 

    Weber Spirit Grills Specifications

    Having extensively reviewed each grill, let's delve into the similarities and differences between these grills. Key similarities include the shared fuel type, the number of side tables, and the type of grates used. Regarding differences, both E-310 models come with an extra burner, and are larger in all dimensions, providing a more expansive cooking area and a larger warming rack. The Spirit II models are slightly smaller in size, albeit with more weight. Listed below is a table of the Weber Spirits Grills compared in BTU per hour, dimensions with the lid open and the lid closed in inches, cooking area in square foot, weight in lbs, number of burners, type of fuel used, side tables and grate provided:

    Product BTU/Hour Dimensions (Open Lid) Dimensions (Closed Lid) Cooking Area Warming Rack Area Weight Burners Fuel Side Tables Grate
    Spirit E210 26,500 63"H x 50"W x 32"D 45.5"H x 50"W x 24"D 360 sq ft 90 sq ft N/A 2 Liquid Propane 2 Porcelain-enameled, cast-iron cooking grates
    Spirit E310 32,000 63"H x 52"W x 32"D 45.5"H x 52"W x 24"D 424 sq ft 105 sq ft N/A 3 Liquid Propane/Natural Gas 2 Porcelain-enameled, cast-iron cooking grates
    Spirit II E210 26,500 57"H x 48"W x 26"D 44.5"H x 48"W x 27"D 360 sq ft 90 sq ft 103 lbs 2 Liquid Propane 2 Porcelain-enameled, cast-iron cooking grates
    Spirit II E310 30,000 57"H x 52"W x 26"D 44.5"H x 52"W x 27"D 424 sq ft 105 sq ft 114 lbs 3 Liquid Propane/Natural Gas 2 Porcelain-enameled, cast-iron cooking grates

    Weber Buyer’s Guide

    You must have seen that each product comes with several factors, including advantages and disadvantages. We were initially overwhelmed with so much information, and then we decided to break it down into points. This should help you make an informed decision in the long run.

    1. Size And Build

    It is essential that you check the amount of space that is available in your home and then purchase a product. If you want to keep your grill outdoors, then look for a convenient space and measure it. Compare the space with the size of this and then only go on to purchase. 

    Further, decide whether you want to keep the grill in one place or take it around. If you plan to move it from the house to the yard often, then get one with strong and big wheels. The wheels should be able to move on even rocky surfaces too. 

    1. Number Of Burners

    This will depend on the number of people that you plan to cook for. If you have a family of 2-4, 2 burners should be enough as that will allow you to cook for 2-3 people at one time. On the other hand, a bigger group would need you to purchase one with 3 burners. 

    Now some products have burners that can be individually controlled, while in some, this feature is missing. Your choice should depend on the kind of requirements that you have. 

    Next, you should look at how the burners are placed as that will ensure even cooking. In the case of Weber grills, the burners are distributed over the entire area with equal gaps in between. This ensures uniformity in heat distribution, and we were happy with the results. 

    1. Grates

    Now, grates are an essential part of grilling, and they are responsible for providing proper grill marks on the food. Bad or inefficient grates would lead to the burners clogging up and the food getting burnt. So, always opt for cast-iron grates with porcelain enamel or thick stainless steel ones. These are durable and offer excellent heat retention capacities. 

    Also, porcelain grates are very easy to clean, and you can simply wipe them. We would recommend this to save you time while cleaning. 

    Next comes flavorizer bars, which are present along with the grates. These bars prevent grease from entering the burners and clogging them. The grease that collects on it is smoked, and that adds more flavor to the food. Also, it leads excess grease away from the gas and into a drip tray. 

    1. Materials Used

    If good material is used to make a grill, it will last longer and provide more value for money. We suggest that you choose an option that is made of aluminum as it is pretty sturdy and resistant to rusting. It can also be made of stainless steel, which is a great alternative and provides enough sturdiness. 

    Since these products will see a lot of moisture and stains, they have to be resistant to both. Hence, it is best to get grates that are coated with porcelain. 

    1. Cooking Area

    While purchasing a product, you will have to take into consideration the size of the grilling area. If you have a small family, then an area of 250 to 350 square inches should be enough. This is perfect for 2 people, and you can cook at one go. 

    But if you have a medium-sized family, then you can opt for 450 to 500 square inches of cooking area. And for parties and large gatherings, purchasing one with 500 square inches or more is the best. That way, you can cook in large batches and get done with the process faster. 

    How Long Do They Last?

    Weber grills can easily last for up to 10 years or more if you keep them clean and take care of the parts. Some will come with a 5-year warranty, while others will come with a 10-year warranty. 

    Where Are These Grills Created?

    Most of these grills are made in China or the USA. It mostly depends on which model you choose, and the country will be determined according to that. 

    What Are The Color Options?

    Black is the most common color that people choose, but there are other options too. You can choose among red, ivory, black, sapphire blue, smoke, and crimson red. There are limited pieces in copper color too.

    Conclusion

    The quality of a grill is the most important thing that you should look for while making a purchase, and Weber provides you with excellent quality. You must have learned about the 4 models in the previous sections, so choose as per your requirements and that should work out well. 

    Moving on, there are some differences among the Weber models, but all of them will give you a smooth experience. However, the newer and more advanced ones come with a few extra features and can be a bit more efficient than the original ones. 

    But in case you are looking for a simple grilling device, the older ones will serve you well too. With this, we will take your leave. 

    Let us know if you have any further queries in the comment section below. Until next time. Happy shopping! 

    For many folks, enjoying the summer means having a barbecue in the backyard with friends and family. Most gas grills that are available today don’t cater to small families or homes that don’t have the free space to include a large gas grill.

    That shouldn’t be an excuse to not have a barbecue at home. This is where the Weber Spirit E-330 comes in. This is a gas grill that features just about every function you would expect to find in a grill but in a compact unit. The small size of the Spirit E-330 offers users with a compact grill that’s easy to move around and store away when not in use. So, let’s take a closer look at what the Weber Spirit #-330 has to offer.

    Weber Spirit E-330 Review

    Weber 46810001 Spirit E-330 LP Gas Grill, Black, 115cm
    • Equipped with upgraded features and the perfect size for...
    • Sear station creates an intense heat zone to quickly add...

    Sure, there are many gas grills to choose from nowadays, but few offer the functionality and compatibility of the Weber Spirit E-330. This is exactly what you would expect from a company that’s been delivering superior grills for as long as Weber. The company doesn’t disappoint with the Spirit E-330 which is part of its smaller designs. 

    With the Spirit E-330, Weber makes its entry into the compact gas grill market in style. The new Spirit E-330 offers customers with all the bells and whistles one would look for in a gas grill in a compact size unit. The Weber Spirit E-330 offers a full stainless-steel body with 3 burners that provide an ample amount of heat to cook delicious foods outdoors. It is also reasonably priced which makes it possible for everybody to enjoy outdoor cooking in style with the Spirit E-330. 

    Specifications

    • Three burger grill: 32,000 BTUs
    • Side burner: 12,000 BTUs
    • Rear searing burner: 7,500 BTUs

    The Design

    For many folks, purchasing a large gas grill is out of the question due to a lack of space. Keeping that in mind, the Spirit E-330 offers a viable and affordable alternative. With the Weber Spirit E-330, you get to cook delicious food outdoors in style.

    One of the main features of the Spirit E-330 is its compact design. This makes it easy to cook on and move around in the backyard. The compact design also takes the hassle out of storage, which is a challenge with larger gas grills. For a compact grill, the Spirit delivers a decent amount of cooking space to prepare foods, but not enough for cooking for large families. Other features that make the Weber Spirit E-330 standout are the multi-colored controls that add to the grill’s appearance. They are also easy to use and provide complete control over the grill. With just three large heavy-duty control knobs for the grill, there’s no need to guess the function of each. 

    The stainless steel grill area is protected by a heavy-gage metal lid that protects the cooking area. It features a large handle for easy grip and a large thermostat to gauge the temperature of the grill. Below the cooking area is a surprisingly large storage space where you can keep grilling tools and accessories along with the gas tank. If you’re looking to move around the grill then that shouldn’t be a problem with the sturdy caster wheels that can take the unit on any surface. 

    The Features

    The following are some of the features in the Weber Spirit E-330. 

    Stainless Steel Build

    You expect to get a certain level of quality when purchasing a product such as a grill from Weber, one of the masters of gas grills. With the Spirit E-330, you are not going to be disappointed with the quality of the design and the materials that have been used in manufacturing the E-330. The Spirit E-330 offers a durable grilling unit that’s reasonably priced and will last for years to come. 

    Large Cooking Area

    One of the standout features of the Weber Spirit E-330 is its large 424-square inch cooking space that is surprisingly large, considering its compact design. This allows hassle-free cooking of a decent amount of food with ease. While you won’t be having a party with the Spirit E-330, the grill offers just enough cooking space to cater to a small crowd of family or friends, which is exactly what it promises. 

    Impressive Power

    The output of the Spirit E-330 is just as impressive and makes cooking a breeze. The three burger grills can deliver up to 32,000 BTUs of cooking power, and if that’s not enough, you also get a side burner that produces up to 12,000 BTUs and is a nifty addition for preparing sauces or other foods. There’s also a rear searing burner that has a total output of 7,500 BTUs and can be used for both warming and cooking. 

    Easy to Clean

    The Weber Spirit E-330 doesn’t just take the hassle out of storage but also offers a grill that’s extremely easy to clean and maintain. The porcelain-enameled cooking grates can be cleaned with ease along with the rest of the grill. Since the whole unit has been constructed using stainless steel, it is able to maintain its appearance for longer. 

    Flavorized Bars

    While with a gas grill this small you would expect the bare minimum, Weber has gone out of its way to make sure you do not feel that there’s anything missing with the Spirit E-330. The grill includes flavorized bars that bring the flavor out of every food you cook. 

    Other Features

    Some of the other features that the Spirit E-330 offers include lots of space for storage and a temperature gauge built into the grill cover. It also includes heavy-duty control knobs for the three grills and the side burner. You also get an easy to use electronic ignition system to power the grill whenever needed. The addition of two heavy-duty caster wheels makes it easy to move around the grill or keep it in storage when not in use. 

    Warranty

    Weber has always been confident about their products, and they are holding on to the tradition with the Spirit E-330. The company offers a solid 10-year warranty on the cook box and the burners. You will also get a 5-year warranty on the cooking grates and flavorizer bars along with a 2-year warranty for all the other parts of the gas grill. Not bad for a portable outdoor grill. 


    Pros

    • Sleek and heavy-duty design 
    • Many additional features 
    • Comes along with a powerful side burner and rear searing burner 
    • Excellent warranties >


    Cons

    • The low grade of stainless steel 
    • Only three burners 


    Conclusion For Weber Spirit E-330

    The amount of functions that the Spirit E-330 offers along with its portable size makes it a sure winner in the small size gas grill niche. This outdoor grill is the ideal size for enjoying cooking outdoors even with limited space.

    Related Articles

    Traeger Renegade Pro Review – Traeger Pellet Grills

    Blackstone 28” Griddle Review – One of the Best Flat Top Grill Today

    5 Best Small Traeger Grill For Backyard & RV BBQs

    Saber R50SC1417 Gas Grill Review Under the Microscope

    Weber Spirit E-330 Review – Handpicked Gas Grills

    Napoleon Prestige Pro 500 Under Review

    Nexgrill vs. Weber | Budget Grills Product Comparison

    Broil King vs. Weber Grills | Two of the Best Compared

    13 Best Grills For Apartment Balcony at Tasty Prices

    Weber Spirit vs. Spirit II

    Rec Tec vs. Traeger

    The second product Weber Q2200 is a discontinued product, no longer available on the market instead  the updated version Weber Q3200. Although, Weber Q1200 is available on the market. 

    For many folks who take their family barbecues seriously, buying a grill is a pretty big deal, and rightly so. The good news is we’re living in the golden age of outdoor grills. What this means is that when it comes to options, we are spoilt for choice. One of the leading players in outdoor grills for many years now is Weber. 

    The manufacturer has been responsible for delivering many high-quality grills and is constantly improving its game in terms of both style and functionality. Since Weber has been responsible for rolling out many premium grills through the years, here we are going to focus on two grills, in particular, the Q1200 and the Q2200. So, if you’ve been stuck with the decision of which grill to choose, this is going to be your guide. So, let’s get started. 

    Weber Q1200 vs Weber Q2200

    Sale
    Weber Q1200 Liquid Propane Portable Gas Grill for Travel and...
    • The Titanium Weber Q1200 Travel Grill features...
    • 8,500 BTU Burner: Provides robust level of heat output,...

    The Weber Q1200 and Q2200 are two world-class outdoor grills that are known for their superior build quality and many functions. Both these outdoor grills have been well-built using heavy-duty materials. They are also both powerful enough to deliver an excellent cooking experience. These also are without a doubt, two of the best barbecue grills that have been built by Weber, and they are certainly two of the most popular. Both these grills feature a slide on drip pan for collecting oil and grease while cooking. 

    Since both the Weber Q1200 and the Weber Q2200 fall under the portable or tabletop section of outdoor grills, they both offer great value for money with their portability and sturdy design. With so many similarities, it can be difficult to choose between the two, but upon taking a closer look you will find that there are quite a few differences between these two top-shelf grills. 

    Specifications

    • Single burner | [Q1200] 8,500 BTUs, [Q2200] 12,000 BTUs
    • Electronic Ignition | [Q1200] yes, [Q2200] yes
    • Porcelain-enameled cast-iron grates | [Q1200] yes, [Q2200] yes
    • Cooking space | [Q1200] 189 square inches, [Q2200] 280 square inches
    • Folding side tables | [Q1200] yes, [Q2200] yes
    • Dimensions [Q1200] Height: 24.4 inches, Width: 40.9 inches, Depth: 20.5 inches
    • Dimensions [Q2200] Height: 26 inches, Width: 51.4 inches, Depth: 25.1 inches

    The Design

    When it comes to the design and appearance of the Weber Q1200 and Weber Q2200 it gets really difficult to tell them apart. Both these barbecue grills boast of a similar design with a sturdy lid covering the cooking area, and foldable side tables. Both get a thermometer for gauging the temperature while you cook and are available in multiple colors. 

    One of the areas where both the Weber Q1200 and Weber Q2200 are almost identical is in its build quality. You will notice the top-shelf build quality of the Q1200 and Q2200 right off the bat. The stand-out features between the two grills are the porcelain enameled cast iron cooking grates that are sturdy and well built. Maintaining their high-quality standards, you also get a glass-reinforced nylon frame that supports the grill. The slide on the drip pan makes sure all the grease or oil is collected in one place for easy disposal. 

    Right off the bat, it’s clear that the only real differences worth mentioning between the Weber Q1200 and the Weber Q2200 is the difference between the heat output, dimensions and the available cooking area which differ slightly. Both the Q1200 and Q2200 offer the best value for money since you will be getting a barbecue grill that features an ergonomic design while also offering you with power and portability. 

    The Features

    The following are some of the features of the Weber outdoor grill and how these features differ in the Weber Q1200 and Q2200.

    Total Cooking Area

    The Weber Q1200 has a cooking area of 189 square inches while the Weber Q2200 has a cooking area of 280 square inches, which is a difference of a full 91 square inches between the two grills. While this might seem like a big deal to some folks, the good news is that the nature of squaring size means that, at the end of the day, the difference in cooking space isn’t that drastic. 

    To put the size difference of these two grills into perspective, the manufacturer has decided to use hamburgers as a means of measurement. For instance, according to Weber, the Q1200 has a total capacity of eight hamburgers. The Q2200, on the other hand, can cook up to 11 hamburgers at a time. While this isn’t much of a difference, if you plan on inviting many guests to your backyard barbecue it’s best to go with the larger option. 

    Heat Output

    Both the Weber Q1200 and the Weber Q2200 feature a D-burner which helps distribute the heat well throughout the interior of the cooking area. The Q1200 offers a total heat output of 8,500 BTUs while the slightly larger Weber Q2200 can produce up to 12,000 BTUs of heat. It is also important to mention here that the Q2200 has a slightly larger lid. The taller lid has been incorporated into the design of the Q2200 because it provides more options for the users in terms of grilling.

    Performance

    When it comes to performance, both the Weber Q1200 and the Q2200 performs well and can cook delicious foods. Both these grills are quick to start thanks to the electronic ignition system. Both the Q1200 and Q2200 also feature a temperature gauge that’s been integrated into the design of the lid. This makes it easier for the user to know the temperature inside the cooking space. The feature also comes in handy if you are looking for a precision cooking grill. 

    Since the Q2200 comes with a slightly larger lid, it allows you to cook more meat. What the Q1200 fails to deliver in size it more than makes up for in cooking capabilities. For instance, while the larger Q2200 is a more convenient option if you are looking to cook more food within the least amount of time, it still cooks at a high temperature, which can make it difficult to roast meat. On the other hand, the Weber Q1200 cooks perfectly on low heat as well, which makes it a versatile choice. 

    Final Verdict For Weber Q1200 vs Q2200

    While both the Weber Q1200 and the Weber Q2200 have similar features, if you are looking to cook more food then the larger Q2200 is going to be a better option. If you are going to be roasting meat a lot, then it’s best to go with the Q1200. Both grills have plenty to offer users all you have to do is choose one that suits your needs.

    Related Articles

    Blackstone 28” Griddle Review – One of the Best Flat Top Grill Today

    Saber R50SC1417 Gas Grill Review Under the Microscope

    Weber Spirit E-330 Review – Handpicked Gas Grills

    Napoleon Prestige Pro 500 Under Review

    Weber Summit S-470 Gas Grill Under the Microscope

    Traeger Renegade Pro Review – Traeger Pellet Grills

    Watts is a measure of the amount of energy being released. It is created when amps and volts combine. The higher the wattage, the more will be the output and power from an appliance. A watts-to-amps calculator converts watts (electric power) to amps (electric current) in alternating current (AC) and direct current (DC) power systems.

    Watts to Amps Calculator

    Amps to Watts

    Switch

    Results:

    Watts to Amps

    Switch

    Results:

    You can easily convert watts to amps (amperage) by using the electrical power formula, according to which power (watts) is divided by voltage (volts) to get amps. The formula for this is:

    Amps (I)=Watts (P) Voltage (V)

    This formula is applicable only for devices that operate with DC power, whereas for AC current, the power factor is considered. So, the equation goes:

    Amps (I)=Watts (P)Voltage (V) Power Factor (PF)

    Watts To Amps Converter: Some Key Terms Explained

    Watts To Amps Converter: Some Key Terms Explained

    Before you can fully understand why the conversion from watts to amps is important, you must have a brief idea of certain terms associated with this formula. Let me tell you more about them:

    Volts

    Volt or voltage is the measure of force or electric potential. Simply put, it helps measure how much force is required to get the electrical current flowing. In the United States, home appliances work at different voltages. For instance, air conditioning units, clothes dryers, etc., operate at 240 volts, whereas computers, light bulbs, and phone chargers work at an electrical supply of 120 volts.

    Before making a big investment, like buying a new air conditioner, you must check your AC system’s cooling capacity. You can do so using BTU to kW air conditioning calculator or even the kW to BTU calculator.

    Amps

    Amps or ampere is a unit that measures electrical current. It determines the amount of electricity that runs through a circuit. In a circuit breaker, you will often notice the amperage written, and the larger this number, the more electricity can flow through the circuit.

    To calculate amps, you divide watts by volts. So, if you have an 800W electric appliance connected to a circuit of 240V, then it will be drawing 3.33 A.

    Similarly, you can calculate how many amps of current are drawn per watt of power using the amps formula. For example, at 120 volts, you will need 8.33 amps of current to generate 1000 watts of power.  

    Watts

    I’ve already explained what watts are. To recap, it represents the energy produced when volts and amps work together. It is the power that an electric device uses to run. For instance, when you light a bulb or run a vacuum, it consumes a certain power, which is expressed in watts.

    You can calculate watts by multiplying amps with volts. For example, at 120 volts, 1 amp will produce 120 watts, and at 120 volts, 20 amps will produce 2,400 watts. 

    In larger units, the power consumed is mentioned in kilowatts. One kW = 1000 watts. 

    Convert Watts To Amps: All You Need To Know

    When you are converting watts to amps, the first step is to know what is the current type you are dealing with. 

    In DC or direct current, the electric current flows in one direction. This type of current is produced by solar panels and used by devices (such as laptops, cell phones, etc.) that run on the electric battery. When the battery is connected to a circuit, electric charge flows in a single direction from negative charge to positive charge.

    AC or alternating current has current flowing in both directions. Usually, the current changes direction periodically. The AC supply is used extensively in homes and businesses. 

    Tip

    Although the calculation is easy to do manually, I recommend using an online calculator instead. When you use the watts to amps calculator, you will be asked to insert a few values.

    For instance, you will be asked to specify the current type you’re working with - DC, AC (single), or AC (three-phase). Then, you will be asked to insert the amps-watts-volts values. For an AC voltage, you will be given the power factor (usually taken as 1). 

    Watts To Amps Conversion For AC Single Phase

    For DC watts to amps calculation, you have to divide power (expressed in watts) by the power factor times RMS voltage (expressed in volts). So:

    Amps (I)=Watts (P)Voltage (V) Power Factor (PF)

    Watts To Amps Conversion For AC Three Phase

    For three-phase units, you will get the option to choose between the line-to-line voltage and line-to-neutral voltage. The PF is taken as one, and a certain square root is derived.

    You simply have to insert the given values and choose the voltage type, and the results will be calculated for you. 

    Watts To Amps Converter Final Words

    Final Words

    Converting watts to amps may feel simple, but there are a lot of factors you need to consider. It is not simply possible to convert watts directly to amperes or amps to watts. Instead, you must know the resistance (r), voltage, voltage type, and so on. This is why it is best to use a calculator. 

    Calculators designed for electrical systems, such as BTU calculators, also come in handy when trying to determine a home appliance’s cooling capacity or when trying to convert between EER and COP numbers.

    With that, I will take my leave. Goodbye!

    Have you just stumbled on the idea of waterproofing surfaces through epoxy?

    Recently, the popularity of using epoxy for covering materials has resurfaced. Hence, we thought about sharing some information about working with it. 

    When it comes to epoxy, most people think of it as only an adhesive. Apart from its brilliant gluing capacities, epoxy is also an excellent coating material. It can be an overlay on anything from a bathtub to your kitchen floor to reduce corrosion and damage. 

    However, its quality as a waterproofing material remains lesser-known. And, with proper techniques, epoxy can become an instant favorite for the job. 

    If you are one of those people who have questions about the water resistance of epoxy, hop on to get your answers. Also, check out the new project ideas to start one as soon as possible. 

    On that note, let us begin unraveling the queries on epoxy! 

    All You Need To Know About Waterproof Epoxy

    Is Epoxy Waterproof? 

    Let's start by answering the burning question. Yes, when used properly, epoxy can make a surface water-resistant. Moreover, using a layer of epoxy can create a barrier against corrosive chemicals. 

    Because of its waterproofing capabilities, epoxy is often used as a coating on floors of commercial buildings. Even swimming pools have an added layer of it as a beneficial sealant. 

    However, you need to be very careful to buy the correct epoxy. Generally, the claim of being a waterproof epoxy is mentioned on the label of a bottle. Hence, picking up an already tested epoxy would give you much better results. 

    Try to look for a water-based epoxy or waterproofing epoxy for your intended job. If possible, it's always good to consult with an expert present at the store to get their opinion about the product. 

    Having said that, we do think that epoxy is seriously underrated when it comes to waterproofing surfaces. Sure, you might have to experiment a bit, but it will be a worthy project. 

    How To Properly Use Epoxy For Waterproofing? 

    To ensure appropriate waterproofing with epoxy, here are some points that you should note:

    1. Clean The Surface Properly 

    People often end up blaming the waterproofing capabilities of epoxy due to improper application. Before you start the application, it's essential to clean the surface thoroughly. This includes getting rid of dust, oil, and water. 

    Moreover, it's necessary to let the surface be absolutely dry. Many people try to waterproof a wet surface, but we would suggest against it. Also, as you will need to apply multiple layers of epoxy, make sure not to get dirt between them. 

    1. Health Of The Base Material 

    Even though epoxy is a strong sealant, the health of the base layer plays a vital role in lasting capabilities. You cannot expect a cracked wooden floor to maintain the same level of integrity as a brand new surface. Hence, you may want to fix the base material before applying the epoxy. 

    This is especially important for wooden surfaces, as they tend to get damaged sooner. Besides, you may want to look for more flexible epoxy options to make the process easier. 

    1. Proper Application Of Epoxy 

    One of the most common mistakes committed while waterproofing with epoxy is the application of a thin layer. Every epoxy comes with instructions about the adequate amount that needs to be used. In the case of waterproofing, this is usually a thick layer to make the seal extra tight. 

    Additionally, you may need to apply multiple layers of epoxy to make it fully effective. Hence, make sure to check the application instructions before buying the materials. 

    Moreover, choosing the correct application tool is also quite vital as it may affect the amount of epoxy that ends up on the surface. So, be sure to lay it on thick for better water resistance. 

    1. Choice Of Epoxy 

    On your visit to the hardware store, you will be greeted with numerous types of epoxy resins. All of them might look tempting, but you will need to find the one that will work best for you. Hence, a handy tip from our side is to know more about the base material. 

    We suggest you pick up an epoxy that is either water-based or is meant for waterproofing. Manufacturers often mention it on the bottle. Additionally, you may also look for the features stated on the packaging. Also, make sure to check the type of surface that works for the particular epoxy. 

    1. Proper Curing Time And Environment 

    Usually, most epoxy resins take around seven days to cure. However, it will depend on the type of epoxy that you are buying. After the application is over, it needs to receive a proper environment for curing. Adhering to the instructions gives anticipated results, and you wouldn't need to reapply epoxy for a long time. 

    Advantages Of Using Epoxy For Waterproofing 

    If you are new to using epoxy, you are at the right place to know about its advantages as a waterproofing material. Here are some of the strongest points about epoxy that you should know about: 

    1. Works With Various Substances

    Are you tired of buying different sealants for various base surfaces? Epoxy comes as a miracle since it can work with numerous materials. It works well on wood, metal, plastic, and even fiberglass. Some even use it on bare concrete or outer walls of their houses as a waterproofing layer, and it seems to do the job. 

    You may need to experiment with the thickness of the coating and the application technique to get it right. But, it will most likely be a long-lasting sealant on most surfaces. 

    1. Easy To Use

    Epoxy is a fuss-free substance, and it is easy to use even for a DIY beginner. It can be applied with a brush, roller, or any tool you may find comfortable. Besides the usual protection measures needed to work with it, there aren't many requirements. 

    Most manufacturers clearly state the instructions. However, the only thing that needs to be perfect is the curing time and temperature. But that’s pretty easy to follow, so you don’t really need to worry about anything. 

    1. Corrosion Resistant

    An epoxy wouldn't just give you a waterproof surface. Alongside, you will also get the benefit of corrosion resistance. This feature prevents damage-causing chemicals from getting to the base material, and is especially helpful for things like wood which are easily affected by harsh substances. 

    Moreover, epoxy also helps to delay the usual wear and tear seen on a surface. This is particularly true for waterproofing outdoor surfaces like swimming pools or lawn furniture, as they may get easily damaged from heat and rain.

    1. Durability

    A prominent feature of epoxy resin is its durability. With proper curing time and environment, you practically create a long-lasting hard layer. Also, epoxy doesn't require frequent reapplications. Even busy flooring may only need a touch up every 3-4 years. Hence, the lasting protection of epoxy makes it a perfect choice for those who detest a yearly chore. 

    Projects For Epoxy Waterproofing 

    If you are a DIY-er, then you must always need a new project. Hence, to get you started, here are some items that benefit from epoxy waterproofing. 

    1. Swimming Pools

    Swimming pool surfaces always need waterproofing as the treatment chemicals and heat can cause lasting damage. So, covering it with an epoxy layer will prevent most of the probable damage. Also, frequent reapplications after 3-4 years will keep the pool healthy and good-looking. 

    1. Commercial Or Personal Flooring

    Floors tend to get damaged due to many things, and serious ones can cost you a lot. Hence, applying a thick layer of epoxy can protect against damage, especially from water or other liquids. Moreover, it's great for wooden floors as the thick layer also prevents damage caused by excessive pressure or sharp objects. 

    1. Kitchen Countertop And Floor

    When it comes to household damage, the kitchen is one of the most common places to drop things. Most of us have experienced our hearts stopping when the fork drops on the beloved wood flooring. But a proper application of epoxy can put an end to it. Moreover, it will keep your surfaces stain-free even if you mistakenly drop a bowl of tomato soup. 

    Epoxy Resin Frequently Asked Questions 

    Here are answers to some further questions that you may have in mind while waterproofing with epoxy. 

    How Waterproof Is Epoxy Resin?

    Even though we cannot tell you the exact waterproofing capacity of epoxy, the substance is definitely resistant to water. On application of an adequate layer of it, the surface wouldn't be affected by moisture or liquid. Moreover, epoxy also prevents chemicals and corrosives from seeping into the surface.

    Will Epoxy Resin Waterproof Plywood?

    Yes, epoxy is one of the best ways to waterproof plywood. However, while buying the epoxy, make sure to check if you can use it with wood. The epoxy works as a laminate on wooden surfaces and helps to deter water for a long time. Also, it provides one of the smoothest surfaces by filling out any holes or cracks.

    Is Epoxy Resin Suitable For Outside?

    You can use epoxy to waterproof outdoor surfaces. As most epoxy is UV stable, the coating does last long. Nevertheless, you will have to ensure that the epoxy layer gets cured properly for the waterproofing to work.

    Car mechanic repair service center cleaning using mops to roll water from the epoxy floor. In the car repair service center.

    Final Words: Should You Go For Epoxy Waterproofing?

    To give you a simple answer, yes, we would definitely recommend going for waterproofing by epoxy. This great substance has surprised us with its capabilities. As more people come to learn about its versatility, we’re sure you’d love to test it out on new projects. 

    Moreover, we appreciate the fact that it's a readily available substance. Most hardware stores contain one or more variants, and the salesperson will surely guide you to find the right one. Also, it leaves a pleasing glossy surface that looks wonderful! 

    However, you must remember that working with epoxy requires some precautions. This includes wearing a pair of thick gloves, goggles, and a respiratory mask. You can also check the packaging for more specialized instructions. 

    Now, it's time for you to go and find a surface that you would love to waterproof. In case of any queries, come back to us, and we will surely help you out. 

    Till then, have fun and stay safe!

    Related Articles

    5 Best Epoxy Pool Paint | Buyer’s Guide and Reviews

    9 Best Glue for Metal to Wood [Reviews & Buyer’s Guide]

    9 Best Varnishes for Wood [Reviewed & Buyer’s Guide]

    13 Best Paint for Furniture 

    Sanding Epoxy Resin Guide 101 [All You Need to Know]

    11 Best Bar Top Epoxy [Reviews & Buyer’s Guide]

    5 Best Epoxy Wood Filler

    What is Resin and How It’s Used

    Epoxy Paint For Wood 101

    10 Best Epoxy for Plastic Today

    Totalboat Resin Epoxy 101 | Reviews + Buyer’s Guide

    How To Make Resin Dice 101 [All You Need to Know]

    How To Make A Resin Geode [Complete Guide]

    Art n Glow Resin Review [All You Need to Know & Buyer’s Guide]

    Alcohol Ink and Epoxy Resin 101 [All You Need to Know]

    7 Best Resin 3D Printer 

    How to Color Clear Epoxy Resin [Coloring Resin

    How To Fix Radiator Leak With Epoxy+ Best Radiator Repair Epoxy

    Epoxy Garage Floor 101 [All You Need to Know]

    Mold Release Guide + Best Epoxy Release Agents

    Surfaces Resin Won’t Stick to [All You Need to Know]

    Heat Resistant Epoxy 101 [A Guide for High Temperatures]

    Epoxy Cement Guide 101 [How to Repair Concrete with Epoxy]

    How To Mix Epoxy 101 [Measuring & Mixing Epoxy Resin Guide]

    How To Harden Sticky Resin [Uncured Epoxy Solutions]

    How To Fix Epoxy Mistakes [Tackling Common Epoxy Problems]

    6 Best Pressure Pot For Resin Casting Right Now

    The effects of a beautiful piece have a way of capturing the eyes of an observer.

    And many existing artists love watercolor as a painting medium because of the many benefits they get from using it.

    Firstly, watercolors are easy to use for anyone, be it beginners or experienced artists. Another good thing about watercolors is that they are relatively cheaper if compared to other coloring mediums.

    Now, there are many upcoming artists who are drawn to the art of painting with this medium. But how does one prepare for painting with watercolors? There are a lot of things to consider having and buying.

    If you too are a practicing artist, don’t worry! We have your back. Today, we will give you a list of all the things/supplies that you must have in order to set up your very own watercolor studio.

    Keep in mind that these materials are both necessary and inexpensive, therefore, anybody can get them without having to spend so much.

    With that said, let’s move on to the list! 

    Must-have Watercolor Supplies


    The first thing you’d need is, of course, watercolor paints.

    You probably have seen watercolors come in different packaging - tubes, pan sets or pencils.

    If you are wondering which one to get as a beginner, we would suggest going for pan sets because firstly, they are easy to carry around and they do not consume too much space in the studio or on the shelf.

    Secondly, these paints are organized, hence, preventing the user from creating a lot of mess during the painting process.

    When looking for watercolor pan sets as a beginner, choose one which is student grade as they are much cheaper than those which are artist or professional grade.

    Student-grade watercolors are good for practicing because you don’t have to focus much on the mixing process as you will do with professional or artist grades.

    However, if you feel unsure about buying a whole set of watercolors, you can buy sample sets of any brand which you like. They will cost you much lesser than the actual colors would. Hence, this is a good way to find out if a watercolor painting set is the right one for you.

    There are a lot of sketchbook varieties out there and choosing one can be tricky because each and every one of them seems important.

    However, we would suggest buying one with thick sheets that are about 300 gsm since the colors are water-based and can penetrate through the paper if it is too thin.

    Not only that but if you choose a much lighter or thin paper, there is a high chance your painting will not last as long as you expect because the paper may warp anytime soon.

    The size of the notebook also matters a lot because you don’t want to end up regretting having bought a sketchbook that is too big or too small.

    When picking out the right size, think about how practical it is for you. The practicability of the sketchbook depends on where you work often, how you carry the sketchbook, and so on.

    Finally, we would also recommend finding the right orientation: horizontal or vertical. This again depends on what and how you want to paint. If you choose landscapes, then a horizontal-oriented sketchbook is the right one for you as it provides more space width-wise.

    Painting Periwinkle Flowers
    © Homesthetics - Dylla Setyadji

    Painting by your-confusion

    As we have discussed a little about sheets in a sketchbook and how thick they should be, now we are going to look at something similar; these are watercolor papers.

    Paper is one of the most essential supplies when it comes to watercolor painting. What makes a piece of art great is not only the right paints but the right quality of the paper as well.

    There are papers that are specifically designed for watercolors, and they are known as “watercolor papers”. These are not the same as regular papers we use every day, or like sketching papers.

    These absorb moisture very well and do not allow the paint to bleed through on the other side of the paper. Besides that, these papers also provide enough texture to make your painting look excellent.

    However, just like how normal papers are measured, these watercolor sheets are also rated by their size, weight, and texture.

    And just as choosing sketchbook sheets, we suggest you go with watercolor papers that are about 300 gsm or 140 lb which are cold-pressed. Also, choose papers that are acid-free or pH neutral because they will preserve the quality of your painting and help it age well.

    The importance of pencils is inevitable even if we are doing a watercolor painting.

    Many artists use pencils to create an underdrawing before they start off with the actual painting. The reason they use a pencil for this is because it provides outlines which make the work easier.

    However, a pencil can do so much more than just outline the piece. It can contribute to the overall beauty of the painting by enhancing small details. Moreover, lead pencils blend very well with watercolors.

    Besides lead pencils, you can choose to outline the work with other colored pencils which you see fit. And that’s the best part about it - we get to be creative with this step. 

    Final Touches
    © Homesthetics - Dylla Setyadji

    • Pens

    If you use pens to darken a few areas or just for working with other details, you will notice amazing changes in the painting.

    Although watercolor painting by itself is already magnificent, adding pen effects will take it to a whole different level. But then again, not just any pen will do.

    For watercolor paintings, we recommend going for micron pens. If you can, refrain from using ballpoint pens because they do not have pointy nips.

    If you like to sketch and paint at the same time, using micron pens will surely help make a great piece of painting.

    With micron pens, you can easily slide through the details of the painting without making a mess. These are also much suitable for rough surfaces and cold-pressed papers since you don’t require to put on a lot of pressure on the nip while drawing.

    One more benefit we get from using micron pens in watercolor paintings is that they tend to blend well with the rest of the colors, making them look harmonized. Ballpoint pens, on the other hand, do not produce the same effects. Rather, you can tell that the ink does not belong there.

    We understand if you are a beginner, that you would want to start off with only a couple of brushes first, and that’s a good thing.

    But we must say that you should not be content with only a few brushes you have in hand. The reason we are saying this is because there are a lot of brushes that provide different effects because of their shapes and sizes.

    If you only stick to the few ones you have, there is a lesser chance for your work to improve.

    Even if you plan to buy a few brushes for the beginning of your watercolor journey, make sure that each brush is distantly different from the other so that you can see the different effects that each brush has on the painting.

    If you have gained a certain level of experience, that’s when you start trying out different brushes every now and then.

    However, even if you are on a budget, be sure to get good-quality brushes so that they will serve you for years to come as well.

    Draw The Pine Tree Trunk And Inner Branches
    © Homesthetics - Dylla Setyadji

    Palettes are necessary for mixing any kind of paint.

    Yes, there are DIY alternatives or other surfaces which are good enough for mixing colors - and that is great!

    But there are certain benefits of using palettes. First of all, they are specifically made for the purpose of mixing colors and all good artists prefer using them.

    Secondly, there are varieties of palettes made to suit different paint mixing purposes and have different surfaces.

    If you are an artist who works once in a while, then a paper palette would be a great choice since you can discard them after you’re done. Paper palettes can be used for a maximum of three times continuously before disposing.

    But if painting is your daily hobby, there are so many palettes out there with various features to suit your preferences. For instance, a plastic palette with a thumb hole is great when you’re working for many hours because it is lightweight and comfortable.

    Also, unlike random surfaces, palettes these days are washable, scrapable, or even foldable. These features make them desirable for certain preferences.

    •  Artist Tote Board

    An artist's tote board provides a flat support for when you are painting.

    You can use any board with a smooth surface for this. But we would recommend getting a tote board because it is designed for artists and their work.

    Most boards have clips to hold the paper in place. They also come with a smooth rubber band to ensure your painting does not move or tilt.

    •  Tracing Paper

    You may be wondering why tracing paper is on the list of watercolor supplies.

    If you are a beginner, tracing papers can come in very handy.

    For instance, there is an art that you want to imitate and recreate, but it’s too complicated. What you can do is use tracing paper and trace every outline.

    After that, use the “rub method” of transferring the outline onto the actual watercolor paper and you’re good to go!

    But choosing tracing papers is not a task where you have to take much caution; any kind of tracing paper will do. If you need a tip, we would suggest looking for cheap ones which have enough transparency and won’t easily tear while tracing. 

    •  Drafting or Masking Tape

    Artists will do anything to make sure their paintings remain in good and straight shape while painting so it does not curl up at the touch of water-based paints.

    From choosing the right watercolor paper to using the right amount of paints, they also have found another technique to prevent papers from crippling; and that’s taping the paper down.

    For this technique, you can either use masking/drafting tape or gummed paper.

    Using gummed paper ensures that the paper remains flat on top of a surface. However, gummed papers can get too rigid to remove and at times, require to use of a blade or any sharp object to detach it from the paper.

    We do not recommend using force to tear off the tape from the paper because that will only damage the painting.

    A masking tape, however, is not as strong as gummed paper. It still holds it in place, but will not be as flat as it should be when using gummed paper. That means you still need to straighten it when the painting is dry.

    Nonetheless, the masked tape can be removed easily without harming the condition of the paper.

    •  Spray Bottle

    A hair spray bottle will come in handy during the painting process.

    If you want different effects on the painting, use a water spray bottle. It has become a technique for achieving and trying out different textures.

    It depends on the distance and the amount of water used for spraying, you can work with different kinds of effects.

    • Glass Jar

    A glass jar is where you store all brushes used for painting after you’re done cleaning and drying them.

    It does not necessarily have to be made of glass but we mentioned it because it provides better storage and you can see through the glass whenever you have to choose a preferred brush with a name on it.

    We would recommend using a medium-sized glass jar if you own only a few brushes now.

    But if you have a lot of brushes, make sure to store them in a glass jar which is much bigger so that when you put in a brush, it does not touch the bristles of other brushes and increase the chance of warping or getting damaged too early. There should be enough space in the jar when moving the brushes.

    We also suggest getting three glass jars for your brushes because you can use one for rough cleaning, one for proper cleaning, and the last for storing your brushes.

    Sketch The Teak Tree Trunk And Branches
    © Homesthetics - Dylla Setyadji

    • Masking Fluid

    Liquid latex, which is commonly known as masking fluid, is used to create blank white spots on the painting. These are areas where you don’t want the paint to touch.

    Sometimes, when working with watercolors, it becomes hard to avoid certain areas in which you want to stay white (like painting dozens of stars, for example). And in this case, using masked fluid would be an excellent choice.

    Masking fluids protect the areas by repelling any liquid and then you can peel it off when finished. Those areas will still remain blank as your desired effect..

    Masking fluid can come really handy once you start to get the hang of using it.

    • Watercolor Sponges

    Another one of the best non-traditional techniques is using a sponge for achieving different effects in watercolor painting.

    If you want to paint small textures which will probably take forever using a brush, then a sponge is the best option for this. It is comparably faster to achieve a texture that you like.

    Any type of sponges will work for watercolor painting. However, if you want to explore different textures, we would recommend using a natural sponge.

    A natural sponge comes in different textures and there’s no telling which pattern you’re getting next, hence, it also becomes a great option for achieving a spontaneous painting.

    But if you want to manipulate and have more control over the pattern outcome, you can always cut the sponge and trim it to get the desired texture. If not, there are always sponges available online or at an art store that has a variety of sponges with different textures.

    • Water Jar

    Needless to say, this is an obvious tool needed for watercolor painting. How else are you going to mix watercolor paints without water?

    But the reason it is worth mentioning here is that some of us can be a little careless at times and forget the most necessary materials because they’re too small to notice that they’re missing.

    When you’re painting at home, we see there’s no need to pay attention to small things like these. Even when there’s no water jar kept separately for painting, you can always use a bowl or something else to substitute that.

    But a water jar becomes necessary when you go plein air. Either keep a separate one for this purpose or buy brushes that come along with a barrel that you can use it to store the water.

    Having a jar helps you stay organized as a painter. There is no need to keep looking for a different bowl/container every time you have to paint.

    By practicing keeping a separate water jar, it will become a habit to carry it wherever you go plein air; you will automatically remember to store it along with the other supplies.

    Conclusion

    So these are all the basic supplies you’ll need for your studio. Few of them are available online or at a local art store, while for some, you can use alternatives without having to shed some extra money.

    We hope this article was helpful and we’d like to see you again soon.

    Happy painting!

    Related Articles

    Cold Press vs. Hot Press vs. Rough Watercolor Paper Compared

    Best Watercolor Painting Books Everywhere | Beginner to Expert Grade

    9 Best Water Brushes for Beginners, Professionals & Calligraphy

    11 Best Watercolor Palettes for Beginners & Professionals Everywhere

    13 Best Watercolor Pencils and Water Soluble Art Supplies Today

    15 Best Watercolor Paints| Students & Artist Grades

    Best Watercolor Paper|Top Brands Reviewed + Plein Air

    12 Must-Know Watercolor Tips for Beginners & Pros Everywhere

    Why and How to Use Watercolor Mediums to Enhance Your Painting Game

    Learn How to Use Watercolor on Wood | Professional Tips & Tricks

    13 Best Watercolor Sketchbooks for Creatives Everywhere

    11 Best Watercolor Brushes for Beginners & Professionals Reviewed

    Stretching Watercolor Paper & How To Keep Watercolor Paper From Warping

    Learn How to Paint Watercolor on Canvas Easily & Successfully

    16 Must-Know Painting En Plein Air With Watercolors Tips & Tricks

    Learn The Basic Watercolor Painting Techniques For Beginners - Ideas And Projects

    Expand Your Knowledge With Watercolor Painting Ideas

    19 Incredibly Beautiful Watercolor Painting Ideas

    Watercolors are a simple yet challenging medium to work on. Practicing various painting techniques with watercolors can help you master it. 

    Artists are generally thought of as expressive and emotive - at least when it comes to their canvas. Painting is therapeutic, and even if you don’t consider yourself an expert, experimenting with watercolors can be exhilarating. 

    As it was rightly said by famous painter Bob Ross, “There are no mistakes, only happy accidents.” When it comes to learning a new technique, the best way to do it is by picking up the brush, dipping it in paints, and creating magic on the canvas. 

    Do you paint as a hobby, or are new to the world of watercolors? Well, this guide has been created for anyone who is looking for watercolor painting ideas and inspiration. 

    So without further ado, let’s bring out our paints and get started!  

    1. Forest

    I've always loved the deep tranquility of the forest. With each brushstroke, I've tried to capture that feeling, using a palette of various shades of green.

    2. Types of Trees

    In this painting, I focused on 4 types of trees: pine tree, cypress, aspen, and teak. Each tree species has unique characteristics that I've tried to emphasize in watercolor.

    3. Sunset

    Try to capture the fleeting beauty of a sunset in this piece, with a blend of warm hues that bring the twilight hour to life.

    4. Lotus Flower

    5. Lake

    My goal was to create a sense of calm and tranquility with this depiction of a lake, paying close attention to the play of light on water.

    6. House

    7. Galaxy

    I wanted to capture the vast expanse of a galaxy in this painting, using shades of blues and purples to depict the infinite cosmos.

    8. Sea

    9. Roses

    I've always admired roses, so I dedicated this painting to their velvety texture and vibrant colors.

    10. Pine Forest

    This painting of a pine forest aimed to capture the grandeur of these evergreens and the crisp, invigorating atmosphere they create.

    11. Types of Flowers

    12. Amsterdam 

    In this piece, I tried to encapsulate the charm of Amsterdam with its colorful townhouses and picturesque canals, and of-course tulips.

    13. New York

    14. Berlin

    15. Paris - Le Consulat

    16. Colorful Balloons


    Colorful Balloons watercolor painting

    One of the first watercolor painting ideas to try out is a simplistic, colorful balloon painting. Wet your watercolor paper and use any light color to create a soft background - maybe a sky or splash pattern. Use bright colors to make two inverted egg-shaped balloons and add a string. 

    17. Balancing Zen Stones

    Balancing Zen Stones watercolor paintings

    Try creating balancing stones to tune in to your inner Zen. Begin by outlining, then use gray, white, and shades of black to add delicate details. Don’t forget to add the shadow! You can use this reference image for tips. 

    18. Sea Of Poppies

    Sea Of Poppies

    Create a splotchy watercolor background by dropping paint water on your wet canvas or watercolor paper. Once dry, add beautiful purple poppies using rounded strokes and a long stem. 

    19. Mountain Scenery 

    Mountain Scenery 

    Painting mountains with watercolors is easier than it looks. Use a simple layering technique with light shades to create the mountain background. Check if it is completely dry, then add dark-colored trees.

    20. Abstract Art

    Abstract Art

    Let your imagination run wild! Create abstract designs and shapes using whichever color you wish to express your emotions for the day. Abstract art is one of the most fulfilling ways of letting your paints do the talking for you. 

    21. Dusk 

    Dusk watercolor paintings

    Painting dusk sceneries can be challenging, but there are always online tutorials to help. Opt for darker pastels and create a scenery at dusk for this one. Start with lighter shades and build up to darker ones.

    22. Bird

    Bird

    Outline a bird and fill it in with bright watercolors. Add some branches and fruits to complete your painting. Don’t forget to include a small beak and a white gleam in its eye for the reflection of light. 

    23. Farmhouse 

    Farmhouse watercolor painting

    Paint this beautiful farmhouse, complete with trees, flowers, and the sky. This can take a couple of days to complete, but once it’s done, you can sell it. Trust us, it’s so thrilling to see once it's complete. 

    24. Half Sunflower 

    Half Sunflower 

    Not confident enough to paint a full sunflower? Try painting half! Opt for bright yellow and orange shades and use black for details. Tune in to your inner Van Gogh with this one. 

    25. Lighthouse 

    Lighthouse  watercolor

    While this watercolor painting does require some skill and patience, the end result is stunning. Use a template to create the structure if you need help. Remember to add a background to complete it.

    26. Abstract Trees

    Abstract Trees watercolor

    The background for this painting idea is astounding - create a colorful transition using different shades. Add the silhouette of a tree and branches, and finish off by dropping splotches of colored paint. 

    27. Cup Of Tea

    Cup Of Tea watercolor

    Fancy a cup of tea? Why not paint it using brown and red watercolor shades? Add the teabag in for a unique effect. Creating shadows will give the painting a realistic appeal.

    28. Fall tree

    Fall tree

    Fall trees remind you of the warm sun, pumpkin patches, and shades of orange. Use a wet toothbrush dipped in paint to create the effect of flowers. Try a wet-on-wet technique with watercolors for the orange leaves. 

    29. Flamingo 

    Flamingo  watercolor

    A favorite subject amongst most painters - is the majestic flamingo! Outline first, filling it in slowly with shades of pink, red, and white. Add a splash watercolor effect at the back for a mesmerizing result. 

    30. Rainbow Trees

    Rainbow Trees watercolor

    Ditch the monotone trees and try creating rainbow-colored ones instead! Use all the colors on your watercolor palette and add black for detailing work. Let your creativity run wild with this one. 

    31. Bright Flowers 

    Bright Flowers 

    Paint brightly colored flowers using a wet-on-wet technique for this watercolor painting idea. Remember to add a bright, contrasting background for a special effect. Use different size brushes for the flowers.

    32. Pastel Roses

    Pastel Roses

    Using a dry-on-dry technique for this watercolor painting, paint with undiluted soft shades to create roses. Add a vase and some dark green ferns to complete it. Once done, you can use this as a postcard for loved ones. 

    33. Lavender Trees 

    Lavender Trees 

    Start by creating the curved tree trunk and branches. Add the lavender leaves and flowers using both wet-on-wet and wet-on-dry techniques for added details. Create a bright purple shade by adding some pink to your lavender paint.

    34. Seahorse 

    Seahorse 

    Create an emerald seahorse with this watercolor painting inspiration. Use the wet toothbrush technique to add colored bubbles in the background, giving it an underwater effect. Cover the seahorse with a piece of paper if you don’t want to add the colored splotches to it.

    35. Misty Waters

    Misty Waters painting watercolor

    A soft but mesmerizing watercolor landscape. Use lighter blue shades to create the misty waters, keeping lots of white space for effect. The negative space will enhance the appeal of this watercolor painting.

    36. Hibiscus 

    Hibiscus watercolor

    Created using a ‘wash technique’ with watercolors, this hibiscus is an excellent way to practice your watercolor techniques. Use shades of red and white to create it. Add green stems and black detailing work. 

    37. Sunset Cacti

    Sunset Cacti

    Using beautiful shades of navy, orange, and yellow, create a gradient background for this watercolor painting. Then, use black paint to make the cacti silhouette, and add some details for bushes. 

    38. Simple Flower

    Simple Flower watercolor

    An extremely simple watercolor technique to practice for beginners. Use a wet-on-wet technique to make a watery background effect, picking any colors you wish. Once it is dry, add a minimalistic flower, and you’re done!

    39. Roses

    Roses watercolor

    Roses are some of the most beautiful concepts to paint using watercolor. Since they’re found in a variety of colors, experiment with your watercolor palette and use wet-on-wet techniques to create a bunch of colorful roses. 

    40. Splatter Painting

    Splatter Painting

    Splatter paintings are not only easy but also fun to create. Dip a paintbrush or toothbrush into different watercolor paints and spray them on your canvas. Create shapes and designs as creatively as you can. 

    41. Flying Egret

    Flying Egret

    This beautiful, white bird with an orange beak is challenging yet impressive. Try your hand at painting this in watercolor using soft white and grey shades and blue for the background. Of course, feel free to use a template or reference to create the bird.

    42. Layered Leaves

    Layered Leaves

    Layering watercolors can create stunning textures that look like they’ve been made by expert painters! Try it yourself by layering different watercolors over one another. Remember to let one layer dry before painting the next. 

    43. Lone Boat

    Lone Boat

    Paint a solitary but determined little boat using simple watercolor painting techniques. Try the wet-on-wet technique for creating water ripples and the dry-on-dry technique for the boat. Remember to use line work for detailing. 

    44. Sponge Clouds

    Sponge Clouds

    Love the look of fluffy clouds? Why not try painting them using a sponge? Dip a dry sponge into watercolors and blot it on watercolor paper to create dreamy clouds. Choose any watercolor shade you like for this one. 

    45. Red Radish

    Red Radish watercolor

    Painting vegetables can be fun. Paint this red radish using red and pink and a thin brush to create the roots in beige. Add the green leaves on its crown to finish. You can use a real vegetable in front of you to make this into a still-life painting.

    46. Night Sky

    Night Sky

    Create a night sky watercolor painting using shades of blue and black. Add white stars and black trees to make the painting pop. Try different effects to create the background. 

    47. Bicycle Basket With Flowers 

    Bicycle Basket With Flowers  watercolor paint

    This watercolor painting looks extremely attractive because of its use of bright colors. Paint the bicycle in whichever color you wish and add colorful flowers to complete it. You don’t need to paint the entire cycle if you don’t wish to.

    48. Lavender Fields 

    Lavender Fields 

    Lavender fields look striking, especially against a sunny background. Pick a vivid purple color for the fields and add a bright sun for this one. Add a splash effect to make it pop. 

    49. Rainbow Giraffe 

    Rainbow Giraffe  watercolor

    A colorful, rainbow idea to jazz up a monotone giraffe painting. Add clouds and pouring, colorful rain for effects. Take the help of a reference image to draw the giraffe. 

    50. Dreamcatcher 

    Dreamcatcher 

    Dreamcatchers are meant to catch your deepest, innermost dreams and desires. Make your dreamcatcher come to life by painting it with vibrant watercolors. 

    51. Dandelions

    Dandelions

    Another popular idea for watercolor painters - the dandelion. Paint a couple using unique colors like blue, green or your favorite watercolor shades. Add any background effects you wish to experiment with. 

    52. Happy Orangutan 

    Happy Orangutan 

    Paint a happy baby orangutan using shades of brown, orange, and white. Don’t forget to add a big, dreamy smile! 

    53. Solitary Dandelion 

    Solitary Dandelion  watercolor painting

    How about painting a solitary dandelion for a change? You can see a blue one in this image, but feel free to add any other color to your artwork. 

    54. Fuschia

    Fuschia

    Attempt these magnificent fuschia flowers using a mixture of colors to create the exact shade. Opt for a splash effect for the background. 

    55. Geometric Flower

    Geometric Flower

    The beauty of this watercolor painting lies in its tasteful shading. Try layering techniques to create this shaded effect for your flower. 

    56. Crossing 

    Crossing 

    Paint a busy street with a zebra crossing using advanced watercolor techniques. Take a photograph for reference to get the shading right. 

    57. Doors

    Doors

    Remaking door paintings have been popular for generations. Create your own using watercolors and add bright flowers for effect. 

    58. Flowers 

    Flowers  painted in watercolor

    Yet another idea for watercolor flowers - try painting them in a clear glass pitcher. Add some shaded shadows below for effect. 

    59. Bird Study

    Bird Study painted in watercolor

    This cute, fluffy bird is worth spending a few days painting. Add a spot of white to its beady black eyes to make the pop. 

    60. Church Door

    Church Door

    Instead of traditional doors, how about painting a watercolor church door this time? Add black details with a pen. 

    61. Sparrow 

    Sparrow 

    This watercolor painting features a tiny sparrow on cherry blossom branches. Use your imagination to create a colorful background. 

    62. Colorful Dreamcatcher

    Colorful Dreamcatcher

    Similar to the previous dreamcatcher on our list, this one has a cleaner backdrop but more vivid feathers. 

    63. Skull 

    Skull watercolor rainbow painting

    Begin by drawing a rough skull, then fill it up with black, grey, and white watercolors. Add a drip effect with rainbow colors for the background. 

     64. Autorickshaw

    Autorickshaw

    Found commonly on Southeast Asian roads, the autorickshaw can be an interesting subject to paint. Keep the background minimalistic for this one. 

    65. Purple Flowers

    Purple Flowers

    Purple and pink are lively colors to opt for. Paint watercolor flowers using various shades of these colors and add a green contrast. Use different techniques for this painting, mixing wet on wet and wet on dry methods. 

    66. Simple Vase Flowers

    Simple Vase Flowers

    Sketch a long neck, and thin vase with flowers, and use watercolors to paint them in your creative style. Keep the background simple to make the flowers pop. Add a table or window in the background if you wish to. 

    67. Pink Roses

    Pink Roses

    The best part about this pink rose painting is its colorful background. Let your creative juices flow with this one! Don’t be fussy about the paint, instead, let it flow and create its masterpiece. 

    68. Simple Trees

    Simple Trees

    Paint simple trees by adding splotches of greens and yellow, and some black penwork for detailing. Don’t forget a colorful background! 

    70. Lord Krishna

    Lord Krishna

    A classic Indian God, Krishna, was painted in a minimalistic style. This idea is great for those who want to practice making watercolor figures. Use any reference image for this one, picking a bright, dark blue for the figure. 

    71. Autumn 

    Autumn 

    Embrace autumn with this rich, orange and red tree painting. Scatter some leaves on the floor to make it more realistic. Remember to let the paint dry first, before adding the leaves on the floor. 

    72. Seaside

    Seaside watercolor

    A unique seaside painting complete with long-stemmed plants painted in black silhouette. Add a bright sun and its reflection on the blue water. Use a wet-on-wet technique for the watery effect. 

    73. Lake & Trees

    Lake & Trees watercolor

    Honestly, this one looks like a Bob Ross painting. It does require some skill, but attempting it is so much fun! Watch a tutorial for more guidance, or simply use this reference image as your guide.

    74. Cone Flower

    Cone Flower

    Although it looks minimalistic, it’s quite challenging to make this coneflower. Use a fine-tip black marker to add finer details. Don’t be a perfectionist - let the paints flow freely for this one. 

    75. Hummingbird

    Hummingbird

    Draw a hummingbird and fill it in with bright, green watercolors. Add a long, black beak and a branch for it to perch on! Remember to paint a long, dark beak to complete it. 

    76. Abstract Landscape 

    Natural Landscape 

    Painting abstract landscapes can be a great way to practice different watercolor painting techniques. Try experimenting with wet on wet, dry brush, gradient, and wash techniques when making these paintings. 

    77. Abstract Christmas Tree

    Abstract Christmas Tree

    Christmas trees are always fun to paint, but how about trying an abstract one this time? Create fluid brush strokes with dark and light green and use paint splotches for the background. 

    78. Superman 

    Superman 

    Who doesn’t love Superman, right? Try your hand at this watercolor Superman painting by using red and blue. Keep light brush strokes and diluted watercolors for the effect. Create a drip effect using a wet brush for this one. 

    79. Paint Brushes

    Paint Brushes

    Painting still life can be one of the best ways to practice any art technique. Place your paintbrushes in a glass jar or mug, keep them on a table, and start painting! Inspiration is right in front of you.

    80. Tulips

    Tulips

    Practice painting watercolor flowers by choosing different species as inspiration. This time, paint some watercolor tulips in bright, vibrant colors. Flower paintings are a great way to practice different watercolor techniques.

    81. Flying Hummingbird

    Flying Hummingbird

    If you’ve already painted the sitting hummingbird, you’re probably up for a new challenge. Try painting a flying hummingbird, complete with a beautiful flower and vibrant background. 

    82. Colorful Lighthouse

    Colorful Lighthouse

    Coming back to lighthouses, why not pop in a splash of color for this one? Look at a reference image and draw a lighthouse. Complete it by adding vivid watercolors and a brilliant sky. 

    83. Portrait 

    Portrait 

    Painting portraits is challenging. Opt for this abstract girl portrait with dream-like blue eyes. Choose a fun backdrop to blend it in. You can replace the girl image with a boy if you wish to experiment further. 

    84. Flower Vase

    Flower Vase

    Why are flowers so popular amongst watercolor artists? Maybe because they’re so much fun to paint! How about this brightly colored bunch of flowers in a beautiful, blue vase? Make the flowers brightly colored or monotone, as you wish.

    85. Enchanted Woods 

    Enchanted Woods 

    Once you learn the wet-on-wet watercolor technique, use mystical shades of blue, purple, black, and a pop of pink to create this enchanted woods painting. Complete it by adding a deer silhouette. 

    86. Catching Stars

    Catching Stars

    Create this beautiful concept painting of a little girl on a ladder trying to catch stars. You might need a reference photo which you can find online, but painting it should be super fun! 

    87. Mountains 

    Mountains 

    Instead of scaling the mountains, how about painting them? Use gradients and soft shading to create this mountain landscape painting. Remember to use a layering technique to create the effect of mountains at the back.

    88. Pine Cone

    Pine Cone

    You can take this as a still life painting by actually getting a pine cone, or simply take this reference image to paint it. It’s quite a fun watercolor exercise to try! Keep the background simple so the focus remains on the pine cone.

    89. Blue Jay

    Blue Jay

    Paint this wonderful Blue Jay using your best blue and gray watercolor shades. Remember to draw a pretty branch for your Blue Jay to sit on. Draw the bird first, so you have a reference of how much to paint. 

    90. Waterscape 

    Waterscape 

    A perfect postcard image of two boats on the water. This watercolor painting might require some skill, especially for the water effect, but it’s fun to try out nonetheless. Try using a wet-on-wet technique for the ‘water ripples’ effect. 

    91. Owl 

    Owl  watercolor painting

    Try painting the wise owl using your watercolor shades of brown and oranges. This is a fluffy bird, so make sure you add lots of feathers. Add a few lines of blue on its underside, just to make a shadow effect. 

    92. Poppies

    watercolor painting

    You can never paint enough flowers. This time around, try painting these beautiful yellow poppies as your next watercolor painting inspiration. Intertwine the stems to create a unique effect, and don’t forget to add a background. 

    93. Day & Night

    Day & Night

    This is a brilliant concept of a day and night painting on one single canvas. Paint a day scenery on the top and a nightscape at the bottom. Flip the painting to show off both styles of art. 

    94. Midnight Sky

    Midnight Sky watercolor

    Skies are always super fun to paint. It allows you to use various effects like gradients, splash, textures, etc. Paint this midnight sky by opting for darker shades of blue and purple. Add the silhouette of trees to the finish. 

    95. Rainbow Elephant

    Rainbow Elephant watercolor

    Painting animals with watercolor is an exhilarating project. The elephant especially is fun to paint. This gentle giant has been painted in shades of purple, pink, and navy. It seems like it has stepped into a puddle of rainbow colors, which is a great effect to recreate.

    96. Wish Dandelion

    Wish Dandelion watercolor painting

    Although this is another dandelion watercolor, its gradient background gives it a unique vibe. Keep the center of the dandelion white, while painting the rest of the background in vivid colors of your choice. Add details with markers and write ‘Wish’ in cursive at the top for a special effect. 

    97. Florals

    Florals lavender painting in watercolor

    To end with, we are adding another beautiful floral watercolor painting. Although it looks abstract, a great deal of detailed work has gone into this one. Start with a colorful background using the wet-on-wet technique, and let it dry completely before making the flowers.

    Final Words

    With that, we have come to the end of our massive list of watercolor painting ideas! 

    Learning anything new requires patience and effort. When it comes to watercolors, the challenge is different. Watercolors are notorious for having a mind of their own. Remember one thing about learning this technique - it is best to let the colors flow freely and see where it takes you. 

    The mistake beginners make with watercolors is trying to control its flow. Instead of doing that, just let the colors blend into each other, creating their own mesmerizing textures and patterns. As with anything, it takes some practice to get comfortable with watercolors. So don’t hesitate. Pick up your brushes and start painting. 

    Let the little Picasso in you shine! 

    Related Articles

    45 Best Oil Painting Ideas [Reviewed]

    59 Best Face Painting Ideas

    103 Best Acrylic Painting Ideas

    10 Best Paper for Acrylic Paint in 

    10 Best Canvases for Acrylic Painting | Student & Artist Grade

    8 Best Palettes For Acrylic Paint & How to Choose What You Need

    Learn How To Make An Acrylic Painting Waterproof Right Now

    Acrylic Painting Materials That You Really Need In The Studio

    13 Best Acrylic Paints for Beginners & Professionals Reviewed

    10 Best Acrylic Paint Brushes for Artists & Students Reviewed

    Learn How To Get Dried Acrylic Paint Out Of Brushes Successfully

    Cold Press vs. Hot Press vs. Rough Watercolor Paper Compared

    Best Watercolor Painting Books Everywhere | Beginner to Expert Grade

    9 Best Water Brushes for Beginners, Professionals & Calligraphy

    10 Best Watercolor Palettes for Beginners & Professionals Everywhere

    13 Best Watercolor Pencils and Water Soluble Art Supplies Today

    Best Watercolor Paper |Top Brands Reviewed + Plein Air

    12 Must-Know Watercolor Tips for Beginners & Pros Everywhere

    Why and How to Use Watercolor Mediums to Enhance Your Painting Game

    Learn How to Use Watercolor on Wood | Professional Tips & Tricks

    13 Best Watercolor Sketchbooks for Creatives Everywhere

    11 Best Watercolor Brushes for Beginners & Professionals Reviewed

    15 Must-Have Watercolor Supplies for Beginners & Artists Everywhere

    Stretching Watercolor Paper & How To Keep Watercolor Paper From Warping

    Learn How to Paint Watercolor on Canvas Easily & Successfully

    16 Must-Know Painting En Plein Air With Watercolors Tips & Tricks

    Learn The Basic Watercolor Painting Techniques For Beginners – Ideas And Projects

    Expand Your Knowledge With Watercolor Painting Ideas

    19 Incredibly Beautiful Watercolor Painting Ideas

    13 Best Concrete Paints  

    10 Best Canvases for Oil Painting | Beginner & Artist Grades Reviewed

    8 Best Oil Paint Brushes 

    11 Best Oil Paints for Beginners & Professionals Artists Alike

    Learn What is the Best Surface for Oil Painting Right Now

    How Long It Will Take Oil Paint To Dry  & How to Speed It Up

    Oil Painting for Beginners Basics & How to Use Oil Paints

    Learn How To Dry Oil Paint Faster Overnight

    12 Oil Painting Supplies That Every Oil Painter Needs in the Studio

    5 Things You Should Know Before Painting Oil Paint on Glass

    Learn How to Make Oil Paints Dry Faster

    What Are The Benefits of Oil Painting?

    Watercolors act as an excellent tool for expressing the works of an artist’s creative mind. 

    Some painters who are just starting out choose to explore the scopes of watercolors using their own techniques - a splendid approach that nurtures creativity. 

    On the other hand, some want to learn what has already worked for others. This is also a great way to start because then they will know what and what not to do at a much faster pace. 

    First of all, it is highly essential that one must learn the basics of a subject before they can become a master at it. The same thing applies to watercoloring as well. 

    There are many sources out there that one can go to for guidance. 

    Reading a book is comparatively better because you can easily stop, think, and re-engage whenever you want to. Another reason to read a book is that it strategically describes all the small and minute details that other sources fail to do. 

    And in today’s article, we have picked out the most useful and highly recommended watercolor painting books which one needs to learn.

    Best Watercolor Painting Books

    Painting watercolor landscape pink red color of Wild himalayan cherry roadside in the morning with vintage emotion sky cloud background, Hand painted, beauty nature winter season landmark in Thailand. Best Watercolor Painting Books

    Besides the fact that these books have worked for many artists, they also contain specific techniques and instructions that will introduce the amateur artist to a whole different level of watercoloring, while recommending useful skills to the experienced one. 

    And with that in mind, let’s begin! 

    1. Watercolour For The Absolute Beginner

    With 128 pages and numerous instructions about watercoloring, this book by Matthew Palmer is a must-have for beginners. 

    Inside this book, there are 12 outlines for drawing, 6 fascinating projects as well as hundreds of demonstrations to help a beginner out in producing an exceptional piece of watercolor painting. 

    Experience

    We find this book to be extra helpful for artists who are new to watercoloring and still not sure where to begin, as well as for those who are concerned with outlining or sketching before actually getting into the painting process. 

    Most developing artists find the book to be rather helpful when understanding the complications of watercolor as a painting medium. 

    This book contains everything a beginner needs to know about watercoloring, hence, it has saved us a lot of money which we could have paid for an expensive art class. 

    Moreover, we like that throughout the whole book, there are recommendations for using particular painting materials like certain brushes and paints, which we find really suitable. 

    While the book tells us about simple and elementary color mixing, it does not stress much about how some colors work well together, however. But keeping that aside, this is an incredible, complete beginner’s guide to watercoloring. 


    Pros

    • Provides detailed descriptions about the different techniques and methods of watercoloring
    • It offers recommendations of using particular painting materials that work well for various instances
    • Contains up to 12 outlines and 6 projects


    Cons

    • Includes simple illustrations for color mixing but lacks information about better color balance


    1. If You Are Bored With Watercolor Read This Book

    If You Are Bored With WATERCOLOR Read This Book
    • Lilja, Veronica Ballart (Author)
    • English (Publication Language)

    Here is another book which consists of 128 instructional pages. 

    Judging by its name, this book by Veronica Lilja may appear to be oriented towards those who have reached expert levels and slowly starting to get tired of using watercolors. 

    However, the name is somewhat misleading because the book contains guidelines for beginners to follow as well. 

    Experience

    What we love about this book is that it includes a set of techniques and color-mixing guides which serve both beginners and experts. And apart from that, it offers suggestions to use different types of supplies and papers for watercolors. 

    We also get to explore various topics such as the comparison between warm and cool tones, color wheels, and many other aspects of watercolors. 

    Another good thing about this guide is that it is flexible.

    Unlike other tutorials which require completion of a task before a given time period or that need us to follow certain guides strictly, this book allows us to experiment with watercolors while getting guidance at the same time.


    Pros

    • It contains a number of strategies for beginners to take on, as well as innovative and non-traditional techniques for the experienced artist
    • Allows readers and watercolorists to see the extent to which watercolors can go and experiment with it 


    Cons

    • The title of the book is confusing as it seems to target only seasoned artists


    1. Texture Techniques For Winning Watercolors

    Texture Techniques for Winning Watercolors
    • Hendershot, Ray (Author)
    • English (Publication Language)

    This book is for artists who have had a lot of experience with watercolor paintings and want to try something new. What it includes are state-of-the-art techniques and suggestions to make watercoloring more enticing.

    The author, Ray Henderson, is an esteemed watercolor artist whose artworks reflect his brilliant, ingenious mind. Through his book, you’ll be able to see his unique methods for creating outstanding watercolor art.

    Experience

    First of all, we find this book to be very easy to follow because it breaks down complicated instructions into much simpler ones. 

    For instance, within the book, there are a number of full-sized pictures and right beside them are specific portions of the image which the author keeps aside to explain what type of technique he used for achieving that kind of effect. 

    Secondly, it teaches and provides complete details on how to create amazing textures in watercolor paintings. And since textures are almost always required for producing exceptional paintings, we think this guide is a must-have for both an advanced beginner and a watercolor expert. 

    However, the paperback version does not contain high-quality pictures, and we have to settle for the hardcover version which comes at a slightly higher price. 

    And if you are one of those artists who are really concerned about the quality of a painting, this book will be just what you need. 


    Pros

    • The book provides amazing illustrations when it comes to texture techniques with watercolors
    • It thoroughly explains how to achieve a particular effect most easily 


    Cons

    • The paperback version of this book contains low-quality images, and one has to settle for a higher priced hardcover


    1. Modern Watercolor

    Sale
    Modern Watercolor: A playful and contemporary exploration of...
    • Van Leuven, Kristin (Author)
    • English (Publication Language)

    Kristin Van Leuven wrote this book which is so much different from the rest of other guides.

    The reason is that there are two parts to it. One section focuses on the essentials of colors and supplies while the other section focuses on exploring resist art (a technique where several layers are used to highlight a design with the use of a medium such as tape) and concentrating on common painting subjects such as flowers, landscapes, animals, etc.

    Experience

    When we struggle with the process of watercoloring, we tend to lose focus on what we need to do for achieving great painting results. And this book really helps when it comes to situations like this.

    The best thing about this book is that the author chose to use a simple language for communication rather than highly technical terms which might be difficult for a beginner to understand.

    The 8-pages techniques which inform us how to achieve the desired effect using multiple methods are quite enlightening. For example, we learn to add the necessary amount of water to mix with the right amount of colors for various painting effects.

    Then, we also learn about the resist technique in 12 pages which provides detailed explanations on how to use them properly.

    Another great thing about this book is that it provides knowledge about the world of watercolor painting as no other book does. Therefore, if you want to go from a complete beginner to a much more experienced artist, then this book is for you.

    The book is only intended solely for beginners because it provides only basic information and is not for artists of the intermediate level. Painters who are already familiar with the basics may not find this book to be helpful although they are still learning how to paint with watercolors.


    Pros

    • Introduces all the ins and outs of watercoloring to the absolute beginner
    • The book contains simple terms which anybody can understand


    Cons

    • The guides provided by this book are only for beginners and not for artists of intermediate level


    1. The Complete Watercolorists Essential Notebook

    This book by Gordon MacKenzie allows the artist to explore endless watercolor scopes and ideas through the use of delightful and easy instructions.

    It leads both beginners and seasoned artists to the world of watercolors using light, casual structures to successfully come up with a great piece of art.

    Experience

    Rather than using guidelines, the book itself takes the reader for a ride through the whole creation process.

    The reason we chose to include this book on this list is that it is entirely different from other guides by letting learners see the step-by-step, non-traditional journey for creating an exceptional piece of painting.

    This process is effective because we feel that we’re in the author’s shoes, scrutinizing each step carefully.

    Even with the informal style of guidance one gets from this book, we are still able to produce remarkable paintings.

    Another great thing about this book is that we get both The Watercolorist’s Essential Notebook and The Watercolorist’s Essential Notebook: Landscapes in one place.

    However, the book’s whole explanation concept is lengthy at times and might not work for everyone, especially those who like to follow single sentence instructions.


    Pros

    • This book delivers a guide for both beginners and experts in an informal way, allowing them to observe each and every step carefully
    • It also includes two North Light watercolor guides that are essential for any creative artist
    • For the price of two different guides, this book is highly affordable


    Cons

    • The book’s concept of explanation might not work for those who choose to follow short and crisp guides


    1. Watercolor Techniques: Painting Light And Color In Landscapes And Cityscapes

    In this 142-page guide, you will be able to see the fantastic life-like artworks on cityscapes and landscapes achieved by using multiple creative steps and techniques.

    This guide leans more towards bettering the advanced artist whose aim is to improve their paintings on both landscapes and cityscapes.

    However, the steps provided by the author are so easy that a learner can also follow if they choose to take on this wonderful journey.

    Experience

    To experienced watercolorists, this book brings new ideas and demonstrations which enhance their present styles of painting by using the author’s approaches.

    We liked that in one way, this book covers all the basics of watercoloring in minute details which beginners would find helpful since every explanation is a byproduct of answering frequently asked questions about watercolor paintings. 

    While at the same time, it helps a seasoned artist to see the extent that watercolors could go to by following the suggested techniques.

    Besides that, we gain a lot of insights into the struggles and successes experienced and shared by the author.

    But because the book clearly focuses only on producing great landscape art, it might not be useful for artists who want to learn the different subject matters of watercolor paintings.


    Pros

    • A large section of the book’s guidance is based on questions raised by artists every now and then, making it more relatable and reliable
    • It includes many instances encountered by the author so that it helps readers, especially beginners, in knowing what to expect


    Cons

    • As good as the book is, the demonstrations are only limited to those of landscape and cityscape paintings


    1. Painting Watercolors [First Steps]

    Sale
    Painting Watercolors (First Steps)
    • Johnson, Cathy (Author)
    • English (Publication Language)

    This next book by Cathy Johnson is a good option for the absolute beginner.

    Inside this 128-page guide, there are full-sized pictures in each page along with brief and very clear demonstrations about them.

    Besides being quite simple in explanation, the author also uses simple terms and language to convey the methods to her audience so that anybody can easily get the idea.

    Experience

    This guide provides a complete guide to using different tools and materials for painting and proper color mixing that makes the process of learning come easily to a beginner.

    There are times when we think that teaching ourselves the art of watercolor painting is pretty hard to achieve immediately. But that’s not the case with this guide; everything we read is available in a simple form and everything we have to follow is broken down into the easiest manners possible. 

    With a guide as such, we can start painting with watercolors efficiently within a few days.

    Moreover, the paintings we are able to achieve with this guide are remarkable and realistic to the eye of any beholder.

    The ebook version of this guide contains poor-quality images. Therefore, we do not recommend buying it.


    Pros

    • This book offers the determined beginner a number of easy ways to learn how painting with watercolor works
    • The tricks available in this book help deliver realistic and exceptional watercolor artworks


    Cons

    • The ebook version contains images which do not produce good-quality images when zoomed in for a better view


    1. Breaking The Rules of Watercolour

    Breaking the Rules of Watercolour
    • Keep your techniques sharp with this amazing book
    • Hardcover Book

    Shirley Trevana in her book Breaking The Rules of Watercolour adds 10 watercolor paintings followed by revealing her thoughts while creating them.

    With this process, we not only see what’s genuine narration but we get to learn the do’s and don’ts of watercolor artworks using her techniques.

    In this book, you’ll see how the author creates amazing artworks by continuously looking for alternative ways to make the best use of watercolors.

    Experience

    To put it out there first, this book is not a guide for beginners because the kind of illustration which the author used leans more towards those who already have enough knowledge of this medium.

    That being said, the book shows us personal methods which the author used to create these 10 paintings.

    We get to see the way Shirley was able to come up with extraordinary paintings is by using her unique methods. These methods include her own style of creating textures, different perspectives, and most importantly, her way of combining colors to get the best results out of them.

    Moreover, the features of these 10 paintings used in the book are very clear and of high quality so that the reader can observe all the textures carefully.  


    Pros

    • The whole guide is based on using the author’s unique methods of taking watercolors to their highest level
    • All the pictures in the book are enhanced so that the reader can closely watch each attribute and brushstroke


    Cons

    • The demonstrations in this book seem to be intended only for knowledgeable artists, hence, beginners will find it hard to understand the guide


    1. Watercolor 365: Daily Tips, Tricks, and Techniques

    Sale
    Watercolor 365: Daily Tips, Tricks and Techniques
    • Redhead, Leslie (Author)
    • English (Publication Language)

    Here is a book that will work pretty well for anyone who likes to paint for fun. Anybody who reads this book will find it to be pleasing and entertaining rather than serious and descriptive.

    The book covers almost all the basics about watercoloring, and is therefore great for learners.

    Experience

    We like that this book provides short and crisp guides which are very easy to understand for anybody. With a brief guide, you can jump from one step to another step pretty easily.

    What we like about this book is that it has fun and fascinating guides that make us look forward to what’s in store for us on the next day.

    We find the concept to be constructive because unlike other guides which you read once a while, this one actually helps form a habit for us.

    The guide helps us learn and practice one new step every day, ensuring better and quicker learning. So, if you are determined to learn about watercolor paintings, this book might be the best choice for you.

    However, the problem with the short guides is that they don’t answer or clarify doubts. If you need a better explanation, you won’t be able to find it here.


    Pros

    • The book contains short and crisp ideas that any reader would understand and easily follow
    • The guide’s concept is entertaining, which makes it fun to read


    Cons

    • These steps are meant only for giving ideas/techniques and not to provide extra information or to clarify any doubts


    Autumn floral border background in white with leaf watercolor illustration. Watercolor Painting Books Conclusion

    Watercolor Painting Books Conclusion

    Well, that’s it, folks! Those are the best watercolor painting books that we have chosen specifically for you. We hope you found this article helpful enough and enjoyed reading it!

    Check out our other article on the best watercolor painting books for kids to know more about this topic.

    See you soon. Good luck!

    Related Articles

    Cold Press vs. Hot Press vs. Rough Watercolor Paper

    10 Best Watercolor Palettes for Beginners & Professionals

    13 Best Watercolor Pencils and Water Soluble Art Supplies

    15 Best Watercolor Paints

    Best Watercolor Paper

    12 Must-Know Watercolor Tips for Beginners & Pros

    Why and How to Use Watercolor Mediums to Enhance Your Painting Game

    Learn How to Use Watercolor on Wood

    13 Best Watercolor Sketchbook for Creatives

    11 Best Watercolor Brushes for Beginners & Professionals

    15 Must-Have Watercolor Supplies for Beginners & Artists

    Stretching Watercolor Paper & How To Keep Watercolor Paper From Warping

    Learn How to Paint Watercolor on Canvas Easily & Successfully

    16 Must-Know Painting En Plein Air With Watercolors Tips & Tricks

    Learn The Basic Watercolor Painting Techniques For Beginners

    Expand Your Knowledge With Watercolor Painting

    19 Incredibly Beautiful Watercolor Painting

    83 Best Watercolor Painting