A house is not a home unless it has something different. Memories are the ones that make the biggest difference, but having a few items made by ourselves and perhaps the loved ones can truly make a place special. Sofas, wardrobes, or even dining tables require more work and knowledge, but an end table can be easily put together with materials that might be at our immediate disposal. The expression "end table" comes from the 1850's in America and represents a small table that is placed beside a chair or at the end of a sofa. It's a project small enough so it doesn't take much time to design and create, but big enough to make a difference, just like a chair, a lamp, or a coffee table. Wood is perhaps the easiest material to work with, but go ahead and be creative. See the potential in anything, add a little work and passion, and you'll end up with a unique home. We hope the examples in this article will improve your imagination and challenge you to make your one-of-a-kind end table.
Creative DIY End Tables
1. Rustic end table
No wood beams or metal pipes hanging around? No problem. This model can be built with materials found at any construction store. Go ahead and play with the design. The satisfaction of spending some time working and then seeing it done is priceless.
This might be the easiest approach to building such an object. Wooden pallets are very common, easy to take apart, cut and reassemble in a variety of shapes that can suit any available space. Moreover, you can give them any look you want. Do you have a rather rustic living room? Then go ahead and use a wool-vinegar solution to give it an old look. Or perhaps you painted one of the walls turquoise. No easier task than buying some paint and a brush and having some fun while creating a beautiful diy end table.
Stacking two wooden boxes on top of each other might not seem such an intriguing idea at first, but the picture speaks for itself. By themselves, the boxes are no design pieces, but they stand out near the blueish new couch and look very good with all the books stored inside. This is what imagination is all about. Seeing potential in any item. Perhaps you have some lying around and don't even know it.
4. the beauty and adaptability of a diy end table project
Are you struggling to find a furniture piece that fits perfectly near your new couch? Then look no more and build one yourself. The principles and the materials used do not differ much and you'll definitely enjoy the building process.
via thefriendlyhome.blogspot.com
5.combining wood with metal-fancy milk can end table
Who would have thought that you can turn a metal milk can into a table right?
Well, your guests will definitely be impressed and admire its one of a kind nature. Look around the house. What other apparently useless objects do you have? Think twice before throwing them away. Instead, save, repair and paint them and you won't regret. I bet you won't find this in a regular store. Furthermore, this diy end table masterpieces can be used in a variety of spaces, both indoors and outdoors.
Combine various items for increased practicality and looks. Figure out what your needs are and what is the most appropriate storage idea.
via thisbetterhome.com
7. creating a set of tables can be a great choice
Decorating your home with special furniture items is great but having a set of similar looking objects is even better, giving your living room a rather unitary appearance. Don't overdo it. Too many individual looking designs can be displeasing.
Don't know what image to go for? A clean looking white end table is something that no one can argue with. A simple design fits anywhere and is less stressful to accomplish.
9. a small wood diy end table fits perfectly near the new couch
Opt for contrasting or blending colors; a striking looking piece of furniture is usually meant to be an accent. The main color of the room should be chosen according to its size and lighting.
If you want something made by you, custom-made for your home but do not know what it should be yet than think about what you need. It's the easiest way. Maybe it's a small table to put the remote or an end table with shelves that can store the books you read on the armchair.
11. creating a diy end table with store-bought items
There is no need to build something complicate that takes hours. Go to the store and get creative. There are many objects that can be merged together to create something beautiful.
Size, shape and color. Those are the attributes that define an object. You only need to emphasize one of them to create something beautiful to look at.
Source Unknown
14. patio diy wooden end table
Wood is very easy to work with. Cut the pieces in various shapes and sizes to create patterns on your diy end tables or coffee tables.
With this diy nightstand or end table it's the shape that makes it look good. Not the size or the color. The beautiful craftsmanship makes it looks very tidy.
17. raw piece of wood turned into a furniture item
Combine this element with other rustic elements or, by contrast, with a new piece of furniture. Either way, you will impress. This simple but beautiful log can work as a diy nighstand or an end table in your living room.
This end table was made from an old crate or a wooden pallet. Leave it like this and it's perfect for your backyard or paint it and it will fit just as well inside.
via covenantnetworksupport.com
19. playing with shapes and colors
Don't resume to a simple design. Find some inspiration and cue the music. The Japanese wood art is a very good place to begin, they take wood craftsmanship to a whole new level. Not sure what colors to use? Pastel pallets are always a safe bate.
via ryobitools.com
20. creating the perfect fit for your new couch
Always think about the relation between the new object and the existing ones. A regular layout will only limit your imagination. Take a design and adapt it to your place.
Source Unknown
21. fresh looking end table
This item is even more connected to the sofa. The small table top is supported by two thin legs and it simply looks great.
22. Unique rope end table for your cozy living room
Wood and metal are not the only materials available. If it looks good and it is durable, it can be used. This rope end table is lovely and quite easy to make. The next step would be to create shapes or combining it with other materials.
One or two colors are enough. You don't want to have a crowded room that is tiring to look at; too many materials and colors and you'll feel like in a general furniture store.
The color palette is just right, keeping the room clean and full of light. Hairpin legs on a beautiful savage wood table top might be all you need.
via goinghometoroost.com
25. clean looking wooden table for a neat living room
You can never fail by using a simple design. Add a little flavor by using contrasting colors, here the table top contrasts the table base elegantly in relation with the context.
26. an industrial end table will definitely stand out
Depending on your skills and tools available, you can go for something that requires more work. Envision the end result before you start anything though, ensure that the project complements or contrasts your place in pleasant, beautiful way.
via thegoldensycamore.com
27. attractive log slice end table
Contrast can be achieved by employing not only colors but also shapes, sizes and textures. A beautiful slice of a wooden log receives the legs of an inexpensive ikea stool and magically becomes a legendary side table.
The combination of metal and wood is always interesting. Here, a piece of wood doubles as a warm table top while the table base is supporting is industrial looking, heavy duty, and a beautiful balance.
This design is definitely exclusive. There are many ideas that can help you choose the right one for your place. Acrylic is a inexpensive material that looks like glass and manages to emphasize the feeling of space through transparency.
33. Using a wooden crate is the most effortless approach
I like how the materials complement each other while keeping the room fresh. The thin hairpin legs are easy to obtain, they look epic; a crate and hairpin legs, you have the ultimate hairpin legs side-table design!
34. a special project - a himmeli copper pipe base for a geometric end table
This example is rather intriguing and easier to make than it looks. It was inspired by Himmeli, a Nordic technique used to make Christmas décor that has influenced many other designs over time. It's a beautiful project that will offer you a lot of satisfaction once it's done, it will impress any guest. It might not fit in a rustic room but place it near modern furniture and it will look amazing.
via homedepot.com
35. a chick presence - the diy wire bin end table
Unlike the Himmeli end table above, this design is made of two store bought items that manage to look appealing with less work involved. Working hard definitely pays off sometimes but take advantage of any opportunity.
36. thinking simple can result into lovely exclusive furniture items
This is the essence of an end table. No fancy copper tubes or intricate wood design. Just the basics. Something to rest a book on. It's not a simple design though. The creator did put some thought into it and carefully calculated the proportions to achieve something simple and beautiful at the same time.
I love the detailing on this small end table. The creator matched the base of each leg to the ones of the couch. The natural dark wood matches perfectly with the pastel pink.
What do you think about this particular DIY End Table gallery ? Would any of these be a good fit in your home? We would to hear your feedback in the comment section below.
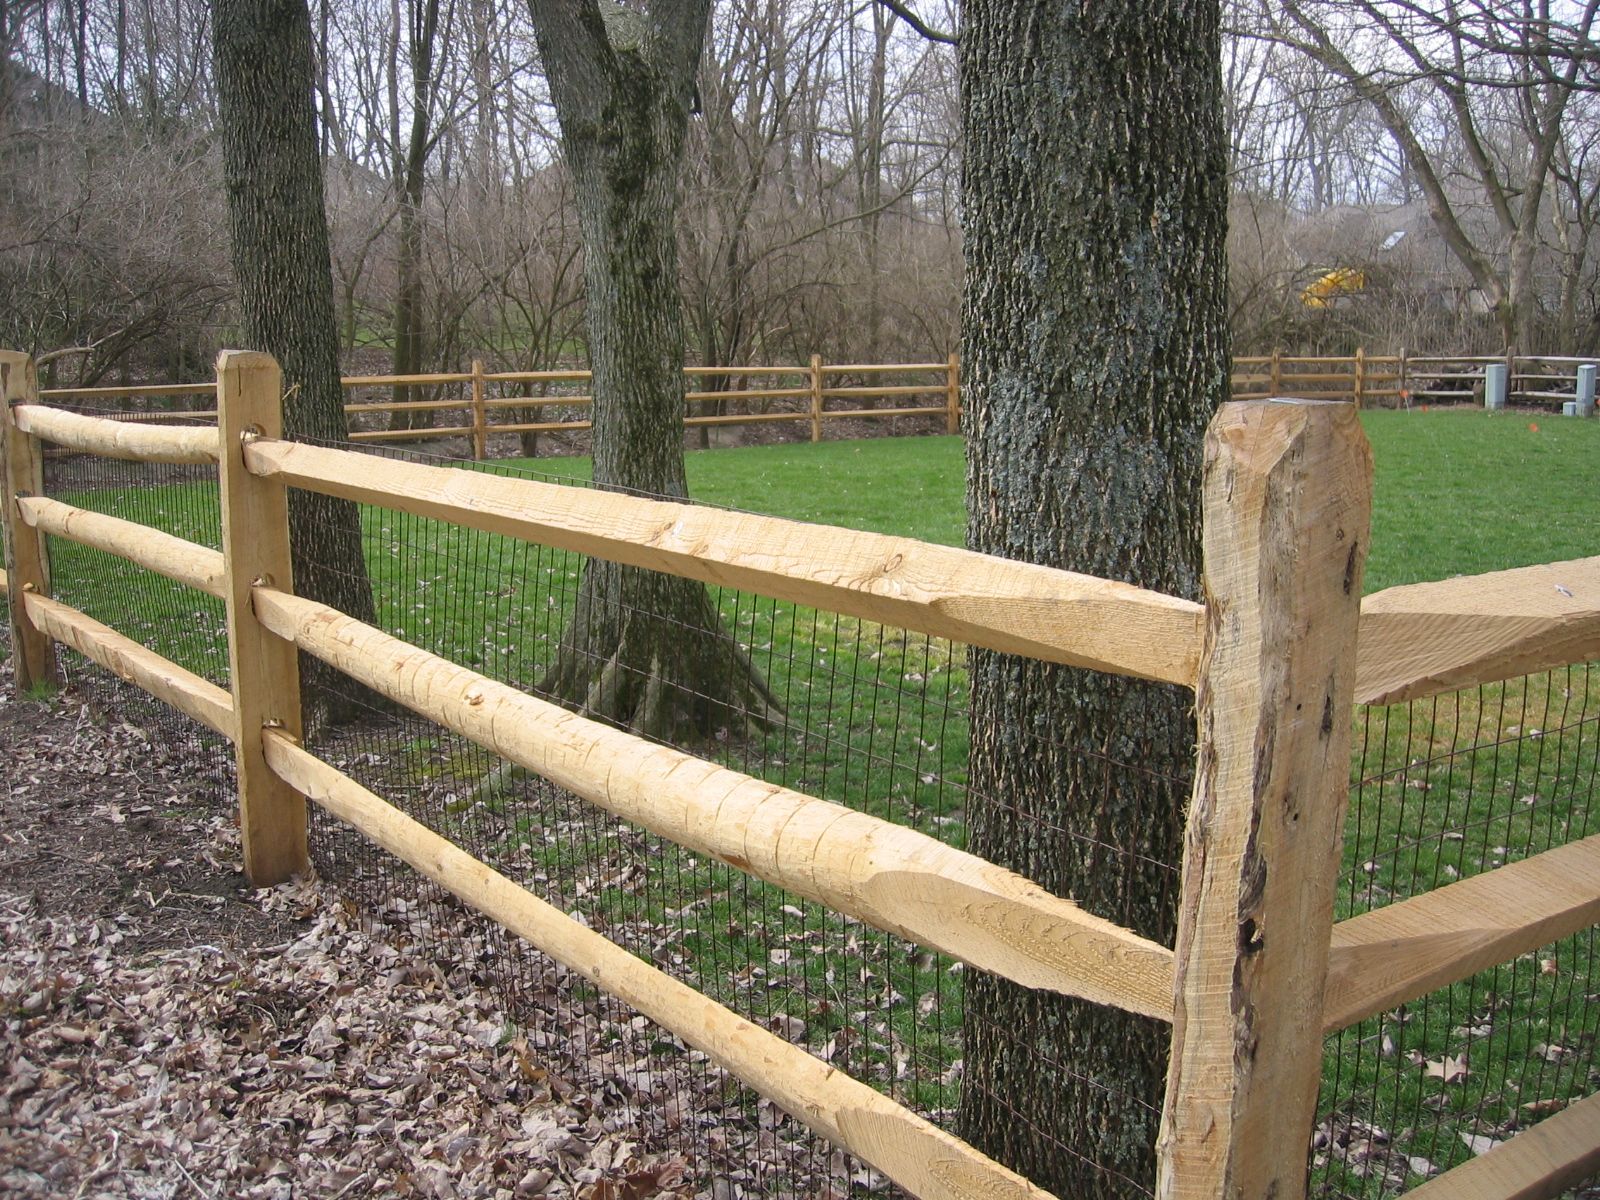
If you are living in an open-floor plan, then you will be interested in this article a lot since I'm going to show you some excellent ways to define the areas and divide your home. The Contemporary Room Dividers That Will Add Style To Your Home are truly amazing because they will add a unique statement in your home.
The room dividers come in so many different designs and styles, and it won't be hard for you at all to pick the one that will work the best for your space.
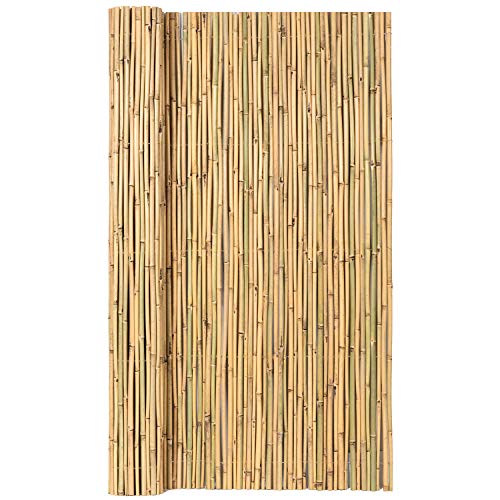
The bamboo room divider is great for you if you are looking for eco-friendly materials. We have to admit that it makes the home look just marvelous.
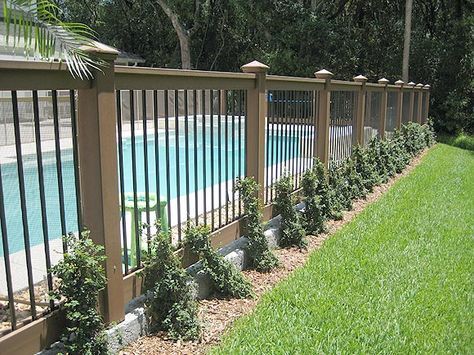
Instead of building a real wall in your spacious area, the room dividers are an inexpensive and smart way to define the functional areas in your home, and not make it look tiny at the same time.
Some of the room dividers can be purely aesthetically pleasant to the eye, while others can be really functional and practical. Look at the design below which holds a fireplace and lots of shelves at the same time. Isn't it just stunning?
The investment that you will make for incorporating a room divider into your home is small compared to the difference it will make in its look. It will not only make it look more comfortable and cozy, but it will also make a fashion statement and will elevate the style of your home.
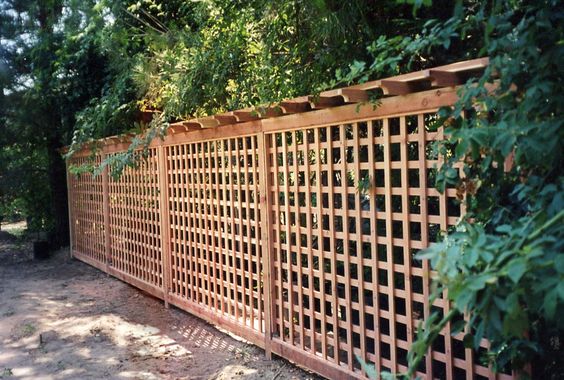
What do you say about using wood for your room divider? The wood is a natural material that adds warmth to your living space and gives it a special charm.
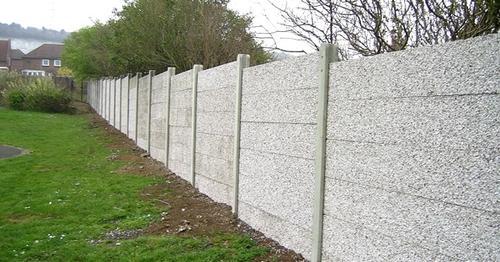
PVC dividers are a hot thing nowadays, and lots of people decide to add them in their homes. You can get super unique and unusual shapes, which will make your home distinctive and different from the rest of the homes.
If you don't have enough space for lots of flowers and plants inside your home, here's an idea that you will look forward to recreate. This room divider that will hold your flower pots in an outstanding fashion will separate the dining room from the living room with ease. How do you like it?
Source
Aren't these room dividers a contemporary way to define the areas in your home? Has some of the designs already caught your eye? I hope that you found your inspiration and that you are going to add one in your home really soon!
The Himalayan salt lamp light made our room feel calm at night. My little cousin jumped from chair to chair. One big jump knocked the lamp to the floor. Pink chunks went everywhere.
Cousin gave a shy look and ran off. I looked at the broken lamp and sighed. Work got busy, so the new lamp did not arrive quickly. The house felt different without that soft glow.
What to Do When Your Himalayan Salt Lamp Breaks
Mess happens. Safety comes first. Here is what I did, step by step.
How did the salt lamp help me?
Himalayan salt lamp glow told my brain, “Time to slow down.” Writing felt easier. Bedtime felt calmer. Dust near the lamp looked lighter on the shelf.
What changes did I see after the lamp was broken?
Night felt bright and busy. Sneezes came back to the desk. A small HEPA air cleaner near the desk helped sneezes more than the lamp did.
First safety steps right after the crash
Unplug the cord. Take out the bulb.
Use a brush and pan for salt dust and small bits.
Pick up big pieces by hand. Watch for sharp edges.
Put the pieces on a hard tray to keep the tables safe.
Wipe the table last with a damp cloth. Dry it right away.
Can salt lamps be repaired?
Salt breaks fast. Small cracks get a simple fix. Big breaks do not go back to one smooth rock.
Small crack: Mix fine salt dust with one drop of water. Press into the crack. Let it dry. A line stays.
Clean split: Use clear epoxy on dry edges. Press together. Let it cure. Wet air weakens the glue.
Many pieces: Make a bowl lamp. Skip the “one big rock” idea.
Is there a safe way to use the broken pieces?
Food idea popped in my head. The bag did not say “food grade.” I did not eat the salt. Safety matters.
Bath or foot soak: Use clean pieces with no glue. Rinse the tub after.
Warm or cool pouch: Fill a cloth pouch with clean salt. Warm for short bursts or chill. Place on tight muscles. Keep skin dry and unbroken.
Jar decor: Put small pieces in a glass jar with a lid. Looks nice. Stays safe from pets.
Bowl lamp that worked for me
One glass bowl. One small bulb. Same warm glow.
Set a heat-safe glass or metal bowl on a tray.
Place a low-watt bulb in a ceramic holder under a small metal stand inside the bowl.
Add salt pieces loosely so air moves around the bulb.
Keep the bulb from touching the salt.
Stick small bumpers under the bowl so it does not slide.
Moisture and electric checks
Use a cord set with a safety mark (UL). The switch should click cleanly.
Keep a tray under the lamp. Salt “sweat” drips on humid days.
Use a drier room or a dehumidifier if the lamp sweats a lot.
Pet and food safety
Keep pets away. Licking salt harms pets.
Use only “food-grade” salt for eating. Lamp salt may hold dust or glue.
Store leftover pieces in a sealed jar.
The Result?
Broken rock became a bowl lamp. Light felt soft again at night. Cleaning got easier with the tray. A quick cord check once a month keeps it safe.
Quick Choice Guide
Choice
Use When
How
Watch Out For
Fill a Small Crack
One thin line
Salt paste, dry
Still weak
Glue a Split
Two or three big parts
Clear epoxy, cure
Wet air weakens glue
Make a Bowl Lamp
Many pieces
Bowl, bulb, loose stack
Needs a dry room
Jar Decor
Small bits
Glass jar with lid
No lamp glow
Throw Away
Dirty or sharp waste
Seal in a bag
None
FAQ
Does the lamp help sleep?
Warm, low light helped my night routine. Regular bedtime and less screen time helped more.
Which bulb works for a bowl lamp?
Low-watt incandescent or low-heat LED. Leave space around the bulb.
How do I stop marks on furniture?
Use a hard tray. Add felt pads under the tray.
How do I know the lamp is real salt?
Real salt sheds tiny crystals and softens a bit when damp. A shiny, tough “stone” might be fake.
Should I swap the cord after a fall?
Yes, if the switch sticks, the plug looks burned, or the cord pulls loose. Safety wins.
Best oil pastels combine rich pigment, creamy texture, and effortless blending to create vivid, expressive artwork without the need for brushes or solvents. Compact and easy to use, they’re perfect for both studio work and outdoor sketching, allowing artists to apply color directly to paper, canvas, or board. Professional-grade pastels feature dense pigments and superior lightfastness, while beginner sets focus on smooth layering and control. To enhance your results, you can explore additional techniques in our guide to colored pencil techniques and learn how to protect finished work using the best fixatives for pastels. In this article, we’ve selected the 7 best oil pastel sets known for blendability, durability, and brilliant color payoff, helping you find the perfect set to elevate your creative process.
Best Oil Pastels
Take a moment and have a look at this list of the 7 best oil pastels we’ve carefully selected to meet any of your creative requirements.
BRIGHT, VERSATILE COLORS: Achieve many painterly effects...
THE ORIGINAL OIL PASTEL: Invented Sakura in 1925 by the...
From an endless collection of Sakura Cray-Pas oil pastels, we chose to start off with this pack for a lot of reasons, which you will see in a minute.
The pack contains 50 non-toxic sticks of different shades that are very rich in pigments. It also comes with a color chart, which can be handy for beginners.
Experience
One of the features that makes the Sakura Cray-Pas Oil Pastels very dear to users is that it is beginner-friendly.
Firstly, the fact that it comes with a color chart to guide learners makes it easy to use. We also like that the chart shows the pigments as they really are when applied.
We find that using this pack to guide younger artists does not raise any concerns because they are non-toxic.
If there are children, you will understand the worries that come with having colors lying around, either in the studio or around the house.
But that is not the case with these pastels because you can go anywhere and be worry-free, except for them ruining the precious sticks, of course.
However, we think the best aspect of these pastels is that they can be sold individually as well. We tend to run out of blue or yellow every so often when doing landscape painting,s and this is where the option to buy a single stick can be very helpful.
Besides, they are inexpensive as each pastel costs $0.67. For those starting with a single art concept, it would be a waste to purchase the whole set at once.
But a collection of 50 colors is still too less to choose from. We have to rely on mixing/blending in order to get the desired shades for our paintings.
Nonetheless, we notice the pastels provide a very tight texture, which is what artists would look for to achieve full coverage. Along with that, they also deliver a smooth outlook with an opaque touch to it.
All in all, we would suggest getting this pack to those artists who are looking for quality over quantity.
Pros
The pastels are beginner-friendly and come with a color chart to see the actual results when used
They are non-toxic, which is suitable for younger artists to use as well
Each pastel is available individually and costs $0.67, so it’s perfect for artists on a budget
Cons
The range of colors is too limited, making blending the only option to achieve the desired shades
Material: Soft | Quantity: 50 | Container: Box | Dimensions: 4.4 x 9.9 x 0.8 inches
Pentel has been around for about 70 years or above. To say that they have produced great-quality art supplies throughout the years would be a correct statement.
Because the brand focuses on delivering art supplies for students, the products are also highly affordable - and the pastels are no exception. Their retail price is mostly under $10 for several 50 pastel sticks.
Experience
We can’t help but mention the price tag first. 50 sticks of pastels for under $10 is like a steal. Not only are we impressed by the quantity, but we also love how the results turn out.
No doubt, the pigments are as rich as those of high-end brands, but they do not produce perfect strokes on a surface. What is also not compromised is the blend and binder that these pastels are capable of delivering.
Because they are relatively cheaper, it makes they are suitable for children to use as well. It would be heartbreaking to give expensive pastels to kids when they are liable to break them, especially if we are on a tight budget.
The only disadvantage we find with these pastels is that they are not available for buying individually.
If we run out of a couple of colors, we have to turn to other brands that provide individual purchases. And buying a whole new box of these would be a waste if we rarely use the other colors.
We would say that the pastels are great if you’re just starting out or perhaps to purchase for young artists.
Also, if you are on a restricted budget for purchasing high-end brands but want to buy quality sticks anyway, we will highly recommend this option that won’t leave you disappointed.
Pros
These pastels come at a much cheaper retail price compared to other brands because they are intended for students
The blend and stroke are exceptional as compared to its price
Children can also use these pastels for fun because of the cheap price
Cons
They are not available for purchasing individual sticks
Material: Soft | Quantity: 432 | Container: Box | Dimensions: 13.4 x 10.6 x 3.4 inches
Oil pastel. I use the pigment of high quality, purity of...
Supplies
Here are pastel sticks that fall between student and artist grades in terms of classification and ratings.
The Caran d’Ache Neopastels are great for artists who are on the journey of mastering oil pastels as a painting medium. Learners, too, can go for these pastels if they want to take on another level of pastels.
Experience
What we really admire about the Caran d’Ache Neopastels is their consistency. It delivers a soft and creamy texture while working.
We can understand why many artists would prefer this option if they’re looking for easy and smooth blending. And because the pastels are really soft, they are rich in pigment,s and that can produce vibrant results which anyone would want for their artwork.
The pack comes with a color chart, which is very different from the one we get with the Sakura Cray-Pas pastels. In the chart, you’ll see a more detailed explanation to give artists a visual guide before mixing colors.
The chart specifies everything one needs to know about the pastels - from their unique names to pigments and lightfastness. So if you’re a self-taught beginner, this would be a good pick to get yourself familiar with mixing colors.
We took it from different artists who said that the pastels are a great investment and that there is a wide range of colors within the pack. Sure enough, we weren’t disappointed since they did justice to our work.
If you’re wondering, the overall online rating of these pastels is 4.7 out of 5.0. With an affordable price and brilliant quality, we feel these are indeed worth investing in.
One of their best features is that they are available separately, too. Imagine running out of a few shades and not having to spend money on a whole box of pastels over and over again - that is in itself a great deal.
But sometimes the quality of the pigments can differ with each stick. At times, we find some shades to be too dry to work with.
All in all, we would suggest going for this option if you want to shift the focus from your previous pastels to a pack of superior-quality ones.
Pros
Pastels are extraordinarily smooth and creamy, which is perfect for blending
The pack comes with a color chart that provides basic and easy details
Available for purchasing individually, so it saves a lot of money
Cons
Some shades can get too dry to work with at times
Material: Soft | Quantity: 96 | Container: Box | Dimensions: 13.5 x 9.8 x 0.8 inches
One of the high-end brands is Holbein. You will likely know this if you have been around art supplies for a while.
These Japan-based pastels are decently hard and rectangular in shape, which makes them perfect when working on outlining and small details.
What makes this stand out from the rest of the oil pastels is their chalky composition.
Experience
We really like how these pastels provide full coverage when working with backgrounds. Moreover, they are pretty easy and quick to blend because of the chalk and oil combination. They hardly spread over the painting, nor are they messy.
Because their structure leans a bit to the hard side, we find them to be great for working with minor details in the artwork. This is also because they are not easily breakable, as soft pastels are.
The rectangular shape of the pastels also has a part to play in the texture of the painting. It really gives a fine gradient touch when toning the surface.
But what surpasses every aspect of the pastels is that the pack contains up to 225 colors, which makes our work pretty easy since there is no need to blend colors to get the desired shade.
This also saves us a lot of money, which we could have spent trying to find a box with other different shades.
The pastels are available in a set as well as individually. In case we used up a shade, it will be pretty easy to order one right away.
If you’re wondering if the price is a major drawback, you’re right. Even though they are available to buy separately, each pastel costs $3.2,9, and that can be too much for artists with a tight budget.
But to be on the safe side, you can always try out a few shades before deciding if these pastels will meet your requirements.
Besides, you can always get only a few of these and mix them with other brands to get a unique piece.
Pros
Chalky composition helps make blending quick and easy
Perfect for creating outlines and sharp edges
A total of 225 sticks are available in the set for the artist to explore a wider range of colors
These pastels are also available individually and as a set
Cons
One stick costs $3.29, which may not be ideal for every artist
Material: Soft | Quantity: 40 | Container: Cardboard Box | Dimensions: 9.2 x 7.2 x 0.8 inches
Mungyo Gallery Soft Oil Pastels Set of 48 - Assorted Colors
You probably have come across this brand while watching tutorials every now and then. Mungyo is very popular in the world of oil pastels currently.
While the quality is very much like that of Sennelier’s, these come at a more affordable price, however.
These oil pastels have a smooth and buttery touch to them, which makes them highly preferable.
Experience
As we have stated before, they are high-quality pastels that come at a very affordable price of $25 per set. This is one of the reasons why we are drawn to these colorful sticks.
Although the number of pastels is limited to only 48 sticks in one set, we love the consistency it delivers to the paintings. More importantly, the coverage is compact and smooth.
The best feature when it comes to these pastels is that they offer extraordinary results while highlighting, since they are vibrant in pigment.
If you’re looking for pastels that are easy to use, we highly recommend these for their amazing composition as a whole. Both texture and consistency make these a perfect choice for the complete beginner who has just started with the basics of oil pastels.
But unlike most of the good pastels we’ve reviewed, these do not come with a color chart. On top of this, we also found that they are not available for buying separately. It leaves us no choice but to look at other brands and find a similar shade to the one we used up from this set.
Overall, we can say these are ideal for learners who want to explore good-quality oil pastels without having to spend too much money on them. Also, they can compare to see the difference between average pastels and those that hold superior quality.
Pros
Easy and simple to use, which makes them ideal for complete beginners
Lower price than high-end pastels, given their wonderful quality
Working with highlights is very easy with the pastels since they are soft and contain a high level of pigment
Cons
The set does not have a color chart, which should include details about the pastels
They are not available for individual purchase
Material: Soft | Quantity: 48 | Container: Box | Dimensions: 9.3 x 6.5 x 0.7 inches
Whether you’re into paintings or not, it would be a lie if you have not heard of Crayola before.
At some point in time, you probably have come across this brand, especially as a kid when art class was necessary to enhance our creative minds.
There are many reasons why we included this on the list - one of them is that they make cleaning up very easy.
Experience
We will first begin by stating the comfort of holding these large oil sticks.
Whenever we paint or sketch with most oil pastels, we have to keep in mind to always be extra careful not to break them. But working with the Crayola oil pastels reduces those worries since they are thick, which makes them less susceptible to breakage.
Of course, that is the reason why these are perfect for children and young artists because they can get quite reckless at times.
But that is not only ideal for youngsters, since we also find this structure beneficial for certain uses. For instance, when having to work on filling the background or creating sharp outlines, we can do so with ease, and there’s no tension behind it.
The sharpened tip is also one of the best features required for the painting process. With a sharp tip like this, creating precise lines is not an issue.
However, the quality of these pastels is nowhere near that of high-end brands. But that does not come as a surprise since these come at a pretty affordable price because they are meant for children.
Keeping that aside, if you are looking for oil pastels that can serve both you and the kids, we would suggest going for this option.
Pros
Really affordable and good for children to use
They are both rigid and big, which makes holding them very comfortable
Great for working with backgrounds
Cons
The quality of these pastels is average compared to high-end brands
Material: Hard | Quantity: 12 | Container: Box | Dimensions: 4.4 x 1.4 x 3.4 inches (each)
Last on the list, we have a high-end brand that most artists would know.
The French-based brand Sennelier has been around for a long time and has served great artists such as Picasso.
You can just imagine the kind of quality Sennelier would provide when it comes to oil pastels. This particular set is undeniably great for delivering marvelous results.
Experience
We discussed some brands that offer oil pastels with high consistency and smoothness, but the same features that Sennelier pastels have are unbeatable.
We can tell the difference when comparing a similar test painting using Sennelier oil pastels and inexpensive sticks. The vibrancy that the former delivers is classic and rich. Also, working with these pastels allows us to have more control over the sticks.
The set contains 120 unique colors that can fulfill any artist’s desired shade, either directly or through blending.
This is a great aspect that we would look for in our oil pastels because we don’t have to go to other brands in search of a single intended shade. And unlike liquid paints, blending oil pastels is a bit harder; therefore, the wide range of colors reduces that tension as well.
Along with that, the price of this set is already high enough for artists with a limited budget. So, settling for this alone already solved most of our shade-hunting problem.
Artists who wonder what the color chart is like would be glad to know that it contains the list of colors and details on opacity and their lightfastness. Beginners would also find this feature beneficial while learning about oil pastels.
The pastels can also be bought individually as well as a set, which again prevents us from going through the shade-hunting process all over again.
But as we have mentioned, the price of these high-end pastels is very high and might not be reasonable for students and budget artists.
Pros
Pastels deliver outstanding consistency and vibrancy to the piece
120 different shades in the set, which most artists prefer to reduce the process of blending
The set also comes with a handy color chart, which is easy to understand
Cons
The cost of these pastels can be too much for many budget artists and students
Material: Soft | Quantity: 48 | Container: Cardboard Box | Dimensions: 10.8 x 6.9 x 0.9 inches
Before we move forward with the reviews, let’s take a quick look at how oil-based pastels are different from those with different compositions.
If you are an advanced artist who is already familiar with the differences, we’d suggest skipping this part. But if you are new to pastels and want to purchase a set, you might want to go through this brief guide.
From the name itself, you can tell that these sticks produce rich pigments. They are perfect for creating really bright and luminous paintings.
Because they are soft in form, it makes they pretty delicate and fragile to work with. However, this does not mean that one should refrain from using them, since you get one of the best results by using them.
However, keep in mind that there are certain types of soft pastels that are toxic, like those with cadmium pigments. Therefore, we would recommend looking for non-toxic soft pastels if you have children around, by going through the labels first.
Contrary to soft pastels, pencil pastels are usually hard-structured and slightly tough to blend. However, what they are perfect for is that they can create fine and accurate lines. They are also good for highlighting small details.
And unlike soft pastels, these are pointed and rigid, which makes them unbreakable when used.
They can actually be used as a separate medium for minor details to complement and complete your oil pastel painting.
As the name suggests, these sticks are pretty hard and deliver fewer pigments to your paintings.
But like the pencil pastels, they do a good job when you need to create precise outlines and extra highlights. Besides that, many artists use them for creating backgrounds.
Also, if you are a traveling artist, these will come in very handy in your creative journeys because they are not fragile.
Finally, let’s look at oil pastels and see why they are favored by most artists to create beautiful artwork.
Oil pastels have a different composition altogether. They are made of wax and contain mineral or linseed oil. This gives them a reason to produce vibrant colors. They are also soft, which makes them pleasant to hold while painting.
But the only drawback of this pastel type is that it can get too tough to blend when working on rough textures due to its thickness. Keeping that in mind, the one thing that makes oil pastels stand out from the rest is that they have no requirement for a preserving medium or a fixative. While other types of pastels depend on a spray to prevent discoloration, oil pastels only require being stored away from direct heat.
The second striking difference is that oil pastels can be mixed with certain chemicals to thin them down, creating various effects.
Note: Remember that oil sticks and oil pastels are not the same. The former can dry out after some time, while the latter does not.
Buying Guide For The Best Oil Pastel
Before purchasing a set of oil pastels, there are a few things you might want to first take into consideration.
Grade
Like other art supplies, oil pastels also come in two different grades: Artist and Student. Deciding which one is for you requires knowing where you and your skills stand. Take a quick look at the two options for a better understanding.
Artist
The reason why you see some oil pastels termed as artist grade is that they have superior quality in performance and pigments. In fact, if we look at every aspect, artist-grade pastels surpass others.
Moreover, artist-quality oil pastels are resistant to oxidation. They contain more oil than wax in their composition.
Caran d’Ache Neopastels, Holbein Artist, Sennelier, and Sakura Cray-Pas are some examples of artist-grade pastels.
Student
On the other hand, student-grade oil pastels have fewer pigments. They also contain more wax and less oil in the composition.
This is the reason why they are more affordable, so that students or artists on a budget can have access to them financially.
But not all student grade pastels have compromised quality to a large extent. There are brands such as Mungyo Gallery and Van Gogh that offer the best kind of student-grade oil pastels.
Pigment
Lightfastness means the amount of light that can affect the pigments of these paints. We all have some idea about how different colors reflect and absorb light.
This information is available mostly on the color chart, which comes with the set. Therefore, when buying oil pastels for serious paintings, we suggest looking for those with a color chart.
Consistency
The consistency of pastels entirely depends on your preferences. If you are going for a vibrant and luminous look, then those with a creamy recipe will work for you.
But if you’re looking for kid-friendly and good for outlines, you will want to look for options that lean more towards the hard side.
Individual or Set
By now, you would already know the importance of buying from a brand that offers both individual and sets. Finding the best oil pastel set for you can greatly emphasize your efforts.
The reason this is very important is that it will save you a lot of money and time, especially when working on a larger artwork. The fact of having to replace the same color time and again will not be convenient if you can’t purchase it individually.
However, if you’re a beginner working on smaller projects, a set would be the ideal pick for you.
A tortillon is a tool useful for blending pastels. It is nothing fancy, but a piece of paper that is tightly rolled up so that it forms a tip at the end, which can assist the artist with blending the colors smoothly.
A palette knife is a versatile tool. It can be used to blend liquid paints, but for pastels, it can help in the process of scraping off any excess paint to create sharp and clean edges.
Turpentine or other mineral spirits are used for blending colors as well. These solutions help make the colors creamy and soft to blend.
They also help remove any pastel stains that are left on the surface after scraping off the excess paint.
If you use them for blending, you can use a brush and dip them in the turpentine. Wipe off the excess liquid and apply it to the area where you need to blend. It will soften the wax in the oil pastels and make it better for the process of blending.
In case there is a need to clean the areas where the paint is spreading, use a small piece of cloth.
Another one of the blending tools is the color shaper. It is perfect for use with oil pastels because its shape is very similar to that of a brush.
However, the tip does not have any bristles but instead has either a silicone or a plastic end, which is great for blending detailed areas in an oil pastel painting.
A primer is a necessity in the world of painting as a whole. If you are an experienced artist, you will know the striking difference between paintings with and without a primer. The primer plays a role in the outcome of a painting.
Without it, your painting will be very hard to manage throughout the entire process. It will create issues when trying to blend colors or working with strokes, for that matter.
But if you prime the surface before starting, the results will be completely different. You will see it is smoother to work on, and the finished painting will be very alluring.
While liquid paints dry out eventually, oil pastels are not the same whatsoever.
Made with oils that do not dry, oil pastels are vulnerable to heat and other elements. This leaves the artist with two options to preserve the painting: framing or using fixatives.
While framing sounds like a perfect idea, not everybody can afford to frame each and every piece of their collection. This is where fixatives come in.
If you want to preserve your oil pastel artwork, use a decent fixative that is made for oil pastels. That will prevent the painting from dust and discoloration in the long run, keeping it fresh.
Oil Pastels FAQ's
How are oil pastels different from other art materials?
Oil pastels are different from other art materials, such as regular pastels or colored pencils, in that they are made with oil and wax, which makes them softer and easier to blend. They also have a more intense and vibrant color than other art materials.
Can oil pastels be used with other art materials?
Yes, oil pastels can be used with other art materials, such as acrylic paint, watercolor, or graphite. However, it’s important to use a surface that is suitable for the specific medium, as some surfaces may not be compatible with oil pastels.
Are oil pastels toxic?
Oil pastels are generally considered safe to use, but some brands may contain toxic materials, such as heavy metals or solvents. It’s important to read the labels and follow the safety instructions provided by the manufacturer.
How do you store oil pastels?
Oil pastels should be stored in a cool, dry place to prevent them from melting or becoming too soft. They should also be kept in their original packaging or a separate container to prevent them from getting dirty or mixing with other colors.
Can oil pastel artwork be preserved?
Yes, oil pastel artwork can be preserved by fixing it with a fixative spray or framing it behind glass. It’s important to use a fixative that is suitable for oil pastels to prevent the colors from smudging or fading over time.
Can oil pastels be used for professional artwork?
Yes, oil pastels can be used for professional artwork and are a popular choice for artists who want to create vibrant and expressive pieces. There are many artists who specialize in oil pastel artwork and have gained recognition for their unique and innovative styles.
How do you clean up after using oil pastels?
Oil pastels can be messy, so it’s important to clean up properly after using them. You can use a soft cloth or tissue to wipe off any excess pastel from your hands or the surface. You should also avoid blowing on the pastels, as this can spread the dust and make the mess worse.
Conclusion
Thank you for taking the time to explore our in-depth article on the best oil pastels. We trust that you found the information valuable and are now equipped with the knowledge you need when deciding which oil pastels to purchase. As you embark on your artistic journey, these oil pastels will help elevate your artwork to a whole new level of vibrancy and depth.
Out of these 7 best oil pastels, here are our top three recommendations:
Sakura Cray-Pas Oil Pastels - Best for Beginner-Friendly Experience: This pack not only comes with a color chart but is also non-toxic and suitable for younger artists. A great option for those new to oil pastel painting.
Pentel Arts Oil Pastels - Best for Budget-Conscious Artists: With an impressive collection of 50 pastel sticks for an affordable price, Pentel Arts Oil Pastels are perfect for student artists or those on a tight budget.
Caran d'Ache Neopastels - Best for Smooth Blending: These pastels boast a soft, creamy texture ideal for smooth blending, making them well-suited for artists looking to level up their oil pastel skills.
With these recommendations, you are now ready to embark on a colorful adventure, creating breathtaking masterpieces with your chosen oil pastels. Trust your artistic instincts and let your creative spirit flourish with every stroke and blend of color. The world of oil pastels awaits you – go ahead and unleash your imagination! Happy painting!
Best fixatives for pastels are essential for protecting artwork from smudging, dust, and discoloration while preserving the vivid pigments that make pastel creations so striking. Acting as a transparent sealant, a fixative forms a thin, invisible layer that locks in color, prevents abrasion, and helps your art age gracefully. Most professional-grade options are acid-free and alcohol-based, offering quick drying times and consistent coverage. Available in two main types—workable fixatives, which allow layering and blending, and final fixatives, which provide long-term protection—these sprays are a must for pastel, charcoal, or chalk artists seeking lasting results. In this guide, we’ve selected the 6 best fixatives for pastels, each tested for spray consistency, color preservation, and finish quality, so your artwork remains vibrant and secure for years to come.
Best Fixatives for Pastels
Give the following a quick look to see the differences between the 6 best fixatives for pastels so you can choose one that best suits your requirements.
What’s a better way than to start off this list with a fixative that can be used for all purposes?
The Winsor & Newton Workable Fixative is highly versatile, in that it can be used not only with the given specific paints but with other media such as oil pastels, chalk, and even charcoal.
Colorless Fixative For Use On Charcoal, Pastel, Pencil &...
To Protect From Smudging & Dust
Experience
Before we get to our review, the first thing you should know (in case you’re not aware of it yet) is that this brand is well known for its great-quality art supplies, such as acrylic paints and watercolors. And now, we have the fixative, one of the best products yet.
First of all, for its amazing effects, we think the fixative comes at a very reasonable price of about $12 per can.
However, we find that, unlike other fixatives, which are meant to enhance the paints, this one can somewhat make the paints seem a bit shadier than how they actually appear.
But the best feature about the Winsor & Newton fixative is that it protects the painting with a very light coat. With a thin coating, artists have more control over the texture and the tooth of the surface. This is one important feature to look for in a fixative if you want your paintings to dry quickly.
We would recommend getting this fixative if you are looking for a more budget-friendly option that produces excellent results.
Pros
This spray covers paintings with a very thin coat, which allows the artist to manipulate the tooth surface
The price of the fixative is very reasonable and budget-friendly
It dries off pretty quickly after application
Cons
It might darken the painting a little, and that can create a slight difference in the outcome from the original idea
If you’re searching for a brand that produces a wide range of art products, you’ll be glad to know it’s Blick.
What you would love to know, however, is that Blick performs pretty well when it comes to delivering both quantity and quality.
Apart from its many art supplies, the Blick Matte Fixative is one of the best products this brand offers and we will see why.
Experience
What we really like about this fixative is the cost. For the quality of coverage and protection that it offers, we think it comes at a very affordable price of around $6 per can. However, if we buy it in large quantities, we can get higher discounts.
This is another fixative that can be used on different media and not just one. For instance, when used with media such as charcoal and pencils, we see that it produces the most terrific results.
Don’t let the name fool you because this fixative comes in both glossy and matte sprays. And since it comes at a very low price, a lot of artists can afford both of these options to create different types of artwork.
We will also suggest this fixative for beginners and students since they are likely to make multiple mistakes in the process. Moreover, they still need to explore the effects of different sprays and will probably need cheaper options.
Unlike most fixatives, it dries out very quickly - about 15 minutes approximately. When it comes to this aspect, we find that the fixative lives up to our expectations.
Although it enhances the artwork, the original pigments, however, remain the same, with only a slight visible change that one can hardly tell the difference. But the best feature of this fixative is that it provides more teeth to the surface once it dries out.
One flaw that we found with this fixative is that it releases a very unpleasant smell once sprayed. We suggest working in a place that has proper ventilation while using a half mask to protect yourself from its fumes.
Pros
Comes at a pretty affordable price which is great for those on a budget
The fixative dries out quickly within 15 minutes
It provides excellent tooth surface after drying
Cons
While spraying, it produces a very strong, unpleasant smell
Volume/Weight: 12 oz | Type: Aerosol | Finish: Matte | Spray Type: Fine mist | Acid-Free: Yes | Archival Quality: Yes | UV Protection: No
If you have been around this line of work for a while now, you’ll know that Krylon is one of the most famous names when it comes to sprays for artwork.
Among other sprays, this workable fixative is known for providing the best results when it comes to oil or soft pastels. It can also be used with multiple other mediums as well.
Prevents smudging, wrinkling and allows for easy reworking...
Experience
We like that this workable fixative is acid-free; therefore, it safeguards our artworks and prevents them from discoloring as they age.
Another reason we love this spray so much is that it is affordable. Although the price is a bit higher than that of the Blick fixative, we think that this is still wallet-friendly for a lot of artists out there with a restricted budget.
The price is very reasonable compared to the benefits we get from this fixative.
First of all, it is suitable for artists who are getting themselves familiar with fixatives. And apart from being acid-free, it also provides a smooth matte finish that is perfect for display with enough tooth on the surface.
If we look at the aspect of enhancing colors, we find that the fixative does not quite meet our expectations since it produces normal results. However, it does provide a barrier of protection against dust and discoloration. This is why we feel that the fixative is a great pick for beginners.
Finally, the drying time of each layer takes around half an hour. Although it is a slow process, we think the final result, which includes a matte finish and good tooth, is worth the wait.
Pros
The Krylon fixative is acid-free, which is good for preventing discoloration and patch development
It comes at a very affordable price to meet the needs of artists with budgets
It provides enough tooth and a matte surface after the process is done
Have you ever wondered which brands of pastels the great masters used to depend upon to create their amazing masterpieces?
Well, you’ll be glad to know that the French brand, Sennelier, is one of the most favorable options. Artists such as Picasso, Van Gogh, and Cezanne used art supplies from here. It has been around since the year 1887.
We can’t help but recommend the fixative by one of the most trusted companies when it comes to art supplies.
If you feel you’re ready to explore some expert levels in the world of art, give this big name a try, and you’ll see a huge difference between using average sprays and the ones from Sennelier.
There are two kinds of fixatives that Sennelier offers for pastels: Latour and D’Artigny, the former being for soft pastels, while the latter is for oil pastels.
You are probably thinking, why should one go to such an extent to differentiate pastels?
But then again, that is the reason that makes Sennelier such a high-quality brand. According to their Materials Safety Data Sheet, the two fixatives are made to specifically serve an intended purpose following the elements present in soft and oil pastels.
They focus on producing memorable and lasting professional artwork while being efficient in the approach of making quality fixative sprays.
We personally love these sprays for the light touch they have on the surface, making it smooth to run through with your hand.
Both of them are also very fast to dry; therefore, working multiple layers is not an exhausting task, and we don’t have to wait for a very long time.
Another important feature these sprays hold is that they do not affect the original pigments in any way. All they do is leave our work with a glossy, appealing look.
What the Sennelier sprays do is give our piece the type of preservation that does not affect the original look. While some fixatives can change the actual form of our work, we find that these offer what we or any other artist is looking for.
However, it would be impossible for the sprays to be without flaws because, with high quality and a respectable name, they will also come at a higher cost than normal options.
But overall, these are perfect for artists who look for transparent resin-based fixatives to shield their work with.
Pros
Made to focus on specific purposes according to the pastel’s composition to ensure the best final results
They have a quick drying time, which is perfect for the layering process
They do not meddle with the original pigments that the artist used
If you are looking for a spray that contains no chemicals and is safe for children, you will be happy to know that there is the SpectraFix Pastel Fixative.
Going through its Materials Safety Data Sheet information, it states that the spray contains only water, casein, and denatured alcohol.
But do not let this simple composition fool you into thinking it compromises the performance because it does not, and that is why it falls under this top 6 list.
PLEASE NOTE: This product is available in multiple sizes and...
The version you will receive by ordering from this page is...
Experience
If you have kids in the house, you’ll understand the need to get a spray (or any other material for that matter) that prevents the chance of harmful incidents.
This is the reason why we love the non-toxic SpectraFix so much. It also reduces our worries about misplacing them, especially during busy days.
Apart from the safety features, the spray can be used with any medium, such as watercolor, gouache, and even charcoal. This saves a lot of money rather than buying different fixatives at higher prices for each of them.
Although it costs around $14, we are satisfied with the fixative since there is a lot of quantity in one big container. It will probably serve for a very long period, and we don’t have to spend some extra bucks for the time being.
There is one thing we don’t find help with the fixative, and that is the spray feature.
Being a non-toxic fixative comes with some disadvantages on its own. While other fixatives depend on propellants like propane to achieve consistent sprays, this one does not have such chemicals, making it watery while spraying.
The runny spray can be the cause of uneven distribution of the solution throughout the painting, which can get messy. Beginners may not have any problem regarding this, but experts just might.
We will complete the list with a brand name that is known for its efficiency with the products they offer. Grumbacher delivers carefully formulated art supplies, and one of them is the workable fixative spray.
The quality you get with this spray is very much the same as you get when using renowned high-end fixatives.
The feature of this fixative, which is worth mentioning first, is its drying time.
Among the other sprays we’ve mentioned on this list, this one is the quickest to dry. It only takes about 7 minutes maximum for a light spray to completely dry out until we can touch it or work another layer on top of it.
This makes it way easier for us to work on a piece at a much faster pace. We would recommend this option if you are an artist who regularly works on commission. It will save a lot of time, and you will finish more artwork faster.
Another desirable feature is versatility, which this fixative happens to embrace. We love how easily it can go with any given medium and still be able to deliver great teeth that we can work on pretty smoothly.
A few examples of the kind of media this goes along pretty well with our oil or soft pastels, charcoal, as well as pencils.
Last but not least, the spray does not hold back the original pigments from popping up as they are. If we are going to talk about the resemblance, we find that this is the feature that truly makes it similar to high-end products. It only provides transparent protection with a glossy effect.
However, the only drawback of this fixative spray is its price. It might not be suitable for artists with a tight budget, or students, for that matter.
But overall, the fixative spray is a great pick, especially if you want your paintings to age properly, since it is acid-free and prevents discoloration.
Pros
Dries out in about 7 minutes; quicker than most sprays out there
A great level of versatility, which makes it suitable for use with other media
Acid-free, and it does not affect the original colors of your painting
Cons
It can be too expensive for some artists
Volume/Weight: 11.75 oz | Type: Aerosol | Finish: Matte | Spray Type: Fine mist | Acid-Free: Yes | Archival Quality: Yes | UV Protection: No
To help make your search easier, take a look at the brief suggestions below for finding the right fixative that best suits your needs:
The Winsor & Newton fixative is perfect if you are looking for a perfect workable spray. In case you want a safer workable option, we would suggest going for the SpectraFix spray. You can opt for the Blick fixative if you’re looking for a wallet-friendly, workable fixative.
Lastly, we found that the Sennelier fixative is the most reliable option for the final spray.
Fixatives for Pastels Guide
If you are new to fixatives or you’re not sure what to look for while buying one, we have prepared a guide below.
There are a few considerations that you might want to look at before purchasing a fixative so that you won’t get disappointed later on.
Type of pastel
From what we have reviewed, you see that almost all of the fixatives can be used for multiple media, including soft and oil pastels.
Unless you intend to purchase different fixatives for different pastels, we suggest going for a versatile option if you are on a budget.
We also recommend students and beginners not to stress much about getting the perfect fixative for their desired pastel, since that can be done as you become more experienced.
Cost
As it is with any product, the price of fixatives will depend on the brand name or quality. Similar to what we mentioned above, high-end brands tend to have more varieties and more specifications.
But we found the main reason that makes high-end fixatives costly is that they are composed of superior quality materials, which means they will have greater performance.
Because they are specifically made for an intended composition of pastels, they will also produce better results.
Most importantly, most higher-end fixatives aim to be safer and acid-free.
On the other hand, fixatives that are less expensive save more money and have more versatility.
While they are affordable, there is also a chance that the cans will come with a warning label that they are dangerous to health because of their inexpensive ingredients.
However, with extra care, inexpensive fixatives can produce great results when it comes to finishing.
Grade
You are probably aware of the fact that most art products have grades such as student and professional.
Popular, reputable brands such as Winsor & Newton, Sennelier, or Grumbacher offer fixatives that are professional grade. While many experienced artists lean towards these brands, it does not mean beginners shouldn’t give them a try, either. The whole idea is to find a fixative that your artwork truly deserves.
It is always good to explore the workings of the two grades so you can see the different effects both of them deliver.
Type of fixative
Before choosing a fixative, keep in mind that there are two types - one is ‘workable’ and the other is ‘final’. If you are wondering what the difference is between the two, the answer lies in the application process.
Workable fixatives are used when you have to spray one layer after another while working on the painting.
And as the name suggests, the final fixative is meant for finishing in order to protect your artwork from elements.
Keep in mind these will work with any pastels and that there are no specifications as to finding the right workable/final fixative.
How To Use Fixatives
We have seen some questions on the usage of fixatives and today we will try to answer a few of them.
How do I use fixatives?
The first piece of advice we would give is to read the instructions before using them because one’s directions will always be different from the other's.
However, the normal application includes spraying a light mist while holding the can about 1 ft away from the artwork.
Keep in mind never to bring the can closer than 1 ft to the painting because it will ruin the original form.
While spraying, make sure to go through the surface gently and uniformly so that it provides maximum even coverage throughout.
In case you are using a workable spray, remember to wait until the last layer is dry before touching or applying another layer on top of it.
The number of layers to add depends on the type of spray you’re using or the ingredients within it.
Can I use a hair spray as a fixative?
Just because the two of them are both sprays, it does not necessarily make them substitutes for each other.
Although at first glance a hairspray looks as if it produces the same results as a fixative does, it is actually deceiving. The contents used for protecting hair are not the same as those for protecting pastels.
No doubt, it can be tempting to use hair spray as it is relatively cheaper, but we advise never to use it as an alternative to a fixative spray. In the long run, either the paint will flake or the painting will be damaged.
Which online sites should I go to for fixatives?
The best sites you can get fixatives from are either Amazon or Blick Art Materials. Both of these sites offer international shipping, and they also come with a good return policy in case you are not satisfied with the product.
Fixatives For Pastels FAQ's
What is a fixative for pastels?
A fixative for pastels is a spray that is applied to a pastel drawing or painting to prevent the colors from smudging or rubbing off. It creates a protective layer over the pastel that helps preserve the artwork and make it more durable.
How many coats of fixative should I use on my pastel artwork?
The number of coats of fixative you should use on your pastel artwork depends on the level of protection you want to achieve. In general, 2-3 light coats of fixative are recommended, allowing each coat to dry completely before applying the next.
Are fixatives for pastels toxic?
Some fixatives for pastels contain toxic ingredients, such as VOCs (volatile organic compounds), which can be harmful if inhaled or absorbed through the skin. It is important to read the label and follow the safety instructions carefully when using any fixative spray.
Can I use hairspray as a fixative for pastels?
While hairspray can be used as a substitute for a fixative spray, it is not recommended. Hairspray contains different ingredients than fixative sprays, and may not provide the same level of protection or preservation for your artwork.
What is the difference between a workable fixative and a final fixative for pastels?
A workable fixative for pastels is designed to be used during the creation of a pastel artwork and allows the artist to continue working on the surface of the artwork after it has been sprayed. A final fixative is used after the artwork is completed and is designed to provide a more permanent protective layer over the pastel.
Conclusion
Thank you for joining us on this exploration of the best fixatives for pastels! We hope this article has provided you with valuable insights and useful information. We've tested each of the six fixatives extensively, and we're confident that these excellent products will do wonders for your artwork preservation and enhancement needs.
Out of these 6 best fixatives for pastels, here are our top three recommendations:
Winsor & Newton Artists' Aerosols Workable Fixative is an ideal option for artists seeking a versatile and budget-friendly fixative. It provides a light coat while maintaining the texture of the painting, despite sometimes making the colors appear a bit shadier.
Blick Matte Fixative is a good option for both beginners and seasoned artists. This affordable fixative dries quickly (within 15 minutes) and provides excellent tooth surface after drying. Just make sure you work in a well-ventilated area due to its strong smell.
Krylon Workable Fixatif Spray is the right choice for artists looking for an acid-free and affordable fixative. It protects against dust and discoloration while providing a smooth matte finish and good teeth.
As you can see, each of these top three recommendations has its own unique qualities and advantages. Whichever you choose, remember that the right fixative can make all the difference in preserving your pastel artwork's beauty and longevity. With a quality fixative on your side, you'll have peace of mind knowing your masterpiece is protected, allowing you to fully focus on your creative journey. Happy painting, and may your artwork continue to inspire and delight!
Best sharpeners for colored pencils help preserve the delicate wax or oil-based cores that make these artistic tools so unique. Unlike graphite pencils, colored pencils require careful maintenance to keep their pigments vibrant and prevent breakage—a process that starts with understanding what colored pencils are made of and how to handle them correctly. Whether you prefer hand-blended textures or layered gradients, mastering proper colored pencil techniques is only effective when your tools stay sharp and consistent. A high-quality sharpener ensures smooth precision, prevents core damage, and maintains control for fine detailing. Both manual and electric sharpeners offer benefits depending on your workflow—see our guide on the best electric pencil sharpeners for colored pencils for power options designed specifically for artists. In this guide, we’ve selected the 10 best sharpeners for colored pencils, each tested for precision, lead protection, and ease of use, so your creativity stays as sharp as your pencils.
Listed below are the top 5 recommendations for the best sharpeners for colored pencils:
Staedtler Metal Sharpeners: Featuring dual sharpening holes (8.2 mm and 10.2 mm) and durable all-metal construction, this sharpener offers versatility for artists. Lacking child safety measures and a small size requiring frequent disposal of shavings may impact user experience.
Staedtler Pencil Sharpener: Known for sharp blades, affordability, and a child-friendly design, this sharpener is favored. Yet, the single chamber limits tip size options, potentially affecting its appeal to advanced artists.
Bostitch Electric Pencil Sharpener: Recognized for removable blades, a soundproof design, and six chambers accommodating diverse pencil shapes, this electric sharpener caters to varied user needs. A comparatively higher price point and electric operation may influence user preferences.
Maped Shaker 2 Hole Pencil Sharpener: Standing out for its economical pricing, durable metal build, and versatility with various coloring mediums, this sharpener is not recommended for children due to its sharp blades. It offers fewer features compared to higher-priced alternatives.
The Duet Manual and Battery Pencil Sharpener: Offering adjustable tip sizes at an affordable rate, this sharpener serves both studio and outdoor use. User reports indicate occasional lagging in battery mode, and manual tuning demands attention during use.
Here is the list of the 10 best sharpeners for colored pencils that you can use to achieve a sharp, precise point for your artwork.
1. Staedtler Metal Sharpeners - Best for Dual Sharpening Holes
Staedtler is a German company that has been around for almost 200 years now. It is one of the most respected brands when it comes to stationery supplies.
And we have metal sharpeners, each with dual sharpening holes to serve two purposes. If you want a pointy tip on your colored pencil, use the 8.2 mm hole, while if you’re planning to draw wider lines, then the 10.2 mm hole will be perfect.
Experience
The sharpener is ideal for working with a piece where you can use your pencil for many different textures, since it offers two sizes for the tip.
We love that there are two high-quality pieces within the pack, so we can take one out for plein air projects and keep one as a backup or for use at home. They can also sharpen soft oil-based pencils without breaking them in the process.
For their use and durability, we think the price is very reasonable. It’s worth investing in a sharpener that won’t malfunction as soon as regular ones do after a certain period of usage.
However, the sharpener is not designed to be safe for children as it is fully constructed from metal, and there are no outer plastic covers to prevent possible cuts. It is also very small so we don’t suggest giving it to younger kids.
And since the pencils don’t come with a shell, you must have a trash can by your side all the time to prevent creating a mess.
Nonetheless, the sharpener is great for those who are in search of quality and reliability since it has already withstood the test of time.
What We Like
The sharpener has dual holes and can be used to sharpen tips in two different sizes
It is highly durable and has withstood the test of time
Besides durability, the sharpener offers great-quality sharpening that will take good care of colored pencils
What We Don't Like
Without any outer cover, this sharpener is not suitable for kids
Dimensions: 4" x 3" x 0.5" | Weight: 0.11 lb | Material: Metal | Operation: Hand-Operated
2. STAEDTLER Pencil Sharpener - Best for Kids & Portability
Here is another sharpener from Staedtler. This one comes in a very simple yet attractive design, which also happens to be child-friendly and portable.
It’s also one of the cheapest sharpeners on the list, but that doesn’t compromise its functionality.
Experience
Those who are starting with colored pencils as a coloring medium will find this sharpener very handy and suitable to carry around.
We personally love that a high-quality, sharpener from a renowned name such as this comes at a very reasonable price. Its sharp blades allow for clean and pointy tips.
You can use it for both graphite and colored pencils. But the reason we included it on this list is that it takes good care of your colored pencils by keeping them fine and pointy at all times.
While the quality is good, the only limitation is it does not have dual holes for sharpening. For advanced artists, this might not be preferable when working with more than one tip size.
However, it’s a perfect sharpener to carry around for outdoor drawings since it has a secure plastic cover to hold the shavings inside. It’s also a good pick for kids since the cover hides the sharp blade.
So, if you want a good, reasonably-priced sharpener for kids, give this one a try. It also comes in different colors!
What We Like
It has sharp blades with good performance, yet cit omes at a very cheap price
The sharpener is available in multiple colors, so it’s perfect for children too
It is small and portable
Keep your colored pencils sharp and in clean shape all the time
What We Don't Like
There is only one chamber for sharpening and that limits pencil tip size
Dimensions: 1.5" x 1.5" x 2" | Weight: 0.04 lb | Material: Metal | Operation: Hand-Operated
3. Bostitch Electric Pencil Sharpener - Best Multi-Functional Sharpener
Bostitch is a name that has won the Teacher's Choice Award of 2023.
The sharpener is made to meet both classroom and industrial requirements. It can be used for graphite pencils, but it works excellently with colored pencils too.
It has a blade that can easily be removed while using in case the oil/wax binder gets stuck inside and prevents the pencil from sharpening.
Experience
Many artists love this sharpener for many reasons. First of all, unlike other sharpeners, the blade on this electric sharpener can be removed for easy cleaning if the wax ever gets clogged inside while sharpening colored pencils.
On top of that, the blade is very sharp and is always able to produce pointy tips in every single use without damaging the outer wood casing, as cheap sharpeners do.
We love the design as it is sturdy and compact. It adds to the overall high-quality performance. Moreover, it is also soundproof, which even makes it more desirable. Unlike sharpeners from older days, this one creates very little sound, which eliminates distractions.
Besides its removable blades, the sharpener has 6 chambers meant for different pencil shapes and tip sizes. So if you’re using round or triangular-shaped pencils, this is the perfect pick.
And if you are looking for a more reliable or long-lasting option, this one would be a pretty good investment.
Although the price of this sharpener is much higher than that of other, more popular sharpeners from the same brand, we are very satisfied with the quality and multiple features it offers.
All in all, we recommend investing in this sharpener as it lasts long and you can buy separate replacement blades. Moreover, it can be used by both adults and children.
What We Like
The sharpener has 6 sharpeners suitable for any common pencil shape and tip size
Blades can be removed, easily cleaned, and also be bought separately if you lose one
It is soundproof to prevent distractions
It is ideal for professionals, beginners, as well as children
What We Don't Like
Compared to other sharpeners from the same brand, this one comes at a higher price
Dimensions: 10.63" x 6.13" x 9" | Weight: 4.03 lbs | Material: Metal | Operation: Electrically-Operated
There are a lot of reasons to love this sharpener from Maped.
One of the main reasons is because of its very low price at only $1.79 for a double chamber and $0.79 for a single chamber.
We included this one on our list solely because it comes at an inexpensive price, but it still performs as other high-end sharpeners do.
Experience
If you’re planning to buy a sharpener that will last for a very long time, we recommend the Maped Hand-Held Sharpener. Not only is it cheap, but it is also highly durable.
This metal sharpener is suitable for professionals, and it has a rating of 4.8 on the Blick Art Supplies website. All of this is a reason for its multiple features.
It has a perfect grip on both of its sides for precise pencil sharpening. The double-chambered unit has one large hole that can be used for graphite pencils, colored pencils, and even pastels or charcoal. And it works incredibly well with all of them.
Because it accepts more than one coloring medium, artists find this sharpener to be more convenient than other ridiculously priced high-end units out there that only serve one purpose. Rather than buying multiple sharpeners to meet different requirements, this one already serves 4 coloring mediums.
We can say that the only setback is that it is not suitable for kids, even though it comes at a very cheap price. Because it also has sharp blades, you’ll also want to store it in a place where kids won’t find it.
But other than that, this sharpener is one of the cheapest options that comes with amazing features you’ll find in the market.
What We Like
Inexpensive price
Suitable for mediums such as graphite pencils, colored pencils, pastels, and charcoal
It will last for a very long time
What We Don't Like
Not recommended for children to use
Dimensions: 10.63" x 6.13" x 9" | Weight: 4.03 lbs | Material: Metal | Operation: Electrically-Operated
5. The Duet Manual and Battery Pencil Sharpener - Best for Adjustable Tip Size
We have here another electric pencil sharpener. Duet has come up with this electric pencil sharpener, which operates on two batteries and has manual settings.
The innovative idea by Duet for this sharpener allows users to have control over the size of the pencil tip by tuning it.
Experience
We love how colored pencils can be sharpened effortlessly. The only time you need to pay undivided attention to it is when you have to choose a tip size for your pencil, right before the sharpening is complete.
It also falls under the inexpensive sharpeners on this list, which is around $7 and may be highly favored by users on a tight budget. It has most of the features one would look for in an electric pencil sharpener. Moreover, it is perfect to take along for outdoor projects. So, investing in it will be a pretty good idea.
However, some users reported that when keeping it in battery mode, it has a tendency to lag or stop. Other than that, the manual option works pretty well.
For what it’s worth, this will be a good pick for those who are looking forward to having control over the pencil tip.
What We Like
The pencil sharpener only needs 2 AA batteries to operate
Inexpensive price
This is perfect for both studio and outdoor use
It has a casing to save shavings and is safe for children to use
What We Don't Like
Sometimes, going on battery mode can cause lagging or stopping
Dimensions: 3" x 3" x 3" | Weight: 0.23 lb | Material: Plastic, Metal | Operation: Hand & Battery-Operated
6. Prismacolor Premier Pencil Sharpener, 2-pack
Prismacolor is a brand name that is respected for its high-quality pencils that come at affordable prices. For this reason, they came up with a sharpener that works well with their colored pencils, but we don’t doubt it is excellent for other colored pencils too.
Experience
If you have been around the world of colored pencils for some time, you’ll know Prismacolor is a very trusted brand. So, when they introduced the colored pencil sharpener, we knew it was going to be nothing short of a good-quality product.
And as we expected, their sharpener performs very much like the other high-end ones. It has a large casing that allows us to store the shavings when working outdoors. There are also two chambers - one for a wider tip and another for a finer tip.
One thing to keep in mind is that this sharpener is only meant for colored pencils. Although it might work well for graphite pencils too, we recommend sticking only to the intended purpose as the blade is not replaceable.
As we have seen from many online reviews, users said the sharpener is more than enough for those who work daily with colored pencils. They found that the price is worth its performance.
If you always use Prismacolor colored pencils, this would be the perfect sharpener for all your projects. But we also urge you to try it for other colored pencils as well, since it has everything you might be expecting from a colored pencil sharpener.
What We Like
The sharpener comes at a reasonable price
It has a casing that can be used to store shavings as long as the user is outdoors
There are two chambers to let the user select either a wide or fine tip
What We Don't Like
It is only suitable for use with colored pencils and not for other media
Dimensions: 3" x 6.1" x 0.2" | Weight: 0.2 lb | Material: Stainless Steel | Operation: Battery-Operated
7. X-ACTO Electric Sharpener
X-ACTO is a brand known for producing some of the sharpest knives and razors universally. And now, they have introduced this electric sharpener for multipurpose uses.
It can be used for colored and graphite pencils. The blade is incredibly sharp, which allows users to cut pencils easily.
Experience
We love that this sharpener keeps our pencils pointy all the time until they become too short to use. Besides graphite and colored pencils, it can also be used for either soft or hard leads and triangular pencils. Therefore, this increases its versatility.
Like most of the options we mentioned before, this one is suitable for children and adults to use, as well as for taking outdoors.
However, what sets it apart from the rest is that it comes with a warranty of 10 years. This hints that the sharpener is of very high quality. We take this as an opportunity to get the most performance from the sharpener. Rest assured, it is incredibly durable.
Another feature we must include is that the blades can be removed for cleaning. In case we lose them, there are replacement blades that are available online.
Expect to find the blades dull after a long while of use, which means there is a need to change them.
Besides artists, professionals who are looking for a heavy-duty sharpener to carry to their work site found this sharpener very handy.
What We Like
Sharpener suits various media like hard/soft leads, graphite, triangular, and colored pencils
Suitable for all ages and professions
Blades are easily replaceable
What We Don't Like
The blades can become dull and blunt after a while of use, which they will need to be changed
Dimensions: 7" x 3.13" x 4.5" | Weight: 0.87 lb | Material: Plastic, Metal | Operation: Electrically-Operated
In our review of the Alvin Brass Bullet Pencil Sharpener, we mentioned that the blade it utilizes is from this particular brand.
Mobius & Ruppert is a company making stationery that has been around for more than a hundred years now. All of the products are known for their premium quality, and that’s the same case with this sharpener.
Experience
As the name suggests, the Brass Round Double Hole Sharpener has double chambers for wide and fine sharpening. It comes at a very affordable price, so students as well as artists with a restricted budget can use it.
The round body is made entirely of brass. It is one of the smallest sharpeners on our list. Although its shape is round, we can still get a good grip for smooth sharpening, all thanks to the side grooves.
The blades on this sharpener can be removed as well as replaced with new ones, which you can find on any online stationery-selling platform.
Many artists who have used this sharpener for a while now said that it is durable and still functions pretty well.
Since it is an open-blade sharpener, it means that it is not designed to have a casing. Therefore, its usage is restricted only to adults, and not children.
What We Like
Sharpener comes at an incredibly low price for everyone to be able to afford it
Blades can be removed and replaced to ensure clean cutting
It has two chambers and lasts for a long time
What We Don't Like
The open-blade design exposing sharp blades might not be suitable for little children to use
Dimensions: 3.9" x 2.7" x 0.7" | Weight: N/A | Material: Brass | Operation: Hand-Operated
9. Dahle 155 Professional Pencil Sharpener
The Dahle Professional Pencil Sharpener is used for sharpening a variety of coloring mediums such as watercolor pencils, pastels, colored pencils, and charcoal.
One important feature about it is that it has the looks of a crank sharpener but functions as a modern one.
Experience
This sharpener is one of the best that we have reviewed.
What we truly love about it is that it allows us to choose the right tip size simply by tuning the adjustment lever. Moreover, it contains a chamber opening that is large enough for any pencil size to fit inside. It has a small casing to save unwanted shavings.
The benefit you’ll get from manually tuning the tip is if the art piece require patches and lines of different sizes, which the art piece can easily provide. You will also have more control over the outcome of the piece.
We also like that it is inexpensive, so that everybody can have access to it. We can use it both in the studio or outdoors too.
One drawback is that, unlike automatic or even hand-held sharpeners, you need to actually turn the handle for sharpening, and this requires more time and effort.
But apart from that, this would be a good pick for your studio or if you want an accurate tip size.
What We Like
The sharpener allows its users to choose the tip size according to their preferences
It comes at an inexpensive price
It is ideal for both outdoor and studio use
What We Don't Like
It can take time to sharpen pencils by turning the handle
Dimensions: 3.9" x 2.7" x 0.7" | Weight: N/A | Material: Brass | Operation: Hand-Operated
10. Derwent Super Point Manual Helical Pencil Sharpener
Another manually operated crank sharpener is the Derwent Super Point Manual Helical Pencil sharpener. It can be used for pencils of different sizes.
Its features include having helical blades to ensure long-point sharpening and many more.
Experience
We love this sharpener because of the multiple features it includes. It is ideal for pencils with a size that reaches up to 8mm.
First of all, the secured metal casing is one feature that assures us that the sharpener will last for a long time.
Although you have to turn the lever, it automatically stops when the cutting process is done. The sharpener will slack, and that’s when you know it’s ready. There is no need to hold the sharpener with your hand since it comes with a clamp that can be attached to a desk or work table.
The blades are easily reachable for cleaning since all you have to do is pull out the reservoir tray.
This is a professional-grade sharpener; hence, it falls under the expensive options on this list. It may not be suitable if you’re either on a tight budget or just looking to sharpen your colored pencils with a cheaper alternative.
Overall, the sharpener produces amazing extra-long and extra-pointy pencils.
What We Like
Auto-stop feature to make sure you don’t waste your precious colored pencils
Comes with a clamp that can be attached to various surfaces such as a desk, work table, or chair
Blades are easily accessible for proper cleaning
What We Don't Like
The price can be expensive for students and budgeted artists
Dimensions: 5.31" x 2.95" x 4.92" | Weight: 1.1 lbs | Material: Metal | Operation: Hand-Operated
What Is the Best Sharpener for Colored Pencils?
This table offers a concise overview of essential attributes for various pencil sharpeners, detailing dimensions (in inches), weight (in pounds), number of chambers, operation mode, and material composition.
Can I use a regular pencil sharpener for colored pencils?
Although it is possible to use a regular sharpener, it is preferable to use a sharpener designed for colored pencils. Colored pencil leads are generally softer than graphite, and a specialized sharpener will provide better results and prevent breakage.
What types of sharpeners are best suited for colored pencils?
The best sharpeners for colored pencils include manual, electric, and battery-powered options. Look for sharpeners with high-quality blades and sharpness adjustment features to better protect the delicate leads of the colored pencils.
How do I choose the right sharpener for my colored pencils?
To choose the right sharpener for your colored pencils, consider the sharpener’s compatibility with the pencil diameter, the quality of the blades, and adjustable sharpness. It can also be helpful to read product reviews and consult fellow artists for tips and recommendations.
Do I need a separate sharpener for each color?
No, it’s not necessary to have a separate sharpener for each color. You can use the same sharpener for multiple colors; just make sure to clean it periodically to avoid mixing colors.
How often should I sharpen my colored pencils?
The frequency of sharpening depends on your usage and desired level of precision. Frequent sharpening helps maintain a fine tip, but over-sharpening can waste the colored lead. It’s essential to find a balance between performance and pencil life.
How do I prevent lead breakage while using a sharpener?
To prevent breakage, use a gentle grip, rotate the pencil slowly, and avoid excessive pressure. Make sure the sharpener is clean and free of debris. High-quality sharpeners with adjustable sharpness also help to prevent lead breakage.
How do I clean and maintain my colored pencil sharpener?
Regularly clean your sharpener to remove debris and prevent lead/color mixing. Use a small brush, toothpick, or pipe cleaner to remove lead remnants. Always handle the sharpener carefully, and replace the blades when they become dull.
As we've explored various sharpeners for colored pencils, it's apparent that the right sharpener can make a significant difference in the quality and precision of your artwork.
Having analyzed the top 10 best sharpeners on the market, we've narrowed down our expert recommendations to the following top three options:
For those who appreciate quality and durability, the Staedtler Metal Sharpeners with their dual sharpening holes are an ideal option. Providing two different tip sizes and withstanding the test of time, it's a reliable investment for artists who want a versatile, long-lasting sharpener.
The STAEDTLER Pencil Sharpener, on the other hand, is a good option for kids and artists on the go. With its child-friendly design, sharp blade performance, and reasonable price, this might be just the sharpener you're looking for.
Lastly, the Bostitch Electric Pencil Sharpener is the right choice for artists seeking a multi-functional sharpener. Its removable blades, ability to accommodate various pencil shapes and tip sizes, and wide range of use make it an excellent investment.
No matter which one you choose, you'll be equipping yourself with the right tool for creating exceptional artwork with vivid, precise colors. Happy coloring!
The best concrete vibrators are essential for achieving smooth, durable, and air-free concrete finishes in both residential and commercial projects. By generating controlled vibrations, these tools help eliminate air pockets, improve compaction, and enhance the strength and longevity of concrete structures. From portable electric pencil vibrators ideal for small slabs and posts to heavy-duty gas-powered plate compactors suited for large foundations, there’s a model for every job size. Modern designs emphasize ergonomics, lightweight portability, and easy handling, allowing for efficient operation without fatigue. Whether you’re a contractor working on large-scale construction or a homeowner tackling a DIY patio, this guide reviews the 11 best concrete vibrators that deliver exceptional power, reliability, and consistency—ensuring your concrete sets perfectly every time.
Best Concrete Vibrators
Here's the list of the 11 best concrete vibrators, helping you choose the perfect tool for your construction or home improvement needs.
1. Makita XRV02Z - Best for Portability & Ergonomics
Occupying the top spot on the list is the Makita XRV02Z, which has turned out to be a trustworthy product for most people. It is well-balanced and innovative, making it a quality unit capable of handling light to medium jobs with aplomb. All this and more guarantee a satisfying performance.
Makita-built motor delivers 12,500 VPM to help increase...
Dual-directional switch to conveniently hold the tool in...
Why Did We Like It?
It weighs in at only 11.4 lbs, making it one of the lightest tools on the market. The size well supports the weight as it measures 39x24x6 inches. Therefore, it is compact and is ideal for taking from one site to another. Additionally, it is powered by an 18V lithium-ion battery that drives all the functions and makes it long-lasting.
Likewise, it features an ergonomic design that makes it comfortable to work with and comes in handy while controlling the 12,500 vibrations per minute. However, the star attraction is the dual-direction switch that ensures you get the much-needed stability.
On top of this, there is a computer control protection system that improves both performance and battery life by monitoring the output under various conditions. So, you do not have to worry about overheating, overloading, or over-discharging and can get the job done swiftly.
What Could’ve Been Better?
Batteries are not included with it, so you will have to pitch in extra to buy a compatible power source. Hence, it could be an inconvenience for many people. Besides, it is not ideal for massive projects, meaning that a section of buyers would look for other options.
The name Stark usually reminds us of Iron Man. While this may not be Tony Stark's brainchild, the Stark 2.0HP Gas Vibration Industrial Plate Compactor is impressive when it comes to delivering a stable output. Thus, you will not only be able to handle various types of work, but it will also stand out from the crowd.
To ensure that your work is long-lasting, it delivers a 2000-pound impact force due to the 2.0HP engine. As a result, even a large area can be covered in a short time, which is made possible by its ability to compact an area of 2691ft per hour. So, it is the ideal model if you want your machine to be versatile.
Therefore, you can use it around the house or for professional purposes, and even for landscaping work. Moreover, it has fold-up wheels that make it best suited for transportation from one place to another. Plus, the recoil ignition enables you to start it up quickly.
This proves to be very convenient and adds to the 79cc vibratory plate; you get a dependable output in most scenarios. Finally, it measures 40x15-1/2x34-1/4-inch, which, coupled with the base area of 17x11.8-inch, allows you to get a vibration frequency of 5210.
What Could've Been Better?
It is smaller than some of the other units. So, if you want your tool to look muscular and powerful, this is not the model for you. Besides, users have reported that it leaks oil, which could not only bring your work to a stop but also mean that you will have to buy a new machine.
Pros
Versatile
Compact
Portable
Recoil ignition
79cc vibratory plate
Cons
Slightly small
May leak oil
Power Source: Gas | Voltage: N/A | Horsepower: 2HP | Vibration Frequency: N/A | Vibration Amplitude: N/A | Length of Shaft: N/A | Weight: 165 lbs | Warranty: 1-year limited
And in the third spot, we have the GlobMarble Concrete Vibrator, which comes with some exciting upgrades. These additions make it a highly useful tool with some of the features not available in other products. Thus, you get a very reliable performance that has earned it positive reviews.
Concrete Vibrator for Concrete Vibrating Table. Concrete...
Vibration Motor, Electric Vibrators, Electric motors
Why Did We Like It?
Right off the bat, you will be charmed by the IP65 protection feature, which is hardly seen in any other tool. Thus, your machine is well protected against dust, water, or other harmful contaminants that can enter it while working. Moreover, the vibrating motors are heat-resistant and can withstand temperatures as high as 180 degrees Celsius.
Furthermore, it is low maintenance, unlike other devices, but that does not compromise reliability. Likewise, the motors generate a lot of power that produces both small and large-scale vibrations for different jobs. However, just in case you also have the option of adjusting the intensity of vibrations as you wish.
Additionally, it is very versatile, and you can use it as a vibrating source if you need to use vibrating screens, vibrating feeders, vibrating dryers, and concrete forms. Moreover, even under full force, you get an uninterrupted performance and a high level of consistency.
What Could’ve Been Better?
It is a heavy unit that could be a deterrent for a lot of people. Most people like their models to be lightweight so that they can maneuver quickly, which is lacking in this case. Plus, it becomes difficult to control the speed as well-meaning that you may not get the desired result at work.
Pros
Powerful
Versatile
Reliable
Waterproof
Low maintenance
Cons
Heavy
Difficult to control the speed
Power Source: Electric | Voltage: 110V | Horsepower: 3/4HP | Vibration Frequency: 12,000 VPM | Vibration Amplitude: 1.5" | Length of Shaft: 10 ft | Weight: 10.5 lbs | Warranty: 1-year limited
Having gone through our top three products, we now take a look at the Lightweight Chicago Pneumatic, which just missed the cut. Yet, there is no reason to be disappointed as this is a feature-heavy tool that can carry out light-duty tasks with ease. Therefore, it is incredibly efficient.
It measures 28x8x4 inches, which makes it ideal for maneuvering on most jobs. Plus, the weight of only 15 lbs means it is incredibly lightweight, making it portable as well. Now, thanks to the 1-3/8-inch diameter, it can generate up to 13000 vibrations per minute. Added to this, the vibration head is 15-1/8 inches long, allowing you to use it for deep concrete consolidation.
It also features a lock-on button that provides stability and ensures that extended working hours are not a worry. You can enable the function and continue working without having to ponder the controls.
Meanwhile, due to the cast aluminum body, this is a sturdy unit that can handle even the toughest of jobs regularly. And thanks to the swift-to-change shaft, you will be able to enjoy it without any hassle. Finally, despite all the functions on offer, the designers have kept the price within reasonable limits.
What Could’ve Been Better?
There is a problem with the switch, which could affect performance while you are at work. Thus, it is not ideal to find yourself in such a situation when you have to meet a deadline. Besides, it is not the most flexible tool, meaning you could be prompted to look elsewhere.
Pros
Affordable
Durable
Powerful
Lightweight
Swift-to-change shaft
Cons
Not very flexible
Problems with the switch
Power Source: Electric | Voltage: 110V | Horsepower: 1.5HP | Vibration Frequency: 13,000 VPM | Vibration Amplitude: 1" | Length of Shaft: 0.83 ft | Weight: 5.5 lbs | Warranty: 1-year limited
The USA Pro Concrete Vibrator is a handy unit that can take care of your light-duty requirements at work. Plus, it is affordable, and with a range of features on offer, you will undoubtedly take a liking to it. As a result, it has earned a lot of praise from users, making it highly accessible.
Heavy Duty Vibrator has a 60in X 35mm shaft needle
Will Vibrate the Bubbles out of Concrete / Cement
Why Did We Like It?
If you need to vibrate air bubbles out of the cement or concrete, then the 60-inch by 35mm shaft needle will come in handy. Plus, thanks to the 6.5ft power, you will be able to reach most spots quite quickly. Moreover, thanks to the 110V supply, no job is too tight for this model.
Moving on, the 1-3/8-inch breadth of the head makes it ideal for generating 12000 vibrations per minute. Likewise, the trigger lock is well-suited to allow you to control all the power. It helps you to get better results and makes the overall experience user-friendly.
Besides, since it is handheld, you can use the 1.5HP to set the concrete quickly. Additionally, you get all these features for a meager price. The manufacturers have made sure that it is reasonably priced to cater to a broad audience.
What Could’ve Been Better?
It is not the most powerful option available in the market. If you are looking for a model that delivers a high power rating, then you have to consider some other option. And because the power is less, it is not ideal for large-scale projects.
Pros
Affordable
Long cord
Maneuverable
Suitable for light-duty tasks
Eliminates air bubbles and water
Cons
Not very powerful
Not for heavy-duty projects
Power Source: Electric | Voltage: 110V | Horsepower: 2HP | Vibration Frequency: 13,000 VPM | Vibration Amplitude: 1.2" | Length of Shaft: 6.5 ft | Weight: 11 lbs | Warranty: 1-year limited
We are nearing the end of our list, but the top-notch products just keep on coming. Up next is the Seeutek Hand-Held Concrete Vibrator, which is a useful option if you want to finish your projects fast. So, you are guaranteed a powerful performance thanks to its potent functions.
If you need speed, you will love the 13000 vibrations per minute that it generates because of the 1HP engine. Additionally, it can produce a maximum of 750W power, which effectively allows you to remove air bubbles so that the concrete is durable and consolidated.
Furthermore, it has an extra-long shaft woven from steel and ensures you get the desired flexibility. Thus, you can rest assured that it will not stop working under normal conditions due to overheating problems. Meanwhile, it comes with an ergonomically designed handle that makes long working hours possible.
And this design is well complemented by the lock-on button, enabling you to leave your machine on until the work is complete. Therefore, you do not need to worry about anything else and can get the desired output. Plus, it has a metal screw thread that forms a secure connection.
What Could've Been Better?
This unit is not suited for heavy-duty work. Therefore, the buyers' base is reduced, and several people may miss out. Plus, there is a slight delay before it starts, which may not please you. You may even have to bang it on the head to get it up and running.
Pros
Metal screw thread
Flexible
Suited for light-duty projects
The shaft is 4.9ft long
Secure connection
Cons
Not for large-scale tasks
Slight delay before it starts working
Power Source: Electric | Power: 1500W | Vibration Frequency: 13,000 VPM | Vibration Amplitude: 1.2" | Weight: 10 lbs | Length of Shaft: 6.6 ft | Warranty: 1-year limited
If you are a professional worker or if you harbor hopes to be one, then the WEN 56035T Compaction Force Plate Compactor is the tool for you. It is a highly versatile unit that comes with some unique features, which have made it one of the top buys in the market.
It comes with a 212cc engine that gives it a lot of power and allows you to use it for different compounds other than just cement. So, you can form a solid groundwork on most projects and use it for walkways, driveways, repair work, or even the foundation for small buildings.
Plus, with the swing-over-handle, you get a high degree of maneuverability while also being capable of taking it to various worksites. Therefore, given the versatility on offer, you can even use it for projects around your home. Likewise, thanks to the 4496 lbs of force, it can generate 5400 blows per minute.
Furthermore, due to the isolators, the vibration from the motors is reduced considerably, helping to extend the lifespan of your tool. Besides, it has fast travel speed, likewise increasing output, and ensuring that a single direction plate can travel up to 82ft per minute.
What Could've Been Better?
There have been reports that while working, it tends to bog down on instances. Therefore, you will have to put in more effort to get the maximum out of it. Plus, you will have to keep a check on the bolts to see if they are coming loose or wearing out.
Pros
Swing overthe handle
Highly maneuverable
Vibration isolators
Portable
Durable
Cons
May bog a bit
Bolts could be an issue
Power Source: Gas | Voltage: N/A | Horsepower: 7HP | Vibration Frequency: N/A | Vibration Amplitude: N/A | Length of Shaft: N/A | Weight: 207 lbs | Warranty: 2-year limited
At number two on our list is the DeWalt DCE531M1 Cement Vibrator, which is quite similar to the first product. But there are a couple of areas where it is different, which has placed it in the runners-up spot. Nevertheless, it has quality features that will please many buyers.
The concrete vibrating tool has 4 foot long flexible shaft...
Why Did We Like It?
It is a very convenient model, weighing in at only 8lbs, and added to the overall measurements of 8x46.5x3.8 inches, it is compact. Now, the 1-1/8 head permits you to get 14,000 vibrations per minute, and coupled with the shaft and isolated motor, you will see that it delivers productive output.
Plus, it is very versatile and works well with both residential as well as industrial operations. Because it is cordless, you get added maneuverability under most circumstances. So, you can use it to get into tight areas for excellent execution.
Furthermore, due to the separate drive shaft and motor, it is sturdy and can last for a long time. Also, given that it is portable, you can consistently use it for several small-scale jobs. Besides, it will give most consumers great pleasure to learn that it is easy to clean, and you can rinse it off.
What Could’ve Been Better?
The problems with this device are similar to the earlier product. For one, batteries are not included, and many people would not like to spend extra to purchase batteries. If you need a machine for big projects, then it is better to consider some other option.
A pencil is usually associated with subtlety, but in this case, the designers of the DeWalt DCE531B 20V Max Pencil Concrete Vibrator have been quite smart. They have coupled finesse with power so that you get an uninterrupted performance on most jobs. Therefore, most people have taken a liking to its excellent features.
4 foot long flexible shaft for easy use and long reach
1- 1/8" diameter vibrator delivers maximum consolidation...
Why Did We Like It?
If you crave power, then you will love the sharp performance that it produces. Thanks to the shaft, you get 14000 vibrations per minute, allowing you to take on most tasks with assurance. As a result, you can fix anything from the sidewalk to the footing required for streetlights.
Such is the reliability that you can bet your bottom dollar that it is much faster than other units. Meanwhile, the shaft is 4ft long, enabling you to use it on some large-scale tasks. Moving on, it is lightweight, so you do not face any problems while controlling it.
Besides, when you use it on the concrete, you will see air bubbles coming to the surface. This is thanks to the 1/8-inch vibrator that offers a consistent burst of power. Finally, it can reach even the problematic spots to produce a complete performance.
What Could've Been Better?
If you opt to buy this unit, then you must know that you will have to purchase the batteries separately, which will drive up the total cost. Additionally, it is not the ideal unit if you have to cater to big-scale project,s and, therefore, potential buyers may look elsewhere.
We are down to the last three products on our list, and maintaining the quality, we have the BIZOERPO Hand-Held Electric Concrete Vibrator. This is a very versatile tool that provides you with incredible efficiency. Moreover, it is potent, which has endeared it to users.
【HIGH EFFICIENCY】: The length of vibrator shaft is up to...
【HIGH POWER】: Remove air bubbles and level concrete...
Why Did We Like It?
The vibrator shaft measures 4.5m in length, having a 1.5” head that both improves as well as gives you more coverage while working. Therefore, it comes equipped with an advanced leading design that lets it work at a maximum power of 1100W.
Thus, you can get rid of air bubbles with ease and get a smooth operation while leveling the concrete. All you need to do is dip the head into the wet cement, which will get rid of air or excess water and solidify it within the structure. Furthermore, it has a metal roll cage that provides excellent protection and makes working with it safe.
Finally, it is incredibly versatile, making it suitable for use on numerous jobs from concrete slab bridges to hydroelectric power plants. Also, you will be happy to know that you will not have any issues in starting it up, such as having to tap or knock on the vibrator shaft.
What Could’ve Been Better?
This is a heavy model, so there may be people who will opt for another option. Thus, if you are not well-built, you could have trouble controlling it. Besides, it could bog down and start smoking, hence bringing your work to a premature stop.
Pros
Powerful
Efficient
Easy to use
Versatile
Accurate
Cons
Bit heavy
Could bog down and start smoking
Power Source: Electric | Voltage: 110V | Horsepower: 2HP | Vibration Frequency: 16,000 VPM | Vibration Amplitude: 1.2" | Length of Shaft: 13 ft | Weight: 10.7 lbs | Warranty: N/A
The penultimate product on our list is the BEAMNOVA Electric Concrete Vibrator, which flaunts a simple design. It comes with all the components to make this a complete unit, and you will enjoy working with it. Thus, it is a trendy device and is a good investment for most buyers.
Efficient & Long Reach - The BEAMNOVA concrete vibrator is...
Versatile Use - Submerge the vibrator head into wet concrete...
Why Did We Like It?
It is a lightweight model allowing you to get better handling so that you can control the 13000 vibrations per minute. Complementing the speed is the 1-3/8-inch vibrator shaft that gives you more range at work and makes the entire operation more potent.
Moving on, you can dip the head into the wet concrete to remove air bubbles or excess water. This will allow the concrete to set into the mold which will make it stable. Plus, you can even use it to level the concrete, which is a great function to have.
The significant inclusion is the dust-proof button switch that provides you with user-friendly operation and permits you to get over 10000 presses. Likewise, thanks to the metal-built case, you do not have to worry about cement entering the machine. Thus, it is a highly versatile tool that can perform a range of tasks such as patching or pouring operations.
What Could’ve Been Better?
Like some of the other modes, it does not start instantly. You may have to bang it on the body to get it rolling, which many people may not like. Another cause for concern is the lack of robustness, which will affect the longevity of the unit.
Pros
4.9ft shaft
Versatile
13000 vibrations per minute
1-3/8-inch vibrating head
Removes trapped air
Cons
May not start instantly
Durability is an issue
Power Source: Electric | Voltage: 110V | Horsepower: 2HP | Vibration Frequency: 11,000 VPM | Vibration Amplitude: 1.2" | Length of Shaft: 43 ft | Weight: 9.3 lbs | Warranty: N/A
Before you buy, there are some points that you need to keep in mind. These are the aspects that distinguish the top products from the not-so-good ones. Although they may all look and feel the same, the best concrete vibrators' anatomy is a little different.
It is based on these points that we have formulated our list, but you still have to choose the best from the best. Therefore, by taking note of the details, you will be much better placed to make an informed choice.
Durability
Most significantly, your model must be able to withstand the demands of work daily. A concrete vibrator is likely to be subjected to the harshest of conditions, and in that regard, it cannot afford to break down. The designers need to be careful and use quality materials so that they get a long lifespan.
If the device is unable to deliver on longevity, then all the other functions go to waste. There is no point in loading it with features if you do not get to enjoy it for a long time. Also, it is not precisely feasible to keep purchasing new tools in a short period. Therefore, durability is essential for any user.
Ease of Use
It must be user-friendly because you are working with a heavy machine, which is already difficult. On top of that, you do not need the added burden of figuring out what every function or feature does. One does not have the time.
All the functions should come to you quite smoothly. The tool's primary purpose is to ease your workload and, in that regard, you cannot afford to compromise. Rather than having lots of features, manufacturers should focus on the most important ones to make the device uncluttered.
Speed
Finally, it has to be fast. Working in the field is hard, and being fast is essential because you are working with various components that need to dovetail to make your work complete. Thus, it has to offer the maximum number of possible vibrations per minute to ensure that the cement sets appropriately.
Additionally, you have a lot of work to do and cannot just focus on one task. The best concrete vibrators reduce the time of work considerably, allowing you to focus on other things. Plus, the faster you get your job done, the more chances you will have to work on various projects.
But being fast does not mean compromising on efficiency. There must be a precise balance between pace and output, and they should complement each other for the best results.
Concrete Vibrators FAQ's
What are the types of concrete vibrators available in the market?
The most common types of concrete vibrators are internal (needle) vibrators, external (form) vibrators, and surface vibrators. Internal vibrators are most commonly used for concrete consolidation.
What is the ideal frequency and amplitude for a concrete vibrator?
The ideal frequency for a concrete vibrator is between 7,000 to 12,000 vibrations per minute (VPM) and the ideal amplitude should be around 0.04 to 0.06 inches.
How do I choose the right concrete vibrator?
The choice of a concrete vibrator depends on the size and shape of the concrete pour, the thickness of the concrete, and the desired level of consolidation. Also, consider the type of vibrator needed and its power source.
Can a concrete vibrator damage concrete?
If a concrete vibrator is used improperly, it can damage concrete. Over-vibrating or using a vibrator with too high of a frequency or amplitude can cause segregation of the concrete mixture, which can weaken the final product.
How do I maintain a concrete vibrator?
To maintain a concrete vibrator, keep it clean and dry, lubricate the internal bearings, and store it in a dry place. Check for damage or wear on the cord, switch, and housing before each use.
Is it safe to use a concrete vibrator?
Yes, it is safe to use a concrete vibrator as long as you follow the manufacturer’s instructions and take safety precautions, such as wearing protective gear and ensuring that the power source is properly grounded.
What is the average lifespan of a concrete vibrator?
The average lifespan of a concrete vibrator depends on its quality, frequency of use, and maintenance. Generally, a well-maintained vibrator can last for several years.
Can a concrete vibrator be used for other purposes?
No, a concrete vibrator should not be used for any other purpose other than consolidating concrete. Attempting to use it for other purposes can damage the tool and result in injury.
Are concrete vibrators noisy?
Yes, concrete vibrators produce a significant amount of noise during operation. It is important to wear hearing protection while using them.
Conclusion
We hope that, having gone through our list, you have a better idea about concrete vibrators.
We have decided to assist you a bit more before you make the final choice. We have narrowed the top three products from our list to give you a much clearer idea of where every model stands.
In first place is the Makita XRV02Z, which is an exceptional model that can carry out a range of functions even under challenging situations. It is followed in the second spot by the DeWalt DC530B Cement Vibrator, which has ticked most of the right boxes and has turned out to be a dependable tool for most people.
Finally, in the third spot, we have the GlobMarble Concrete Vibrator, which presents a different option compared to the other two products, which many users will like. So, that is all from us.
We believe you are well-equipped with all the knowledge to make your purchase. Till next time!
Best solar-powered birdbath fountains and pumps combine beauty, sustainability, and functionality to create a serene outdoor space that attracts birds and supports local wildlife. Unlike electric alternatives, these eco-friendly models operate entirely on solar energy, offering a cordless, low-maintenance, and noiseless way to circulate water. The gentle flow not only keeps the water fresh and oxygenated but also adds a soothing visual element to your garden or patio. Built from durable, weather-resistant materials, modern solar birdbath pumps perform reliably even under variable sunlight, with adjustable nozzles for different spray patterns. Whether you prefer a floating fountain, submersible pump, or decorative pedestal design, this guide showcases the 9 best solar-powered birdbath fountains and pumps available today—each selected for efficiency, ease of installation, and aesthetic appeal to help you transform your garden into a peaceful retreat for both you and your feathered visitors.
Best Solar-Powered Birdbath Fountain & Pump
Whether you want a simple and compact design or a more elaborate one with adjustable features, here's the list of the 9 best solar-powered birdbath fountain & pump to enhance your outdoor oasis.
Have you ever heard of a floating solar-powered birdbath? Well, the Solatec Solar Fountain was one of our first fascinating finds with a variety of uses. Its amusing aesthetic and eco-friendly features make it a welcome addition to most gardens. Most importantly, birds loved frolicking in the running water while we enjoyed their gentle, friendly chirping.
Eco Friendly: It is an extremely competent solar panel. It...
Sprayer for Different Water Style: There are 4 different...
Why Did We Like It?
First off, we loved the look of the black, glossy surface with light-colored stripes across it. It looked elegant and aesthetic in any birdbath or waterbody we placed it in.
Moving on to its usability, you must submerge it in water entirely while exposing all the solar panels to direct sunlight. While this can be slightly tricky, especially if you have a lot of foliage in the garden, it isn't impossible.
Another fascinating aspect is its four-style nozzle heads that are attached to the pump. Essentially, it allows you to switch between different spray styles according to your requirements. It is super versatile and can be used in the pool, tiered fountains, and Zen gardens.
Moreover, it is very low-maintenance. Installation is a one-step process, and it doesn't ring up high electricity bills or even make annoying motor sounds. It is an ideal addition for those looking for a minimalist and convenient birdbath installation in their garden.
What Could've Been Better?
While it worked flawlessly in direct sunlight, it was prone to stopping intermittently if even one of the solar panels was slightly covered by shade. So, it is a must to ensure that these panels are always exposed to direct sunlight to work uninterruptedly. This can be slightly challenging for some users.
Pros
Variety of spray options
Lightweight and portable
Super easy installation process
Low-maintenance product
Cons
Works intermittently if even one of the solar panels is slightly shaded
Solar Panel Wattage: 1.4W | Nozzle Heads: 4 | Fountain Type: Submersible Fountain | Battery Backup: No | Adjustable Height: No
For our next recommendation, we bring you the Okmee Solar Fountain. It features a unique four-design spray nozzle that can be changed as per your requirements. Furthermore, it murmurs a gentle, burbling sound that is soft and pleasant - for you as well as the birds visiting your garden.
4-in-1 Integrated Nozzle: OKMEE solar powered fountain pump...
Different Water Style and Gentle Burbling Sound: 4 water...
Why Did We Like It?
We were searching for the most planet-friendly alternative for our daily visitors - the sweet and gentle birds of the neighborhood. When we first came across the Okmee Solar Fountain, we were curious to know why it was advertised as one of the most environmentally friendly birdbaths.
For starters, this solar-powered birdbath is made of PET material or polyethylene terephthalate. It is a long-lasting substance that doesn't contain any toxic ingredients or harm the environment. We were instantly on board with this concept and decided to try the product on our lawns.
Installation was super easy; in fact, it was just a one-step process. The birdbath features four modes - one bubbling mode and three spray modes.
Moreover, changing the modes is very convenient as well. The bubbling mode can be activated by removing the nozzle. It lets out a gentle, murmuring sound with the lowest water spray design. To activate, place, and rotate the nozzle to switch between the other three spray designs.
What Could've Been Better?
The instructions provided in the user's manual explained that the lock mechanism is located under the bottom of the birdbath. However, disassembling and putting it back together can be slightly confusing since the instructions are a little unclear.
Pros
Filtration box for added protection
Made of PET material
Works even in low sunlight
Compact and friendly design
Cons
Instructions on disassembling it are slightly unclear
The next item on our list is the Sunlitec Solar Fountain. We especially like its fast-working technology that starts pumping fresh water within three seconds of exposure to direct sunlight. Moreover, the pack features four different nozzles that allow you to switch between spray designs and pressure according to specific needs.
⛲ PREMIUM QUALITY SOLAR POWERED BIRDBATH KIT - Crafted to...
⛲ ENERGY SAVING FISH AND BIRD BATH FOUNTAIN - Help keep up...
Why Did We Like It?
What is the best, most eco-friendly alternative to providing water for birds in the garden? In our opinion, it is by installing a solar-powered birdbath. This unit helps you minimize energy consumption while providing an aesthetic addition to your garden. Moreover, since it doesn't use electricity or extension wires, it is completely safe for your little bird friends to use.
Moving over to its ease of use, this unit is easy to install and can be used even in shaded areas. If you're wondering how a solar-powered unit can be used in the shade, here's the secret - the 9.5-foot power cord.
You can practically place the birdbath fountain and pump in any spot of your garden, even one that doesn't get direct sunlight. Ensure that you place the solar panels in direct sunlight - and voila! This is made possible thanks to the long power cord that connects the solar panels to the birdbath fountain.
What Could've Been Better?
While the addition of a power cord enables most users to activate the pump even in slightly shaded areas, it isn't ideal for someone looking for a completely cordless birdbath. Moreover, the center spray might be a little too high for small containers. We fixed this issue by enlarging the center hole using a pocket knife, which immediately lowered the spray height.
Pros
Compact and lightweight
It has a variety of uses
Safe for birds and the environment
Maintenance-free technology
Easy to install
Cons
Not entirely cordless
Spray height might be too high
Solar Panel Wattage: 1.8W | Nozzle Heads: 4 | Fountain Type: Floating Fountain | Battery Backup: No | Adjustable Height: No
Coming to our next solar-powered birdbath recommendation, we have the Mademax Solar Birdbath. This product features a variety of four spray nozzle designs, along with excellent battery backup. It ensures that you can use the trusted birdbath pump and fountain even during partially cloudy or shaded weather conditions.
LATEST 1W SOLAR POWERED: The solar birdbath fountain only...
KEEPING THE PUMP IN THE MIDDLE OF THE BIRD BATH: Our company...
Why Did We Like It?
The next product we tested was the solar-powered birdbath from Mademax. Although it requires no electricity or battery, it features an excellent battery backup that allows you to use it even during partial sunlight.
That being said, the pump and fountain can efficiently spray water up to heights of 70 cm when the solar panels are exposed to direct, full sunlight. However, in partially shaded or cloudy weather, the pump may only spray water up to a height of 10 to 20 cm.
We also appreciate the new safety protection feature enabled on this product. In case the fountain detects a shortage of water (in which case, it will not work efficiently), it will begin to run a battery of tests immediately. Within 20 seconds, if the fountain detects a low water supply, it will shut off automatically.
This function ensures that there is no strain or pressure on the solar-powered pump. It ensures long-lasting productivity and efficiency of your purchase.
What Could've Been Better?
Initially, we were not aware that the pump would begin working right out of the box. As soon as we removed the birdbath (out in the garden), it began whirring, which is somewhat damaging to the device.
Our recommendation is to turn the solar panel upside down, so it is shaded. This will prevent the pump from automatically starting.
Pros
Completely quiet operation
Good battery backup
Light and compact
Easy installation process
Cons
The machine may get damaged if the pump starts when it isn’t submerged in water
Solar Panel Wattage: 1.4W | Nozzle Heads: 6 | Fountain Type: Floating Fountain | Battery Backup: No | Adjustable Height: No
Moving on to our next recommendation, we have the Viajero Solar Fountain. Packed with 2.5W and an 800mAh battery, this birdbath is designed to power through an entire day's use - even without direct sunlight. The PET lamination on its solar panels gives added durability and longevity from daily wear and tear.
【PREMIUM-QUALITY SOLAR PANELS】:We’ve outfitted our...
Why Did We Like It?
Most homeowners look for a high-quality solar-powered birdbath made of durable materials with sturdy construction. Viajero has ensured that its products are made of the best quality engineered plastic with PET lamination. This additional coating enables users to submerge the product in water for prolonged periods without worrying about damage or daily wear and tear.
One of the most significant attributes of this product is its battery backup and advanced solar panel design. Unlike other solar panels, they have been designed to power the fountain even if some of the panels are shaded or covered by debris. When we tested it, the pump continued to spray water throughout the day without interruption.
Moreover, the 800mAh battery enables the device to store power throughout the day so you (and your birds) can enjoy uninterrupted use all day. Finally, the auto-shutoff and safety feature ensures that the device doesn't pump under a low water supply, thus preventing damage.
What Could've Been Better?
After assembling, we submerged the fountain in the birdbath in our garden, but it did not work as efficiently as expected. That is when we read the manufacturer's instructions, which said that the pump must be shaken vigorously till there is a noise.
Those looking for a lightweight solar-powered birdbath fountain that is versatile and easy to use may find our next recommendation ideal. The Lewisia Solar Birdbath Fountain weighs only 0.8 lb. Moreover, its easy installation, cleaning, and maintenance make it a hassle-free addition to most gardens.
【Plug and Play】--- The pump only works in direct...
【Ground Stake Mount】 --- You can install the solar panel...
Why Did We Like It?
Not all solar panels are built the same. The Lewisia Solar Birdbath Fountain features a flat solar panel with metal brackets, enabling you to prop it against a wall or place it standing on the garden floor. This feature is excellent as you aren't restricted by where you wish to place the panel for optimal, direct sunlight.
Furthermore, a 10-foot cable ensures that you can place the pump and fountain at a distance from the solar panels. It is especially helpful during partially shaded or cloudy days. The fountain is made of high-quality, durable polycrystalline silicon and ABS material. It is long-lasting, tough, and does not break or crack easily.
Moving on, we loved how easy the device was to install and set up. We did not require any additional tools as the manufacturer provided everything. Moreover, the panels and pump are easy to clean and maintain, which is a bonus.
What Could've Been Better?
Although the solar panel and pump work efficiently when they are clean, they immediately stop if there is even slight debris or dirt on them. This can be challenging to manage since a device kept in the open air is bound to get dirty often. As such, it is imperative to regularly clean them to keep them in optimal working condition.
Next up, we have another solar-powered birdbath fountain that is slightly different from our previous recommendations. Featuring a rounded flower design, this product is a super aesthetic addition to any garden. However, unlike other products, it does not have a built-in battery to provide additional backup. Read on to find out if it's the right option for you.
For starters, we loved the unique calendula-shaped design of this birdbath fountain. It looked aesthetic and elegant when placed in any birdbath or shallow body of water.
Moving on to its usability, this product does not feature an in-built battery, unlike most other competitor fountains. Unfortunately, this is slightly restrictive as it allows us to use it only when there is direct sunlight and adequate exposure. As such, the solar-powered device will not work on cloudy days or if the panels are covered or shaded.
That being said, it is fast-working and efficient under the right conditions. When exposed to full, direct sunlight, the pump begins to work within three seconds, spurting a steady stream of water vertically upwards. Our bird visitors seemed to enjoy this immensely as they swarmed into the garden for a gulp of water and a quick bath.
Lastly, due to its cordless design and technology, we enjoyed unrestricted use in the pool, the Zen garden, and our tiered fountain.
What Could've Been Better?
In our opinion, the absence of battery backup was a feature we really missed. While the pump and fountain work excellently under the right conditions, as soon as the sun went behind a cloud, the pump would automatically stop.
Honestly, this was a little annoying. The addition of a small battery backup might have made this product a favorite for many users.
Pros
Fast-working solar panels
No cords or electricity eliminates the chance of accidents
Unique, aesthetic design
Compact and easy to transport
Cons
No battery backup
Solar Panel Wattage: 1.6W | Nozzle Heads: 4 | Fountain Type: Floating Fountain | Battery Backup: No | Adjustable Height: No
Next up, we bring you the Mademax Solar Birdbath Fountain & Pump. If you're wondering what this model might have different compared to our previous recommendations, don't worry. We're here to tell you all how this solar-powered birdbath fountain is right for your needs.
LATEST 1W SOLAR POWERED: The solar birdbath fountain only...
KEEPING THE PUMP IN THE MIDDLE OF THE BIRD BATH: Our company...
Why Did We Like It?
Those looking for a solar-powered birdbath fountain that won't run out of energy easily might find this product to be their best bet. This device runs on a 6V solar panel, 5V water pump, and an additional 3.7V 800mAh battery backup. You can easily expect long hours of use with this device, even in cloudy conditions.
Moving on to its next feature, the PVC+wave fiber material is exceptionally durable and long-lasting. Not to mention, its brushless submersible pumps come with excellent start-up features, along with added efficiency and a reliable spray effect.
If you're wondering how many spray nozzle patterns you will get with this one, get ready to be pleasantly surprised. This model features six different spray patterns to choose from. Its easy installation and nozzle replacement make it super convenient to use, even for first-time users.
Lastly, the included battery comes with two power modes. It allows you to choose the most optimal mode that conserves the battery while offering the best power source possible.
What Could've Been Better?
Overall, we loved how user-friendly and efficient this device was for our needs. If we had to nitpick, we would probably comment on the fact that the solar panels, even when charged, take about 10 seconds to activate. However, this isn't a huge issue.
Pros
IP68 waterproof rating
Rechargeable lithium-ion battery
Six nozzle patterns to choose from
Easy installation process
Cons
The pump takes about 10 seconds to activate
Solar Panel Wattage: 1W | Nozzle Heads: 6 | Fountain Type: Floating Fountain | Battery Backup: No | Adjustable Height: No
Moving on, we want to introduce to you the Biling Solar Bird Bath Fountain. Those looking for a high-quality solar panel will appreciate these solar glass laminates that are scratch-proof and crack-proof. Moreover, it comes with an IP65 rating, which is an excellent feature.
Although we extensively tested more than a dozen products, we finally narrowed down our top picks. We included the Biling Solar Birdbath in our top recommendations list because of its excellent features, adaptability to cloudy weather, and high-quality, durable materials used. But that's not all!
You might wonder why it is crucial to have an IP rating on a device meant to be submerged in water. Well, water is known to affect most materials over time. With constant use and wear and tear, low-grade materials are prone to damage. Replacing or repairing them can be an expensive affair.
However, the IP65 rating on this product ensures us that its high-quality materials won't deteriorate over time, especially when kept underwater. Furthermore, the innovative design of the solar panel allows you to screw it into the group or prop it against a wall for convenience of use.
What Could've Been Better?
The biggest drawback of this device is the absence of an auto shut-off feature. Without this, the pump continuously runs and needs to be manually unplugged to turn it off. Although it isn't a massive issue, the safety feature would have added another layer of protection to the device.
Pros
IP65 rating
The solar panel can be screwed into the ground or hung on a wall
We are almost at the end of our comprehensive guide, but there are just a couple more things we want to discuss with you. After going through our reviews, you might have made up your mind about the right solar-powered birdbath for the garden.
However, we implore you to take a look at our short guide below before purchasing one. These are a few factors that you should keep in mind when buying the best solar-powered birdbath fountain and pump for your home.
Free Floating VS Corded Design
Whether you want to opt for a free-floating birdbath fountain or a corded one is your personal preference. However, in our opinion, the free-floating one might be better suited for those who prefer not to deal with cords and wires. Moreover, it is easy to install and set up and more convenient than a corded design.
That being said, the corded solar panels offer slightly more flexibility from a different angle. With this design, you can efficiently place the solar panels slightly away from the birdbath, where the sunlight is strongest. This way, you don't need to worry about the fountain not working on a partially lit morning.
The Materials Used
By definition, a birdbath fountain is something that you will place outside your home in the garden. Here, it will be exposed to several environmental factors, such as pollution, leaves and twigs, debris, bird poop, insects, and sunlight.
It is best to look for a device that is made of high-quality, durable materials. Furthermore, if the product has a good IP rating, it will give you peace of mind about how long-lasting it is, especially when dunked in water frequently.
We recommend researching the material used before purchasing a product. This way, you can rest assured that you have purchased the best quality material that won't deteriorate or get damaged over time.
The Size Of The Pump
What size pump is best suited for a birdbath? Well, the answer depends on the size of your fountain. The larger the fountain, the bigger the pump you may require.
That being said, bear in mind that corded pumps are known to create a bit of noise during operation. This may scare away shy birds and will effectively prove your idea of installing a birdbath to be pointless.
We recommend opting for brushless motor technology. These motors typically have a fast-start technology. Moreover, they are relatively more efficient, long-lasting, and, most importantly, noise-free.
Your Budget
Although this may seem obvious, you must always consider your budget before purchasing a new product. Since a birdbath fountain is an addition primarily for your feathered friends to enjoy, make sure that you pick one that is environmentally friendly, has a silent operation, and is made of good-quality, non-toxic materials.
We have included products in our guide that are ideal for people looking for budget options as well as those willing to spend a little lavishly. Of course, you should have a preset budget in mind before exploring your options.
Solar Powered Birdbath Fountain & Pump FAQ's
Do I need to have direct sunlight for the solar-powered birdbath fountain and pump to work?
While direct sunlight is ideal for optimal performance, most solar-powered birdbath fountains and pumps can still operate in partially shaded areas. However, it’s important to ensure that the solar panels receive enough sunlight to generate sufficient power.
Are solar-powered birdbath fountains and pumps easy to install?
Yes, solar-powered birdbath fountains and pumps are generally easy to install. They typically come with detailed instructions that guide you through the setup process. Most models require minimal assembly and can be placed directly in the birdbath without the need for additional wiring or plumbing.
Can I use a solar-powered birdbath fountain and pump in any type of birdbath?
Solar-powered birdbath fountains and pumps are designed to be versatile and compatible with various types of birdbaths. However, it’s important to check the product specifications to ensure compatibility with your specific birdbath size and design.
What maintenance is required for solar-powered birdbath fountains and pumps?
Solar-powered birdbath fountains and pumps require minimal maintenance. It’s important to keep the solar panels clean and free from debris to ensure maximum sunlight absorption. Additionally, regular cleaning of the birdbath to prevent clogging and the growth of algae is recommended.
Can I leave the solar-powered birdbath fountain and pump outside during the winter?
It’s generally recommended to store the solar-powered birdbath fountain and pump indoors during the winter months, especially in regions with freezing temperatures. Freezing water can damage the fountain or pump. However, some models are designed to withstand winter conditions, so it’s essential to check the product specifications or consult the manufacturer’s guidelines.
Are there different fountain patterns and water flow options available?
Yes, many solar-powered birdbath fountains and pumps offer various fountain patterns and adjustable water flow options. Some models come with interchangeable nozzles or spray heads, allowing you to customize the water display according to your preference.
Can a solar-powered birdbath fountain and pump also be used as a standalone water feature?
Yes, in addition to birdbaths, solar-powered birdbath fountains and pumps can also be used as standalone water features in ponds, small water gardens, or decorative containers. They add a tranquil and visually appealing element to any outdoor space.
Conclusion
So, have you decided on the best solar-powered birdbath fountain & pump for your garden?
It is advisable to research and go through customer reviews before purchasing one. This will help you get a better hold of the features and usability of different products. Moreover, it is important to pick the right one according to your budget.
Bear in mind that more expensive devices don't always translate to better-quality products. Furthermore, it is vital for the birds to like the device more than you do, don't you think?
Those looking for a lightweight and low-maintenance product might find the Solatec Solar Fountain best suited for their needs. Also, the Okmee Solar Fountain offers an excellent feature that produces a soft, burbling sound that is soothing for birds.
We hope you enjoyed going through our guide. In case you have any questions, please feel free to comment below and let us know.
Best air tool oils are specifically formulated to keep pneumatic tools, nail guns, and air compressors operating smoothly by reducing friction, dispersing moisture, and preventing internal corrosion. Unlike standard lubricants, these oils are engineered with anti-rust additives, viscosity stabilizers, and anti-foaming agents that maintain performance under high air pressure and variable temperatures. Regular use of quality air tool oil extends tool lifespan, ensures consistent torque output, and minimizes downtime caused by wear or water buildup. Whether you’re a professional contractor, automotive technician, or DIY enthusiast, choosing the right lubricant makes a measurable difference in performance and longevity. In this guide, we’ve selected the 8 best air tool oils that excel in lubrication quality, moisture control, and cold-weather protection, ensuring your pneumatic setup runs at peak efficiency year-round.
Best Air Tool Oils
Here’s the list of the 8 best air tool oils to help you find the perfect maintenance solution for your pneumatic tools, ensuring optimal performance and longevity.
The first and unarguably the editor’s pick on our list is the best-selling Marvel Mystery oil. This brand has already established a wide reputation with its leading innovations. The MM080R 4 oz. Air tool oil is said to deliver nothing but sheer quality under a bargain-basement price range. That said, let’s check out what’s all that buzz about!
It’s fair to say that this unit has been manufactured keeping customers in mind, provided how efficiently it caters to almost every consumer’s needs under a fair budget. It works best with piston-type air tools and line/rotary lubricators, and the credit goes to Marvel Mystery’s state-of-the-art technology behind its formulation. Not only that, but it’s also an appropriate supplement to eliminate rust formation, which defines total value for money.
Moving on, we’ve also found this oil to deliver positive lubrication, which comes quite handy in minimizing power outages. As a bonus, it also stands eligible to dissolve any gum/sludge formation that often hampers the tool's power and speed. So, if you’re looking for an oil that maximizes your tool performance without costing an arm and a leg, then the MM080R should be your go-to pick.
Not to forget, this product is also pretty appropriate for protecting hoses, as we found that it does not have any adverse reaction on rubber. Besides, it’s also suitable for dressing motor compartments, so that’s another win-win!
One of its most significant limitations is in the name itself, have you noticed? Yes, the size and quantity of the oil bottle are 4 oz, which is quite less. The price, on the other hand, is higher than most other recommendations, so that’s a bit upsetting.
What We Like
Appropriate for spray bottles
Suitable for multiple air tools
Protects rubber hoses
Premium quality oil
What We Don’t Like
High price
Volume: 4 fl oz | Dimensions: 7.2" x 5.8" x 5.4" | Weight: 4 oz | Water Dispersal: Yes | Rust Protection: Yes | Corrosion Protection: No
Next on our list, the Lucas Oil air tool lubricant is unarguably the one-stop solution to your professional tool maintenance needs. This product has been specially formulated to offer world-class performance, and its excellent ease of use makes it even better. That said, let’s check out its core specs and functions!
This product easily stands out to be a smart solution to double the efficiency of your pneumatic tools, as its brilliant formula enables the devices to have a longer lifespan. First and foremost, this tool comes off as an efficient rust-resistant oil, allowing you to protect the tools for a more extended period. Furthermore, the oil has been tested to be weatherproof, which is quite incredible for professionals who often work in extreme temperatures.
When it comes to metallic tools, water becomes a prevalent issue that threatens their longevity. Be it rust or just any other performance issue, water inevitably deteriorates the overall life of the tool in a jiffy. However, this oil also acts as an efficient water dispersal agent, which gives it a tremendous advantage over its critical alternatives in the same category. This feature prevents water jamming from extending the tool’s longevity.
Furthermore, we’ve noticed that the oil also provides the utmost help in preventing the tools from facing a blowout. Air tools are frequently prone to blowouts when the insides get rough, which can be serious trouble in the long run. Last but not least, this product comes in a 16-ounce bottle, providing sufficient oil for long-term use.
Although the product is quite good at what it does, it’s disappointing that it fails to prevent corrosion. To be precise, oil might not be the best option to consider if your air tool is eroding due to acidic components.
What We Like
Efficient tool lubrication
Ample size and quantity
Easy-to-use nozzle
Value for money
What We Don’t Like
Ineffective against corrosion
Volume: 16 fl oz | Dimensions: 9.38" x 2.47" x 2.47" | Weight: 15.7 oz | Water Dispersal: Yes | Rust Protection: Yes | Corrosion Protection: No
For those looking for a long-lasting solution to their frequent tool maintenance needs, the Lucas Oil 10200 1-quart air tool lubricant is a smart, budget-friendly alternative. The oil has been specially formulated to deliver nothing less than top-notch performance and defines value for money at its finest. Let’s find out more!
This one is quite a smart solution featuring a unique formula to safeguard your pneumatic tools from early rusting. If you’re observing any damage due to rust in your devices, applying this oil will help in eliminating the risk of significantly extending their longevity. Like our previous pick, this tool is resistant to extreme weather, which allows you to use the device at any temperature without being damaged by heat.
We’ve also tested this product to be an excellent water dispersal agent, which appears to be a common Lucas Oil feature at this point. This feature prevents any scope of water jamming in the tool, which lessens the chances of rusting by a fair deal.
Not to forget, it also prevents the possibility of a blowout, which is very common amongst pneumatic tools while being used roughly. Consequently, you can enjoy a smooth and uninterrupted working session.
There isn’t much difference between the 10200 and the 10216 units, except its size and quantity. Likewise, this product is also not very efficient at handling damages caused by acidic components. But apart from corrosion prevention, it’s a best-value product to consider.
What We Like
Prevents damage caused by moisture
Ample size and quantity
Can protect from extreme heat
Rust-resistant material
What We Don’t Like
Can’t prevent acidic corrosion
Volume: 32 fl oz | Dimensions: 14" x 14" x 10" | Weight: 32.48 oz | Water Dispersal: Yes | Rust Protection: Yes | Corrosion Protection: No
When it comes to premium automotive accessory protection, Sta-Lube is a brand that we can rely upon with our eyes closed. The SL2531 15 fl oz lubricant has everything you’d need from a professional air tool oil, and its sufficient size makes it a deal we can’t afford to miss. That said, let’s find out whether it suits your requirements.
First, this product redefines ultra-smooth performance with its excellent formula, which gives a significant advantage over its competition. It is quite efficient at lubricating the harshest and roughest of pneumatic tools, which makes it very suitable for heavy-duty commercial usage. For those who don’t mind spending a little extra for sheer quality, this product stands out to be a brilliant option to consider.
One thing about this oil that we’re in love with is its compatibility with almost any pneumatic tool. This product can lubricate the machine with sheer precision, whether it’s an air motor, air ratchet, grinder, hammer, or drill. Not to forget, this product also prevents any scope of rust formation on the tool surface, enhancing its overall life by a considerable amount.
Unlike most of our budget-friendly picks, this oil provides 100% protection from corrosion that occurs through acidic components. Last but not least, this product comes packed in a large 15-oz bottle, so be assured that it’ll last for a lifetime.
As you’ve guessed, this oil is a little more expensive than the standard alternatives, which may restrict some from making the purchase. We’ve also acknowledged that this oil isn’t VOC compliant in California, so that’s bad news for many.
What We Like
Suitable for heavy-duty use
Incredible rust protection
Can be applied on any pneumatic tool
Large size and quantity
What We Don’t Like
A little pricey
Volume: 15 fl oz | Dimensions: 1.63" x 3.75" x 9" | Weight: 16.16 oz | Water Dispersal: Yes | Rust Protection: Yes | Corrosion Protection: Yes
If you have any experience in pneumatic tool maintenance, you’re most likely not a stranger to Ingersoll Rand. The brand has a rich history of developing brilliant innovations to stay one step ahead of the game. Its 10P Edge air tool oil has been recently making a buzz, so let’s find out whether it lives up to the hype!
The main reason this product never fails to be a fan favorite is that it’s extremely easy to use. We’ve faced zero viscosity while using this product on almost any tool category, which adds an advantage. You can use this oil with the utmost smoothness and absolutely no interruptions. It features a unique formula that is guaranteed to enhance your tool’s life through continuous use.
Moving on, the product also comes with a redcap for quick snipping, which makes it a lot easier to use. We are also impressed by its compatibility with hydraulic tools, which further enhances its versatility by a great deal.
Not to forget, it manages to provide optimal protection against rusting, safeguarding the surfaces from early damage for a longer life. Many users have further suggested that using it every 48 hours is ideal for the best results.
Coming to what’s in the box, you get a pack of four 1-pint oil bottles in this package. In other words, this product is assured to outlast every other recommendation on our list. Last but not least, this product can be availed at a very affordable price, which is pretty impressive.
Quite frankly, there isn’t much to complain about this product, as it’s pretty reliable and affordable. However, numerous users have frequently complained that although the nozzle can be snipped easily, it can be a little difficult to open it accurately, and may cause spillage.
What We Like
Substantial quantity
Affordable price tag
Compatible with any tool
Supports hydraulic tools
What We Don’t Like
Snipping the cap can be difficult
Volume: 16 fl oz | Dimensions: 3.25" x 2" x 8.75" | Weight: 16 oz | Water Dispersal: Yes | Rust Protection: Yes | Corrosion Protection: No
BOSTITCH is a brand that thousands of American families trust blindly, as this brand has always changed the game with its world-class innovations. The PREMOIL 20 oz air tool oil defines premium efficiency at its best, and the credit goes to its ultra-high performance and beginner-stage ease of use. Let’s find out more!
For those who are looking for an oil that can restore industrial-grade strength in their tools, the PREMOIL unit is an efficient option to consider. This product works best with nail guns, and offers nothing less than optimal performance upgrade and extended longevity once applied. This oil is also available at a very pocket-friendly budget, giving us another reason to buy it for maintenance. Also, the product is guaranteed to last for a lifetime.
For the price, you get a 20-ounce bottle that offers sufficient oil quantity for long-term usage. We’re also quite impressed by the fact that this oil is a non-detergent solution, which raises its value even higher. To put it simply, the product formula doesn’t involve any added chemicals and comprises 100% pure oil. The purity that it offers at such a reasonable price makes it a deal that can’t be missed at any cost.
We’ve noticed that a prevalent issue among numerous air tool oils is being consolidated during colder temperatures. However, the BOSTITCH product is tested to be reasonably weatherproof, which saves it from any damage by cold temperatures. Last but not least, this product offers 100% protection from rust formation and acid corrosion.
Unfortunately, this product fails to dissolve any sludge formation inside the pneumatic tools, which gives it a significant disadvantage against our top picks on the list. Furthermore, we’ve also found it to be a subpar water dispersal agent, which further restricts its versatility.
What We Like
Suitable for heavy-duty use
Incredible rust protection
Can be applied to any pneumatic tool
Large size and quantity
What We Don’t Like
Average water dispersion
Volume: 20 fl oz | Dimensions: 4" x 2.3" x 7.9" | Weight: 8 oz | Water Dispersal: No | Rust Protection: Yes | Corrosion Protection: Yes
The penultimate pick on our list is the Super Lube 12004 air tool lubricant, a product that has been making waves in the market with its versatile applications. Most importantly, this oil is recommended by professionals due to its incredible rust-protection qualities. Let’s have a more in-depth look at its core features!
First and foremost, this product is one of the best anti-rust agents that we’ve tested till now, so big ups for Super Lube. This product starts showing visible results against any sort of rust formation within its first few uses, which makes it a complete value-for-money product. This unique formula extends your product’s life by a great deal, which is incredible for its price.
Not to forget, the model also ranks very high in terms of user comfort and convenience. To break it down, you get a smart nozzle that makes handling a lot easier for the users. In this sense, the model ensures very low spillage and can be very handy for beginners with zero prior experience at tool maintenance. Also, we’ve noticed that the oil doesn’t lose efficiency under colder temperatures, enhancing its versatility a notch.
We’re fans of its brilliant formulation that eliminates any sort of sludge buildup inside the pneumatic tools. This way, using this tool can help in keeping the tool’s speed and performance intact for a more extended period.
It’s a little upsetting that the model doesn’t offer sufficient size and quantity, as 4 ounces is too low for many. Furthermore, the product is also not very resistant to extreme heat, which makes it a little inconvenient to work with. Last but not least, the model fails to stop any scope of acid corrosion.
What We Like
Ergonomic nozzle for optimal handling
Doesn’t consolidate in cold temperatures
Fairly affordable price
Extends the tool’s life greatly
What We Don’t Like
Ineffective against acid corrosion
Volume: 4 fl oz | Dimensions: 1.7" x 1.7" x 6.5" | Weight: 0.24 oz | Water Dispersal: Yes | Rust Protection: Yes | Corrosion Protection: No
We’re ending our list with an incredible treat to bargain hunters, as the CLI-Syntec premium air tool oil delivers nothing less than industrial-grade efficiency at a fraction of its cost. This product is also compatible with almost any pneumatic tool, which defines the best values like nothing else. Let’s check out its core features!
When it comes to the best values, this product takes the cake, as it offers quite a lot for its price. First and foremost, it arrives in a 16-ounce bottle that contains sufficient oil to last for months of continuous usage. Furthermore, this unit features an incredible formula that helps in maintaining the tool’s longevity within its first few uses only. As a bonus, it offers optimal protection from heat and moisture.
This product takes the cake for out-of-the-box convenience with its elasticity preservation technology. Simply put, the oil can last for a considerably long time after it is applied to a tool, which defines value and efficiency at its best.
You only need to use a few droplets at once, and you’d be good to go for months. It also helps in minimizing friction inside the tool that’s caused by jamming and drastically enhances the motor’s performance.
Although this product is pretty efficient at preventing rust formation, its ability to eliminate acid corrosion is utterly disappointing. We’re also upset about how this oil can get consolidated in colder temperatures, which is pretty disadvantageous compared to our other recommendations.
What We Like
Suitable for heavy-duty use
Incredible rust protection
Can be applied on any pneumatic tool
Large size and quantity
What We Don’t Like
Ineffective against acid corrosion
Volume: 16 fl oz | Dimensions: 6.42" x 2.4" x 2.28" | Weight: 15.2 oz | Water Dispersal: No | Rust Protection: Yes | Corrosion Protection: No
Before we take your leave, here are the most important factors to keep in mind before putting your money in a pneumatic tool oil. As these products are selling like hotcakes, it’s best to be well-informed to avoid being fooled into buying an unreliable one. That said, make sure to include these factors while shopping for an air tool oil.
Lubrication Quality
Let’s be practical here; it’s just oil, and its primary motive is to lubricate the tools. Let’s not forget that different tools come with distinctive mechanisms and not every oil can adhere to all of them. That’s why it’s imperative to make sure that the product comes with sufficient lubrication characteristics. For instance, thinner oil is always more appropriate for thorough lubrication.
Rust/Corrosion Resistance
Resistance to toxicity is a universal need, whether it’s your personal life or your workspace tools. That said, pneumatic tools are also popular as rust/corrosion-resistant agents, which broadens their versatility. However, not most of the products in the market offer optimal protection from corrosion developed due to acidic components. But then again, it can be availed if you’re willing to slide in a little extra cash for superb quality.
Heat/Cold Temperature Resistance
Most of the users are frustrated because the oil turns out to be ineffective against moisture, or it becomes consolidated under colder temperatures. That said, if you’re looking for cheap oil for temporary fixes, neither of these should bother you. But, if you’re a professional looking for a reliable long-term solution, it’s vital to keep these factors in mind while choosing your oil.
Can I use any type of oil for my pneumatic tools?
It is recommended to use air tool oil specifically designed for pneumatic tools. Regular household oils or automotive oils may not provide adequate lubrication and could potentially damage the tools. Air tool oils have properties that make them suitable for the unique requirements of pneumatic tools.
How often should I apply air tool oil?
The frequency of oil application depends on the manufacturer’s recommendations for your specific tools. Some tools may require oiling before each use, while others may need it after a certain number of hours of operation. Refer to the tool’s user manual or the oil manufacturer’s instructions for the recommended oiling schedule.
Can air tool oil be used for other applications?
Air tool oil is formulated specifically for pneumatic tools and may not be suitable for other applications. It is designed to provide the necessary lubrication and protection required by pneumatic tools’ unique mechanisms. For other purposes, such as general lubrication or household applications, it’s best to use oils specifically intended for those purposes.
How should I store air tool oil?
Air tool oil should be stored in a cool, dry place away from direct sunlight and extreme temperatures. Ensure the container is tightly sealed to prevent moisture absorption and contamination. Follow the manufacturer’s instructions for any specific storage requirements mentioned on the product label.
Can I mix different brands or types of air tool oil?
It is generally recommended to stick to one brand or type of air tool oil to maintain consistent performance and avoid potential compatibility issues. Mixing different brands or types of oil may affect the oil’s properties and performance, leading to inadequate lubrication or other problems. If you need to switch to a different oil, it’s best to thoroughly clean the tool and follow the manufacturer’s guidelines.
Can air tool oil improve the performance of my pneumatic tools?
Yes, using the right air tool oil can improve the performance of pneumatic tools. Proper lubrication helps reduce friction, heat, and wear, resulting in smoother operation and increased efficiency. Regular maintenance with high-quality air tool oil can extend the life of your tools and ensure optimal performance.
Conclusion
We’re hoping that you’ve enjoyed going through our extensive guide to the 8 best air tool oils in the market. Here’s a brief highlight of the few products that we personally found to be the best in the game:
The Marvel MM080R unit is our editor’s pick, as its overall performance is unparalleled. However, if you’re looking for a more budget-friendly option, then the Lucas Oils are a good enough choice. Last but not least, the Sta-Lube oil serves correctly to those who don’t mind spending more for professional-grade performance.
Have you found your pick yet? Let us know in the comments below. That said, we’ll see you soon with more interesting articles, so stay tuned!
Best utility pumps are essential tools for homeowners and professionals who need to remove, transfer, or circulate water efficiently across various settings. Also known as water transfer pumps, sump pumps, or submersible pumps, these versatile machines handle everything from draining flooded basements and emptying pools to maintaining hot tubs, spas, and irrigation systems. Built with durable materials like cast iron, stainless steel, and reinforced thermoplastics, modern utility pumps deliver dependable performance and long service life, even under heavy-duty use. Advanced models also feature automatic shut-off sensors, debris-handling impellers, and adjustable discharge ports for improved efficiency and safety. In this guide, we’ve tested and ranked the 11 best utility pumps that excel in flow rate, power, and ease of operation, ensuring you have the right equipment for any water management task.
Best Utility Pumps
Here is the list of the 11 best utility pumps that can help you tackle any water-related job with ease.
Indoor Use Only - This 1/3 HP WAYNE basement sump pump is...
Tough And Durable - Corrosion-resistant epoxy coated steel...
The Wayne’s CDU790 Submersible water pump comes with a mechanical float switch that provides reliable operation. The top suction strainer will filter all debris and prevent it from getting into the pump tank and clogging it.
This hot tub pump doesn’t require any weep holes, and the cast iron seal plate helps in preventing water leaks and corrosion. If you’re looking for a water pump that is durable and reliable, this is a good option, and it also helps in removing debris so that it doesn’t clog the pump system.
Pros
Made from durable materials
Eliminates any air locking and clogging
The pump doesn’t need any weep holes
Cons
Some problems when it comes to the pump’s switch
A check valve is recommended to be used
Dimensions: 10.5" x 9" x 11" | Weight: 16lbs | Material: Cast Iron | Power Source: Corded Electric | Voltage: 120V | Horsepower: 0.3HP
Hands-Free Water Removal: WAYNE model EEAUP250 has iSwitch...
Automatic Pumping: Water level must be at least 1-3/4 inch...
The Wayne 57729 is an automatic electric water pump that comes with a switch technology, which manages to turn the pump on and off whenever it senses running water. The pump conveniently runs on 1/4 maximum horsepower and produces a flow rate of 3,000 gallons per hour.
The submersible water pump is from reinforced sealed thermoplastic construction, ensuring that you don’t need to worry about the service life of this pump.
Pros
Fully submersible
Made of corrosion-resistant materials
It can be left unattended since it can automatically sense the water level
Cons
Requires more energy to run
Tends to overheat
Dimensions: 6.5" x 6.5" x 12" | Weight: 8.56lbs | Material: Thermoplastic | Power Source: Corded Electric | Voltage: 100V | Horsepower: 1HP
The ECO-FLO utility pump is one of the best in the market and has been designed for numerous residential uses. It’s a great water pump for running a hot tub because it uses less energy but is highly energy efficient when you compare it with other hot tub pumps.
The materials of this water pump are made from corrosion-resistant thermoplastic, which ensures that it provides you with long service life.
Pros
Can be used around the house and in different hot tub installations
Made of plastic and rubber components
Needs less energy to operate
Cons
Manually operated
There are no on and off switches
Can overheat when ran dry
Dimensions: 6.5" x 6.5" x 11.8" | Weight: 7lbs | Material: Plastic | Power Source: AC/DC | Voltage: 115V | Horsepower: 0.25HP
Heavy-Duty Removal - This 1/2 HP WAYNE multi-use pump is...
Tough And Durable - Corrosion-resistant and sealed...
The Wayne VIP50 Electric water pump is constructed from a durable thermoplastic material that’s recommended to be used with any water removal system. This pump is a 1/2 horsepower submersible water pump that can be used to handle 3/8-inch solids without getting clogged.
The great thing about the Wayne VIP50 is that it can easily pump up to 2,500 gallons of water per hour and can also remove water down to 1/8-inch of the surface.
Pros
It’s fully submersible
Corrosion-resistant and durable
Made from sealed thermoplastic construction materials
Cons
The design of the pump can shorten the service life
Needs over 2.5 inches of water before it will pump
Dimensions: 7″ x 7.25″ x 12.4″ | Weight: N/A | Material: Iron | Power Source: Corded Electric | Voltage: 100V | Horsepower: 0.5HP
MULTI-PURPOSE WATER REMOVAL PUMP – Designed for use in...
GET RID OF WATER QUICKLY - Multi-Flo technology allows for...
The Wayne WWB WaterBUG has multi-flow technology that makes it easier for you to easily select the appropriate discharge for any application. The top discharge is great for top spaces, and the side discharge is great for removing water from flat open surfaces.
The head of the water can move up to 30 feet and handle water up to 1,257 gallons per hour. It’s a great pump that can be ideally used in tight spaces and limited areas.
Pros
Top and side discharges are designed for specific usage
Can also be used to eliminate stagnant water in your backyard
Can handle up to 30 feet of the head of the water
Cons
The motor of the pump tends to overheat
Expensive compared to other pumps that are available in the market
Dimensions: 11" x 11" x 10" | Weight: 6lbs | Material: Thermoplastic | Power Source: Corded Electric | Voltage: 120V | Horsepower: 0.16HP
EASY TO USE: Simply prime the pump with food-grade vegetable...
POWERFUL: The (115 Volt) 1/10 HorsePower motor, transfers...
The SumpMarine transfer water pump is a heavy-duty 1-horsepower water pump that runs at 115-voltage and can manage to pump nearly 330 gallons per hour of water. The water pump is made of durable materials with metal hose connectors. The portable water pump is lightweight in nature, allowing it to be transferred anywhere.
This is a great option for a utility pump, especially if you have more than one permanent or inflatable installation of hot tubs, and are looking to save on operational costs.
Pros
Has a 330 gallon per hour of water pumping capacity
The power cord included in the initial purchase is long enough
Portable and can be transferred among the area.
Cons
No switch for powering the pump on or off.
There’s no auto shut-off if it runs without any water.
Dimensions: 8" x 8" x 7.5" | Weight: 5.79lbs |Material: Thermoplastic | Power Source: AC | Voltage: 115V | Horsepower: 1HP
[Wide Application]: This 1 HP or 750W Submersible Water Pump...
[High Efficiency]: Powered by a 1 HP oil-cooled electric...
The Yescom water pump easily runs on 110 voltage and is oil-cooled and durable. The water pump has a 1 horsepower electric motor, and the heavy-duty motor can run underwater up to 28 feet. It comes with a built-in automatic shutoff mechanism and is engineered with resin construction.
It’s the perfect utility pump for temporary installations, such as inflatable hot tubs, and garden hoses. The low horsepower capacity makes it easier for the pump to be installed easily.
Pros
Compact yet powerful
Made of resin-graded materials
Relatively inexpensive in comparison to other brands
Cons
Some complaints regarding the float switch
Dimensions: 16.15" x 9.45" x 7.88" | Weight: 12.74lbs | Material: Plastic | Power Source: Corded Electric | Voltage: 110V | Horsepower: 1HP
1/4 HP Utility pump moves up to 1,800 gallons per hour; pump...
Tough thermoplastic construction; 10' cord length
The Superior Pump 91250 does justice to its name for being a superior utility pump. This water pump can easily move up to 1,800 gallons of water per hour. Its head can go up to 25 feet underwater. It comes with a 1 and 1/4-inch NPT discharge, along with a 3/4-inch garden hose adapter to improve flow rate.
The Superior Pump 91250 is made from tough thermoplastic materials that can withstand both pressure and heat. It also comes with a removable suction screen, which can easily handle solids, while you can be assured that the utility pump will serve you for a long time.
Pros
Designed for consistent and residential use
Has continuous-functioning motors
Rugged and compact design for extra durability
Cons
The cord included with the product is short
Can become too powerful if not adjusted properly
Dimensions: 12" x 7" x 7" | Weight: 6.8lbs | Material: Thermoplastic | Power Source: AC | Voltage: 120V | Horsepower: 0.25HP
High-quality Material: The submersible well pump comprises...
Super Large Head & Flow: Powerful flow of the deep well pump...
The Happybuy submersible water pump is designed for both industrial and home use and is renowned for its powerful performance. The water pump comes with a stainless-steel house and cast-iron inlets and outlets that are designed to last for several years. The pump has a class-leading flow rate with more than 150 feet depth under surface and a powerful motor that can bring water up from any height.
The thermoplastic impellers, inlet screens, and diffusers give this pump thermal protection against heating and low energy consumption. There are 6 impellers that provide stable performance, while installation is quick and easy. You can use this pump for farmland irrigation or in the mountains, while it’s ideal for rivers, reservoirs, canals, and deep wells too.
Pros
Stainless steel and cast-iron body for enhanced durability
Remarkable and stable performance
Powerful motor to pump water from any height
Easy and quick to install and use
Cons
The instructions are a bit confusing
Dimensions: 1" x 4" x 27" | Weight: 22lbs | Material: Stainless Steel | Power Source: Battery-Powered | Voltage: 110V | Horsepower: 0.5HP
HIGH EFFICIENCY: Great horsepower (1.5HP) and amazing...
MULTI-OUTLET SIZE: Compatible with 1-1/4" and 1-1/2" hoses....
If you’re living in places that are frequently affected by floods, you need to get your hands on the Homdoz 1.5 HP stainless steel submersible sump pump. It operates at 115V providing it with maximum pumping power and is ideal for emptying ponds, flooded areas, and swimming pools.
The motor of the Homdox is wound with copper, which makes it efficient and durable. The water pump kit also comes with a 15 feet long power cord that can be used to acquire power from anywhere.
Pros
It is made of steel body thus easy to clean
Has a rust and corrosion-resistant motor
The outlet can be used with larger hoses
Has a floater that allows multiple applications
Can be controlled using an automatic floater switch
Cons
It is easy to get the coil burned if not handled with care
Dimensions: 16.93 x 15.98 x 7.99 | Weight: 12.1lbs | Material: Stainless Steel | Power Source: Battery-Powered | Voltage: 115V | Horsepower: 1.5HP
Non-clogging, dirty water ready, stainless steel screen with...
Pumps up to 3685 GPH
The Site Drainer will empty any sump area with its powerful submersible pump. The water pump can also be used for commercial and residential dewatering, infrastructure or construction projects, and industrial wastewater. The pump comes with stainless steel mesh that is great for preventing debris from getting in and clogging the pump. You are guaranteed to get long-lasting and trouble-free operation from the pump. Since it is compact and portable, you can carry it anywhere.
The pump comes completely assembled and ready to use whenever you want, as it has a stainless-steel case that is corrosion-resistant and rugged. It has an in-built protector and the power tool can also run dry without overheating.
Pros
Suitable for different purposes and applications
Stainless-steel mesh to prevent debris
Long-lasting and trouble-free operation
Rugged and corrosion-resistant construction
Cons
Beginners may find it hard to use
Dimensions: 8.5" x 12" | Weight: 27.55lbs | Material: Aluminum | Power Source: AC | Voltage: 110V | Horsepower: 0.5HP
There’s quite a difference between the best utility pump and a cheap utility pump, which makes it harder to choose one. To make things easier, we’ve included a buyer’s guide for utility pumps:
How to Choose the Right Water Transfer Pump
There are several things you must check when selecting a utility pump, especially for use in a pool or a hot tub. Picking the best water pump may sound complicated to you but it’s not rocket science. All you need to keep an eye on is the speed of the pump, the horsepower requirement of your frame, voltage, tub, and plumbing size. Here are the specificationsyou must consider first:
· Type of Discharge
Utility pumps are classified based on the type of discharge, which can be from the side or the top. The side discharge pumps are applicable for open and flat surfaces such as water build-up on the yard, decks, and basements. On the other hand, top discharge pumps are suitable for tight spaces like spas, pools, laundry tubs, wells, and hot tubs.
· Supervision Requirement
Most advanced pumps aren’t equipped with sensors that would automatically turn off the pump when the surface turns nearly dry or dry. Some pumps don’t have a sensor system, and if left unattended, the power generator will quickly start to overheat.
· Manner of Water Usage
It’s important that you know whether it’s going to be a dirty or clean operation because there are pumps made for ‘clean water only’ and they can’t be interchanged for any other purpose. You can use these multi-purpose pumps to cover all types of operations.
· Speed of the Pump
Hot tub pumps generally have 1 or 2 speeds, and you’ll find this information written on the AMPS listed on the side of the pump or in the owner’s manual of the pump. The pump has 2 speeds if there are two numbers listed there. The speed gives you a good idea of the flow rate and how strong the pump is going to be to drain large volumes of water from your hot tub, pond, or swimming pool.
Utility Pumps FAQs
What are the differences between manual and automatic utility pumps?
Manual utility pumps require user intervention to turn on and off, while automatic pumps have a built-in float switch that activates the pump when the water level reaches a certain height and turns it off when the water is sufficiently low.
What safety precautions should I follow when using a utility pump?
Always read the user manual before operating a utility pump. Ensure the pump is in good working condition, do not use damaged power cords or plugs, and make sure the pump is compatible with the liquid being transferred.
Avoid operating the pump in extremely hot or cold environments and do not use the pump for flammable, toxic, or corrosive liquids.
Can I use a utility pump to drain a hot tub or pool?
Yes, utility pumps can be used to drain water from hot tubs and pools. However, confirm that the pump is suitable for the amount of water, and ensure that it’s rated for the temperature of the water, as some pumps are not designed for high-temperature applications.
Can utility pumps handle solid materials or only liquids?
Most utility pumps are designed to handle clean or slightly dirty water. However, some pumps, known as trash pumps, are built to handle water with solid debris, such as leaves or small stones. Read the pump specifications to ensure it meets your needs.
How often should I maintain my utility pump?
Regular maintenance varies depending on the pump type and usage. Generally, it’s best to inspect your pump for signs of wear or damage every few months and clean it as necessary. Consult the user manual for specific maintenance requirements.
Conclusion
As we draw to a close to our in-depth look at the best utility pumps, it's evident that the choice of a good utility pump largely depends on various factors such as durability, energy efficiency, and the ability to handle debris.
From the above 11 best utility pumps, here are the top three expert recommendations:
The WAYNE Submersible Cast Iron and Steel Sump Pump is an ideal option for those who need a durable and reliable debris management system. The pump is made from robust materials, offers a reliable mechanical float switch, and ensures consistent performance.
For anyone needing an unattended water pump system, the Wayne Automatic Electric Water Removal Pump is a good option. With its ability to sense water levels and turn them on and off automatically, this pump offers convenience and is made from corrosion-resistant materials.
Finally, the ECO-FLO Products SUP55 Water Pump is the right choice for someone looking for energy efficiency. The pump consumes less energy but still provides powerful performance. Made from corrosion-resistant thermoplastic, you can trust its service life.
With these three top-notch utility pumps, you can find the perfect fit for your specific requirements. So, select the best one for your needs and enjoy the benefits of a reliable and effective pump for any water removal or management task that arises.
Now that you’ve checked the reviews and considered the buyer’s guide, you won’t have any problems finding the best utility pump for yourself. Check out our other article on how utility pumps work to know more about the specific topic.
The best insulated pellet smokers are designed for consistent temperature performance, efficient pellet consumption, and flawless cooking results in any weather. Built with double-wall insulation and digital PID temperature control, these smokers lock in heat for even cooking while minimizing smoke loss and pellet waste. Whether you’re a backyard griller or a professional pitmaster, insulated models make outdoor cooking easier, more reliable, and incredibly flavorful. Some even include smart WiFi control and stainless-steel construction for long-lasting durability. If you’re exploring other insulated options, check out our complete guide to the best insulated smokers for traditional and vertical setups. In this article, we’ve reviewed the 10 best insulated pellet smokers that deliver exceptional heat retention, cooking precision, and fuel efficiency, helping you achieve perfect barbecue results every single time.
Listed below are the 5 best-insulated pellet smokers from our list:
Z GRILLS Wood Pellet Grill Smoker: This versatile and affordable grill stands out for its ease of use and superior temperature control, making it an ideal choice for backyard BBQ enthusiasts. Its stainless steel body and even heat distribution are additional notable features.
Traeger Grills Tailgater 20 Smoker: Noted for its portability and easy assembly, this lightweight smoker is perfect for outdoor activities like camping and tailgating despite its smaller grilling space. It also offers robust temperature management, making it more convenient for users.
Traeger Ironwood Wood Pellet Grill: Highlighted for its smart control system, including Wi-Fi pellet sensor and voice control, this durable grill offers remote temperature control and faster heating. Its handy companion app with low pellet notifications adds further convenience, even though the pellet hopper capacity is relatively small.
PIT BOSS Pellet Smoker: As a versatile smoker ideal for various cooking techniques, this model is best known for its generous cooking space, patented insulation system, and excellent digital control. It offers great value for money and is particularly suitable for large events, though it's geared more towards smoking rather than grilling.
Camp Chef Pellet Grill And Smoker: Featuring superior temperature control, including a PID controller and smart WiFi connectivity, this versatile grill excels in adjustability and convenience. A noteworthy element is the convenient ash cleanout system, but the additional cost for the sidekick unit could be a downside.
1. Z GRILLS Wood Pellet Grill Smoker - Best Overall Smoker
What we like
Even heat distribution
Excellent temperature control
Corrosion resistance
Robust warranty
What we don't like
No app or WiFi connectivity
Very small hopper capacity
The Z Grills 700D2E pellet smoker is a versatile, easy-to-use, affordable grill perfect for backyard BBQ enthusiasts. With the 700D2E model, you can cook anything from burgers to brisket to bacon. The best thing about this product is its upgraded digital controller, which makes it easier to set up and monitor your cooking.
The body of the 700D2E pellet grill is made entirely of stainless steel and has sturdy double-wall insulation. At the same time, its small burn pot is covered with a large deflector lid that absorbs the heat and spreads it evenly on the surface. As such, you can cook your food evenly and season it perfectly.
The 700D2E smoker has a generous cooking area and a closed storage cabinet under the grill. It also facilitates an accessible pellet cleanout, better temperature control, and versatility in grilling. These features make the Z GRILLS 700D2E product one of the best-insulated smokers over other products in the same price range.
Grilling Space: 700 sq. in | Hopper Capacity: 8 lbs | Maximum Temperature: 450°F
2. Traeger Grills Tailgater 20 Smoker - Best Portable Smoker
What we like
Even heat distribution
Lightweight
Large LCD
Great portability
Easy to set up
What we don't like
Small grilling space
The Traeger Tailgater 20 pellet grill is perfect for camping, tailgating, picnics, and more since it comes with folding legs. It's lightweight and portable so you can take it anywhere. The smoker is easy to assemble, with only five screws. It's also easy to clean up after every use.
The pellet smoker has a large cooking area, perfect for grilling large food groups. You can easily ignite and heat the grill with the automatic safety igniter button. The automatic digital starter even allows you to monitor the internal temperature without any worry.
The Tailgater 20 smoker even has a digital arc temperature control system. This feature allows you to keep the unit stable under turbulent weather conditions. The pellet grill also contains a “keep warm mode” setting to make the most of your smoking time. Though its price is a bit higher than the competitors, all the above features offer quite the back for the buck.
Grilling Space: 300 sq. in | Hopper Capacity: 8 lbs | Maximum Temperature: 450°F
3. Traeger Ironwood Wood Pellet Grill - Best Smart Controller
What we like
Low pellet notification
Accurate temperature control
Heats up quickly
Easily monitor and adjust the temperature using an app
Sturdy design
What we don't like
Small capacity of the pellet hopper
The Traeger Ironwood 650 has a heavy-gauge steel exterior, which is corrosion-resistant. As such, it's more durable than other types of grills. Also, the Tailgater Ironwood 650 is a "portable" smoker you can take on your camping trips.
The smoker has an auto-ignition system that delivers consistent heat, so you don't have to worry about it going out.
It also has a Wi-Fi pellet sensor and voice control system for customizing your grill. This allows you to control the temperature of the Traeger grill remotely. You can even download recipes using the companion app of this unit. You'll even get notifications on your app if the pellets run low. You can enjoy your time without worrying about smoke odor or grease stains.
The Traeger Ironwood 650 pellet grill has a new D2 drive-train feature that enables it to heat faster. This helps the smoker to hold a consistent temperature without any fluctuations. In addition, it allows you to monitor your food temperature using the meat probe sensor.
The pellet is made from heavy-gauge steel, which makes it highly durable. The porcelain-coated grill racks are easy to assemble and clean. So, if you're looking for a pellet grill and smoker that can handle anything you throw at it, the Traeger Ironwood 650 Wood Grill is a perfect choice.
Grilling Space: 650 sq. in | Hopper Capacity: 20 lbs | Maximum Temperature: 500°F
4. PIT BOSS Pellet Smoker - Best Vertical Smoker
What we like
High-quality porcelain-coated grates
Plenty of cooking space
Great value for money
Complete digital control with a large LED display
Automatic shut-off function
What we don't like
Highly suitable for smoking instead of grilling
PIT BOSS 5.5 is a versatile smoker used for smoking, grilling, and baking. Its patented insulation system can keep your food warm for extended hours without additional fuel.
The pellet smoker has ample cooking space, which makes it perfect for large gatherings or catering events. It also has a built-in meat probe and an LED display which helps monitor the temperature inside the smoker so that you can cook your food perfectly every time!
The grill also features an intelligent controller that allows it to set the temperature, handle grilling and smoking simultaneously, and read out smoke volume control. It has a pellet hopper that can hold a large volume of pellets. It is easy to clean the pellet smokers by simply removing the porcelain-coated stainless steel grates.
The PIT BOSS 55 pellet smoker is the best insulated vertical smoker if you are on a budget. It has many useful features you would expect to get at a higher price point.
Grilling Space: 1548 sq. in | Hopper Capacity: 40 lbs | Maximum Temperature: 450°F
5. Camp Chef Pellet Grill And Smoker- Best Temperature Control
What we like
PID controller for consistent temperatures
Smart WiFi connectivity
Settings to adjust smoke levels
Four stainless steel meat probes
Convenient ash cleanout system
What we don't like
The sidekick unit costs an extra
Camp Chef Woodwind pellet smoker is a versatile grill used for smoking, grilling, baking, roasting, and more. It has a large cooking area and a powerful heating system to keep your food warm and juicy. The grill is also easy to assemble, making it perfect for beginners.
The pellet smoker has an insulated design that ensures even heat distribution. This means you can cook your food evenly without worrying about hot or cold spots.
The smoker also has a built-in “PID” and “Wi-Fi controller” that routinely monitors and adjusts the temperature of your grill. The controller lets you set the smoke flavor from mild to hot through Wi-Fi. Besides intelligent temperature control, the grill uses PID to know when it's time to add more pellets to the smoker box.
It also has an easy-to-clean ash pan and grease tray, which makes it perfect for people who don't have much time to clean their grill after each use. Overall, the Camp Chef Woodwind Smoker is an affordable product worth your money.
Grilling Space: 811 sq. in | Hopper Capacity: 22 lbs | Maximum Temperature: 650°F
6. Z GRILLS 7002C Grill Smoker - Best Beginners Smoker
What we like
Upgraded PID controller for even cooking
All-terrain caster wheels for mobility
Easy to use
Easy to remove unused pellets
What we don't like
Heat retention is relatively low
Wi-Fi connectivity is not provided
The Z GRILLS ZPG-7002C pellet grill boasts 6-in-1 versatility to handle any grilling situation. This unit can act as a grill, smoker, oven, braiser, and more, allowing you to cook anything you can imagine. It is made of high-quality materials, has a large cooking area, and has a sleek design that will fit in any backyard.
With digital temperature monitoring and easy-to-use controls, this grill is perfect for any grilling enthusiast, whether a beginner or a pro. The smoker also comes with two racks so that you can cook two different types of meat simultaneously. The integrated smoker box adds another layer of flavor to your food.
The ZPG-7002C pellet grill and smoker provide upgraded caster wheels and locks for good mobility. This durable machine is built to last. You can easily fit it into your car and carry the smoker to your favorite tailgate or camping spot.
It also has a PID controller for temperature maintenance, two meat probes, and a heat deflector plate to cover the pellet grill cooking chamber. The plate helps tame the heat, so your food won’t burn you while cooking. Overall, with this unit, you don't need to worry about flare-ups or burning your food!
Grilling Space: 700 sq. in | Hopper Capacity: 24 lbs | Maximum Temperature: 450°F
7. Camp Chef (36-inch) Pellet Grill & Smoker - Best Compact Smoker
What we like
Sidekick for reaching higher temperatures
WiFi and PID enable complete remote app control
Slide and Grill option for faster grill heating
Convenient app notifies you when the food reaches your set temperature
What we don't like
Hard to assemble
Quite heavy
Whether smoking a brisket or grilling a steak, the Woodwind pellet grill will help you achieve delicious results. Unlike the 24-inch Camp Chef Woodwind unit, this 36-inch pellet smoker provides plenty of room to cook up a feast. With the built-in digital temperature control, you can ensure that your food is cooked to perfection every time.
One of the unique features of the 36-inch Camp Chef pellet grill is the built-in slide and grill technology. This grill uses infrared radiation to cook food, so you don't have to worry about hot spots or flare-ups. And because the grill grates are always in contact with the food, you'll get grill marks on your food, making it look and taste even better.
Another great feature of the Camp Chef pellet grill is its adjustable smoke technology. You can remotely choose between different smoke options, change the temperature, or shut down the grill.
This grill is perfect for large families and entertaining guests. With its four meat probes, you can control the internal temperatures via the Camp Chef app. With the PID controller, you will be able to achieve temperature stability. The unit also has a built-in ash catcher and a removable drip tray.
Grilling Space: 573 sq. in | Hopper Capacity: 22 lbs | Maximum Temperature: 500°F
8. Recteq Bullseye Pellet Grill/Smoker - Best Easy-To-Use Smoker
What we like
Powerful heating system
Easy to control and maintain the temperature
Heats up quickly
Simple to set up and use
Very lightweight
What we don't like
Legs are not sturdy enough
Recteq RT-B380 Bullseye Wood Pellet Grill is a versatile product that can be used for smoking, grilling, roasting, or even baking. It sports a cooking space of 380 square inches, which is more than enough to cook food for large groups of people.
The pellet grill has a PID control panel, making it easy to maintain a consistent temperature. Other features like RIOT mode and stainless heat deflector lid enhance the smoky flavor of the food.
Additionally, the Recteq RT-B380 Bullseye has a meat probe, which allows you to check the internal temperature of your food without having to open the lid. With its powerful ignition, the pellet grill can reach higher temperatures faster, making it ideal for cooking steak, chicken, or fish.
The inner cooking chamber of the RT-B380 grill is made from high-quality stainless steel. That's why these grills are considered to be highly durable and lightweight.
Grilling Space: 380 sq. in | Hopper Capacity: 15 lbs | Maximum Temperature: 749°F
9. Recteq RT-590 Pellet Smokers - Best Durable Smoker
What we like
Separate side firebox for smoking
Smart remote access
PID system with precise temperature control
Great build quality
What we don't like
Expensive compared to other pellet grills
No provision for the removal of unused pellets
The Recteq RT-590 grill is the best pellet smoker for small to medium-sized families. It infuses food with a natural smoky flavor that can’t replicate with other cooking methods.
Recteq has provided an advanced PID-based Wi-Fi controller with its RT-590 model so that you can monitor the pellet grill at all times. This way, you control the grill temperature remotely with just a single click. Select the desired temperature from your smartphone app and leave the rest to the smoker grill.
Another reason to buy the RT-590 Wood Pellet Grill is its convenience. It has a stainless steel fire pit and drip rack, which makes these grills easy to use and clean. The grills are perfect for busy families or anyone who doesn’t want to spend much time cooking.
With the RT-590 Wood Pellet Grill, you can indulge in yummy meals right in the comfort of your home.
Grilling Space: 592 sq. in | Hopper Capacity: 30 lbs | Maximum Temperature: 700°F
10. Monument Pellet Grill/Smoker (698 Sq.-In) - Best Portable Smoker
What we like
Extra space at the front
Easily movable
Convenient to clean
An impressive leftover pellet cleaning system
Compact Design
What we don't like
Setting up the lid holder can be a bit tricky
Like the 530 square-inch Monument Grill, the 698 square-inch Monument unit also has a sturdy octagonal shape. You get two chrome-plated stainless steel grates that cater to multiple food options. It provides two meat temperature settings, which can adjust the smoky flavor of your food.
The grill features a large LCD screen and control panel that make it easy to set the temperature. It provides an intelligent temperature and pellet feed control system to monitor the grill's internal temperature.
The body of this pellet is made of powder-coated steel, the fire pit is made of stainless steel, and the cooking grate is made of porcelain-coated cast iron. The coated steel helps to resist rust, while the stainless steel fire pot makes it easy to clean this grill. You can use the ash removal system to dispose of the residual ash build-up and grease.
Further, the product comes with sturdy wheels. So, it is possible to effortlessly move the 698 square-inch Monument Grill and Smoker from one place to another. The pellet grill has a side shelf where you can prep your food or keep frequently used cooking tools close at hand.
Grilling Space: 698 sq. in | Hopper Capacity: 20 lbs | Maximum Temperature: 700°F
What is the Best Insulated Pellet Smoker?
Here's a direct comparison of top insulated pellet smokers, focusing on grilling space, hopper capacity, and maximum temperature.
Have you decided which pellet grills you should get? We believe it can still be difficult for you to choose the best fit for your needs. While all the smokers mentioned above have attractive specifications, you should know about some basic features of insulated pellet smokers to make the right choice.
So, the first thing you need to consider before buying your pellet grill is the size. You need to ensure it will fit on your deck or patio. It would be best if you also thought about how much food you plan on cooking at one time and how many people will be eating.
Consider the price range and the features of wood pellets you want the smoker to have. For example, if you want to cook a lot of food at once, you should go for higher-capacity pellet grills. If you are on a budget, consider buying a pellet grill with better features and less capacity.
As such, here are some factors you need to keep in mind when shopping for new pellet smokers:
1. Size
As mentioned before, the grill size is the first thing to look for when buying a pellet smoker. Most pellet grills have a cooking area of around 300 square inches. This is enough space to cook a few meat dishes at a time, but not large enough to cook a whole hog or an entire turkey.
If you want pellet grills with ample cooking surfaces, consider the pellet grill models with a cooking area of 800 square inches or more.
2. Cooking Area
A large cooking surface allows you to prepare multiple items at the same time without having to move them constantly from the grill. When looking for a pellet grill with a large grilling space, you need to consider the size of the grill. Most pellet grills have a cooking surface of around 225 square inches.
While choosing a grill with a larger cooking surface, you need to look for a pellet grill with a larger size. Another factor to consider is the type of fuel that the grill uses. Pellet grills that use propane or charcoal tend to have a larger cooking area than those that use natural gas.
To get closer to your final decision, you should go for a grill with a larger size and a type of fuel that uses a larger area.
3. Installation
One of the biggest concerns when purchasing a pellet grill is how easy the installation will be. But now, you don't need to worry about complicated installations. This is because, nowadays, many pellet grills come with detailed instructions that simplify your installation process.
If you are a beginner, consider buying grills that are already assembled. Look for the pellet grills that come with pre-drilled holes, which makes installation a breeze. Such pellet grills also provide the necessary hardware, like screws and bolts, to make the installation process as smooth as possible.
4. Hopper Size
Looking for a pellet grill with a large hopper size is a great way to ensure you have enough pellet fuel available to cook your food. A large hopper size means you won't have to refill the pellet grill as often. This leads to less time spent refilling the grill and more time cooking your food.
Some pellet grills, such as Z GRILLS 7002C and PIT BOSS 5.5, have sufficient hopper storage capacity.
5. Temperature Range
When buying a pellet grill, the temperature range is one of the most important things to keep in mind. Not all pellet grills are created equal, and not all buyers are familiar with the available temperature ranges.
It is essential first to understand the three different temperature ranges available on pellet grills to avoid confusion. These ranges are: high, medium, and low.
A. High-TemperatureRange
This temperature range is perfect for cooking thick cuts of meat, such as steaks and racks of ribs, or for searing food. The high temperature will help lock in the meat's flavor and juices.
B. Medium Temperature Range
This temperature range is perfect for cooking most meats. The medium temperature will allow the meat to cook evenly and prevent it from drying.
C. Low-Temperature Range
This temperature range is perfect for cooking delicate fish or vegetables. The low temperature will prevent the food from drying out or getting overcooked.
You need to probe these different grilling temperature ranges and choose the one that addresses your needs. As far as a wider temperature range is concerned, the Camp Chef PG24 is an excellent option. This pellet grill has a temperature range of 180° to 500°F, making it perfect for grilling various foods. It even provides an automatic low-heat setting that helps keep your food warm.
6. Ease of Maintenance
Pellet smokers such as Monument Grills have a perfect ash clean-out system. It's easy to take this feature for granted. But we always advise you to look for a grill with a removable ash pan. These types of grills allow you to easily remove the ash residue and dump it into the trash, making cleanup a breeze.
Moreover, the best pellet grill even has a built-in grease management system. This system collects the grease and drippings from the food and funnels it into a drip pan. When it is time to clean the grill, remove the drip pan and discard the grease.
For the most part, pellet grills with stainless steel racks are easy to clean and won't rust or corrode over time. Consider these elements while picking up your smoker.
7. Remote Access Controlling Capabilities
Many of the newer pellet grills on the market come equipped with Wi-Fi and Bluetooth capabilities. A Wi-Fi connection can be an excellent asset for any pellet grill owner. Why? Because it allows you to control the grill remotely, no matter where you are.
Whether you're at work, running errands, or relaxing on the couch, you can use a smartphone or tablet to adjust the temperature of the grill. Further, you can set a timer or even check on the status of your food. Not only does it give you peace of mind, but it also allows you to make last-minute adjustments to ensure the food is cooked to perfection!
So, if you're considering the best pellet grill for your next outdoor cooking adventure, be sure to review the importance of remote connectivity!
Are there health risks associated with using an insulated pellet smoker?
While employing an insulated pellet smoker is typically safe, health risks may arise from prolonged smoke inhalation. Therefore, it's crucial to have ample ventilation when using the smoker. It's also advised to use food-grade pellets and avoid those containing additives or fillers to ensure health safety.
Are insulated pellet smokers suitable for beginners?
Indeed, insulated pellet smokers are favorably appropriate for beginners in addition to professional chefs. This is attributable to their user-friendly nature, coupled with excellent temperature control and even heating, which collectively simplify the cooking process.
How energy-efficient are insulated pellet smokers?
Insulated pellet smokers tend to be markedly energy-efficient compared to their non-insulated counterparts. This benefit is the result of the insulation, which minimizes heat loss, thereby enabling steady cooking temperatures and reduced pellet usage, which maximizes energy efficiency.
Is a WiFi feature important in an insulated pellet smoker?
A WiFi feature isn't absolutely vital for an insulated pellet smoker, but it undeniably enhances convenience. Specifically, WiFi-enabled models allow users to remotely monitor and adjust the temperature and other smoker settings, which can be particularly beneficial during lengthy smoking sessions.
How do I clean an insulated pellet smoker?
Most insulated pellet smokers come with an easily removable ash and grease pan. To clean, allow the smoker to cool, then detach these pans, empty them, and thoroughly cleanse them. For the smoker's interior, a damp cloth or a soft grill brush suffices, and ensure it’s subsequently dried to avert any rusting.
How long will an insulated pellet smoker last?
Subject to proper care and maintenance, high-quality insulated pellet smokers can have a long lifespan, extending many years. This necessitates consistent cleaning, use of premium-quality pellets, and storing the smoker under a protective cover when not in operation, among other steps to prolong its use.
Best dual trash cans combine smart design and functionality to help you separate trash and recyclables effortlessly while keeping your kitchen organized and odor-free. Modern models go beyond basic waste storage, offering dual compartments, soft-close lids, and sleek stainless-steel finishes that enhance both hygiene and style. Some feature mobility-focused bases similar to those in our wheeled trash cans guide, while others include secure, pet-safe lids like those found in our pet-proof trash cans selection. Whether for a busy family kitchen, compact apartment, or office setup, these bins maximize space efficiency and simplify recycling. In this curated list of the 10 best dual trash cans for recycling and kitchen organization, we break down the most reliable options for durability, odor control, and ease of use to help you create a cleaner, more organized home environment.
Listed below are the 5 best dual trash cans from our list:
Home Zone Dual Trash Can - 13 Gal / 50 L. Home Zone has produced a sturdy, high-capacity, and convenient model with a small footprint. Known for its rectangular step design, built-in bag tuck band, and dampened closing lid, the Home Zone Dual Trash Can is excellent for kitchen use, even if the lid squeaks when closing.
Songmics Trash Can With Two Compartments - 16 Gal / 60 L. Songmics offers an all-steel, sleek dual-step trash can that boasts a tight seal acting as a deodorizer, making it great for odor control. The durable and streamlined SONGMICS Trash Can stands out for its silent lid and multiple applications despite its minimal capacity.
Simplehuman Rectangular Dual Compartment Trash Can - 12 Gal/ 46 L. Celebrated for its Shox technology and engineered foot pedal, the Simplehuman dual-compartment trash can delivers excellent longevity and smooth operation. Ideal for heavy-duty usage, this Simplehuman model emphasizes easy emptying and movement with rubber pads and a removable bucket, although its narrow, tall design could limit the size of the waste and its placement.
NINESTARS Automatic Dual Compartment Trash Can -18.5 Gal / 70 L. NINESTARS offers a high-tech experience with its infrared motion sensor dual trash can. The stainless steel NINESTARS Automatic Dual Compartment Trash Can shines for its fingerprint-proof, water-resistant, and hands-free design, offering a superior experience despite its battery maintenance.
RecycleBoxBin Double Recycling Bin - 33 Gal / 125 L. Ideal for large volume waste management because of its 50-gallon capacity, the RecycleBoxBin Double Recycling Bin simplifies rubbish removal with its bottomless design. The lightweight and durable RecycleBoxBin is prized for its easy cleaning and bag-holding features, even if it lacks rubber grips for stability.
Whether it's for your kitchen, office, or any other space, having dual trash cans can make your waste disposal routine a breeze. To help you find the best options available, here's the list of the 10 best Dual Trash Cans.
1. Home Zone Dual Trash Can - 13 Gal / 50 L - Best for Kitchen Use
When it comes to a dual-compartment trash can, Home Zone offers an incredible 13-gallon capacity model that has separate compartments to accommodate a recycling bin and trash bags. With the built-in bag tuck band to help change the bags and durable construction, this is one of the best dual kitchen trash cans out there today.
Home Zone has decided to go with the rectangular step trash cans in this model to help keep the footprint as minimal as possible. This compact design makes it a great option to use as a kitchen trash can, as it fits snugly under a kitchen island or flat against the wall. There are eight gallons of waste, while the recycling bin can hold a bit over five gallons for a combined total of 13-gallon capacity.
Additionally, the inner bucket uses custom-fit liners to help you sort trash more easily. The bag tuck bands also keep the trash bag in place, so when you need to throw trash out, you won't have to go digging to find the edges of the bag.
Another feature that makes this Home Zone model stand out from other dual trash cans is the dampened closing lid. When this hinge is combined with the durable heavy pedal, it makes for a seamless movement to quickly open the lid.
A minor inconvenience that many users found in the Home Zone double trash can was the fact that the lid makes a slight squeak when closing. This could be due to a dry hinge, so if you want a model where the lid closes silently, you may want to take this into consideration.
2. Songmics Trash Can With Two Compartments - 16 Gal / 60 L - Best for Odor-Control
This dual-step trash can from SONGMICS has a sleek all-steel design and can hold up to 16 gallons of trash and recyclable waste. Featuring two ABS plastic buckets with metal handles and a soft closure system, taking out the trash has never been so seamless.
After a few days of use, we found that the tight seal on this dual-step trash can acts as a built-in deodorizer compartment to keep the smells contained. This allows you to place it in either a kitchen or just as a regular trash can around the house.
As for the build, the ULTB60NL is a durable trash can, to say the least. Not only is it robust, but the stainless steel finish allows it to remain fingerprint-proof and sleek for longer.
Furthermore, throwing trash away is easier with a silent lid that isn't intrusive to use. By having two separate step cans with their own pedals, the regular trash and the recycling will remain in their own trash bags.
If there were one drawback to using this stainless steel trash can, it would be the fact that it has a minimal capacity. Using a small size of trash can be helpful in a small space; however, it also means frequent emptying if there is a lot of waste to throw away.
3. Simplehuman Rectangular Dual Compartment Trash Can - 12 Gal/ 46 L - Best for Heavy-Duty Usage
Simplehuman has designed one of the best dual trash cans to give a lasting quality performance. It uses its own Shox technology to have a dampened closing motion on the lid, while the foot pedal has been engineered to last over 150,000 steps.
One of the highlight features of the CW1830 is the Shox technology that has been incorporated into the lid of the dual garbage can. The hinges of the trash can will gently bring the lid down and dampen once it reaches the closed position, making for a slow and silent closing motion.
Furthermore, the lid can be set to remain open for as long as you need. This definitely comes in handy when you need to dump a lot of trash during chores like cooking or cleaning.
Another helpful feature that improves the user experience is the rubber pads on the base and the removable bucket inside. Both of these features make emptying out the waste and recycle bin without the unit tipping over or moving.
Despite having a plethora of valuable features, the CW1830 is limited in terms of how large the openings for disposal are. The body is narrow, meaning more oversized items may not fit. On top of that, the placement of this double trash can becomes limited due to its tall design it has.
What We Like
Removable inner buckets
Fingerprint proof
Stay open lid
Strong steel pedal
What We Don't Like
Tall and narrow opening
Capacity: 12 Gallons | Material: Stainless Steel | Opening Mechanism: Step On | Lid Type: Soft-Close | Odor Control: Yes | Dimensions: 19.8 x 12.8 x 25.7" | Weight: 17.6 lbs
4. NINESTARS Automatic Dual Compartment Trash Can -18.5 Gal / 70 L - Best for Touchless Operation
A modern design combined with modern features, this stainless steel trash can from NINESTARS uses an infrared motion sensor to open and close the lid. Anyone looking for a truly hands-free experience will definitely want to check out this double trash can that is both silent and robust.
Of course, the main feature of this dual trash can has to be the infrared sensor feature that activates when you approach the unit. However, what makes it unique is the delayed activation of said sensor. This feature prevents accidentally opening the lid due to accidentally walking by the unit and saves a bit of battery in the process.
Additionally, the NINESTARS dual trash can has a removable ring liner that holds trash bags in place and keeps them from bunching up at the top. Maintaining a sleek and clean appearance is a crucial focus with such high-tech features built into it.
Overall, this double trash can has an outstanding construction in terms of materials used and construction quality. Not only is it fingerprint-proof, but the sensors themselves are water-resistant to protect against accidental spills and wet waste, making for a genuinely durable trash can.
Seeing as the NINESTARS double trash can features motorized parts, it does require a source of power in the form of batteries. As such, it has an additional layer of maintenance to buy replacements when the four batteries are out of juice.
5. RecycleBoxBin Double Recycling Bin - 33 Gal / 125 L - Best for High Capacity Usage
Designed to accommodate more material than a standard kitchen trash can, the CP2 from RecycleBoxBin has an incredible 50-gallon capacity, 25 gallons each for the trash cans and recycling bin. With the option to place labels on top of each compartment, this unit is ideal for public buildings and offices.
Removing heavy trash bags from the CP2 is much easier than standard pull-out trash cans as it features a bottomless design. Simply lift the body off of the base to access the bags for disposal; no need to go digging or take the entire trash can apart every time it is full.
Using such a unique method of disposal, the question of leaks from wet waste comes to mind. The CP2 tackles this problem by using a 1.5-inch high base pan to act as the inner buckets and catch any runoff. It also holds the bags in place when you are emptying out the trash can and recycling bin.
Since plastic is the primary material in construction, this dual trash and recycling bin unit is relatively easy to clean. The plastic is both durable and lightweight to help you take full advantage of the bottomless design.
A feature that we would have liked to have included in the CP2 is rubber grips on the underside of the unit. As it can hold more material and has a unique disposal method, including rubber grips, would have improved the stability while emptying the trash bags.
What We Like
Seamless assembly and storage
Includes 6 common pre-printed labels
Uses standard 23-39 gallon trash bags
Solid and easy-to-clean plastic construction
What We Don't Like
No rubber grips
Capacity: 25 / 25 Gallons | Material: Recycled Polypropylene | Opening Mechanism: Open Top | Lid Type: N/A | Odor Control: No | Dimensions: 20.5 x 20.5 x 30.5" | Weight: 15 lbs
6. Rubbermaid Elite Dual Step-on Trash Can - 10.5 Gal / 40 L
One trash can that stands out from the competition, thanks to its elegant charcoal finish on a stainless steel bod,y is this dual kitchen trash can from Rubbermaid. This finish allows it to remain fingerprint-proof and smudge-free to complement the smooth opening and closing lid.
What makes this Rubbermaid kitchen trash can an outstanding model is the minimal amount of maintenance it requires. As it has a darker sheen, any blemishes are not as noticeable compared to lighter stainless steel models.
Another feature that makes this one of the best dual trash cans out there is the color coding in the pocket liners. Black is designated for waste, while blue is indicative of a recycling bin, making trash sorting more streamlined.
Taking out the trash bags is also more accessible using the built-in bag cinch on the top of the dual trash cans. These cinches keep the edges of the bag from falling deeper into the bin. They also help you hide the straps of the trash bags to maintain a clean look.
While a sleek design may look nice, it does come with its share of drawbacks as well. For one, the Rubbermaid trash can lid lies flush on the top of the unit. Accessing the bins is only possible with the pedal, and any large items will keep the lid slightly propped open.
What We Like
Hands-free use
Smudge and fingerprint-proof
Built-in bag cinch
Charcoal finish
What We Don't Like
Lid sits flush against the body
Capacity: 5.25 / 5.25 Gallons | Material: Stainless Steel | Opening Mechanism: Step On | Lid Type: Soft-Close | Odor Control: Yes | Dimensions: 17.7 x 13.1 x 25.8" | Weight: N/A
7. AmazonBasics Dual Trash Can - 13 Gal / 50 L
A dual trash can from the AmazonBasics line, this model has a straightforward design that incorporates all the features you need for disposing of trash and recycling. Featuring a soft opening and closing mechanism as well as plastic liner buckets to catch leaks, this stainless steel dual trash can is a great go-to option.
One of the features we found to be incredibly useful in the AmazonBasics dual trash can was the two inner buckets. Each bucket has holes on the back to keep the trash bag tightly secured until they are filled and ready for disposal. They both have a plastic construction and metal handles to ensure a longer lifespan and easier cleaning as well.
Furthermore, the body of the trash can is stainless steel, which allows it to remain clean and free from smudges and fingerprints for longer. What's more, the brushed finish makes it relatively low maintenance, with any leaks easily wiped off with a damp cloth.
As for the opening and closing mechanism, the wide foot pedal allows for quick and easy access to either of the two trash bins. It opens and closes softly as well, which not only makes for a quieter experience but also extends the lifespan of the trash can.
Although the AmazonBasics dual trash can has all the essential features of a trash can, some may find the holding capacity to be lacking. As it uses a separate compartment trash and recycling bin design, it can not hold much and may need regular emptying.
What We Like
Durable body
Brushed stainless steel body
Plastic liner buckets with handles
Wide foot pedal
What We Don't Like
Small-capacity trash bin
Capacity: 4 / 4 Gallons | Material: Stainless Steel | Opening Mechanism: Step On | Lid Type: Soft-Close | Odor Control: Yes | Dimensions: 20.5 x 13 x 15.7" | Weight: N/A
8. Kohler Dual Trash Can - 11 Gal / 42 L
Kohler is a brand that is well-known for its quality products, a streak that is continued in its dual trash can. With a large capacity of 11 gallons split between two buckets, this dual-compartment trash can holds enough waste and recycling for days. Finished off with a fingerprint-proof surface, it has a sleek design that matches any kitchen style.
In a word, the design choices of the Kohler dual trash can only be described as sleek. The matte stainless steel is muted and stands out among other kitchen trash cans. Continuing the elegant design, the raised foot pedal is raised for easy access while keeping the overall footprint of the trash can at a minimum.
Inside the unit, there are two compartments: one for trash cans and another for a recycling bin. Both are capable of holding up to 5.5 gallons and feature a raised liner pocket. This raised liner helps you change out the trash bags more easily by giving you better access to tie off the bag.
Additionally, the Kohler dual trash cans use a hinge design to keep the walls free from scuffs. It is contained within the body of the trash can, which allows it to lie flush against a wall.
A minor inconvenience in the design of a raised liner comes in the occasional lifting of the liner when the lid is opened. This happens when the force of the lid opening is too sudden, so the liner lifts along with it; although rare, it should still be taken into consideration.
What We Like
Stainless steel body
Quiet close lid
Space-saving and compact design
Locking lid feature
What We Don't Like
The liner lifts when opening
Capacity: 5.5 / 5.5 Gallons | Material: Stainless Steel | Opening Mechanism: Step On | Lid Type: Soft-Close | Odor Control: Yes | Dimensions: 16.82 x 13 x 26.44" | Weight: 20.6 lbs
9. iTouchless 16 Gallon Dual Step Trash Can - 16 Gal / 60L
This step trash can from iTouchless has an outstanding 16-gallon capacity split between two compartments. With a color-coded system, sorting out trash has never been easier. Locked in with a secure seal and individual foot pedals, this dual-compartment trash can is a handy and reliable option for anyone.
One of the most critical features of the dual trash can is the separate compartments, so it makes sense that each bin should have its own pedal. iTouchless has realized this and implemented it into its own design, making for a comfortable and effortless experience when opening and closing the lid.
The softly opening lid of this step trash can is powered by an air damper, which can be replaced to regain its performance like new.
Within the dual trash can, there are two compartments that are color-coded for trash and recycling. The blue bin is for recyclable material while the black is for general waste. Each can hold up to eight gallons, so there is ample room whether it is placed in a home, business, or office.
Furthermore, both compartments of the trash can be removed for easy access. What's more, having a removable design means there is no need to buy additional custom bags.
As the iTouchless has a maximum capacity of eight gallons in each compartment and fits eight to ten-gallon bags, filling to capacity is challenging. With some adjustment to the load when getting full, it may be possible, but this should not be the case.
Appearing below is a detailed comparison table, carefully constructed to outline the defining characteristics of the top dual trash cans on the market. It scrutinizes critical elements such as capacity, material, opening mechanism, lid type, odor control features, dimensions, and weight.
Before settling on a particular dual trash can model, there are a few factors that you should keep in mind. To help you make the most informed decision, make sure you take the following points into consideration.
1. Material of the Bin
One of the first things that you should look for in a trash can is what it is made out of. The material can determine how much maintenance it will need as well as the weight and lifespan.
A popular material choice that many manufacturers go with is stainless steel, which is heavy-duty and repels odor. Spills and leaks can also be cleaned off with minimal effort, which makes it ideal for a trash can. Altogether, stainless steel is a material that maintains its quality for the long run.
Another material that is widely seen in trash cans is plastic. While it is durable and lightweight, it can easily be knocked over by children or pets. It is also susceptible to becoming stained and holding certain odors as time goes on.
2. Lid of the Trash Can
After materials, the next factor that should be considered is the lid type. Although there are many options out there, we highly recommend finding a hands-free model if you want peak accessibility.
Besides a foot-pedal method, there are also swing lids, sensors, and open-top options to look into. Just find the one that seems to fit your uses best and go with that model. However, we prefer the pedal method over all else because it allows you to access the bins even if your hands are full.
3. Trash Capacity
Depending on how many people are using the trash can, it can fill quite quickly or over weeks at a time. So, to make sure you don't have to regularly empty the bins, find an appropriately sized model.
Additionally, pay attention to what type of bag the model can hold and the capacity of the bins. Many advertise the model at its full capacity, so make sure to read the fine print while searching. Often, the ratio of the trash can is much more than the recycling bin, so find a good balance based on how much waste you throw away.
4. Recycling Bin
As the name suggests, a dual-compartment model has two sides for waste disposal. On the one hand, you have a trash can, while on the other, a recycling bin can be placed. Similar to the trash capacity, the recycle bin should have an appropriately sized capacity.
Whether you recycle more material or less, this bin size can determine how frequently you will need to empty it. Keep in mind that some models have a smaller recycling bin capacity compared to the trash can side. If you want to take full advantage of the recycling bin, make sure it is in the correct ratio with the waste side.
5. Grip
Trash cans should always be firmly planted on the ground to make sure there are no spills while changing the bags out. There are two ways that you can accomplish this secure base; by using a trash can that is made of heavy materials or one that has rubber grips on the bottom.
On the one hand, a stainless steel body can help the trash can reach a heavier weight and prevent it from tipping over easily if bumped. However, lighter materials have the benefit of being more accessible when interacting with the unit.
On the other hand, rubber grips on the bottom allow the entire trash can to have a solid base no matter what material the body is made out of. These grips will prevent the unit from slipping out from underneath you, no matter what the body of the trash can is made out of.
What are the benefits of using a dual trash can?
Efficient waste sorting: Dual trash cans enable easy separation of recyclables and non-recyclables, promoting eco-friendly waste disposal.
Space-saving: By combining two compartments in one unit, dual trash cans help save space and keep your area organized.
Convenience: You can dispose of different types of waste in one location, eliminating the need for multiple trash cans.
Odor control: The separate compartments and lids help contain odors, keeping your space fresh.
Are dual trash cans suitable for both indoor and outdoor use?
Most dual trash cans are designed for indoor use, especially in kitchens, offices, and other indoor spaces. While some models may be suitable for covered outdoor areas, it’s essential to check the product specifications for weather resistance if you intend to use it outdoors.
Can I use regular trash bags in a dual trash can?
In most cases, you can use regular trash bags in a dual trash can. However, some models may offer custom-fit liners designed specifically for their compartments. Using the provided liners can enhance the trash can’s aesthetics and prevent bags from slipping.
Are dual trash cans durable and long-lasting?
The durability of dual trash cans depends on the materials and construction. High-quality models made from stainless steel, durable plastic, or metal tend to be more long-lasting. Reading customer reviews and product specifications can help you gauge the durability of a specific dual trash can.
With that, we will wrap up our review of the best dual-compartment trash cans; hopefully, you were able to find a suitable option for your use.
Overall, our top choice has to go to the Home Zone for its small footprint and durable build. A close second is the SONGMICS, as it has excellent odor control. However, if you are looking for a sturdy base and quiet operation, then we highly recommend the Simplehuman.
Regardless of the model that you decide to go with, these trash cans will be sure to keep your home clean while looking clean and sleek. Just make sure you keep in mind our pointers, and you'll be sure to get the best dual-compartment trash can out there.
The best pet-proof trash cans are designed to keep dogs and cats out of the garbage while maintaining a clean, odor-free home. These specialized trash cans combine locking lids, durable stainless-steel construction, and odor control technology to prevent messes caused by curious pets. Whether you’re dealing with a large dog that tips over the bin or a cat that pries lids open, the right model offers security, convenience, and easy cleaning. As Simplehuman’s design director Frank Yang explains, “Our pet-proof bins are engineered with precision hinges and secure lid locks to ensure they’re both functional and durable for everyday use.” In this guide, we’ve reviewed the 4 best pet-proof trash cans for dogs and cats with locking lids, tested for durability, seal strength, capacity, and design, so you can keep your pets safe, your home tidy, and your trash where it belongs.
STREAMLINING THE TASK: Our unique liner rim system is a...
KEEP LINERS WHERE YOU NEED THEM: Our liner pocket makes it...
Simplehuman’s 58-liter dual recycler is built like a tank yet elegant enough for any modern kitchen. The brushed stainless-steel body resists scratches and fingerprints, while its dual-compartment design separates recyclables and household waste for easy organization. The motorized soft-close lid glides silently and operates on six AA batteries, keeping movement smooth even after months of daily use.
In our in-house tests, this bin shrugged off everything from accidental bumps to direct paw swipes from larger dogs. The lid’s tight seal prevented intrusion, and its weight distribution kept it stable when pushed. The integrated liner rim hides bags neatly, preventing curious pets from tugging at loose edges. Even repeated cleaning didn’t dull its finish, and the sturdy base remained unshaken by playful impacts. It’s an investment piece with a decade-long warranty that reflects its build quality.
Pros
Massive dual-bin capacity ideal for waste and recycling
Premium brushed stainless steel construction resists scratches
Soft-close motorized lid powered by 6 AA batteries
Compact, stylish, and solidly engineered, this 2.6-gallon stainless-steel can is ideal for bathrooms or small apartments. Its butterfly-style lid opens from the center using a weighted foot pedal, allowing operation in tight spaces and under counters. The mechanism feels deliberate and premium, and the finish options—brushed steel or dark bronze—fit nearly any décor.
During our evaluations, the can’s compact form proved convenient yet sturdy enough to stay upright against playful pet nudges. The internal bucket lifts easily for cleaning, and the precision hinges ensure long-term reliability without lid misalignment. For homes where space is precious but design matters, this bin stands out. The smooth steel finish also resists nose prints and scratches from smaller pets trying to pry the lid open.
Pros
Compact and elegant design perfect for small spaces
Smooth butterfly-style pedal mechanism with weighted action
Durable brushed or bronze finish resists scratches and fingerprints
10-year warranty guarantees product longevity
Cons
Lightweight form may tip if hit by large or active pets
SILENT CLOSE LID - Patented lid shox technology controls the...
LOCK THE LID SHUT - A slide lock securely locks the lid to...
Simplehuman’s 13-gallon slide-lock can offer an exceptional balance of affordability and functionality. The secure slide lock on its lid is specifically engineered to resist nosy pets and small children. Though made of high-grade plastic rather than steel, it retains the brand’s signature SoftClose pedal system and quiet operation.
Our tests found that the locking tab stayed firmly in place despite persistent attempts to open it by hand or paw. The semi-round profile hugs walls neatly, saving space while the generous capacity accommodates busy households. The matte finish hides smudges well, and the step pedal requires minimal pressure. For its price, it’s a smart choice for pet owners who need a reliable everyday bin without splurging on all-metal designs.
Pros
Budget-friendly option with premium design quality
Slide-lock lid securely prevents pet access
Quiet SoftClose pedal system minimizes noise
Large 13-gallon capacity suitable for family kitchens
Cons
Plastic body lacks the premium look and weight of steel models
This 12-gallon butterfly-lid model translates Simplehuman’s design language into a taller, kitchen-sized bin. The central split lid opens gracefully with a light foot press, allowing placement beneath countertops or against islands. Its stable rectangular base resists sliding or tipping—especially useful in homes with active pets.
The brushed steel exterior passed our scratch tests with flying colors, even against repeated pet interaction. The lid’s slow, smooth return prevents loud clangs that can startle animals. We also appreciated the internal liner rim that conceals the bag neatly while simplifying changes. If aesthetics, pet resistance, and a quiet kitchen environment all matter, this model excels.
Pros
Tall and slim design fits under counters or in tight areas
Stable base resists tipping from pets and movement
Butterfly lid opens smoothly and quietly for daily use
Scratch-resistant brushed steel finish hides paw marks
A high-tech solution for pet households, this iTouchless model features a motion-sensor lid paired with a PetGuard locking system that disables the sensor when needed. Its stainless-steel shell is fingerprint-resistant, and the integrated carbon filter neutralizes odors efficiently.
During extended use, they can be reliably opened and closed with no lag. The sensor placement prevented accidental activation by passing pets, and the locking switch provided extra assurance. We particularly liked how the AbsorbX odor filter kept the kitchen smelling fresh after multiple days of use. Maintenance is straightforward—wiping the lid and emptying the filter compartment once a week maintains performance.
Pros
Motion-sensor lid with manual PetGuard lock for added security
PERFECT DESIGN FOR ANY HOME: With 2 inner buckets, one 3 Gal...
CONVENIENT OPERATION: Opens at the lightest touch with its...
The Bo Touch Bin blends European design with practical engineering. Its touch-open mechanism activates with a gentle tap, while twin inner buckets simplify waste sorting. The large footprint and soft-close lid make it ideal for design-conscious households that still need functional waste control.
Our testing team appreciated its quiet operation and premium feel. The sealed lid design kept odors at bay, and its steel shell resisted marks during daily use. Although it lacks a locking mechanism, the balanced lid and sturdy stance deter casual pet interference. For owners who prioritize style and smooth mechanics over lock features, this bin is a standout.
Durable Construction: Made from ABS resin for long-lasting...
Convenient Size: 1 gallon capacity fits in small spaces
Minimal, mobile, and exceptionally well sealed, the Yamazaki Airtight Can relies on an airtight gasket lid that snaps firmly into place to block odors. Mounted on discrete casters, it moves easily for cleaning while maintaining a small footprint.
In everyday use, the lid’s tight fit and smooth surface discouraged pets from lifting or toppling the bin. The air-tight seal trapped kitchen odors completely, even after disposing of pet food cans or meat packaging. Constructed from rigid ABS plastic with clean lines, it blends seamlessly into modern interiors while delivering true functionality for smaller households.
Pros
Airtight gasket lid fully seals odors inside
Minimalist design fits seamlessly into modern interiors
Smooth walls discourage scratching or prying by pets
Casters allow easy repositioning for cleaning or mobility
Cons
No dedicated lock—best suited for calm or smaller pets
How to Choose the Best Pet-Proof Trash Can
Selecting a pet-resistant bin means balancing security, convenience, and long-term durability. Based on our testing, these are the most important factors:
1. Locking Mechanism
Look for slide locks, latch systems, or PetGuard sensors that physically prevent lid lift. Mechanical locks are most reliable, while motion-sensor models need a manual lockout option.
2. Weight and Base Stability
A heavier or broader base resists tipping. Rubberized or weighted bases proved invaluable in our lab when testing against medium-sized dogs pushing or pawing.
3. Lid Design and Seal
Split lids (butterfly) and overlapping soft-close designs reduce gaps pets can exploit. A firm seal also minimizes odors that attract animals.
4. Material and Finish
Stainless steel offers durability and scratch resistance. High-density plastic is lighter and more affordable but can shift more easily. Look for fingerprint-resistant coatings for easy maintenance.
5. Capacity and Access
Choose 8–10 gallons for smaller spaces or pets, and 13–16 gallons for family kitchens. Consider dual-compartment models for recycling.
6. Odor Control
Filters, carbon cartridges, or airtight lids prevent smells from enticing pets. Odor suppression is critical in multi-pet homes.
7. Maintenance and Liner Management
Bins with hidden liner rims or removable buckets simplify cleaning and prevent pets from pulling on bag edges.
8. Noise Level
Quiet hinges and slow-close lids prevent startling animals and discourage curiosity, helping the deterrent factor.
Whether you prefer smart automation, elegant simplicity, or classic mechanical design, each of these bins proved capable of withstanding daily use and the curiosity of pets. A proper pet-proof trash can not only protect your home from messes but also keep your four-legged companions safe—and that peace of mind is worth every penny.
Best electric pencil sharpeners combine speed, precision, and durability, making them essential tools for classrooms, offices, artists, and anyone who values consistently sharp pencils. Unlike manual sharpeners, electric models use helical or rotary blades powered by efficient motors, allowing for fast sharpening while maintaining an even point. Performance is typically measured by sharpening speed, blade longevity, noise level, portability, and compatibility with different pencil sizes. As school supply experts note, “A good electric sharpener isn’t just about convenience—it’s about consistency and extending the life of your pencils.” With so many models available, finding the right one can feel overwhelming, which is why we tested and compared the leading options. In this guide, we review the 9 best electric pencil sharpeners, highlighting those that excel in compact design, heavy-duty performance, quiet operation, and versatility, so you can confidently select the right sharpener for your needs.
Best Electric Pencil Sharpeners
Here is the list of the 9 best electric pencil sharpeners that you can use to quickly, conveniently, and easily sharpen pencils at home or in the office.
If you like sharpeners that come with stellar design and are also very lightweight, Bostitch Personal Electric Pencil Sharpener is an excellent option to consider. The manufacturers have designed this keeping in mind both home and office use. This product boasts a modern design with an incredible space-saving characteristic.
NEVER STALLS – Powerful stall-free motor powers through...
Why Did We Like It?
Well, the first thing to catch our eye was its compact design. It does not take up any extra space because it is designed in an exceptionally smart way. Its footprint is really small, and it will only occupy a very small portion of your workspace.
Furthermore, with this device, you do not have to worry about safety at all. It is equipped with MagnaSafe Technology, and this makes it completely tamper-proof. If the shaving tray is removed, the sharpener stops functioning. So, there is no reason for you to worry that the area might get dirty.
Moreover, what good is a sharpener if it does not offer precision? This option comes with an HHC cutter that is very durable and enhances the precision by four times. It has a powerful motor that makes constant, stall-free operations possible. Your pencil tip will be at its sharpest every time you use this!
What Could've Been Better?
Although this product performs quite well, there's one thing that could have been better. The manufacturers have not really paid much attention to packaging. When it arrived, we found that the box it came in was a little flimsy.
Pros
Brilliant design
Very safe to use
Delivers highly precise results
Easy to clean
Cons
Packaging is not up to the mark
Power Source: Corded Electric | Blade: Helical | Pencil Diameter: N/A | Sharpening Speed: N/A | Auto-Stop Feature: No
X-ACTO School Pro Electric Pencil Sharpener is made keeping in mind the needs of the students. With this, pupils can spend more time on their coursework and less time sharpening. Your wooden pencils will get one of the finest and most precise tips when you decide to use this item.
Flyaway cutter prevents oversharpening by stopping the...
Why Did We Like It?
We have to say that even though it has 'school' in its name, its use is not just restricted to that. It is actually a heavy-duty device that can equally fulfill sharpening needs in your workspace and home, too.
The material that is used to make it is highly durable, and it features rugged construction. This makes it highly resistant to regular wear and tear. Moreover, it has a Smart Sharpening Technology that helps it deliver better performance.
Furthermore, what really caught our attention was the versatility that this sharpener offers. It stands apart from its contemporaries by offering six variations in size. Because of this adjustable feature, you can sharpen pencils of various sizes using this device.
Additionally, it has a helical steel blade that cuts with an equal amount of precision on all sides of the pencil. Another thing worth mentioning is the auto-reset feature that prevents the device from getting overheated and protects it from probable damage.
What Could've Been Better?
There's hardly any complaint we have with this product. However, after using it for a while, we found that its shaving tray is not very efficient. If not installed properly, you might face a problem of shavings flying from the corner of the container.
Pros
Can perform heavy-duty sharpening
Highly versatile
Very durable
Safety features included
Cons
The shaving tray is not very efficient
Power Source: Electric | Blade: N/A | Pencil Diameter: Fits Most Woodcase Pencil Size | Sharpening Speed: N/A | Auto-Stop Feature: Yes
We cannot compile our list of the best electric pencil sharpeners without mentioning the JARLINK Electric Pencil Sharpener. It is one of the most liked and popular options among students and office workers. With one of the most outstanding designs, it has made sharpening as easy as a breeze!
Fast Sharpen: With a more powerful motor, this electric...
Auto Stop & Save Pencils: The colored pencil sharpener works...
Why Did We Like It?
What stands out about this item is that it does not require you to do much work. It is fully automated, and the moment you plug your pencil in the device, it gets automatically sharpened. It stops when it detects that the pencil is sharpened or when the lid is opened.
Moreover, it is extremely easy to power this device. All you have to do is to plug it into an electric socket or simply put 4AA batteries. Apart from that, you can easily opt for a USB cord or a power bank to charge this device.
Furthermore, it has a big capacity bin where all the pencil shaving gets dropped. As a result, cleaning becomes super simple as the flyaways are reduced to the minimum. All you have to do is clear the tray once it fills up to the brim.
Additionally, not only does it sharpen lead and charcoal pencils, but you can also use it on your colored pencils.
What Could've Been Better?
There is no doubt that this item delivers excellent performance. However, it needs to be mentioned that it comes with a sharpening port of a single size. If you are thinking of using it on pencils of a wide range of sizes, this item might not be very helpful.
Pros
Easy to power
Very easy to clean
Lightweight
Efficient helical motor
Cons
Single-size sharpening port
Power Source: Corded-Electric/Battery-Operated | Blade: Helical | Pencil Diameter: No.2/6mm to 8mm | Sharpening Speed: 5 to 10 Seconds | Auto-Stop Feature: Yes
Next up on our list, we have X-ACTO Heavy Duty Electric Pencil Sharpener. This is best known for the dual brilliance it offers: smart technology and a beautiful design to suit your modern home. This item is built to enhance your home décor and, at the same time, provide the maximum amount of efficiency.
This item comes with a helical cutter that lasts 16x longer than most of its contemporaries. So, this item is a lot more durable and provides more precise results as compared to its competitors.
And this highly efficient blade is supplemented by a very powerful motor, which, honestly, according to us, is the cherry on the cake.
Additionally, you won't have your neighbors or classmates complain about the noise with this item. It is constructed of heavy-duty metal and hardly makes any noise. As a result, you can get the job done in complete peace without having any noise disrupting your concentration.
Moreover, when it comes to hi-tech features, this item aces it. The built-in Pencil Saver technology detects when a pencil is plugged in for too long and prevents the problem of over-sharpening.
Also, in case the device gets too hot, the auto-reset feature immediately shuts off the device to prevent any form of damage.
What Could've Been Better?
Despite the brilliant performance it delivers, we have to say that this item is not a good bet for everyone. It is quite delicate, and you need to maintain it well to ensure that it runs for a long time. This item is not very suitable to be used by small kids.
Pros
Prevents damage from overheating
High-performance
Does not make any noise
Prevents over-sharpening
Cons
The item is delicate
Power Source: Corded Electric | Blade: Helical | Pencil Diameter: N/A | Sharpening Speed: N/A | Auto-Stop Feature: Yes
For the ones who are looking for an option that offers excellent quality, AFMAT Electric Heavy Duty Classroom Pencil Sharpener is the perfect bet. It comes with a very strong blade that is suitable not just for lead pencils but also for colored pencils. To know more about it, read on.
Sharpen 10000 Times Without Wearing out: This heavy duty...
UL Listed Electric Pencil Sharpener: Our classroom pencil...
Why Did We Like It?
If you are a teacher or a working professional who needs pencils sharpened regularly, this heavy-duty sharpener will make your life easier. It can easily sharpen both normal lead pencils and colored pencils to perfect precision in 3-5 seconds.
Furthermore, what makes this product stand out from other helical blade sharpeners is that it is UL-listed and will not face any trouble even after sharpening more than 200 pencils one after the other. The blade and the motor are both incredibly efficient and durable. The blade can sharpen pencils more than 6,000 times.
Additionally, it comes with 2 major safety features that ensure that the item does not malfunction. In case you have the shaving box removed, this item will not operate and thereby prevent unnecessary mess.
And if by any chance something gets stuck in the machine, it will immediately stop to prevent the problem of overheating.
What Could've Been Better?
High functionality, speed, and noteworthy efficiency indeed are what make this item commercial grade. However, this is not exactly the best when it comes to packaging. The boxes are a little too light, and we were concerned whether the product might have been damaged on arrival.
Pros
Can sharpen a variety of pencils
Highly effective blade
Safety features included
Does not overheat
Cons
Inferior packaging
Power Source: Corded Electric | Blade: Helical | Pencil Diameter: No.2/6mm to 8mm | Sharpening Speed: 3 to 5 Seconds | Auto-Stop Feature: Yes
POWERME Electric Pencil Sharpener - Pencil Sharpener is one of the best-looking smart sharpeners that are out there. It is made of high-quality stainless steel and will easily sharpen more than 1000 times without getting worn out. Once you test this product, you will agree with us that it is designed to achieve perfection.
Guarantee - We truly want you to be happy with your electric...
Why Did We Like It?
Whether you are an artist, a student, or a businessman, you will like this item for its design and the high-quality material that it is made of. You can use it for commercial purposes and also in classes or offices. It comes with a table mount that fits perfectly on all sizes of desks.
Furthermore, this item is highly durable, and if you manage to use it with proper care, it can deliver more than 3000 rounds of sharpening. Because of the ultra-durable and efficient helical blade, the sharpening is extremely precise and gets done in less than 3 seconds.
And, when we said it is designed to achieve perfection, we were not exaggerating! Its spiral drill design always helps ensure that the tip of your pencil is pointed, and the auto-jam release feature prevents your pencil from ever getting stuck.
Moreover, this item is very lightweight, and you will find no difficulty in carrying it around.
What Could've Been Better?
There are hardly any complaints that we have with this incredibly well-designed product. However, we have to say that it would have been better if it came with multiple sharpening ports to sharpen a variety of pencils. This item supports lead and colored pencils only.
When compiling a list like this, there's no way we could have missed Bostitch QuietSharp Executive Electric Pencil Sharpener. It provides 70% higher speed than most of its contemporaries and also lasts 10% longer than regular sharpeners. To know more about this highly efficient sharpening tool, read on!
QuietSharp motor for quiet, stall-free operation (under...
Why Did We Like It?
The first thing that we noticed is that this product has mastered the art of precision. This durable cutter delivers a very precise and clean pencil tip. The powerful motor that it comes with enables constant and stall-free functioning to provide you with a clean, sharpened pencil every time you use it.
Furthermore, this item is very smart. Whenever a pencil is plugged in, it only sharpens it to the point that it is necessary. It never sharpens more than needed, thereby extending pencil life.
Once the pencil is totally sharp, the sharpener retracts without you having to take the pencil out of it. So, you do not need to be constantly mindful while using this item.
Moreover, this provides a completely hassle-free service. In case the shaving tray is not in its place, the MagnaSafe Technology completely stops all forms of operation till the tray is put back in its place. You can also keep the tray away if you have small children in the house.
What Could've Been Better?
To be honest, this product has performed brilliantly. However, we have one complaint, and that is the noise. If you are doing a job that demands complete concentration, this noise might completely distract you. To avoid this, we suggest that you keep your pencil pairs sharpened before beginning to work.
Pros
Provides precise pencil tips
It does not over-sharpen
Very clean
Easy to use
Cons
Make noise
Power Source: Corded Electric | Blade: Helical | Pencil Diameter: No.2/6mm to 8mm | Sharpening Speed: N/A | Auto-Stop Feature: Yes
Be it your classroom, home, artist's studio, or office, Riyo Riyo Electric Pencil Sharpener Heavy-duty Helical Blade is perfect for all. The sharpening port is broad enough to insert the pencil without fearing that you might get hurt. Moreover, the blade and motor ensure that the efficiency of this device is always top-notch.
[Heavy Duty Steel Blade] 360°fast sharpener and powerful...
Why Did We Like It?
This device is popular for being very smart with its mechanism, as it prevents your pencils from incurring any form of damage while sharpening. It takes around 3-5 seconds to sharpen the pencils and prevents problems like over-sharpening and broken tips.
Additionally, the heavy-duty blade requires a special mention. It is made of steel and can sharpen your pencil more than 3,000 times.
Also, it offers versatility in terms of the amount of sharpening that you prefer. You can use this device to select a sharp, medium, or blunt level of sharpening for your pencils.
Moreover, this item comes with a very compact storage box. It is quite handy, and you can use it to store things like paper clips, staples, erasers, and so on. It is ideal for keeping your stationery organized and your desk clean.
Also, it is very easy to clean the product. Just twist open the cover and insert a cleaning brush to remove pencil dust and shavings.
What Could've Been Better?
Honestly, we did not face many hindrances while using this item. However, we did face a little difficulty while setting it up. The user manual is not very detailed, and you might face some hardships before you can start using it. We recommend that you look up some tutorial videos on the internet, and it would become quite easy.
Pros
Does not damage pencils
Highly efficient blades
Additional storage box
Very easy to clean
Cons
User instructions are not very clear
Power Source: Battery-Powered | Blade: Helical | Pencil Diameter: No.2/6mm to 8mm | Sharpening Speed: 3 to 5 Seconds | Auto-Stop Feature: Yes
Well, if you are one who enjoys the benefit of having a choice, Aogwat Electric Pencil Sharpeners is the perfect bet for you. With this option, you can choose the modes when sharpening pencils. Also, it is quite efficient in the way it shapes the tip of your pencil to a desired precision.
Mini Pencil Sharpener Compact Size: The compact design and...
Why Did We Like It?
It is extremely easy to get this item charged, and you can start using it without much fuss. To use it, you will need to get your hands on 2AA batteries, and that's all. It does not support direct charging or USB charging.
This might seem like a disadvantage at first, but it is actually a quite praiseworthy safety control for kids.
Additionally, this item offers you the chance to use two modes when sharpening: the automatic and manual modes.
Moreover, the blade requires a special mention. The stainless steel blade, along with a robust motor, helps to shape your pencil tip to perfection. This enables you to produce the finest pencil works.
To top it all, what is unique is that the blade can be easily replaced. By twisting the security lock and taking the blade out, you can install a new blade every time the old one gets worn out. This way, you do not have to keep replacing the entire sharpener.
What Could've Been Better?
One issue that we faced while using this item was that the blade gets unscrew quite easily. It takes some time to figure out how to align the blade with the base of this device. Once you figure that out, it is as easy as a breeze.
Pros
Very easy to charge
Has two modes of operating
Efficient motor
Blade is replaceable
Cons
The blade gets unscrewed
Power Source: Battery-Powered | Blade: Flat | Pencil Diameter: No.2/6mm to 8mm | Sharpening Speed: 3 to 5 Seconds | Auto-Stop Feature: No
After going through this thorough and detailed list, we hope you now have a better idea about how to select the best electric pencil sharpener. Look for portable ones, and it won't matter if you are a student, an artist, or a working professional. It will take care of all your pencil-sharpening needs.
However, until now, we have only discussed the products in great depth, and in order to make an informed choice, there are a few more things that you have to take into account. Besides the usual features that the sharpeners offer, there are a few more factors that need to be taken into consideration.
In this section, we will be discussing some of those factors. So, without any more delay, let's check them out.
Aesthetic
Since the electric sharpeners are mostly kept in open display, you can always go for one that comes with good design elements. If you are an artist who constantly uses a sharpener, it's better to go for one that looks good, because you will see a lot of it.
From the above-mentioned list, you can find quite a few options that boast good design and, in no time, will enhance the beauty of your workspace. This will improve your mood and help you become more productive.
Type Of Pencil
We always recommend that our users identify their needs before choosing a product. And this time, it is no exception. As students or working professionals, you will have a need to sharpen different kinds of pencils.
What you need to keep in mind is that not every electric sharpener can sharpen all types of pencils. Some of them are hexagonal, some round, and a few are also triangular in shape. Also, the lead type acts as a determining factor.
So, we recommend that you read the label carefully before buying to ensure that you do not end up spending on something that would be of no use.
Speed
Depending on the purpose which you are using the sharpener for, you should choose an option. If you are on the go and buying a product that will be continuously used for work, it is better to go for one that can get the job done fast.
However, how fast a device can get pencils sharpened is determined by the motor and the blade that is installed in it. An easier way to understand how fast an option operates is to read the labels. All details regarding the speed, motor, and blades are clearly stated in the labels to make it easy for the users.
Blade Replacement
If you have used sharpeners before, you would know that the blades have to be replaced after prolonged use. And the electric ones are no different.
However, replacing the blades is more comfortable in some units than in others. So, before you decide on going for an option, see if they offer a replacement blade in the kit. Or, if there is no such thing available in the kit, do a little bit of market research to know if replacements are available.
In case there are no blade replacements available for a particular product, go for one that is cheap. In that case, when the blade gets worn out, it would not burn a hole in your pocket to buy a new device that has a brand new blade.
Electric Pencil Sharpeners FAQs
Why should I opt for an electric pencil sharpener over a manual one?
Electric pencil sharpeners offer greater precision and a quicker, more uniform sharpening experience compared to manual sharpeners. They also tend to reduce the risk of breakage of pencil tips.
Are electric pencil sharpeners safe for children to use?
Safety varies from model to model. Some electric pencil sharpeners have an auto-stop feature when the shavings reservoir is removed, or they may not operate unless a pencil is inserted. These features make them safe for children, but supervision is always recommended.
How much power does an electric pencil sharpener consume?
Power consumption varies from model to model. Battery-powered and USB models generally use less power than corded models. If efficiency is a concern, look for models with an energy-saving feature.
How sharp can electric pencil sharpeners make my pencils?
This often depends on the make and model of the sharpener. Most electric sharpeners can consistently achieve a fine point, but some models may feature different settings for varying degrees of sharpness.
How frequently should I clean my electric pencil sharpener?
The frequency of cleaning depends largely on usage. However, as a general rule, empty the shavings reservoir once it becomes about 75% full to prevent any obstruction or damage to the blades.
Conclusion
That brings us to the end of our guide on the best electric pencil sharpeners, where we compared precision, durability, and performance across nine top-rated models. Our goal was to simplify your decision-making process so you can choose a sharpener that truly matches your needs—whether for home, school, or professional use.
Each of these sharpeners excels in different categories, ensuring that whether you prioritize size, longevity, or convenience, there’s an option here for you.
With the right sharpener, you’ll never struggle with dull pencils again. Invest once, and enjoy consistent, precise results every time.
Best central vacuum hoses are essential accessories that connect your central vacuum system to cleaning tools, ensuring efficient suction, durability, and easy maneuverability. Unlike standard vacuum hoses, these are engineered with universal connectors, crush-proof materials, and ergonomic grips, making them suitable for extended use without tangling or breaking. Performance is typically measured by airflow efficiency, flexibility, build quality, and compatibility with different inlet valves and attachments. As home care specialists note, “A central vacuum system is only as reliable as the hose you pair it with—compatibility and durability are key to consistent cleaning.” In this guide, we review the 8 best central vacuum hoses, highlighting options that excel in affordability, durability, complete accessory packages, and universal connectivity, so you can choose the right one to make your cleaning routine faster and more effective.
Best Central Vacuum Hose
Here's the list of the 8 best central vacuum hoses of 2024 to help you find the perfect hose for your cleaning needs.
Let’s start our list strong with this fantastic central vacuum hose by Ovo. Now, if you are familiar with the vacuum market, you might already know how well-established this Canada-based company is. Without wasting any time, let’s get to know more about this hose.
Not to be used with electric carpet beater or electrical...
40 FT LOW-VOLTAGE HOSE: ON/OFF switch control at the handle...
Why Did We Like It?
First things first, this universal vacuum hose is 40 feet long and one of the most affordable options available on the market. It’s almost surprising that we found a hose of this length in such a low price range.
It has an inner diameter of 1.5 inches and is compatible with most of the inlets in US homes. Due to frequent folding and bending, hoses often develop kinks. But this one has a swivel at its handle, which prevents it from kinking. Equipped with a switch control, you can turn it on or off at your convenience.
Ovo is a trustworthy brand and looks after its customers well. Suppose at any point you encounter difficulties with your vacuum or hose installation. In that case, Ovo is happy to provide technical support at its toll-free number and repair service in its service center.
What Could’ve Been Better?
It is a piece of well-rounded vacuum equipment with almost no flaws. The tube is well-received on the market with very high customer ratings. Given its long length, it weighs around nine pounds. Some might find it heavy, but it only makes it more durable and crushproof.
Next in line, we have a high-quality crush-proof central vacuum hose by Broan-NuTone. Ideal in shape and size, this lightweight hose consumes minimal voltage while cleaning. Backed by the assurance of a well-established brand like Broan-NuTone, this one offers an array of high-class features.
DURABLE: Vinyl reinforced construction with a dark gray...
Why Did We Like It?
CH235 hose has a length of 30 feet and an inner diameter of 1.38 inches. Its dimensions are ideal for easy cleaning.
The long length allows you to clean a room 1,000 square feet in area. The diameter is perfect to fit with most vacuum inlets. We’d like to tell you that this tube comes with a universal hose end compatible with all the vacuums from the same brand and other standard inlets commonly found in homes.
Let’s talk about durability. Its vinyl-reinforced, rugged construction makes it long-lasting and difficult to crush. The outer structure of the hose is built in such a way that it springs back to its original shape after use. This ensures that it doesn’t suffer any kinks or damage and is also quite convenient to store.
What Could’ve Been Better?
Lightweight and easy to handle, this hose is perfect for making your house spotlessly clean. However, the only thing we felt that could have been better is its length. It is a little shorter when compared to the price. But the durability and versatility more than compensate for it.
Pros
Low voltage
Springs back to the original shape
Universally compatible hose end
Vinyl construction
Cons
A tad bit short in length
Size: 30" | Inner Diameter: 1.38" | Weight: 7.3 pounds | Compatible: Standard inlets | Features: Crush-proof, springs back to original shape
Loaded with essential premium accessories, this kit is an all-rounder. It has all the equipment that you’ll most likely need while installing or using your vacuum system. The kit comes with the option of hoses in four different lengths, each sold separately so that you can buy one according to the size of your room.
The 93048 is compatible with air turbine nozzles and all...
The 93070 permits remote activation of the central vacuum...
Why Did We Like It?
We could see the excellence of this package right from the beginning. First and foremost, it is such a thoughtful gesture from the company’s side to include every essential accessory in a single set. It comes with a battery-powered nozzle, a floor tool, a combination tool, two air turbines, and an extendable wand.
Not just that, but the hose is also extremely flexible and lightweight. It is compatible with all the major brands of central vacuums like Hayden, Vacumaid, Eureka, Vacuflo, and many more, along with the air turbine nozzles. In broader terms, 93070 works well with any accessory of size 1.25 inches.
The tube is equipped with the latest tech, allowing you to activate the central vacuum remotely through exposed contacts in the valve inlet. One of the floor nozzles is multi-surface and works equally well on both hard floors and carpeted areas. The other one is a specially designed hard floor brush.
What Could’ve Been Better?
Coming in a bag full of essential gear, this hose is hands down one of the best on the market. But we have one minor complaint that we’d suggest the company looks into. The hose is incompatible with electric air nozzles. Rest assured, everything is on point.
We’re almost halfway through our informative list now. Pay attention because we have another exemplary vacuum hose from the same trustworthy brand. Cen-Tec Systems is a prestigious US-based company that delivers high-quality vacuum cleaners and commercial and residential accessories. Let’s get into the details of this one.
1. 375” x 35 foot pearl gray central vacuum hose designed...
Has a 360 degree swivel handle with a comfortable grip...
Why Did We Like It?
While cleaning your house with this one, you won’t get fatigued, and there’s a logical reason behind that. Firstly, the hose has a lightweight carcass, which makes it effortless to handle. Secondly, it is armed with a 360-degree swivel handle with a comfortable grip that lets you navigate it single-handedly.
It comes in two lengths: 30 feet and 35 feet. The industrial standard for hoses is 30 feet, but this one goes a step ahead and offers an extra five feet for the sake of convenience. Due to its longer length, it is ideal for large and spacious areas.
Perfect for industrial use, it works well with valve inlets typically found in offices and factories. The hose has a pearl gray finish and Eva body, because of which it doesn’t leave any dark markings on your precious tiles or walls while vacuuming.
What Could’ve Been Better?
Just like the previous one, it is not fit to work with electric air nozzles. Apart from that, we don’t have any complaints. Some might find it to be in a higher price range, but our opinion is that it is worth the price with all the features.
Now moving past our mid-point, there is a central vacuum hose from Ultra Clean. Good news if you love having different options, this one is available in two different colors and lengths along with four different styles. Are you intrigued by the options, or do you find them overwhelming? It’s okay, sit tight, we’ll tell you all about it.
✅Light-weight Crush-proof Central Vacuum Electric hose...
✅ Compatible with most central vacuum brands like Beam,...
Why Did We Like It?
While more choices mean more confusion, it also means that there is a higher chance of meeting your specific needs. 35 feet long and 1.5 inches wide, this hose is compatible with several brands like Beam, Kenmore, NuTone, Eureka, Ovo, Canaval, Husky, and many more.
Coming back to the options, you can decide on a direct connect or pigtail-type end design. Direct connection allows only single connectivity, while a pigtail hose allows double connectivity. It is available in two lengths of 30 and 35 feet. Furthermore, you can either get it in white or silver. All the options are available for mixing and matching according to your preference.
It has a spring-like structure, which prevents it from external crushing and makes it easier to store. Equipped with a handle, it has a good grip and easy handling.
What Could’ve Been Better?
A few setbacks of this hose model are that it is not compatible with an oblong or square plastic wand system. Therefore, it is advisable to select another tube if you have these types of wands. Secondly, you’ll need the latest version of the upper wand for your power hose.
Pros
Leaves scope for fulfilling your specific needs
Offers a pig-tail end cuff for multiple connections
Works with all 1.5-inch accessories
Flexible spring structure
Cons
Needs the latest version of the upper wand
Size: 35" | Inner Diameter: 1.5" | Weight: N/A | Compatible: Multiple brands | Features: Available in different colors and lengths
Offering hoses of three different lengths, Nadair is a Canada-based brand renowned for its top-class hoses and high-quality central vacuum systems. Spread all across Europe, this is a brand that you can trust. Having discussed that, we’ll review their hose in detail now.
Engineered to fit in all types of inlets, this hose is a universal one. Until now, we have discussed swivel handles, and you must be familiar with their functioning. This one comes with not just single but double swivel technology. This feature leaves no scope for kinking or breaking the tube.
The Nadair hose is 30 feet long and can cover an area of 950 sq feet. Those with lengths of 35 and 40 feet can clean up to 1,250 sq ft and 1,600 sq ft large areas, respectively. Isn’t that a deal worth grabbing, given its low price range?
Moreover, it has an inner diameter of 1.5 inches, suitable to fit in most vacuum inlets and accessories. Last but not least, the tube has two low-voltage pins that allow it to draw less power from the inlet and operate efficiently.
What Could’ve Been Better?
Alright, there are many good features in this one, and it is a feasible option without a doubt. But we cannot ignore the fact that it cannot be used with an electrical carpet beater. As long as you don’t want to use your hose with that kind of powerhead, you won’t face any issues with the Nadair universal.
If you’ve been paying attention, then you must have noticed that we have mentioned the brand “Beam” quite a few times on our list. Backed with a warranty of one year, this hundred percent crash-free vacuum hose guarantees 27 percent more suction power than others on the market. Let’s get into the details of this one, shall we?
THIS HOSE WILL NOT WORK WITH THE OLDER STYLE 3 PRONG POWER...
THIS HOSE WILL NOT WORK WITH BEAM D-SHAPED OR SQUARE NECK...
Why Did We Like It?
Equipped with a novel comfort grip, it has an ergonomic handle that can be locked using a button. These features make it unique and stand out from others on the list. The high-power suction simplifies and speeds the cleaning.
In terms of the dimensions, it has a length of 30 feet with a diameter of 1 to 1.25 inches toward the handles. This makes it compatible with modern universal vacuum accessories. With an inner diameter of 1.5 inches, it can work well with all the standard wall valve inlets. It is compatible with modern universal vacuum accessories.
Furthermore, the hose is incomparable when it comes to flexibility, durability, and airflow. The brand is trusted and loved by people worldwide, and not just us; the reviews speak for themselves.
What Could’ve Been Better?
We relentlessly appreciate the useful aspects of this hose, but we’ll also admit to the downsides. This hose doesn’t work with the three-prong power nozzles of the old style. Given it’s a piece of the latest tech, incompatibility with old-style nozzles is only logical.
We’ve finally reached the end of our list of the best vacuum hoses. Let’s finish it on a powerful note with a powerful suction hose from Ultra Clean. You are right, Ultra Clean doesn’t go easy on you, indecisive folks, but it’s a dream come true for those who like choosing from a wide variety of options.
✅ Light-weight Crush-proof Central Vacuum Air Hose, Low...
✅ Compatible with most central vacuum brands like Beam,...
Why Did We Like It?
Available in lengths of 30, 35, 40, and 50 feet, Ultra Clean is the only brand that offers such a long hose in this price range. A hose of 50 feet is more than enough to cover an area of 2,000 sq ft.
With the amazing grip of a pistol handle, you can choose between a friction-fit type and a button-lock type. Another great quality of the hose is that it operates at a low voltage of 24 volts only. Such a low voltage implies that you’ll definitely be saving on the electric bill.
Lastly, it fits well with 1.5-inch wide wall inlets and is compatible with several vacuum brands like Ovo, Honeywell, Allegro, Canavac, etc. The hose can be used with floor and air-driven turbo brushes.
What Could’ve Been Better?
Okay, we know it is the longest hose with a pistol-grip handle, and it has many amazing features, but it has a lot of restrictions too. It only works with universal-type inlets that have two metal contact balls. So that kind of dulls down its overall flair.
Are you feeling like a vacuum hose expert already? If yes, then well and good, and if not, don’t you worry because we still have a few finishing strokes left.
It’s not really possible to shop confidently just by knowing the best options and top picks. You’ll need a basic guide to inform you about what features to look for, and what parameters to consider, and we’ve got that covered in the next part of our guide.
Keep these points in mind, and you’ll be ready to go!
Structure
When buying a vacuum hose, the most important thing is to be acquainted with its dimensions, structure, and material. In this section, we’ll discuss the importance of the same.
First and foremost, you should know how large your room is and how restricting the furniture set is in that room. That will help you better understand what length of a hose you need for comfortable vacuuming.
Additionally, pay attention to the external structure of the hose. What is it made of, how is it textured, and does it have a spring finish or a vinyl construction? These are a few questions that you must ask yourself. We’ll suggest going for a light-colored hose, so it doesn’t leave behind dark markings on the floor.
We’ll also advise you to purchase the models that have a grip handle and 360-degree swivel technology. They are less likely to kink and are comfortable to maneuver while cleaning.
Connectivity And Compatibility
Next, you’ll have to make sure that the hose you are investing in is compatible with standard valve inlets and, most importantly, those you have in your home or office space.
For convenience, it should also be functional with vacuum accessories of all the major brands. Some hoses, like those from Cen-Tec Systems, are compatible with almost all vacuum cleaners.
Cost
Finally, sticking to your budget and buying a cost-effective product is of immense importance. Some hoses on our list offer an extended length in a lower price range. Look out for those options.
However, if you don’t have any budget constraints, it’ll be smarter to buy a sturdy and durable hose once and for all. The Broan-NuTone central hose and the Cen-Tec Systems Vacuum kit fall in a pricey range but are the best options.
Central Vacuum Hose FAQs
What materials are central vacuum hoses made of?
Central vacuum hoses are typically made of durable materials such as plastic, rubber, or a combination of both. The outer layer is often textured to provide a better grip, and some hoses may have a spring or wire reinforcement to prevent kinking.
What is the significance of a grip handle and 360-degree swivel technology?
A grip handle and 360-degree swivel technology enhance the usability of the central vacuum hose. The grip handle provides a comfortable and secure hold, reducing strain on your hand and wrist during extended cleaning sessions. The swivel technology allows the hose to rotate freely, preventing it from getting tangled or twisted while you maneuver around furniture and other obstacles.
Are there any high-end central vacuum hoses available?
Yes, there are premium central vacuum hoses available on the market. These hoses often come with additional features like superior durability, improved suction power, and advanced maneuverability. The Broan-NuTone central hose and the Cen-Tec Systems Vacuum kit are examples of high-end options, although they may come at a higher price point.
Are there any maintenance tips for central vacuum hoses?
To maintain your central vacuum hose, avoid running over it with heavy objects or allowing it to get pinched or tangled. Clean the hose regularly to remove any debris that may affect suction. If the hose becomes clogged, use a long, flexible rod to clear the blockage. Additionally, store the hose properly when not in use to prevent damage and ensure its longevity.
Conclusion
After exploring the best central vacuum hoses, we hope you now feel confident about choosing the right one for your system. To wrap things up, here’s a quick recap of our top recommendations:
Each of these hoses has been tested for durability, compatibility, and performance, making them reliable choices to keep your home clean with minimal effort. With the right hose, your central vacuum system becomes more efficient and easier to use.
That’s a wrap on our guide to the best central vacuum hoses—until next time, happy cleaning!
The best exterior polyurethanes are clear protective coatings designed to preserve and enhance the appearance of outdoor wooden surfaces such as decks, doors, furniture, and railings. Unlike interior finishes, exterior polyurethanes are formulated with UV blockers, moisture-resistant resins, and flexible binders that protect wood against sunlight, rain, and temperature changes without cracking or peeling. Performance is typically measured by durability, clarity of finish, resistance to yellowing, drying time, and long-term flexibility—all critical factors for outdoor projects. As Minwax’s product team explains, “Exterior polyurethane combines beauty with protection, providing the gloss and richness of a varnish while shielding wood from the elements.” Whether you choose an oil-based polyurethane for deep warmth and toughness or a water-based formula for faster drying and low odor, the right finish ensures both long-lasting protection and aesthetic appeal. In this guide, we’ve reviewed the 8 best exterior polyurethanes, highlighting options tailored for UV protection, marine use, and overall versatility, along with a buyer’s guide to help you select the most effective product for your project.
Best Exterior Polyurethanes
Here's the list of the 9 best exterior polyurethane options to help you achieve a smooth finish and long-lasting protection for your wooden surfaces.
Founded in 1921 in the US, Rust-Oleum is one of the leading manufacturers of innovative coatings that empower professionals and DIYers alike. Formulated to deliver resistance to UV rays, the 250041H Ultimate Spar Urethane does a magnificent job of protecting wooden surfaces from discoloration due to the sun’s rays.
Firstly, this exterior polyurethane is produced using a water-based formula, which makes it easy for users to apply and clean up. For any exterior polyurethane, the odor is a major issue, but you would be glad to know that you will barely be able to smell any odor with this product.
Once applied, it dries in just 30 minutes, which is an added advantage for professionals who need to paint many surfaces in a short time. What’s more, a quart of this solution can cover up to 87 square feet, which, in our opinion, is pretty decent.
Furthermore, the formula is non-yellowing, which helps ensure that the wooden surfaces look great for a long time. Coupled with this is a crystal clear, gloss finish that takes the visual appearance of the surfaces to the next level by offering a clean and polished look.
We were quite pleased with the results delivered by it. However, the manufacturer needs to pay attention to the packing material used for shipping. One of the cans was a bit dented when it came to us, which was a bit of a disappointment, given the brand’s popularity.
Next up, we have a highly effective product from the house of Minwax, a brand that is committed to helping consumers meet every wood finishing need. On that note, meet the 630500444 Helmsman Spar Urethane that delivers satisfying results on most projects.
We were thoroughly impressed with what this product had to offer. For starters, it contains UV blockers that help minimize the sun’s fading and reduce graying effects to a bare minimum.
From outdoor furniture to kitchen countertops, you can use this polyurethane on a range of surfaces as per requirements. On top of that, it contains special oils that enable the finish to contract and expand with the wood as temperatures and seasons change. This means you can trust the coating to stand the test of time with ease.
We also loved that despite all the durability-enhancing additives, it maintains a crystal clear finish, making it a perfect choice for use over stains and light-colored wood. Finally, it is available on the market at a budget-friendly price, so you don’t have to pay an arm and a leg for it.
The only gripe we have against it is that it is a little too thin; it tends to soak into certain surfaces. As such, you would require more than one coat to achieve optimal results. Other than that, it works perfectly well and is worth the investment.
What We Like
Offers a crystal-clear finish
Durable
Can be used on a range of surfaces
Sports a budget-friendly price tag
What We Don’t Like
A bit on the thinner side
Material: Water based | Dimensions: 5 x 5 x 5 inches | Weight: 2.25 pounds | Dry Time: 8 - 10 hours | Durable: Yes | Finish: Gloss
As you already know, Rust-Oleum is one of the leading manufacturers of innovative coatings, so it made sense to add yet another quality unit from the brand to our list. The brand’s 207008 Marine Spar Varnish is made of a flexible yet thick polyurethane formula, which withstands tough weather conditions and adds brilliant color.
For us, the main highlight of this product is its spar varnish, which, besides maintaining an exceptional shine, offers top-notch resistance to damaging elements like salt, UV rays, and mildew. Therefore, durability would be the last thing to worry about with this product.
Thanks to the detailed instructions, you can easily apply and clean the coating in no time. Now, users owning boats will especially love this product, as it contains an antifouling formula that is specifically designed to prevent the buildup of marine growth on the boat’s base.
Apart from boats, it can be applied on a variety of other surfaces including decks, walkways, rails, bare metal, and a lot more. Beyond that, it features an affordable price tag, ensuring that it delivers exceptional value for money.
Overall, it is one of the top-rated products out there.
This product is an exceptional choice, considering its affordable pricing and durability. However, this might not be the right product for those looking for a thick-layered varnish that wouldn’t darken or yellow the wooden surfaces. Also, it has a longer drying time, which again might not be to the liking of some users.
Our next item is yet another Rust-Oleum polyurethane that works perfectly to offer top-quality finishes. Made using a water-based acrylic formula, the 260165 Ultimate Polyurethane from the brand delivers a protective matte finish that helps in reducing smudges and fingerprints. Let’s take a closer look at this product in the next few sections.
In our opinion, the USP of this product is its versatility. This coating can be applied to a wide range of interior surfaces such as trims, doors, cabinets, and more. Being water-based, it allows an easy cleanup, which can be done using just water and soap. Sounds good? Well, there’s more.
It has a drying time of 1 hour, which can actually be beneficial for DIYers and professionals working on projects that require small corrections. Plus, it offers a 150 square feet per quart coverage area, which we believe is ideal for nailing small projects.
As far as durability is concerned, the coat delivers exceptional stain and scratch-resistant finishes on wooden surfaces that can last for years to come. All these features make this product an option you certainly wouldn’t want to miss out on.
A handful of users have complained that this product is not meant to be applied to white-colored wood, as there was noticeable amber discoloration of the surface. But other than that, the product seems to be very handy in protecting a range of wooden surfaces.
What We Like
Allows for an easy cleanup
Provides a durable coating
Offers decent coverage
Can be applied to different wooden surfaces
What We Don’t Like
Not meant to be applied to white-colored wood
Material: Water based | Dimensions: 5 x 5 x 5 inches | Weight: 0.20 pounds | Dry Time: 1 hour | Durable: Yes | Finish: Matte
We are halfway through this list, and now it’s time to talk about a highly sustainable and affordable product from TotalBoat. Available in satin and gloss, the Gleam Marine Spar Varnish from the brand promises to have something in store for those looking to preserve the beautiful finish on exterior surfaces.
To begin with, this classic marine varnish features phenolic resins and premium tung oil that work to deliver a warm, beautiful, and transparent ambient finish on a variety of surfaces. Plus, it’s easy to apply; hence, you get a durable and radiant finish without breaking a sweat.
On top of that, it dries quite fast and can be recoated in just one hour. And the best part is that you can apply as many as 3 coats per day without the need for sanding between coats.
Now, the major issue with varnishes is that they often fail to maintain the finish due to temperature changes and humidity. But this product will come to the rescue as it contracts and expands with the wood during seasonal changes, thereby maintaining the finish of the surface.
It is available in both satin and gloss; therefore, you have the option to choose a finish that would best meet your requirements. Overall, one of the best car shines that any DIYer can hope to get their hands on.
According to some customer reviews, the cleanup requires applying toxic solvents like xylene, and can’t be done with just soap and water. So, make sure that you are careful. Other than this, it is a quality option available at a reasonable price.
General Finishes is among the leading manufacturers of innovative water-based finishes in the US. As such, it should come as no surprise that Exterior 450 from the brand is one of our top recommendations. It offers a durable coating that helps keep wooden surfaces free from damaging elements.
The best part about this product is that it is fortified with UV absorbers, which help protect and stabilize the integrity of the coating. Plus, it features built-in mildewcides that prevent the growth of mildew and mold on wooden surfaces, thereby adding to the durability of the surface.
Furthermore, it is easy to apply. In fact, this product can be rolled, sprayed, or brushed on surfaces at the user’s convenience. It offers a clear-drying finish that can be applied on a wide range of exterior surfaces, including entrance doors, patio furniture, fences, and much more.
We also loved the fact that it is available in quantities of 1 gallon and 1 quart, allowing you to choose a size based on the project’s requirements. From our experience with this product, we are sure that you’ll be more than happy with its results.
This product is undoubtedly an outstanding choice, given its versatility and durability. But having said that, the only gripe we have against it is the steep price tag, which may be beyond the buying capacity of most paint enthusiasts who are starting new.
What We Like
Highly functional
Easy to apply
Can be applied to protect a range of exterior surfaces
Prevents the growth of molds and mildews
What We Don’t Like
Tad bit expensive
Material: Water Based | Dimensions: 4.15 x 4.15 x 4.9 inches | Weight: 2 pounds | Dry Time: N/A | Durable: Yes | Finish: Satin
Are you looking for a premium polyurethane that provides superior protection to both interior and wooden surfaces? Then the 037125257040 from Deft will work out perfectly well, as it comes with a hoard of benefits that ensure you get spectacular results. Want to know more about this product? Well, then keep reading.
Being water-based, it offers a clear protective topcoat that is formulated with the latest urethane technology. This ensures that your surfaces are equipped with superior UV protection, thereby providing top-notch weather resistance and durability. Plus, you can apply it to a range of exterior and interior surfaces.
Eco-conscious users will especially love this product as it meets environmental regulations for VOC, thereby eliminating the short and long-term health risks of using polyurethane. Not to mention, it has a low odor, which, in our opinion, is a bonus.
We also loved the fact that this product can be applied through a spray gun, which is handy when you have many projects to deal with. Finally, all these benefits make this product one of the most sought-after polyurethane solutions by professionals.
Much like the Rust-Oleum 207008, it tends to add a slight tinge of yellow to white-colored surfaces. Even though this might be an issue for all, it surely is a disappointment for those who don’t want their white-colored wooden surfaces to turn yellow with time.
What We Like
Offer top-notch durability
Has a low odor
Can be applied to both interior and exterior surfaces
Eco-friendly
What We Don’t Like
Yellows' white-colored surfaces with time
Material: Water Based | Dimensions: 4.25 x 4.25 x 4.88 inches | Weight: 1 pound | Dry Time: 2 hours | Durable: Yes | Finish: Gloss
Next, we have included another Deft product, and honestly, this list would have remained incomplete without it. The 037125020040 Defthane Polyurethane provides an excellent finish on both exterior and interior surfaces, and it’s as good as the other options on this list. Obviously, there’s a lot more to it, so keep reading.
This product is specifically designed to be used in hard-use areas. As such, it has some of the most secure and best finishes for wooden structures. Plus, you would be pleased to know that it is highly versatile, meaning it is suitable for a range of interior and exterior surfaces, including furniture, cabinets, doors, and floors.
Once you apply this product, its formula dries in just half an hour, leaving an eye-catching and robust gloss finish that is resistant to both UV rays and water. This enhances the durability and longevity of the wooden surface to a great extent.
DIYers venturing into their first project will love the fact that it is easy to apply and that they will be the ones in charge throughout the entire process. Overall, it is one of the best qualities of polyurethane on the market that you simply cannot afford to ignore if you want the desired results.
Even though it has a faster drying time of just 30 minutes, the recoat time of this product is over 6 hours, which is too slow, in our opinion. But other than this, we don’t really have much to complain about this otherwise great product.
What We Like
Can be used on both interior and exterior surfaces
Delivers an eye-catching finish
Easy to apply
Adds to the durability of the surfaces
What We Don’t Like
High cure time
Material: Oil based | Dimensions: 4.25 x 4.25 x 4.88 inches | Weight: 1.8 pounds | Dry Time: 2 hours | Durable: Yes | Finish: Gloss
Let’s face it, knowing the brand names, specifications, and a few pros and cons is simply not enough when buying the best exterior polyurethane. Since different products have different properties, choosing the right one that would meet your project requirements is easier said than done.
That’s why we have come up with this buyer’s guide, explaining all the key factors that you should keep in mind when selecting an exterior polyurethane. Plus, we strongly advise reading this section carefully to avoid making any mistakes while purchasing.
Ease of Use
You should always go with a product that is easy to apply. This factor is particularly important for DIYers who are starting new. Needless to say, the more your polyurethane is easy to apply, the less professional help you would require. In this way, you can ensure that you are cutting down on the additional expenses required to hire a professional.
Durability
Durability is one of the essential factors that you need to consider when buying an exterior polyurethane. Your product should be able to offer long-lasting protection to your wooden surfaces against various weather elements. It will help you save expenses on repairs and the time you need to refinish the surfaces.
Drying Time
The drying time is a crucial factor for professionals who work on projects within a limited timeline. So, if you are one of them, we suggest going with a product that has a fast drying time. In this way, you will be able to complete multiple projects throughout the day.
Finish
Polyurethane solutions come in different finishes, the most common ones being satin, gloss, and clear. Before purchasing, confirm what finish your product offers, as it will determine how your wooden surfaces will look.
Flexibility
You might already know that wood expands and contracts due to changes in weather conditions. As such, it is best to choose an exterior polyurethane that features the right amount of resins and oils to enable the coating to expand and contract with the wood. So, make sure you check the specifications for flexibility before making a decision.
Resistance to UV Rays
Truth be told, polyurethane solutions that offer a clear finish are usually not as long-lasting as other finishes. Since the clear coating allows the wooden surface to be visible, naturally, it makes the wood not as protected from the sun’s harmful UV rays. So, achieving quality protection for a surface that has a clear finish is a bit complicated.
Therefore, you should ideally go with a product that features titanium dioxide, as it can reflect the UV rays back. That said, keep in mind that no additive is 100% functional at blocking the UV rays.
Oil-based or Water-based
Before you make a purchase, you should have in-depth knowledge of the two most common types of polyurethane formulas available on the market: oil-based and water-based.
A. Oil-based Formula
They offer more durability but are a bit more expensive than water-based polyurethane. They are the ideal choice for exterior wooden surfaces as they offer top-notch protection from harsh weather elements. Plus, oil-based formulas contract and expand with the wood, which further adds to the durability.
B. Water-based Formula
Polyurethane featuring water-based formulas is popular for showcasing the natural finish of wooden surfaces. They protect the wood from drying out by offering enough hydration and enhancing the overall beauty of the surfaces.
What should I consider when selecting an exterior polyurethane?
When selecting an exterior polyurethane, there are several key factors to consider. These include ease of use, durability, drying time, finish options, flexibility, resistance to UV rays, and whether it is oil-based or water-based.
How important is durability in an exterior polyurethane?
Durability is crucial because you want your polyurethane to offer long-lasting protection against weather elements. A durable product will save you time and money on repairs and refinishing in the long run.
Why is flexibility important in an exterior polyurethane?
Wood expands and contracts with changes in weather conditions. To prevent cracking or peeling, it’s important to choose a polyurethane that has the right amount of resins and oils to accommodate this movement. Check the specifications for flexibility before making a decision.
What are the differences between oil-based and water-based exterior polyurethane?
Oil-based polyurethane offers more durability and protection against harsh weather elements. It expands and contracts with the wood, enhancing its durability. Water-based polyurethane, on the other hand, showcases the natural finish of wooden surfaces and provides hydration to prevent drying out.
Conclusion
So, that brings us to the end of our review-based guide; hopefully, it will help you make an informed purchase.
But before we drop the curtains, let us tell you about our top picks from this list. The Rust-Oleum 250041H is a good choice if you are looking for a product that can be used on a wide variety of surfaces and has a low odor.
Closely following it is the Minwax, mainly because it offers a crystal clear finish and sports an affordable price tag. However, if you are looking for an item that offers a durable coating and that is specifically designed for boats, we suggest going with the Rust-Oleum 207008.
On that note, it’s a wrap. Until next time, take care!
Best watercolor paints are essential tools for both students developing their skills and professional artists refining their craft. Unlike generic paints, watercolors are judged by their pigment concentration, lightfastness, granulation, and blendability, all of which directly affect transparency, vibrancy, and archival quality. Beginners often make the mistake of buying the cheapest sets available, but using low-grade pigments can hinder progress and produce dull results. To truly improve, artists need to understand the difference between student-grade and artist-grade paints, and how each supports growth at different stages. For those just starting, our step-by-step guide on how to paint with watercolor for beginners is a valuable companion to this list. In this article, we review the 8 best watercolor paints, including options tailored for affordability, portability, and professional-grade performance, so you can confidently select paints that match your artistic goals.
Best Watercolor Paint Sets
Here is the list of the 8 best watercolor paints that you can use to bring your artwork to life.
If you’re just trying out watercolor paints, this set of watercolor paints is best. There aren’t too many paints to confuse you – just a set of 12 basic shades that bear the name of the virtuoso Post-Impressionist artist. But, rest assured that these are all incredibly high-quality paints – much better than a few more expensive ones, too!
Experience
When it comes to watercolor paints, a few important factors you should consider include price, the number of colors, the volume of the tubes that you get, and the lightfastness. This paint delivers on all fronts except the number of colors – you get a generous serving of the 12 colors, which can be used to create some truly exquisite and subtle effects.
The paints that you get are fairly consistent in nature and will give you the same shade over and over. You get 10 mL of paint in these tubes. You also get a Nylon brush and a palette to mix your colors on with this particular set. People are often surprised about this being a “student grade” paint – such is the quality of the paint in this set. You definitely won’t go wrong with this!
Pros
Exceedingly good lightfastness
Basic shades, but they mix very well, and you can end up creating wonderful effects
A good quantity of paint as well
Cons
Somewhat expensive compared to other student/entry-level paints
Dimensions: 9.24" x 3.99" x 0.74" | Weight: 4oz | Finish Type: Opaque | No. of Colors: 12
Winsor & Newton Cotman Water Colours are a range of water...
Cotman Water Colours possess good transparency, excellent...
When people think of “student watercolors”, Winsor & Newton is the brand that is most likely to come to mind. Not just student paints – they’re an established name in the professional space, too. A number of factors are in play here – the high rating of lightfastness, the permanence of the paints, and the flexibility of getting these paints either as a tube or in pans.
Experience
There’s a lot of flexibility involved with this set of paints. First, you’re not restricted to buying a particular number of paints only – you can choose from among the 6, 10, 12, 14, or 24 best shades on offer. Further, you can buy both pans and tubes as per your requirement. These happen to be very affordable, too.
The texture that these paints deliver on the paper surface is great. The colors are also vibrant and punchy – far from the color you’d expect an “entry-level” set to have.
Then we come to lightfastness and permanence – both of which are rated as high as the ratings go. The lightfastness is rated at either I or II (excellent or very high) and the permanence is rated as AA or A (extremely permanent/permanent). If nothing else, this should have you convinced that these paints are the real deal on all fronts – not just one.
Pros
Incredible lightfastness and permanence ratings
Colors are vibrant and punchy, delivering good texture
Affordable and you can choose between a number of sets
Cons
The fillers that they use are synthetic and not natural
Dimensions: 2.56" x 5.12" x 0.87" | Weight: 3.17oz | Finish Type: Transparent | No. of Colors: 12
WATERCOLOUR PAINT - Unleash your creative genius with...
VIBRANT COLORS - 18 colors; Chinese White, Lemon Yellow,...
Coming from the same umbrella company as the set we’ve reviewed above, Reeves has been in the market since 1766. Like the one above, they’ve managed to put together a very convincing set of 18 paints with 10 mL volume each. However, here’s the USP: it is very affordable. It comfortably slots into the budget/entry-level paint category!
Experience
You get a whole lot of paint for the money – and these are good paints, too. Though they come out of the tubes in a somewhat watery manner, that’s because they’re water-mixable. This effect disappears once you mix them with water. They are known to dry very quickly and have no weird, strong smell. The colors are very consistent as well.
This set makes a lot of sense for someone wanting to try watercolors out – the price of admission, usually high, becomes much more manageable this way. Do note, however, that at this price, it’s impossible for Reeves to give you a paintbrush for mixing and a palette, so you’ll need to spend a little more here. Otherwise, this set delivers the best in both quality and quantity.
Pros
Comes with several paints, reducing the overhead of mixing paints over and over
Perfect for those wanting to try watercolors out
Consistent paint, good finish
Cons
No accessoriesare bundled with this particular paint
Dimensions: 0.75" x 7.24" x 7.89" | Weight: 13.1oz | Finish Type: Pigmented | No. of Colors: 18
Prima Marketing Art Philosophy Watercolor Confections...
There are some watercolor sets that you can’t go wrong with, even if you try. The artist-grade Classics collection of watercolor paints offered by Prima Marketing is definitely one of these. You get pans and not tubes in this set, which works out well because tubes can get messy sometimes and risk spilling. The transparency of the paint itself is astoundingly good for starter paints.
Experience
This set is again a steal at the bargain basement prices you get this set at. The lightfastness of the paints and the permanence are good enough for what you pay for, but the major kicker here is the color palette that comes with the set. You get 12 classical shades of blue, green, yellow, red, and a few other unique pre-mixed shades.
Another benefit of getting this set is that you don’t have to buy another set in order to replenish shades – Prima Marketing gives you the option of buying separate shades as well. This works out well in case there’s a particular shade you need – and is cheaper in the long run. A small disadvantage is that permanence and lightfastness information is all word of mouth.
Pros
Comes with several great shades
Includes a palette for mixing colors
Can buy shades separately, definitely economical compared to a lot of other offerings
Cons
No brush is included for mixing paints
No lightfastness rating
Dimensions: 5" x 3" x 1" | Weight: 4.9oz | Finish Type: Gloss, Satin | No. of Colors: 12
While several paint sets focus on your own presence of mind to navigate color mixing, this one removes that pressure from you and lets you paint in peace. Sennelier La Petite brings to the table a wonderful, honey-based watercolor set with 24 unique shades, which come with a palette for mixing these paints. Their palette even has a hand strap to keep it secure!
Experience
This kit, like the ones reviewed above, is unlikely to disappoint all but the very choosy artists. The colors are rated incredibly highly for permanence, and most colors have excellent lightfastness ratings – your watercolor paintings will definitely last very long when you use these paints.
These are all pan watercolors, so you don’t have to worry about eking out the last drop of paint from tubes. The colors on offer include severalof Sennelier’s own shades, which are truly unique and beautiful. You can also purchase some of their other color pans as individual items.
The mixing area, which comes with this set is large enough to accommodate a number of paints. This is useful for when you’re working on more complex tasks and you want to mix up multiple colors for this purpose. All in all, this set of watercolors is one of the best you can get as beginner!
Pros
Comes with a mixer for creating a variety of colors
Permanence and lightfastness are guaranteed with this set
24 shades, some are exclusive to Sennelier
Comes with a strap for the mixing palette
Cons
A palette and mixer are present, but where’s the mixing brush?
Dimensions: 9.25" x 4.75" x 1.4" | Weight: 6.3oz | Finish Type: Satin | No. of Colors: 24
DANIEL SMITH is the Innovative Manufacturer of Beautiful...
The DANIEL SMITH Watercolor PrimaTek Set is designed to...
Taking a radically new approach towards beginners, the Daniel Smith introductory watercolor paints rely on minimalism and your own presence of mind to create the artwork of your dreams. It comes with just three colors in two different variants, warm and cold – and the ball is now metaphorically in your court when it comes to mixing them up and creating custom shades.
Experience
This paint set takes minimalism to a whole new extent. You get just six paints to play around with, and it’s up to you to determine how to make the best of these warm/cold paints. However, fret not – for one, they have around 238 shades on offer in their catalog, which you can order separately. Secondly, there are try-it-out charts available for the entire range of colors.
We recommend this artist-grade set because, on your journey toward being an artist, it’s crucial to understand color mixing and dealing with a paucity of resources. It’s best if you learn this skill right at the start, so you won’t be handicapped later. These colors are brilliant and are priced very economically.
Further, there are some truly unique color gradients/mixes that no manufacturer offers right off the bat. Starting with just six paints will help you immensely later on!
Pros
Wonderful lightfastness, vibrancy, and permanence
Can purchase refills individually
Great learning experience on mixing, also highly recommended for experienced students
Cons
Gives you just the color tube and nothing by way of accessories
Dimensions: 3.38" x 3.75" x 0.63" | Weight: 1.76oz | Finish Type: Matte | No. of Colors: 6
Either straight from the tube or when mixed with white,...
Only finely ground pigments are used in making this smooth,...
Coming back to more generic student paint kits, this one comes with all the bells and whistles required for a student to get going with the process of watercolor painting. You get a stunning array of 12 colors, of which a few are standard and the rest are unique shades. These are also best for those who like pigment information – their website lists the exact pigments of the paints!
Experience
With this set, you really do get everything you need to get started – that includes paints, a mixing palette, and a good quality mixing brush too. The colors are rated very highly for both lightfastness and permanence, which is why ,despite it landing in the beginner category, it’s used by professional artists widely.
This paint impresses on a lot of fronts – not just the measurable aspects. You’re going to see brilliant shades in your work, whether you go as is or mix considerable amounts of white paint for lighter shades. This is the perfect bridging product for those wanting to go for more professional paints.
Pros
Comes with all the things you need to get started
Great quality of paint
Useful for both professionals and students alike
Cons
Maybe a little bit pricey for some
Dimensions: 10" x 1" x 7.9" | Weight: 6.1oz | Finish Type: Matte | No. of Colors: 12
Beginner Watercolor Tube Set - Each 12ml (.4oz) tube of...
Adaptable Paint - The water color paint featured in this set...
The Daler Rowney Aquafine set of watercolor paints is aimed exclusively at beginners. They are priced very inexpensively, come in around 48 shades and give good watercolor painting performance relative to their price. They are available in both half pans and watercolor tubes, so you can go for either, depending on your personal requirements.
Experience
This set comes in several varieties, perhaps the most we’ve seen in any beginner watercolor set we’ve reviewed. This includes the pocket set, which is best for artists who prefer plein air instead of their studio. You can go for just 5 paints in a set, right to the largest set of 20 paints, which includes some of their most common as well as some unique shades.
Some of their sets come with a brush – great for beginners. Their metal box set is crafted to perfection and includes a mixing palette as well. When it comes to lightfastness and permanence, Daler Rowney’s set is good but not quite among the best, which is excusable given how little they cost compared to the competition.
Their transparency and lightfastness are also very compelling. All in all, this set is great for beginners, even though there are some obvious compromises here.
Pros
Good lightfastness and permanence for the price
A lot of variety in the sets you can pick, can order individual shades as well
Comes in several sizes from 5 mL to 29.5 mL
Cons
Some sets have better lightfastness
Dimensions: 10" x 1.2" x 8" | Weight: 18.72oz | Finish Type: Gloss | No. of Colors: 24
Best Watercolor Paint Set For Beginners Comparison Table
Now that we’re done with the best starter paint kits, we move on to proper professional watercolors. Here, the permanence and lightfastness of professional watercolor paints are all but guaranteed – instead, the onus of the conversation will be centered around the look and feel of the paint, as well as other important factors.
The quality of colors and how well they mix, their opacity, and their granularity become much more important as you become more experienced at watercolor painting with watercolor paints.
More finely ground than any other artist watercolor
Holbein has been around in the watercolor paint market long enough to realize what professional artists need from their paints. Hence, this paint comes with literally everything you could want from your watercolors and then delivers a superb watercolor painting experience on top of it. Good things come in small packages, and so does this set of paints.
Experience
With 24 superb quality paints coming into the picture (pun unintended), you’re unlikely to go wrong with it. Holbein’s paint quality is fastidiously maintained, and this is visible right on their website. You can easily see in-depth details about each shade of paint that they sell, including the pigment information, which is crucial for large-scale pieces that require multiple paint refills.
You can achieve a number of crisp, subtle transparency effects using these paints. Even the 5mL tube runs through several watercolor painting sessions because of the incredible paint quality Holbein gives you. You can easily get refills for the exact pigment and shade from a number of online retailers as well as in your local art supplies store.
All in all, Holbein delivers a wonderful experience with vibrant paints, don’t crack and last a long time – and are also affordable (compared to a vast variety of paints on the market).
Pros
Comes with some paints, many of which are unique to Holbein
5mL of paint volume lasts long because of the variety and thickness of the paint
The texture of the paint is absolutely superb
Cons
Nothing at all
Dimensions: 4.2" x 0.8" x 10.2" | Weight: 11.3oz | Finish Type: Matte | No. of Colors: 24
🎨 THE BRAND: Schmincke has been producing the best,...
🎨 WATERCOLOR SET: The HORADAM watercolor color box from...
This set comes from the antique German company Schmincke Horadam, which has over 130 years of experience in creating some of the best artist supplies. The paint is without fault – but at the same time, it comes with an incredibly detailed color guide as well. Containing detailed descriptions of opacity, permanence, granulation, color indices, and much more, it is a stunning color guide.
Experience
Some paints wow you not just by the quality, but how much easier they make your career as an artist. This paint set does exactly that – not only does it deliver on each and every front as far as professional paints are concerned, but it also excels at describing all the paints that they have on sale. They have a total of 139 paints on offer – and many of them are truly unique.
Their production processes are such that these paints are created fastidiously over a time span of four months. The thing about German engineering is that while it may not be the most aesthetically pleasing, there will never be compromises on quality.
The box this set of paints comes in has the same situation – it is rounded instead of edged and will last much longer than your generic steel box. This set also comes with a half-pan paint option, which means you can either go for watercolor tubes or pans as per your need. This is one of the very best watercolor paint sets money can buy – hence the cost.
Pros
Comes with a metal box which may very well last generations
The color guide is stupendously detailed
Paint quality and granularity are beyond reproach
Cons
Doesn’t look like it’s worth the outlay at first sight, does not come with a brush
Dimensions: 4.33" x 1.57" x 8.66" | Weight: 20.48oz | Finish Type: Opaque, Transparent | No. of Colors: 48
While we already went through one set of colors by the brand, it’s the professional set that has put Winsor & Newton on the map when it comes to watercolors for watercolor painting. This set is best renowned all over the world for its permanence, the texture of the paint, and the usage of environmentally friendly and non-toxic materials to produce stunning paint shades.
Experience
This paintbox is very different from the Cotmans, which are the first thing that comes to mind when one thinks of the brand. This paint comes with a number of striking characteristics that set it apart from the crowd. First off, there are no toxic paints in this set – even those that were generally manufactured using heavy metals are made using the nearest nontoxic substitutes.
Then we come to the permanence ratings, which are second to none. An awe-inducing 98% of paints in their entire collection are rated either excellent or very good (A or AA) for permanence. For lightfastness, opacity, and texture, the story is pretty similar as well.
You get small watercolor tubes of paint in this set, but you can easily buy extras. You also get a mixing palette and a good quality brush, which is best for intermediate painters looking to go the professional way. All in all, this set is a wonderful addition to your repertoire.
Pros
Very affordable when compared to other such paints
78% of their paints are derived from the same pigments
The colors have impressive saturation and compete with the very best on the market today
Cons
We’re nitpicking here, but we would like larger tubes in this set – 7.5 mL would be perfect
Dimensions: 4.72" x 7.87" x 0.51" | Weight: 11.3oz | Finish Type: Transparent | No. of Colors: 24
Artist quality watercolor paint made with natural blackberry...
Watercolor made with honey absorbs moisture from the air...
If it’s the final word in fastidiousness and attention to detail that you’re seeking, you’re looking at the perfect product for you. This paint is also sourced and produced responsibly. Their pigment loading process proves that their manufacturing standards are second to none. Further, their paints are unique in that they’re made out of honey!
Experience
These products have an ASTM lightfastness rating of either I or II – you’ll never have to worry about the longevity of your work! Out of the 70 paints they have on offer, a 61 score is the highest category. Permanence is pretty much the same story. M. Graham provides detailed hue information so you can mix and match between a number of brands, should you need to.
As for the inclusion of honey in this watercolor paint set, this comes as a result of products that tend to dry out easily if left on their own for some time. M. Graham decided that this problem should not plague paints meant for professionals – and hence, these paints last for ages and ages without fail. There are no problems with the texture that you get either – you get your money’s worth.
They’re also committed to giving you 100% non-toxic, renewable energy-produced products – for an industry that has traditionally been associated with toxic waste, this comes as a breath of fresh air.
Pros
Excellent quality and texture of paints
Responsibly sourced and manufactured, ecologically safe
Will not dry, even if they’re left for a long time without use
Cons
70 paints is too less, most manufacturers have around 120-130 paints on offer, a few shades have very little variety
Dimensions: 3.12" x 0.75" x 4.12" | Weight: 2.4oz | Finish Type: Pigmented | No. of Colors: 33
A honey-based watercolor - giving incomparable brilliance...
L'Aquarelle Sennelier has been produced in the same way for...
This set is the professional variant of the La Petite student watercolor paint kit we reviewed earlier. The basic formula stays the same; however, keeping in mind the professional nature of this kit, the pigment loads have been jacked up. It comes with honey and Kordofan Gum mixture in the paint, leading to improved control over transparency and a better texture.
Experience
This watercolor paint comes with the same benefits we established in the earlier review – Sennelier produces some of the best and most unique shades on the market today. The honey and gum mixture makes sure that you’ll be able to use these paints for much longer periods of time than most other varieties. Plus, the work won’t crack over time due to dryness.
In their solid repertoire of paints, nearly every watercolor paint has an excellent lightfastness rating. The opacity control is always in your hands with this set, and the texturing results in some beautiful work. The pigment concentration is also appreciable compared to a number of other watercolor paints.
The only problem is that this French brand is a tough find – only a few art stores keep stock of them, and it’s even harder to find particular shades because Sennelier is not a mass producer of the best watercolor paints. However, if you do find them, you’re unlikely to be disappointed.
Pros
Comes with excellent opacity, permanence, and light-fastness properties
Honey and gum mixture givesa unique personality to the paint
Watercolor paint stays rewettable for long periods of time
Cons
Some shades can rarely be found
Dimensions: 8.66" x 3.54" x 0.39" | Weight: 1.6oz | Finish Type: Metallic | No. of Colors: 5
Rembrandt watercolors are proudly crafted in Holland.
These brilliant colors are made from the purest pigments and...
This belongs to the same manufacturer whose Van Gogh set we reviewed a little while ago. While that set featured amazing units, when it comes to beginners, this set contains some of the very best paints, period. This set features a staggering 48 half-pan paints, which all have excellent lightfastness, transparency, and permanence.
Experience
This box of watercolors opens up in a three-way manner. One side contains the 48 half-pans, one has four different areas for mixing paints (it is very generously sized too), and there is one side that covers it all. Royal Talens includes a red, sable paint brush for mixing, but we believe most professional readers already have a few sets they’re comfortable with.
When it comes to the colors, these paints are on a different plane altogether. The ratings for all parameters you can think of, as well as the texturing of the paint, are absolutely spot on. A few products we review are good enough to be called faultless – and this happens to be one of those very few paint sets. It’s a great set, but also mightily expensive.
Pros
Comes with a huge variety of paints in a travel-friendly format
The included brush is a nice touch
The ratings, as well as the overall paint feel, are very hard to match
Cons
While it may be one of the best, it is also incredibly expensive
Dimensions: 9.25" x 9.13" x 1.25" | Weight: 4.6oz | Finish Type: Transparent | No. of Colors: 22
Watercolor Paint Set For Professionals Comparison Table
Yes, you can generally mix watercolors from different brands, as long as they are of the same type, either tube paints or pan paints.
Are there different qualities of watercolor paint sets?
Yes, watercolor paint sets are available in student grade or artist grade quality, with artist grade offering better color performance and lightfastness.
What's the difference between watercolor and gouache paint?
While both are water-based, watercolor paints have a translucent quality and gouache is more opaque. Watercolor paint sets typically feature watercolor paints only.
Can I use watercolor paint on any type of paper?
It’s recommended to use watercolor-specific paper, which is thicker and more absorbent than regular paper, to avoid buckling or ink saturation.
How do I take care of my watercolor brushes?
Clean brushes with water after each use, reshape the bristles, and store brushes with the bristles facing up to prolong their lives.
Conclusion
It's no secret that watercolor painting can be an incredibly satisfying hobby, and having the right paint set can significantly impact your artistic journey. After extensive research and analysis of various watercolor paints, we can confidently recommend some top options that cater to different needs and preferences.
From the above 8 best watercolor paints, here are the top three expert recommendations:
The Winsor & Newton Cotman Watercolors, on the other hand, are a good option for those seeking flexibility, as it gives you the choice between several paint sets and both tube or pan formats.
Lastly, the Reeves 18-Pack Water Color Paint Set is the right choice for those on a budget, offering a generous amount of paint in 18 unique shades without breaking the bank.
This wraps up our discussion about the 8 best watercolor paints on sale today. Whether you’re a beginner just starting out with painting with watercolors, or you’re someone with years of experience behind you, these paints are unlikely to disappoint. Filtered from among a vast number of paints on offer, you won’t go wrong with them.
Pair them up with great watercolor paper, and your artwork will definitely shine. All the best with your artwork, and have fun painting!
Leaf mulchers and shredders are essential gardening tools for managing piles of fallen leaves by turning them into compact mulch for composting or disposal. Designed with electric or gas-powered motors, shredding lines or steel blades, and safety guards, these machines reduce yard waste volume and save hours of manual raking. The best models offer a high leaf-to-mulch reduction ratio, efficient collection systems, portability, and eco-friendly operation for both small residential yards and larger properties. In this guide, we review the 7 best leaf mulchers and shredders, comparing motor efficiency, safety features, storage convenience, and environmental impact to help you select the right one for your gardening needs.
Best Leaf Mulchers & Shredders
Here's the list of the 7 best leaf mulchers & shredders, so you can easily choose the right one to tackle those piles of shredded leaves and make yard cleaning a breeze.
If you’re still not convinced by the Trivac Blower/Mulcher, here’s an even more compact and portable alternative- the WORX Trivac 3-in-1. Although there isn’t much difference between these two products, the 3-in-1 unit raises the bar even higher for portability with its carry-on bag feature. On that note, let’s check out why we liked it!
3-IN-1 DESIGN: Leaf blower, mulcher, vacuum in one for...
POWERFUL AIRFLOW: Delivers 350 cfm and 210 mph for clearing...
Why Did We Like It?
The WORX Trivac series boasts multiple best-selling products, one of which is the popular Trivac 3-in-1 Electric Blower/Mulcher/Vacuum. If you’re searching for an inexpensive machine for everyday use, we cannot have a more appropriate recommendation than this unit. As for us, we became instant fans of its ultra-ergonomic design, which also features a shoulder strap for increased mobility.
You can wear it as a bag and walk around while cleaning your garden or yard with only one hand. It’s incredibly lightweight, so we didn’t face any shoulder fatigue while carrying it around for a lengthy cleaning session. It offers an average mulch ratio, which suffices for small cleaning tasks.
Furthermore, its tube is specially designed at a curved angle, which helps it penetrate hard-to-reach bushes and drains to ease up your vacuuming jobs. The product also features soft-grip handles, which make it comfortable for users of all reach lengths to use it. Overall, it may not qualify as an industrial-use product, but it rules when it comes to personal jobs.
What Could’ve Been Better?
The Trivac 3-in-1 turned out to be surprisingly loud, which is a significant disadvantage for a tool that you have to wear while working. Unlike the former Trivac mulcher, this unit doesn’t mulch the leaves straight into the garbage bin.
Pros
Very lightweight and portable
Ergonomic design
Decent mulch ratio
Reasonable price tag
Cons
Loud motor
Mulch Ratio: Average | Dimensions: 20 x 15 x 9 inches | Weight: 11 pounds | Voltage: 120V | Portable Yes
Although Earthwise isn’t one of those names that we come across too often, its out-of-the-box innovations can surely give major brands stiff competition. Likewise, its GS7001515 unit comes with an advanced 15-amp motor that makes leaf mulching look like a cakewalk. However, this unit has a lot more to offer than that, so let’s check it out!
Powerful 15-Amp Electric Motor: Delivers strong, consistent...
Optimized for Dry & Aged Material: Designed for best...
Why Did We Like It?
We were looking for a powerful yet affordable leaf mulcher when we came across the Earthwise GS7001515 unit. Surprisingly, this product seems to offer a lot more than what we pay for it. It beats most of the WORX leaf mulchers in terms of power and efficiency, and the credit goes to its long-lasting 15-amp electric motor. It offers a satisfying all-in-one mulching/vacuuming experience with its mobile dust collection bin.
Similar to the WORK Trivac, this product is capable of transporting shredded leaves directly into its collection bin. Apart from leaves, you can also use this product to clean almost any kind of waste. However, the icing on the cake here is its 1.2-bushel bin, offering you enough space to mulch heaps of garbage at once, without consuming a lot of time.
This machine further makes an appropriate companion for composting jobs, because it can chip small tree branches and twigs, too. We’re also a fan of its advanced safety features, including a leaf chute and tamper tool.
If you’re new to mulching and shredding, you can prevent accidental hazards by using its overload protection feature. Not to forget, its sturdy rear wheels make it reasonably convenient to move around.
What Could’ve Been Better?
Although it can mulch small twigs, it would’ve been better if the product were capable of chipping large branches like the WORX models. Also, we personally find it a tad heavy for a medium-duty leaf mulcher. The manufacturers should further consider issuing a warranty period for this product, too.
Pros
Multi-functional leaf mulcher
Spacious disposal slot
Value-for-money product
Easy to use and store
Cons
A little heavy
Mulch Ratio: High | Dimensions: N/A | Weight: 29.8 pounds | Voltage: 120V | Portable No
Globally established brand WORX Tools Co. has bagged another position on our list with the latest addition to its Trivac product range. It’s popular among DIY gardeners as an efficient leaf blower-cum-mulcher tool under a reasonable budget. If you’re trying to hit two birds with one stone, you should aim for this product. Let’s dive deep into its core features!
TRIVAC 3-IN-1 DESIGN: Leaf blower, mulcher, vacuum in one...
POWERFUL AIRFLOW: Delivers 600 cfm for clearing large areas...
Why Did We Like It?
The Trivac range has undoubtedly redefined user convenience with such a vast palette of features that it offers without costing a fortune. It’s pretty impressive how this product can mulch the huge piles of leaves straight into your trash can while giving you 100% user control. Honestly, it feels like a mini-me version of the popular WORX 13-amp leaf shredder- only a lot lighter and quicker.
It comes equipped with an adapter bag and an extended vacuum tube, which can be directly attached to the opening of your garbage bin. While being used, the machine automatically transports the mulched leaves into the garbage container through the tube. Not only does it save you plenty of time by disposing of the shredded garbage automatically, but it also leaves very little post-work cleaning to do.
Furthermore, you get a brand-new 26-gallon garbage bin with this machine, which saves you from buying a new bin if you don’t have one already. Also, its electric motor is specially engineered to produce very low noise levels, which was a much-needed upgrade since the loud WORX 13 amp unit.
What Could’ve Been Better?
We’re a little disappointed that the product doesn’t come with any warranty. Also, as we’ve said, it’s a compact mini-me version that may not deliver as much power as our other recommended leaf shredders. And on the flip side, it appears a little pricey for the product category it falls in.
Pros
Extremely compact and lightweight
Transports mulched garbage into the bin
Quiet and smooth motor
Easy to use and carry
Cons
Lacks power
Mulch Ratio: Low | Dimensions: 35.5 x 10 x 14 inches | Weight: 8.6 pounds | Voltage: 120V | Portable No
We’ve recently tested the 51621 UltraPlus, one of the best-selling leaf mulchers manufactured by the international power tools brand, Toro co. All we have to say here is that if you’re not looking for a leaf mulcher that’ll cost a fortune, this product can be a smart short-term investment you can consider.
Superior blowing and mulching proven by controlled...
Powerful up to 250 mph degree. 350 CFM blow mode and 410 CFM...
Why Did We Like It?
Some of us usually look for low-priced products that come in handy during seasonal yard cleaning, and the Toro leaf blower is a perfect option for those people. It’s probably the most inexpensive unit on our list, so you can always go for it if you’re running short of cash. Also, we found it pretty appropriate for beginners to use- that’s how easy it is to operate.
The manufacturers haven’t compromised the product efficiency for cost-cutting either, which is proven by its multifunctional usability. Although it’s a decent mulcher, it’s also pretty good at leaf-blowing and vacuuming yard waste.
In fact, the manufacturers claim that this product can offer a 97% size reduction from leaf to mulch, which is pretty amazing. It also uses a dual metal propeller, which gives you finely shredded leaves every time. Also, this unit offers a maximum capacity of 410 CFM when it comes to vacuuming.
However, what we’ve liked the most here are its multiple speed modes. In other words, this product offers a high-speed mode for large-scale cleaning and a low-speed mode for small tasks, giving total control to the users. You can use it anyhow and anywhere you want because it’s also very lightweight and easy to carry around.
What Could’ve Been Better?
As we’ve mentioned before, there’s no guarantee that this product will last you for a long time. Considering that it’s manufactured in China and is available at a surprisingly low price, it may not even last for a few months. Neither could we find a lot of customer reviews for this product, which makes us seriously question its reliability.
Pros
Meager price
Lightweight frame
Can blow leaves at 250 mph
Suitable for beginners
Cons
Not reliable
Mulch Ratio: High | Dimensions: 45 x 9 x 14 inches | Weight: 8.9 pounds | Voltage: N/A | Portable Yes
Commonly known as “the ultimate mulcher” among professionals, the Flowtron LE-900 surely has a few heads turning with its top-notch power and performance. This product offers a huge variety of useful features in a lightweight and portable frame, which makes it an ideal household tool. Let’s find out more about this product!
This product doesn’t miss out on a single useful feature that a leaf mulcher must have. If you’re stressed out by cleaning out your garden and porch daily, this is a quick purchase that you can consider to make your daily life a little more comfortable. Also, we’ve found several similarities between this unit and the WORK Travic product, the biggest of which is the direct garbage disposal feature.
Yes, the Flowtron allows you to dump the shredded leaves straight into a garbage bin, too. In case you don’t have a bin, you can hang the mulcher on the included stand right above your compost pile for better results. However, it gets an advantage here, as it weighs around 17 lbs. Being a lightweight product, it’s a lot easier to carry around without stressing your arms.
Also, we’re a fan of its detachable air filter, which extends the longevity of its motor by minimizing dust and dirt. It mulches leaves swiftly and precisely like a ninja- all thanks to its authentic double-cutting line design. Noteworthy to mention, we were able to reduce 11 bags of leaves into a single bag of mulch, which shows that this unit offers a decent leaf-to-mulch ratio.
What Could’ve Been Better?
There’s honestly not much to complain about this product, except for how often the wire cutters need to be replaced. Also, we wish that it could be a little more compact because it can be a bit troublesome storing this equipment. And we’ve found most of the buyers complaining that the switches on some models tend to malfunction, which can be a manufacturing defect.
Pros
Lightweight and portable
Decent mulch ratio
Reasonable price tag
Ergonomic design
Cons
Storage issues
Mulch Ratio: High | Dimensions: 23 x 19.5 x 19.5 inches | Weight: 17 pounds | Voltage: N/A | Portable Yes
Any conversation about high-performance power tools is always incomplete without a Black and Decker product. We were fortunate enough to have a hands-on experience of the much-talked-about BV6000 multifunctional mulcher/vac/blower; we can’t wait to share our experience!
This 250 mph corded leaf blower blows through leaves and...
Disposable leaf bag system for easy, no hassle leaf...
Why Did We Like It?
B&D is one of those brands that don’t need any introduction when it comes to premium household tools. And it's all-new 3-in-1 electric mulcher easily stands out as one of the best leaf mulchers, regardless of pricing categories. Despite being ridiculously inexpensive, it surpasses most of our recommended products in terms of the leaf-to-mulch ratio. Yes, its 16:1 mulch ratio is surprisingly too good for a product at this price bracket.
Speaking of performance, the BV6000 features a 12-amp motor, which can be used both for blowing and vacuuming. Furthermore, it also works as a decent mulcher that can shred around 16 bags of leaves into one, giving a very close competition to the Super Handy Electric Mulcher.
However, we’d say that it features the most efficient vacuum on our list, as it’s proven to operate 50% quieter than most of the leaf vacuums available in the market.
Operating this device is as easy as cake because it comes with fewer buttons. It features a large center button, which turns on the vacuum with a single click. We’re also pretty impressed by its ergonomic design and portable frame and would recommend it to any household owner looking for a quick fix to their yard-cleaning nightmares.
What Could’ve Been Better?
We’re a little upset that this product isn’t available as cordless, as the long wires can get in your way while working and cause an accidental hazard. And although it’s pretty good for small-duty jobs, it isn’t as powerful as the stationary products on our list.
Last but not least, we’ve noticed that the machine tends to get heavier while vacuuming leaves, which is a little inconvenient.
Pros
Speeds up to 250 mph
Low price tag
Ergonomic body
12 amp motor
Cons
Not powerful
Mulch Ratio: High | Dimensions: 15.63 x 1 x 20.6 inches | Weight: 8.1 pounds | Voltage: 120V | Portable Yes
As we move on with our list, let’s have a quick peek at one of the easiest-to-use leaf shredders that we’ve tested recently. The 13 Amp electric leaf mulcher by Worx has been making waves in the market with its impressive 11:1 leaf-to-mulch ratio. Besides, it also makes an ideal companion for those who haven’t used this sort of equipment before.
53 GALLONS/MIN: That’s right, the 13.0 Amp motor mulches...
RIGHT INTO THE BAG: Disposes of leaves and debris into a bag...
Why Did We Like It?
First and foremost, big ups to Worx for packing such a vast array of features within this unit, making it one of the most powerful pieces of equipment in the gardening tools market. Apart from that, this product also features quite a compact and lightweight frame, which makes it easier to carry around and store. In case you’re having storage space issues in your garage, you can opt for this product with your eyes closed.
Moving forward, we have to mention how strong its 13-amp motor is; it can mulch around 53 gallons of leaves within a minute. No matter how large the heap of leaves is, this product is guaranteed to clean every last bit within a few minutes. Now that’s fast!
The Worx leaf shredder also comes with a leaf disposal bag for higher efficiency and is capable of reaching up to an 11:1 mulching ratio, which is quite impressive.
This product is also quite user-friendly and features a singular button that shuts it down and turns it on with only one press. Also, unlike the typical leaf mulchers, instead of using metal blades, this product is equipped with a heavy-duty grass trimmer line. Not only does it save this model from rust or dullness, but it also makes it a lot safer for the user.
What Could’ve Been Better?
Unfortunately, we’re a little annoyed by how the model produces unbearably loud noises while being used. And that’s why it’s best to use protection for your ears while operating this machine. Also, we’re not a fan of how this product relies on extension cords. But then again, electric machines are not all rainbows and butterflies.
Pros
A compact and lightweight frame
13 amp electric motor
Enhanced safety features
Easy shutdown button
Cons
Noisy motor
Mulch Ratio: Very High | Dimensions: 22.6 x 22.6 x 13.2 inches | Weight: 20 pounds | Voltage: N/A | Portable No
A leaf mulcher and shredder is a time-saving yard tool that turns piles of leaves into compact mulch or compost material. Since most buyers don’t purchase these tools often, it’s easy to overlook the key features that determine long-term performance and convenience. Before investing, evaluate the following factors:
Motor Efficiency
The motor is the heart of a leaf mulcher. Electric mulchers typically use motors rated between 12–15 amps, which are sufficient for most residential yards. If you only need to manage leaves from a few trees, a 12-amp motor will suffice, while 15-amp models or gas-powered shredders are better for heavy-duty or continuous use. Always check the machine’s CFM (cubic feet per minute) and MPH (airflow speed) ratings on blower/mulcher combos, as these figures determine suction and shredding power.
Safety Features
Leaf mulchers contain fast-spinning blades or nylon lines, making safety essential. Look for models with automatic shut-off switches, safety interlocks on lids, overload protection, and stable bases to reduce accident risks. Proper safety design ensures both novice and experienced users can operate the unit with confidence.
Storage
Mulchers range from stationary drum-style shredders to handheld blower-vacuum hybrids. If garage or shed space is limited, opt for a collapsible or wearable mulcher with detachable bags and compact frames. Some units also feature removable collection bins or foldable stands, making them easier to store when not in use.
Leaf-to-Mulch Ratio
The leaf-to-mulch ratio tells you how effectively the machine compresses leaves. A good mulcher provides at least a 10:1 reduction ratio, meaning ten bags of dry leaves become one bag of mulch. High-performance models achieve 16:1 or even 18:1, which is ideal for large properties or composting systems.
Environment-Friendliness
Gas-powered mulchers offer more raw power but produce higher emissions and noise levels. Electric mulchers, whether corded or battery-powered, are cleaner, quieter, and more eco-friendly, making them the best choice for residential neighborhoods. If sustainability is a priority, look for Energy Star-certified motors or models designed for lower energy consumption.
What is the motor efficiency I should look for in a leaf mulcher?
The motor efficiency you should look for depends on yard size. A 12-amp motor is sufficient for small-to-medium residential use, while 15-amp electric models or gas engines are better suited for large yards and continuous shredding.
Are safety features important in leaf mulchers?
Yes, safety features are critical because leaf mulchers use sharp blades or high-speed nylon lines. Features like automatic shut-off switches, lid interlocks, and overload protection greatly reduce risks during operation.
What should I consider regarding storage for leaf mulchers?
For storage, consider whether you have space for a stationary mulcher with a large hopper or if you need a portable blower-vacuum mulcher that fits in a small garage. Collapsible units and detachable collection bags improve storage convenience.
How important is the leaf-to-mulch ratio in a mulcher?
The leaf-to-mulch ratio is very important because it determines efficiency. A ratio of 10:1 or higher means you’ll spend less time emptying bags and more time working. Ratios of 16:1 or 18:1 are excellent for composting or managing large amounts of fall leaves.
Conclusion
A leaf mulcher and shredder is one of the most practical tools for yard maintenance, turning piles of dry leaves into manageable mulch while saving time, storage space, and disposal costs. The best models combine powerful motors, safe operation, compact storage, and high reduction ratios to deliver consistent results. From our list, the WORX Trivac 3-in-1 Electric Blower/Mulcher/Vacuum is the most portable option, the Earthwise GS7001515 15-Amp Electric Garden Chipper/Shredder excels in raw power and durability, and the Worx Trivac Blower and Mulcher is the most convenient for direct disposal into trash bags. By considering motor efficiency, safety features, storage, mulch ratio, and eco-friendliness, you can select a mulcher tailored to your property size and sustainability goals—making yard cleanup faster, easier, and greener.
Butane torches are versatile handheld tools that generate a high-temperature flame for applications ranging from culinary caramelizing to soldering, jewelry making, welding, and DIY repairs. Unlike cheap disposable lighters, quality butane torches feature adjustable flame control, piezo ignition, extended burn time, and built-in safety locks for precision and reliability. They are compact, refillable, and portable, making them indispensable in both workshops and kitchens. In this guide, we review the 11 best butane torches, comparing maximum burn time, temperature range, safety features, and durability so you can choose the right tool for your projects.
Best Butane Torches
Here is the list of the 11 best butane torches that you can use to get the perfect flame for your welding, soldering, brazing, and heat-shrinking projects.
Beginning our list with a product that has set the bar quite high for durability, the GT8000 is one of the best-selling butane torches in the market these days. This model offers a wide range of groundbreaking features, which make it an instant go-to option for numerous semi-professionals. Let’s check out its core features!
Anti-flare, brass-frame nozzle, for safety and flame control
Attachable tabletop base, for hands-free use
Why Did We Like It?
Although Blazer has established a name for itself in the welding tools market with multiple best-selling products, the GT8000 carries a particular X factor that helps it stand out. Numerous semi-professionals recommend it for commercial use, mainly due to the longer burning time it offers at the highest setting.
To be precise, we found that it can blaze for as long as 35 minutes at a go while testing it on the maximum setting. But it gets even better; the torch’s flame can be customized between a range of 1.25 to 5 inches, which offers optimal versatility for multiple industrial-level tasks. The bar for flexibility is raised higher still with its detachable base.
Apart from that, the product can be tilted upside down while working, without affecting the flame by the slightest. Last but not least, its compact and ultralight body makes it pretty convenient to carry around, making it an appropriate addition to your toolbox.
What Could’ve Been Better?
Being a semi-professional model, we had expected it to comprise an easy-start button. But unfortunately, you’d need both of your hands to start the torch. Also, it’s a little pricey, so we’re not sure whether it’s affordable for everyone.
Pros
Lightweight and compact
Large gas tank
Customizable flame range
Long-lasting product
Cons
A little expensive
Dimensions: 5.2" x 2" x 7.5" | Weight: 12oz | Run Time: 35 Minutes | Max Temperature: 2500°F | Warranty: 1 Year
Moving on to some top-notch innovations for hardcore welding, the 2200-01 Versa Flame unit is an ideal commercial-grade alternative under a fair budget. Dremel Co. has surely stepped up its game in terms of quality with this one, as it arrives as a full-fledged kit for high versatility. Let’s find out more about this model!
Compact and powerful, the small butane micro-torch designed...
INTEGRATED IGNITION TRIGGER – For easy start up, no...
Why Did We Like It?
When it comes to longer burn time, the Versa Flame beats almost every other mid-range model in the market. With an impressive burning capacity of 75 minutes, it defines user convenience at its finest. Not to forget, this torch can burn up to a maximum temperature of 2200°F, generating sufficient heat for welding and melting jobs.
Furthermore, as we’ve previously mentioned, it arrives as a professional welding kit, comprising nine distinctive accessories.
Simply put, the package comes with a blower, flame diffuser, deflector, solder, soldering tip, wrenches, and every possible add-on required to build an efficient tool kit. With so many accessories, it only requires you to change the tip according to your needs. In return, it provides you with high versatility at the expense of one tool.
Speaking of versatility, this product also offers numerous temperature and flame range control settings, similar to the Blazer GT8000 Big Shot unit. Moreover, it also enhances flexibility by a great deal with its detachable base.
What Could’ve Been Better?
Although the product hardly leaves any scope for disappointment regarding performance, the reliability of its ignition capabilities is debatable. While testing, we’ve had to use lighters to keep the flame intact at times, which is a little upsetting. Also, multiple buyers have complained that the product shows signs of leakage after a few months.
Pros
Compact and portable
Highly versatile applications
Detachable base
Flame adjustment settings
Smart flame lock
Cons
Unreliable ignition
Leakage issues
Dimensions: 13" x 7" x 2.13" | Weight: 24.64oz | Run Time: 75 Minutes | Max Temperature: 2200°F | Warranty: 1 Year
Although SE isn’t one of the brands you would come across daily, its trailblazing innovations make it every DIY homeowner’s top choice. The MT3001 butane torch, manufactured by SE, comes equipped with an advanced in-built ignition system that gives it an advantage over most of the top-selling alternatives in the market. Let’s find out more!
This product appears to outperform the GT8000 model with its extended burn time of 60 minutes, which is quite impressive for a mid-range welding accessory. It can be used for long hours at a go, which makes it quite suitable for personal use. Moreover, the model can burn as high as 2400°F, which outperforms most of the top-rated torches in the game right now.
Nonetheless, the cream of the crop here is its in-built ignition system, which makes it very appropriate to use for first-timers. Besides, it also gives this model the upper hand over the Dremel 2200-01 unit, mainly as it doesn’t come with unreliable ignition issues.
Being a household product, this product comprises advanced safety measures. For instance, its thumb-release lock makes it quite safe to be kept around children. And although it might not be the most efficient professional-grade butane torch out there, it rules in the personal tools category. At a very negotiable price, this product offers a value-for-money experience that is hard to deny.
What Could’ve Been Better?
Being a low-priced product for personal use has its downside as well. For instance, this product is built with average-quality plastic material, which makes us question its durability. So, if you’re looking for a long-lasting, durable product, this may not be your cup of tea.
Pros
In-built ignition system
Lightweight and compact
Affordable price
Value for money
Cons
Made of cheap plastic
Dimensions: 8" x 4" x 1" | Weight: 5.6oz | Run Time: 60 Minutes | Max Temperature: 2400°F | Warranty: 3 Years
Power Probe is a brand that has established a name for itself in the power tools market with a wide range of high-end products. Its all-new MTKIT01 micro torch kit stands out to be an efficient tool for professional use. Let’s have a more in-depth look at what it offers!
International Renown For Our Diverse Range Of Award-Winning...
Why Did We Like It?
When it comes to professional-grade features, the Power Probe kit holds its own against numerous popular models in the market. For starters, this product beats almost every other unit out there in terms of extended burn time. To be more precise, the MTKIT01 provides a staggering burn time of 120 minutes, which makes it highly appropriate for long-term professional use.
Furthermore, it can reach a maximum temperature range of 2500°F, which is quite impressive. Also similar to the Dremel model, this product arrives at you as a professional kit, including numerous add-ons. For instance, you get a blower tip, a hot knife, a soldering tip, a solder attachment, and countless other useful accessories for a versatile user experience.
As a bonus, you get a sturdy case to store the product safely, which extends overall product life to a great extent. It’s also equipped with an electronic auto-ignition feature, making it a lot more reliable for commercial applications. With so many benefits at the cost of one product, it appears to be an absolute steal of a deal.
What Could’ve Been Better?
As it is a full-fledged commercial welding kit, it’s a little more expensive than an average butane torch in the market. But then again, this product saves you from purchasing multiple other tools separately, which makes it even. Apart from that, it’s one of the best in the game right now.
Pros
Automatic ignition feature
Sturdy case for protection
Durable and long-lasting
Lightweight and compact body
Cons
May appear a little expensive
Dimensions: 10" x 7.4" x 2.7" | Weight: 15.8oz | Run Time: Up to 120 Minutes | Max Temperature: 2500°F | Warranty: 1 Year
Power Probe is a brand that’s gradually becoming popular among American households, and the credits go to its best-selling MT Micro unit. It had initially gathered our attention with its portable frame, but it surprised us with the vast range of features it provides. Let’s jump right into the details!
No products found.
Why Did We Like It?
Whoever believes that smaller tools aren’t as powerful as large appliances should swallow their words after using the Power Probe torch, as it is stacked with adequate, groundbreaking features. Although it isn’t ideal for professional use, it’s probably the most appropriate model out there to handle personal jobs.
Whether it’s about heating your cooking ingredients in the kitchen or a minor plumbing task, the MT micro unit has it all covered with its versatile applicabilities.
When it comes to user control, this model holds its own with its adjustable flame settings, ranging from 0.5 to 1.25 inches. Similar to the Dremel 2200-01 kit, this product also comes as a complete welding kit, comprising several accessories. To be exact, the kit consists of a shielded adapter, solder attachment, heat blower tip, soldering tip, and a Rosin Core solder tube.
It’s quite unusual for a small-duty product to offer such high versatility, for which this model gets a head up. Last but not least, you also get a sturdy case for the utmost protection, which raises the standards higher for durability.
What Could’ve Been Better?
As it’s mostly recommended for personal use, choosing this product for heavy-duty commercial jobs might not be the best idea. It’s not as powerful, nor does it offer a similarly lengthy burning time as most of the professional-grade torches in the market. Apart from that, it’s quite good for the category it serves.
Pros
Lightweight and compact
Electric ignition feature
Detachable base
Suitable for personal use
Cons
Hard to refill
Dimensions: 4.5" x 1.7" x 6.7" | Weight: 8oz | Run Time: About 60 Minutes | Max Temperature: 2500°F | Warranty: 1 Year
Bernz-O-Matic is a brand that is best known for delivering trailblazing innovations at negotiable prices. The brand has recently launched the ST220T unit, one of the highest-rated products in the game right now, in terms of user convenience. Let’s find out more about what it offers!
Used for Construction - Concrete & Metal Tools,...
The product is manufactured in United States
Why Did We Like It?
First and foremost, the futuristic design of this product makes it total eye candy. Apart from that, its design appears to be quite ergonomic, which makes it more appropriate to use for long hours. It’s relatively easy to use, too, so it shouldn’t be hard to blow this torch even if you’re not sufficiently experienced in these criteria.
Also, though it doesn’t come equipped as a kit, that doesn’t restrict its versatility by any means. Instead, this product proves to be equally versatile with its multiple flame modes.
To be precise, its fine soldering mode stands out to be highly appropriate for plumbing and similar heavy-duty construction jobs. Its pinpoint flame mode helps in handling more delicate tasks, such as jewelry making. Last but not least, its hot air blower mode comes in very handy in handling numerous personal DIY jobs with ease.
It also features an electric ignition button for higher flexibility, which makes it a good option for first-timers to consider. It doesn’t cost a fortune, unlike most of the professional-grade products in the market, which makes it ideal to opt for those with a budget issue.
What Could’ve Been Better?
We’re not a fan of the material this product is built with, nor can we guarantee that it’s built to last for years. Also, considering its low price, we’re not sure if this is the model you should opt for if you’re looking for optimal durability.
Pros
Automatic ignition feature
Safety features
Adjustable flame settings
Lightweight body
Cons
Durability issues
Dimensions: 3" x 6.5" x 9.5" | Weight: 8oz | Run Time: N/A | Max Temperature: N/A | Warranty: 3 Years
For those who are naturally inclined towards old-fashioned products, the Flame Forte Micro blow torch combines the early 2000s aesthetics and modern technology for an extraordinary user experience. Although we’re in love with the safety features it comes equipped with, this product offers a lot more. Let’s check it out!
✔ PROFESSIONAL AND AMATEUR FRIENDLY This high quality...
✔ HAND CRAFT ACTIVITIES. Soldering, plumbing, arts and...
Why Did We Like It?
Although the Flame Forte torch may appear as an outdated butane torch to the average eye, it carries the potential to outperform most of the latest products in the game these days. To begin with, this product can burn as high as 2600°F, which speaks volumes about the top-notch performance this model promises to deliver. As a bonus, this model offers an incredible burn time of 60 minutes.
This product also comes equipped with a detachable stand, which enables hands-free operation for a more comfortable user experience. Plus, it arrives in a lightweight body, which altogether prevents the user from experiencing arm fatigue after using it for a long time. To make it even better, this product features an advanced safety lock that restricts the chances of any accidental fire hazard.
The micro blow torch also comes equipped with an extra-long nozzle and a flame lock, both of which combine to ensure that the fire lasts longer while generating more flame. Its temperature can also be adjusted as per your needs, which isn’t usual among small-range products.
What Could’ve Been Better?
Although the manufacturers claim that the product offers a maximum temperature setting of 2600°F, multiple buyers have complained that it doesn’t reach its highest setting most of the time. Keeping that aside, it’s good enough for the price it demands.
Pros
60-minute burning time
Flame lock settings
Maximum temp. range at 2600°F
Long-lasting product
Cons
Inconsistent temperature
Dimensions: 7.1" x 6.5" x 0.6" | Weight: 10.4oz | Run Time: 60 Minutes | Max Temperature: 2600°F | Warranty: 2 Years (Guarantee)
Any conversation about high-tech welding tools would be incomplete without mentioning Master Appliance, one of the pioneering brands in the butane torch market. Its MT-70 makes an efficient medium-duty torch that offers several user-convenient features under a negotiable price tag. Let’s find out more!
BUTANE TORCH FOR PROFESSIONALS: Featuring an adjustable...
TEMP UP TO 2500F: This torch lighter efficiently heats...
Why Did We Like It?
This product is an appropriate example to prove that the biggest surprises usually arrive in the smallest packages. To be more precise, this product offers multiple groundbreaking features within a compact frame, giving it a higher advantage in terms of both performance and portability.
For starters, this model provides a handsome burn time of 60 minutes, which is sufficient for both medium-duty professional and personal jobs. Moreover, this product can burn as high as 2500°F, delivering sufficient heat for medium-scale welding and jewelry development tasks.
Similar to numerous popular models such as the Dremel 2200-01 unit, this product also offers flame control settings for higher versatility. It’s quite surprising for a product at this range to provide this feature, which makes us love it more.
Not to forget, the MT-70 also comes equipped with an advanced self-ignition feature, which gives it the upper hand over the Dremel 220-01 model. It also features an in-built stand that helps in enabling hands-free operation for a comfortable user experience. Overall, this product offers a lot more than you pay for, to be honest.
What Could’ve Been Better?
Although it’s very easily accessible, it may not be the best option to consider if you’re searching for a long-lasting product. Multiple users have already rated it low in terms of durability, as the model reportedly leaks too often.
Pros
Lightweight and portable
Adjustable flame settings
Value for money
Hands-free operation
Cons
May not last long
Dimensions: 1.3" x 3.8" x 5.5" | Weight: 7.4oz | Run Time: 60 Minutes | Max Temperature: 2500°F | Warranty: 1 Year
Blazer has managed to grab another position on our list with its all-new GB4001 unit. This product has been making noise in the market with its precise flame emission feature, which makes welding an easier job. Let’s find out more about this model!
Anodized outer body finish, to resist corrosion and wear
Gas-flow adjustment lever, to control flame length
Why Did We Like It?
This product is an ideal upgrade that the Blazer fans were waiting for since the GB2001 mini torch, mainly due to its precise flame settings. Simply put, this product comes equipped with an upgraded nozzle head that helps in maintaining optimal flame precision for tasks that are all about the details.
Consequently, it makes an appropriate option to consider for semi-professionals who indulge in electronic repairing and brazing jobs quite often.
Furthermore, we’re in love with its sturdy construction that enables the product to maintain optimal durability. Apart from its hard and thick construction frame, the model is also protected with an anodized finish. As a result, you get rust and a rust-resistant torch that is guaranteed to last for years to come.
Not to forget, this product also offers a breakthrough self-ignition feature, which makes it a lot easier for beginners to use. Furthermore, this torch features an adjustable flame control lever for higher versatility. It also comes equipped with a safety lock to prevent accidental hazards when the torch isn’t being used. The maximum temperature setting of this model is 2500°F, which suffices for both small-duty and medium-duty welding jobs.
What Could’ve Been Better?
While testing, we found the ignitor of this model to be a little unreliable, which restricts its performance to a great extent. As a result, we wouldn’t recommend it for heavy-duty commercial jobs.
Pros
Durable construction
Hands-free operation
Maximum temp. Range 2500F
Self-ignition feature
Cons
Not very powerful
Dimensions: 3.5" x 1.3" x 6" | Weight: 6.3oz | Run Time: 90 to 120 Minutes | Max Temperature: 2500°F | Warranty: 1 Year
The penultimate product on our list is none other than the ES1000, one of the most technically advanced butane torches manufactured by Blazer to date. Although it’s guaranteed to capture anybody’s attention with its unique design at first glance, it has a lot more to offer. Let’s dive into the details!
Angled head design and slim body shape, for ease of use and...
Air flow control switch, mounted at top of unit, for an easy...
Why Did We Like It?
First and foremost, we’re a fan of its futuristic design, which makes it extremely convenient to use. The product features an angled head that contributes to enhancing the product’s accuracy a notch, which is quite impressive. The rest of the body is very ergonomically designed and is pretty lightweight and compact. As a result, you can carry it around anywhere with ease.
Coming on to its specs, this product features Blazer’s patented nozzle head. This feature helps the model in maintaining utmost precision while being operated, making it highly suitable for culinary and jewelry-making jobs. Not to forget, this nozzle head makes the flame reasonably steady and more resistant to wind.
The torch allows hands-free operation for a user-convenient experience, and the credits go to its detachable base. It further offers a maximum burning temperature of 2500°F, which is similar to most of the popular models in the market right now. You can also operate it hands-free by using its detachable stand.
We’re also in love with the flame precision this product offers, which comes quite handy while thawing difficult compounds. Overall, this unit is highly appropriate for anybody who’s into multitasking, considering its versatile functionalities.
What Could’ve Been Better?
To begin with, this product is quite expensive for a mid-range torch, which gives it a considerable disadvantage in the market. And that’s because it offers a maximum burn time of 30 minutes, which is below average if compared to the alternatives that come at a lower price.
Pros
Angled head for higher accuracy
Self-ignition feature
Lightweight and compact
Adjustable flame settings
Cons
Subpar burn time
Dimensions: 6" x 3" x 2.5" | Weight: 5.5oz | Run Time: 30 Minutes | Max Temperature: 2500°F | Warranty: 1 Year
Our final pick of the day is the Sondiko Culinary unit, also famous for being every culinary enthusiast’s delight. Although it’s primarily designed to excel in kitchen jobs, that doesn’t restrict the product from being instrumental in the broader applications of butane torches. Let’s check out what this model has to offer!
No products found.
Why Did We Like It?
Before we begin, it’s important to mention that nothing describes Best Values Unit better than the Sondiko culinary unit. It offers every necessary feature you’d expect from a butane torch under a very affordable price tag, which makes it worth everyone’s attention. Multiple buyers have further rated it high in terms of ease of use, so it might just be your go-to option if you’re searching for a hassle-free tool for your DIY personal jobs.
As already mentioned, this product is one of the best products there is for kitchen purposes. The model also comes equipped with adequate safety lock features to avoid injuries. This feature also makes it easier to turn on and shut down, which makes it an appropriate option for inexperienced first-timers to consider.
Moreover, this product also features flame adjustment settings for optimal versatility, which gives it a considerable advantage for a personal-use torch. Culinary jobs require low flame most of the time, whereas welding requires turning up the heat- both of which are possible with the Sondiko model.
Not to forget, the product comes equipped with an adjustable stand, which lets you rest it safely on flat surfaces without tipping it over. Overall, if you’re a little low on budget and still need a butane torch for personal use, then it is an ideal option to opt for.
What Could’ve Been Better?
As apparent as it gets, this product may not be the most efficient torch when it comes to secondary applications such as thawing and soldering, in comparison to our other recommendations. However, it’s one of the best products there is when it comes to culinary and small-duty welding jobs.
Pros
Lightweight and compact
Durable construction
Value for money
Adjustable flame settings
Cons
Average flame orange
Dimensions: 4.7" x 2.2" x 6.1" | Weight: 7.7oz | Run Time: N/A | Max Temperature: 2372°F | Warranty: 1 Year & 6 Months
Owning a butane torch is about more than flame on demand—it’s about reliability, safety, and precision. Whether you’re caramelizing desserts, soldering jewelry, or working on automotive repairs, the right model must balance burn time, temperature range, safety features, durability, and portability. Here are the critical factors to consider:
Maximum Burn Time
A butane torch must deliver consistent burn time to complete projects without frequent refueling. Models with less than 40 minutes of continuous burn time are best suited for light-duty household or culinary use. For professionals, look for torches rated at 60–90 minutes or more, with refillable tanks that allow extended sessions without interruption.
Maximum Temperature Range
Temperature capacity determines the applications a torch can handle. Most reliable torches reach 2,100°F (1,150°C), which is sufficient for crafts and light welding. For professional use, such as brazing, glasswork, or heavy-duty soldering, choose a torch capable of 2,400–2,500°F (1,315°C) with adjustable flame controls. Advanced models often feature precision knobs or sliding regulators for tailoring heat output to your task.
Advanced Safety Measures
Because butane torches involve open flame and pressurized fuel, safety is paramount. Essential features include:
Child-safety locks to prevent accidental ignition.
Flame lock switches for continuous burning without finger strain.
Anti-flare technology to prevent flame instability when tilted.
Stable bases or stand brackets to keep the torch upright during use or cooldown. Investing in models with these safeguards reduces risk and makes the operation more user-friendly.
Durability and Portability
Durability is determined by both construction materials and resistance to wear. Choose torches with metal nozzles, anodized aluminum bodies, or reinforced composites to prevent leaks and withstand frequent use. Portability is equally important: lightweight torches with ergonomic grips are favored for culinary or field applications, while heavy-duty professional models may prioritize stability and larger tank capacity. Many premium torches also feature anti-corrosion coatings for longevity.
What are the benefits of using a butane torch over other types?
The benefits of using a butane torch over other types include refillable fuel tanks, adjustable flame control, compact portability, and versatile applications. Unlike propane or MAPP gas torches, butane units are easier to ignite with piezo-electric starters, safer for indoor use, and precise enough for culinary, craft, and light repair projects.
What safety measures should I take when using a butane torch?
The safety measures for using a butane torch include operating only in well-ventilated areas, wearing heat-resistant gloves and safety goggles, and keeping the torch away from flammable materials. Always engage the safety lock when not in use, allow the nozzle to cool before storing, and use only manufacturer-recommended fuel canisters to reduce leakage risk.
Can I use a butane torch for cooking?
Yes, you can use a butane torch for cooking, and it is commonly employed for crème brûlée, caramelizing sugar, browning meringues, roasting peppers, and finishing sous-vide dishes. Culinary-grade butane torches are designed for safe kitchen use, offering adjustable flames and stable bases for precision control.
How do I refill my butane torch?
To refill a butane torch, ensure it is turned off and cool. Invert the torch and locate the refill valve on the base. Insert the nozzle of a butane fuel canister into the valve, press firmly, and hold until the tank is filled (usually 5–10 seconds). Wait at least 3–5 minutes before reigniting to allow fuel vapors to stabilize.
What if my butane torch doesn’t light up?
If a butane torch doesn’t light, check for low fuel levels, clogged nozzles, or faulty ignition systems. Clean the jet with compressed air, verify that the canister is properly seated, and adjust the flame regulator. If ignition issues persist, consult the manufacturer or replace worn ignition components.
How long does a butane torch last?
The lifespan of a butane torch depends on burn time per refill, build quality, and maintenance practices. A full tank typically lasts 30–90 minutes of continuous use, while a well-maintained torch can last several years. Regular cleaning, proper storage, and using high-quality fuel extend both performance and longevity.
Conclusion
A butane torch is an indispensable tool for both professionals and hobbyists, offering precise flame control, portable convenience, and multipurpose usability. The best torches combine long burn times, high heat output, advanced safety locks, and durable construction to deliver consistent performance. From our list, the Power Probe MTKIT01 Micro Torch Kit is ideal for users who require maximum burn time, the Blazer GT8000 stands out for its unmatched durability and professional-grade build, while the Dremel 2200-01 provides excellent all-around performance at an affordable price. By matching features like temperature range, fuel efficiency, and portability to your intended tasks, you can confidently select a butane torch that will enhance your toolkit for years to come.
Vizio speaker stands are essential accessories for optimizing the performance of your home theater or surround sound system. Properly designed stands position speakers at ear level, reduce unwanted vibrations, and ensure balanced sound distribution across the room. Many models feature adjustable heights, universal mounting plates, and integrated cable management for a clean and professional setup. In this guide, we review the 6 best Vizio speaker stands, comparing build quality, stability, weight capacity, and design features to help you choose the right pair for your space.
Listed below are the Best Vizio Speaker Stands:
Atlantic Satellite 77305018: The Atlantic Satellite 77305018 is renowned for universal compatibility and adjustable height features. The positioning of the mounting bar could be improved.
Sanus VuePoint: The Sanus VuePoint Adjustable Height Speaker Stand offers an appealing design and sturdy build quality. Best for speakers weighing under 3.5 lbs.
VideoSecu Heavy Duty: The VideoSecu Heavy Duty Satellite Speaker Stand is optimal for studio use, supports heavier speakers (up to 30 lbs), and allows for flexible positioning. The base is comparably small.
Sanus BF24B 24-Inch: The Sanus BF24B 24-Inch Speaker Stand (Pair) is an affordable choice with decent adjustability and stability. The quality of floor spikes and screws needs enhancement.
USX MOUNT Universal: The USX MOUNT Universal Speaker Stands are notable for wide compatibility and integrated cable management. The assembly might be unclear, and only supports speakers with specific mounting holes.
Here's the list of the 6 best Vizio speaker stands, carefully selected to enhance your audio experience and ensure a smart and satisfying purchase.
1. Atlantic Satellite 77305018 Adjustable Height Speaker Stand - Best for Universal Compatibility
When it comes to assurance of excellent quality and performance, Atlantic is the brand that most households rely on. And if we’re talking about speaker stands, the efficiency of the AS adjustable height model remains unmatched. In fact, it has a reputation for being sold the most with VIZIO speakers!
Check the ratings; this one might just be the highest-rated VIZIO speaker stand you'll come across. And that's not even an exaggeration - this product indeed ranks very high in terms of compatibility and price-to-quality ratio, making it the first choice for most customers.
The biggest reason for this is its universal compatibility with both surround and satellite speakers, which isn't the case with many high-priced alternatives. This way, in such a negotiable price range, this product offers more than enough to set a higher benchmark for quality.
Coming to its dynamics, we're pretty impressed with how easily you can play around with its adjustable height feature and set it as per your needs. Also, considering that VIZIO speakers aren't ultralight, you'd need to choose stands that can withstand a heavy load. In this case, you'd be happy with the sturdy build quality that it offers, making it strong enough to withstand the weight.
Furthermore, it's amazing how the support pole is so ultra-wide that you can easily conceal the dangling speaker cables behind it to maintain the audio setup's visual appeal. Apart from that, the ample width also makes it a lot more stable on firm ground.
Quite frankly, this product doesn't have any essential aspect that needs to be improved, performance-wise. However, we've noticed that its mounting bar is located in an odd position, due to which it tends to stick outwards a little.
What We Like
Compatible with satellite speakers
Wide support pole for added safety
Convenient speaker stand
Affordable price range
What We Don't Like
The mounting bar needs improvement
Adjustable Height: Yes | Material: Metal | Height Range: 27 - 49" | Base: 3-point | Weight Capacity: Up to 10 lbs | Compatibility: Universal, fits most speakers
2. Sanus VuePoint Adjustable Height Speaker Stand - Best for Aesthetic Appeal
For those who don't mind paying a little extra for a heavy-duty build and quality, the Sanus VuePoint is a brilliant choice. Although it's mainly famous for its dark and slick design, best believe that it's much more than just a living room souvenir. Let's take a look at its core features!
Beginning with the USP of this product, the VuePoint certainly sets a view worth staring at for hours. This product features quite an aesthetically appealing body, which transforms your living room into a professional studio. The best-in-class matte black-grey finish with zero leftover paint amplifies its appearance by a great deal indeed. Overall, apart from being an excellent speaker stand, it also makes a decent showpiece for interior decor.
However, as we've mentioned before, it's more than just an attractive speaker stand. The best way to reflect on it is by highlighting its premium-grade build quality. This product is indeed built with premium make and materials, which enables it to deliver the same efficiency for years without showing any sign of damage.
The product also maintains compatibility with almost any satellite speaker in the market, which puts it next in line after the Atlantic satellite speaker stands. However, there's a catch - it can support a maximum weight of 3.5 lbs, which is, again, good enough for fitting in bookshelf speakers or home theatre systems. Moving on to its robust height adjustments, it allows you to place it between 28-38 inches.
Although this product may appear easy to install at first glance, we can assure you that it's not. It becomes a little challenging to install the speakers on it with optimal stability, due to its limited support base. Furthermore, the only flaw in its build material is the subpar-quality plastic connector.
What We Like
Optimally satisfying product quality
Easy to assemble the stand
Maximum weight limit of 3.5 lbs
Remains very firm to the ground
What We Don't Like
A little hard to install the speakers
Adjustable Height: Yes | Material: Alloy steel | Height Range: 28 - 38" | Base: Round flat | Weight Capacity: Up to 3.5 lbs | Compatibility: Universal, fits most speakers
3. VideoSecu Heavy Duty Satellite Speaker Stand - Best for Studio Use
In case you're searching for heavy-duty stands that don't put you in dire straits while setting the speakers, VideoSecu is what you should be searching for. Although this product is mainly designed to be positioned in a home studio, we can't say that it doesn't make a normal speaker stand for your living room.
In general, if you're an aspiring musician looking forward to setting up a home studio on a meager budget, this is the ultimate solution to your needs. At first glance, you're bound to be amazed by its industrial-grade design that adds a touch of class and professionalism to a rather bland room.
Not to forget, we're huge fans of the minimalism the overall design beholds, for it's sure to complement the taste of those who fancy subtlety.
When it comes to the weight-carrying limit, this VideoSecu stand crushes all competition with a monstrous limit of 30 lbs. Moving on, we're also impressed by how the product can offer a maximum height adjustment limit between 26.8 to 48 inches, which is a lot more than what you'd usually require.
On a side note, we don't find it fair to compare it with our other personal-use picks, mainly because it's primarily designed for commercial purposes.
But then again, such a premium build also has its benefits! For instance, you can pan the speakers through 180 degrees, thanks to their adjustable top base. Despite such flexible movements, it remains very stable and firm on the ground.
Let's not hype it as the best option in the game, as it does come with a few silly flaws. First and foremost, although very flexible, the base of this speaker stand is comparatively small. Besides that, we're also not very impressed with how the mount makes it extremely difficult for thick wires to pass through.
What We Like
Optimally strong build quality
Impressive panning ability
Very attractive-looking
Supports all types of VIZIO speakers
What We Don't Like
The base is tiny
Adjustable Height: Yes | Material: N/A | Height Range: 26.5 - 47" | Base: Square | Weight Capacity: Up to 30 lbs | Compatibility: Universal, fits most speakers
4. Sanus BF24B 24-Inch Speaker Stand (Pair)
Behold, folks, for globally leading brand Sanus is back for the throne again- a lot stronger, this time. We've had the opportunity to test the Sanus BF24B speaker stand personally, and it didn't fail to blow our minds with the vast array of benefits it comes packed with. Let's take a more in-depth look at its core specs and functions!
As per our experience, the Sanus BF24B model is one of the most efficient picks under a meager budget. However, let's not only look at it as a mere low-priced model, because it still comes packed with several useful features to offer you the best value.
To begin with, its height is very well-synchronized with VIZIO and various other premium bookshelf speakers. In case you still don't find the height satisfactory, it enables you to take the wheel and set it exactly the way you prefer. At its maximum setting, you can adjust the speakers to a near-ear level and enjoy an incredible surround sound while you're chilling on your sofa.
Furthermore, we're also quite amazed that, even though its overall pricing is so low, the brand hasn't compromised on its overall quality. Its metal construction ensures a very long-lasting product life, and the premium coating adds life to its rather simplistic design.
Don't be afraid to load with bulky and bassy speakers, as the stand is capable of carrying a maximum load of 20 lbs. Other than that, the base is quite widespread to ensure fantastic stability. As a bonus, the bottom comes with a floor-spike pattern that dampens the vibrations caused when the speakers are blared at high volume.
Although the floor/carpet spikes initially sound like a great idea, let's be clear that your carpets aren't going to like it. Due to being made of cheap quality, it's likely to tear out the carpets in the long term. Furthermore, the manufacturers must note that the screws provided during shipping are smaller than the grooves, which is concerning.
What We Like
Hides the speaker cables precisely
Low-profile design
Very easy to assemble
Reduces vibrations
What We Don't Like
Cheap-quality floor spikes
Adjustable Height: No | Material: Engineered wood | Height Range: 24" | Base: Square | Weight Capacity: Up to 20 lbs | Compatibility: Compatible with select brands
5. USX MOUNT Universal Speaker Stands
USX MOUNT Universal Speaker Stands are height-adjustable stands designed to accommodate satellite speakers and small bookshelf speakers up to 8 lbs. With their strong triangle base and wide compatibility, these speaker stands ensure stability and a clean, organized appearance for your home audio setup.
The USX MOUNT Universal Speaker Stands are liked because of their sturdy triangle base, offering excellent stability and resistance to tipping. Their adjustable height and depth allow customization for different speakers, while their compatibility with numerous speaker brands makes them a versatile choice.
Additionally, the integrated cable management adds a neat appearance to the setup.
One downside to these stands is that the part C (M4) washers are not needed for assembly, which sometimes causes confusion during installation. Furthermore, speaker compatibility is limited to those with mounting holes on the back or bottom.
What We Like
High-quality, durable steel construction
Weight capacity supports up to 8 lbs per stand
Rubber feet protect different floor types
What We Don't Like
Certain speakers may not meet mounting hole requirements
Certain parts may have unclear assembly instructions
Adjustable Height: Yes | Material: Alloy Steel | Height Range: 46” | Base: Triangle | Weight Capacity: Up to 8 lbs | Compatibility: Universal, multi-type of speakers
6. ECHOGEAR Speaker Stands Pair
ECHOGEAR Speaker Stands are height-adjustable stands made of solid steel, promising stability and quality acoustics. Compatible with speakers up to 4 lbs, these stands work with various brands such as Vizio, Klipsch, Bose, and Sony, making them a versatile choice for your surround sound setup.
These ECHOGEAR Speaker Stands are popular due to their universal compatibility with a range of small speaker brands. They also feature built-in cable management for a clean and organized appearance. The solid steel design ensures that the stands are stable and contributes to enhanced acoustics.
Additionally, these stands offer tool-free height adjustment up to 11".
A limitation of these speaker stands is the weight limit of only 4 lbs, making them unsuitable for all small speakers. Moreover, the cable management system might not accommodate thicker cords effectively.
What We Like
Easy installation with included brackets and hardware
Adjustable height for optimal speaker positioning
Improved sound with energy-absorbing steel construction
What We Don't Like
Limited weight capacity of 4 lbs per stand
May struggle to secure thicker cables effectively
Adjustable Height: Yes | Material: Rubber | Height Range: 11" | Base: N/A | Weight Capacity: Up to 4 lbs | Compatibility: Universal, fits most small speakers
What Are the Best Vizio Speaker Stands?
Vizio speaker stands offer a diversity of features making them an essential accessory for any audio enthusiast. Based on several key attributes, a comparative analysis has been conducted to highlight the standout Vizio speaker stands. The aspects compared include Adjustable Height (Yes or No), Material used in construction, Height Range (in inches), Base type, Weight Capacity (in lbs), and Compatibility.
Purchasing a Vizio speaker stand is not as straightforward as it may seem. Beyond simply holding your speakers, the stands directly affect sound quality, stability, and room aesthetics. Choosing the wrong model can lead to vibration issues, reduced audio clarity, or even accidental damage to your equipment. Here are the key factors to consider before making a purchase:
Build Quality
The build quality of a Vizio speaker stand determines its durability and acoustic performance. High-quality stands are typically made from powder-coated steel, anodized aluminum, or MDF wood. Metal options provide excellent strength and minimal resonance, while wood stands blend better with home décor but may require extra care to avoid warping. Look for reinforced joints, welded connections, and scratch-resistant finishes to ensure long service life.
Stability
A stable stand is essential for protecting your speakers and preserving sound clarity. Wider bases, carpet spikes, or non-slip rubber feet anchor the stand securely to different surfaces. Some stands allow the base to be filled with sand or steel shot to reduce vibrations and increase mass, improving both stability and bass response. Avoid lightweight, narrow-base models if your speakers are heavy or if the stand will sit in high-traffic areas.
Weight-Bearing Capacity
Every stand has a rated weight capacity, and exceeding it risks tipping or structural failure. Vizio speaker stands for satellite or bookshelf speakers, usually support between 3.5 lbs and 30 lbs per stand. Always confirm compatibility with your speaker’s weight and mounting type—whether it’s a top plate, L-bracket, or threaded insert.
Design of the Stand
Because speaker stands are also part of your living space, design matters. Choose models that complement your room’s style, whether sleek black metal for modern setups or wood-grain finishes for classic interiors. Many stands also include integrated cable management systems to conceal wiring inside hollow columns, keeping your installation neat and professional-looking. Adjustable height and tilt features further help align the tweeter to ear level, which is critical for accurate stereo imaging and surround sound.
Why do I need a Vizio speaker stand?
You need a Vizio speaker stand because it elevates your speakers to ear level for optimal sound projection, minimizes vibrations through isolation, and ensures consistent surround sound dispersion. Proper stands also protect your speakers from accidental damage.
Are Vizio speaker stands adjustable?
Yes, many Vizio speaker stands are adjustable in height (typically 28–42 inches) and sometimes offer tilt adjustment. This allows precise speaker placement to achieve the best listening angle and immersive audio.
Can I use Vizio speaker stands for other speaker brands?
Yes, you can use Vizio speaker stands for other speaker brands as long as the mounting method and weight capacity are compatible. Most universal stands support speakers with keyhole slots, threaded inserts, or flat bases.
Do Vizio speaker stands come with cable management?
Yes, several Vizio speaker stands include integrated cable channels or clips that conceal wires within the column or along the frame. This helps maintain a tidy, professional setup while protecting cables from wear.
Can Vizio speaker stands be used for wall-mounting?
No, Vizio speaker stands are primarily designed for floor placement, not wall-mounting. If wall installation is required, use dedicated wall brackets or universal wall mounts rated for your speaker model.
Conclusion
A Vizio speaker stand is more than just furniture—it’s an essential component for improving sound quality, speaker safety, and room aesthetics. The best stands combine durable construction, stable bases, adequate load capacity, and thoughtful design features like height adjustability and cable management. From our reviews, the Atlantic speakers are the best all-rounder with universal compatibility and adjustable height, while the VideoSecu model is ideal for studios or users needing maximum weight support. For those prioritizing style and practicality, the Sanus VuePoint delivers a sleek design with reliable stability. By aligning your choice with your speaker weight, room layout, and audio goals, you’ll ensure an investment that elevates your listening experience as much as your speakers.
Boot scrapers are practical cleaning tools designed to remove mud, snow, dirt, and debris from footwear before entering a home, barn, or workplace. Commonly used on farms, ranches, construction sites, and in snowy or muddy climates, modern boot scrapers combine sturdy steel frames, stiff bristle brushes, and weather-resistant materials to provide efficient cleaning without damaging leather or rubber soles. They come in various forms, including stand-alone brush frames, folding models, coir doormats, and commercial-grade scrapers for heavy-duty use. In this guide, we review the 13 best boot scrapers, comparing durability, cleaning effectiveness, weather resistance, and ease of use to help you find the right model for your environment.
Best Boot Scrapers
Here's the list of the 13 best boot scrapers of 2023, designed to keep your floors clean from mud and snow while ensuring no scratches on your boots - so let's dig in!
The product that tops this list with its brilliant cleaning features is the Carlisle 4042414 Commercial Boot 'N Shoe Brush Scraper. Paired with specially designed brushes and a sturdy frame, this will make sure you leave the dirt behind every time you enter the house.
Steel scraper below the brushes assists in the removal of...
Chrome Steel tube frame can be securely bolted to the floor...
Why Did We Like It?
To begin with, this product consists of 2 brushes with blue polypropylene bristles. These can tackle all kinds of dirt, including snow, manure, and grass. We placed one outside our doors as well as the barn door, and that saved us from a lot of cleaning.
The brushes are attached to a chrome-plated steel frame. This frame is very sturdy and will hold the brushes steadily while being able to take a lot of weight. It is also resistant to corrosion and daily wear and tear. And if it does get dirty, all you need to do is wipe it clean.
Additionally, to prevent moisture from affecting the steel, there are plastic blocks on both sides. This prevents water from damaging it and makes sure that the body is not affected. We found that it can easily survive rain and snow if you leave it outside.
What Could've Been Better?
Although the scraper worked perfectly for us, we discovered that it might be slightly problematic for short people. If your height is less than 5 feet 5 inches, there's a high chance that the mud might splatter across your face as you try to remove it. We're trying to create a splash guard ourselves, and we would suggest you do it too.
Pros
Steel scrapers help remove bigger debris
Plastic block with bristles is non-absorbent
FDA compliant
Cons
Not suitable for very short individuals
Material: Plastic | Dimensions: 12" x 16" x 4" | Weight: 2.4 pounds | Features and Benefits: Dual brushes, durable construction, rust-resistant
Known for its subtle design and effectiveness, the Rubber-Cal "Herringbone" Coir Boot Scraper Brush is one of the favorites for many customers. It complements the entrance and keeps the house free from dust and debris, which the boots tend to bring in.
Subtle design complements entryway or mud room decor
Shake, brush or vacuum shoe scrapers for easy cleaning
Why Did We Like It?
This is a product built to last. It uses tough and resistant coir to ensure every bit of mud and gunk is removed from the boots. It has a wire frame to keep the coir in place and deal with high foot traffic.
In most cases, this unit will be placed outdoors just before the entrance. So, it will be facing different weather conditions. But do not worry at all! It shows a very high resistance to UV rays and moisture. Adding to it, the material would not let molds form on the surface even when it gets damp.
Besides, the product comes with excellent scraping potential. With its highly effective angled pattern, it reaches the tough spots and grooves in the boots' soles and cleans thoroughly.
Furthermore, the scraper is made of natural materials, making it safe for the environment. It is sourced from coconuts to make the tough bristles.
What Could've Been Better?
Although the unit itself worked exceptionally well, we had to place it beside a wall for support. Whenever you stand on it, you have to do so with both feet, which may cause a loss of balance. Now that you know about this, make sure there is some form of support besides it.
Pros
Weighs only 2.3 pounds
Easy to clean
Known for its attractive design
Made from the husks of the coconut
Cons
Needs external support to maintain balance
Material: Coir, Rubber | Dimensions: 2.5" x 12" x 13" | Weight: 5 pounds | Features and Benefits: Natural coir bristles, a durable rubber backing, eco-friendly
Ranking 3rd on this list is the Rhino Bilt Folding Boot Scraper, which is well known for its sturdy body. This is one of the best quality scrapers available today and is also quite affordable. We loved the scrubber, scraper, and cleaner combination that it offered.
First of all, this unit is 100% resistant to nearly all weather conditions. We have been leaving it outside, and it has been through some heavy rain, but there have been no signs of rust on the body. It can truly stand against extreme weather conditions, thanks to the powder-coated steel used to make it.
Besides, the body consists of a steel frame along with firm wood, which adds to the sturdiness. It also has screws that let you fix it to any kind of surface. The mounting process is pretty simple, and you would not need professional help for it.
Also, the brushes that come with it are made of plastic fiber. These do not come off even after applying pressure while cleaning because the material is very strong.
Additionally, there is a folding plate on both sides of the product. These make it easy for you to store when not in use, as the size gets reduced on folding.
What Could've Been Better?
We found one major drawback here. People with bigger foot sizes will not be able to use this scraper as it is made for small to medium-sized feet. Bigger boots are wide, while this provides a narrow area that will not fit them. So, make it a point to check the width of your boots before buying this scraper.
Pros
A combination of a scrubber, scraper, and cleaner
Resists moisture and rust
4 pre-drilled holes for easier mounting
Corrugated composite bristle tips
Easy to install
Cons
Very narrow
Material: Wood, Plastic, Steel | Dimensions: 9.92" x 6.57" x 4.72" | Weight: 2.9 pounds | Features and Benefits: Foldable, compact design, rust-resistant, detachable brushes
Are you worried about the surface of the boots being scratched by rough bristles? Fret no more as the Scrusher - Original Scrusher Boot and Shoe Cleaner has a solution to this. It has soft bristles on each side, which will clean the top of the shoes with great care without leaving any marks.
Gentle Yet Effective Cleaning – This outdoor shoe scrapers...
Why Did We Like It?
We will begin with the unique design that this product boasts. It has sturdy maple wood on both sides to which the bristles are attached. This will not only clean your shoes thoroughly but will also make sure that the brushes stay in place for years to come.
Furthermore, from mud and grass strands to snow and dirt, this scraper works well with all materials. To make the cleaning process efficient, there are firm bristles below, which brush the sole properly.
Also, if you work in the barn very often, you would be using the unit almost every day. With greater usage, the brushes might lose their scrubbing power. But they can be easily replaced, and you will not need to buy another.
To top it all, this product is made to last and has a 5-year warranty. We have been using it for a year now, and there are no visible signs of damage from rough usage.
What Could've Been Better?
Although we found no signs of wear and tear, the product is not very resistant to rust. It is described to be weather weather-resistant, but we found that this is not the case. If you keep it in the snow, you will find rusted patches. To escape this, we would suggest that you coat it with Rustoleum for protection.
Pros
Sturdy wood to hold bristles in place
Brushes can be replaced when needed
Provides a clean sweep
Comes with a 5-year warranty
Cons
Prone to rusting
Material: Steel, Hard Maple | Dimensions: 9.75" x 6.5" x 5.25" | Weight: 4 pounds | Features and Benefits: Made in the USA, durable construction, portable, effective in cleaning all types of footwear
If you are looking for a versatile product that will take care of every kind of dirt with ease, the JobSite Original Boot Scrubber is a remarkable choice. It cleans sawdust, snow, mud, as well as grass and manure to provide you with clean boots every time.
Mounting Required: Mount to a variety of surfaces with...
Why Did We Like It?
This product is truly built to last. A common problem that occurs with most of its peers is that they are prone to rust or rot. Now, there is a big chance that it will be exposed to extreme hot and cold temperatures, so the company has made the sides with sturdy plastic.
Wood is generally used here, but it rots after a few years. On the other hand, plastic will never rot, and the high-density composite molded sides provide better stability and ease of usage.
Apart from this, the brushes are made to handle the toughest of materials. They are made to be long-lasting and strong, and you do not need to worry about them coming off.
Adding to this are the two side guards. These help in catching dirt and gunk every time you scrub the soles. It even prevents mud from flying around to a large extent.
What Could've Been Better?
The frame is not as sturdy as we would have wanted it to be. It may not be able to hold up against too much pressure. This is something that disappointed us, considering how efficiently the rest of it works.
Pros
4 screws for easy mounting
Can be used in all weather conditions
Long-lasting, strong-bristle brushes
Non-rotting, non-cracking material
Cons
The frame is not that sturdy
Material: Heavy-duty Plastic | Dimensions: 9.25" x 6.5" x 4.75" | Weight: 2.35 pounds | Features and Benefits: All-weather construction, durable bristles, portable
If you are looking for a scraper to take care of industrial-level boot cleaning, we have an incredible option for you. The Mr. Boot Cleaner Scraper brush will make sure you have spotless boots after working in mud and gunk. It can easily be mounted on all kinds of floors, including hardwood.
KEEP MAMA HAPPY: Leave the dirt and mud outside, keeps...
HEAVY DUTY: Long-lasting sturdy boot scrubber / shoe...
Why Did We Like It?
First of all, this boot brush has a perfect set of brush heads, making it convenient to reach the toughest parts of the sole with ease. Getting mud and snow out of deep grooves is a difficult task indeed. But it shows remarkable capabilities when it comes to cleaning without scratching the surface of the boots.
To achieve this, the unit has a metal body with premium bristles. The metal makes sure that its frame is firm, while the tough bristles take out the gunk. It also has reinforced sides with softer brushes that clean the sides of the boots efficiently.
Besides this, the boot scraper weighs less at 2.55 pounds and will not be a hindrance while transporting it. With a host of amazing features and an affordable price tag, this is a great choice to make.
What Could've Been Better?
Although we appreciated the compact size of this scraper, we wish it was a little broader. It will work well with smaller foot sizes, but with broad boots, this can be a problem. So, make sure that you keep this in consideration before purchasing one.
Pros
Can be mounted on all kinds of floors
Weighs only 2.55 pounds
Mounting hardware included
Can be kept indoors as well as outdoors
Cons
Will not fit wide boots
Material: Heavy-duty Rubber, Coir | Dimensions: 16" x 10" x 2.5" | Weight: 3.2 pounds | Features and Benefits: Durable construction, all-weather use, easy to clean, effective in cleaning all types of footwear
Do you own a commercial barn and want to keep your house free from mud and gunk every time someone walks in from the yard? The Rhino Bilt Boot Scraper, Deluxe Boot Scraper, will come to your rescue. With a solid design and a wide area to place your foot, this is a brilliant product to own and work with.
Our house has never looked cleaner before, thanks to this remarkable product. It fits well outdoors and can be placed just at the entrance. You can mount it with the help of pre-drilled holes and screws provided with the pack. Once it is in place, your main job is done.
Though there are wooden panels on both sides that have the bristles attached to them, it is still weather-resistant. The wood is very sturdy and will hold against extreme weather conditions. The body is also powder-coated to prevent rusting and to enable water droplets to fall off.
We also admired the versatility that it offered. Place it anywhere from farms and ranches to beach homes and hunting camps. It is lightweight and easily portable while dealing with dirt and dust efficiently.
Along with this, the 5-brush system makes sure every inch of particles is removed from the bottom and sides.
What Could've Been Better?
We felt that the side brushes are too wide apart for people with smaller foot sizes. If you have kids, you may not be able to clean their boots at one go. But the good part is that you can adjust the base and sides according to your advantage. So, we would not hold this as a drawback in this case.
Pros
Extra wide for all shoe sizes
Versatile and fit for any location
Powder-coated to prevent rusting
All-in-one scrubber, scraper, and cleaner
Cons
Side brushes are too wide apart
Material: Steel, Wood | Dimensions: 15.5" x 9" x 4.5" | Weight: 6 pounds | Features and Benefits: Durable construction, detachable brushes, easy to clean, all-weather use
Bid messy houses goodbye with the Kole Imports Shoe Boot Cleaning Brush. Place this anywhere from your back door, barns, and construction sites, or even outside beach homes, and you would not have to spend the better part of the day cleaning anymore! With a durable body to boast of, this brush will make your life so much easier.
Conveniently clean the sides and bottoms of your shoes
Why Did We Like It?
This is one of those basic brushes that will do the job at hand perfectly well. It has 4 brushes, which clean the soles of shoes as well as the sides. The bristles are strong and can get to the inner edges of grooves on your sole.
Additionally, the wooden frame is made to deal with all kinds of weather and will stand firm through it. Bad weather is a problem in many cities, and you cannot be completely prepared for it. With this unit outside your doors, the house will not see any marks of wet mud and snow.
Also, after a night of heavy snowing or once the product is full of dirt, just wash it with water! That will do the trick, and we have not yet used any kind of soap for it.
What Could've Been Better?
Although the product worked well, we had to get additional screws to mount it. The package did not come with screws, and we were not aware of that earlier. So, it took us a while before we finally managed to get them and mount them. Once it was done, we faced no more issues.
Pros
For both indoor and outdoor use
Can clean golf and athletic shoes, too
Durable and robust construction
Lightweight and portable
Cons
Screws were missing
Material: Plastic, Nylon | Dimensions: 9.5" x 5" x 4.5" | Weight: 0.55 pounds | Features and Benefits: Compact design, affordable, effective in cleaning all types of footwear
Next up is an attractive product that will add to the aesthetics of the entryway. The Superio Boot And Shoe Scrubber is known to do its work exceptionally well while making sure that the entryway looks nice! It is a perfect cleaning equipment that will do its job, leaving you with a dirt-free home.
COME HOME WITH CLEAN SHOES - We all know better than to take...
GORGEOUS WOOD DESIGN - This product may be designed to wipe...
Why Did We Like It?
Leave the mud and gunk outside your house with this brilliant product. Made with natural elements, this product features an attractive wood design with natural bristles that are efficient in removing every bit of sand and snow from your boots.
And that's not all, it is super easy to wash and clean, and you would only need water to do so. We usually clean it and then leave it outside to dry. It dries quickly, and you can use it soon after.
Adding to the convenience, since the scraper brush is so light, you can carry it anywhere with you. We had placed it in the car and would use it before entering the vehicle after camping or hiking. This ensured that the car stayed clean, and we did not have to spend long hours on it.
Also, we have to mention how broad it is, allowing every boot to fit in and scrape the dirt away easily.
What Could've Been Better?
Although the brushes worked very well, we were disappointed to see that some of the bristles started coming off after a year of usage. We are still able to use it, but are unsure about how long it will survive. It would be great if we could get replacement brushes.
Pros
Deep cleanses snow, mud, and dirt
Can withstand all weather conditions
Known for versatile usage
Made with durable premium premium-quality wood
Cons
Brushes break off in time
Material: Heavy-duty Plastic | Dimensions: 10" x 6" x 4.5" | Weight: 1.3 pounds | Features and Benefits: All-weather use, durable bristles, easy to clean, affordable
With a flat design and very sturdy construction, the Jobsite Boot Scrubber Flat Mat Scraper Brush is one of the most convenient options to use today. It does not need to be mounted, and you can easily stand on it without losing your balance.
Best Boot Cleaner: As seen on TV, this is the perfect...
Leave The Dirt Outside: The built-in sole and edge brush...
Why Did We Like It?
Be it in front of your doors or inside the car, this freestanding product will help keep your home and vehicles free from dirt and sand always. With a high-density molded plastic body, it stands firmly and can take a weight of up to 250 lbs without breaking down or bending.
To make sure that you can stand comfortably, the product comes with three non-slip rubber grips. This will help maintain balance while on any kind of surface. We were initially very worried about slipping and falling since it is not mounted, but we ended up completely trusting this one.
Additionally, this unit comes with low-profile brushes. These brushes are the right height for cleaning sides and edges. They are also designed not to scratch the surface of the boots. There are roller bristles also, which enhance the process of cleaning.
Overall, this impressed a lot, and for the affordable price that it came for, we could not complain at all.
What Could've Been Better?
The only drawback was that this product took time to get the dirt out. It does work well, but it took us almost 10 minutes to clean both our boots. You might not have that much time on your hands, and hence, this could be slightly disappointing. But for the price it comes in, this is not a dealbreaker.
Pros
Roller bristles for effortless cleaning
Sturdy construction
Three non-slip rubber grips to maintain stability
Does not scratch shoes
Cons
It takes time to clean
Material: Heavy-duty Rubber, Coir | Dimensions: 20" x 15" x 1.5" | Weight: 5 pounds | Features and Benefits: Large size, all-weather use, durable construction, effective in cleaning all types of footwear
Next up is a product that will effortlessly scrape, scrub, and clean to give you absolutely clean boots. Featuring 3 benefits together, we had strong bristle brushes scrubbing the dirt while an edge scraper helped clean the mud from both sides. Many homeowners choose this simply for the number of benefits offered.
HEAVY-DUTY SHOE BRUSH: Easily clean boots and shoes with...
VERSATILE BOOT SCRAPER FOR ALL FOOTWEAR: Features a durable...
Why Did We Like It?
A scraper needs to be sturdy enough to take the weight of whoever is standing on it! With a heavy-gauge metal frame, we were sure that this one would not break under pressure.
Accompanying the frame are strong bristle brushes with firm tips to clean all kinds of boots and sneakers. We loved the versatility that is offered in this case. From Wellingtons to cowboy and hunter boots, this will take care of it all.
Not only this, but we also found it very easy to store the product. All you need to do is fold the flaps, and it becomes compact enough to fit anywhere.
To add to the product, we got a free shoe brush, which can be used to further clean off any remaining particles of dust and snow from the boots. We would say it works remarkably well, and the brand has taken every measure to ensure proper cleaning.
What Could've Been Better?
The product works exceptionally well after you manage to assemble it. When it arrived, the side wings were bolted in the opposite direction of its brushes. We tried to unbolt and turn them over and then attach them again. But they are fixed tightly, and it took us a lot of effort to make a change.
Pros
No mounting required
Folding design adds to the ease of storage
Extra shoe cleaner brush
Works as a scraper, scrubber, and cleaner
Cons
Wings are bolted inwards
Material: Heavy-duty Rubber, Coir | Dimensions: 15.5" x 9" x 4.5" | Weight: 5.8 pounds | Features and Benefits: Durable construction, detachable brushes, all-weather use, easy to clean
Next up is a unique product that is specially designed to meet your cleaning needs. The Cadillac Boot Scrubber Cleaner Shoe Brush combines convenience and reliability and is bound to satisfy you completely. We were very happy with how clean the house was after we brought this home.
To begin with, the unit is made of high-quality materials that are not prone to damage in extreme weather conditions. We live in an area with a lot of snowfall, and you can imagine the amount of cleaning we had to do every time someone stepped in from outside. But with this just outside our entryway, we can finally breathe a sigh of relief.
Another feature that needs to be mentioned is the scrubber and its exceptional capacity to remove dirt even from within the stitching. This is often ignored, but dirt and sand get trapped in between threads, too. The brush attempts to remove all of it, improving the longevity of your boots.
Besides, this product is designed to be portable and made with lightweight materials. You can either mount it or use it without installing it. It will still be stable and will be able to take your weight without getting imbalanced.
What Could've Been Better?
The only part that needs improvement would be its wooden sides that hold the bristles. These are rough and unfinished and stick out a little. It will not cause damage, but be careful about letting the sides of your boots touch this. It may lead to scratches.
Pros
Cleans all kinds of footwear
Can be used indoors and outdoors
Weather-resistant and rustproof
Cons
Wood sticks out and is rough
Material: Heavy-duty Rubber, Coir | Dimensions: 15.5" x 9" x 4.5" | Weight: 4 pounds | Features and Benefits: Durable construction, all-weather use, easy to clean, effective in cleaning all types of footwear
Occupying the 13th place is a product we can rely on because of its effective performance. The Ninamar Natural Coir Boot Scraper Door Mat consists of strong fiber, which will deal with the most difficult of dirt with ease. It is also known for its modern design, which will add to the decor of the place.
Strong, Thin Fibers: Strip off caked-on dirt, sand, mud,...
Attractive, Modern Design: Fits any home décor
Why Did We Like It?
If you live with livestock and a barn, you will know how muddy it can get. Also, the black clay on the ground can turn into solid gunk and stick to soles. But this product will make sure that every inch is removed, thanks to the strong coir of this mat.
The coir is made from sustainable, environmentally-friendly coconut fiber, which is very resistant and will not break off. It is also resistant to moisture and dries very quickly.
To add to this, the unit is unaffected by all weather conditions, and you can expect it to survive throughout the year without any issues. The body is supported by a steel frame, which is rustproof. So, you can easily keep it outdoors.
Besides, the mat is also very light and can be kept in cars, too. There is no need to mount it, so it is always portable.
What Could've Been Better?
This product worked excellently for us till it lasted. The lifespan is slightly limited, and our one started falling apart after a year and a half. But we would say it served its purpose well and is totally worth the money that would be paid for it.
Pros
Attractive and modern design
Made from environmentally friendly natural coconut fiber
Easy to clean
Weighs only 2 pounds
Cons
Shorter life span
Material: Natural Coir, Rubber Backing | Dimensions: 16" x 24" x 1.5" | Weight: 5.15 pounds | Features and Benefits: Large size, all-weather use, eco-friendly, durable construction, effective in cleaning
Large size, all-weather use, eco-friendly, durable construction, and effective in cleaning
Best Boot Scraper Guide
A boot scraper is only effective if it matches the type of dirt, debris, and weather conditions you deal with regularly. Some models excel in wet, muddy environments, while others are better suited for dry sand, gravel, or snow. To make the right choice, focus on the type of scraper, materials used, weather resistance, and dimensions.
Type of Scrapers
The most common boot scrapers are flat scraper mats and brush-based boot scrapers.
Doormat scrapers: Typically made from coir, rubber, or synthetic fibers, they are effective at removing surface dirt and absorbing moisture. However, they often cannot clean the sides and treads of boots.
Boot brushes: Mounted with stiff plastic, nylon, or coir bristles, these scrub both the soles and sidewalls of boots, ensuring a more thorough clean. Commercial or heavy-duty models often combine brushes with a metal scraping bar for compacted mud.
Material Used
The material of the boot scraper determines durability and cleaning efficiency.
Coir fibers are natural, weather-resistant, biodegradable, and excellent at trapping sand and grit.
Rubber mats are slip-resistant and floor-friendly but less effective on deep grooves.
Powder-coated steel frames with synthetic bristles are the most durable for farms, ranches, and worksites, resisting rust and handling daily heavy use.
Plastic frames are lightweight and inexpensive but typically less robust.
Weather Resistance
Because most boot scrapers are placed outdoors, weather resistance is essential. Choose models with powder-coated or galvanized steel to prevent rust, and opt for UV-resistant coir or plastic bristles to avoid degradation in extreme heat or sun. If you live in snowy climates, ensure the scraper can handle ice, slush, and constant moisture without warping.
Dimensions
Size matters when selecting a boot scraper. Compact scrapers are convenient but may not accommodate larger boots (size 11 and up). Always check internal width and brush spacing to ensure the scraper can fit wide work boots, hiking boots, or insulated winter footwear. Oversized models are better for households with multiple users or for work environments where heavy boots are common.
What are the types of boot scrapers available in the market?
The types of boot scrapers available include standalone boot scrapers, scraper mats, and brush-based boot scrubbers. Some advanced models combine all three for comprehensive cleaning of soles, treads, and sidewalls.
What materials are used to make boot scrapers?
Boot scrapers are made from metal, coir, rubber, wood, and synthetic plastics. Bristles are typically crafted from coir, nylon, or stiff plastic, while frames are often steel, wood, or durable rubber.
How do I clean my boot scraper?
To clean a boot scraper, remove debris manually, then use a garden hose or stiff brush to rinse dirt from the bristles or scraper bars. For coir mats, shake vigorously to release trapped grit, and allow to dry completely before reuse.
Can I use a boot scraper indoors?
Yes, you can use a boot scraper indoors if it includes a tray, mat, or base to capture mud and debris. This is useful for mudrooms, garages, or industrial entryways where outside cleaning isn’t practical.
Where should I place a boot scraper?
The best place to put a boot scraper is near exterior entry points such as porches, barn doors, or workshop entrances, ideally on a flat, stable surface. Mountable models can be fixed to wood or concrete for extra stability.
Can boot scrapers damage my shoes?
Boot scrapers are generally safe for shoes, but overly stiff metal teeth or harsh wire bristles can scratch leather uppers. For delicate footwear, choose scrapers with coir or plastic bristles.
How often should I replace my boot scraper?
A well-maintained boot scraper made from coir or powder-coated steel can last several years. Replace when bristles lose stiffness or when metal frames show signs of structural damage.
Are boot scrapers environmentally friendly?
Boot scrapers made from natural coir or untreated wood are biodegradable and eco-friendly. Models made from plastic or synthetic fibers are less sustainable but usually last longer.
Can I make my own boot scraper?
Yes, you can make a DIY boot scraper from wood, metal rods, or repurposed brushes. Many tutorials recommend building a wooden frame with mounted stiff-bristle brushes and a central scraping bar for efficiency.
Conclusion
A boot scraper is an essential tool for keeping mud, snow, sand, and debris out of homes, barns, and workplaces. The best models combine durable materials, effective brush systems, weather resistance, and proper sizing to clean even heavy work boots thoroughly. Among our top picks, the Carlisle 4042414 Commercial Boot ‘N Shoe Brush Scraper excels at heavy-duty cleaning, the Rubber-Cal "Herringbone" Coir Boot Scraper Brush offers an attractive natural design with excellent grit removal, and the Rhino Bilt Folding Boot Scraper is a weather-resistant, space-saving choice. By matching the scraper to your climate, dirt type, and footwear size, you’ll save time, protect your floors, and extend the life of your boots.
Wheelbarrow cement mixers are compact, portable machines designed to mix and transport small to medium batches of concrete efficiently. Unlike stationary drum mixers, these models combine the mobility of a wheelbarrow with the power of an electric or gas motor, making them ideal for construction sites, home renovations, and landscaping projects. With features such as polyethylene or steel drums, adjustable tilt mechanisms, and safety guards, modern wheelbarrow cement mixers reduce labor fatigue and speed up mixing tasks. In this guide, we review the 8 best wheelbarrow cement mixers, comparing durability, ease of use, and mixing capacity to help you select the right model for your projects.
Best Wheelbarrow Cement Mixers
From powerful motors to large mixing capacities, each cement mixer on this list offers unique features and benefits. Whether you need to mix concrete, mortar, or other construction materials, these wheelbarrow cement mixers will provide you with the efficiency and convenience you need. So, if you're ready to find the perfect wheelbarrow cement mixer for your projects, here's the list of the 8 best wheelbarrow cement mixers that you can consider.
We kick things off with the YARDMAX YM0046 1.6 Cu. Ft. Concrete Mixer has rightly occupied the top spot on our list. Due to its highly durable features and fantastic performance, you can use the unit under various conditions without any difficulties.
Easy to clean and use with solid steel drums and Ip45 wash...
Factory assembled motor drive box for easy and mess-free...
Why Did We Like It?
The first thing that you notice about it is that it is an efficient model to have because of its sturdy features. The manufacturers realized that it would have to undergo a lot of wear and tear, and to combat that, they used quality materials for construction.
As a result, it is ideal for both DIY enthusiasts as well as professionals. You will love how easy it is to assemble despite being a heavy-duty mixer. You won’t face any trouble in pouring the cement and moving it around the job site for better coverage and accuracy.
So, you can use it in almost all types of weather conditions without having to interrupt your work. Moreover, the low-profile design makes it very compact, and you are guaranteed an efficient performance when you want to pour concrete into a wheelbarrow. Finally, it promises safety for both you and the machine.
What Could’ve Been Better?
After regular use, you may notice the bolt at the bottom of the drum coming loose. Therefore, you must keep a close eye on it and tighten it when necessary. Plus, while it is robust, the motor may not be able to handle the extra weight, thereby slowing down your work.
Pros
Gear box
Safety guard
Durable
Quick assembly
Compact
Cons
Bolt at the bottom of the drum is loose
The motor may not be able to handle the extra weight
Capacity: 1.6 cu ft | Power Source: Electric | Power: 0.2 HP | Drum Material: Metal | Wheel Type: Flat-Free Rubber
Having gone through our top three products, it is now time to switch our attention to the Generic Wheelbarrow Portable Cement Concrete Mixer, which just missed the cut. But you will love the output it generates and how easy it is to use, which has led to most people taking notice.
5cuft Portable Electric Concrete Cement Mixer Barrow Machine...
Duty Cement Mixer Ideal For Concrete; Stucco; And Mortar....
Why Did We Like It?
It comes with 10-inch wheels that permit you to get more flexibility even under various conditions. Therefore, you can easily maneuver it, allowing you to put the 220-240V/50Hz motor to good effect. You can also plug it into a 110-120V/60Hz power outlet without experiencing any dip in performance.
The motor is capable of producing 0.5HP of power, provides excellent efficiency, and makes sure that you get a homogenous mixture. Plus, it has a 24-inch drum, which gives you the option of mixing up to 275 lbs of cement in a single batch. As a result, you can cut down on the time it takes to complete a task.
Furthermore, along with the drum, an 8-inch discharge outlet enables you to empty the contents into the wheelbarrow quickly. And when you are done working for the day, you will enjoy the fact that it is collapsible and compact.
What Could’ve Been Better?
One of the issues with it is that the bolts are curved, making it difficult to get the unit in place. So, it may prove to be an inconvenience for you. On top of that, the holes made for the blades allow water to flow through them.
Pros
0.5HP of power
Homogenous mixture
The capacity of mixing up to 275lbs
8-inch discharge outlet
Easy to disassemble
Cons
Curved bolts
Issues with water
Capacity: 5 cu ft | Power Source: Electric/Gas | Power: 0.5 HP | Drum Material: Polypropylene | Wheel Type: Pneumatic
If you need a unit that will help you do touch-ups around the house, you will love the Klutch Portable Cement Mixer. You can tell at a glance that it is not muscular, but in no way does it affect the exemplary performance you are guaranteed to get.
While most designers tend to make their products bigger, thinking about the possibilities of outdoor work, in this case, they have gone the other way. If you have work to do around the house, you will not need to waste a lot of cement for minor touch-ups.
It may look small, but it delivers high consistency due to the 120V electric motor, which can generate 1/2HP of power. As a result, you get a two-cubic-foot drum capacity combined with a 0.88 cubic-foot mixing capacity for most small-scale projects.
While the motor may not be a rapid mixer, it does offer a considerable number of rotations at 26 per minute. And added to the lightweight design, you can quickly move it from one location to another and then let the motor do its job. Finally, you get all of these functions without having to burn a hole through your pockets.
What Could’ve Been Better?
Since it is not a large unit, you can guess that you will not be able to use it for large-scale projects. You will get the best performance only if you use it for small tasks or chores around the house. Thus, if you want muscle, you will have to opt for a different unit.
Pros
Lightweight
Easy to use
Compact
Ideal for small projects
120V electric motor
Cons
Not suitable for large-scale projects
Capacity: 3.5 cu ft | Power Source: Electric/Gas | Power: 0.5 HP | Drum Material: Polypropylene | Wheel Type: Pneumatic
If you are a fan of the Avengers movies, then the name Stark Portable Wheelbarrow Cement Mixer will resonate with you. Although Iron Man does not need a cement mixer, you need one if you are a professional needing to work on various jobs. And coupled with the brilliant functions, you will enjoy the experience.
Cleans easy with solid steel drums, and IP45 wash down...
Motor drive box is factory-assembled for easy and mess-free...
Why Did We Like It?
It comes in a freestanding design, which has the added advantage of making it highly portable. So, you need not worry about taking it from one site to another. Further adding to the movement are the two rubber wheels.
Thus, you not only get high durability, but you will get smooth movement over any surface without much difficulty. Moreover, there is an inside storage system that ensures that it has a substantial capacity, which makes it ideal for heavy-duty work. Additionally, it comes with a 110V battery, which offers 23 rotations per minute for slow mixing tasks.
Therefore, you can use it for mixing seeds and mulch along with other items like concrete. So, you get a lot of versatility at a reasonable price, which has made it an attractive option for most people. Lastly, you get the benefit of a safety lock to control all that power.
What Could’ve Been Better?
For all the power that it generates, we feel that the rotations per minute could be higher. As it is, you can use it primarily for slow mixing, which may appear limiting. A higher rpm value would have given it more edge and ensured that the mixture is of excellent quality.
Pros
Safety lock
Powerful motor
Dual rubber wheels
Versatile
Easy assembly
Cons
Rotations could be higher
Capacity: 4 cu ft | Power Source: Electric/Gas | Power: 0.2 HP | Drum Material: Polypropylene | Wheel Type: Pneumatic
We are at the halfway point of our list, but the top-notch products keep on coming. And if you have a need for speed, you will like our next model. The IMER USA MINUTEMAN II delivers exceptional results in a short period, which is why it is one of the products to look out for.
One of the pivotal points to getting a good mixture is to mix the cement as quickly as possible. In that regard, the wheelbarrow carted freestanding design comes in handy and delivers a professional performance even on the toughest of jobs.
Hence, it can mix up to 275 lbs of grout, concrete, cement, and mortar in just under four minutes. As a result, it is suitable for a range of projects, and you do not have to dawdle on only one particular task. Additionally, it is versatile, too, thanks to the state-of-the-art design, which allows you to handle most situations.
Furthermore, the 110V motor ensures you can get a consistent performance. But what truly takes the cake is the easy installation. You don’t need a lot of time to get it set, and in most instances, it is ready to use in 15 minutes after taking it out of the box.
What Could’ve Been Better?
However, it is costly, which could prove to be a deterring factor for most people. Given the numerous options on offer, you may not want to splurge more without considering other models. Besides, there is a chance that it may tip over if not entirely on the ground level.
Pros
Fast
Easy installation
Mixing capacity of 275lbs
Efficient
Three easy-to-load components
Cons
Costly
Tends to tip
Capacity: 5 cu ft | Power Source: Gas | Power: 0.5 HP | Drum Material: Polypropylene | Wheel Type: Pneumatic
In case you need a large mixer, then the Generic 8 Cubic Feet Cement Mixer will do the job more often than not. It is available in a substantial size with a high capacity that most professionals would love to work with. Thus, there is no project too big for it.
You will be able to mix a lot of cement, grout, and mortar, thanks to the eight cubic foot capacity, which is much higher than in other tools. You can use it to make up to 400 lbs of cement in one batch, which means that you can cover a large area quickly.
Added to that is the 23 rotations per minute, which is very high, and doesn’t affect the output in any way. Moreover, it has a tripod design that makes it very sturdy, thereby improving its lifespan and ensuring that it doesn’t tip under a load.
The motor is capable of generating 1/2HP of power and is well supported by the gearbox to offer consistency under most circumstances. Plus, there is an on-off switch that provides safety and makes sure you get a smooth operation. Lastly, it comes with wheels for more maneuverability.
What Could’ve Been Better?
Unlike other models, it is corded, which means that you need an extension cord to operate it. But there is no denying the fact that it restricts the movement to an extent. Also, despite all the power, it provides only 23 rotations per minute, which means that it could take some time to mix the cement.
Pros
Can mix 4000lbs of cement in every batch
Sturdy
Won’t tip over
17-1/2-inch diameter
Gearbox drive
Cons
Corded
Rotations could be higher
Capacity: 8 cu ft | Power Source: Gas | Power: 0.5 HP | Drum Material: Steel | Wheel Type: Pneumatic
We are nearing the end of our list, but there are a few more quality products to go through. At number ten, we have chosen the Kushlan Electric Portable Cement Mixer specially designed to reduce your time in the field. But it still delivers a power-packed performance.
It presents us with a different option considering it has a 3.5 cubic foot capacity, neither too large nor too small. Therefore, it could be the ideal fit for most tasks and has all the bases covered with its 120V motor. The motor can produce enough power to meet your deadline.
Furthermore, it features a tripod design, making it sturdy enough to withstand the pressures of daily cementing. Added to that, it comes with flat-free tires that provide reliability while ensuring you can maneuver it as per the requirements of a task.
Moreover, the drum is exceptionally crafted in a manner to ensure that you can install it quickly. Hence, it will take you only a few minutes to make it ready for work after taking it out of the box. Also, it is fast, and you will manage to save a lot of time.
What Could’ve Been Better?
While it is easy to install, the instructions are a bit difficult to understand. So, if you are a first-time user, it could take a few minutes to get used to it. Besides, it offers only 21 rotations per minute, which is less than some of the other products and which could affect the quality of the mixture.
Pros
Flat-free tires
Durable
Easy installation
Affordable
Highly maneuverable
Cons
Tricky instructions
Rotations could be higher
Capacity: 6 cu ft | Power Source: Electric | Power: 0.75 HP | Drum Material: Polypropylene | Wheel Type: Pneumatic
The penultimate product on our list is the TALL Portable Concrete Mixing Mortar Mixer, featuring a unique design. It has been around for a long time, and its excellent mixing ability adds to its reputation. Thus, it has ticked most of the right boxes to make for an attractive option.
Motor: 1/2 HP 1680RPM, 2.3 AMP;Voltage: 110V, 60Hz;Rotates @...
Why Did We Like It?
You can use it to carry concrete and other equipment, which makes it an invaluable addition to the work shed. Hence, it is a multipurpose tool that offers you an excellent mixing ability, which you can use in construction places if you are a professional worker.
Furthermore, it has a large capacity, allowing you to use it even under a load. Plus, you do not have to worry about portability, thanks to the 10" rubber wheels, which make sure that you don't feel any strain while maneuvering it. Likewise, the handles have a non-slip feature for added safety.
So, even under various conditions, you don't have to worry about losing control. You can effectively focus on getting accuracy in your tasks. Meanwhile, it comes with a ball-bearing motor that offers 23 rotations per minute and is well complemented by 360-degree drum movement forthe best results.
What Could've Been Better?
It is an expensive tool that could lead to many users opting out of purchasing it. In case you have a tight budget, you will have no other option but to opt for a different model. Also, the rotations could be better to allow you to complete work faster.
Pros
Ball-bearing motor
Made of steel
Easy assembly
Rugged
High torque gear transmission
Cons
Expensive
Rotations could be higher
Capacity: 1.6 cu ft | Power Source: Electric/Gas | Power: 0.2 HP | Drum Material: Steel | Wheel Type: Pneumatic
Wheelbarrow cement mixers combine the portability of a wheelbarrow with the mixing power of a small concrete drum. While they appear simple, choosing the right one requires attention to durability, ease of operation, and mixing performance. Below are the key factors to evaluate before investing in one.
Durability
A cement mixer must withstand abrasive aggregates, heavy cement loads, and constant vibration. Look for mixers with steel or high-density polyethylene (HDPE) drums, powder-coated steel frames, and rust-resistant components. Reinforced bearings and sealed motors extend lifespan by preventing damage from dust and moisture. Because a cement mixer is a long-term investment, durable construction ensures you won’t need frequent replacements or costly repairs.
Ease of Use
Despite their size, the best wheelbarrow cement mixers are designed for one-person operation. Prioritize models with clear controls, quick assembly, and intuitive disassembly for cleaning. Ergonomic handles and large wheels (10-inch or greater) improve maneuverability on rough terrain. A tilt mechanism with safety locks ensures controlled pouring, while clearly labeled components help reduce setup time and user error.
Speed and Mixing Efficiency
Mixing speed directly affects concrete quality and job efficiency. A good mixer drum should rotate at 20–30 RPM to create a uniform mix without splashing. Capacity matters, too: smaller drums (1.5–2 cubic feet) suit DIY or small-scale projects, while larger drums (5–8 cubic feet) reduce batch frequency on bigger jobs. Motors rated at 0.3–0.5 HP (120V electric) are common for home projects, while heavy-duty units may exceed that for commercial use. The right balance of speed, drum size, and power ensures both productivity and consistent mix quality.
Can a wheelbarrow cement mixer handle large mixing jobs?
A wheelbarrow cement mixer can handle small to medium-sized mixing jobs, but it is not designed for extremely large-scale pours such as full foundations or industrial concrete projects. Most wheelbarrow cement mixers feature drum capacities between 3 and 6 cubic feet, making them ideal for home renovations, landscaping, patios, sidewalks, and light construction work. For larger jobs, a tow-behind or stationary drum mixer with a capacity of 9 cubic feet or more is more suitable.
What are the advantages of using a wheelbarrow cement mixer?
The advantages of using a wheelbarrow cement mixer include portable mixing capacity, time and labor efficiency, and consistent concrete quality. By combining drum rotation at 20–30 RPM with durable polyethylene or steel construction, these mixers produce uniform batches faster than manual hand-mixing. Their wheelbarrow design allows easy transport of mixed material directly to forms or work areas, reducing the need for extra shoveling or carrying. They also minimize operator fatigue compared to traditional mixing methods.
How much material can a wheelbarrow cement mixer hold?
The material capacity of a wheelbarrow cement mixer generally ranges from 3 to 5 cubic feet per batch, though some heavy-duty models can hold up to 6 cubic feet. In weight terms, this is typically 250 to 275 pounds of concrete mix, depending on aggregate size and water content. Always check the manufacturer’s load rating before operating, as overloading can strain the motor and reduce mixing efficiency.
Can a wheelbarrow cement mixer be used for other materials besides cement?
Yes, a wheelbarrow cement mixer can be used for mortar, grout, stucco, plaster, and even soil or compost mixtures for landscaping. Many contractors also use them for mixing epoxy-bound materials, lime-based mortars, or refractory mixes. Their rotating drum and mixing paddles are versatile enough to handle a variety of construction and masonry materials, as long as the mix ratio is within the drum’s design capacity.
Are wheelbarrow cement mixers easy to clean?
Wheelbarrow cement mixers are relatively easy to clean if maintained properly. After each use, the drum and mixing paddles should be rinsed thoroughly with water before the cement hardens. For stubborn residue, operators can use a vinegar solution or a light acid wash, though this should be done sparingly to protect the drum’s coating. Some models feature removable drums or tilt mechanisms, which make cleaning and maintenance quicker. Regular cleaning prevents hardened buildup, prolongs the lifespan of the mixer, and ensures consistent mixing performance.
Conclusion
A wheelbarrow cement mixer is a practical solution for anyone who needs a portable, efficient, and durable machine to mix and transport concrete for construction sites, DIY renovations, landscaping, or repair projects, and the best models balance drum capacity, motor power, and maneuverability to deliver consistent results. Among the top-rated options, the YARDMAX YM0046 1.6 Cu. Ft. Concrete Mixer stands out for sturdiness and safe operation, the Generic Wheelbarrow Portable Cement Concrete Mixer excels in motor strength and batch size with its 0.5HP capacity, and the Klutch Portable Cement Mixer offers lightweight convenience for small projects. By considering factors like durability of the drum, frame design, wheel size, mixing speed, and ease of cleaning, you can select a wheelbarrow cement mixer that saves time, reduces fatigue, and ensures uniform concrete mixing across all types of jobs.
Gas-powered post drivers are high-impact tools that use compact engines to drive fence posts, signposts, and stakes deep into the ground with speed and precision. Unlike manual or pneumatic drivers, gas-powered models combine portability with consistent impact force, making them ideal for agricultural fencing, construction projects, and landscaping. Equipped with 2-stroke or 4-stroke engines, reducer sleeves, and vibration-dampening handles, these tools save time and reduce operator fatigue when working with steel, wood, or composite posts. In this guide, we review the 12 best gas-powered post drivers, analyzing durability, power output, ease of use, and compatibility with different post types to help you choose the right model for your projects.
Listed below are the 5 best gas-powered post Drivers from our list:
REDI Driver Boss: An exceptionally durable gas driver, famed for precision and high-quality components, offers versatility through optional reducer sleeves and handle extensions and includes a storage case, albeit at a higher cost. It shines for its robust 4-Stroke Honda GX35 engine and high Beats Per Minute (BPM) at 1820.
Rhino GPD40 Fence Pro Honda 4-stroke Gas Powered Post Driver: Notable for its combined power and versatility energized by a Honda GX35 4-stroke gas engine, this model accommodates both T-posts and smaller round posts with an ergonomically designed handle for comfort, alongside chuck adapters for wide application, though it is slightly pricey.
Titan PGD3200X: Recognized for managing heavy-duty tasks, the model's added weight delivers a powerful performance with 1850 BPM and can drive metal posts up to 3-1/8 inches. It also comes with a storage case and is attractively priced, but lacks handle extensions and additional accessories.
Rhino Multi Pro: Renowned for commercial contracts, this model offers 35% more driving force due to its substantial weight and includes different-sized Chuck-Lok adapters for driving a variety of posts. Despite its weight and the lack of a storage case, its versatility and reliability make it a compelling choice.
Titan PGD3875 4" Barrel Post Driver: Hailed for its large capacity, this 50lb model can drive posts as large as 3.5" quickly and offers three different adapter sleeves for flexible use. It also affords a quicker setup time and comes with a serviceable tool kit, although the positioning of the anvil might pose challenges in getting the post started.
Here is the list of the 12 best gas-powered post drivers that can help you drive posts into the ground quickly and effectively.
1. REDI Driver Boss - Best for Precision & Durability
The first product here is the best tested, the REDI Driver Boss, an absolute failproof gas driver that will post in seconds, with a legendary engine and extremely high-quality components, a driver built to last. The driver provides unparalleled performance, and you can get a precise output in most of your tasks.
You get improved versatility with the model, thanks to the 3-1/8-inch guide tube, which is more significant than on some of the other units. Now, because the machine is more substantial, it adds a little to the weight, bringing it around to 35 lbs. But it is not something to worry about, and you will still get great portability.
You can choose to use optional reducer sleeves, which are available in four sizes 13/16-inch, 1-3/4-inch, 2-1/4-inch, and 2-1/2-inch. Likewise, you can choose to use the optional handle extensions that speed up your work and come in handy when driving taller posts.
Moving on, you have the option of a storage case that keeps it safe from damage and offers a long lifespan. Finally, you can use it for precision work due to the inclusion of an integrated throttle and a polymer piston that delivers a complete performance.
It is more expensive than the other units in the market, and while we think one can’t put a price on quality, you may beg to differ. So, if a budget restricts you, you will have to choose some other option. Also, there are no spring cushioned grips that may affect comfort.
What We Like
Integrated throttle
Polymer piston
Speeds up your work
Storage case
Durable
What We Don't Like
No spring cushioned grips
Expensive
Dimensions: 25" x 15" x 12" | Weight: 35lbs | Engine: 4-Stroke Honda GX35 | Horsepower: 1.6HP | Barrel Size: 3.12" | Barrel Capacity: N/A | Beats Per Minute: 1820BPM
2. Rhino GPD40 Fence Pro Honda 4-stroke Gas Powered Post Driver - Best for Versatility & Power
The runner-up is the Rhino GPD40 Fence Pro Honda 4-stroke Gas Powered Post Driver, which offers a lot of power. Plus, the latest design makes sure that you get unmatched performance, but the most significant upgrade is the versatility.
It is another lightweight model, owing to its weight of 38 lbs, even though it has a large body. The hammer and the anvil are substantially sized as well, along with the overall design. All the components then come together to produce 30% more hitting power.
Hence, it has a considerable edge over other models and further complements the powerful functions is the Honda GX35 4-stroke gas engine designed for industrial use. The 4-stroke engine is invaluable in generating the necessary power for completing most tasks. Moving on, it comes with a 2'chuck sleeve.
It offers you the desired versatility, allowing you to use it with both T-posts and smaller round posts. Meanwhile, for maximum comfort, there is an ergonomically designed handle and an integrated throttle to make long working hours possible. Finally, it has 1-¾” and 1" chuck adapters that ensure you can use it for erosion control, agriculture, and other tasks.
It is slightly pricey compared to the other units in the market, but most users have reported that it is money well spent. But in case you have a tight budge,t you should consider some other options. Also, the sturdiness may decline over time, but that is true of any product.
What We Like
Versatile
Ergonomically designed handle
Lightweight
Integrated throttle
1-3/4-inch to 1-inch chuck adapters
What We Don't Like
A bit costly
Durability may decline over time
Dimensions: 11" x 14" x 24" | Weight: 38lbs | Engine: 4-Stroke Honda GX35 | Horsepower: N/A | Barrel Size: N/A | Barrel Capacity: Up to 2.12" | Beats Per Minute: Approx. 1720BPM
3. Titan PGD3200X - Best for Heavy-Duty Tasks
The Titan PGD3200 is another powerful model that comes with many features you may find to your liking. The designers have been smart to use the weight to make it robust and amplify the performance.
It is slightly heavy, given that it weighs 45 lbs, but that allows it to generate a lot of power. As a result, you can get 1850 beats per minute, which can considerably reduce the amount of time you need to spend on one job.
Likewise, you can drive metal posts measuring 3-1/8 inches without much effort. Furthermore, it comes with a 2-inch adapter sleeve, which is useful for driving pipes, jobs, and rebars, measuring 1 to 2 inches in diameter. Plus, you have the added advantage of getting a storage case.
Therefore, you can keep your tool safe, enabling you to use it for a long time. Meanwhile, you will be able to enjoy all the functions at a reasonable price. Hence, you do not have to burn a hole in your pockets to get the much-needed reliability.
There are no handle extensions with this unit, so you may have to compromise on comfort while sweating it out in the field. Thus, it may not be an attractive option for people. Besides, there are no additional accessories, so you will have to spend extra depending on the type of work.
What We Like
Powerful
Safe operation
Durable
Affordable
Fast
What We Don't Like
No handle extensions
No additional accessories
Dimensions: N/A | Weight: 45lbs | Engine: 4-Stroke Honda GX35 | Horsepower: 1.3HP | Barrel Size: 3.25" | Barrel Capacity: Up to 3.12" | Beats Per Minute: 1850BPM
4. Rhino Multi Pro - Best for Commercial Contracts
The Rhino Multi Pro can deliver unmatched power to help you get through numerous tasks with ease. So, it is quite a favorite among the masses.
It is one of the more massive models on the market due to its weight of 44 lbs, but there is a reason for making it slightly heavy. It generates a lot of power, and for that, it has to be well-built. So, you will see that it has a large body to support the hammer and anvil.
As a result, it can produce 35% more driving force, invaluable in taking care of heavy-duty projects. Furthermore, it includes Chuck-Lok adapters available in three sizes: the 1-inch, 1-3/4-inch, and 2-inch. You can then use them for driving in round posts that measure 2-3/8 inches.
Meanwhile, you can use the power to perform several tasks, which makes it extremely versatile. Therefore, you can drive both T posts and Terminal posts for commercial contracts. Likewise, you can use U-channel and Square Anchor Posts for installing municipal signs. Plus, optional adapters and chucks are also available.
It is heavier than some of the models on our list, so you could be tempted to opt for a lighter option. Many people do not like their units to be heavy, which could affect maneuverability. Also, there is no storage case, meaning that you will have to spend extra.
5. Titan PGD3875 4" Barrel Post Driver - Best for Large Capacity
The has the Titan PGD3875 4" Barrel Post Driver that is armed with some great functions; nonetheless, you will find the features to your liking.
It weighs in at 50 lbs and therefore offers an excellent hammering effect, but that does not compromise portability. While it uses weight to produce a strong performance, you can rest assured that it will still be easy to lift and carry around. Moreover, in comparison to other models, you will get a much smoother installation.
It reduces the time required to set it up by almost half, which means you can use it without delay. And what is sure to grab your attention is the large capacity that enables it to drive posts as large as 3.5" quickly.
Moreover, it comes equipped with three different adapter sleeves – the 1", 2", and 3" – that permit you to use it with various types of posts. Plus, you can also use it with rebar and rods that measure less than 3". Lastly, you get a serviceable tool kit with the unit.
We have seen that the anvil is situated close to the bottom of the tube. Thus, there is a chance that it could be challenging to get the post started. This leads to the other issue where the tube may fail to keep it aligned, thereby causing it to wobble.
What We Like
Powerful hammering
Portable
Reduces installation time
Fast operation
Service tool kit included
What We Don't Like
Difficult to get the post started
May wobble
Dimensions: N/A | Weight: 50lbs | Engine: 4-Stroke | Horsepower: 1.3HP | Barrel Size: 4" | Barrel Capacity: Up to 3" | Beats Per Minute: 700 to 1350BPM
6. Skildril G2XD
The Skildril G2XD, which comes armed with several new functions that have earned it a lot of praise from users, has ticked most of the right boxes, and you get variations to choose from depending on the type of work. The air cushion dampening system gives it the edge.
You can use it with 4-inch posts because a 4-stroke engine from Honda powers it. The GX35 engine is also available in the 2-stroke variation, but in either case, you get a lot of energy. Therefore, it can produce 1100 to 1800 beats per minute, which reduces your work time to a great extent.
Meanwhile, it weighs all of 42 lbs, which is slightly heavy but not a lot to cause maneuverability issues. However, the significant upgrade is the natural oil sight glass that offers sufficient lubrication of the hammer assembly. Thus, you can generate a smooth performance as well as a lot of driving force.
Besides, it is easy to use, and you will enjoy the simple on-off function that makes sure you can continue with your work uninterrupted. Another great feature is the multi-collet option air cushion dampening that ensures there is hardly any recoil, even on tough jobs.
It does tend to leak oil, which is seen in a lot of other models as well. While it is not a severe issue, it could lead to problems in the long run. On top of that, there are no cushioned handles, which might cause you some difficulty during prolonged hours in the field.
What We Like
Lots of driving force
Oil sight glass
Smooth performance
Simple on-off function
Effective lubrication
What We Don't Like
May leak oil
No cushioned handles
Dimensions: 29" x 11.5" x 13" | Weight: 42lbs | Engine: 2-Cycle/4-Cycle OHV | Horsepower: 1.8HP (2 Stroke)/1.4HP (4 Stroke) | Barrel Size: N/A | Barrel Capacity: Up to 4" | Beats Per Minute: 1100 to 1800BPM
7. Titan PGD2875 Gas Powered Post Driver
We have several top-notch products to go through, so without wasting any more time, we kick things off with the Titan PGD2875 Gas Powered Post Driver. It has secured the top spot on our list due to its ability to blend power and design to produce a strong performance.
It is incredibly lightweight as it weighs only 30 lbs, which makes it one of the lighter models in the market. As a result, it is easy to use and highly portable. Moreover, you get a high degree of maneuverability that ensures you can acquire the desired finish on most tasks.
The design is well complemented by the powerful 4-stroke engine that can deliver 1.3 Horsepower. Thus, it can generate a speed of 1500 to 2000 beats per minute quite quickly. Thanks to all that power, your work time is cut down significantly, and you can drive in posts that have a diameter of up to 3".
The excellent output is due to the 3.25" barrel that gets the job done by cutting down the time required to half as compared to a manual driver. On top of that, it comes with 1” as well as 2” adapter sleeves suitable for driving in posts, rods, or rebars.
You have to be careful while using it lest you burn yourself because the housing gets hot quickly. You may need to cover it with a shroud to avoid accidents. Plus, as per the instructions, you cannot start working with it right away and have to wait for at least five minutes.
What We Like
Powerful
Lightweight
Easy to use
3.25-inch barrel
Drives posts in a quick time
What We Don't Like
value1
value2
Dimensions: 13" x 12" x 26.5" | Weight: 30lbs | Engine: 4-Stroke | Horsepower: 1.3HP | Barrel Size: 3.25" | Barrel Capacity: Up to 3" | Beats Per Minute: 1500 to 2000BPM
8. Skidril 2-stroke Gas Powered Post Driver
Next up, we have the Skidril 2-stroke Gas Powered Post Driver that has secured the runners-up spot as it has several similarities with our topmost recommendation. The good thing about it is that it is straightforward to use, which will allow you to use the power it generates as per your requirements.
You will find it to your liking because of the 2-stroke engine that generates 1.8 Horsepower. Therefore, it is easy to use, and you can start it without any trouble. Further adding to the comfort is the ergonomic design that is well complemented by the device's lightness.
Likewise, the Cyclone gasoline engine has very few moving parts, which ensures you will not need any hoses to make it compatible. Thus, it is also easy to maintain, which is sure to please most customers.
Meanwhile, you can drive posts as large as 4” in diameter, thanks to the multi-chuck system and the air cushioning feature. Both functions work together to reduce the recoil effect, which goes a long way in providing much-needed longevity. Lastly, you can enjoy all these features for a reasonable price, which has made it a highly desirable option.
It is a slightly heavy model, but that should not be too much of an inconvenience. However, after a long day in the field, you may have trouble getting through the final few posts. Besides, it does tend to leak oil, but not too much; therefore, you should be on the lookout.
What We Like
Air cushioning
Reduced recoiling
Affordable
Ergonomic design
Easy to start
What We Don't Like
Slightly heavy
May leak oil
Dimensions: 26x10x11” | Weight: 38lbs | Engine: 2-Cycle/4-Cycle OHV | Horsepower: 1.8HP (2 Stroke)/1.4HP (4 Stroke) | Barrel Size: N/A | Barrel Capacity: Up to 4" | Beats Per Minute: 1100 to 1800BPM
9. Titan PGD2875H
Next up, we have the Titan PGD2875H, which has paid a great deal of attention to comfort. It is for this reason that buyers are interested in the model, which is why it has generated a lot of positive feedback.
You can use it comfortably throughout the day, thanks to the easy-grip handles and the vibration-dampening springs. Thus, not only will your fatigue be reduced, but it will also help prevent back strain. Therefore, the designers have focused on making it as user-friendly as possible.
Further adding to the ease of use is its weight of 28 lbs, making it ideal for transportation. You will be able to lift and carry it down the fence line without much difficulty. Likewise, it comes with a trigger throttle that allows you to start it easily. Moreover, it has an integrated stop button for added safety.
Meanwhile, the 4-stroke gas-powered engine from Honda produces 1.3 Horsepower that is effective in generating 1500 to 2000 beats per minute. Therefore, you can use it for commercial purposes or simple tasks around the house. Lastly, it has a 3.25-inch barrel along with adapters.
The designers have included plastic sleeves, which do not make it very durable. So, there is a chance that it could break after regular use. Plus, installing T posts could produce a lot of noise, which is not an ideal work environment in which to find yourself.
What We Like
Storage case
Lightweight
GX 35 4-stroke engine
Reliable
Fast
What We Don't Like
Plastic sleeves
Could get loud
Dimensions: N/A | Weight: 28lbs | Engine: 4-Stroke Honda GX35 | Horsepower: 1.3HP | Barrel Size: 3.25" | Barrel Capacity: Up to 3" | Beats Per Minute: 1500 to 2000BPM
10. Yescom 32.7cc 2-stroke
The Yescom 32.7cc 2-strokeis quite similar to the earlier tool, so it is no surprise to see that some of the functions may overlap. But some fascinating additions have driven its popularity among buyers. Therefore, it has received mostly positive reviews.
The significant upgrade that is noticeable with the model is the inclusion of the spring-isolated handles. It absorbs the vibrations that pass through the hand, even when you are working in the field, and you will not have to use any additional tools. It is made available with a vertical shaft engine that is ideal for working on T posts.
Likewise, there is an adapter that makes it suitable for posts measuring 2-3/16-inch and 2-3/4-inch. And the tool kit, fuel mixing tank, and optional adapters deliver an excellent performance. Moving on, we see that the designers have added muscle to it by including a substantial-sized hammer andan anvil.
Hence, you can use it for agriculture, construction, or geophysical exploration. Besides, because it weighs 34.2 lbs, it is easy to lift, and you can take it from one post to the next without any difficulty. Finally, you get secure handling as well for precise results.
It does not come with extended handles like some of the other tools, so you may not get the same degree of comfort for extended work hours. Besides, there is no storage case, and you will have to be mindful of minor bumps or scratches from impacting your unit.
What We Like
Powerful
Weight of 34.2lbs
Spring isolated handles
2230 beats per minute
Versatile
What We Don't Like
No storage case
No extended handles
Dimensions: 24" x 13.4" x 9.8" | Weight: 34.2lbs | Engine: 2-Stroke | Horsepower: 1.2HP | Barrel Size: N/A | Barrel Capacity: N/A | Beats Per Minute: 1700 to 2230BPM
11. Field Tuff FTF-33GPD Gas Post Driver
The Field Tuff FTF-33GPD Gas Post Driver features an exquisite design that allows you to work several jobs, making it very versatile. Apart from that, the powerful engine is well complemented by the many components that come with it to ensure that you don’t have to incur any additional cost.
When you have to install a new fence, you will like that it is lightweight, which will offer you more excellent maneuverability. But you can also use it for various structures, farm fences, orchard fences, and barriers. Hence, you get great versatility so that you can work on many projects.
Furthermore, it has a 2-cycle gas-powered engine that produces 1.2 Horsepower, which is enough to generate 7500 rotations per minute. Likewise, you will be able to use it to drive 2.67” in diameter stakes at a time, which will help you quickly complete your work.
The numerous components that it comes with, such as the storage stand, blow mold case, and fuel tank, make it fully compatible. You won’t require any hose or external power source, which makes it very convenient to work with and lowers the operation cost. Finally, there is a vibration-dampening system for more comfort.
It is an expensive model, and so most customers might opt out of buying it, given the numerous units they can choose from. Plus, the housing does tend to get hot, which raises safety concerns, so you may have to use a shroud to avoid accidentally getting burned.
What We Like
Blow mold case
Lightweight
Storage stand
34.16 oz fuel tank
Two-way dampening spring
What We Don't Like
Expensive
Housing gets hot
Dimensions: N/A | Weight: 40lbs | Engine: 2-Cycle | Horsepower: 1.2HP | Barrel Size: N/A | Barrel Capacity: Up to 2.67" | Beats Per Minute: 1700 to 2230BPM
12. Titan PDG2000
The Titan PDG2000 because it offers a high degree of reliability, which is in short supply. So, most customers have marked it down as one of the models on their wish list. Plus, due to the powerful engine, you get a stable performance and the components to back it up.
It derives power from the GX35 4-stroke engine from Honda, one of the best gas-powered engines in the market. As a result, it can generate 1750 beats per minute, which can take care of most projects. But you do not need to worry because the internal dampening springs will help you effectively control it.
Thus, you will be able to drive ¾-inch rods along with T posts without any problem. Besides, you get two types of sleeves measuring ½-inch and ¾-inch, respectively, for use with rods or rebars. Moving on, the handles have been designed in a way to provide you with maximum comfort.
Therefore, extended work hours will no longer be an issue, and you can carry on without succumbing to fatigue. Moreover, it comes with a storage case that helps to extend its lifespan and ensures that you can use it under various circumstances without having to worry.
The issue with the unit is that it faces problems when driving posts into compacted dirt. Users have reported that if the surface is hard, there is a chance you could have performance issues. Besides, there is no extended handle option for amplifying comfort, so long work hours may be a problem in some instances.
This section provides a thorough comparison of the top gas-powered post drivers available. The table below outlines key attributes, including dimensions, weight, engine specifications, horsepower, barrel size, barrel capacity, and beats per minute.
Gas-powered post drivers are designed for high-impact, heavy-duty applications such as fencing, sign installation, and structural anchoring. Choosing the right model requires more than just comparing specifications—it’s about ensuring durability, ease of operation, and driving power that match the demands of your projects. Below are the most critical factors to evaluate.
Durability
A reliable post driver must withstand repeated 1,500–2,000 Beats Per Minute (BPM) under demanding field conditions. The housing should be built from forged steel or powder-coated alloys, resistant to impact, corrosion, and fuel exposure. Engines such as the Honda GX35 4-stroke are favored for longevity and low emissions, while reinforced handles and vibration-dampening mounts prevent premature failure. Durability also applies to accessories—adapter sleeves, chucks, and anvils must be rugged enough to handle continuous impacts without deforming.
Ease of Use
The best post drivers are designed for single-operator use with minimal setup. Look for models with recoil or push-button ignition, lightweight construction (typically 35–50 lbs), and ergonomic grips. Quick-change Chuck-Lok or reducer sleeves allow you to switch between T-posts, round posts, and square posts in seconds. Effective vibration-reduction systems are essential for reducing operator fatigue during extended use. A well-designed unit should be intuitive enough that its controls and components can be understood at a glance.
Power
Driving force is the core of performance. Entry-level models generate around 25 ft-lbs of impact energy, while commercial-grade drivers exceed 30–35 ft-lbs. The choice between a 2-stroke and 4-stroke engine also affects power delivery and maintenance—2-stroke engines are lighter but require oil-fuel mixtures, while 4-stroke engines are cleaner, quieter, and more fuel-efficient. Adjustable throttle control and built-in vibration absorption are important for balancing raw power with precision, ensuring posts are driven straight even in clay, compacted soil, or rocky ground.
Do gas-powered post drivers require any additional tools or accessories?
Yes, gas-powered post drivers often require adapter sleeves or reducer collars to fit different post diameters, such as T-posts, U-posts, or round posts up to 4 inches. Some models include these accessories, while others must be purchased separately. A storage case and service kit are also recommended for transport and long-term use.
Is a gas-powered post driver easy to operate?
Yes, a gas-powered post driver is designed for ease of operation. With pull-start or push-button ignition and minimal training, most users can operate them safely. Lightweight builds and ergonomic handles with vibration dampeners make them user-friendly, even for extended shifts.
What safety measures should I take when using a gas-powered post driver?
When operating a gas-powered post driver, always wear hearing protection, gloves, safety goggles, and steel-toed boots. Ensure the post is stable before engaging the throttle, maintain proper footing, and never exceed the rated post size. Always follow the manufacturer’s safety instructions for your specific model.
Are gas-powered post drivers suitable for all-weather conditions?
Yes, gas-powered post drivers can be used in most weather conditions. However, wet or frozen ground may reduce driving efficiency, and extreme cold can affect engine performance. For longevity, avoid prolonged exposure to rain or snow and store the driver in a dry, covered environment when not in use.
What types of posts can I use with a gas-powered post driver?
Gas-powered post drivers can handle a variety of materials, including steel T-posts, U-posts, wooden fence posts, vineyard stakes, and signposts. The key is selecting the correct barrel size and adapter sleeve to match your post’s diameter.
How deep can a gas-powered post driver drive a post?
The depth depends on soil density, post diameter, and impact force. In normal soil, most gas-powered drivers can set posts 3–4 feet deep. Hard, rocky, or compacted terrain may require pre-drilling or specialized heavy-duty drivers.
Can I use a gas-powered post driver for other applications besides fencing?
Yes, beyond fencing, gas-powered post drivers are used for signposts, orchard stakes, erosion-control barriers, decks, and mailboxes. As long as the post size is compatible with the driver’s barrel and adapters, it can serve multiple construction and agricultural applications.
How do I maintain my gas-powered post driver?
Maintenance involves regular oil checks (for 4-strokes), correct fuel-oil mixtures (for 2-strokes), cleaning air filters, and inspecting spark plugs. After use, remove debris from the barrel and chuck, tighten bolts, and check fuel lines for wear. Store the tool in a protective case to prevent damage during transport or long-term storage.
Final Verdict
Gas-powered post drivers combine engine-driven impact force, durable construction, and vibration-dampening design to make post installation faster and safer than manual methods. By focusing on durability, ease of use, and raw driving power, you can choose a model that matches your workload—whether that’s light-duty farm fencing, vineyard maintenance, or heavy commercial contracts.
From the reviewed models, the REDI Driver Boss stands out for its precision, robust Honda GX35 4-stroke engine, and professional-grade durability, while the Rhino GPD40 Fence Pro offers excellent versatility with ergonomic handling and adapter compatibility. For buyers seeking value with heavy-duty strength, the Titan PGD3200X delivers high BPM performance at a competitive price.
By aligning your choice with post size, soil conditions, and frequency of use, you’ll ensure an investment in a gas-powered post driver that saves time, reduces fatigue, and provides reliable performance across a wide range of applications.
Wheelbarrows for concrete are essential construction tools designed to transport heavy, wet, and uneven loads efficiently across job sites. Unlike regular garden carts, these wheelbarrows feature reinforced steel or high-density poly trays, robust undercarriages, and flat-free or pneumatic tires that provide stability even on rough terrain. A well-built concrete wheelbarrow reduces strain on the user, improves site productivity, and ensures safe handling of dense materials like cement, gravel, and mortar. In this guide, we review the 9 best wheelbarrows for concrete, comparing load capacity, tray material, tire design, and overall durability to help you select the right model for heavy-duty work.
Listed below are the 5 best wheelbarrows for concrete from our list:
WORX Yard Cart. The WORX Yard Cart combines the strength of a 300 lbs. capacity and the convenience of lightweight, ideal for undertaking various functions. Its eight-in-one nature and flat-free tires provide multiple uses and smooth functions. Although some users found it narrow, the hindrance is measurable and only requires getting used to.
Marathon Yard Rover. The Marathon Yard Rover offers a large carrying capacity of 300 lbs. Its 5-cubic-feet tray is designed with polypropylene, delivering outstanding longevity and reliability. The contoured design and loop handles ensure easy maneuverability, despite some issues with installation.
Ames Garden Cart. The Ames 2463875 Garden Cart's standout feature is its built-in tool tray, making organizing tasks a breeze. Its 4 cubic feet capacity and rust-resistant tray make it hardy and reliable, although some users might find the handle too low, which could be inconvenient.
Garden Star Garden Cart. The Garden Star Garden Cart offers simplicity, ease of use, and high efficiency. The 4-cubic-foot tray incorporates multiple compartments, and the unit showcases impressive balance and stability thanks to air-filled tires. The primary issue is installation, which some found challenging due to mismatched bolts and holes.
True Temper Wheelbarrow. The True Temper Wheelbarrow excels in versatility, offering a range of options to choose from. The dual-wheel conversion kit, an 8-cubic-foot poly tray, and an all-steel undercarriage make it a reliable workhorse, though some might find the higher price point a drawback.
Here is the list of the 9 best wheelbarrows for concrete that you can use to easily and quickly transport heavy items.
1. WORX Yard Cart - Best for Multifunctional Use
The WORX Yard Cart has quickly made its way up the charts to cement a place among the top brands. There's a lot to like about it, including its refined look, which is sure to grab your attention. So, let's get down to brass tacks.
The striking aspect of the model is the remarkable capacity of 300 lbs., making it suitable for various purposes. We loved how the designers have kept the weight within reasonable limits despite having numerous functions.
But don't worry, because you can use it as a heavy-duty model since it has combined eight carts in one. Users can employ it as a yard cart, bag holder, extended dolly, and cylinder carrier, among other things. It delivers much-needed comfort and significantly reduces stress, allowing you to quickly complete any task.
We also need to talk about the flat-free tires, which save you the trouble of inflating them. It features a rugged design and provides smoothness on various surfaces. You won't have trouble maneuvering it, while the smart two-wheel placement provides easy access to all functions.
Whether it's your first time using a cart or you need it for professional purposes, this wheelbarrow takes care of most situations.
Some users have found the unit too narrow, which can be inconvenient. It has several advantages, but if you're unaccustomed to using a narrow cart, it'll take time to get the hang of it. Also, you may need to purchase additional components, driving up the overall cost of the model.
What We Like
Innovative two-wheel placement
Lightweight
Doesn’t need inflating
Sturdy construction
Versatile
What We Don't Like
Narrow
Doesn’t include all components
Dimensions: 42" x 12" x 18" | Weight: 49lbs | Load Capacity: 300lbs | Tub Material: Metal | Caster Type: N/A | Number of Wheels: 2
2. Marathon Yard Rover - Best for Heavy-Duty Tasks
Those of you who liked our earlier recommendation, don't make up your mind just yet because the products keep getting better. Next up is the Marathon Yard Rover, which comes with several exciting upgrades, making it suitable for numerous tasks. Rest assured, you'll get your money's worth.
Straight off the bat, the large capacity allows you to handle a wide range of tasks with ease. The 5-cubic-feet tray is well-supported by the polypropylene construction and has several benefits. It's both impact and rust-resistant, delivering much-needed longevity to provide reliability at work.
Furthermore, the contoured design makes work more manageable, ensuring you can carry large loads and dump them in any suitable spot. In fact, it has a total carrying capacity of 300 lbs, permitting you to work with bark bags, debris, mulch, and yard waste. In that regard, the loop handles provide exceptional maneuverability, allowing you to push or pull with ease.
Once work is over, you won't have any trouble storing the unit. If you don't have sufficient room in the shed, there's no need to worry; simply hang it from the wall. Finally, we can't end this discussion without mentioning the air-filled tires for smooth movement.
The primary problem users face is installation since, in some cases, the bolts and holes don't match up to the instructions. So, it'll take longer to arrange and fit all the components, and you may have to redrill the holes for better alignment. If you haven't done something like this before, it's better to seek professional help.
What We Like
Loop handles
Easy to store
Air-filled tires
Highly maneuverable
300 lbs carrying capacity
What We Don't Like
Tricky installation
Dimensions: 53.5" x 55" x 27.5" | Weight: 25lbs | Load Capacity: 300lbs | Tub Material: Polypropylene (PP) | Caster Type: Pneumatic | Number of Wheels: 2
3. Ames Garden Cart - Best for Organizing Tools
Ames 2463875 Garden Cart has been making all the right noise, and a closer look at the model reveals why. It may look like a simple unit, but don't be fooled as Ames has made the necessary upgrades, delivering improved performance. So, read on to find out more.
One of the first things that you notice about the wheelbarrow is its ease of use. It comes in an easy-roller yard cart, making it convenient for first-time users and seasoned professionals. But what's exciting is the multi-purpose nature of the tray, given that it's divided into several compartments.
The cart has a total capacity of 4 cubic feet and comes with an integrated tool tray to store all necessary items. Therefore, it's highly convenient for carrying out numerous tasks and allows you to quickly complete work, highlighting its efficiency. Additionally, the tray is rust-resistant and lasts a long time for the best results.
Apart from that, what grabbed our attention are the four sets of wheels, including two smaller wheels and two larger wheels for more portability. It provides even weight distribution and reduces fatigue as you navigate harsh terrains. Therefore, you can work for prolonged periods, made possible by its comfortable performance.
Depending on your preference, the handle might seem slightly lower, making it inconvenient for tall users. But this isn't a significant issue and certainly feels better once you start working. Apart from that, you should be wary of overexposure to the sun and other natural elements, which can cause the color to fade.
What We Like
More balance
High efficiency
Wider wheelbase
Rust-resistant
Multi-purpose model
What We Don't Like
Low handle
Color may fade
Dimensions: 12.1" x 20" x 11.1" | Weight: 5.4lbs | Load Capacity: 225lbs | Tub Material: Plastic | Caster Type: Swivel | Number of Wheels: 4
4. Garden Star Garden Cart
Garden Star Garden Cart has many similarities with some other models available out there, so why should you opt for it? The primary reason would be user-friendliness, but that doesn't mean it compromises on other aspects. We guarantee you'll get a reliable performance during tasks, making it stand out.
Firstly, several factors need to be considered when buying a wheelbarrow, but capacity and maneuverability are perhaps the most important. This product does well in both these aspects, thanks to the 4-cubic-foot tray and loop handles. Further adding to the convenience is the impact-resistant and anti-rust construction, ensuring it lasts a long time.
You can carry various materials, be it hay, debris, rocks, or mulch, and then deposit them in any suitable spot. This is made possible by the innovative handles, permitting you to pull or push the wheelbarrow quickly.
But the significant upgrade is the pneumatic dual air-filled tires, providing excellent balance and weight distribution. This ensures stable performance in most situations. Also, once work is over, it's exceptionally convenient to store the unit as it can be hung from the wall or placed in the shed.
You must keep the loads closer to the handle; otherwise, the wheelbarrow tends to flip. It's not an ideal scenario and may make prospective buyers hesitant about the purchase. Besides, the installation procedure takes time because certain nuts and bolts aren't best suited for the purpose.
What We Like
Air-filled tires
Even weight distribution
Accurate
Fast performance
Provides stability
What We Don't Like
Installation takes time
Tends to flip
Dimensions: 37" x 25.5" x 27" | Weight: 20.13lbs | Load Capacity: 300lbs | Tub Material: Polyurethane | Caster Type: Pneumatic | Number of Wheels: 2
5. True Temper Wheelbarrow
We're at the halfway point of our list, but there are several quality products we're yet to review. Next up is the True Temper Wheelbarrow, primarily focusing on versatility so that you can handle several tasks with ease. You'll love all that it offers, and it makes for a wonderful addition to the workshed.
First and foremost, you've got a lot of options to choose from, highlighting the unit’s incredible versatility. True Temper has added all relevant components, meaning there's no need for additional purchases; you can quickly complete the installation. Among all the upgrades, the dual-wheel conversion kit is extremely convenient, making work more manageable.
It has an 8-cubic-foot poly tray, which shows the fantastic capacity you get for most tasks. In that regard, the anti-rust coating proves useful and ensures that it'll last a long time to deliver consistent performance. You won't have to worry about it breaking down in the middle of work, providing much-needed reliability.
Furthermore, thanks to its quick maneuverability and fast performance, the wheelbarrow reduces work time without compromising accuracy. We also loved the dual-wheel design well-supported by the all-steel undercarriage, allowing users to work for long hours. So, it's suitable for all age groups and comes in handy irrespective of the job at hand.
For all that's good, there's one point of contention for buyers, which is its higher price. The cost of a unit is one of the most important considerations for customers, and given the range of available options, we understand why. You need to be flexible with the budget or choose a different model.
What We Like
All-steel undercarriage
Conversion kit included
Flat-free tires
Suitable for all ages
Fast installation
What We Don't Like
Expensive
Dimensions: 58.75" x 30.5" x 33" | Weight: 53.9lbs | Load Capacity: 499.44lbs | Tub Material: Plastic | Caster Type: Pneumatic | Number of Wheels: 2
6. Polar Trailer
The Polar Trailer has most bases covered, and you can use it on various terrains while getting a superb output. Designers have paid a lot of attention to the details, making it suitable for first-time users and professionals alike. No surprise, it has mostly received a positive response from prospective buyers.
Let's begin by discussing the weight of the model to give you a clear idea of the load-bearing capacity and versatility. It weighs 35 lbs and consists of a high-impact polyethylene tub, which is sure to last a long time. Therefore, you can use it for construction work or gardening activities to carry a substantial load of 400 lbs.
Once you start working, you'll see that the tub has 7 cubic feet of space, sufficient to hold an array of materials. It's well complemented by the suitable dimensions of the wheelbarrow, providing several benefits. So, you won't have any trouble moving it over different terrains to pour the contents over the desired spot accurately.
In that regard, we must talk about the wide-rugged, wide-track rubber tires, which prove highly useful in managing weight. You can work for long hours, as it reduces fatigue, while the shielded ball bearings provide a seamless experience.
Like some other units, you'll have problems with poor instructions, making it difficult for first-time users to complete the installation. On top of that, some holes haven't been drilled; you’ll need to do it yourself, which can be cumbersome. We suggest you take your time and call someone to help you.
What We Like
7 cubic feet of space
Suitable dimensions
Wide-rugged wide-track rubber tires
Shielded ball-bearings
Ergonomic design
What We Don't Like
Holes need to be drilled
Poor instructions
Dimensions: 50" x 28" x 29" | Weight: 36lbs | Load Capacity: 400lbs | Tub Material: Polyethylene (PE) | Caster Type: Pneumatic | Number of Wheels: 2
7. Goplus Wheelbarrow
Even a cursory glance at the Goplus Wheelbarrow will leave you coming back for more, meaning it's on most people's wish lists. There's a lot to like about it, and if you're searching for a feature-heavy model, it's hard to look past this unit. So, let's take a closer look at the details.
There are several fantastic features we need to cover, so let's get right into it. The unit is highly versatile and features a glossy design, well-complemented by its lightweight nature. You can use it for numerous tasks and in various places such as the patio, warehouse, or farm.
What's more, a lot of attention has been given to the sturdiness seen about the heavy-duty steel frame and PP container. Now, if you're wondering how to maneuver the wheelbarrow, let us tell you that the 13-inch pneumatic rubber tires provide the answer. You can quickly turn, lift, and navigate across the bumpy terrain.
Other than that, it has a large capacity of 5 cubic feet, capable of carrying a load of 330 lbs without hassle. We should also let you know that the container won't bend or break under substantial weight, delivering a long lifespan. You get much-needed reliability during tasks while the ergonomic design permits extended work hours.
Price is one of the first things that users notice, and given the range of functions, we understand the higher cost. However, if you've got a tight budget, it might be difficult for you to make the purchase. In such a scenario, it's better to opt for a different unit.
What We Like
Loop handle
13-inch pneumatic tires
Doesn’t get deformed
Fast installation
Easy to maneuver
What We Don't Like
Higher cost
Dimensions: 57" x 26" x 26" | Weight: 23.1lbs | Load Capacity: 330lbs | Tub Material: Polypropylene (PP) | Caster Type: Pneumatic | Number of Wheels: 2
8. Ames CP6PS Wheelbarrow
While choosing any unit to feature on our list, we've had to ask ourselves what makes it stand out. With regards to the Ames CP6PS Wheelbarrow, the answer is the fantastic range provided by the model. It strikes the right balance between various functions, turning quite a few heads in the market.
At the very outset, what grabs your attention is its refined look, which isn't usually seen for a wheelbarrow. Good looks are the least of your concerns for a product that's designed to work in construction sites or gardens. However, Ames has backed up the elegant design with sturdy and efficient features.
The significant addition comes in terms of the pour spout mechanism, ensuring you get more accuracy in your tasks. Whether it be for heavy-duty work or small-scale purposes, the precision performance allows you to complete any task for the best results. In that regard, the double-coated American ash handles prove useful, permitting you to work for long hours.
Coming to robustness, we liked the corrosion-proof poly tray, which delivers a long lifespan and much-needed reliability. Since a significant part of the work is situated outdoors, designers have carefully chosen the components so the wheelbarrow doesn't break down.
There are a couple of issues with the model, and we found that the instructions aren't suitable for first-time users. If you haven't assembled something similar, you might feel lost, which doesn't bode well for the unit. Plus, the axle needs improvement and may not perform well under a heavy load.
What We Like
Ergonomic design
Excellent wheels
Highly maneuverable
Weather-resistant
Long-lifespan
What We Don't Like
Poor instructions
Axle needs improvement
Dimensions: 59.75" x 29.5" x 26.5" | Weight: 29lbs | Load Capacity: 374.58lbs | Tub Material: Plastic | Caster Type: Pneumatic | Number of Wheels: 1
What is the Best Wheelbarrow for Concrete?
The following table provides a detailed comparison of the top wheelbarrows engineered for concrete-related tasks. It meticulously evaluates key attributes, including Dimensions, Weight, Load Capacity, Tub Material, Caster Type, and Number of Wheels.
Choosing the right wheelbarrow for concrete requires more than comparing load capacities. Concrete is dense, heavy, and unforgiving, so your wheelbarrow must be engineered for strength, stability, and ease of handling. Below are the key factors to consider before making your purchase.
Portability
A concrete wheelbarrow must be easy to maneuver, even when carrying 200–400 pounds of wet mix. Look for models with flat-free polyurethane tires or heavy-duty pneumatic wheels that handle rough terrain without losing balance. Ergonomic handles and dual-wheel designs can further reduce strain and improve stability, especially when moving across gravel or uneven job sites.
Price
Wheelbarrows for concrete range from affordable polypropylene trays for light-duty jobs to premium steel or high-density poly tubs with reinforced frames for contractors. While budget models may suffice for occasional DIY use, professionals should invest in heavy-duty designs that withstand daily exposure to concrete, gravel, and mortar. The best value comes from balancing cost with longevity, repairability, and load rating.
Robustness
Durability is critical in a concrete wheelbarrow. Look for powder-coated steel undercarriages, reinforced welds, and rust-resistant trays that won’t degrade under constant exposure to moisture and abrasive materials. A robust frame ensures the wheelbarrow won’t bend, crack, or fail mid-task, which can pose safety risks and cost time on the job.
Can I use a regular wheelbarrow to move concrete?
You can use a regular wheelbarrow to move concrete, but concrete-specific wheelbarrows are stronger, wider, and more stable. Regular garden wheelbarrows may bend, crack, or tip under the heavy load, making them less safe and less efficient.
Can I assemble a wheelbarrow for concrete myself?
Yes, most concrete wheelbarrows ship in parts and can be assembled with basic hand tools such as wrenches and screwdrivers. Always follow the manufacturer’s assembly instructions to ensure correct alignment of the tray, frame, and wheel for safe use.
What safety measures should be taken when using a wheelbarrow for concrete?
Safety measures when using a concrete wheelbarrow include wearing gloves, safety footwear, and eye protection, never overloading beyond the rated capacity, clearing the path of obstacles, and avoiding steep or unstable terrain. Always push rather than pull to maintain control.
How to balance a heavy load in a wheelbarrow for concrete?
To balance a heavy load in a concrete wheelbarrow, keep the center of gravity over the wheel by loading evenly and avoiding side-heavy piles. Positioning the bulk of the weight toward the front helps with stability. Maintain a firm grip on both handles and use short, controlled movements to reduce tipping risks.
How should I maintain my wheelbarrow for concrete?
Maintain a concrete wheelbarrow by washing it immediately after each use to prevent hardened concrete buildup. Check tire pressure regularly, tighten bolts and fasteners, and store the wheelbarrow in a dry, covered area to prevent rust or UV damage. For steel trays, applying a protective coating can extend lifespan.
Final Verdict
Wheelbarrows built for concrete combine load capacity, stability, and durability to handle one of the toughest building materials. If portability is your main concern, look for dual-wheel models with flat-free tires. For heavy-duty job sites, reinforced steel trays and undercarriages ensure maximum longevity. Among the top picks, the WORX Yard Cart excels in versatility with its eight-in-one design, the Marathon Yard Rover offers excellent balance and easy handling, and the True Temper Wheelbarrow delivers contractor-grade strength for demanding tasks. By prioritizing portability, price, and robustness, you can invest in a wheelbarrow that not only improves efficiency but also withstands years of heavy use on construction projects.
Vacuums for tile floors are specifically designed to remove dust, dirt, and debris from hard surfaces while reaching into grout lines and crevices where standard vacuums often fail. Tile is durable and stain-resistant, but its porous joints easily trap particles that make floors appear dull and dirty over time. The best vacuums for tile floors combine strong suction power, hard-floor brush rolls, and efficient filtration systems to capture fine dust without scattering it. Some models include swivel steering for maneuverability, cordless operation for flexibility, and even robotic automation or wet-dry functions for all-in-one cleaning. In this guide, we review the 10 best vacuums for tile floors, ranging from compact handhelds to multi-surface stick and robot vacuums, to help you choose the right tool for effortless tile maintenance.
Best Vacuums For Tile Floors
Here's the list of the 10 best vacuums for tile floors of 2023, designed to tackle dust, dirt, and grime to keep your tiles looking pristine.
A cordless vacuum, the CHV1410L, is a powerful vacuum with great additional features that seem to be designed with cleaning tiles in mind. With a great battery and quick charge paired with easy maintenance, this offering from Black+Decker is a small machine with extreme suction power.
The CHV1410L is compact and lightweight, making it easy to maneuver and reach those tiny crevices. There are several extra features and its powerful 15.2 AW suction power, which makes it great for cleaning tiled floors.
With an extendable crevice tool that makes getting in tight spaces much easier, as well as a rotating slim nozzle, it's ideal for getting in between tiles. Additionally, the “cyclonic action” suction of the vacuum keeps the filter clean and maintains the same strong suction power over time.
As for maintenance, the washable dust bowl and filter are easy to remove and make cleaning up a hassle-free experience. To charge up the lithium-ion battery inside, simply attach the vacuum to its charging base, and in four hours, you’ll be ready to go!
What Could've Been Better?
One issue we did find with this model is related to the battery and its longevity. A lithium-ion battery is meant to last for years; however, this was not the case with this vacuum cleaner. The battery might die within a few months despite light use. Furthermore, the battery itself is not replaceable in this model.
The Featherweight Stick is a stick vacuum cleaner with a unique three-in-one design that can convert into a handheld or stair vacuum. This lightweight model is excellent for hard floors, with a 15ft. power cord that allows you to reach anywhere in the house with ease.
VERSATILE THREE IN ONE DESIGN. Easily converts from a corded...
LIGHTWEIGHT AND EASY TO MANEUVER. Weighing less than 4...
Why Did We Like It?
Having the ability to change the vacuum type as needed in the situation is a treat and makes cleaning so much easier with an all-in-one machine.
The Featherweight is able to pick up pet fur and dust from tiles with sufficient power. Be it on a flat floor, furniture, or stairs, it is a pleasant experience to switch between the modes. Moreover, the crevice tool came in handy, especially for reaching tough spots in the corners and tiles.
That's not all; storing the vacuum away was easy, as the overall footprint is smaller than many wired vacuums. The wire itself tucks away neatly and efficiently behind the handle, making the maintenance that much easier.
Cleaning the vacuum out is a simple task as well. After all, it has a filter with a bag-less design that requires simply opening the vacuum and emptying the collection chamber.
What Could've Been Better?
While some may enjoy having a smaller-sized vacuum, it may be a nuisance for those with larger areas to clean. The Featherweight truly is small and will require more passes to cover larger areas.
Although the 15ft. cord is sufficient for the standing vacuum, it can be lacking when using the other two vacuum modes.
Another corded vacuum option, the Shark Rocket from SharkNinja features a two-in-one design with great suction, be it in the stick or handheld form. It includes attachments to clean those tight spaces and handle pet hair with ease. Taking it one step further, the fingertip controls allow fast switching between cleaning carpet and hard floors.
SHARK ROCKET PET CORDED STICK VACUUM: Ultra-powerful, corded...
PERFECT FOR PETS: Powerful pet hair pickup attachments like...
Why Did We Like It?
One feature that stood out the most while using the Shark Rocket was the swivel steering. Maneuvering it around furniture was a breeze and made cleaning much easier than having to go around table and chair legs manually.
Another thing we liked was the accessibility it offered. The low-profile, 8.5-inch wide cleaning path allowed us to reach under furniture: an included crevice and precision tool allowed for cleaning in even the tightest of spaces. Additionally, the handheld mode combined with the long wand made it easy to reach from the floor to the ceiling.
Furthermore, storing the vacuum away was simple and easy. Simply detach the hand vac portion and hang it from the wand. After all, it comes with a free-standing and compact design.
Finally, the dust cup is easy to empty with a unique, bagless, bottom-opening design. At the touch of a button, the bottom of the dust cup is released, and the debris falls through into the disposal.
What Could've Been Better?
Due to the design of the Shark Rocket, the top half offsets the weight distribution of the whole vacuum. This is why the storage calls for you to detach the hand vac and attach it closer to the ground. We have had multiple instances of it falling over, which could have caused damage or hurt someone.
Another cordless option, this time coming from Hoover, the BH50010 uses a lithium-ion battery as its power source. Featuring a simple build, it gets the job done with ease thanks to its lightweight body. And with a low-profile design coupled with a powered brush roll, it can pick up dirt and debris on any floor surface.
WINDTUNNEL 3 TECHNOLOGY: The Linx cordless vacuum cleaner...
Why Did We Like It?
Cleaning multiple floor types can be a hassle when vacuuming, as the suction power may not always be strong enough for both hard floors and carpets. However, the powered Brushroll in the Hoover was fantastic at pulling the dirt and dust up from both these spaces.
Of course, the suction power itself is not lacking either. Equipped with Hoover’s WindTunnel airflow technology, there was no problem in picking up dirt. Additionally, the low-profile design helped reach lower areas, under furniture and such, which is always great for convenience.
An included rechargeable lithium-ion battery on a base brings another level of freedom while using the vacuum. Additionally, the display in the front of the vacuum will show how much power is left in the battery to keep the vacuum ready to go.
What's more, the model comes with a washable filter inside that will allow reusability and ensure the dirt is collected properly.
What Could've Been Better?
Without a dedicated slim nozzle option, you must rely solely on the Brushroll and suction power to reach the crevices on the floor. Apart from that, the battery charger seems to be lacking. After a few uses, it would stop charging the battery altogether, prompting us to buy a whole new charger.
A modern robot vacuum option, the Roomba 675 is an autonomous cleaning device. With several onboard sensors and motors, it will power itself throughout your home and pick up dirt and debris. Paired with an app, it offers a futuristic experience when it comes to cleaning.
Capacity volume - .6 liter. Works with Alexa for voice...
Clean and schedule from anywhere with the iRobot HOME App;...
Why Did We Like It?
This is one of the most technologically advanced vacuums currently on the market. You may control it using a voice assistant, through the app, or even let it clean automatically based on your set schedule, making it convenient to use.
Autonomy on the Roomba 675 goes a long way when it comes to power, as it will run for up to 90 minutes before docking itself and recharging. Furthermore, the sensors will detect different floor types and adjust the bristle height to pick up dirt, from carpets to hardwood floors.
It also has multi-surface and edge-sweeping brushes to handle corners and tight spots. Pair this with the Dirt Detect sensors, and it will get to areas that you may have missed or can’t reach right away.
What Could've Been Better?
Comparing the Roomba 675 to traditional vacuums, it does fall short in some areas. With such a compact build, it does not have as strong of a suction power as other vacuums might have. Additionally, it can miss spots that the sensors are unable to pick up due to obstacles, so the coverage is not always accurate.
Essentially, the big brother of the 675, the i7+ from Roomba, is packed with many of the same features but comes with a few more tricks up its sleeve. With more autonomy and power, as well as sensors and learning capabilities, this vacuum adapts to your needs specifically.
ALWAYS GETTING SMARTER - Quality that lasts; Intelligence...
COMPLETE CONTROL OF YOUR CLEAN - With Smart Mapping, your...
Why Did We Like It?
Watching the i7+ in action is a delight, knowing that it will handle the entire vacuuming job from charging to collecting to even disposal; this is definitely one for low-maintenance lovers.
One especially useful feature was the smart learning capability. To be able to tell the vacuum where exactly you want it to clean without lifting a finger was a great, hassle-free experience. You can also tell it where not to go, such as play areas or pet bowls, instead of having it roam around looking for dirty areas to clean.
iRobot states the i7+ as being ten times more powerful than their 600 series in terms of suction power. This, combined with the adaptive bristles underneath, the i7+ will be able to power through many cleaning jobs across whatever floor surface you may have.
What Could've Been Better?
There were issues that we ran into with the brush bristles getting caught on the hair while cleaning. This clogged up the system and kept the i7+ from picking up more dirt, essentially just roaming.
Furthermore, the sensors need light in order for the Roomba to function, which can be a nuisance at times.
Corded vacuums can be limited in their maneuverability due to the length of the cord. The NV352 from SharkNinja is not one of these vacuums. With a detachable pod and excellent Swivel Steering, cleaning around tight spots and spaces is a breeze. Attachments and different-length crevice tools are a nice touch as well.
LIFT-AWAY FUNCTIONALITY: lift away the detachable pod and...
ANTI-ALLERGEN COMPLETE SEAL TECHNOLOGY: Works with a HEPA...
Why Did We Like It?
With a larger build, the NV352 remains lightweight and easy to maneuver, even with one hand. The lift-away pod feature is helpful to reach spots the vacuum wouldn’t fit. There are two crevice tools of different lengths to get to those spots better, to increase the reachability further.
Additionally, the swivel steering smoothly guides the vacuum around any obstructions like furniture legs and corners for full cleaning coverage. For cleaning on hardwood floors that may be prone to scratches from a vacuum’s bristles, a quick shutoff feature is also available.
Weighing 14 pounds, the NV352 is a portable dust and allergen trap with a HEPA filter and two foam filters inside. Suction power is excellent on this vacuum, and with the substantial cord length, it can get around any room with ease.
What Could've Been Better?
While the suction on the NV352 is strong, it does struggle with hair getting tangled in the roller brush. Additionally, the vacuum is top-heavy, which means using it with any of the attachments on the hose can cause it to tip over easily.
An excellent corded vacuum designed ideally for pet owners, it has a built-in washer so you can vacuum and wash in one go. Essentially a mop and vacuum in one build, it removes pet hair with a tangle-free brush roll. It can also remove odors with a multi-surface Febreze formula.
The Crosswave Pet Pro is an excellent vacuum for what it offers. The mopping feature is useful for any cleanup job, be it wet or dry. With two tanks to keep the clean and dirty water separate, the floor gets an even scrub of clean water and formula every time.
There are different cleaning formulas to work specifically with a particular floor type. The hard floor formula is excellent at removing sticky stains and odors from tiled floors, for example. Carpets and hard floors alike benefit from the multi-surface brush.
Another great feature is the hair strainer while cleaning out the tanks. It catches the hair collected in a filter to keep it from clogging drains, which is a nice, convenient touch. What’s more, the tangle-free brush roll can pick up hair from any surface up to eight inches long without becoming entangled.
What Could've Been Better?
With an excellent mopping feature built into it, it is not recommended that you use this vacuum on carpeted areas, as it can cause damage to the flooring. It is an ideal choice, however, for tiled floors.
The cleanup must also be thorough as any remaining debris in the vacuum itself can cause odors if not done correctly.
Another of the robot vacuums from iRobot, the Braava Jet 240, is a cleaning machine for mainly hard floors like wood and tile. It mops and sweeps with different cleaning modes with an innovative design to ensure all the edges of a room are reached. Indeed, a great autonomous option for hard floors.
Gets into hard-to-reach places, including under and around...
Automatically selects the correct cleaning mode based on...
Why Did We Like It?
Using robot vacuums can be a hit or miss, but this lithium-ion battery-powered machine from iRobot hardly misses. It is simple to use; simply select the cleaning pad type designed for your floor, and it will mop based on the pad type. Additionally, the Virtual Wall Mode confines it to rooms even without a physical doorway to keep it in the rooms with hard floors.
Cleaning and mopping are done with the jet spray firing in front of the robot and a vibrating pad that will gently scrub the floor underneath. To dispose of the pad when it is done, simply hold the Jet 240 over a trash can and eject the pad with the push of a button. Convenient!
Each pad has its benefits when used on different flooring and cleanup jobs. Utilizing these differences makes it versatile in dealing with hard floors.
What Could've Been Better?
Being designed as a mopping device, the Jet 240 does not pick up dirt well. Of course, there is no suction being done with this machine. It simply breaks down dirt with its vibrating pad.
Moreover, the water must be replaced when using it in rooms more extensive than it was designed for.
A bagless vacuum from Eureka, the Whirlwind is a lightweight yet highly effective vacuum for any type of flooring. A wand attached to the large dust cup will allow you to reach any surface with ease. Furthermore, the included attachments are ready at your fingertips to extend your reach even further.
Innovative Multi-Surface Vacuum: Deep clean with EUREKA...
Lightweight And Easy To Maneuver: Eureka whirlwind...
Why Did We Like It?
What stands out right away when using the Whirlwind is the long reach and maneuverability. Its 16 ft. cord paired with the long wand extends this reach even further. The wand has a telescopic design, which helps fold the vacuum away easily.
Attachments are already at the end of the wand and can be switched between using controls on the handle itself. Additionally, all components, such as the tube and wand, connect with a secure snap for easy access. No more losing attachments or fumbling to get them on.
Maintenance is another area with great features to save time and money. The filters are washable, and the high-capacity container is easy to clean with a bottom-opening design that drops the dust and dirt directly into the trash. What’s more, the power cord retracts at the push of a button, saving so much time and energy.
What Could've Been Better?
While the whirlwind shines in its convenience, it lacks suction power. While ideal for hard floors, it struggles to pick up dirt trapped in carpets unless it is passed over the area a certain way.
Additionally, the 16-foot-long cord may fall short in reaching certain areas of the house.
Choosing the right vacuum for tile floors requires attention to design, suction technology, and overall usability. Unlike carpet, tile presents unique challenges—dust settles into grout lines, debris scatters easily across the surface, and standard brush rolls may not be effective. Below are the key factors to evaluate before making a purchase.
Maneuverability
A vacuum for tile floors should be lightweight and easy to move, especially across large, open spaces. Modern models feature swivel steering, slim profiles, and ergonomic handles to navigate tight corners and edges. Cordless designs increase mobility, while corded models often provide longer runtimes for continuous cleaning. Look for edge-cleaning nozzles and low-profile heads that can reach under cabinets, furniture, and along wall edges where debris tends to collect. For households with stairs or multiple levels, a compact weight (under 10 lbs) is ideal for portability.
Suction Power
Tile floors require strong direct suction rather than reliance on carpet agitators. A good vacuum should deliver at least 15–20 kPa of suction or 100+ AW (air watts), ensuring it can lift dirt and fine dust from grout lines. Models with variable suction control are useful, allowing you to adjust power for delicate surfaces versus stubborn dirt. Multi-cyclonic systems or sealed HEPA filtration are recommended, as they prevent fine dust from being recirculated into the air. Avoid vacuums with stiff beater bars unless they have a hard-floor mode or a soft roller brush to prevent scattering debris.
Power Source
Vacuums for tile floors are available in three main power categories:
Corded models provide consistent suction and unlimited runtime, making them best for deep cleaning sessions. They typically have higher amperage motors (8–12 amps), though cord length (20–30 ft) limits cleaning radius.
Cordless vacuums offer convenience and flexibility with rechargeable lithium-ion batteries, usually lasting 20–60 minutes per charge. They’re ideal for quick cleanups but may require recharging for larger areas.
Robotic vacuums use onboard batteries and smart navigation to automatically sweep tile floors. Premium models include mapping technology, self-emptying bins, and mopping attachments for dual cleaning. They’re highly efficient for daily maintenance but may lack the raw suction power of upright or stick vacuums.
Can a vacuum cleaner damage my tile floors?
Yes, a vacuum cleaner can damage tile floors if it uses abrasive beater bars, stiff bristles, or non-adjustable brush rolls. These components can scratch glazed ceramic, porcelain, or natural stone tiles and wear down grout lines over time. To prevent damage, choose vacuums with a hard-floor mode, soft roller brush, or suction-only operation, which are designed specifically for tile surfaces.
Should I choose a corded or cordless vacuum for tile floors?
Choosing between a corded or cordless vacuum for tile floors depends on your cleaning habits. Corded vacuums deliver consistent suction power and unlimited runtime, making them ideal for large areas and deep cleaning. Cordless vacuums, powered by lithium-ion batteries, offer portability and maneuverability, especially in multi-room or stair-heavy homes, but they require regular charging. For homes with extensive tile flooring, corded models provide reliability, while cordless options are best for convenience and spot cleaning.
Can a vacuum effectively remove pet hair from tile floors?
Yes, a vacuum can effectively remove pet hair from tile floors if it has strong suction (15–20 kPa or 100+ air watts) and includes specialized pet attachments, such as motorized brush rolls or rubberized nozzles. These features prevent hair from scattering across the hard surface and ensure it’s captured efficiently. Vacuums with HEPA filters are also recommended for households with pets, as they trap dander and allergens in addition to visible hair.
Can I use a steam mop instead of a vacuum on tile floors?
No, a steam mop cannot replace a vacuum on tile floors, as the two serve different functions. Vacuuming removes loose dirt, dust, and debris, which steam mops cannot pick up. Steam mops are designed for deep cleaning and sanitization, loosening stains and killing bacteria. For best results, vacuum first to clear debris and then use a steam mop for a hygienic finish.
Can I use any vacuum on tile floors?
Not all vacuums are suitable for tile floors. While most models can technically operate on hard surfaces, the best vacuums for tile floors are designed with soft brush rolls, adjustable suction, and hard-floor attachments. These ensure efficient cleaning without scratching the tile glaze or damaging grout. Standard carpet-focused vacuums with aggressive agitators should be avoided unless they have a dedicated hard-floor setting.
Conclusion
Tile floors demand vacuums that combine strong suction, efficient filtration, and easy maneuverability to keep surfaces and grout lines spotless. From our reviewed models, the CHV1410L from Black+Decker handheld vacuum excels for spot cleaning and small messes, offering compact convenience. For larger areas, the Hoover Linx BH50010 cordless stick vacuum provides versatile coverage with the freedom of a battery-powered design. If you prefer corded reliability in a lightweight build, the Bissell Featherweight Stick is an excellent choice for daily hard-floor cleaning. For premium cordless performance, the Shark Rocket HV302 delivers strong suction and swivel steering for seamless maneuverability.
By matching your vacuum choice to your space—whether it’s a small apartment, a family home, or a busy multi-room layout—you can ensure your tile floors stay clean, bright, and free from debris with minimal effort.
Refrigerators are one of the most essential appliances in any kitchen, responsible for preserving food, extending shelf life, and supporting daily meal prep and storage routines. With advancements in energy efficiency, smart features, and flexible configurations, modern refrigerators now cater to a wide range of household needs—from compact, budget-friendly top freezer models to premium French door and counter-depth units. Choosing the right refrigerator depends on your kitchen layout, storage preferences, and budget—especially since it’s a long-term investment that affects both convenience and energy use. In this guide, we’ve reviewed the 8 best refrigerators, covering top-rated models across all major categories to help you find the perfect unit for your home.
Best Refrigerators
Besides coming in different brands, refrigerators differ significantly in their styles and technologies. It can be overwhelming to look at and experiment with this type of technology.
Luckily, you don't have to do that anymore. I've tried and tested many to learn which are the best refrigerators.
I've considered the different features of these refrigerators, from configurations and styles to their capacity and notable features.
Here are the top 8 refrigerators you can consider for your home.
When it comes to refrigerators, this 27-cubic-foot refrigerator from LG has to be the best one. It's functional, aesthetic, and organized. It comes complete with shelves and crisper drawers for all your organizational needs.
It even features the Glide N' Serve, a drawer specifically designed to set different temperatures in certain sections.
It can form a specific compartment to be cooler than others, and these deli drawers are perfect for meat products and other kinds of produce.
It's also easy to see what's inside thanks to its InstaView Door-in-Door window on its right refrigerator door. You don't even have to open your fridge to see what's inside.
The refrigerator features a fingerprint-resistant stainless steel finish, giving it a sleek and stylish look that can easily fit in your kitchen.
While it's not a smart refrigerator, it does have all the necessary features to do what a fridge should. I highly recommend this, especially for families who spend a lot on food and don't want that to go to waste.
Dimensions: 36 D x 38 W x 73 H inches | Style: French door | Total Capacity: 27 Cu. Ft | Dispensers: Ice maker | Available Finishes: Stainless steel | Energy Star Certified: Yes
If you're looking for something that goes above and beyond what a typical refrigerator can do, this 27.7 cubic foot refrigerator from Samsung is for you.
It's high-tech and has ample storage space, which is excellent for families and large households. It also features a sleek stainless steel finish to match your other appliances.
Its Ice Max is one of the best ice makers on the market, storing up to 4.2 pounds of ice! It's great for gatherings and families who love to add plenty of cold drinks to their gatherings.
The best part about this smart refrigerator is how it can help you in the kitchen. It can create shopping lists, search for recipes online, and even play music while you work!
You can easily see the inside through the screen on the right door without opening the fridge door, letting cold air out.
It's one of the best smart fridges on the market, and worth the price. Not only will it keep your food fresh, but it even serves as an intuitive kitchen assistant.
Dimensions: 37.5 D x 72 W x 37.5 H inches | Style: French door style | Total Capacity: 27.7 Cu. Ft | Dispensers: Ice and water dispenser | Available Finishes: Stainless steel and black stainless steel | Energy Star Certified: Yes
If you're looking for the most affordable refrigerator possible, this 13.9 cubic foot top freezer model from Frigidaire is one of the best options.
It features two adjustable glass shelves and a half-sized deli drawer, which can help you easily retrieve the contents of your refrigerator. You can easily access the food you need, depending on how you organize it.
On top of being affordable, it's also an energy saver. It's estimated to consume only about $40 of electricity annually. It lessens your carbon footprint and your bills.
Given its price, however, it has a smaller capacity than the other models on this list. It also lacks smart features and an ice/water dispenser, limiting it severely.
That said, it does excel in keeping your food fresh for a small price. It's an excellent choice for those who do little grocery shopping and only need minimal refrigerator size.
Dimensions: 28 D x 29.37 W x 59.87 H inches | Style: Top freezer | Total Capacity: 13.9 Cu. Ft | Dispensers: Ice maker | Available Finishes: Black, white, brushed steel | Energy Star Certified: Yes
4. LG LFXS26973S - Best for French Door Refrigerators
What We Like
Easy to organize
Dual ice maker
Fingerprint-resistant
Wi-Fi enabled
What We Don't Like
Lacks smart functions
The water dispenser is not automatic
This 21.8-cubic-foot LG refrigerator has to be the best French door refrigerator on the market, thanks to its features and functions.
These include four adjustable glass shelves, including the Glide N' Serve. You also get a full-width shelf above the double crisper drawers for your vegetables and other fresh goods.
Its storage space and included shelves are exceptional for easy organization. You can even dedicate a tray for snacks, appetizers, and more.
It's Wi-Fi enabled, letting you control the fridge's temperature from the LG ThinQ App. However, it's not as high-tech as other similar refrigerators.
All these features make it one of the best French door refrigerators. They're worth adding to your kitchen if you want a sleek French-door refrigerator.
Dimensions: 30 D x 69 W x 36 H inches | Style: French door | Total Capacity: 21.8 Cu. Ft | Dispensers: Ice and water dispenser | Available Finishes: Stainless steel | Energy Star Certified: Yes
When it comes to counter-depth refrigerators, you might automatically think about their small capacities. However, this 20.8 cubic foot refrigerator from Bosch breaks that stereotype.
Despite being a counter-depth refrigerator, the upper part is filled with a deli drawer and compartments with an integrated FarmFresh System, keeping your food in tip-top shape.
It has a built-in ice maker known for creating unique pyramid-shaped ice. Personally, this is just an adorable feature that I enjoy. Since the ice/water dispenser is inside, it will keep your drinks cold.
Temperature can easily be tracked thanks to its Wi-Fi connectivity and the Bosch Home Connect App. You can control your refrigerator with a simple tap.
The downside of this refrigerator is that its freezer is smaller despite its large capacity. Its storage is half a typical French door fridge, making it more limited than expected.
If you're the type who needs more in the refrigerator department but doesn't want to sacrifice aesthetics, consider this reliable and sleek counter-depth refrigerator from Bosch.
Dimensions: 31.13 D x 35.63 W x 72 H inches | Style: French door | Total Capacity: 20.8 Cu. Ft | Dispensers: Ice dispenser and water dispenser | Available Finishes: Stainless steel | Energy Star Certified: Yes
If you're looking for a reliable side-by-side refrigerator, try looking into this 27.4 cubic foot model from Samsung.
This refrigerator addresses the common issues faced by these types of fridges. Thanks to its multi-vent system, cold air is evenly distributed throughout the refrigerator.
Its built-in ice maker and water dispenser are accessed through the door, making it easier to get into the proper hydration routine of drinking eight glasses daily.
The best part about the ice/water dispenser is its child lock and safety features. You can also choose between having cubed or crushed ice.
It has a fingerprint-resistant stainless steel finish, making it easier to clean and maintain. This refrigerator is sure to stay sleek for a long time.
However, the biggest downside of this refrigerator is its lack of Energy Star certification. It might raise your energy bills slightly, depending on how you use it.
Dimensions: 76 D x 38 W x 36 H inches | Style: Side-by-side | Total Capacity: 27.4 Cu. Ft | Dispensers: Water and ice dispensers | Available Finishes: Stainless steel | Energy Star Certified: No
7. LG LRDCS2603S - Best for Bottom Freezer Refrigerators
What We Like
Compact
Large capacity
Fresh air filter
What We Don't Like
Expensive
Less longevity than competitors
If you need a larger freezer compartment, check out LG's 26-cubic-foot bottom freezer refrigerator. It provides more storage space designed explicitly for your freezing needs.
Besides storage, this bottom freezer refrigerator was designed to be durable with its industrial handles. It also has auto-closing hinges for safety and energy efficiency.
Its interior features tempered and spill-protected glass shelves, which are adjustable, depending on your preferences. The freezer drawer contains an ice maker that can be stocked with lots of ice.
While it's not a smart refrigerator, this bottom freezer refrigerator does the best to maintain freshness. It has an air filter that must be replaced every six months to keep the fridge clean and fresh.
It's pretty expensive for a bottom freezer. However, since it's Energy Star certified, you're sure it'll save you a lot of money in the long run.
This bottom freezer model is specially made for those who like to stock up on frozen goods.
Dimensions: 35 D x 38 W x 73 H inches | Style: Bottom freezer | Total Capacity: 26 Cu. Ft | Dispensers: Ice maker | Available Finishes: Stainless steel and black stainless steel | Energy Star Certified: Yes
If you're looking for a more luxurious and classic-looking refrigerator, this 20.5-cubic-foot French door refrigerator from Bosch is a welcome addition to any stylish home.
It features a flexible configuration, allowing the owner to adjust temperatures according to their needs easily. It makes up for its major downside so that you can maximize the available storage space.
Its middle drawer is usually dedicated to wines and other drinks, keeping them cool when you need a drink. However, you can easily change it as required.
It has an ice/water dispenser located inside to maintain its sleek outward appearance. Since you'll get an internal water dispenser, it's more likely to keep everything cold.
However, the downside of this model is its storage space. Unlike the classic French door fridge, this is a counter-depth type, meaning it's not as efficient in the storage department.
If you're looking to invest in this French-door refrigerator, it's best to consider its positives and negatives.
Dimensions: 28.8 D x 35.6 W x 72 H inches | Style: French door | Total Capacity: 20.5 Cu. Ft | Dispensers: Ice maker, water dispenser | Available Finishes: Stainless steel and black stainless steel | Energy Star Certified: Yes
There's a reason certain refrigerators have more doors or shelves than others. There's also a reason for freezer compartments to be in various locations.
These configurations are what differentiate one type of refrigerator from another. They all have pros and cons, depending on their design and your needs as a customer.
Here is a comparison of the different types of refrigerators to know which would best fit your home.
French Door Refrigerator
The French door refrigerator is often known for its price. However, French door models also tend to be one of the most preferred by people.
Its top part is a two-door refrigerator compartment that features wide and adjustable shelves for your food. This feature makes it easier to see and get your food.
The freezer compartment isat the bottom. You can pull it out like a drawer, depending on the design of the refrigerator. You can even find a French door model with 4 or 5 doors for various cooling options.
They usually include an indoor ice and water dispenser. Some also have more smart features to help you adjust your refrigerator with a tap on a smart device.
They're known to be extremely spacious and aesthetically pleasing, making them the preferred choice, especially for those who can afford them.
However, its freezer space is often limited, and you'd have to adjust to the space given. Additional features can also raise the price.
Counter-Depth Refrigerator
Counter-depth refrigerators have front edges aligned with the kitchen's cabinets and countertop. It makes them look like they're specifically built for their spot in the kitchen.
Some people prefer a counter-depth refrigerator because they're more stylish and easily blend in with the rest of the appliances.
A counter-depth refrigerator isn't as deep as the other types on this list. On top of having a smaller structure, it also tends to be more expensive than a standard-sized refrigerator.
The counter-depth style is usually combined with other types as it focuses more on the depth of the refrigerator rather than the configuration of the two kinds of compartments.
Side-by-Side Refrigerator
A side-by-side refrigerator is less expensive than a French-door refrigerator. They're known as space savers and will help keep items within sight.
The left door is for the freezer, while the right is for the refrigerator. You wouldn't have to bend down to access one of these anymore.
Another positive is that you get more freezer space than the other types since you'll have a whole side dedicated to it.
Its fridge and freezer compartments are different in size, with the freezer being narrower. As a result, it might not be easy to put pizza boxes and baking trays because of their width.
If you decide to get a side-by-side refrigerator, it's important NOT to overfill your freezer because it would be bad for the shelves. Your overall cooling system might also get overworked.
If you still need more freezer space, you might want to consider a chest freezer or an upright freezer, depending on how much space you need.
Top Freezer Refrigerator
The top freezer refrigerator features a freezer on top of a single-door fridge. It allows the freezer compartment to be at eye level, making it easier to access it.
However, top freezer refrigerators have fewer features than the previous three. They also tend to have fewer aesthetics and can appear bulkier than the previous ones.
You would also have to bend down to get to the lower shelves of the refrigerator.
Bottom Freezer Refrigerator
The bottom freezer refrigerator is the opposite of the previous type, with the freezer compartment at the bottom.
It keeps your refrigerator at eye level while its freezer is at the bottom. The downside is you'd have to bend down to access this compartment.
Instead of a door, you get a freezer drawer that you pull out to access your freezer, much like a French door design. It does provide more storage space in this section.
These are best for people who rarely use freezers. That way, they don't have to worry about the occasional defrosting needed to maintain that compartment.
How to Find the Right Refrigerator for You
Nowadays, refrigerators come in different sizes and feature different technologies. It can be overwhelming to look into these features, especially with how much can go on with one appliance.
It's best to narrow them down to help you know which features would help you daily.
You need to consider these factors to find the right refrigerator for you.
Type/Configuration
As previously mentioned, refrigerators come in different types and configurations. Some may have doors or freezers placed differently from others.
Some might prefer a French door model, while others might prefer a side-by-side. You might need a specific type of refrigerator because of what you buy and the number of people in your household.
These types vary in cost and features, affecting a person's preference. Some might have to settle for a specific type because of their budget.
It's best to know the type of refrigerator you want and what would best fit your lifestyle.
Size/Exterior Dimensions
When choosing a refrigerator, take note of its size, both inside and out.
You'd need to measure the space in advance, taking note of the height, depth, and width dedicated to the appliance.
Adding a few inches of clearance is best so your refrigerator won't be wedged into the space. The space also helps the fridge work better, letting heat dissipate as it works.
The interior space would also affect how much you put into it. You can dedicate a bigger space for groceries or adjust your purchases to get a smaller refrigerator.
Finish
The refrigerator's finish is another factor to consider since it will affect the appearance of your kitchen.
It can come in stainless steel, black, white, and other colors. You can choose one that best fits your other appliances and your kitchen's décor.
Some may even have a glass door option that lets you choose what to take out without opening the fridge. However, this may require you to organize your refrigerator more to keep everything nice and presentable.
Choosing the finish that best fits your kitchen is ideal, especially with the variety available. Refrigerators tend to have different finishes for one model.
Brand
Appliances come in different brands, including refrigerators. Some can specialize in certain types of refrigerators or excel with their cooling technology compared to others.
The best refrigerator brands you can consider are LG, Bosch, GE, Whirlpool, Samsung, Frigidaire, and KitchenAid. They are the best in terms of functions, designs, and longevity.
These brands can also have smaller and more compact refrigerators for dormitories and apartments.
The brand you choose can affect the features you get. Some brands are more high-tech or high-end than others. It would also affect the cost, as others tend to be more expensive.
Researching the specific brand of your refrigerator can affect how you choose your new appliance.
Refrigerator Space
This space can vary depending on the design and style you purchase. Those with a deeper and wider fridge would automatically have more space.
Normally, a fridge compartment can hold more cubic feet (cu. ft.) than a freezer. However, it can also depend on the model and the brand itself.
Different models can have their unique ways of keeping this space organized, from shelves to refrigerator drawers. There would even be compartments specifically for fresh food storage.
Check the build of the refrigerator shelves to see how much they can hold.
Its door shelves also tend to be affected by the price. Some can have a higher capacity than others.
Freezer Space
The size of your freezer tends to be affected by the refrigerator space and its model. Some freezers tend to be smaller than others
When getting a new refrigerator, it's best to consider how much space you'd need for the freezer. Check how many cubic feet (cu. ft.) it can hold and compare it to other similar styles if required.
You can also check the freezer door for any extra compartments you can use.
Ice Maker/Water Dispenser
Dispensers tend to be more of a luxury feature commonly found in a French door refrigerator or a side-by-side refrigerator.
Some people might find this feature necessary, while others can have separate appliances for them. The benefit of having an ice maker and water dispenser is that you have everything in one machine.
It's usually easier to forego the ice maker since you could always get an ice tray. It would take up more space in the freezer, but it's a lot cheaper.
Know your preference in advance. It's best to skip these features if you think you're not going to use them, especially since they do add to the cost.
Additional Features
Refrigerators can come with extra features besides dispensers. These can add to the things your refrigerator can do to make life easier or improve how you manage it.
These are some of the additional features you can get, depending on the kind of refrigerator you get:
Water Filtration System: Some built-in water dispensers can come with a filtration system to provide more refreshing water.
Flexible Compartment: If you notice that your refrigerator has an extra door or drawer, it can be used as extra storage space for fresh and frozen foods. Its temperature is easily adjusted to match the type of food you'll be putting in.
Smart Functions: These additional functions are usually what make refrigerators more high-tech. You can adjust and monitor your refrigerator from a phone or tablet using Wi-Fi connectivity.
Swiveling Door Bin: This feature is usually found in refrigerators with a door-in-door design, allowing access to some of the contents without opening the main doors
Inventory Trackers: Some of the smarter refrigerators can note if you're running low on certain items in your refrigerator to help you come up with a shopping list.
Through-the-Door Ice Dispensers: This type of ice maker makes it more convenient for you to get ice. Most through-the-door ice dispensers tend to be combined with the water dispenser for easier convenience.
Door-in-Door Shelves: This design allows you to easily access shelves without opening the whole door. Having a door-in-door would also limit the cool air escaping.
While these features may sound fantastic, it's best to ONLY get those you're sure to need daily. They can be the reason why your refrigerator is expensive.
Energy Star Ratings
Appliances are required to have their energy ratings listed, as these affect the environment and your electricity bill.
If you notice that a refrigerator is Energy Star Certified, it's sure to be energy-efficient, as tested by professionals.
It can lower your electricity bill and lessen your carbon footprint, making it an excellent investment in the long run.
Retailers
You can opt to purchase your refrigerator from the manufacturer itself or through a local retailer. It usually depends on what is more convenient for you.
If you're looking into retailers, comparing prices and the service they provide is best. Some retailers may offer more for a product at a more affordable price.
It's also best to go to retailers trusted by the manufacturer to ensure that you only get the best models. These would also include the warranties and accessories that normally come with buying from the manufacturer.
Price
While entry-level models would cost around $400, I recommend going for the more expensive basic models if you're looking for something cheap. These should be about $750.
The standard models can cost from $1,500 to $1,800. However, it can go up to $4,000, depending on the brand, design, and features.
Additional features tend to heavily contribute to the price of the refrigerator. Know which features are necessary for your daily activities.
It's best to set a specific budget so you'll know which refrigerators can be considered for your home. This will prevent you from overspending on the appliance.
Warranties
The usual warranty for a refrigerator is one year. However, it can also depend on the manufacturer.
It's best to look into the warranties provided, as this ensures the craftsmanship of your appliance. If something happens, warranties can cover damages as per the terms and conditions.
Some manufacturers can offer expanded or extended warranties for an additional price. However, these tend to be more expensive than repairs or even replacing your refrigerator.
How long do refrigerators last?
Refrigerators typically last 10 to 15 years, depending on their build quality, usage frequency, and maintenance habits. Units with durable compressors and Energy Star certifications often last longer. To extend lifespan, clean condenser coils every six months and avoid placing the unit near heat sources like ovens or direct sunlight.
What is a standard-sized refrigerator?
A standard-sized refrigerator measures 30 to 36 inches in width, 66 to 70 inches in height, and 29 to 35 inches in depth, excluding counter-depth models. Top and bottom freezer units are generally narrower and shorter, while French door and side-by-side models tend to be wider and deeper. Always confirm dimensions against your kitchen space before purchase.
Conclusion
Choosing the best refrigerator comes down to your kitchen layout, daily habits, and budget—but no matter your priorities, a reliable model should offer energy efficiency, long-term durability, and intuitive storage features. After comparing several top-rated units, the LG LFCS27596S stands out as the best overall choice, thanks to its spacious French door design, Door-in-Door access, and internal water and ice dispenser. If you’re looking for excellent value with smart functionality, the Samsung RF27T5501SR combines modern connectivity with versatile storage and sleek design. For tighter spaces or budget-conscious shoppers, the Frigidaire FFHT1425VV offers compact size, energy-saving performance, and dependable cooling at a great price. With the right refrigerator in place, you'll streamline food storage, reduce waste, and upgrade the overall efficiency of your kitchen for years to come.
Utility sinks—also known as laundry tubs or slop sinks—are deep, durable basins designed for heavy-duty cleaning tasks, tool washing, laundry pre-soaking, and household maintenance. Whether installed in a laundry room, basement, garage, garden shed, or workshop, the right utility sink can significantly streamline your day-to-day chores by offering superior water capacity, splash control, and faucet flexibility. Available in materials like stainless steel, acrylic, cast iron, and composite granite, these sinks can be freestanding, wall-mounted, or integrated into a cabinet system for added storage. In this guide, we’ve reviewed the 10 best utility sinks, analyzing each for durability, drain performance, faucet compatibility, and installation ease—so you can choose a solution that fits your workflow and space requirements.
Listed below are the top 5 recommendations for the best utility sinks and laundry sinks:
Black Utility Sink Laundry Tub: I was impressed by this sink's classic style and durable features, including its rust-proof and stain-resistant attributes. One thing to consider is that certain components are made from low-grade plastic, which might impact its overall longevity.
Vetta 040 JS6507GRY Utility Sink: This sink stands out with its high-quality stain resistance and high arc pull-down faucet. For enhanced stability, it might need additional support from wall or floor mounting.
JS Jackson Supplies 040 JS6502BLK Utility Sink: I admired the customizable high arc faucet in this sink. The slope design has the potential to create challenges with drainage.
TRINITY THA-0307 Utility Sink: The easy installation process of the swiveling faucet and adjustable legs are major highlights of this sink. One thing to keep in mind is the large size, which might not be suitable for smaller spaces.
Kraus KHU24L Utility Sink: While the sleek design and noise-minimizing technology are great features, the angle of the base might prove difficult with drainage.
What Is a Utility Sink?
A utility sink is a type of sink used for various utility tasks, as the name suggests. It is usually larger than a standard bathroom sink and can be made from different materials such as ceramic, porcelain, marble, stainless steel, and even cast iron. They are usually installed as drop-in sink,s which means they are placed in an opening cut into the countertop or cabinet.
This allows for easy installation and great flexibility around the cabinet or counter in which they are placed. Utility sinks are commonly used in laundry rooms for washing clothes, cleaning large items such as pots and pans, pet bathing and grooming, and general cleaning. For these uses, stainless steel sinks are often chosen as they are highly durable and resistant to scratches while also being easy to clean.
Are you looking for the best utility sink? From stainless steel to cast iron, you'll find the perfect sink for your laundry room, basement, garage, or outdoor workspace. Here is the list of the 10 Best Utility Sinks to help you keep your household clean and clutter-free!
1. Black Utility Sink Laundry Tub - Best for Classic Styling
This sleek utility tub comes with a chrome faucet that fits easily into your workshop, laundry room, washroom, or garage area. The laundry tub has a classic look and is also black in color, which adds style to the look of the room where it is installed.
The best part about this utility sink is that it is both rust-proof and stain-resistant. That helps take care of complex and cumbersome jobs that could otherwise cause damage to the sink. This laundry sink is quite rugged and can help with almost all cleaning requirements at home.
Also, the drain of the sink is molded into the tub for easy drainage. The sink has a standalone base that can be fixed to the floor using pre-cut holes. You will find these holes just beneath the leg-levelers.
The best part is, that it is easy to install this sink in the house all by yourself. There is a step-by-step manual available, which is easy to follow. The levelers can be adjusted to sit the whole tub perfectly on rough or uneven surfaces and provide stability.
The tubs are freestanding stations that help in washing and cleaning efficiently.
Some parts of the tub are made of plastic. For example, the legs seem too thin for the entire apparatus to seem sturdy. Even though the sink has many valuable features for your home, this one problem might keep you from buying the sink immediately.
What We Like
Pull-out faucet
Slop sink
Helps ease heavy work
Easy floor installation
What We Don't Like
Some parts are made of low-grade material
Short life-span
Dimensions (inches): 23.3 x 22.88 x 41.75 | Material: Plastic, Metal | Color: Black | Faucet Included: Yes | Weight (lbs): 20
2. Vetta 040 JS6507GRY Utility Sink - Best for Stain Resistance
The advantage of having this sink is that it has a faucet with a high arc. That gives you the option of washing large things in the tub. The faucet can also be pulled down for spraying water to remove stubborn dirt. Along with that, drainage equipment and supply lines accompany the set for complete installation.
The washbasin is large and can accommodate a lot of items. The faucet not only gives more room for cleaning oversized things, but it also helps in making the washing process easy and comfortable.
Apart from the high arc, the faucet in this utility sink has both stream and spray functions. It can also be pulled down to blast a stream of water on stubborn dirt and stains. The pull-down function gives the flexibility to maneuver the faucet as you want.
Moreover, the entire set comes with all the accessories required to fix the sink in place at home. There is an instruction guide, and customer support is also available for you to reach out to if there is a problem with the installation.
The best part is that you would not have to buy any accessories apart from the set with this Vetta utility sink, providing everything for a clean home!
The sink is sturdy and can also stand alone. But without fixing it to the floor or the room's wall, it tends to flex. Some flex is perhaps alright in a sink; the trouble is, this product seems to flex a lot without the necessary stability of a floor or wall mount.
3. JS Jackson Supplies 040 JS6502BLK Utility Sink - Best for High Arc Faucet
The sink is perfect for washing and cleaning all oversized and bulky items at home. The metal legs are sturdy and have a smooth black finish. The legs keep the tub stable even when it is full of water. The utility sink is available in 4 attractive colors.
If you are enthusiastic about customizing a utility sink, this JS Jackson is perfect for you. The tub comes with plenty of holes and a slop sink without an attached faucet. These holes can be used to customize the sink's abilities according to the kind of utility room that has to be set up.
So, add a soap dispenser, a side spray, and many other accessories to the sink you like most for the utility room. The tub has several preformed holes that can accommodate any faucet you choose in order to customize the utility sink.
To install the faucet, all you have to do is punch out a 1" hole in diameter. There are seven preformed holes available in this set. Any 4" or 8" faucet can fit into these preformed holes. In case you have a larger or more widespread faucet, just drill holes into the existing options.
The tub is large and spacious, but the slope of the design is such that it could cause water retention. The pitch of the sink is something to watch out for. You could get this fixed by a professional if the problem occurs while washing and cleaning.
What We Like
Fairly easy installation
Rust-free
Durable
Customizable sink
What We Don't Like
Might be unstable
Improper drainage
Dimensions (inches): 23.5 x 22.87 x 33.75 | Material: Plastic | Color: Black | Faucet Included: No | Weight (lbs): 31
4. TRINITY THA-0307 Utility Sink- Best for Customization
This sink has a stainless steel tub with a large basin. It has a single-handle chrome faucet that includes hoses. The drain is simple without any inner basket. The entire design is sleek and enhances the room's look - be it a mudroom, laundry, or garage.
The quality of the stainless steel used for the body of this utility sink is high-grade. That ensures that the sink lasts long at home, as the wear and tear are quite slow due to the high-grade material.
Also, the sink is easy to clean and maintain. The body is sturdy and looks good in any room of your house. In fact, it looks as professional as any of the sinks usually found in a cafeteria or a restaurant.
The installation is fairly simple as well. You can do it all by yourself, or get expert help to fix the sink properly in any room. It also offers complete value for money as it combines the functions of a utility sink with great design. The features and look of this sink make it one of the best utility gadgets for a home!
The utility sink is bigger than the usual utility sink. The disadvantage is that it can occupy a large part of the room, which might make your home feel congested and uncomfortable. This product has to suit the dimensions of your room to be worth your while.
5. Kraus KHU24L Utility Sink- Best for Sleek Design
The KHU24L is one of the largest kitchen sinks that can be found in the utility sink range. It is excellent for washing oversized objects and is built to support all kinds of washing and cleaning.
So, put it in a greenhouse or workshop today to wash up all the big items!
It is a unique home utility sink that has been inspired by professional sinks used in restaurant kitchens. The designs are made to suit the modern home, so you will surely be happy when you notice those square-shaped designs.
The body of the sink is resistant to denting, as it is made of T304 stainless steel. It also has an 18-gauge thickness. These features aid both the strength and longevity of the utility sink. It has NoiseDefend soundproofing technology that lets you enjoy a quiet time while washing and cleaning.
Also, the utility sink is long-lasting with corrosion and rust-resistant features. The resilience of the sink makes it a handy tool to clean and wash those oversized items at home that could be difficult to wash otherwise.
Lastly, the sink's finish is satin smooth; it can easily fit into your home and match the interiors flawlessly.
You might notice that water does not go entirely down the drain while washing utensils, clothes, etc. The water may not flush down 100% after cleaning because of the angle of the base of the sink. You could get a professional to fix the problem if this occurs.
What We Like
Durable
Easy to Clean
Rust-resistant
Resilient
What We Don't Like
Some plastic accessories
Faulty drainage
Dimensions (inches): 18.5 x 24 x 12.25 | Material: Stainless Steel | Color: Stainless | Faucet Included: No | Weight (lbs): 17.71
6. Mustee 14CP Utility Sink
The tub is made of polypropylene and can stand on its own. In other words, it is a freestanding tub that can be mounted on the floor. The 14CP also has a great look and sturdy body that complements your house both in terms of style and stability.
A simple utility sink can be very handy for washing and cleaning, which is a daily requirement in all households. The 14CP utility sink is excellent for light and everyday jobs at home.
What's more, the sink can be put outside and used for multiple functions. For example, clothes can be washed just near the clothesline on a bright, sunny day. The small yard tools can be cleaned up right after use. All the more, the installation in the yard can be done quite quickly without any trouble.
So, for the yard installation, all you need to do is buy a simple adapter that attaches the hose to the utility tub. Let the drain run out into a tree hole or a large plant, and you are ready to wash the dirt off all your tools, utensils, and equipment!
The leg levers are an essential part of the sink that stabilizes it in the utility room. However, be cautious about the leg levelers that come with this setup. They do not support the weight of the entire sink for long-term use sometimes. Check the levelers before choosing this sink.
What We Like
Easy floor mount installation
Easy to use
Easy to operate
What We Don't Like
Non-durable materials
Average leg leveler performance
Dimensions (inches): 23.5 x 25.5 x 15.5 | Material: Polypropylene | Color: White | Faucet Included: Yes | Weight (lbs): 15.8
7. Simpli Home, Ltd. AXCLDYHEN-SS Utility Sink
The utility sink is constructed with strong materials such as stainless steel and PB MDF. It has a high-arc faucet that can swivel easily. There is also a cabinet beneath the sink with two Shaker-style doors. The cabinet gives plenty of room for storing things in the utility room.
The cabinet and the Shaker-style doors are sturdy and have a simple yet unique design. The sink can look good in any utility room at home. Just place it where your washing and cleaning jobs need to be done.
Also, the storage area of the cabinets is quite big; it can accommodate a lot of things related to the chores that you do at home. For example, the white cabinet can store laundry, washed clothes, soaps, cleaning agents, detergents, etc., all in one place for your convenience.
Moreover, the cabinet is useful and decorative, as it can tuck away the small things you need while enhancing the house's overall look. The good news is that the cabinet and the sink combo are pretty easy to install by yourself.
Lastly, the faucet has a toggle switch that can help turn either stream or spray functions on as per your need.
The sink is prone to denting if a heavy object is put in it or accidentally dropped in, without you meaning to do so. Otherwise, you can freely wash any lightweight thing that needs cleaning and store it away later in the cabinet. Maintain proper precautions while using this gadget.
What We Like
Easy and clear instructions
Deep sink
Easy to install
Sturdy
What We Don't Like
Might need a wall mount
Cannot handle much weight
Dimensions (inches): 19.7 x 23.6 x 52 | Material: Stainless Steel | Color: White | Faucet Included: Yes | Weight (lbs): 60.5
8. Transolid TC-2420-WC Utility Sink
The sink and cabinet combo has a faucet with a flexible neck. The cabinet is pre-assembled, which helps save time during installation. It is made of brushed nickel and Shaker-style doors that enhance its look. It is good for everyday use and decor with ample storage space and an excellent finish.
The sink is made of 19-gauge stainless steel and serves as a powerful agent in cleaning and washing at home. It is handmade and features an integral backsplash as well. The sink also has a center drain location and a pre-drilled faucet hole. There is a matching strainer for your convenience at all times.
Also, the sink bowl is large and spacious, with a 13-gallon water capacity. Fix it in the laundry room or the garage and find the perfect utility for this new Transolid sink. The faucet has a flexible neck covered with white silicone, which looks good with the entire product.
You would love the garden hose adapter that comes with the faucet. The dual-function spray head with a 1.8 GPM flow rate and the ceramic disc cartridge are impressive additions. All these parts and features make this faucet superior in quality and design.
The utility sink is excellent if you have lightweight things to wash. The features and functions of the sink make it a good value for money. However, make sure your requirements at home are not heavier than the sink’s weight limit. Do be careful and attentive about its weight-bearing capacity.
What We Like
Easy to use
Adjustable legs
Easy DIY soap dispenser installation
Multiple-function faucet
What We Don't Like
Small laundry load capacity
Dimensions (inches): 19.7 x 23.6 x 34.6 | Material: Stainless Steel | Color: White | Faucet Included: Yes | Weight (lbs): 79
9. JS Jackson Supplies 040 JS6503SS Utility Sink
The 040 JS6503SS from Jackson Supplies is a rectangular-shaped tub made of metal, plastic, and ABS. It has a freestanding mode of installation. The faucet of the utility sink has metal shanks and handles and is constructed of metal overall for a sturdy and solid performance over a long duration.
Both the tub and the faucet are made of resilient and good-quality materials. That gives the tub and the faucet durability and an excellent finish. You definitely have a good buy in hand when it comes to the longevity and look of this tub.
The convenience of having this sink is that it solves all your washing and cleaning problems in one go. The high-end faucet adds far more functions and style than the good old kitchen faucet to your specific utility room!
Also, the faucet has a high arc and leaves lots of room for washing and cleaning bulky clothes and other items. The arc also helps avoid the need to maneuver the faucet to wash things, making it easier for you to focus on getting them cleaned quickly.
Finally, the sprayer can be pulled down to wash those corners and edges that are difficult to reach while washing.
The sprayer is of great utility as it washes off stubborn dirt from clothes and other items. But the sink tends to flex when the spray hits the back of the basin. That could make you uncomfortable, as the product might seem fragile and make you hesitant about its durability.
What We Like
Multipurpose utility kitchen
Illustrated step-by-step instructions
Rust-proof metal legs
Compatible with garden hoses
What We Don't Like
Sink flexes with a strong spray
The trap may need early replacement
Dimensions (inches): 23.5 x 22.88 x 49.75 | Material: Stainless Steel | Color: White | Faucet Included: Yes | Weight (lbs): 21.4
10. Ruvati USA RVU6100 Utility Sink
The RVU6100 is a 16-gauge premium utility sink built with stainless steel that has a modern look. The sink is perfect for mudrooms, laundry rooms, and other utility rooms. In fact, the stainless steel construction is best suited for the mudroom, but can easily adapt to different kinds of rooms.
The bowl in the utility sink is big and can accommodate large items for washing and cleaning. At 12", it can fit any big bucket, so you can even wash your boots in the sink! The rinse grid of the sink is made of stainless steel, which allows water to flow freely.
Moreover, the material protects the sink bottom from getting scratched by heavy or long hours of washing. The brushed finish of the sink helps hide scratches. The body is built and finished to match standard appliances in the kitchen.
What’s more, the grooves in the drain are designed to perfection. There are four grooves in the drain at the bottom of the sink channel water bends towards the drain. That helps in keeping the sink dry and clean.
Finally, the sink is covered in heavy SoundGUARD padding that minimizes noise while it is in use.
The stainless steel material is A-grade and can last quite a long. But the sink, unfortunately, has to be handled with care. The corners and the body are prone to bending and denting and cannot be used roughly. That means an accident might leave unwanted bumps and scratches in the body.
What We Like
Rust-proof
Stain-proof
Thermal insulation
Easy waste dispensing mechanism
What We Don't Like
Stainless steel material can bend easily
Rust spots may occur
Dimensions (inches): 18 x 23 x 12 | Material: Stainless Steel | Color: Stainless | Faucet Included: No | Weight (lbs): 20
What Is the Best Utility Sink?
This table provides a detailed comparison of leading utility sinks, evaluating key attributes such as dimensions (in inches), material, color, faucet, and weight (in lbs).
A utility sink is a deep, heavy-duty basin designed for high-volume, high-impact tasks that regular kitchen or bathroom sinks are not suited to handle. Whether installed in a laundry room, garage, mudroom, basement, or workshop, a utility sink enhances both functionality and workflow. It offers a dedicated zone for hand-washing clothes, rinsing tools, cleaning bulky items, bathing pets, and managing dirty work without contaminating your primary plumbing fixtures.
Utility sinks are available in a variety of installation types—including freestanding, drop-in, wall-mounted, and floor-mounted configurations. Materials range from stainless steel, cast iron, and porcelain-coated steel to polypropylene, each suited to different levels of use. Stainless steel utility sinks are favored for corrosion resistance, ease of cleaning, and impact durability, while plastic tubs are ideal for lighter use or temporary setups.
Beyond practical utility, these sinks help protect high-end kitchen and bathroom fixtures from harsh usage. By offloading messier chores to a separate sink zone, homeowners can invest more confidently in designer sinks elsewhere in the home. In modern home design, utility sinks are increasingly integrated with custom cabinetry, pull-down faucets, and storage drawers, helping to increase home value through functional upgrades that appeal to buyers.
Best Utility Sink Guide
Choosing the right utility sink requires understanding your space constraints, intended use cases, and desired features. Below are the essential factors to evaluate:
1. Durability
A quality utility sink must be built to withstand abrasive cleaning agents, heavy loads, and constant use.
Stainless steel (18- to 20-gauge) offers industrial-grade strength and longevity.
Plastic or polypropylene tubs are lightweight, rust-proof, and impact-resistant—suitable for low-traffic or temporary environments.
Cast iron or fireclay sinks provide maximum resilience but are heavier and costlier. Evaluate not just the basin, but also the supporting legs, faucet, drain assembly, and cabinet—all components should be structurally sound.
2. Look and Finish
Modern utility sinks are designed to blend with interior decor rather than stand apart from it.
Look for finishes like brushed stainless, matte black, or glossy porcelain that coordinate with your cabinetry or tilework.
Terms like sleek, minimalist, industrial, or transitional often denote sinks that balance performance with style. Choose models that enhance—not disrupt—your room’s visual language.
3. Performance
A utility sink’s effectiveness is defined by its drainage efficiency, faucet flexibility, and depth capacity.
Prioritize models with deep basins (at least 10–12 inches) for soaking or scrubbing.
Look for pull-down or high arc faucets with spray functions for maximum utility.
Check that the drain design prevents clogging and supports easy maintenance. Some models offer sound-deadening insulation, overflow protection, or dual basins for multitasking.
What are the positives of owning a utility sink?
Owning a utility sink provides a dedicated, heavy-duty wash station for handling cleaning tasks too messy or bulky for kitchen or bathroom sinks, increasing both efficiency and hygiene in your home.
How is a laundry sink distinct from a utility sink?
A laundry sink differs from a utility sink in size and function—it is typically shallower and optimized for garment care, while utility sinks are deeper and designed for multi-purpose cleaning and heavier-duty tasks.
Do laundry rooms necessitate the inclusion of a utility sink?
Laundry rooms do not strictly require a utility sink, but including one adds considerable functionality by enabling pre-soaking, hand-washing, and cleaning of laundry accessories.
Which sink type stands out as an optimal choice for a utility room?
The optimal utility room sink is typically a stainless steel or porcelain drop-in or freestanding unit, chosen for its durability, easy cleaning, and compatibility with high-use environments.
What dimensions would be apt for a laundry room sink?
Ideal laundry room sink dimensions range from 18 to 24 inches in width, with a minimum basin depth of 9 to 12 inches, ensuring efficient water retention and ergonomic use.
Can one build a cabinet surrounding a floor-mounted sink?
Yes, a cabinet can be built around a floor-mounted utility sink to create integrated storage, improve aesthetics, and contain plumbing hardware out of view.
What styles are on offer when choosing a utility sink?
Utility sinks come in freestanding tubs, drop-in basins, wall-mounted units, and under-mount styles, with options for cabinet-integrated models and multi-basin configurations.
Conclusion
A utility sink is more than just a cleanup station—it's a functional upgrade that improves workflow, protects your primary fixtures, and increases home efficiency. Whether you need a compact model for light-duty garage use or a deep-basin stainless steel unit for heavy-duty laundry tasks, there’s a utility sink to fit every space and demand.
Top recommendations like the Black Utility Sink Laundry Tub offer a balance of durability and classic styling, while models such as the Vetta Utility Sink add faucet flexibility and stain resistance. For homes prioritizing faucet customization, compact design, or easy installation, options from Jackson Supplies, TRINITY, and Kraus deliver industry-standard performance.
Use this guide to match your material, size, and installation preferences to the right product—and turn your laundry room, garage, or mudroom into a more functional, organized, and hygienic space.
Fertilizer spreaders are essential tools for precise, uniform distribution of nutrients across lawns, gardens, and agricultural plots—dramatically improving efficiency, plant health, and application consistency. Whether you're a home gardener or a commercial landscaper, choosing the right spreader minimizes waste, enhances soil nutrition, and saves time compared to manual application. From large-capacity broadcast spreaders for wide turf areas to compact handheld models for targeted use, the market offers solutions for every scale and skill level. In this guide, we've reviewed the 9 best fertilizer spreaders, covering build quality, hopper capacity, distribution accuracy, and ease of operation to help you select the ideal model for your horticultural or landscaping needs.
Best Fertilizer Spreader
Here are the top 9 fertilizer spreaders, designed to meet your needs and elevate your fertilizing game, whether you have a small lawn or a vast landscape.
Most horticulturists would recognize this brand instantly, as Earthway is known for its vast array of high-quality gardening accessories all over the States. And, when it comes to spreaders, the brand does an exceptional job of producing highly functional units, such as the 2150 Commercial Spreader.
Tackle rough, uneven patches of lawn with ease! The 13 inch...
Clog free grate will help keep your material flowing...
Why Did We Like It?
First up, we’d really like to talk about the performance and efficiency of this product, because it is quite good! The unit comes with the brand’s unique “EV-N-SPRED” 3-hole drop shut-off system. This maintains an even pattern of distribution, offering a feathered spreading edge for precise applications. You can even adjust the drop rate of the fertilizer or seeds to cater to narrower sections of the lawn.
But what we really liked is the spreader’s capacity to hold 50 pounds of fertilizer, which dismisses the need for frequent refills. This covers all standard residential garden spaces at one go.
Additionally, the spreader is built to withstand heavy blows and impacts. It’s considerably durable construction makes it ideal for use on rough terrains in any sort of weather. The wide-set pneumatic tires are designed to work on any uneven turf supporting an additional 175-pound load-bearing frame of the unit itself along with the hopper capacity.
What Could Have Been Better?
The only thing we thought could have been better was the setup procedure. Assembling this unit tends to be incredibly tough and confusing. Also, the issue is aggravated by the weight of the product, as it is quite heavy.
Next up on our list is a pretty functionally designed hand-held fertilizer spreader by Fasmov. Sporting an uncomplicated layout, the spreader actually goes a long way in allowing all the ease of maneuverability and portability that one can require.
No products found.
Why Did We Like It?
The spreader comes in a value pack of two and is designed to hold a sufficient amount of fertilizer, for that matter. You can even use salt and grit with your fertilizers in this to spread the mix across the entire garden.
These spreader canisters feature graduated marks on the sides that help to measure the exact levels of fertilizer. This prevents wastage and spillage of any sort, saving up on fertilizer quantities. What it also does is sprinkle just the required, precise amount of fertilizers needed by the plants, so that they aren’t burdened with excess quantities.
Each canister has an adjustable perforated disk that dispenses the required amount of fertilizer. This is, in fact, ideal for deicing the yard or other similar purposes that arise throughout the year.
The spreader is easy to fill and use. It can be carried anywhere and used at your convenience.
What Could Have Been Better?
Some may find the holes on the adjustable perforated lid to be a tad bit too small, in which case one has to take it off the mouth of the canister. That should give you the required drills for an even spread.
Pros
Simple yet effective design
Can be easily used and maneuvered at will
Graduated markings ensure precision filling and spreading
Scott Turf is undeniably a stellar name in the field of horticulture, which prioritizes quality above all others. And one of the highest-selling items from the brand is its Classic Drop Spreader. Not only is this model highly rated for its performance, but also for its hopper capacity which is one of the largest out there!
Large capacity hopper holds up to 10,000 sq. ft. of Scotts...
Heavy-duty frame for optimum stability
Why Did We Like It?
This particular model from Scott Turf actually holds up about 10,000 sq. Ft of fertilizers that are really more than enough to cover the largest of residential or commercial lawns. This is why it is extensively used by professional horticulturists and conservationists.
Coming to the built construction, the spreader, in every way, is a heavy-duty one. Each of its parts is constructed using quality material and designed to provide maximum stability to resist heavy blows, shocks, and jerks on rough terrains. This makes it the perfect fit for all kinds of gardens, including the ones with uneven grounds.
We were really impressed with its 22-inch spread pattern that offers precision during spreading and distribution. Apart from reducing spillage, this also ensures just the required amount of fertilizer for your plants without choking their roots.
Another great advantage of this unit is that it comes fully assembled with a pre-calibrated structure. This cuts down on the hassles of putting together all its heavy parts and makes it immensely easy for you to use.
What Could Have Been Better?
There’s hardly anything to complain about this model. But, if we really had to name something that we think could use an upgrade, it is the wheel design, which we think, is not correctly grooved for grassy areas. If you have grass beds, then you may wanna go a little light with it.
Pros
Has an enormous hopper capacity
22-inch spread pattern delivers well and evenly
Comes entirely pre-assembled
Built to resist weather extremities
Cons
Wheel design could have been better
Capacity: 10,000 sq ft | Spreader Type: Walk-behind | Application Method: Drop | Adjustable Settings: Yes | Spreader Material: Plastic
So, for our next slot, we are back with another awesome spreader from the house of Earthway, and this one is the Ev-N-Spred 3100. And, as you probably know by now, that means superior efficiency, which ensures precision spreading for your gardens and lawns!
EASY TO USE: Strap into the comfort backpack-type harness,...
COMFORT: Large buckles and a quick tug on the front...
What Did We Like It?
The Ev-N-Spred 3100 is a high-quality commercial “crank-spreader.” And it comes with straps that attach the device to your body, helping you to carry the device around to fertilize the land. What we do like about this device is that it allows you all the control and ease of use to spread the fertilizer over extensive distances.
Coming to the technicalities of the device, it uses the brand’s patented “Ev-N-Spred” mechanism, which ensures consistent and even distribution all over. Additionally, the device also includes an Easy Operator Shut-off, which makes it comfortable for the user to manage the control, along with a Powder Coated Chassis and an exclusive dual-port shut-off.
The quality of the unit is also commendable, which does hold up against the onslaughts of regular wear and tear, or even the corrosive effects of certain substances.
Overall, this one’s an excellent unit that could be used for any standard-sized gardens and lawns to spread fertilizer, seeds, or ice melts.
What Could Have Been Better?
Even though this is a high-performing unit, we found the straps to be too flimsy and uncomfortable to wear. It feels like they could break off anytime soon, and this makes it difficult to keep the spreader on for too long. So, this part of the device could definitely use an upgrade.
Pros
Allows you all the control and ease of use
Comes with a few beneficial and functional features
For those who have their sweet little gardens and lawns back home to maintain, a hand-held fertilizer spreader is always an essential item, for the ease of use it provides. So, the next model we want to suggest to you is this brilliant unit from Spot Spreader that is known for its precision and versatility.
And here is an insight into its mechanism that you might wanna have!
Strong * Durable * Easy to Use * Simply Pour Your Materials...
Perfect For Pouring Large Salt & Seed Bags in the Spot...
Why Did We Like It?
What impressed us the most about this model is its exceptional design and durability. This is built to last under any given situation, making it an ideal device for tending gardens in every weather!
The spreader features a range of different controls, which makes it an exceedingly versatile device even for such a compact size. Such features include multiple adjustable openings that provide the highest degrees of precision while applying the fertilizer. This saves all the hassles of measuring out the contents first or losing a lot out on it while spreading. You can also easily spread grit in the winter using this.
We love how easy it is to use, as all you need to do is pour the fertilizer mix from its bag into the top-screw container of the device and begin applying.
Another advantage to this device is its lightweight, yet significantly sturdy and compact design. This neither strains your hand nor does it make it too heavy to carry around. In fact, the ergonomically designed handle makes it even more convenient for you to do the job.
What Could Have Been Better?
There is barely anything about this unit that can be an issue. However, just to point it out, the smallest holes in this may get jammed with seeds or fertilizer dregs easily. And this may require you to clean the device out every once in a while.
Pros
Exceedingly efficient and functional design
Lightweight and compact design
Offers precision spreading
The ergonomically designed handle makes it easy for you to use
Up next we have one of the most commonly and widely used spreaders, that has made a name for itself in terms of ease of use and maneuverability. And this one is the AS-80ATV12 Receiver Mount Spreader from Field Tuff.
And following are all the reasons that made us put it on this list today!
Easily spread seed and fertilizer with Field Tuff’s...
Heavy-duty and durable, this spreader has a maximum capacity...
Why Did We Like It?
This Field Tuff model spreads seeds and fertilizers efficiently and evenly using a 12-Volt DC motor, possessing a rated speed of 570 rpm. The spreader is incredibly heavy-duty, providing a maximum capacity of 80 pounds. It can easily hold up to 8 gallons of fertilizer, grass seed, or small grain. This really makes it fit to be used in any standard-sized lawn and garden.
The 12’ distribution broadcast width ensures an even and consistent spread. You can also conveniently adjust the drop rate by managing the controls on the device, which can be easily reached from the operator's seat.
Speaking of the versatility of the mount-spreader, it can be easily mounted onto a UTV, ATV, or on a utility tractor’s 1 ¼” or 2” receiver. Additionally, the device includes a wiring harness and a separate on/off switch that could be added to the structure to improve its efficiency.
And what we also like is that the device comes with a rain cover that contributes to product longevity.
What Could Have Been Better?
The main issue that we faced is that the tray door on it doesn’t close. Also, the spray guard should be positioned in a way during assembly, so that it doesn’t interfere with the spreader wheel. This is a definite issue with it, and we hope it was designed well to be set up with ease.
Pros
Efficient and fast distribution
Comes with a number of functional settings
Can be easily mounted on the receiver of compatible vehicles
Since we have already explained to you the role and importance of hand-held spreaders in maintaining smaller gardens, it’s only fair to suggest another high-performing model for you. And that would be the Scotts Wizz Hand-Held Spreader, which, in our opinion, does an exceptional job of helping your precious plants grow.
Battery-powered spreader you can use year round—designed...
Designed to cover up to 2,500 sq. ft. using Scotts lawn care...
Why Did We Like It?
This Scotts Wizz spreader is a battery-powered unit that you can use in any month of the year. It is significantly durable and can resist sudden shocks and impacts with ease. You can use almost all kinds of fertilizers and mixes with it, including grass seed, weed, and lawn control products, as well as salt and ice melt.
And would you be shocked if we told you that the device is designed to cover an area as extensive as up to 2500 sq. ft? We know, right? The unit has a 5-foot broadcast for distribution with EdgeGuard and HandyLock technologies that ensure precise and even distribution at all times.
What really got us hooked on to the device in the first place is the fact that Scott Wizz offers as many as 23 settings in this spreader for hairsplitting accuracy! The setting dial is super-easy to use; and all you gotta do is just fill the device up, choose the required setting and move around to spread the contents.
What Could Have Been Better?
It goes without saying that it is, in fact, the most feature-rich spreader we have on our list today, and there’s hardly anything that takes away its brilliance. But, just to put it all out, this is a heavy unit that may tire out your hand after a point of time. So, you have to put it down at intervals before using it again.
Earthway shouldn’t require an introduction by now to you, given this is the third product from the brand that we’re reviewing. Well, we cannot just seem to get over the versatility of its spreaders, that make it so increasingly easy to undertake this cumbersome task!
And, we believe that the 2750 Hand Crank Bag Spreader is going to be just the thing that you need to tend your beautiful little garden!
EASY TO USE – Hand-operated bag seeder and spreader works...
EVEN DISTRIBUTION – High-RPM gearbox provides a smooth,...
Why Did We Like It?
So we’re here with yet another hand-held spreader. But the only difference between this one and the rest is that it is way more spacious than all the hand spreaders we have reviewed for you yet.
This one’s actually a nylon crank bag “seeder” or seed-spreader, that is designed to be carried around on the shoulder. It covers considerable distances fast and holds enough seed or fertilizer to last you well for a single run. This a simple yet very effective way of fertilizing the garden or sowing selected seeds. This bag seeder actually works well, distributing seeds pretty efficiently and evenly without any snagging.
We liked how conveniently this zippered bag holds the contents. It does keep them secure, preventing spillage and wastage, especially when you’re lifting it on your shoulders.
The bag can hold up to about 25 pounds of seed, which is broadcasted using a high-RPM gearbox. It features an oscillating shut-off plate that prevents the seeds from clumping, aiding flow control, for smooth, consistent dispersal.
What Could Have Been Better?
Well, to be honest, this one does have a few minor issues with it. First up, we do think, it could have been given a better quality. It doesn’t fare well on durability, and the straps do look a bit flimsy and could break if you happen to overfill the bag.
With that, we have arrived at the last slot of this listicle, and the spreader we have for it is from the reputed brand Scotts, which we talked about earlier in the guide. The Elite Spreader from Scotts is one that we will highly recommend owing to its high degree of accuracy and coverage.
And you can read the rest of the good things about it right here!
Dual rotor technology provides unbeatable accuracy and a 6ft...
Holds up to 20,000 sq. ft. of Scotts lawn product, including...
Why Did We Like It?
The Scotts Elite Spreader comes with a “dual-rotor” technology, which scores substantially in efficiency. Along with this, the device also offers a 6ft spread pattern that makes it significantly precise when it comes to distributing fertilizer, grass seeds, ice melt, or salt.
Additionally, the device can hold up to 20,000 sq. ft of lawn product, delivering brilliantly on any terrain. It is formidably built to tackle massive impacts without falling apart. And the well-structured wheels on it balance out the pressure on the frame that is created due to walking it on uneven ground.
The handle on the unit is pretty ergonomically designed, which keeps it really comfortable for the users. This allows you to push the unit around effortlessly, without tiring your hands.
Also, the best part about the unit is that it comes almost assembled, requiring only minor tweaks and adjustments.
What Could Have Been Better?
The only thing with this one is that the agitator pins may not work that well. You do have to take them out if you’re planning to use coarse rock salt. But even with that, the unit may glitch when dispersing granular contents.
Pros
Works on dual rotors, which makes it pretty efficient
Formidably built to withstand pressure
Ergonomically designed to make it comfortable for the user
Selecting the right fertilizer spreader is critical to achieving even, efficient nutrient application across your lawn, garden, or agricultural plot. A well-matched spreader helps eliminate waste, reduce physical labor, and ensures uniform coverage of fertilizers, seeds, lime, or ice melt—ultimately improving turf health, plant vigor, and soil balance. However, with multiple spreader types, hopper configurations, and drive mechanisms available, it’s essential to understand how each model performs relative to your landscape, application volume, and material type.
Below are the key spreader types and core features you should evaluate before making a purchase.
Types of Fertilizer Spreaders
Broadcast (Rotary) Spreaders
Broadcast spreaders are designed for high-efficiency coverage over large surface areas, making them ideal for residential lawns, parks, golf courses, and agricultural fields. They use a spinning impeller or disc to fling material in a wide arc—typically between 6 and 12 feet—depending on the model and material weight. Available in walk-behind, tow-behind, and ATV-compatible styles, broadcast spreaders are excellent for granular fertilizers, grass seed, and ice melt. While they cover ground quickly, their coverage pattern may be less precise near edges and borders, requiring overlap for consistency.
Drop Spreaders
Drop spreaders provide high-precision application by releasing material directly beneath the hopper in a straight, narrow path—ideal for tight control along sidewalks, flower beds, or garden rows. While slower than broadcast models, drop spreaders are perfect for smaller lawns, ornamental beds, and areas requiring localized fertilization. Their uniform distribution minimizes overlap and prevents accidental spillage into unwanted areas. Drop spreaders are also well-suited for handling heavier materials like compost, topdressings, and fine sand.
Hand-Held Spreaders
Hand-held spreaders are compact units designed for spot treatments, touch-up fertilizing, or small plot maintenance. Often crank-operated or battery-powered, they offer complete control over application rate and direction in hard-to-reach spaces, such as corner beds, raised planters, or steep terrain. Although limited in hopper capacity (usually under 2 liters), hand-held models are ideal for homeowners with tight landscapes or container gardens.
What to Consider Before Buying
Build Quality & Materials
A fertilizer spreader must withstand weather exposure, corrosive fertilizers, and repetitive mechanical stress. Look for models with powder-coated steel frames, high-density polyethylene hoppers, and stainless steel fasteners. Walk-behind and tow-behind units should include sealed gearboxes, non-corrosive axles, and reinforced handles. For terrain handling, prioritize models with wide pneumatic tires or heavy-duty plastic wheels that absorb shocks and maintain balance across uneven ground.
Spreading Efficiency & Calibration
The efficiency of a spreader depends on the evenness of distribution, flow rate control, and spreader plate design. Rotary and drop spreaders should feature adjustable spread width settings, calibrated flow gates, and multi-position levers for accurate rate adjustment. Gear-driven systems should provide smooth torque with minimal skipping, while battery-powered hand spreaders must offer variable-speed control for flexible output. Higher-end models may include pattern adjustment controls, allowing left-right calibration for precise edge application.
Ease of Use and Operation
An intuitive design ensures smoother operation and less user fatigue. Look for ergonomic handles, clearly labeled rate dials, and tool-free assembly. Units with foldable handles, quick-release hopper lids, and integrated agitators help speed up usage and refills. For large properties, models compatible with tractor or ATV hitches improve mobility. Hand-held spreaders should offer a comfortable grip, one-handed operation, and clear level indicators for refill management.
Hopper Capacity
The hopper size determines how much material the spreader can carry in one pass, directly impacting coverage efficiency and time savings. Broadcast spreaders typically range from 40 to 80 pounds, suitable for medium to large lawns. Drop spreaders average 20 to 40 pounds, while handheld units range from 1 to 5 pounds. Select a capacity that minimizes the need for frequent refills while staying manageable in terms of unit weight and maneuverability. Larger hoppers should include flow restrictors or baffles to control material flow and prevent clumping.
Bonus Features to Consider
EdgeGuard™ or Deflector Shields to limit the spread on sidewalks and driveways
Rain covers to protect materials in damp conditions
Agitators or stirrers to prevent clogging from clumpy fertilizers
Towing kits for converting walk-behind models to tractor-towable units
Pre-calibrated rate charts for popular fertilizers and seed mixes
Tip
Always match the spreader type to your material, lawn size, and terrain. For example, use granular fertilizer in rotary or drop spreaders, while powdered lime or pelletized compost works best in larger-hopper units with stirrers. With the right model, you'll maximize nutrient delivery while saving time and reducing product waste.
Fertilizer Spreader FAQs
What are the different types of garden spreaders?
Broadcast spreaders: Designed for extensive gardens and lawns, these spreaders cover larger areas and are heavy-duty.
Drop spreaders: Used for dispersing granular mixes, they are suitable for residential or commercial gardens and lawns.
Hand-held spreaders: Smallest versions designed for smaller lawns, allowing convenient fertilization in hard-to-reach areas.
Are broadcast spreaders suitable for agricultural purposes?
Yes, broadcast spreaders are commonly used for agricultural purposes due to their ability to efficiently cover larger areas.
Can drop spreaders handle tough debris like mulch and compost?
Yes, drop spreaders are capable of handling tough debris like mulch and compost, distributing them evenly across the land.
What are the advantages of hand-held spreaders?
Hand-held spreaders are ideal for smaller lawns and allow for precise fertilization in hard-to-reach spots such as corners or flower beds.
Should I prioritize user-friendliness when choosing a spreader?
Yes, it’s important to choose a spreader that is easy to understand and operate. Avoid overly complex models that may be confusing or difficult to use effectively.
Final Verdict
Choosing the right fertilizer spreader can significantly improve the efficiency and consistency of your lawn or garden care routine. Whether you're managing a small residential lawn, maintaining a formal garden, or working on a larger landscape, the right spreader ensures accurate nutrient distribution, reduces product waste, and supports uniform plant growth across all zones.
Among the models reviewed, three stand out as top performers in their respective categories. The Earthway 2150 Commercial 50-Pound Spreader is our top recommendation for high-capacity, professional-grade fertilization—ideal for large properties and commercial use. For portability and convenience, the Fasmov Adjustable Handheld Spreader offers exceptional control and value, making it perfect for small gardens and tight spaces. Lastly, the Scotts Turf Builder Classic Drop Spreader provides precise, row-based coverage that’s ideal for detail-oriented horticulturists seeking maximum application accuracy.
Each of these models has been selected based on critical factors such as hopper size, distribution uniformity, construction quality, and user ergonomics. Use this guide as a reference to match your spreader to your application size, terrain, and level of control required—and elevate your fertilization workflow with the right tool for the job.
Best watercolor palettes offer more than just convenience—they are foundational tools that support efficient color mixing, pigment management, and consistent application in watercolor painting. Whether you're working with tube paints, pan sets, or watercolor cakes, a high-quality palette improves control, preserves color purity, and streamlines workflow. Watercolor palettes vary in design, including options with airtight seals to prevent paint from drying out, sloped or rounded wells for better brush access, and stain-resistant mixing areas that maintain clean tonal transitions. They also eliminate the need for separate mixing trays and paint wells, making them ideal for both beginner and professional artists. In this guide, we’ve reviewed the 11 best watercolor palettes available today—evaluating each for durability, pan layout, portability, and paint compatibility. Standout options include the GenCrafts Watercolor Paint Palette for compact versatility, Falling in Art’s airtight, leak-proof palette for moisture control, and MYARTOOL’s empty palette for mixed-media flexibility.
48 VIBRANT COLORS: Delve into a palette of 48 classic hues,...
PRECISION PAINTING: Experience the versatility of real brush...
What I like
All-in-one watercolor paint set
Movable half-pans
Wide mixing space
Additional water brushes and a watercolor pad
Easy portability
What I don't like
Expensive
This plastic palette from GenCrafts is quite comprehensive, containing 48 highly-pigmented watercolor paints in individual half-pans for a mess-free painting. These pigments allow easy color mixing and blending, much like gouache, making it ideal for “en plein air” painting.
Moreover, you can move around the paint pans to create more mixing space, so you can finish a huge chunk of studio work in one go. The GenCrafts Watercolor Paint plastic palettes also come with two refillable water brushes with flexible nylon tips that allow you to experiment with different art styles. And with the additional paper pad containing 15 high-quality watercolor paper sheets, you can immediately start making your art.
Its easy portability due to the convenient storage case is another quality that makes it a compact and efficient watercolor paint set. Furthermore, the brand claims to maintain an active customer service line and query desk that responds to your problems within 24 hours and also provides exchange services.
Material: Plastic | Color Capacity: 48 | Palette Color: White | Style: Modern (with full or half-pans) | Weight: 1.5 pounds
With 24 sloped paint wells, these aluminum and plastic watercolor palettes from Falling in Art ensure there’s no paint leakage, even if you’re not balancing it properly. A watercolor artist will benefit from the removable paint panel and wide mixing area, which will aid in mixing vibrant colors without worrying about a lack of space.
Moreover, this mixing watercolor palette has a foldable tin flap with a transparent sealing rubber ring that prevents your paints from leaking. Art classes and professional artists prefer a folding palette since it’s handy, and the rounded paint pans are easy to clean since they don’t have pesky corners that hold onto residues.
What’s more, the watercolor paints can stay well for much longer in their deep, rounded half-pans, and you can conveniently close the lid to keep dust away. This folding palette is also compatible with oil-based, acrylic paint as well as tube paint. And you can use the additional sponge to create exciting textures!
Material: Plastic-tin palette | Color Capacity: 24 | Palette Color: White, steel | Style: Modern | Weight: 1.04 pounds
Empty watercolor palette has 12 half-pans: The watercolor...
Hard, durable, can build your favorite watercolor...
What I like
Tin-plated iron material
Internal metal buckle
Bottom ring buckle
Transfer-proof
Foldable
What I don't like
The lid is not air-tight
Made from tin-plated iron material, this metal palette is incredibly durable due to its sturdy construction, internal metal buckle, and can slide, which doesn’t incur a single dent after falling.
There are 12 half-pans and four fold-out spaces for blending and mixing colors - and if you remove the built-in tray, you’ll find an extra mixing area. And these half-pans are quite deep, therefore, it's a perfect palette for oil painting since it ensures the colors don’t transfer.
Unlike plastic palettes, the half-pans will stay inside the folding palette while you customize your watercolor paints and color sequence. Besides, the corners of the half-pans are smooth and rounded, so you won’t hurt your hands while cleaning the watercolor palette. You can also use the tin lid for mixing paints if you’re out of the mixing area.
And unlike ceramic palettes, it is very lightweight and will not break even if it slips out of your hold - that’s why I recommend this palette to children and beginners. The durability and portability of these metal palettes make them good for painting “en plein air.”
Material: Tin-plated iron, plastic | Color Capacity: 12, 24, 48 | Palette Color: Steel, white, black | Style: Modern | Weight: 0.02 pounds
Package includes 1 airtight watercolor palette with 18 wells...
Mr. Pen airtight watercolor palette is made of sturdy white...
What I like
Air-tight watercolor palette lid
Keeps the watercolor paint moist
Removable tray/ organizer
High-quality plastic material
Lightweight
What I don't like
Very small half-pans
This artist-quality palette consists of 18 empty pans for individual and mixed paints and two large mixing spaces, which makes it quite a huge palette. Made from high-quality white plastic, this palette has an airtight lid that keeps the paint from the watercolor tubes moist and ready to use. A professional artist can shift between different studio work without worrying about the paint drying, and it gives you vibrant colors and hues every time!
I’ve tested this mixing palette with the Daniel Smith watercolor set and Winsor & Newton oil-based paints, and the palette worked well with both. Moreover, its removable tray comes in handy, especially when you need extra room to mix colors. And its flat surface also helps in organizing the colors and keeping your palette set tidy.
What’s more, it is much more lightweight compared to ceramic and porcelain palettes, making it an excellent watercolor palette for children and budding artists. I’ve traveled with the palette a couple of times, and it hasn’t leaked any color, and the paints were all in their place when I opened it to paint en plein air.
Empty Watercolor Palette Size: 8.9 x 4.4 x 0.8 inches...
Upgraded Metal Insert Slot: You could put extra 11pcs 2ml...
What I like
Anti-spill tin palette
Pans with two ml capacity
Automatic lock system
Portable
Fully refundable
What I don't like
Very thin metal protection
Suitable for traveling and studio work, FCLUB’s empty palette contains 48 watercolor half-pans with rounded corners to facilitate easy cleaning and usage. This aluminum watercolor palette comes with a lid that sits tight and prevents spilling and drying paint.
Moreover, the studio palette has two fold-out mixing areas and extra space for mixing colors if you remove the additional tray. This tray also prevents the pans from jostling about, keeping your organized palette in place.
And each half-pan has a two-milliliter capacity, and they automatically lock into place, which makes organizing your pan palette much easier. Additionally, you can use the half-pans inside the mixing palette to repackage a solid watercolor paint set or simply solidify tube paints. Kickstart your watercolor painting by adding the full and half pans into the larger palette and filling them with paint.
FCLUB also promises 100% customer satisfaction - if you’re not satisfied with the watercolor palette, you can email them, and they’ll initiate a full refund to your bank account. So, you don’t have to worry about not getting your money back, which is helpful since it takes away the risk factor from the purchase.
Material: Metal, plastic | Color Capacity: 48 | Palette Color: Black, white | Style: Foldable, modern | Weight: 0.78 pounds
18 ergonomically slanted wells with two (2) generous mixing...
Includes a completely removable clear tray in order to mix...
What I like
Transparent mixing tray
Affordable price
Compact metal case
Airtight and leak-proof
Silicone packing
What I don't like
Limited palette with a few pans
Ideal for a small art desk, this plastic palette from Mijello has 18 paint wells and enough mixing area in its compact metal case. What’s more, it has a transparent mixing tray that you can remove to make more room for your paint.
Its transparency ensures you precisely use the watercolor paint on canvas, Yupo paper, and other art supplies. This is because it reduces the difference between the color pay-off on the painting surface and palette.
You can also use this tray to store different color swatches for your next artwork. I mixed yellow, orange, and red to create a color blend on the tray and left it there for 24 hours. Surprisingly, it stayed in place and did not dry up. And talking about drying watercolor paint, this small yet good-quality watercolor palette is completely airtight, so you can freely travel with it and create a plein-air painting.
Moreover, the silicone packing around the edges of the folding palette prevents the curing and leaking of acrylic and oil paints. The best watercolor palettes for plein air paintings are durable, leak-proof, compact, and easy to use - and Mijello’s 18-Well Fuchsia palette ticks all those boxes.
Material: Metal, plastic | Color Capacity: 18 | Palette Color: Fuchsia | Style: Art Deco | Weight: 0.52 pounds
Fold size(LWH): 26 x 13.5 x 2.1 cm/10.24 x 5.31 x 0.83...
With multi compartments: this palette has 28 small wells and...
What I like
Five large mixing wells
Paintbrush and thumb holes
Convenient for one-handed use
Airtight lid
Easy to clean
What I don't like
Susceptible to breakage
Made from lightweight and toxin-free plastic, Shappy’s folding watercolor palette has 28 paint pans and five large mixing areas, which is very convenient for artists who work in bulk. It also comes with designated holes for five paintbrushes of different sizes and another one for your thumb for better leverage.
So, you can create beautiful paintings on a canvas while holding this palette with one hand, thus improving your productivity and overall convenience.
Moreover, it has an airtight lid that helps contain the moisture in your watercolor paints and prevents them from drying out. However, this lid is quite difficult to close, so you have to be very careful while folding it. Much like a porcelain or ceramic palette, it is quite susceptible to breakage and dents, but it should last longer when properly handled.
Plus, the smooth plastic wells are easy to clean - simply use a damp paper towel to remove the paint residue. This watercolor paint set is also ideal for children and beginner artists who are beginning to explore the world of watercolor painting.
Material: Plastic | Color Capacity: 28 | Palette Color: White | Style: Folding, Modern | Weight: 0.26 pounds
【ENAMELED METAL WATERCOLOR PALETTE】Watercolor paint...
【INCLUDE 14 EMPTY WATERCOLOR FULL PANS】Includes 14 empty...
What I like
Tin-plated metal construction
Deep paint wells
Easy to clean
Removable full pans
Two fold-out mixing areas
What I don't like
Paint pans don’t lock into place
Made with tin-plated metal, LOONENG has palettes designed with a white enamel interior and a black enamel exterior to make them rust-proof, sturdy and professional. Moreover, this palette features 14 full paint pans with a 3.6 ml capacity, which is sufficient for entire paint tubes.
And it’s easy to clean - a cleaning sponge or cloth will smoothly glide over the even metal surface of the palette and remove all the watercolor paint in just a few swipes. Plus, each of the pans is removable, so you can switch out the paints to your liking and create a custom color palette catering to the subject of the painting.
Besides the full pans, there are sloping half-pans that aid in creating new hues and shades by blending the original colors. Ideal for painting en plein air, this watercolor palette comes with two broad fold-out mixing areas that also act as convenient organizers that keep the moisture intact.
Unlike a porcelain palette, its sturdy tin material prevents any breakage and paint leaks, so you can simply slip it into your art bag while traveling.
Material: Enamel metal | Color Capacity: 14 | Palette Color: Black, white | Style: Foldable paint case | Weight: 0.85 pounds
Ideal for different paint media, including acrylic, gouache, watercolor, and oil paints, Transon’s palette is designed after the traditional prototype with deep wells and a flat surface. It includes 36 deep compartments and four larger wells to store paints that you use more frequently. Moreover, it features a soft, flippable lid that acts as a mixing area with a large surface area, allowing you to experiment and create unique colors without running out of space.
The lower surface of the lid has grooved lines that fit perfectly into each pan to prevent the paints from mixing, and since it's airtight, the paints don’t dry out. However, it’s important to note that this palette is not leak-proof - I’ve noticed several instances of paint leaks with this palette, so you’ll have to carry it upright.
Lastly, the brand includes an additional thin paintbrush and an oval-shaped palette for mixing color, making this product a classic watercolor paint set.
Material: Plastic, silicone | Color Capacity: 40 | Palette Color: White, navy blue | Style: Classic | Weight: 1.06 pounds
PORTABLE FOLDING PAINT PALETTE CASE: With the use of...
PREFECT DESIGN: Paint palette contains 28 deep wells and 5...
What I like
Five spacious mixing areas
Designated holes for a paintbrush and a thumb
Environment-friendly material
Odorless
Easy to clean
What I don't like
Not leak-proof
With 28 paint half-pans and five different mixing areas, this watercolor paint palette from Mifuner is also practical and convenient for acrylic, gouache, and oil painting. Moreover, it has five different-sized holes for paintbrushes and a separate area for your thumb, which offers better support during painting.
And you need not worry about safety concerns while mixing vibrant colors since it is made from environmentally friendly and toxin-free materials. Besides being sturdy, this palette features a slick body and smooth texture that allows you to clean any color residue without hurting your fingers.
What’s more, it is completely odorless, unlike other new palettes, which give off a strong smell that many people, especially children, don’t appreciate. The Mifuner brand also has a good customer support line in place, and you can reach out to them if you’re not satisfied with their products.
Material: Plastic | Color Capacity: 28 | Palette Color: White | Style: Modern | Weight: 0.31 pounds
Made of the same shock-proof material used in bulletproof
Allows user to view colors in palette precisely as they...
What I like
Shock-proof material
Large mixing areas
Well-structured organization
Precise colors
Moisture-extracting lid
What I don't like
Expensive
Made of shock-proof and bulletproof white glass metal, Mijello’s new palette is designed for increased efficiency since it allows artists to view each color exactly as they appear on paper. This glass-like surface includes 38 paint wells, among which 36 are half-pans, and the other two are large capacity wells to hold a sufficient amount of primary colors.
And besides the four mixing areas, the brand also provides a separate mixing tray that locks into place and prevents the paints from moving around. Moreover, this palette has a unique steel-colored lid with textured edges that allows you to remove extra moisture from your brush for vibrant colors.
This convenient feature, coupled with its durable, bulletproof material that is made to last, makes it a terrific palette for en plein air painting. What’s more, Mijello has thoughtfully organized the 38 wells and four mixing areas in a convenient way for both right and left-handed artists.
However, it’s a little heavy on the pocket and requires you to scrub it with a sponge or cloth to remove the color residue, especially from the textured lid.
Material: Bulletproof glass, plastic fiber | Color Capacity: 38 | Palette Color: Steel, white | Style: Modern | Weight: 0.99 pounds
To get a good color payoff and prevent the watercolor paints from being damaged, they must be protected from direct light and humidity. And an airtight lid or closure prevents the paint from drying out while you take a break from your painting.
Look for a silicone lid or a rubber seal - they hold the paint wells securely and don’t let the moisture from your paints evaporate. This feature also makes your palette spill-proof, so you can carry it around in an art bag.
2. Portability
A folding palette or paint case that is lightweight and easy to carry is the most preferred palette type among budding and professional artists. You can carry around such palettes to look for inspiration and paint plein air without worrying about spilling or drying out your paints.
3. Good Amount of Paint Pans
You’ll require multiple colors - individual or different hues of the same color - to create beautiful gradients and blend colors to achieve your vision. So, an ideal palette should have at least 10-12 pans (the more, the better).
Moreover, you should look for large (and multiple) mixing areas to mix and experiment with colors freely. Some brands even include a detachable mixing tray without any paint wells to give you a bigger surface area to mix colors in.
4. Anti-Stain Mixing Areas
Most plastic palettes are prone to being stained by darker pigments, so they get dirty after the first few uses. That’s why many artists prefer to invest in a ceramic or porcelain palette since they don’t stain and are durable and weighty compared to flimsy plastic ones.
Another reason why professional artists don’t prefer low-grade plastic palettes is due to the phenomenon called “beading,” where the paints form tiny beads instead of blending. Of course, certain brands have created high-quality watercolor paint sets (for example, the Winsor & Newton Cotman paint set), but ceramic or porcelain palettes totally prevent beading.
5. Sufficient Space Between Each Compartment
Whether you purchase a big or small palette, there should be sufficient gaps or high walls between the two mixing areas to prevent unwanted color mixing. Working hard to create unique hues and then finding out that they’ve mixed into each other is incredibly frustrating.
But, you’ll save a lot of effort with a well-spaced palette - and you won’t need to worry about colors splashing even if they’re a little watery.
FAQs Related To Watercolor Palettes
What are watercolor palettes?
Palettes are the most widely used art supplies, even topping the highly popular watercolor paper. A tray of sorts, a watercolor palette, is used by artists for mixing and blending colors before they paint on their preferred medium. It helps you understand how a color (original or blended) will look on paper, canvas, and other textiles.
Artists organize the different colors in their palette in keeping with their preferred art style, painting subject, or specific artwork.
What are the different types of watercolor palettes?
Based on their portability, watercolor palettes are categorized into two types: folding and open palette. You can easily close a folding palette using its lid, making it ideal for en plein air painting and traveling.
Based on the materials, palettes can also be divided into three other categories, which include plastic, tin, and ceramic palettes. The first two are affordable options, but the tin palette (usually made from aluminum) is comparatively sturdier. And even though the ceramic palette is expensive and not travel-friendly, they last significantly longer.
How do you choose the right watercolor palette?
As discussed in the buyer’s guide, you should consider five key factors while purchasing a palette for your watercolor painting. Look for the information in the product specifications, and be more careful about the material, durability, number of paint pans, airtight capacity, etc.
Moreover, additional abilities like spill-proof, transfer-proof, and anti-stain features will improve the overall painting experience. You might have to invest a little more for these features, but they’re worth it.
How do you maintain your watercolor palette?
Remember to wash your palette after you’re done with it immediately – this will prevent darker stains from forming in the corners and surfaces. Plus, dried watercolor paints are quite difficult to clean and require too much scrubbing.
If there are color splatters all over your palette, simply dip an old toothbrush or coarse sponge in dish soap and scrub them away. When it is completely clean, remove the excess water with a cloth or towel, and you’re good to go.
How to assemble or create your own watercolor palette?
First, you must decide on the illustration or painting you want to create and envision a suitable color scheme. Then, based on that color family, pick your preferred colors from your existing watercolor set or tubes. After picking out the colors, it is time to assemble your palette.
If you have a watercolor paint set with removable cakes, simply place the preferred color cakes into the palette, leaving some space for mixing them. In the case of tube paint, squeeze a little of each color into the half-pans, and arrange them according to the color family they belong to.
Final Thoughts
The best watercolor palettes don’t just hold paint—they elevate your workflow, improve mixing accuracy, and give you full control over pigment intensity and hue variation. After evaluating a range of palettes for design, build quality, and real-world usability, my top recommendation is the GenCrafts Watercolor Palette, which stands out for its generous pan capacity, durable construction, expansive mixing areas, and reliable customer support. A close second is the Falling in Art Leak-Proof palette, praised for its innovative sloped wells and airtight seal, making it ideal for artists on the move. For those prioritizing structural durability, the MYARTOOL empty metal palette remains a top choice thanks to its impact-resistant body that handles travel and studio use with ease.
A lawn dethatcher is a turf maintenance tool designed to remove excess thatch—a dense layer of dead grass, roots, and organic matter that accumulates between the soil and living grass—thereby improving air, water, and nutrient penetration. Excessive thatch, typically more than ½ inch thick, restricts root development, promotes disease, and reduces overall lawn vitality. Whether electric, tow-behind, or manual, dethatchers use steel tines or blades to lift and clear this buildup, restoring soil contact and promoting healthy regrowth. In this guide, we review the 9 best lawn dethatchers based on working width, dethatching depth, motor power, coverage area, and build quality—helping you select the right model for residential or large-scale lawn care.
Best Lawn Dethatchers Reviews
Here is the list of the 9 best lawn dethatchers that you can use to ensure your lawn's health and vitality.
KEEP YOUR YARD HEALTHY : dethatch in early spring or early...
POWERFUL MOTOR : 10A motor provides the power you need to...
We start our list of best lawn dethatchers with an amazing product from Greenworks. This is one of the best-reviewed products on the list. It comes with a 14-inch dethatching path, which is perfect for the job. You may choose to buy it with or without tines and other accessories.
Why Do We Like This Product?
Right from the beginning, we start our list with this functional product from Greenworks. It is lightweight and easy to maneuver while performing any lawn work. Besides this, they have earned impressive customer satisfaction and a ton of positive reviews.
When it comes to storage, Greenworks came up with a cool solution to tackle the problem. The handles are easy to fold, and that helps in compact storage.
Moreover, Greenworks products have a zero carbon footprint. Hence, they are a greener alternative to other lawn dethatchers. And if you ask us, we definitely recommend investing in something more premium and eco-friendly.
What Could Have Been Better?
While looking into this product, we did stumble across some downsides. The tines that come along with it can wear out. So, you might have to replace it. Besides this, the instruction manual can be quite confusing. We recommend watching a full tutorial before using the product.
Pros
Lightweight and easy to use
Cheap and affordable
Eco-friendly and sustainable
No need for a battery or charge
Cons
Tines need to be replaced (replacements are available)
Dimensions: 40" x 22.5" x 36" | Weight: 25.92lbs | Type: Electric | Working Width: 14" | Warranty: 4 Years
High-Powered Performance: Equipped with a 12-amp motor, this...
Customizable Depth Control: Adjust the 5-position height...
Ranking second on our list is an exceptional product from Sun Joe. It comes packed with a robust 12-amp motor and a dethatching path of 13 inches. It also comes with a Scarified feature that allows you to cut the grass and dead grass from thicker lawns. Affordability and versatility make this a must-have for every gardener.
Why Do We Like This Product?
Being one of the top products, the lawn dethatcher from Sun Joe caught our attention. It is super easy to assemble and use. You wouldn't need extensive technical experience to use it.
Another cool feature is the Scarified function, which helps in cutting thick grass. Plus, the 12-amp motor gets your job done in no time. This product also comes with a built-in child safety switch to keep you stress-free.
Coming to cleanliness, the Sun Joe’s lawn dethatcher doesn’t miss a beat. The product comes equipped with a detachable collection bag for your trash, making it easy to collect and dispose of the waste. For this price, we feel this is a highly functional option to invest in.
What Could Have Been Better?
No matter how perfect a product is, it always comes with some drawbacks. As such, the disposable collection bag for thatch is rather small for most lawn purposes. A bigger bag would have made this product a perfect pick.
Pros
Convenient thatch collection and disposal
Easy to assemble and use
Dethatcher and Scarifier rollers are easy to swap and use
Built-in safety switch makes this product safe from accidents
Cons
The thatch collection bag is too small
Dimensions: 24" x 20" x 12.5" | Weight: 27lbs | Type: Electric | Working Width: 12.6" | Warranty: 2 Years
Tine de-thatcher uproots dead, matted grass and dislodges...
Coming in third place is a dethatcher from Agri-Fab. This product comes with a 40-inch lawn detacher patch so you can cover a bigger area in less time than usual. It also comes with a universal hitch to attach to any tractor, regardless of the brand. What’s more astonishing is that the 20 rust-proof tines are heat-resistant and, thereby, more durable.
Why Do We Like This Product?
Agri-Fab immediately caught our attention with its 40-inch dethatcher. It is excellent for uprooting dead and matted grass within a short period. Moreover, the durable and premium build makes the product appealing to the masses.
Along with a sturdy build, the product also comes with 20 rust-proof and heat-treated tines. So, you can worry less about the harsh weather while focusing more on productivity.
What makes this product even more appealing is the universal hitch. The unique design allows the hitch to attach to any tractor, irrespective of the brand. At this price range, this is a total bargain.
What Could Have Been Better?
Motors play an important role in a lawn dethatcher, but this product doesn't come with one. However, the universal hitch comes as a blessing in disguise. So, we recommend using it to get the job done.
Pros
Durable heat-treated spring tines
Universal fit hitch for better productivity
Simple to use
40-inch thatcher covers a wider area in less time
Cons
No built-in motor
Dimensions: 40" x 41" x 41" | Weight: 28.5lbs | Type: Tow-Behind | Working Width: 40" | Warranty: 3 Years
The Lawn Master GV1212B is another notable product due to its unique design. Its 19-position height adjustment feature allows you to clear the thickest of lawns in no time. Apart from this, the 2-in-1 swappable feature comes in handy, especially when you want to switch from lawn detaching to scarifying. Also, the foldable handle is an excellent solution for your storage problems.
Why Do We Like This Product?
One of the most unique features of this product is the 19-position adjustable height, which is best suited to tackle all sorts of terrains and lawn surfaces. It is excellent for thick matted layers and dense gardens that need professional grooming.
What makes this product an essential in every gardener’s arsenal is the lightweight and foldable handles, which help in easy storage and maneuvering. So, if you are looking for something extremely versatile, then the LawnMaster is a feasible option for you.
It also comes with a pre-attached 7.4-gallon collection bag to collect all your weeds and dead grass from the garden.
What Could Have Been Better?
Overall, the LawnMaster is a well-balanced lawn dethatcher that serves the purpose it was built for. Despite its perfection, the poor quality cable is the only drawback that keeps it from shining ahead of others. We would recommend using a high-quality cable for efficient power consumption and saving.
Pros
Lightweight and portable
Swappable cylinder for scarifying or dethatching
7.4-gallon collection bag
Foldable handle for easy storage
Cons
Low-quality cable used
Dimensions: 22" x 18" x 12" | Weight: 24.69lbs | Type: Electric | Working Width: 12" | Warranty: N/A
Earthwise Power Tools by ALM power dethatcher with a 13-Amp...
Lawn cultivator with a 16" working width for quick and easy...
Earthwise is an eco-friendly product that focuses more on keeping the Earth clean from harmful fuel emissions. Its powerful 13-amp corded electric dethatcher is a good alternative to the gas-powered lawnmower. Plus, it comes with a 16-inch cutting width dethatcher and a 4-gallon grass catcher to collect all your lawn grass.
Why Do We Like This Product?
Right off the bat, we were impressed by the green Earth initiative of this product. The corded electric cable serves the purpose of keeping the environment clean from harmful fuel emissions. Moreover, less maintenance is required since the product doesn’t depend on fuel.
Additionally, the height adjustment is ideal for small and large yards, which makes this product extremely versatile for different lawns and gardens. It also comes in handy when you need to deal with various degrees of matted grass layers or entangled debris.
Besides this, the electric rake is designed to keep lawns healthy and beautiful throughout the year.
What Could Have Been Better?
Earthwise is highly dependent on extension cords, but the retainer is too small for thicker cords. Keeping this in mind, we would recommend using a thinner extension cord, which would help in the easy maneuvering of the dethatcher.
Pros
Planet conscious
Low maintenance
Adjustable working depth
Ideal for small and large yards
Cons
Short extension cord retainer
Dimensions: 54.45" x 24.45" x 37.4" | Weight: 30.42lbs | Type: Electric | Working Width: 16" | Warranty: N/A
Maximum Thatch Removal: 40" working width and 2 rows of 10...
Multiple Settings for Different Tasks: Brinly's Dethatcher...
If you are looking for something more durable and well-built, then Brinly is an excellent option to choose from. The entire design is made of steel and heavy-duty trays that can hold up to 70 lbs of additional weight. It also comes with a 40-inch working width lawn mower and muller to promote a healthier root system.
Why Do We Like This Product?
Brinly's strong and sturdy design immediately caught our attention. It is extremely durable and capable of working in an aggressive operation or tough terrain. Plus, the tines are made out of durable spring steel and are unlikely to break at any time.
To promote versatility, the product has multiple settings to choose from. Each setting is designed to suit your needs and purposes in gardening. It also comes with a universal hook that can be mounted to any rider or tractor for easy maneuvering.
Brinly has been one of the most trusted products since 1839, and you can be assured of its quality, durability, and innovative design.
What Could Have Been Better?
Straight out of the box, Brinly is simple and easy to assemble, but the instruction manual can waste a lot of time and energy. The instructions and illustrations are unorganized and confusing. We recommend watching some YouTube tutorials before assembling the product.
Pros
Easy-to-engage transport wheels
Simple assembly
Multiple settings for different tasks
Maximum thatch removal
Cons
Poor instruction manual
Dimensions: 40" x 40" x 33" | Weight: 30.8lbs | Type: Tow-Behind | Working Width: 40" | Warranty: N/A
[3 DEPTH ADJUSTMENTS] Set the Dethatcher to minus 9mm, minus...
[EASY TO STORE] The handle folds down so you can throw it in...
Worx corded electric dethatcher is designed with a 14-inch cutting width and a 12-amp motor to get your lawn dethatched in no time. The 3-depth adjusting feature will even out the lawn grass according to your liking. It also comes with a lock-off switch to keep things safe and more power-efficient.
Why Do We Like This Product?
Worx immediately impressed us with the lock-off switch, which is not only power efficient but also extremely reliable. The switch is designed to keep things safe, and it also helps in preventing any accidents. So, you can worry less while enjoying your gardening hobby.
The lawn dethatcher also comes with Worx tools that are designed with cutting-edge technology. You can buy them separately; however, fret not, because they are extremely cost-effective and durable. Along with this, the foldable handles are well-suited for easy storage, making this a compact product.
Another cool feature was the lightweight design and premium build, which allows users to operate through the lawn and mow the grass easily.
What Could Have Been Better?
While going through this product, we realized that the wheels were inefficient and poorly constructed. Grass can easily get stuck between the wheels, causing the dethatcher to stop moving. However, periodically cleaning the wheels can solve the minor problem.
Pros
Easy to maneuver over the lawn
Foldable handles and easy to store
Convenient lock-off switch
Promotes healthy lawn growth
Cons
Poorly designed wheels
Dimensions: 39" x 22.88" x 43.25" | Weight: 18.6lbs | Type: Electric | Working Width: 14" | Warranty: 3 Years
Looking for something more versatile and affordable? VonHaus Electric Lawn Detacher is just the right option for you. It comes with a 2-in-1 design for swapping between scarifying and aerating functions. Plus, it is well-suited for mowing small and medium-sized lawns.
Why Do We Like This Product?
One of the most beneficial features of the product is the large capacity collection bag. It is capable of collecting all your lawn debris and unwanted dead roots and grass. Also, the adjustable heights are well designed to even the grass according to your liking.
If you’re worried about storage, VonHaus comes fully equipped with foldable soft grips and a removable grass box for easy storage in your garage. Moreover, it can also be easily transported to different places by using the built-in handle.
The lawn dethatcher also comes with five operational heights for all seasons of lawn maintenance and purposes. Just adjust the height according to your liking, and it will get your job done in no time.
What Could Have Been Better?
At this price range, the lawn dethatcher is well-balanced and suited for most tasks, but it falls short in heavy-duty tasks. A bigger attachment blade would be ideal for larger lawns that have thicker matted grass.
Pros
2-in-1 swappable feature
Adjustable height
Large capacity collection bag
Foldable soft-grip handle and removable grass box
Cons
Attachment blades could be bigger
Dimensions: 23” x 55” x 40” | Weight: N/A | Type: Electric | Working Width: 14.5" | Warranty: 2 Years
Multiple Uses: Tines Can Be Raised Via the Adjustment Handle...
Dethatching and sweeping are both key elements of maintaining a beautiful lawn, and Brinly has got you covered. It comes combined with a premium lawn sweeperas well as a durable tine dethatcher to get the job done faster and easier than before. It also comes with two years of warranty and an assured guarantee of its durability and productivity.
Why Do We Like This Product?
The 2-in-1 approach is what makes this product stand out from the rest. It can take care of cleaning the lawn while mowing your lawn into perfect shape. Moreover, a simple pull on the handle raises the dethatcher's tines up and gives you complete access to its sweeping mode.
Another notable feature is the transportation mode that makes this a portable choice. The 12” X 13” tread-heavy wheels are ideal for tough terrains and wet grounds. Along with this, the durable steel tines are perfectly secured by a safety wire to prevent any damage or breakage from the mower blade.
Lastly, the patented foldable storage design makes this a convenient pick for those who have minimal storage space.
What Could Have Been Better?
We really liked the overall design and functionality of this dethatcher; however, we faced some difficulties while assembling the product. When we attempted to contact customer care service, we received no response, even after multiple attempts.
Pros
Multiple uses
Convenient transport mode
Durable steel tines
Fast pick-up pace
Cons
Difficult and lengthy assembly
Dimensions: 69" x 53" x 38" | Weight: 94.8lbs | Type: Tow-Behind | Working Width: 42" | Warranty: 2 Years
While you are getting a lawn dethatcher, you should keep certain factors in mind. We have carefully summarized these important factors to make your task easy and stress-free:
Design
When it comes to lawn dethatchers, there are a variety of designs to pick from. Some are extremely durable and built for heavy-duty tasks, while others are lightweight and portable. If you have a small lawn, we recommend something more lightweight and easy to move around, while heavy-duty lawn dethatchers are best suited for larger lawns with tougher terrains.
Types Of Lawn Dethatchers
Another important factor to keep in mind is the type of lawn dethatcher you would like to use on your lawn.
Electric lawn dethatchers and gas lawn dethatchers are best suited for small to medium-scale lawns that require less time and energy. On the other hand, tow-back lawn dethatchers are ideal for larger lawns with uneven surfaces. They are durable and get the job done in no time.
Working Width
You should also keep in mind the working width of the lawn dethatcher you’re planning to buy. It represents the number of thatch it can collect in one go. The larger the width, the more area it can cover. We recommend selecting the working width according to the size of the lawn.
Warranty
Investing in a lawn dethatcher can be a costly ordeal. Thus, we recommend selecting a brand that offers warranty coverage for a long period of time. As such, if something were to happen to your dethatcher, you can claim free repairs and services.
Functionality
Different lawn dethatchers come equipped with different functions. Some have a built-in lock switch to keep your children safe from danger, while others have 2-in-1 swappable modes for different gardening requirements. Overall, each lawn dethatcher serves its basic purpose of dethatching the lawn, but note that additional functions often come with a higher price tag.
Lawn Dethatchers FAQs
What Is The Best Time Of The Year To Dethatch Your Lawn ?
Based on our research, dethatching is usually performed during mid-Spring and mid-Fall. The weather in these months is ideal for dethatching as it promotes healthy grass recovery as well as favorable conditions for new grass growth.
What’s The Difference Between Aeration And Dethatching ?
Dethatching is a method of removing the dead layers of grass from the soil surface as it allows room for new grass to grow. On the other hand, aeration is the process of sucking out plugs of compacted soil as it promotes better saturation of light, water, and nutrients to the plant.
Can You Dethatch Your Lawn While It Is Wet ?
While dethatching the lawn, one should be aware of the weather conditions. If the lawn is wet, we do not recommend dethatching your lawn as it could damage the healthy grass by pulling out its root. This would eventually lead to lawn thinning.
Which Dethatcher Is The Best ?
Under most circumstances, we recommend going with a corded electric lawn dethatcher which is more eco-friendly and beneficial for the environment. But if you are looking for something more durable and heavy-duty, then we recommend trying some of the heavy-industry tow behind lawn dethatchers. They can easily mount on any tractor or vehicle.
How Often Should Your Lawn Be Dethatched ?
We recommend dethatching your lawn every one or two years, depending on the grass type and weather conditions in your area. Cooler and heavier grass types require dethatching either once in a year or less. At the same time, the heat-loving grass type requires a more frequent dethatching routine.
Why Does The Lawn Look Bare After Being Dethatched ?
When you dethatch your lawn, it removes all the dead grass from the lawn surface. This tends to leave the soil exposed; thus, your lawn appears barer than usual. But fret not because this makes more space for new grass and promotes a healthy lawn.
Is It Important To Mow Before Dethatching The Lawn ?
According to our research, the grass height should be less than 4 inches before dethatching. If the grass length is greater than that, then we would recommend mowing the lawn before dethatching for better lawn health.
Conclusion
Effective thatch removal improves soil aeration, water infiltration, and root growth—key indicators of lawn health. Modern dethatchers integrate precision depth control, durable steel tines, and electric or tow-behind operation for targeted turf management across residential and commercial spaces.
Among the top performers, Greenworks Dethatcher offers a 14-inch working width and stainless steel tines, making it ideal for eco-conscious homeowners prioritizing efficiency and minimal emissions. The Sun Joe Electric Dethatcher and Scarifier combines dual dethatching and scarifying modes with a safety lock system, suitable for controlled use in households with children. Agri-Fab Tow-Behind Dethatcher , with its 40-inch working width and 20 heat-treated tines, is built for high-volume dethatching on large properties or uneven terrain.
Select based on lawn size, dethatching frequency, and power source compatibility. For optimal turf recovery, follow dethatching with core aeration and nitrogen-rich fertilization.
Crawl space dehumidifiers are specialized moisture control systems engineered to maintain optimal relative humidity in low-clearance, enclosed subfloor environments. By extracting up to 70–130 pints of water per day, these units prevent mold growth, structural decay, and poor air quality caused by excess moisture infiltration. Unlike standard dehumidifiers, crawl space models are built with sealed housings, continuous drainage, integrated humidistats, and low-temperature operation—making them ideal for basements, foundations, and utility voids. This guide reviews the five best crawl space dehumidifiers based on capacity, energy efficiency, drainage setup, build quality, and long-term reliability in high-moisture zones.
Best Crawl Space Dehumidifier
Each of these dehumidifiers has been carefully selected based on its dehumidification capacity, energy efficiency, durability, and user reviews. So, without further ado, here's the list of the 6 best crawl space dehumidifiers to keep your crawl space dry and well-protected.
Healthy air in the house should never be a luxury, and that is something AlorAir believes in. Thanks to the compact design and the intelligent technology that runs the product, everyone can avoid musty odor and mold growth. Not only is this dehumidifier great for crawl spaces, but also basements, apartments, and shops.
120 PPD Crawl Space Dehumidifier: The Sentinel HD55S Energy...
Continuous Drainage for Hassle-Free Operation :Designed for...
Why Did We Like It?
This may seem unnecessary, but if you have just moved into a house, hear us out. With time, you may find excessive moisture in the hidden nooks and crannies of the house, which leads to a ton of issues. To help tackle that, we recommended looking into a crawl space dehumidifier like this one.
The AlorAir crawl space dehumidifier is one of the smartest products on the market, thanks to the technology that goes behind it. It will help by removing excess moisture from the air and keeping the environment dry. Furthermore, the reduced humidity level is better for the body.
Another fantastic benefit is that the product has an auto-defrost system that enables you to use it no matter how cold it is. Meaning, you can always have excellent overall air quality throughout the year.
What Could’ve Been Better?
In our honest opinion, this crawl space dehumidifier is all you need, as it secures the structural integrity of your home by ensuring that there isn’t too much humidity. The only thing we suggest being wary about is customer care, as it can be a bit frustrating to reach them.
Pros
Eliminates musty odors
Brings down the humidity level of the house
Optional remote control feature
A small frame makes it ideal for smaller crawl spaces
Cons
The customer care team is not great
Coverage Area: 1,300 sq ft | Moisture Removal: 120 Pints/Day | Energy Star Certified: Yes | Auto-Defrost: Yes | Warranty: 5 Years
Halfway through the list, we cannot go on without mentioning this crawl space dehumidifier by BaseAir. This product is perfectly sized for a tight space but also can be used in multiple areas. Additionally, this product can remove humidity efficiently and prevent mold while being easy to transport from room to room.
Professional, Smart, Easy to Use: With the built-in humidity...
Why Did We Like It?
One of the reasons this one stood out for us was that it is great for crawl spaces with collected water. Considering that this is a commercial-grade dehumidifier for households, it is well-equipped to deal with tons of moist air in tight spaces. Additionally, the evaporator and the filters ensure that the product runs smoothly for a long time.
We also appreciate the fact that it features some of the more common features, like a memory restart in case of a power outage. Furthermore, the dehumidifier can be used at low temperatures as it has a defrosting feature that will keep it going. Despite being commercial level, this product does not make a lot of noise while maintaining humidity levels.
What Could’ve Been Better?
The one thing you need to be wary of is that this crawl space dehumidifier does not have a pump that allows for automatic draining. Hence, you will have to arrange for an appropriate drainage hose and place it at an elevation for seamless draining.
Pros
Commercial dehumidifier for the house
Durable with high-quality parts
Remote controllers can be bought
The product can self-diagnose any issue that crops up
Cons
Needs to be installed in a particular way for auto-drainage
Coverage Area: 1,200 sq ft | Moisture Removal: 113 Pints/Day | Energy Star Certified: No | Auto-Defrost: Yes | Warranty: 1 Year
Next on the list is this one by Waykar, and it is made for people who want something that works well but is not complicated to understand. This industrial dehumidifier is ideal as it has an advanced display that shows everything necessary, and there is no need to spend hours on it with the manual.
【Remote Control for Easy Humidity Adjustment】This...
Why Did We Like It?
One of the first reasons this one stood out for us was because of how innovative the technology in this product is. The Waykar industrial humidifier features smart humidity control that automatically adjusts itself based on the humidity in the room and works based on pre-set levels. Moreover, it can automatically turn on and off based on the humidity levels.
We were also pretty impressed with the capacity of his dehumidifier, as it can remove 155 pints of moisture per day. Despite the high volume, it is pretty compact, making it ideal for crawl spaces and basements. It can also be used at home in any living space since it does not take up a lot of room.
The best part is that this product comes with a 30-day money-back guarantee. So, if you are not satisfied after a month, reach out to the company for a refund.
What Could’ve Been Better?
We found this product to be quite reliable, efficient, and ideal for controlling the moisture level of any space. However, the overall make of the crawl space dehumidifier is not great, so it can get damaged quite easily. Furthermore, a lot of care must be taken when moving it around and even during installation.
Pros
Backed with a money-back guarantee
Digital controls that make it easy to use
Removable controller for larger spaces
Features defrosting and automatic restart
Cons
Not a very sturdy make
Coverage Area: 6,500 sq ft | Moisture Removal: 158 Pints/Day | Energy Star Certified: Yes | Auto-Defrost: Yes | Warranty: 6 Years
Next up, we have this small but powerful dehumidifier by Honeywell. This is the ideal product to look at for people who are energy-conscious (as we all should be). It is Energy Star qualified, which ensures less energy is used than conventional dehumidifiers. Read on below to know what other eye-catching features it has.
No products found.
Why Did We Like It?
Energy efficiency is a big deal to Honeywell, and this is why their dehumidifiers can work on lower energy and remain effective. To further corroborate this, the company has mentioned that the product has an Energy Star 4-star Energy Efficiency Certification by UL.
Additionally, it is ideal for not just crawl spaces but also kitchens, basements, attics, and any space where there might be a significant amount of moisture. We also love how easy it is to use this product, as it has smart digital controls with a display screen, which makes operation nearly effortless.
Lastly, the product has smooth-gliding wheels, making it easy to transport it from one room to another. Adding to the convenience, the filters in the crawl space dehumidifier are washable, so you do not have to keep buying new ones. All you need to do is pay attention to the clean filter alert, so there is no hindrance to the dehumidification process.
What Could’ve Been Better?
One of the biggest issues with this particular product is that it can be pretty bright at night when used in the bedroom. While it is ideal for any crawl space since it is quiet and works efficiently, using this humidifier in the bedroommay be an issue, as the “night mode” feature does not turn off one display.
Pros
Ideal for smaller rooms
Backed by a five-year warranty
Wheels for enhanced portability
Noiseless operation
Cons
The front display light is too bright
Coverage Area: 1,000 sq ft | Moisture Removal: 20 Pints/Day | Energy Star Certified: Yes | Auto-Defrost: Yes | Warranty: 5 Years
Another great product by AlorAir is the Sentinel HDi90 dehumidifier, which is ideal for crawl spaces and basements. Since a dry environment is crucial for the house and its people, you can sleep peacefully knowing this product will keep you safe. Additionally, this crawl space dehumidifier will keep foul odors and bacteria out.
198 PPD Dehumidifier: With a large water removal capacity of...
Heavy Duty Condensate Pump: When removing large amounts of...
Why Did We Like It?
It is not very often that you find a compact dehumidifier that works just like a large-scale commercial one. And if you do find something like that, it is best to get your hands on it quickly. This crawl space dehumidifier by AlorAir may look small, but it has a moisture extraction capacity of 198 pints per day. Additionally, the small frame ensures portability.
An added benefit that comes with this humidifier is the flexibility of installation. Depending on the requirement, this one can be attached to ducts or left freestanding. Furthermore, it is Energy Star certified and will not use as much energy as competitor brands.
We also love the auto-defrost, memory restart, and auto-operation features, making it much easier to use. The best part is that it is protected under a five-year warranty.
What Could’ve Been Better?
We sincerely appreciate this dehumidifier, considering how compact it is and yet can cover up to 2600 square feet effortlessly. However, we found it to be a bit on the higher side of the price range and might be a bit out of budget for many people.
Pros
Compact and energy efficient
Design has a built-in pump and a high-quality filter
Compatible with remote control operation (bought separately)
Five-year warranty to protect it
Cons
A bit expensive
Coverage Area: 2,600 sq ft | Moisture Removal: 198 Pints/Day | Energy Star Certified: Yes | Auto-Defrost: Yes | Warranty: 5 Years
Finally, we recommend the BLVEDEEP DK145 commercial-grade dehumidifier. Not only is this one great for crawl spaces and basements, but it can also be used in a greenhouse or industrial spaces. Considering that it has a massive extraction capacity, you can rest assured it will keep the space free from excess moisture, mold, and mildew.
✔[ENERGY STAR CERTIFIED DEHUMIDIFIER] quickly and...
✔[AUTO DEFROSTING SYSTEM] The auto defrost is important,...
Why Did We Like It?
One of the features that stood out to us regarding this particular humidifier was the adjustable humidity controller. Depending on the requirement, you can adjust the humidity control between 30% and 80%. Moreover, once the room reaches the level the crawl space dehumidifier was set at, it will auto-turn off (and turn on when needed).
It is great for eliminating dust particles from the air as it has a high-quality filter that can trap them all. The best part is that the filter is washable, and you do not have to go through the hassle of buying more. Furthermore, features like auto-defrost allow it to work even if the crawl space is a little chilly.
All in all, this is a reliable product. It is built to last long, thanks to its steel exterior and high-quality, durable parts.
What Could’ve Been Better?
On researching further about this product, it was hard to fault it at any point, as it has raving reviews. However, the only thing to keep in mind is that it cannot be stored outdoors (like in the garage) and needs to be kept indoors at all times.
Pros
Drain hose included
Easy to operate with an interactive display
Ideal for rooms up to 6000 square feet
Effective humidity and moisture control
Cons
Can only be stored indoors
Coverage Area: 6,000 sq ft | Moisture Removal: 145 Pints/Day | Energy Star Certified: Yes | Auto-Defrost: Yes | Warranty: 1 Year
Although we are done reviewing some of the top brands for dehumidifiers, we are far from finished. The issue with excess moisture is not a new one, and hence most crawl space dehumidifiers are well-equipped to control humidity levels. However, the main question is - which one is ideal for you?
To simplify this, we have put together a short buyer’s guide to list out some of the top factors to consider when buying such a product. Let’s get into it in a bit more detail, shall we?
1. Size And Coverage
One of the first things to look into is the dehumidifier’s size and coverage area. Make sure you know the house’s square footage and the size of the dehumidifier to ensure it is suitable. Furthermore, most of these products mention pretty clearly the kind of space they can be used in.
Another thing to keep in mind is the pints per day amount of the product, ensuring it can extract moisture from the entire space.
2. Noise Levels
Conduct ample research on the product to ensure it does not make noise as it does its job. Not only that, it is always better to have a crawl space dehumidifier that can operate silently from start to finish. Since many of these are kept in basements and crawl spaces near bedrooms, a quiet dehumidifier will ensure no one is disturbed.
3. Humidistat
The role of a dehumidifier is to reduce and maintain humidity levels. Hence, the humidistat is the essential feature of the product. Moreover, a programmable humidistat ensures that the entire product can be controlled without manually operating the product.
The only thing to ensure is that the humidistat does not use up too much energy (as it tends to do).
4. Drainage
Most crawl spaces are quite dark, dingy, and challenging to be in for a long time. Having a crawl space dehumidifier in such areas will ensure humidity removal and drainage of any collected water without any manual help. This is why it is crucial to ensure that the dehumidifier comes with a drain hose and a convenient system for automatic drainage.
5. Additional Features
There are excellent features in many units these days, such as auto-defrost, memory reset, and remote usage. All of these ensure the product is user-friendly and easy to maintain despite challenging circumstances.
Crawl Space Dehumidifiers FAQ's
Why do I need a crawl space dehumidifier?
Crawl spaces are susceptible to high humidity levels, especially in humid climates or areas with poor ventilation. Excess moisture can lead to mold growth, musty odors, and structural issues. A crawl space dehumidifier helps maintain optimal humidity levels, preventing these problems and improving indoor air quality.
What size crawl space dehumidifier do I need?
The size (capacity) of the crawl space dehumidifier you need depends on the square footage of your crawl space and the level of humidity present. It’s essential to choose a dehumidifier with a sufficient pint-per-day (PPD) rating to effectively remove moisture from your crawl space. Manufacturers typically provide sizing recommendations based on the area and humidity conditions.
Can I use a regular dehumidifier in the crawl space?
While a regular dehumidifier can technically be used in a crawl space, it is not recommended. Regular dehumidifiers may not be designed to handle the specific conditions in crawl spaces, such as lower temperatures and restricted spaces. Crawl space dehumidifiers are built to withstand these conditions and perform more efficiently.
Can I use a crawl space dehumidifier with a sump pump?
Yes, crawl space dehumidifiers can be used in conjunction with sump pumps. Some dehumidifiers have built-in pumps that can directly discharge water to the sump pit for automatic removal. Alternatively, you can use a gravity drain or a condensate pump to direct the collected water to the sump pump.
How often should I run my crawl space dehumidifier?
The frequency of running your crawl space dehumidifier depends on the level of humidity in the crawl space. In humid conditions, it may be necessary to run the dehumidifier continuously or on a set schedule to maintain optimal humidity levels. In less humid conditions, you can adjust the dehumidifier’s settings accordingly.
Can a crawl space dehumidifier be used in basements or other areas?
Crawl space dehumidifiers are specifically designed for use in crawl spaces and may not be as effective in larger areas like basements. For basement dehumidification, it’s best to use a dehumidifier specifically designed for that purpose, as basement dehumidifiers are generally more powerful and can handle larger spaces.
Conclusion
Maintaining controlled humidity in crawl spaces is critical for protecting structural integrity, improving indoor air quality, and preventing long-term moisture damage. In this guide, we’ve evaluated top-performing crawl space dehumidifiers using criteria such as pint-per-day extraction, energy efficiency, drainage systems, smart control features, and space compatibility—ensuring each recommendation addresses a range of real-world applications.
Among the six models reviewed, three stand out for their performance and versatility. AlorAir Sentinel HD excels with its smart humidity sensors, compact footprint, and commercial-grade reliability—ideal for residential or semi-industrial use. BaseAire Commercial Dehumidifier delivers efficient moisture removal and rugged portability, making it a strong choice for tight, high-load spaces. Meanwhile, Waykar Industrial Dehumidifier offers user-friendly controls, an auto-adjusting humidistat, and robust air filtration—suitable for users seeking automation and ease of use.
Choosing the right dehumidifier depends on crawl space dimensions, drainage access, and desired automation. Each of the recommended models is engineered to reduce microbial growth, protect materials from degradation, and maintain stable indoor humidity. We hope this guide has equipped you with the technical insight needed to make a confident, informed purchase—ensuring a safer, drier, and healthier home environment.
We hope that you found our article to be both insightful and helpful in your pursuit of the best keyword. We've thoroughly tested each product and considered a variety of factors that are critical in determining its efficiency. It's safe to say that no stone was left unturned, and we believe the products discussed will meet diverse user needs and circumstances.
Ceramic and porcelain glues are specialized adhesives engineered to bond non-porous, mineral-based materials with high precision and durability. These glues—typically epoxy resins, cyanoacrylates, or polyurethane-based compounds—are formulated to resist thermal stress, moisture, and minor mechanical impact, making them ideal for restoring cracked or shattered ceramic dinnerware, decorative tiles, or porcelain figurines. With product advancements from leading brands such as Gorilla Glue, Loctite, J-B Weld, and Devcon, modern adhesive solutions now offer stronger molecular adhesion, faster curing times, and increased versatility for both indoor and outdoor use. In response to growing demand for effective at-home repair solutions, this guide evaluates the nine best ceramic and porcelain glues currently available—based on bond strength, food safety, curing speed, and ease of application—to help you make an informed choice for any ceramic repair scenario.
Best Ceramic and Porcelain Glues
Here is the list of the 9 best ceramic and porcelain glues that you can use to repair broken plates, mugs, and other ceramic and porcelain pieces.
Expensive china ornaments, ceramic plates, your favorite coffee mug - you name it, and Gorilla Super Glue will fix it. With its unique no-run gel formula, its versatility is unparalleled. Moreover, its easy application and fast setting time make it perfect for all your DIY repairs and quick fixes.
Gel glue formula: Our thick, no-run Gorilla glue gel formula...
All purpose glue: Gorilla Super Glue is formulated for...
Why Did We Like It?
Among the variety of options available on the market, the Gorilla Super Glue tops our list because it bonds excellently to a variety of surfaces. From porcelain dinner plates to diorama artwork, this super glue will effortlessly bond anything you want.
Additionally, it features a unique no-run control formula that makes it perfect for vertical applications. Thus, you don’t have to think twice before applying to chandeliers, wooden furniture, and so on.
Moving on, the highlight of this glue is its fast setting time. With a setting time of about 45 seconds, you can rest assured that your surfaces will bond quickly in almost no time.
Better yet, this glue comes with an anti-clog cap that ensures the glue doesn’t dry up after use. Thus, you can use the glue till its last drop. Lastly, Gorilla offers excellent value for money because a few drops of glue are sufficient to bond surfaces.
What Could’ve Been Better?
Considering its drying time and versatility, this is one of the best glues we have come across on the market. So, there isn’t much to complain about. However, our only gripe is that it isn’t water-resistant. Therefore, it might not be ideal for outdoor applications.
Those looking to fix porch benches or ceramic pots will have to look elsewhere. Other than that, this Gorilla Super Glue is a bang for the buck!
Pros
Versatile applications
No drip formula
Quick setting time
Does not clog
Cons
Not suitable for outdoor repairs
Quantity: 1 Bottle | Volume: 0.71fl oz | Set Time/Dry Time: 10 to 45 Seconds | Cure Time: 24 Hours | Dry Color: Clear | Resistance: Resists Impact
If you’ve been on the lookout for adhesives to bond the ceramic pots of tables on the porch, then Gorilla Epoxy is perfect for your needs. With its incredibly tough and strong formula, you can bond anything you want. Plus, its easy-to-use syringe and 5-minute setting time have made it popular among DIYers.
5 minute epoxy: This epoxy resin kit in just one applicator...
Why Did We Like It?
When it comes to Gorilla, we can vouch for its quality. Similar to our previous pick, this two-part epoxy formula scores high on versatility. Not only does it work perfectly on ceramic tiles in the bathroom, but it also bonds wooden cabinets excellently. Therefore, it is compatible with a variety of surfaces.
Moreover, we love the fact that this epoxy by Gorilla can be used for outdoor repairs, too. Thanks to its water-resistant formula, you have the freedom to use it on any surface you want.
Additionally, you will love the design of this 25 ml epoxy. This two-part formula comes in separate barrels and features a dispenser. Simply push the plunger, and equal amounts of resin and hardener will be dispensed. Mix it properly using a stick, and your mixture is ready to bond surfaces. Considering its versatility and durability, Gorilla offers excellent value for money.
What Could’ve Been Better?
Although this epoxy works exceptionally well for bonding surfaces, it emits a pungent odor. Therefore, we recommend using it outdoors or in well-ventilated areas.
Also, this epoxy isn’t the best pick for beginners because it sets within five minutes. Thus, you will have to mix it fast and apply it within that time. Otherwise, the epoxy will lose its bonding strength.
This 2-ton epoxy is perfect for those looking for a quick solution to fix hairline fractures on ceramic mugs. Most DIYers and homeowners have been opting for this product because of its versatility. With a tensile strength of 2500 psi, you can rest assured of its strong bonds. Moreover, it is water-resistant.
Ideal for joining wood, metal, concrete, glass, ceramics,...
Sets in 30 minutes with strength up to 2,500 pounds per...
Why Did We Like It?
Finding strong adhesives to fix minor hairline cracks and fractures in your favorite ceramic mugs is pretty much a task. However, with this 2-ton epoxy, you can fix all the minor cracks and fractures on your ceramic wares.
Furthermore, it is compatible with a wide variety of surfaces. Be it ceramic, porcelain, metal, china, concrete, or even glass, you can use it to fix anything you want. Additionally, it has a setting time of 30 minutes. So, you can work at your own pace without worrying about the epoxy losing its strength.
Moving on, this epoxy is water-resistant. Therefore, you can use it for repairing kitchen wares without worrying about water tampering with the bonds. Besides forming durable bonds, we love the design of the bottles, which makes it easy to dispense equal amounts of resin and hardener.
Lastly, it dries clear, and once cured, you can sand and paint it to your liking. So, if you’re looking for a versatile option to bond ceramics, then this product is the one for you.
What Could’ve Been Better?
This is undoubtedly one of the best options for fixing hairline cracks on ceramics and porcelain. However, we wouldn’t recommend this to novices. That’s because it isn’t easy to mix. Even so, if you intend to use it, we recommend that you go through YouTube tutorials.
Pros
Adheres well
Dries super hard
Form strong and durable bonds
Can be sanded and painted
Cons
Challenging to mix
Quantity: 2 Bottles | Volume: 4.25fl oz Each | Set Time/Dry Time: 30 Minutes | Cure Time: Allow 24 Hours | Dry Color: Clear | Resistance: Water-Resistant
If you’re a frequent DIYer, then this KwikWeld Epoxy by J-B Weld is perfect for you. With its quick setting and curing time, you can complete all your ceramic diorama projects in a breeze. Moreover, it features a resealable cap that prevents the glue from drying. Overall, this two-part epoxy is your perfect companion in DIY fixes and repairs.
J-B WELD KWIKWELD: A fast setting version of The Original...
CURE AND SET TIME: After mixing the two part formula with...
Why Did We Like It?
More than anything, we were impressed by the fast-curing time of this epoxy. With a curing time of about 6 hours, this is one of the fastest-drying epoxies that we’ve come across. On top of it, J-B Weld guarantees strong and long-lasting bonds.
Additionally, it is usable on a variety of surfaces. From ceramics to tiles and fiberglass, J-B Weld assures incredibly tough bonds on almost all surfaces. Plus, it is great for plumbing and fixing ships, too.
One of the highly striking aspects of this epoxy is its design. With a plunger connected to the two syringes, dispensing the mixtures is quite an easy-peasy task. All you have to do is push the plunger to dispense the two-part epoxy and mix it properly. And, you’re done.
Moreover, the package includes a resealable cap to ensure maximum reusability. With a tensile strength of up to 3127 psi, you can rest assured that the bonds will withstand high temperatures of up to 300 degrees Fahrenheit.
What Could’ve Been Better?
Considering its versatility and tensile strength, this epoxy is an excellent option for all your DIY repairs. And for that reason, it comes with an expensive price tag. So, it might not be an ideal option for those on a budget.
Pros
Cures in about 6 hours
Great for plumbing and marine use
Easy to use
Can withstand high temperatures
Cons
Expensive
Quantity: 1 Double Syringe | Volume: 0.85fl oz | Set Time/Dry Time: 6 Minutes | Cure Time: 4 to 6 Hours | Dry Color: Dark Gray | Resistance: Withstands Up to 300ºF
Looking for adhesives to fix hairline cracks on your ceramic tiles? Take a look at this Tile Paste Adhesive that is specifically formulated for bonding tiles. With a setting time of about 30 minutes, this adhesive gives you ample time to manipulate the surface. Moreover, once cured, it becomes resistant to mildew.
VERSATILE TILING SOLUTION: Install and repair mosaic,...
PERMANENT BOND: Create durable tile installations with this...
Why Did We Like It?
First things first, we were pretty much pleased by the price tag of this adhesive. This 5.5-ounce tube is hands down one of the most affordable options available on the market. Moreover, the design of the tube is quite appealing. With tube packaging, the glue can be easily dispensed onto the surface without any mess.
Moreover, it is super easy to use. Simply squeeze the tube and dispense the glue onto the surface. And, you’re done! Plus, they are highly versatile. So, feel free to use this on porcelain, ceramic, and even plastic tiles.
Additionally, its paste-like consistency can be used outdoors, thanks to its water and heat-resistant formula. Also, it is pretty easy to clean. Therefore, you need not worry about any spillage.
Lastly, what’s particularly interesting about Red Devil adhesive is that it is VOC-compliant and has a low odor. All in all, it’s a perfect pick for those looking to repair broken tiles.
What Could’ve Been Better?
Even though this product is an excellent option for repairing broken edges and hairline fractures on your ceramic tiles, customers have complained about receiving a dried-out tube. However, this happens only sometimes. Thus, in such situations, you must contact customer care for replacements or refunds.
Pros
Affordable buy
Easy to use
Low in odor
Cleans easily
Cons
Some may receive a dried-out tube
Quantity: 1 Tube | Volume: 5.5fl oz | Set Time/Dry Time: 30 Minutes | Cure Time: N/A | Dry Color: White | Resistance: Resists Water, Heat, Mildew
If you’ve got to repair some broken white ceramic plates, then this epoxy is your best bet. As the name suggests, it dries to a white color. With its quick-setting formula, you can rest assured that your kitchenware will be repaired in almost no time. Much like other epoxies, it responds well to paints.
Quick setting, exceptional adhesive strength, bonds well to...
Why Did We Like It?
Specially formulated for use on rigid surfaces, this epoxy bonds exceptionally well to a variety of surfaces. From broken ceramic wares to your favorite ruby necklace, its versatility is almost limitless.
Moreover, you can also use it to repair the bathroom sink and toilet tank lid, thanks to its tough and durable bonds. With a quick setting time of about 3 minutes, this epoxy will meet your needs without any doubt.
Additionally, this epoxy has a butter-like consistency, which makes it easy to use. In case of an uneven and bumpy surface, you can file and sand it to create a neat finish. Not only that, but you can also drill screws. Plus, it is compatible with stains and paints too.
Moving on, this epoxy doesn’t run easily, thanks to its unique formula. Unlike other epoxies, it doesn’t dry crystal clear. Instead, it dries to a brilliant white color. Therefore, it’s perfect for repairing your broken ceramic wares.
What Could’ve Been Better?
We found this epoxy incredibly easy to use; however, we wouldn’t recommend this to novices. That’s because it doesn’t come with clear instructions. That said, most customers have complained that instructions are difficult to follow. Therefore, dealing with this epoxy might be a challenge for novices.
Pros
Works well on a variety of surfaces
Easy applications
Paintable and machinable
Doesn’t run easily
Cons
Unclear instructions
Quantity: 2 Tubes | Volume: 0.60fl oz | Set Time/Dry Time: 3 Minutes | Cure Time: N/A | Dry Color: White | Resistance: Resists Most Chemicals, Oil, Petrol
If you’ve been hunting for waterproof glues to repair outdoor ceramic pots, this Gorilla Polyurethane Glue is the one for you. With its 100% waterproof formula and incredibly strong bond, your ceramic pots will withstand even the harshest elements. Plus, it is solvent-free and super easy to use.
Our original bottle of glue: A heavy duty glue with a water...
100% waterproof: When cured, this waterproof glue doesn't...
Why Did We Like It?
This waterproof polyurethane glue is compatible with all kinds of surfaces. Be it ceramic pots, wobbling chairs, or even motorcycle grips- this glue sticks firmly and bonds to everything you want. On top of it, this glue expands three times more than ordinary glue to form incredibly tough bonds.
Additionally, bonding uneven, irregular surfaces isn’t challenging with this glue, thanks to its polyurethane formula that wicks perfectly into the surfaces. However, the best part of this glue is its waterproof formula. Plus, it can withstand high temperatures. So, feel free to use this on outdoor surfaces without worrying about nature tampering with bonds.
Moving on, you can easily sand off any extra glue that is peaking from the cracks. With a shelf-life of one year, this glue is a long-lasting one. Moreover, cleaning isn’t much of a task with this Gorilla glue. A dry cloth or a paint thinner will be perfect for wiping extra glue from the surface.
What Could’ve Been Better?
While Gorilla Glue is a dependable option for all your household repairs, it might not be an ideal option for a quick fix. That’s because it takes slightly longer to cure fully.
However, it is an excellent option for your large-scale projects because of its incredibly tough bonds and versatile nature.
Pros
Versatile applications
Incredibly tough
Can be sanded
Can withstand different elements
Cons
Longer curing time
Quantity: 1 Bottle | Volume: 18oz | Set Time/Dry Time: N/A | Cure Time: 24 Hours | Dry Color: Brown | Resistance: Waterproof, Withstands Elements, High Temperature
Incredibly strong and versatile, the Loctite Super Glue Gel is an excellent choice for filling small gaps. Compatible with porous and non-porous surfaces, this glue adheres well to a variety of surfaces. Plus, it is moisture-resistant and sets quickly without any clamping. Additionally, it dries clearly, making it an aesthetically pleasing repair.
Invisible Repairs: No-drip gel sets quickly and dries...
Why Did We Like It?
There are a lot of things that we love about this glue. However, the thing that hooked us right away is its quick setting time. With 10 seconds of setting time, the pro in you can mend, repair, and bond anything. That being said, your broken ceramics will be ready for use within just a few minutes.
Additionally, the versatility of this glue makes it an excellent option for your DIY repairs. This glue gets along well with leather, metal, plastics, and even hard plastics. And it weighs only 2 g, making it a convenient option for people who are always on the go.
Moving on, this high-quality glue is resistant to moisture, chemicals, and high temperatures. Rest assured, your surfaces will withstand harsh elements. Moreover, this gel formula dries clear, making it ideal for stained surfaces.
Better yet, the glue doesn’t clog, thanks to its clog-free cap. Moreover, its anti-drip formula ensures that the application is mess-free.
What Could’ve Been Better?
Although this is our go-to recommendation for immediate repairs, keep in mind that it isn’t dishwasher or microwave-safe. Therefore, make sure you avoid using it on those wares that you toss in the dishwasher or microwave. Considering its functionality and versatility, this product is a bang for the buck!
Pros
Highly versatile
Compatible with both porous and non-porous surfaces
Lightweight
Can withstand elements
Cons
It isn’t compatible with microwave or dishwasherware
Quantity: 1 Tube | Volume: 0.07fl oz | Set Time/Dry Time: 15 to 30 Seconds | Cure Time: 12 to 24 Hours | Dry Color: Clear | Resistance: Resists Water, Most Chemicals, Withstands Elements, Freezing Temperature
Another premium glue that DIYers can add to their craft kit is this Super Glue by Krazy Glue. With its versatile formula, you can repair all that you want. Moreover, its brush applicator ensures easy application and even coverage. Overall, it is an excellent product for DIY crafts, home repair, and office repair, too.
Strong Adhesive: Krazy Glue's brush-on super glue provides a...
Wide Range of Uses: This versatile glue works on wood,...
Why Did We Like It?
To be honest, this glue is popular among crafters, enthusiasts, and professionals alike because of its versatile formula. From DIY crafts to office projects, you can use this to bond anything you want.
Moreover, we love the brush applicator that comes with this glue, as it makes it easy to control. Furthermore, it also ensures even coverage. Thus, you can use it in large as well as tight spaces easily.
Additionally, it comes in a clog-free bottle that ensures the glue and the brush remain in perfect condition.
With its strong bonds, you can rest assured that the surfaces will stand the test of time. Plus, it is one of the most affordable glues available on the market. Thus, this is an excellent option for those who have just ventured into the field of DIY. Considering its versatility and functionality, Krazy Glue offers excellent value for money.
What Could’ve Been Better?
Overall, this glue is an excellent option for those looking for a versatile product. However, we noticed that this glue isn’t water-resistant. Therefore, it might not be ideal for outdoor applications.
Also, it isn’t FDA-approved. So, you must not use it on your mugs, plates, or other kitchenware. Other than that, it is an excellent option for all your household needs.
Despite knowing the nine best options available on the market, choosing the correct ceramic and porcelain glue is still challenging. There are a lot of factors that you need to consider before picking one for your tasks. Thus, we’ve curated this buyer’s guide to help you pick the correct one for your needs.
We’ve compiled a list of all the factors and discussed them in detail to ease your task. So, move on and take a look.
Uses
Before deciding which one to pick, you will have to look at your needs. That’s because there isn’t a “one-size-fits-all” solution when it comes to ceramic glues. For instance, if you have to bond outdoor ceramic pots, you will have to opt for one that can withstand all the elements.
Therefore, we suggest you take a look at the description of the product before you buy one. Also, make sure you buy clear glue to repair your ceramicware. So, take a proper look at the uses and the description of the product
Shape Of The Container
Though it might seem to be a trivial thing, the shape of the container is of utmost importance. That’s because the shape of the container determines how easy it is to use the glue.
If you’re looking for a product that offers easy applications, go for the one that features a nozzle. Meanwhile, for precise application, you may opt for glues that come with a brush applicator. Of course, you wouldn’t want to mess with your project because of spilling or dripping. Therefore, make sure you take a look at the container before you decide to go for one.
Safe For Food Contact
Let’s be honest, most glues available on the market are toxic. And when it comes to ceramic glues, they contain chemicals. So, when it comes to bonding ceramic plates, mugs, and other kitchenware, you must look for glues that are FDA-approved. That’s because they are safe from contact with food.
So, you must check the description of the product properly and buy it only if it mentions that it is “FDA-approved.” With tons of cheap products on the market, we are sure you wouldn’t want to end up buying a fake one.
Drying Time
When it comes to ceramic glues, no glues come with identical drying times. Some may dry quickly within hours, while some may take up even days to fully cure. Therefore, while shopping for ceramic glues, consider the drying time of each.
Although super glues dry quicker than epoxies, their bonds aren’t as durable as those of epoxies. Moreover, the drying time also depends upon your needs. If you have to fix something immediately, opting for a quick-drying glue will be a wise decision.
On the other hand, if you’re looking for more durable bonds, then going for epoxies or longer-curing glues will be the best bet. Thus, before picking one, consider your needs and the nature of your task.
Accessories
Now, most glues come with extra accessories that make bonding and repairing surfaces an easy task. Such accessories ensure easy application and even coverage and are beginner-friendly. So, when you’re searching for the best glues to bond ceramic and porcelain, make sure you even check the accessories offered by the brand.
Therefore, we recommend you go for the glues that feature a brush applicator. Also, if you don’t get extra accessories, you can always purchase a brush from the local stores.
Price
With plenty of options on the market, you’re sure to stumble upon both affordable and expensive products. If you’re a frequent DIYer, we recommend you go for the best. Although it might cost you a few bucks more, you wouldn’t regret it. But, if you’re simply looking for occasional repairs, affordable glues will be an excellent option.
Ceramic and Porcelain Glues FAQs
What is the difference between ceramic and porcelain?
Ceramic and porcelain are both types of clay-based materials. Ceramics are more porous, less dense, and can be fired at lower temperatures. Porcelain, on the other hand, is denser, less porous, and fired at a higher temperature, making it more resilient and difficult to bond.
Can I use regular super glue for ceramics and porcelain?
Regular super glue can be used for repairing small breaks or chips in ceramics or porcelain. However, for a more durable bond or for larger repairs, it’s recommended to use a glue specifically designed for ceramics and porcelain.
Are there any health concerns related to ceramic and porcelain glues?
Some ceramic and porcelain glues contain chemicals that may cause skin, eye or respiratory irritation. Always follow the manufacturer’s safety instructions, work in a well-ventilated area, and wear gloves and protective eyewear when using these glues.
Are ceramic and porcelain glues suitable for outdoor use?
Some ceramic and porcelain glues are rated for outdoor use, but not all. Check the product label for weather resistance and UV stability before using it in outdoor applications.
How should I prepare the surfaces before applying ceramic and porcelain glue?
Thoroughly clean the surfaces with a damp cloth to remove dirt, dust, and any oily residues. Make sure the surfaces are completely dry before applying the adhesive. For a stronger bond, you may lightly sand the surfaces to create better adhesion.
How do you remove excess or dried glue from ceramic or porcelain surfaces?
Remove excess glue before it cures, using a clean cloth or spatula. If the glue has already dried, use a fine abrasive pad, a razor blade, or acetone, depending on the glue type and manufacturer’s recommendations.
Can I use a hairdryer to speed up the curing process?
Using a hairdryer might cause uneven curing or weaken the bond. It’s best to follow the manufacturer’s instructions for an appropriate cure time and avoid trying to force a faster cure.
Can you paint over ceramic or porcelain glue?
Yes, once the glue has fully cured, you can paint over it. Epoxy glues are particularly suited for painting as they can be sanded smooth and accept most types of paint.
Can ceramic and porcelain glues bond other materials?
Yes, many ceramic and porcelain glues can bond to a variety of materials, including metal, glass, and various plastics. However, the bond strength and durability may vary depending on the surfaces being bonded.
Conclusion
Ceramic and porcelain items require adhesives with strong cohesion, thermal resistance, and compatibility with non-porous surfaces. Based on formulation type, bond strength, and application precision, three products stand out. Gorilla 7700104 Super Glue is cyanoacrylate-based, offering rapid polymerization for small, high-stress breaks. Gorilla 4200101 Epoxy, a two-part epoxy resin, delivers high tensile strength and water resistance, ideal for structural or outdoor repairs. Devcon GLU-735.90 Epoxy is optimized for micro-fractures and hairline cracks, with low-viscosity flow and high bonding integrity across ceramic substrates.
If curing time, food safety compliance, and material specificity are priorities, consult the full comparison table and guide above. Proper adhesive selection ensures long-term durability, minimal visual disruption, and material-safe restoration for all ceramic and porcelain applications.
The best uncuttable locks are engineered with high-strength alloys, hardened shackles, and tamper-resistant mechanisms to protect against bolt cutters, grinders, lock picks, and brute force—offering unmatched security for high-risk applications. Whether you're securing a storage unit, garage, industrial gate, or shed, investing in a heavy-duty padlock designed to resist physical attacks is essential. Models made from boron-carbide, alloy steel, and laminated hardened steel deliver superior cut resistance, while features like shrouded shackles, drill-resistant cylinders, anti-pick keyways, and double-ball locking mechanisms increase defense against manipulation and forced entry. Brands like ABUS, FJM, Draper, Stanley, and Master Lock lead the category with products certified under standards such as ASTM or CEN Grade 5, indicating professional-grade durability. In this guide, we review the 9 best uncuttable locks available today—highlighting material strength, key control systems, weatherproofing, and tamper resistance—so you can find the most reliable solution for your security needs.
Listed below are the 5 best uncuttable locks from our list.
ABUS 03100 37/60 Padlock. The ABUS Padlock, crafted with alloy steel, offers top-notch security and durability with a tensile strength of over six tons, a drill-resistant disc cylinder, and an additional layer of security in the unique keying system.
Draper Expert Heavy-Duty Padlock. The Draper Expert Heavy-Duty Padlock combines security with convenience, featuring a hardened steel body, a shrouded shackle resistant to cutters and saws, and an easy rekeying system, all while being exceptionally durable even under tough weather conditions.
Master Lock Padlock. The affordably-priced Master Lock Padlock ensures security with its resistant hardened steel construction, a lock that doesn’t lock without the key, preventing accidental lock-outs, and durability backed by a full warranty.
Stanley Hardware Hardened Steel Padlock. The Stanley Hardware Hardened Steel Padlock, a professional-grade lock, caters to high-security needs with features such as resistance to lock-picking, a lock body that withstands attempted break-ins, and an ASTM certification.
FJM Padlock. The FJM Padlock, designed for heavy-duty applications, offers comprehensive security with its unique keys that are hard to replicate, resistance to bolt cutters, and smooth key movement, all encased in a water and corrosion-resistant body.
Are you looking for indestructible locks that can’t be cut with bolt cutters? If so, you’ve come to the right place! Here is the list of the 9 incredible uncuttable locks that cannot be cut.
1. ABUS 03100 37/60 Padlock - Best for High Security
ABUS is a trusted name as it started working on security technologies in 1924. With the alloy steel padlock, ABUS has outdone itself. Not only does it match the highest security standards, but it has commendable durability. It makes the lock perfect for internal and external use in household or industrial settings.
ABUS makes trustworthy padlocks, and the security features immediately caught our eye. The tensile strength of the lock is over six tons, which means it is nearly impossible to remove the shackle from the body using force. The padlocks also come with the ABUS Plus drill-resistant disc cylinder, which ensures the highest protection against tampering and manipulation.
Apart from the lock’s body, the keying system is designed to add a layer of security. In the event a key is lost, there is a security card that details how to make duplicates. Since the owner has the said card, they are aware of the number of spare keys in circulation.
Finally, the stainless steel body and shackle should be praised for ensuring the highest degrees of security, even in external saltwater environments.
Considered to be one of the most secure padlocks in the world, there’s nothing much the German-made lock could improve on. But there have been some complaints about it being too bulky. As a result, the lock doesn’t easily fit through latches, even when it comes to standard shipping containers.
What We Like
The stainless steel body and shackle make the lock suitable for extreme weather conditions
The lock body is protected by a hardened steel cap, protecting it from cutting and sawing
The cylinder is re-keyable, so spares can be made if keys are lost
What We Don't Like
Bulky and unsuitable for smaller latches
Only two sets of keys were provided initially
Shackle Diameter: 11 mm | Body Material: Alloy Steel | Shackle Material: Alloy Steel | Keying Options: Keyed | Weatherproof: No
2. Draper Expert Heavy-Duty Padlock - Best for Durability
Draper Tools has been around since 1919, and in that time, the company has gained the trust of users with quality products. The heavy-duty padlock is yet another step in the right direction. It is crafted with great care to ensure the highest degree of security and deter break-ins.
Draper’s padlock combines the best characteristics that make such products suitable. The hardened steel body ensures a degree of protection from assaults on the lock. The shrouded shackle only serves to enhance safety measures by deterring attacks from cutters and saws.
Besides, the lock’s durability is guaranteed thanks to the electric coating, which protects it from weather conditions, allowing seamless external use. Finally, servicing and rekeying are made extremely swift and easy, which ensures customer satisfaction even if something goes wrong with the padlock.
Considering the modest price range of the product, the six-pin precision tumbler makes the lock an automatic choice for many. Moreover, Draper’s accumulated goodwill instills an automatic faith in the functionality of the padlock.
Draper’s stayed ahead of the curve by making constant improvements to their existing models. This particular padlock could benefit from the availability of extra sets of keys beforehand, to save users the hassle of rekeying. Moreover, additional security would protect the lock from assaults with heavier tools, like drills.
What We Like
Durable against extreme weather conditions, including exposure to water
Hardened exterior and shackle ensure lock integrity against most attacks
Easy rekeying guarantees a seamless experience, even if existing keys are misplaced
What We Don't Like
Not available in various sizes, limiting the scope of applicability
Extra sets of keys are not provided beforehand
Shackle Diameter: 10 mm | Body Material: Brass | Shackle Material: Hardened Steel | Keying Options: Keyed | Weatherproof: No
3. Master Lock Padlock - Best for Affordability
We start the list with the Titanium Series Stainless Steel Lock from Master Lock. It is the most affordable item on the list and has the added advantage of coming from a company that has been in the lock-making business since 1921. The 2-5/16 inch lock encapsulates Master Lock’s principles of quality, innovation, and providing top-notch security.
Owing to the several positive reviews the product has received, we had to try it for ourselves, and we are glad to report it lives up to the hype. The padlock, as advertised, can fit through most lock holes – despite the heavy-duty appearance. Handling and installation are easy, so customers don’t need to worry too much.
The best part about the Master Lock padlock is that it’s great for the most forgetful of customers. Everyone can avoid the embarrassing situation of locking the door with the keys still inside. The Master Lock padlock doesn’t lock without the key, and once locked, customers can rest assured that casual thefts will be completely prevented by the sturdy product.
It’s also durable and comes with a full warranty, so you can be sure that purchasing the lock is a stellar investment. Combining the best features at extremely pocket-friendly rates really sets the Master Lock padlock apart from the other products on the list.
While one can sing praises of the reliable lock, there are some downsides to be considered. The key is quite small, and some customers have complained that it can be easily misplaced. Moreover, the lock only prevents casual theft. Anyone with high-powered equipment, besides the basic bolt cutter and crowbar, can easily break through it.
What We Like
Hardened steel protects against extreme cutting and prying
The sliding key prevents dirt and grime from accumulating, jamming the locking mechanism
The key retaining feature prevents the padlock from being left unlocked
What We Don't Like
The chances of misplacing keys are high
Not resistant to heavy-duty machinery like portable grinders
Next up, the padlock from Stanley Hardware might cost a bit more than the others, but customers get a quality product for the money spent. The professional-grade locks combine a host of security features and promise durability, which makes them suited for any job site and guarantees to bring peace of mind to the buyer.
For the price charged, the Stanley Hardware lock really is the best. Customers can use it with chains to secure gates or recreational vehicles. Reports from people who’ve diligently tried to break the lock suggest that it deters most casual thieves. Moreover, the stamp from ASTM International cements the fact that Stanley Hardware’s padlock matches a certain reliable standard.
Although the 6-pin cylinder can stave off lock pickers, it is a commercial line that can be changed out by those concerned about additional security. Yes, the padlock offers the option to make it even more secure by getting a locksmith and installing a cylinder of your choice.
Described as a standout product, the padlock has been through the proverbial test of fire to gain everyone’s trust – and at this price, we can’t ask for more!
The Stanley Hardware padlock is placed second to ABUS, which seems to have won everyone’s hearts. Although Stanley Hardware’s product might be priced more competitively compared to ABUS, the former could make additional assurances to gain trust.
The Stanley Hardware padlock’s key is as big as a car key, and if the padlock gets too tight, the head of the key has to be bent to fit. Thus, reducing the size might help.
What We Like
Fully shrouded, hardened steel body
Resistant to prying, lock-picking, and drilling
ASTM graded
What We Don't Like
Not equipped to withstand the onslaught of heavy machinery
The key size makes operations difficult on occasion
The product offers a wide range of features for the most discerning buyers. It delivers durability and peace of mind, while also being applicable for heavy-duty purposes like shipping containers. Needless to say, the FJM padlock can be used in any weather condition with no fear of damaging the core structure.
With unmatched security and durability, the movement of the key is smooth, and there aren’t any loaded parts with springs that might erode over time. The plating makes it great for conditions, even when the FJM lock might come in contact with a fair amount of water.
The ability to be fitted horizontally or vertically is an added benefit, and the padlock offers very little access to bolt cutters, ensuring complete security. The cherry on the cake has to be the hard replication of keys, making each lock unique, and assuring customers that nobody but them can gain access. It’s hardly surprising, considering the use of European high-security keys.
All these features come under a modest price range, and the promise of long-lasting service makes this the right investment for customers.
Despite the assurance of smooth key turning, there have been instances where the key gets stuck. The feature for the keyway to turn 90 degrees to connect with the disks needs to be modified. Although the FJM padlock comes with four keys, no keys are sold separately, so if customers misplace them, they have to end up buying another lock.
What We Like
Freely rotating shackles that can’t be cut
Erosion-proof internal brass and stainless steel mechanics
Can’t be picked or jimmied open
What We Don't Like
Keys, if lost, can’t be replaced
Keys get stuck, requiring the lock to be broken
Shackle Diameter: 11 mm | Body Material: Hardened Steel | Shackle Material: Hardened Steel | Keying Options: Keyed | Weatherproof: No
6. KAWAHA High-Security Padlock
We move on to the high-security, shrouded steel padlock from KAWAHA. Suited for indoor and outdoor applications, the 2-3/8 inch stainless steel product can be used for household, commercial, and industrial purposes. After all, it delivers strength, reliability, and resistance to corrosion, making it apt to secure valuables and bring peace of mind to the user.
We tried out the KAWAHA product, and the first thing that stands out is how the lock can be used in situations where water damage should not be an issue. Naturally suited for marine purposes, the stainless steel product is impervious to casual attempts to break it. A bolt cutter or wrench doesn’t make much headway.
If customers are concerned about losing the key, that’s not an issue either. The KAWAHA padlock comes with three sets of keys, meaning you will never be locked out of your own space.
Considering the price one has to shell out for peace of mind, the KAWAHA padlock is a smart investment for any customer who believes in protecting their product. The 12-piece cylinder disks prevent prying, so you can enjoy a good night’s sleep knowing all your valuables are being guarded by the trusted padlock.
Despite the many advantages of using a KAWAHA padlock, customers should check what kind of shackle they’re using, since the lock is not compatible if the are too thick. Moreover, the key sometimes tends to get stuck.
What We Like
Shrouded design protects locks from bolt cutters
Stainless steel body deters corrosion, making it suitable for indoors and outdoors
Weather-proof and tamper-proof disc cylinder
What We Don't Like
Not resistant to heavy machinery like portable grinders
Kurtzy defines what sturdy locks should be like. The heavy-duty padlock comes with a shackle and has varied applicability - be it for commercial or industrial purposes. The chances of tampering are minimized, guaranteeing the users’ peace of mind. It makes the alloy steel padlock a preferred choice among several options on the list.
The Kurtzy lock inspires confidence due to its bulky, tamper-proof appearance. But the security goes beyond surface looks. The shackle is designed to be particularly tough, while the anti-drill and anti-saw body deter most lockpickers.
Since they are intended for casual and professional use, the locks aim at making life easier. Keeping this in mind, each Kurtzy padlock comes with a set of four keys, so there are enough spares in cases of misplacement.
But, among the many features that make the lock suitable for buyers, we loved the fact that it offers a hundred percent money-back guarantee. The return policy ensures that customers dissatisfied with the product aren’t stuck with a lock they don’t like. Kurtzy’s flexibility, in this regard, gives it a definite edge.
The Kurtzy lock is undeniably good, but it comes in just one size. As a result, there are some restrictions in its applicability, in case the customers require it in smaller sizes. There have also been complaints about the lock being unsuitable for a standard shipping container.
What We Like
Free-rotating shackle makes it hard to cut through the lock
An extra set of keys ensures users aren’t locked out ever
The money-back option saves buyers from possible dissatisfaction
What We Don't Like
Rusts due to rain, thus unsuitable for extensive external use
Single size incompatible with standard shipping containers
Shackle Diameter: 12 mm | Body Material: Hardened Steel | Shackle Material: Hardened Steel | Keying Options: Keyed | Weatherproof: No
8. FJM Security SPRS60-KD Padlock
The crucial values of high security and durability are championed by FJM Security Heavy Duty padlocks. The hardened build and chrome-plated water-resistant exterior make the lock suitable for external use, even in marine environments. Besides, its availability in keyed-alike and keyed-different styles allows users to pick locks tailored to their needs.
Since the FJM padlocks are designed to guarantee the safety of products, they focus on security and durability. The former is upheld thanks to various notable features, chief among which is the set of four European high-security keys, which are extremely hard to replicate. The shrouded shackle deters attacks from bolt cutters and saws, while the keyway mechanism makes the lock extra safe.
Spring-loaded parts are deliberately avoided for smooth use and the prevention of wear and tear over time. The triple chrome-plated body enhances durability and prevents the lock from rusting even if it is exposed to extreme marine environments. Similarly, the internal mechanisms of the heavy-duty lock are made of brass and stainless steel for long-lasting protection.
Despite the lock’s durability, the keys are made of soft metal and are likely to break over time. Since the core of the lock is not removable, there is no possibility of rekeying or making duplicates. Thus, the buyer has to go through the ordeal of contacting the company for extra keys.
What We Like
Heel and toe locking, rotating hardened steel shackle ensures the lock has no weak spots vulnerable to attacks
The highly durable body makes it perfect for external use, including exposure to water
Available in different varieties for additional security
What We Don't Like
Keys might break over time
Vulnerable to heavy machinery like drills
Shackle Diameter: 12 mm | Body Material: Solid Brass | Shackle Material: Hardened Steel | Keying Options: Keyed | Weatherproof: No
9. ABUS 83CS/55-300 Padlock
As the leading manufacturer of security products, ABUS has a reputation to uphold. Anyone who uses this padlock will be hard-pressed to agree that ABUS has cemented its position since 1924. It offers the highest degrees of security along with unparalleled durability, ensuring the padlock can be used in any environment without worries.
There’s not much to dislike about this ABUS padlock, which champions quality and precision. The lock stands out, especially for the quick rekeying as well as shackle-changing options. ABUS’s patented Z-bar helps convert key-retaining to non-key retaining in very little time.
When it comes to security, the padlock’s dual ball-bearing locking system prevents picking and prying. Meanwhile, the shrouded shackle gives very little leeway to bolt-cutters, therefore guaranteeing the lock’s safety. Despite the hardened steel bodies, they are surprisingly lightweight due to the Titalium aluminum alloy used in making the padlocks.
The tough exterior is not just a deterrent to attacks but also makes the lock suitable for harsher weather. Thus, if you’re looking for a padlock to suit the needs of external use, the ABUS product matches up well enough. Its patented NANO PROTECT and chrome plating ensure protection against the elements of nature.
ABUS’s product leaves very little to be desired, but there is scope for improvement. Firstly, the size is unsuitable for smaller storage spaces. Also, there have been complaints that these ABUS locks are ‘zero-bitted,’ which means they come with just one blank key and have to be set up by a locksmith before use.
What We Like
A hardened exterior prevents brute force attacks
NANO PROTECT plating ensures the lock’s durability, shielding it from harsh weather
The re-keyable feature allows users to get more copies in the event they lose the keys
What We Don't Like
Extra costs in setting up the lock before use
The shackle is too thick for the smaller latches in storage units
Shackle Diameter: 11 mm | Body Material: Alloy Steel | Shackle Material: Hardened Steel | Keying Options: Keyed, Combination | Weatherproof: No
What is the Best Uncuttable Lock for Your Security Needs?
Below, we provide a structured comparison of the best Uncuttable Locks, focusing on critical attributes including Shackle Diameter, Body Material, Shackle Material, Keying Options, and Weatherproofing capabilities.
While knowing the best padlocks available in the market right now streamlines the task of buying, customers still need to pick one tailored to their specific needs. There are a couple of factors to be kept in mind that can assist buyers in choosing the perfect lock to secure the products. Here’s what you need to remember.
Security Level
The most vital utility of the padlock is its security level. As such, manufacturers try to make the products safe through a careful focus on the lock material or key mechanisms. However, there are some options with higher grades of security, which can be understood from the ASTM ratings.
Depending on the value of the products you’re securing, opt for locks offering higher levels of protection.
Size
Yes, size does matter. While choosing the right padlock, buyers need to keep in mind that they have to secure the latch of the storage unit with it. Thus, it is advisable to check not just the lock’s dimensions, but also the width of the shackle before making a purchase.
Shackle and Padlock Body Material
The shackle and padlock body is exposed at all times - not just to attacks, but also to the elements of nature. Therefore, it is always advisable to opt for sturdier options if buyers intend to use the locks externally. One should check for the coating material, whether it is rust-proof, and how durable the lock is, before zeroing in on the right option.
What are the different types of padlocks?
Types of padlocks encompass options like combination padlocks, keyed padlocks, and electronic padlocks. While combination padlocks operate using a numerical code, keyed padlocks require a physical key and electronic padlocks employ key cards, RFID, or biometric systems.
What is the difference between a weatherproof and a regular padlock?
The distinction between weatherproof and regular padlocks lies in their resilience to external elements. Weatherproof padlocks are engineered to resist outdoor conditions such as rain, snow, and extreme temperatures, often boasting rust-resistant materials and water-pervasive rubber seals. In contrast, regular padlocks might lack such weather resistance.
Can padlocks be rekeyed?
The possibility of rekeying padlocks is offered through certain designs, enabling the changing of the lock's key without having to replace the entire lock system, thereby offering convenience and adaptation when changing access becomes necessary.
Can I use one key for multiple padlocks?
One key for multiple padlocks can be accommodated using keying options provided by some padlock manufacturers, a feature that simplifies management, providing convenience by reducing the number of keys needed.
Are there any regulations or standards for padlocks?
As for existing regulations or standards for padlocks, organizations such as the American National Standards Institute (ANSI) and the British Standards Institution (BSI) have defined such regulations. Ensuring a padlock's compliance with recognized standards guarantees that it fulfills certain security prerequisites.
The most famous abstract paintings challenge our perceptions of reality, inviting us to explore emotion, movement, and form through bold color palettes, fragmented shapes, and non-representational techniques. Unlike traditional figurative art, abstract painting asks the viewer to engage intuitively—seeing not what is there, but what is felt. From Mark Rothko’s color field explorations to Jackson Pollock’s action painting, and Kandinsky’s musical visualizations to Hilma af Klint’s mystical geometry, abstract artists have used painting as a language to express ideas beyond words. These works often reflect deep psychological, political, and philosophical undercurrents, helping define entire movements like Abstract Expressionism, Suprematism, Cubism, and De Stijl. Whether rooted in chaos, spirituality, or mathematical harmony, the 21 paintings listed here have reshaped the visual language of modern art and continue to influence contemporary creatives across disciplines. Join us as we explore these groundbreaking abstract artworks, uncover the visionaries behind them, and understand why they continue to resonate across generations.
Famous Abstract Paintings
1. No. 61 (Rust and Blue) by Mark Rothko
This painting is all about emotion and mood. The first thing you'll notice is its massive size, measuring over 9 feet wide and 7 feet tall. It's hard not to be drawn in by the sheer scale of it. No. 61 has a passionate hue, similar to the city of love, Paris.
Once you get closer, you'll notice the two dominant colors - rust and blue - which are layered on top of each other in a color field that seems almost hazy and dreamlike. There's a sense of depth and texture that draws you in, and the longer you look at it, the more you'll start to feel like you're being enveloped by the painting.
Mark Rothko was a master of color, and he uses it here to create a sense of tranquility and calmness. It's almost like you're looking at a beautiful sunset, but instead of seeing a literal depiction of the scene, you're experiencing the feeling of it.
The painting is also part of the collection of the Museum of Modern Art (MoMA) in New York City, further cementing its connection to the United States art world.
The painting is deceptively simple, but it's filled with so much emotion and depth that it's impossible to look away. It's a beautiful example of how art can communicate something beyond words or images, and it's definitely worth seeing in person if you ever get the chance.
2. Abstraction White Rose by Georgia O'Keeffe
At first glance, this oil painting may seem simple and minimalistic, but there's so much more going on beneath the surface. The painting is dominated by a large white rose, which is rendered in a way that's both abstract and highly detailed. The petals are layered on top of each other, creating a sense of depth and dimensionality that draws you in.
But what's most interesting about the aesthetics is the way that O'Keeffe uses negative space to create a sense of balance and harmony. The rose is surrounded by a sea of white, which could easily overpower the delicate flower. But instead, the white space feels like an extension of the rose, as if the two are working in perfect harmony together.
There's also a sense of mystery and intrigue in this painting. The white rose is both a recognizable symbol of beauty and innocence but also an abstract form that's open to interpretation. It's like O'Keeffe is inviting us to look closer and explore the hidden depths of the painting.
Overall, "Abstraction White Rose" is a stunning example of O'Keeffe's mastery of form, balance, and composition. It's a painting that rewards careful attention and invites us to explore the beauty of the natural world through an abstract lens.
3. Elegy to the Spanish Republic No. 110 by Robert Motherwell
This painting is a tribute to the Spanish Republic, which was overthrown by fascist forces during the Spanish Civil War. Motherwell was deeply affected by the conflict, and this painting is a powerful expression of his grief and anger.
The painting is dominated by a large black shape that seems to loom over the canvas like a dark cloud. It's a symbol of the oppressive forces that Motherwell saw at work in the world, and it creates a sense of foreboding and tension.
But there's also a sense of hope and resilience in the painting. The black shape is balanced by a series of white lines and shapes that seem to push back against it. It's like Motherwell is saying that even in the darkest of times, there is always a glimmer of light and hope.
Overall, "Elegy to the Spanish Republic No. 110" is a stunning example of how abstract art can be used to communicate complex emotions and political ideas. It's a concept that invites us to contemplate the darker aspects of human nature but also to celebrate our capacity for resilience and hope.
4. Woman I by Willem de Kooning
This painting is a tour de force of color, form, and emotion. It depicts a woman in an abstract and distorted form, with bright pinks, blues, and yellows dominating the canvas. The painting is both beautiful and unsettling, with a sense of raw energy and passion that's hard to ignore.
What's most interesting about this painting is the way that de Kooning uses abstraction to challenge traditional notions of beauty and femininity. The woman in the painting is depicted in a nude and highly sexualized way, with exaggerated curves and suggestive shapes. But at the same time, she's rendered in a way that's almost grotesque and distorted, as if de Kooning is critiquing society's objectification of women.
The painting has been the subject of much controversy and debate over the years. Some have criticized it for its portrayal of women, while others have praised it for its boldness and innovation.
But regardless, there's no denying its power and impact. It's a painting that demands attention and provokes strong emotions, whether you love it or hate it. This is a painting that challenges our preconceptions and invites us to see the world in a new and different way.
5. In Memory of My Feelings by Jasper Johns
Oh, "In Memory of My Feelings" by Jasper Johns is definitely worth talking about! It's a series of abstract prints that was created in collaboration with the poet Frank O'Hara in the 1960s.
What's interesting about this piece is that it's not just a simple visual representation of the poem. Instead, the prints and the poems play off of each other to create a layered and complex emotional experience. Pop art often features bright, bold colors like the vivid hues in this painting.
Each print features different layers of images and text, with some elements repeated across multiple prints. It's almost like a puzzle that the viewer has to put together to understand the meaning behind the work fully.
Overall, it is a beautiful and thought-provoking work that rewards careful examination and contemplation.
6. Morning Mist, Maine by Georgia O'Keeffe
It is a stunning painting that captures the ethereal beauty of a misty morning in Maine. The soft, muted blues and greens of the mist contrast with the bright, warm orange of the sun rising in the background. This creates a dynamic interplay between the foreground and background and draws the viewer's eye across the painting.
The misty landscape is rendered in simple, abstract forms that suggest trees, rocks, and water but are not overly detailed. This allows the viewer to fill in the gaps with their own imagination and creates a sense of mystery and intrigue.
Another interesting aspect of this painting is the way that it plays with scale. The foreground rocks are rendered in large, almost abstract shapes that dwarf the tiny figures in the distance. This creates a sense of grandeur and awe and emphasizes the power and majesty of nature.
7. Simultaneous Contrasts: Sun and Moon by Robert Delaunay
This is a painting that will make you want to stare at it for hours. The painting, completed in 1913, features a dynamic circular composition with bold contrasting colors of yellow, blue, and red. The painting is divided into two sections, one representing the sun and the other the moon, with both elements depicted in an abstract and stylized manner.
What's fascinating about this painting is Delaunay has captured the essence of light and color. The circles of color seem to vibrate and pulsate, giving the impression of the sun and moon in motion. It's almost as if the painting is alive, with the colors and shapes interacting with one another in a symphony of light and movement.
Delaunay was a master of the art movement known as Orphism, which sought to create abstract art that evoked a sense of rhythm and musicality. "Simultaneous Contrasts: Sun and Moon" is a perfect example of this, as it captures the rhythm of the celestial bodies and the harmony of color in a way that is both stunning and mesmerizing.
Overall, "Simultaneous Contrasts: Sun and Moon" is a work of art that will capture your imagination and leave you breathless with its beauty and complexity. It's a painting that demands your attention and rewards you with a visual experience that is truly unforgettable.
8. Composition VIII by Wassily Kandinsky
This painting is an absolute masterpiece that will transport you to another world with its bold colors and intricate composition. Completed in 1923, "Composition VIII" is a riot of color and form. The overall effect is one of movement and dynamism as if the painting is a living thing that is constantly shifting and changing.
One of the most striking things about this painting is Kandinsky's use of color. The bright blues, yellows, and reds seem to jump off the canvas, while the darker colors add depth and complexity. The colors are not just random but carefully chosen to create a sense of balance and harmony within the painting.
The composition itself is also incredibly complex, with different shapes and lines intersecting and overlapping in a way that is both beautiful and intriguing. Kandinsky was a master of abstraction, and in "Composition VIII," he created a painting that symbolizes the vastness of the universe, something that is both abstract and yet somehow grounded in reality.
Overall, "Composition VIII" is a painting that will leave you awestruck with its beauty and complexity. It's a painting that rewards close inspection, as there are always new details and nuances to discover. If you're a fan of abstract art or just art in general, this is a painting that you simply must see in person to fully appreciate.
9. The Deep by Jackson Pollock
"The Deep" by Jackson Pollock is a painting that is both chaotic and mesmerizing at the same time. Completed in 1953, it is a classic example of Pollock's drip painting technique, where he would drip or pour paint onto the canvas in a seemingly random manner.
At first glance, "The Deep" may seem like a mess of swirling lines and splatters of paint. But upon closer inspection, you can see the careful control and intention behind each mark.
The raw, earthy hues and textures of The Deep are reminiscent of the natural world and the sculpture it creates. The colors used in "The Deep" are deep, and the painting seems to evoke a sense of depth and movement as if you're peering into some kind of mystical abyss.
One of the most interesting things about this painting is the way in which it was created. Pollock famously worked on the floor, using his whole body to create the painting. The drips and splatters of paint were created through a kind of dance between the artist and the canvas, with each movement carefully choreographed to create a specific effect.
10. Helen Frankenthaler’s Mountains and Sea
Let me tell you about one of the most famous abstract paintings in the art world, Helen Frankenthaler's "Mountains and Sea." This abstract watercolor painting was created in 1952 during the post-war era, a time when abstract art was taking the art world by storm. Frankenthaler was part of the Abstract Expressionist movement, a group of artists who used abstraction to convey their emotions and feelings.
"Mountains and Sea" is a prime example of the soak-stain technique that Frankenthaler is known for. This technique involved diluting the paint with turpentine and then soaking it into the unprimed canvas. The effect is a beautiful blend of colors that flow together like water, making the painting look like an abstract landscape.
The painting is dominated by shades of blue and green, which are blended seamlessly with each other to create a sense of movement and depth. Frankenthaler's signature style is apparent in the loose watercolor brushstrokes and the way the colors blend, creating a dreamy atmosphere that transports the viewer into a world of abstract motifs.
11. Composition with Red, Blue, and Yellow (1930) by Piet Mondrian
Composition with Red, Blue, and Yellow is one of the most famous abstract paintings in the world. Created in 1930 by Netherlands' Dutch artist Piet Mondrian, the painting exemplifies the style of De Stijl, a modern art movement that emphasized geometric forms and primary colors.
What makes this painting so unique is its bold and minimalist approach to composition. Mondrian reduces the elements of his painting to their simplest forms, using only rectangular shapes and primary colors to create a striking geometric pattern. The colors themselves are vivid and intense, with the bright red, blue, and yellow tones contrasting sharply against each other.
In contrast to the minimalist approach of Mondrian's "Composition with Red, Blue, and Yellow," "Broadway Boogie Woogie" (1942-43) features a dynamic and intricate composition of colored squares that evokes the bustling energy of New York City's streets.
All in all, "Composition with Red, Blue, and Yellow" is a classic example of philosophy in abstract art that continues to captivate audiences today. Its influence can be seen in the work of many contemporary artists who continue to experiment with the principles of pure abstraction, geometric shapes, and vivid colors in their own art.
12. Gray Mirrors by Gerhard Richter
Gray Mirrors is an extraordinary piece of abstract art created by the famous German artist Gerhard Richter. This artwork is a masterpiece that reflects the essence of minimalism and the versatility of the abstract art genre. Richter's Gray Mirrors is one of the most famous abstract paintings of all time, and for a good reason.
It's a beautiful example of the abstract movement and showcases the incredible talent of one of the most prominent abstract artists in history. The artwork features a series of geometric shapes and lines arranged in a way that creates a mesmerizing visual effect. The painting's color scheme is primarily gray, with hints of blue and green, which adds to its overall calming and serene vibe.
Gray Mirrors is part of a larger series of over 100 abstract artworks that showcase Richter's talent and versatility as an abstract painter. His works have been featured in some of the world's most prominent art galleries, and he's known for producing art that reflects both figurative art and abstract art styles. Richter's influence on the art world is profound, and his paintings are some of the most expensive abstract paintings in the world.
13. The Swan by Hilma af Klint
Hilma af Klint's "The Swan" is an otherworldly masterpiece that stands out even among the most famous abstract paintings of the past century. While the painting shares some elements with surrealism, it is truly in a category of its own.
Af Klint was ahead of her time, creating abstract paintings long before the abstract expressionism movement of the mid-twentieth century. "The Swan" was painted in 1915, making it one of the earliest examples of abstract art in Sweden.
Despite this, her works remained unknown for more than a century, and it wasn't until the 1980s that they were first exhibited. Today, her paintings are celebrated for their otherworldly beauty and intricate geometric patterns.
14. Ad Parnassum by Paul Klee
Have you heard of Paul Klee's famous abstract painting "Ad Parnassum"? It's a great example of the modernist movement in art that emerged in the early 20th century in Switzerland.
"Ad Parnassum" is an abstract painting that showcases Klee's fascination with geometric shapes and patterns. The composition of the painting is complex and layered, with different shapes and lines intersecting to create a harmonious whole. The painting is dominated by cool blues and grays, with occasional splashes of warmer colors like yellow and orange.
If you ever get the chance to see "Ad Parnassum" in person, it's definitely worth the trip. The painting is currently on display at the Albright-Knox Art Gallery, New York City, where it's considered one of the gallery's most famous paintings. Its light & dark phases, pure art, and abstract works make it stand out. You'll be amazed by the intricate details and the way the colors and shapes come together to create something truly unique.
15. The Persistence of Memory (1931) by Salvador Dali
If you're looking for a mind-bending example of famous abstract paintings, look no further. The Persistence of Memory" features a dreamlike landscape of melting watches and distorted forms, set against a backdrop of the rocky landscape of La Mancha, Spain.
The painting is a prime example of Dali's unique style, which blended the traditional art of Europe with avant-garde surrealism in Russia. It has been reproduced countless times and has inspired countless artists and writers over the years.
One of the fascinating things about this painting is its ability to evoke a sense of both timelessness and decay. The melting watches seem to suggest the passing of time, while the barren, rocky landscape and distorted forms hint at a world in a state of decay.
16. Composition in Black and White (1913) by Kazimir Malevich
This piece was created in 1913, just a few years before the Russian Revolution that led to the collapse of the Russian Empire. This iconic work of art is one of the most famous examples of Suprematism, a movement that focused on geometric shapes and the use of simple forms to express complex ideas.
At the heart of this painting is the infamous black square, which Malevich believed represented the "zero degrees" of painting. He saw it as the starting point for all art, a way to break free from the constraints of representational art and explore the power of pure abstraction.
Despite its minimalist appearance, Composition in Black and White is a striking work of art that draws you in with its stark contrast of black and white shapes. Malevich's use of bold lines and shapes creates a dynamic and visually captivating composition that challenges our perceptions of space and form.
17. The Tilled Field by Joan Miró
"The Tilled Field" by Joan Miró is a visually striking and complex abstract painting that rewards close inspection. The painting features a vibrant array of geometric shapes, lines, and patterns arranged in a seemingly haphazard yet balanced composition.
The painting is dominated by a series of oval and circular shapes in various shades of blue and green, which contrast sharply with the warm earth tones in the lower right corner. Despite the abstract nature of the painting, there are also figurative elements present. In the background, a landscape scene can be discerned, with fields and hills in the distance.
One of the most striking features of "The Tilled Field" is the use of negative space. The large areas of blank canvas around and between the shapes serve to create a sense of movement and tension. The overall effect is one of energy and vitality, with the composition appearing to be in a state of constant flux.
"The Tilled Field" is a testament to Joan Miró's skill as an abstract artist, as well as his ability to combine figurative and abstract elements in a harmonious and thought-provoking way. It remains a favorite among art lovers and a fascinating example of the possibilities of abstract art.
18. Guernica by Pablo Picasso
Guernica by Pablo Picasso is one of the most famous abstract paintings in modern art history. The painting was created in 1937 and is a reaction to the bombing of the Spanish town of Guernica during the Spanish Civil War. It is a striking and powerful work of art that showcases the horrors of war uniquely and innovatively.
Picasso, who was a pioneer of the Cubism movement, used this style to create the artwork. The painting features an array of abstract shapes and lines that come together to form a large, chaotic image. The monochrome color palette of black, white, and grey further adds to the unsettling mood of the painting.
Picasso was already a famous abstract artist when he created Guernica, but this painting solidified his place as one of the most influential and celebrated artists of all time. It is a prime example of how an artist can use their skills to create powerful and influential works of art that stand the test of time.
19. White Relief by Ben Nicholson
White Relief, created by British artist Ben Nicholson, is a beautiful example of abstract art that captures the essence of minimalism and simplicity. The painting consists of a white square relief made up of intersecting lines that form smaller squares and rectangles.
What makes this piece so interesting is its ability to convey so much with so little. The use of minimal color and simple geometric shapes makes the painting incredibly versatile and adaptable to different spaces and moods. The white color scheme creates a sense of purity and tranquility, while the interlocking lines and shapes evoke a feeling of movement and energy.
One fascinating aspect of the artwork is how it plays with light and shadow. Depending on the angle and source of light, the relief can create different patterns and textures, adding an extra layer of intrigue and complexity to the piece.
Overall, White Relief is a stunning example of abstract art that showcases the beauty of minimalism and simplicity. Its timeless design and versatility have earned it a place among the most famous abstract artworks in history.
20. Painting Number 2 by Franz Kline
Painting Number 2 was painted in 1954, and it's an excellent example of Kline's signature style. Kline was one of the most famous abstract artists of the 20th century, and his work has had a significant impact on the art world. He was one of the pioneers of abstract painting, and his artwork is still revered today.
His work is characterized by bold brushstrokes and a sense of movement, and Painting Number 2 is no exception. The painting is done in black and white, and it's an abstract expressionist piece.
The composition of the painting is striking, with thick black lines dominating the canvas and smaller white marks adding contrast and depth. The black lines appear to move and twist, creating a sense of tension and drama that draws the viewer in.
21. I Saw the Figure 5 in Gold by Charles Demuth
"I Saw the Figure 5 in Gold" by Charles Demuth is a famous abstract painting that blends elements of realism and futurism in a truly unique way. Created in 1928, the painting is a tribute to the poet William Carlos Williams, who wrote a poem titled "The Great Figure" about a fire engine racing through the streets of New York City.
The painting features a bold, gold numeral 5 surrounded by various shapes and lines that seem to suggest movement and speed. The geometric shapes give the painting a futuristic feel, while the gold color adds a sense of luxury and elegance. At the same time, the painting also has a certain level of realism, with recognizable elements like the lettering on the side of the fire engine.
What makes "I Saw the Figure 5 in Gold" so interesting is the way in which it plays with the boundaries between different art genres. On one hand, the painting is clearly abstract, with its emphasis on shapes and colors over realistic representation. On the other hand, it also has elements of realism, with recognizable objects like the fire engine and the lettering.
Abstract Paintings FAQs
How do abstract artists create their works of art, and what techniques do they use?
Abstract artists create their works of art through a variety of techniques, including gestural brushstrokes, drips, splatters, and the use of color and texture to convey emotions or ideas.
What is the light and dark phase, and how does it relate to abstract art?
The light & dark phase in abstract art refers to the use of contrast between light and dark colors to create a dynamic and impactful composition. This technique is often used in modern abstract painting to create depth and dimension within the artwork.
What are some characteristics of modern abstract painting?
Some characteristics of modern abstract painting include the use of bold colors, gestural brushstrokes, and the incorporation of texture and pattern within the artwork. These elements often work together to create a sense of movement and energy within the piece.
How has the abstract movement influenced other art forms, such as abstract reliefs and post-painterly abstraction?
The abstract movement has influenced other art forms, such as abstract reliefs and post-painterly abstraction, through its emphasis on experimentation with form and color. Many artists have been inspired by the techniques and ideas of the abstract art period and have adapted them to their own artistic styles.
What is lyrical abstraction, and how does it differ from geometrical abstraction?
Lyrical abstraction is a form of abstract art that emphasizes the use of organic shapes and gestural brushstrokes to create a sense of movement and rhythm within the composition. It differs from geometric abstraction, which emphasizes the use of precise geometric shapes and lines.
How did world events like World War II impact the development of abstract art?
World events such as World War II had a significant impact on the development of abstract art. Many artists sought to create artworks that were free from the constraints of traditional representation and explored new forms of expression through abstraction.
What is the significance of art history when studying abstract art?
The study of art history is significant when studying abstract art because it helps to provide context for the development of the abstract art movement and the artists who were involved. Understanding the historical and cultural context of abstract art can help to deepen our appreciation and understanding of the artwork.
How does contemporary art incorporate abstract elements?
Contemporary art often incorporates abstract elements such as gestural brushstrokes and bold colors into its compositions. This incorporation of abstract elements can help to convey emotions or ideas in a powerful and dynamic way, and it reflects the continued influence of the abstract art genre on modern art.
Final Thoughts
As we stand in awe of these masterpieces, we can't help but feel a connection to the artists who created them. The pinnacle of this art form can be seen in the interchanges of color, resulting in a breathtaking display of knowledge and emotion that speaks to our very souls.
It's like a child's imagination brought to life on a wall with the use of pigment and palette. From the studio to the auction house, these paintings have become a part of our culture. They're more than just drawings on canvas - they're a language that speaks to us in a way that words cannot. They remind us of our humanity and our desire to create and connect.
So let's raise a glass to the fathers of abstract painting, who have given us nothing less than masterpieces of science and art. Let's celebrate the Broadway Theatre of our minds, where these paintings come to life and speak to us in a language that transcends borders and boundaries. Let's bask in the lavender glow of their beauty and the fathomless depth of their meaning.
The best flower drawing ideas are a perfect blend of simplicity and beauty, offering both beginners and experienced artists a calming, creative outlet through the organic forms found in nature. Whether you're sketching for practice, decorating your bullet journal, or just unwinding, flowers make excellent subjects thanks to their symmetry, variety, and timeless appeal. From elegant roses and lilies to whimsical daisies and exotic orchids, floral sketches can range from quick, minimal outlines to detailed botanical renderings. This list of 45 creative flower drawing ideas includes easy-to-follow prompts for all skill levels and drawing styles, helping you explore shape, line work, texture, and color. You’ll also find inspiration that complements broader sketching interests like those found in our guides to easy drawing ideas and drawing ideas for girls, both of which expand on personal, playful, and relaxing themes. So, grab your sketchbook, pencils, or tablet—and let these flower ideas guide your next art session with natural beauty and expressive detail.
Flower Drawing Ideas
Is your mind starting to draw blanks? Do you need more things to draw? We've got some flower ideas for you to draw!
Whether you're an amateur or professional artist, these easy flower drawing ideas can put your skills to the test.
A lotus flower symbolizes purity, strength, and birth. The lotus flower is a rare beauty amidst dark and murky water.
Lotus flowers are fun to draw because they're both easy and intricate at the same time. The beautiful shades of pink and white of the lotus flower make it a great flower drawing idea.
If you want to learn how to draw a lotus flower, there is a video tutorial to help you get started.
Peruvian lilies (also known as alstroemeria) are super cute, small flowers. Admittedly, the whole process it takes to draw this flower might not be for beginners.
It's hard because of the shape and the different styles of shading needed. Nonetheless, these flowers are so beautiful that one can't help but attempt to draw them.
You can check out different flower drawing tutorials to help you draw tulips.
Calla lilies are just as beautiful as a rose, or maybe even more! They are relatively easy to draw because they don't require different types of shading.
As long as you get the general details of the calla lily, you'll be able to draw this flower in no time.
It's the perfect simple flower drawing idea for spring because of its bright and fun colors.
Because of its striking deep blue petals, you can never forget the "forget-me-not" flower. It looks regal, especially if it lies on luscious green grass.
No wonder a lot of people attempt this flower drawing. It's simple and striking at the same time!
We highly recommend watching a tutorial to perfect this flower drawing. You can master how to draw and color the petals in no time.
The evening primrose is a unique flower because of how it blooms. The flower begins to bloom at sunset, revealing its beautiful, bright-colored petals.
But once daybreak comes, the flower closes itself, waiting for the next sunset.
Draw flowers as unique as the evening primrose! You can watch a tutorial to help you capture the intricacies of this unique flower.
The coneflower stands as high as five feet. On top is a beautiful, large flower with shades of orange, purple, and even red.
This plant is striking in many ways, including its big and spiny dome in the center. You can easily capture the essence of this flower thanks to its distinct features.
Watching flower drawing tutorials may even help you master drawing the coneflower.
Who doesn't love clematis flowers? You can transform and decorate your wall with this simple plant!
It can climb on walls and can reach as high as five feet. Given a chance to grow the clematis on your wall, you'll have a beautiful-looking wall in no time.
Capturing every detail of this flower will be easy, especially if you already have a plant nearby. Grab a pencil and draw flowers as beautiful as this one.
We recommend the camellia if you want to draw a flower as striking as a rose or hibiscus. This flower looks soft with its white, pink, and even yellow hues.
It's a symbol of love and affection that can convey the message to your loved ones. This might even be better than a rose!
This flower drawing will give you some plus points to whoever you give it to.
Why draw a single flower when you can draw a bouquet of them? Once you've mastered how to draw flowers of different kinds, you can start exploring drawing them all together.
Whether you're a beginner or not, this drawing idea is worth trying.
You can check out flower drawing tutorials to give you a boost.
The anemone is a unique flower because it blossoms only in the morning. Once the flower has fully bloomed, you're greeted by a beautifully colored flower.
At night, it closes itself up and waits for the sun to rise again! It's only there for a fleeting moment while the light is still alive.
If you want to draw flowers with a symbolic meaning behind them, the anemone is the one to choose. You can use it to send messages of anticipation and even secrets.
The forsythia flower can easily be spotted from a mile away because of its sun-colored petals. This flower blooms and welcomes the spring season, which is why many people love this plant.
Start your spring right, and draw flowers as beautiful as the forsythia! It's a fun and relaxing way to lift your spirits after a cold winter.
Load a tutorial and learn how to draw this amazing plant.
If you want to draw flowers that give you peace and serenity, we recommend hellebore flowers.
Hellebore represents tranquility and beauty thanks to its calming colors - white, pink, and yellow.
Drawing a hellebore is as easy as like when you draw a rose. The petals are easy to master, and so is the stem. You'll hardly need a tutorial for this one.
Love, innocence, and purity. That's everything the jasmine flower represents. No wonder many people draw flowers like this one for brides and brides-to-be.
Also, jasmine flowers have a distinct scent that people love using as a perfume worldwide!
Drawing Queen Anne's lace flowers is tricky because of their size. This flower is so small and delicate that capturing every detail can be challenging.
But if you're ready to level up your skill and want to draw challenging flowers, this one's for you.
We recommend watching tutorials to help make your drawing realistic in the end.
Ranunculus flowers scream elegance and majesty. They look like flowers from a fairytale because of their soft and voluminous petals.
One look at this flower is enough to get you out of a creative block. Grab your pencil and start drawing!
Consider the Ranunculus flower if you want to draw a flower that can get your imagination rolling. You can learn how to draw this flower by watching drawing tutorials to get started.
Petunia flowers grow so easily, and you can plant them almost anywhere. This is why it doesn't come as a surprise that you can find them almost anywhere in your afternoon walk.
It's not surprising, either, that many artists use this bright-colored petunia as a muse to draw flowers.
They look beautiful on paper, especially right after you've colored the petals.
Another spring flower you can draw is the daffodil. This two-in-one flower has all-white petals and a bright yellow trumpet.
They're easy to draw on paper and don't require too much effort. You can create as many daffodil drawings as you want until you've mastered every aspect.
From afar, it's easy to mistake the black-eyed Susan for a sunflower. After all, both share the same bright yellow petals and brownish-black center. Not to mention, both can grow to exceptional heights.
But make no mistake, thinking the two are the same. The petals on a sunflower are thicker and have a round curve.
Once you've mastered drawing a sunflower, we're sure you won't have a hard time with the black-eyed Susan.
Crocus flowers are often overshadowed by other flowers because of their small size. This flower blooms right when spring is about to come.
It marks a new season and a time for new beginnings to create more memories. Doodling crocus in a bullet journal is one of the best ways to practice your skills in drawing flowers.
This flower doesn't have many intricacies, making it a good, easy flower drawing idea.
Add a splash of color to your bullet journal by drawing some poppy flowers. Its bright red color is enough to give your masterpiece a pop.
Poppy flowers are best known for symbolizing hope and peace, which can uplift any fallen spirits. Share the love and create poppy flower drawings for a friend in need.
An iris flower drawing can often be mistaken for wilting flowers. After all, the petals on this flower don't all stand straight. Some slope down as if they were wilting.
But the iris flower is very much alive, and its striking purple petals are enough to convince you.
If you want to capture this flower's intricacies, we highly recommend watching drawing tutorials to get started. This can help you add other details you might have missed the first time.
Among the beautiful flowers that bloom during spring is the buttercup. Buttercup flowers symbolize happiness, youth, and friendship, fitting for the spring season.
This flower is often overlooked because of its size. Only a few can appreciate its beauty.
Buttercup flowers are easy to draw — you can doodle them on your bullet journal without much practice.
The azalea flower is characterized by its fiery shades of red and pink, and you can spot them from a mile away. This flower symbolizes beauty, purity, and femininity — a perfect muse for women artists.
They look picture-perfect, especially if they're in full bloom.
Azalea flowers are super easy to draw. You can learn how to draw an azalea with the help of a drawing video tutorial!
When we think of fall, we imagine lawns covered in sunset-colored leaves. But besides the beautiful shades of orange, there are other colors we associate with fall.
Aster flowers typically grow right before fall hits. They come in different colors, such as blue, pink, and purple, with a bright yellow center.
They almost look like a sunflower and a smaller version of a daisy! They're perfect to doodle on a bullet journal.
Marigolds are easy on the eyes because of their beautiful yellow and orange petals. This flower drawing is notorious for its ruffled petals, and you can't tell where to start.
Drawing a marigold flower is fun and easy. You don't need to capture every detail. This simple flower drawing might seem tricky to some beginners, but the results will be worth it.
Add color to make your drawing pop and create a beautiful and simple masterpiece.
There's something about peonies that makes them so charming and beautiful. This flower symbolizes love and honor, perfect for the Valentine's season.
This is another awesome spring season flower to draw because of its beautiful blossoming ruffled petals.
A peony flower drawing may be complicated, especially if you only rely on pictures. As such, we highly recommend watching a video tutorial, especially for beginners.
Another easy flower drawing idea is a daisy. They look like a small sunflower because of their characteristic yellow center.
Daisies always remain in the spring season because of their beautiful and bright colors - white, yellow, and lavender.
They're fun to draw and color. It's easy, and you can doodle them in your bullet journal.
What Supplies Will You Need for Your Flower Drawing Ideas?
Before you can start to draw flowers, you need to get your art supplies.
There are many art supplies on the market — and you can use just about anything to make your art come to life.
We've listed some of the supplies you want to check out to get you started with your flower drawing journey:
Sketchbook
Nearly all of us started with sketchbooks to create our masterpieces. Sketchbooks are like time capsules of our creativity — from the moment we started until we started developing our art skills.
It witnessed the growth of many artists, from beginners to pros.
Sketchbooks might not mean much to the average person, but they're where everything started for an artist.
It's our gallery that only we can understand — what we want to draw, the feeling we're trying to convey, and the moment we want to portray.
There are several sketchbooks you can use to draw flowers. It comes in different paper thicknesses, depending on the material you'll use to draw.
PRO TIP:Use thick paper if you use watercolors or paint.
Bullet Journal
Bullet journaling has become one of the best trends to happen. Not only is it therapeutic, but it lets you stay on top of your schedule.
You can buy a bullet journal almost anywhere. It doesn't have to look fancy and artsy at first because you're the one who's in charge of that process.
It's always fun to carry a bullet journal around because it's an easy way to sketch your idea wherever you are.
Pencil
You can either use a traditional wood pencil or a mechanical pencil.
Artists know the power of having a good mechanical pencil for drawing. Your sketching and drawing experience will be much better since you no longer have to sharpen.
The lead always stays sharp — perfect for drawing even the most intricate details on a flower. It's also perfect for shading that can create amazing illusions.
The textured grip on the pencil feels very comfortable in the hand, and you can draw for hours on end without fail.
And the best part of it all is you don't need to replace your mechanical pencils often — at least when you have a reliable one. All you need to worry about is the lead.
If you want to stick with a traditional pencil, that should be fine. With the different types of pencils out there for drawing, you can achieve your masterpiece in no time.
The only downside is that you need to constantly sharpen your pencil all the time.
Eraser
Pencils and erasers always come hand in hand. You can only have a pencil with an eraser, especially if you're prone to making several mistakes.
Most pencils have an eraser at the end, but it's not enough — not if you're drawing non-stop.
Never underestimate the power of a good eraser. A good eraser won't leave traces of your mistakes. More importantly, it won't tear your paper.
This is a common problem with different erasers. Either it leaves traces behind, or you must use too much friction.
Crayons
Who doesn't love crayons? The smell alone is enough to bring us back to our childhood. Crayons are probably one of the first things we held as a child and used to create our first very art.
To this day, crayons remain a favorite art supply for both beginners and professionals alike. It comes in many colors that can bring your flower drawings to life.
It's easily accessible, and they're pretty affordable! The only trouble we have with crayons is that they break so easily.
And let's not forget the tips need to be sharpened if you want your coloring to be precise.
But other than that, this nostalgic art supply is always a great addition to your collection.
Colored Pencils
A step up from crayons is colored pencils. It's perfect for coloring small details, and the pencils are very easy to sharpen.
We especially love water-colored pencils because of their versatility. We can draw, color, and paint at the same time.
Similar to pencils, there's a variety of colored pencils out there that can match your artistic needs. Some can come in vibrant colors that make your flower drawing come to life.
Drawing Tablet
Thanks to technology, all you need is a drawing tablet to draw, color, and paint. The beauty of using drawing tablets is that you can take them wherever you go.
You don't need to bring all your art supplies anymore because everything you need is on a single device.
Regardless of your budget, there's a drawing tablet for you. You'd be surprised to know that there are many affordable drawing tablets perfect for beginners or the budget-conscious.
But if you're already a professional artist and want to unlock more skills, we highly recommend investing in a good iPad.
iPads come with great value for money and versatility.
You can draw flowers wherever you are and even print your art immediately!
What Are Some Related Drawing Ideas You Can Try Out?
Besides the usual rose drawing, we'd love to share several other ideas related to flower-drawing with you. They're also connected to nature and the environment, and use beautiful, vibrant colors.
Tree Drawings
Source: zeichenblog
Consider drawing a tree if you don't want to draw flowers anymore.
Trees are easy to draw, and there are only two parts: the trunk and the leaves.
How to draw the tree is entirely up to you! You don't have to stick to the usual green and brown colors when coloring them.
You can draw inspiration from the four seasons or create your fantasy-inspired trees!
It's the quintessential drawing for beginners because it's super easy to draw. Beginners don't have to perfect drawing their apples on their first try.
Not to mention, beginners can use apples to try out different styles and techniques for drawing. They could use it as a baseline for their drawing improvement.
Every artist has a general idea of how to draw the Earth. It's simple and only requires a few colors.
How to make your Earth drawing stand out is entirely up to you. You don't have to stick to the usual illustrations! Try to draw it from different angles.
Sunflowers are so beautiful, and we love drawing them. Its bright yellow petals are enough to make us feel better.
What we love about sunflower drawings is that every picture is different. Each artist has their way of making this simple flower drawing look spectacular.
Test your drawing skills when you draw sunflowers! You can master the different shading and shadow techniques while you're at it.
Pumpkins might be a little tricky to draw, especially because of their irregular shape.
But that's exactly what makes it a good idea to draw. You don't have to worry about perfecting each corner and getting the details right.
Conclusion
Consider drawing flowers if you want a breather from a complicated art piece you're working on. They're simple and therapeutic, and you can use them to draw inspiration for your next pieces.
You can also check out your favorite flower drawing tutorial videos to understand how to create your masterpiece.
We hope you've found your new favorite flower to draw.
The best dump carts for lawn tractors and ATVs are rugged, towable hauling solutions designed to simplify the transport of heavy loads such as soil, firewood, mulch, rocks, and tools across large properties. By attaching directly to the rear hitch of a lawn tractor, riding mower, or all-terrain vehicle, these carts allow users to move bulky materials quickly and safely—reducing manual strain and improving worksite efficiency. High-performance models are built with steel or high-impact polyethylene beds, heavy-duty pneumatic tires, tilt-and-dump mechanisms, and removable side panels for loading flexibility. Depending on your property size and application, you can choose between poly dump carts for corrosion resistance or steel dump carts for heavy-duty hauling capacity. Brands like Agri-Fab, Polar, Ohio Steel, and Gorilla Carts lead the market with smart, durable designs optimized for both residential and light commercial use. In this guide, we review the 6 best dump carts for lawn tractors and ATVs, comparing load capacity, build quality, mobility, and dumping convenience—so you can select the right cart for your lawn care or landscaping needs.
Best Dump Carts For Lawn Tractors and ATVs
Here is the list of the 6 best dump carts for lawn tractors and ATVs that can help you to transport materials around your garden quickly, easily, and safely.
Motoalliance is the parent company of Impact Implements, a company that has been in the lawn equipment manufacturing game for a long time. As a result, they have a wide variety of products and accessories that cater to the lawn maintenance industry. Considering the manufacturer of this product, it’s easy to see why it takes the top spot on our list.
USA TRADEMARK: The Impact Implements 1500lb trailer is...
STEEL BED - NO RUBBER MATS!: The Impact Implements trailer...
Large Size Dump Cart
The Impact Implements dump cart is by far the largest we have seen in the market and does not skimp on quality or design. The dump cart features a heavy-duty 11-gauge steel frame that helps hold the whole body together. This sturdy and well-built steel frame gives the Impact Implements dump cart all the support it needs when transporting heavy hauls across the lawn.
The large size of this dump cart enables you to carry the maximum load as compared to other dump carts that are available in the market today. The Impact Implements dump cart can haul a maximum of up to 1,500 pounds of weight with ease.
Large All-Terrain Wheels
One of the stand-out features of the Impact Implements dump cart is the large wheels, which are the largest we’ve seen on any dump cart. These large wheels make it easy to move while hauling heavyweights. Also, the all-terrain wheels have been designed to perform on all types of surfaces, especially grass, so you can rest assured that the wheels aren’t going to get stuck or break while moving over rocks or gravel.
From its high-quality steel frame to its impressive hauling capacity, this dump cart from Impact Implements scores high across the board.
Pros
Features a Sturdy polyethylene bucket
Features an 11-gauge steel frame
Large all-terrain wheels for easy mobility
Boasts of the highest max load for dump carts
Features a nifty pass-through swivel
Cons
Some people might find it a bit expensive
Hard to assemble
Dimensions: 85" x 47" x 27" | Weight: 165 lbs | Load Capacity: 1500 lbs | Tire Size: 18" x 8" | Tub Size: 54" x 28" x 15" | Tub Material: Solid Steel
The brand Agri-Fab has been manufacturing agricultural equipment for years and has got years of experience in designing heavy equipment and machinery that performs well outdoors. Recently, the company has made its way into the lawn maintenance niche and has been designing an excellent range of outdoor equipment for lawn maintenance and landscaping. The company has been known to deliver heavy-duty equipment that’s built to last.
750LB CAPACITY & PNEUMATIC TIRES – This cart is designed...
DURABLE & LONG-LASTING - Steel bed with a durable powder...
Sturdy and Well-Built Design
One thing that the products rolling out of Agri-Fab have in common is excellent quality and value for money. With the 45-0101, Agri-Fab delivers a sturdy piece of equipment that’s able to take a few knocks. The heavy-gauge steel design ensures that the dump cart does not bend or break. The solid steel frame reinforces the tub, which also features premium quality steel, making carrying heavy hauls a breeze. The sturdy steel frame also ensures that this is one dump cart that’s going to last you a very long time.
Well-suited for Heavy Hauls
The main concern when it comes to the design of a dump cart is its ability to carry heavy hauls across long distances. That’s what the dump cart by Agri-Fab has been specifically designed to do. This is one of the most well-built dump carts we’ve seen. Although it follows an old design, the solid steel frame means that you can carry heavy hauls with ease. The Agri-Fab has been built to carry hauls of up to 750 pounds. This includes heavy lawn maintenance equipment, wood, gravel, and manure. The steel frame means that you get to move about manure or gravel without worrying about the contents of the tub leaking out.
Best Value for Your Money
But that’s not all the Agri-Fab 45-0101 dump cart has going for it. Apart from the very impressive specs of this cart, it also happens to be one of the most inexpensive dump carts you are going to find for its size and load capacity. Agri-Fab has been looking to introduce a low-cost, heavy-duty option for a dump cart for a while, and it seems like they’ve struck gold with the 45-0101. The only downside of this dump cart is that it can’t swivel.
Pros
Can carry a maximum load of 750 pounds
Is the least expensive of the dump carts of its size
Heavy-duty steel bucket
Boasts of a high 12 cubic feet capacity
Has large 16” wheels
Cons
Doesn’t swivel
Heavy design
Dimensions: 49" x 32.5" x 12" | Weight: 102 lbs | Load Capacity: 750 lbs | Tire Size: 16" x 4" | Tub Size: 32.5" x 49" x 12" | Tub Material: Alloy Steel
When it comes to poly dump carts that are great to work with, the list is long and includes some impressive brands, but that list wouldn’t be complete without the best one of the lot. There’s a reason why the Polar Dump Cart LG7 is considered to be one of the best dump carts that are available in the market today.
High-impact polyethylene tub is rugged, durable,...
10-minute assembly
This cart is brought to you by Polar Trailer, which is a subsidiary of Clam Outdoors- a company that manufactures equipment and accessories for ice fishing. The company acquired Polar Trailer, which allows it to enter the dump cart market. But just because the parent company is in the ice fishing industry does not mean that the Polar LG7 lacks in functionality or efficiency; in fact, it’s the opposite.
Built with Premium Quality Materials
Clam Outdoors has been known for designing high-quality products that are sturdy and well-built, so it’s no surprise that Polar Trailer, which is their subsidiary brand, is following the same high bar when it comes to quality and build.
This dump cart features a premium-quality polypropylene bucket, which has been designed to take quite a liking. The sturdy and leak-proof polypropylene tub is supported by a heavy-gauge steel frame that enhances its functionality. The design of this dump cart is also able to swivel, which makes unloading a breeze.
Best-in-Class Consumer-Grade Dump Cart
One thing that some people would point out is that this is a consumer-grade product. Polar Trailer has touted the Polar LG7 as just that, which means that while the product has been built using premium materials, you should not expect it to carry out the same tasks as a commercial-grade dump cart. Overall, the Polar LG7 is an affordable and easy-to-use dump cart that’s aimed at the average consumer.
Pros
Features a polypropylene bucket
Designed to swivel
Maximum 10-cu.ft. heap capacity
Easy to assemble
Cons
Maximum load capacity is low
It is a consumer-grade product
Dimensions: 31" x 65" x 28" | Weight: 51 lbs | Load Capacity: 600 lbs | Tire Size: 15" X 4.8" | Tub Size: N/A | Tub Material: Heavy-Duty Polyethylene
Ohio Steel is the oldest operating company on this list. The company started more than 60 years ago and mainly specializes in products that are designed mainly out of plastic. This also makes them the most unique company on this list. While the move by Ohio Steel to enter the dump cart market was a surprising one, the company does have a long reputation for delivering high-quality products that offer great value for money.
Foot pedal activates swivel dump feature to dump anywhere...
High-Quality Design and Build
The Ohio Steel Dump Cart 4048P-HYB gets full marks in both design and the quality of materials that have been used in manufacturing this cart. Going the same route as many other brands, Ohio Steel has decided to use polypropylene as the base material for the tub of the dump car,t which is a smart move considering that polypropylene is an extremely popular material for carts because of its robust build quality. The high-grade material that has been used in its design means that if offers you the best value for your money with a design that’s going to last a very long time.
Exceptional Specs
Apart from the high-quality polypropylene build, the Ohio Steel Dump Cart 4048P-HYB also has a few other surprises that are going to leave you wanting to get it for your next cart. This dump cart features an easy-to-use design that’s also extremely easy to assemble. Apart from that, the cart features a combo hitch that makes it compatible with a lawn tractor, zero-turn mower, and ATV. It can also switch from a pin hitch to a ball hitch (and vice versa) in seconds. The conveniently placed foot pedal operates the swivel, which makes it easier to dump your haul without much effort.
High Load Capacity
Another stand-out feature of this dump cart is its 12½ cubic ft. capacity which can hold an impressive 1,250 pounds of weight with ease. The polypropylene structural foam is extremely durable, is rust-proof, and easy to clean.
Pros
Large maximum load of 1250 pounds
Premium quality polyethylene tub
Boasts a 12½ cubic ft. capacity
Features 16” wheels
Designed to swivel
Features combo hitches
Cons
Unnecessarily heavy design
Some people might find it expensive
Dimensions: 48.25" x 39" x 13.75" | Weight: 48.5 lbs | Load Capacity: 1250 lbs | Tire Size: 16" | Tub Size: N/A | Tub Material: Polyethylene
5. [easyazon_link identifier="B01BECQBZ0" locale="US" tag="homesthetics0a-20" type="link" link_id="275215"]Gorilla GOR400-COM Steel Garden Cart[/easyazon_link] - Best Dump Cart with Removable Sides
Gorilla Carts has become a household name in lawn maintenance equipment. Unlike other companies that manufacture dump carts today but mainly operate in another industry, Gorilla Carts has been specializing in dump carts for over 20 years. With the GOR400-COM, what you get is a high-quality garden cart that’s smaller than the GOR866D but offers a similar level of quality.
CONVERTIBLE CART WITH QUICK ASSEMBLY: This garden wagon's...
EASY TO MANEUVER: The 10-inch pneumatic tires, tight-turn...
Heavy-Duty Steel Frame
The GOR400-COM features a premium quality 34" x 18" steel mesh bed that’s supported by a steel frame. The frame has been built with high-quality steel to ensure its longevity. The dump cart has been designed keeping the user in mind. The powder-coated steel means that the frame is not going to rust. The steel body is sturdy yet light enough for easy maneuverability, which makes the GOR400-COM incredibly easy to move. Another feature that sets this dump cart apart from the rest is its removable sides. This can make the cart even lighter or create more space for larger items.
Padded Pull Handle and Other Features
The Gorilla Carts GOR400-COM steel dump cart has a maximum capacity of up to 400 lbs., which is what you would expect from a cart of its size. But the manufacturers compensate for the lower load capacity by providing many other features that make this dump cart more efficient. Apart from the removable side mesh, which makes it easier to carry larger items, the padded pull handle makes it easy to pull and maneuver. The simple, yet efficient design of the Gorilla Carts GOR400-COM makes it one of the more versatile dump carts that’s available in the market today.
Pros
Sturdy build
10-inch pneumatic turf tires are designed to tackle any terrain
Padded grip handle upgraded to make hauling heavy rocks or equipment easy
Features removable sides for more versatility
Easy to assemble
Nice paint job
Comes with a 1-year limited warranty
Cons
Steel mesh may break
Low max weight capacity of just 400 pounds
Dimensions: 40.6" x 18" x 37" | Weight: 36.6 lbs | Load Capacity: 400 lbs | Tire Size: 10" | Tub Size: 34" x 18" | Tub Material: Stainless Steel
We have covered quite a few Gorilla carts in this list. That’s because the company is one of the oldest in the cart industry and has been designing and manufacturing dump carts for more than 20 years. More importantly, the company is responsible for giving us some of the most efficient carts of all types. Their continuous consistency through the years makes them the leading brands in lawn maintenance dump carts, and the all-new Gorilla Carts Poly Garden Dump Cart is no different.
Heavy Duty Wheelbarrow: Heavy-duty poly yard utility cart...
Durable Steel Frame: Lawn cart is made with tough durable...
Large Hauling Capacity
Sure, the Gorilla Carts Poly Garden Dump Cart is a compact tool that’s efficient around the garden, but what makes it stand out is its impressive 800 lbs. hauling capacity. This makes it the highest haul capacity for any part of its size. The large hauling capacity means that you get to move more equipment, manure, or other items with ease without having to waste much time loading and reloading the cart.
Patented Quick-Release Mechanism
Speaking of loading and unloading, this dump cart also features the patented quick-release mechanism that made quite a splash when it was first released by Gorilla Carts. This feature is sure to be appreciated by the user since it makes it easier to load and unload the contents of the dump cart.
Another feature that has been included in the design of the Poly Garden Dump Cart is the 2-in-1 convertible handle, which is a great addition since it allows the cart to be either pulled by hand or towed. The overall design of this cart makes it great at maneuvering through tough terrain and gives it great ground clearance, along with a tight turn radius as well. You also get a one-year limited warrant,y which is a nice cherry on top.
Pros
Sturdy, heavy-duty build
New frame design
A padded two-in-one convertible handle
Can haul up to 800 lbs.
Can be hand-pulled or towed
Features a patented quick-release mechanism
Rust-proof design
Large 10” pneumatic tires
1-year limited warranty
Cons
Pneumatic tires aren’t strong
Not easy to assemble
Dimensions: 37.5" x 23.8" x 20.25" | Weight: 37.5 lbs | Load Capacity: 800 lbs | Tire Size: 10" | Tub Size: 38" x 20" | Tub Material: Polyethylene
Dump carts that are used by homestead or farm owners go by various names, which include utility trailers, dump trucks, utility wagons, and garden carts. These dump carts are the preferred choice for many homeowners who need to maintain large lawns. Because the cart makes it easier to move around lawn maintenance equipment and remove heavy debris, it has become a mainstay and a useful tool for lawn maintenance.
Dump carts are often mistaken for utility trailers. The main difference between the two is that a utility trailer has a flat surface, while the dump cart is designed like a tub for moving mud and gravel, along with wood and heavy lawn maintenance equipment. This key difference is what makes the dump cart an indispensable tool in the arsenal of the homeowner or lawn maintenance service provider.
Types of Dump Carts
A dump cart is a simple piece of lawn maintenance equipment. But several types of dump carts are used by the modern gardener. Thanks to the popularity and versatility of the dump cart, there is now a myriad of options when it comes to the cart’s size and design. Regardless of the type or size of the dump cart you go for it is important to ensure you get one that’s sturdy and well-built. The following are some of the different types of dump carts that are available in the market today.
Poly Tub Dump Cart
For many homeowners, the poly tub construction of a dump cart is the ideal option. Not only is this one of the more affordable options available for dump carts, but it is also usually built with high-grade plastic, which ensures its durability and resistance to cracks and breaks in the plastic.
The poly tub design is also waterproof, which means you can easily load hauls of manure and gravel without having to worry about it leaking out of the tub. Because of its design, the poly tub dump cart is also easier to clean without any hassle. All you have to do is hose down the tub’s surface with the garden hose to clean this type of dump cart.
Plastic Tub Dump Cart
Dump carts featuring a plastic tub are also a viable option for many homeowners who have to maintain their lawns or use lawn maintenance services. The plastic tub dump cart is similar in its appearance to the poly tub version, but it costs a lot less. This is because of the low-quality plastic that’s been used in its design. That being said, the plastic tub cart is a great option if you do not have to ferry extremely heavy hauls across the lawn.
While the plastic that’s been used in its design is a lot thinner compared to the poly tub option, it is okay to move around lightweight items without it caving in. If you do plan on using it to haul heavy equipment and lots of gravel or wood, then the plastic tub cart does tend to tear, crack, and split.
Steel Tub Dump Cart
The steel tub dump carts are by far the most durable ones that are available in the market. They also tend to be more expensive as compared to plastic and poly tub carts. These dump carts feature a high-quality steel design and have been fitted with additional features to ease their use. Some of the common features that are found in the steel tub dump cart are the removable tailgate, which makes it easier to dump the loader without creating a mess. This unique feature alone makes the steel tub dump cart worth the investment.
Another major advantage of owning a steel tub dump cart is that it can handle the heaviest of loads, which makes it easy to move around your lawn maintenance equipment, gravel, and other heavy equipment with ease. On the downside, dump carts that feature a steel tub are expensive and also tend to rust since they are mostly not made of stainless steel. But the steel tub dump cart is quite easily the most sturdy and durable dump cart that’s available in the market today.
Structural Form “Polymer” Dump Cart
This type of dump cart is characterized by high-quality polymer materials that have been used in its design. The low density of the polymer makes the tub extremely durable. Another added feature of the structural form cart is that it features pockets on either side. This allows the user to add extensions to the sides.
Some of the more high-end polymer tubs are both scratch and stain-proof. Again, because of the premium quality materials used in its design and the additional features, you will have to pay more for this type of dump cart.
Dump Carts FAQs
What are the typical features of a dump cart?
A quality dump cart typically comes with a durable, rust-resistant metal or poly bed, large wheels for improved stability, a release lever or dumping mechanism, and a hitch system compatible with your tractor or ATV.
Are dump carts universally compatible?
While many dump carts feature a universal hitch, which can connect with a wide range of lawn tractors and ATVs, some might not be universally compatible. Always check the hitch connection and the compatibility with your specific tractor or ATV model before purchasing.
Do I need any special tools or hardware to attach a dump cart to my lawn tractor or ATV?
Most dump carts come with the necessary hardware to attach them to a lawn tractor or ATV. However, in some cases, you may need to purchase additional pins, brackets, or a hitch adapter to ensure compatibility.
Can a dump cart be used on uneven terrain?
Yes, dump carts are designed to be used on uneven terrain. Many models feature large, pneumatic tires with proper traction to handle a variety of surfaces, such as grass, gravel, and dirt.
How do you unload materials from a dump cart?
Dump carts usually have a lever or release system that allows the user to effortlessly tilt the cart, spilling the contents from its bed. Some models come with an assisted unload mechanism, which makes the process even easier.
How do I maintain my dump cart?
Regularly inspect and clean your dump cart, checking for any signs of wear and tear. Keep the hitch components and dump mechanism lubricated, and be sure to repair or replace any damaged parts as needed.
Conclusion
After thoroughly examining dump carts for lawn tractors and ATVs, it is apparent that these vehicles play a vital role in lawn care and landscaping tasks. They are essential for transporting heavy equipment, wood, gravel, or manure. A quality dump cart should be sturdy, dependable, and suitable for various terrains. Based on functionality, design, and weight capacity, we suggest the following top three products:
The Impact Implements by Motoalliance is an excellent choice, offering a sizeable dump cart with a maximum weight capacity of 1,500 pounds. Its 11-gauge steel frame and large all-terrain wheels ensure effectiveness and longevity when carrying or moving heavy loads across different surfaces.
On the other hand, the Agri-Fab 45-0101 is a solid option, providing a maximum load capacity of 750 pounds and featuring a robust steel bucket. While its design may be dated and lack swivel functionality, this dump cart delivers excellent quality and value for its price.
Lastly, the Polar Dump Cart LG7 is the ideal choice for those in search of a top-tier consumer-grade dump cart. Its polypropylene bucket, swivel design, and 10-cu.ft. heap capacity makes it an affordable and user-friendly option for everyday consumers.
Carefully examining the features, advantages, and drawbacks of each recommended dump cart is essential in making the best decision for your needs. Be mindful of your specific requirements, preferences, and budget when selecting the perfect dump cart for your lawn tractor or ATV. We hope that our expert suggestions help you make an informed choice and contribute to a more efficient and enjoyable experience in lawn care and landscaping tasks.
The best wheeled trash cans are built for durability, mobility, and convenience—streamlining waste management in both residential and commercial environments. From curbside pickup to facility-wide sanitation, wheeled bins simplify garbage disposal by reducing physical strain and allowing users to transport heavy loads with ease. Whether you’re managing weekly household waste or handling debris in high-traffic areas, the combination of large capacity, ergonomic handles, and heavy-duty wheels makes these trash cans indispensable. Many models feature polyethylene or high-density resin construction, tight-fitting lids to lock in odors, and UV-resistant finishes for long-term outdoor use. The mobility factor not only lets you move the can to the trash pile—rather than hauling trash bag by bag—but also improves efficiency when bins need to be relocated over uneven terrain or long driveways. Some designs also offer compatibility with automated collection systems, rear-wheel stability, and integrated drainage for easy cleaning. In this guide, we review seven of the best wheeled trash cans available today, highlighting models that excel in functionality, durability, and ease of use—whether for daily home use, large-scale cleanup, or commercial sanitation needs.
Best Wheeled Trash Cans
Here is the list of the 7 best wheeled trash cans that you can use to keep your home or office clean and organized.
SECURE LID – With the attached snap lock lid, this trash...
HEAVY DUTY HANDLE – Make transportation effortless with...
Highlights
Extremely lightweight
Comes with a twist-and-lock lid to prevent critter spills
It can also be used as a storage container
If you are looking for an inexpensive way to move your garbage to the curb without treating the critters, then the United Solutions TB0042 trash can is ideal for you. The manufacturer also boasts about multiple uses of TB0042. For instance, you can use it as a collector for lawn clippings, or dedicate it to store non-reactive dry chemicals, pet foods, and seeds.
The best thing about United Solutions TB0042 is that it's lightweight. In just 8 pounds, you get a capacity of 32 gallons. With its wide on-top handle, you can easily haul it to the disposing site. United Solutions has also named it critter-proof because it comes with a twist-and-lock lid. This allows you to leave a filled trash can out all night without worrying about the shenanigans of pests and rodents.
While providing good value for home use, United Solutions TB0042 is not recommended for heavy-duty commercial use.
Product Details
Brand:United Solutions
Model: TB0042
Shipping Weight: 7.55 pounds
Dimensions: 22.38" x 20.98" x 33.46" | Capacity: 32 Gallons | Opening Mechanism: Manual-Lift | Material: Polypropylene
HANDLES: User-friendly handles for easy maneuverability, and...
EASE-OF-USE: Easily attach and remove poly-liners
Highlights
Non-scuffing wheels
Locking cabinet to keep cleaning supplies safely
Available in two colors
Non-scuffing wheels
Locking cabinet to keep cleaning supplies safely
Available in two colors (blue and black)
Rubbermaid has designed a product that is nothing short of a cleaning all-rounder. Rubbermaid’s housekeeping cart has every feature that you look for in a trash can. It has a fixed trash bag, a trolley with multiple shelves, a drawer to store cleaning and disinfecting supplies, and 11 hooks on the top shelf to hang brooms, dustpans, mops, etc, and all of them on wheels.
Besides having an entire cleaning console on the wheel, you get further ease of use with its front-access zippered trash bag. You don’t need to lift the bag through the top to remove the collected waste. Just unzip the bag, tilt the trolley, and you are good for the next cleaning round.
This state-of-the-art trash can from Rubbermaid is equally good for residential and commercial settings.
Product Details
Brand: Rubbermaid Commercial Products
Model: FG617388BLA, FG617388BLUE
Shipping Weight: 40.02 pounds
Dimensions: 6.8" x 26.5" x 32.5" | Capacity: 44 Gallons | Opening Mechanism: Open-Top | Material: Rubber
Perfect for Storage, Containment or used as a spill kit when...
Ideal for on-site drum storage and containment
Highlights
Ideal containment unit for non-hazardous chemicals
Safe for provisional chemical storage
A sturdier can weigh around 55 pounds
Relatively expensive
If you are looking for a trash can that can hold every garbage item and can also be used as a spill and disposal container, then the Black Diamond Polly SpillPack is the most suitable option for you. Its overpack configuration also allows you to use it as a temporary container for chemicals and other toxicants.
This animal-proof trash can boasts a 95-gallon capacity and is made of thick polyethylene sheets. This means it could easily take care of the garbage that any large residential unit or a small-to-medium business produces daily.
Black Diamond Poly SpillPack is lined with UV-resistant coating, so you can put it under the sun without worrying about its fading color. Moreover, the non-corrosive body lets you throw the gooey waste in the can without giving it a second thought. With the wheeled design, it’s quite convenient to move around the can even when it is filled to its full capacity.
Product Details
Brand:Black Diamond
Model:1299-BD
Shipping Weight: 56 pounds
Dimensions: 31" x 31" x 48" | Capacity: 95 Gallons | Opening Mechanism: Manual-Lift | Material: Polyethylene (PE)
Double walled lid with steel reinforced rugged rim 1/4 inch...
Compatible with automated and semi-automated curbside...
Highlights
The double-walled lid and steel-reinforced rims can withstand gnawing by large animals
Made of completely recyclable plastic
Ergonomic design allows easy handling
If you live in a suburban neighborhood where wild animals often transgress and make a mess out of trash cans, then we would refer you to the Toter’s Bear-Tight Two-wheeled Cart. The manufacturer has exclusively designed this trash can to withstand the gnawing and mishandling of animals like bears, boars, and large-sized moles.
With a double-wall lid, a tight latch lock, and steel-reinforced rims, it is impossible for those wild creatures to chew through the can. Moreover, the black stone finish makes the can resistant to general wear and tear too.
While offering unmatchable durability in its trash can, Toter has made sure that you can still use it with ease. For instance, the rugged wheels keep it easy to move and maneuver the can over curbs. Similarly, the ergonomic design allows you to easily tilt and roll it even when it is full to the top. Lastly, it is compatible with all automatic and semi-automatic garbage trucks and cart lifters.
You can get Toter Bear-Tight Two-Wheeled Cart in two different capacities (64 and 96 gallons).
Product Details
Brand: Toter
Model: 025B64-R1BKS
Shipping Weight: 50.6 pounds
Dimensions: 31.5" x 24.75" x 42.5" | Capacity: 64 & 96 Gallons | Opening Mechanism: Manual-Lift | Material: Plastic
This Rubbermaid product is ideal for all heavy-duty garbage collection in residential, commercial settings, and garages. The can is fitted with inset wheels and a molded-in axle. This configuration makes maneuvering a 50-gallon trash can a breeze.
Trash cans often come with a lid that doesn’t open fully and continues to fall when you empty the can. Rubbermaid has particularly taken care of these issues in the Brute roll-out trash can. The hinged lid fully opens (270 degrees) and gets locked against the walls of the bin. This allows the easy removal of the garbage.
The ergonomic handle design also allows you to easily push and pull the trash can around. Rubbermaid has also made sure that they can remain compliant with all automatic and semi-automatic lifting systems through a molded-in catch bar. The trash can also has a UV stabilizer so that it remains protected from sun-inflicted fading and discoloration.
FUNCTIONAL: Slim fit design fits in tight areas to conserve...
HEAVY DUTY: Polymer construction allows for strength and...
Highlights
Comes with a drain plug
Lightweight
Can withstand tough weather conditions
Garbage doesn’t always involve solid waste. Sometimes you have to deal with a gooey and sloppy mess as well. In such instances, using a conventional trash can becomes one heck of a task. Collecting liquid-like garbage and then disposing of it by tipping over the can is not everyone’s forte.
Suncast Commercial has made it tremendously easy to dispose of liquid trash with its drain plug-laden 32-gallon wheeled trash can. Collect the liquid waste in the bin and open the plug to dispose of it- no tipping over the container and getting your hands dirty is needed.
With nylon bushes installed between the wheel and axle, you can smoothly roll the trash can on any surface. Moreover, the clean access design of the lid allows you to open and close it without coming in contact with garbage. The sturdier plastic of the can is chip/dent-proof and blow-molded so it can withstand the toughest of weather conditions.
Product Details
Brand: Suncast Commercial
Model: BMTCW32
Shipping Weight: 12.1 pounds
Dimensions: 30" x 11" x 22" | Capacity: 23 Gallons | Opening Mechanism: Open-Top | Material: Plastic
Rugged rim design and bottom wear strip provide added...
Toter trash can design is compatible with automated and...
Highlights
Greenstone finishing prevents general wear and tear
Large footprint ensures stable operations
Compatible with curbside garbage lifting systems
Comes with a 10-year manufacturer’s warranty
Toter is known to make one of the most durable trash cans on the block. And 025532-R1GRS is also the demonstration of what Toter really offers. With greenstone finishing, a rugged rim, and a wear strip, you get a trash can that can operate beyond its operating life. By keeping the design aerodynamic and footprint larger, Toter has made sure that the trash can remains stable even when full and there is a high gust pushing it to one side.
The built-in lift handle also makes Toter 025532-R1GRS compatible with all automatic and semi-automatic curbside garbage lifting systems. Moreover, the rugged wheel designs allow you to easily roll and tilt the can when it’s full. And state-of-the-art molding process guarantees that the body doesn’t warp under tough conditions.
Toter 025532-R1GRS heavy-duty trash can is equally good for use in commercial and residential settings.
Product Details
Brand: Toter
Model: 25532-R1GRS
Shipping Weight: 25.1 pounds
Dimensions: 31.75" x 24.25" x 41.75" | Capacity: 32, 48, & 64 Gallons | Opening Mechanism: Open-Top | Material: Plastic
Among these seven products, you can easily find the best trash can as per your unique garbage disposal needs!
Buying Guide For The Best Wheeled Trash Can
Many people don’t consider buying a trash can as some sort of ‘task’. You can certainly buy a garbage can without putting any thought into it. However, this neglectful purchase will eventually result in another purchase. This second purchase often happens when people fully understand the situation in which they have to collect garbage.
Even though the above review discussion has highlighted the features to keep in mind while buying a trash can, here we will discuss them separately so you can get the best trash can as per your requirements.
Capacity:You don’t want to empty the trash can twice a day. So, always try to get the best available volume offered on the block at the price you are willing to spend.
Lock System: The Lid lock doesn’t just keep all the bad odors under the wrap, but it also helps in keeping the critters at bay. Usually, you have to deal with small critters and rodents, where twist-and-lock and clamp-down lids are good enough to prevent spills even when the can is tipped over or rolled around. However, you will need a bear-proof design, such as Toter 025B64-R1BKS, where you are dealing with the mishandling of large wild animals.
Ergonomic Design: One can’t stress enough how important it is to pick an ergonomically-designed trash can when it has to be handled every day. A trash can that is easy to move, roll, tilt, and can pass through any door or a curb makes your garbage collecting and dumping routine a lot easier.
Wheel Assembly: Molded-in axles and treaded wheels offer better maneuverability over rough curbs and for general outdoor use. And if you are looking to use and move the trash can inside the property, then go for non-marking wheels so you don’t need to mop up the floor afterward.
Investing in the right trash container will sort out your garbage collection and disposal chores for decades.
Wheeled Trash Can FAQs
How do I choose the right size of a wheeled trash can?
Consider factors such as the volume of trash you generate, the frequency of trash pickup, and the available storage space before selecting the appropriate wheeled trash can size.
Are wheeled trash cans compatible with automated garbage trucks?
Yes, most wheeled trash cans are designed to be compatible with automated garbage trucks and come with a standardized, easy-to-grab attachment for these trucks.
Can I use wheeled trash cans for recycling as well?
Definitely! You can utilize wheeled trash cans for recycling by sorting recyclable materials into designated wheeled recycling bins.
How do I maintain a wheeled trash can?
Regularly rinse the trash can with water, use mild soap, and a scrub brush if necessary. Ensure the wheels and hinges are free from debris, and inspect them for wear and tear periodically.
Conclusion
As we wrap up our discussion on wheeled trash cans, it's time to highlight the top three expert recommendations from the seven best products we have covered. Each of these products stands out due to its unique features, offering solutions for different specific needs.
For those looking for a budget-friendly option, the United Solutions TB0042 Critter-Proof Trash Can is an ideal choice. It is extremely lightweight and includes a twist-and-lock lid that prevents critter encounters, making it perfect for home use. However, it's not suitable for heavy-duty commercial applications.
For those in search of an all-around trash can that excels in both residential and commercial settings, the Rubbermaid Commercial Housekeeping Cartis a good option. This versatile product offers a complete cleaning console on wheels with easy access for waste disposal and ample storage for cleaning supplies.
Lastly, if you require a containment and spill unit capable of holding both garbage and non-hazardous chemicals, the Black Diamond Gallon Wheeled Poly-SpillPack is the right choice. This heavy-duty trash can has a 95-gallon capacity and is designed to safely store non-reactive chemicals, making it suitable for larger residential units and small-to-medium businesses.
Choose the one that aligns with your requirements and enjoy a cleaner, more efficient waste disposal experience.
Finding the best landscape design software for Mac users can be a game-changer when planning an outdoor space—whether you’re updating your current garden or designing a new landscape from scratch. With the right software, you can visualize layouts, plantings, and hardscape elements in detail before a single shovel hits the ground. These tools simplify planning by offering drag-and-drop functionality, photorealistic renderings, and seasonal simulations—all within a macOS-compatible environment. Whether you're a homeowner, landscape architect, or hobbyist, the ability to experiment with layouts virtually helps avoid costly mistakes and refine design ideas. While this guide focuses on the top Mac-compatible options, you can also explore broader alternatives in this landscape design software comparison for Windows and cross-platform use. Let’s take a look at the best software tools available to help you bring your outdoor vision to life—right from your Mac.
We consider this software to be one of the best landscape design tools out there today. You will be delighted to know that it works both online and offline on a variety of operating systems including Mac. Plus, this 2D yard planner is also quite easy to operate and is packed with a lot of interesting and useful features. So let’s take a look at everything it has to offer.
Why Did We Like It?
The feature that we loved the most about this software was that it allowed us to use a real photo for our house or garden. This way, we could design our landscape in a way that would be exactly suitable for our home. Also, we could fiddle around with existing design elements besides adding new ones to the plan.
But if you don’t have a photo, you may also upload a sample photo from the library available in the software. Then on, you just have to use plants based on filters such as climate zone, species, light requirement, and size. Notably, you can choose from 800 choices of plants, and after making the choice, just drag it around till you fit it in the right place.
Furthermore, this software also has an online version, which is suitable for users who don’t want to download any data on their device. And it is available at quite an affordable subscription rate for anybody willing to utilize it effectively.
What Could’ve Been Better?
A disappointing aspect of this software was that it had no redo option. Thus, if you undo a change in your plan, but change your mind just the next moment, there is no way you can redo that.
So, you need to be extra careful about this when you’re handling the software. No one doesn’t love the redo function on Word or Google Docs, so we expected this would be found here too.
If you are looking for a very simple software for just redesigning your landscape, this one will be a great choice. That said, it is more intuitive than many other design tools available out there. Note that you can work with this software in 2D mode and opt for a paid subscription to access all its features.
Why Did We Like It?
First and foremost, this software will be really useful if you are looking to make a basic sketch of your garden before making it a reality. The design elements and plants available to users are generic, but its simplicity of use sets it apart from many other software available currently. So, even if you are new to using landscape design software, it will be quite easy for you to navigate through it.
Besides, you have the drag and drop option to put the elements in the places where you need them to be. And you also get to see a view of the plan from above, to get an impression of the design as a whole.
Plus, you just need to pay for the desktop version of the software once to get full access to all its features. Other than that, there are no subscription renewal fees or in-app purchases needed. Additionally, all future updates to the software are also available for free.
What Could’ve Been Better?
Although this software lets you conveniently draw a basic sketch of your garden, it doesn’t have 3D planning capability. So, you won’t get a virtual pictorial representation that seems like you’re walking through the garden.This is a drawback for those homeowners who have larger landscapes to design, as they would need a 3D representation to make sure that their design is perfect.
What we have next is this powerful desktop landscape design software from TurboFloorPlan. It is meant to help home enthusiasts design their landscapes most successfully. Also, the software is designed in such a way that you can learn to operate it quite fast.
Why Did We Like It?
We loved the way the software automatically followed the shape and contours of the house as we drew the design. So, ultimately, you can get the landscape designed in just the style that suits the structure of your home. Plus, some templates help you to start making the design.
Further, it offers users a vast range of materials, which includes pavers, flower gardens, paths, and mulch. You also get to choose from a great collection of plants, and in case it’s not available in the directory, you can even import it. Additionally, it lets you zone the plants together and then move them collectively across the plan.
Besides, you may import backgrounds or photos, simulate how the plants will appear shortly, and also construct retaining walls in the design. Lastly, an intelligent Topo Designer is also available to users, which lets them add real-world topography.
What Could’ve Been Better?
Despite all its amazing features, we found a flaw that we would like to point out. The Mac version of this landscape design software seems ported straight from the Windows version. That’s because the interface feels and looks Windows-based and includes fewer updates than the other version.
We’ve included this one in our list since it’s among the best free software for landscaping that you’ll ever find. Notably, it was previously owned by Google but was later acquired by Primble in 2012. You will get quite an impressive range of features and tools in this software, which offers both 2D and 3D modelling.
Why Did We Like It?
At the start, let us tell you that the user interface of this software is really simple, so that both a beginner and a pro can handle it equally well. You will find that the toolbars appear discreetly on the left and right-hand side of the screen. While the “instructor” and a few other panels are found on the right, the drawing and navigational tools are placed on the left.
As for sample designs, though this software offers no templates, it allows you to use sample models downloaded from 3dwarehouse. This is a platform brought by SketchUp itself, which offers 3D sample models of landscapes designed by other users. Plus, you also get a “push and pull” feature, which lets you manipulate and drag designs in several ways.
Additionally, your camera can be moved around the 3D design prepared, so that you can check the progress and view the model as a whole. Note that there are predefined camera angles, and you can choose the length of the transition between the angles yourself.
What Could’ve Been Better?
Although the software is available for free for your personal use, subscriptions to the professional-grade application are expensive. Note that the free version doesn’t have sufficient export options for your creations, so you will need the pro version for those.That said, apart from this, both versions have nearly the same features.
For those who are in search of a software that can help in making a combination of landscape and home design, this is one to go for. The makers of this design tool have tried to ensure that landscape designing becomes an enjoyable, visually striking, and easy process. You can get this software in two versions, namely, Pro and Standard, though the Standard version is a pretty basic one.
Why Did We Like It?
First of all, you will be glad to know that this software lets you design both 2D and 3D models of landscapes. And you can simply switch between both formats any time you like. So, there is no need to wait around to view a close-up of your designs.
Moving on to the design elements and tools, you can select objects and furniture from among the thousands of options available in SketchUp’s 3dwarehouse. The Pro version of the software also lets you import SketchUp models and edit them as you like.
Another notable feature of this software is its increased attention to detail, due to which it provides you with more than 300 choices of exterior objects. And in case you don’t find an object in the library, it can be easily imported into Wavefront. Obj format.
Moreover, it is also equipped for saving all creations to iCloud and utilizing the benefits of 64-bit architecture in the most current versions of MacBook Pros.
What Could’ve Been Better?
We felt that the walkthrough mode in Live Home 3D could be improved, though a range of beneficial features are offered by the software. The mode is not easy to control as it takes more effort to get the angle right to view the model from all sides. Also, you may hit a few snags while designing more complicated structures.
Our next pick for you is SmartDraw, which is a very easy-to-use, professional-grade software. It ranks among the best software in terms of speed, flexibility, and ease of use. Note that this software can be used to make 2D landscape designs.
Why Did We Like It?
You will like the extensive landscape symbol library of this software, which has thousands of shapes and symbols ready-made for all kinds of landscapes. Also, it lets you drag and drop various kinds of flowers, grasses, sprinkler systems, shrubs, and groundcover. And you can even apply realistic textures and brick patterns to your landscape design.
On top of this, you are also provided with the best possible choice of templates in any landscape software. These include layouts for planning decks, gardens, pools, floors, and patios, which give you ample inspiration for designing your landscape.
Finally, once you’re done making the blueprint of your design, it can be exported to nearly all major formats such as PDF, JPEG, Office, PN,G and SPG. You may also print it in any size you want.
What Could’ve Been Better?
This one is another expensive option on our list, though its functionality and features do work to deliver you the finest possible landscape design. Note that you can try the software for free to judge whether it would suit you. So, we would suggest you try it once before you decide to go for it.
If you are specifically looking for 3D landscape design software, this one will be an ideal choice. This software has been loved by many DIY home design enthusiasts who have used it to create the home of their dreams. Note that it can be used for designing both the home interiors and exteriors.
Software for home design, remodeling, interior design,...
Take a virtual tour and use 3D views to know exactly what...
Why Did We Like It?
The best thing about this software is that it has specific tools for terrain planning. These can account for the contours and elevations and can also be used to show setback requirements to neighbors or professional designers.
Besides, you also have the benefit of importing photos of your yard or property to enable more realistic designing. Plus, it offers a huge collection of as many as 3,600 plants along with their detailed botanical information, which includes Hardiness Zone maps. With all these tools, it can help immensely in bringing your garden patios and decks to life.
Also, the software provides quite powerful and vivid 3D walkthroughs and a fairly vast range of both internal and external objects. As such, it can be used to create extensive house plans containing even minute details of the design.
What Could’ve Been Better?
The only aspect that we felt could’ve been improved in the software was its ease of learning. We found the navigation the placement, and use of the tools a bit complicated. So, it might take as long as a month for someone new to landscape designing to learn even the basics of the software.
Another popular and powerful landscape design application is Punch Landscape Design. With this software, you can create a variety of designs in the form of 3D, 2D aerial shots. It features the latest trends in landscape design, which can help you turn your backyard into a beautiful mini outdoor lounge.
Why Did We Like It?
We begin by discussing the navigation and ease of operating this software, which, in our opinion, was its best feature. That’s because it installs quite fast, and you can start working on your landscape design almost instantly.
Notably, the interface of this software is very easy to navigate and can also be customized according to the user's preferences. Also, the search option lets you find the tools that you want in just a few seconds. What’s more, it comes with a set of keyboard shortcuts, which is beneficial once you are used to it.
Besides, this application offers you both the option of using existing templates or designing a project from scratch. Plus, an ongoing shopping list feature is available, which is useful for keeping track of all that you need for the project.
An impressive feature of Punch Landscape Design software is QuickStart, which lets you render the topography by entering the coordinates of your lot. Thus, you can plan your design based on the unique property line.
What Could’ve Been Better?
Although we have no complaints about the efficiency of this software, as it suits all kinds of landscaping needs. The only drawback that we found was the unavailability of a drag-and-drop option for the 3D version of the software. This makes the operation in the 2D mode relatively easier.
Pros
Easy-to-navigate interface
Search option finds tools almost instantly
Comes with a unique ongoing chopping list feature
Let’s you render the landscape topography easily
Cons
Drag and drop option not available for 2D models
Landscape Design Software FAQ
Why should landscaping software be used?
Most of the homeowners prefer designing their home landscape to hiring an architect for the purpose. So, they require making a rough sketch representing that idea. That is the basic step to turn the desired look of the garden or the backyard into a reality.
Landscape software provides you with templates and all the necessary tools you need for the purpose. So, the problem of not having anything to refer to while making a design is solved. And the process is a lot more accurate and easier to follow than just a sketch on paper.
Which landscaping software should I go for?
Any of our recommended options can be chosen, since all of them will be greatly useful for you. Note that if you’re not too tech-savvy, a software that offers templates to begin your design will be suitable. This way, the first few important steps in designing the plan will be easier.
Is there free landscaping software?
Yes, most of the software out there is available in both free and paid versions. In our list, we’ve included many such options, but some might offer limited functionality if availed for free.
So, you have to keep in mind any special preferences and check whether the free version gives you that particular benefit. We’ve also included efficient yet affordable options, so you can use any of those by paying a minimal subscription fee.
Final Words
Choosing the right landscape design software for Mac is a crucial step in transforming outdoor concepts into executable plans, whether you're a homeowner refining your backyard layout or a designer visualizing a full-property masterplan. As you evaluate options, prioritize platforms that combine an extensive library of plant species, hardscape materials, lighting, and topographical tools with an interface optimized for DIY accessibility or professional workflow. Additionally, selecting software that supports 3D rendering and real-time walkthroughs will greatly enhance your ability to assess scale, spatial flow, and design cohesion—enabling more confident decision-making before any physical work begins. With these considerations in mind, the right tool won’t just help you design your landscape—it will help you visualize it with precision and bring it to life with clarity.
The best embossing machines—combining die-cutting, relief embossing, and high-pressure precision—allow designers, crafters, and packaging professionals to add dimensionality, tactile texture, and fine detail to paper, cardstock, leather, and even textile materials. Powered by manual or motorized platforms, these machines press a patterned die into substrates to create raised or recessed motifs—whether for wedding invitations, luxury packaging, technical labels, or architectural mock-ups. In professional print-finishing and packaging workflows, embossing ensures consistent alignment, sharp emboss definition, and depth accuracy—qualities essential for maintaining high brand and quality standards. Today's top models offer compatibility with embossing folders, adjustable pressure rollers, and compatibility with steel-rule dies or integrated scoring systems. To guide your selection, this article reviews the 5 best embossing machines, whether you're seeking semi-professional tools for studio use or automated systems for high-volume design reproduction.
Best Embossing Machines
Here is the list of the 5 best embossing machines that you can use to bring your art and craft projects to life.
The first on our list is the Sizzix 660340, popularly known as the Big Shot Plus. Sizzix hasn’t left any stones unturned to equip this embossing machine with the best-in-class features, which justifies its slightly high price. Does it deserve your attention? Let’s find out!
MACHINE COMES WITH – 1 pair of Big Shot Plus Cutting Pads,...
DIE CUTTING AND EMBOSSING - It's everything you love about...
Why Did We Like It?
If you’re a semi/full-fledged embossing professional searching for heavy-duty equipment, it is one of the most reliable machines to consider. Apart from the outer casing, it also features a die-cast steel-core roller system for higher durability.
Although it’s built with the same material as the standard Big Shot variant, the manufacturers offer a whopping 3-year durability warranty period as a bonus.
Being a semi-professional machine, the manufacturers have ensured that it’s very maneuverable. That being said, this product weighs around 16 pounds, making it easier to carry around without suffering from arm fatigue. The even distribution of weight doesn’t make it top-heavy either.
To make it even better, the compact dimensions make it effortless to store anywhere.
Speaking of efficiency, this product is a little more advanced than the standard Big Shot. For instance, it features dies and embossing folders for smooth and uninterrupted functionality. Also, it is capable of cutting materials as wide as 9 inches, making it a tad more versatile and useful for heavy-duty tasks.
Last but not least, it’s also compatible with the entire Sizzix tools library.
What Could’ve Been Better?
It’s a little convenient how the die-cut tools of this variant are costly, making it quite a high-maintenance product. Apart from that, it’s also a little complex to operate, and we wouldn’t recommend it to beginners.
Pros
Suitable for heavy-duty jobs
Impressive cutting width
Highly versatile
Steel core roller system
Cons
Not for beginners
Dimensions: 15.75" x 11.75" x 7.5" | Weight: 16lbs | Opening Width: 9" | Operation Mode: Manual
Crafter’s Companion has recently launched a world-class product that bridges the gap between heavy-duty performance and entry-level ease of use. Apart from its eye-candy outlook, the Gemini is also one of the quietest and fastest embossing machines on our list.
Faster & Quieter: Die cuts and embosses quickly and has a...
Many Uses: Use for intricate dies, heavyweight cardstock,...
Why Did We Like It?
Heavy-duty jobs become a hassle when you’re using manual systems, and that’s where this full-fledged automatic unit shines in all its glory. Despite being an all-electrical unit, the Gemini is exceptionally safe, which allows you to use it for regular professional jobs without facing any issues. To make it even better, its quiet operating motor makes it more comfortable to use for long hours.
Furthermore, we’re amazed by the low-profile design that makes it an eye-candy product. Apart from that, its compact body also makes it easier to store anywhere, so that’s an added advantage.
When it comes to efficiency, this product holds its own against numerous high-cost alternatives in the game. First and foremost, you get a 9 x 12.5-inch wide platform, giving you sufficient space to perform your tasks with utmost comfort. Along with that, it’s also compatible with almost any embossing folder, which enhances its versatility a notch.
Last but not least, it’s one of our top-recommended choices for inexperienced beginners, mainly because the easy-button user interface makes it effortless to operate.
What Could’ve Been Better?
There’s a minor issue - this product tends to overheat quite frequently, and that’s why we wouldn’t recommend operating it for long hours. Apart from that, it also has a frequent tendency to warp, which is a little distracting.
Pros
Automatic embossing machine
Wide platform for easy cutting
Silent operation motor
Universal compatibility
Cons
Overheating issues
Dimensions: 14" x 8" x 6.5" | Weight: 19lbs | Opening Width: 8.5" | Operation Mode: Automatic
One of the most established manufacturing brands, Spellbinders, brings you an intelligent and cost-effective machine to add a touch of perfection to your DIY creative pursuits. PE-100 Platinum is what you should opt for if you prioritize durability and user-friendliness more than anything else.
Powered by the same versa cut technology used in Platinum,...
Effortlessly cuts up to eight layers of most materials in a...
Why Did We Like It?
What is the most important feature we look for while buying an embossing machine? Undoubtedly, it's multi-purpose efficiency. Well, if that’s what you’re looking for, the PE-100 Platinum is the best it can get at this price range. This product is compatible with dies manufactured by almost any brand, making it twice as versatile as a typical variant.
The versatility is raised even higher with this unit, as it allows you to perform embossments using brass stencils. Its world-class blades provide a razor-sharp edge, sufficient to cut through the thickest of materials with utter smoothness.
Speaking of durability, the Spellbinder machine is built with high-quality make and materials, which makes it quite a long-lasting product. On top of that, you also get a premium cutting plate and embossing mat to protect it from damage while being used.
For beginner DIY-ers, it’s an all-in-one unit to opt for under a reasonable budget, mainly because of its ease of use. As a bonus, you also get a detailed instructional booklet that walks you through the basics for an enhanced user experience.
What Could’ve Been Better?
Although we aren’t complaining about the build quality of the Grand Calibur, it’d be better if the manufacturers backed it up with a considerable warranty period. Apart from that, various users have reported that it’s not as efficient at cutting in the middle, which is a little disappointing.
Pros
Appropriate for beginners
Sturdy build materials
Universal compatibility
Affordable price tag
Cons
Doesn’t come with any warranty
Dimensions: 7.5" x 12.5" x 9.25" | Weight: 1.25lbs | Opening Width: 6" | Operation Mode: Manual
The Bira Craft Die Cutting & Embossing Machine Combo is a versatile and portable die-cutting/embossing machine designed to cater to your varied project needs. With features like an adjustable gear system, a 9-inch slot opening, and multiple mode options, it might be just the tool you need for your creative projects.
Measures approximately: 18 x 14 x 9 inches (with handle...
The innovative height ADJUSTMENT gear system eliminates...
Why Did We Like It?
This embossing machine stands out for its user-friendly design backed by an advanced set of features. We appreciated the adjustable gear system that allows you to effortlessly customize the height of the platform for different projects.
Its compact and portable design, featuring a fold-away cutting surface, is perfect for full-sized A4 tasks and offers easy storage of the handle during transit.
The three different mode options (3D emboss, 2D letterpress emboss, and die cutting mode) available through the simple control dial provide flexibility for various projects.
What Could’ve Been Better?
Despite its impressive features and ease of use, the Bira Craft Die Cutting & Embossing Machine Combo may come across as expensive for some users, especially considering it's a manual model.
Pros
Portable and compact design
In-built height adjustment for platform versatility
Easy-to-use controls with multiple mode options
Cons
Expensive compared to other manual models
Dimensions: 18" x 14" x 9" | Weight: 17.4lbs | Opening Width: 9" | Operation Mode: Manual
Crafted in Germany, the RAYHER Embossing Machine is a reliable, hand-operated embossing tool that offers a compact and efficient solution for crafting enthusiasts. While it might not include the advanced options and intricate details found in machines like the Sizzix Big Shot, it delivers a satisfying embossing experience and boasts outstanding portability.
This small machine features a feeding slot for cutting mats...
Simply put the paper or cardstock on your cutting plate,...
Why Did We Like It?
Firstly, it works exceptionally well across various card stocks, guaranteeing consistent outcomes for diverse materials. The machine is particularly designed for smaller projects, catering to the specific needs of hobbyists who prefer to work on a smaller scale.
Additionally, the embossing machine's compact dimensions and lightweight nature make it a highly portable device, perfect for crafting sessions with friends or trips away from home. The smooth operation of the RAYHER Embossing Machine, despite its small size, results in an enjoyable user experience.
What Could’ve Been Better?
While the RAYHER Embossing Machine accomplishes its primary function adeptly, certain enhancements could boost its adaptability:
Adding a magnetic plate for accessories would permit a greater variety of projects and enable users to achieve more intricate embossing designs. Moreover, addressing the challenges faced when using larger dies, such as the awkwardness of cranking the handle, would refine overall performance.
Pros
Effectively handles a wide range of card stocks
Ideal for small-scale projects
Lightweight and highly portable
Provides a user-friendly experience
Cons
Lacks advanced features and accessories for intricate designs
Struggles with larger dies, causing difficulties when cranking the handle
Dimensions: 7.48" x 3.74" x 5.11" | Weight: 3.19lbs | Opening Width: 9" | Operation Mode: Manual
If you’ve decided to purchase an embossing machine, whether it’s for business or personal use, it’s our job to ensure that you’re investing in the product that meets your needs precisely. That said, the buyer’s guide section aims to introduce you to the first factors to keep in mind before buying one of these.
Versatility
If you’ve read till now, you probably realize that embossing machines are usually engineered to offer optimal versatility. To be precise, these products must carry out various tasks, including cardmaking, piercing, and engraving. Most importantly, the machine should be compatible with other materials other than embossing paper. Last but not least, you should always opt for variants that offer multiple embossing patterns.
Size and Capacity
The size requirement of an ideal embossing machine varies according to the user profile and needs. Whether you’ll be using it for personal or commercial purposes is a significant determinant in this scenario. Nevertheless, it’s essential to choose variants that offer a minimum accommodation width of 12 inches. This feature would enable you to emboss or die-cut various types of materials.
Universal Compatibility
What good is a machine that continually puts you through the stress of searching for selective powders and dyes? One of the most crucial factors determining the efficiency of a reliable embossing machine is its universal compatibility with almost any powder or dye in the market. It enables you to increase productivity and experiment with different materials to understand which one best suits you.
Ease of Use
You wouldn’t like ending up with a product that you can’t figure out how to operate at its potential, would you? That’s right, ease of use is very important to ensure while choosing the ideal option. Luckily, most of the DIY-friendly options in the market are effortless to operate. However, selecting heavy-duty products that offer optimal ease of use can be a little tough.
Build Quality
These products are built for regular and heavy-duty use, and that means that they're always exposed to mild wear and tear issues. That being said, always make sure that you’re investing in models that feature an all-steel construction for higher longevity. As a bonus, make sure that it comes with a decent warranty period.
Maneuverability
Last but not least, it’s essential to ensure that the product is easy to carry around. On that note, it’s always smart to choose variants that are comparatively lightweight and feature an ergonomic handle for easy portability.
Embossing Machines fAQs
What are the safety precautions I should take when using an embossing machine?
When using an embossing machine, follow these safety precautions: always read and follow the manufacturer’s instructions, wear protective gear like safety glasses, keep fingers and loose clothing away from moving parts, and ensure a stable work surface to prevent accidents during operation.
What types of projects can I create with an embossing machine?
Embossing machines enable you to create a wide range of projects, including greeting cards, wedding invitations, scrapbooking, fashion design, home décor, and much more, by adding attractive textures and designs to materials.
Can I create my own embossing designs?
You can create your own embossing designs by purchasing a custom embossing die, or some advanced digital machines come with software that allows you to create personalized designs using your computer.
How do I maintain my embossing machine?
Regular maintenance of an embossing machine generally includes cleaning the machine’s parts, such as rollers, checking for loose or damaged components, and lubricating gears when necessary. It is important to follow the specific care guidelines provided by the manufacturer.
Can I replace parts of my embossing machine if they wear out or break?
Yes, most embossing machine manufacturers offer replacement parts and accessories for their products. It’s essential to contact the manufacturer or an authorized sales representative to obtain the suitable replacement parts.
Conclusion
Embossing machines offer unlimited potential for creativity and crafting, be it for personal projects or small businesses. They provide a convenient way to add professional-looking designs and textures to various materials, transforming ordinary pieces into unique art. However, choosing the best embossing machine to suit your specific needs can be overwhelming with many great options on offer.
After thoroughly reviewing the top 5 embossing machines, we have selected our top three expert recommendations based on different factors. These include the machine's features, versatility, performance, price, and user-friendliness.
For semi-professional use, the Sizzix 660340 Big Shot Plus Embossing Machine is an ideal option. Its die-cast steel-core roller system ensures durability, while its wide cutting capacity and compatibility with the entire Sizzix tools library make it perfect for heavy-duty tasks.
For those seeking a silent, automatic embossing machine, the Crafter's Companion Gemini Die Cutting and Embossing Machine is a good option. It offers an electric, user-friendly interface, a wide platform, quiet operation, and universal compatibility with embossing folders.
Lastly, the Spellbinders PE-100 Platinum 6.0 Die Cutting and Embossing Machine is the right choice for beginners and those looking for versatility. Its universal compatibility with various dies, ability to work with brass stencils, and detailed instructional booklet make it perfect for those new to embossing or looking to take their creativity to new heights.
In conclusion, investing in an embossing machine can add a professional touch to your projects while fueling your creativity. It's important to carefully consider your requirements and preferences while selecting the best one for you. Hopefully, our expert recommendations can serve as a useful starting point in your search for the perfect embossing machine. Happy crafting!
The best ID card printer is an essential tool for organizations that require secure, fast, and high-quality badge printing in-house. Whether used for employee access cards, school IDs, visitor passes, or membership credentials, ID card printers give businesses and institutions the ability to print customized, scannable identification cards on demand. Compared to outsourcing, owning an ID card printer reduces turnaround time, ensures tighter data control, and allows for greater design flexibility—including color or monochrome output, dual-sided printing, lamination, and optional features like magnetic stripe encoding or smart card compatibility. From compact, entry-level machines for small businesses to high-volume badge printers built for enterprise-level use, selecting the right model depends on print speed, durability, connectivity, and card security features. In this guide, we’ve reviewed the best ID card printers currently available, comparing them across core specifications and use cases to help you choose the ideal solution for your organization’s identification and security needs.
Best ID Card Printers
Here’s the list of the 9 best ID card printers, providing you with the perfect solution for printing high-quality ID cards in your office or organization.
Bodno is a leading name in the world of high-quality office supplies, and Magicard Pronto is a great example of it. If you are looking to print a low volume of ID cards or need a printer for a small business, this is the ideal choice. It is a good product that comes with a bunch of accessories.
INCLUDES EVERYTHING: Print your own professional grade photo...
EASY TO USE PRINTER: Included in this package is a Magicard...
Why Did We Like It?
Well, first off, we were impressed with the number of accessories the printer includes in the package. Other than the printer itself, it comes with 300 PVC cards, a color ribbon, an ID camera, and the required software. That’s not all; it gives you the option to choose between 4 Holo-Kote patterns for the cards to prevent unauthorized card copying.
Moreover, the machine is quite straightforward to use. It has a plug-and-play setup, and there are a USB and an Ethernet port on the device to enable that. The software comes in five versions, each with its own set of upgrades. If you are looking for basic printing, the bronze software allows image browsing, a drag-and-drop interface, and an editor.
In a nutshell, this ID card printer is ideal for printing cards without taking too much time. It is also affordable and has a lot to offer, which makes it quite the steal.
What Could’ve Been Better?
One significant issue with this printer is that the instructions for setting up the device are not clear. Many users have had problems installing various parts of the printer, like the ink roller, which has led to failed ID card printing. We urge you to take time out to understand the instructions.
Pros
Value for money
Fast printing
Comes with a camera
Handy software
Cons
Poorly drafted instructions
Print Technology: Dye-Sublimation | Printing Speed: 35 seconds/card | Connectivity: USB | Card Capacity: 1 card | Dual-Sided Printing: No | Encoding Capabilities: No
2. Bodno Badgy200 – Best for Small Businesses and Ease of Use
When it comes to compact ID printing solutions, the Badgy200 continues to prove why Bodno remains a trusted name for office and organizational needs. This complete bundle is designed to deliver professional-grade ID cards quickly and efficiently, all in a small desktop footprint.
ALL-INCLUSIVE STARTER PACKAGE: Includes the Badgy 200...
NEAR EDGE-TO-EDGE PRINTING: Produces cards with a near...
Why Did We Like It?
What stood out immediately was the simple user experience—the Badgy200 comes with plug-and-play functionality and includes Bodno Bronze Edition software compatible with both Windows and macOS, making it perfect for beginners and small teams alike. The printer can produce full-color, edge-to-edge cards in just 38 seconds, which is ideal for small businesses, schools, or clubs that need moderate but consistent output.
The bundle also includes a 100-card input tray, a YMCKO color ribbon, and a webcam for photo capture—so you're ready to start printing right out of the box. Its compact design fits neatly into most workspaces without sacrificing performance. Like other Bodno offerings, this model is backed by a two-year warranty and is supported by Bodno’s highly rated US-based customer service team.
What Could’ve Been Better?
While it's a capable printer for most uses, it’s worth noting that the Badgy200 is single-sided only. So, if your business needs dual-sided cards regularly, this might not be the best long-term solution unless paired with manual duplexing or an upgraded model.
Pros
Fast printing time
Easy-to-understand software
Can print in bulk
Great customer support team
Cons
Single-sided printing only
Not suited for large-scale, high-volume operations
With each one as good as the next, it was tough for us to pick just one Bodno printer to review. That is why next on the list is the Fargo DTC1250e. This one is a bit higher up in the price range compared to the previous ones, but worth the money.
ALL-INCLUSIVE PACKAGE: The Fargo DTC1250e includes supplies...
SINGLE-SIDED PRINTING: Prints sharp, full-color or...
Why Did We Like It?
Much like the other Bodno printers on the list, this one comes with a full set of accessories as well. It has 251 PVC cards that are perfect for printing professional cards in no time. Additionally, it has an input capacity of 100 cards and can print 30 at a time. With only 16 seconds per card needed, this is great for bulk printing.
Besides ID cards, it is great to print any type of card, like healthcare and loyalty cards, because of its bulk printing ability. Another significant aspect is that everything that comes in the box is all you need, and a three-year warranty covers it.
This particular unit includes bronze software that offers features like image browsing, drag-and-drop, and a photo editor. However, you can also pick the silver software, which has a few more upgrades, such as password protection.
What Could’ve Been Better?
Overall, this is an excellent buy as it has all the essential features needed for high-quality card printing. The only issue is that, like most Bodno products, it’s a bit pricey. Moreover, it only allows single-sided card printing.
Like the Magicard Pronto had an updated version, Bodno manufactured the Badgy200, which is like an upgrade from the Badgy100. It has some improved features but maintains being in the low-mid price range. Moreover, it is a compact machine that can print cards with utmost perfection.
ALL-INCLUSIVE STARTER PACKAGE: Includes the Badgy 200...
NEAR EDGE-TO-EDGE PRINTING: Produces cards with a near...
Why Did We Like It?
The Badgy200 is a small, lightweight machine ideal for small businesses; what’s not to like? One of the best things about this device is that it works just as efficiently as any high-end device, but for more than half the price. The printer comes in a box containing everything a small to medium-sized business needs to start printing.
In the box, you will find 100 PVC cards (which is an upgrade from 50 cards in the Badgy100 kit). Additionally, it has a 25-card input capacity and a printing speed of 38 seconds per card. If you need a printer to shell out about 1000 cards per year, this is the one to consider.
Even the bronze edition of the Bodno software is easy to understand and gives access to many templates used in various cards.
What Could’ve Been Better?
Functionality-wise, it works efficiently. However, setting up the printer is a bit challenging. Unlike other Bodno products, users seem to have trouble getting the ink ribbon to calibrate with the device. However, it’s a minor issue that the responsive customer support team can solve.
If you are looking for a high-end ID card printer, we recommend checking this one out. The Fargo HDP5000 is a compact yet efficient printer with a ton of features. It is an excellent product for small to medium-sized businesses and can print a variety of cards.
Straight off the bat, we were impressed with the variety of colors, templates, and shades it has to offer. This printer gives you the flexibility to creatively experiment with how the card should look. Although this is for single-sided prints, you can opt for dual-sided printing as well.
The device’s printing speed is 20 seconds per side, and the input capacity is 100 PVC cards. This is particularly beneficial for businesses with an urgent demand for cards in bulk, like libraries and clubs. In addition to this, it has an inbuilt USB port, an Ethernet port, and an easy-to-read LED screen.
We were pretty impressed that the printer can encode data, making it ideal for printing contactless cards and magnetic stripes. The accompanying software is user-friendly, with many templates to choose from. Plus, you can create and save designs using your photos and logos.
What Could’ve Been Better?
Finding something wrong with this printer was an arduous task. And, (much to our relief) we failed. However, we are concerned with the price. Plus despite being high in the price range, it is more suited for small-scale use only.
Next on the list is the Evolis Primacy printer, which is quite similar to the Fargo HDP5000 printer. This one, too, is an excellent buy for small to medium-sized businesses with mid-range volumes of printing to deal with. It comes with a box full of accessories, which are all you need to operate the printer.
If you are a small-sized business and do not want to hire an external vendor for printing, this printer is worth considering. The Evolis Primacy printer offers high-quality dual-sided color printing. Each side takes about 23 seconds to print, and the printer has a 100-card capacity.
Additionally, the printer comes with a color ribbon and design software compatible with most operating systems. If you are looking to make library or membership cards that need barcodes, the Evolis software has 20 templates to choose from. Moreover, it also has many design templates for all types of cards.
You will appreciate that the printer is easy to use, thanks to USB and Ethernet ports and a simple design. Plus, the setup is pretty simple as a member of the support team walks you through it.
What Could’ve Been Better?
Among the glowing reviews regarding this printer, it was challenging to find something wrong. However, we did find the font colors to be a bit different from what we picked. It is not a massive difference, but took us by surprise.
If you are looking for an efficient printer that prioritizes security over design, then take a look at this one. The ID Card Pros’ ID maker can print professional-quality cards with heightened security. Let’s have a look at some of the other features this printer has to offer.
BADGE PRINTER & SUPPLY KIT INCLUDED: Each dual-sided ID...
ID MAKER SOFTWARE: Our user friendly drag-and-drop...
Why Did We Like It?
Regardless of the kind of business, an ID card is a necessity. In some places, it only gives access to the workplace, but for some, it is a doorway to sensitive information meant for their eyes only. This is why this printer is so popular, as it considers the security aspect of ID cards.
The company knows that low-quality ID cards do not perform with consistent efficiency. This is why it produces high-quality cards that are clean and crisp. Additionally, it takes about 30 seconds to print each side, making it easy to print at a faster rate.
The best part is that it has four holographic overlays, which can add an extra layer of security to the card. Not only does this reduce the chance of forgery, but the printing is done in a clean manner that does not hamper your personal information that’s printed.
What Could’ve Been Better?
While this is a popular printer in the industry, it does seem to have some minor flaws. First of all, the software is not compatible with MAC, which is not a big issue but quite surprising. And secondly, it is not great for bulk printing since each card has to be put in manually.
Next on this list is yet another Fargo printer, only this time is a bit more heavy-duty. The Fargo DTC4250e is aimed at commercial use and hence has a sleek design meant to suit offices. It produces high-quality cards with clean text and accurate colors that help print logos for brands.
In our opinion, this is quite the printer to consider for commercial use. It has many features that are aimed at benefiting large workplaces and people. Since security is a big concern in most companies, this printer takes care of that. It can encode, create, and secure any data that is needed when creating personalized ID cards.
We were also impressed that despite catering to bigger businesses, it consumes less energy and uses eco-friendly refill ribbons. Moreover, the machine can be password-protected, which helps keep information secure. That’s not all; it has an input of 200 PVC cards and an output of 100, which makes it great for bulk printing.
Other than the features mentioned above, the printer has some standard features like easy-to-use software with various templates and designs. It is also straightforward to use as it has a smart screen that displays the necessary information.
What Could’ve Been Better?
This Fargo printer is very highly recommended by many businesses that see mid-range volumes of printing. And although it meets all expectations in terms of quality, it does not have a camera. It is not a necessity, but the inclusion can make things more convenient.
And finally, we have the Zebra ZXP printer by Bodno. For low/medium range volumes for printing, this is the ideal product to consider. It can produce high-quality cards with clean designs that are easy to read. Moreover, it is very beginner-friendly and easy to use. Let’s have a closer look.
Item Package Dimension - 21.699999977866L x 14.49999998521W...
Item Package Weight - 16.300979652280002 Pounds
Why Did We Like It?
This is an excellent investment for small businesses looking for a high-end printer. The color quality is rich, and the ribbons are very easy to install. All you need to do is load them into the printer, and it’s ready to be used. This is very convenient when replacing the color ribbons as well.
Moreover, the machine is relatively fast and does not jam when printing. It takes close to 6 seconds for monochrome cards, and color, it’s 20 seconds. The printer comes with 200 PVC cards with an input capacity of 100 and an output capacity of 45. It is the perfect printer for library and club cards.
Lastly, the printer can automatically print on both sides. So printing company ID cards or transport ID cards is much more manageable when this is around. Additionally, it comes with software that helps the printing process.
What Could’ve Been Better?
One consistent complaint with the printer is the software. Many users felt that the software is a bit disappointing since it does not have many features. To avoid this, we recommend getting the silver edition of the software. Also, a MAC driver needs to be downloaded before using the software.
Now that we are done with the product reviews, let’s talk about why we chose these.
When buying ID card printers, there are certain factors to look out for. The printers in this list meet most of those factors, which is why they have been featured. If you’re wondering what those factors are, we are here to tell you just that.
So, buckle up, and let’s dive into it!
Speed
One of the most critical factors to look at is the speed at which the printer can generate output. The only thing worse than not having any printer is to have a printer that cannot keep up with the number of cards required.
Ideally, you should be looking at about 5-7 seconds for monochrome printing and 20-30 seconds for color prints. However, it is entirely dependent on the kind of volume you will be seeing, and based on that, you can zero in on the speed.
Print Quantity
This factor is closely related to speed. The main aim is to have a printer that can keep up with the requirements.
The best thing to do is get an idea of how many ID cards you could be printing. Will the volume be low, like it is for loyalty cards, or high, like it is for company ID cards? Calculate beforehand and then pick a printer.
Technology
Currently, there are two types to choose from - DTC and reverse technology. Direct-To-Card technology (DTC) is when the image is directly transferred to the PVC card. In reverse technology, the image first goes on a clear film and is then printed on the card using heat and pressure.
They are both popular as they have their own set of advantages. However, DTC is the faster method.
Space
Take a look around the place where the printer is supposed to be. How much space do you have for the printer? Keep that space in mind when looking for one. Plus, since the printer will be used often, it will help keep it in an accessible area.
Color
Some printers come with a YMCKT (yellow, magenta, cyan, black, and topcoat) ink ribbon, and others allow you to print in any color. Figure out the needs of the business and the ID card before picking the printer.
Additional features
Since ID cards are mainly used for security purposes, it is essential to look out for features that can protect your information. If the ID card you intend to print needs to be secure, look for one that can encode, create, and secure data. Also, having a password-protected machine will add a layer of protection.
ID Card Printers FAQ's
Can I print both sides of the ID card using an ID card printer?
Yes, many ID card printers support dual-sided printing. This allows you to print information, images, or barcodes on both sides of the card, maximizing the available space and enhancing the card’s functionality.
Can ID card printers encode smart cards or magnetic stripes?
Yes, certain ID card printers have encoding capabilities, allowing you to encode data onto smart cards or magnetic stripes. This feature is particularly useful for access control systems or cards that require additional security measures or functionality.
Are ID card printers easy to set up and use?
Most ID card printers are designed to be user-friendly and come with intuitive software for designing and printing cards. However, the ease of setup and use may vary between models. Look for printers with straightforward installation processes and user-friendly interfaces if you prefer a hassle-free experience.
What type of cards can be printed with an ID card printer?
ID card printers can print on various types of cards, including PVC cards, proximity cards, magnetic stripe cards, smart cards, and more. The specific types of cards that a printer can handle may vary, so ensure compatibility with your desired card type before making a purchase.
Can I print custom designs or photos on ID cards using an ID card printer?
Yes, ID card printers allow you to print custom designs, logos, text, and even photos on the ID cards. With the appropriate software, you can create personalized and professional-looking cards that reflect your organization’s branding or individual requirements.
Conclusion
Selecting the right ID card printer is about matching features to function—whether you're printing access badges, membership cards, or secure credentials. Factors like print resolution, thermal transfer or direct-to-card technology, smart card encoding, and lamination support all contribute to producing durable, scannable cards that meet professional and security standards. For those working across departments or industries—such as education, hospitality, or administrative services—it's also important to consider the media versatility of your equipment. If your printing needs extend to heavier media types like event passes, custom packaging, or premium business cards, you may benefit from exploring printers designed for cardstock and specialty materials. A helpful resource for that is this breakdown of the best printers for cardstock, which covers high-performing models equipped for thicker paper and creative print tasks.
Digital art encompasses a broad spectrum of creative practices that use digital tools—such as computers, tablets, software, and AI—to produce visual works across two- and three-dimensional media. Originally emerging in the late 20th century as new media art or computer art, digital art has rapidly evolved into a legitimate and widely embraced creative discipline. From 3D modeling, pixel art, and matte painting to modern practices like VR painting, AI-generated art, and photobashing, the diversity of styles reflects the adaptability and innovation of this medium. Digital art offers not only greater flexibility and accessibility but also fewer material constraints and easier revision than traditional methods—making it a preferred medium for game developers, concept artists, illustrators, and experimental creators alike. In this guide, we explore 19 essential types of digital art, breaking down each category’s tools, techniques, and creative applications to help you better understand the scope and potential of digital expression in contemporary visual culture.
Different Types Of Digital Art
Digital art can be classified into two broad categories: regular digital art created using art software and a graphics tablet, and art created using Artificial Intelligence. Both styles of digital art include several techniques, so let’s look at the regular types of digital art before moving on to the methods that use AI.
1. 3D Digital Painting And 3D Sculpting
One of the most popular types of digital art is 3D painting, an extension of 2D printing and closely related to sculpting. In this art form, artists apply various textures, paints, and shading to 3D models to create realistic and lifelike representations of people and objects. Leading animation studios such as Pixar generally use this art technique, and even Japanese studios like Studio Ghibli have shifted from 2D to 3D painting.
3D digital painting can be used to create realistic or stylized characters, while 3D sculpting allows artists to manipulate the created object, unlike traditional sculpting. This makes this art form especially suited for animation, as such objects and characters can be easily created before placing them in a scene.
2. 3D Modeling
While many people are confused between 3D sculpting and 3D modeling, both are distinct from each other. 3D modeling involves creating points in a digital 3D canvas similar to vector art, between which various planes and lines are created using software.
These planes are grouped to form a mesh, and it is this mesh that the artist manipulates to create objects. Also, this mesh can be animated, which is how 3D characters are animated.
3D modeling is used to create graphics for all modern games and to create special effects in TV shows, movies, and architectural mockups. The most popular 3D modeling software includes Blender, Maya, and 3DS Max.
3. Matte Painting
Matte painting is similar to standard digital painting but also incorporates the use of 3D modeling and photography for creating photorealistic environments and landscapes. This type of digital art is commonly used for movies where a realistic background is needed but may be unavailable in real life or may be too expensive.
It involves creating backgrounds that blend seamlessly with the scene through the use of photographs, 3D modeling, and digital painting. Matte painting allows movies to have breathtaking scenes that look fantastic while still retaining an element of realism.
This technique is also closely related to photo manipulation, as both forms utilize similar techniques and serve a similar purpose. Both involve the use of photographs, 3D modeling, and digital painting, but photomanipulation is more commonly used for character design.
4. Structured Drawing
Structured drawing is a digital art style that involves creating art pieces using mathematically described strokes and shapes. This means that it results in the creation of vector art instead of raster art, which can be scaled easily without any loss of detail.
While traditionally structured drawing can be done using just a mouse and keyboard, modern software developed for the purpose can easily mimic various line drawing tools. This means that hardware like pressure-sensitive drawing tablets can be used for the purpose effectively.
Structured drawing generally results in an art style that leans closely towards graphic design instead of traditional painting. Also, there are software programs especially suited for structured drawings, such as Inkscape, Adobe Illustrator, Gravit Designer, and Affinity Draw.
5. Pixel Art
Pixel art makes use of tiny basic shapes to create highly intricate images and, in modern times, is associated closely with the gaming industry.
But it did not originate as a form of digital art, as the famous Spanish artist Salvador Dali often used pixel art in his traditional art pieces. And after that, it was first used in the creation of assets and sprites for early computer games since it did not require a lot of memory.
That is also the reason why this art form is often referred to as 8-bit art. Pixel art can be used to create simplified and highly realistic pieces and is fairly easy to animate. Almost all mobile video games use pixel art at some level. Due to these reasons, it was one of the first types of digital art used for both private and commercial purposes.
Pixel art may be classified into isometric and non-isometric, and is usually created using dedicated software like Krita or Pixen.
6. Voxel Art
While many people have heard of pixel art, voxel art is not that well-known, even though both techniques are quite similar. Instead of relying on square pixels, voxel art involves transforming the pixels into cubes, which are used to create images in a 3D space. The process most closely resembles building objects using Lego bricks.
Due to its nature, the software available for voxel art is quite limited when compared to that available for pixel art. While pixel art can be created using almost any image editing software, voxel art requires specialized software like Blender. Other dedicated software available for this art style includes MagicaVoxel, and there are even some free-to-use options available.
7. Isometric Art
Isometric art is quite similar to voxel art, but the major difference is that the viewing angle is restricted to 30 degrees. This means you can view three sides of the object or character created using this art style. Isometric art first appeared when architects and engineers used it for technical illustrations.
However, it has become popular for many other purposes and is often used on various websites and smartphone applications. Isometric art is also known as isometric projection and is used by artists to create the illusion of three-dimensionality in a two-dimensional space.
While it is possible to replicate this process using 3D applications, it is generally done using an isometric grid through structured drawing programs like Affinity Designer and Adobe Illustrator.
8. Digital Photography
Digital photography is among the most revolutionary changes in the world of photography and is an important form of digital art. Unlike traditional cameras, digital ones do not require the use of film, which effectively removes the limits on how many images and videos can be captured. Additionally, a digital camera can filter, zoom, and manipulate images in multiple ways.
But digital photography is more than just taking photos of objects; the real work comes after the photos have been taken. Photos taken using digital cameras can be easily transferred to your computer and can then be edited. And software like Lightroom and Adobe Photoshop play an important role in digital photography for editing images to make them more appealing.
Such software is also used to enhance images by adding and removing elements as required.
9. Vector Painting
Besides being a common image format, a vector is a term used to describe a form of digital art. It involves using geometrical formulas to capture the various shapes and lines that make up an image. Vector art usually uses features like grouping, embossing, flipping, adding or removing transparency, and others through different vector art software.
The biggest reason for the popularity of vector art is that vector art pieces can be resized as needed without affecting their sharpness. This means that an image can be made infinitely larger, and there won’t be any pixelation issues to worry about. That is also why artwork like logos is generally created using digital art.
Apart from being resizable, vector art can be generated multiple times without any loss in resolution and can even be edited by conveniently adding and removing elements like color. Due to this reason, many digital artists convert their artwork into vector images, which is why vector art is a popular element of graphic design.
10. 2D Animation
Traditional 2D animation is an important form of digital art that creates the illusion of movement in two-dimensional art pieces and is used in almost all cartoons and games. 2D animation can be categorized into skeletal-based and frame-based animation.
Frame-based 2D animation involves drawing objects or characters multiple times, and each drawing is known as a frame. Each frame is slightly different from the previous one, and the illusion of movement is created when all the frames are played continuously sequence-wise. Generally, one second of animation requires 24 frames, which makes it a very tedious process.
To overcome this problem, skeletal-based animation was developed, in which the object to be animated is divided into different parts. The various parts are assigned bones, which can be moved individually as required, making the animation process easier. However, this makes the animation appear more artificial.
11. Raster Painting
In simplest terms, raster painting can be said to be the complete opposite of vector painting, and raster is also a commonly used image format. This art form is known as grid painting or bitmap and comes the closest to traditional art done on a canvas. Similar to traditional canvas art, lines and colors are registered individually, pixel by pixel, on the computer screen.
Since it is a digital form of traditional painting, art pieces created using this art form cannot be resized. This is because when they are enlarged, it can cause pixelation issues, which is the biggest downside of this art form. Raster painting may also involve painting on top of a rasterized image, just like in photo painting.
And it can incorporate many other types of digital painting, making it suitable for 3D and 2D graphics that make use of pixels. This technique allows the creation of more organic shapes and textures, and high-resolution raster images have a larger number of pixels.
12. Photo Painting
In this type of digital art, the artist utilizes an existing photograph and paints over the various objects and characters to create a painting. Generally, larger objects are blocked using color, and details such as the features of a face are left out to create a minimalist painting. But photo painting can even be used to create highly realistic paintings and portraits.
This technique is similar to photobashing, which is another type of digital art since it can be used to add more details to existing photos or art pieces. Also, this is another art form in which both traditional and digital techniques can be used. However, photo painting is distinct from photoshopping, which involves making changes to images using art software.
In photo painting, image editing software and painting tools enhance paintings using photographs as their starting point. And it is similar to photo realism because it involves reproducing photographs on canvases in the most realistic manner possible.
13. Digital Collage
Digital Collage is a digital art style that has become popular through techniques like scrapbooking and the use of mood boards. Such boards are being increasingly used on social media platforms like Facebook and Instagram. In this digital painting style, artists compile multiple images together while employing software that allows photo editing and image splicing.
This method goes back to the period when the camera was first invented, and there can be a wide variation in the style and appearance of digital collages. They can include painting techniques, 3D assets, and even photography. One of the most popular ways artists use digital collages is to create illusions through pieces attempting to distort reality.
Digital collages can be created using almost any image editing or painting software, since all it does is combine images from different sources together. Before being discontinued in 2016, the Picasa software by Google was among the most popular software for creating a digital collage.
14. Integrated Art
Integrated Art is quickly becoming one of the most popular styles of digital art and involves using multiple software for complete the same painting. Alternatively, a single art program can be used to create hybrid paintings. Generally, integrated art incorporates raster and vector painting techniques together or combines manual and computer-generated vectors.
In some cases, it can even involve using raster or vector painting methods along with photography.
Digital art software like ArtRage is popular for integrated art since it allows combining different art techniques, which is impossible with traditional mediums like canvas. And this art form is becoming even more popular because there is no limit to the number and type of forms that can be integrated into a single piece of artwork.
In recent years, integrated art has expanded to include virtual reality elements by combining real environments with artificially generated assets. Also, other forms of art, such as music, writing, video games, films, and theater, can be considered examples of integrated art.
15. Mixed Media
Often treated as one of the extensions of integrated art, mixed media also involves combining and blending multiple art media. These can include pottery, painting, ceramics, photography, and glassworking. However, as far as digital art is concerned, mixed media involves combining painting and 3D modeling.
Mixed media involves applying paint to 3D models, helping provide them with a more realistic, lifelike feel, and special brushes have been developed specifically for this purpose. These brushes can help add textures, shadows, and lighting to the 3D models. Mixed media provides a sense of realism to digital art while combining both traditional and digital assets most effectively.
16. 2D Digital Painting
2D digital painting is the most well-known type of digital art and involves using a tablet, stylus, and digital art software to create digital art. This art form aims to provide digital artists with an experience close to traditional painting, along with the advantages of the digital medium. Because of this, it can often be difficult to distinguish a digitally created piece from a hand-painted one.
Just like traditional painting, 2D digital painting involves the use of several types of brushes, mediums, and paints. Oil paint, watercolor, and pastels are some of the most common media for creating 2D digital images, and the digital artist can work in layers and edit the artwork easily. Also, most tools offer multiple settings that can help provide a highly customized painting process and help enhance the overall experience.
17. VR Painting
Virtual Reality has gained a lot of traction over the past few years and has become immensely popular in the digital art world as well. And the main reason for that is the Tilt Brush developed by Google.
This tool allows digital artists to use a 3D space for painting purposes, and they can utilize multiple angles to create the artwork. The completed artwork can be viewed in the form of a 3D image or VR.
Also, what makes the Tilt Brush so revolutionary in the digital art industry is the fact that it allows artists to paint around them easily. It also utilizes highly realistic physics and mechanics, allowing hyper-realistic images to be created. And this tool is available on almost all the popular VR platforms, which include PlayStation, Oculus, Windows Mixed Reality, and Vive.
18. 2D Computer Graphics
Computer graphics can be categorized into 2D and 3D, and the former includes images created exclusively by the computer. 2D graphics include logos, text, shapes, graphs, and more. They may either be in the form of a .gif or a .png and may even be vector images instead of raster ones.
2D computer graphics form the largest part of the digital art industry and include all 2D art, even animations and cartoons. This type of art led to the development of clipart and the popularity of web advertisements and logos.
Also, this digital art form may appear in 3D, such as in the case of video games, but is created using 2D shapes only. This is why it remains one of the easiest forms of digital art today.
19. Photobashing
Another one of the most popular digital art forms is photobashing, which involves combining 2D, 3D, and real-life images. In this technique, the artist paints certain portions of the artwork while including 3D textures and models in other areas. This helps create a surrealistic image that can be highly engaging and may often include a science-fiction element.
One of the more popular elements that photobashing artists utilize is cyberpunk, since it can be blended easily with the more realistic aspects of the artwork. Photobashing can also be used to speed up the digital painting process or help correct certain elements in a piece, which is why it is popular among concept artists.
AI Art
The above were the traditional types of digital art that have been present since this art form became popular. However, with the advent of technologies like Artificial Intelligence, newer types of digital art have become popular. And two of the most well-known names in this field are Midjourney and Dall-E.
Both Midjourney and Dall-E are AI-powered tools that can generate various types of images, including paintings, photorealistic images, emojis, and more. They allow creating artwork from scratch using AI technology, simplifying the digital art process. Let’s look at them in detail now.
Dall-E is a machine learning model developed by the AI laboratory OpenAI to generate images using natural language. This is possible since this model can understand the relationships between text and images, and it uses two processes called clip and diffusion to generate the images.
Generally, Dall-E creates photorealistic images if there are references for the concept linked to the text. But in the absence of such references, it can even create stylized images similar to digital paintings. Dall-E 2 has succeeded Dall-E and can generate even higher quality, more realistic images and combine different art styles and concepts.
How Does Dall-E Work?
The process that matches the images to the text is called clip and can be used to train the computer to understand the concepts linking the text to the images. This allows Dall-E to come up with new images of the same concepts for the text pieces, making it a truly revolutionary technology.
The tool starts generating images with the creation of random dots, which are altered into the pattern of an image.
However, in its current form, clip cannot generate high-quality images of the concepts, which is where diffusion comes into the picture. Diffusion involves adding Gaussian Noise to an image to corrupt it, allowing Dall-E to learn how to reverse the process and enhance images by removing noise.
The diffusion technique can even be used to alter an already generated image further to bring it closer to what is required. But the biggest advantage of Dall-E is that it can generate multiple variations of an image in a very short period, which even the best artists cannot.
Limitations Of Dall-E
Due to the various concerns and possibilities associated with Dall-E and Dall-E 2, these are not publicly available for general use. These powerful tools are available to only a few selected individuals, and the tool also has a few intentional and unintentional limitations.
The first among these is that while the images are highly detailed, a closer inspection can reveal that the photorealism is not perfect. It is possible to identify whether the images are real objects or generated completely using AI, and this can be done by zooming in close to the images.
Another intended limitation of this tool is that you cannot generate images that have violence, illegal activities, or adult content. Similarly, it cannot be used to create images of specific people, as it can pose several risks.
Apart from that, Dall-E does not do very well in understanding the relative position of multiple objects and has trouble generating images of written words. Despite those limitations, however, this tool has enormous potential.
Dall-E and Dall-E 2 are not consumer products but research projects that aim to help create a safe and reliable AI for general purposes. In its current form, Dall-E is best suited for brainstorming concepts and ideas, which can be great for digital artists.
Midjourney is another AI tool that can be used to generate images using text prompts similar to Dall-E. The tool is used through Discord bot commands and is currently in its beta state. It can also create images in several styles, ranging from stylized artistic ones to hyper-realistic ones.
Artists can use the tool to showcase prototypes to clients while creating the artwork themselves. It can even be used to create customized advertisements, special effects, and more. Midjourney can also create highly detailed images in high resolution, and the quality of the generated images can be further enhanced.
Also, with this tool, it is possible to generate more variations from an already generated image and even upscale them.
How Does Midjourney Work?
Midjourney uses AI and machine learning to create images through text prompts provided by the user. Users need to sign in through their Discord account using a web browser or use the Discord app available on various platforms, including Windows, Android, Linux, Mac, and iPhone.
The digital tool has a free trial that provides users with 25 prompts for generating images, and for more prompts, there is a paid membership option. And the images can be downloaded to your device and shared directly with others. The Midjourney server can even be used to communicate with other people and share ideas and art pieces.
Midjourney also allows editing of the generated images by altering their colors and lighting, and other aspects like aspect ratio.
Limitations Of Midjourney
The biggest limitation of Midjourney is its dependence on a bot. All queries entered by users are hosted on a single server, which makes them easily visible to everyone. This goes against the concept of the uniqueness of the idea and also makes it impossible for users to enjoy any privacy.
The only way to overcome this problem is to purchase a private subscription, which will provide you with a private chat, and the prompts will become confidential. But even in that case, the artwork created will be shown on the community feed page.
Apart from that, the images generated by this tool may not be of the same quality and resolution as those created by Dall-E. But they can be upscaled, which can help enhance them to a certain extent.
Now, let’s look at some of the different types of AI art.
Types Of AI Art
1. Fractal Art
This type of digital art originated in Middle Eastern and Asian cultures, where traditional artists created highly detailed patterns and mosaics to decorate important places like temples. However, with modern technologies, it became possible to create similarly detailed designs digitally, which eventually led to its popularity.
Patterns can be created in both 2D and 3D, and popular mathematical elements such as the Fibonacci Sequence are often used for the purpose. Fractal art utilizes mathematical equations and algorithms to create detailed patterns, and artists use fractal-generating software to do so. Also, fractal art is among the earliest examples of Artificial Intelligence, as it involves teaching computers how to create art.
A fractal means an infinite pattern, and fractal art uses the calculation of fractal objects to create an image, animation, or other artwork. Several types of fractal art exist, and the Mandelbrot set is among the most famous. Software is available for creating fractal artwork, both free and paid, and the fractal created is generally further processed using different software.
Other types of fractal art include Polynomial fractals, Iterated Function Systems (IFS), Quaternionic fractals, and Newton fractals.
The unique aspect of fractals is that the patterns are completely identical, irrespective of the zoom level. That is why creating fractals can be quite challenging, since even a small change can lead to similar changes in all the recurring patterns because of the butterfly effect.
2. Algorithmic Art
Algorithmic art is closely related to fractal art and involves using certain equations or codes to create artwork. What sets algorithmic art apart from other forms of digital art is that it generally does not require any input from the artist. This means that algorithmic art can be used to create both digital and traditional art pieces that include abstract as well as hyper-realistic pieces.
The designs are generally created by the computer and can be used to create vector art as well, which does not suffer from pixelation problems. Since the artwork can easily be resized without losing graphical fidelity, algorithmic art is often used for logos, word art, and computer-generated assets and backgrounds.
Digital artists who use algorithms to create art are known as algorists, and they are responsible for creating the algorithm that creates the artwork. Algorithms can include functions, expressions, computer code, or other input in mathematical or computational forms. Also, they may be deterministic or may include random elements.
Deterministic algorithms will result in identical art every time, but elements like a random number generator or external data stream can bring some variety. While the first instances of algorithmic art date back to the 1960s, that art was created using a plotter instead of a computer.
Also known as glitch art, datamoshing forms a small yet popular niche of digital art and involves using programmed glitches and layering videos and bringing them together. The finished video is a modernist example of digital art and can be visually engaging. This technique can also be applied to still and 2D images and requires the right software and programming for splicing and layering videos.
One of the developments in this field was the creation of the Deep Dream tool by Google to allow artists to datamosh images. And software like Avidemux has been specially developed for this purpose.
Datamoshing generally involves manipulating the various types of frames, such as I-frames, P-frames, and B-frames. Each of these frames serves a different purpose. For instance, I-frames can store the complete picture without needing more information, while B-frames and P-frames do not. These require some additional information from the previous or next frame, as they only contain the information required to display the change between frames.
There are mainly two methods of datamoshing. The first involves replacing, removing, or corrupting an I-frame that helps create a glitch. Alternatively, one can duplicate P-frames multiple times for the bloom effect.
4. Still Imagery
Still imagery is another form of computer-generated art and can utilize both 2D and 3D images. 2D computer graphics are created by combining 2D geometric models, text pieces, raster images, and other elements. Tools like Flash, Adobe Illustrator, and other software are generally used to create still images.
3D still images are generally used for video game graphics and computer animation. And they are created using 3D representations of geometric data that can be used for calculations and rendering images. This process depends on various algorithms for both vector and raster and involves modeling, animation, layout, and rendering.
5. CGI Or 3D Computer Graphics
CGI or computer-generated imagery utilizes digital technology effectively to create high-quality artwork easily. It makes use of both dynamic and static images, but is most commonly used with 3D computer graphics instead of 2D graphics. This technique allows greater control over computer-generated animations compared to traditional animation methods.
CGI or 3D animation involves modeling objects, providing structure and skeleton to 3D figures, and rendering the final animation. In contrast, animation that makes use of 2D computer graphics requires the use of computers but is not computer-generated.
3D graphics can be used with real-life physics to create ultra-realistic objects and characters. 3D computer graphics do not use any real-life assets and can easily be reshaped, resized, rotated, or manipulated in other ways. That is why such graphics are often known as digital clay and can be used in various applications, such as architectural or engineering programs.
6. Dynamic Painting
Dynamic painting involves using human data and artificial intelligence to create vivid art pieces that cannot be distinguished from traditional artwork. However, since this depends entirely upon AI, the chances of errors are high in the case of dynamic painting. That is why while some dynamic paintings may be highly impressive, others may be slightly off.
In dynamic art, machines are trained in a variety of different art styles that were created by the masters. While landscape paintings are generally impeccable when created using dynamic painting techniques, portraits may not be as impressive. That said, dynamic paintings provide a unique take on the digital art forms available today.
7. Computer-Generated Digital Painting
Artists use digital art software to create environments and backgrounds that can be used as assets for other purposes. Computer-generated digital paintings are highly common these days and are often used to create backgrounds, landscapes, and concept art. This technique is also used to repair photographs and even traditional art pieces.
Similarly, computer-generated digital paintings can be used to create smaller assets, such as weather effects, hair, textures, and surfaces. This digital art form is perfect for creating painted versions of technology and machinery. Generally, such objects are quite difficult to paint using traditional painting methods, which is where this style can come in quite handy.
8. Projection-Mapping
Projection mapping is a digital art style closely related to spatial augmented reality and video mapping. It is a computer-based projection technique used to transform irregularly shaped objects into a surface for video projection.
This art technique can be used on a small or a large scale and is used in a variety of situations. It is commonly used in corporate workshops, fashion shows, or even pop-up exhibitions along with permanent installations.
Also, projection mapping is used for mapping buildings and can be used as the focus itself or as a medium for other digital art pieces. This is because it can transform the appearance of an object in real-time by combining computer graphics with videos and still images.
Final Thoughts
Art has been an important part of human history since the very beginning and has evolved considerably over the centuries. And with the changes brought in by technology, the next phase in this evolutionary process has become possible with the development of digital art.
Digital art is a vast field encompassing several art types, and here we’ve mentioned the most common types. The best thing about these art styles is that they can be combined and used together to create visually pleasing and highly impressive pieces.
And the advent of Artificial Intelligence is opening up more opportunities in this field than ever before. But it may be a few years before tools like Dall-E and Midjourney become more widely available.
So until then, regular practice and proper training are the most effective ways of becoming a great digital artist.
An art desk or drafting table is a purpose-built workstation designed to support the physical, spatial, and ergonomic needs of artists, illustrators, and designers. Unlike conventional tables, these surfaces offer enhanced functionality through tilt-adjustable tops, angle calibration, built-in storage, and material-resistant finishes that protect artwork from smudging, tearing, or distortion. The ability to maintain a consistent line of sight and a controlled drawing grip is critical for tasks ranging from technical sketching to freeform illustration, especially during extended sessions.
Modern drafting desks come in a variety of materials—tempered glass, laminated wood, metal frames—and support features such as modular trays, height-adjustable legs, and compatibility with drafting stools or task chairs. Selecting the right unit requires evaluating your available space, posture preferences, and whether your workflow demands a traditional drafting table or a multifunctional art desk. This guide compares the 5 best art desks and drafting tables, each selected for their stability, versatility, and studio-ready design features to help you build a professional-grade creative setup. Art desks and drafting tables come in various sizes and shapes, but picking the right one as per your needs can appear like a daunting chore! Each type of desk/ table has its pros and cons, so weigh them out carefully by asking yourself these questions:
How much space do you have for keeping the table?
Do you need a table with adjustable height or not?
Do you have a stool/ chair, or do you need to buy one?
How much inclination or tilting angle do you need?
What type of style (traditional or modern) do you prefer?
Once you answer these questions, it will not be challenging to select your art desk or drafting table. We have carefully researched and analyzed the different art desks and drafting tables according to their specific features and design.
Listed below are the Best Art Desks & Best Drafting Tables for Artists:
Futura Advanced Drafting Table: Highlighted for its customizable tempered glass surface, Futura's table endures up to 70 lbs. Notably, the see-through design caters to a stylish workspace. A chair or stool is not included, which may necessitate additional purchase.
Studio Designs Comet Center: This table stands out with a robust steel design and 15-degree desk angle adjustability, promoting diverse artistic activities. Generous storage is provided through an attached side table and cubby stool. Yet, the fabric drawers lack the same durability.
Safco Split Level Drafting Table: Safco's table is suited for traditional artists, with a unique split tabletop where one surface tilts 50 degrees. The downside is the smaller, non-tilting surface, limiting some aspects of use.
OneSpace Craft Station: With a mix of style and versatility, OneSpace's table offers stability with a heavy-duty steel frame. It features removable trays and drawers, fostering workspace organization. Some users reported instability issues.
Folding Modern Glass: The Folding Modern Glass Top Adjustable Drafting Table combines style with functionality, built with a heavy-gauge steel frame and unique foldable design. Its fixed height is a potential drawback for users seeking height adjustments.
Here is the list of the 5 best art desks to help you create masterpieces.
1. Futura Advanced Drafting Table - Best for Customization & Versatility
If you're looking for a see-through drafting table, then getting this piece will be perfect. You'll get this unit along with a foldable side desk area that can be used to store your knick-knacks, eatables, supplies, and everything in a compact size. The extra shelf can also be folded when you don't need to use it. However, you can also get the same Futura Drafting Table without the side shelf.
The legs of the table are correctly built, and they have been designed well. To keep the table well balanced on wood paneling or carpet, the base has been carefully made with extruded aluminum and plastic caps.
The drawing surface is about 38 inches, and it has been strengthened with tempered glass, which can hold a weight of up to 50-70 pounds. This indicates that this drafting table can also be used as a real desk because you can customize this piece easily.
You can choose to shift the cubby and the foldable shelf to either side, and you can also leave them out altogether. And the drawing surface can also be tilted with a tilt of a maximum of 35 degrees.
Some plastic holders have been kept on both sides for keeping rulers, pencils, t-squares, and any other similar supplies. The drawing surface also has a raised lid on the bottom to keep your papers secure when you choose to work at a tilt.
You'll find this workstation perfect for professional use, and it has been crafted exquisitely. The glass surface can be the only reason why some people might not want to select this table. This table has been a popular choice among people like artists or architects who need a see-through surface with ample amount of space.
The table does not come with a chair or stool. If the price of this unit is within your budget and you like the layout, then we advise you to get the piece.
What We Like
Versatile and customizable design
Foldable side storage area
Durable, tempered glass drawing surface
Maximum tilt of 35 degrees
What We Don't Like
Chair or stool not included
Dimensions: 23.75" x 50" x 31.5" | Surface Material: Tempered glass | Max Tilt: 35° | Weight Capacity: 70 lbs | Storage Options: Cubby & foldable shelf | Adjustable Height: No
2. Studio Designs Comet Center - Best for Art & Craft Activities
Studio Designs is known for its quality work and the variety of sizes, materials, and styles of its products.
The drafting table from Studio Designs is probably the best drafting table or drawing desk. It comes in a modern design with pretty heavy steel construction. You'll also find a side table that has cubby storage, which is attached to your desk, and a cubby stool also comes with this set.
The table will stick out for around 2ft from the wall, but if you consider the tool along with it, then it will be about 3ft of space from your wall. The storage cubbies that are provided are not detachable, so they will take up to 4ft of total area.
You can angle up the desk area to a maximum of 15 degrees. It will be perfect for any artistic work such as storyboarding, drafting, or sketching. There is a detachable pencil ledge that is around 2 feet, and you can keep your paper and pencil secured even when the table is tilted.
There are different measurements for height, as it depends on the extent to which the table is tilted. After the table is at a tilt, it measures a maximum of 40 inches from top to bottom, which is a max of around 3 ½ feet tall.
The drawers are square in shape and measure a size of just under 13 inches. You can fit your ruler and other similar supplies, but if anything is longer than 12 inches, then you would have to fit it in tightly. The drawers are not very strong as they are made of fabric and come with a cupboard base.
But you can fit in your art supplies, such as your rulers, paper, pencils, sketchbooks, and similar products. The drawing area measures about 36 inches wide(3ft) by 24 inches tall(2ft).
The drawing board is either made of plywood covered with a vinyl finish or particleboard. This might not be the best-crafted table, but it's a good bargain for the price. You'll be just using this table for drawing purposes, so there is no need for it to be strengthened for heavy machinery.
The height of the table will be suitable for a 6-foot adult to a 3-foot child. If you're not comfortable with the stool, then you can also use an adjustable computer chair. And if you do like the fabric and the design, then you'll enjoy using this table for your work.
What We Like
Strong, steel construction for durability and stability
Adjustable desk angle, up to 15 degrees tilt, for versatile use
Detachable pencil ledge for added convenience
Ample storage space with attached side table and cubby stool
What We Don't Like
Fabric drawers may lack strength and durability
Dimensions: 23.75" x 50" x 29.53" | Surface Material: Plywood | Max Tilt: 15° | Weight Capacity: 50 lbs | Storage Options: Side table, cubby storage, and fabric drawers | Adjustable Height: No
3. Safco Split Level Drafting Table - Best for Traditional Drafts & Artists
Anyone looking for a compact drafting table will undoubtedly love this desk by Safco. This table is an expensive one, but it has been designed especially for draftsmen and for artists who use traditional mediums (charcoal, watercolors, oil painting, etc.).
You can completely adjust the height of the table, while there is also a single tilting surface and a smaller drawing area on the right side. You might find the desk a little fragmented, as the two different drawing surfaces are not connected.
The drawing surface on the left side can be angled up to a 50-degree tilt, while it measures about 31.5 inches wide by 20 inches deep. And the table surface on the right side is much smaller and doesn't tilt. It measures up to 16 inches wide by 20 inches deep. But the distance from the wall is the same for both these surfaces.
When the table is lying flat, you can quickly draw one surface to the other. And when it's tilted, you can keep your drawing equipment and other supplies on the small surface.
Since the surface has a split, it makes this desk useful for only specific purposes. But the width (4 ft) of the entire tabletop is the same as the other desks.
We have kept this table in our list for the distinct split tabletop design, which is preferred by many and will technically work correctly as a drafting table.
What We Like
Height adjustable with a tilting surface for comfort
Unique split design with two separate surfaces
The additional drawing area doubles as a storage space
Perfect for draftsmen and traditional artists
What We Don't Like
Smaller surface lacks a tilting feature
Dimensions: 29.75" x 47.25" x 37.25" | Surface Material: Oak | Max Tilt: 50° | Weight Capacity: 75 lbs | Storage Options: Smaller drawing area on right side | Adjustable Height: Yes
4. OneSpace Craft Station
The OneSpace Craft Station is a versatile and stylish drafting table that serves not only as a workspace for artists, designers, and hobbyists but also adds a touch of elegance to any room.
With its sleek silver finish and sturdy glass top, this drafting table offers a combination of aesthetics and practicality that many users will appreciate.
One of the things that stood out with the OneSpace Craft Station is the durable frame made of heavy-duty steel that ensures excellent stability while working. T
The glass top, despite being sleek and stylish, is much sturdier and thicker than it looks, supporting up to 130 pounds (59 kg) of weight.
This means you can confidently use the drafting table for various projects without worrying about it breaking.
The angle adjustments of the table are easy to make, allowing you to tailor it to your needs and preferences. Additionally, the desk has four casters (two with a locking mechanism), which not only makes it easy to move around but also helps secure it in place when you want it to remain stationary.
The OneSpace Craft Station comes with removable trays and slide-out drawers, which are useful for keeping your tools and materials organized and within easy reach.
These storage options make it convenient to use and maintain a clutter-free workspace.
What We Like
Ideal for a variety of craft and design needs
Easy-to-assemble design
turdy, thick glass top able to support up to 130 pounds
Smooth-rolling casters for easy movement and reliable locking
What We Don't Like
Some users found the table to be unstable
Dimensions: 24" x 41.25" x 31.5" | Surface Material: Glass | Max Tilt: 62.5° | Weight Capacity: 130 lbs | Storage Options: Removable trays and slide-out drawers | Adjustable Height: No
5. Folding Modern Glass Top Adjustable Drafting Table
Are you looking for a sleek and modern drafting table that not only meets your drawing or drafting needs but also adds some style to your workspace? Then, the Folding Modern Glass Top Adjustable Drafting Table might be just what you're looking for!
Similar to the OneSpace model, this table features a glass top and a foldable design but does not come with storage drawers.
The Folding Modern Glass Top Adjustable Drafting Table stands out with its foldable frame that allows users to easily store the table when not in use.
It offers a spacious 35.25” wide and 23.75” deep work surface made of tempered glass that's both stylish and functional.
This drafting table is available in two color options: a maple top with a white base or a white top with a black base.
For those who prefer a pop of color, there is a blue glass model with a silver-finished base.
The heavy-gauge steel frame ensures durability and strength, providing a reliable workspace for your creative needs.
Besides, the table also features some storage options for your art supplies, adding convenience to your work environment.
What We Like
Eye-catching design with blue tempered safety glass as an option
Foldable frame for easy storage
Durable and sturdy heavy-gauge steel construction
What We Don't Like
Fixed height with no adjustment options
Dimensions: 39" x 26" x 7" | Surface Material: Tempered glass | Max Tilt: 35° | Weight Capacity: 50 lbs | Storage Options: Art supplies storage options | Adjustable Height: No
What Is the Best Art Desk?
Art desks are vital tools for both casual and professional artists, offering various characteristics that cater to numerous art methods, storage needs, and the artist's physical comfort. Our compiled table examines the top art desks, assessing their attributes such as dimensions, the material constituting their work surface, tilt capabilities, weight-bearing capacity, storage features, and the availability of adjustable heights. The respective units of measurement for these features are included in the discussion below.
If you're trying to select the best drafting table, then here are a few guidelines that you'll need to know for making the best choice:
Dimensions of the Table
The best drafting table for you should have the right dimensions in terms of height, depth, and width. It also depends on where you want to place the table and the amount of space that is available there to fit it correctly.
You have to focus on the measurements to have a hassle-free shifting process. The table should also come with an appropriate height that will be comfortable for the person who is using the desk.
Storage Options
You should check the number of storage compartments or cabinet drawers that are there on the drafting table. If the unit comes with several storage options, then you need to make sure that the bottom of the table has enough legroom for you.
The size of the compartments should also be taken into consideration, depending on the products that you want to store. The drawers should also be well-secured and simple to open.
The Material
Most of the drafting tables are made up of wood, but there are several that have a glass top. The tables with the glass top have an edgy and luxurious appearance. Irrespective of the type of table you're selecting, it should last you for a reasonable amount of time, so choose wisely!
Eco-friendliness
Finding an eco-friendly drafting table will be an excellent measure to take. This technically means that it should not be constructed with any harmful chemicals that can pose a threat to your office space or your home.
Adjustability
You should consider picking a drafting table that will be easy for you to adjust according to the design. The drawing surface of the drafting tables is generally flexible, except for a few models. You need to ensure that the tabletop does properly when it has been set up.
The height should also be easily adjustable so that both children and adults can use the desk. There are also a few drafting tables that have a dual top design (angled and flat), which you can use at the same time for different tasks.
Paper Size
The dimensions of the drafting table surface should be suitable for your paper size. If you use big paper for your project, then you should consider a drafting table that has a big enough tabletop. Since the paper size is not the same all around the world, so this is a crucial point to consider while selecting your unit.
Purpose
The art desks and drafting tables are used for different careers like engineers, architects, illustrators, animators, and other similar types of artists.
You need to pick the right desk according to the career that you are pursuing at present. For instance, a drafter will benefit from a desk that is backlit and comes with a clear top. Therefore, this serves as a lightbox and a drafting table.
Chair
When you're buying an art desk, you'll find some that have a chair included, while for others, you might have to buy separately. This leads to added expense, which will make you extend your budget.
If you're buying a chair separately, then you have to consider the height of the armrests, if it's applicable. Moreover, there are a few small desks, so you would have to make sure that there is enough space to slide your chair under them.
What is an art desk or drafting table?
An art desk, also known as a drafting table, is a specialized work surface designed for artists, architects, and designers. These tables typically have an adjustable surface that can be angled or tilted to cater to the user’s ergonomic comfort and ease of use while drawing, sketching, or drafting.
Which materials are commonly used for different parts of an art desk?
Art desks feature a variety of materials for the drawing surface, frame, and storage compartments. Commonly, the drawing surface may be made of tempered glass, plywood with a vinyl finish, or particleboard.
The frame and legs are typically made of steel, aluminum, or wood for durability and stability. Storage compartments can include plastic, metal, fabric, or wooden drawers and cubbies.
Is it important to have a tilting feature on an art desk?
A tilting feature helps users adjust the table surface to a comfortable angle according to their needs and preferences. The ability to tilt the drawing surface can provide ergonomic benefits, reducing strain on the neck, shoulders, and back, especially during long working hours.
What is the typical weight capacity of an art desk?
The weight capacity of an art desk depends on its construction and materials, ranging from 50 to 130 pounds or more. When considering a table, pay attention to the manufacturer’s recommended weight limits to ensure that it will safely support your intended use.
Do art desks come with storage and organization options?
Many art desks include built-in storage options such as shelves, cubbies, drawers, and pencil ledges to keep tools and materials organized and within easy reach.
However, storage options can vary significantly from one model to another, so it’s essential to consider your specific organizational needs when choosing an art desk.
How do I choose the right art desk for my specific needs?
When selecting an art desk, consider factors such as desk size, space available in your room, materials, weight capacity, tilting range, storage options, and price.
Assess your specific needs and select a desk that meets your requirements while offering a comfortable and versatile workspace.
With an excellent art desk or drafting table, you'll have no problem painting, drafting, drawing, crafting, and doing everything that pertains to your trade. However, you'll find a variety of options to choose from when you consider the design and material.
You need to patiently review the features to see a unit that will suit your needs, and it should give you excellent comfort, grip, perspective, and secure work.
For those who appreciate a unique design that caters to traditional artists and draftsmen, the Safco Split Level Drafting Table is the right choice.
By considering these options, we're confident that you'll find the perfect art desk or drafting table for your unique creative needs.
Remember that your workspace is a reflection of your artistic world, so choose a product that inspires and excites you to work on your next masterpiece.
Happy creating!
A quiet generator is specifically engineered to maintain noise levels under 60 decibels, making it ideal for use in residential neighborhoods, RV parks, and campsites where sound restrictions apply. In the 3000-watt power class, the quietest models are typically inverter generators, which operate at variable engine speeds and incorporate advanced muffler systems, insulated enclosures, and low-vibration frames to reduce acoustic output. These generators are capable of powering essential appliances and sensitive electronics with low total harmonic distortion (THD) while operating at noise levels equivalent to normal conversation. Models from leading manufacturers such as Honda, Yamaha, and Champion have achieved acoustic ratings as low as 50–57 decibels at partial load—making them standouts in the category of quietest 3000-watt generators. This level of sound suppression is critical for users who prioritize both performance and discretion in portable power. Whether you're preparing for a power outage or embarking on a remote RV trip, choosing a low-noise generator ensures reliable electricity without compromising peace and quiet.
Listed below are the 5 best Quietest 3000 Watt Generators for RV and Home Use from our list:
Generac GP3000i. Generac GP3000i is one of the most compact and powerful 3000-watt generators. Its stand-out features include PowerRush technology, which provides increased starting capacity, and it can safely power electronic devices due to its Truepower feature. On the downside, it may struggle when connected to multiple large loads simultaneously.
WEN 56380i-RV. The WEN 56310i stands out for its extreme portability and incredibly quiet operation. A major advantage of this unit is the pairing ability that allows for the connection of multiple units to generate more power. One semi-disadvantage is its relatively small fuel tank that may require frequent refilling.
Champion 3800 Watt Generator. The Champion 3800 stands out with its dual-fuel operation, allowing it to run on both gas and propane, alongside an impressive 4750-watt starting power. This makes it perfect for longer trips. One downside is its noticeably higher noise level compared to other models.
Yamaha EF3000iS. Yamaha EF3000iS is known for its sound-absorbing technology that enables quiet operation. Among its main advantages are a steady 3000-watt power, long-lasting operation time, and automatic adjustment to the power requirements of connected devices. However, it only accommodates 120V outputs and does not provide an electric start.
Westinghouse WGen3600 Portable Generator. The Westinghouse WGen3600 stands out for its cost-effectiveness. The 4-gallon fuel tank of the WGen3600 promises up to 18 hours of running time, and it has separate power outlets for home and RV use. One of its main disadvantages is its substantial weight, making it harder to move around.
1. Generac GP3000i
We kick off our list with the GP3000i from Generac, one of the most portable options available when it comes to 3000-watt generators. Handy, powerful, and amazingly quiet, this is one device that can fulfill all your power needs without breaking a sweat or making a sound.
Who doesn’t like a winner? That’s exactly what we found in the GP3000i, the very first time we tested it out. Lightweight, portable, and with a durable build, this inverter generator gives you one of the most powerful yet quiet operations possible.
Very few generators offer the compactness and power that the GP3000i provides. And the ability to connect two generators makes for a more significant power source. This might come in handy for larger households with higher consumption requirements.
Also, the PowerRush technology is noteworthy, as it delivers fifty percent more starting capacity. This makes it useful in situations that demand higher initial power. Along with that, the device even comes with the Truepower feature, which provides clean, spikeless power for electronics.
Finally, we were wowed to see that the device is USB-ready, which means one can directly charge electronics using the generator. A great blend of power and portability, this one is worth the money.
The price point, obviously, is a bit too high as far as generators of this class are concerned. Another worrying aspect of the product is that it sometimes struggles to deliver the required power to multiple large loads connected simultaneously.
What We Like
Lightweight and portable design
Silent inverter technology
Truepower feature for electronic devices
Durable build
What We Don't Like
A high price tag
Struggles with larger loads
Wattage: 3000 | Engine Type: 4 Stroke | Running Wattage: 2200 | Fuel Type: Gasoline | Tank Volume: 5 Gal | Voltage: 120 | Dimensions: 13.3 x 18.4 x 22.2" | Weight: 59.5 lbs
2. WEN 56380i-RV
Perfect for use in RVs, the WEN 56310i can also come in handy for domestic settings. Although it isn’t exactly the most powerful generator at this price, it still has several nifty features that can make you go wow. Absolutely portable and entirely noiseless, this product speaks for itself, albeit quietly.
Though not the most powerful, and decidedly not the cheapest option, this product is on our list for the host of other features that it boasts of.
The very first thing that we noticed about the product was its extreme portability. Due to this, it’s perfect for taking on long road trips. In fact, at just about 80 pounds, this is one of the lightest generators in its class.
Adding to the portability is the wheel kit, which makes it simple to move it around from place to place. The compact design ensures that it doesn’t take up unnecessary space, thus making it perfect for storing anywhere.
The next point that impressed us was the extremely quiet operation of the product. The generator produces at most 55 to 60 decibels of noise while in operation. This makes the sound barely perceptible.
Another great feature of the device is the pairing ability, which allows multiple units to be connected to produce greater power. This may be required in situations that demand greater load-bearing capacities.
Reliable, RV-ready, and providing clean power, this is a product that any homeowner would be proud to use.
The only flaws we noticed were that the fuel tank is a bit small and needs frequent refilling, and the outer casing of the generator is not very durable. These apart, there’s nothing that’s considerably wrong with the device.
What We Like
Produces clean power
Super quiet operation
Lightweight and portable design
Surge protection included
What We Don't Like
Relatively small fuel tank
Wattage: 3800 | Engine Type: 4 Stroke | Running Wattage: 3400 | Fuel Type: Gasoline | Tank Volume: 2.2 Gal | Voltage: 120 | Dimensions: 23.2 x 18 x 20.1" | Weight: 99.2 lbs
3. Champion 3800 Watt Generator
A real winner from the house of Champion Power Equipment, this generator packs in a bit more power than our 3000-watt threshold. With a plethora of features that make it a must-buy, this product occupies one of the most prominent positions in the world of quiet generators.
Champion has years of experience delivering quality products to its customers, and this model stays true to the promise of the brand. Completely RV-ready with electric start technology, this generator certainly has us in thrall.
The most distinctive feature of this product is the dual-fuel operation, which allows the 224cc engine to run on gas as well as propane. This gives you the freedom to choose the fuel type as per your needs and availability.
The product provides a starting wattage of 4750 Watts, which is massive. This is complemented by the 3800 Watts running power and over nine hours of operation time. For this reason alone, the device is perfect for long road trips.
Other noteworthy aspects of the device include a touch-start, a 3.4-gallon fuel tank, and a cold-resistant design. Plus, the entire arrangement is ultra-portable and has a premium look and feel. All things considered, a perfect bang for the buck.
With so many features packed in under the hood, it’s no wonder that the device is a bit on the heavier side. Also, the maximum noise level is 68 dBA, which is higher than that of the previous models.
What We Like
Runs on gas as well as propane
Reliable 224cc engine
Volt Guard protection from power surges
Longer running times
What We Don't Like
Slightly heavy device
Marginally higher noise levels
Wattage: 4750 | Engine Type: 4 Stroke | Running Wattage: 3800 | Fuel Type: Gasoline / Propane | Tank Volume: 3.4 Gal | Voltage: 120 | Dimensions: 26.3 x 22.9 x 24.8" | Weight: 119 lbs
4. Yamaha EF3000iS
We’ve already introduced you to Honda, and now we bring forth the EF3000iS from Yamaha, another Japanese giant in the generator space. This particular model is especially known for its sound-absorbing technology that enables it to operate without emitting significant noise. But that’s not the only thing it’s packing under the hood.
Yamaha products are known the world over for their resilience and durable operation, and this generator is no exception. Extremely quiet, unbelievably portable, and powerful, the EF3000iS makes sure that you get more for the money.
We were particularly taken in by the smart use of sound-absorbing materials in key locations throughout the generator. This reduces resonant noise, enables much quieter operation, and presents you with exactly the correct inverter generator.
The motor itself is commendable for delivering a steady 3000-watt power straight off the bat. It even has the provision of providing 500 Watts of extra power for 10 seconds. This increases the versatility of the product.
With a 4-stroke Yamaha engine that’s EPA-certified and a 3.4-gallon fuel tank, this device provides up to 19 hours of uninterrupted service at a 25% load. It even automatically adjusts to the power requirements of any connected device. Smart, efficient, and quiet, this is a product that you can’t miss.
Despite the rather impressive feature set, two points stick out like sore thumbs. First, the product has only 120V outputs, and this limits its usability somewhat. Second, the product doesn’t come with an electric start.
There’s a misconception that good generators don’t come cheap, and the WGen3600 from Westinghouse is here to break that mold. Offering 3600 Watts running and 4650 Watts peak power, this is a product that is at once affordable, efficient, and easy to use. We urge you not to take our word for it and judge for yourselves.
As far as power is concerned, the WGen3600 is a clear winner in its category, as we’ve already seen. Coming to the fuel tank, this beast boasts of a massive 4-gallon fuel tank that promises up to 18 hours of running time.
Another exciting feature of the device is that it incorporates separate receptacles for household and RV use. This speaks to the versatility of the product. What’s more, every power outlet is equipped with insulated covers for extra safety.
As for the sound levels, at 69 dBA, the noise is slightly higher than imperceptible, but not enough to draw significant attention. Also, the product is low on maintenance and ensures that your generator is ready to serve you at all times. In short, a prize pick.
It’s hard to find cons in such a well-made device, but still, one thing that we did notice was the weight of the product. At 107 pounds, the device is quite hefty and requires significant effort to move around. Apart from that, there’s nothing to complain about.
What We Like
Extended running time
Quick and easy maintenance
Multiple power outlets
EPA and CARB-compliant
What We Don't Like
Rather heavy product
Wattage: 4650 | Engine Type: 4 Stroke | Running Wattage: 3600 | Fuel Type: Gasoline | Tank Volume: 4 Gal | Voltage: 120 | Dimensions: 26.4 x 17.9 x 18.5" | Weight: 105 lbs
6. Champion 3500 Watt RV-Ready Portable Generator
Another quality product from the house of Champion Power Equipment, the 3500-watt RV-ready portable generator has been designed with your safety in mind. Reliable, powerful, and quiet, this generator makes sure you can use it at home and in the wilderness without disturbing the peace and quiet of your neighbors.
If versatility and power are what you are looking for, then this is the product for you. This Champion product is equipped with a 196cc engine that allows the user to enjoy up to 12 hours of run time at 50% load.
What’s more, with a noise level of merely 68 dBA, this device is quieter than any generator. So whether you’re resting at home or taking a road trip in your RV, this can be your constant companion and a reliable power source.
But the most arresting features of this device are in the area of safety. The product comes with a low-oil shut-off sensor that ensures that the oil reserves of the device are not entirely depleted. The Volt Guard Feature prevents overloads, thus ensuring the safety of your sensitive devices.
To top it all off, the device even comes with a three-year limited warranty and lifetime tech support, which translates to complete peace of mind. And all this is available at an extremely affordable price.
There are no wheels! Yes, you heard us right, this device does not have any wheels that can be used to transport it from one place to another easily. Considering the nearly 100-pound weight of the device, this can pose serious problems.
What We Like
Advanced safety features
Rugged and durable steel frame
Volt Guard and Intelligauge system
Up to 12 hours of run time
What We Don't Like
Doesn’t have transportation wheels
Wattage: 4375 | Engine Type: 4 Stroke | Running Wattage: 3500 | Fuel Type: Gasoline | Tank Volume: 4.8 Gal | Voltage: 120 | Dimensions: 23.2 x 18.5 x 19.9" | Weight: 103.4 lbs
7. Honda EU3000IS1A 3000 Watt Inverter Generator
The EU3000IS is another popular model from Honda, the Japanese generator giant we’ve already mentioned once. With the ability to run a plethora of appliances from furnaces to air conditioners, this device is a good match for any home or RV.
Whether you’re planning to cook up dinner in the microwave or are ready to relax with your buddies in front of the TV, this generator has your back. We were pleasantly surprised by the wide range of devices that this product can support.
Now, let’s come to the quiet part. The EU3000IS operates at extremely low sound levels of 49 to 58 dBA, which means it emits less noise than a low-sound conversation. This makes the devices a perfect match for situations that demand peace.
Plus, the product is extremely fuel-efficient, with a run time of up to 20 hours on 3.4 gallons of gas. This gives it one of the longest running times in its range. So, you can easily turn it on at night and go to sleep, no worries there.
Finally, we need to mention the inverter technology that helps to provide safe and reliable power for computers and other sensitive electronic devices. Plus, the oil alert feature ensures that the device is automatically shut off when fuel levels are low.
At 144 pounds, this is one of the heaviest models on our list. This means you’ll have to expend significant effort to transport this monster from place to place. But as we all know, no pain, no gain.
What We Like
Long run time of up to 20 hours
Perfect for sensitive equipment
Super quiet and fuel-efficient
What We Don't Like
Rather heavy machine
Wattage: 3000 | Engine Type: 4 Stroke | Running Wattage: 2800 | Fuel Type: Gasoline | Tank Volume: 3.4 Gal | Voltage: 120 | Dimensions: 25.9 x 17.6 x 22" | Weight: 131 lbs
What is the Quietest 3000-watt Generator?
Presented below is a comparison table specifically framed to spotlight the essential components of the premium quiet 3000-watt generators on the market. The table reviews elements such as wattage, engine type, running wattage, fuel type, tank volume, voltage, dimensions, and weight.
The place where you are going to use your generator is going to play a significant role in the choice. Usually, most 3000-watt generators for RV use are portable and lightweight. Still, the following distinctions must be maintained.
For home use, you can stick with a heavier model; at least you won’t have to take it out of the house. For camping and RV trips, however, go with a lighter build, preferably with trolley wheels that facilitate easy transportation.
Runtime Considerations
This is the next factor to consider when choosing a portable generator. Generator runtimes are usually specified in terms of hours at a quarter load and a full fuel tank. Therefore, based on the kind of load that you plan to use with the generator, the runtime will vary.
To make sure that you have enough fuel for the entire duration, you’ll need to perform some quick wattage calculations before taking the generator for a ride. Hence, before buying, make sure to keep those calculations in mind.
Noise Levels
All the generators in our list are quieter models, but still, there are variations among them as well. Be sure to check the decibel ratings of the generator that you are planning to buy. Also, if you’re purchasing the generator for an outdoor trip, make sure to check out the regulations regarding noise for the campsite you’re planning on. This should play a major role in the choice of the device.
Warranty And After-Sales
The warranty of any product is a reflection of the faith that a particular business has in its products. Plus, it makes sense to buy a product that has an extra cover. So when selecting a generator, make sure you go with one that has an extended warranty and a reputation for excellent after-sales service.
Durability And Reliability
When choosing the right generator, it’s best to go with one that has a sturdy build. Generators are heavy-duty instruments, and it makes sense to buy one that can withstand regular wear and tear. Plus, a durable device offers greater longevity, and that’s something everyone wants from their device.
Type Of Fuel
Generators need fuel, and the type of fuel often determines the efficiency of the device. Most generators run on either gasoline or propane. And then there are hybrid models such as the Champion 3800, which boasts of dual-fuel technology.
Safety Features
All things said and done, a generator is an electrical device, and with any electrical equipment, there remains a risk of hazards. So, before buying a generator, it’s best to check out the safety ratings and ensure that it complies with all the safety norms and regulations laid down by the authorities.
Another safety feature to keep in mind is the low-fuel shutdown mode. This is essential for the device’s safety in case the fuel runs too low.
Motor Power
The motor is the heart of the generator, so take extra care when choosing the right motor type. Usually, portable generator-motor powers range from 2000 to 5000 watts, with higher ratings meaning higher performance. On our list, we have kept to the 3000-watt range to ensure portability.
Budget
Finally, we come to the money matters. While budget is always a big consideration in any purchase, when it comes to generators, more expensive doesn’t always mean better. Many affordable generators provide commendable performances. So consider all the factors carefully, and choose the one that’s best for you.
How quiet are these generators compared to others?
Quietest 3000-watt generators are designed to operate at a noise level of around 50-65 decibels, which is relatively quiet, making them suitable for campgrounds and residential areas.
What can I run with a 3000-watt generator?
A 3000-watt generator can power various appliances simultaneously, including lights, a refrigerator, a microwave, a TV, and some smaller appliances, making it suitable for basic RV or home needs.
Can a 3000-watt generator run an air conditioner?
It depends on the type and capacity of the air conditioner. A 3000-watt generator may be able to power a small window or portable air conditioner, but larger central air conditioning units typically require a more powerful generator.
How long will a 3000-watt generator run on a full tank of gas?
The run-time of a 3000-watt generator on a full tank of gas varies depending on the specific model and load. On average, it can run for approximately 7-9 hours at 50% load.
Can I parallel two 3000-watt generators for more power?
Yes, many 3000-watt generators come with parallel capabilities, allowing you to connect two generators for increased power output.
Are these generators suitable for sensitive electronic devices?
Yes, most modern 3000-watt generators provide stable and clean power, making them safe for sensitive electronics like laptops, smartphones, and TVs.
What safety features should I look for in a 3000-watt generator?
Important safety features include low-oil shutoff, overload protection, and GFCI outlets. These help protect both the generator and connected appliances.
Can I use a 3000-watt generator in an RV park or campground?
Yes, a 3000-watt generator is generally suitable for RV parks and campgrounds due to its relatively low noise levels and sufficient power for basic RV needs.
How should I maintain and store my 3000-watt generator?
Regular maintenance includes checking oil levels, cleaning air filters, and inspecting spark plugs. When storing, ensure it's in a cool, dry place and follow the manufacturer's guidelines.
Conclusion
Selecting the quietest 3000-watt generator demands precision in evaluating both acoustic performance and electrical stability. Inverter generators in this class are engineered for low-noise output—typically under 60 decibels—while offering clean power suitable for sensitive devices and small to medium household loads. High-performance models such as the Honda EU3000iS and Yamaha EF3000iS deliver exceptional sound attenuation and runtime efficiency, making them ideal for RV parks, residential use, or off-grid deployments. For more portable or cost-conscious needs, units like the Westinghouse WGen3600 or Generac GP3000i offer excellent decibel control and ease of transport. If your power demands exceed this category, consider scaling to larger, low-noise systems. Explore our expert-curated reviews of the quietest 4000-watt generators, quiet 5000-watt models, or our definitive guide to the best whole-house generators for continuous backup power solutions. Prioritize not just wattage—but silence, reliability, and environmental suitability.
Squarespace templates for architects are professionally designed, fully responsive website themes specifically tailored to showcase architectural portfolios, project documentation, and studio branding. These templates are widely used by licensed architects, interior designers, landscape architects, and residential or commercial decorators looking to establish a compelling digital presence without relying on custom development. By combining visual storytelling with clean typographic systems, Squarespace offers templates that support project galleries, service listings, contact forms, integrated blogs, and eCommerce modules—all optimized for mobile UX and SEO best practices. For professionals operating in competitive urban markets or targeting clients in the real estate development, hospitality, or luxury renovation sectors, a purpose-built Squarespace site can differentiate their practice with stunning visuals and intuitive navigation. Whether you're an emerging studio needing a minimal layout like Bergen or an established design firm seeking high-conversion landing pages via Brine, the right template balances aesthetic impact with functional clarity. In this guide, we’ve curated the top Squarespace templates for architecture and design professionals who want to build a fast-loading, visually immersive, and client-friendly website that reflects their creative ethos.
One of the ideal Squarespace templates for architects is Ventura, with its simple and clean design. Its landing page has a shop page and a subscribing option for periodical newsletters and updates.
The About and Contact sections also have a simple design, making it a good option for an interior design company or architecture firms alike. Also, black fonts are used on a white background as the default design to give the website a professional look.
Next, we have an excellent template for interior designers and artists called Bergen. But architects can also use it to increase their business reach and attract potential clients. If you want to create your own website for showcasing the best works of your company, this template is a good place to start.
While the elegant black and white palettes allow the images to shine on the website, the clear design allows visitors to find the menus easily.
Utica is one of the best templates for an architecture firm, a visual artist, and an interior design firm. Even Real estate agents can use the spacious template to display homes and flats. Out of all the Squarespace options, this template features a straightforward landing page with images on the focal point.
Additionally, the simple design effectively showcases the company's portfolio and past projects, while the homepage has a Modern design and layout. Customizations with this template are a breeze, and the color palette can be adjusted to suit your requirements.
Another Squarespace template that focuses on the visual elements of the landing page is Mark Novo. Arguably, one can say that this template has the ideal web design for graphic designers and artists. However, Mark Novo could also be the perfect building platform for budding architects.
Since it is clean and professional, it is ideal for portraying new ideas and creative designs for clients. Compared to WordPress, the site built with this template gives an impressively large frame to display branding styles and colors. You can add six of your best works on the home page and add the rest in the Work section.
When talking about an architecture website template, the images should take center stage. And this template features a sizable platform for viewing your architectural pictures with the best clarity.
Additionally, the layout includes a button for scheduling appointments for your business, making it easier to promote your services. With this dynamic portfolio template, you can build an online presence and draw in prospective clients. You can also link to social media handles with the inbuilt buttons on the top right corner of the page.
What makes this Squarespace template stunning is its gallery, which is built specifically to display artworks, designs, and photographs. Of course, as a website for architecture, you can modify the images to add your own work. But the detail of leaving no gaps between photos makes for a bold and creative layout.
Furthermore, the About and Home pages have a professional look, suitable for an interior designer. Adding to that, it has a no-frills responsive design to inform the readers about your company in brief.
Creating your own website does not have to be a tedious task. With the correct Squarespace template, it is possible to build a creative portfolio for architecture and interior design. Pazari allows you to segregate various projects while retaining the visual element on the home page.
Moreover, there are only two buttons - Contact and Work, simplifying the pages and giving the portfolio a modern look. Of course, like all templates, this option can be tweaked to add a personal touch with fonts, images, and other tiny details.
Another template that features on the Squarespace website is Craig Classon, which is an image-focused design. Actually, this layout is meant to be for painters and artists, but the three large image sections are ideal for an architecture-based design too. It has three buttons - All Prints, Process, and About, which you can modify into samples or use the space to offer services.
And the best part is you get professional designs for small businesses and personal brands without hiring expensive website designers.
Website templates come in all types of forms imaginable, and Sackett might be an option for a site about architecture. This Squarespace template has a full-screen image on the first page with white font and an orange "Book A Consultation" button. Depending on your business, brand, and the website image you wish to portray online, a few changes might be required.
Besides, there is a Gallery button to which the architecture or interior design portfolio can be added. Squarespace templates like this one are pretty flexible and help you create a customized version of the template provided. Often, the final website may not even look remotely like the original template.
If you are interested in a clean and minimalistic design with a few meaningful writing pieces on the landing page, then Barbosa should interest you. The reader will first see the brand name and a few words describing your company. A full-screen image is just one scroll away.
Also, it has dedicated sections for About, Photos, and Amenities with large photos to complement each section. The default template has a dark gray background and white font, but you can select any color and font of your choice.
Those of you who would prefer a minimal portfolio with simple features should enjoy creating a site on Beaumont. This website template by Squarespace is modern and clean while featuring large images with a white background. Initially, this web design was created for photographers, but architects can also showcase their work online and promote services.
The template is only a beginning point, and unlike WordPress, Squarespace offers a variety of customization options across pages.
Different people have different reasons to create a full-fledged site. Brine is an unconventional Squarespace template for architecture, but here's how you can make it work for your business. First of all, Brine is a food product website template, but the pages have substantial image spaces where you can conveniently fit your architectural designs.
Additionally, it has a blog button that you can use to direct people to architecture-related blogs. You can permanently remove the shop and cart buttons without the help of any web designers. Also, the front page changes images if you hover over it.
Sarah Minetta or Minetta is an unpretentious website template that would work best with photography, art, and architecture themes. On the Squarespace website, this template is found in the photography section, and it seems to be based on food photography. But, it's clean and large picture sections with a black background can be used as an online portfolio with plenty of relevant images on the homepage.
Moreover, it has Work, About, Contact, and social media buttons that can translate to suit any online business or service.
Many website templates by Squarespace are image-based and art and photography-centered. One such template is Talva, which features 15 photographs on the first page. With the blog option, it is possible to create unique written pieces about your niche subject and business.
Apart from that, the template design is modern, clean, and minimalistic, with a pure white background that gives the images prominence. An architecture-themed portfolio and website can easily mold into this template.
Grove is yet another template you can use for an artistic and designer portfolio. This option does not heavily rely on images, even though it has three large images on the first page. It's ideal for an architect or a team of professionals who want to blog regularly.
With Squarespace templates, you can customize and design the website as you please. And this template is no different, so you can use these to add or remove features whenever you want. Finally, it has three main buttons - Blog, Gallery, and About sections.
16. James Balboa
Image Source
Another website template that has the right features for creating an architecture-based page is James Balboa. Its pages are composed of a simple white background that creates a contrast with the clear black font. The top portion of this template consists of a brand introduction, which you can edit as per your preference.
As you scroll down, there are sections of images in rectangular and square shapes. Each section consists of three to four images, each of which belongs to a different project. However, these design templates are changeable, and you can modify the details easily. The Work button drops down to further options when hovered upon.
If you want the images to catch the viewer's eye, then Nevins might be one of the website templates you should consider. With its uncluttered design complemented by the clear white background, this template stands out due to its pure simplicity.
Furthermore, each image clicks to open a different page, which means you can share snippets of all your projects on the first page. The template has a Work, Blog, and Contact button along with social media links on the top right side of the page.
Conclusion
Selecting the best Squarespace templates for architects and interior designers is a foundational step toward building a high-impact digital presence that conveys design expertise, credibility, and aesthetic sensibility. Whether you're an architecture firm showcasing large-scale urban developments or an interior decorator presenting curated residential spaces, the ideal template should combine visual storytelling with performance-driven structure. Look for templates that support full-bleed image galleries, mobile optimization, seamless navigation, and customizable layouts that adapt to your branding needs. Templates like Ventura, Bergen, or Brine not only highlight your portfolio with elegance but also facilitate better client engagement through contact forms, service pages, and integrated social proof.
A strong architecture website demands more than a pretty interface—it must reflect professional authority and scale with your practice. For a broader perspective and even more refined options, explore this curated selection of Squarespace themes for architects, optimized for performance, SEO, and visual impact.
In the end, your website should act as both a portfolio and a business tool—strategically designed to attract, inform, and convert. With the right template, your online presence becomes an extension of your architectural vision and client-focused ethos.
DIY tree house plans, also known as treehouse plans or tree house plans, bring childhood imagination—and adult relaxation—into your backyard. Whether you're dreaming of a cozy reading nook among the branches, a pirate-themed fort, or a full-fledged off-grid cabin, these 37 thoughtfully designed plans offer something for every builder's skill level. From minimalist decks to detailed cottages perched in trees, each plan balances safety, creativity, and ease of construction—making the magic of a homemade tree house both accessible and memorable for families, friends, and future generations.
This very easy and simple tree house blends in perfectly with the surrounding trees. Hanging a tyre swing under the tree house can add more to the simplicity of it. You can even decorate the place as you wish; fairy lights, hanging lamps, hanging potted plants and so much more. Safety is recommended for kids as it is open from all sides. You may use foam pads on the ground to cushion your child's landing and reduce injuries.
If you want to learn the basics of how-tos for a tree house, these plans are your friend. These plans have all the tips and tricks to help you make a simple tree house with a deck. However, this guide lacks the visual step-by-step tutorial of the techniques, so you might have to take a little more effort into building a perfect tree house.
Here we have another easy-to-understand instruction guide to build a simple tree house. This guide has tips to make your tree house stronger and more durable. Give your kids a tree house to enjoy through their childhood and their teenage years.
This tree house can be a small yet quaint place to hang out in the woods. It can be a clubhouse for adults or a playhouse for kids. Adding a pop of color can make it stand out from the trees. Bright pastel colors can bring freshness to an otherwise monotonous tree house.
Give it a personal touch by painting brightly shaped geometric or abstract shapes. Alternatively, just let the kids have fun with paints and paintbrushes. Finger painting and palm painting is a simple and fun activities, so let your children contribute to their play area.
This basic tree house has a simple lean-to roof and four walls. The room is small, so it's not appropriate for adults. The small seating space outside the room lets your kids sit around dangling their legs. It's high enough to have fun, but not so high to cause accidents.
You can cover up the monotonous look of the tree house by painting it with bright, peppy colors. Adding mattresses and pillows inside can make it even more comfortable.
A Medium-sized Tree House
This tree house is not huge, but not small either. It's a perfect fun-sized tree house for your kids for outdoor playtime. It has a room and a small deck, with a sturdy roof. Storing toys and games won't be an issue. So if you're looking for a more economical tree house, you would love this. Introduce fairy lights to the tree house, both inside and outside, to give it a comfortable, homely look. Warm white lights can even be used for reading purposes.
A minimalist approach to building a tree house from picket fences. Minimalist structures are the in-thing. Most modern design elements these days go for a very minimalist look. It basically utilizes a very concise and precise methodology for its design, which, even though simple, looks charming.
It may be covered from two, three, or four sides as per your liking, along with a deck. It can be an open type of tree deck and can be used by the kids to play around, or by an adult to just get away with a book and a mug of hot coffee.
This treehouse is similar to a tree deck, but smaller, mostly for children. It's a very basic construction project for carpentry beginners so if your kids have been insistent on having a tree house, you don't have to fret about detailed, fancy, and time-consuming efforts anymore. This simple treehouse is quite achievable with these easy instructions. But, if you feel the simplicity is a little off-putting to your artistic sensibilities, then you can add movable elements in the house, like fancy little furniture and decor that will make it stand out. Adding fairy lights and other light-based decorations would bring life to the set up too.
If you wish to build a tree house for your kids similar to the one you had in your childhood, this is the pattern you're looking for. Bring back the trend of traditional tree houses with the A-Frame Tree House, equipped with a deck on one side, pulleys and ladders. I personally love A-frame designs.
Be it in chairs, swings, houses, vaulted ceilings, or in a tree house. It brings a more imposing appearance while also calling back to olden times. This compact design can fit well into your backyard too.
This idea is brilliant for a small or medium-sized tree house serving as a hideaway for your kids. It follows the A-Frame construction technique with some open flaps from the side for sunlight and breeze. The rooftop is strong and sturdy, so the tree house is good for playing or napping. It's not covered entirely, so using it in harsh rains or snow is not recommended.
Unlike the simple tree house guides from above, this guide has detailed instructions for building a good tree house. For your convenience, it also has visual aids for every step. You can associate tips and tricks from both guides and build an amazing tree house right in your backyard. Beginners might feel lost with the instructions, but it's easy to comprehend once you start catching up with the procedures.
These plans are for a more elaborate tree house, for more experienced carpenters. The dimensions are quite accurately represented and easy to understand. The tree house consists of a deck with handrails and stair steps, so it's safe for your kids to play. It also comes with a swing and a slide, which adds to the charm.
This very basic and step-by-step plan essentially eases your tree house-building endeavor. This detailed diagrammatic illustration of a tree house with proper dimensions will make it simpler for you to construct. It is not as detail-oriented as photographic visual aids from most instruction guides, but it's still helpful. It's a simple hoist on a large primary beam with supporting beams on the side.
The Wood-Sided Tree House
This traditional tree house design uses the tree as the main support. The actual room is built around the tree trunk with wooden planks and hoisted to the tree itself. It's a completely covered room with a deck and has a small opening with a suspended ladder.
You can probably go with different ladder designs to make the entrance to your tree house look a little more special. Nailing a few fun boards to the trunk around the ladder will bring a peppy appeal. You can accessorize it with swings and toys for your kids.
The Tree Deck
If you want a big spacious tree house in the woods, this idea is quite a catch. You can have a sturdy wooden deck installed between a cluster of trees, in a desired polygonal shape. This will not have a roof, so you cannot store your stuff out in the open. You can even put a rope ladder at the entrance, or modify it into a regular wooden one.
Kids and adults can relax in the tree deck under the lush natural canopy of trees. It's a great site for mini camp-outs, where you can put tents for the night and enjoy slumber parties. You may even hang a hammock and take a peaceful afternoon nap under the trees.
Another economic idea for a tree deck that you might be planning to build yourself. This deck uses the tree as a primary support, with beams to support the corners. Equipped with a strong ladder, but without a roof, this tree deck is an amazing place to hang out on summer afternoons or autumn evenings. Kids will love to play around on this spacious deck, while adults can hang out during small gatherings and parties.
This tree house with a deck can grant you a view of the woods from all sides. This hangout place is small but comfortable for kids and adults alike. With a deck, you can basically add a number of small decorative furniture pieces for that extra appeal and perhaps go for more rustic designs to complement the tree house. So add some adventure to your outdoor parties with this amazing tree house.
As the name suggests, this tree house is similar to a tree deck but smaller and higher. It can be built using the support of two or more trees, with size varying accordingly. The frame for the tree house is a simple cubicle with a roof. The roof can be made using a wooden mesh, and it can be modified for shade with a tarp or some makeshift roofing material.
The walls can be covered with jute or straw lattice for partial privacy. It is perfect for mild sunbathing or having some time for yourself. Since it's an open tree house, it does not protect from harsh weather.
You can build a tree house in the woods right next to your camping site and make your kids feel right at home. Give hiking and fishing a pass, and unwind in this very private, woody tree house with your kids. You can cozy up with blankets and hot cocoa under starry skies and fresh air. Bring a stack of varied storybooks and novels for both kids and adults. A musical jukebox can add to the atmosphere. An adventure for sure!
Give your tree house a refreshing new look by building it like a mountain cabin. Everybody loves a cabin in the woods, and this love usually starts pretty early. So, even if you didn’t have the opportunity to experience a cabin in the woods feeling, your kids definitely can, and perhaps you can with them.
You may build it at a higher elevation and with large windows for plenty of sunlight. You may add a skylight for natural illumination. Let your children's playtime resemble the adventure of camping in a cabin in the woods.
This funny design for your tree house is one of a kind. It's a small, quaint place for the kids to play around in, or for the adults to sit back and relax. The Tree Pod is not very high from the ground and has curved edges to reduce injuries. However, it seems difficult for the Pod to withstand rough and hyperactivity. But, if you are careful and looking to be more laid back, then this tree pod design is perfect.
If your kids prefer being away from the public when they play, you can build a tree house secluded from the public areas around your house. You can hide the tree house behind a lush branch of the tree to provide a natural cover. It's a place where your children can play or study in peace, without being disturbed. Safety and supervision by parents are recommended.
This is a fancy clubhouse your children can use as a play area. It is a simple tree house built on a deck, with a roof but without walls. The beams can be covered with curtains instead, giving it a very homely look. You can also add small chairs, toys, books, and slides to this secret hideaway.
Perhaps, you can add some innovative decor to the interiors and create a more adventurous interior for kids to feel like they have escaped to some unique place. A little splash of colors on the inside and it will look straight out of a catalog.
This basic garden clubhouse is an easy DIY product, which kids and adults can use. Built not very high from the ground, this house has three walls with curtains and a gable roof. You can decorate the place around the tree house with potted plants, flowers, and vines and store toys and books inside. The best thing about this garden clubhouse is that you don't even need a tree to build it upon.
This simple DIY project is a small cubicle you can build in your backyard. Constructed at minimal height, this place is a perfect clubhouse for kids. It has a glass roof so kids can look at the raindrops without getting drenched. Adding fun colors to it can bring charm to your small and cozy cubicle. It's a good play area for children, suitable for all seasons.
This minimalist approach to building a tree house is quite achievable. Simple in looks, yet charming and cozy. The windows are large enough to let in cool summer breeze and lots of sunlight. Making the tree house compact can add to its strength and make it durable for playing kids.
Play forts are a favorite among kids of all ages. A perfect hideout for kids playing outdoors, this tree house has four walls and a hoisted tarp blending in with the trees. You can accessorize the tree house by attaching a pulley and a basket for charm and fun.
Painting the exterior with a camouflage pattern, making holes in the sides, and attaching water guns will make it exciting for the kids to play. And if you want more of a Disney world theme for the house, you can paint sigils with your kids on linen or silk cloth, cut them into shapes of banners, attach wooden or steel rods to the banners to hang them, and hammer some nails in the tree house.
Include a few prop swords and shields and papier mache creatures, light it up with fancy lights, and some heroic adventure music, and your kids have the perfect medieval fort house to play make-believe in.
Bring a feeling of sailing through the seven seas with this nifty tree house idea. The exterior decor and accessories imitating an old ship will bring out the inner pirate in you. You can easily shape the tree house in the form of a boat with some easy guidelines.
Vintage pirate accessories like lamps and hats are available in most stores. Decorating the interior with small ships, treasure chests full of toys, and steering wheels will certainly add more to the theme. Construct a simple periscope or attach a telescope for some stargazing. Ahoy!
A thematic tree house, inspired by childhood stories like Winnie the Pooh, is something every child would love. This tree house is spacious and large, with tiny abstract windows, rope railings, an extra landing, and a dethatched roof. These additions add to the fantastical aesthetics and make it seem like a fairyland right there in your backyard.
Add a pulley or modify your ladder with a spiral staircase for extra charm. Include a small library of storybooks that go with the theme and some toys. The interior decor itself can be tweaked in accordance with a fantasy theme you or your kids are aiming for.
For example, if you have more than one sturdy tree in your backyard and an ample budget, you can construct a couple or more tree houses, and connect them with bridges in the style of Lothlorien from The Lord of the Rings. You can run a Star Wars theme for the kids with small stuffed Ewoks on the branches. The possibilities are endless.
How about an obstacle race to the tree house? Build a fun and challenging obstacle course for your kids by adding a rock-climbing wall, rope swings, or rope ladders. Encourage your tiny ninjas to take this adventure in stride. It also adds novelty to your tree house.
You can find the required accessories like old tires and ropes in your garage, so you can economize too. And if you want to add more fun elements, you can install some easy-to-make or print cartoon characters that are known for racing, like the Wily Coyote, Road Runner, Bugs Bunny, and so on.
Feeding the imagination of your kids is always a good thing, and blending it with exercise means you accomplish two goals.
It's a tree house straight out of fancy catalogs. The tree house in your backyard can be connected to your house by tunnel slides. Imagine climbing into the tunnel slides and sliding into your home, or trying the other way and climbing into the tree house. The two-stor,y spacious tree house can be an exciting getaway for kids playing outdoors. Building it in close proximity to your house can give you extra assurance about your kids’ safety.
As the name suggests, this tree house matches the exterior of an actual house. You can have the main tree house on the upper level and a garage on the ground. With added levels and slides, this luxurious tree house can be equally fun for both children and adults.
You can add a more homely feel to it by painting it in vibrant colors and adding decorative pieces and appliances. Covering it with curtains and laying pillows and mattresses will enhance the comfort of the tree house. A good afternoon nap or late-night sleepovers are both possible.
Add a bit of adventure to your otherwise ordinary tree house with this idea. If your tree house is high enough, you may want to modify the ladders into something more fun, with peppy design elements and decorative additions. This four-sided ladder is easy to build and attach to your tree house. All you need is wooden planks and strong ropes.
If you're interested in adding a natural element to your backyard tree house without making it look constructed, try this design. Made with curved branches of trees, without leaves, of course, these sustainable human-sized nests are durable and strong. The extra-constructed base makes sure that the structure remains intact.
You can decorate the interiors of this beautiful spirit nest with fairy lights, synthetic flowers and vines, toy birds, and other earthy decorative pieces like lamps and scented candles, et cetera. Seems magical for an afternoon nap, doesn't it?
This is a great opportunity for you to try your hand at the modern small-scale architecture that would mostly appeal to adults. If you don't want to build a traditional tree house and are interested in abstract building designs, you could make a tree house in a different way.
The best thing about this design is that you can go freestyle with wood, metal, fiberglass, and glass. Abstract shapes and sizes, neutral colors, and funky lights can be added too. This design needs more investment of time and money.
It's one of the fancier, more luxurious models, and is appropriate for adults. It is supposed to be suspended alongside a cliff on high stilts and beams. I have a family friend who owned a large mansion in the hills, and he built a cliff-side tree house just like this one, but on a larger scale.
Trust me, the feeling is amazing. To look out at the valley or depression from the porch of a tree house like this is mesmerizing. What would be amazing is if you could have a walkway at the entrance to ease your access to the tree house, littered with lights on both sides and some vines growing on them.
Add glass windows, hammocks, or bar stools to give it a posh, homely feeling. You can also add railings for extra safety.
A Wooden Hut on a Tree
This sophisticated design for a tree house is more suitable for adults. It's not weatherproof; it's more of a makeshift hide-out for adults seeking relaxation. What you need to spare are some strong wooden planks and a big sheet of cloth, probably a bed sheet.
Arrange a lantern, some pillows, a warm, cozy blanket, and some books for a complete session of solitude.
So, which of the tree house plans caught your eye the most? Do you think you can take several ideas and mix them to create something unique for you and your family? You don’t always have to stick to the recommended designs.
You may make your tree houses self-sustainable by adding solar panels to the roof. One panel can be enough to power lights in a single tree house. You can use up the remainder of the wooden planks to make birdhouses just next to your kids’ nests.
In the end, tree houses will always be interesting and trendy, no matter how far we come in elaborate building designs. They have this innate sense of escapism that barely anything else can match.
It gives children and adults an extensive opportunity to try their hand at small-scale constructions and let imagination run wild. So, building a tree house is one of the most rewarding experiences and truly a worthy investment.
Do share the tree house plans you select and what you eventually end up building. It would be a delight to see your home perched upon a tree.
Heat‑resistant glue—also known as heat‑tolerant adhesive or high‑temperature epoxy—is essential for applications involving sustained heat exposure, such as exhaust systems, engine components, and industrial furnaces. These specialized adhesives—like J‑B Weld ExtremeHeat, RTV silicone sealants, and high‑temp construction adhesives—maintain strong bonds and structural integrity at temperatures ranging from 500 °F to over 2000 °F. With various curing profiles, viscosity levels, and substrate compatibilities to consider, choosing the best heat‑resistant adhesive can be complex. This guide evaluates eight top-performing options and includes an expert buying guide to help you select the right formula for your heat-critical repair or project.
Listed below are the Best Heat Resistant Glues:
Gorilla Construction Adhesive: The Gorilla Heavy Duty Construction Adhesive excels in quick bonding and all-weather durability. Its strong, waterproof, and low-odor performance is partially offset by the effort required to squeeze out the glue from the tube.
J-B Weld Metal Adhesive: The J-B Weld High-Temperature Resistant Metal Adhesive distinguishes itself with its extreme heat resistance and unique tub packaging. The small quantity of glue supplied may not suffice for larger projects.
Rutland 500°RTV: The Rutland 500°RTV High Heat Silicone shines in environments demanding heat resistance up to 500°F. The single-use packaging of the adhesive could lead to wastage for smaller applications.
Henkel Corporation Loctite Stik n' Seal: The Henkel Corporation Loctite Stik n' Seal Extreme Conditions Adhesive provides precision in the application and a strong bond on wet surfaces, characterized by its low odor once dried. It does come within a packaging setup that users might find challenging to open.
Rutland 600-Degree RTV: The Rutland 600-Degree RTV Silicone Seal Cartridge meets the requirements of extreme heat conditions going up to 600°F and works well as a sealant. The adhesive is high in quantity but lacks waterproofing characteristics.
1. Gorilla Heavy Duty Construction Adhesive
There are very few people who aren't aware of the varied glue products manufactured by Gorilla. This one is the heavy-duty glue that helps bond various materials, including glass, metal, and even plastic. It comes with all-weather resistance to maintain the bond under all conditions. So, let's have a look at it.
Right off the bat, we were impressed by the quality of this glue. It's a 100% waterproof formula, so you would be able to use it to bond objects that may be regularly exposed to rain or water. On top of that, this is an all-weather glue, so the bond does last even with high temperatures, and it's, in fact, heat-resistant.
Furthermore, one of the best things about this glue is that it has a low odor. So, if you are looking for a glue that would be able to bond fabric or the rubber sole of your shoe, this would be a good choice. This feature also makes the glue useful for those who feel nauseous around pungent products.
What's more, on application, this glue is able to hold materials together in just 30 seconds. And, within 24 hours, you would be able to use the glued surface or object without worrying about it separating.
Even though this is one of the best heat-resistant glues available on the market, our only gripe is with the tube. It takes a bit of pressure to get the glue out while applying. This can be slightly problematic for anyone with arthritis or low mobility in their hands.
What We Like
Durable bond
Versatile usage
Easy to use
Convenient small packaging
What We Don't Like
You need to apply pressure to squeeze out the glue
Material: Hybrid adhesive | Dimensions: 11.9 x 7.9 x 2.4 inches | Weight: 9.9 oz | Cure Time: 24 hours | Waterproof: Yes
2. J-B Weld ExtremeHeat High-Temperature Resistant Metallic Paste
Are you looking for a useful metal adhesive that comes with high-temperature resistance? If so, try out this product from J-B Weld, as it has been designed to bond metal surfaces even in extreme temperatures. Moreover, it's from a reputed brand that has been present on the market for a long time.
To begin, what we really liked about this adhesive was the packaging. Rather than a messy tube, this temperature-resistant glue is packaged in a small tub. So, you can easily use a spatula to scoop it up and apply it on metal surfaces without needing much time.
Another great thing about this adhesive is its versatility. You can use it to bond various types of metals and even repair cracks or holes. On top of that, after the adhesive has dried completely, you can drill or sand it according to the requirements of a project.
Furthermore, this high-temperature glue is devoid of solvents or VOCs, which are harmful to our bodies. And, as a non-flammable formula, it's safer to use compared to some other similar products.
Overall, this is an excellent adhesive to use if you are looking for one that can withstand high temperatures. However, the only problem is its small size. Even though a bottle of it might be useful for tiny projects, you will need to purchase multiples to finish larger projects or bond larger surfaces.
What We Like
Best for bonding metal
Easy to use
Strong adhesion
Great for repairing cracks
What We Don't Like
Small quantity
Material: Metallic paste | Dimensions: 1.57 x 1.57 x 2.05 inches | Weight: 3.04 oz | Cure Time: 20 hours | Waterproof: Yes
3. Rutland 500°RTV High Heat Silicone
Rutland is a well-known brand when it comes to buying stove maintenance products. Keeping the heat in mind, Rutland has come up with this silicone-based heat-resistant glue that works well for many other projects. The best part is that it can be used easily by anyone looking forward to bonding different materials.
Right off the bat, we were impressed by the packaging of this adhesive. It comes in a handy tube with an extended tip at the end for easy application. If you're getting the glue to attach fireplace inserts or ceramic tiles around the fireplace, this adhesive would be a good option.
Now, coming to the heat resistance of this adhesive, it's able to withstand temperatures up to 500°F. The upper limit is good for working on different surfaces, including rubber, glass, cement, metal, brick, and stone. Moreover, the bond is durable yet flexible to match the needs of specific projects.
Furthermore, while buying heat-resistant glue, you need to find more about its color, and this glue comes in a black finish. Hence, you can use it on similar colored surfaces without worrying about painting over the glue.
To be honest, this is one of the best glues with heat resistance that we have tried. But, the only problem is that it comes in single-use packaging. This is great for someone looking forward to using the whole glue at once, but it will cause wastage for tiny projects.
What We Like
Versatile usage
Cures in room temperature
Easy to use packaging
Strong permanent bond
What We Don't Like
Single use application
Material: Synthetic | Dimensions: 2.13 x 2.13 x 7.75 inches | Weight: 3.2 oz | Cure Time: 20 hours | Waterproof: No
4. Henkel Corporation Loctite Stik n' Seal Extreme Conditions Adhesive
When it comes to getting adhesive for any project, one of the brands that can be trusted is Henkel Corporation. The Loctite adhesives from the company have always been a rage, and this heat-resistant glue is no different. So, let's check out all the features that make it a worthy product.
A common problem seen in adhesives is that of messy applications, especially on narrow surfaces. But, that won't be a problem with this adhesive as it comes with a precision tip. With the right pressure, you can place the tiniest dots or lines of glue on a surface for mess-free bonding.
However, the best thing about this heat-resistant glue is its ability to bond wet surfaces. So, if you have any materials that would be in regular contact with water, this glue would be the right choice. Henkel Corporation recommends using it on windows, gaskets, weather-stripping, as well as to use on boats or cars.
Furthermore, this adhesive becomes inert once dried, so you can easily use it around your household without worrying about safety. And it has a low-odor formula, making it perfect for anyone who doesn't like strong smells.
We don't really have any drawbacks regarding the adhesive itself. However, we would have liked it even more if Henkel Corporation provided it with better packaging. It's quite challenging to remove the tube from its cardboard and plastic housing before you can start using the product.
What We Like
Easy to use
Versatile usage
Odorless
Good for wet surfaces
What We Don't Like
Hard to remove from its packaging
Material: Silane-modified polymer | Dimensions: 4 x 8 x 1 inches | Weight: 0.1 oz | Cure Time: 24 hours | Waterproof: Yes
5. Rutland 600-Degree RTV Silicone Seal Cartridge
You must have guessed by now that Rutland has one of the best heat resistance ranges when it comes to adhesives. Compared to the product we have already mentioned, this has one of the highest heat resistance capabilities. So, let's check out all its features to know if it would be helpful for you.
Let's start by mentioning the most important quality of this glue. The temperature resistance of this product is up to 600°F, making it great for projects where the surfaces would have continuous heat exposure. Even the brand recommends this for use near ovens, fireplaces, stoves, and heaters.
Additionally, this adhesive is suitable for bonding multiple surfaces and can work as a sealant. As the bond is tough yet flexible, you can expect the glue to last for a long time. It even has the power to prevent smoke or gas from preventing stoves and ovens.
Moreover, we like the amount of product that you get. 10.3 fluid ounces or 304 milliliters is enough to use in several projects, and you only need the tiniest amount to form a strong bond.
To be honest, we cannot question the high-temperature resistance of this adhesive because of its superior quality. However, the only thing missing in this glue is the feature of water resistance. Even though it can stop small leaks, we wouldn't trust it for repairing water pipes or similar surfaces that regularly come in contact with water.
What We Like
Good for dark surfaces
Flexible and durable bond
Great for crafting
Fast drying
What We Don't Like
Not waterproof
Material: Silicone sealant | Dimensions: 1.88 x 1.88 x 11.25 inches | Weight: 12.8 oz | Cure Time: N/A | Waterproof: Yes
6. J-B Weld HighHeat 500 Degree Epoxy Putty
When searching for the best heat-resistant glues, we didn't come across many epoxy-based options. But, this product from J-B Weld has to be one of the most popular epoxy putty adhesives available on the market. And, we liked that it works at a diverse temperature range to make the product great for versatile projects.
Are you tired of epoxy putties that can't resist higher temperatures? Don't worry, as this one from J-B Weld is one of the best high-temperature adhesives with an epoxy base. When applied, the putty can withstand a continuous high-temperature of up to 450°F and an intermittent heat of up to 500°F.
However, the best part of using this epoxy putty is that it's three times stronger than the other options available on the market. So, irrespective of what project you are working on, this putty wouldn't develop cracks.
Furthermore, this is one of the fastest drying epoxy putties we have come across. It takes only an hour to dry, and the hold is pretty strong. You can also expect it to have a functional cure within eight hours, but it's better to wait 24 hours before using the glued area.
This isn't a drawback of this particular adhesive, but there's a learning curve associated with any epoxy putty. As a beginner, you'll need to get a hold on how to get the perfect consistency or thickness to make the surfaces stick. However, applying this putty is pretty straightforward once you get the hang of it.
What We Like
Great for sealing and crack repairs
Good quantity
Strong bond
Versatile
What We Don't Like
Has a learning curve
Material: N/A | Dimensions: 2.4 x 3.9 x 7.5 inches | Weight: 6.4 oz | Cure Time: 8 hours | Waterproof: No
7. Krazy Glue Maximum Bond Super Glue
When it comes to looking for the best adhesives, most of us gravitate towards a brand like Elmer's. This is another great glue from the house meant to have heat, shock, and impact resistance. So, we definitely had to include this versatile product in our list of best heat-resistant glues.
Most of us are tired of using super glue tubes that don't seem to work or have fragile bonds. But, things are going to be different on using this Krazy Glue as it's meant for the maximum bond. Apart from drying pretty fast, the glue doesn't budge even when you put pressure on it.
However, the best thing about this glue has to be the thick no-run gel consistency. If you have been trying to find glue for vertical surfaces, this Krazy Glue would be a great choice. The ultra-thick consistency also lets you bond uneven and mismatched surfaces.
What's more, this versatile heat-resistant adhesive works for both porous and non-porous surfaces like ceramic, stone, cement, plastic, rubber, and vinyl. So, you don't need to worry about buying multiple tubes of glue.
Coming from the house of Elmer's, this Krazy glue is a great product. But, it's priced higher than other similar products available on the market. We expected a bit more product for its price, especially as it's recommended to be used for big projects. So, your costs may go up when buying multiple tubes of this glue.
What We Like
Helpful applicator
Works with versatile surfaces
Great for porous materials
Glue dries fast
What We Don't Like
Expensive
Material: Plastic | Dimensions: 0.75 x 2.75 x 7 inches | Weight: 1.1 oz | Cure Time: N/A | Waterproof: No
8. Permatex High-Temp Red RTV Silicone Gasket
Are you tired of changing gaskets and finding that they break in a few days? Don't worry, as Permatex brings to you a unique adhesive that's meant to work as a gasket. It can withstand extreme temperatures, making it perfect for taking the place of most gaskets you will come across in everyday life.
When it comes to gaskets, a common problem seen with them is cracking under high temperatures. But, that won't be a problem when you use this adhesive as it forms a tough and flexible bond that can resist cracking. Similarly, the bond won't shrink when the temperatures begin to drop.
Moreover, this OEM-certified adhesive can be layered on pre-cut gaskets to increase its durability. It's suitable for heavy-duty use, and the bright red color makes it easy for you to see the adhesive during application.
Further, one of the best things about this product is the straightforward application process. Just clean the surface of any dust and oil before applying the product to get the best bond. And, the glue dries in 24 hours, making it quite useful to be used in everyday objects.
One of the only drawbacks of this product is that it isn't made of sensor-safe silicone which can be a let down for some. But, don't worry, as Permatex has a similar product in its extreme temperature resistance range that would work well.
What We Like
Available in bigger sizes
Easy-to-use applicator
Wide temperature range
Fast drying
What We Don't Like
Not sensor safe
Material: N/A | Dimensions: 1.25 x 3.81 x 8 inches | Weight: 3.21 oz | Cure Time: 24 hours | Waterproof: No
What Is the Best Heat Resistant Glue?
Heat resistant adhesives, integral to many industrial and household applications, are gauged based on material type, dimensions, weight, curing period, and water resistance. The table below outlines detailed specifications of seven top-rated heat-resistant glues. For reference, dimensions are indicated in inches, weight in ounces (oz), cure time in hours, and a yes/no marker indicates whether the product is waterproof.
When choosing the best heat-resistant glue, you need to know some essential points that'll help to make the right decision. As mending or bonding materials are often based on specific projects, skipping any points may leave you with completely unusable glue. So, let's check out these key points.
1. Curing Time
One of the most important things to check while buying any adhesive is its curing time. Even though it may vary between brands, you need to find a glue that has a curing time based on your project. That's because if the adhesive you chose has a speedy curing time, the threshold to change the placement is quite low.
In the case of gorilla glue or super glue, the drying time is very low. Having said that, even though most glues would hold the materials within seconds, it still needs to cure for 24 - 48 hours to set completely. So, keep these things in mind before making your choice.
2. Viscosity
Another point to note is the viscosity of an adhesive. You might find some glues to be too thick while others have a more watery consistency. It's common to skip thinking about the viscosity, but this point is essential as you need the right glue to work on vertical surfaces.
Most of the glues that have watery consistently don't work for vertical surfaces as it drips down and makes it hard for the surfaces to bond. A tip is to check for glues that specifically mention working on mismatched and vertical surfaces to get the right glue with proper viscosity.
3. Temperature Resistance
Even though a glue might be listed as a heat-resistant adhesive, it may not be able to stand the high temperatures. Hence, whenever you look for a high-temperature adhesive, try to find its working threshold. If you are going to use the glue on a surface that gets extremely hot, then opting for a heavy-duty construction adhesive might work better.
4. Materials To Bond
Hands down, this is the most crucial feature to check in any adhesive to get the desired bond. Most brands do specify the materials that can be bonded using the glue. You need to make sure that the glue will create a permanent bond that wouldn't crack or separate under pressure or high temperatures.
Moreover, while working with some materials like metal, glass, and rubber, you would need to buy special glues to make the bond long-lasting. These days, there are several options for adhesives that can be used on multiple materials.
5. Other Features
Along with the points that we have already mentioned, there are some other things you may need to find out about glue. The first one being, its suitability for indoor and outdoor use. Another thing to check for is shock and impact resistance. Without this, your project can crack when put under pressure or in extreme temperatures.
Furthermore, if you are getting the glue for working on kitchen utensils, make sure it's food safe and dishwasher safe. At the same time, look for waterproof adhesives for the bond to last for long.
And, if you're sensitive to smell, always go for adhesives with a low odor formula to avoid discomfort while working.
So, that's everything we had to tell you about getting the best heat-resistant glue for your projects. We do hope that you will get your product of choice from our suggestions. However, do remember that varied projects may call for special adhesives for the best bonds.
Among our recommendations, we would suggest the Gorilla heavy duty construction adhesive looking for bonding different types of materials at an affordable cost.
On the other hand, the J-B Weld ExtremeHeat high-temperature resistant metallic paste is excellent for bonding iron, steel, or other metals. But, you may need to get multiple bottles for bigger projects.
With that, we come to an end. Do let us know if you have any queries regarding any of our suggestions.
Till then, goodbye, and take care!
Compact microwaves, ideal for studios, dorms, and tight kitchens, save space without sacrificing performance. Beyond their convenient size, leading brands now offer advanced features—such as smart presets, eco modes, and child locks—making even small countertop models versatile for reheating, defrosting, and light cooking. To guide your purchase, we evaluated seven top-rated compact microwaves, focusing on power, control types, noise levels, and interior capacity. Here are the best compact microwaves engineered to enhance efficiency and convenience in any small living space.
Listed below are the 5 best small microwaves from our list:
TOSHIBA Microwave Oven ML2-EC10SA. The TOSHIBA ML2-EC10SA Microwave Oven stands out with its broad range of cooking functionalities, remarkable power, and spacious internal capacity, promising an even and quiet heating performance.
BLACK+DECKER EM720CB7. BLACK+DECKER EM720CB7 impresses with its capability of delivering all routine microwave tasks while being lightweight, making it ideal for individuals with limited space, such as those living in offices or dormitories.
COMFEE' EM720CPL-PMB. The COMFEE' EM720CPL-PMB stands as a unique small countertop microwave offering bright interior lighting, an easy-to-read control panel, and a digital LED display.
Panasonic Microwave Oven SN686S. Panasonic SN686S Microwave Oven is highly rated for its powerful motor, perfectly suited to heavy-duty cooking tasks, and its patented inverter technology that offers evenly cooked food and accelerated defrosting - making it a great choice for home use.
Galanz Retro Microwave Oven GLCMKA07BER-07. Galanz Retro GLCMKA07BER-07 Microwave Oven distinguishes itself by effectively distributing heat in a 360-degree range and living up to standard functionalities even with its unusual button design that can attract dirt. Its retro style, size, and color also increase its appeal.
Here's the list of the 7 best small microwaves that are sure to transform your cooking experience.
1. TOSHIBA Microwave Oven ML2-EC10SA - Best for Multipurpose Cooking
This compact microwave from Toshiba has the perfect combination of size and power.
I like using this Toshiba microwave for over eight functionalities — microwave, air fry, convection (toast or bake), defrost, broil, sensor cook, "combi" mode, and odor removal. (The air fryer and toaster oven function is my personal favorite.)
Its microwave inverter technology helps maintain constant power levels, so it runs quietly and heats evenly and quickly.
This cubic-foot microwave has a huge internal capacity where the turntable can fit a 12-inch dinner plate.
Additionally, its odor-removal feature is key for an easier-to-clean interior, and its eco-mode option helps save power.
What We Liked
Multipurpose
User-friendly, easy to use with a digital panel large control panel
Removable turntable and an odor-removal mode
Eco mode lets you save more electricity
What We Don't Like
Bigger energy usability
Weight: 40.8 pounds | Dimension: 20 x 20.5 x 12.8 inches | Interior Capacity: 1 cubic foot | Wattage: 1000 W
2. BLACK+DECKER EM720CB7 - Best for Small Spaces
This countertop microwave performs all basic microwave functions well. It works best for people with limited time to spend cooking and anyone looking for a simple yet effective microwave.
This Black+Decker microwave oven is among the best-selling kitchen appliances today.
It includes features such as a glass tray turntable ring, rack, grease filters, exhaust adapter, installation kit, installation manual, and a child safety lock.
Size-wise, it is super convenient to fit and move anywhere. However, it has a small interior, so it works best in an office, dormitory, or for instant food and coffee cravings.
What We Like
Affordable
Lightweight
A real space-saver
Performs all regular microwave functions well
What We Don't Like
Less heat power
Weight: 22.5 pounds | Dimension:13 x 17.3 x 10.2 inches | Interior Capacity: 0.7 cubic feet | Wattage: 700 W
3. COMFEE' EM720CPL-PMB - Best for User-Friendly Features
What I like best about this small countertop microwave is its bright interior lighting, easy-to-read control panel, digital LED display, and 10-inch glass turntable.
Its one-touch express cooking functions with 1-6 minutes and 30-second options, nine auto cook presets, and two defrost settings (by weight or by time) are good features for something this small.
However, this compact microwave oven has a plastic finish prone to visible fingerprint marks, which I like less because I want my appliances to look shiny and neat.
But for $81.94, you can already have this 700-watt microwave with microwaves, a signal muting option, eco mode, kitchen timer, clock, and child safety lock features.
What We Liked
Large capacity, high power levels
Memory function and intuitive control panel
Soft interior lighting
What We Don't Like
Plastic finish
Weight: 20.3 pounds | Dimension:13 x 17.3 x 10.2 inches | Interior Capacity: 0.7 cubic feet | Wattage: 700 W
4. Panasonic Microwave Oven SN686S
This Panasonic inverter microwave has a powerful motor that makes it ideal for reheating meals and carrying out more intensive cooking tasks.
It has patented inverter technology that produces and modifies smooth power streams and provides cooked food evenly.
Its inverter microwave's cutting-edge power inverter turbo also accelerates the defrosting process.
Additional benefits include fourteen preprogrammed menu options, a quick minute timer, a keep-warm setting, and a child safety lock feature.
This Panasonic microwave is better suited for usage as a home appliance mainly due to its higher weight compared to other models of inverter microwaves.
It is adaptable because it can be either built-in or left as a countertop microwave.
What We Liked
Sleek, dual-purpose
14 preset menu
Smart cooking settings with Genius Sensor Cook
Inverter technology
What We Don't Like
Heavy
Best for residential use only
Weight: 25.5 pounds | Dimension:18 x 22.5 x 14.5 inches | Interior Capacity: 1.2 cubic feet | Wattage: 1200 W
5. Galanz Retro Microwave Oven GLCMKA07BER-07
Cooking is more efficient with its rotating glass (phonograph-looking) turntable, which aids 360 degrees of heat distribution. As a result, you may quickly enjoy delicious and fresh food.
Compared to the touch button design of other models of countertop microwaves, this one has slightly raised protruding buttons.
Although a basic design to establish a retro style, I prefer a touch control panel because these can accumulate dirt easily.
Nevertheless, its power levels can do the usual microwave function: heat meals, pop popcorn, reheat food, or even defrost meat.
What We Liked
Retro design
Small size
Nice color
What We Don't Like
Slightly raised buttons
Weight: 23.1 pounds | Dimension:17.9 x 13.8 x 10.3 inches | Interior Capacity: 0.7 cubic feet | Wattage: 700 W
6. GE Smart Countertop Microwave GE JES1097SMSS
This microwave's smart technology makes the cooking process less complicated.
When cooking, I don't need to read the instructions.
I would scan the barcode, and the GE Smart Countertop Microwave automatically adjusts power levels, defrost settings, cook times, and more, according to package instructions.
Its 900W power level is less heat power compared to other smart microwaves out there. Nevertheless, this one is lighter. That's why it has earned this spot.
What We Liked
Compatible with Google Assistant and Amazon (Company) Alexa
It can be operated remotely via an app
Scan-to-Cook technology
What We Don't Like
More expensive
App may crash
Weight: 28 pounds | Dimension:19 x 14.5 x 11.5 inches | Interior Capacity: 0.9 cubic feet | Wattage: 900 W
7. Magic Chef White Countertop Compact Microwave Oven
The 0.9 cubic feet countertop microwave has 900 watts of power output, much less than the LG NeoChef's model.
But, for a small family or a single person, this power works fine for fitting a standard-size dinner plate, cooking meals, or defrosting meat.
You may defrost using either time or weight in its auto-defrost settings.
Further features of this simple yet elegant microwave include an easy 8-quick-set menu button, a push-button door latch, an LED display, and a white exterior.
What We Liked
Clean white look
Big internal capacity
Ergonomic size for small kitchens
What We Don't Like
Easily gets dirt
Weight: 24.9 pounds | Dimension:14.8 x 18.3 x 11 inches | Interior Capacity: 0.9 cubic feet | Wattage: 900 W
What is The Best Small Microwave?
This table provides a detailed comparison of the best Small Microwaves, focusing on Weight, Dimensions, Interior Capacity, and Power. These essential attributes are crucial in helping you select the most suitable microwave to seamlessly integrate into your space and meet your cooking needs.
Learn what to consider when buying a microwave oven—the right size, type, power, settings, design, and many more.
Practical buyers, here's your checklist guide!
Size
A small microwave's dimension is based on its external measurement (width, height, and depth—measured in inches) and internal capacity (measured in cubic feet, often found in the product description).
For the exterior, the depth is measured from front to back, with the door closed and opened; the width is side to side; and, of course, the height is from top to bottom.
A microwave's interior, on the other hand, determines how much you can fit inside the oven and usually ranges around 0.5 to 1.2 cubic feet.
Type
As a versatile appliance, compact microwaves often come in various types, each offering unique features, functions, and space requirements.
The type is important to consider when setting it up in your home.
1. Countertop Microwaves
These are also known as tabletop microwaves. These may be easily moved around and don't need any installation, making them perfect for households with little counter space.
Some food-on-wheels or RV owners love countertop microwaves as they require limited counter space and electricity.
One of the must-haves and best paired with the Best Portable Fire Pits and Best Hot Dog Rollers when camping or going to different places.
2. Over-the-Range Microwaves
Over-the-range compact microwaves have a range hood feature below them.
They are positioned above your range and below your kitchen cabinets (connected on the top and sides), saving you valuable counter space.
In some over-the-range compact microwaves, the air is cycled and filtered using charcoal filters thanks to internal ventilation.
Some small microwaves provide an option for external ventilation, which involves venting the smoke and fumes outside.
3. Under Cabinet Microwaves
Also known as low-profile microwaves. These are slightly shorter and much wider than conventional microwaves, allowing them to fit in the same space as an under-cabinet range hood.
Similar to an over-the-range microwave, this type enables you to save space because it doesn't require counter space.
However, this is positioned right beneath the kitchen cabinet or counter.
4. Built-in Microwaves
Built-in microwaves are designed to be installed inside kitchen cabinets or on your walls for a more seamless and clean look.
These larger models are ideal for kitchens with a big wall space or cabinets or too much counter space.
These are typically higher-end compact microwaves or pricier models that require more upfront costs, as they need to be installed by a professional.
5. Convection Microwaves
A multifunctional microwave combines some features of an inverter microwave and a convection oven (some even have an afterburner for greater power).
This allows you to heat and defrost food like inverter microwaves and, at the same time, bake, grill, roast, and steam food.
Convection microwaves are also good for small kitchens, apartments, and RVs, but usually occupy bigger spaces than others.
Power
A microwave's power capacity, measured in Watts (W), is typically between 500W and 1000W. These ovens, which often have more than 700 watts, cook food faster and more evenly.
Some brands of kitchen appliances use inverter technology in their microwaves to maintain the heating power and speed consistency required to cook food.
Lower-wattage microwaves are those that are smaller in size. Longer cooking time is associated with lower microwave watts.
Noise Level
Quiet yet highly efficient compact microwaves are great for late-night snackers like me or students who share a dorm room with someone else.
When in operation, most microwave ovens are about as loud as a typical human conversation—around 55-60 dB. (An average human conversation is measured around 55-65 dB.)
Some advanced microwave ovens have this sound-muffling technology with a volume control panel and a mute button that turns off all the interface and feedback sounds from the keypad and kitchen timer.
Controls and Settings
You may prepare food more quickly and easily with the help of preprogrammed settings and cooking presets (which vary by modThirty).
30-second express cooking - This can adjust your cooking time by 30-second intervals as your meal is cooking to ensure proper heating.
Defrost modes - This feature enables the microwave to defrost food without actually cooking it. Its settings can be adjusted to speed up the thawing of a frozen meal or other food based on weight.
Different cooking presets - Some microwaves already include presets for food like pizza, potatoes, popcorn, and frozen vegetables. Whether you want to defrost, soften/melt, reheat, or heat food, it automatically selects cooking power and time.
Understanding the controls and settings is important if you're among the few people who want to know how to safely microwave metal or any other food containers.
Smart Technology
A smart microwave is a more advanced type of microwave that allows you to connect to your WiFi and can be operated remotely using an app on your tablet or smartphone or via a smart home assistant.
Generally speaking, you can adjust cooking times and power settings or even browse online recipes.
Some frequently come with a smart transducer cook option that monitors the moisture levels in your food to regulate the cooking time and temperature to avoid overcooking.
Several versions let consumers scan the packed food barcodes by searching their internal databases for the cook times.
Design
Small microwaves come in a range of styles, materials, and colors.
Modern small microwaves look more classic and elegant thanks to their square viewing panels, one-touch keypad, and stainless steel exterior designs, typically in black, silver, or white.
Retro microwaves have vintage elements, such as circular viewing windows, dials, and antennae.
Of course, aesthetics play a big role in kitchen design.
It is quite important when choosing a microwave because some customers prefer to keep the visual appeal of their home by having all of their home or kitchen appliances match.
Interior
When looking for a compact microwave, interior characteristics are as important as internal capacity.
Here are some inside components that you should look for.
Turntables - Ensure that the turntable of a small microwave is big enough to accommodate the dinner plates for your family.
Interior racks - The rack provides more space to heat two or more containers simultaneously. These removable racks can be hand-washed or put in the dishwasher with your dinner plates.
LED display light - Improving visibility in low light enables users to watch their food as it cooks.
The interiors of other compact models can easily collect dirt and call for a more thorough cleaning. (Improperly cleaned microwaves can cause tuberculosis.)
Microwaves with a ceramic enamel interior are a good choice as they are the easiest to clean.
Therefore, it's necessary to opt for detachable or interchangeable interiors that are also washable.
Price
Budget is unquestionably important when choosing the best small microwave for a price-conscious buyer. We should know whether the cost is fair given the cooking features.
Some models could be more expensive, but the extended warranties might indicate that the maker is confident in their product.
When purchasing a model, choose a respected manufacturer with a good warranty.
A less-priced microwave may end up damaged or malfunctioning too soon (such as an interior light flickering), demanding an earlier and more costly replacement or repair service.
Additional Features
These additional features usually depend on the specific needs of the user. As for me, aside from the mentioned factors, these are other things that make most microwaves worthy of buying.
Child Lock
This control panel prevents children from opening the hot countertop microwave oven door handle (or all small microwaves with this feature).
Eco-mode
Turns off the display like time and power when the microwave is not in use, allowing you to save up to 50% of standby power consumption. It helps save power, money, and the environment.
Warranty
It can help protect your compact microwave from breaking down unexpectedly. Checking the warranty helps me assess if the so-called best microwave is durable enough to last for years.
How do you know what microwave size to buy?
Deciding on the microwave size to buy depends heavily on its intended usage and placement. Consider factors like whether it will be used during travels in an RV or stationary at home, if it's for baking or just heating food, or if it's designed to be mobile or fixed on your countertop.
Ensure to measure the largest potential countertop space for your microwave, leaving a minimum of two feet between it and the range or cooktop.
What can a smart microwave do?
Smart microwaves generally allow for programmable cook times, power levels, and device-controlled operability. These WiFi-connected appliances can initiate cooking cycles remotely, send dinner notifications to your phone, and serve meals even when you're not physically present in the kitchen.
Advanced features such as touchscreens, remote voice control, scan-to-cook technology, and cooking recipe guides are typical of smart microwaves, with other internet-enabled features varying by model.
How do you make a countertop microwave look built-in?
For a built-in look with countertop microwaves, models can be tucked into a cabinet, a solution favorable for those desiring additional counter space without a full kitchen overhaul.
However, the functionality of this built-in installation depends on the specific model, considering that countertop microwaves have rear vents essential for steam emission. If these vents get blocked when built into a cabinet, the vent system may lose its operational ability, which should be checked beforehand.
Where do you put a microwave in a tiny kitchen?
In small kitchens, placement options for microwaves can range from drawers to over-the-range, and any safe location as long as it's known to everyone. Keep them away from food storage areas or the fridge to prevent potential damage.
A small countertop microwave may be preferable for added convenience, as it can be stored outside the kitchen when not in use or for other preparations.
Can I put a countertop microwave in a cabinet?
While storing or non-operational placement of a countertop microwave in a cabinet is feasible, using it as a built-in type demands caution, as not all models may be suitable for this arrangement. Since countertop microwaves are naturally portable, placing them in a cabinet is achievable.
However, for DIY integration into a cabinet as a built-in type, professional installation help is advisable for safety reasons.
How can I clean my small microwave?
Cleaning a small microwave can be accomplished with a simple solution of water and baking soda, applied with a clean cloth to wipe down the interior surface.
Alternatively, heating a concoction of water and lemon for several minutes in the oven and then wiping the inside of the microwave after cooling is an effective cleaning method. There are also specialized cleaning products available.
Do small microwaves have enough power to heat my food?
As for the power sufficiency of small microwaves, it primarily depends on the type of food being heated. Operating usually within 500w-1000w cooking power, small microwaves use less energy than electric or convection microwave ovens.
They're adequate for heating small food quantities, reheating leftovers, making popcorn, defrosting frozen vegetables or other items, and other express cooking tasks.
Converting kW to BTU/h is crucial when comparing the cooling or heating capacity of different air conditioners, especially across global markets using different units. For quick conversion, simply multiply the kW rating by 3,412. If you're evaluating efficiency using EER (Energy Efficiency Ratio), use the formula: kW × EER × 1,000. This helps estimate how much thermal energy an AC unit can transfer per hour. Whether you’re browsing models or sizing a system, tools like this kW-to-BTU/h calculator can simplify decisions—especially when used alongside detailed comparisons like those on Homesthetics’ best air conditioners guide.
Convert (kW) To BTU/hr Calculator
Defining BTU
BTUs, or British Thermal Units, is a measurement of energy that can be considered a unit of heat. One BTU is enough to raise the temperature of one pound of liquid water by a degree (Fahrenheit) at room temperature.
You may have seen BTU per hour as a unit of measurement in certain cooling units as well. This can be defined as the rate of energy transfer. The higher this value is, the more powerful the air conditioner will be. Consequently, the AC will also consume just as much power.
Defining kW
AC specifications often come with a wattage rating, specifying how much electricity the appliance consumes. “Watt” is a basic unit of power in the SI system, a.k.a the metric system. In more physics-based terminology, it is defined as the amount of power required to move a 1 kg object with an acceleration of 1 m/s2.
Or, 1 watt = 1 Joule of work done per second
A kW is short for kilowatts, and one kilowatt has 1,000 watts. That’s the unit you see on your electricity bill.
The Direct Equivalence Between kW And BTU
Every kilowatt is equivalent to 3,412 BTU per hour. And converting to BTU per hour from kW is a simple matter of multiplying the kW by 3,412.
For example, to calculate how many BTU/h there are in 2.5 kW, multiply the value by 3,412. The answer is 8,530 BTU/h.
How Energy Efficiency Rating Affects This Conversion
The previous section was a direct BTU conversion from kilowatts. But, when purchasing a new air conditioner, you may want to factor in the Energy Efficiency Rating. This will paint you a clearer picture of how much power the unit consumes.
Much like the previous conversion method, this method involves simple multiplication. You can know the BTUs of an AC by multiplying the kW rating with the EER rating and then multiplying the number by 1,000. Here’s the formula presented in a simplified manner:
BTU/h = kW x EER x 1,000
For example, if the AC has a kW rating of 3 and an EER rating of 12, the result is 36. Further multiplying it by 1,000 provides 3,600 kW as a result.
Tip
Some AC units have a SEER rating listed instead of an EER rating. In such cases, you can use the formula EER = 0.875 x SEER to convert between the two.
Summing Up
It’s simple to convert kW to BTU and can be done within seconds using the calculation methods listed above. And knowing how to do so is essential when purchasing a new air conditioner. A conversion calculator is also very handy in such situations.
The reason why there are two different units for cooling capacity is due to the different measurement systems. Both the International System of Units and United States Customary units have different units, such as kilograms for the former and pounds for the latter.
This can cause some confusion, but the conversion of units is rarely a complex affair.
Narrow refrigerators—also known as tall skinny fridges or compact refrigerators—are the ideal solution for small kitchens, tight apartments, or galley-style layouts where every inch counts. These space-saving appliances offer impressive storage capacity without overwhelming your kitchen footprint. Whether you’re looking for a top-freezer, bottom-freezer, freestanding, or counter-depth design, there’s a compact fridge out there to suit your needs. From energy-efficient models with LED lighting and inverter compressors to stylish finishes and built-in ice makers, today’s best skinny fridges combine form and function beautifully. We’ve reviewed the most reliable and feature-rich options to help you make a confident purchase. If you’re also open to wider models or need more versatility, don’t miss our complete guide to the best refrigerators.
Listed below are the best narrow fridges:
GE GLE12HSPSS Refrigerator: The GE refrigerator prides itself on its total capacity of 11.9 cubic feet, offering commendable holding volume for a compact design, outshining counter-depth models. Drawback: the absence of a built-in ice dispenser.
LG Electronics LRTNC0705V Top-freezer Refrigerator: A top-freezer refrigerator that leads in consumption with an impressive 255 kWh per year, affirming its energy-efficiency. Its lack of a reversible door could be seen as a downside compared to other options offering this feature.
Liebherr CBS1360X Refrigerator: Liebherr refrigerator is unique for its built-in ice maker ability, unlike the LG fridge, adding convenience. Its higher annual energy consumption of 480 kWh might deter the more energy-conscious consumers.
Bosch B11CB81SSS 800 Series Refrigerator: The Bosch refrigerator takes an edge over the Liebherr model with its lower energy consumption of 357 kWh per year. The upper shelf height may make accessibility a challenge for some.
Blomberg BRFB1051FFBIN Bottom-freezer Refrigerator: The Blomberg BRFB1051FFBIN is a bottom-freezer refrigerator that offers an efficient 8.4 cubic feet total capacity within a compact 22-inch framework. The absence of an ice-maker might deter those who regularly need ice.
1. GE GLE12HSPSS 11.9-Cubic-Foot Refrigerator - Best Overall
This GE refrigerator is my top pick because of how much it can offer while taking up only a small space.
Despite the lack of an ice dispenser, this refrigerator is so outstanding that it's one of the best counter-depth refrigerators among the refs I've tested.
For starters, its internal hinge and reversible door complement its counter-depth design, giving you the freedom to maximize your kitchen space in any way you want.
Open the door of this GE refrigerator, and its varying shelving options can give you endless possibilities for organizing your fresh food.
At first glance, you'll see three door shelves, three main shelves, and two drawers. Each shelf is adjustable, but the internal shelf system also includes a QuickSpace Shelf, which you can slide in to store taller items.
You'll have internal digital controls except for one special drawer. And no, I'm not talking about your crisper drawer here.
Your other storage drawer, apart from your crisper drawer, has adjustable temperature settings separate from the rest of this GE fridge.
If you ask me what I store here, it's usually smaller food items like soft drink cans or deli meat products.
Regarding the freezer space of this GE refrigerator, you'll get two storage space drawers. You can convert one of them into an ice dispenser if you think your household needs one.
However, I didn't. I like this refrigerator as it is. I use one drawer to store smaller frozen goods while the other is for heavier ones.
This is an ADA-compliant refrigerator, so the elderly in our household have no trouble using this unit.
What We Like
It has many shelving options
Can sit flush on many countertops
The additional freezer drawer is icemaker-ready
What We Don't Like
It does not have a built-in ice dispenser
Dimensions: 70 x 24 x 26.5 inches | Total Capacity: 11.9 cubic feet | Refrigerator Capacity: 7.71 cu. ft | Freezer Capacity: 4.19 cu. ft | Consumption: 405 kWh per year | Ice Maker: None | Garage Ready: No
2. LG Electronics LRTNC0705V 21.87-Inch 7-Cubic-Foot Top-Freezer Refrigerator w/ LED Lighting and Inverter Compressor - Most Energy-Efficient
When you get a skinny fridge, it's not enough to fit through your door. It shouldn't spike your electric bill up as well.
Narrow fridges commonly have a smaller capacity. Having a refrigerator that consumes so much electricity with its small capacity is unreasonable.
Among all the fridges I've tested, I found one of LG's best counter-depth refrigerators to be the most efficient. It's an Energy Star-certified refrigerator, but it doesn't stop there.
It also showcases the Inverter Linear Compressor design of LG Corporation. This feature uses a linear arrangement of an electromagnet to compress the refrigerant automatically. In simpler terms, the non-electric adjuster maximizes performance while using low electricity.
Matching this environmentally-friendly top-freezer refrigerator to the aesthetics of your space won't be a problem. It has a sleek platinum silver finish, a contoured door design, and hidden hinges.
It doesn't compromise on its interiors as well. This top-freezer refrigerator only takes 7 cubic feet of space, but its adjustable storage, door bins, tempered glass shelves, and crisper drawer can maximize this space.
It does not have a reversible door. But you'll only have to ensure its proper orientation in your space. Positioning it won't be a problem since it's one of the narrowest refrigerators I've encountered.
What We Like
30% more energy-efficient than many other refrigerators
Highlights LG's Inverter Linear Compressor
Comes with a twisting ice tray
What We Don't Like
It does not have a reversible door
Dimensions:55.125 x 21.88 x 23 inches | Total Capacity: 6.6 cubic feet | Refrigerator Capacity: 5.05 cubic feet | Freezer Capacity: 1.55 cubic feet | Consumption: 255 kWh per year | Ice Maker: None | Garage Ready: No
3. Liebherr CBS1360X 24-Inch 12-Cubic-Foot Refrigerator - Best Ice Maker
In your search for the best refrigerator, I'm pretty sure you've noticed by now that many skinny refrigerators and counter-depth refrigerators don't have an ice dispenser.
Thankfully, Liebherr addresses this.
This feature was helpful, especially when my kids invited their friends after school. I can easily place as many ice cubes as they'd like onto their coolers.
This bottom-freezer refrigerator's automatic built-in ice dispenser has a fixed water connection to ensure you never run out of ice cubes. It can produce as much as 3.1 pounds within 24 hours while storing 6.6 pounds of cubed ice.
You won't even have to worry about weird-smelling ice here. Its DuoCooling technology keeps the cooling systems of your refrigerator and freezer separate.
If you think having a built-in ice dispenser means having to defrost more often, that's also covered. This skinny refrigerator is one of Liebherr's NoFrost appliances. It uses recirculating air and expels humidity. You won't have to defrost this unit at all.
On top of all these, it is a freestanding refrigerator, meaning you can place it anywhere you'd like in your apartment without being an eyesore.
This fridge may be skinny, but its advanced technology keeps it packed and worth its price. It is one of the few garage-ready refrigerators available, which should tell you something about its value.
What We Like
It comes with a built-in ice dispenser with a fixed water connection
It uses two completely separate refrigeration circuits
Removable drawers are sealed to keep their contents cool
What We Don't Like
Its price point is on the more expensive side
Dimensions:79.56 x 23.56 x 24.81 inches | Total Capacity: 12 cubic feet | Refrigerator Capacity: 8.7 cubic feet | Freezer Capacity: 3.3 cubic feet | Consumption: 480 kWh per year | Ice Maker:One | Garage Ready:Yes
4. Bosch B11CB81SSS 800 Series 23.5-inch 11-Cubic-Foot Refrigerator - Most Storage Space
Ten cubic feet is often enough for narrow fridges since many offer less usable space.
This is why I love this Robert Bosch GmbH counter-depth refrigerator. It offers 11 cubic feet of storage room with convenient storage options illuminated by bright LED lighting.
Aside from having precise electronic temperature controls and a MultiAirFlow system that enhances air circulation for even temperature within your fridge area.
On the other hand, its bottom freezer has SuperFreezing technology, protecting your frozen items from defrosting whenever the door opens.
Since I have kids around, I like how this skinny fridge has door alarms on its reversible doors. This may be a common feature, but Bosch takes it to another level with its other warning alarms, including those for malfunction.
The price of this counter-depth bottom-freezer refrigerator is higher than other units. However, its storage capacity and food-preserving technology make it worth the price.
What We Like
Offers advanced cooling and freezing technology
It has a factory-installed ice dispenser
Has reversible door hinges
What We Don't Like
It has a higher price point than other refrigerators
Dimensions:78.88 x 23.5 x 23.88 inches | Total Capacity: 11 cubic feet | Refrigerator Capacity: 7.7 cubic feet | Freezer Capacity: 3.3 cubic feet | Consumption: 357 kWh per year | Ice Maker:One | Garage Ready: No
5. Blomberg BRFB1051FFBIN 22-Inch 8.4-Cubic-Foot Bottom-Freezer Refrigerator - Best Width
Even with a narrow kitchen space, you can still have room for a fridge.
Take it from me. I used this narrow yet reliable appliance while living in my solo apartment.
This Blomberg refrigerator effectively maximizes vertical space when you can't do much about horizontal space. What this appliance lacks in width, it makes up with its height, design, and technology.
Its bright digital display gives you the precise settings you need to control the refrigeration of your fresh and frozen items.
This refrigerator may be narrow, but it doesn't combine the cooling and humidity systems of your fridge and freezer in any way. What you get here is efficiency not only in terms of electric consumption but also in refrigeration.
What We Like
Slim and sleek design to fit small kitchens
It has an interior LED lighting
Offers 3D door adjustment
What We Don't Like
The top shelf may be hard to reach
Dimensions:69.88 x 21.88 x 21.63 inches | Total Capacity: 8.4 cubic feet | Refrigerator Capacity: 6.1 cubic feet | Freezer Capacity: 2.3 cubic feet | Consumption: 387 kWh per year | Ice Maker: None | Garage Ready: No
6. Whirlpool URB551WNGZ 24-Inch 11.3-Cubic-Foot Refrigerator - Best Freestanding
I love how I can position thisfridge from Whirlpool Corporation anywhere!
Both its front and rear are finished, allowing me to place them at the end of my cabinetry and into the surrounding cabinetry.
This was our first refrigerator when we moved into our home, and it easily matched the interiors of our kitchen then.
Its counter-depth design can fit virtually flush with our countertop, giving me more space to move around in the kitchen.
When you look inside, this fridge has frameless glass shelves. Cleaning them was always a breeze for me.
If you want this in your home, you should know that its flat and smooth doors are reversible. This gives you additional freedom to orient this appliance in any way you want.
What We Like
It has a sleek design
It comes in fingerprint-resistant stainless steel
Offers cabinet edge electronic controls
What We Don't Like
No built-in ice maker
Dimensions:74.5 x 23.5 x 27.94 inches | Total Capacity: 11.3 cubic feet | Refrigerator Capacity: 7.88 cubic feet | Freezer Capacity: 3.43 cubic feet | Consumption: 396 kWh per year | Ice Maker: None | Garage Ready: No
7. Galanz GLR10TBKEFR 27-Inch 10-Cubic-Foot Top-Freezer Refrigerator - Best Design
Don't you love how this fridge looks? I know I do.
This Galanz refrigerator has a retro-style design that extends up to the details of its handles and top-freezer build.
Its exterior may be retro, but its interior can still match modern refrigerators.
Aside from being frost-free, this refrigerator has an adjustable thermostat in addition to its adjustable shelves.
It even has a large-capacity crisper drawer that can keep your fruits and vegetables fresh for days.
This top-freezer refrigerator does not have a brushed steel finish. But any of its black, white, red, and blue finishes can spice up any tight kitchen.
What We Like
It comes in black, white, red, and blue finishes
It has an efficient and quiet compressor
Low energy consumption
What We Don't Like
No built-in ice maker
Dimensions:61.81 x 27.48 x 23.74 inches | Total Capacity: 9.84 cubic feet | Refrigerator Capacity: 7.42 cubic feet | Freezer Capacity: 2.42 cubic feet | Consumption: 292 kWh per year | Ice Maker: None | Garage Ready: No
8. LG LTNC11131V 24-Inch 11.1-Cubic-Foot Top-Freezer Refrigerator - Best Counter-Depth
Here's another one of LG's counter-depth refrigerators with great functionality.
This top-freezer fridge isn't only a skinny fridge. It is also a counter-depth fridge with a sleek design.
Starting with its exteriors, it has a contoured platinum door and curved door handles. This gives your kitchen a modern touch that doesn't tell of this refrigerator's affordable price.
Even the interior space is brightened by LED lamp lighting, showcasing this refrigerator's four interior shelves and four-door bins.
This higher count of door bins helps you better organize your condiments, eggs, bottles, and small items while offering easy access.
This appliance may not have a built-in ice maker like high-end models on the market, but it offers great functionality and versatility you can benefit from daily.
What We Like
It has tempered glass shelves and durable door bins
Offers long-term warranty
Has a sophisticated
What We Don't Like
The manual ice maker is not convenient
Dimensions:66.5 x 24 x 26 inches | Total Capacity: 11.1 cubic feet | Refrigerator Capacity: 8.49 cubic feet | Freezer Capacity: 2.62 cubic feet | Consumption: 339 kWh per year | Ice Maker: None | Garage Ready: No
9. Magic Chef HMDR1000ST 23.6-Inch 10.1-Cubic-Foot Top-Freezer Refrigerator - Best Budget
When you have a small kitchen all for yourself, you probably won't need many of the added features of the high-end models.
If so, get this Magic Chef top-freezer refrigerator and stick to your budget.
Even with its low price point, you can enjoy an above-average capacity of 10 cubic feet with this refrigerator.
It is a freestanding refrigerator with a reversible door to conveniently position it anywhere in your space.
What I love about this top-freezer refrigerator is how it seems to be designed for solo living.
It cools quickly, so you can plug it in even when you're just about to store your groceries.
On top of this, it also has an automatic defroster to save you from the effort and mess of manual defrosting.
If you ask me whether this appliance is reliable, I'd say it is, given its price.
What We Like
Affordable
Has reversible door hinges
Offers efficient energy use
What We Don't Like
It does not come with a built-in icemaker
Dimensions:59.4 x 23.6 x 25.2 inches | Total Capacity: 10.1 cubic feet | Refrigerator Capacity: 7.4 cubic feet | Freezer Capacity: 2.7 cubic feet | Consumption: 297 kWh per year | Ice Maker: None | Garage Ready: No
What is the Best Narrow Fridge to Fit in Small Spaces?
If you're seeking the best narrow fridge that offers optimal space-saving, the table below compares dimensions measured in inches, total capacity measured in cubic feet, refrigerator capacity measured in cubic feet, freezer capacity measured in cubic feet, energy consumption in kilowatt-hours per year, whether an ice maker is included, and if they are garage-ready.
It's not enough for the best skinny refrigerators to fit your narrow kitchen space. Be an informed consumer and know what to look for when purchasing.
Storage Capacity
Your skinny fridge should not only fit in your kitchen. It should have convenient storage space inside to fit your groceries.
This is another dimension you should look into.
Many models have less than 10 cubic feet of space. That means less storage for you. Models with at least 10 cubic feet of storage have enough room for the weekly groceries of one or two people.
Is It Energy-efficient?
Look into skinny refrigerators with an Energy Star certification. They are at least 9 percent more energy efficient than those that meet the state efficiency requirement.
In short, you can save money on your electricity bills by using these models.
Top-freezer or Bottom-freezer Fridge?
They're likely not skinny if you're searching for the best side-by-side refrigerators. Most skinny fridges have freezer compartments on top or at the bottom of their refrigerator compartments.
Get a top-freezer refrigerator if you want more door storage. In contrast, get a bottom-freezer refrigerator if you want easier organization. Click here for the best bottom-freezer refrigerators.
Style and Finish
Common color options for the front of your fridgeare black, white, and stainless steel. More expensive skinny fridges can have a fingerprint-resistant stainless steel finish.
Get a freestanding unit if you want to reposition your fridge. Choose a built-in unit if you want a seamless kitchen interior design.
Shelves and Cabinets
Your skinny refrigerator's shelves, drawers, and door bins help with your storage options.
Many skinny refrigerators on the market come with adjustable shelves. These shelves are easy to configure to give you more space. Through this, you won't need to add another home appliance dedicated to storage.
Here's a tip to maximize your fridge space. Use magnets or clips to hang your herbs, small bags, and condiments on the shelves and walls of your refrigerator.
Does It Have an Ice Maker?
Bigger refrigerators usually have external water dispensers outside the door that double as ice makers. In the case of skinny refrigerators, you can find the built-in ice maker inside the freezer.
This may be convenient, but can also take up space for frozen items.
Is It Garage-ready?
A garage-ready skinny fridge can still operate and maintain its internal temperature even in uneven temperatures.
The garage is a perfect semi-outdoor space that can become hot or cold anytime. This gives you a good gauge of the durability of your appliance.
How are Energy Star models different?
Energy Star models are different because they meet strict standards for energy efficiency set by the U.S. Environmental Protection Agency and the U.S. Department of Energy. These products typically use less energy, saving consumers money on energy bills while protecting the environment by reducing greenhouse gas emissions.
How wide are small refrigerators?
The width of small refrigerators typically ranges between 15 to 24 inches, but the exact measurement depends on the model and manufacturer. Always check the specific product specifications for precise measurements.
Do narrow refrigerators cost more money?
Narrow refrigerators don't necessarily cost more money. The cost depends on various factors including brand, features, size, energy efficiency, and materials used. While some narrow models may be more expensive due to these factors, others may be quite affordable. Always check the product's exact price and features.
With the narrow refrigerators I've discussed, my top pick might not be yours, and that's okay.
Choose the best narrow fridge that fits your kitchen space and, more importantly, your needs. Consider how often you do your groceries and what items you want to store in your refrigerator.
You'll want a narrow fridge that seamlessly fits your kitchen and lifestyle.
Electric self‑propelled lawn mowers with electric start revolutionize home lawn care by offering the power of gas mowers without the noise, fumes, or maintenance. Models like the Greenworks 40V Brushless deliver 5.0 Ah motor capacity, twin blades, adjustable cutting heights, and collapsible handles, while the EGO Power+ 56V boasts PeakPower technology for extended runtime on half‑acre lawns. Easier to operate than push mowers and lighter than gas models, these mowers often require minimal assembly, fold compactly for storage, and maintain peak performance with little upkeep. After testing 11 leading models, here’s how they stand up in terms of cutting power, battery life, and overall convenience.
Listed below are the best electric start self-propelled lawn mowers:
Greenworks 40-Volt: The Greenworks 40-Volt Brushless Self-Propelled Lawn Mower is notable for its lightweight and maneuverability on tough terrains but has a limited runtime of 45 minutes.
EGO Power+ 56-Volt: The EGO Power+ 56-Volt Self-Propelled Lawn Mower excels with an 80-minute runtime and capacity to cut half an acre on one charge, albeit at the expense of a heavier build.
Makita 36-Volt: The Makita 36-Volt Brushless Lawn Mower offers diverse features such as a high-capacity grass bag catcher and up to 10 adjustable cutting heights, making mowing around curbs somewhat difficult.
Milwaukee 21”: The Milwaukee 21” Walk Behind Self-Propelled Lawn Mower stands out with durability, ergonomic design, and a 60-minute runtime, augmented by built-in LED lights for low-light mowing. Its advanced features command a higher price.
Ryobi 40-Volt: The Ryobi 40-Volt Walk Behind Self-Propelled Lawn Mower is distinguished by an innovative bag removal system and extended 70-minute runtime, with less effectiveness on wet grass.
1. Greenworks 40-volt brushless self-propelled lawn mower - Best with collapsible handles and adjustable height
What I like
Twin blades that result in more bites
40V rechargeable electric battery integrated with USB port
Brushless motor that offers more torque
7-position height adjustment and collapsible handles
What I Don't Like
Runs for only 45 minutes
Several features have made the Greenworks self-propelled lawn mower or string trimmer a cut above other electric lawn mowers.
Among them, the first is its rear-wheel-drive power that tackles the toughest backyard terrain with ease. The 10” rear wheels, coupled with 8” front wheels, make the mower secure and stable by increasing traction. When the wheels are securely placed on the ground, mowing grass from uneven surfaces is easy.
This electric lawn mower packs a powerful punch because of its high-capacity 5.0Ah motor. With TRUBRUSHLESS technology, its motor is low maintenance and promises efficient operation by offering more torque.
Where gas engine mowers make a lot of noise, this electric mower is significantly quieter. Added to that is its dual blades that cut grass into smaller pieces, producing finer clippings.
Note that this unit provides up to 45 minutes of run time when fully charged, though much of it depends on the operator’s technique and grass condition.
Operating this self-propelled mower is easy-peasy, as it starts at the push of a button. On top of that, the height is adjustable to 7 different positions, guaranteeing comfort to the users.
With side discharge, rear bag, and mulching capabilities, this unit is more versatile than other self-propelled mowers.
Even better? It’s a lightweight unit that weighs less than 22 pounds, further enhancing its user-friendliness. The lightweight design, coupled with collapsible handles, allows for vertical storage.
Not to forget, a 4-year tool and a 2-year battery warranty cover this lawn mower.
Item Weight: 21.65 lb. | Cutting Width: 21-inch | Cutting Options: Side-Discharge, Mulch, and Bag | Runtime: 45 minutes
2. Ego power+ 56-volt self-propelled lawn mower - Best for cutting half an acre of lawn in one charge
What I like
Outstanding power and extended run time
Adjustable deck height
Hassle-free storage
Quiet operation
What I Don't Like
Heavy design
Easier to operate than other units, the EGO Power+ self-propelled lawn mower cuts half an acre of grass on single use. We attribute its efficiency to its engineering, as well as the fact that it’s powered by PeakPower technology.
Because PeakPower technology combines the power of two 56V 5.0Ah (ampere) batteries, this lawn mower delivers exceptional performance. It cuts grass non-stop for up to 80 minutes without overheating on a single charge.
Further enhancing the efficiency of this power tool is its brushless motor that offers high torque and speed so that the lawn is mowed without difficulty. The best part about its battery is that it comes with a universal battery that is compatible with more than 70 power tools.
Despite being powered by a high-efficiency motor, this unit doesn’t produce a lot of noise when in operation. So, it’s a perfect alternative to traditional gas mowers. Besides low noise operation, LED lights on the front part of the machine allow gardeners or enthusiasts to mow the lawn in the dark.
Like other self-propelled lawn mowers, this machine features adjustable handles, whose height can be adjusted up to 4”. Height adjustment is easy and can be done using one hand while operating the device.
Not only does it offer the torque of a self-propelled gas mower, but it also is similar to it in terms of design. Like gas models, this lawn mower is heavy, as it weighs around 62 pounds. But despite its heavy design, it doesn’t require much floor space for storage.
Item Weight: 62.6 lb. | Cutting Width: 21-inch | Cutting Options: Mulching, Side-Discharge, and Bag Discharge | Runtime: 80 minutes
3. Makita 36-volt brushless lawn mower - Best with high-capacity grass bag catcher
What I like
Adjustable up to 10 cutting heights
2,500 to 3,300 RPM ensures faster cutting
Keeps noise down in quiet mode
Durable steel deck
What I Don't Like
Wide back wheels make mowing around curbs or clips slightly challenging
This self-propelled lawn mower from the house of Makita shares many traits with lawn mowers on this list.
Starting with the basics, this lawn mower features a 21” deck, brushless motor, and 3-in-1 design for side discharge, bagging, and mulching. Because these are present in Greenworks and EGO Power+ lawn mowers, it’s no different from them in these aspects.
Now moving to the unique aspects, this brushless lawn mower boasts a teal body, and a grass bag catcher rests atop it. The grass bag catcher, with a capacity of 16 gallons, has a grass level indicator that notifies when it’s time to empty the basket.
Another aspect that separates it from others is its cutting height, which is adjustable to 10 different heights.
The brushless motor of this lawn mower cuts through grasses with ease, as it delivers 2,500 to 3,300 RPM. Also, heavy-duty steel is used in the deck to ensure it withstands the test of time.
With two 4Ah batteries, this unit runs for about 40 minutes and can cut more than ⅓ acres of grass on a single charge.
While it doesn’t make as much noise as gas mowers, it still comes with a quiet mode. When switched to quiet mode, this lawn mower reduces noise and vibrations by running at 2,500 RPM.
Like the best electric lawn mowers, this unit has a fold-forward handle for easy storage. Last but not least, the battery of this lawn mower comes with indicators to prevent it from overloading, overheating, and over-discharging.
Item Weight: 80 lb. | Cutting Width: 18-inch | Cutting Options: Dynamic Cut System, Single Point Height Adjuster, Easy Reel Back | Runtime: 43 minutes
4. Milwaukee 21” walk behind self-propelled lawn mower - Best for mowing in low-light areas
What I like
Recessed bail bar design with ergonomic handles
Active Speed Management from 0 to 4 mph
LED lights make mowing low-light areas easy
Folding handles allow for compact storage
What I Don't Like
Slightly expensive
This Milwaukee Walk Behind Self-Propelled Lawn Mower sold by the Home Depot blends durability with ergonomics without compromising on performance. Starting with the basics, this battery-powered self-propelled lawn mower features 3 exclusive Milwaukee technology- Powerstate brushless motor, Redlithium batteries, and Redlink Plus Intelligence.
The Powerstate brushless motor delivers excellent torque, more than a 200cc gas-powered mower would. That’s what makes it ideal for the most demanding mowing chores. On top of that, it cools more rapidly and reduces noise, which makes it maintenance-free.
Meanwhile, Redlithium batteries provide more power, run time, and recharges than other lithium batteries. To our surprise, this battery can perform in climates as low as 0°F/-18°C while maintaining consistent power. On a single charge, it can mow up to 1/2 acre of land.
Coming to Redlink Plus Intelligence technology, it protects the unit while maximizing performance.
What’s more, the Milwaukee lawn mower delivers instant throttle response within 1 second to increase user productivity and control. Speed can also be adjusted on this lawn mower between 0 and 4 mph. The addition of the active speed management paddles allows users to adjust their walking pace without losing control.
Not just speed, but height can also be adjusted up to 4”, which adds to its user-friendliness.
Much like other lawn mowers, it is a 3-in-1 management tool, which allows for mulching, bag, and rear side discharge. Of course, it comes with a durable steel deck.
That’s not all; the built-in side LED lights and front headlamps make it easy for users to mow in low-light areas. Not to forget, its foldable design doesn’t require much floor space for storage.
5. Ryobi 40-volt walk behind self-propelled lawn mower - Best with easy lift single motion bag removal
What I like
Push button allows for hassle-free starting
High-intensity LED lights
3-year tool and 5-year battery warranty
Easy lift single motion bag removal system
What I Don't Like
Not usable on wet grass
With this walk-behind self-propelled lawn mower, Ryobi has done a great job of blending power with convenience. Ryobi has leveraged advanced technologies and superior ergonomics for a premium experience, making it a top-of-the-line mower.
This 40V self-propelled cordless lawn mower has a premium brushless motor and lithium-ion batteries. No wonder it offers more power without compromising on run time.
Mowing dry grass full of weeds is easy with this lawn mower, as the self-propelled rear-wheel drive makes it easy to maneuver. This also increases traction, which is why it’s effortless to use.
With a run time of 70 minutes, this lawn mower can mow up to 3/4 acres of yard, which is impressive.
Where most electric mowers have steel decks, this self-propelled lawn mower features a polypropylene deck. Besides being lightweight, it resists corrosion and is covered by a lifetime warranty.
Not to forget, the deck features a 7-position single-point height adjustment, which allows mowers to choose the grass height from 1.5” to 4”. On this 10” high wheel design device, gardeners can select between side discharge, mulching, and bagging functions.
Emptying the grass catcher bag on this self-propelled lawn mower isn’t much of a chore, thanks to the easy lift single motion bag removal feature.
Also, it doesn’t require much space for storage, as the aluminum handles are foldable, allowing for vertical storage. Instead of a standard battery charger, Ryobi supplies a 40V rapid charger for fast charging the device.
Oh, and did we mention that this self-propelled lawn mower is backed by a 5-year warranty?
6. Snapper xd 82-volt cordless self-propelled walk mower - Best with load sensing technology
What I like
High-efficiency brushless motor technology
Load sensing technology adjusts power as per the requirement
7 height-of-cut adjustment
Speed control lever allows for speed adjustment
What I Don't Like
Not suitable for cutting tall grass
An excellent alternative to corded electric mowers is this cordless self-propelled walk mower from Snapper.
This battery mower comes with a 3-in-1 mowing deck that is durable and allows users to side discharge, mulch, and bag with ease. Unlike other walk-behind lawn mowers, it’s equipped with 2 Briggs & Stratton 2.0 batteries that can run for about 90 minutes when each one is fully charged. However, installing a 4.0 or 5.0 battery can increase the run time.
Alongside batteries and a lawn mower, a large grass bagger is included in the package that fits about 2.1 cubic feet of grass clippings.
This battery-powered lawn mower comes outfitted with a high-efficiency brushless motor that doesn’t require much maintenance. Where most self-propelled mowers run at one speed, the speed of this unit is variable. Thanks to the easily accessible speed control lever, controlling the forward mowing speed is a breeze.
What makes it the best electric lawn mower is its load-sensing technology that adjusts the power to suit the cutting demands. Like most battery-powered mowers, the height of the cut can be adjusted to 7 different heights using a single lever for the user’s convenience.
Starting this walk-behind mower is easy- clicking the push button is all you need to do to turn on the engine. Like other rear-wheel drive mowers, this device is fairly quiet, so it won’t disturb others.
Thanks to the vertical storage capabilities, this best self-propelled mower doesn’t require much storage space. Needless to say, it is sold in 3 styles and 4 sizes, so there’s one for every lawn.
Item Weight: 80.9 lb. | Cutting Width: 21-inch | Cutting Options: Mulch, Side Discharge, and Bag | Runtime: 45 minutes
7. Dewalt 20-volt walk behind self-propelled lawn mower - Best with auto-sensing technology
What I like
CARB compliant
Auto-sensing technology that increases torque in overgrowth
Adjustable self-propelled wheels
Brushless direct drive motor that delivers high performance
What I Don't Like
Not recommended for properties more than 1/2 acres
For flat, sloped, or uneven terrains, this rear-wheel drive lawn mower from DEWALT would be the best bet.
The DEWALT relies on 2 20-Voltage MAX 10 Ah batteries for power. Using state-of-the-art technologies, this battery optimizes run time.
Besides a powerful battery, a high-output brushless direct drive motor is outfitted in this lawn mower. This, coupled with a powerful battery and direct drive motor, delivers powerful performance, ensuring the unit runs for up to 60 minutes non-stop.
Furthermore, this electric lawn mower is integrated with auto-sensing technology to increase torque where the grass is thick and overgrown.
When it comes to ergonomics, DEWALT didn’t disappoint us, as it’s packed with a few user-friendly features. Users get 6 cutting heights to choose from when mowing the lawn, which range from 1.5” to 4.0”. Its self-propelled rear wheels are also adjustable, so users can choose their cutting pace.
Noteworthily, the steel deck of this electric lawn mower is 21.5”. Not only does this allow for wider cuts, but it also ensures you complete the task as quickly as possible.
Much like its competition, this unit is a 3-in-1 system. Landscapers and gardeners can choose between mulching, bagging, and side-discharge options as per their needs.
Regarding starting up the device, users need not go through much hassle. Just clicking the push button will turn on this electric lawn mower, and mowing the grass will become easier than ever.
One praise-worthy aspect of this lawn mower is that it complies with CARB guidelines, so it produces fewer harmful emissions, particulates, and toxins.
Item Weight: 80 lb. | Cutting Width: 21-inch | Cutting Options: Mulch, Side Discharge, and Bag | Runtime: 60 minutes
8. Hart 40-volt cordless brushless self-propelled mower - Highly efficient mower with fast charger
What I like
Impressive battery power and powerful mulching blade
Charges 2 times faster than most mowers
Fast-fold handles allow for convenient storage
Height can be adjusted up to 4”
What I Don't Like
A bit costly
Fast-charging battery mowers that can mow more grass in one charge is difficult to find. But we found this HART cordless self-propelled mower after hours of research. Its fast charger charges the mower 2 times faster than a standard 1.5Ah charger.
The onboard storage features 2 rechargeable lithium-ion batteries (6.0), because of which this lawn mower cuts up to 1/2 acres of grass on a single charge. Like most battery-powered lawn mowers, the other battery powers this device when 1 battery runs down.
Because of its 3-in-1 design, users can decide how to mow the lawn- a side discharge chute, mulching, or bagging. Unlike corded electric lawn mowers, it doesn’t feature the annoying pull cord. Instead, the machine starts at the push of a button, which further enhances its user-friendliness.
It also comes equipped with a single-point height adjustment knob with which height can be adjusted without hassle. As such, the height of this lawn mower can be adjusted between 1 1/2” and 4” cutting range.
A grass catcher bag also comes with this lawn mower to hold grass clippings. Once it’s filled with lawn grass blades, you can empty it and reuse the bag.
Unlike a push mower, running this mower uphill and down wouldn’t be an issue because it’s self-propelled. Further adding to its versatility is speed variability, which can be adjusted according to the ground surface.
And the best part? A 5-year warranty covers this self-propelled lawn mower, and a 3-year warranty backs its battery.
Item Weight: 65.15 lb. | Cutting Width: 21-inch | Cutting Options: Mulch, Side Discharge, and Bag | Runtime: 40 minutes
9. Skil Pwr Core 40-volt self-propelled lawn mower - Best with weather-resistant body
What I like
Convenient vertical storage
Long battery life
Automatic PWR JUMP charges the battery to 30% within 15 minutes
Sold in multiple styles
What I Don't Like
Doesn’t support side discharge
There’s a lot to like about this self-propelled lawn mower from SKIL. For one, this lawn mower doesn’t have annoying pull cords to start. Instead, it has a convenient push-button, which needs to be pushed, and the machine will turn on.
Despite being a battery-powered lawn mower, this device is no less powerful than gas-powered models. That’s mainly because it’s equipped with a high-performance engine. As soon as it’s turned on, the brushless motor offers it the torque and power of gas minus the hassle associated with those models.
Thanks to the PWR CORE 40 lithium-ion battery technology, this lawn mower has a 25% longer run time than other battery-powered models. That’s mainly because each battery cell is wrapped with a cooling material that prevents it from overheating.
Also, SKIL doesn’t disappoint us when it comes to fast charging. The automatic PWR JUMP charges the 2 batteries within 15 minutes. While cutting grass, adjusting the speed is easy-peasy. Simply turn the knob to your desired speed, and that’s it.
Amid mowing the lawn, deck height can be adjusted to 7 settings with a single lever, which is a thoughtful design. Instead of 3, you get 2 function capabilities with this unit: mulching and bagging.
Moving on, the body of this self-propelled lawn mower scores high on durability. That’s because the construction is weather-resistant. Hence, exposure to the elements won’t affect its longevity.
Similar to the best self-propelled lawn mowers, this unit doesn’t occupy much floor space when it comes to storage. That’s because the telescoping handles are foldable, which allows for vertical storage.
Item Weight: 60.54 lb. | Cutting Width: 20-inch | Cutting Options: Mulch and Bag | Runtime: 45 minutes
10. Yardmax self-propelled lawn mower - Best with double ball bearing wheels
What I like
Double ball bearing wheels ensure smooth rolling
Adjustable up to 3.55”
Deck cleanout port makes cleaning underneath dthe eck easy
Mower speed can be adjusted according to the walking pace
What I Don't Like
Hard to control even at 1st speed
With YARDMAX Self-Propelled Lawn Mower, cutting through thick and tall grass wouldn’t be too much of a chore. That’s mainly because it’s a gas-powered mower outfitted with a durable 201cc OHV YARDMAX engine.
Starting this gas mower isn’t time-intensive, as it comes with an automatic choke system. Therefore, neither priming nor choking is required to start this device.
What’s more, it’s built with exclusive and industry-leading continuously variable transmission or CVT, because of which adjusting the mower pace is easy.
Unlike other self-propelled lawn mowers, it offers excellent traction, thanks to the exclusive rubber tires. Further, the aggressive spike tread pattern of the wheels enhances the traction and maneuverability of this lawn mower.
Notably, this unit sports double ball bearing wheels for extended durability. Not just that, but they allow for easy and smooth rolling. Double ball bearing wheels, coupled with the self-propelling features, make this device a perfect alternative to push mowers.
YARDMAX self-propelled lawn mower also comes with a deck cleanout port, which makes cleaning underneath the cutting deck a breeze.
As you’d expect for a quality lawn mower, the deck height of this gas-powered model is adjustable. With the single lever added to the body of the mower, you can set the mow height between 1.38” and 3.55”.
Another interesting feature that makes it better than the self-propelled mowers of the competition is its MaxFlow deck technology. This volute spiral deck design ensures better mulching and airflow.
Finally, this heavy-duty yet foldable lawn mower doesn’t vibrate much, and the credit goes to the 1-piece durable steel deck.
11. Toro 60-volt stripe self-propelled mower - Best for striping patterns
What I like
2-year mower warranty and 3-year battery warranty
9-position cutting height options
SmartStow allows for compact storage
Speed control knob makes speed adjusting easy
What I Don't Like
Takes about 190 to 290 minutes to charge
Our final recommendation is this Stripe self-propelled lawn mower from the Toro Company, which is great for creating striping patterns. This lawn mower is typically found in sports fields and golf courses; hence, it’s a perfect upgrade from a reel mower.
Weighing no more than 71 pounds, this Stripe self-propelled mower isn’t as heavy as other units of the same cost. Its lightweight design, in conjunction with a self-propelling feature, makes it easy to maneuver.
What’s more, it comes with a knob that allows users to control speed. Adding to that is a turbo button that activates max-power mode and delivers on-demand power, making mowing an easy-peasy chore.
Like other battery mowers, it’s highly versatile equipment, as you can choose between mulching, bagging, and side discharge.
Besides being more lightweight than most, it features a space-saving foldable design.
As it comes with a super bagger, it collects large volumes of grass clippings, eliminating the hassle of emptying them regularly. Traversing rough and uneven terrains isn’t an issue with this self-propelled lawn mower, as its 10” high rear wheels provide enough traction in rough terrains.
Coming to the motor, it’s equipped with a 3-phase brushless motor with RunSmart onboard intel that optimizes torque and RPM for more run time and power.
However, it is outfitted with only 1 battery, unlike other self-propelled lawn mowers that come with 2. Despite that, its run time of 65 minutes is decent. Those with small lawns will be able to mow their entire lawn in one go.
Item Weight: 71 lb. | Cutting Width: 21-inch | Cutting Options: Bagging, Side Discharge, and Mulching | Runtime: 65 minutes
What is the best electric start self-propelled lawn mower?
The table compares notable electric start and self-propelled lawnmowers based on key attributes like weight (in pounds), cutting width (in inches), cutting options, and runtime (in minutes). These factors are vital for buyers to consider when making their selection.
It’s not every day or every year that you buy self-propelled lawn mowers, so you must be careful when buying one for your lawn. Regardless of what brands say, not all lawn mowers have the capabilities, qualities, or build to withstand the test of time. More so, lawn mowers aren’t cheap equipment that can be upgraded every year or so. Once purchased, they will last for a good number of years.
For this reason, gardeners and landscapers must consider every aspect of the model they plan to buy. While professionals know what to look for in a self-propelled mower, newbies have difficulty navigating the options. Things get more complicated when upgrading from a push mower to a self-propelled electric model.
But don’t worry, for we’ve put together a list of some important factors that you must consider when choosing a self-propelled gas or electric mower. Let’s check them out.
1. Lawn Size
Always remember that lawn size is the first thing you will have to consider when purchasing a lawn mower.
For a half-acre lawn, a small-sized battery electric mower will be the right pick, as it will mow the lawn with efficiency. However, the same lawn mower won’t be viable for mowing more than half an acre of lawn or uneven terrain. That means a lawn mower with a greater engine capacity is what you’ll need for large lawns.
Most self-propelled electric mowers can handle a suburban lawn of average size, i.e., 1/2 acre, on a single charge. For yards much larger than that, an electric mower with a high-capacity battery will be needed.
While battery size isn’t an issue for small yards, you should pick models with small decks. That’s because they are easy to maneuver through obstacles or tight curves.
2. Power Source
Self-propelled lawn mowers are either gas-powered or electric-powered.
Although most professionals prefer gas-powered lawn mowers because of their excellent power, they produce a lot of noise. Also, filling oil, gasoline, or fuel now and then is quite a hassle.
For this reason, many professionals have started turning to electric lawn mowers. Though electric-powered, present-day electric lawn mowers are as powerful as gas-powered lawn mowers. They also start with the push of a button, do not generate a lot of noise, and are hassle-free. Plus, they do not consume as much energy as gas-powered ones, meaning they are environmentally friendly.
When choosing an electric mower, you get to choose between corded and cordless models. While corded models are the least expensive, they work only where electrical outlets are available to connect the wire. And let’s be honest, not every lawn has an electrical outlet, which means you’ll have to get an extension cord to mow the lawn, which is inconvenient.
Besides the inconvenience, there’s always the risk of mowing the cord and cutting it through.
Alternatively, cordless models are the best because they work without electrical outlets. All you need to do is charge them, and they run for about an hour or so, depending on their battery capacity.
Always go for self-propelled lawn mowers with dual ports, so 2 batteries can be installed. This way, when one is exhausted, the other keeps the unit running by supplying it with power. As such, 2 batteries double the run time, which is useful when mowing large lawns.
3. Weight
The next important factor after the power source is the weight of the lawn mower, which is measured in lbs. (pounds).
How easily and effortlessly you can maneuver the lawn mower depends on its weight. As with other equipment, a too-heavy unit will not be maneuvered easily. Rather, it will be cumbersome, which means mowing the lawn will be a difficult task.
On top of that, using them for an hour or so will lead to back problems and hand fatigue.
That is why many experts suggest opting for a lightweight model when choosing lawn mowers. Not only are they easy to maneuver, but they also eliminate hand fatigue or backache, allowing users to mow the lawn in one go.
Weight is also an important factor when mowing uneven or rough terrains. Because of the bumps or debris, moving the lawn mower is a challenge on uneven terrain. Lightweight models are easier to move through areas with bumps than heavyweight units.
4. Deck Size
For those unversed, the deck is the part of the lawn mower that holds the blade. So, the wider the deck, the more ground it will be able to cover in less time.
Most self-propelled lawn mowers come with a deck of 21”, which is ideal for average-sized lawns.
However, if you’re looking for something wide, you should go for a mower with a 22” deck. Not only is it big enough to finish mowing quickly, but it also isn’t so large that maneuvering it will be challenging.
You can go for a lawn mower with a larger deck if your lawn is very large. By large deck, we mean a deck with a width of 24” or 25”. There are even commercial mowers whose deck is as wide as 30”.
5. Wheel Drive
Self-propelled lawn mowers drive themselves forward using either front-wheel drive, rear-wheel drive, or all-wheel drive. So, unlike push mowers, there’s no need for you to push them forward. Besides covering large spaces faster, these devices leave a smoother cut, meaning you’ll have a well-manicured lawn.
Bear in mind this convenience comes with an exorbitant price tag. But the good thing is that you will no longer experience aches in your hands or thumb that you would have otherwise by using a push mower.
If your lawn is full of obstacles, a front-wheel drive lawn mower would be an excellent pick. That’s because you can easily push the mower down using the handles and pivot around any wall or corner with ease.
For uphill and side-hill mowing, rear-wheel drive mowers are the best bet. Even for backyards, a lawn mower with rear-wheel drive is considered ideal by experts because the front tires do not lose traction when handles are pushed while going uphill.
And because all-wheel drive lawn mowers are made explicitly for cutting across any surface, we think it’s best for hilly terrains.
6. Wheel Size
Last but not least, don’t forget to check the wheel size of the self-propelled lawn mower you’re planning to buy. Generally, lawn mowers have 2 types of wheels: high and low.
High-wheel mowers feature front wheels of 8” and rear wheels of 9” to 12”. On the other hand, low-wheel mowers come equipped with 8” wheels on both the front and rear sides.
It’s a no-brainer that larger wheels are better than small ones because of their traction. They also do a better job of smoothing out bumps, relieving users from the struggle of mowing uphill.
What’s more, they roll over low-lying hard landscaping and barriers easily, thanks to the extra height clearance.
Lowe’s or Amazon: Which is a reliable third-party seller of self-propelled lawn mowers?
While both are reliable third-party sellers, Amazon (company) is best because it’s home to lawn mowers from almost all brands across the globe. Also, Amazon is generous enough to offer returns on its products. That way, if you don’t like the lawn mower you’ve purchased, you can always contact the brand for returns.
What is the life expectancy of an electric lawn mower?
On average, electric lawn mowers last for about 5 years, though much of it depends on the model, the make, and consumer practices.
Is it safe to mow wet grass with an electric mower?
No, you should never mow your lawn when the grass is wet. That’s because if electricity comes in contact with water, you’ll be at a high risk of electrocution.
With the 11 best self-propelled lawn mowers at your disposal, which model are you planning to go for?
If you still haven’t decided, here are our top recommendations. Overall, the Greenworks Brushless Self-Propelled Lawn Mower earns the top spot on our list for many reasons. Its TRUBRUSHLESS technology motor offers excellent torque, so much that it can mow grass on uneven surfaces. Also, it’s virtually maintenance-free, complete with 7-position height adjustment and collapsible handles.
The EGO Power+ Self-Propelled Lawn Mower is a close second, as it has a run time of about 80 minutes. This unit also offers high speed and torque for quick mowing without overheating.
As a last piece of advice, don’t forget to consider your budget when selecting a lawn mower.
Types of fences range from classic wood pickets and durable vinyl panels to industrial chain-link fencing, stone walls, and even eco-conscious living fences—each offering unique benefits in privacy, security, boundary marking, and aesthetic appeal. Whether you're designing a backyard garden, securing a livestock enclosure, enclosing a pool, or creating a decorative perimeter, your choice of fence should align with your property’s function, style, and climate conditions. In this comprehensive guide, we explore 21 fence types based on material, design pattern, top detail, and intended use—to help you choose the ideal solution for residential, commercial, or agricultural needs.
Types Of Fences
Wood Fence
Wood fencing is one of the most common types of fencing in the United States and many parts of the world. The reason why wood is such a popular option is that they provide elegance, style, and unmatched quality.
Tall wooden fences are easy for homeowners to install. Besides, they give a good sense of privacy and are an attractive option that gives value for money. There are numerous types of wood used to make fences like the Spruce tree, Cedar, Pine, or Eastern Red.
However, you also need to spend a bit on the upkeep and maintenance of wooden fences. Over time, elements of weather and temperature may change the appearance of the wood, or it may rot from water damage. Thus, it needs to be painted, sealed, or stained. How long the fence will last depends on the quality of the wood.
Aluminum Fence
Aluminum fences are often used in gardens and residential homes across the country. They are low-maintenance, neat-looking fences, which come in various designs. When it comes to durability, these fences stay the same for long enough if they are not tampered with.
However, they do require a coat of paint before installation to prevent rust formation. Some people like to powder coat their aluminum fences to prevent damage by weather changes. Apart from this, people use the fence as a base to grow climbers. When these plants grow thick and develop flowers, it only adds to the beauty of the backyard.
This option for fencing is an eco-friendly one since it does not require much upkeep. It is also easy enough to install on your own. That being said, if you are looking for a sturdy option that keeps annoying trespassers out, then other options are much stronger than aluminum.
PVC White-Picket Fence
This is one of the cheapest options available on the market. This option mimics the white-picket look of a wooden fence, and by appearances, it manages to pass off as one. However, the difference is that it isn't made of wood but PVC, a type of light plastic.
So with this option, you get a white-picket fence without the high cost. However, these fences are not made of 100% PVC. Often, they have some amount of natural wood on the inside to provide added sturdiness. Despite this, it isn't as tough as a fence made of natural wood.
Apart from the cost difference, this fence is also resistant to water damage, and harsh temperatures and even survives waterlogging. This is entirely due to its outer PVC layer which does not allow moisture to penetrate through.
However, since this fence is a bit flimsy, it might not be a great pick if you want a security fence or wish to maintain privacy in the yard.
Wrought Iron Fence
You must have come across a fancy and elegant-looking fence or gate, usually black in color but sometimes painted white or silver. They are easily identified as the ones that look like thin arrows pointing toward the sky. These fences are traditional-looking and are used on various residential and official properties.
They are often tall and slender with medium gaps and intricate details on the top. Although they make excellent fences, they are see-through. So, they are good enough for security, but not for privacy. Along with elegance, they are great for marking the boundaries of the house.
This option is on the pricey side because iron doesn't come cheap. The upkeep cost isn't as affordable either. Since iron is prone to rust, it will need fresh paint and anti-rust maintenance coats. Some homeowners use sandpaper to remove the rust, which is a wise move before applying a fresh coat of paint.
Vinyl White-Picket Fence
Vinyl is similar to PVC, and the fences look almost identical. But this material is sturdier than PVC and comparatively easier to install. It's not possible to install this on your own, so it is best to hire professional help.
If we talk about the benefits, many of them will overlap those of PVC. It is easy to clean and paint. Once painted, it doesn't chip off as wood does over time, thus giving the fence a longer lifespan. Although it may be pricey to install, it will turn out to be a good investment in the long run because it doesn't require much upkeep or maintenance.
All you need to do is wash it with water and soap if it's very dusty. Just hose it down with water, and it's as good as new. What’s more, it doesn't rot and get water-damaged like wood.
Chain Linked Fence
These fences usually have two components that make up the entire fence. The first is the upright pole made of either concrete, iron, or steel, and the second is the steel chain fence that is attached to these vertical poles.
The great thing about this type of fence is that it needs no maintenance and is incredibly simple to install. You can do it yourself - no need to hire professionals to install it. It comes in ready-to-assemble pieces and is almost effortless to install. Moreover, it can help you save a lot of money. In other words, you can call it a quick-fix fence.
Even though they are tall, they are transparent and don't do much for keeping the privacy of the yard. Also, this kind of fence is not helpful for security concerns for your property. Still, it's good for keeping stray animals out of the yard for marking your home or field boundary.
Electric Fence
Also known as sensor-based fences, these fences are powered by electricity. It constitutes a mesh of wires and poles at intervals to give the thin mesh some support and structure. Touching the fence in any way provides the person with a strong electric shock.
If you are wondering why someone would go to such extreme measures to maintain their boundaries, here are some of the reasons.
People living in a crime-prone area might feel the need to take such preventive measures to keep thieves and mischievous persons at bay. Sometimes, electric fences are used to keep stray and wild animals out of the yard too.
Once a person/animal comes in contact with the electric fence, an alarm is raised inside the house. There are highly sophisticated systems these days that can detect an intrusion in real time. Also, it can show the exact location of the intrusion on a map.
Bamboo Fence
If you want to take the eco-friendly approach, bamboo fences are the right choice for you. Fences made from bamboo plants are often used to create partitions in fields and yards. If you choose to order these to make fences, they will come in panels or sheet rolls. You can place them one after the other to make a fence of the desired length.
Pre-adjusted bamboo panels are also available - which are easier to install. Apart from that, if you are looking to add a natural look to the fence, bamboo is perfect, as the panels naturally vary in color, giving it a rustic look.
However, care needs to be taken not to drench it in too much water because it tends to rot. To counter this, many people paint the panels with black or transparent tar, which increases the lifespan of bamboo sticks.
Hewn Log And Branch Fence
Here is a fence option for those of you who love a rustic and natural wooden look. As the name suggests, this type of fence is made out of wood and thick branches in intricate patterns. The wood is left uncut, which is why slender trunks and bigger branches are used to make this fence.
Log and branch fences look best in farms, barns, and fields. You can see them in various designs ranging from warped cross-posts to layering untreated wood and branches on top of each other to create a thick fence with small gaps. One of the most common designs is horizontal beams attached to wide cylindrical posts.
Depending on the thickness of the fence, it will provide adequate privacy and security from stray animals and intruders.
On the downside, this fence is made entirely out of wood. And, as we mentioned earlier, wood is prone to damage as the weather changes; thus, it may need frequent maintenance.
Split Rail Fence
Split Rail fence gets its name from the older days when timber was split into many parts to create a fence. Wooden logs would be cut into small and slender sizes and then fit together to form long rails. Usually, this pattern is found in areas where there is plenty of timber wood available.
To add to that, these types of fences are widely used today and can be installed without the use of any tools or nails. You can find them along old bars, which help protect the boundaries of livestock and prevent them from running astray. They are also seen on historically older properties in farms and Greenlands.
When it comes to appeal and beauty, Split Rails give the area and property a rustic feel and will complement a wooden house well. But, they might not be ideal if you are looking for something elegant.
Brick Wall Fence
Another standard option for creating fences is using bricks. Often, these types of fences are seen in South Asian and African countries and some parts of Europe. It is equally common for private homes and is also used as a yard fence for residential colonies.
Even with brick and mortar, it is possible to build a fence of about any size as you, please. While some choose to keep the brick fence plain, others paint it using various colors and install creepers to add greenery to their yards. This looks exceptionally aesthetic when vividly-colored flowers of all colors grow on these creepers, adding to the beauty of the fence.
Furthermore, brick fences can also be used in combination with barbed wire and iron fencing. On the plus side, these fences are water-resistant and survive all weather easily. However, it's difficult to relocate, and shifting costs a significant sum of money.
Barbed Wire Fence
Barbed wire fences might not be the most attractive-looking option for a fence, but it definitely is the cheapest. A pointy wire is held from one end to the other with wooden posts at regular intervals. This kind of fence is transparent like chain-linked fences, but at least the chains prevented animals from entering the boundary.
Whereas this fence does not prevent human or animal trespassing. Small-sized animals like cats or dogs can easily pass through it. However, there is a chance of injury due to the pointy parts of the wires.
These wire fences cannot be increased in height, and they usually do not exceed 4 feet. However, there is a way to make the most of this situation. The wires can be used atop another stone or brick fence to increase the height of the fence.
Precast Concrete Fence
This might be the most durable material for building a fence. This fence is sure to last you as long as your house even. Along with that, it is also one of the most cost-effective fences because it requires little to no maintenance.
If you are looking for maximum security from a long-lasting fence, then a concrete fence might be the right choice. When it comes to wood, wire, and iron, these materials are prone to weather damage.
This is an excellent choice if you are not planning on changing your fencing for a long time. Concrete fencing is gaining popularity because it is easy to install. They are shaped in a mold in factories and brought to your yard for the installation. However, if you like the nostalgic and classy wooden look for fences, then this option is not for you.
Stone Wall With Iron Fence
Using stone to build fences is an age-old tradition, especially in Europe and some other parts of the world. Construction of a stone fence is a lengthy affair and can even be expensive depending on the type of stone used.
Stonewalls give the look and feel of a fort from ancient times. This is not necessarily bad, and many people prefer this look over its wooden or brick counterparts. The benefit of stonewalls is that they are incredibly sturdy and age well. This option is low maintenance and exceptionally durable, and able to withstand harsh temperatures and violent windstorms.
It is possible to keep the stone construction to knee length to get the effect of half stonewall and half iron fence. And the upper half can consist of iron grills of your preferred design. The stone part of the fence won't wither over the years, but to protect the iron grill, you might need paint to protect it.
Uncut Boulder Fence
Using rock and stone for creating boundaries must be one of the oldest ideas for fencing. People in ancient times used naturally occurring rocks and boulders to protect their homes and tribe from wild animals. They were also used as dams to trap water from nearby sources, but boulders can even make the most sturdy fences even nowadays.
While in the olden days' people used to pile stones one on top of the other in a shapely fashion, stone fences have undergone many developments in recent years. Wire mesh frames and mortar are used to give the fence a finished look.
Plants and flower shrubs can be placed around it to add to the beauty of this natural fence and give it a touch of greenery. These fences will look best in wide-open spaces or extensive gardens. However, they can be pretty huge and will look out of place in small backyards. If you are going for a stone or boulder fence, know that it is difficult to maneuver and move it around after installation.
Living Fence Or Shrub Fence
Now that you have seen fences made from wood, iron, vinyl, concrete, and many other substances, how about a wall full of life? If you are a plant lover and want to surround your backyard with greenery, you may want to consider this option.
This kind of "Living Fence" is made entirely of trees, which are usually tall and narrow. A row of trees lining your yard would look majestic. Trees of around 8 feet should be just fine. Along with getting plenty of oxygen supply, it will also create a lush-looking barrier for maintaining the privacy of the yard.
Moreover, a living fence might have a list of benefits, but they are challenging to maintain. We would recommend this only if you have extra time on your hands to upkeep the trimming and maintenance (or if you are planning to hire professional help).
Fence Styles By Purpose
Are you planning to build a fence to cover the patio for a cozy corner, or do your rose bushes need a decorative structure for support?
Where and why you need to place a fence will most often dictate the kind of fence you should install. Let us look at the type of fences appropriate for specific purposes.
Garden Fence
Small gardens with flower bushes will need low and decorative fences to add to their beauty. And when it comes to more extensive gardens, you could opt for a medium-sized wooden fence. Natural wood like cedar spruce or mahogany will be great options for garden fences.
There is one thing to consider for a garden fence- flower bushes and shrubs need to be watered every day, so the fence should be able to withstand that. If you are worried about the wooden fence getting spoiled by water, you can opt for PVC or Vinyl fence options. These are cheaper and look just like wood.
Pool Fence
If you have a backyard pool, a decent fence for privacy is a must-have. The fence must be somewhat resistant to water in case of splashes from the swimming pool.
Aluminum or Vinyl fences can provide a classy look for the pool and are light on the pocket. There are several designs to choose from, and they do not spoil quickly. To cover the gaps in the aluminum fences, you can add a few climbers at the top.
If budget is not an issue and you want to add fancy aesthetics, a boulder or rock fence would go spectacularly with a fresh and blue pool.
Farm Fence
There is no shortage of options for farm fences out there. Farm owners often choose the classic wooden fence to adorn the boundaries of their land. For wide-open spaces like fields and farms, electric fences may come in handy. They keep predatory animals like raccoons, foxes, or coyotes away from your farm animals.
Wire, chain link, and mesh fences with tiny gaps are perfect for chicken coops and for keeping other small animals like rabbits safe. Barns for horses, cows, and pigs can have a hewn log and branch fence. Moreover, you can make these fences yourself if sturdy branches are available in the area.
Snow Fence
For regions that experience heavy snowfall, dense and sturdy fences are required. If your backyard gets a good deal of snow collected every winter, you can use plastic materials for building fences. While some people prefer to use wooden fences in these frigid regions, others go with PVC or vinyl.
The benefit of plastic or PVC fences is that they are lighter in weight and can be moved around easily. They are often used at the side of the road to prevent snowdrifts caused by strong winds. Such fences keep the streets safe for driving. Finally, wooden fences are good too, but they are much heavier and cannot be installed and removed easily.
Fence For Privacy
If you are often outdoors either gardening or swimming in the pool, or simply lounging, you might consider investing in a good fence for privacy. Cedar, pressure-treated wood, and vinyl are good choices for fences without any gaps.
Fence panels are also available on the market, which you simply need to buy and install. The height of these fences can reach 8- 9 feet. However, if you want to mix it up and stay away from traditional paneling, then you can add designs to the top of the fence as a decorative feature.
That being said, every homeowner will have a different preference for the type of fence they choose to install.
Decorative And Functional Fence
White-picket fences are a great example of a function with beauty. They are classic and clean to look at and can be made out of a variety of materials. This is merely one example of the possible designs which would fit well in your backyard.
A more modern fence could have horizontal paneling, vertical poles, and panels, lattice design, checkerboard, and criss-cross, with spaces or without. A combination of two materials, such as wood with vinyl or PVC with wires, can be used to make endless creative designs.
Existing plain fences can be made decorative and interesting by adding a design topper to freshen up the look.
Fence Styles By Aesthetics
Speaking of decoration and aesthetics, not all homeowners want a plain-looking fence that simply does the job. Some look for particular styles and aesthetics for their fences to match the theme of the house and garden. And the best part is, there are hundreds of design options available. In this section, let's look at the fence styles by aesthetic.
Hideaway Or Private Garden
A private corner for reading books or a lounging space to nap in the shade calls for a cozy and warm-looking fence. To achieve this aesthetic, you can use tall wood panels for vinyl fences in natural color or a shade that matches the patio furniture. You could also add decorative top panels and coordinating gates.
Picket Or Traditional Fence
A classic feature in an American front yard, this iconic style is much loved in the country and is considered almost the default look for fences. The good thing about this style is that it can be made of different materials but still gives the same classy look to the area.
Lattice Design
These fences look great in almost any setting. They are versatile designs that can be used as panels for the complete fence or add areas of interest to a plain fence. Lattice fences are often made of Cedarwood, Spruce, pressure-treated pine, and sometimes whitewood. Since the lattice design is thin and frail, the top and bottommost rails are wider for support.
Contemporary Style
In the era of personalization, it is no surprise that people wish to beautify their fences too. Many modern fence creations are customized as per the homeowner's preference using new and unique ideas to style the garden or yard. Intricate wooden carvings and unconventional colors and shapes are used to add a personal touch.
English Garden Style
The English Garden fence style might be right up your alley if you adore classic and sophisticated décor. Traditionally, these garden fences are shorter than knee-length. They are purely installed for decorative purposes because they are too small to prevent any human or animal from crossing over them. Essentially, it is a beautiful way to keep the nursery in order.
Post Modern Fence
The most common pattern seen in this style is a series of posts with horizontal railing. Although this pattern can be translated to various other styles, it remains the most basic fence look. You can consider it as an up-to-date version of split rail fencing. It is often seen as having three wide and horizontal panels.
Gothic Style
This traditional style has been used for centuries to draw boundaries around the property. It is characterized by its evenly spaced vertical panels and pointy tops. The vertical panels are thin and long, while the pointed tops are sometimes sharp to prevent intrusion in the property premise.
Shadow Box Fence
As the name suggests, this style creates shadows that give the fence depth when viewing. Usually, it looks like a traditional vertical paneling with posts at regular intervals, but the gaps in the fence are filled by adding another layer of panels.
The second panel does not have any openings, so the light falls only on one side, giving it a shadowed appearance.
Dog Ear Fence
Another conventional fence design is the “Dog Ear” style. They are so named because the top part of the fence is cut in a curved style throughout the fence line. Apart from this detail of post tops which look like dog or cat ears, they look similar to a tall wooden fence. The tip of the individual panel can be curved or cut at a slight angle.
Flat Top Fence
This is the ultimate no-nonsense fence style. If you are a fan of simplicity and minimalism, you will appreciate the no-frills design of the “Flat Top” fence. As you can imagine, this fence has a plain border of even length on the top. The panel could be vertical or horizontal.
Stockade Fence
Farmers initially used this type of fence to contain and protect their cattle and livestock. In the olden days, it was also seen in military compounds. Its defining feature was the pointed tip at the top of the tall fence, which people added to prevent trespassers from climbing over. These panels with pointy tops are found in markets in two shapes- flat and cylindrical.
What Kind Of Fence Is Good For You?
While you may have loved all the fences, we listed above, not all of them might be for you. In this section, we will help you narrow down the options to find your ideal fence.
Purpose
It goes without saying that the kind of fence you should get depends significantly on where you plan to install the fence and why. Consider if you are looking for security, privacy, drawing land boundaries, keeping pets or farm animals safe, or a decorative piece. The answer to this will heavily influence your final fencing purchase.
Aesthetics
Your and your family's personality is reflected not only in the house but also in the fencing. Do a bit of research about the local materials and vendors and find the style for your fencing. If you like a simple fence, you are going to gravitate towards flat tops. Articles like these will help you understand and match your taste with locally available products.
Maintenance
How much or little you plan to look after the fence is an individual preference and depends on your lifestyle. If you know that you will be too busy to upkeep wood and iron fences, it would be wiser to opt for a low-maintenance option like PVC. However, if you are invested in maintaining your garden and fencing, opt for delicate fencing options like Spruce wood fences, living (plant) fences, bamboo, and iron fences.
Durability
While considering your options, the durability factor cannot be ignored. If you are willing to compromise on the durability, the fence better come at a bargain price! This will work in your favor if you like to change up the home décor every few years.
Local Availability
Let's say you selected a particular wooden fence from the internet, but that timber doesn't grow in your area. In that case, you will need to get the product from afar at a higher price. So, it's wiser to go for a locally available fence product.
Budget
Considering the budget goes hand in hand with value for money. If a fence is bound to last a long time, then spending a bit more can prove to be more economical in the long run. Wire, aluminum, chain, mesh, and PVC are the relatively lower-costing materials. If budget is not an issue, you can go for the pricier options of wood and iron for fencing.
Frequently Asked Questions
How Long Does Wood Fencing Last?
The life of the wood depends on the kind of wood used in the fence and whether it has been treated or not. The most common trees used are Pine, Cedar, and Spruce. Pinewood lasts for 10 years if used in natural form and, if treated, lasts for about 20 years. Cedar lasts for around 20 years untreated, and with treatment, it lasts 30 years. Spruce stays for 5 short years but, with maintenance, can reach 15 years.
How Is PVC/Vinyl Made And How Long Will It Last?
PVC or Poly Vinyl Chloride is a synthetic material that is produced using crude oil, natural gas, and salt. These ingredients are used in bulk, and the raw material undergoes some chemical treatments to form a white powder called PVC resin.
This resin is shaped using molds, and panels for fences are made. PVC and Vinyl products will easily last 20 to 30 years with little maintenance.
Do I Need To Use Concrete For The Fence Post?
Yes, concrete can be (and often is) used for making sturdy fence posts. If you don't want to use concrete, it can be replaced with other materials like solid gravel, densely packed soil, or clay. But concrete remains a standard and reliable option to get long-lasting fence posts.
Can Used Fencing Be Sold?
Yes! With the age of the internet, you can sell just about anything. And there are people who would appreciate a decent second-hand fence at a bargain price. If you want to replace your fencing after a few years, consider selling it on used items websites or on social media.
Conclusion
Phew! That was a long guide about fences. After this thorough discussion of various fences by type, purpose, aesthetics, and personal preference, we come to the end of this article.
We can more or less agree that the most basic purpose of a fence is to provide security and privacy. That being said, there's always room to include personal customizations on a fence you would want to live with for years to come.
But, tell us more about your thoughts. Which of these fencing options caught your eye? Did you find a fence that matched your purpose?
Please let us know in the comments below. Until next time!
Basement dehumidifiers are essential for controlling humidity, preventing mold growth, and maintaining healthy air quality in moisture-prone below-ground spaces. Whether your basement is finished, partially renovated, or used for storage, excess moisture can lead to musty odors, peeling paint, structural damage, and respiratory irritants like dust mites and mold spores. The best dehumidifiers for basements offer high pint-per-day removal rates, built-in humidistats, continuous drainage options, and filtration systems to purify the air while keeping it dry. In this guide, we review 13 top-performing models—evaluating capacity, energy efficiency, quiet operation, and long-term reliability to help you find the best unit for your needs.
Kicking off the list is the hOmeLabs HME020031N, a sleek, easy-to-use unit with an impressive 1.6-gallon tank capacity. Thanks to its large capacity, it is ideal for big rooms and basements, and can extract excess moisture from the air, thereby purifying it. Simultaneously, it prevents mildew and dust formation, allowing you to enjoy a fresh and clean indoor environment.
4,500 sq ft Large Dehumidifier: Our 15.4 x 11 x 24.3 inches...
Designed For Modern Home: That most dehumidifiers are clunky...
Why Did We Like It?
Right off the bat, we liked the size of this machine. It was perfect for our basement, and we noticed significantly less moisture and dust. It has a vast capacity to store water and ensures that the filter doesn’t have to be emptied far too often.
Another thing that impressed us was the design of this dehumidifier. It wasn’t burly and clunky but intelligent and functional. It had conveniently built-in wheels and handles to easily move it from place to place, and a quiet fan that makes minimal sound.
What’s more, running this dehumidifier involves minimal effort. You can adjust it to your ideal moisture setting, post which the machine will run for 24 hours until the tank fills up. When that happens, it will automatically shut off. No chances of a flood in the basement!
Not only this, but it also has an easy-to-clean filter and a turbo mode for maximum moisture reduction.
The dehumidifier has an auto defrost mechanism that is supposed to kick in by itself. Sometimes it fails to do so, and upon inspection, the filter was covered with a layer of white frost. Fixing the auto defrost option and making it more robust would make this machine virtually perfect.
This well-received dehumidifier is also known as the ‘Moisture Maniac’ because it can remove 50 pints of moisture a day! So, if you have a humid basement, this is a great choice and is ideal for spaces that are 3000 to 4500 sq. ft. big.
Our "Moisture Maniac" dehumidifier is rated to remove 50...
We designed our dehumidifier with convenience and style in...
Why Did We Like It?
This product goes hard and sucks the moisture out of the air to make it pleasant and less humid. In fact, it has a water capacity of 1.8 gallons and can extract 50 pints a day!
We like this product a lot because it isn’t just designed to be smart- it also looks the part. It is sleek and not too bulky, and sports wheels and a handle that allows one to move it around. This comes in handy because basements can be massive and crowded.
It's also effortless to use and runs on a set moisture setting for 24 hours, after which it shuts down automatically. To allow the collected moisture to drain out, a hose outlet has also been installed in the unit, for which a hose can be purchased.
This isn’t all; the unit also has a turbo setting to extract even more moisture out!
Despite the stellar performance of this unit, it does have one noticeable shortcoming. Even though it does a great job at keeping excess condensation at bay, it is rather loud and makes as much sound as an old window air conditioner. When set to turbo mode, it gets even louder.
Pros
Easy maneuverability
Sleek and fits in with any decor
Auto switch off mechanism
Hose outlet included for adequate drainage
Turbo mode for maximum moisture extraction
Cons
Noticeably loud, especially when set to turbo mode
Now, let’s look at the Yaufey 1, which is comparatively a more affordable option than some of the other dehumidifiers on this list. It is a versatile unit that can easily fit into a basement and even a bathroom, bedroom, or garage, basically any indoor space of up to 1750 sq. ft.
PROFESSIONAL & EFFICIENT DEHUMIDIFICATION: With removal...
CONVENIENT & SIMPLE TO USE: Home appliances never need to be...
Why Did We Like It?
Considering its lower price tag, this humidifier is an excellent option for basements that are slightly on the smaller side. It can remove up to 32.7 pints of moisture from the air, and this is usually when the average room temperature is under 95°F and 90% RH.
We also liked how incredibly simple this was to use since it featured a light-touch intelligent control panel, which could be seen from a distance and easily operated. Using the panel, you can set an ideal moisture setting, and the unit will run for 24 hours and then shut down by itself.
In case you want to skip manually draining the machine, it comes with a 2-meter-long drain hose to draw out the water. There’s also a separate turbo mode, and the unit has wheels to allow it to be transported easily. All of these features are indeed very impressive for its price!
This dehumidifier packs a punch with its extensive functionality and low price. However, even though it drains the collected moisture, the water leaks from the hose. This may lead to a messy situation, and thus, the fitting of the hose pipe should be reevaluated by the manufacturer.
Covering about 3000 sq. ft., this 35-pint dehumidifier is a great bargain for anyone with a moderately big basement. It has a light-touch intelligent control panel that easily picks a moisture level and returns the air to being cool and humidity-free.
3,000 SQ FT: Removes up to 35 pints (50 pints 2012 DOE) of...
AUTO DRAIN: This dehumidifier will stop running if the water...
Why Did We Like It?
Having the ability to monitor basement humidity in real-time is a great asset for any dehumidifier to have. This unit allows the user to pick a target moisture level, and it shuts off automatically when it reaches it.
However, you can also run the machine continuously regardless of the moisture level. For this, you just have to press the minus button until the control panel displays “NS.”
In that case, the humidifier will run until the drain bucket fills up, which you can prevent by setting up a continuous drain. Plus, the drain bucket has a sizable capacity of 1.5 gallons, and it is removable and easily cleanable.
Probably our favorite thing about this humidifier was that it doesn’t make more than 50 decibels of sound. This is low enough to be easily ignored over a normal conversation, and this way, the unit does its job without disturbance.
This unit exceeded expectations in terms of performance and functionality. However, it could improve its customer service. When we ordered the unit, the exterior was a little dented, so we asked for a replacement. However, the process of getting it replaced was cumbersome and could have been smoother.
Pros
Can monitor humidity in real-time
Auto switch off once it reaches target humidity level
This Airplus dehumidifier does a great job pulling moisture from the air and making it breathable and clean. It can remove up to 70 pints of water in a medium to a large room and actively monitor humidity to reach a preset target level.
It's easy to tell that this humidifier was made with a good user experience in mind. The ergonomic handles and wheels make it easy to move from one place to another. In addition to that, it emits a low sound when turned on, which doesn’t cause any disturbance.
We also appreciate how multifunctional and intelligent it is. It has four modes- Sleeping, Standard, Drying, and Raining, which can be chosen depending on the weather and requirement. The dehumidifier also detects prevailing humidity accurately and adjusts it to match the target level.
Additionally, it can pull out 70 pints of moisture from the earth and store it in its tank with a capacity of 1.1 gallons. So, once this tank fills up, the unit automatically powers off unless you have continuous drainage installed.
Another feature we liked was how sleek the dehumidifier looks and can fit well into the décor of any room- basement, bedroom, kitchen, etc.
This machine pulls out more moisture than some of the units on this list, which is commendable. However, it doesn’t have the most excellent storage capacity, and without continuous drainage, the drain bucket fills up too often
If you want to get rid of the sticky feel of your damp basement, then the Inofia HD161A makes for a great buy. It is comparatively affordable and has a powerful compressor that can remove up to 4 gallons of moisture a day from places under 1500 sq. ft.
This energy-saving dehumidifier is pretty easy to use and can remove up to 30 pints of moisture from the air. We fit it in our tiny basement and felt that it was ideal for a room that size.
It is also quite intelligent and allows the user to set a humidity level. Once it reaches that, the dehumidifier stops automatically and starts up again when the humidity level increases. There is a regular 1-24 hour timer too, so you can switch on the unit and go to sleep! You can also change the fan speed depending on the room temperature.
It comes with a drain bucket that can hold up to half a gallon of water and makes a slight audible sound when the bucket is full and needs draining. To avoid repeated trips to empty the bucket, you can also attach a self-draining hose.
Though the humidifier works well, we did feel that it doesn’t remove as much moisture as is needed. As mentioned before, it works well in a small basement but won’t be as effective in a bigger one. The drain bucket could have been bigger too.
Unlike other bulky, loud dehumidifiers, this one blends into your existing décor and doesn’t sully the aesthetics of your basement. It can easily cover spaces up to 4500 sq. ft. and remove a whopping 70 pints of moisture under 95°F and 85% RH conditions.
No products found.
Why Did We Like It?
First off, we liked the built-in wheels and ergonomically placed handles that can move the unit easily! The fan is adjustable and virtually soundless, and instead of concentrating all four air outlets on one side, they are located on four sides of the dehumidifier. This design improves dehumidification speed and ensures that the unit does its job in all directions.
Additionally, the unit is intuitive and allows the user to pick a target moisture level using the intelligent touch control, and then it strives to reach that level. Once it does so, it automatically switches off.
The auto-switch-off feature also kicks in when the drain bucket reaches its maximum capacity. Plus, the Safety Standby Mode prevents overheating, and the internal components of the unit are manufactured using thermal-resistant material. A child-lock setting further helps save children and pets from any untoward incidents.
All Waykar products come with a 1-year warranty and a guaranteed replacement. However, according to reports, the parent company requires fake positive reviews to be submitted in return for replacing the units, which isn’t a very fair or pleasant situation.
The Midea MAD5051QWT is a quality machine that prides itself on being the world’s first extendable dehumidifier and is highly flexible. It can operate in an extended or a nested form and can collect up to 50 pints of moisture from the air in a reasonably large basement.
4,500 Sq.Ft. OF COVERAGE - Midea dehumidifier with drain...
SMALLER FORM, LARGER CAPACITY - Up to 3X larger water tank...
Why Did We Like It?
Our favorite feature of this machine probably has to be its massive water tank. It is three times larger than a conventional water tank and can store water for longer durations, which mitigates the need to drain the tank continuously.
It is an incredibly versatile unit that has a clever no-bucket option to allow for more flexibility in removing moisture. So, you can remove the water tank and place the unit above something else that can collect the water, like a sink, floor drain, basin, etc.
The dehumidifier is also adept at adjusting humidity levels between 35% to 85% and can store up to 50 pints a day. It is perfect for use in a humid basement, bedroom, bathroom, and even a kitchen. It has a compact design to allow it to tackle humidity even in a small place, and once you find a larger room for it, it can be fully extended.
We noticed that the filters are impossible to remove without specialized tools. An instruction video online makes it look easy, like it can be removed just by sliding it out! But that isn’t practically possible because the handles don’t provide any grip. Consequently, a knife or a thin piece of metal is needed to pry it open.
Pros
Can store water for really long durations
Compact and extendable
Can directly place the unit above a drain without using a bucket
Now we have another product from Airplus on this list, albeit cheaper and smaller. The Airplus AP1907 removes up to 30 pints of moisture from the air per day and is well-suited for a small basement, kitchen, bedroom, etc. It can even fit into a closet and work in the background to purify the air.
Easy Operation & Multipurpose Modes: The portable...
Why Did We Like It?
This unit works well in a room with a temperature under 86°F and a humidity level of up to 90%. It can pull 30 pints of moisture and store it in a 0.3-gallon tank. To save your energy and lessen your work, it comes with a dehumidifier hose that helps the water drain continuously.
Other striking features of this unit are its compact size and quiet running, which ensures that it blends into the background and doesn’t distract. It is also pretty easy to use and comes with four modes- Standard, Drying, Sleep, and Raining, and you can choose one based on your requirement.
We also like how the dehumidifier automatically powers off after it reaches your desired humidity level, and thus, saves electricity. It also has a washable filter that is easy to extract and wash, and does not require frequent cleaning.
Considering its price, the unit is a great bargain and comes with excellent functionality as well. However, we felt that the capacity of the water tank was too low, and the drain hose wasn’t entirely efficient at draining the water.
Pros
Automatic power off after reachingthe target humidity level
This compact yet practical unit is great for spaces up to 2000 sq. ft. since it can remove about 24 pints of moisture from the air daily. This makes it perfect for medium to large rooms, where it can adjust humidity from 30% to 80%.
✔️Intelligent Control & Power Outage Restart : Simply...
Why Did We Like It?
First off, we liked the portability of the unit. It has 360° easy-roll hidden wheels that help it move from one place to another. It also has ergonomically placed handles that make it easy to be picked up if needed.
The dehumidifier is quiet and doesn’t interrupt sleep, work, or conversation. You can even use it to dry clothes in humid weather- simply place the dehumidifier in a room, hang the wet clothes nearby, and voila, they’ll soon dry up!
The Kesnos PD09PD is also easy to drain, which you can do either manually or by using a drain pipe. The unit comes with a 2-meter drain hose, which helps to auto-drain the moisture that builds up in the drain bucket. Alternatively, you can empty the drain bucket yourself.
Lastly, the bucket can hold up to half a gallon of water and comes with an alarm that rings when it's full.
Though the model has brilliant functionality, we did notice one thing that could be worked upon by the manufacturer. Once the water is emptied from the water tank, the unit makes a distracting gurgling sound when it runs. This is due to the water pooling in the tank and lasts for several hours.
Pros
Quiet and non-distracting
Water can be drained continuously
Can adjust the ideal indoor humidity for maximum comfort
Convenient and portable design
Easy-to-remove filter
Cons
A gurgling sound after water is emptied from the water tank
If you’re on the hunt for an excellent dehumidifier for your basement, then the TECCPO TAD-50C might just be the one. It is effective in areas up to 4500 sq. ft. and can store 50 pints of moisture from the air in its 1.8-gallon tank.
POWERFUL&EFFICIENT: ENERGY STAR certified dehumidifier...
QUIET OPERATION&SWING MODE: This energy-efficient unit runs...
Why Did We Like It?
This unit packs a host of features that are all very impressive. Its accurate temperature and humidity sensor work to maintain the humidity levels within the comfortable range of 45%-55%, under 80°F, and 60% RH. The unit also comes with Auto Defrost and Inside Drying options, which help the unit maintain functionality and stay in good shape.
This energy-efficient dehumidifier is also remarkably quiet and has a noise level of merely 49 decibels under the high-fan mode and 43 decibels under the low-fan mode. The reason it has multiple air modes is so that air circulates more effectively in the room, which leads to better moisture removal.
You can also customize how much moisture you want the unit to extract from the air. After setting the desired humidity level, the unit automatically switches off once that is reached. Alternatively, the compressor keeps working and removes at least 50 pints of water every day.
There was one somewhat significant drawback that we noticed while using the unit. The back of the dehumidifier completely freezes over, and a layer of ice forms on it after just one hour of use. Thereafter, it can’t pull any moisture until the ice is cleared.
Pros
Low operating noise
Minimal energy consumption
Can sense and regulate humidity in real-time
Pros
Cons
>Auto switch off once it reaches the target humidity level
The Hogarlabs PD11C makes it a piece of cake to control the humidity levels in a basement! It features three different modes to choose from for optimal performance, and can effectively cover an area of 3500 sq. ft. Thus, it is a versatile and functional unit that can remove up to 50 pints of moisture.
3500 SQ. FT 50 PINTS ENERGY STAR DEHUMIDIFIER - HOGARLABS...
ENERGY STAR - Dehumidifier with ENERGY STAR certification...
Why Did We Like It?
This unit accomplishes the task of maintaining ambient humidity in a basement with the help of its three modes that work according to the need of the hour.
The DEHU mode keeps the humidity levels at a normal, healthy range, whereas the DRY mode is great for drying wet clothes and preventing moisture. This mode extracts more moisture from the air. The CONT mode is perfect for areas that are continuously damp and need near-constant dehumidification, such as an underground basement.
In addition to its top-notch functionality, the design of the unit also deserves a big thumbs-up. It has four universal wheels and a top handle for easy movement, and embedded handrails on both sides to aid with such movement. These also make the dehumidifier easier to carry.
The unit also has other useful features, like a hygrometer for detecting humidity, a 0.6-gallon water tank, and a 2m drain hose for automatic continuous drainage.
The capacity of the water tank is only 0.6 gallons, so this means that it can't store a whole lot of water. Thus, frequent trips to empty out the water tank become inevitable and tedious as well. Such a situation can only be prevented if the unit is used along with the drain hose.
The Honeywell TP70WK is a trustworthy choice for reliable, long-lasting moisture removal. It can pull up to 70 pints of moisture daily, and while doing so, it uses up less energy than other conventional dehumidifiers. Since it covers up to 3500 sq. ft., it is the ideal fit for a basement environment.
No products found.
Why Did We Like It?
We dig how practical and versatile this unit is. It can be used not only as a basement dehumidifier but also as a whole-house dehumidifier- in the kitchen, laundry room, and even the gym. It can help food stay fresh for longer, accelerate drying of clothes, reduce corrosion of equipment and eliminate gym odors.
Interestingly, this compact yet powerful unit is Energy Star qualified and thus uses up less electricity. This will also help you save money every month!
Moreover, the water tank sports splash guards to prevent accidental spills, as well as a drain tube to allow the unit to eject water continuously. In addition to that, the filter used by the unit can be washed easily and doesn't need to be replaced for a long time.
The unit also comes equipped with a digital humidity readout and an elegant front mirror display to track the changes in the level of humidity throughout the day.
Despite its great performance, the Honeywell TP70WK does have some room for improvement. The drain hose doesn’t come with the unit and must be separately purchased. This becomes a problem because the drain receptacle at the back has a flange on it that prevents most regular hoses from being used with it.
Pros
Fits with any kind of decor
Saves electricity
Stored water doesn’t spill over
Supports continuous drainage of water
Washable air filter
Cons
No drain hose included
Not compatible with regular hoses
Dehumidifier for Basement Buying Guide
We believe some factors must be kept in mind while buying the best dehumidifier for a basement. These are:
1. Capacity
Different dehumidifiers have varying levels of moisture they can pull from the air and different water tank capacities. If you have a big basement, you will need a dehumidifier that can pull at least 50 pints of moisture from the air.
In addition to that, the more moisture a unit pulls, the more its storage capacity should be. Thus, it is always a wise choice to go for a machine with greater capacity.
Our pick in such a case would be the dehumidifier from Vremi. It comes with a hose drain outlet to allow continuous drainage of water.
2. Energy efficiency
Most dehumidifiers need to run near-constantly to be effective, and this is bound to take up plenty of electricity. The more the capacity of a dehumidifier, the more energy it’ll take up.
Thus, to prevent soaring electricity bills, we recommend that you look for a dehumidifier with an Energy Star certification. This not only shows that the unit will use up the least amount of energy required, but also acts as an indication of an eco-friendly brand.
If you’d like an Energy Star-certified dehumidifier, we recommend the Honeywell.
Verdict
We’ve finally reached the end of our list, but we understand if you’re a bit confused since there are so many options.
So, before we sign off, we’d like to mention our top picks. Our first recommendation would be the hOmeLabs as it pulls an impressive amount of moisture and boasts a robust storage mechanism. The other product we’d like to recommend would be the Vremi Dehumidifier, because of its top-notch and extensive features that dehumidify the basement effectively.
So, give yourself the gift of good health and get one of these today!


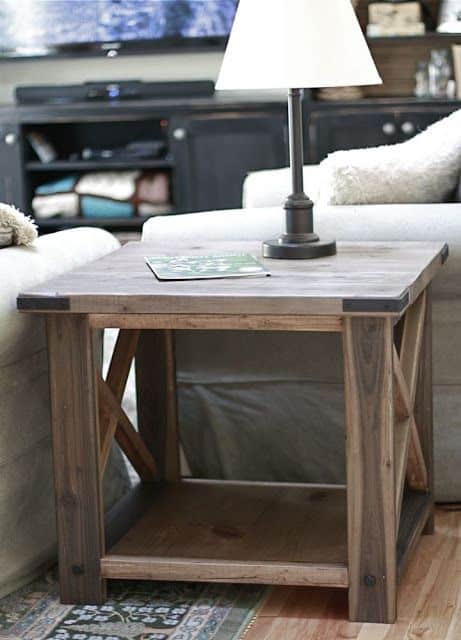
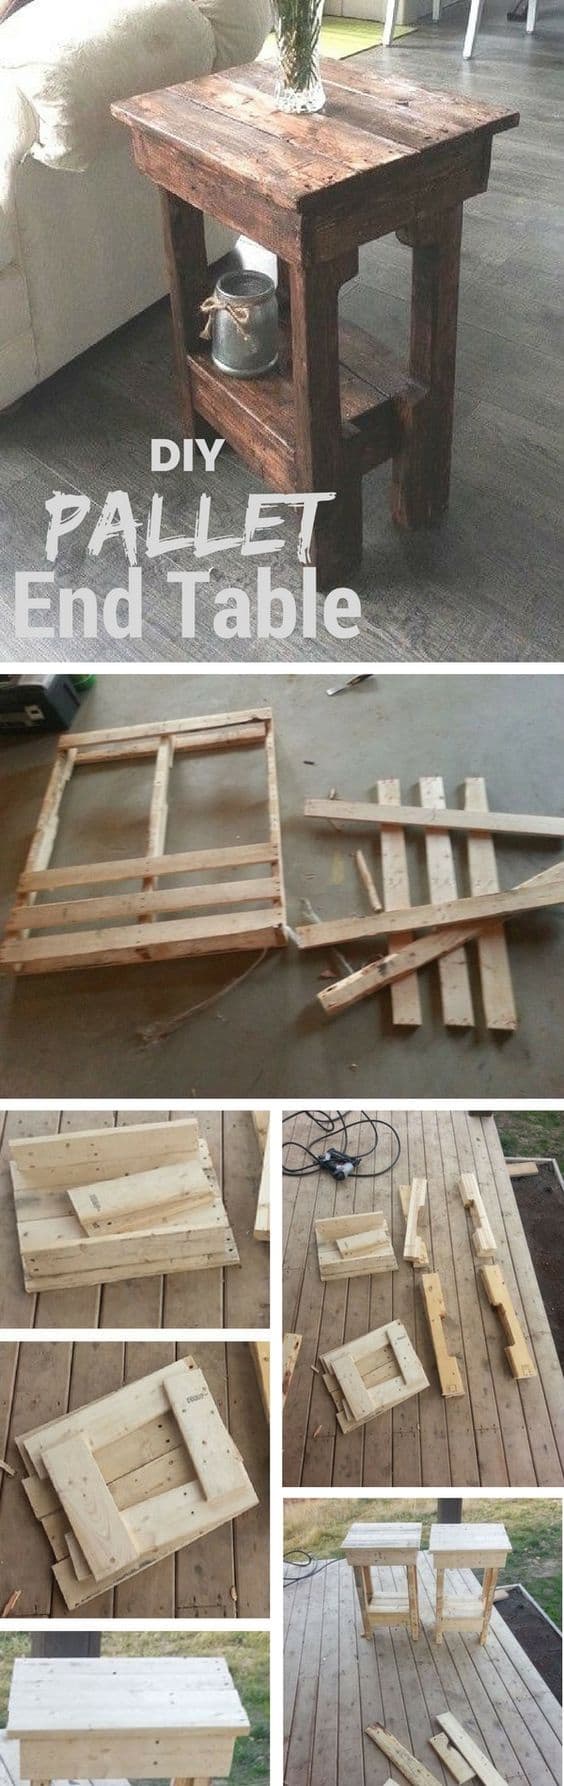

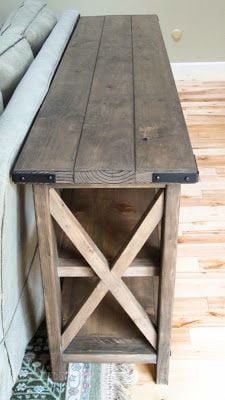
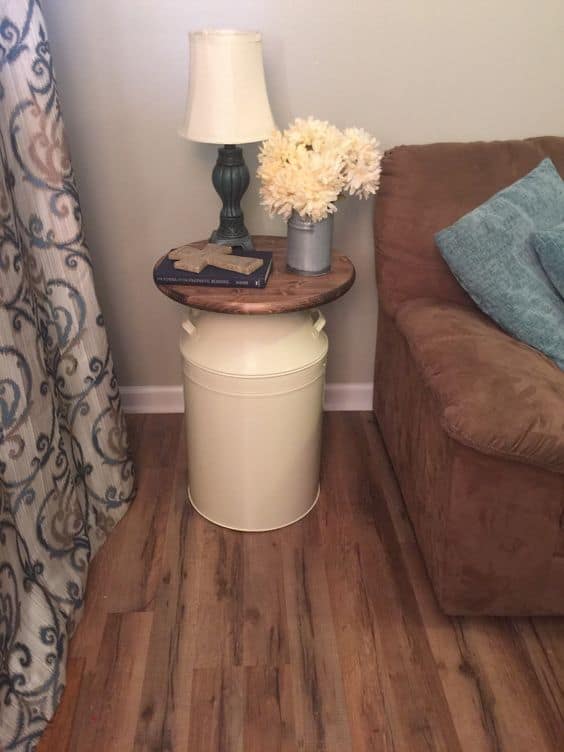
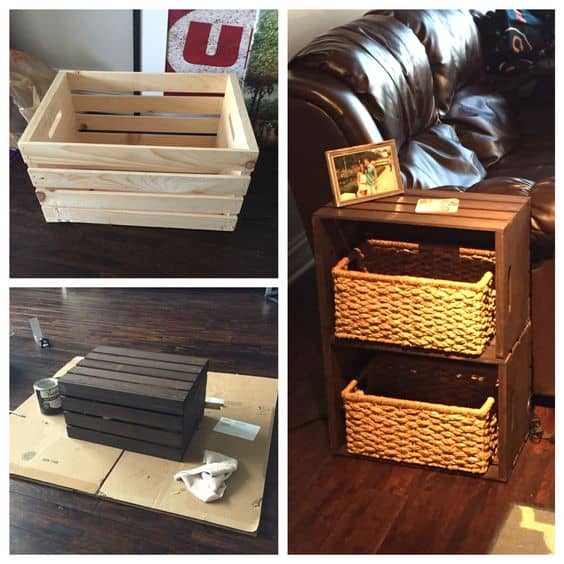
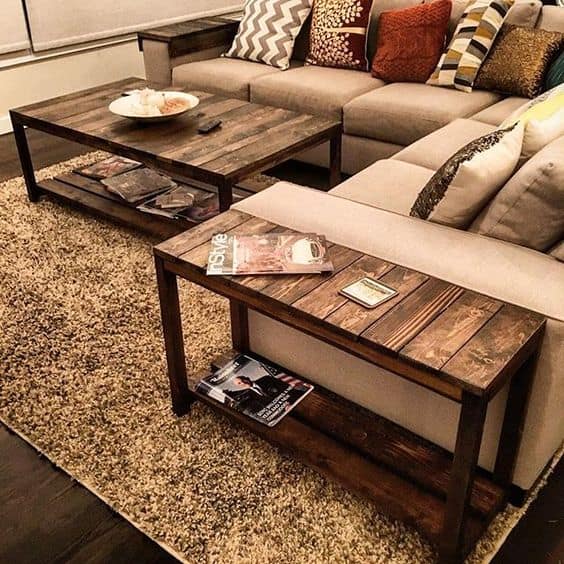

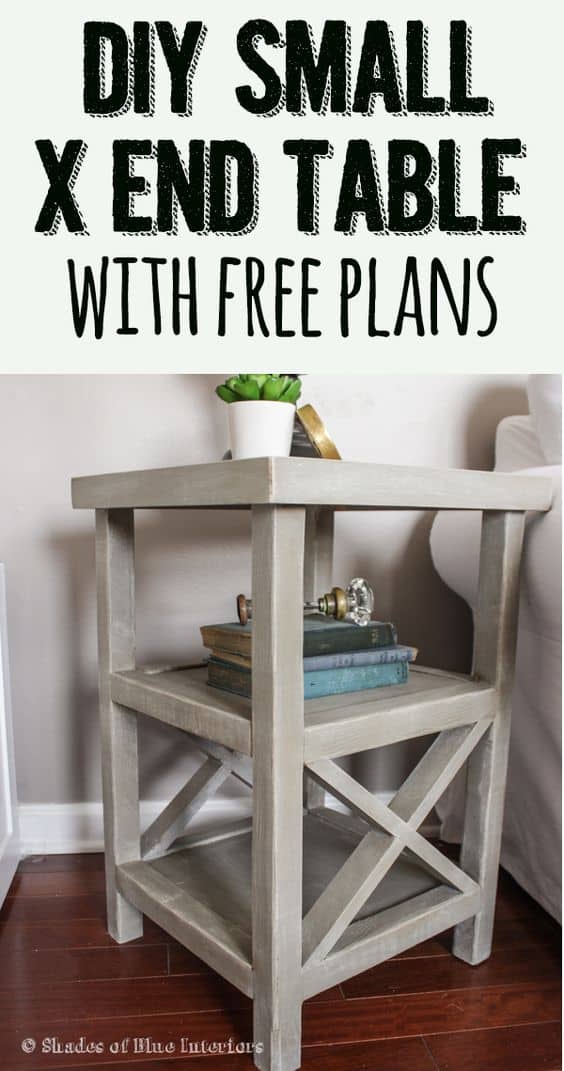
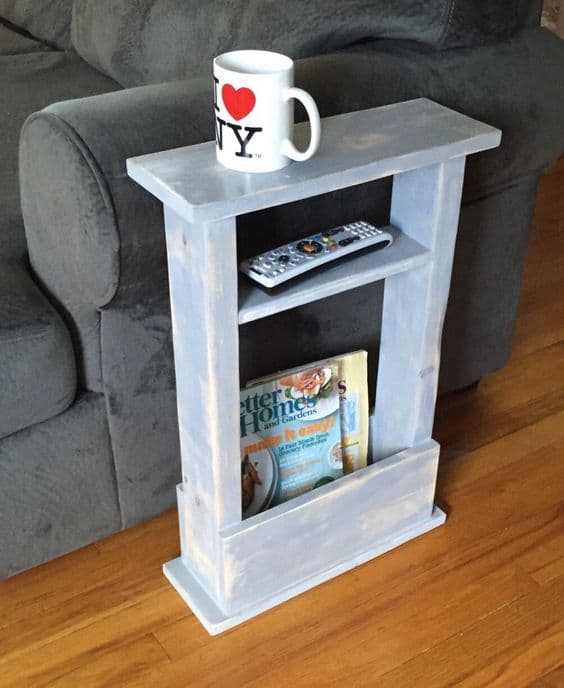
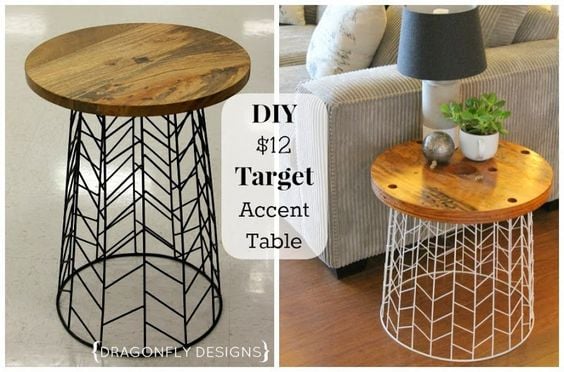
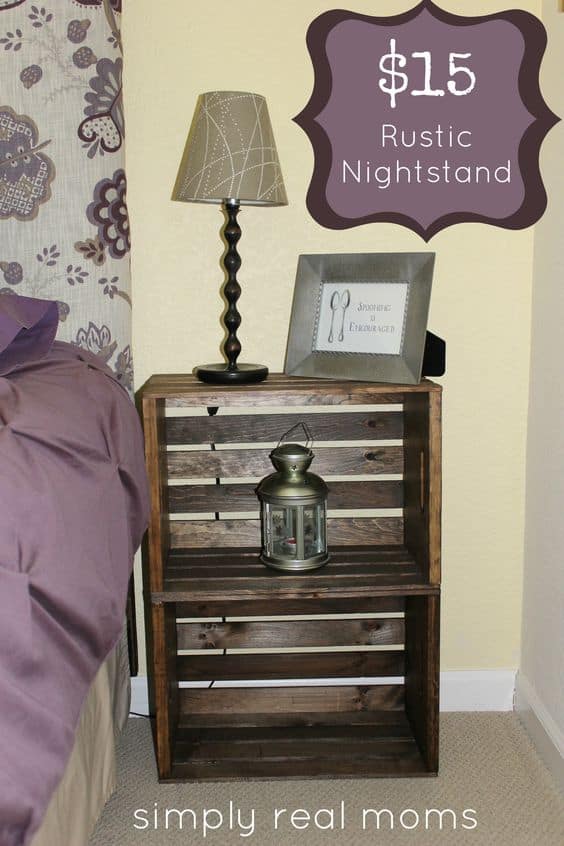
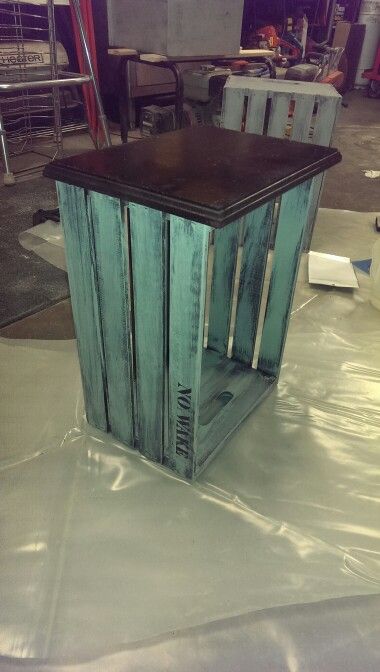
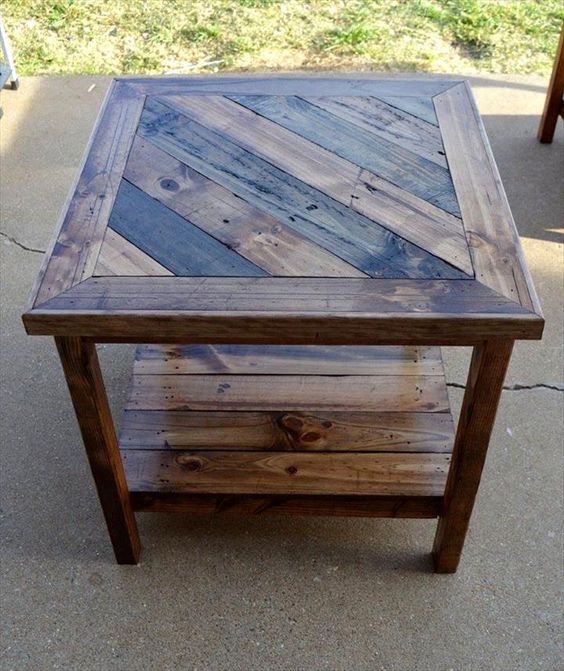


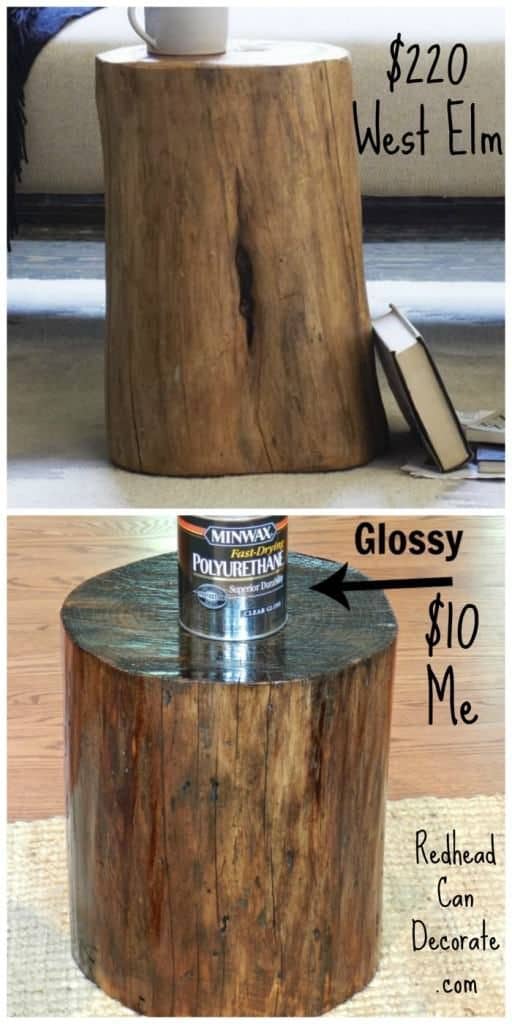
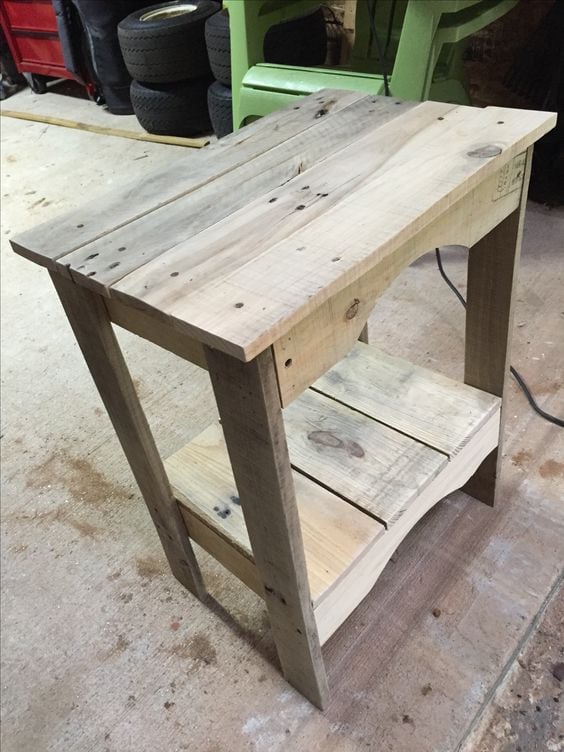
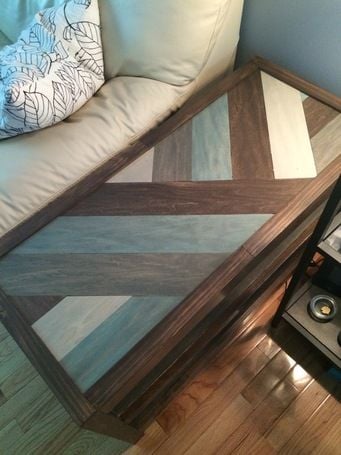
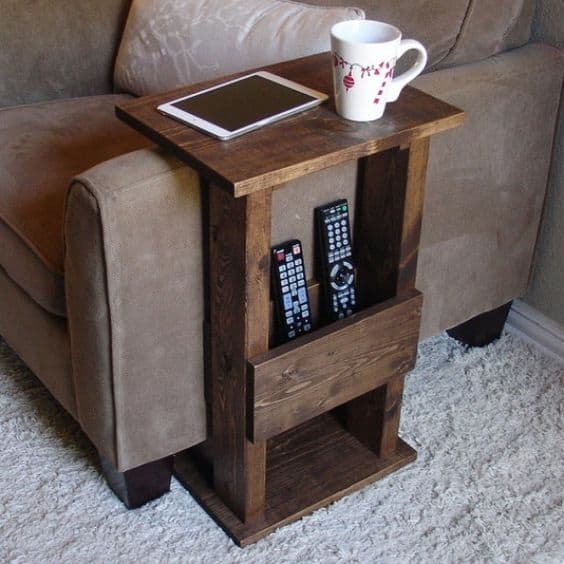
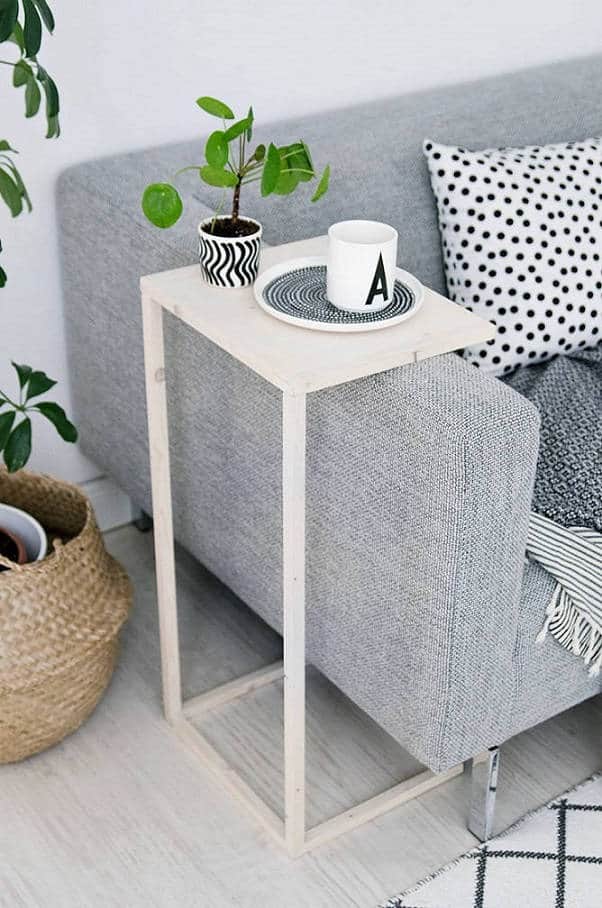


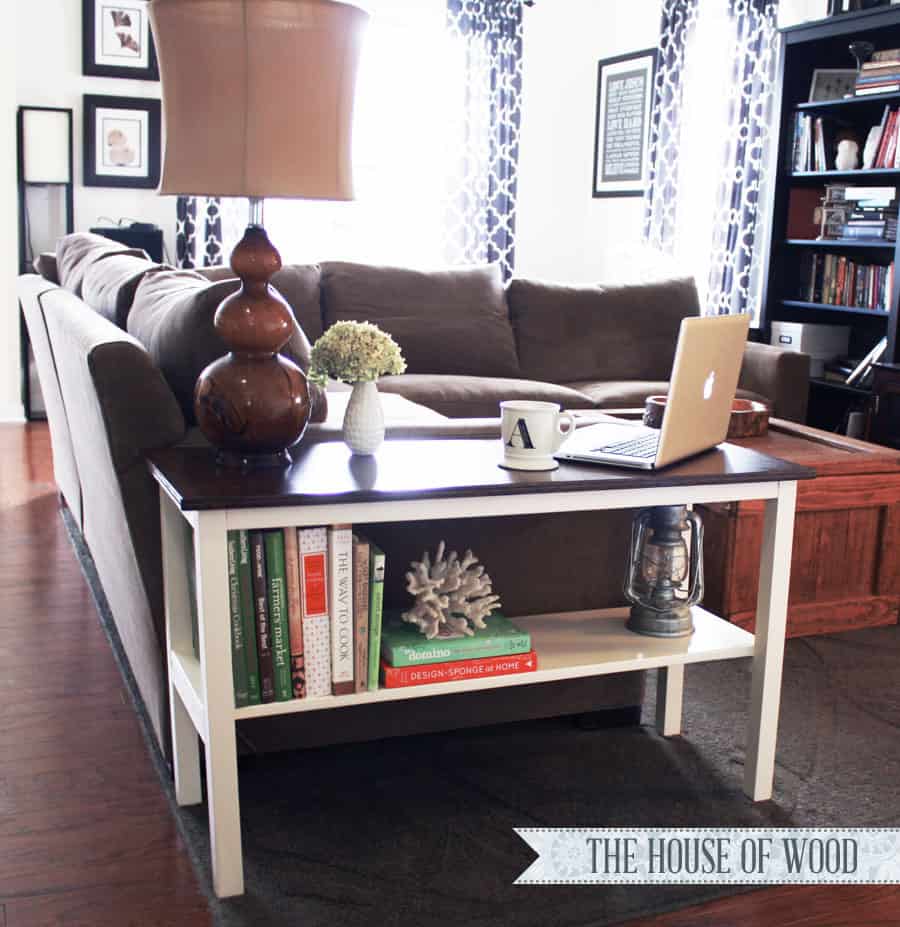
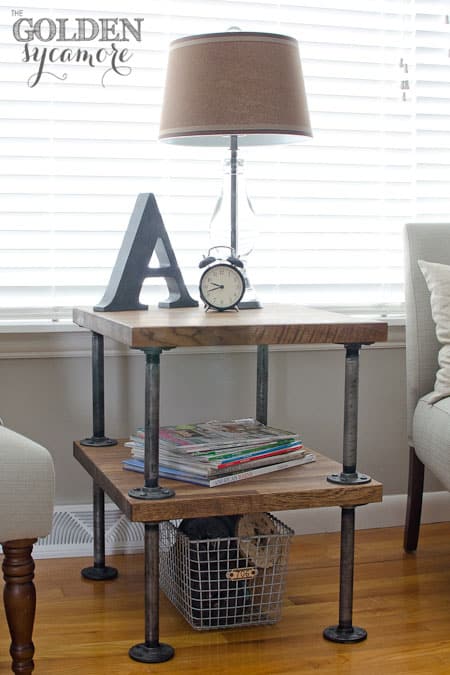

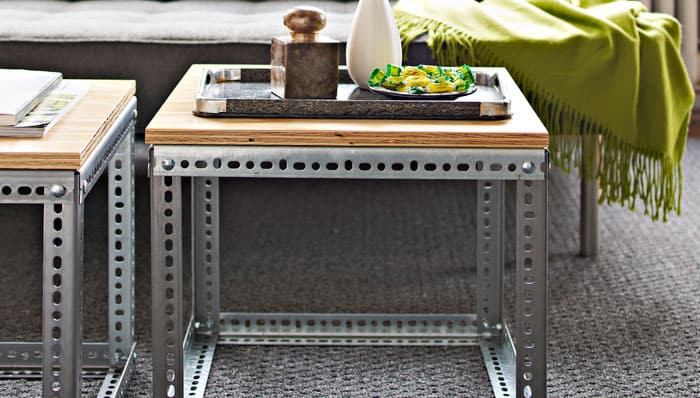
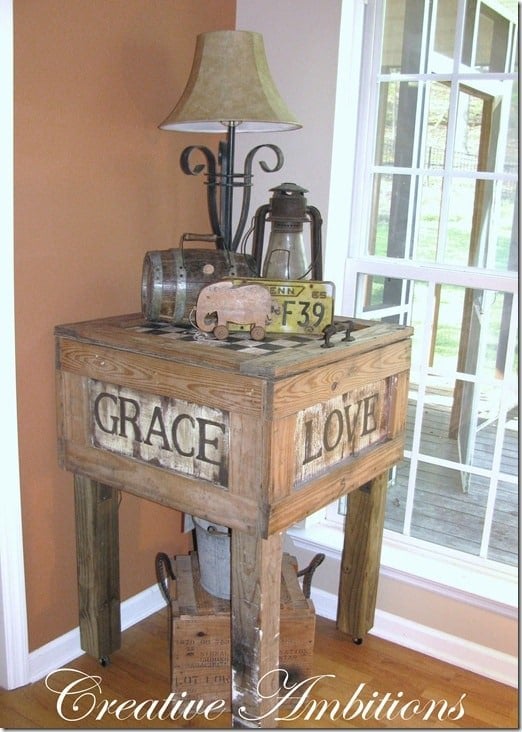
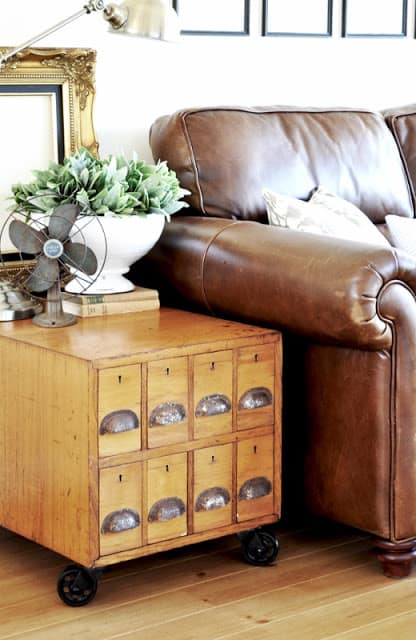
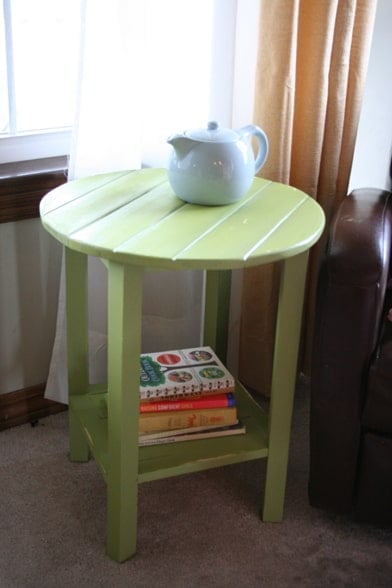
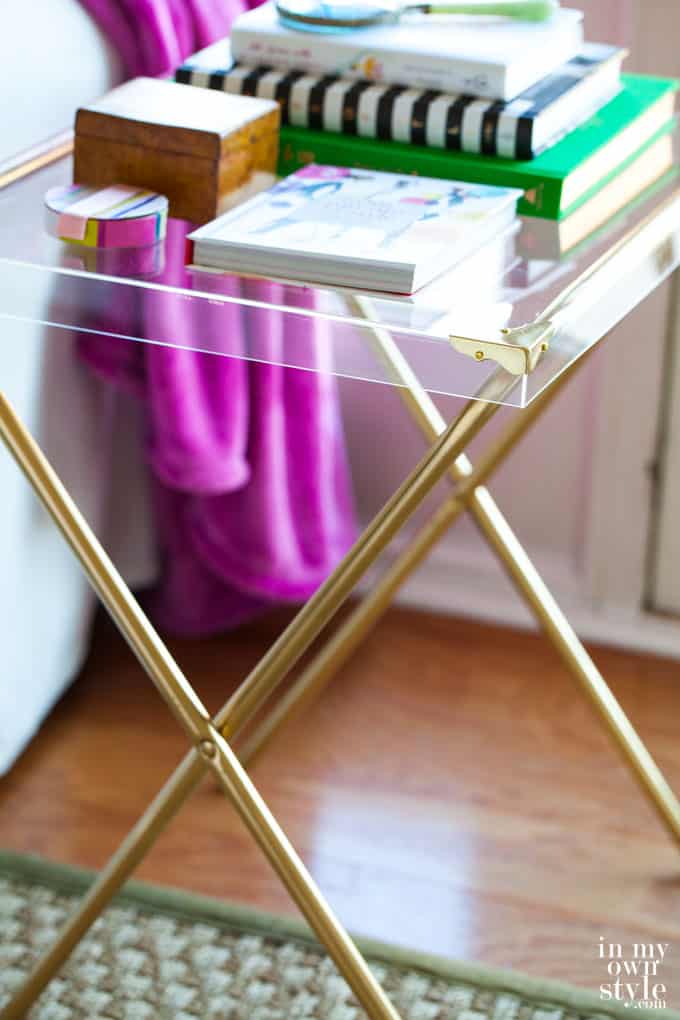


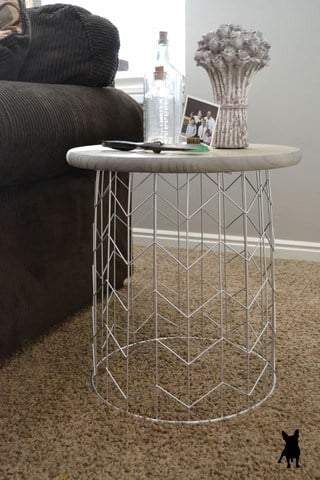
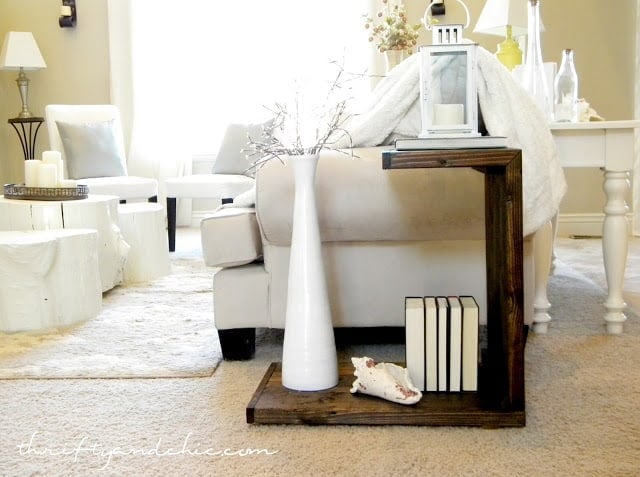


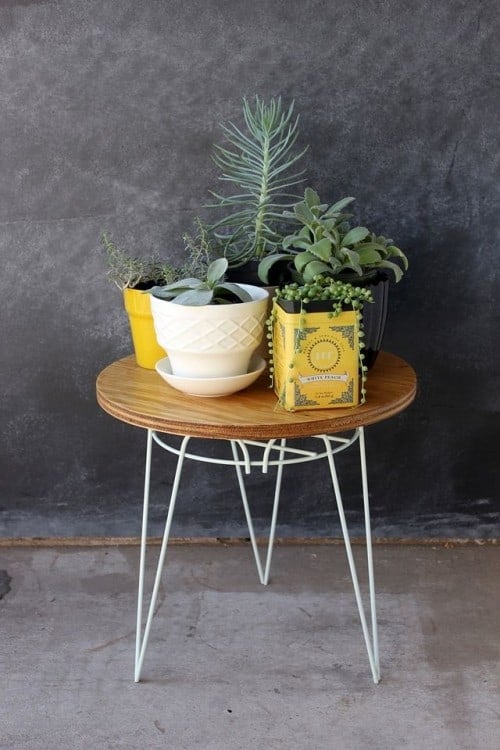
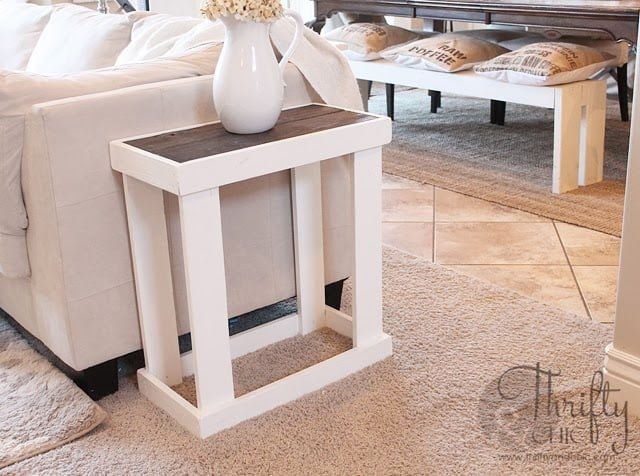


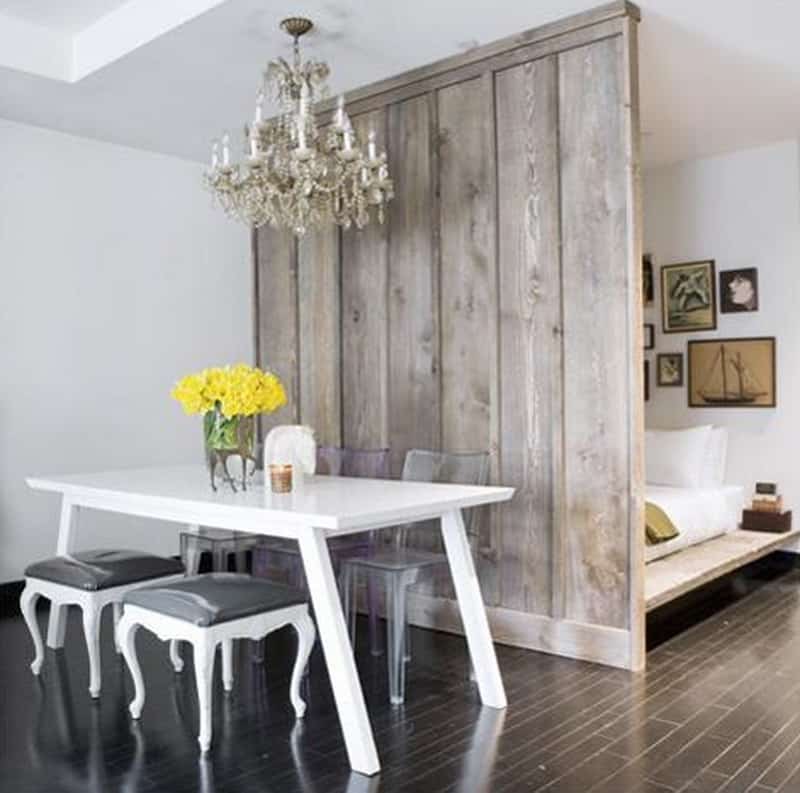


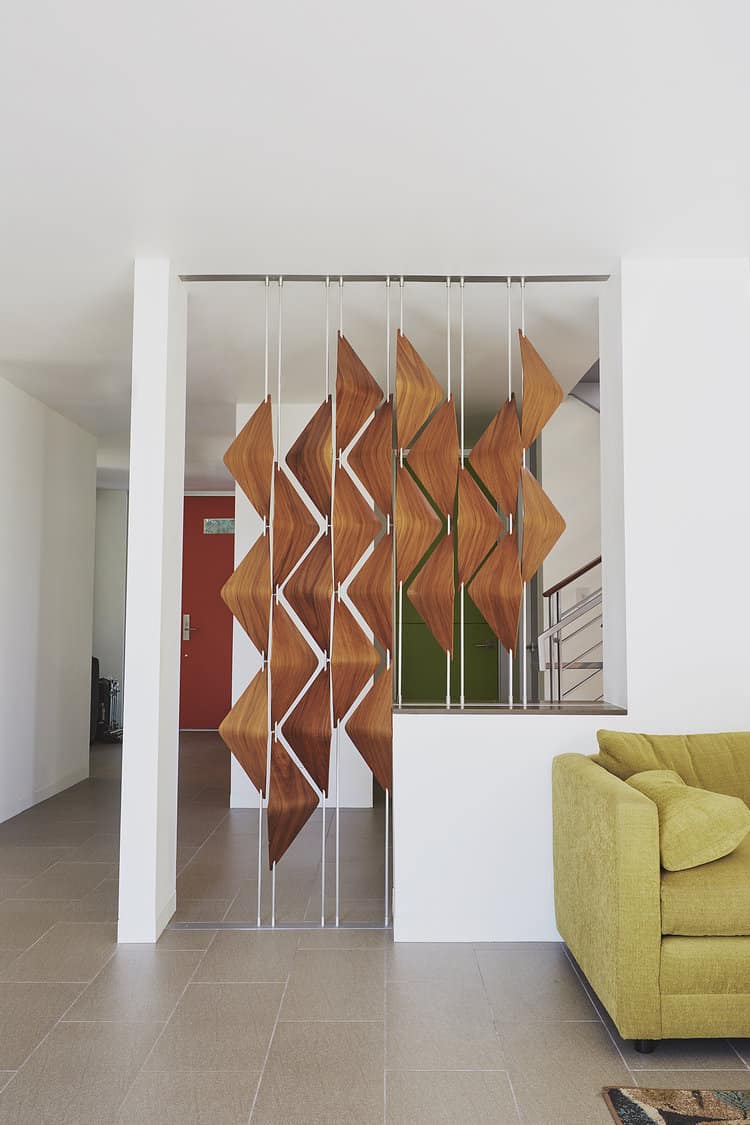

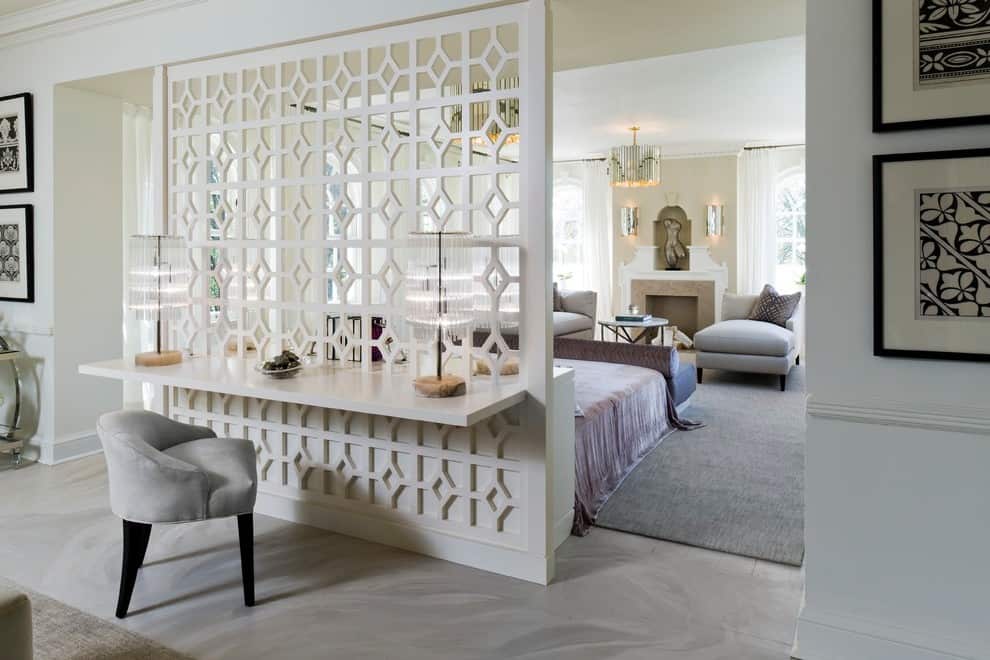
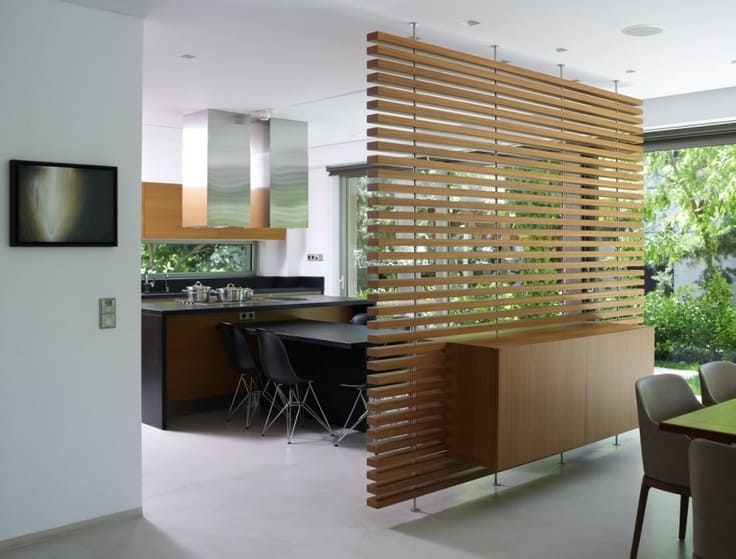

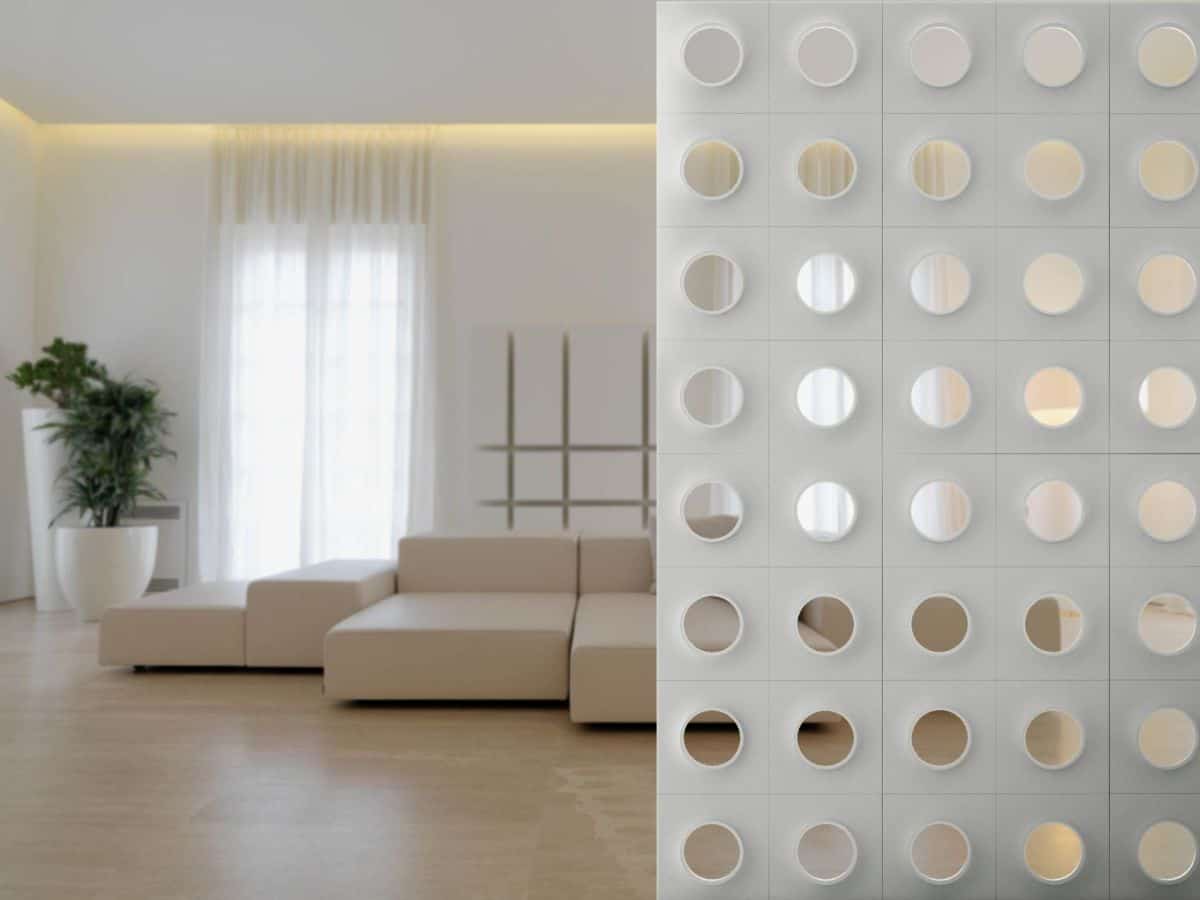

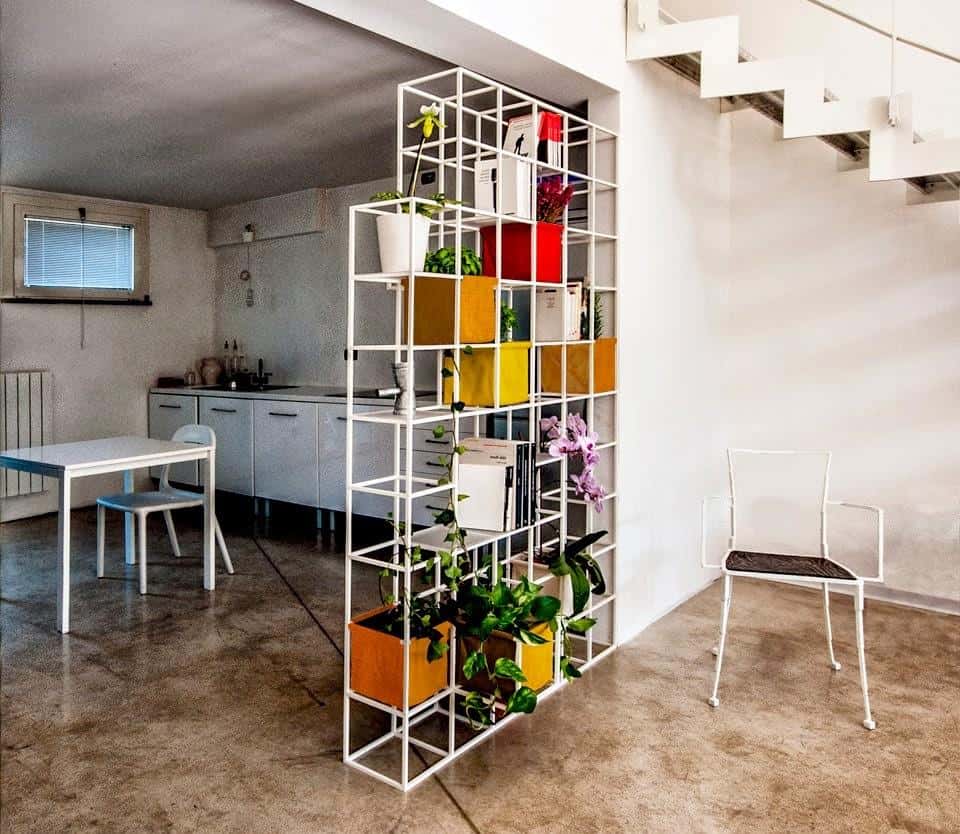


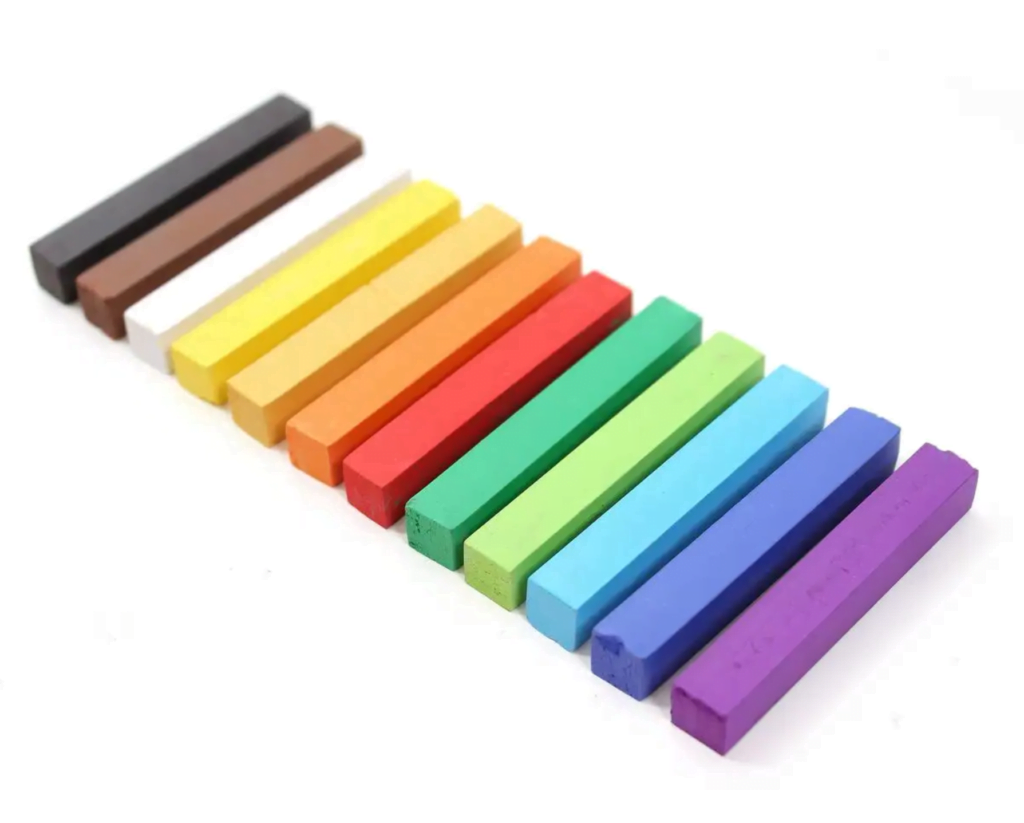
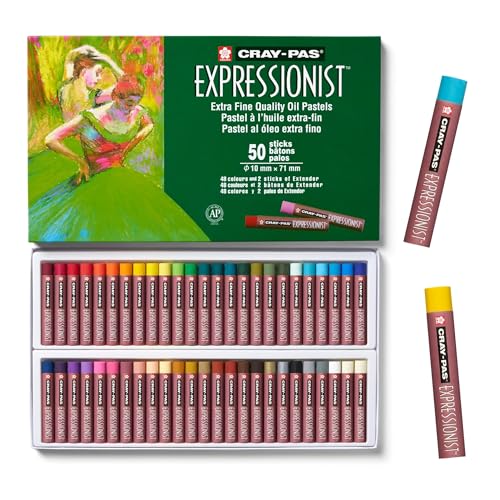

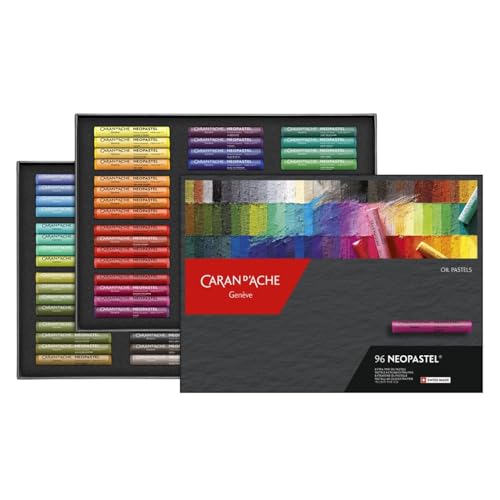


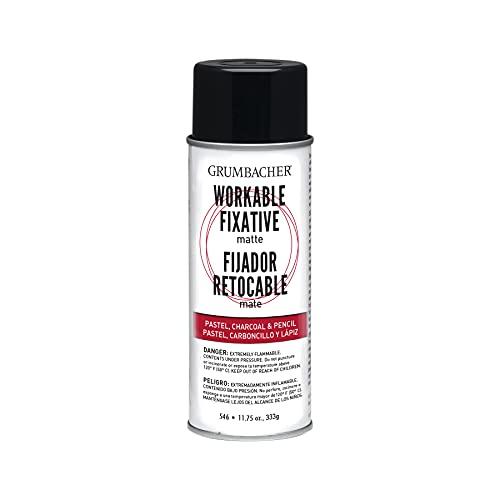


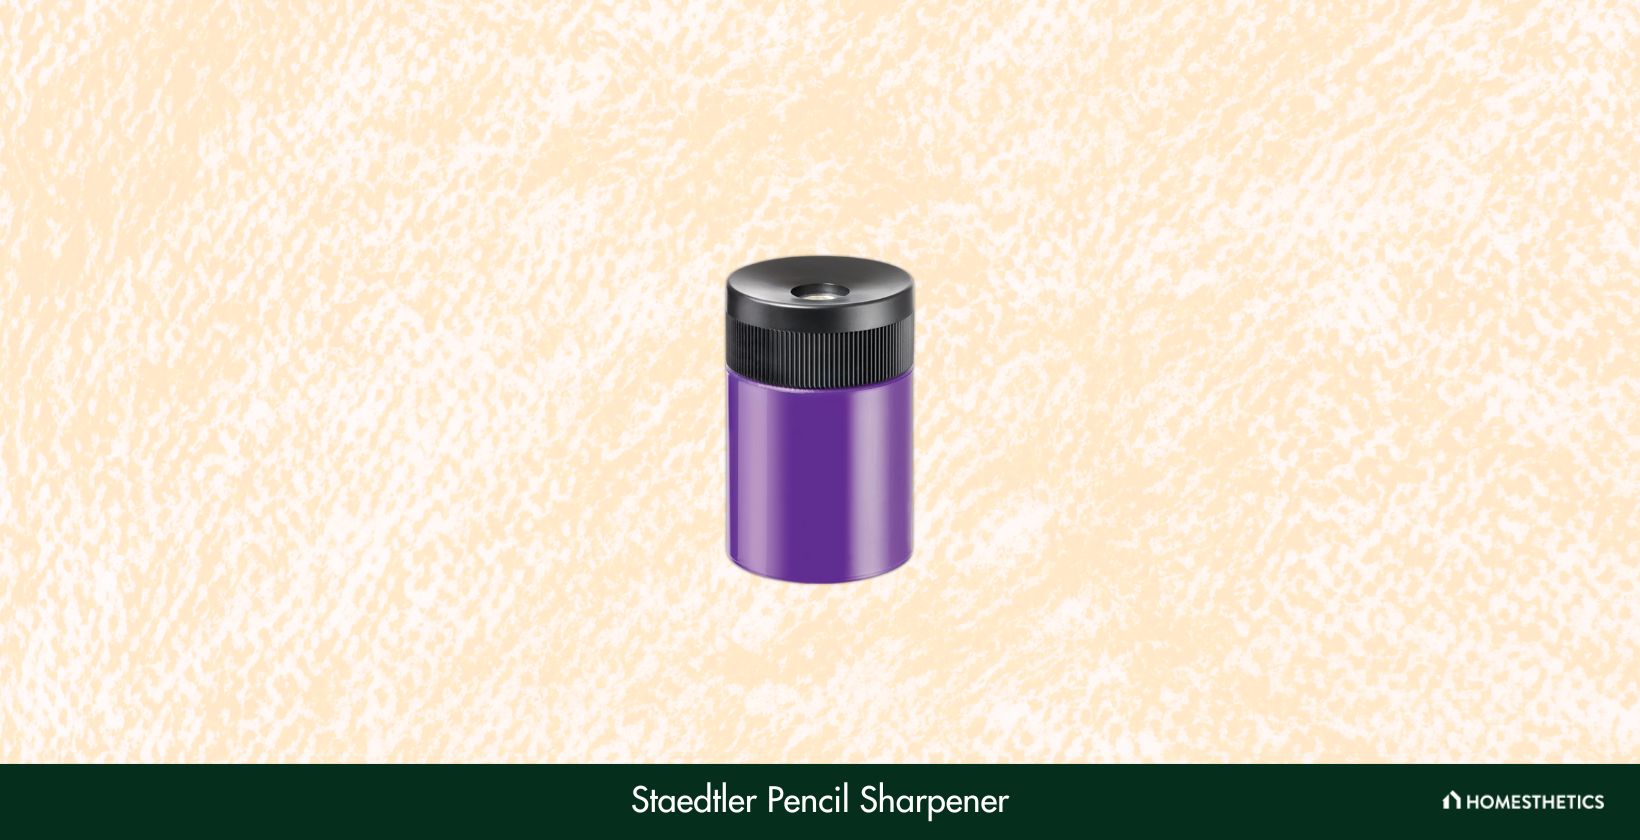


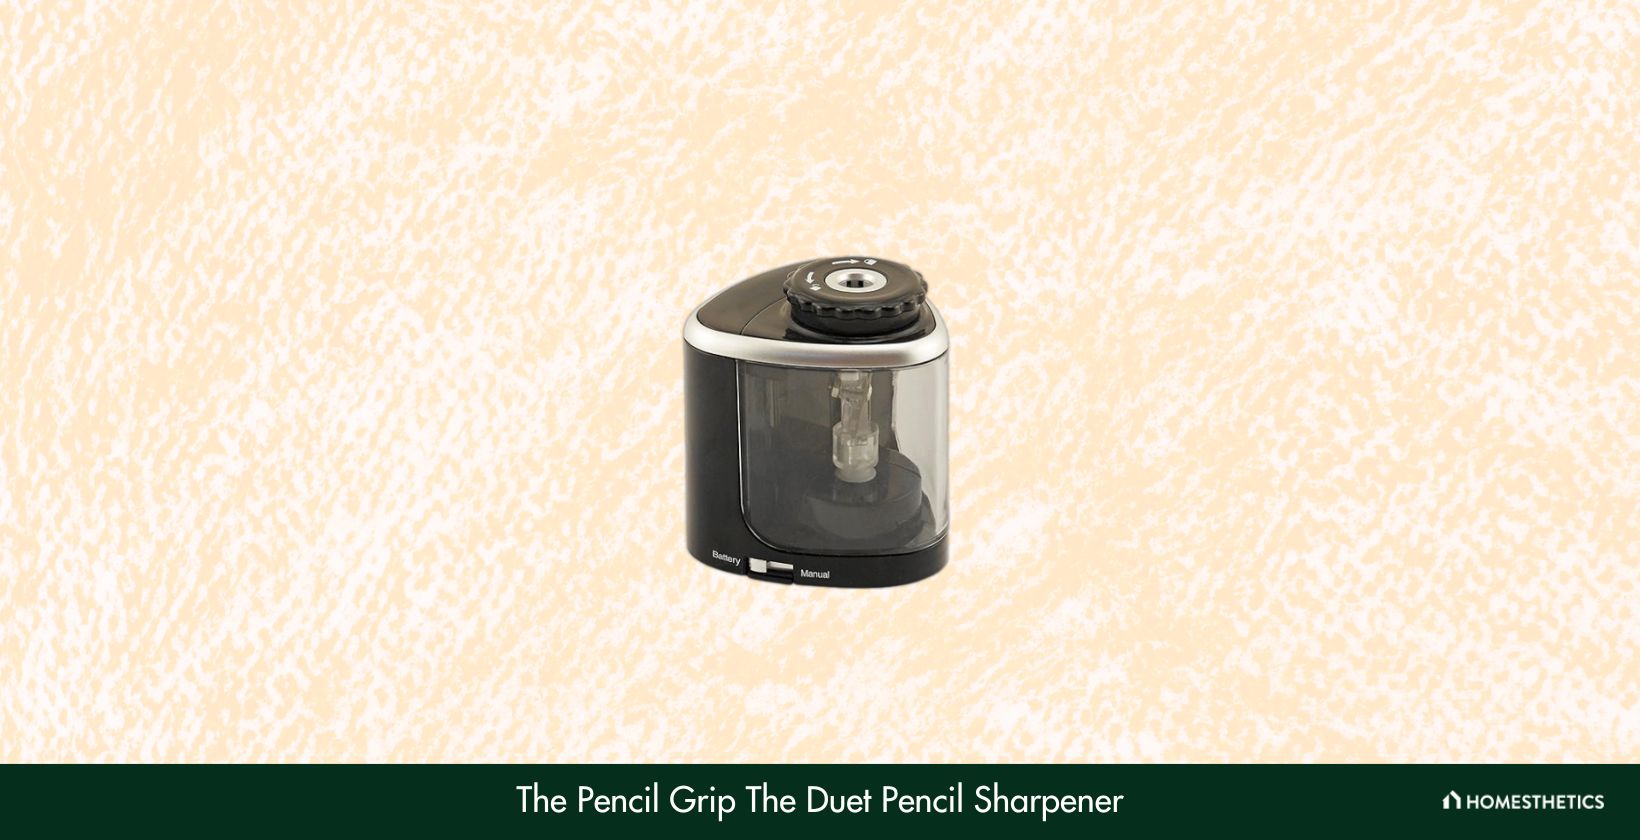
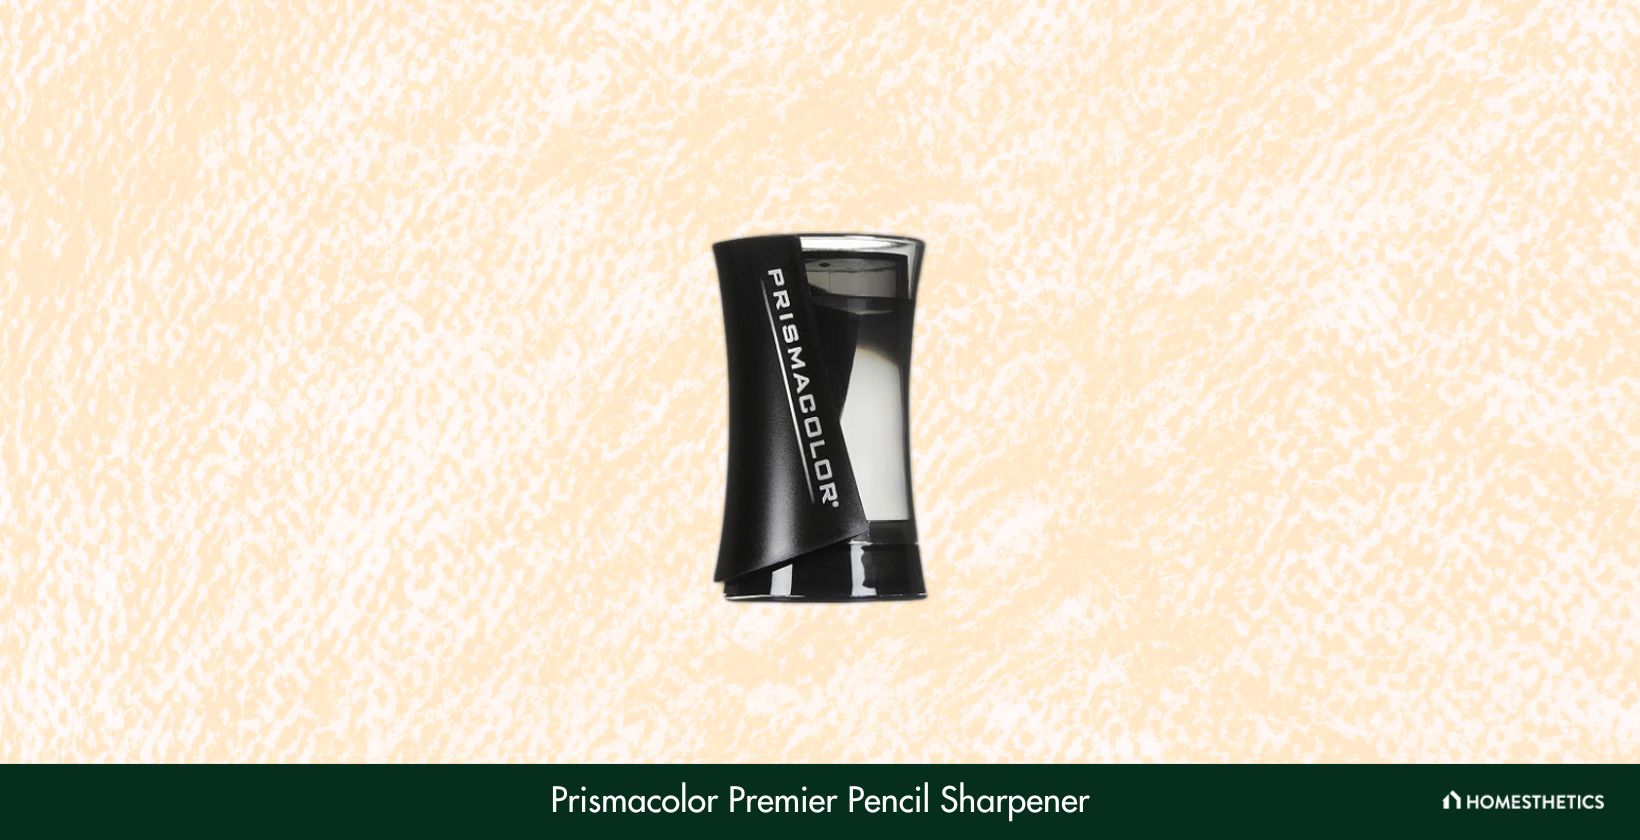
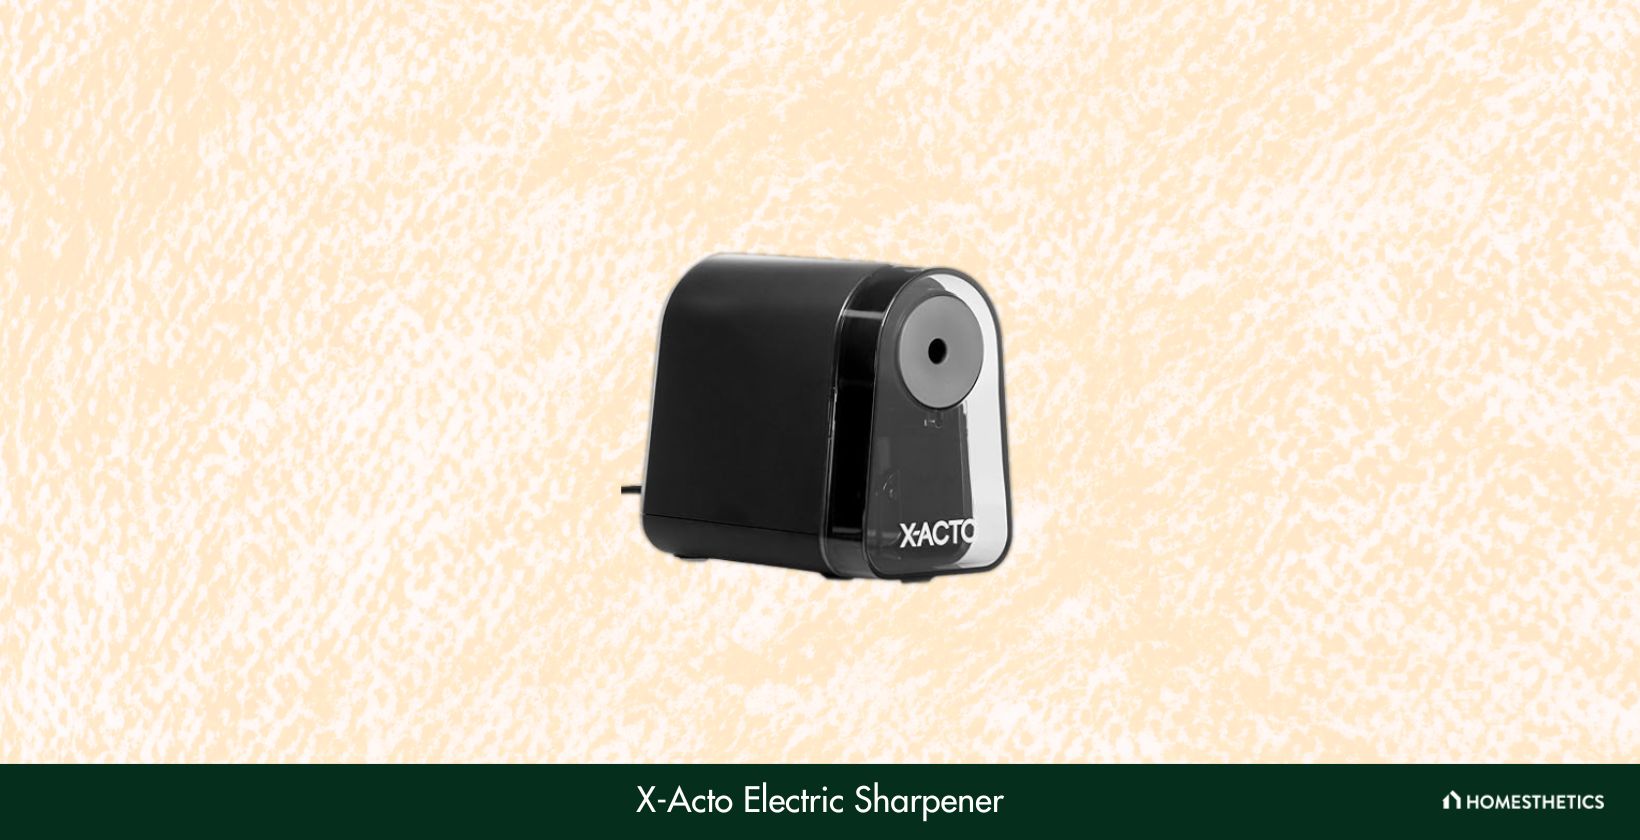
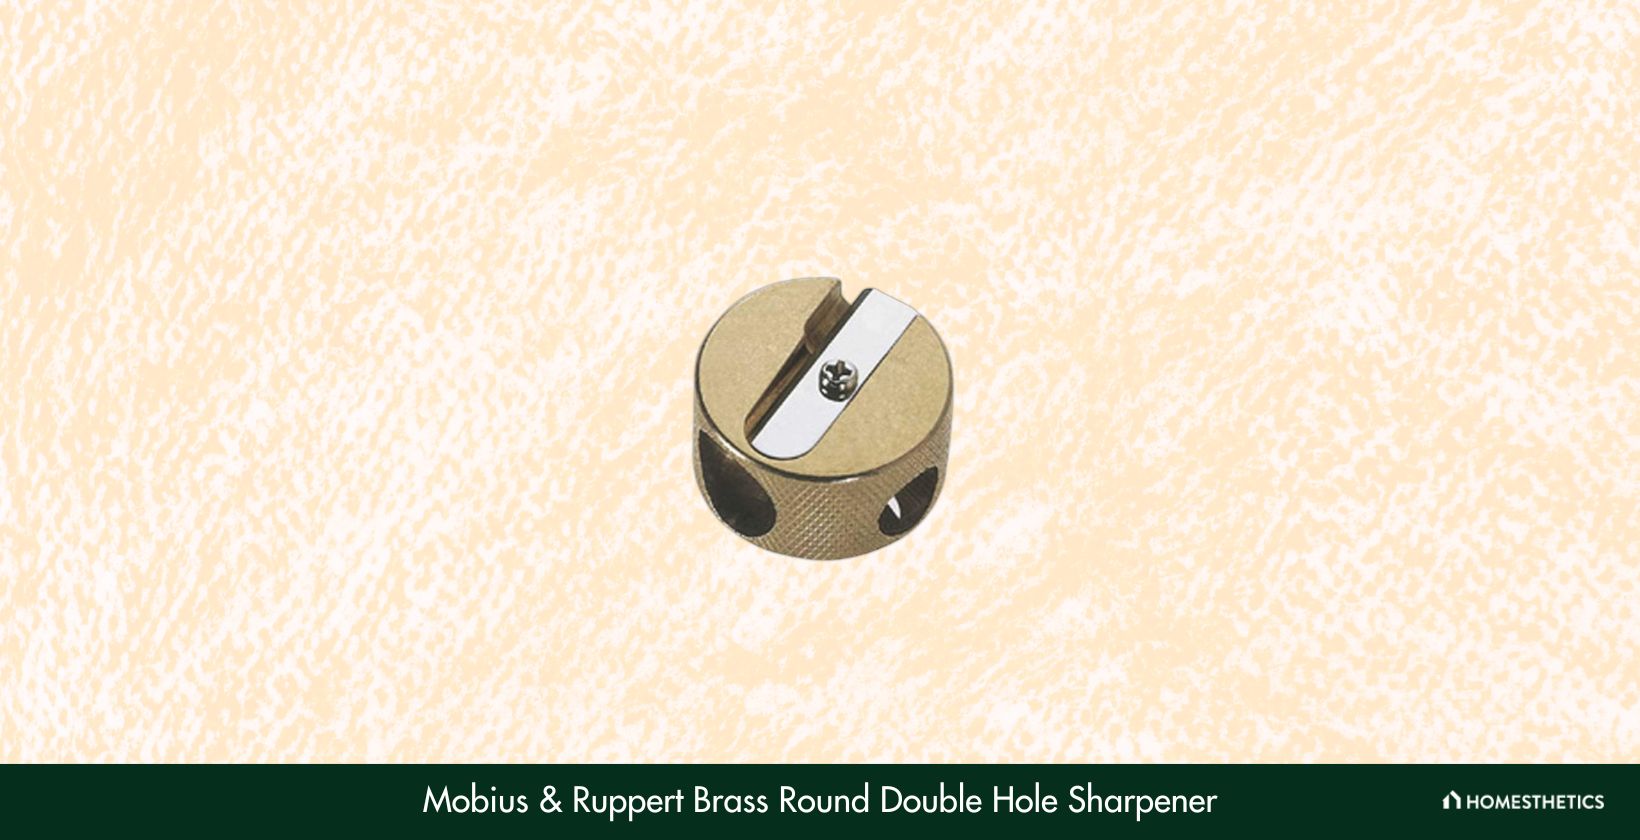
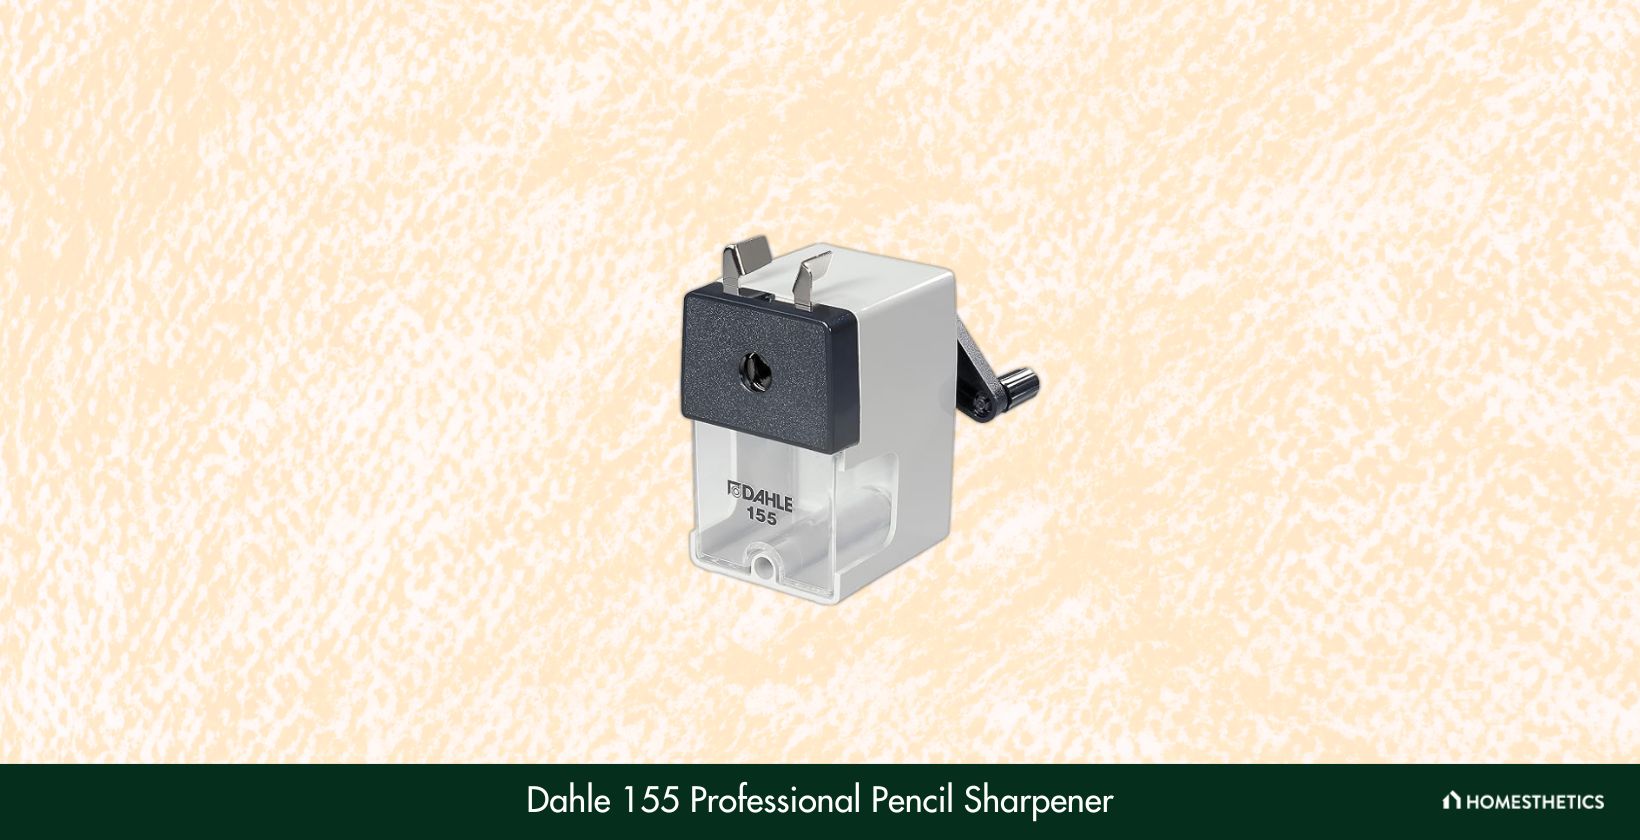
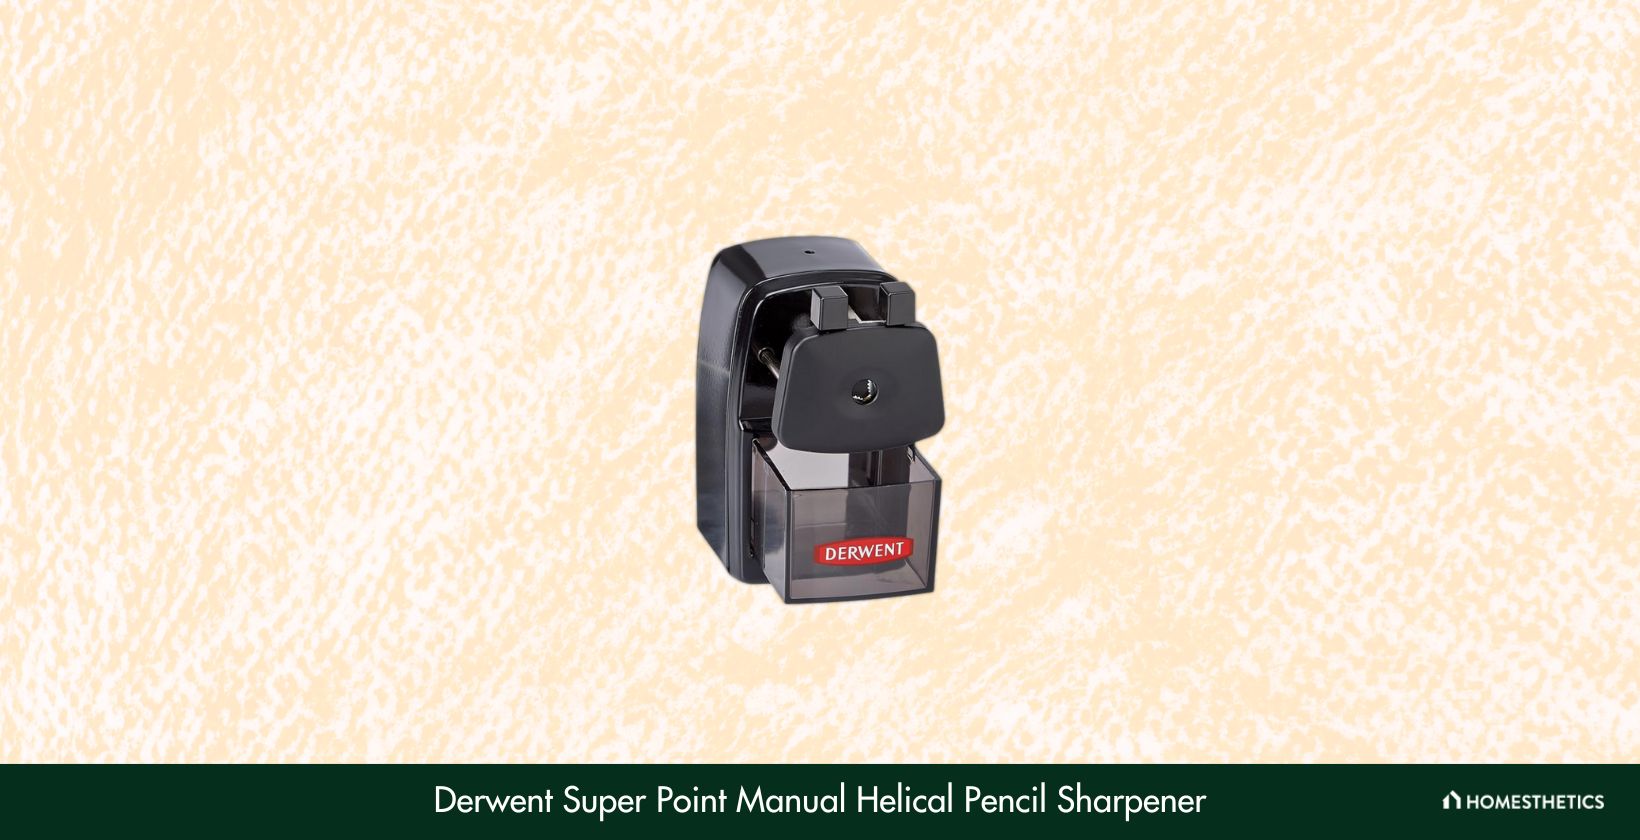


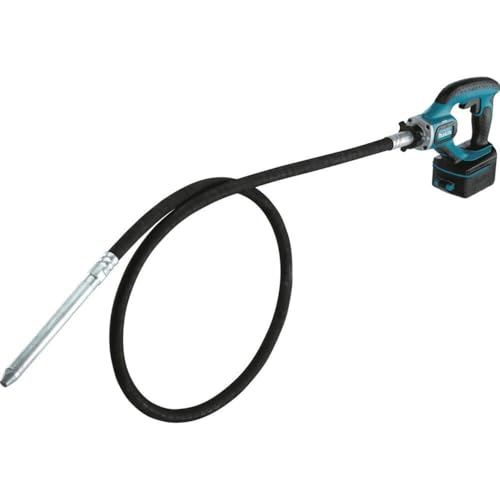

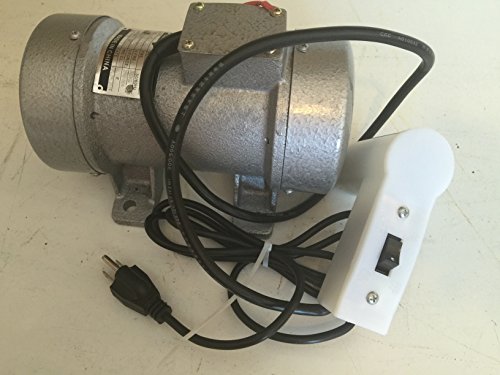


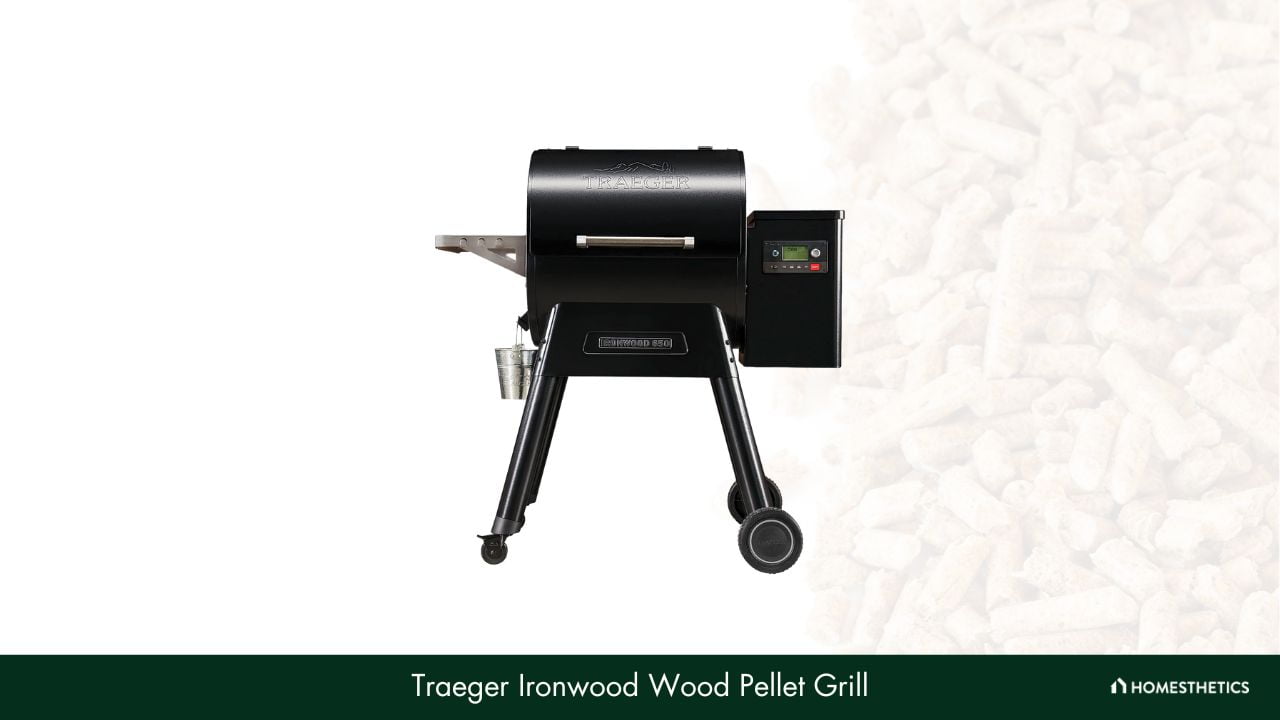
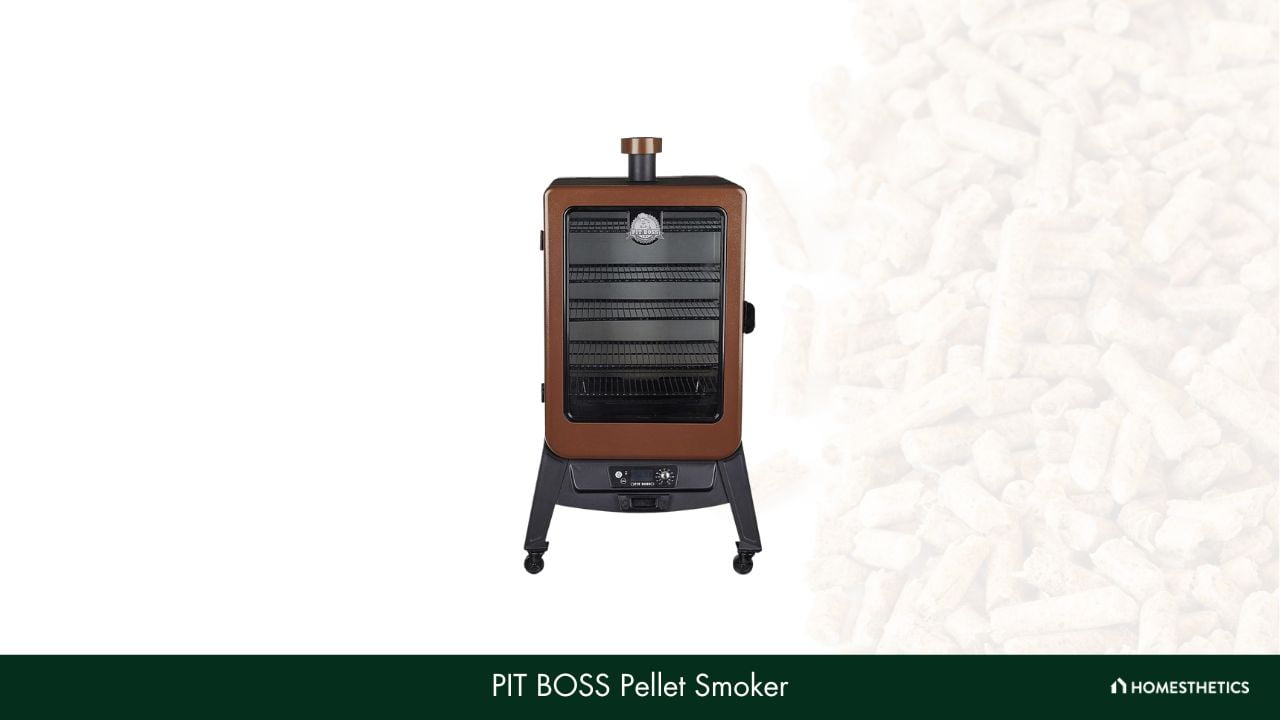
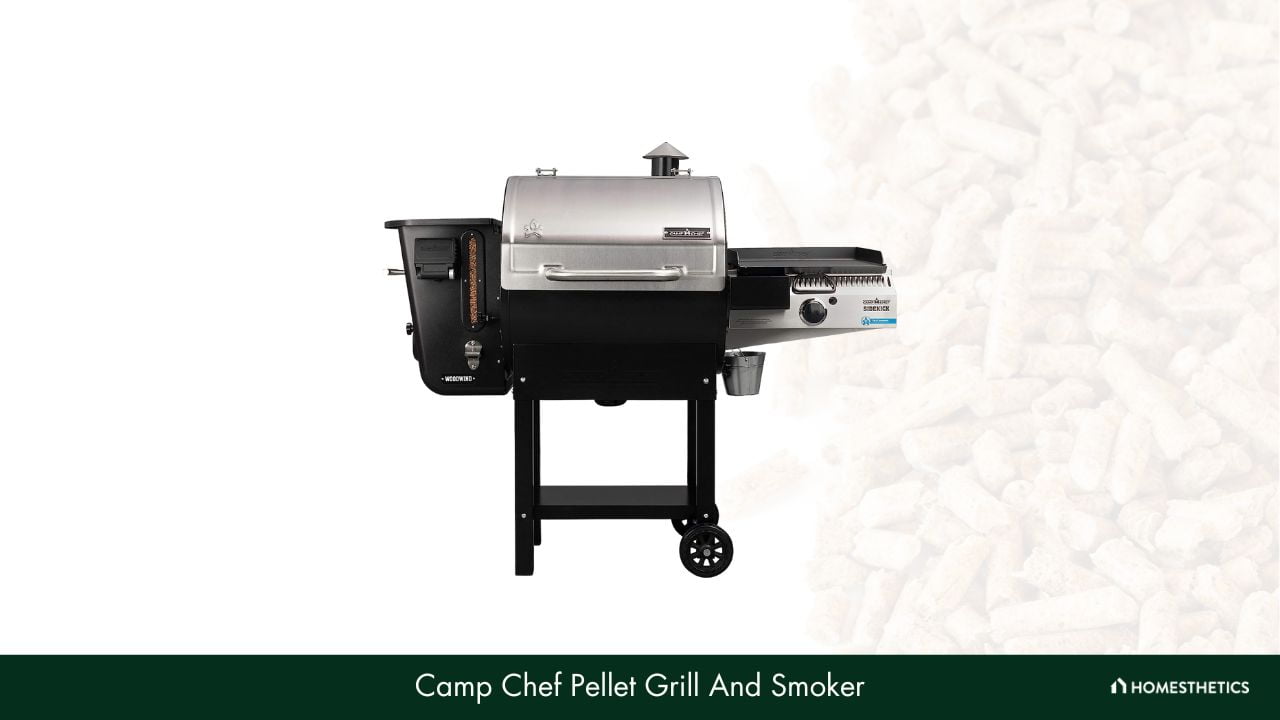
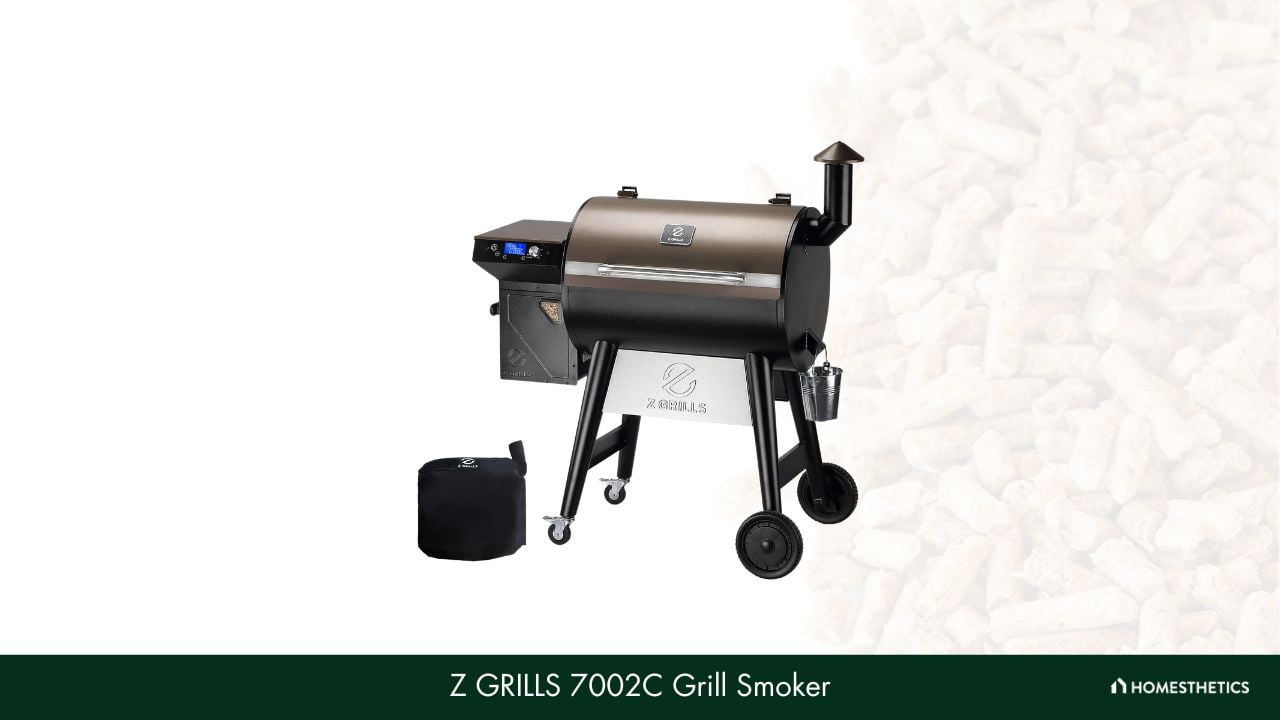
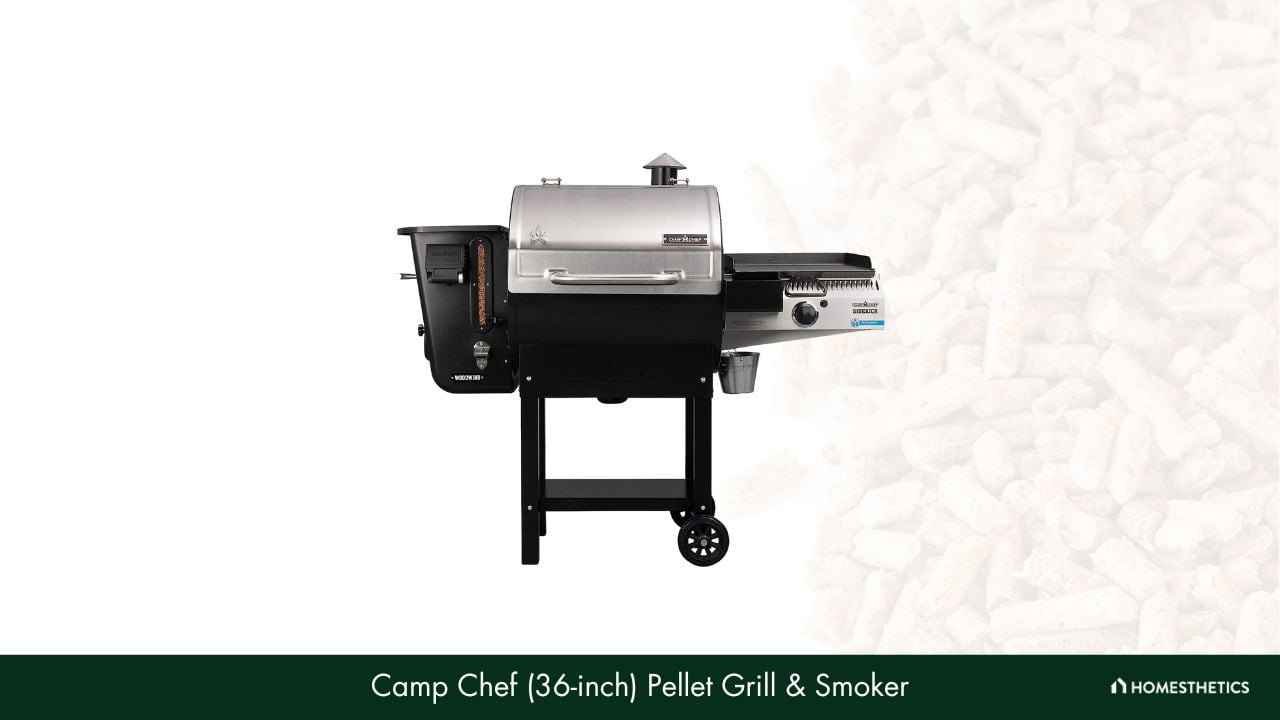
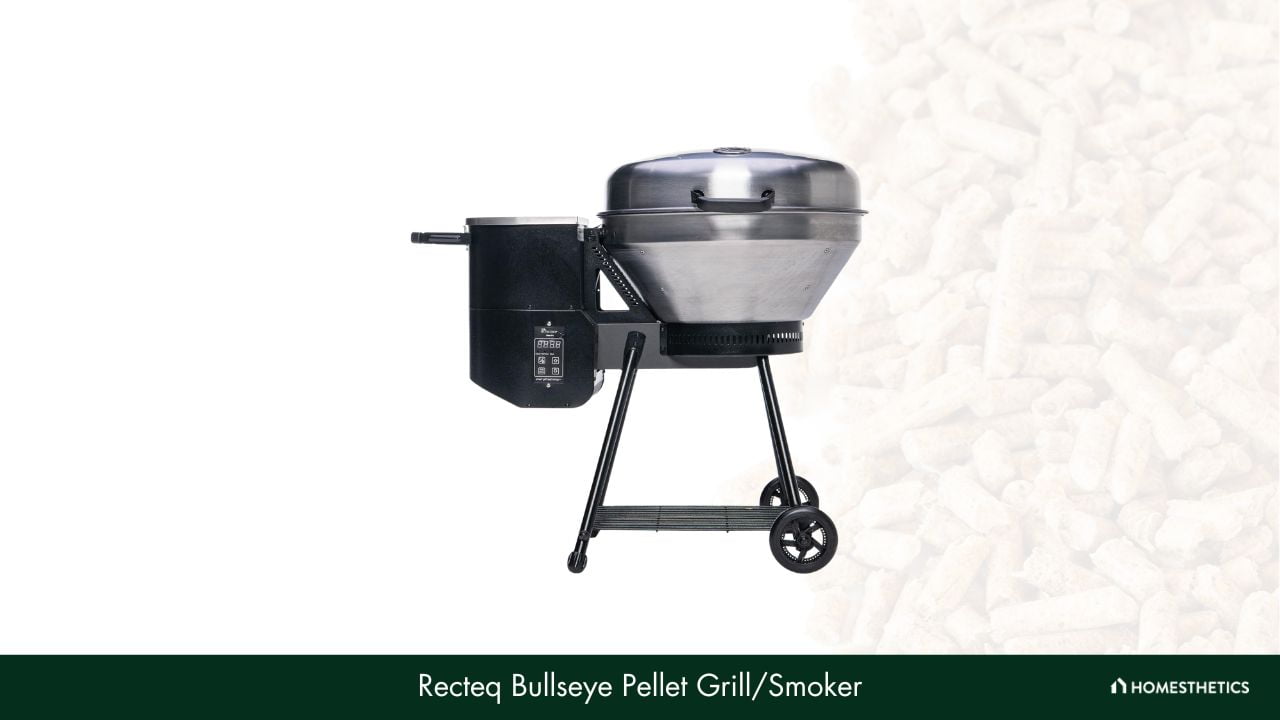

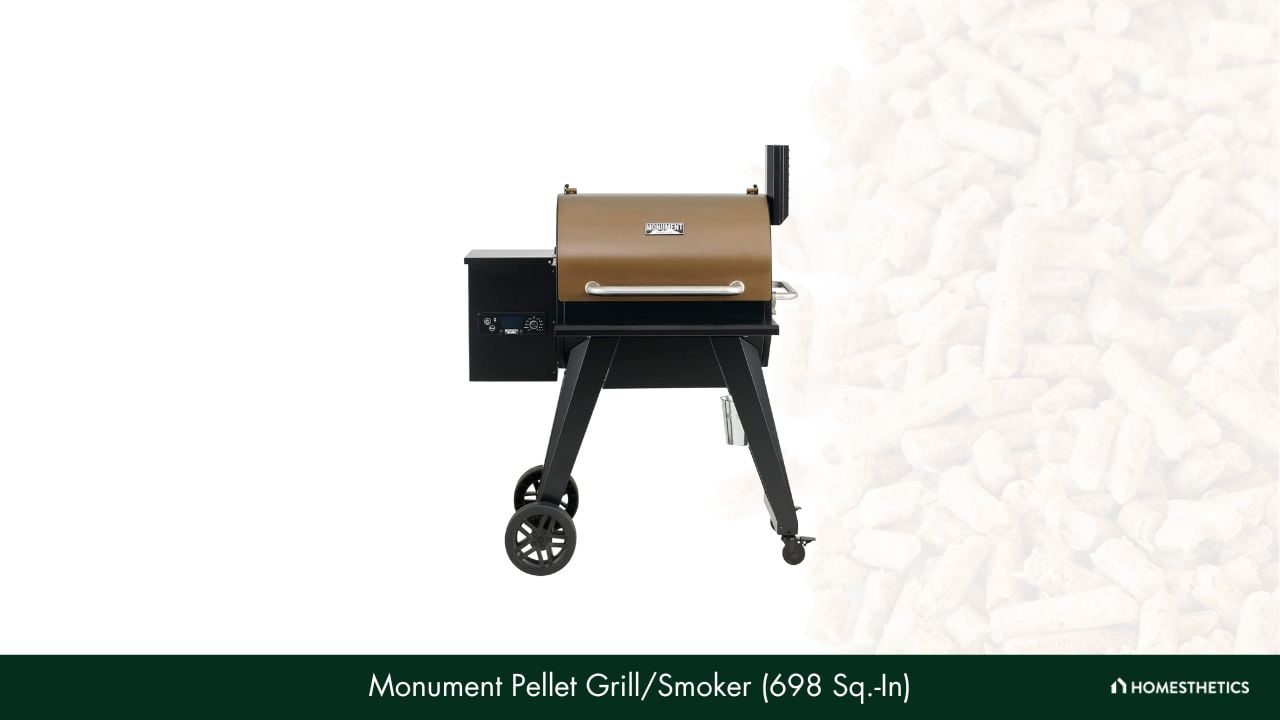

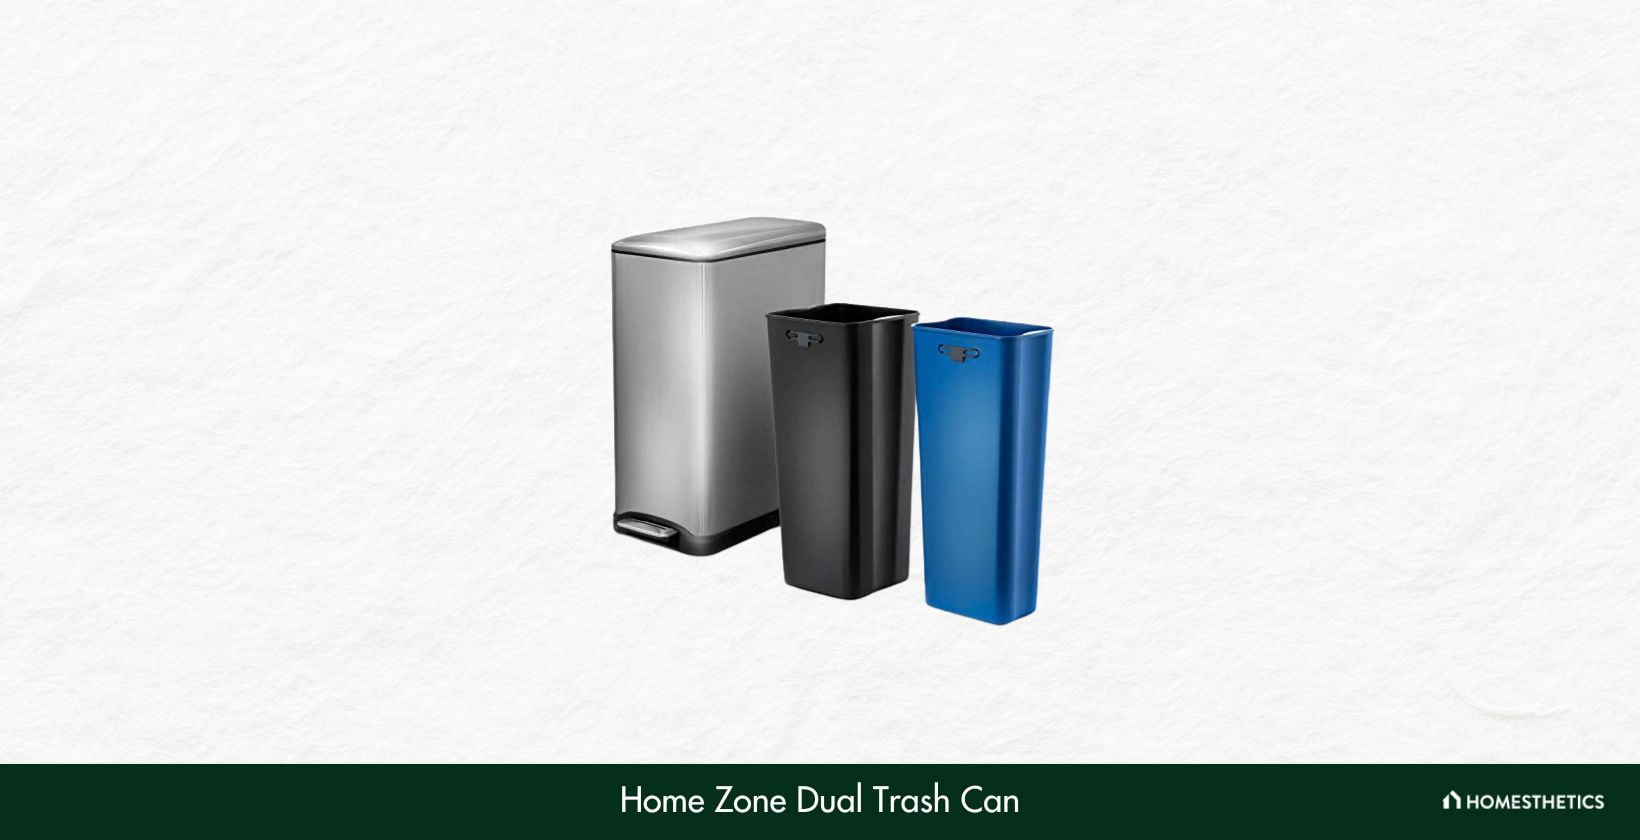
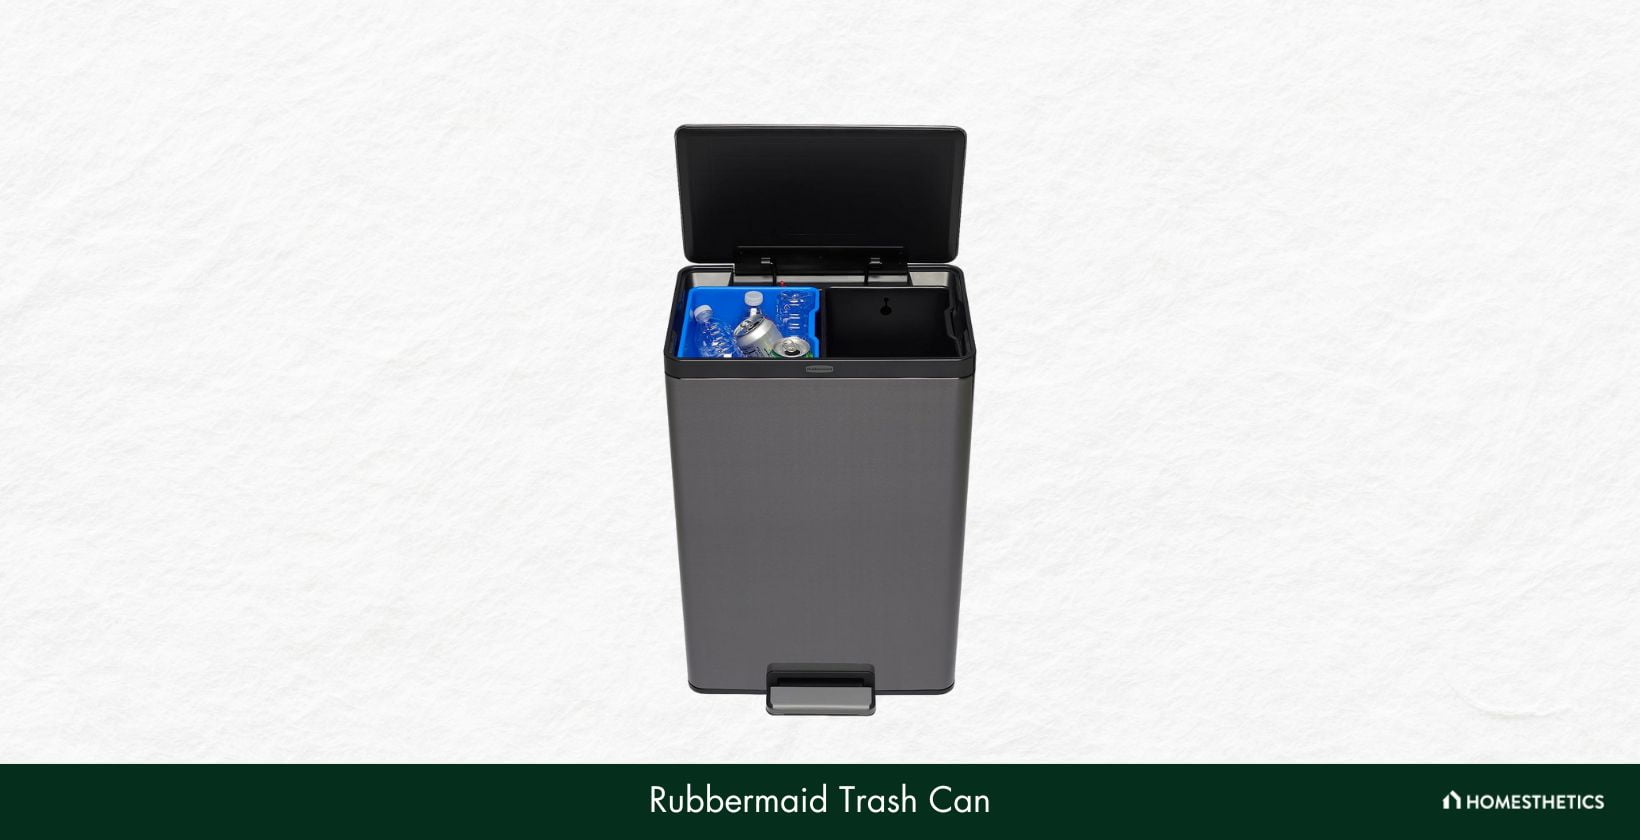
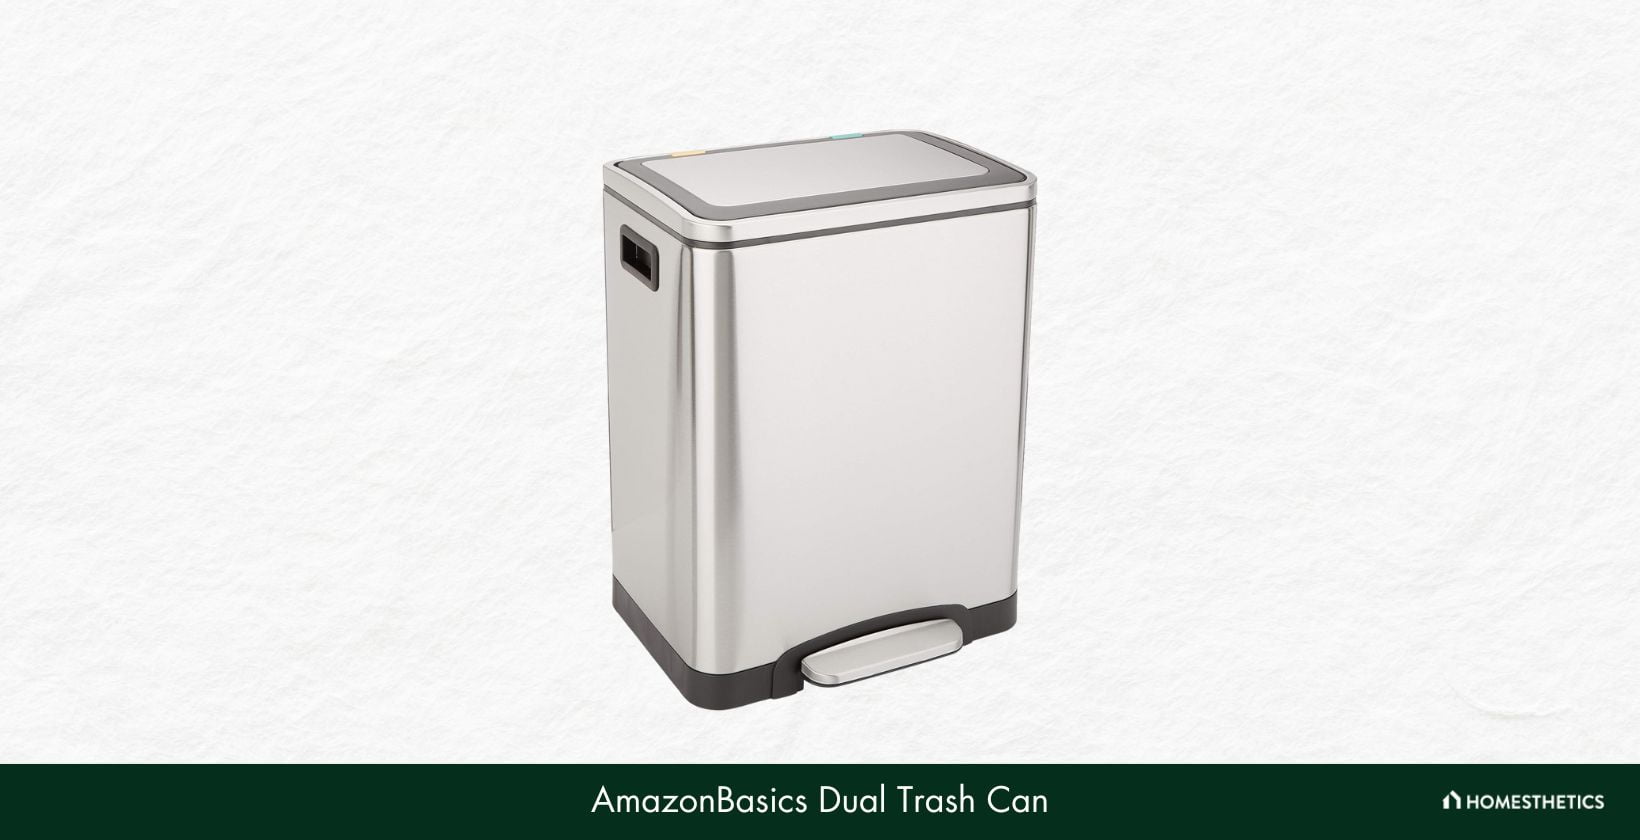
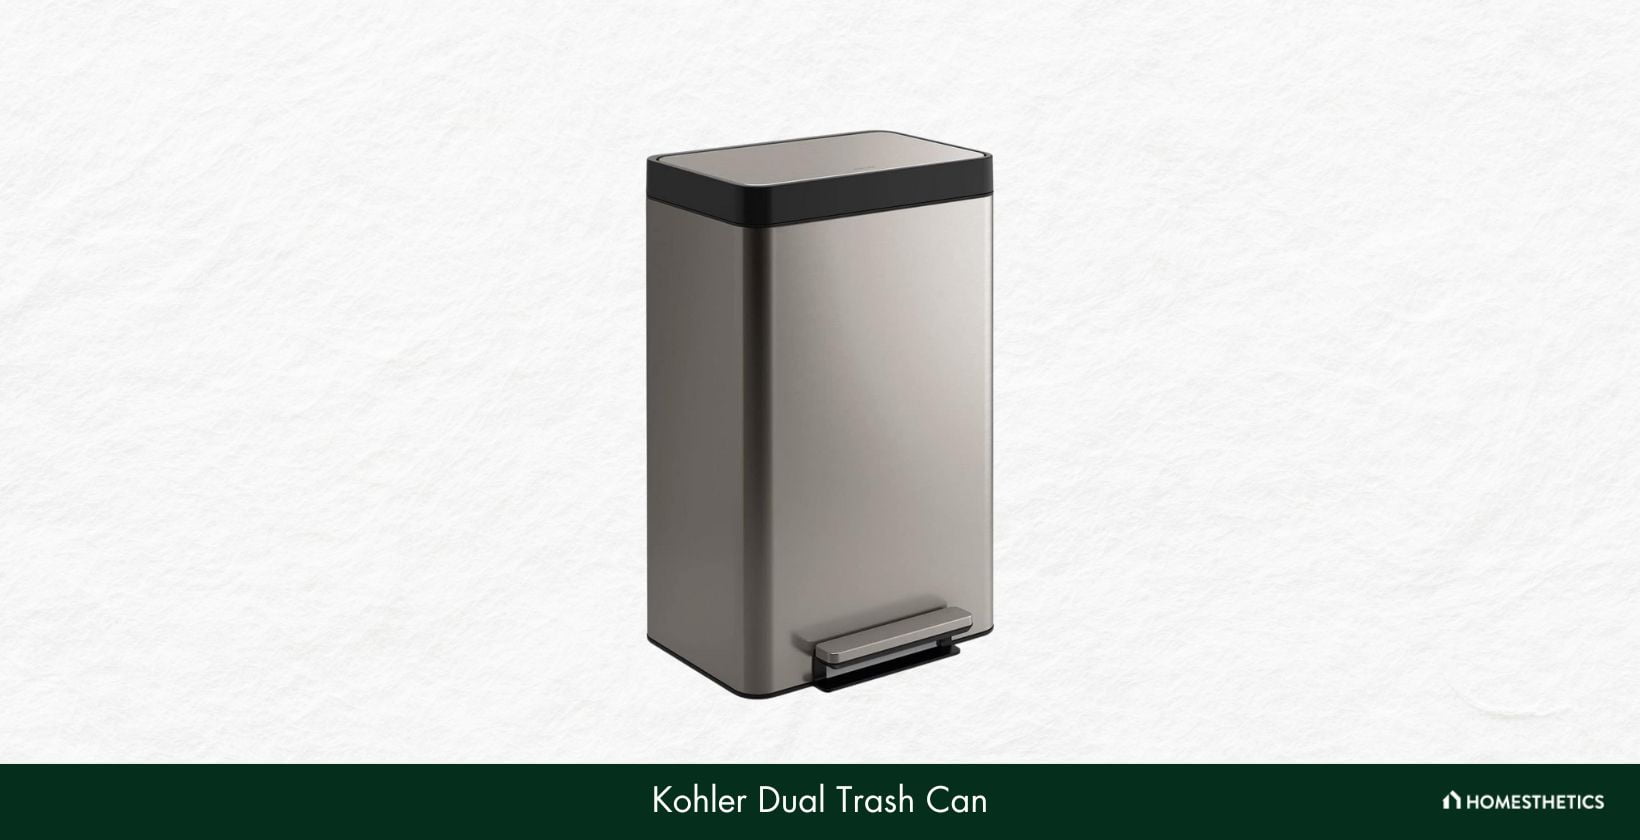
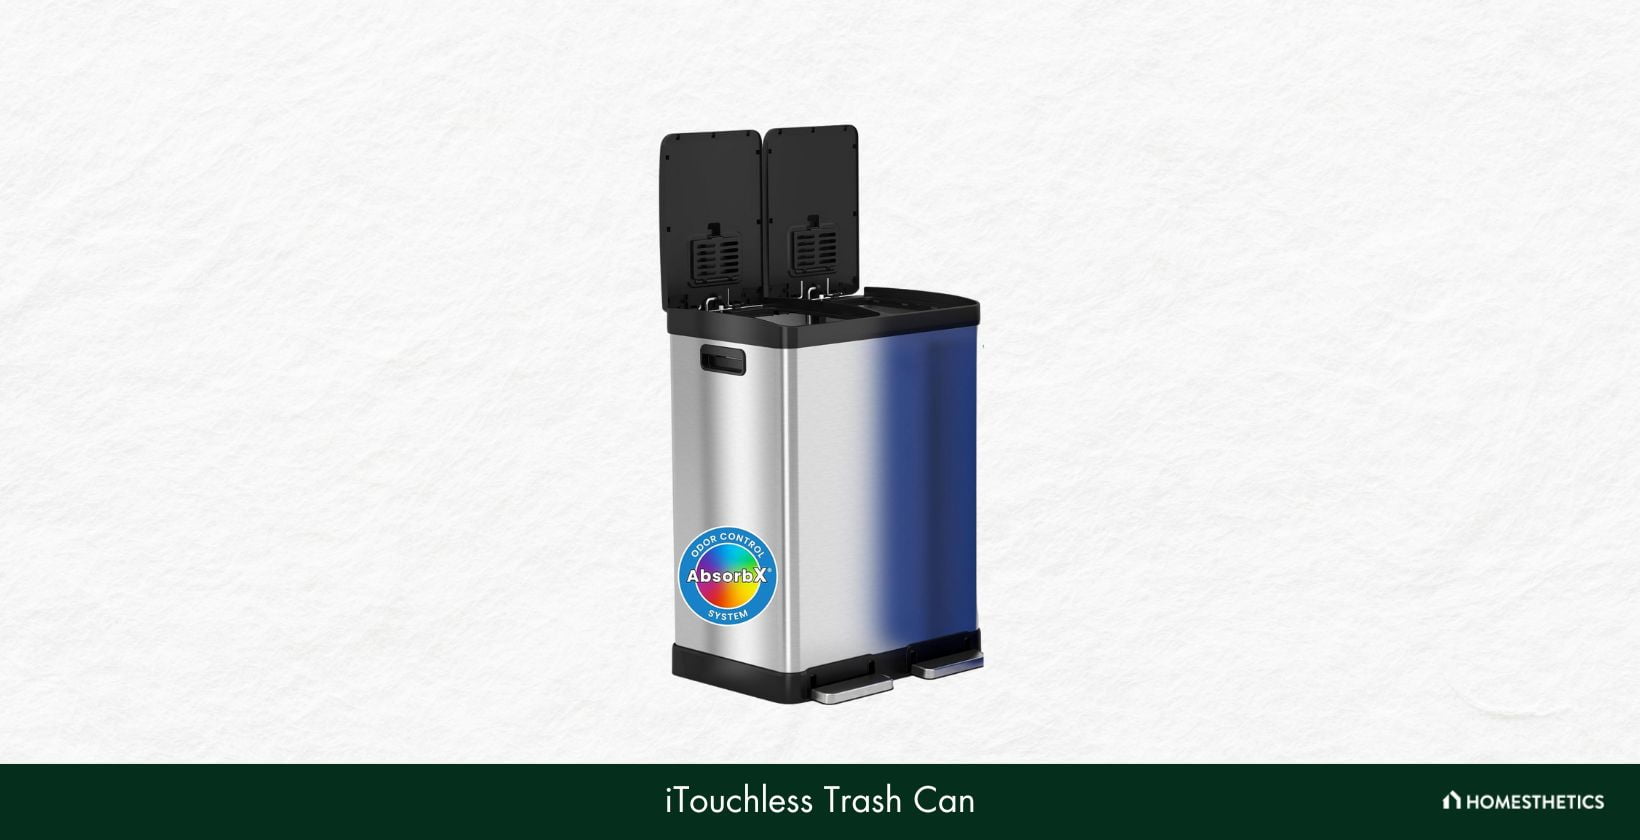


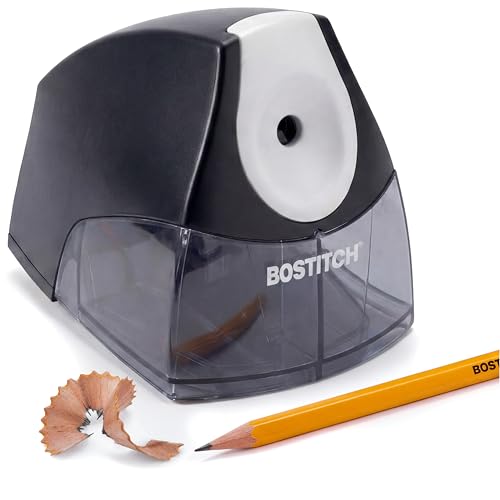

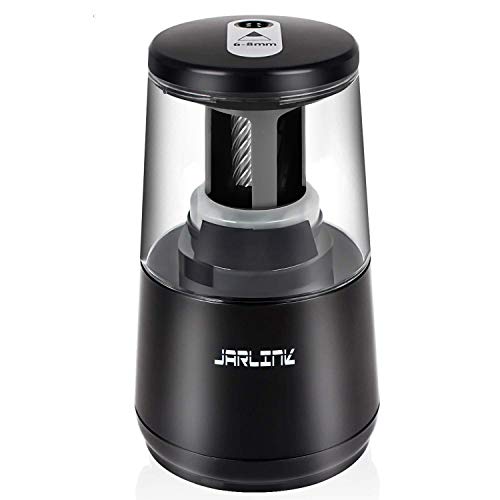

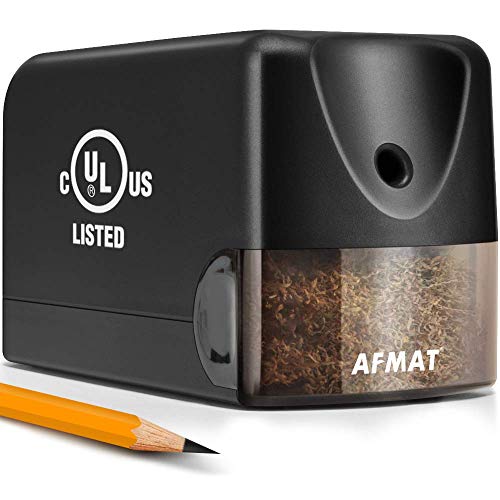
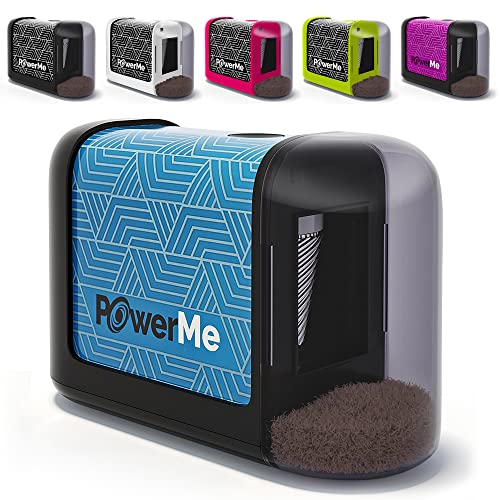


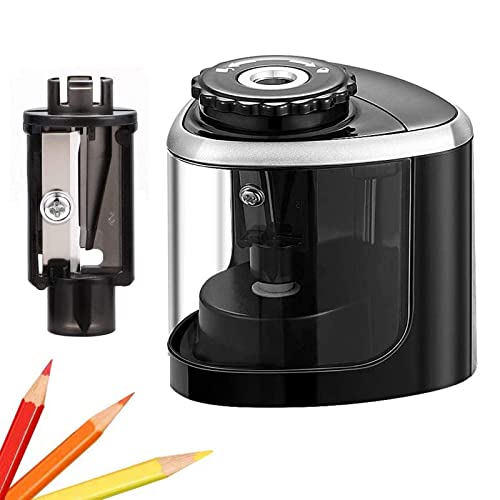
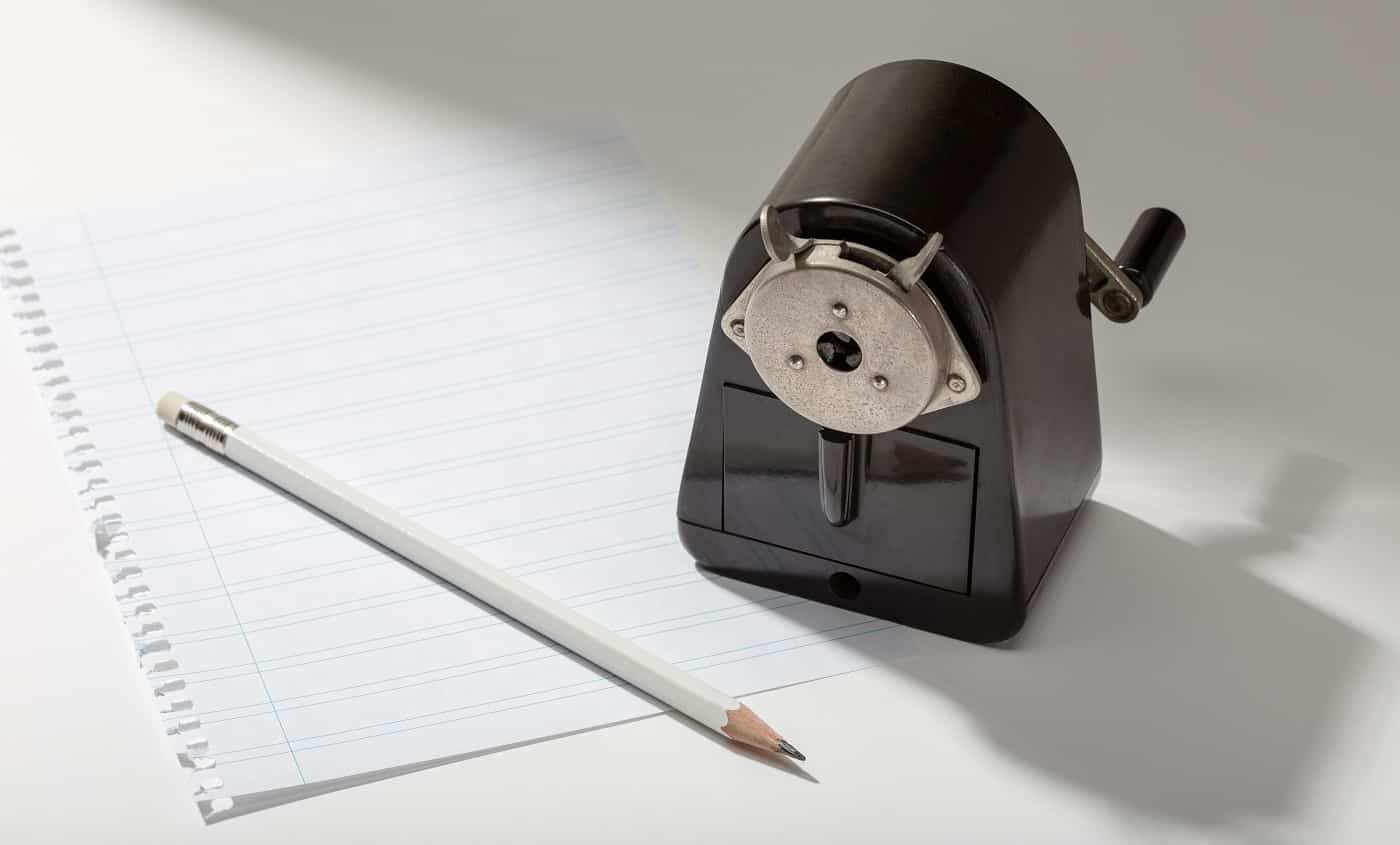
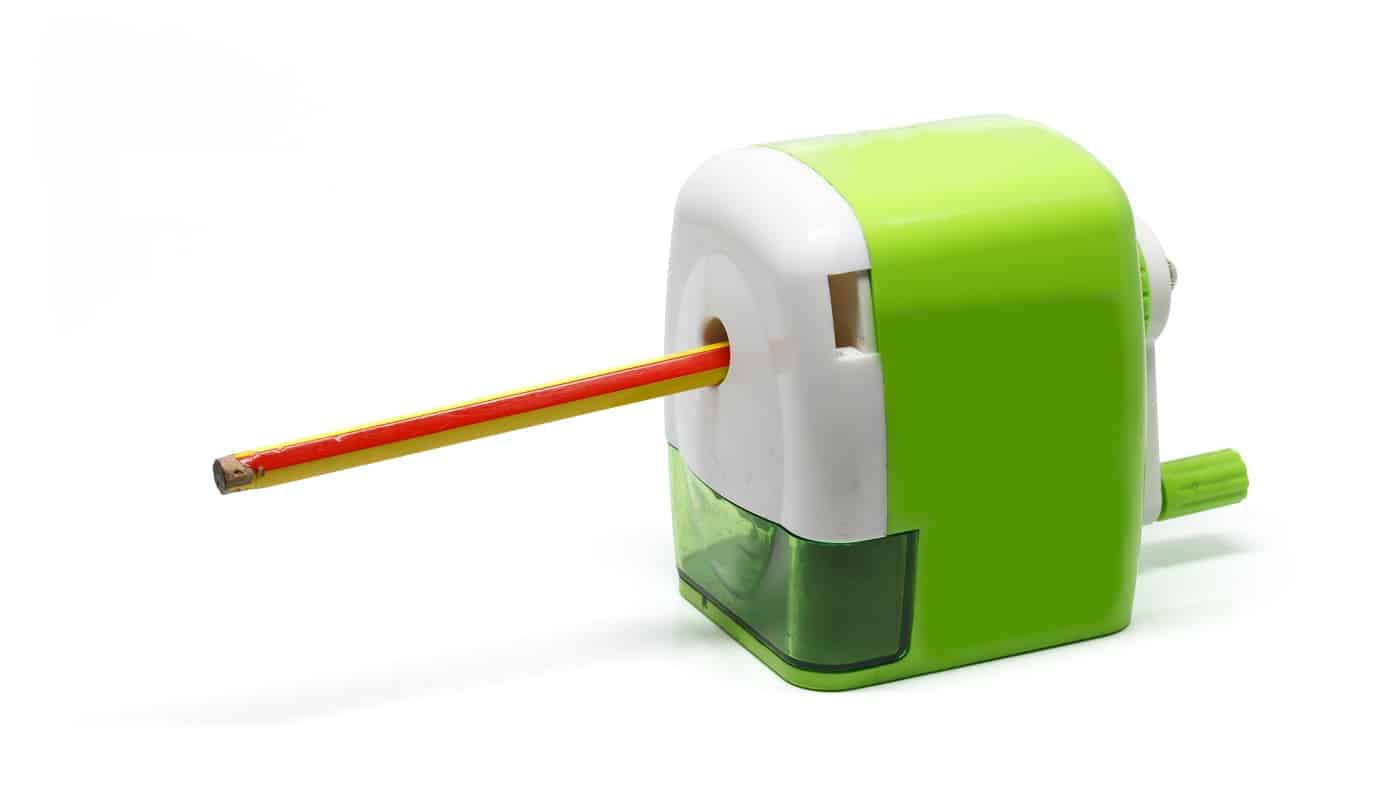

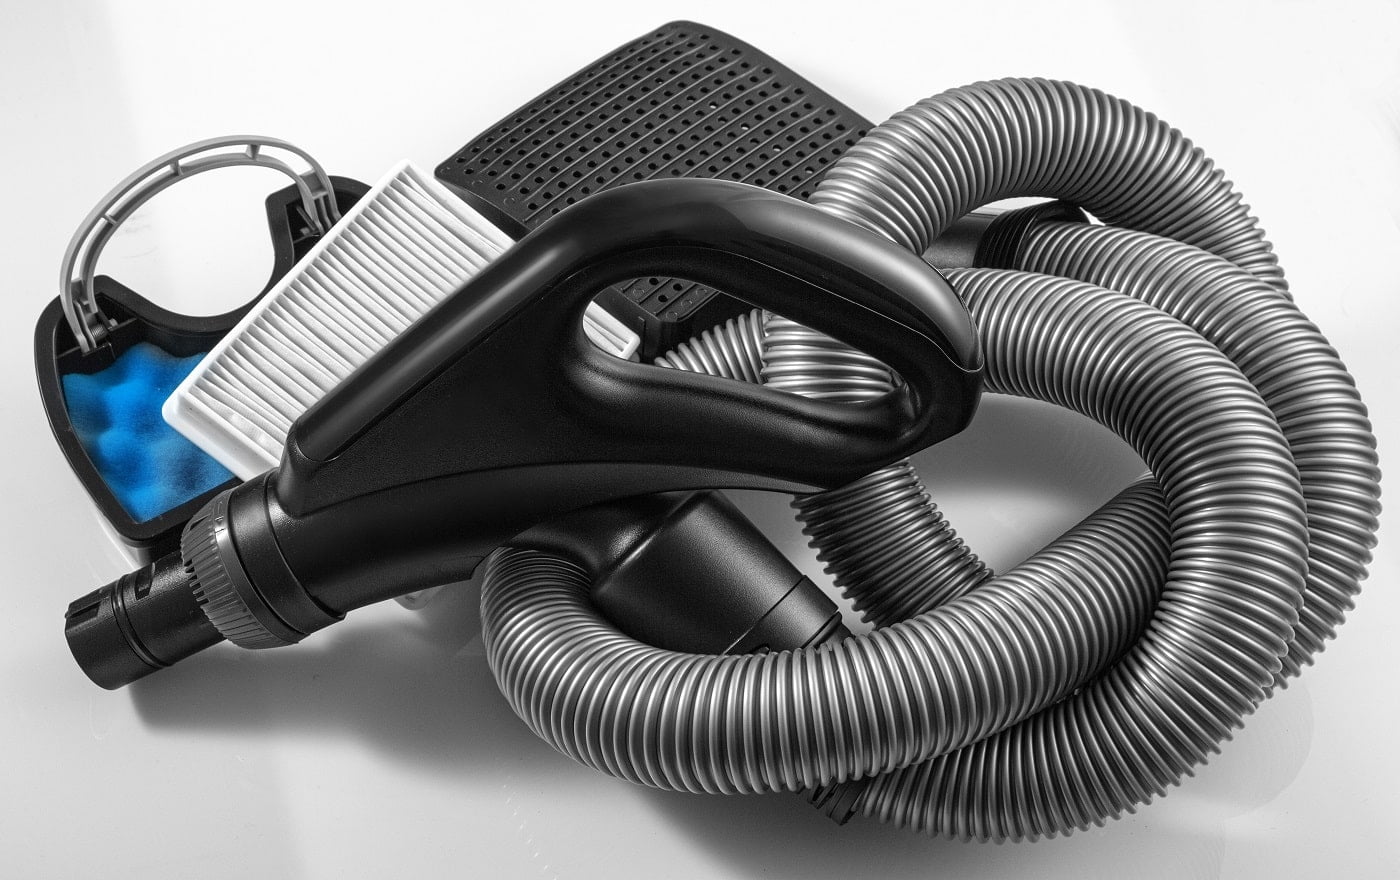


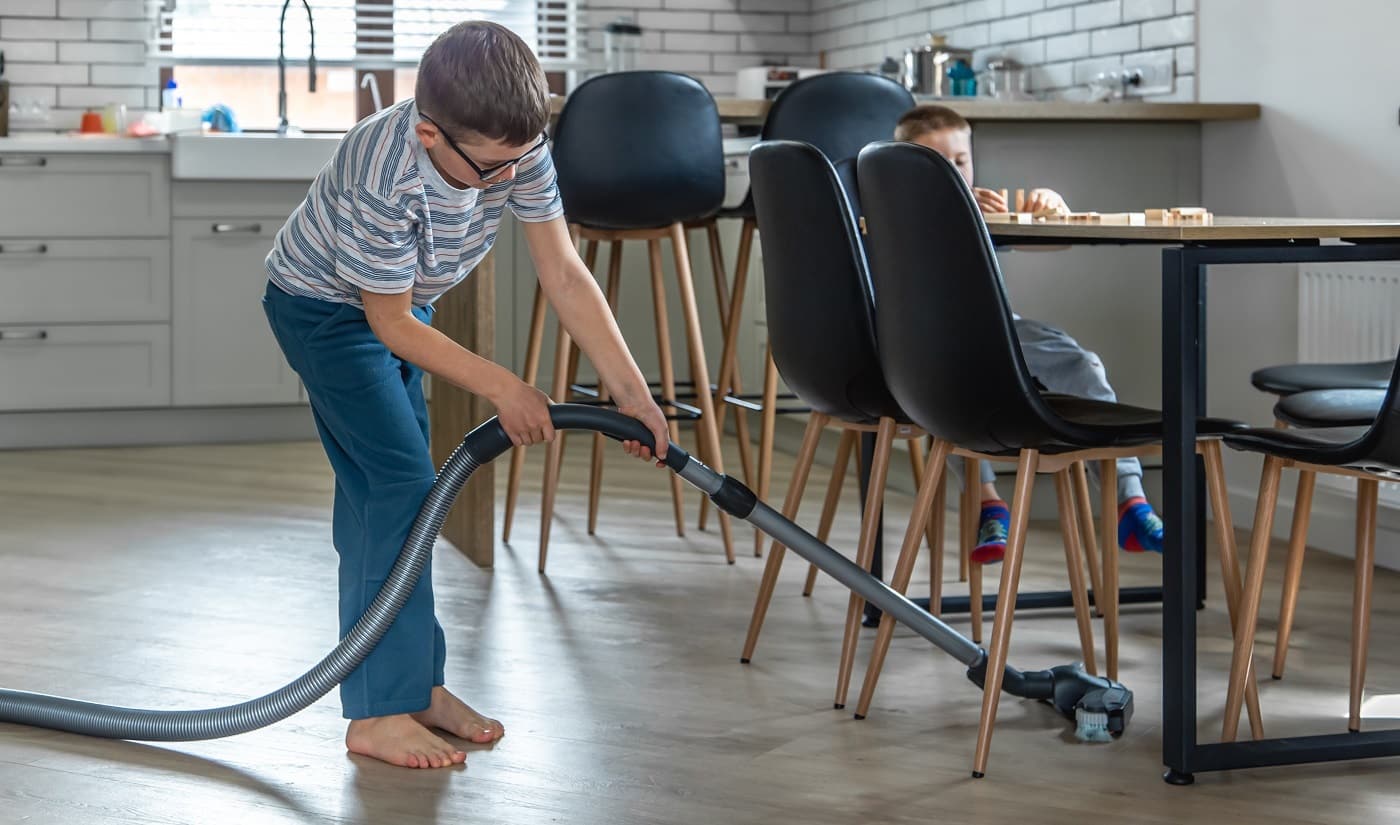


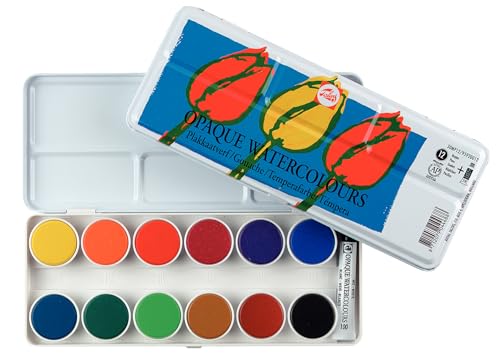
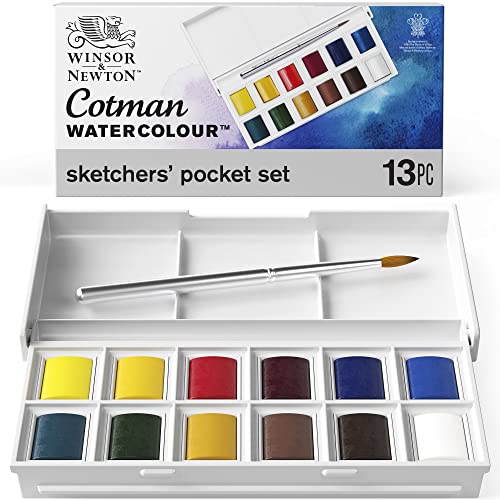


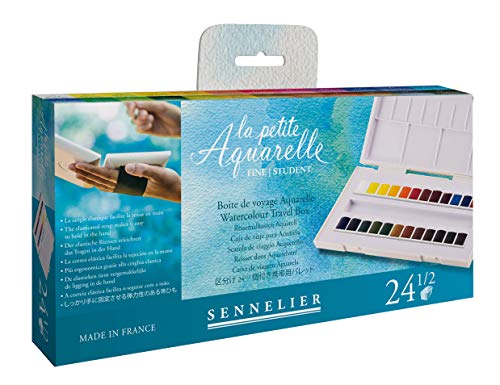


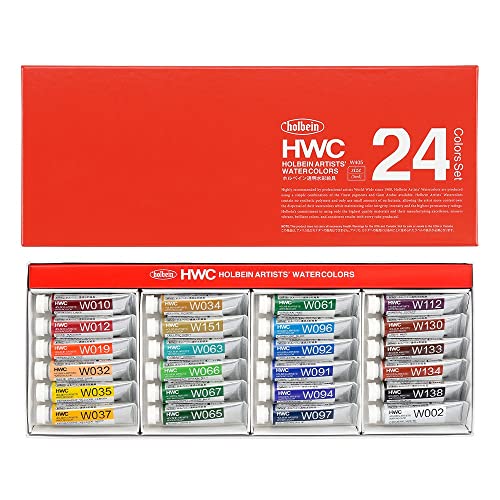


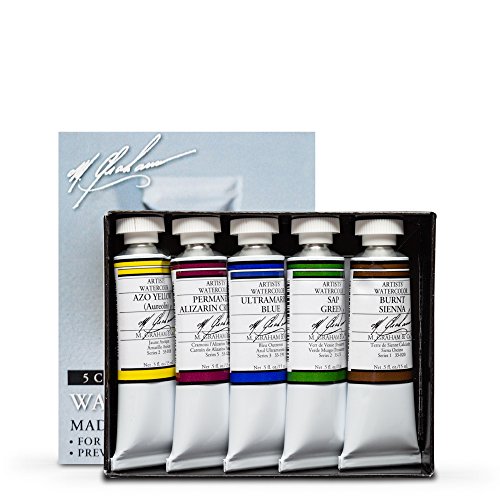


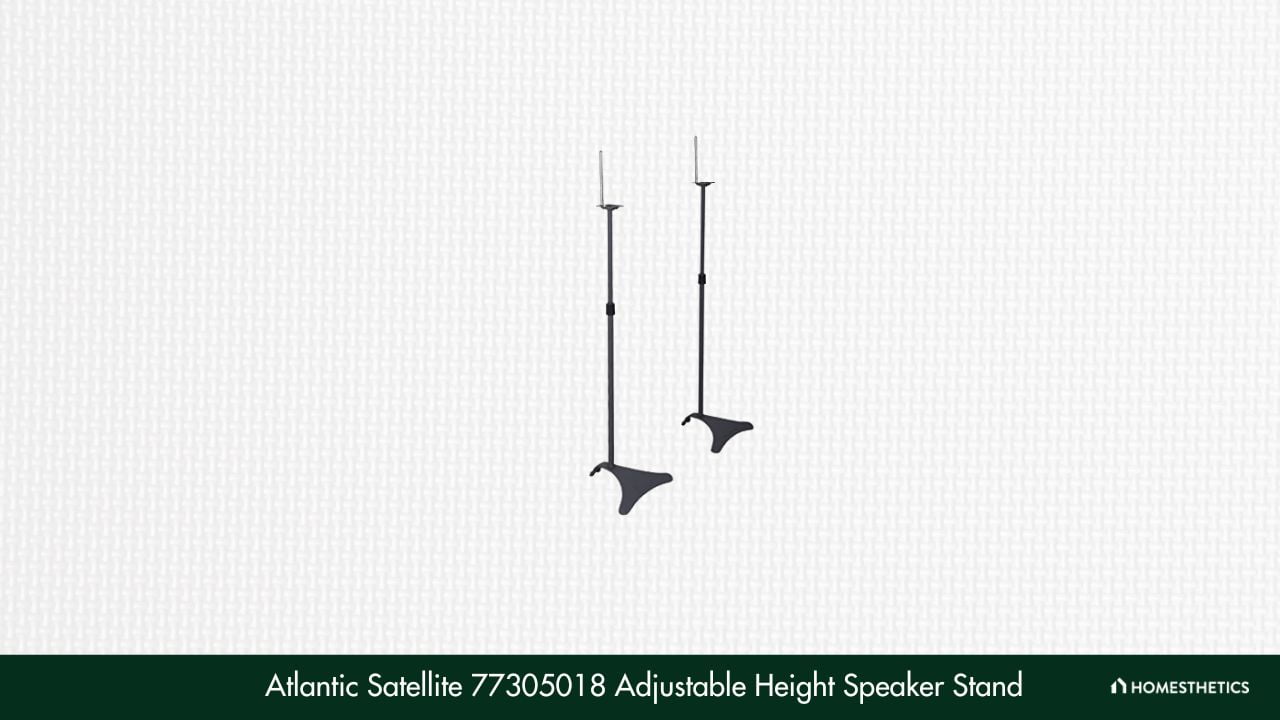
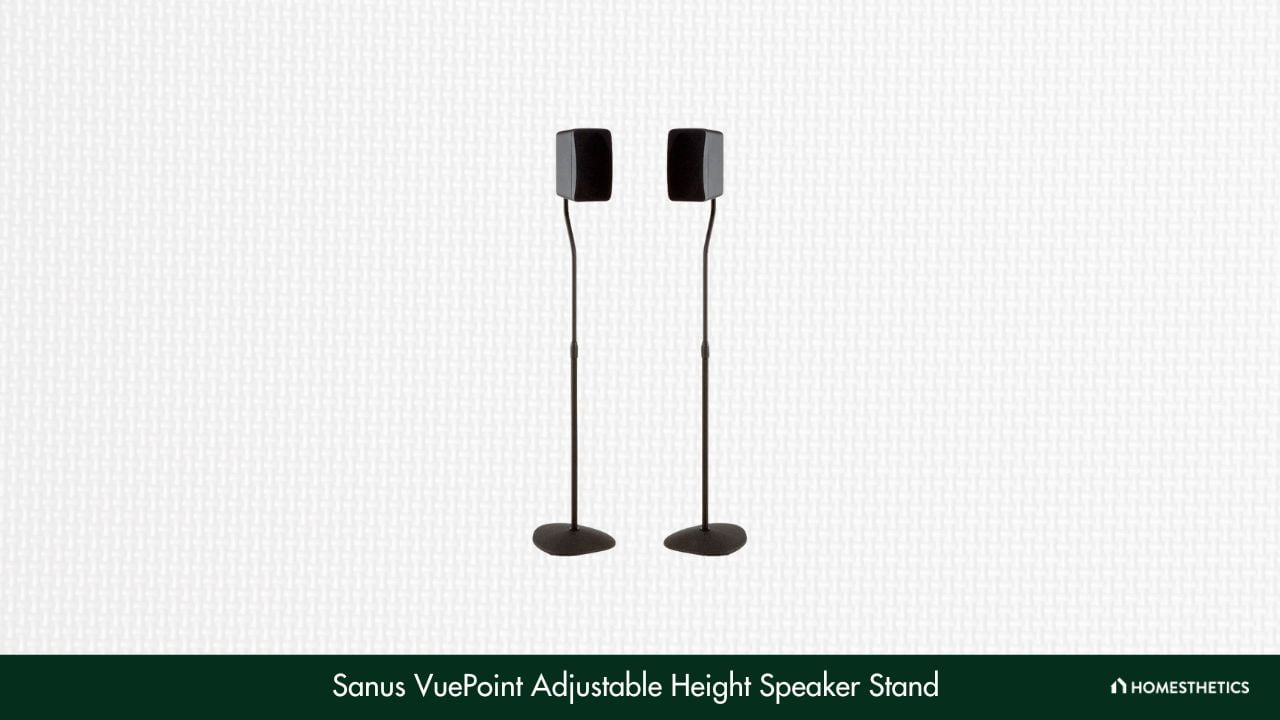


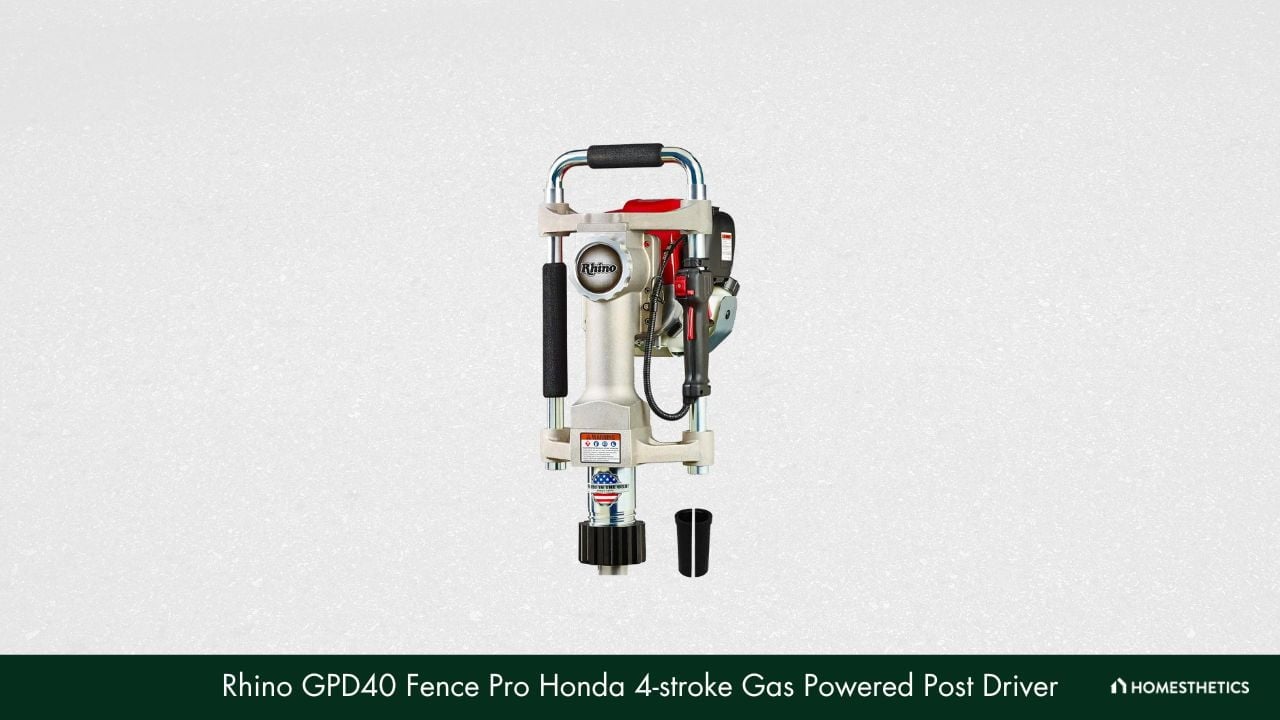
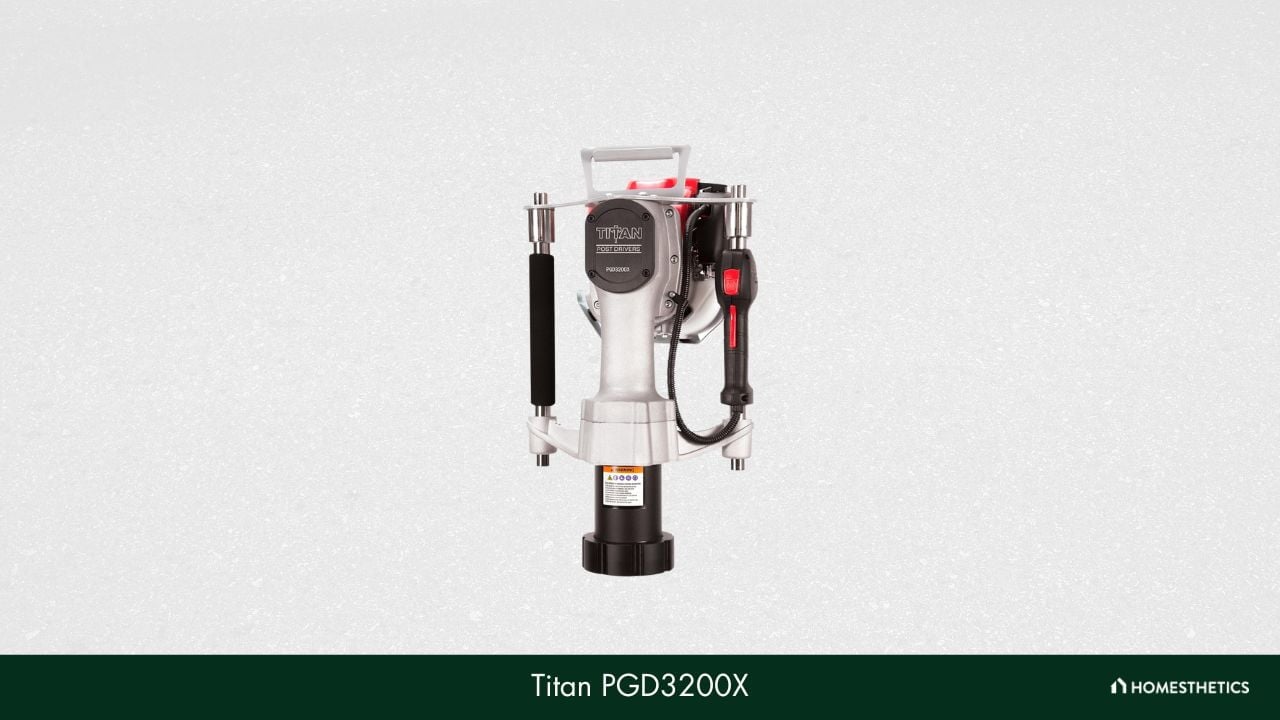
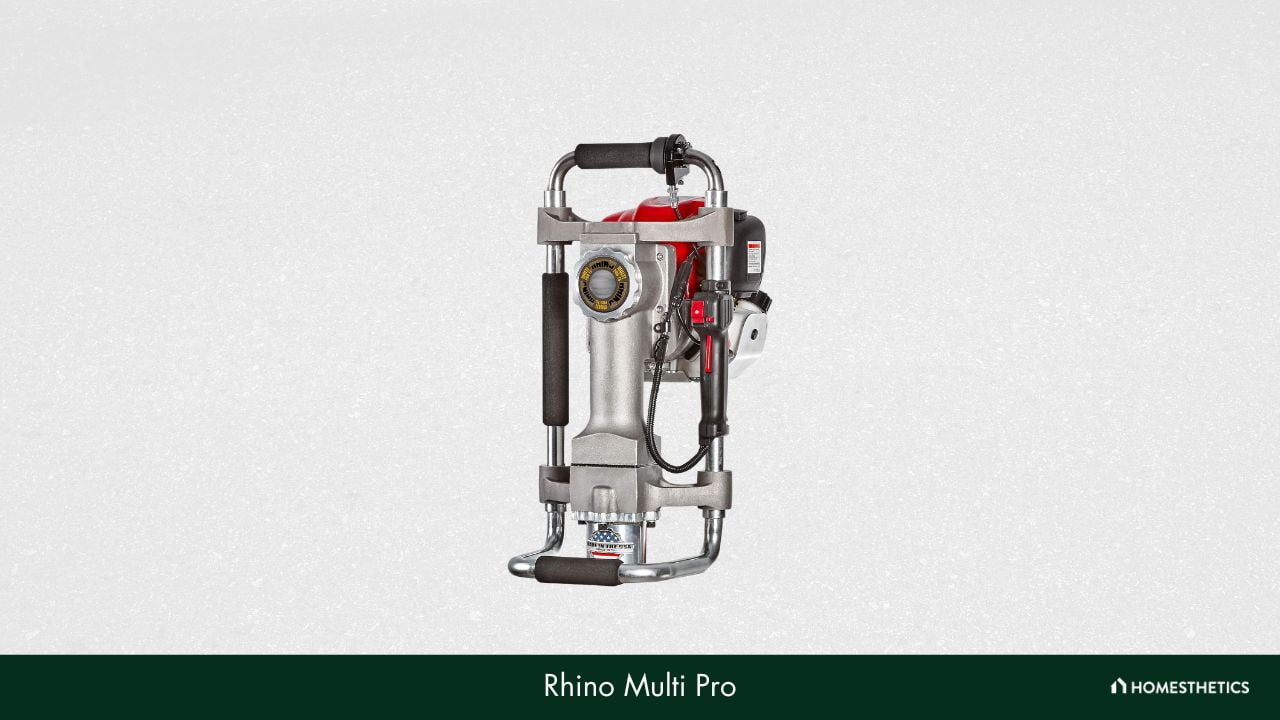
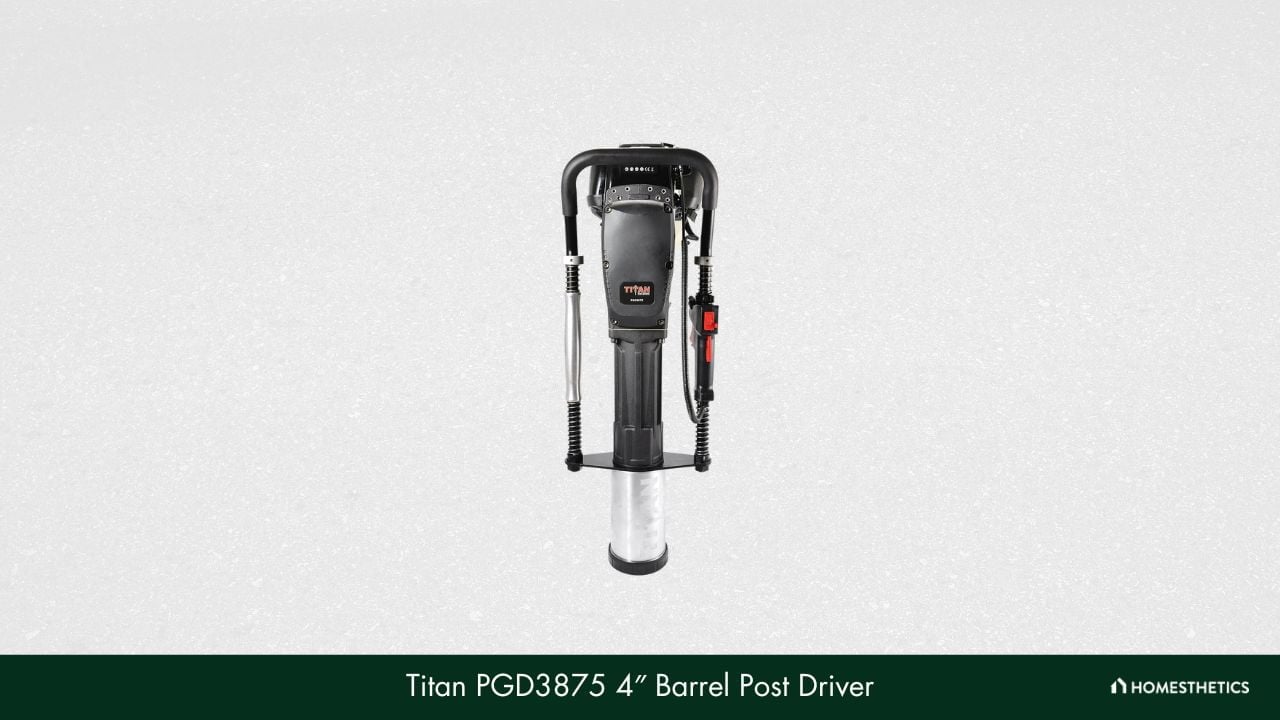
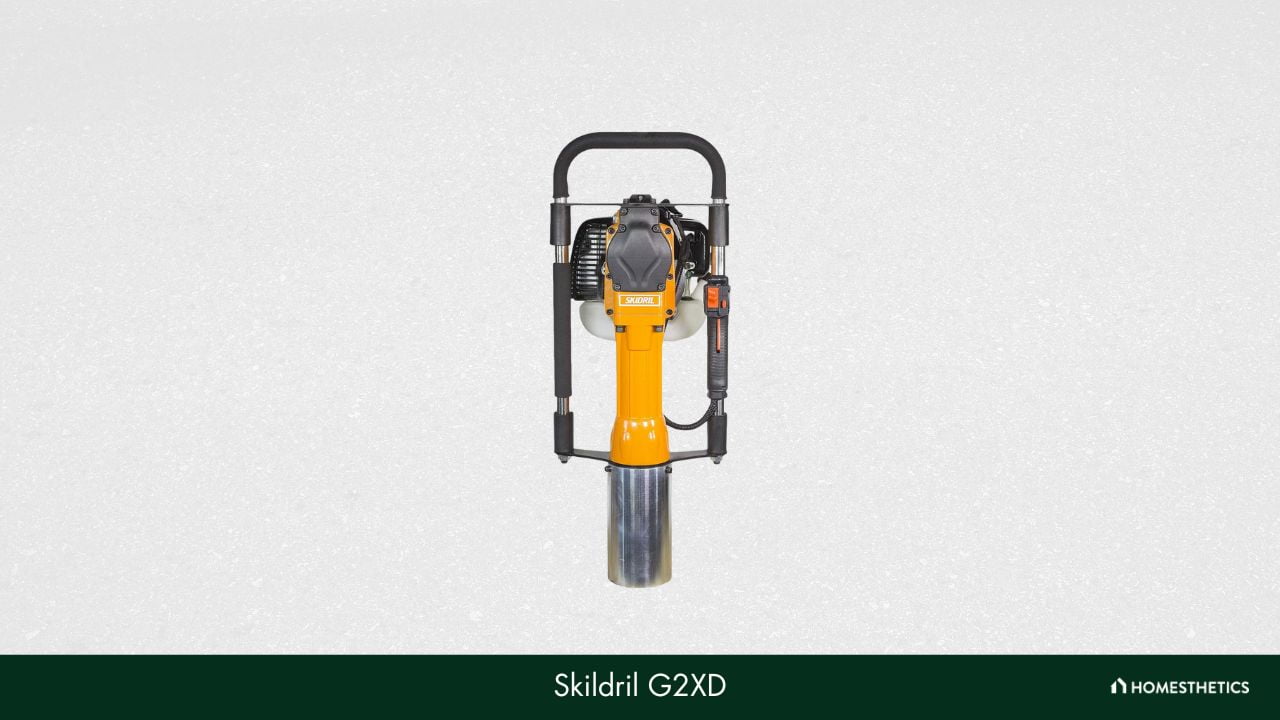
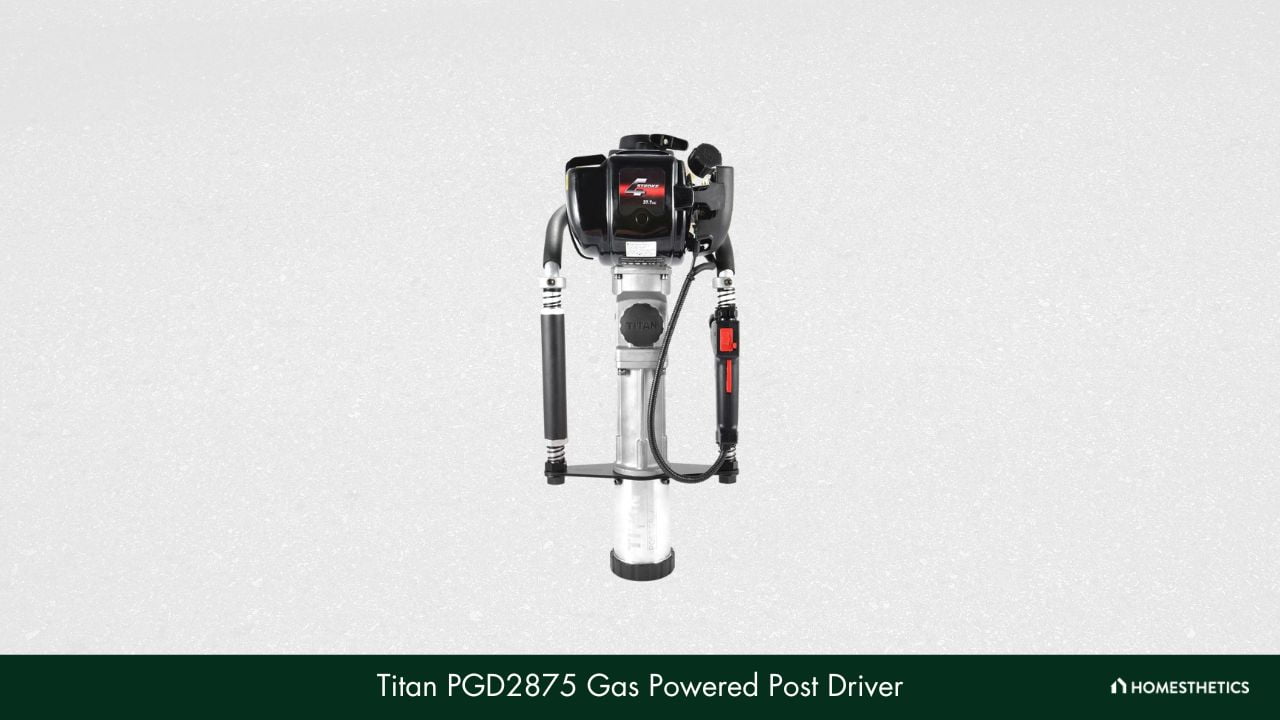
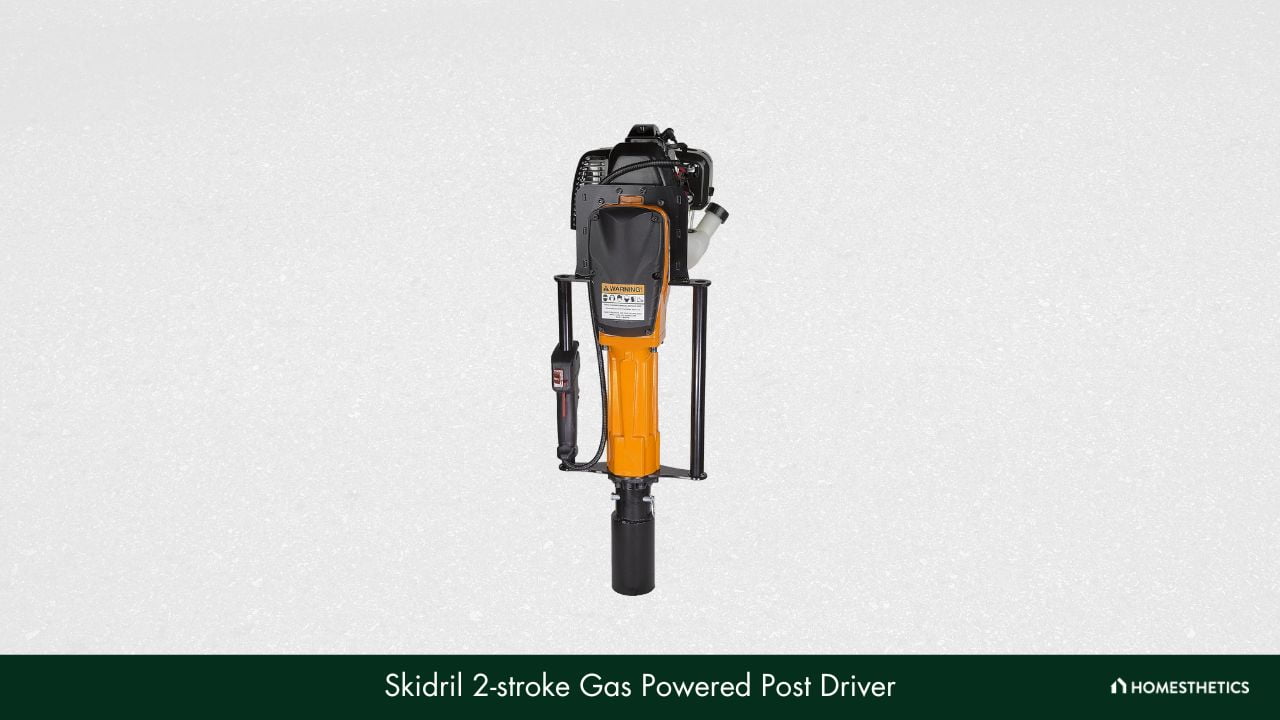
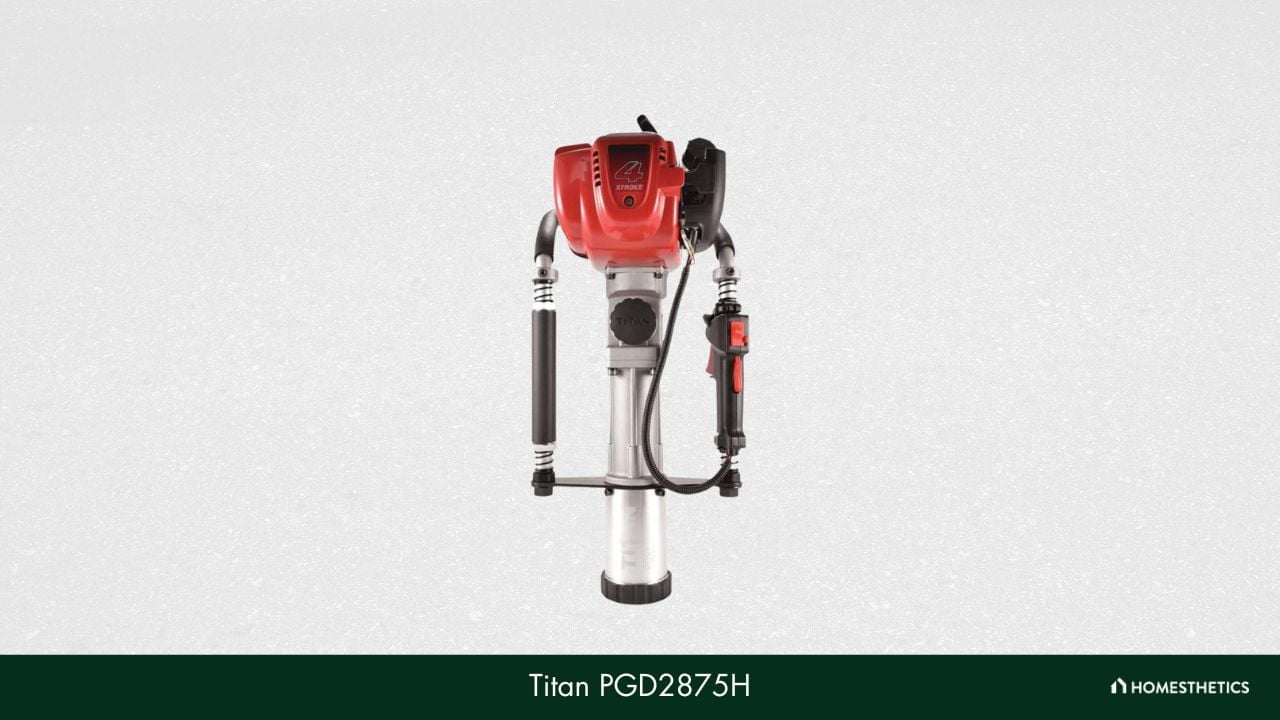


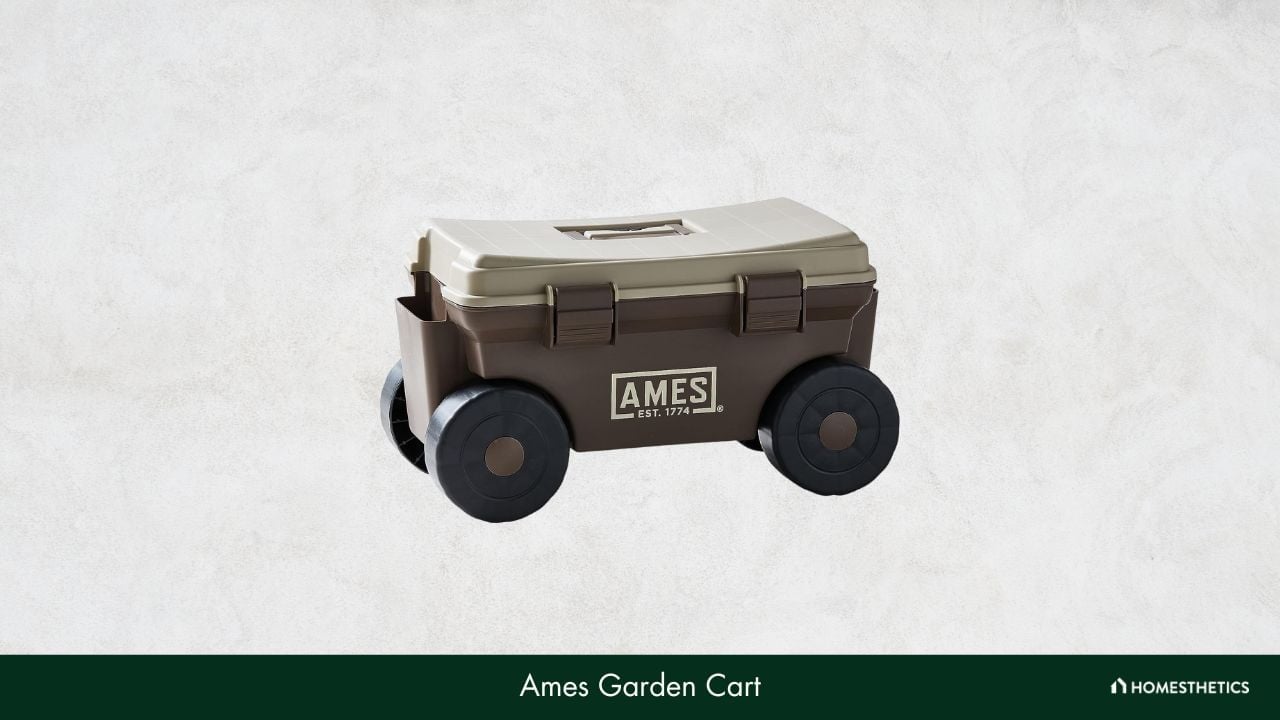
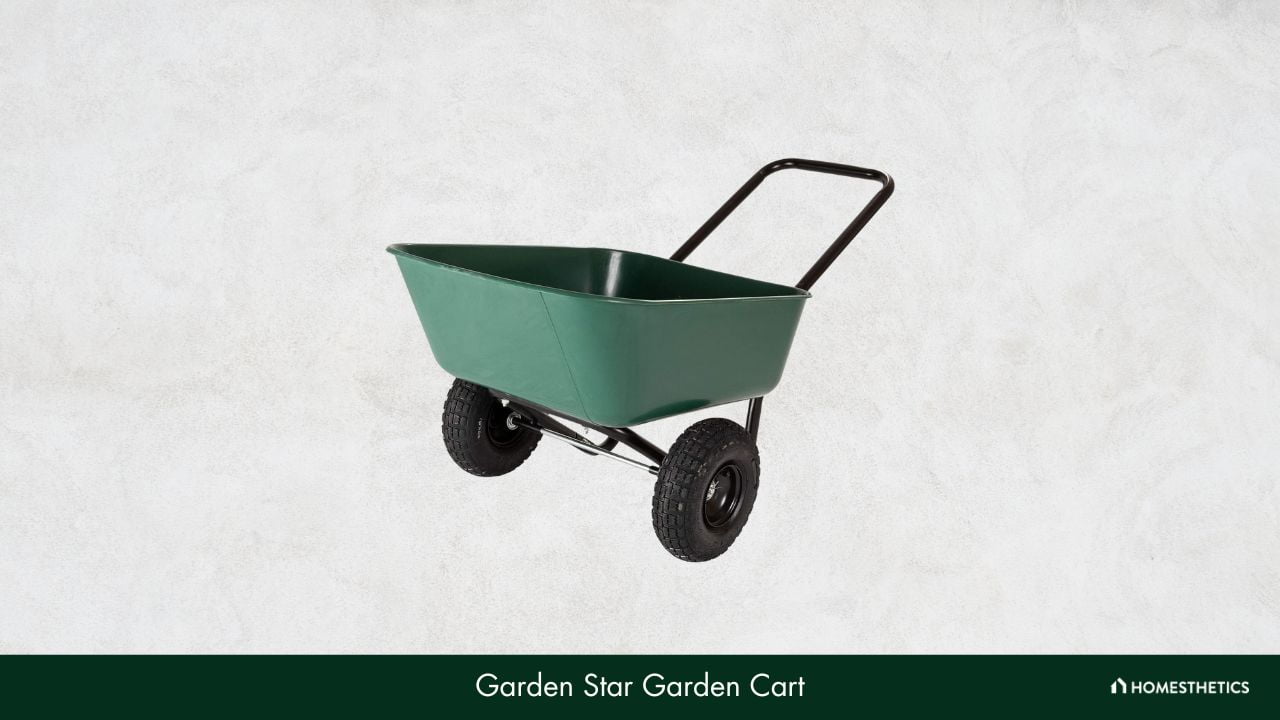
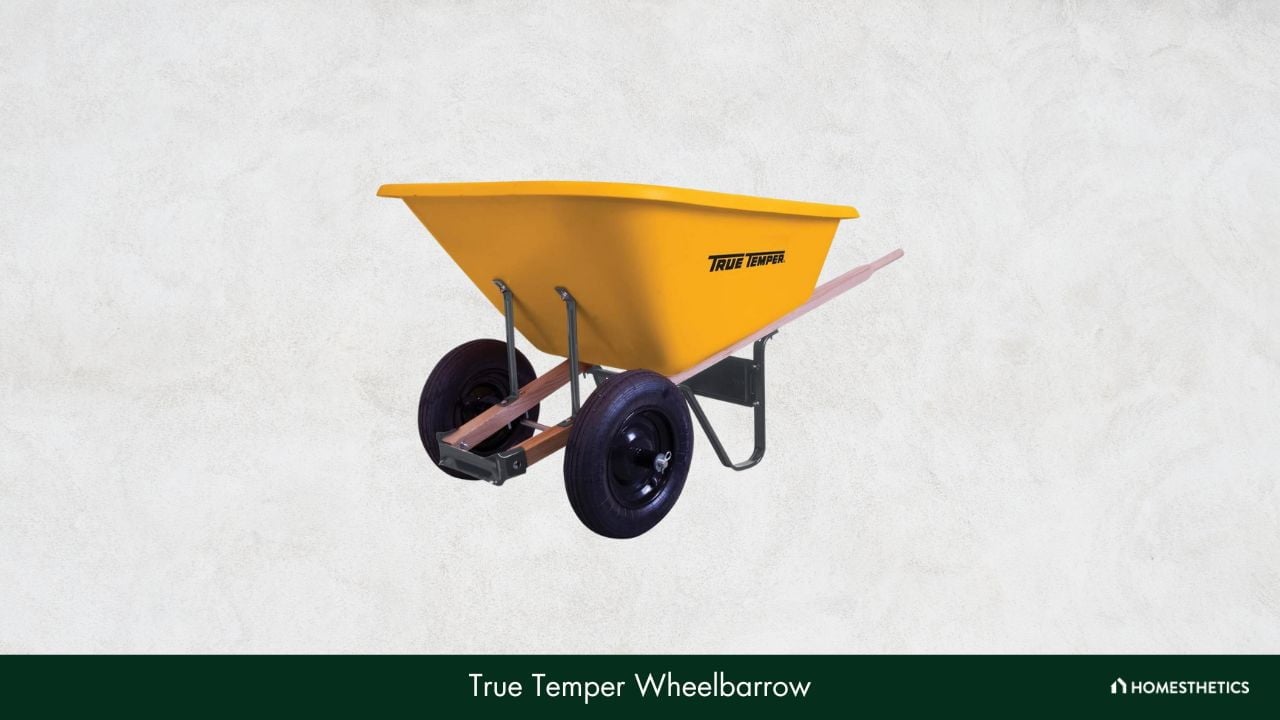
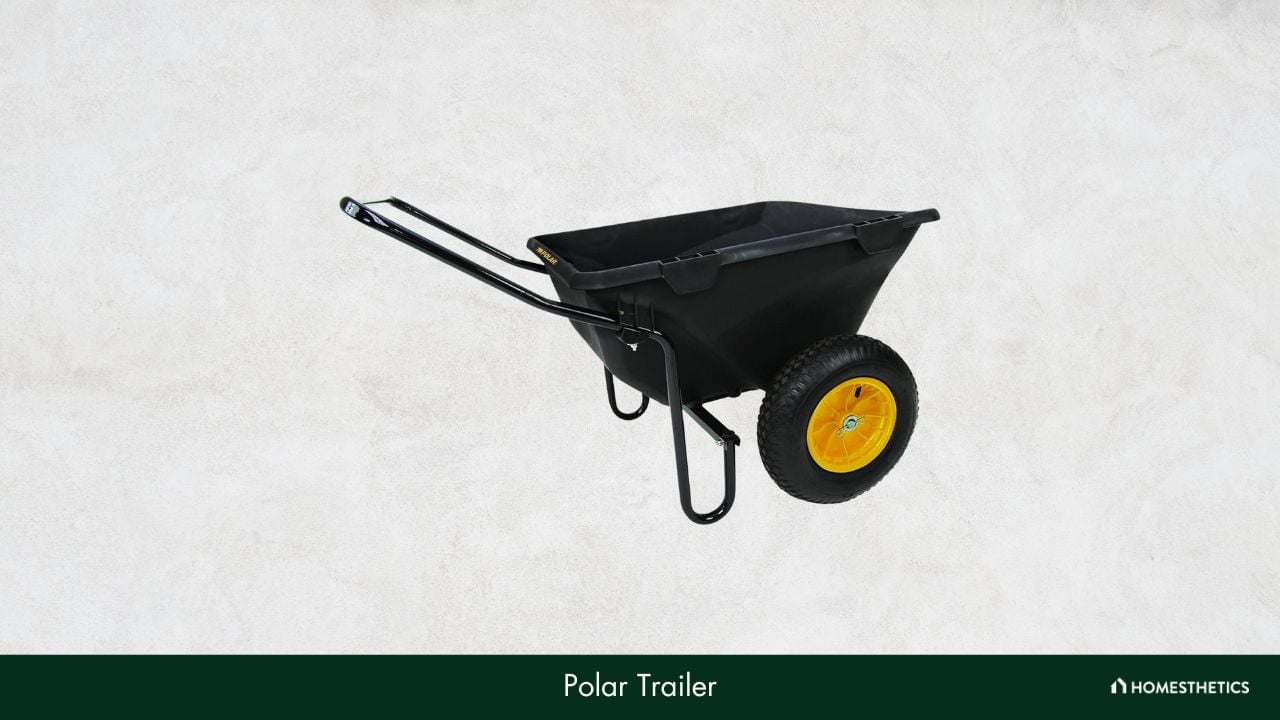
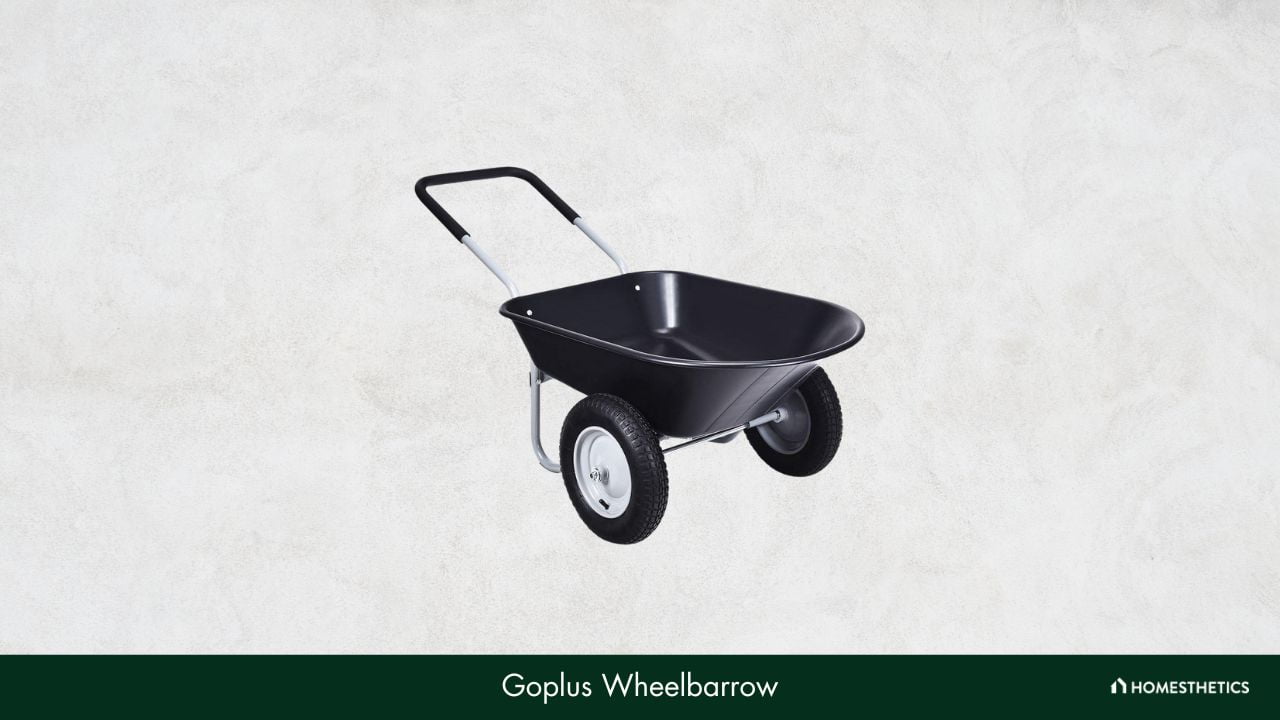
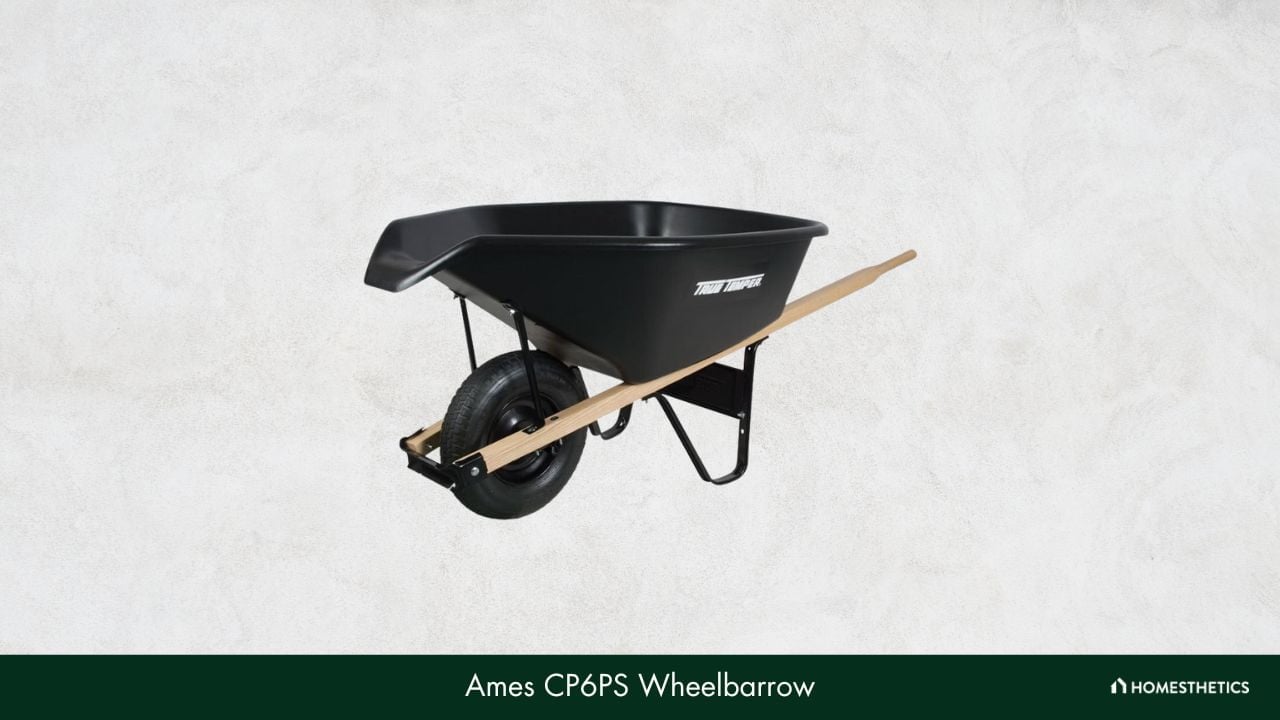

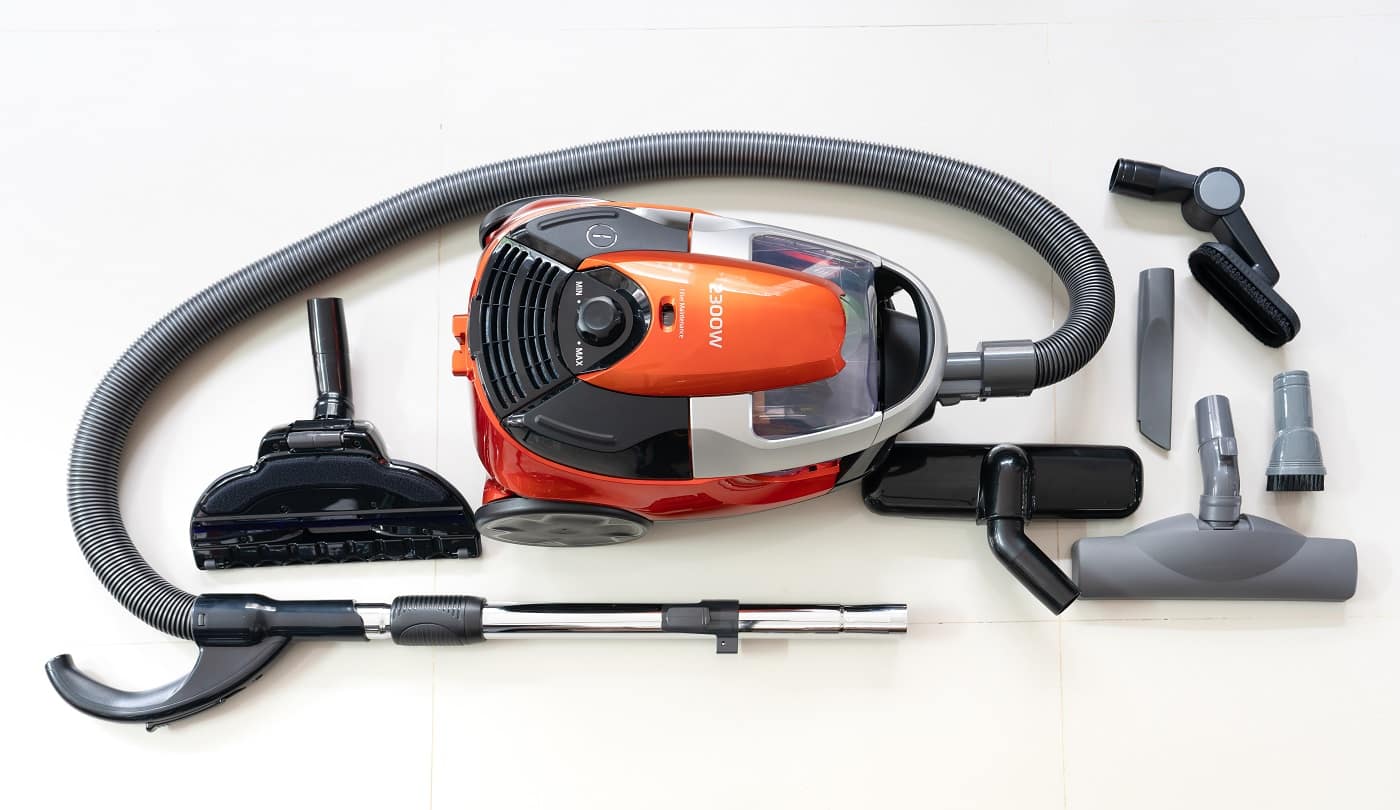
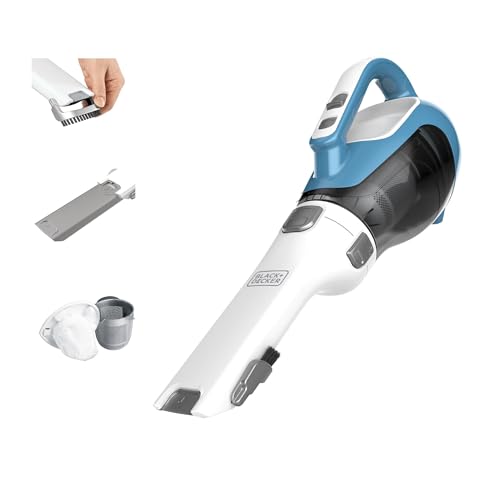


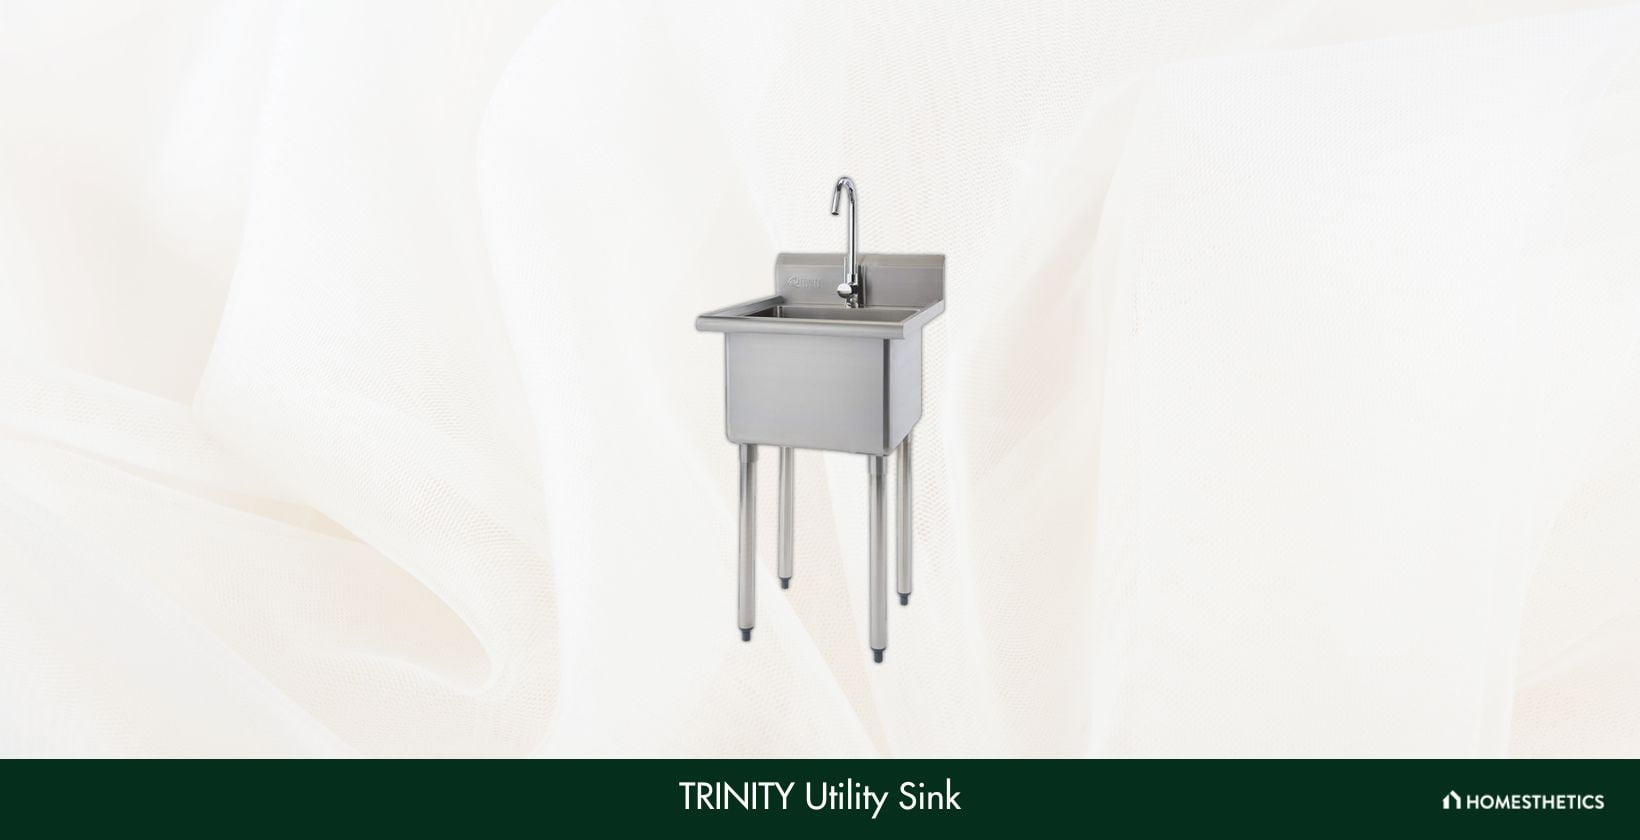

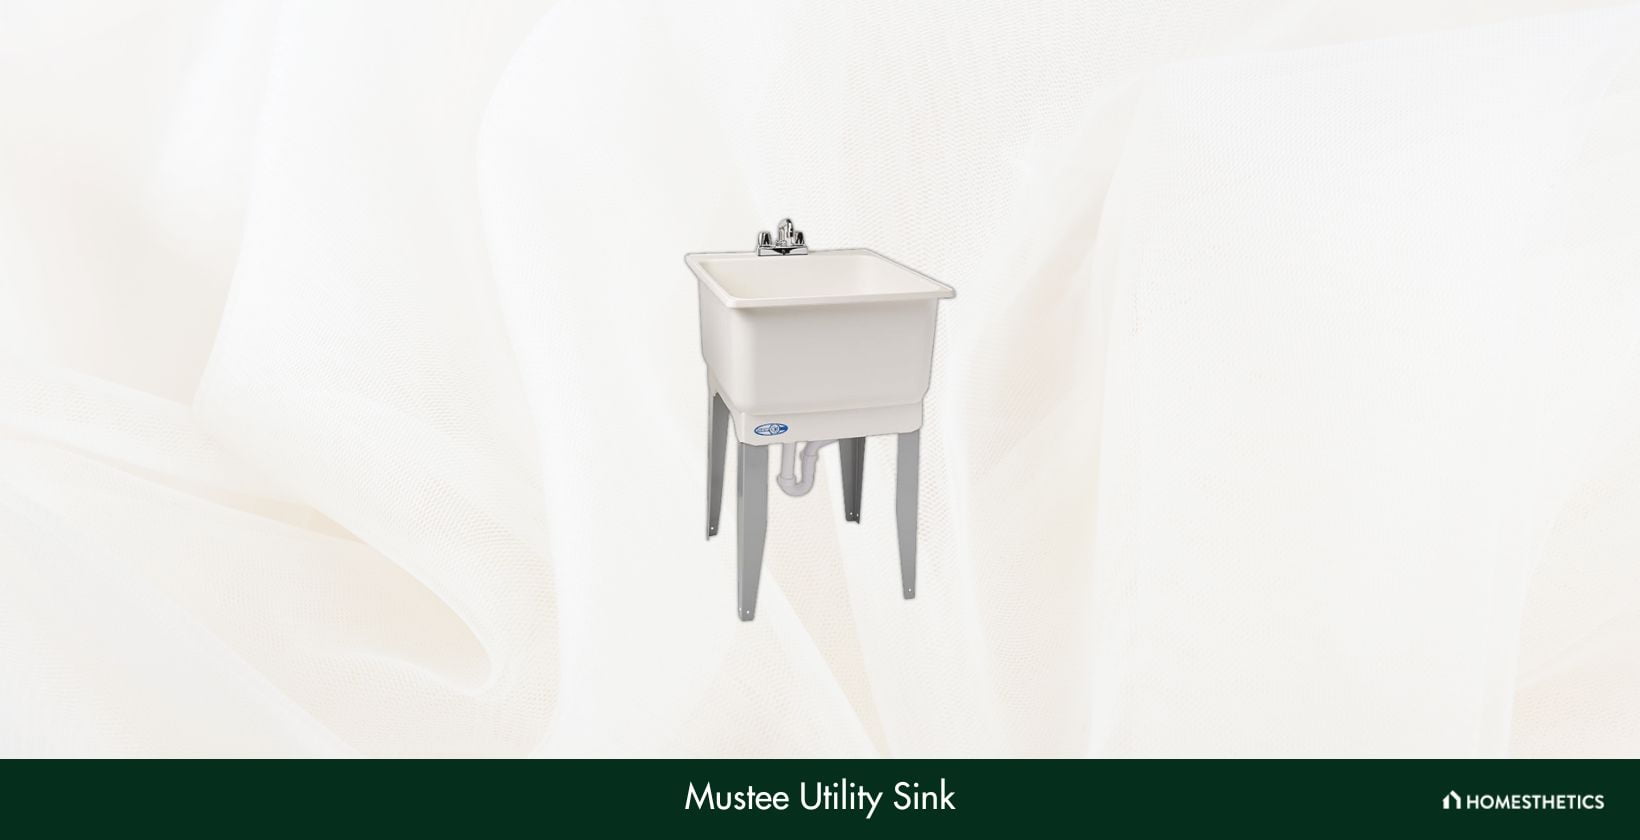
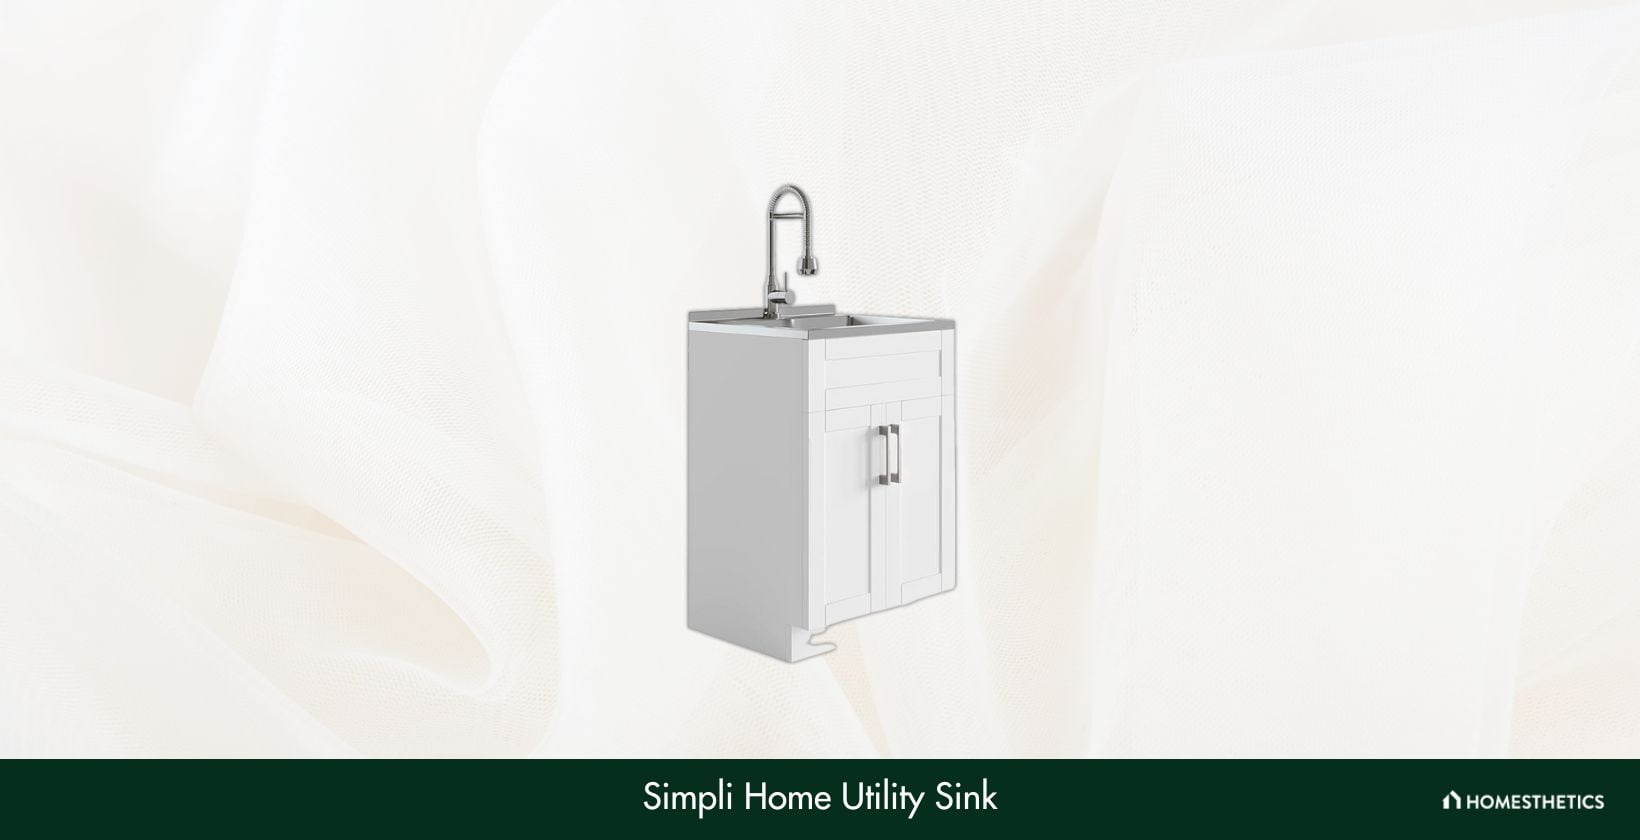
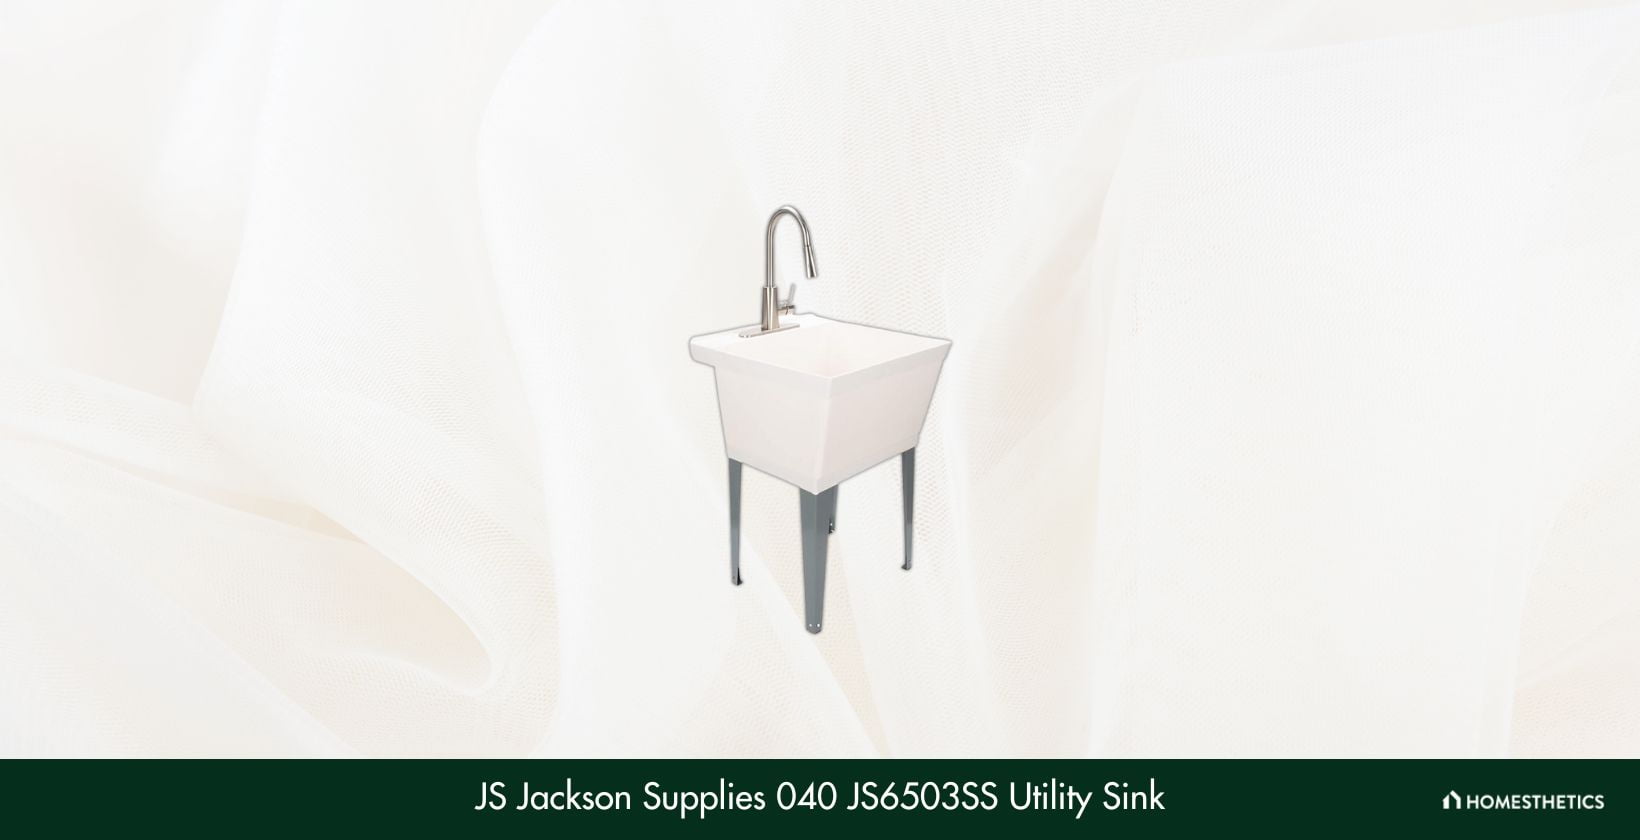


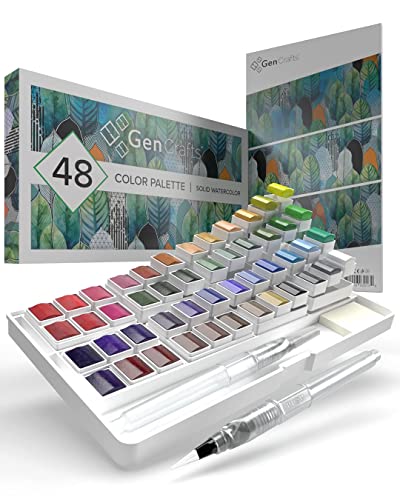


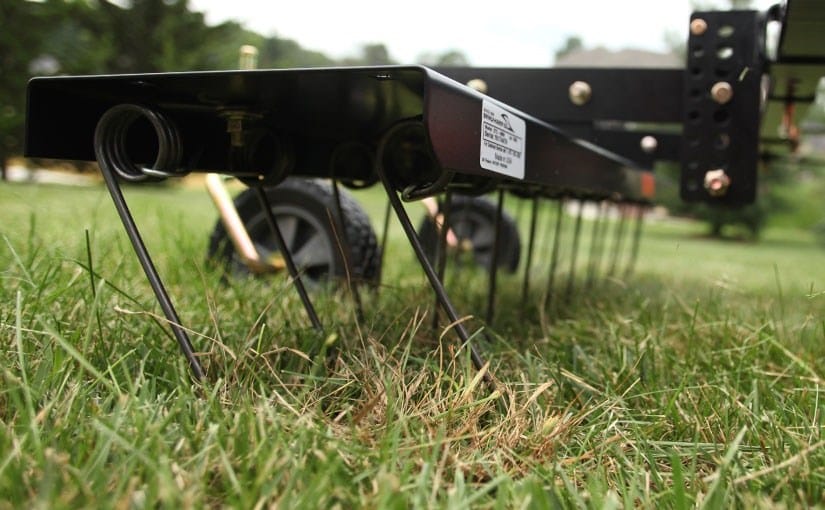


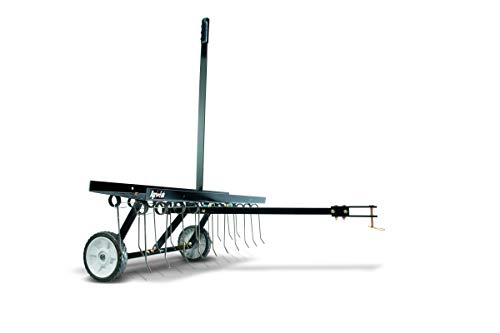


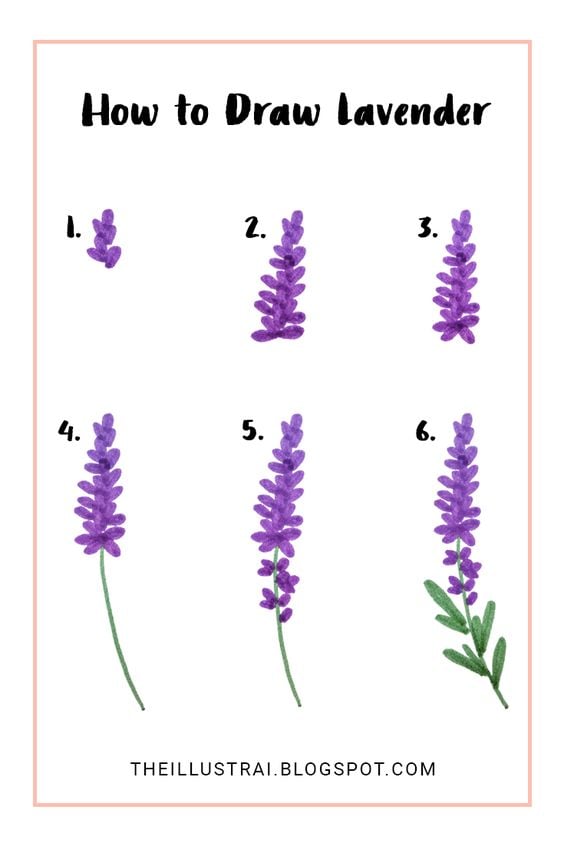


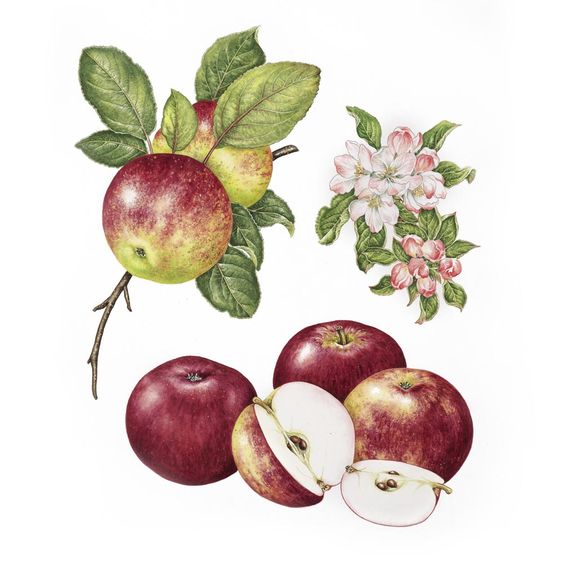


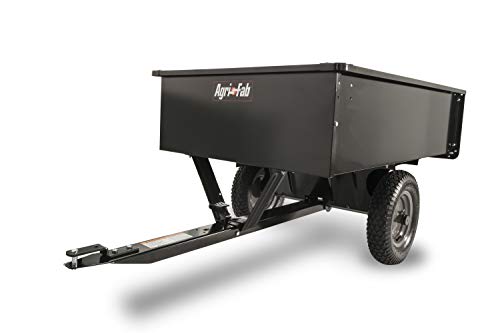


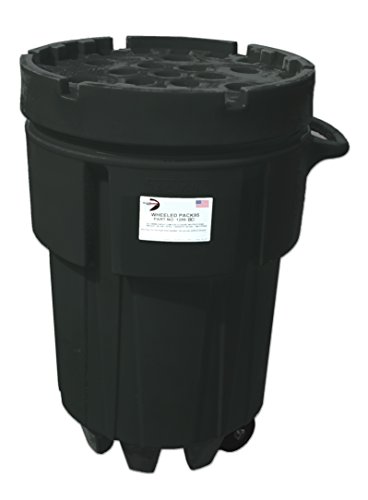


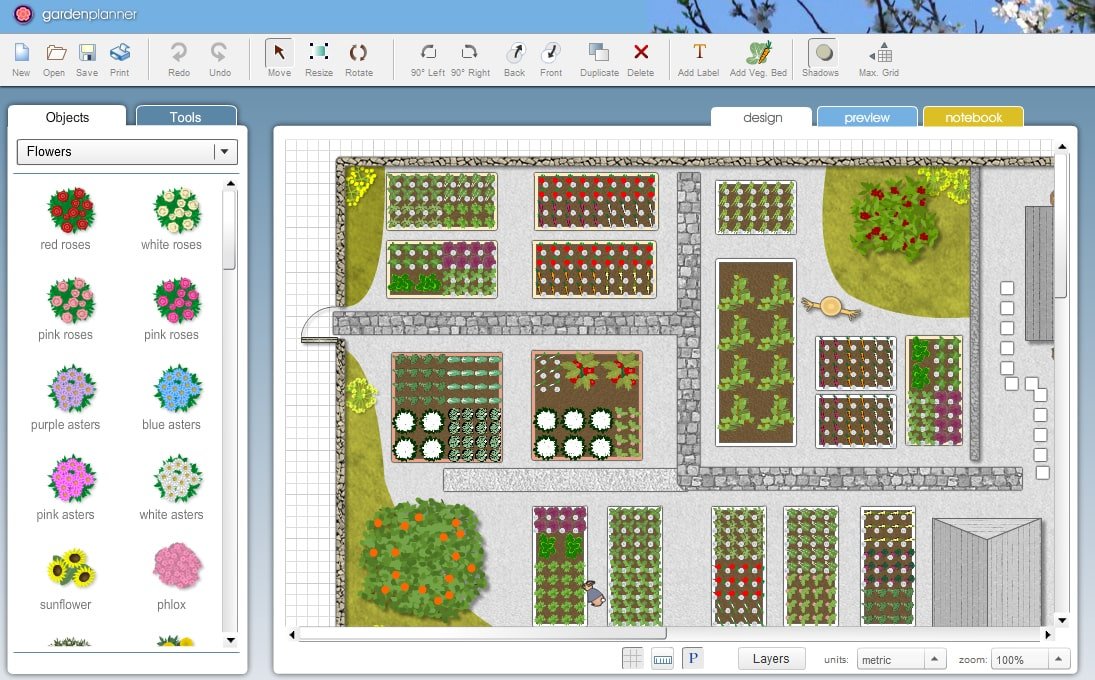


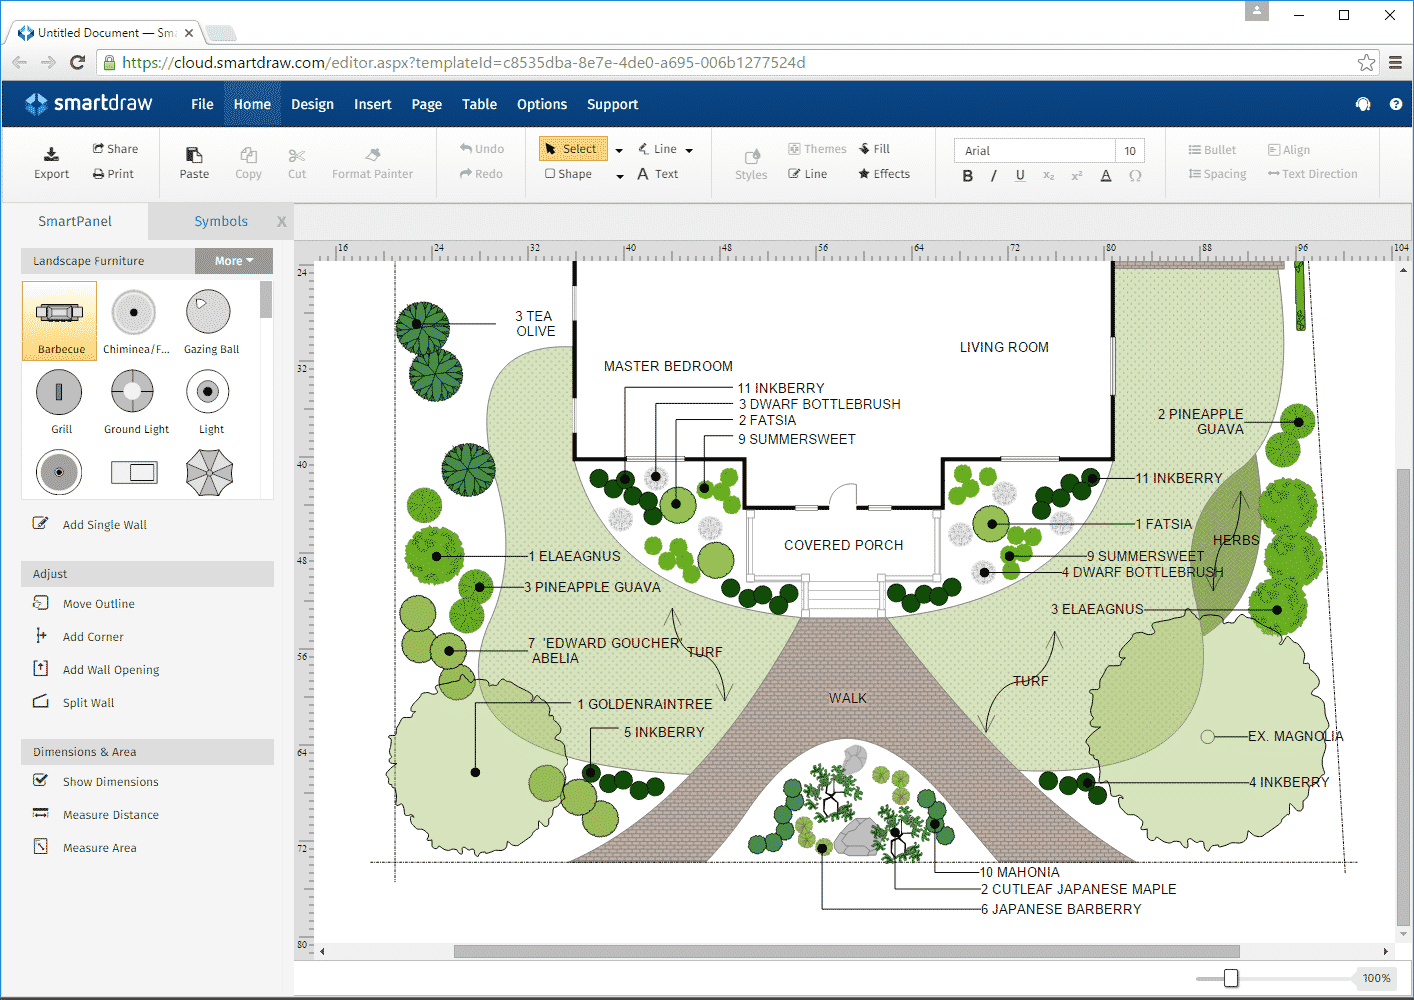


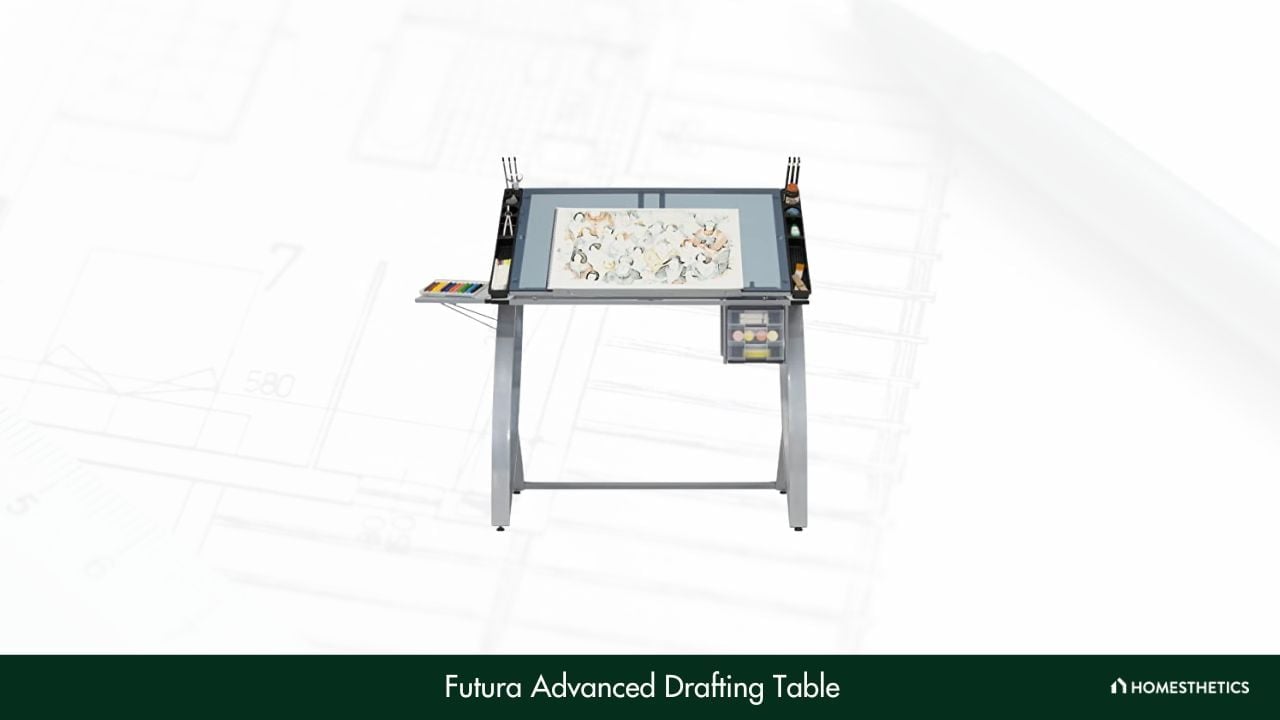
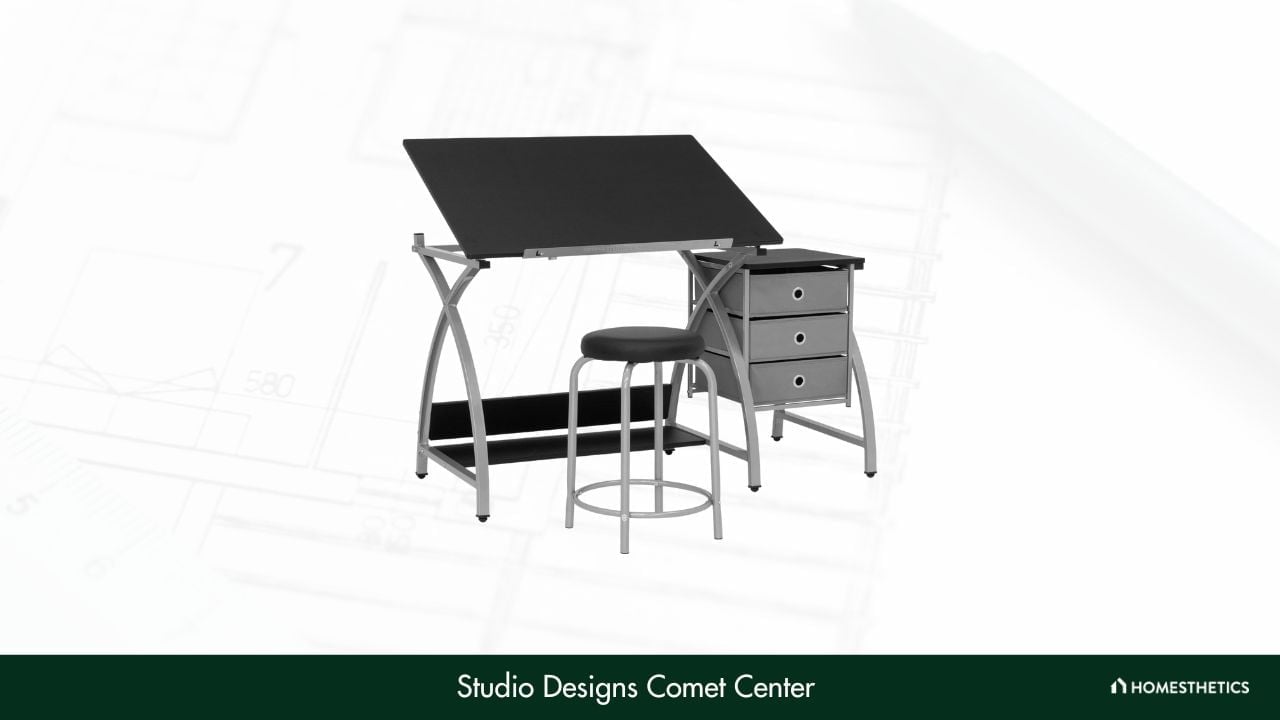
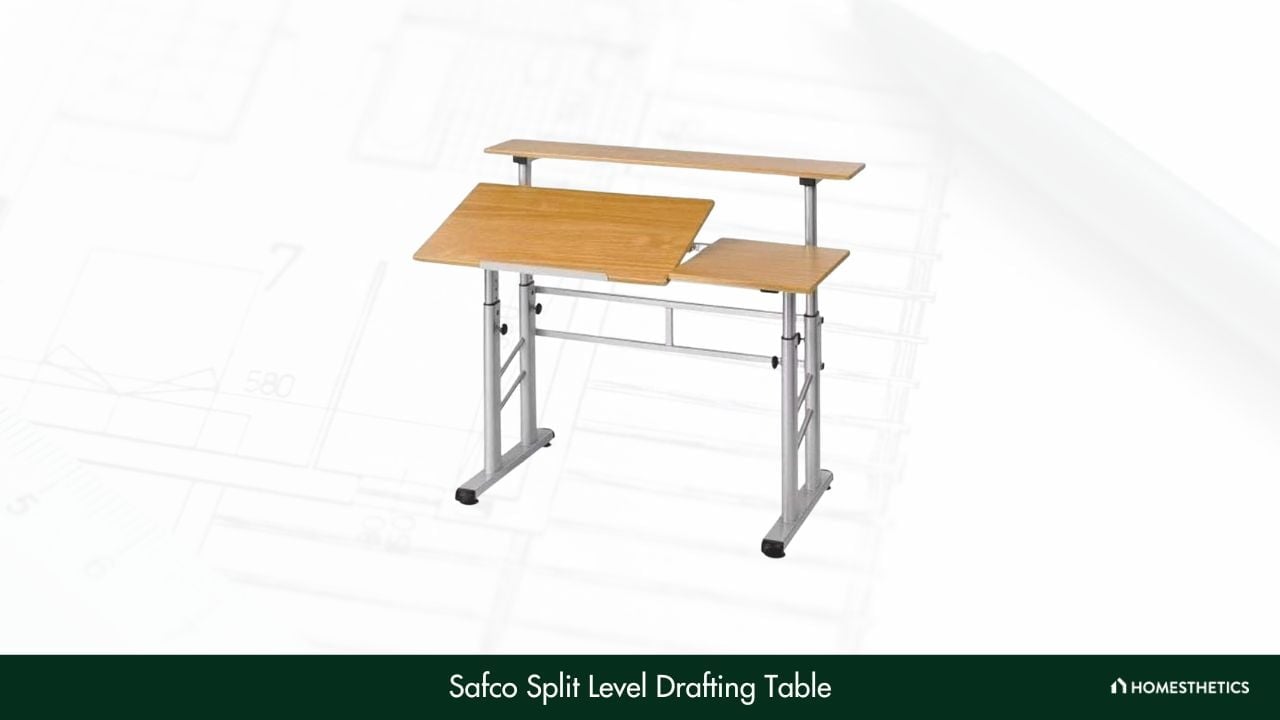


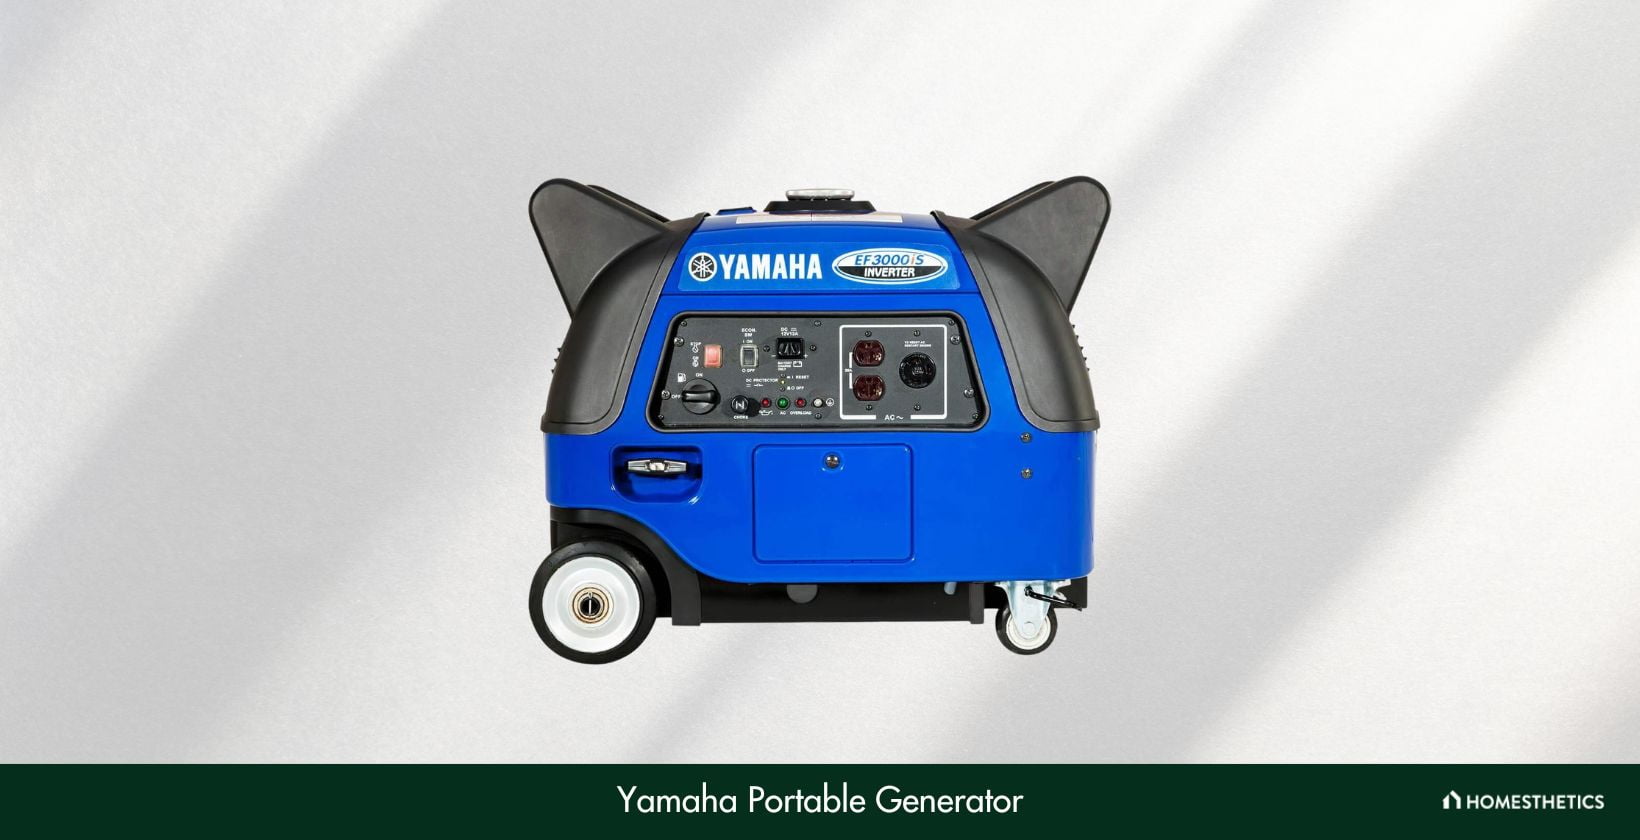
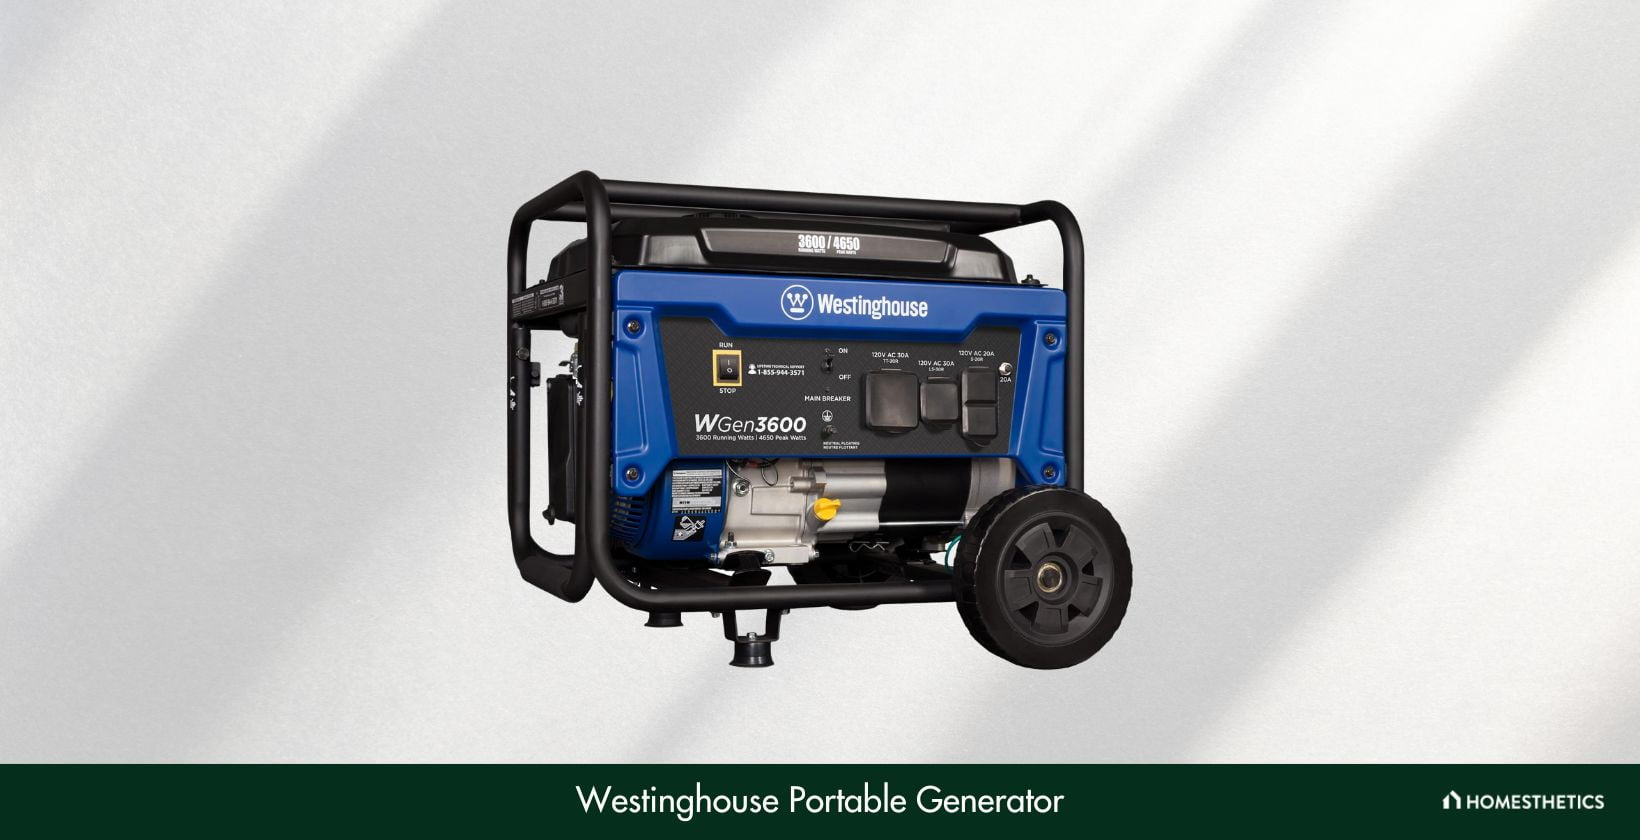
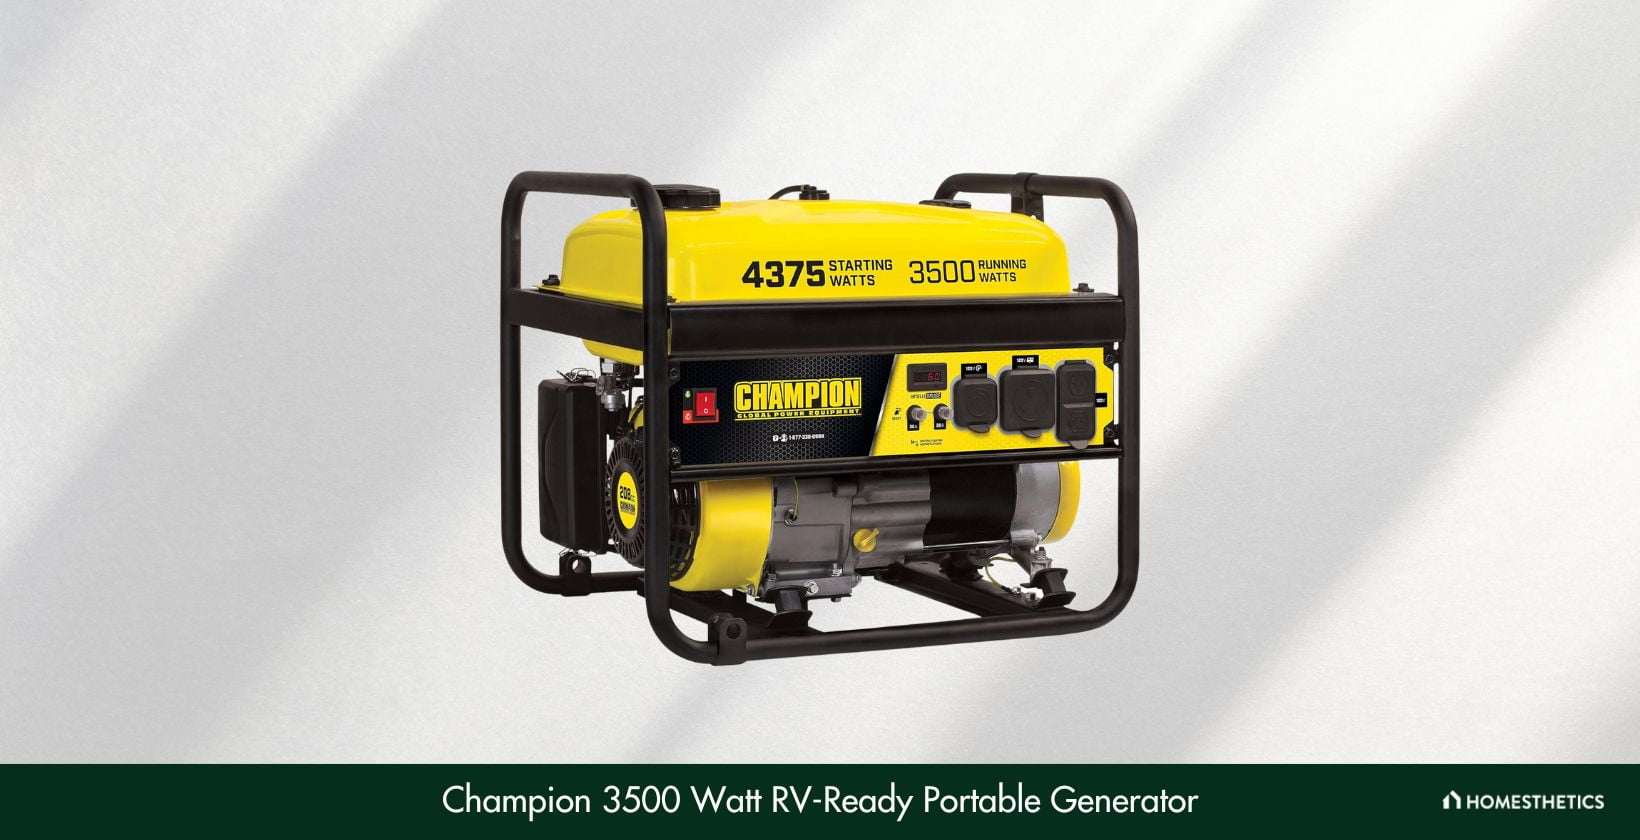
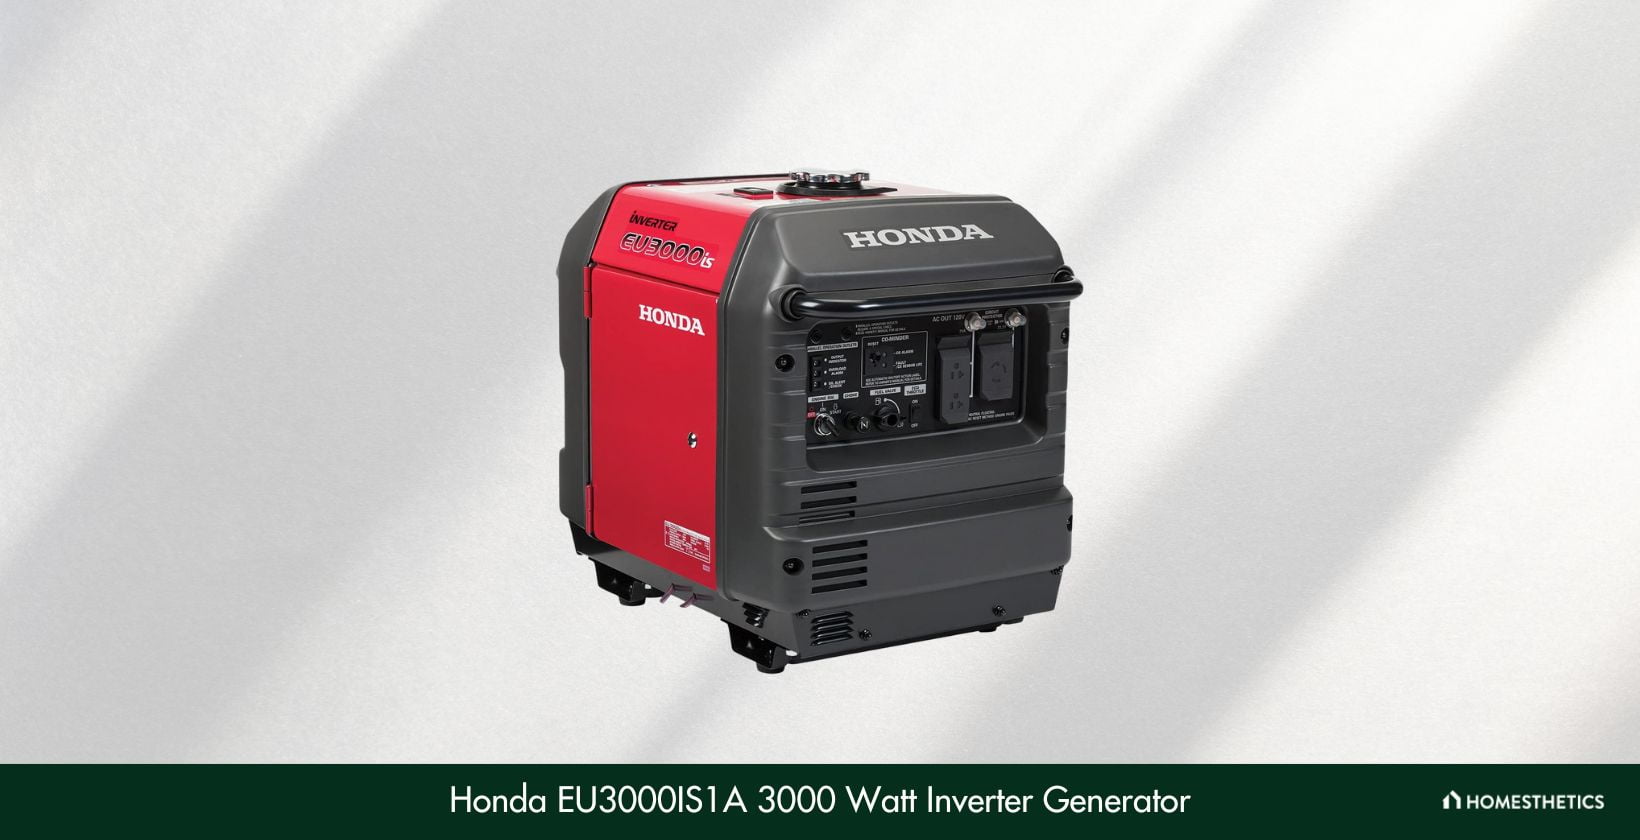


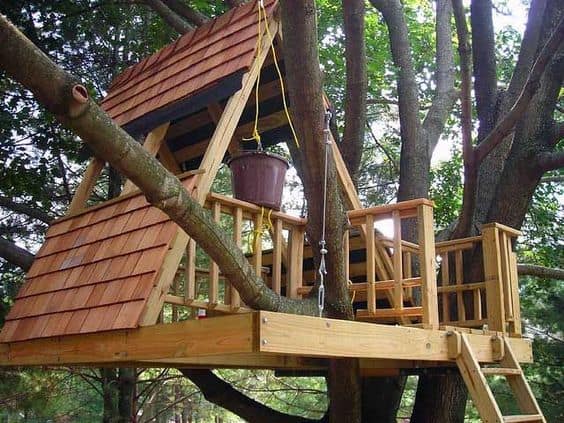
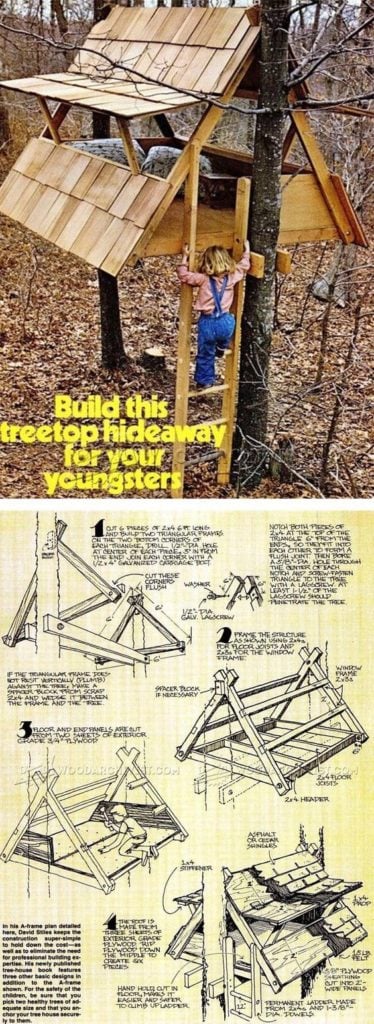


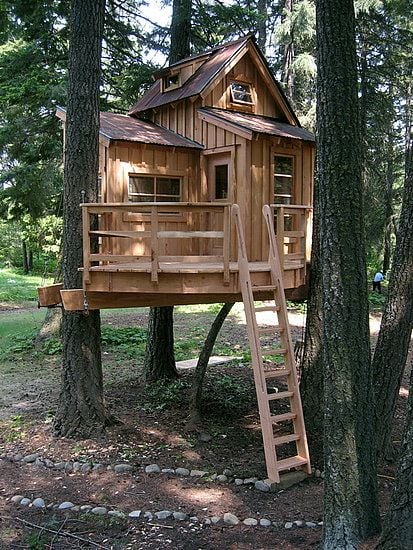

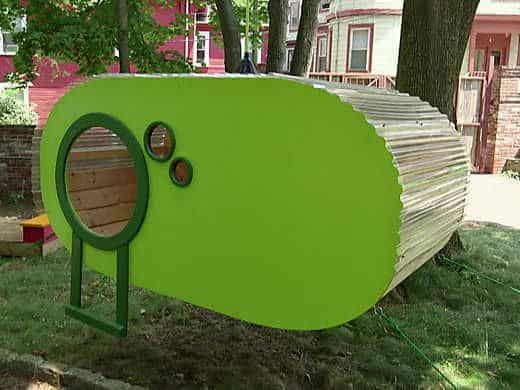

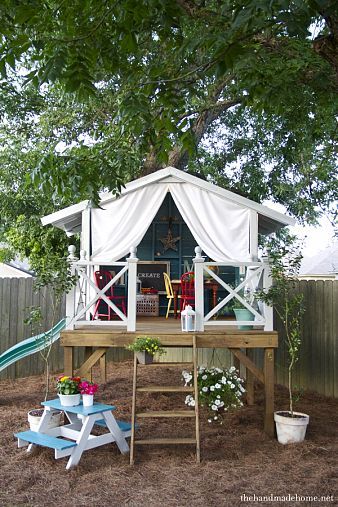 More details at